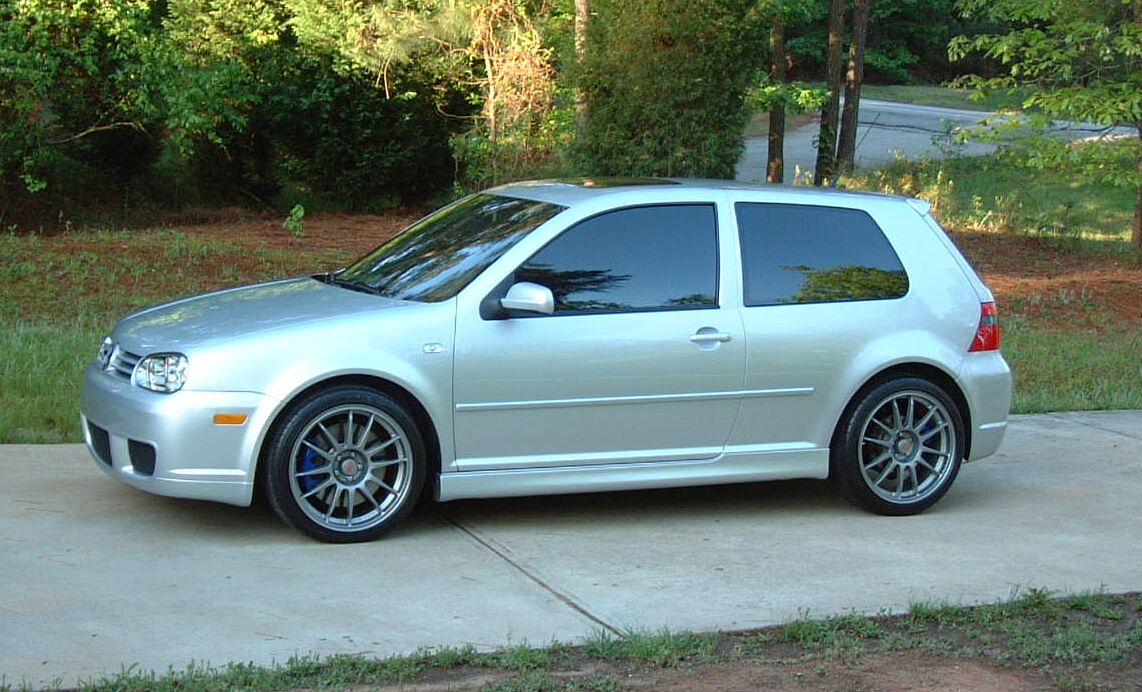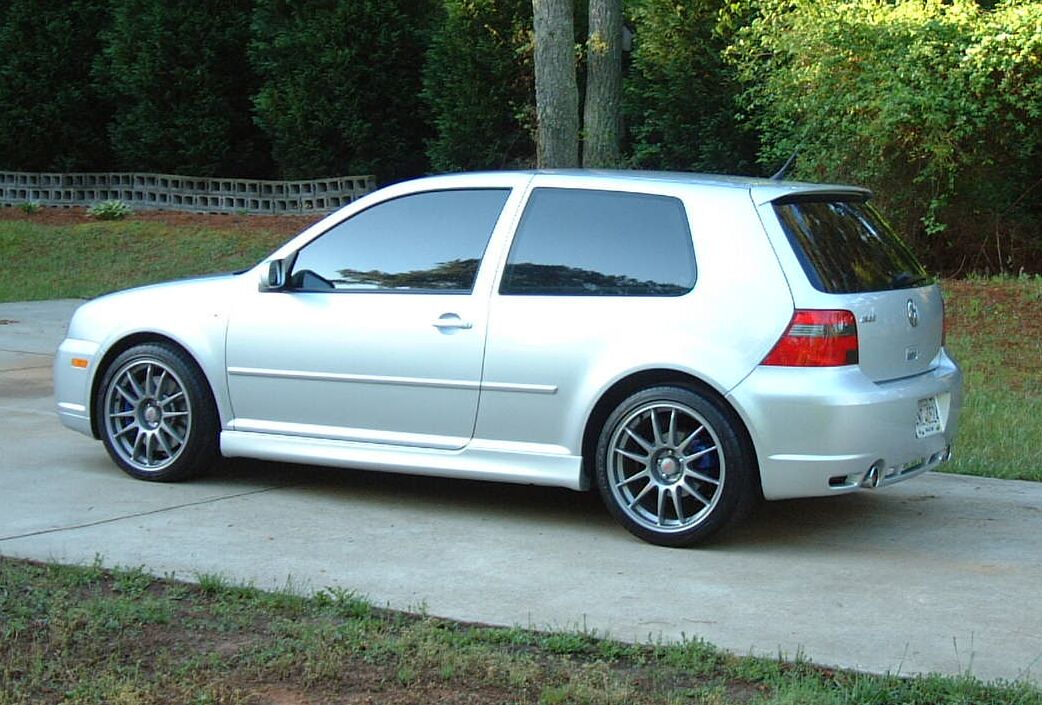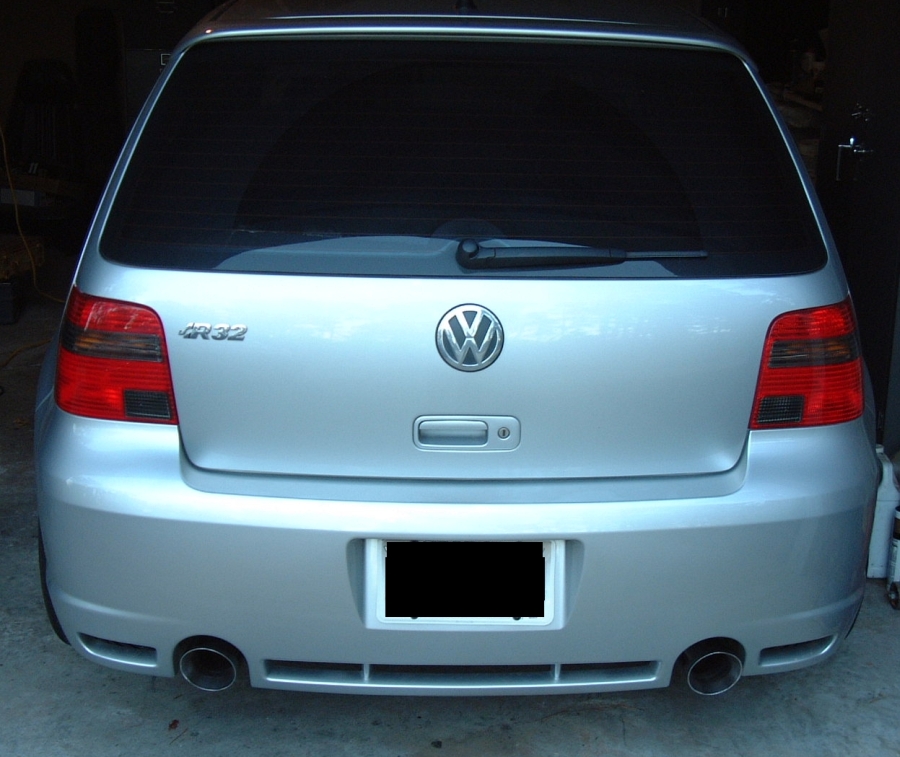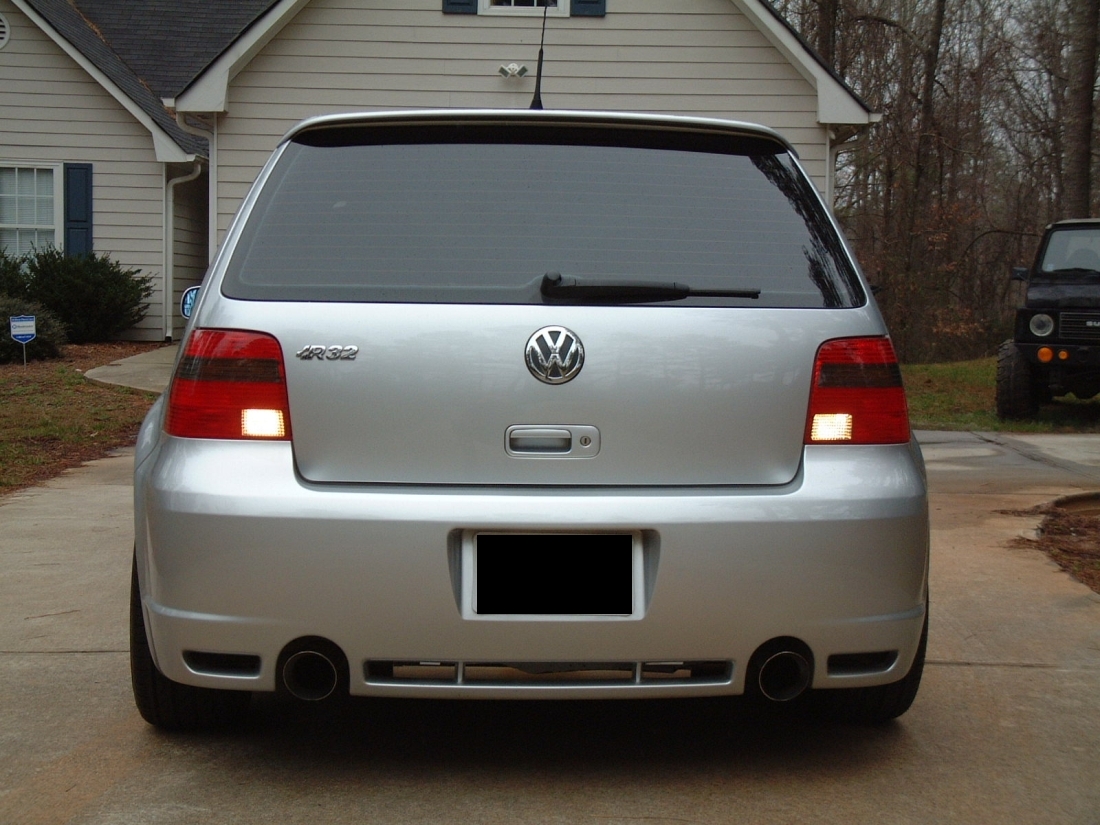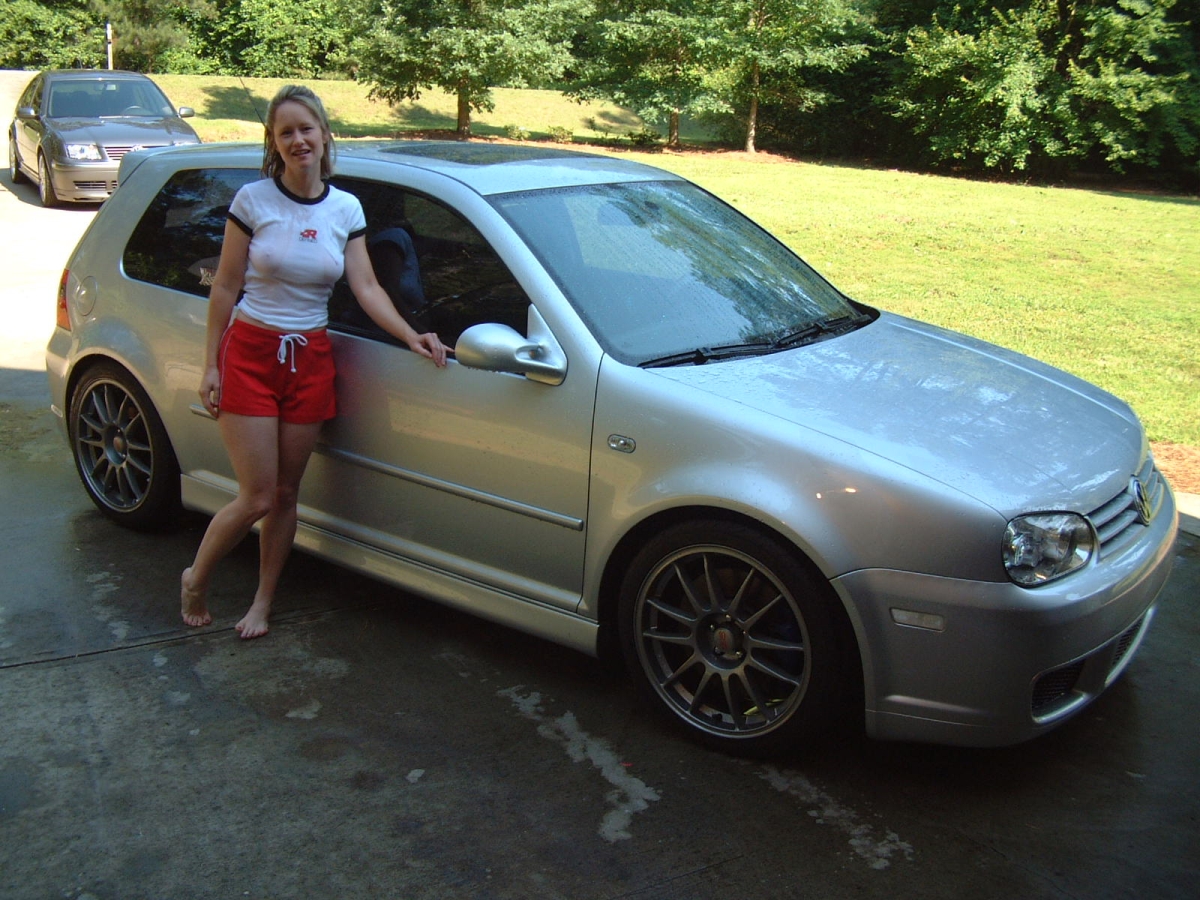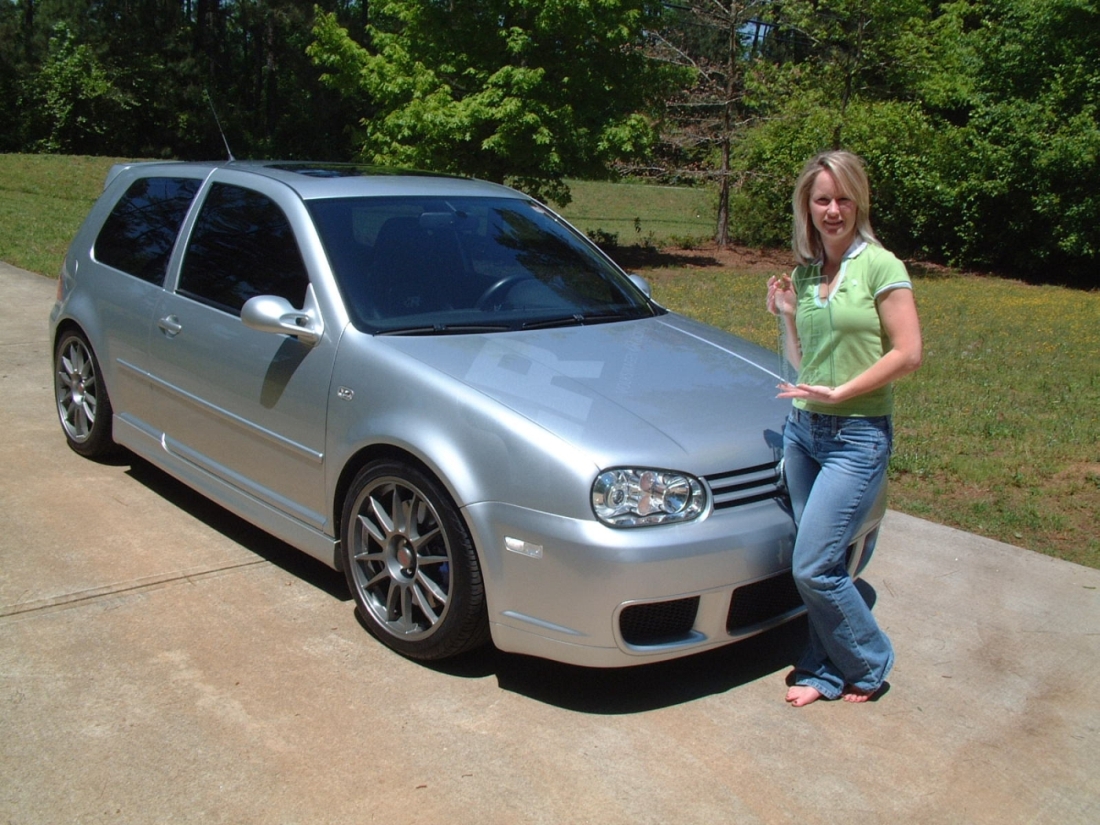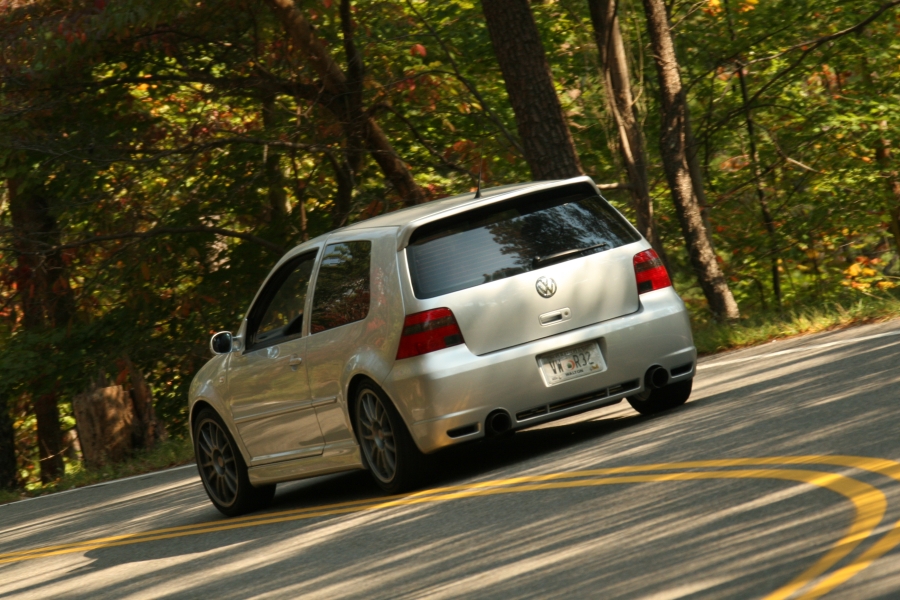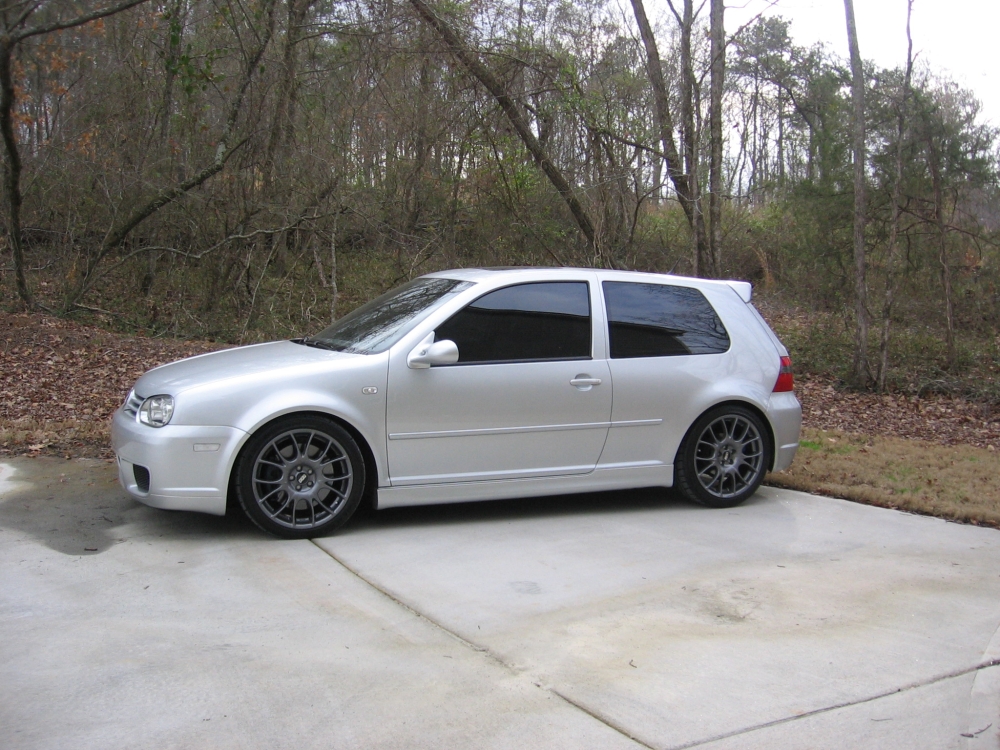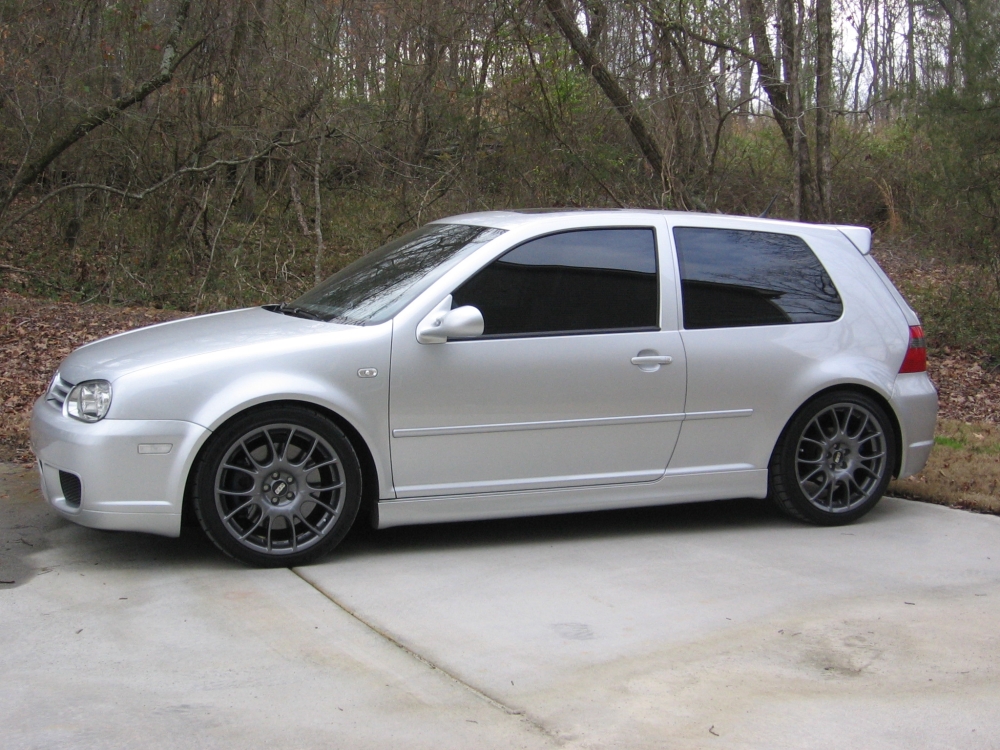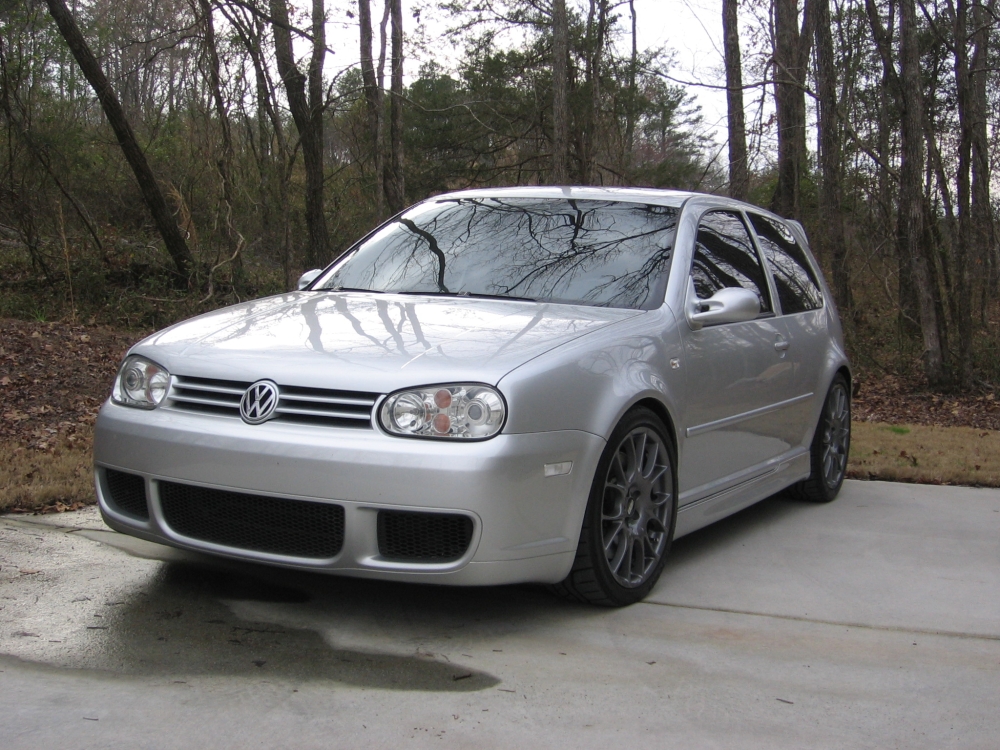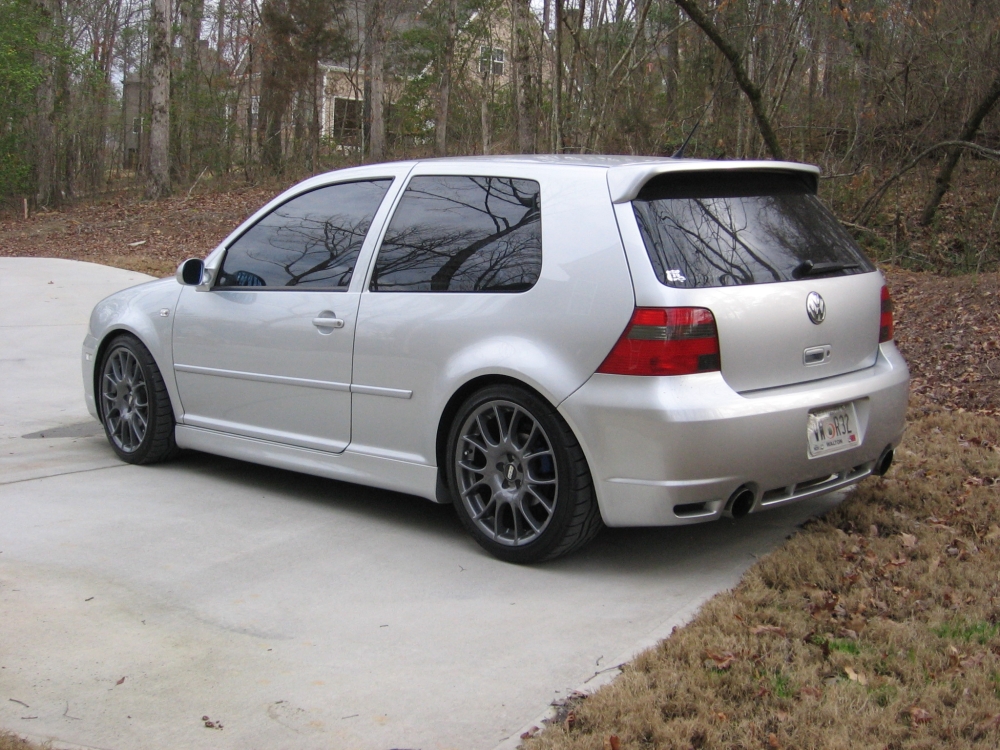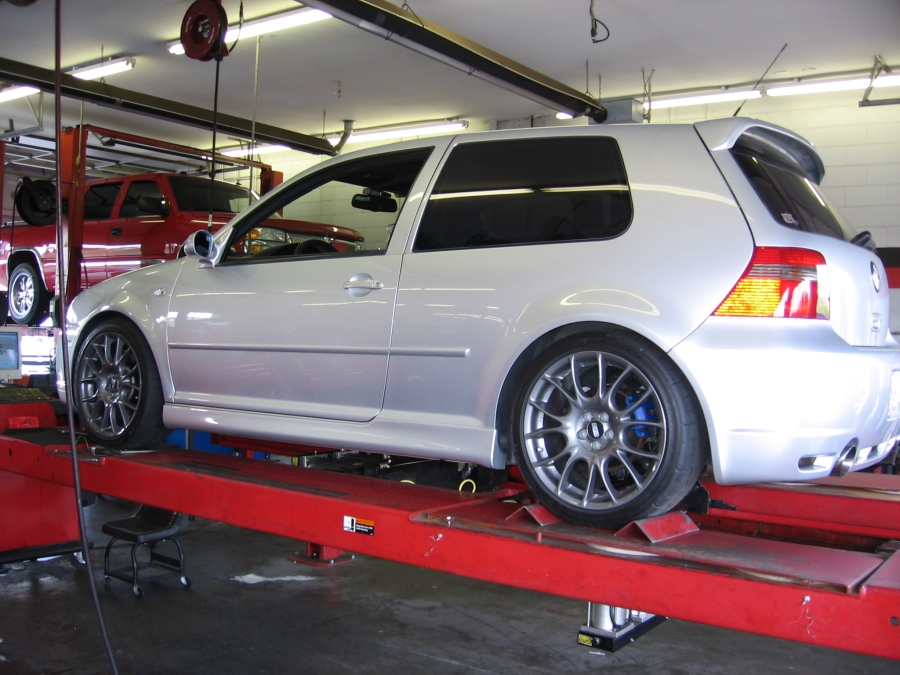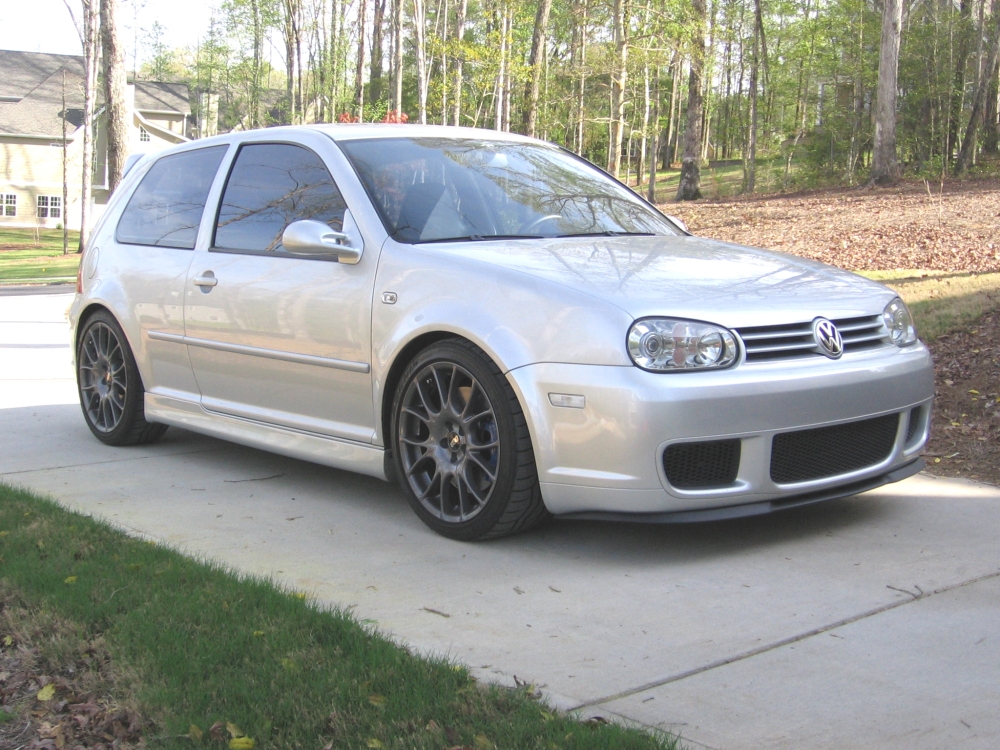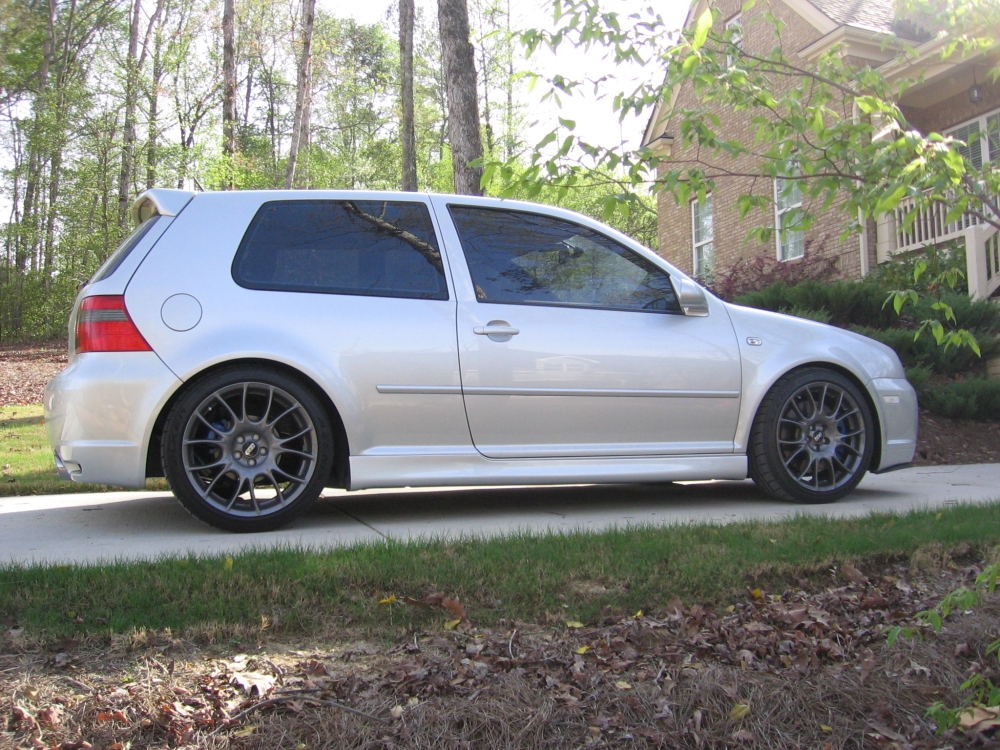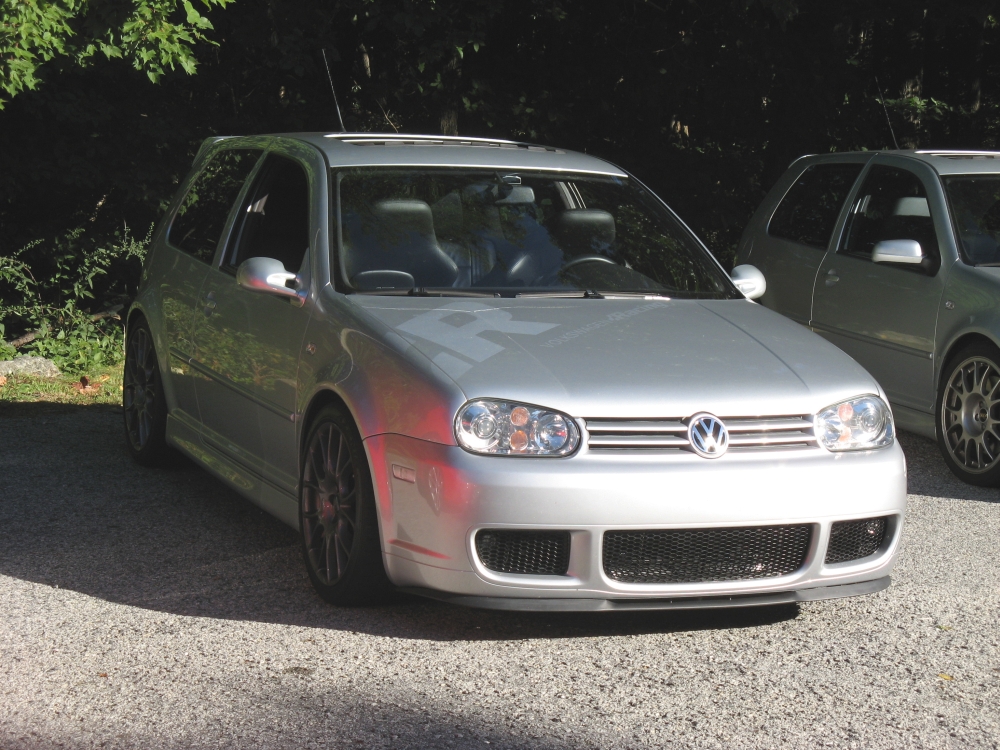

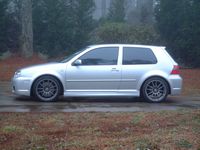
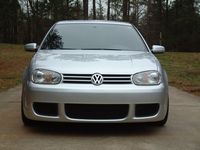
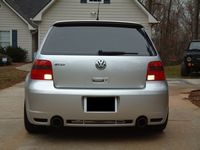
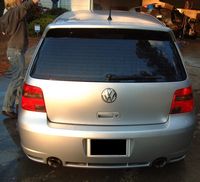
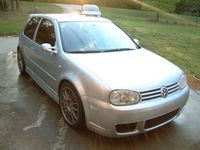
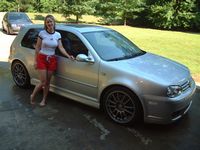
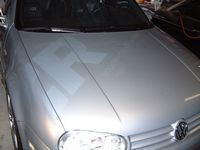
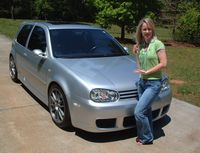
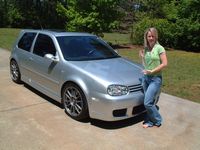
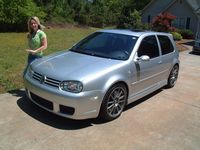
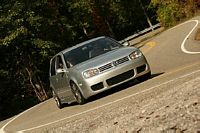
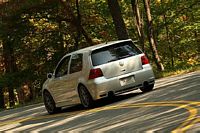
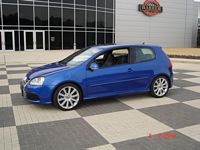
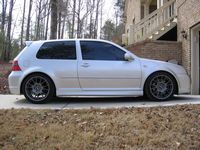
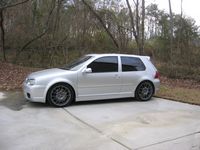
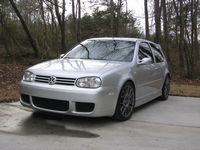
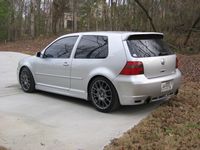
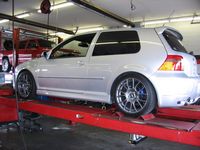
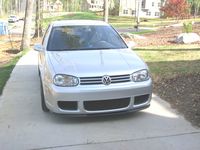
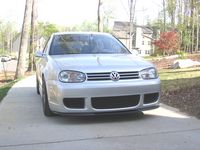
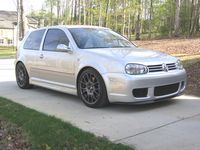
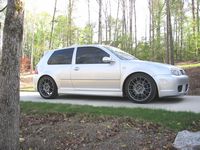
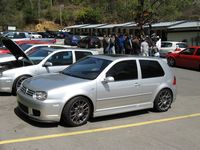
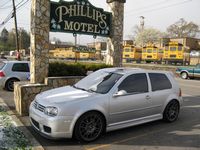
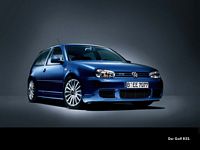
2004 Volkswagen R32

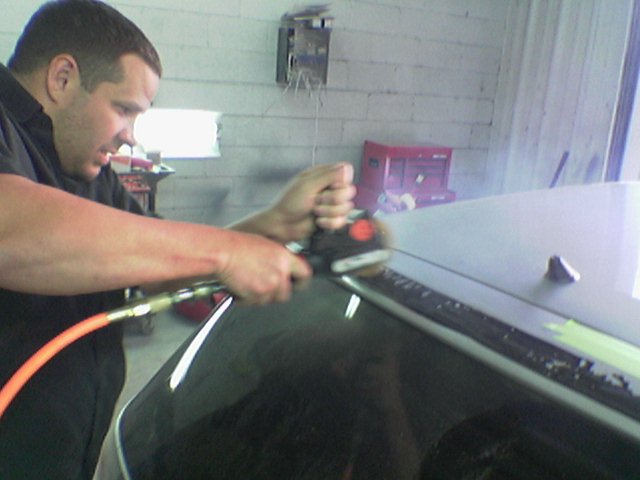
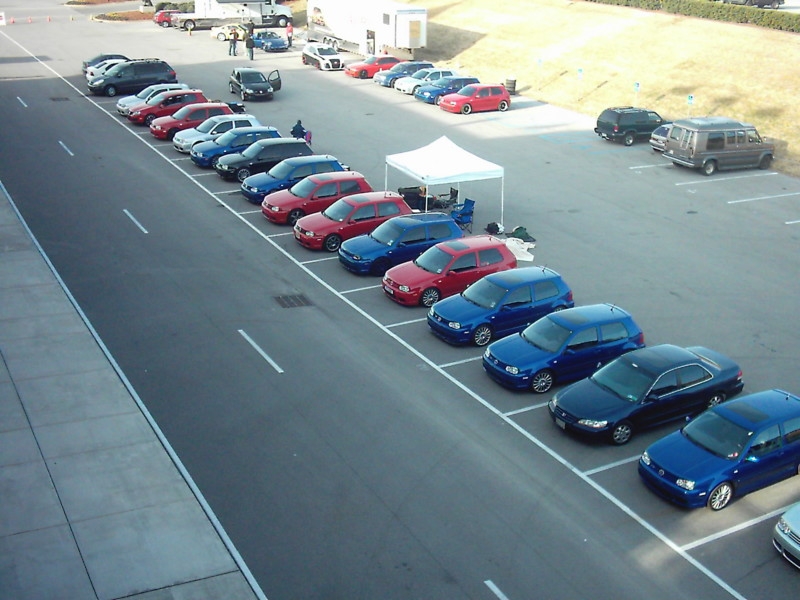
New Car with wife- Windows Tinted 20% by Mr. Tint (aka Barry Wood, H:(770)963-7924 C:(404)392-8007)
Feels good to be back in a VW since my 1st VW, 10 years ago....

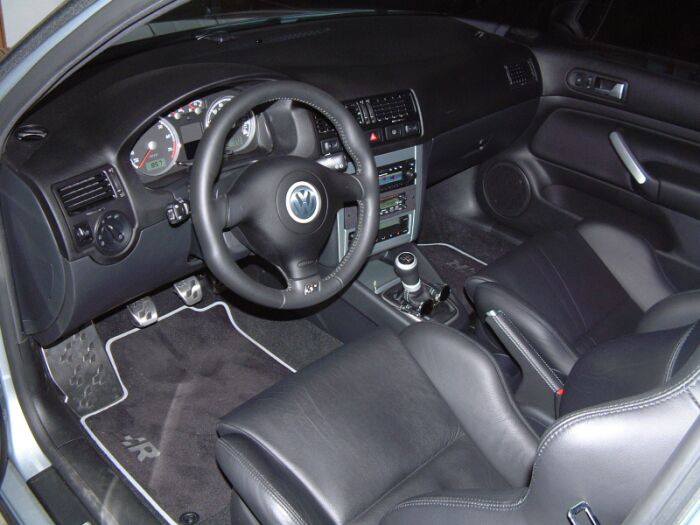
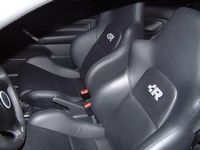
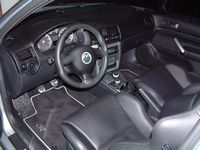
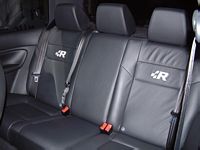
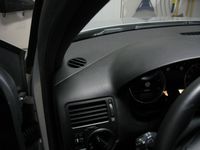
Interior:
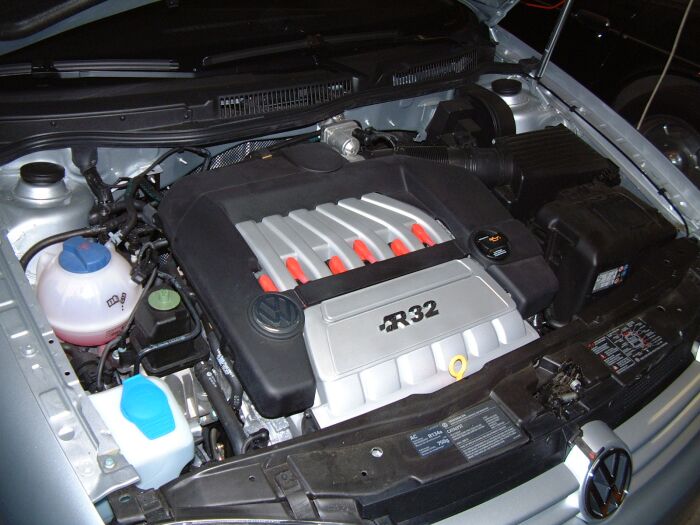
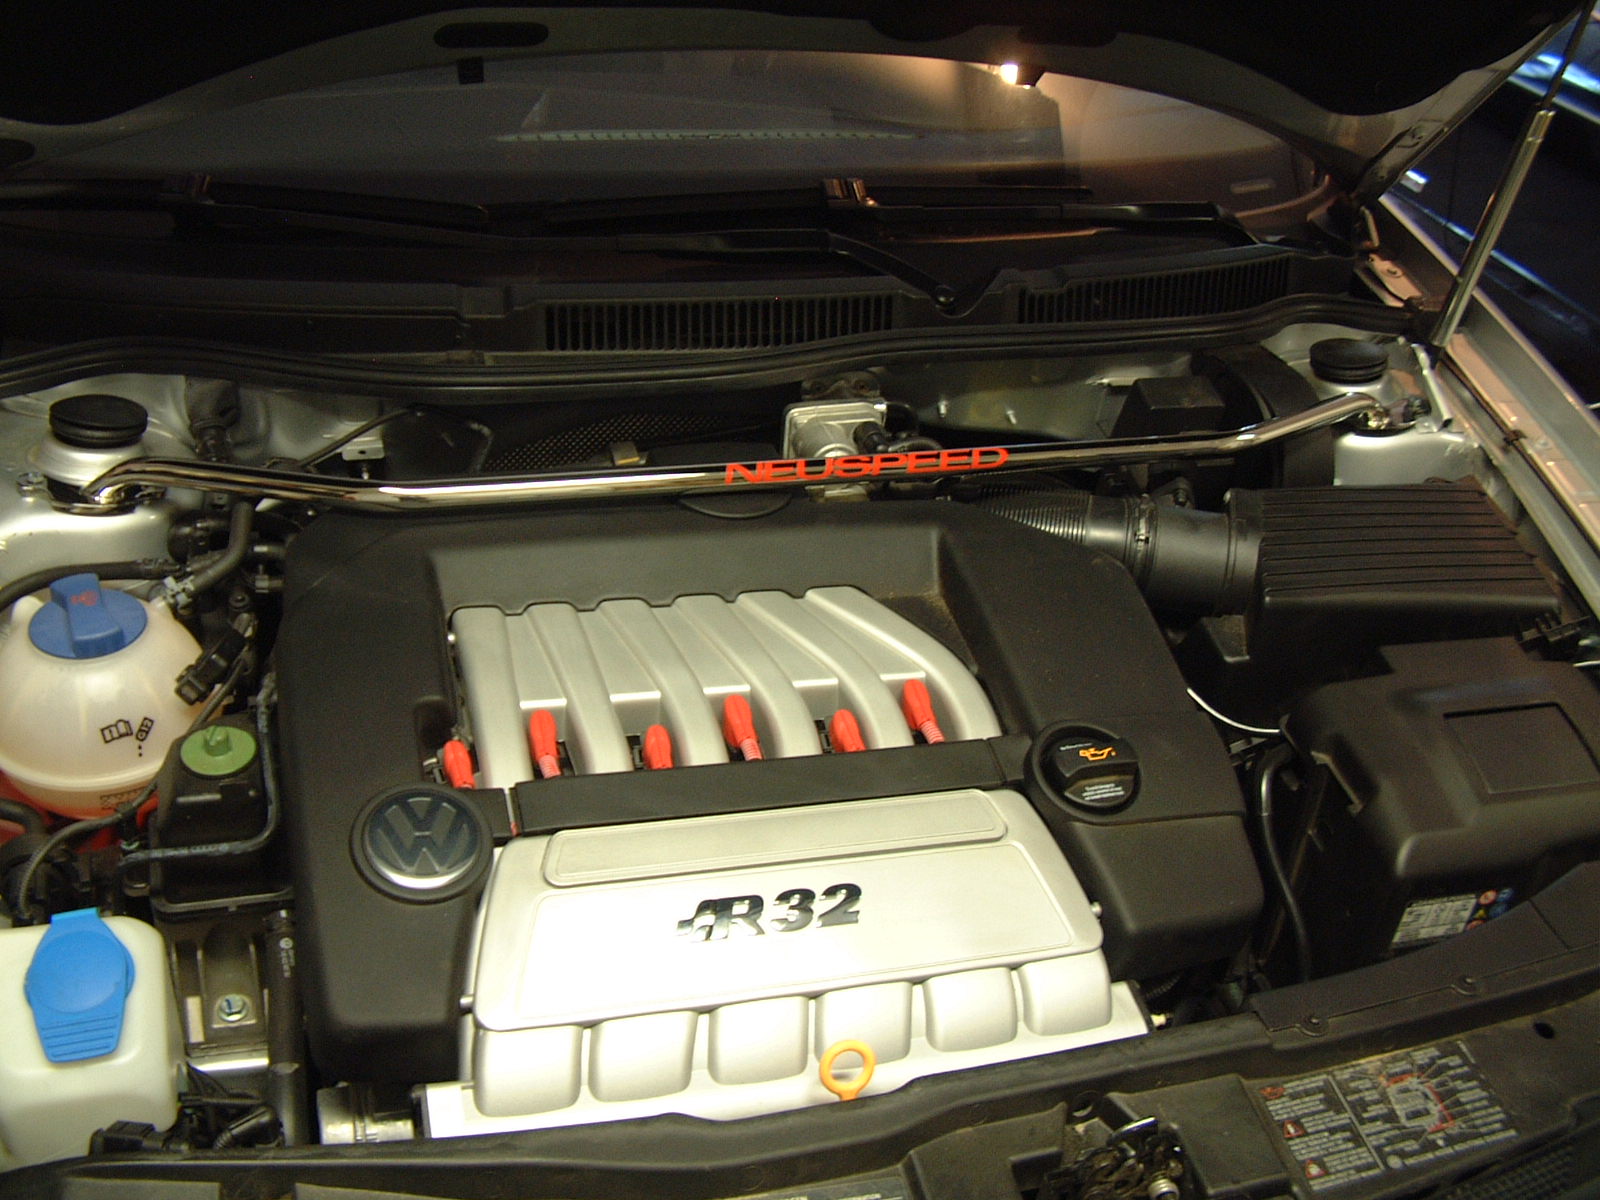
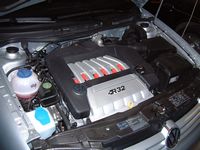
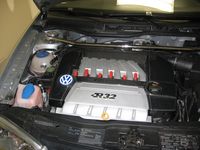
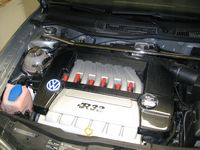
Motor: 3.2L, 24 valve VR6
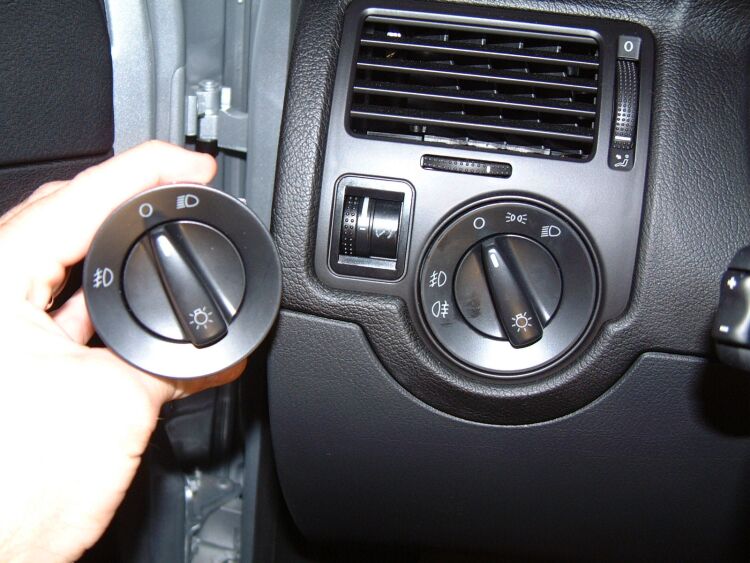
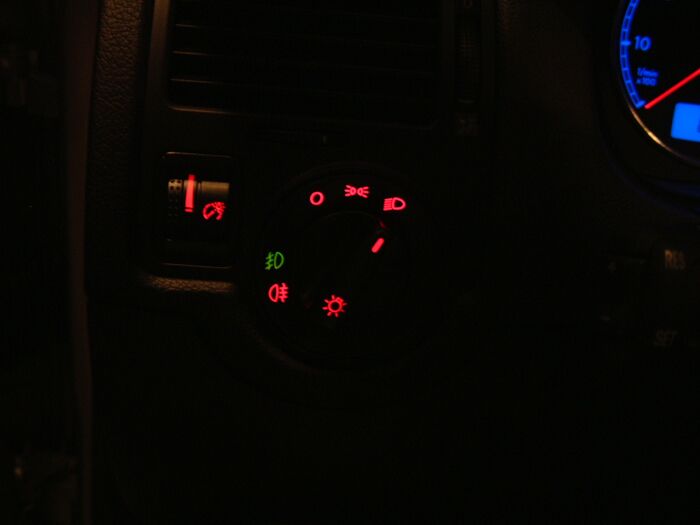
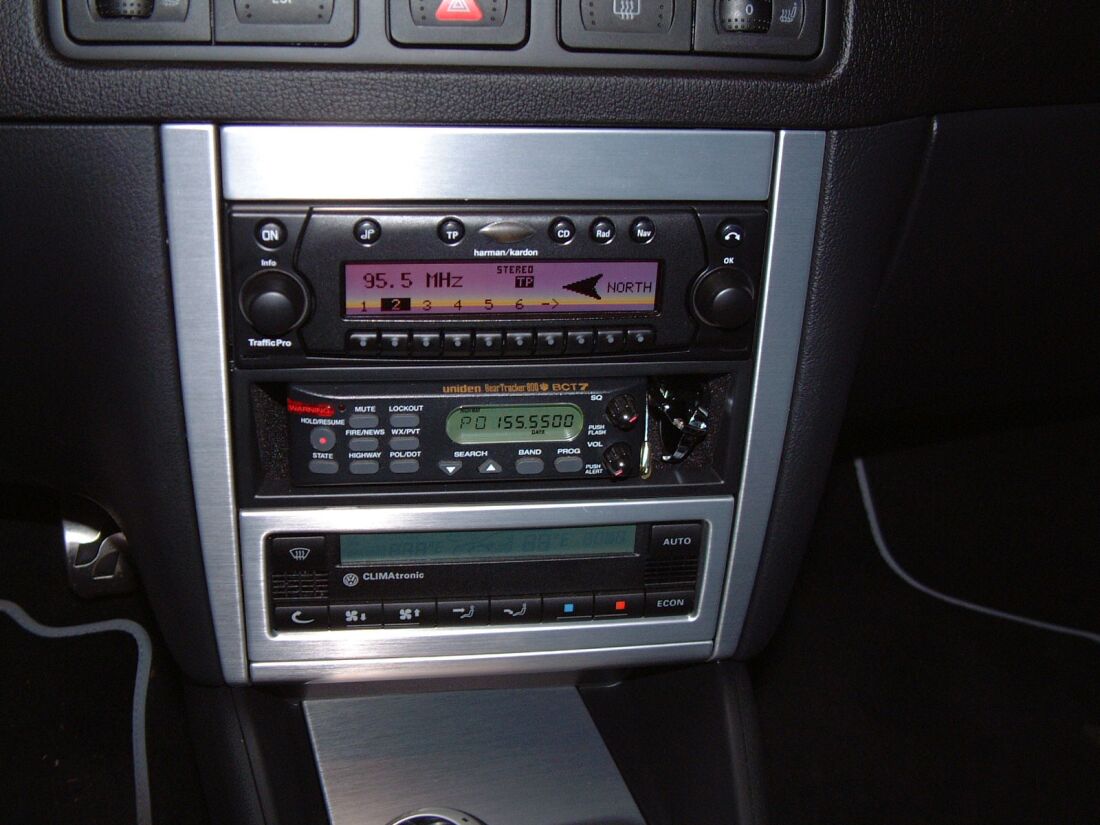
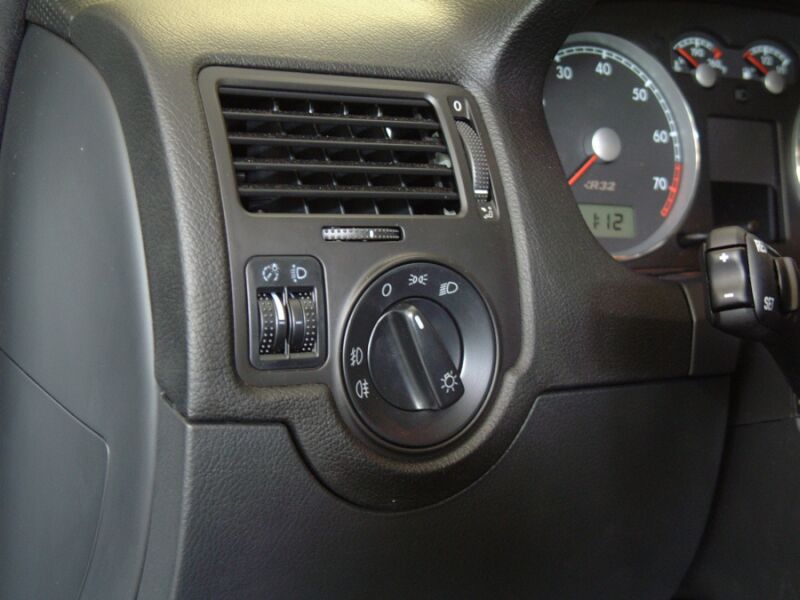
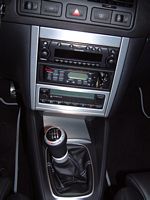
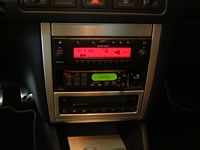
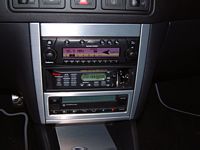
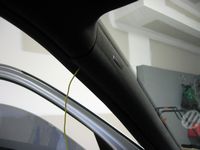
Euro Light switch installed along with Harmon Kardon TrafficPro (GPS antenna was on dash, now mounted on bar underneath dash for stealth....C' Ya Monsoon), Uniden Beartracker Scanner (manual here), and old Passport Radar detector (I need a V1 now).
TrafficPro PDF Docs here: Installation Manual, Owner's Manual, Quick Start Guide, BMW Roundel Review,
Mobile Entertainment Review. There is some more information and links for the Traffic Pro HERE.VW Radio Wire Harness Reference HERE , VW VSS Wire location courtesy of Bentley Publications HERE,
and VSS plug location from the VW ERWIN manual HERE (Thanks for sharing Larry). HERE is a write-up on installing a VW MFD that is also helpful in finding the VSS wire, tapping into it, and mounting the GPS antenna.


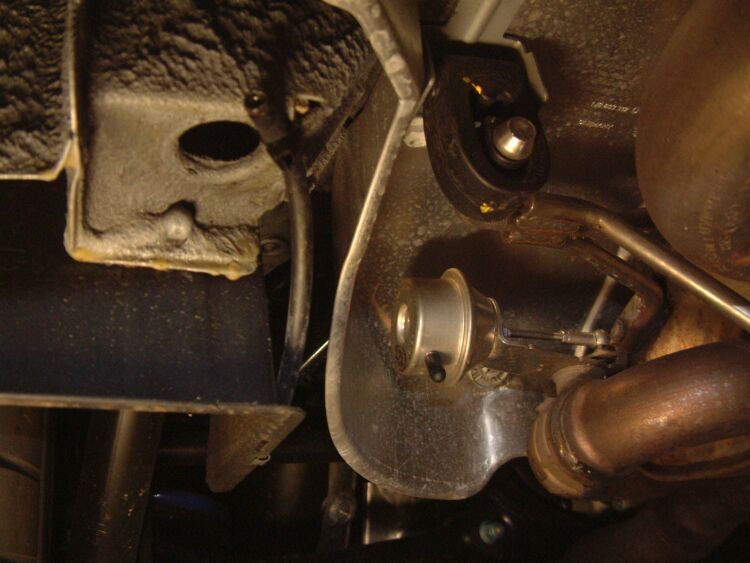
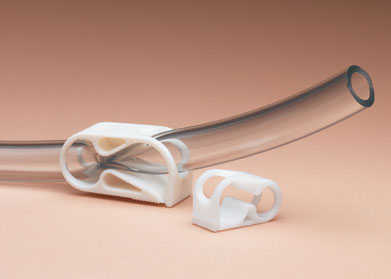
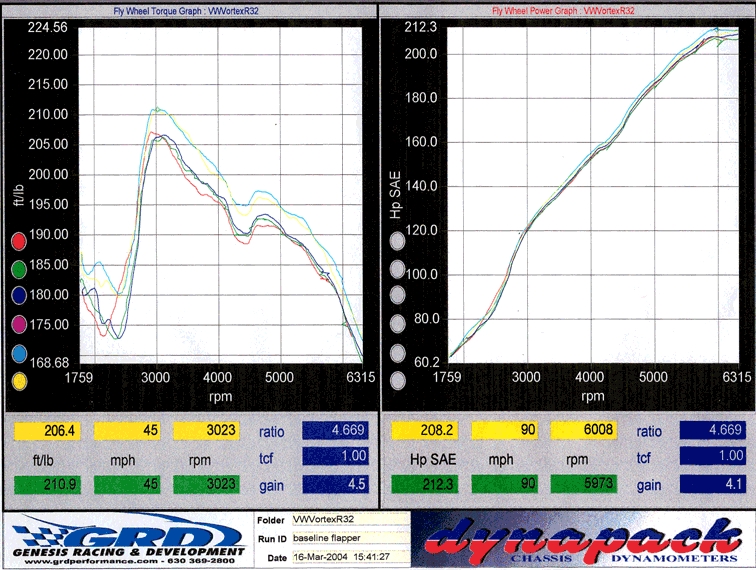
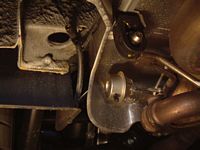
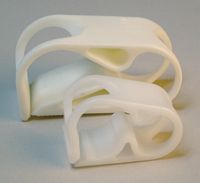
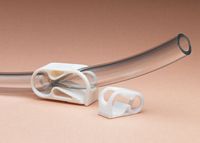
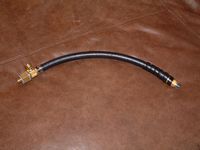
Exhaust "Flapper" Mod: Capped Vacuum motor and plugged vacuum line, now it sounds good ALL the time...you can also use medical pinch clamps as pictured on the right- available for purchase from Midwest Supplies. The flapper vacuum motor can also be wired to a switch, click HERE for the write-up by VW Vortex's gabedibble on this procedure; click HERE for the exhaust flap vacuum motor wiring diagram.
Good for 10 HP, 10 FPTQ

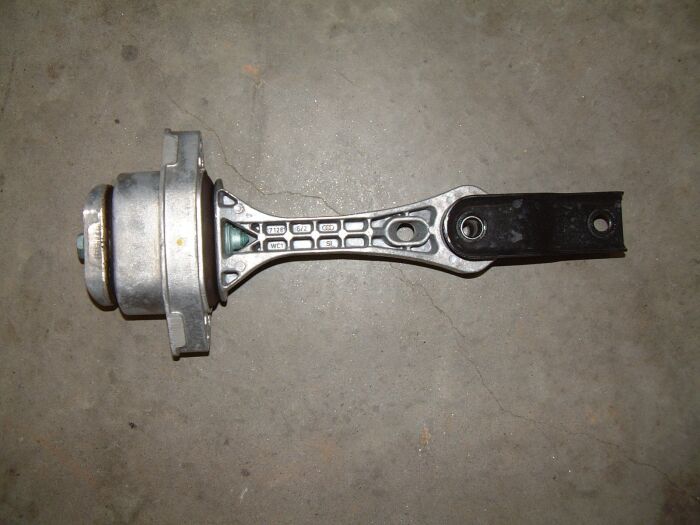
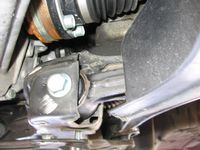
EIP Rear Mount takes the factory slop out without vibration

HPA Short Shifter set to 35% reduction....crisp, short,and sweet.....does not feel like a cable shifter anymore, additional weight makes for a very positive shift


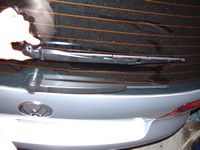
VW Polo Rear Wiper replacement to match aero front wipers from AtLast Imports
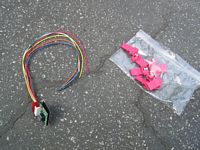
Alientech AlienWindow window and sunroof controller installed. Door panel removal is required to tap into wires (no cutting, easily reversed), click HERE for VW Vortex VgVr6's Door Panel Removal DIY. Similar controller is available from AutoWindow . Another new option is a flashloader that changes VAG settings via the OBDII port to allow this functionality- click HERE for the Vortex thread.
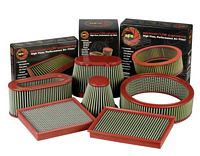
aFe air filter from AMS installed- This is a reusable drop in filter that works with the factory airbox. Click HERE for Testand air filter test results.
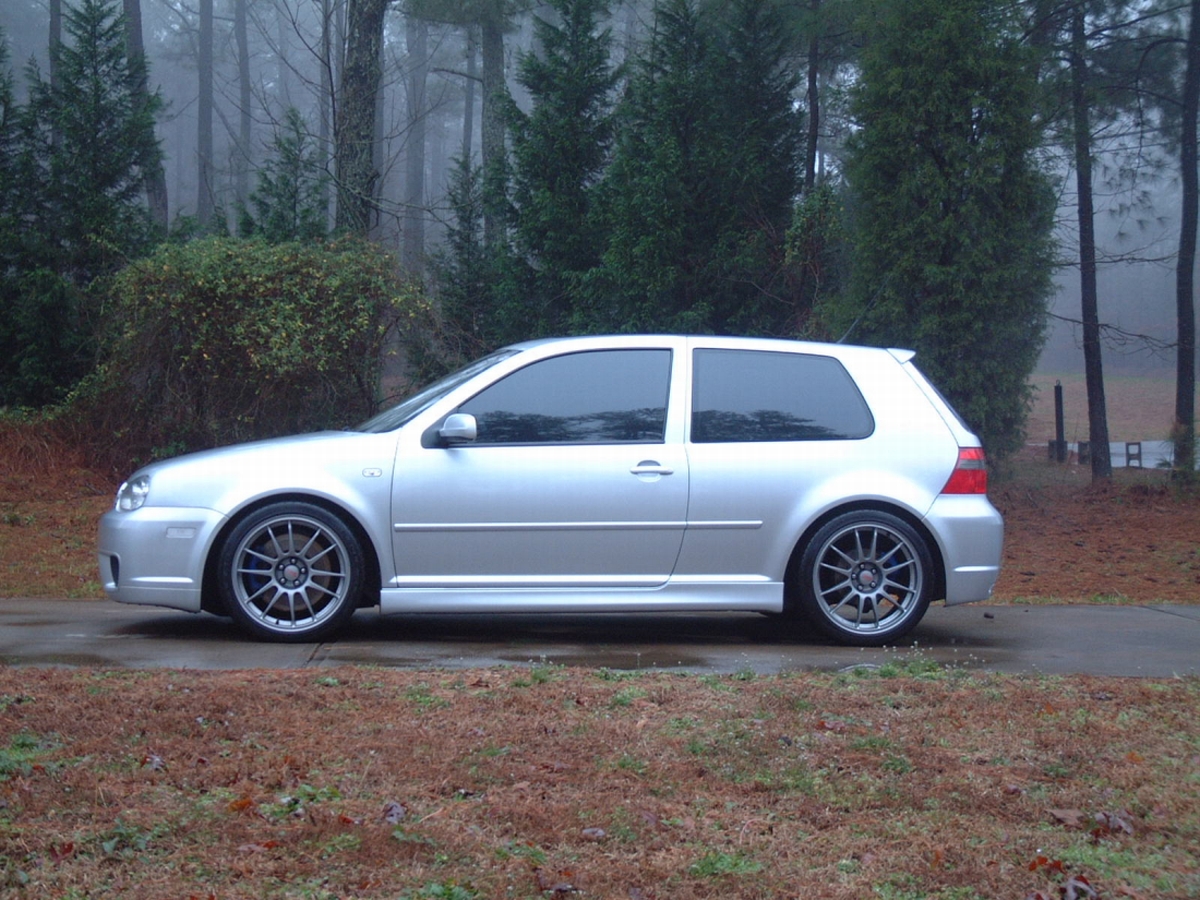
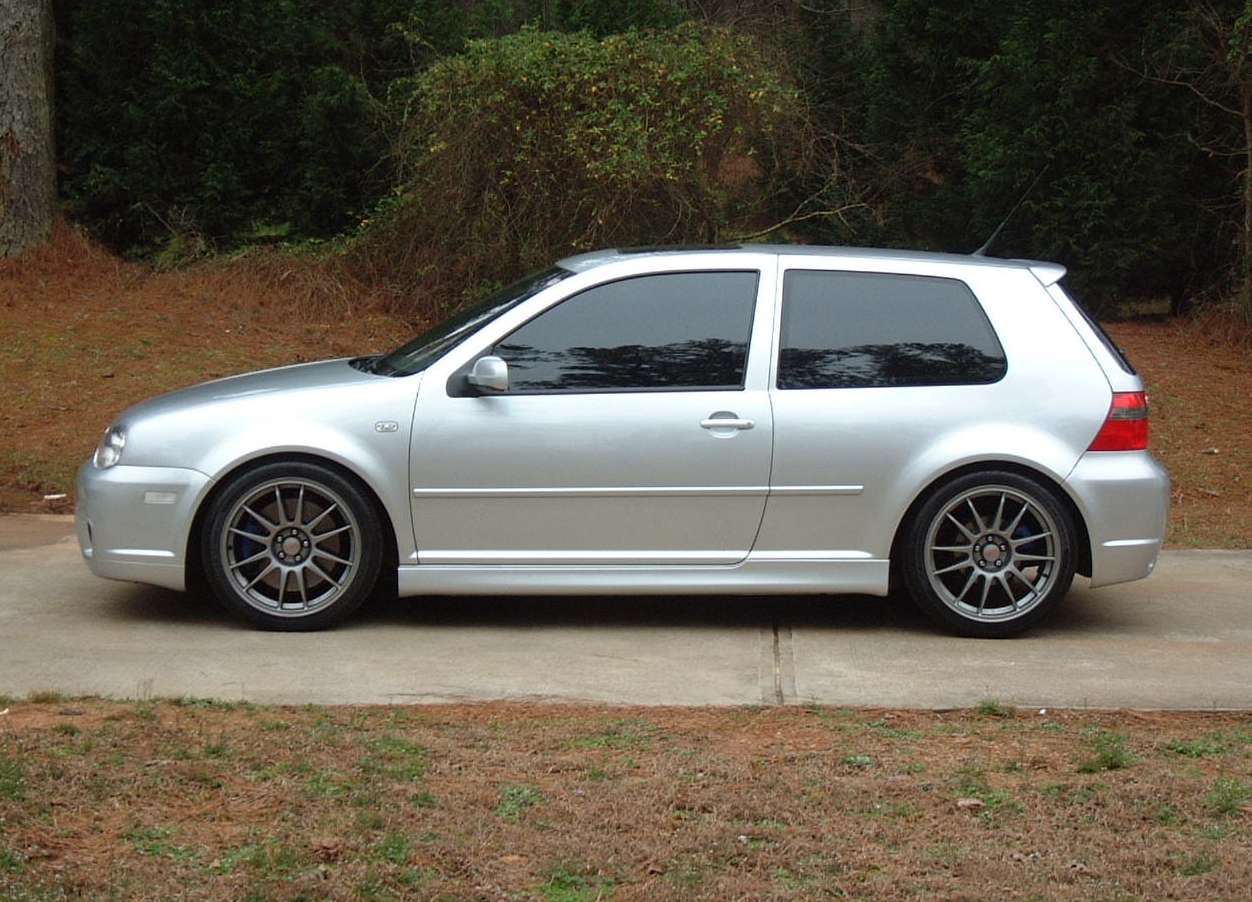
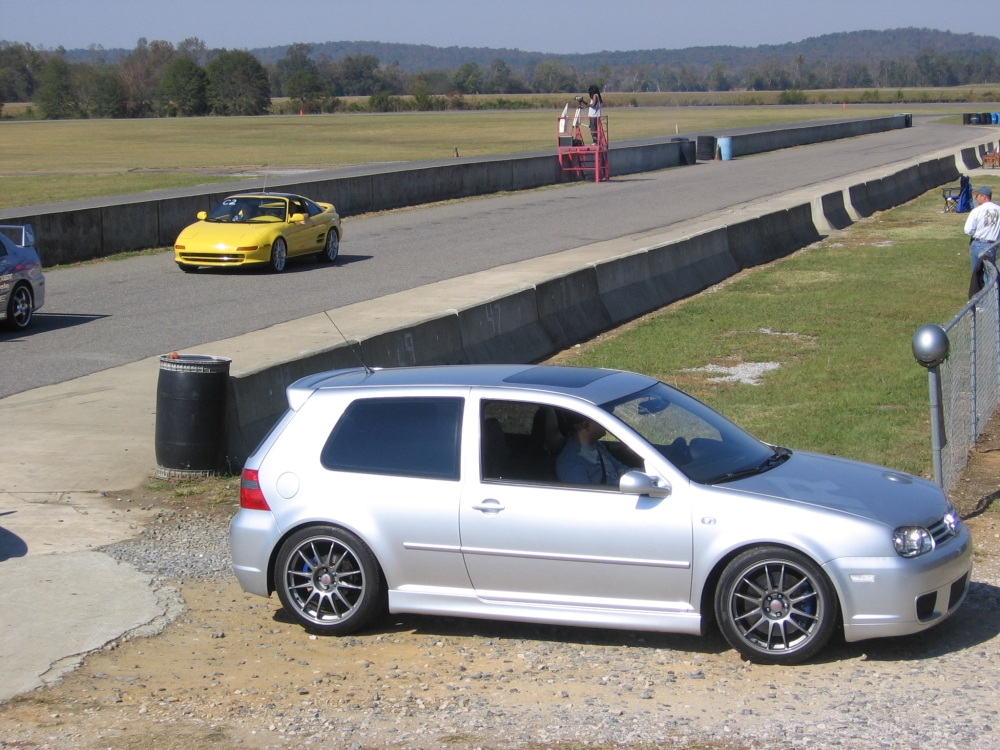
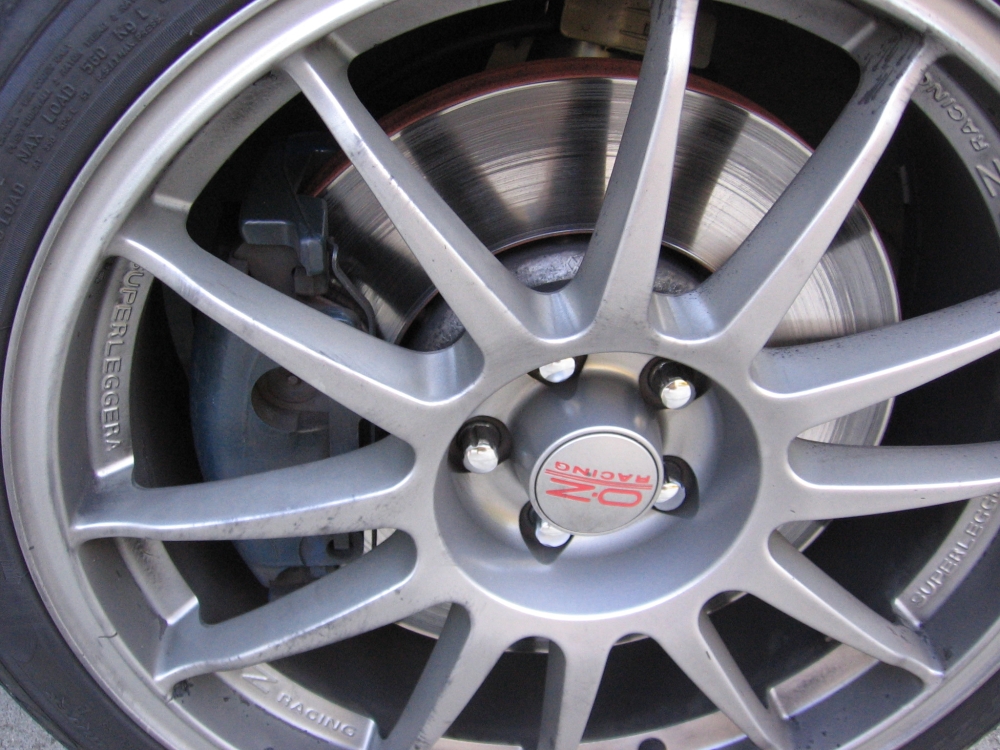
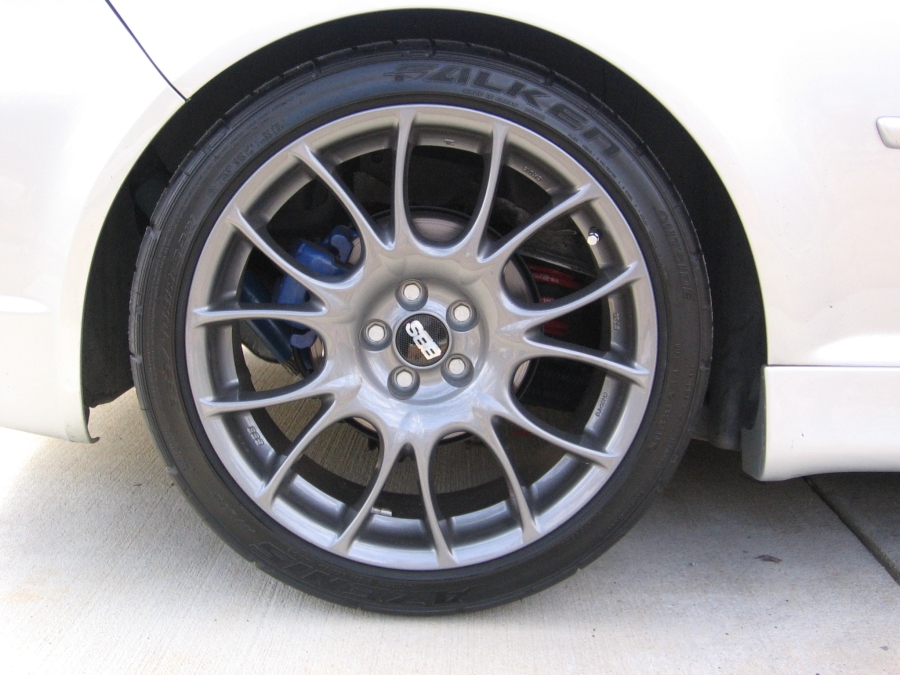
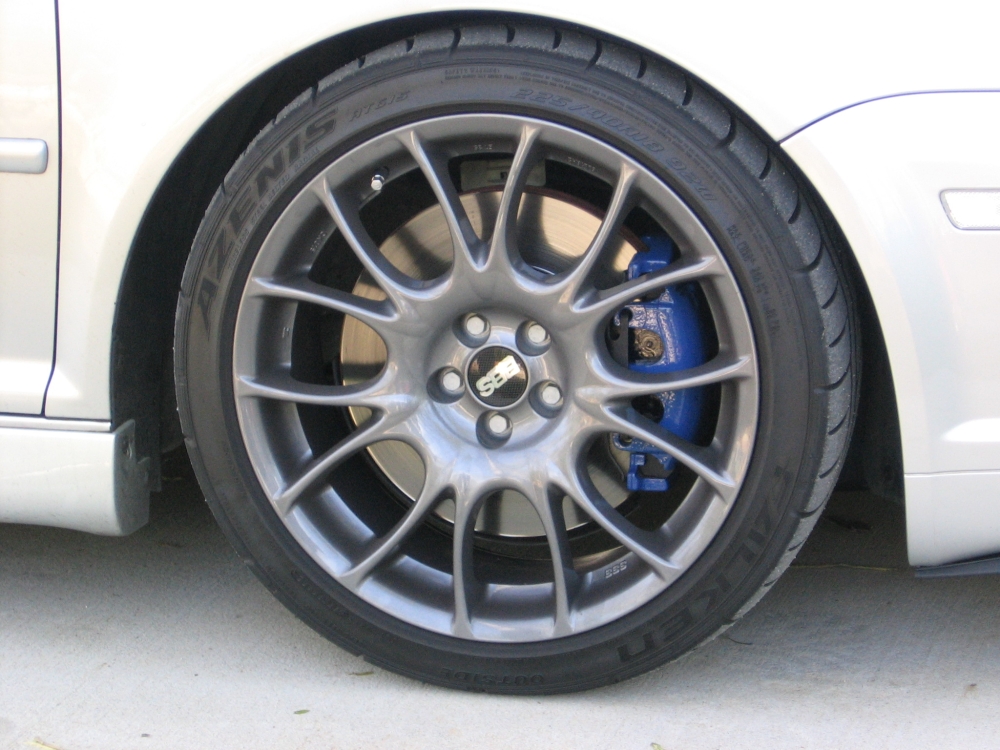
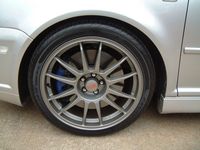
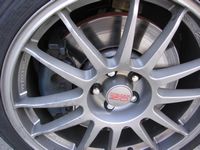
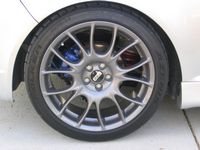
New OZ Superleggera 18x8- HUGE difference in handling going from 30 lbs stock Aristo to these at 18.5 lbs (and now my R32 does not look like all of the ones I saw at Southern Volksfest, wheels don't look dirty as soon)
Brian Pechin at Kauffman Tire (770-614-5650) always takes care of me.


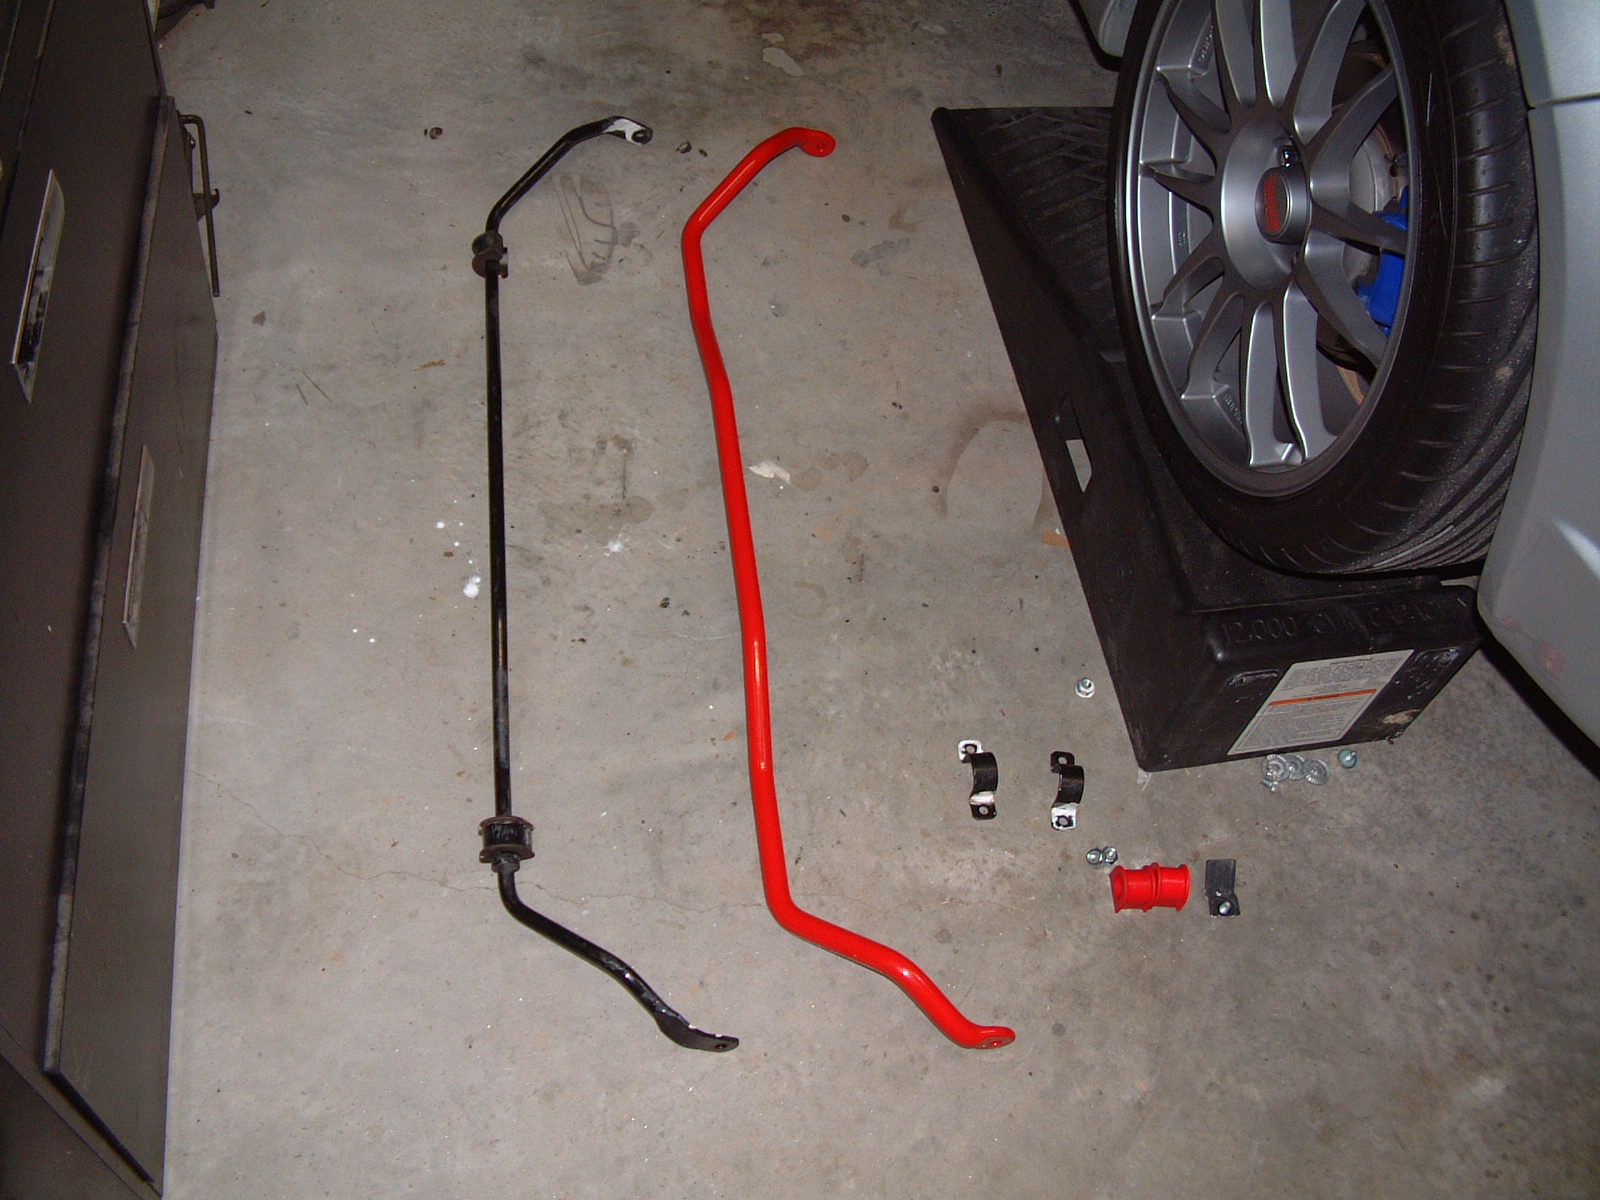
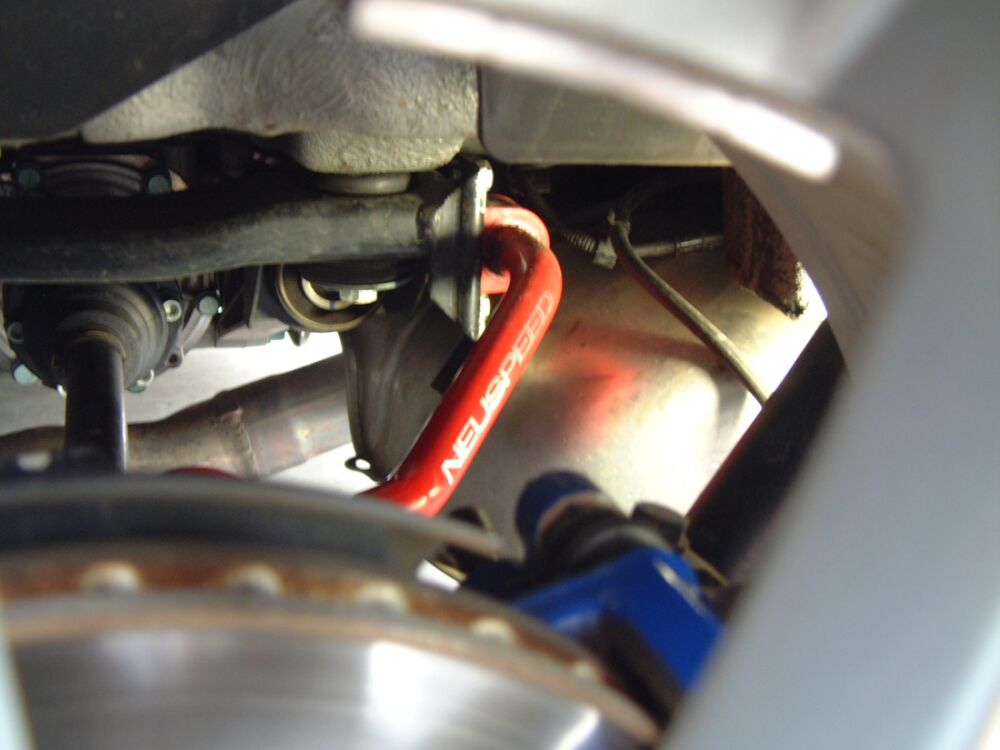
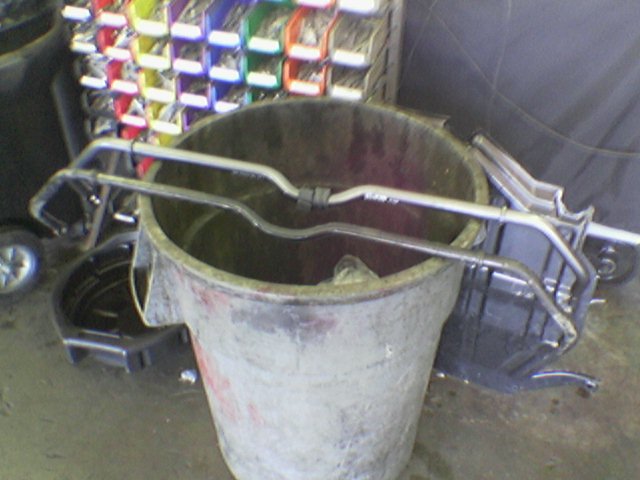
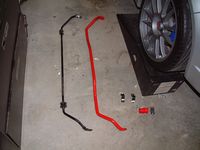
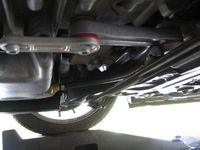
Rear 22mm Neuspeed Sway Bar from Car Buffs of VA (Installation Instructions Here)

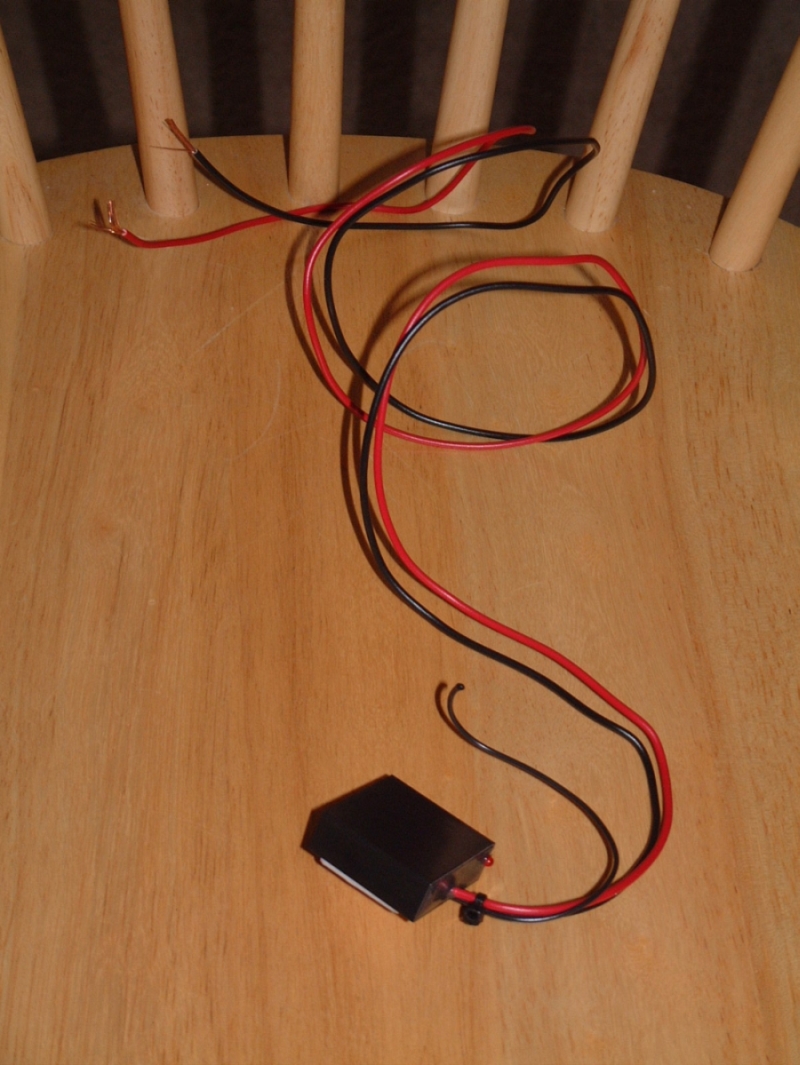
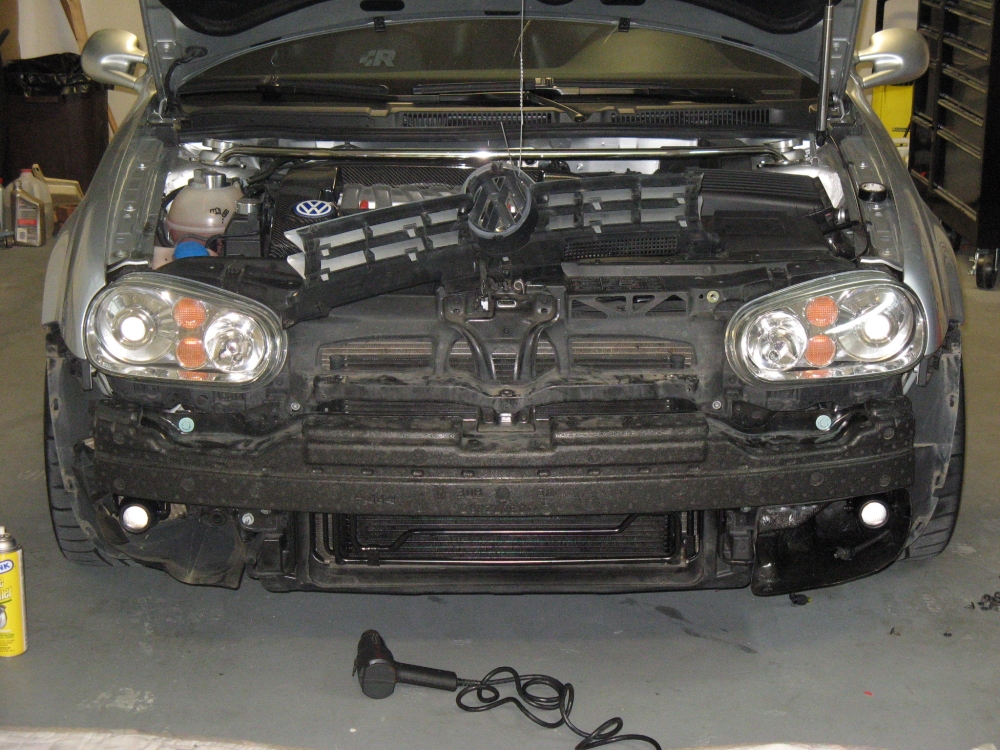
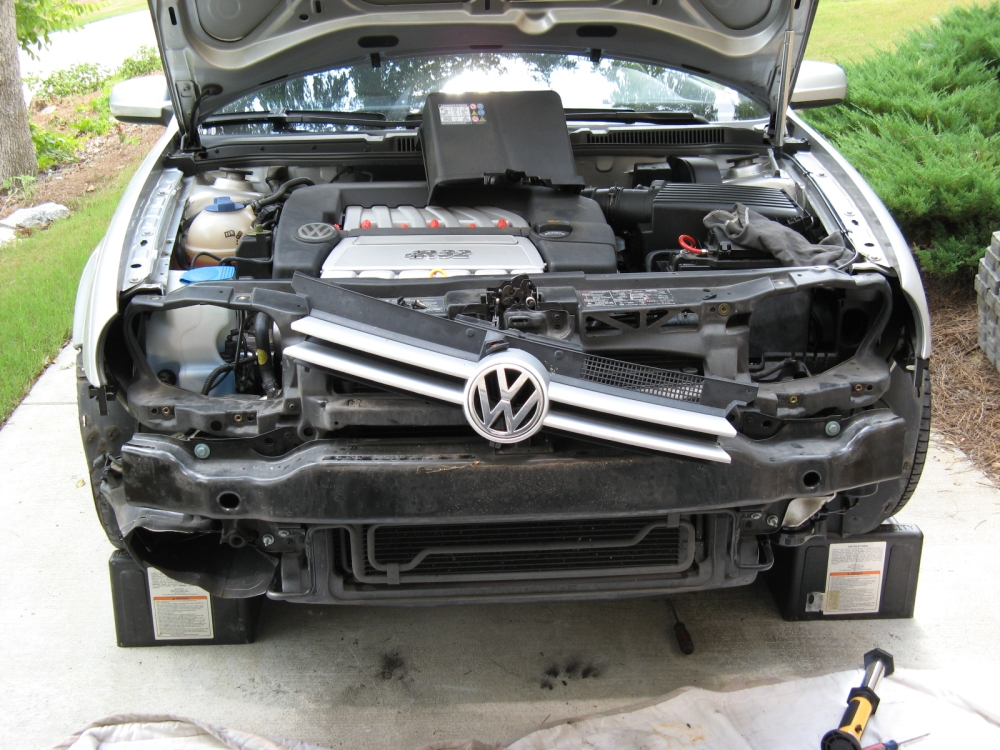
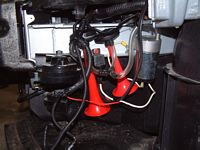
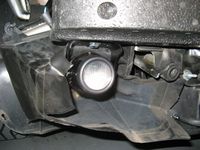
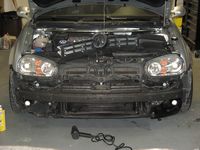
Dual Air Horns=LOUD:compressor,horns and relay all mounted near factory horns while bumper was removed for HID installation:
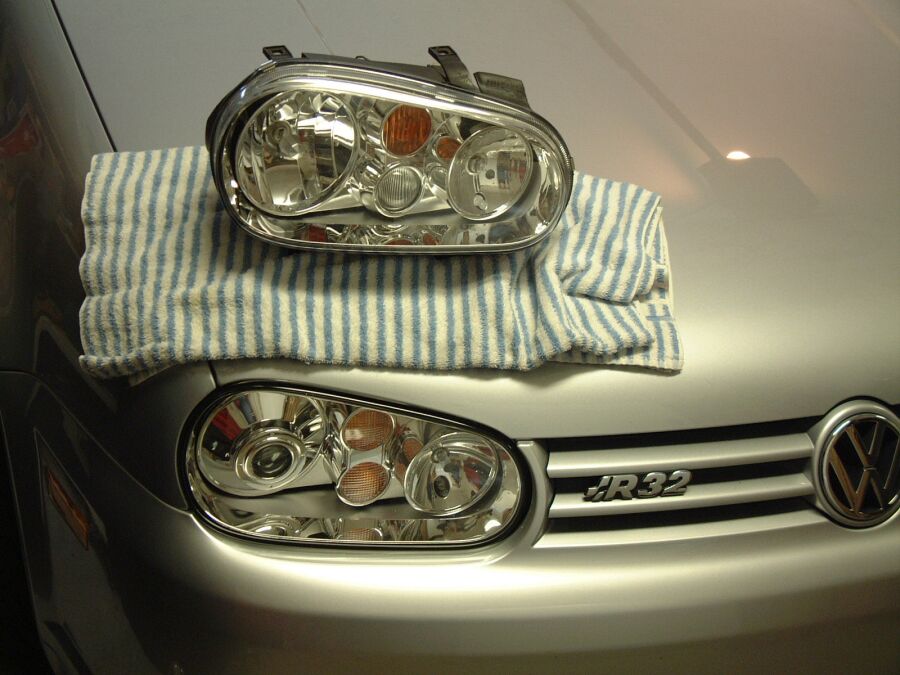
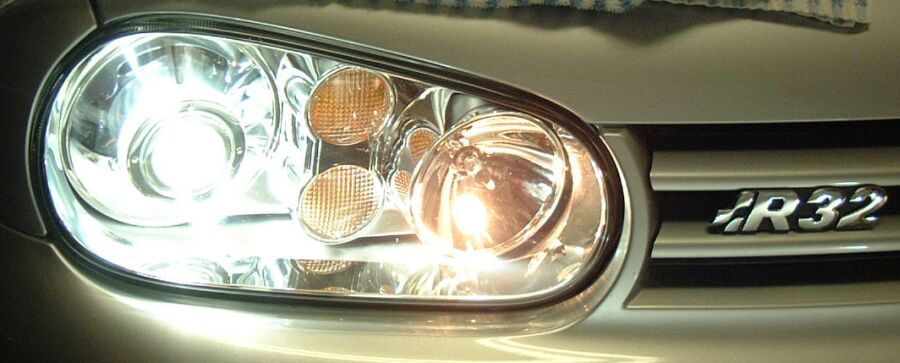
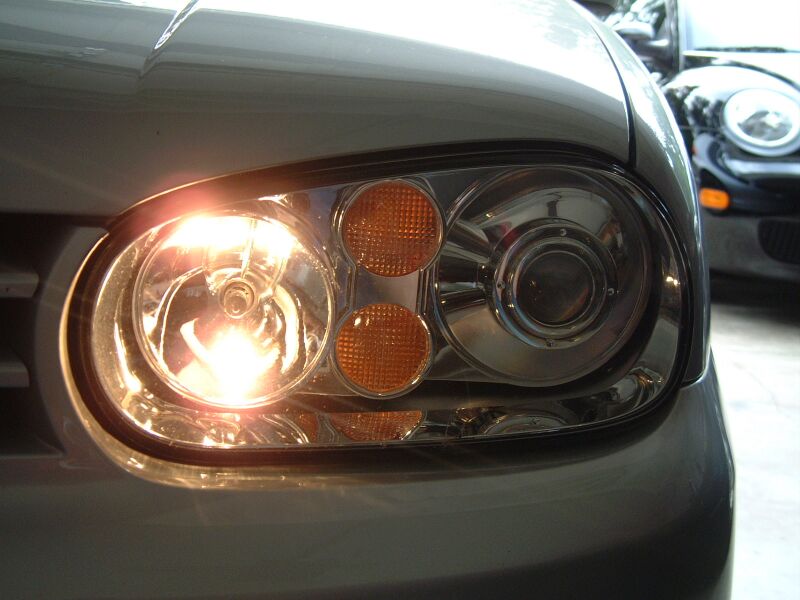
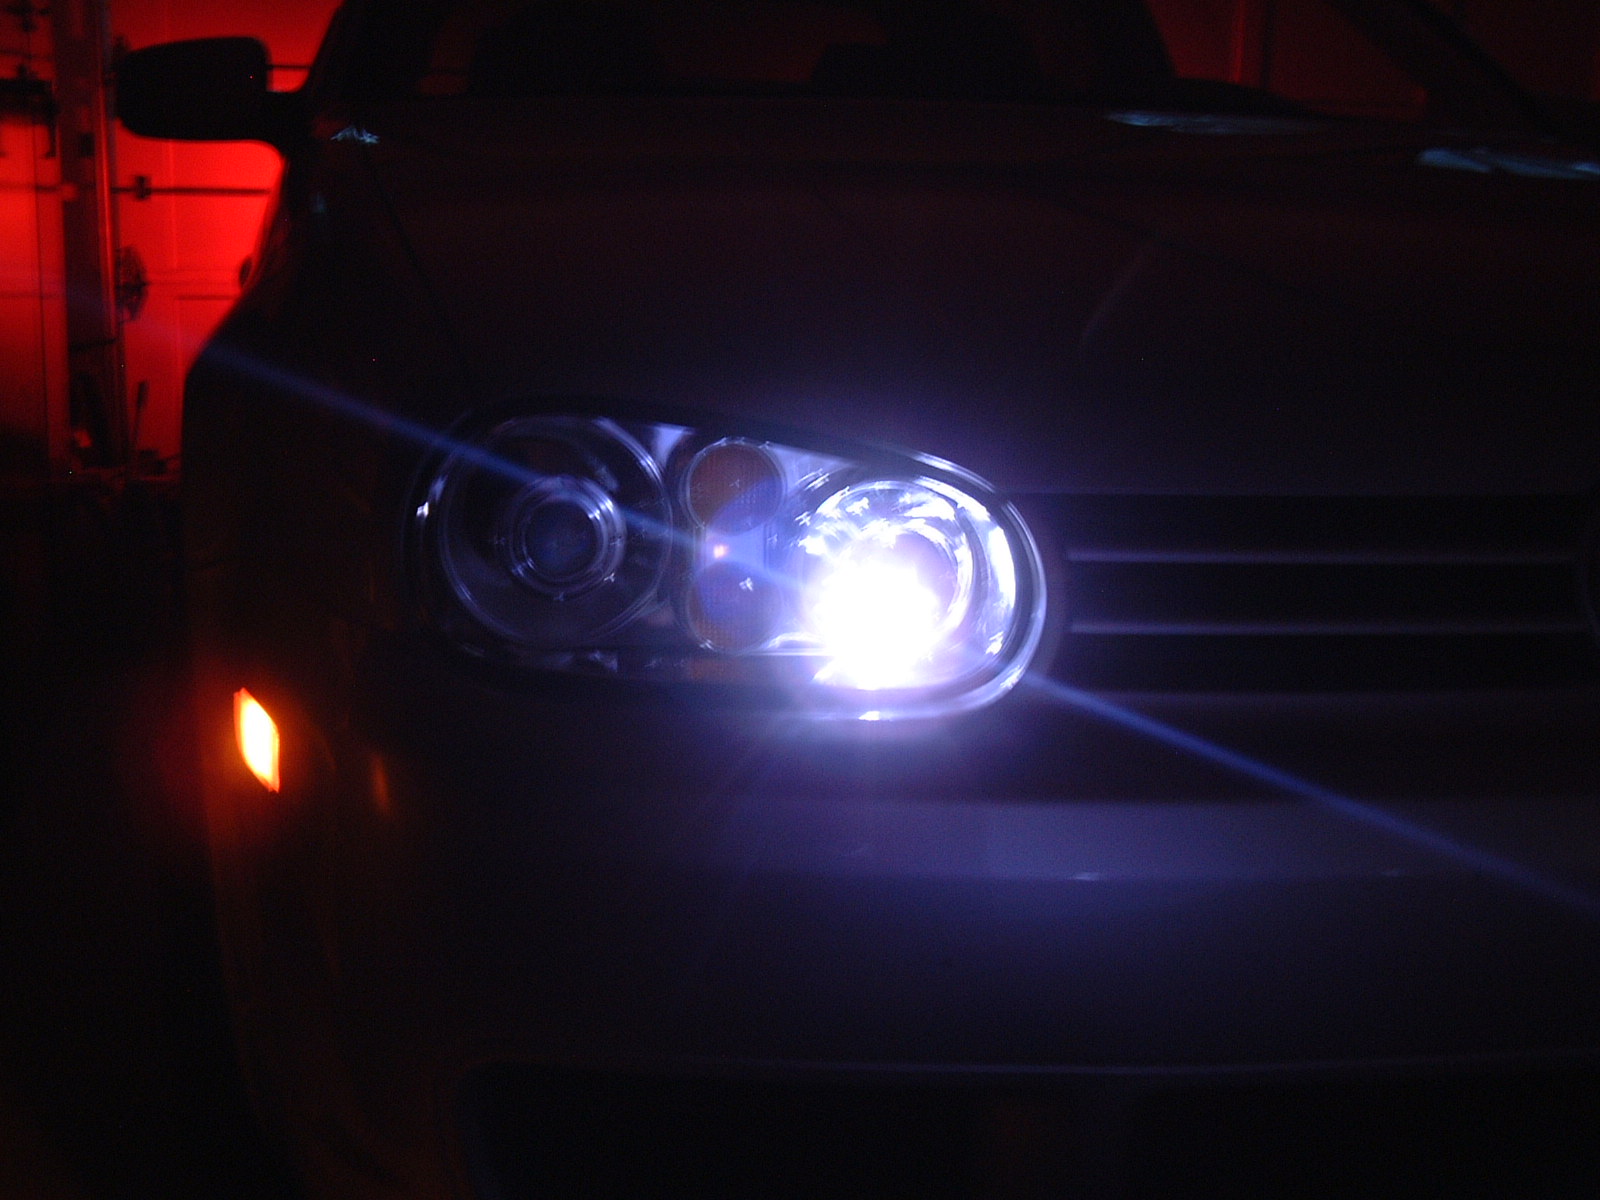
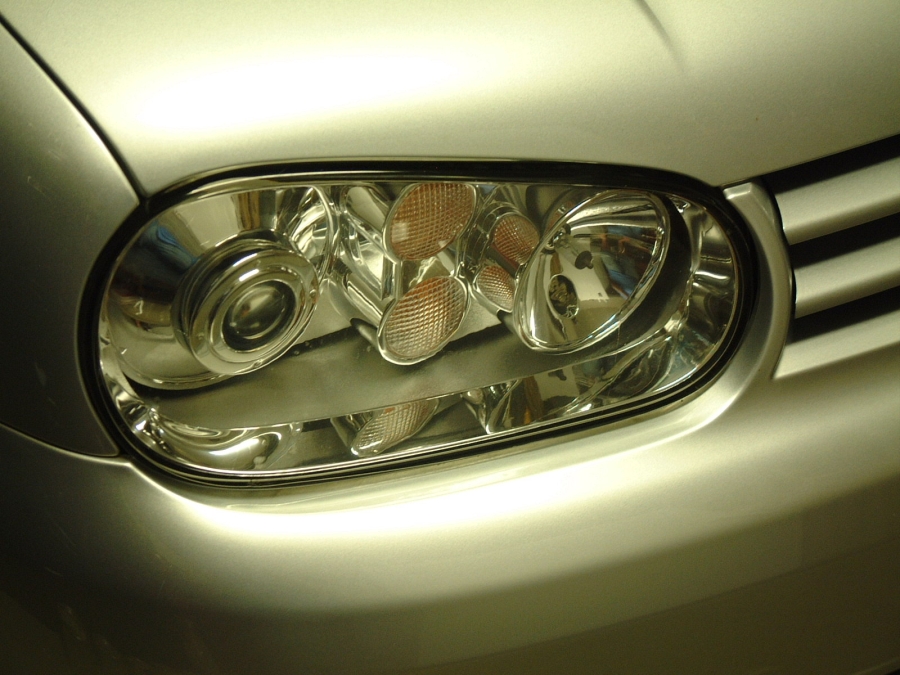
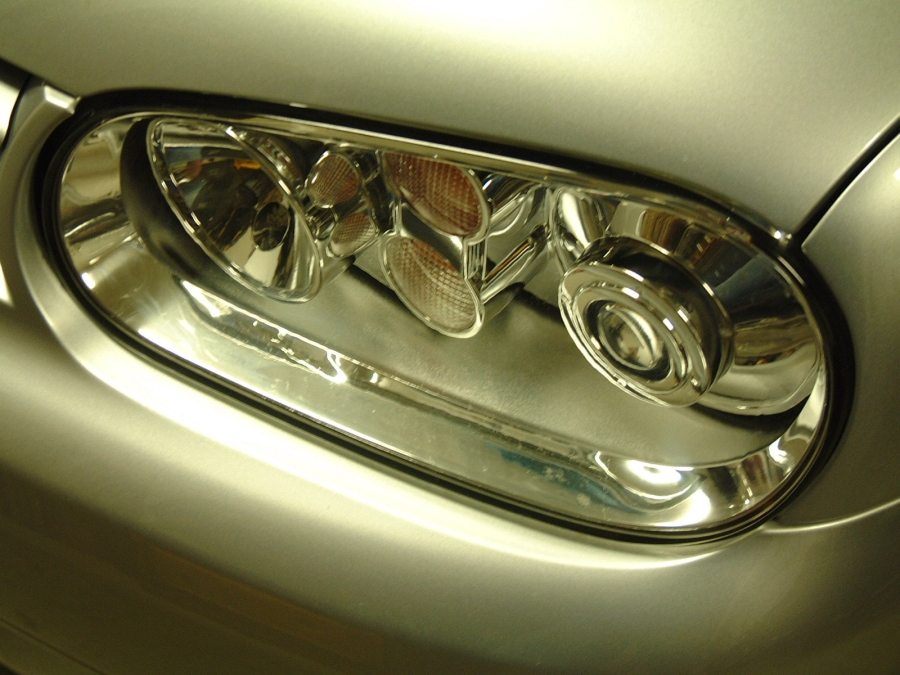
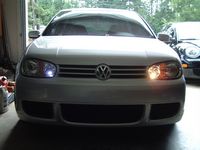
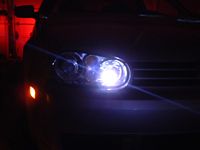
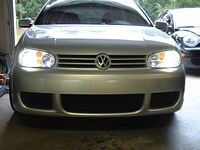
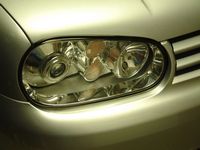
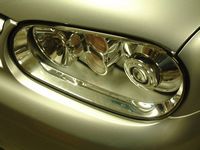
VW Euro-spec HID Headlights with manual rheostat level control from Euro Styles East.....(had to buy wife a new bathing suit
)
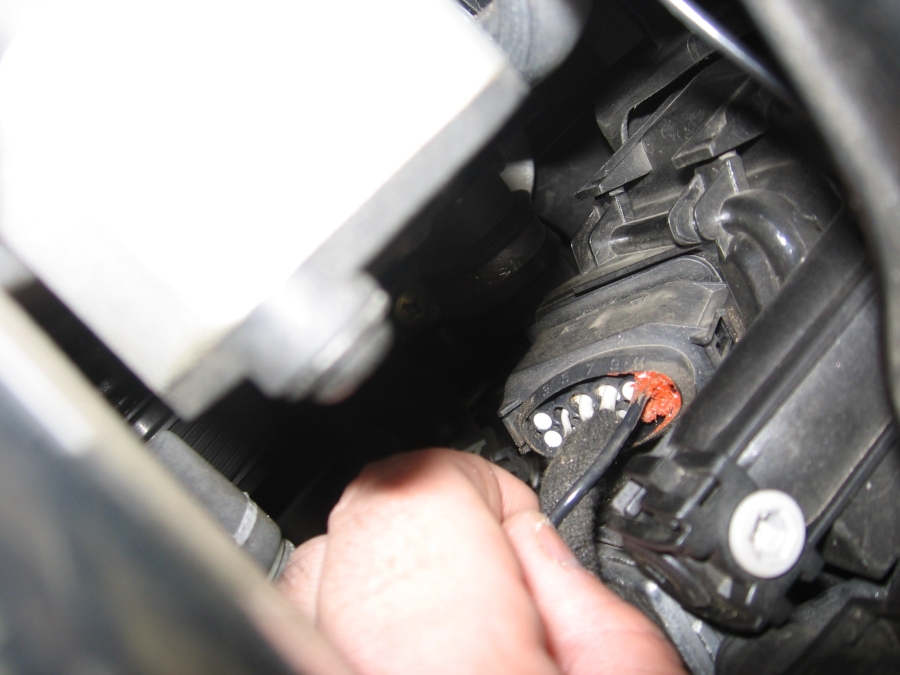
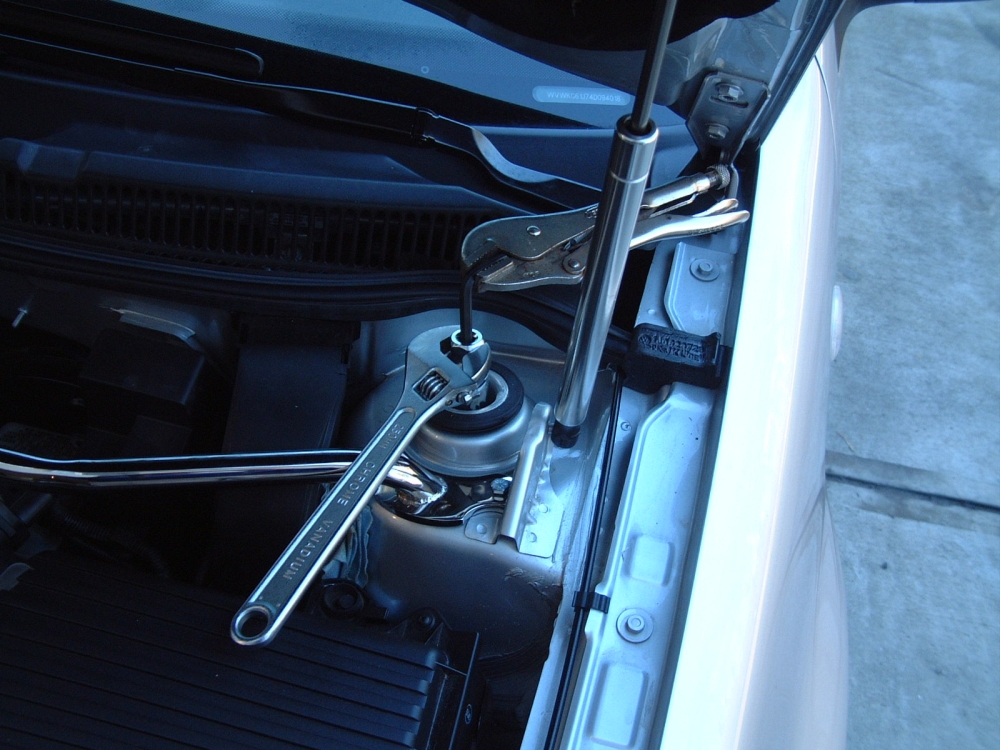
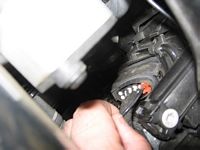
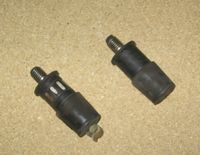
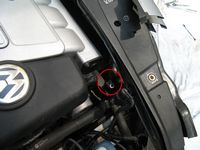
I used the 12 pin plug for the leveling motor wire, I sealed it up with some silicone, looks a little messy but works to keep moisture out.
Bumper Removal and HID installation guide HERE courtesy of VW Vortex's notjcs.
Wiring instructions for leveling rheostat HERE courtesy of VW Vortex's GTI_Matador.
A guide for making the 10>12 pin HID harness adapter can be found HERE (contributor unknown).
Headlight Aiming instructions from the Daniel Stern Lighting website can be found HERE.


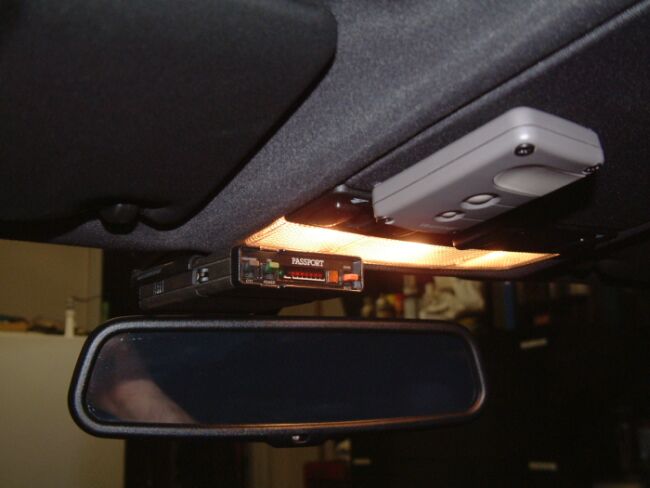
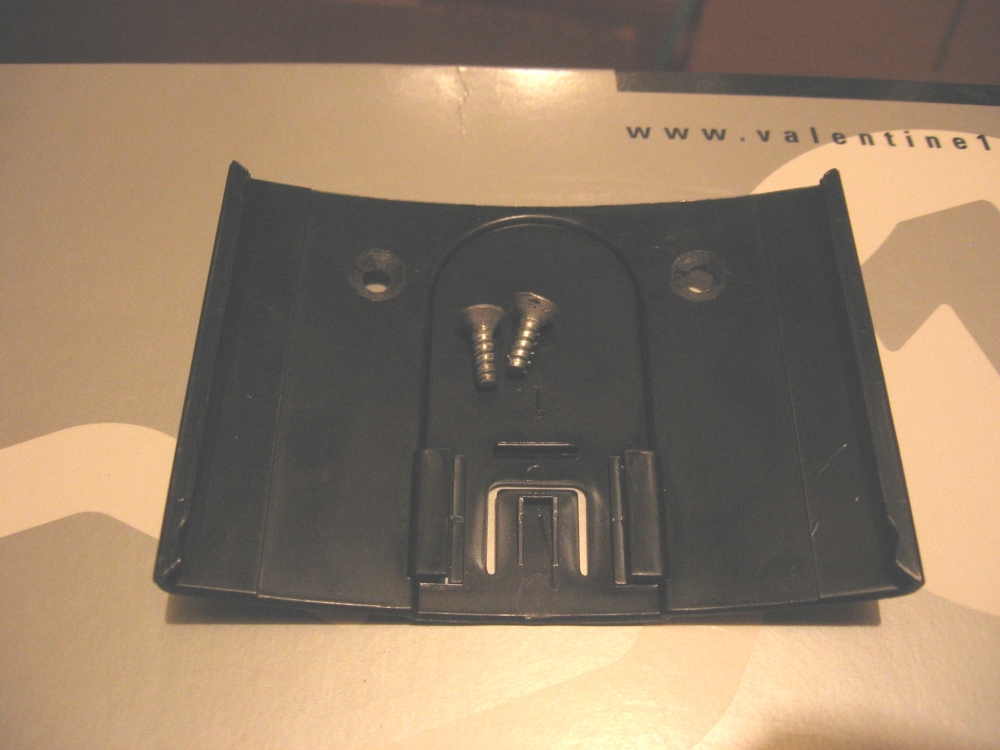
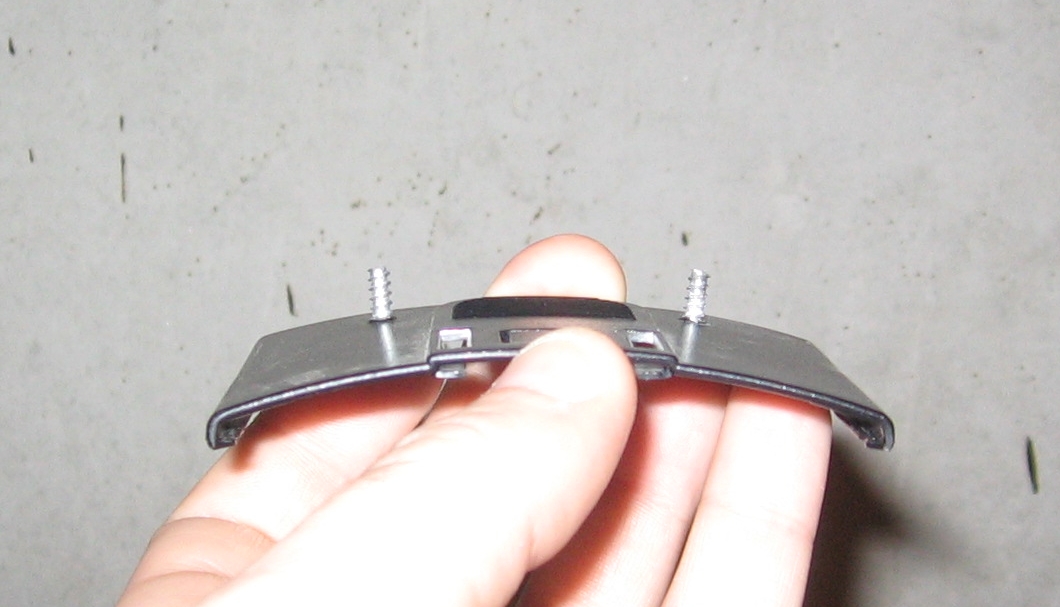
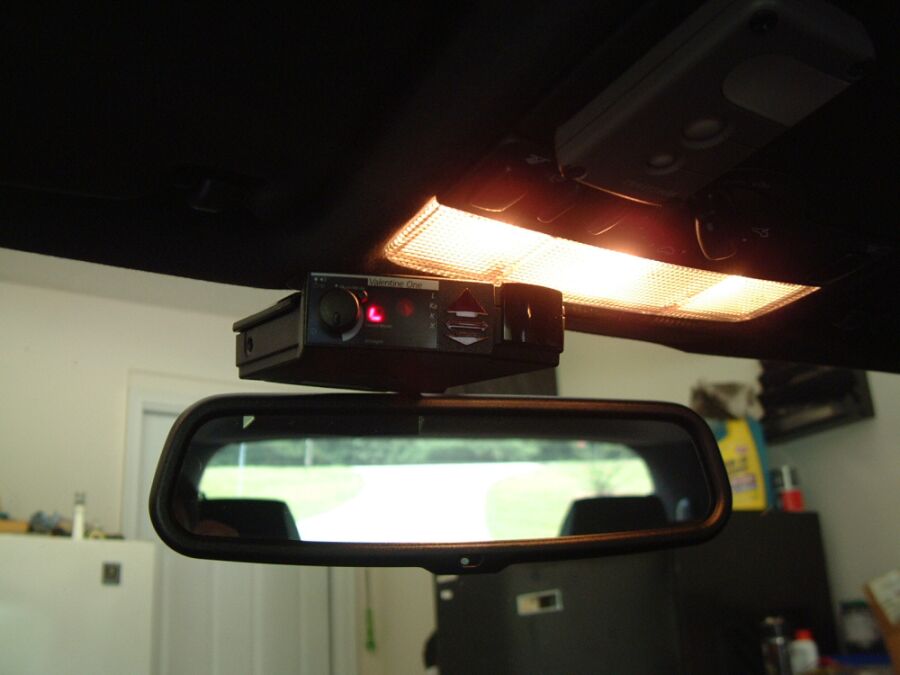
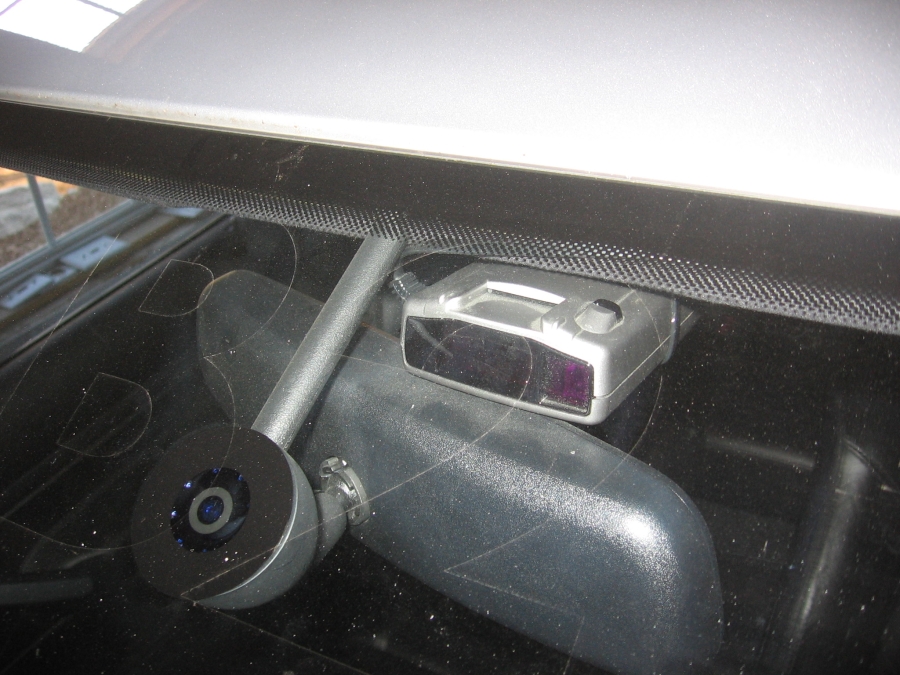
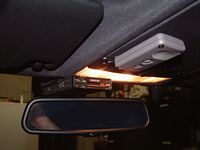
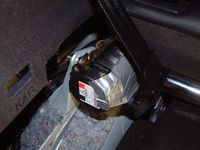
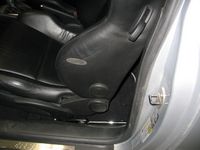
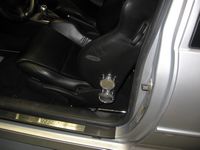
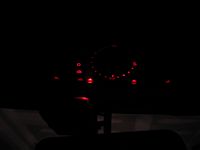
Valentine V1 installed above rearview mirror, direct wired and hard mounted to middle visor (manual here). To mount to the center visor, I started by drilling two small holes in the mount and then in the center visor (easily removed, attached with two screws). The center visor appears to be a solid piece of plastic but is actually two thinner sheets of plastic bonded together with air in the center. I made these holes a little smaller than the screws so that they would catch and remain somewhat tight. A larger bit was then used to flush the screw heads so that they did not make contact with the detector. The screws were small sheet metal screws with the sharp point ground down so that they would sit flush with the top of the visor when installed, after grinding the length was exactly 1 cm. The center visor is easily/cheaply replaced at ~$10 so no worries about drilling holes in it:


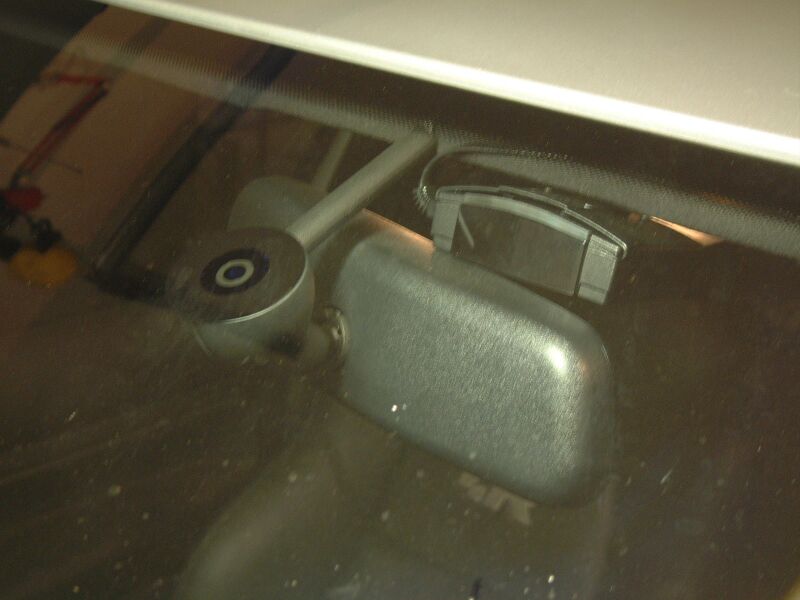
[UPDATE] I moved the V1 to my car I drive more (and which is not as stealthy as the R) and had a Passport 8500 x50 laying around. Passport 8500 X50 hard wired, functions as voltage guage between alerts, not easily noticed looking in from outside (manual here). I installed it using a zip tie since the mount would not work with the center visor, with the zip tie lock on top of the visor and invisible it doesn't look half bad.
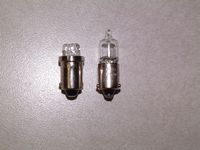
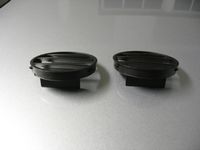
New LED City Lights from www.superbrightleds.com. These are BA9s bulbs and the bayonet nubs are in slightly different places than the factory bulb so one side gets filed down, fits and works perfect. First pic shows bulbs, left is 4-led replacement, factory german bulb on right. LEDs are a lot whiter with a slightly blue tint, definitely better than the yellowish factory look.

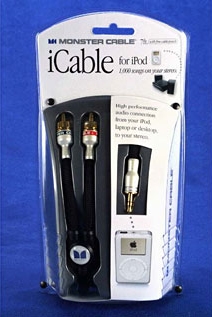
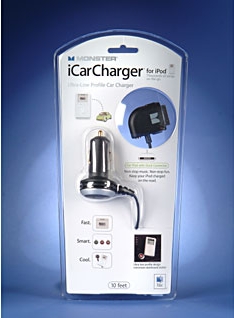
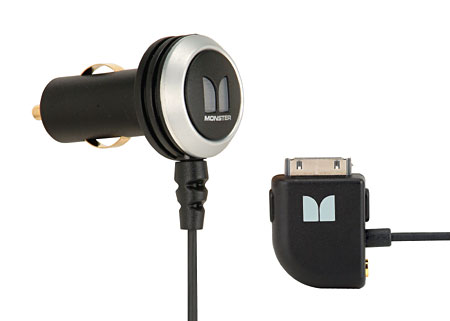
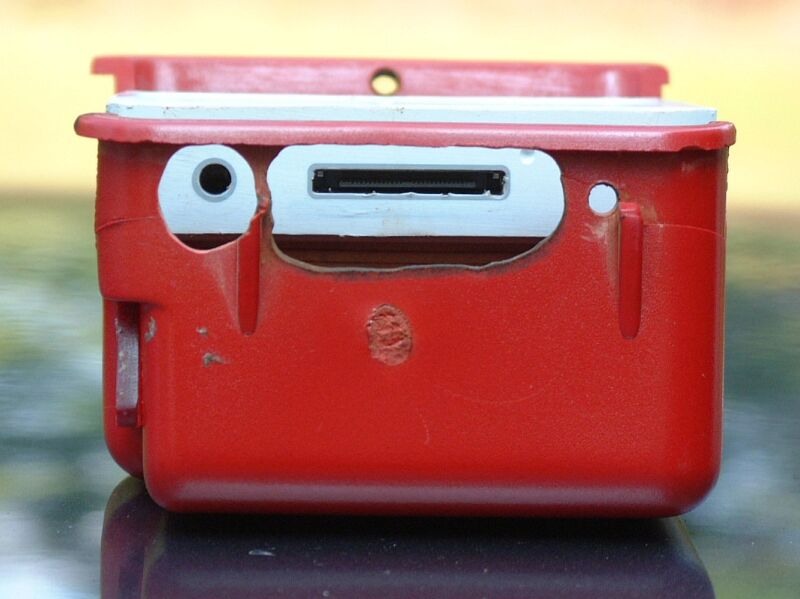
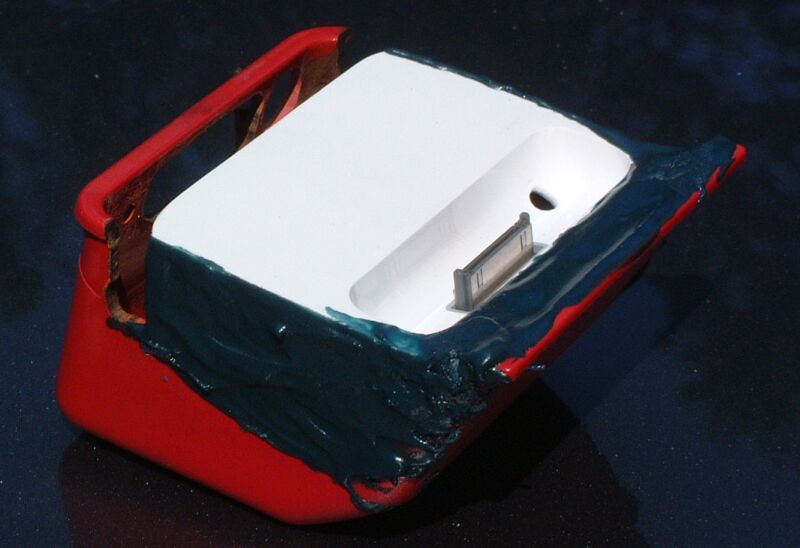
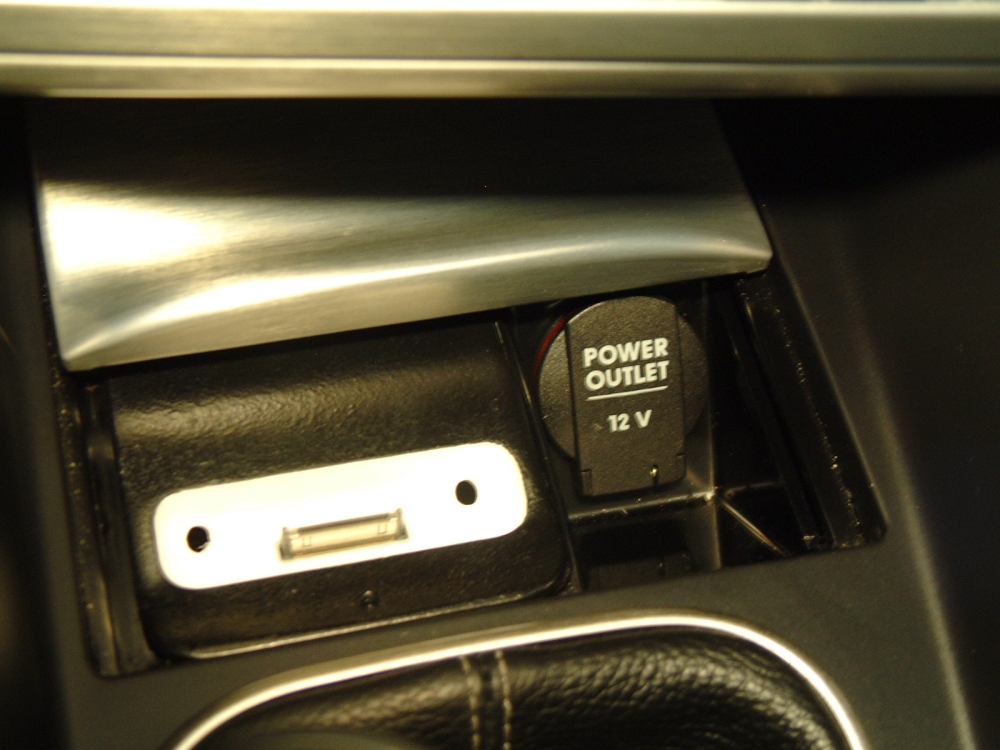
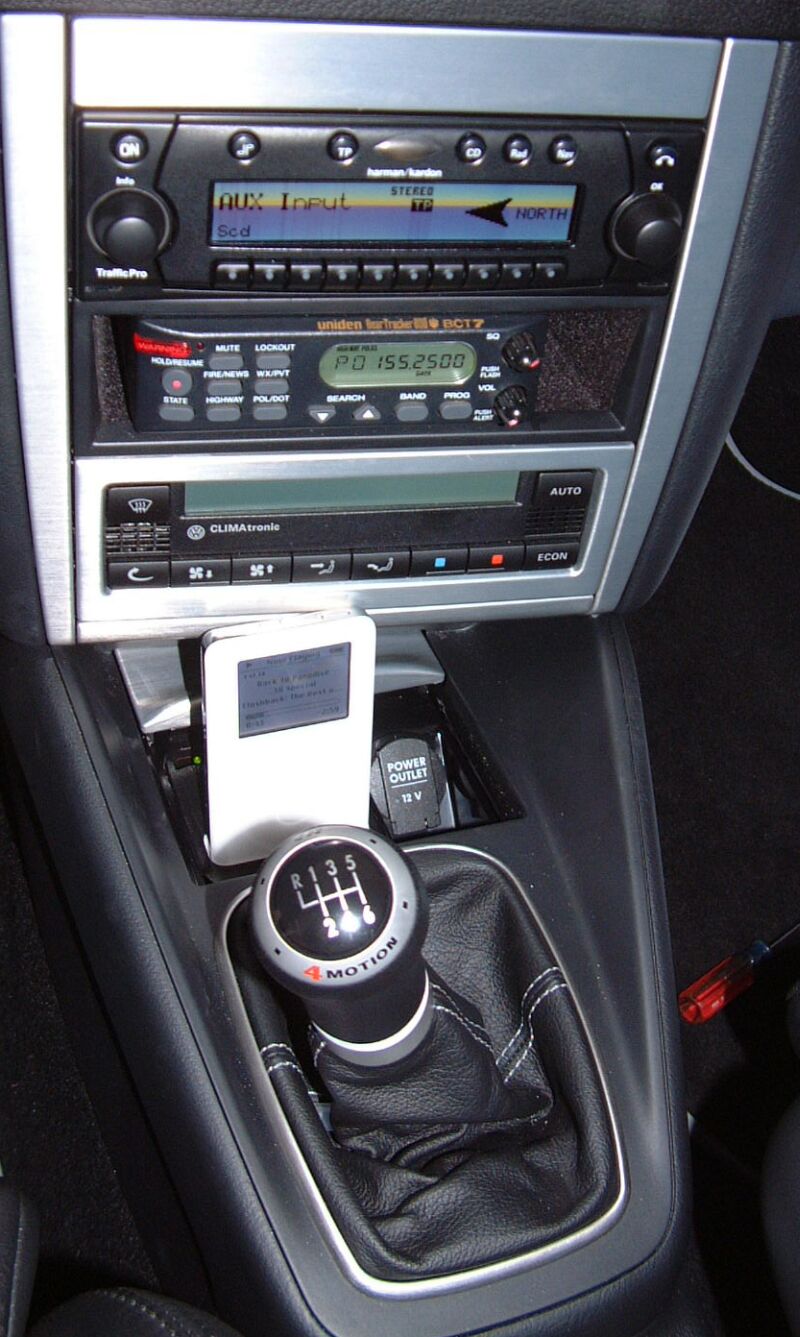
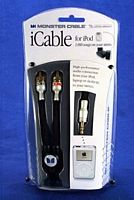
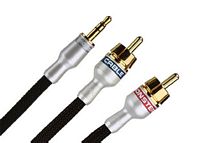
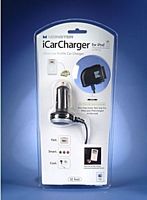
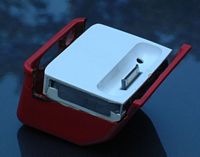
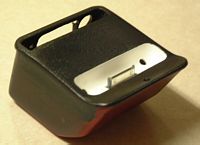
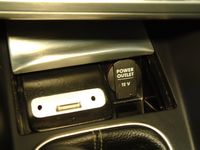
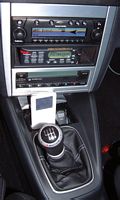
Custom iPod dock in ashtray, The Monster i-Cable I used takes the phono plug on the back of the dock and converts it to RCA outputs to plug into an aux-in connector. For the power side I used a Monster iCarCharger for iPod 12v power supply and modified it to tap directly into available ground and switched 12v power wires without having to plug it into a lighter.


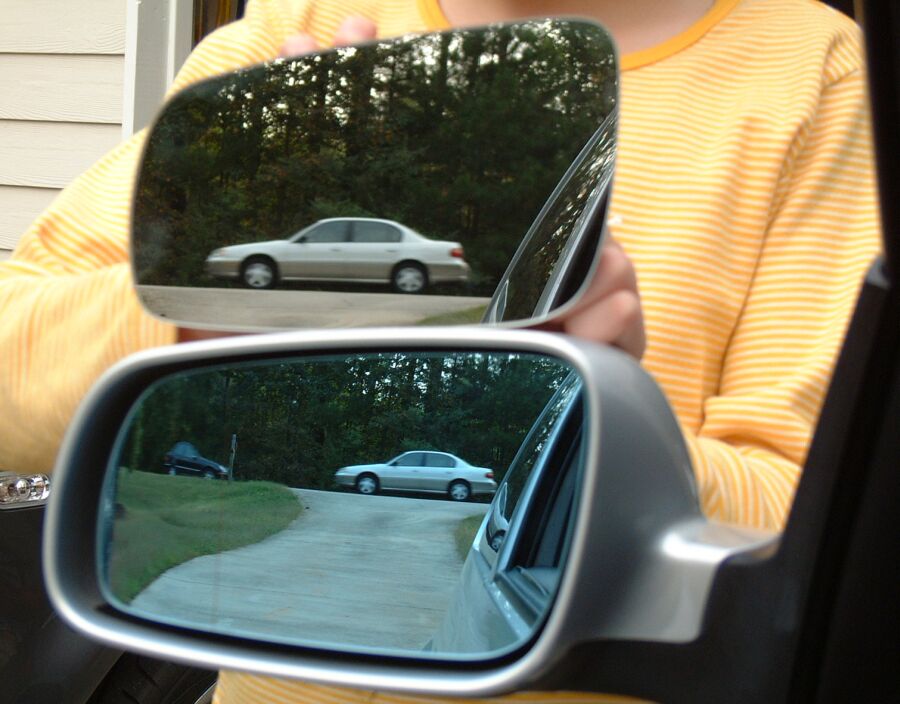
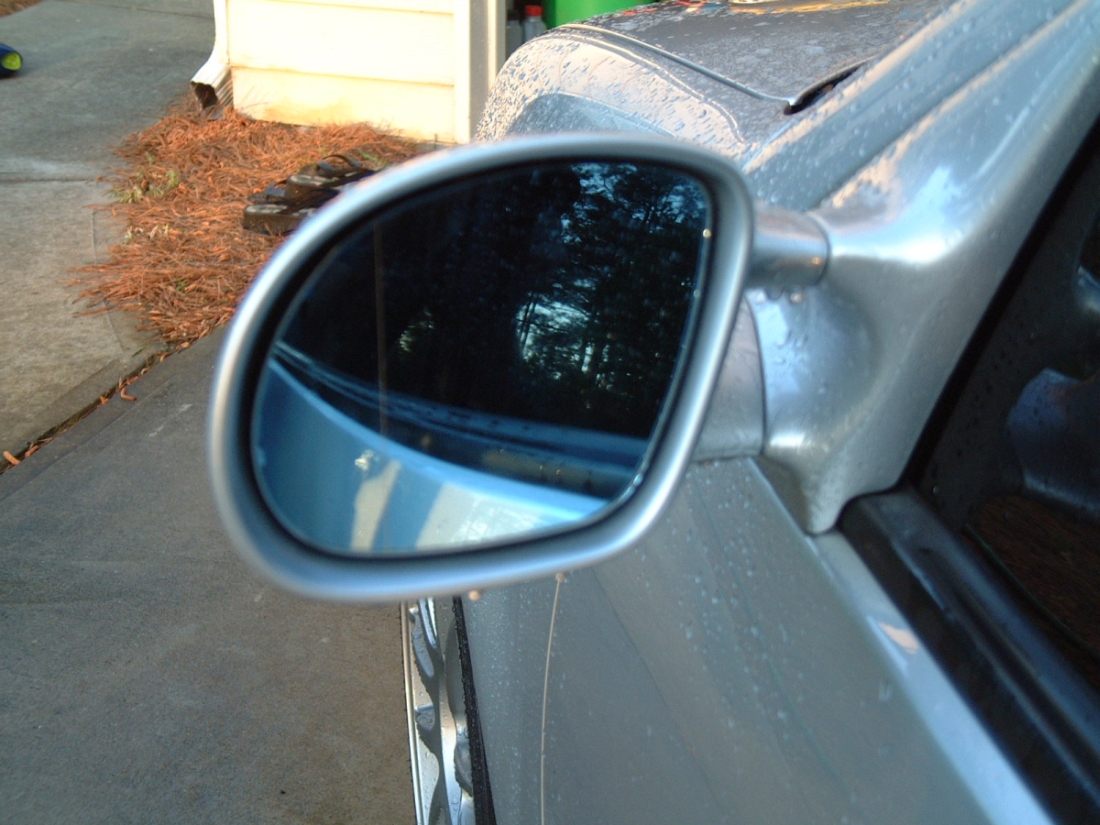
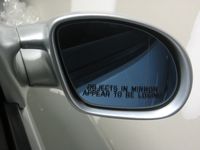
Euro spec mirrors are blue to reduce glare and and aspherical (wide angle) to eliminate blind spots....US spec on top for comparison.

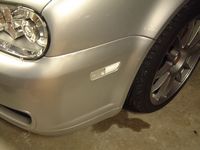
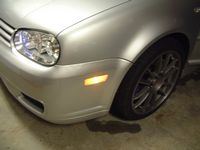
Clear Bumper Side Markers with Orange LEDs
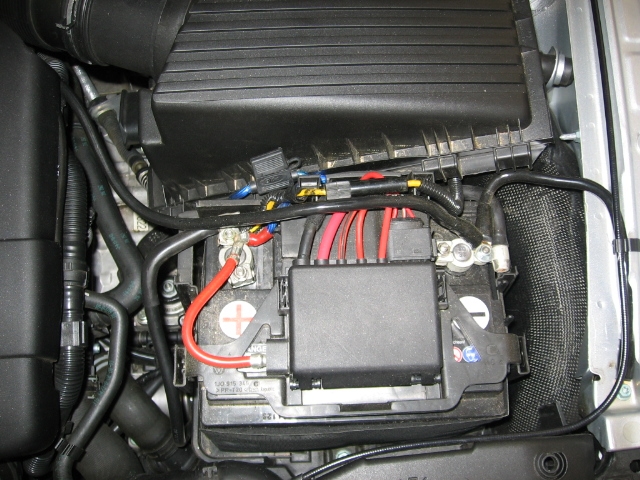
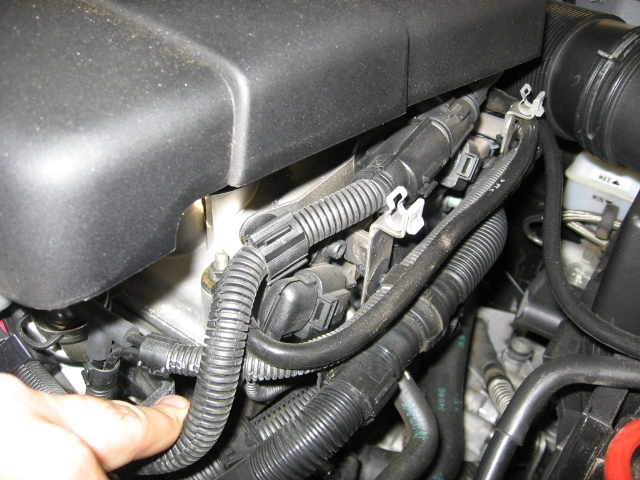
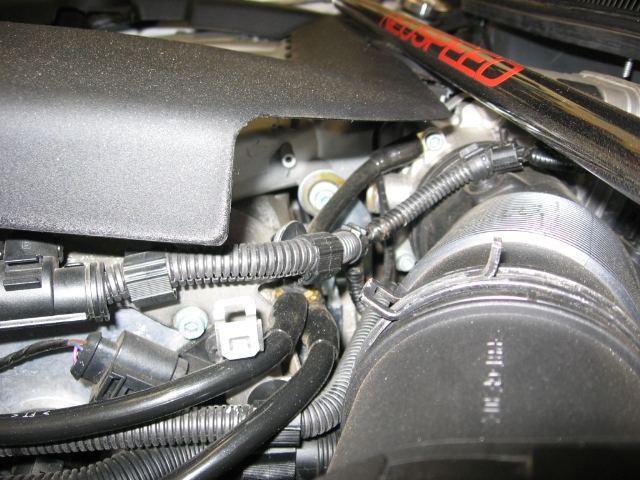
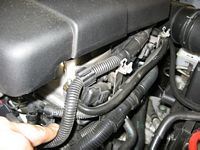
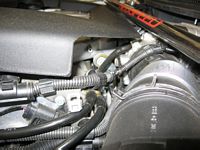
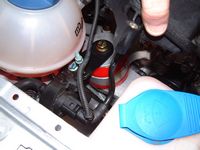
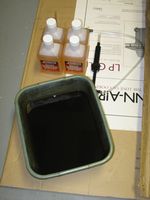
4Grounding ground wire kit installed. The price was right and it seemed to improve the issue of headlight dimming at idle, definitely can't hurt performance to have the engine sensors getting a strong reference ground signal.....
Grounding Kit Installation Instructions: HERE. Kit includes 4- 4AWG wire with gold plated ring terminals. (L to R) Two wires connect the battery negative terminal to the driver's side fender and motor, one wire goes to the front of the valve cover, last wire goes to the throttle body.

VW Headlight Covers from Hillside Imports- Protect HID Glass Lenses

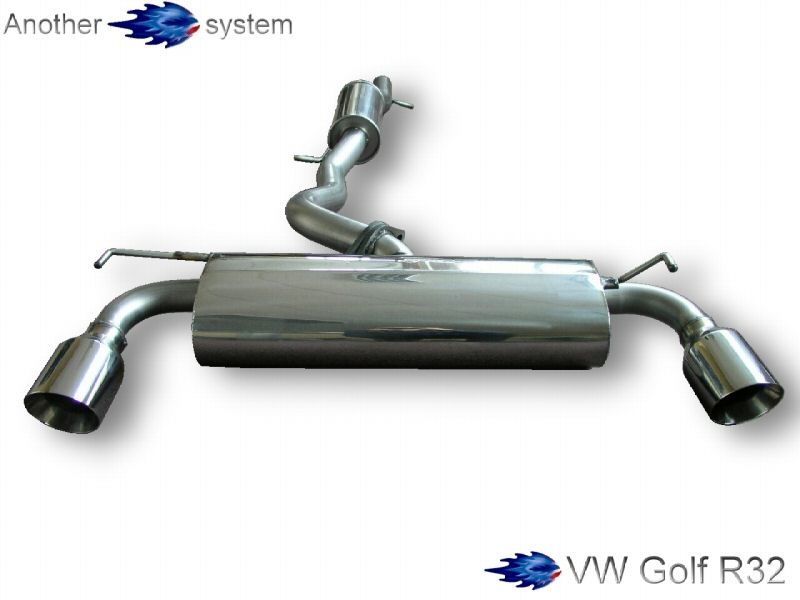
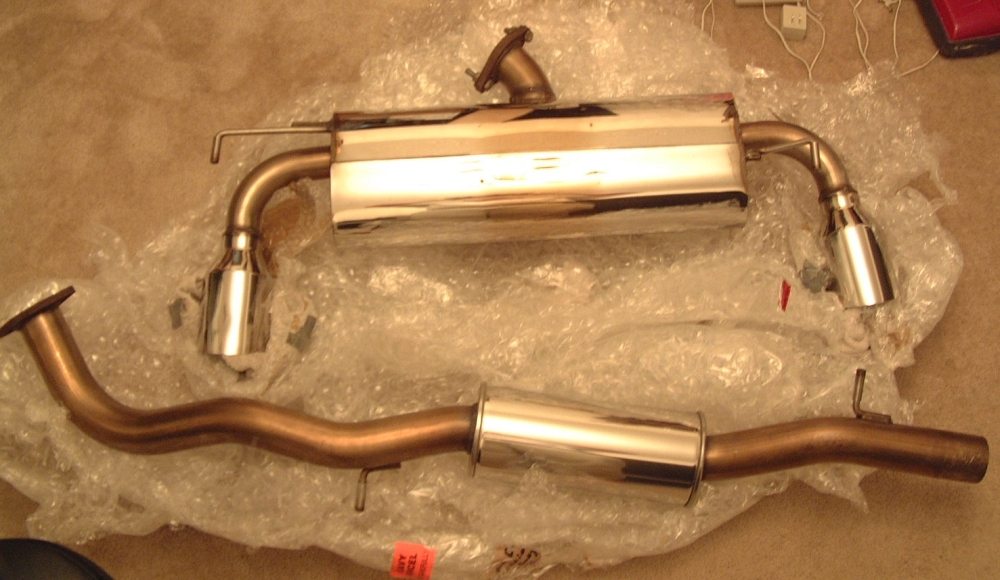
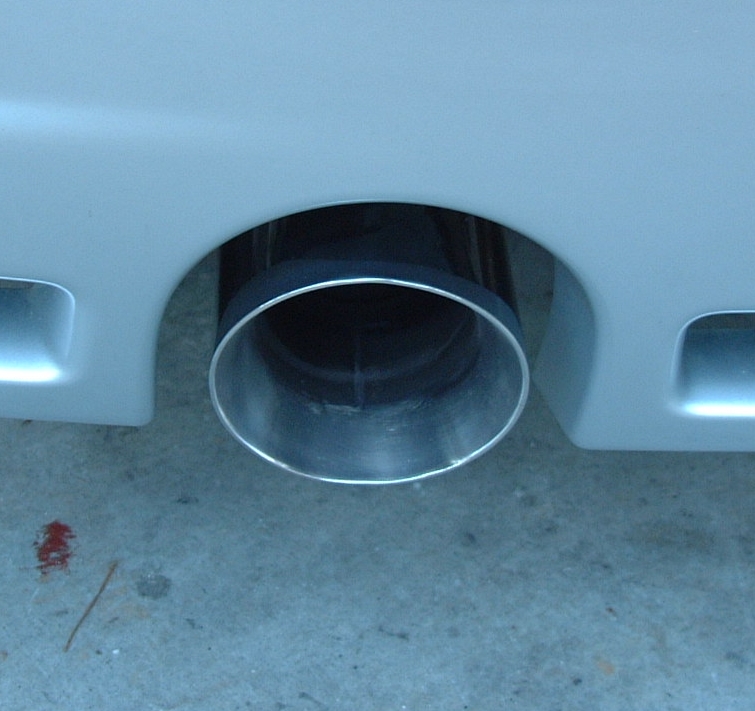
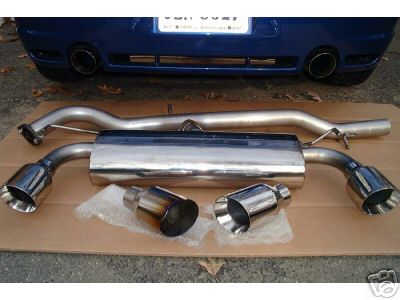
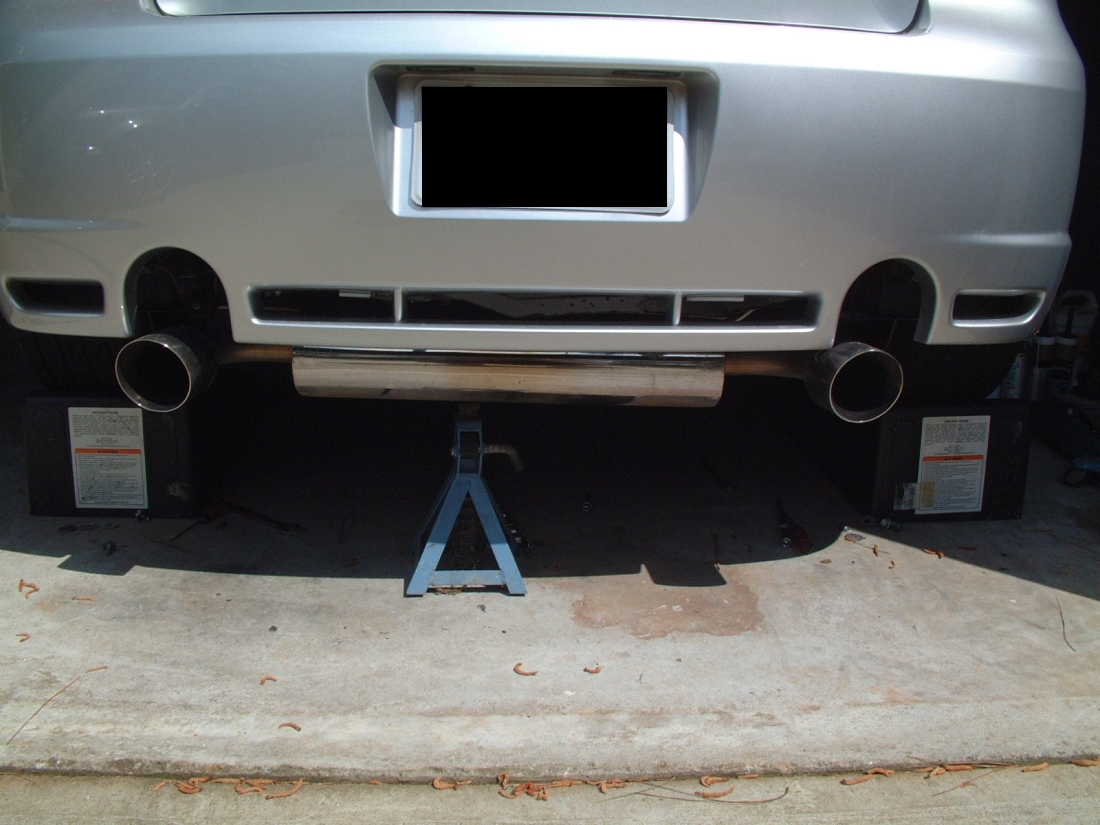
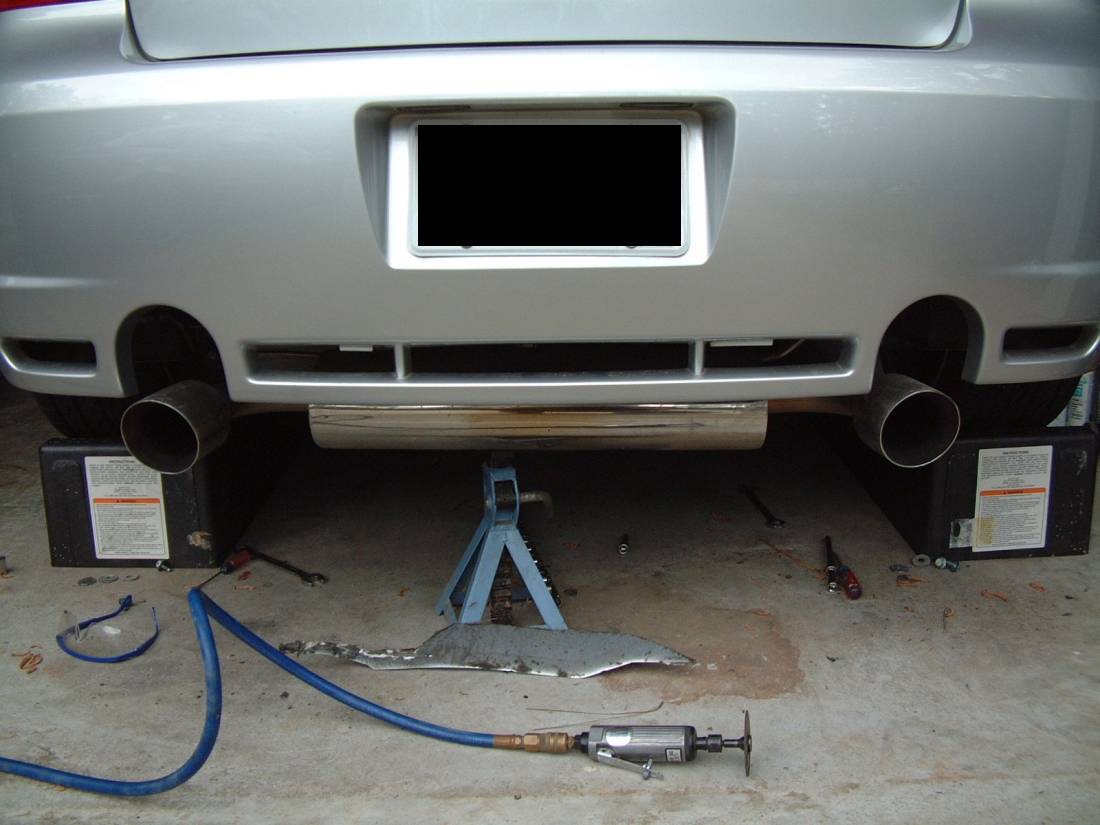
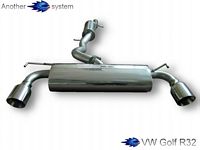
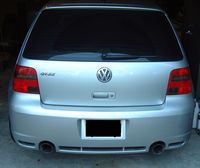
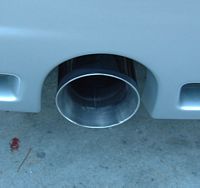
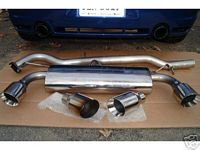
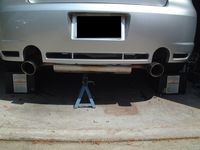
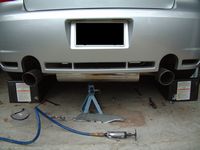
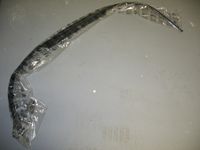
Blue Flame Exhaust - 27 lbs vs 49.5 for the OEM system, also tried out the straight pipe in place of the resonator as seen in Larry's picture. Sound clips made with less than audiophile phone video here: Resonator and Straight Pipe (Open with Quicktime). Here is the Blue Flame Dyno for the R32 exhaust.

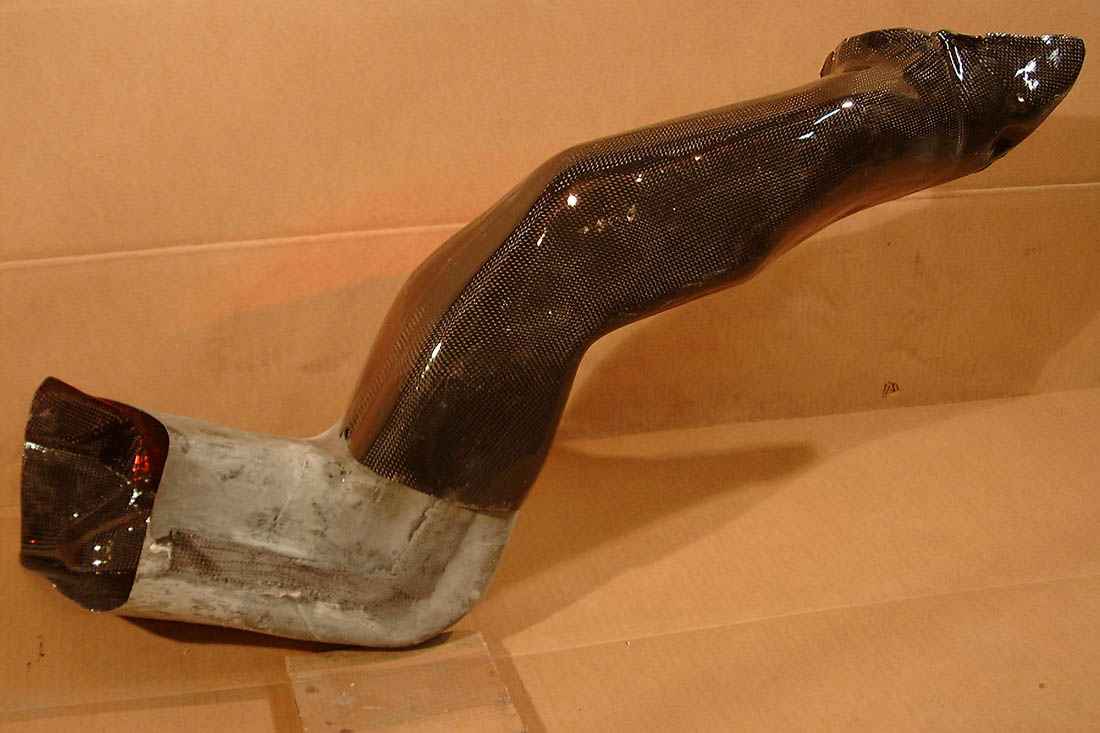
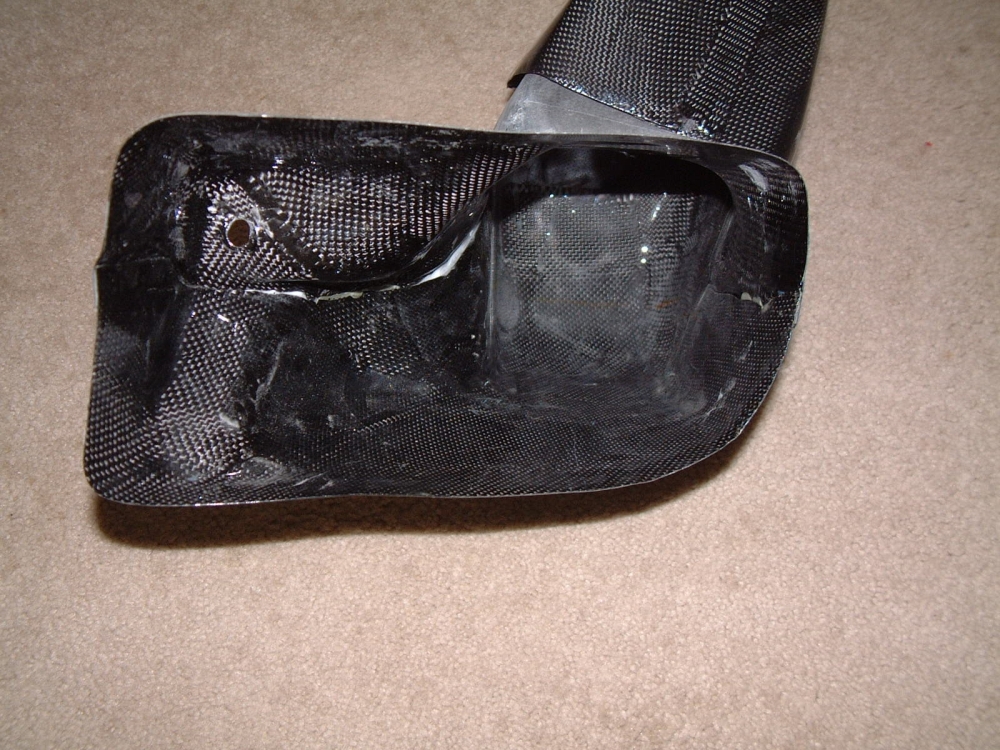
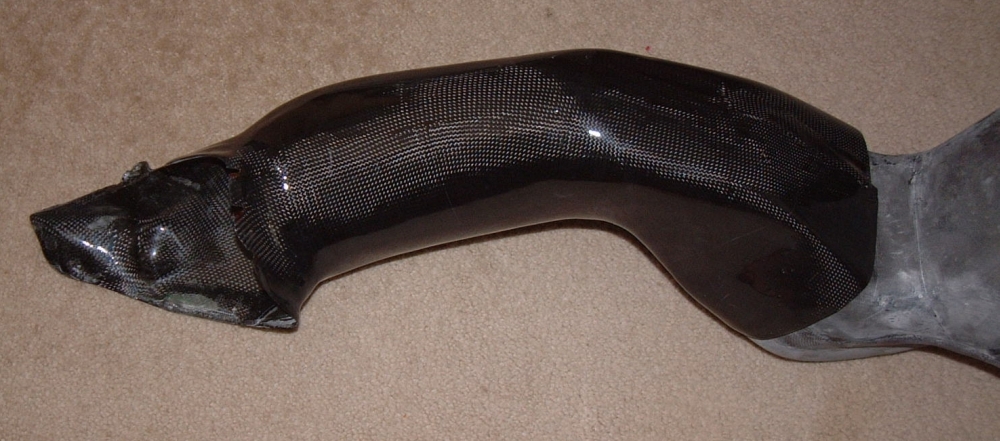
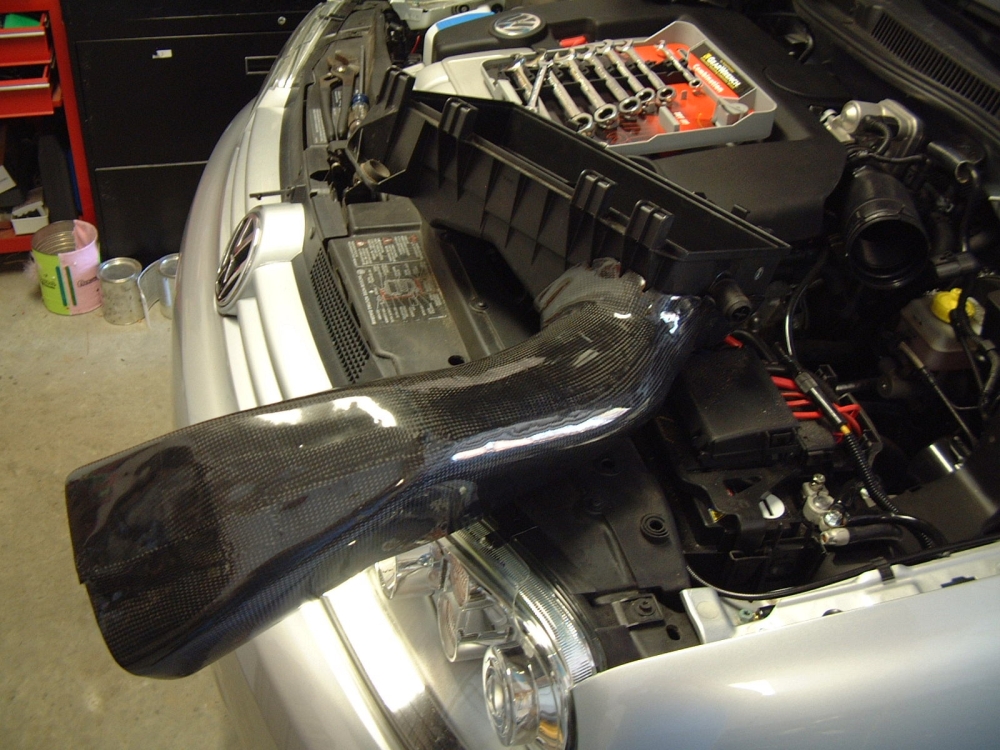
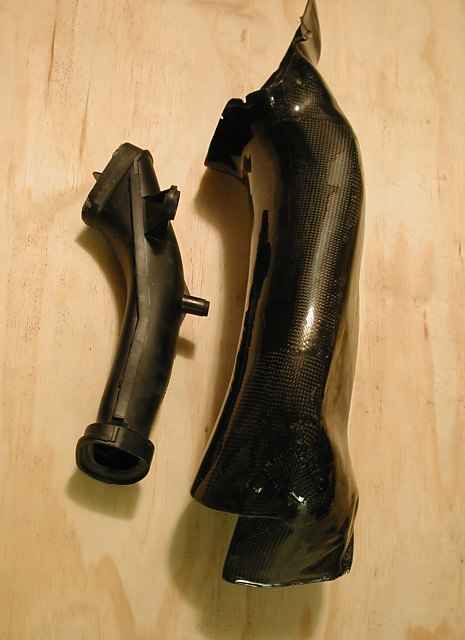
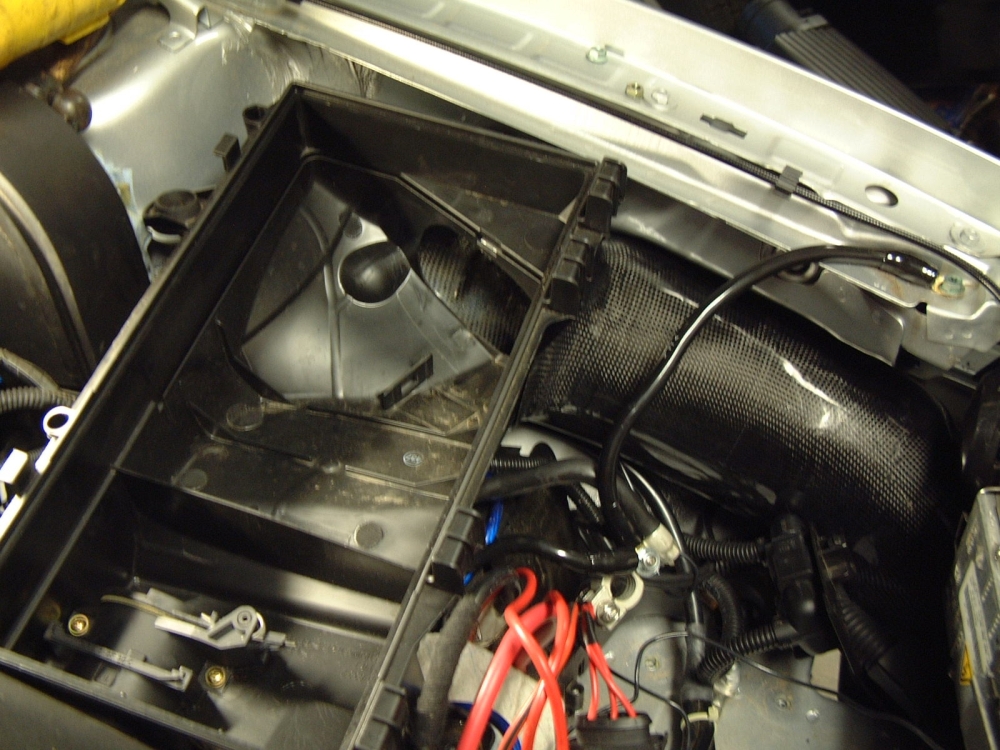
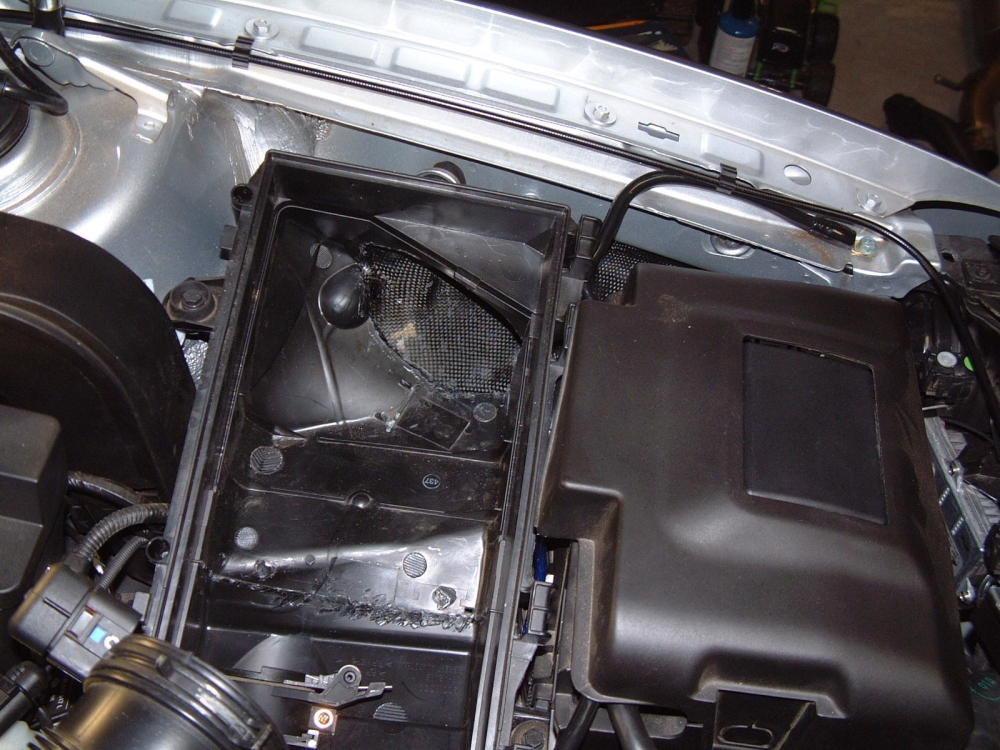
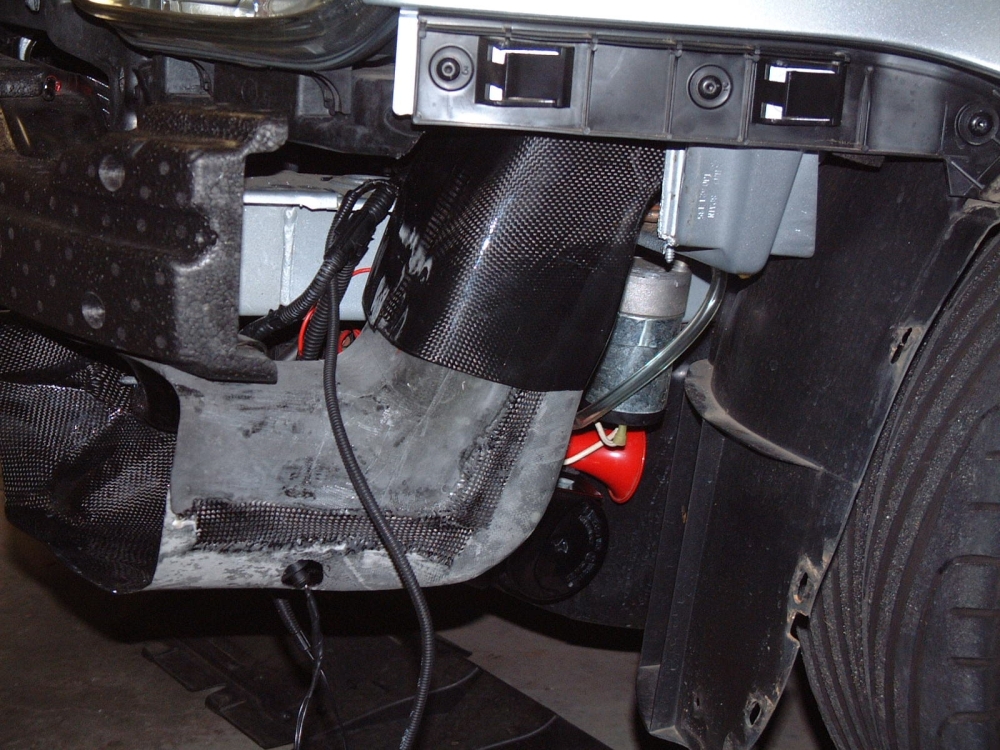
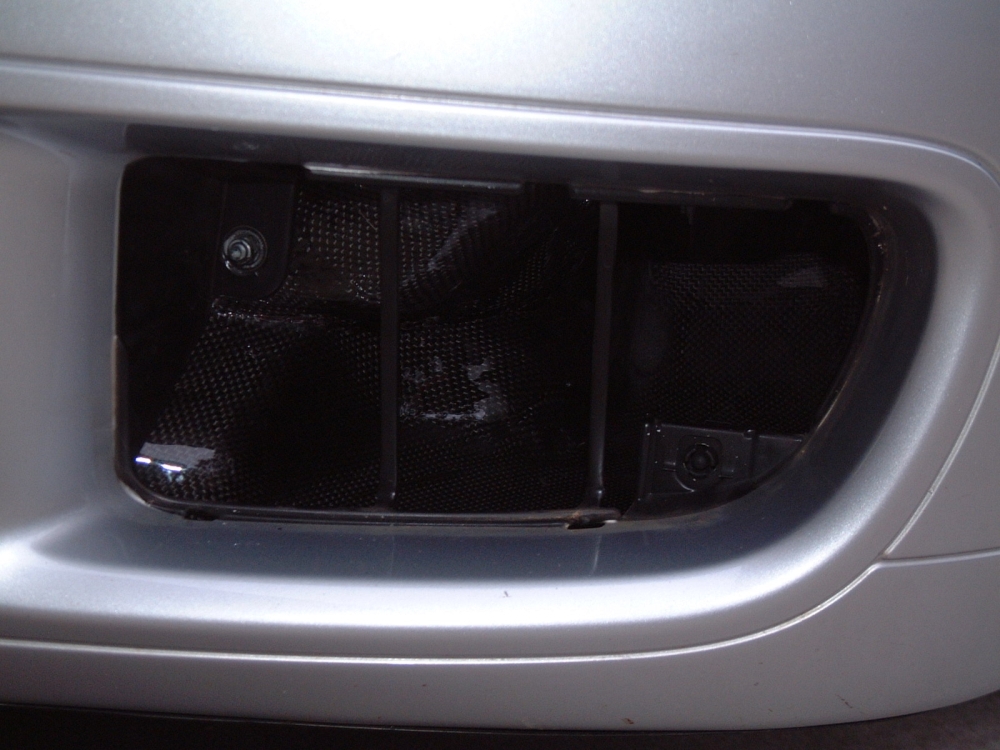
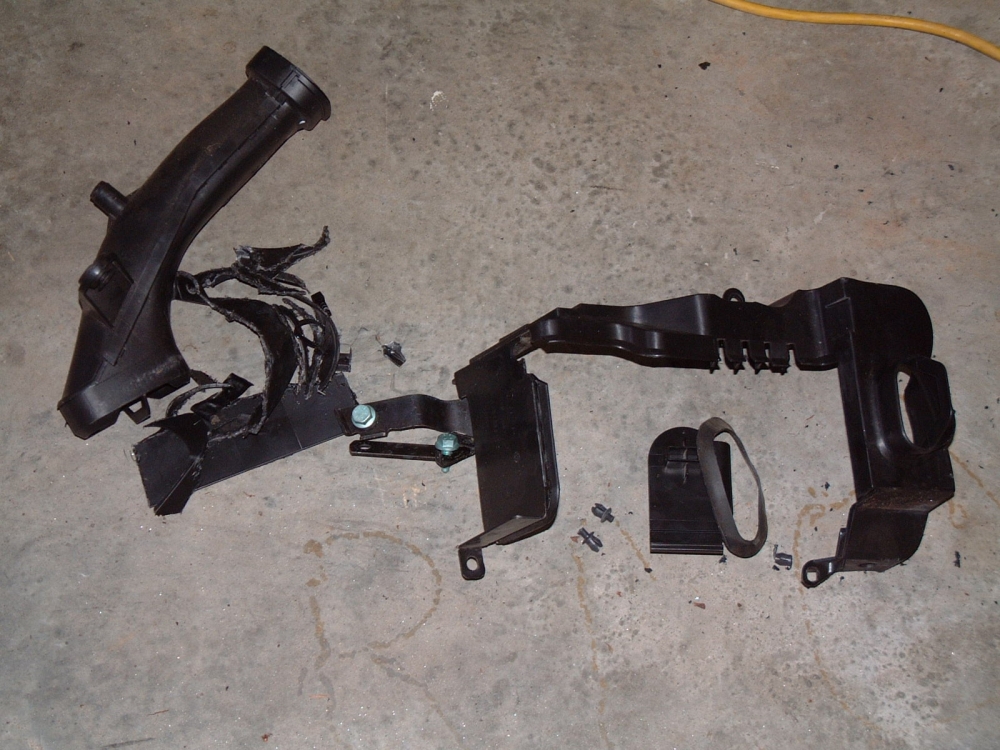
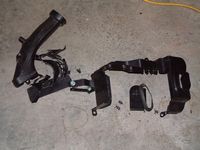
Larry's CCF Carbon Fiber Ram Air Intake- Designed to work with the factory airbox , installation requires some relocation and removal of existing items (including some trimming of plastic around drivers headlight area). Also have to cut out drivers grill to allow air passage.
Pics L to R: Lower Air Horn, Upper Air Horn,Factory intake,CCF Upper Horn Intake,Comparison pic,Relocated Horns to Plastic Wall and extended wires,airbox unmodified,airbox with third divider removed and intake enlarged, union of lower and upper air horns, carbon fiber horn top view,carbon fiber horn lower view,all pieces removed (including cut pieces). Now I can hear the motor....


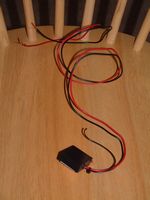
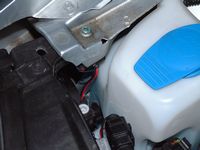
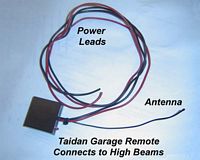
Taidan Garage Door Opener- Uses high beam switch to open and close garage door. Instructions are here in MS Word format. These can be purchased from Ben Moulding for $37 +shipping. Pretty cool for those who don't have Homelink :-) Found this on the Audi boards.....FWIW, white is high beam positive, brown is shared ground, If you don't have a newer Liftmaster/Sears or Genie Intellicode garage door opener you can buy a Liftmaster Security+ universal or Genie Intellicode universal receiver that will work with any garage door opener for about $50...
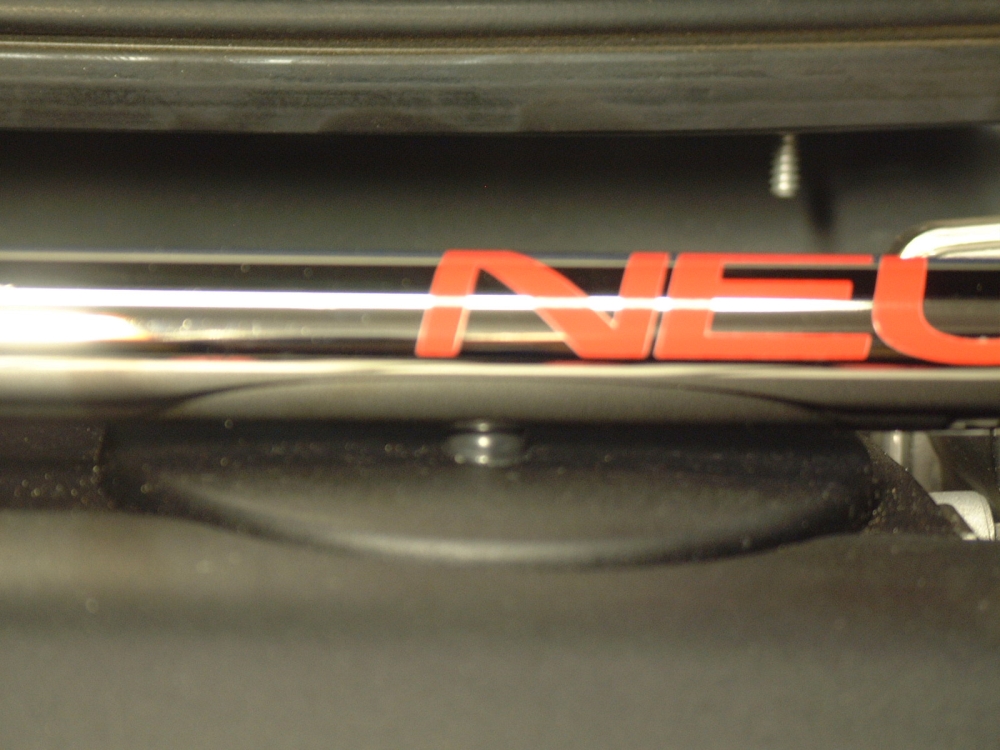
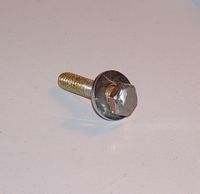
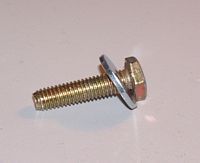
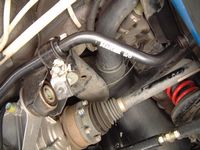
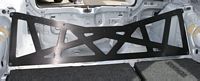
Front Strut Tower Brace by Neuspeed. Had no problems with nutserts, just use small tools and only tighten hand tight. Small gap on inner mounting points will go away when installed, again bolts are hand tight. Bar did contact engine cover so to avoid rattles I placed one small 1/4 round rubber foot between cover and bar, works great.(Installation Instructions Here)
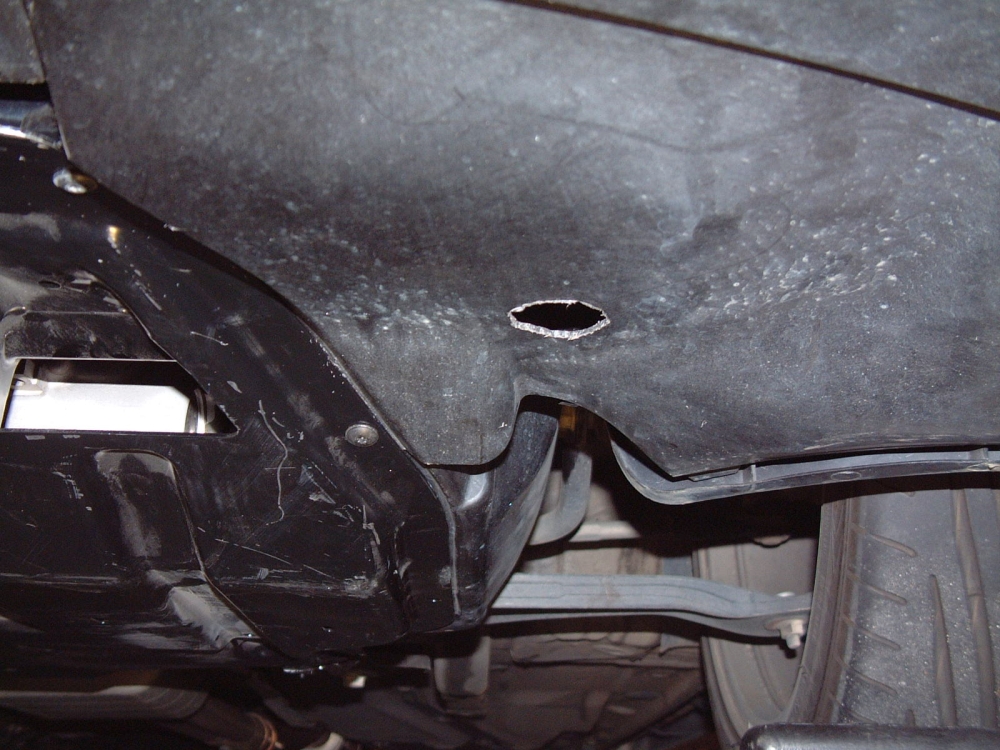
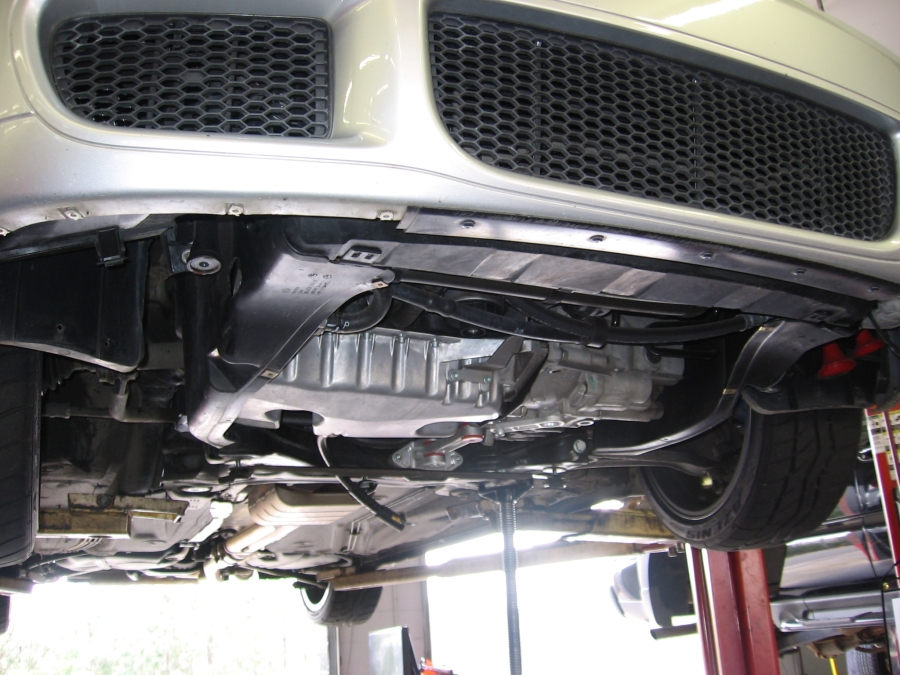
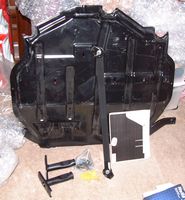
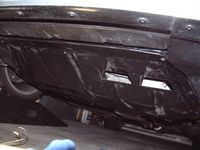
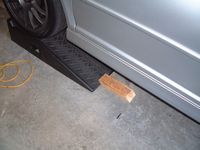
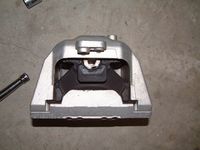
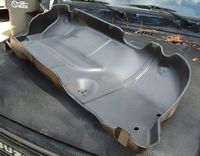
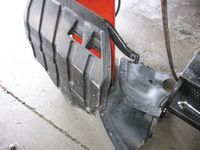
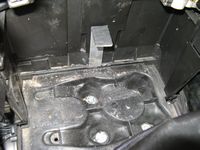
DieselGeek Skid Plate- (L to R) Arrived a little scratched up from FedEx, view of TT lower stress bar and rear three mounts, driver side front mount, passenger side front mount, installed view, cutout front bolt access hole for future removal. Nutserts had to be installed and templates were provided to cut the side skirts for the front mounts.


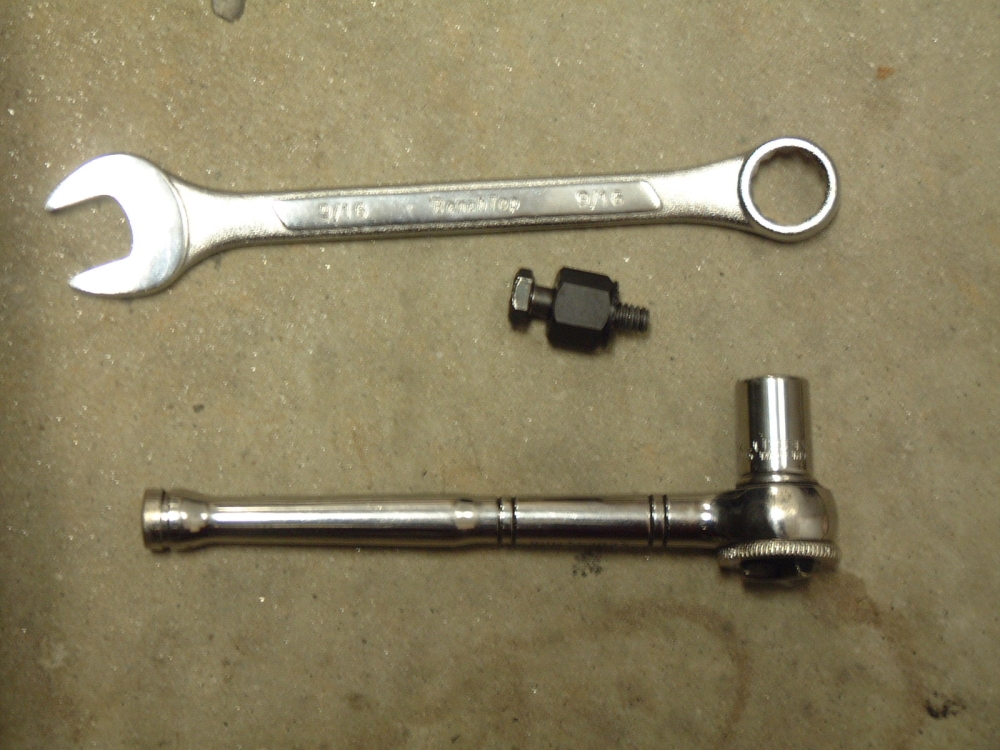
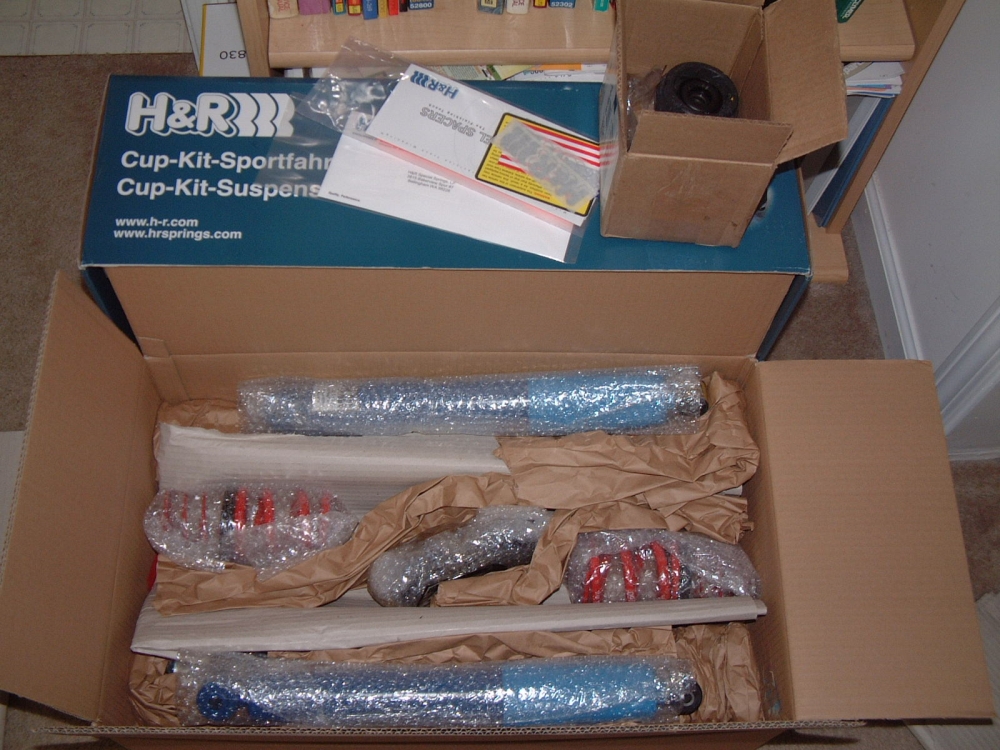
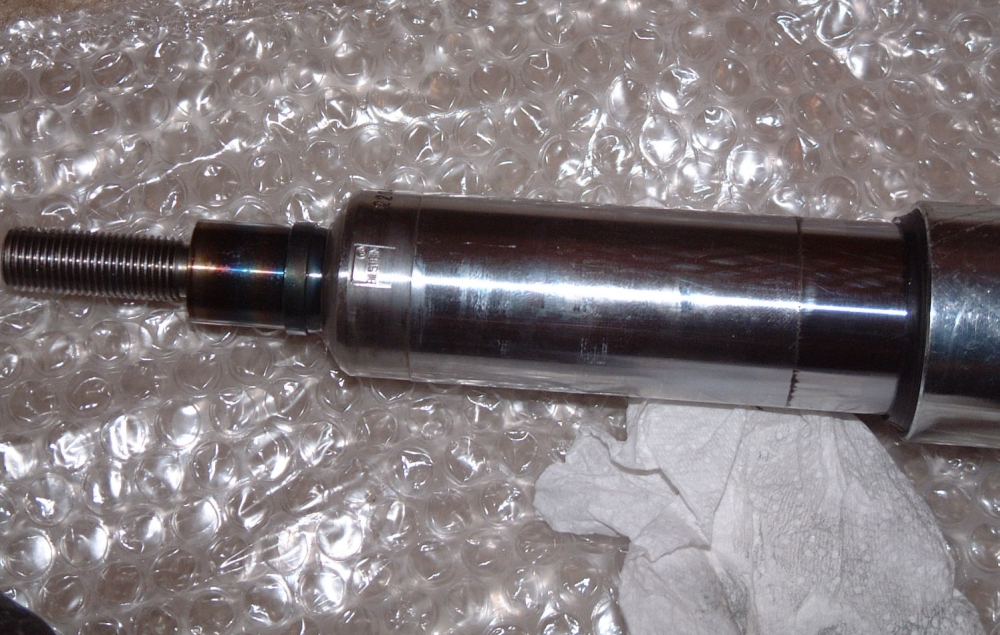
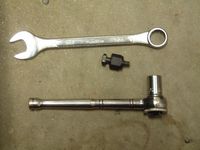
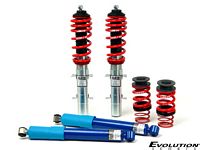
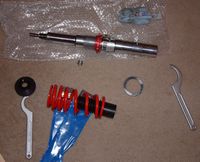
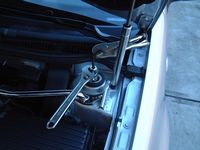
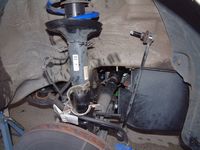
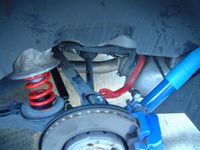
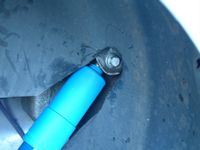
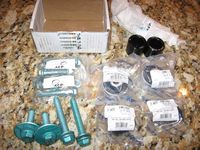
H&R Coilovers from Evolution Sports (Thanks to Matt for the great customer service), Forge Motorsports rear adjustable control arms to bring the camber back to spec from EuroCode Tuning (Thanks to David for the deal), and VW Racing Strut mounts/bearings (P/N 1J0 412 331 CMS for racing part, 1J0 412 331 C for regular OE) from Parts 4 VWs (Thanks for answering my questions Mike) - (L to R) H&R Coilover Set specific to the .:R32, coilovers and strut mounts/bearings arrive, Forge control arms arrive, front coilover disassembled for application of anti seize on threads, note Bilstein stamp on strut and HUGE piston, 13/16 spark plug socket/adjustable wrench/7mm hex wrench/vice grip pliers used to remove top strut nut, 8mm hex wrench ground down to replicate VW "spreader" tool for lower strut pinch bolt joint, front stock suspension disconnected and ready for removal (PB Blaster is a BIG help for that pinch bolt rust), rear suspension installed, dremel tool used to cut out fender liner for rear shock bolt access with out removal, side profile after 1 week, side profile after 2 weeks, and three views after alignment. Also found out I needed new tires at 11k miles due to alignment issues, Pirelli PZeroNero M+S 225/40/18 were installed with alignment. My ramps now have a helper ramp I made out of some scrap 2x4. This car now drives like a go-kart: no squat, no dive, no roll....I LOVE IT! (WARNING: If at anytime you have ever felt comfortable in a Cadillac, this suspension is not for you).
For lowering 1.5" or more adjustable control arms should go on the bottom, for 1.5" or less they should go on top (This directly affects the toe alignment adjustment), see the CPP installation instructions for cars lowered up to 1.5 inches HERE and more than 1.5 inches HERE ......


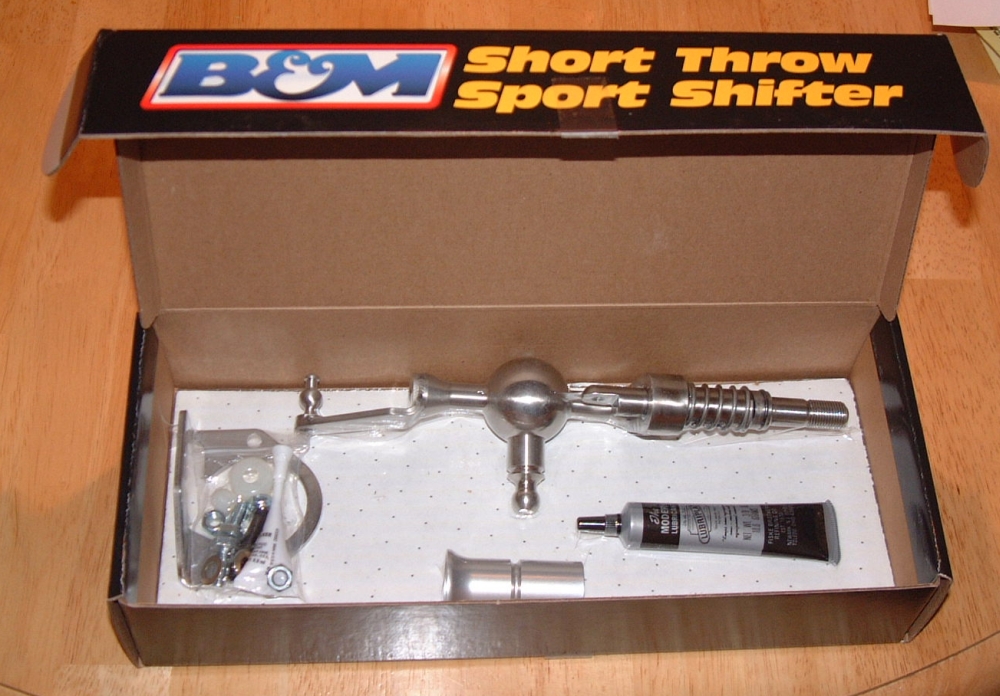
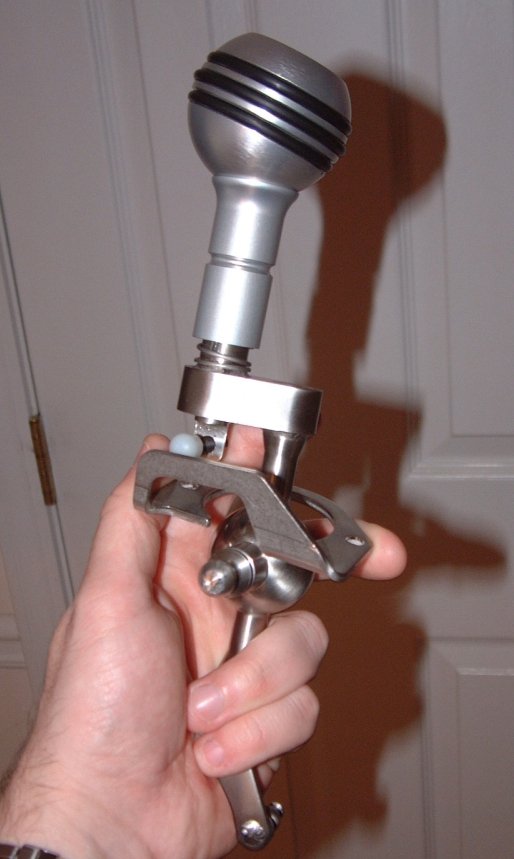
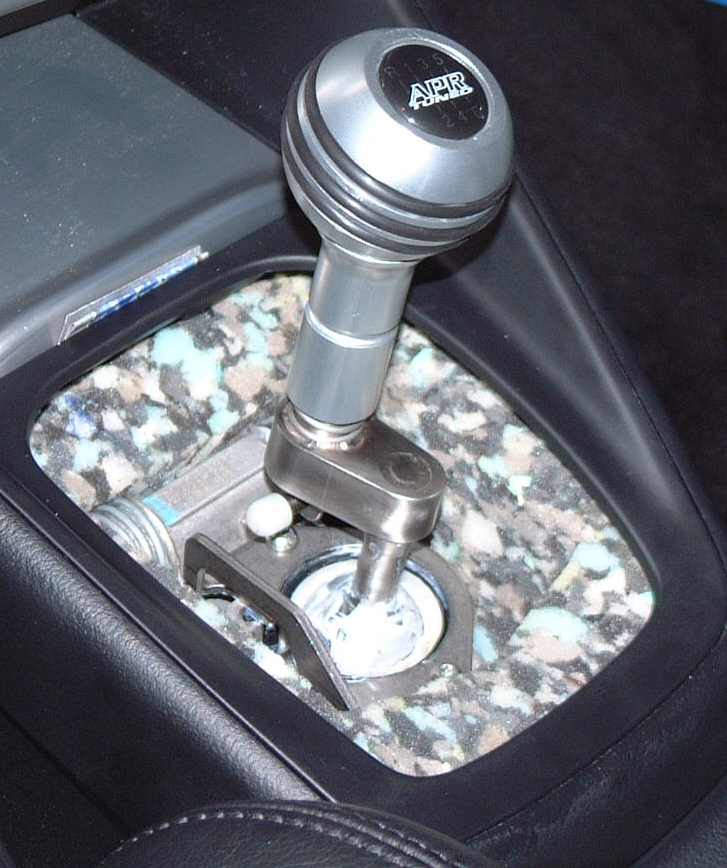
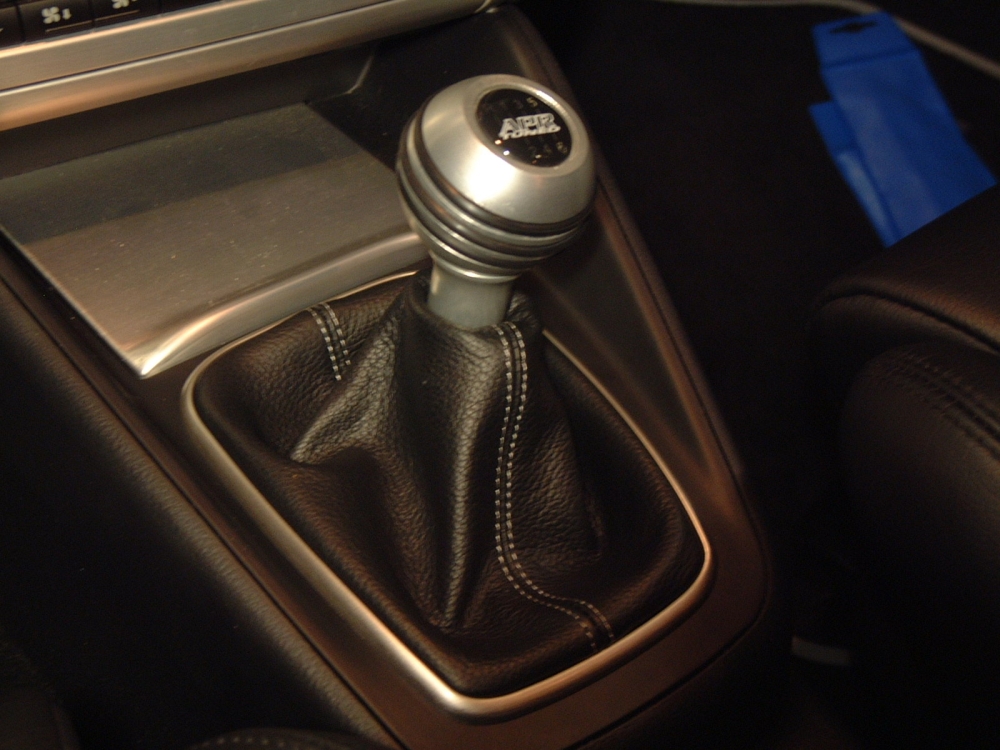
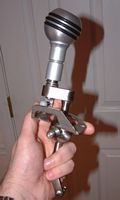
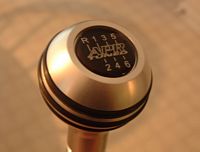
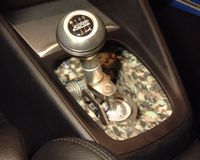
B&M Shifter installed- I elected to install the TT shifter (PN 45146) instead of the VW shifter (PN 45114). I did not like the VW lift for reverse and the fact that I had to use the B&M supplied knob so I chose the Audi TT shifter to retain the push down for reverse feature and be able to use Audi TT knobs. My knob of choice was the APR machined aluminum knob, designed to fit perfectly in your hand when correctly flat palm shifting. PDF installation instructions for both shifters here: Audi TT Installation and VW Installation. Shifter installation was performed by Autobahn Performance. The boot was replaced with a custom boot from Redline Goods, higher quality leather than OEM and fits the shorter height of the new shifter. The factory boot trim ring was re-used by carefully removing staples from the OEM boot, stretching the new boot over the frame, stapeling the boot to the frame, and snapping it back into the trim piece.


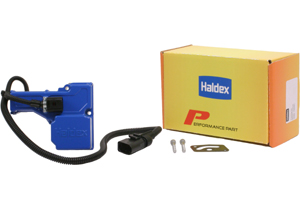
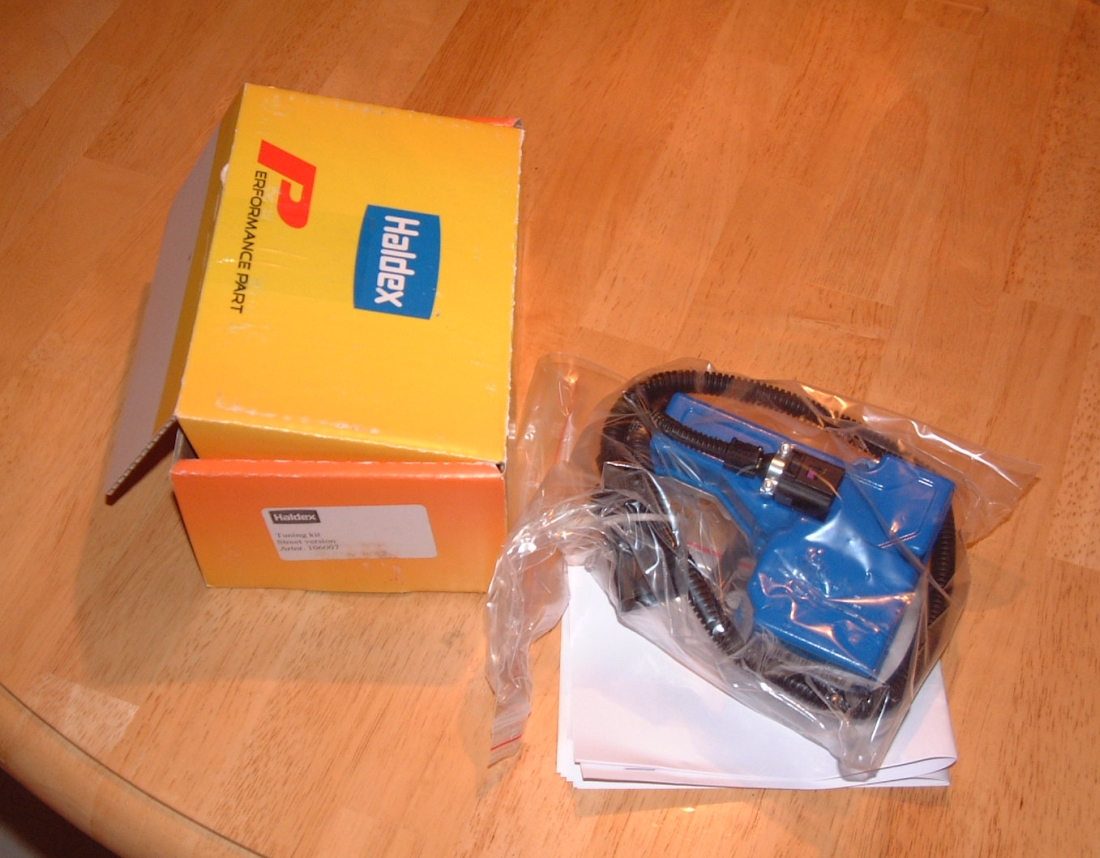
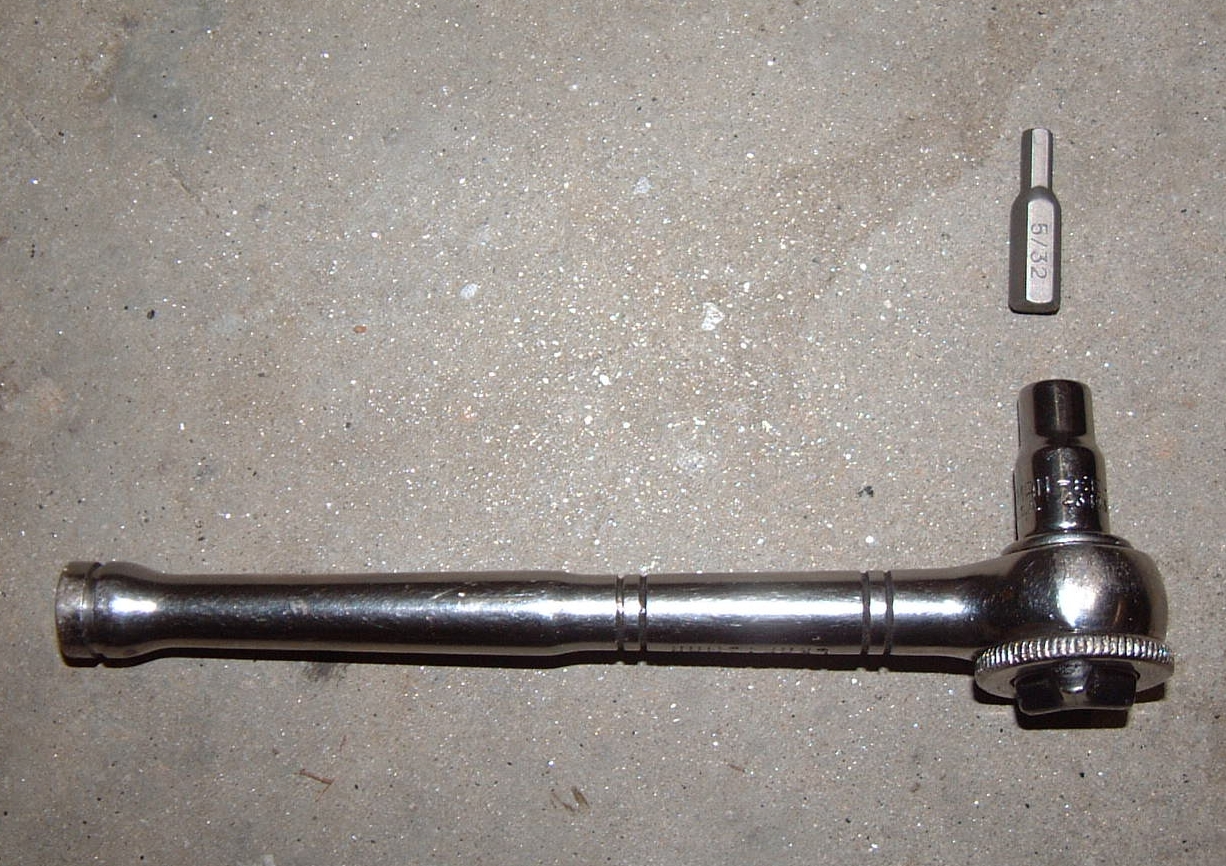
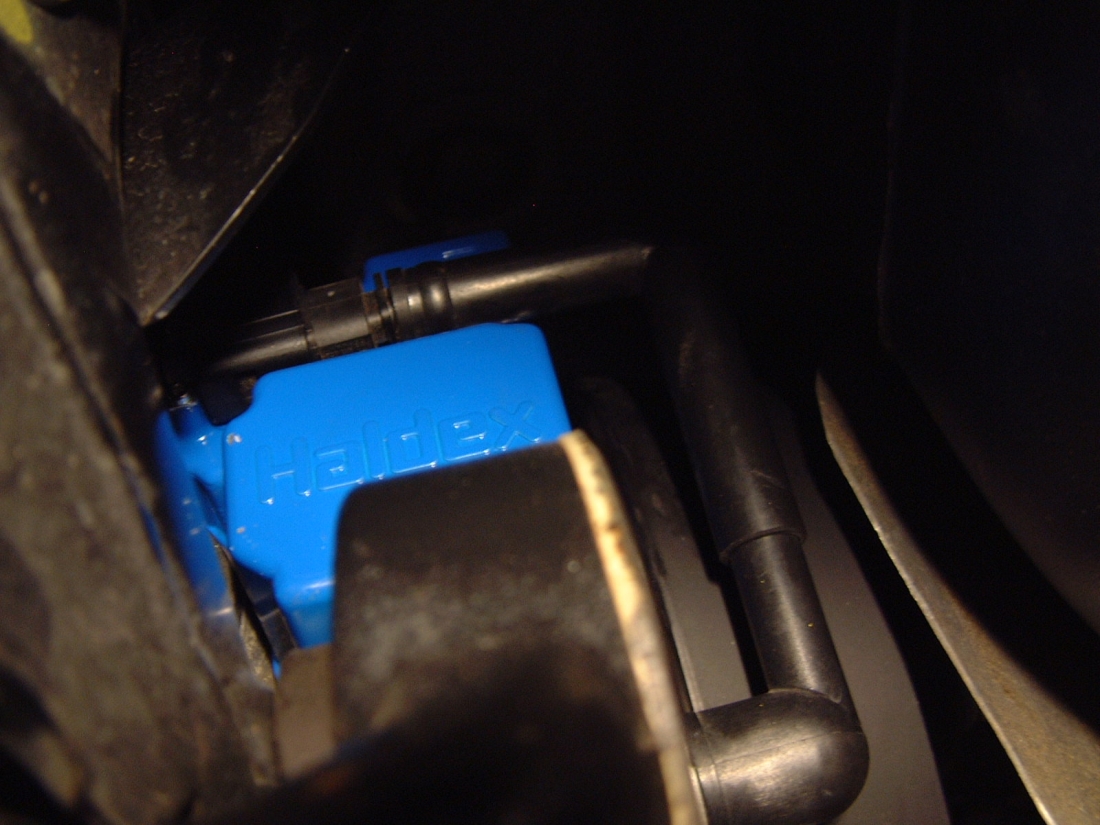
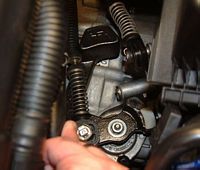
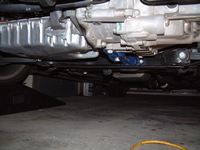
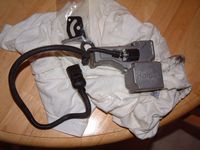
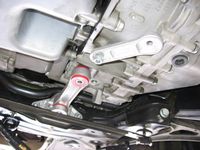
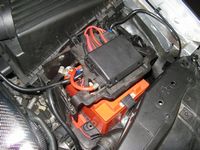
Haldex Performance Part installed- Click HERE for the installation instructions and comparison graphs showing the increased reaction time/torque transfer. The HPP is more aggressive than the OEM controller providing increased and faster torque transfer and anticipating the conditions for activation by reading the throttle sensor. Click HERE for Ian's installation pics to see how he removed/replaced this unit. Using a quarter inch ratchet with socket and 4mm bit (5/32 will work in a pinch, that's what I used) I was able to get to both bolts for removal/installation. It is tight to get the unit in and in/out and routing the wire/connector. It took about an hour of time and a little patience. Ian's picture sequence for getting the unit in and out is a BIG help. Click HERE for the May 2005 European Car write up on the HPP in VW Vortex's Nebuchadnezzar's .:R


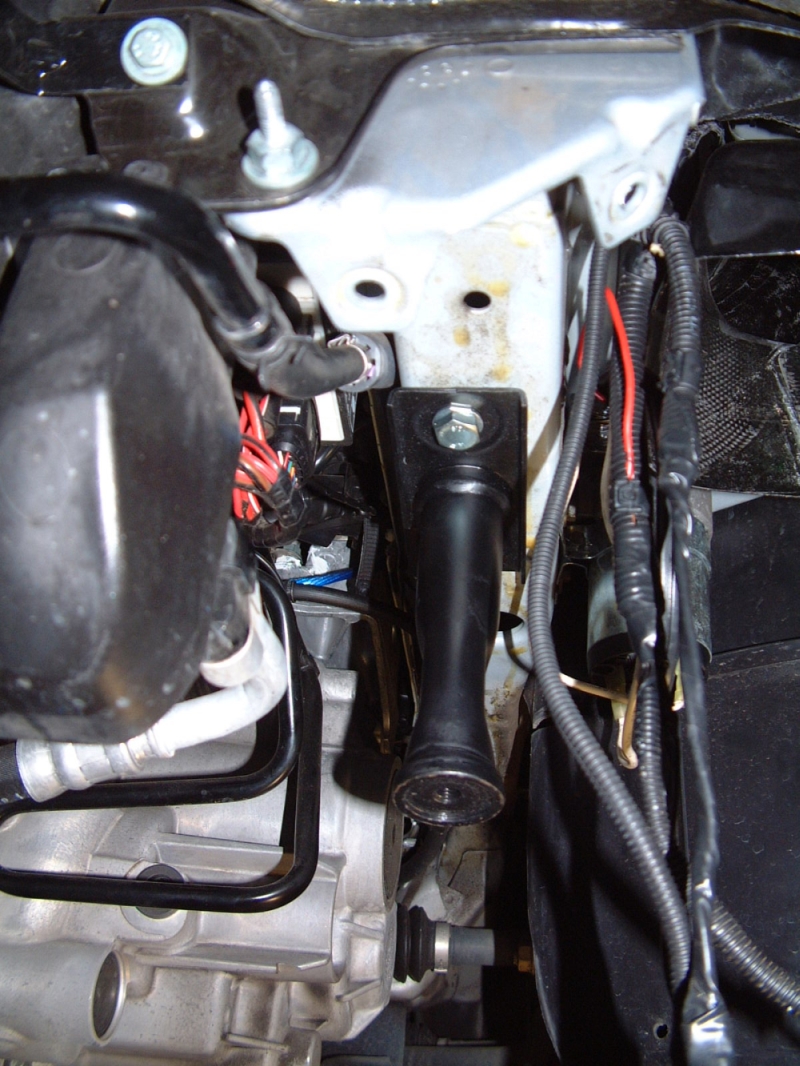
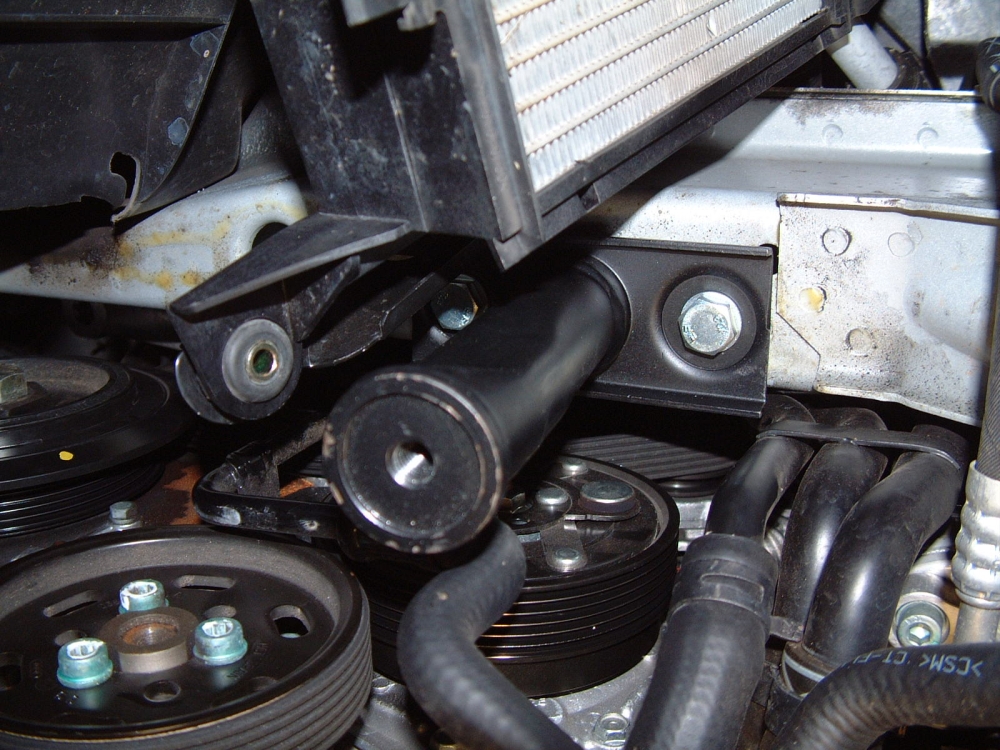
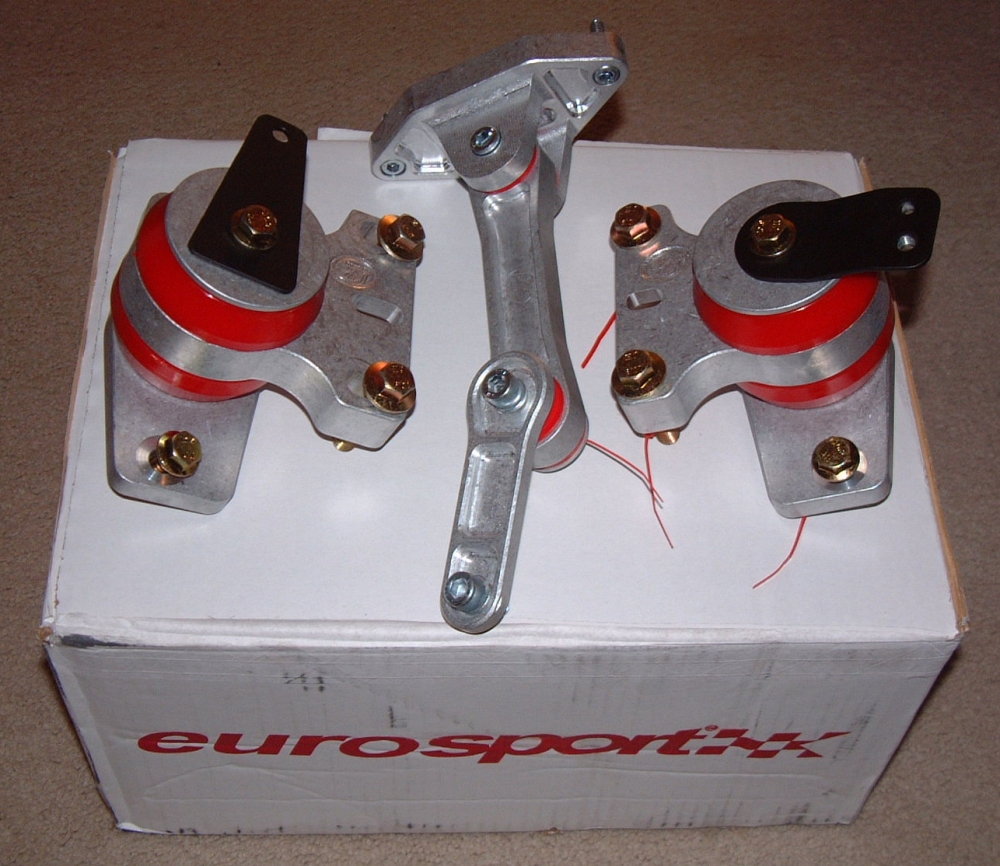
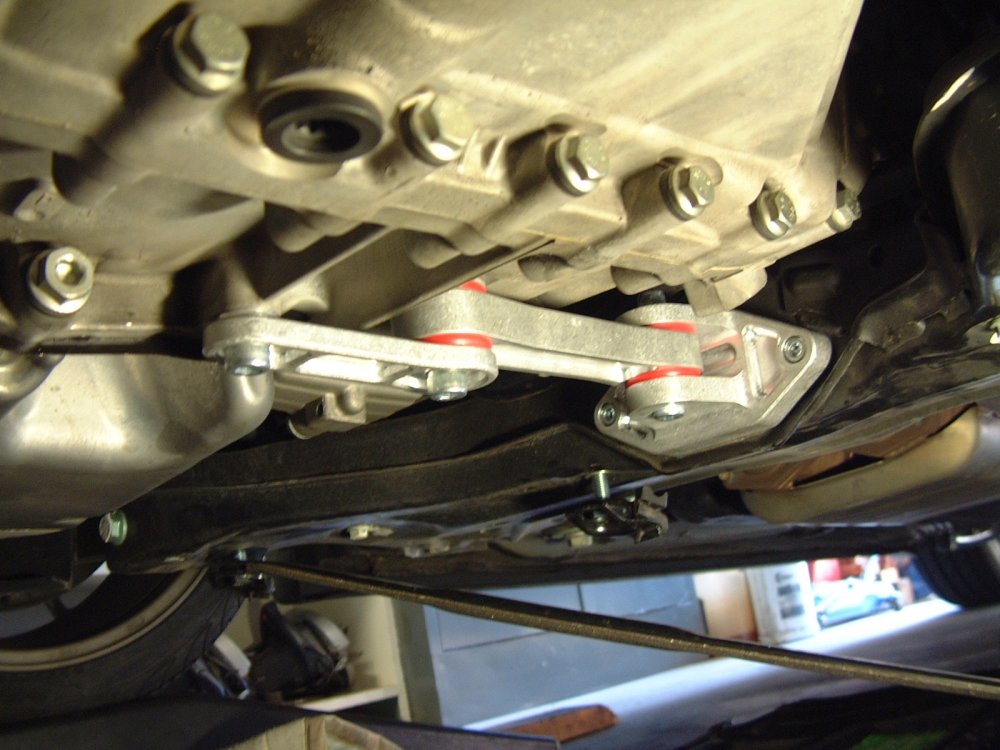
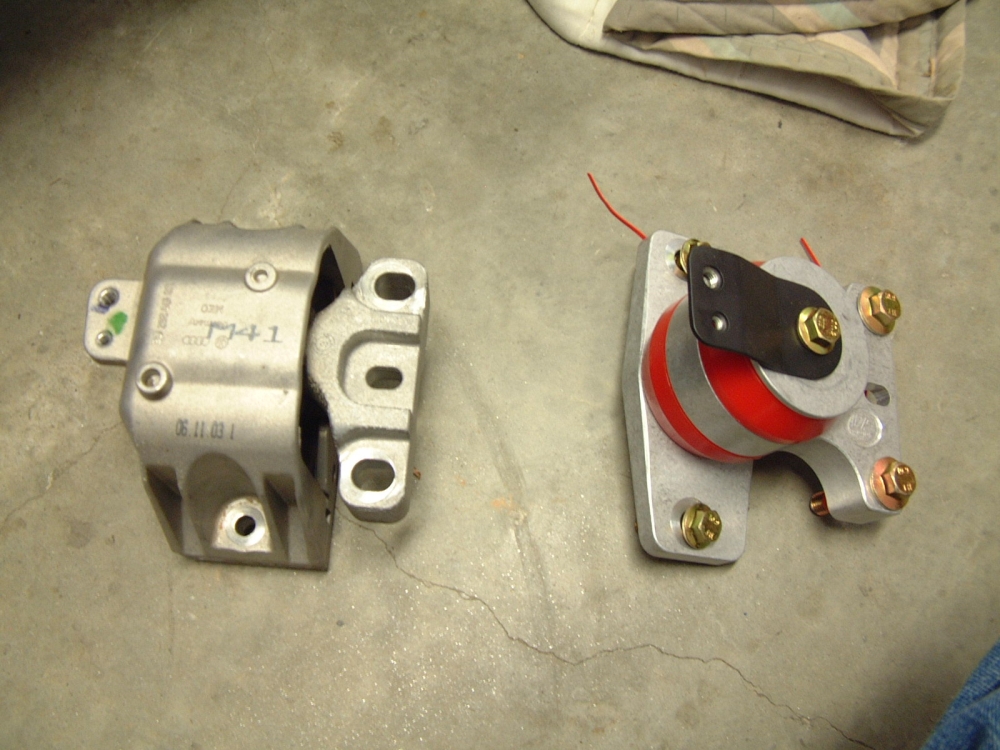
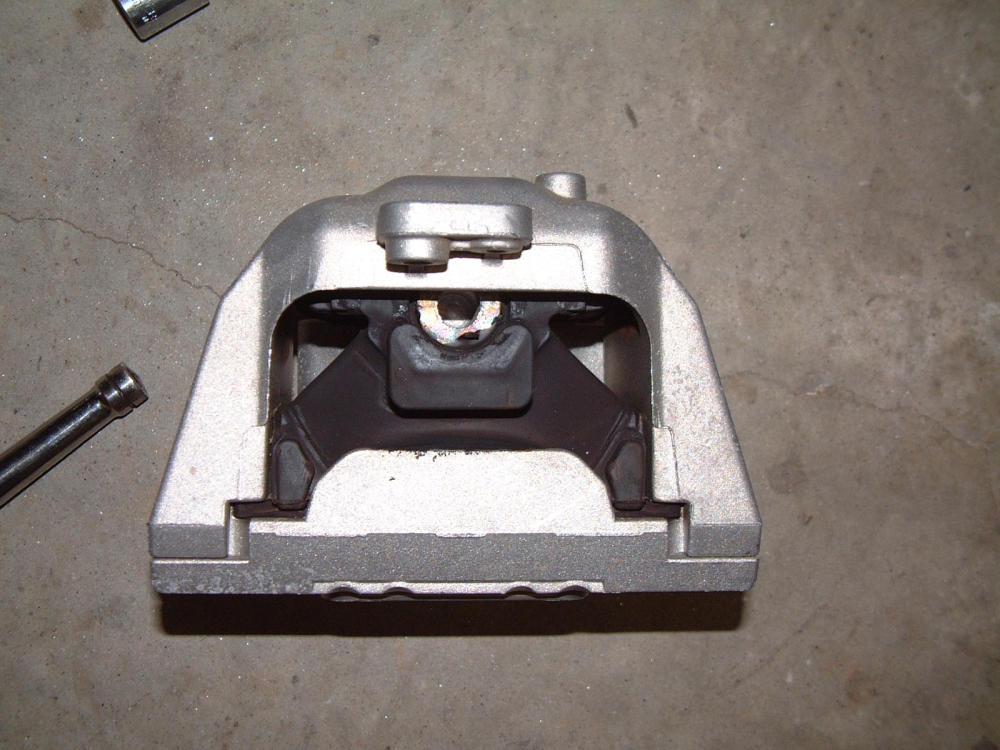
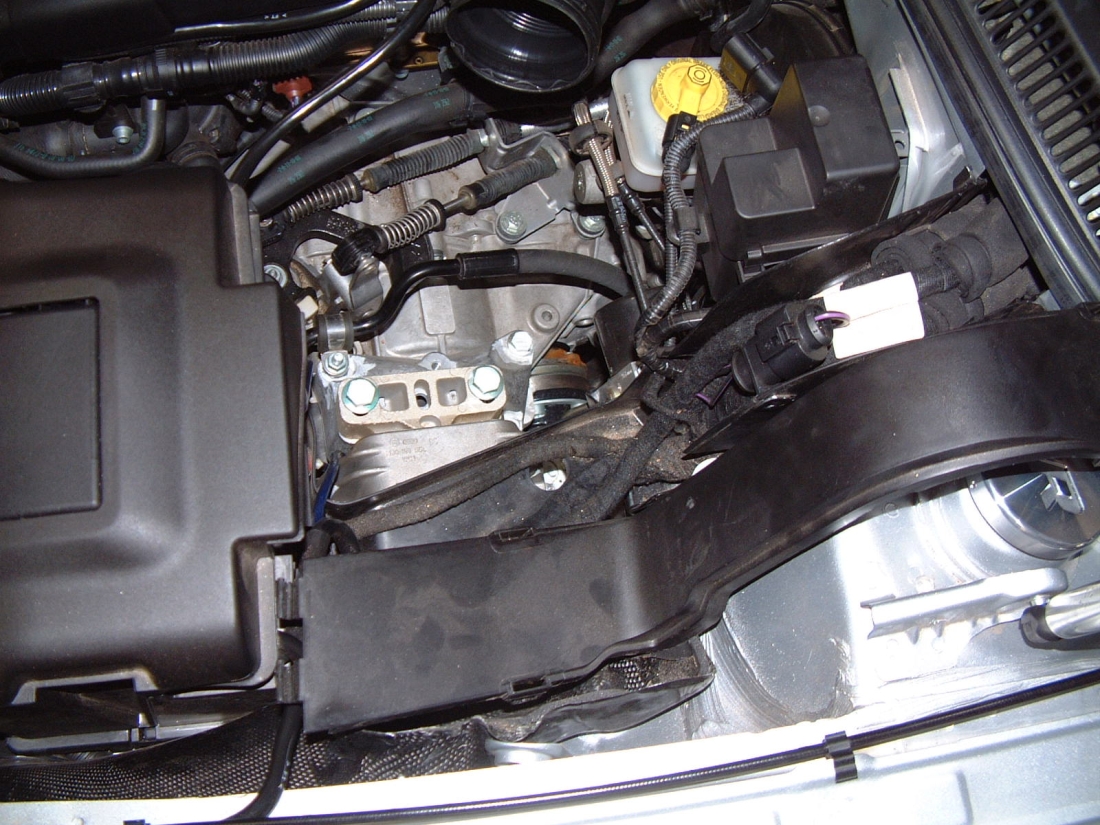
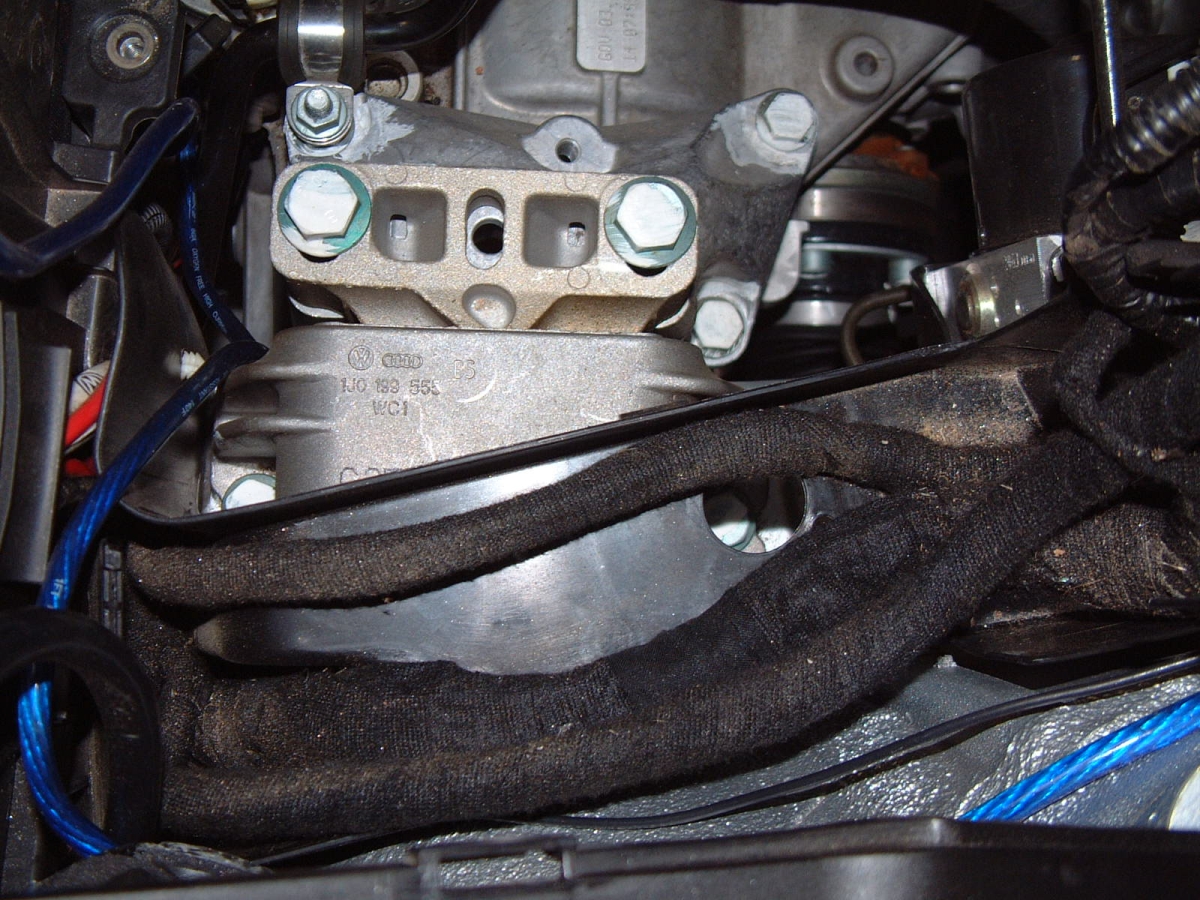
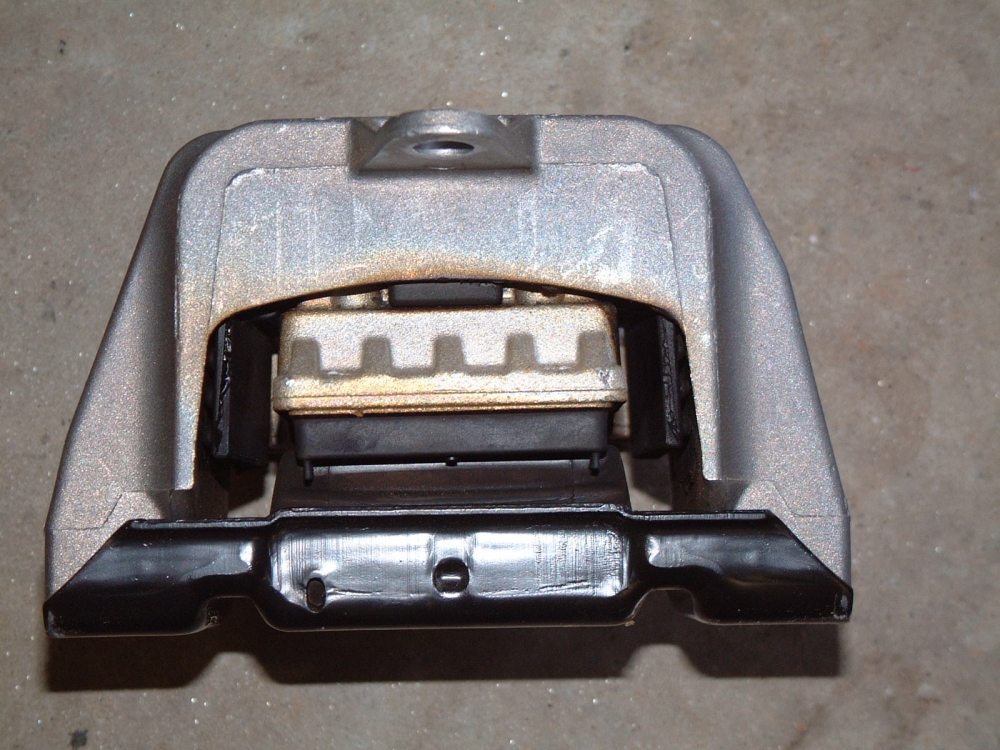
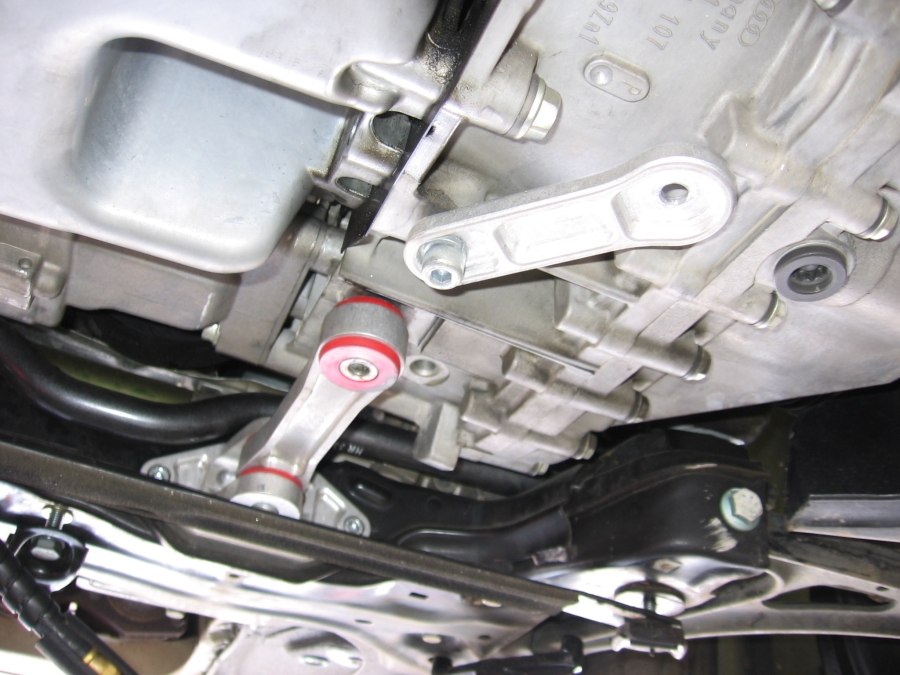
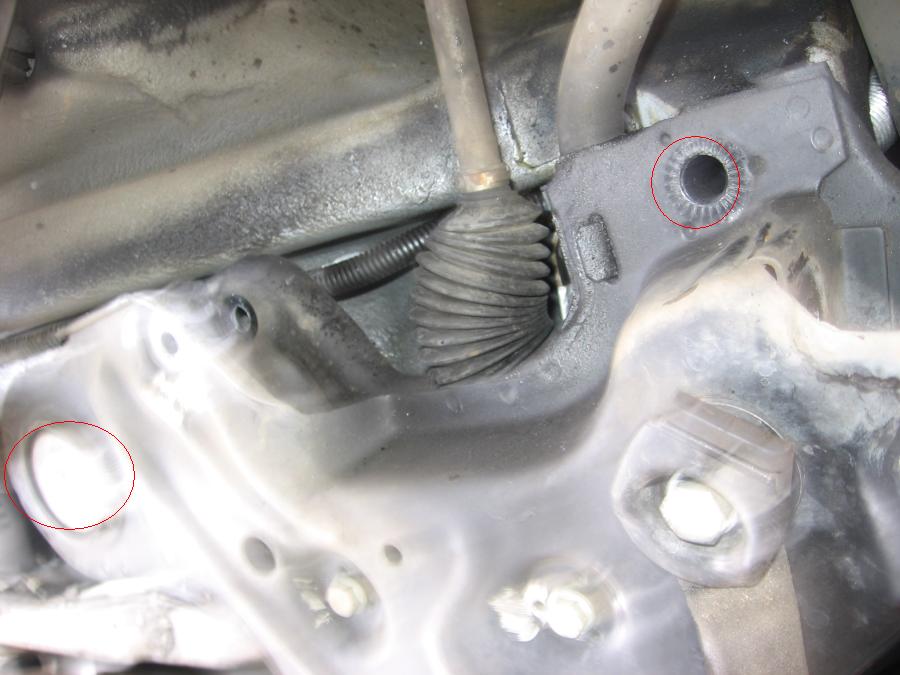
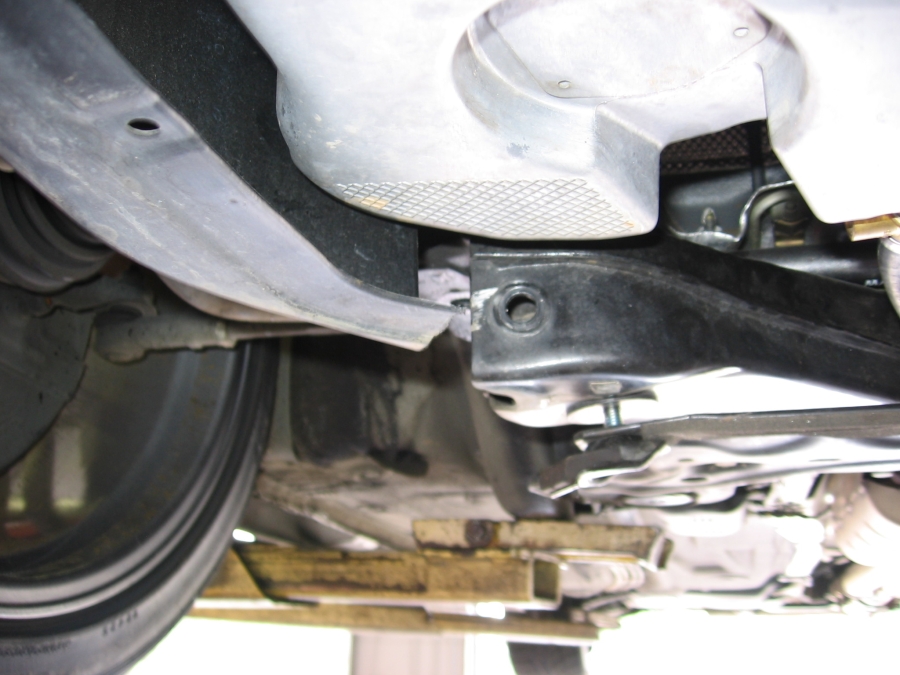
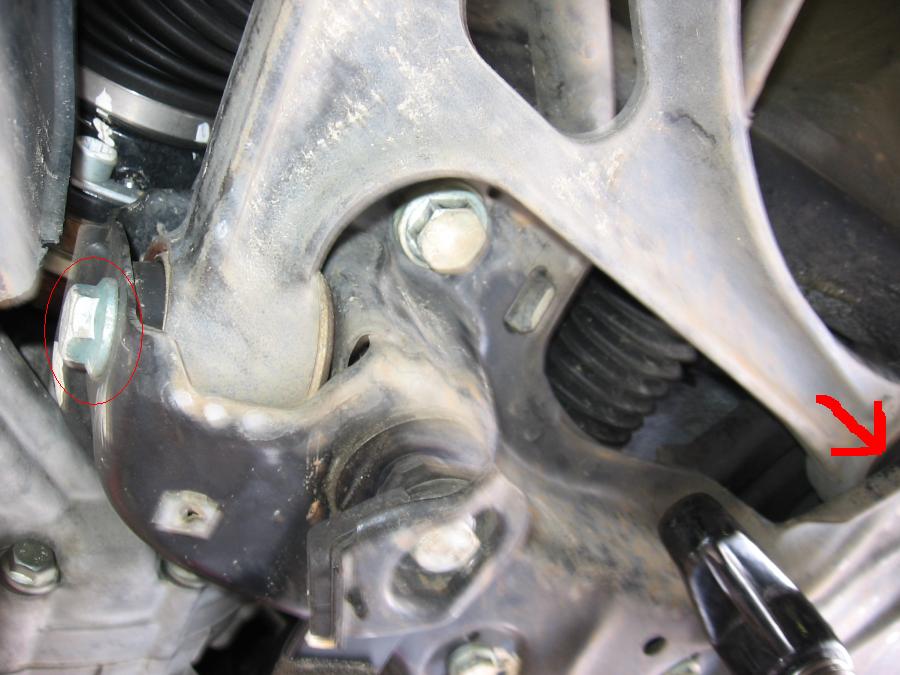
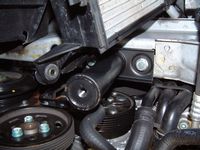
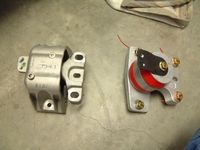
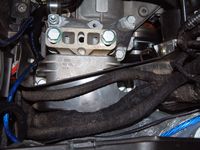
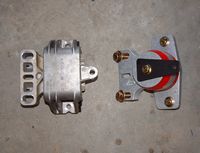
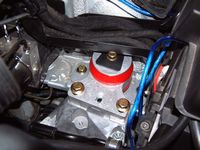
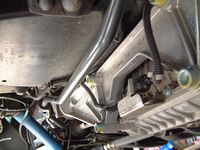
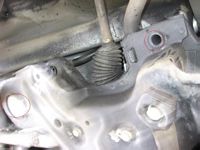
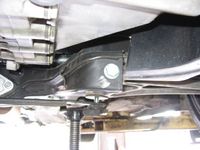
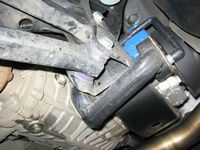
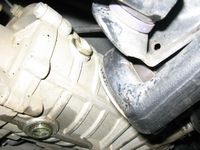
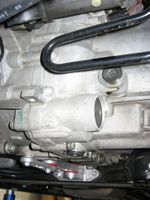
VF Engineering Poly motor mounts installed from Euro Sport Accessories (Thanks Hubert!) - Click on the installation instructions you would like to view: Rear Pendulum Mount, Side Engine Mount, or Side Transmission Mount. VF Mounts remove all of the "comfort" (aka slop) the VW OEM provides and prevent engine movement so that acceleration/braking/shifting are more consistent and stable. The VF mounts are also made from billet aluminum (twice as strong as cast), supplied with stronger mounting hardware (10.9 vs 8.8), and the solid poly is not prone to breakage like the rubber of the OEM mounts. You can see in the pics below how much air space around the rubber the OEMs have. After installation I went for a test drive and surprisingly I did not think the result was horrific vibration as I had heard, just feels more solid, with a subtle vibration that should reduce as they break in. I believe the key is following the VF instructions and making sure the mounts are parallel with the mounting surface, this will require moving the engine/trans a little bit but easy enough to do. About 3 hours if you have to do this on ramps in the garage like me, quicker if you don't have to remove/replace a steel skid plate like me

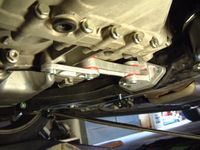

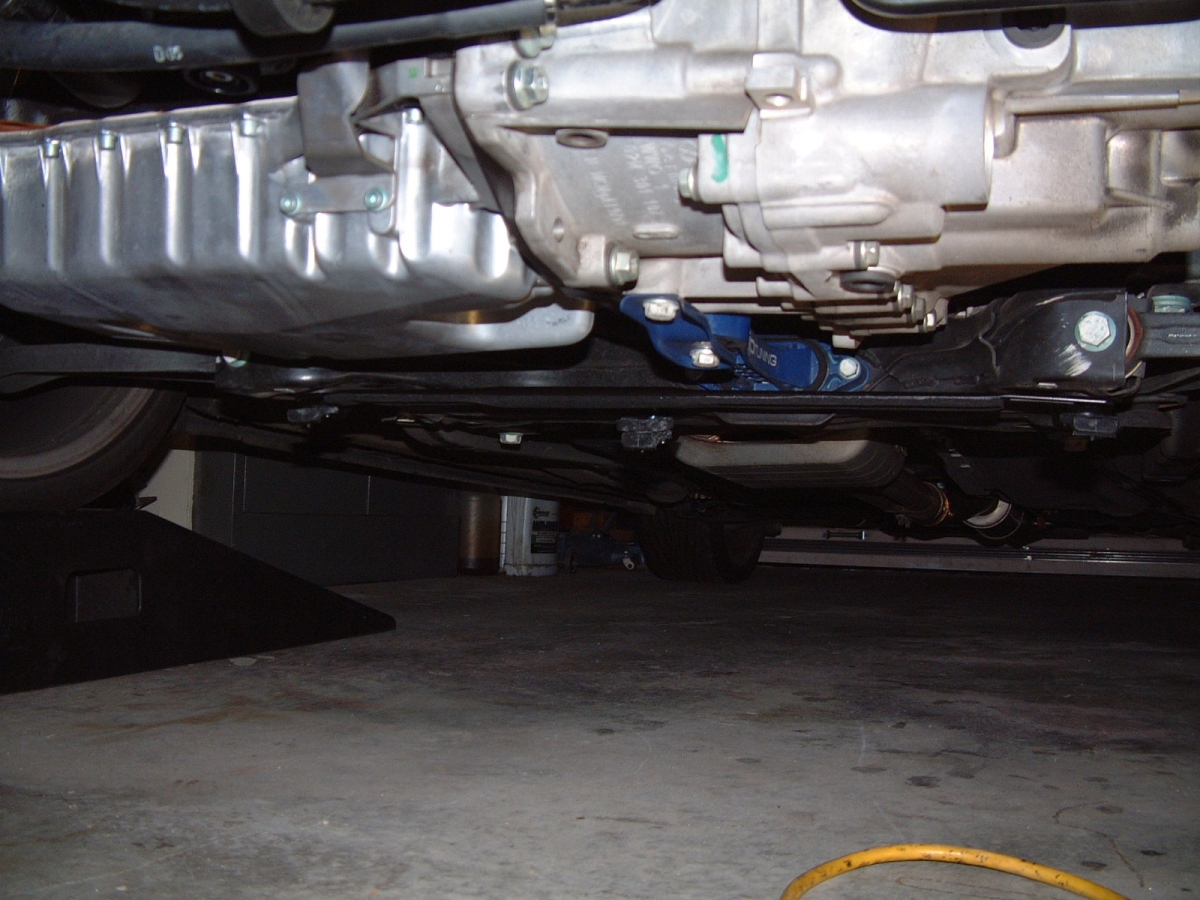
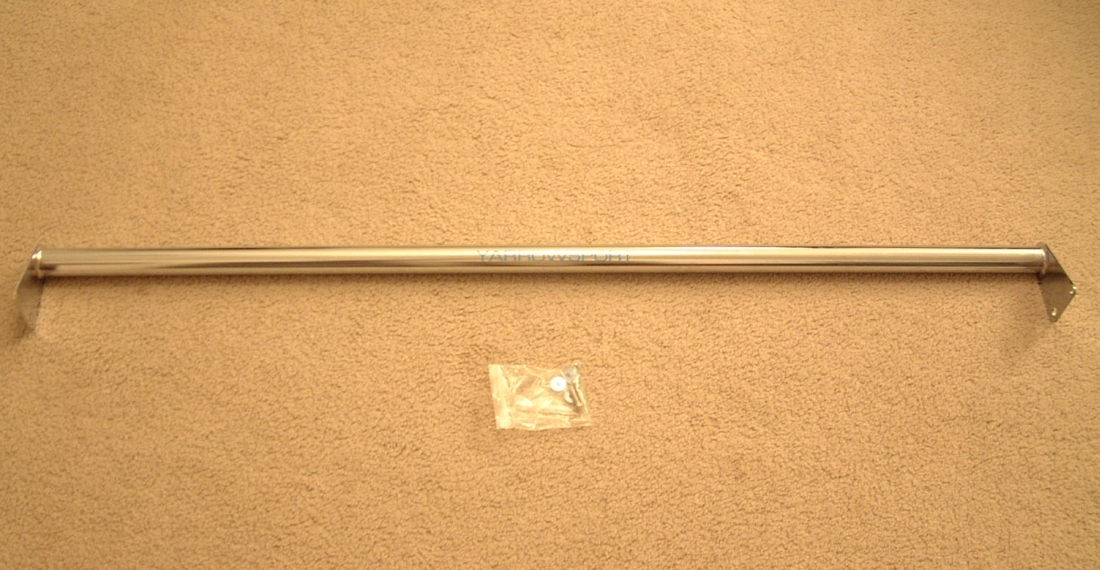
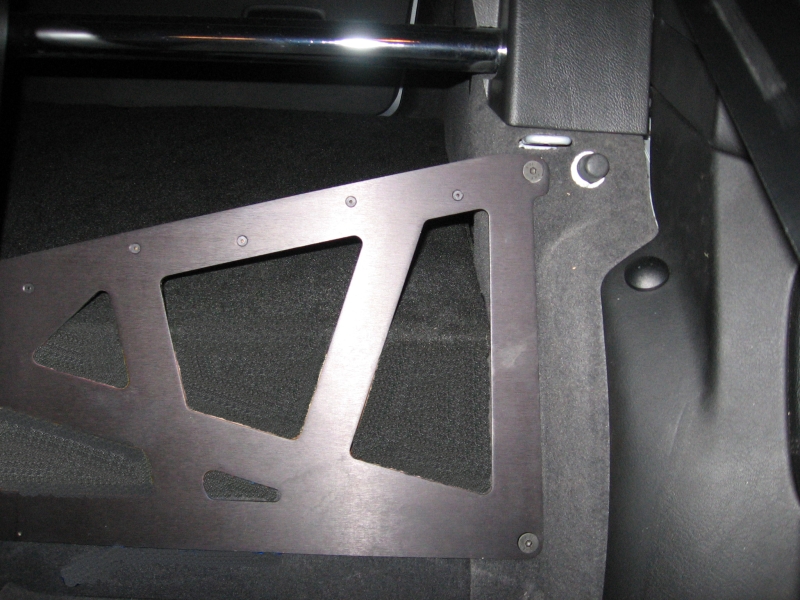
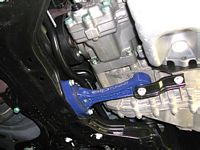
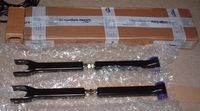
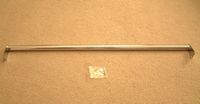
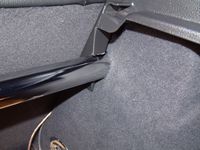
Yarrowsport Rear Stress Bar (Thanks for the Vortex group buy Yarrow!) - I took a few pics to act as a supplement to Yarrow's installation instructions found HERE.
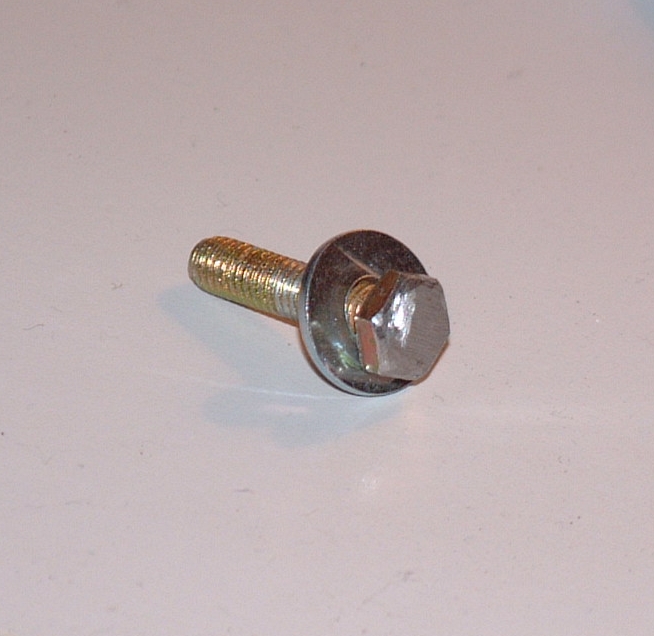
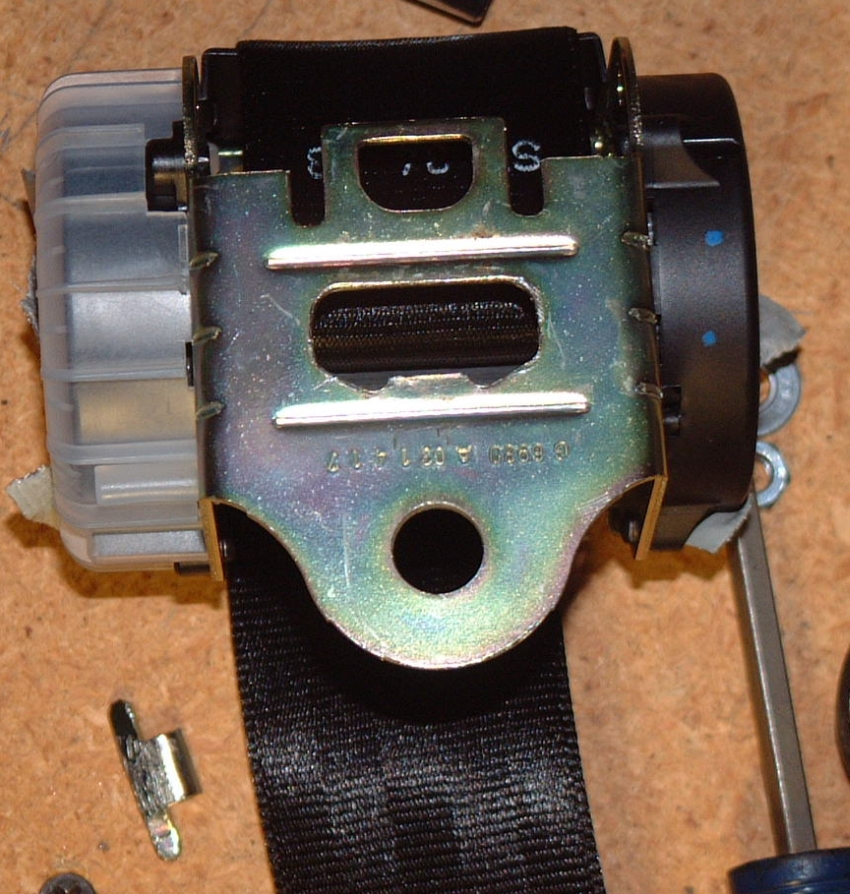
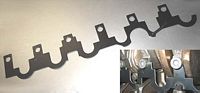
L to R: Bar arrives with hardware, supplied bolt ground down to provide clearance for belt on takeup reel (I had some issues with the belt not retracting entirely, you may not), now you see the seatbelt mounting tab, now you don't (broken off using pliers), belt extended and taped to allow bolt access (also easier to remove the plastic retractor guide so bolt can be accessed from top), installed bar with unfinished sub install (waiting for summer so I can fiberglass), and plastic/carpet cut to allow for bar. Took about two hours to install, you may want to buy some of the metal clips that hold the side panels together, they have a habit of getting lost. Great product, car feels more solid and tight with less rattles attributed to less flex.


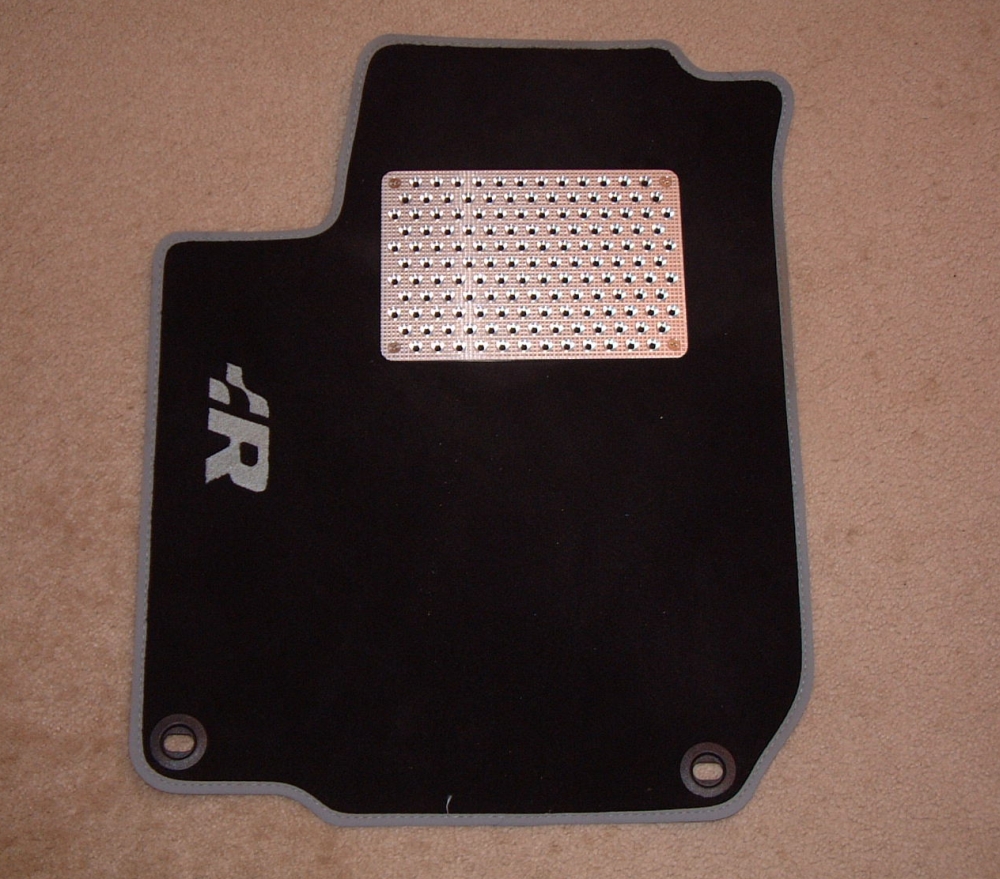
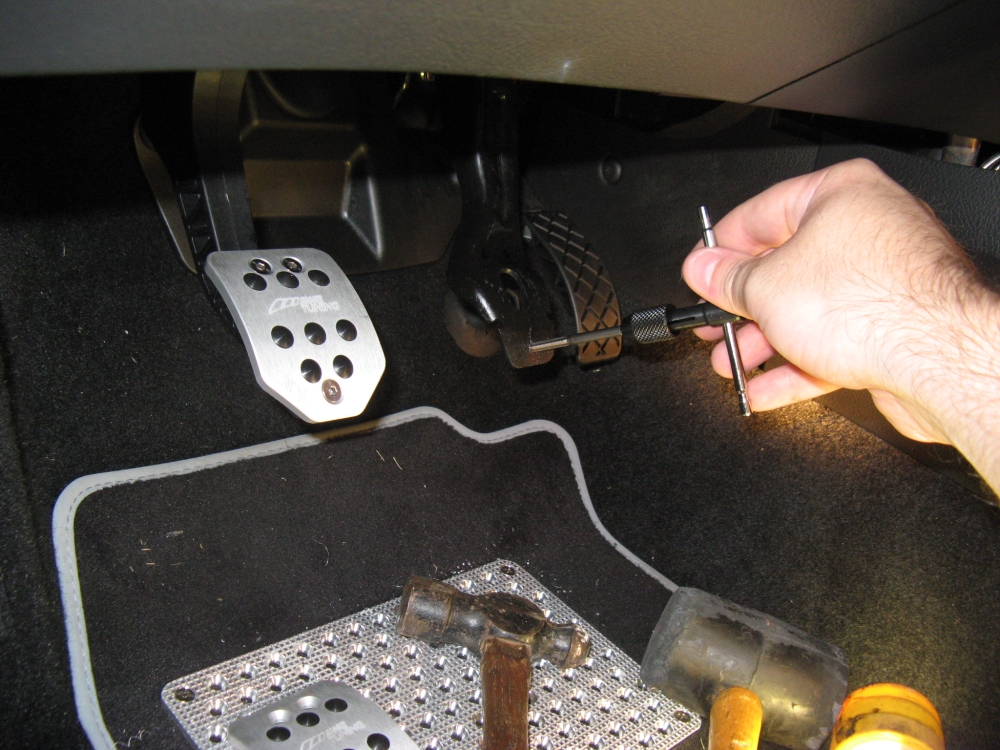
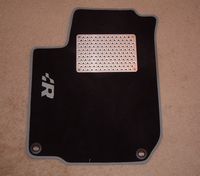
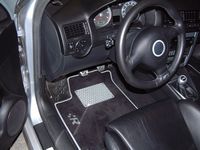
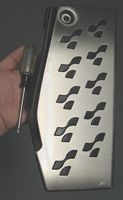
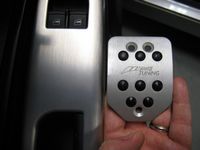
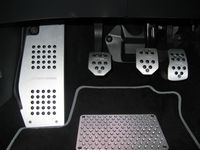
Ultimate Pedals Heel Plate - I saw that the floormats were wearing in two spots from the foot action to shift/brake/accelerate and thought these custom heel plates would look nice and prevent premature wear. It also actually makes for a more stable foot placement. The plate is mounted to the mat using machine bolts and retainer nuts, I found it easiest to mark the holes and drill through the mats.
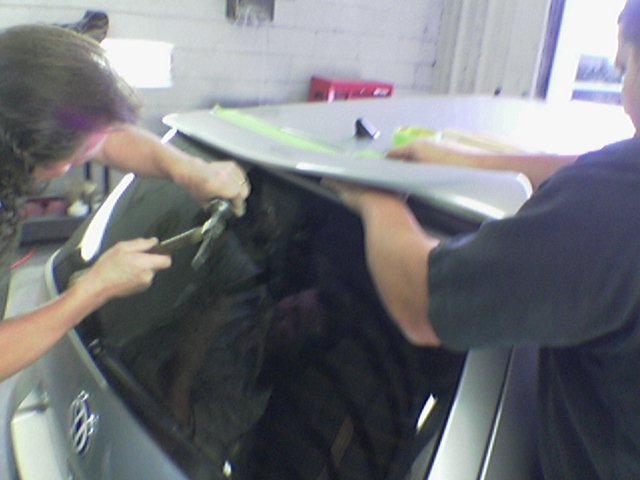
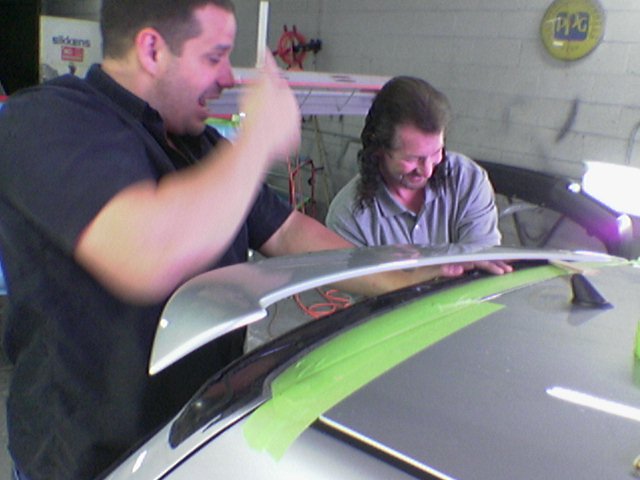
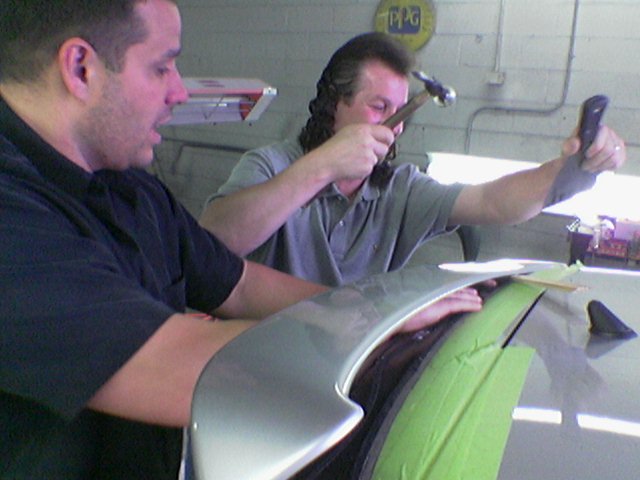
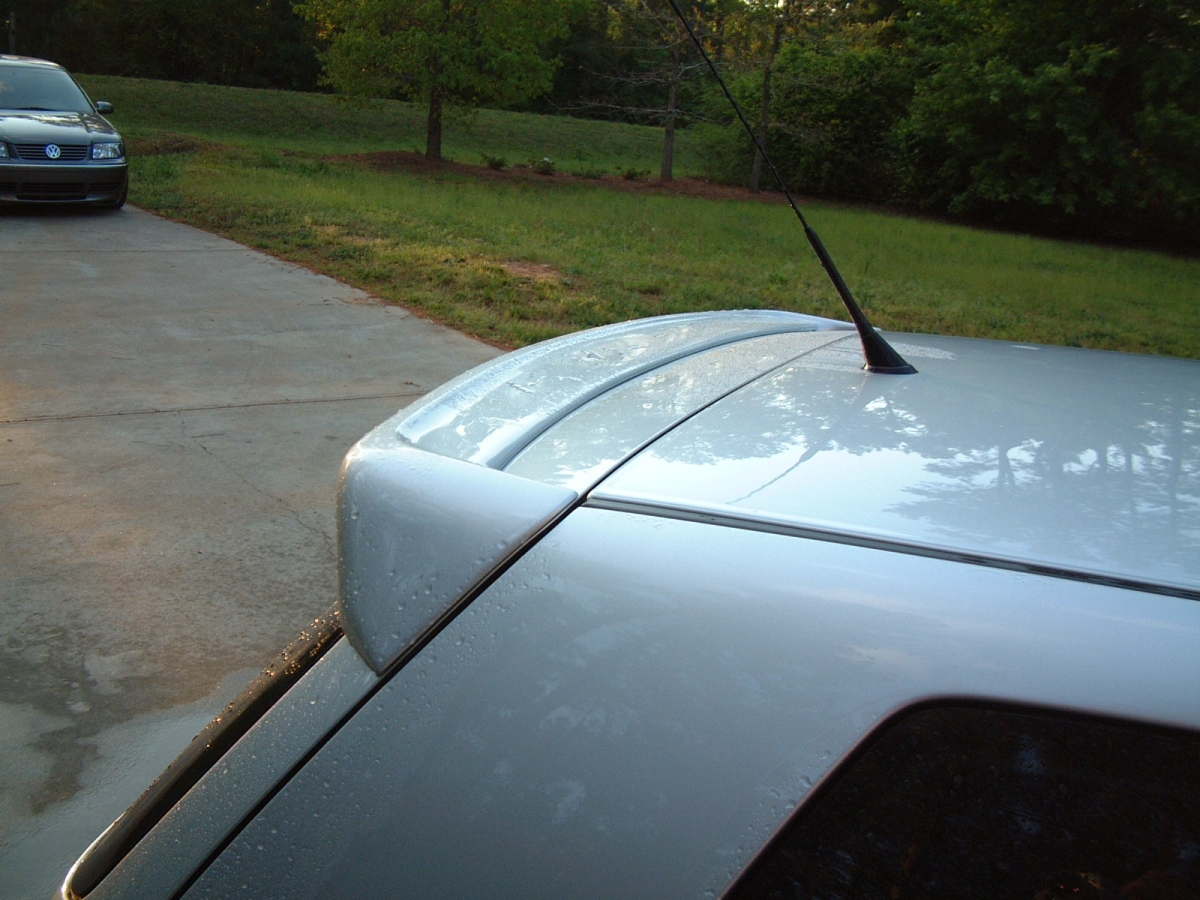
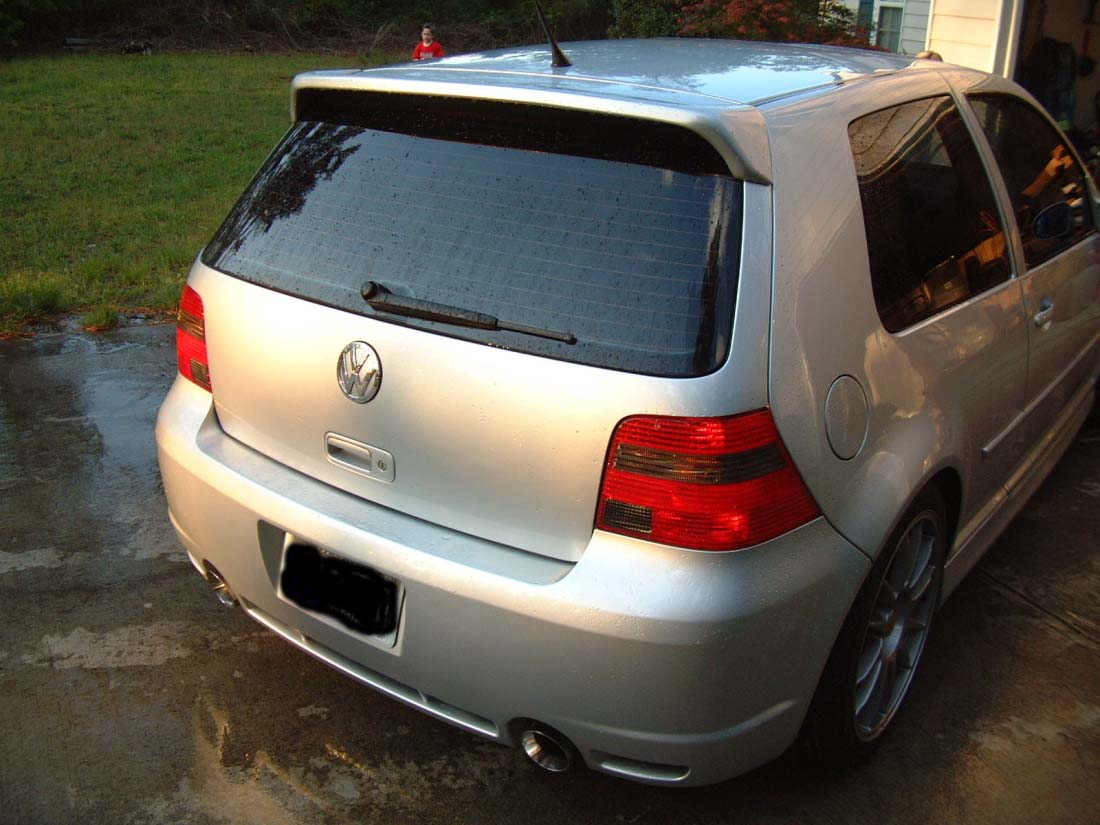
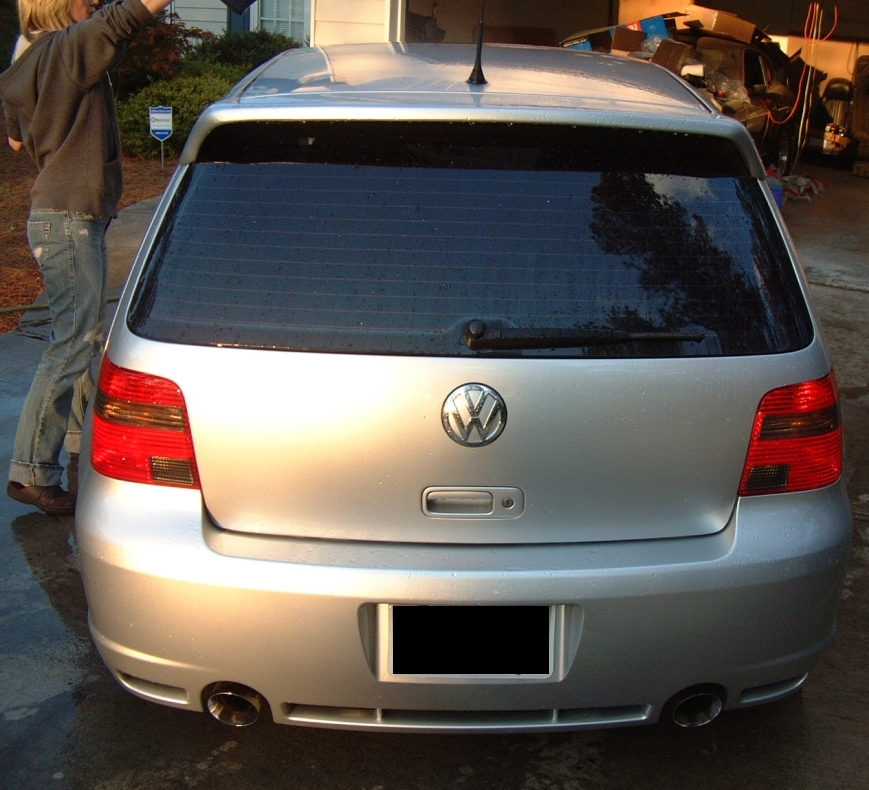
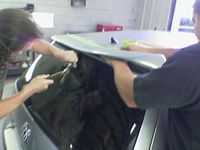
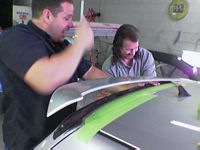
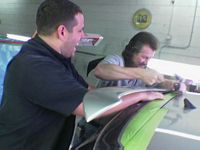
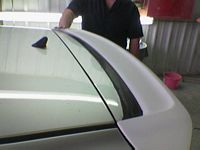
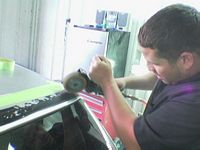
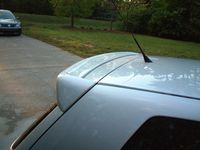
Rieger rear spoiler from RPI Equipped to replace OEM spoiler for a more aggressive look.
Rieger Spoiler Installation Instructions HERE
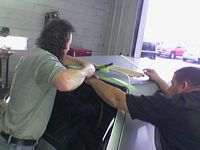
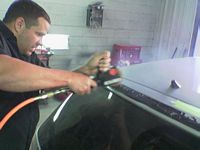
L to R: Removal process involved two friends (experienced professionals in auto body) and a hammer and putty spatula (looks like they are having fun, maybe a little too much
), spoiler removed by alternating on top and bottom sides to break through the three beads of adhesive holding the spoiler on, after the spoiler was off we test fitted the Rieger and found that you could see the etching primer and adhesive so out comes the pinstripe/sticker removal tool, by moving the tool constantly to avoid burning the paint we were able to remove the remaining glue and primer. This area was color matched when the spoiler was painted and then baked at 120 degrees for an hour, spoiler then attached with body panel adhesive...


Hagus Mirrors from AMI Motorsports with aspherical blue glass. Hagus Mirror Installation Instructions HERE

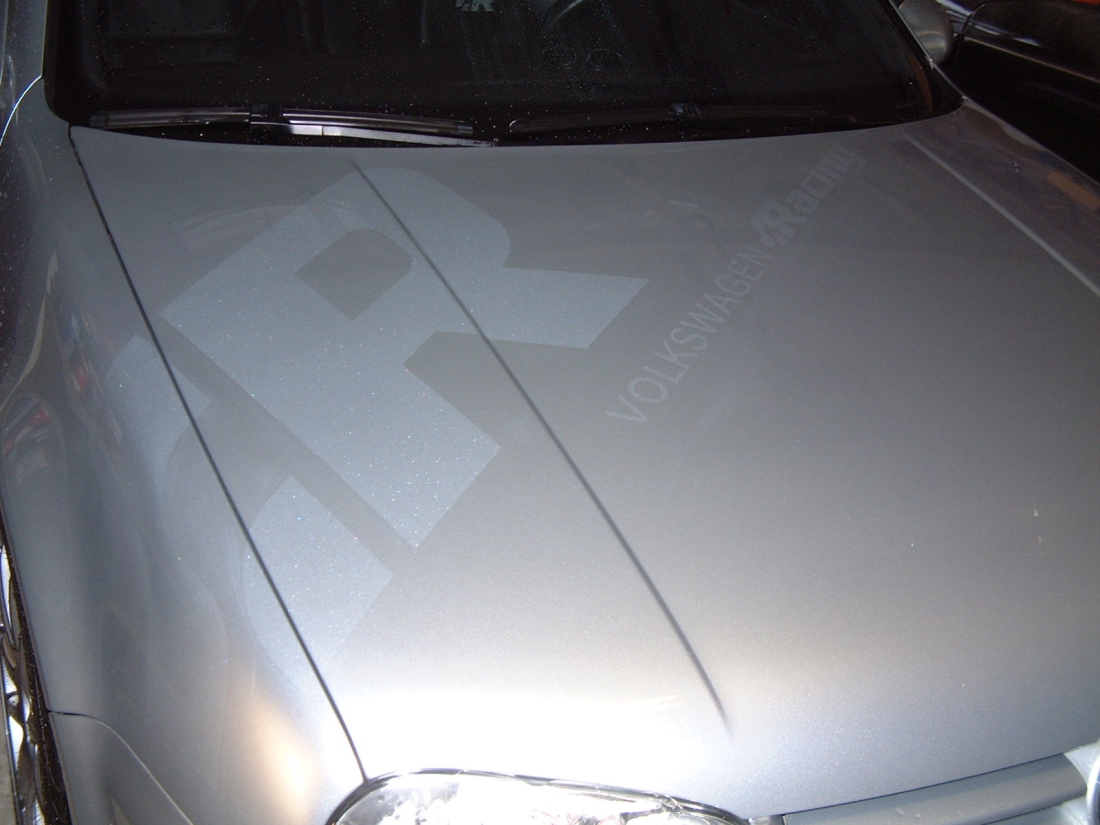
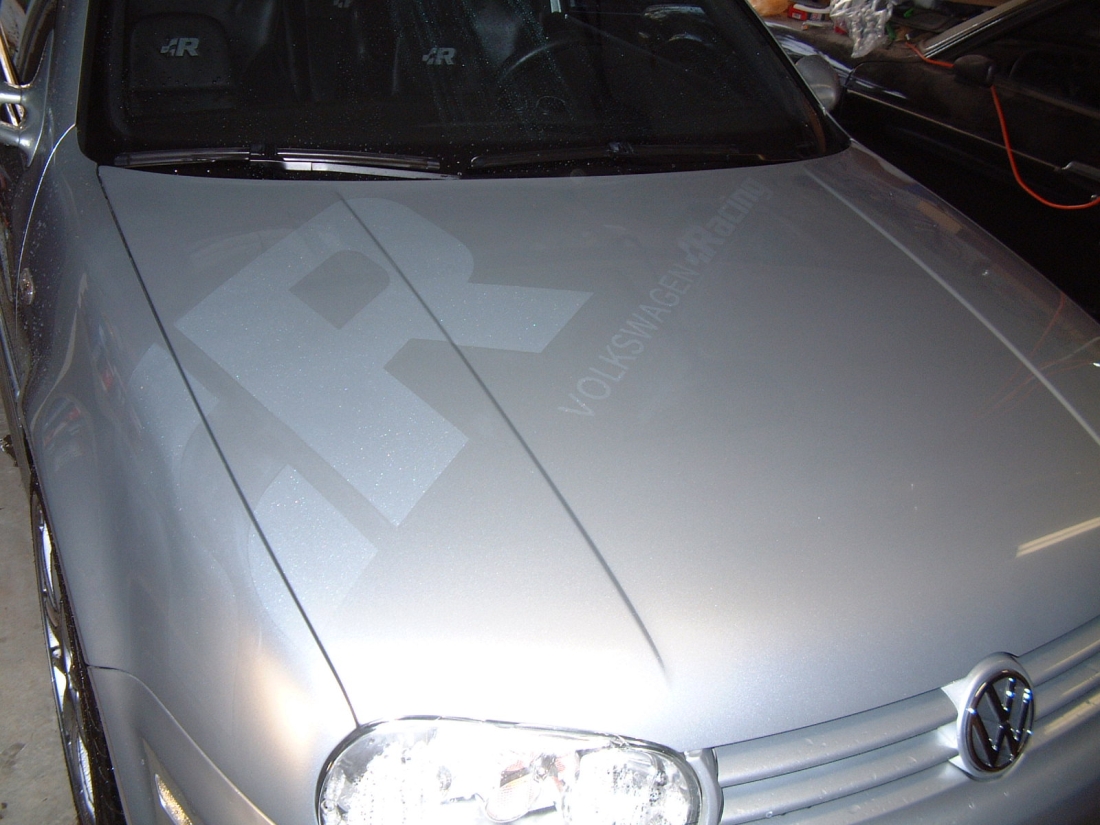
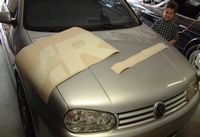
.:R and Volkswagen Racing Graphic painted on hood in pearl. The pearl makes it visible in certain light and completely transparent from some angles. Also disassembled and painted the rear emblem in the same color pearl, kind of cool that it changes color in different light. Tony Hunter at Buford Auto Plaza Paint and Body (770-945-0839) did an awesome job painting this along with my spoiler and mirrors.


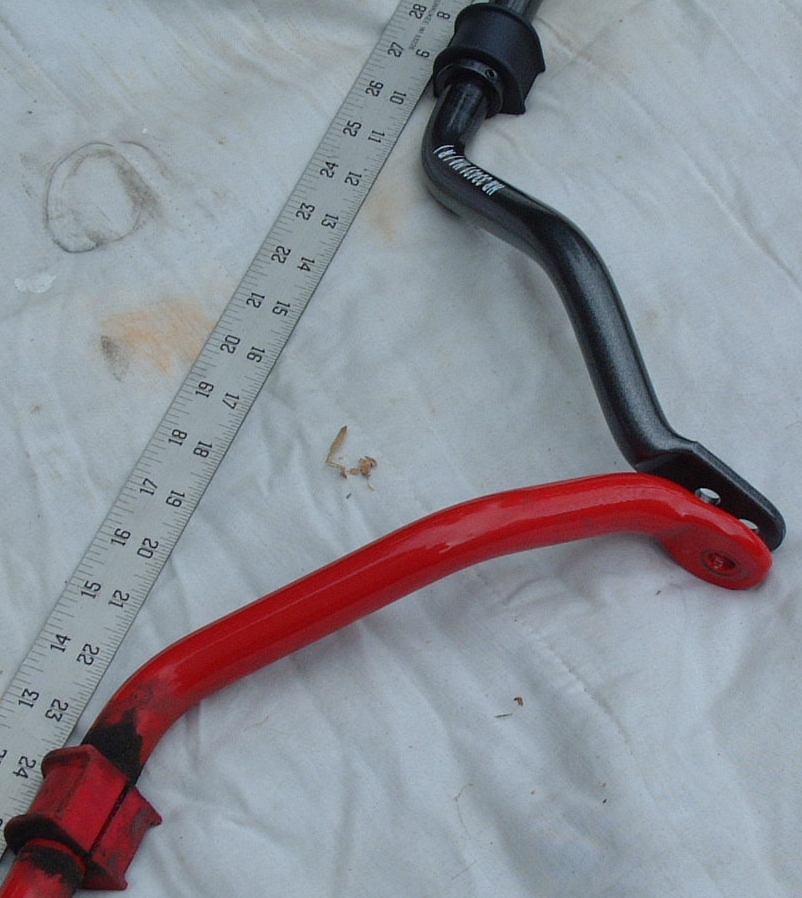
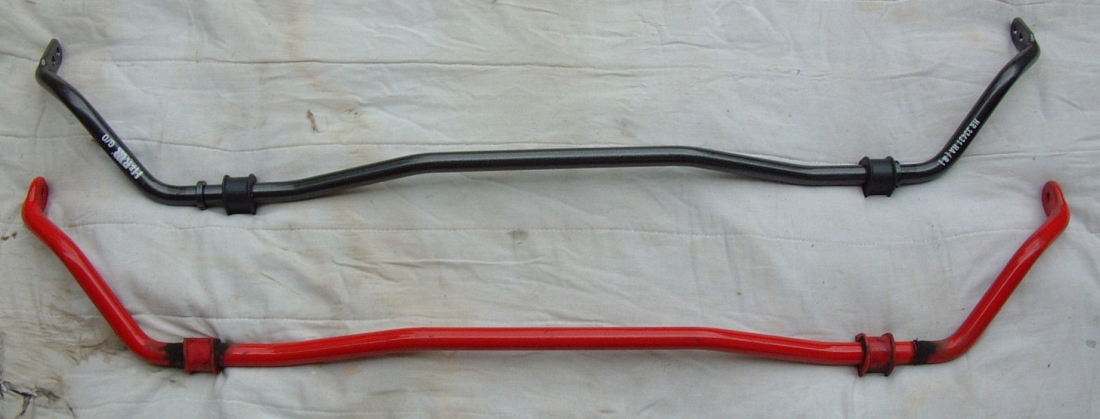
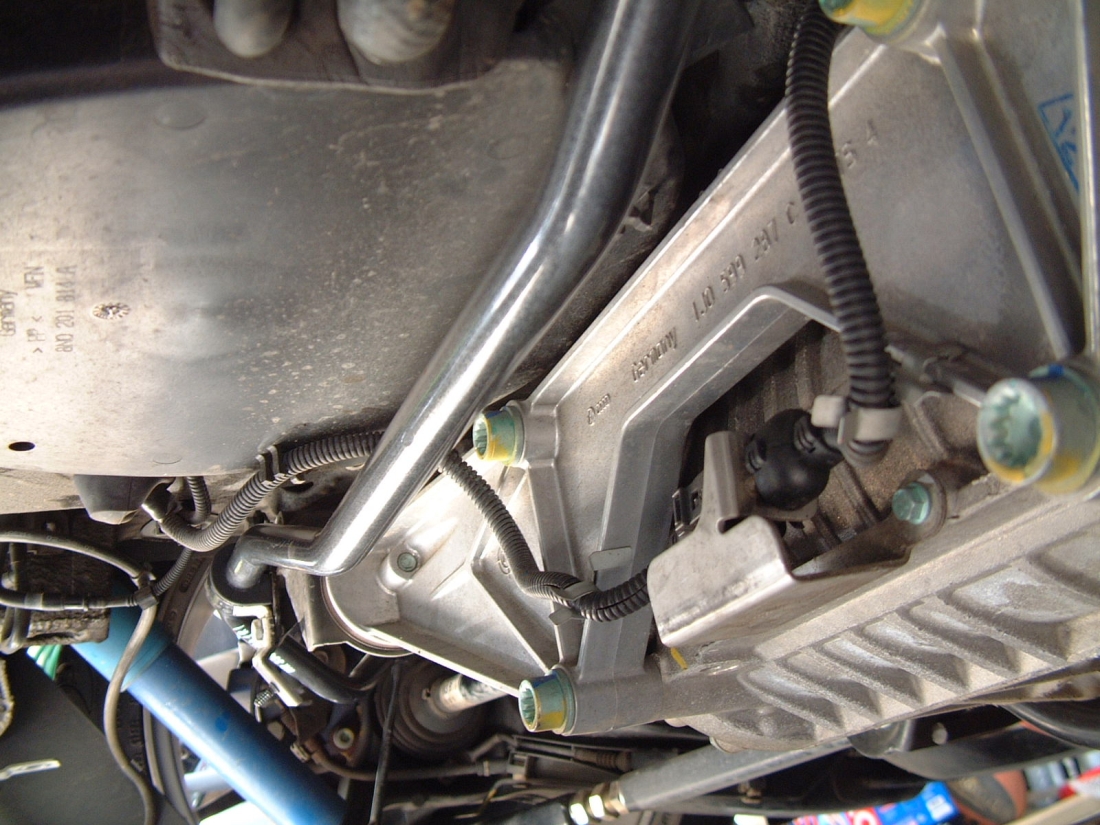
H&R sway bars, front 25mm and rear 21mm, from Parts 4 VWs (Thanks Mike and Kristen, GREAT customer service and communication!). Front Bar was installed by Kauffman Tire on McGinnis Ferry Road in Suwanee (770-614-5650) because the subframe had to be dropped and an alignment was needed. The bolts for the subframe are torque to yield (stretch bolts) and should be replaced, Bentley torque specs are 100 Nm (74 ft-lb) PLUS 1/4 turn (90 degrees). PICS (L to R) Front Sway Bar- Bushing bracket is hinged at bottom with one bolt on top and attached to subframe, endlink bolt removed, two comparison pics of OEM vs H&R, H&R bar installed. Rear Sway Bar- two pics of Neuspeed 22mm/H&R comparison, two pics of H&R bar installed, mystery metal behind valance, mystery metal removed, heat shield painted with black bed liner before re-installation.


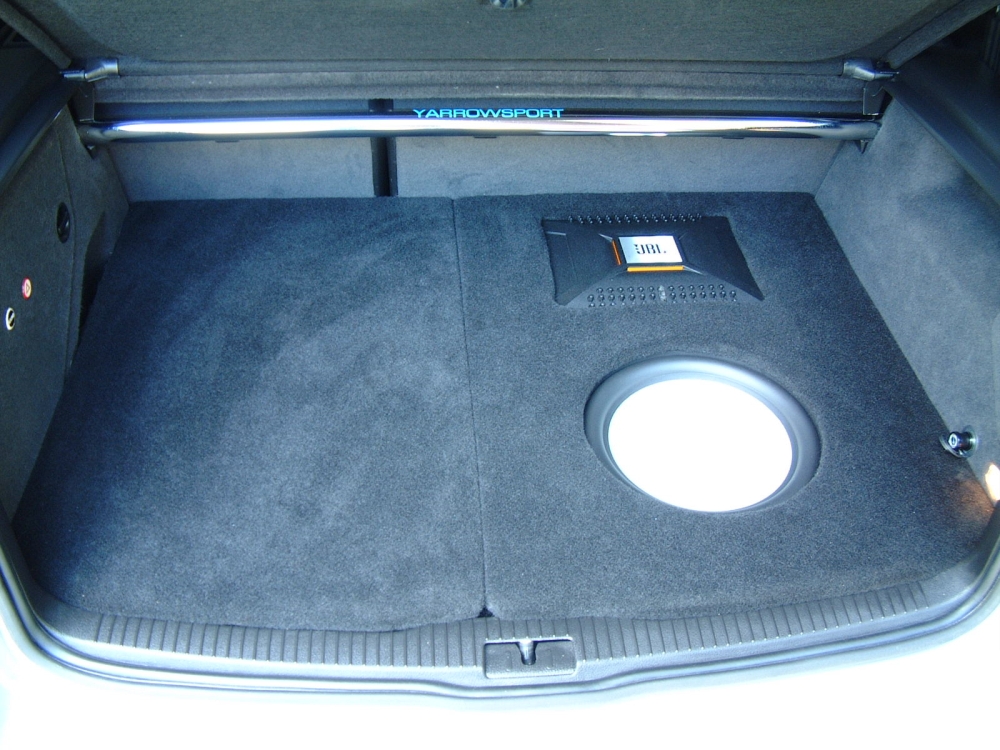
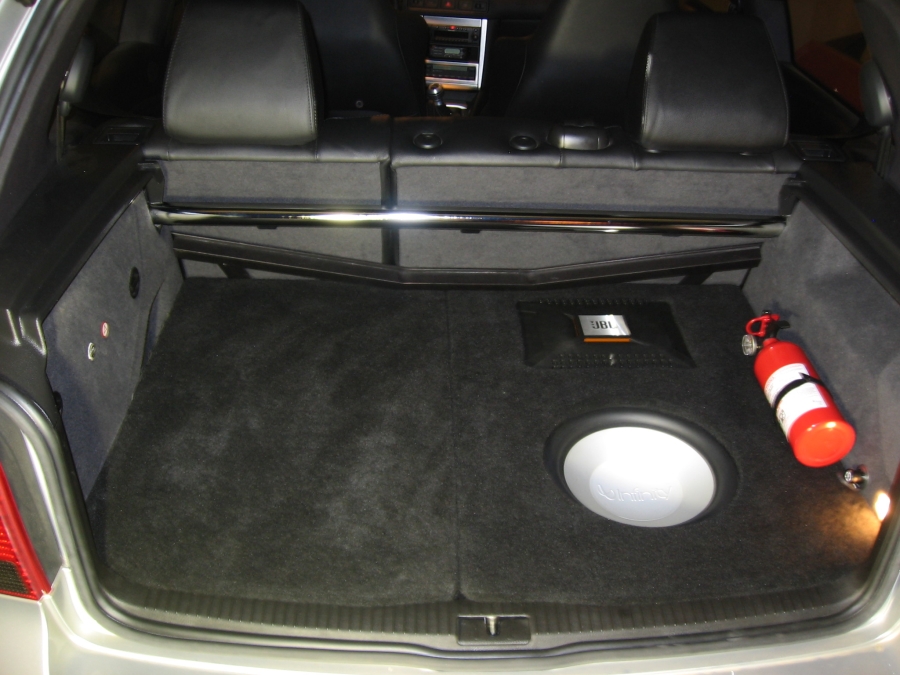
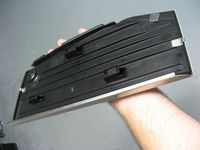
Semi-complete sub installation, JBL BP600.1 amplifier and Infinity Perfect 12.1 subwoofer installed in baffle board. I know it does not sound as good as a box but I did not lose a lot of space and it sounds pretty good....kind of thrown together for SVF.

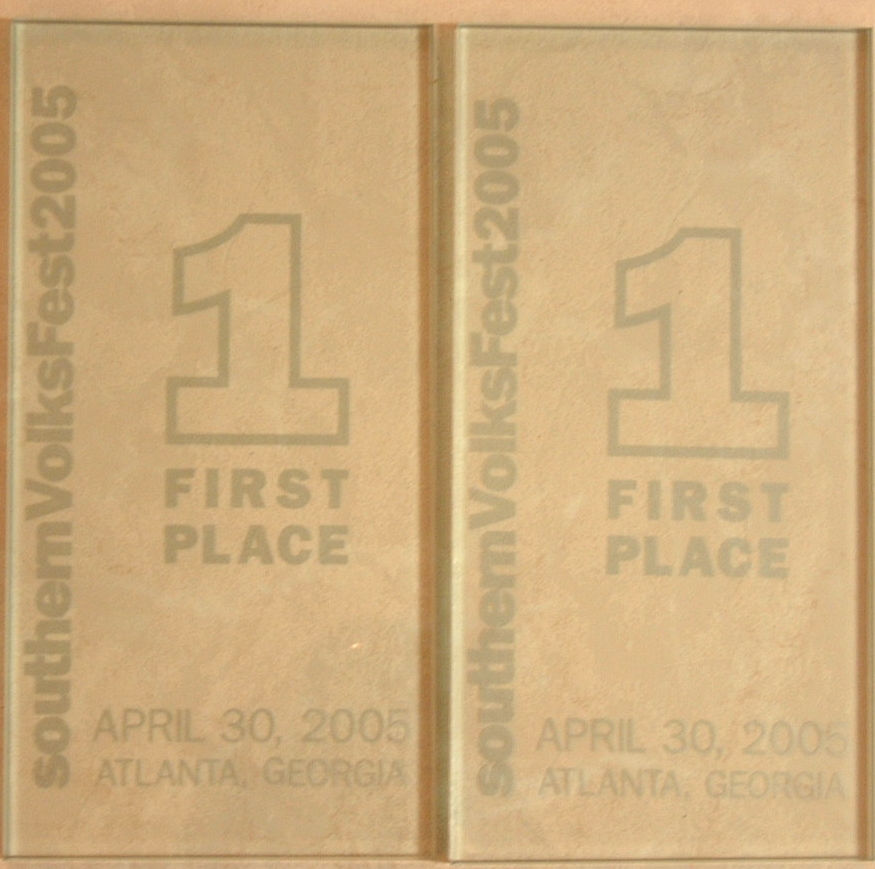
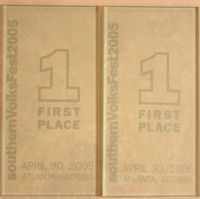
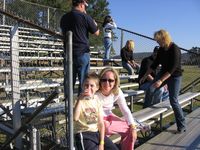
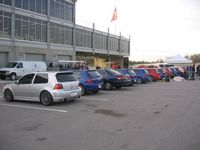
Southern Volksfest 2005: Two first Place Trophies

BIG Thanks to the SVF staff and to the judges (MKIV judges were the_journalist (Chad Patterson) and Jetta Nooch (Andrew Fitzpatrick)) for the time and effort that went into putting this year's show together AND keeping it together despite the weather.....you can't keep a true VW enthusiast down

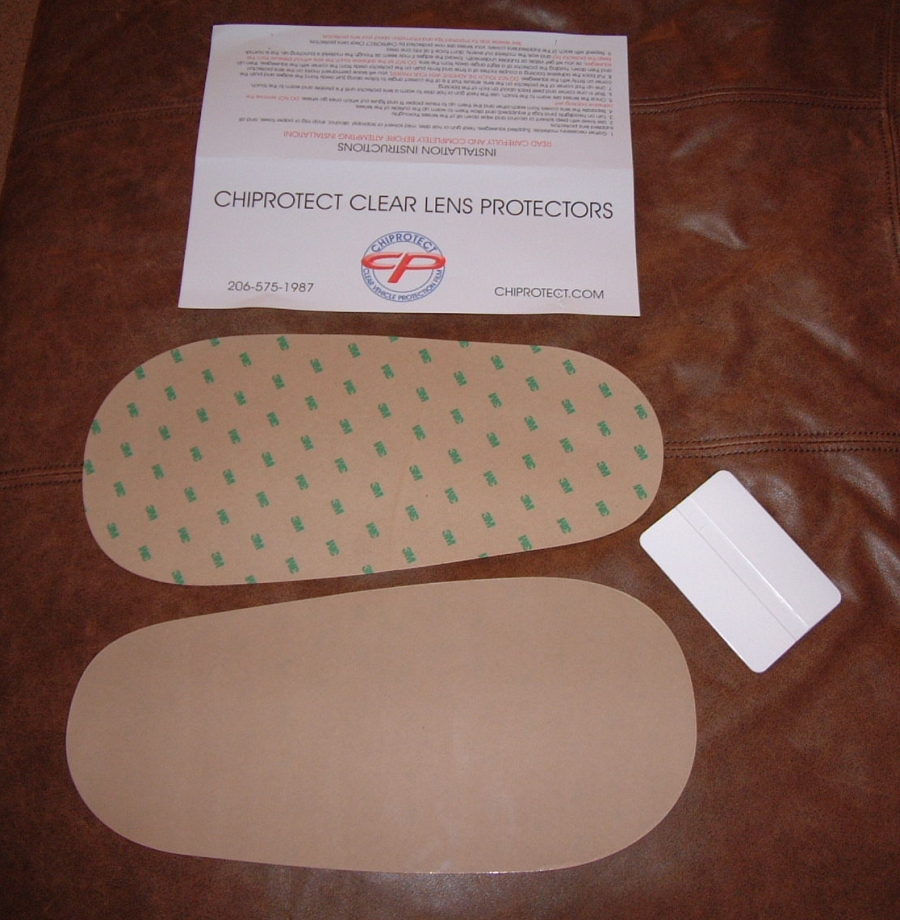
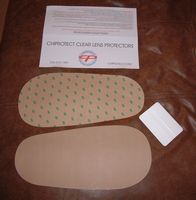
Chiprotect protective headlight film installed. 30 mil thick to repel rock and other road projectile fractures.....click HERE for installation instructions. Originally had OEM VW Lexan protectors but they got brittle and broke one day when I removed them to clean the headlights, so I thought that was my queue to try something else.....
Delivered with instructions and a squeegee, using a heat-gun to heat the glass lenses first, then heating the film, and starting on one end with the squeegee and slowly working over to the other side while removing the backing, helps to have a helper. A few air bubbles remained after install that should go away in a few days, now my headlights are protected again

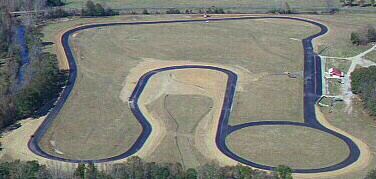
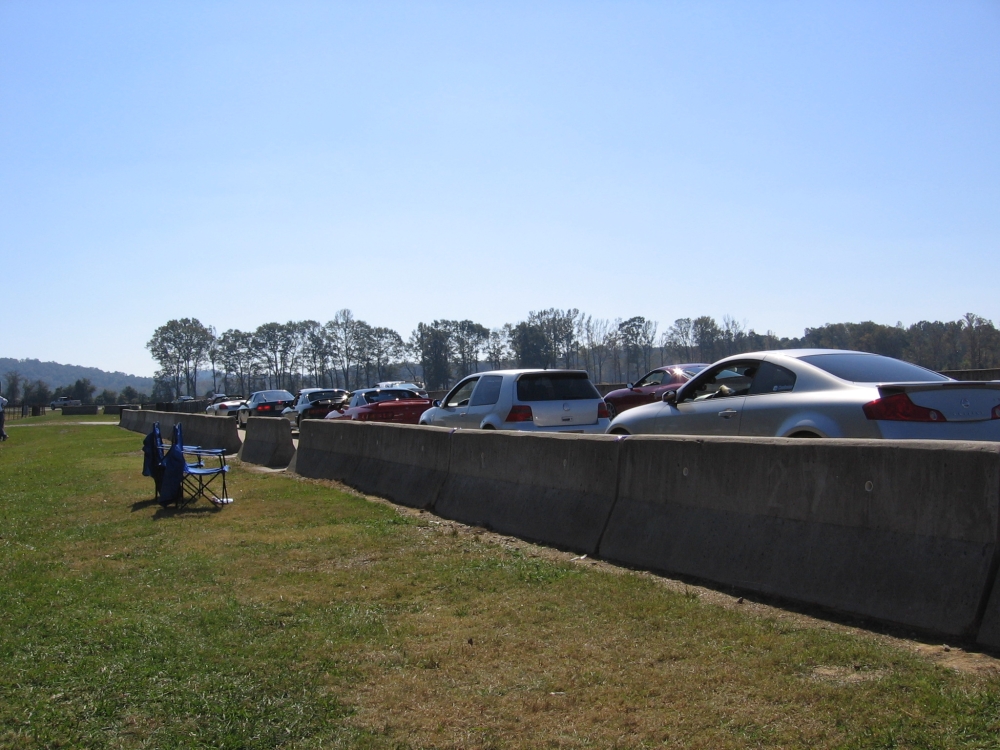
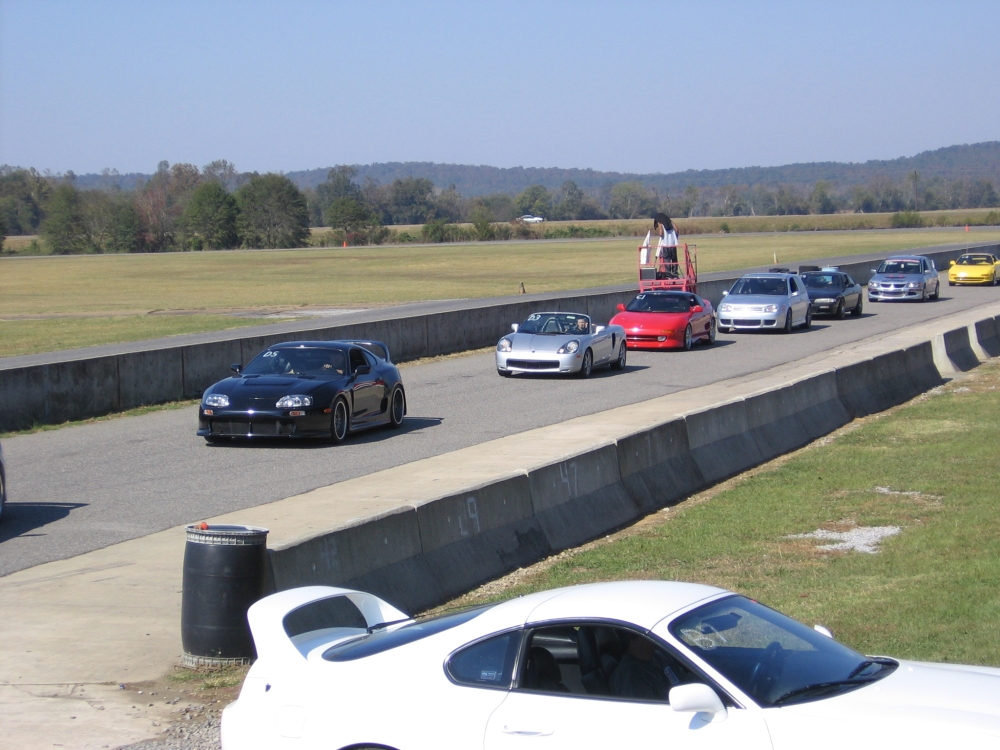
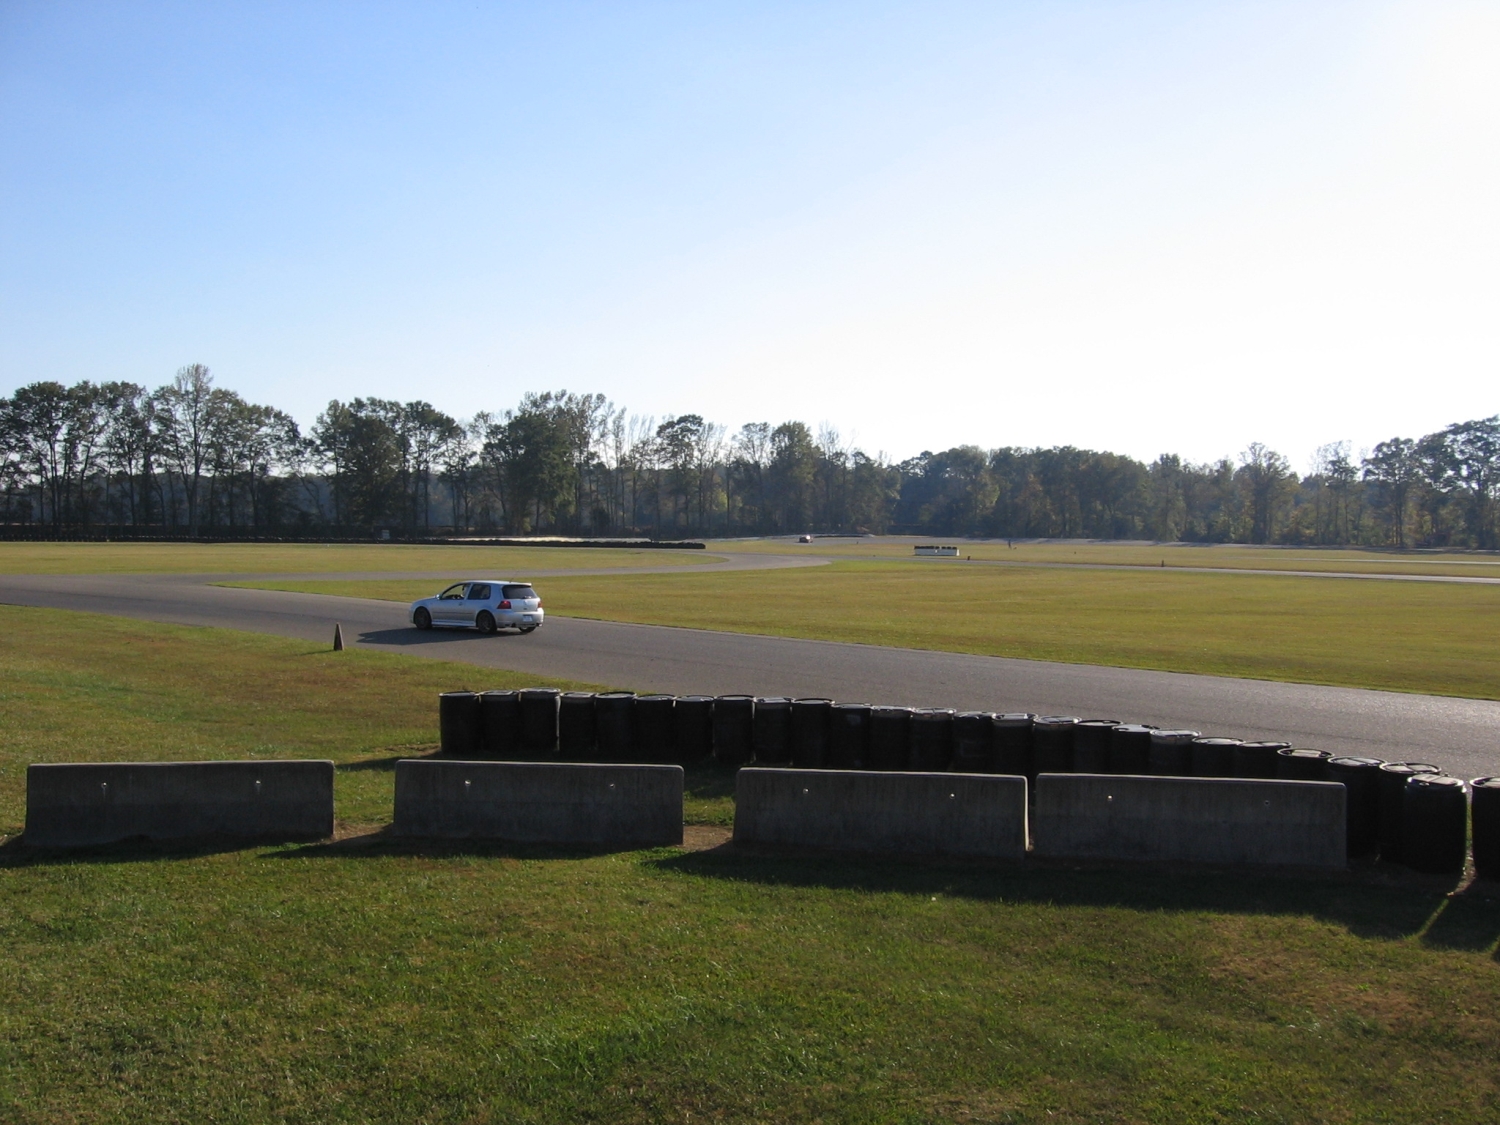
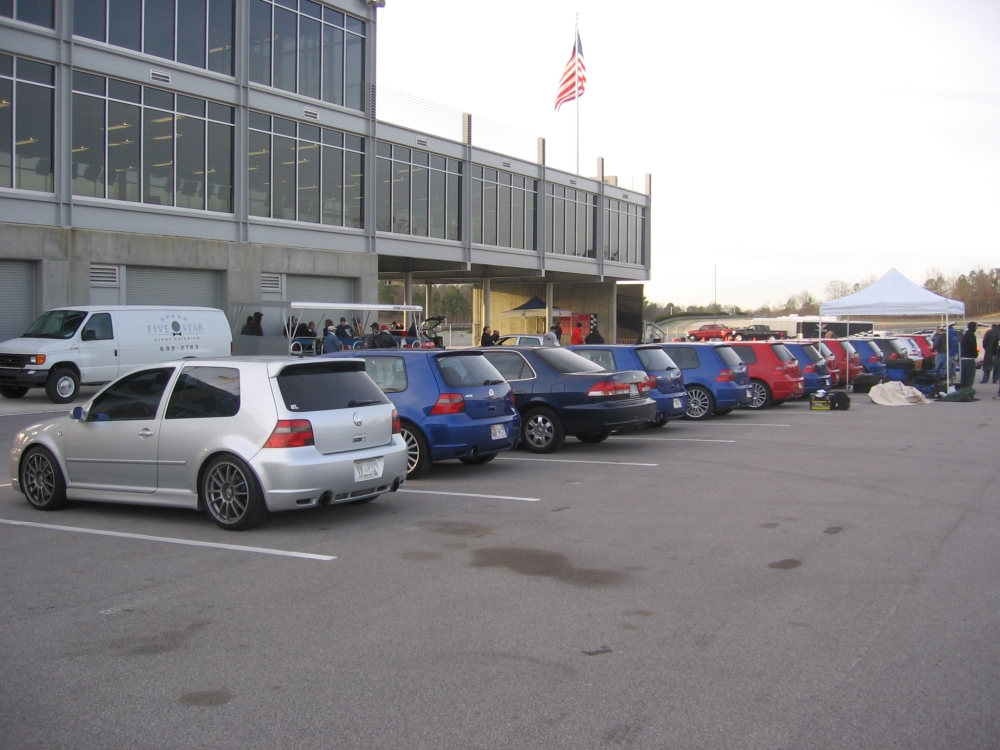
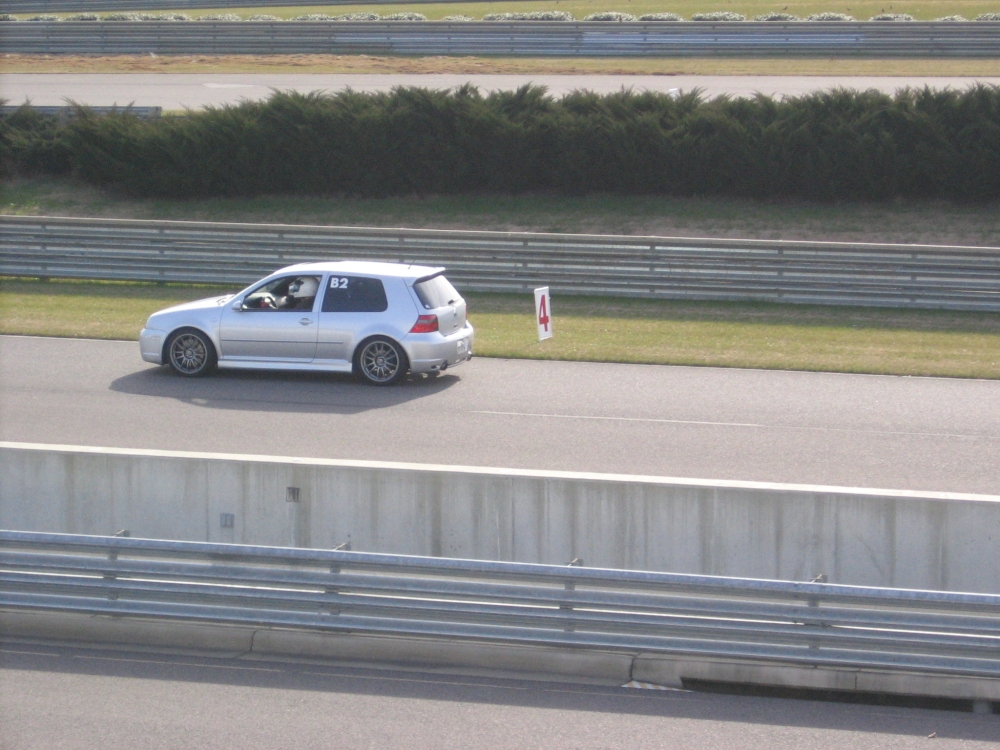
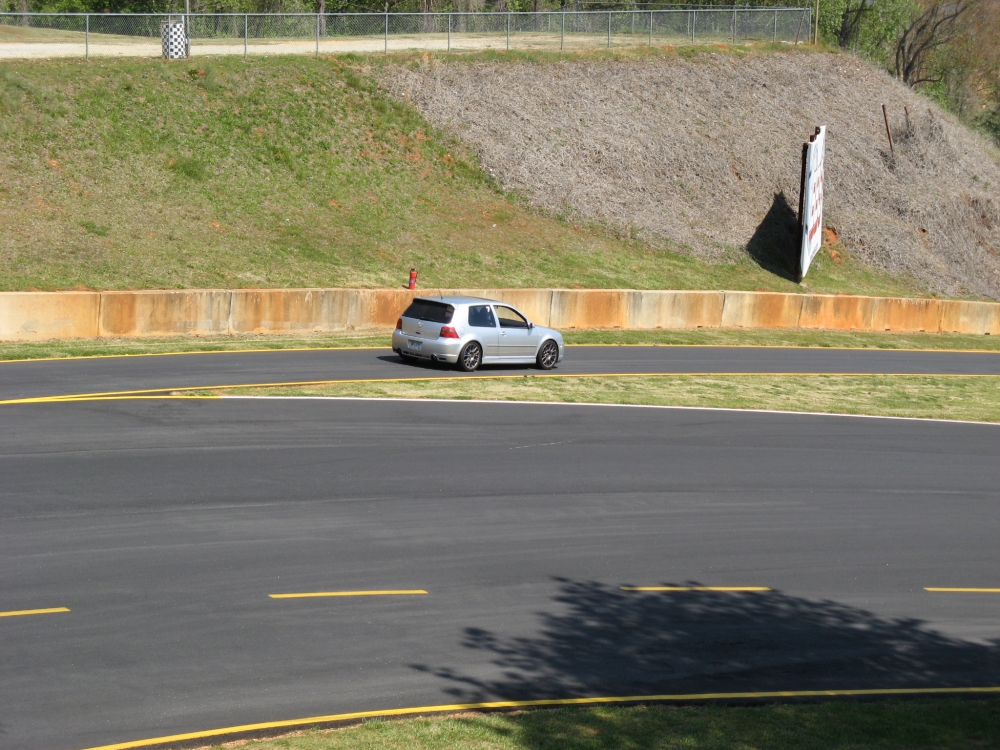
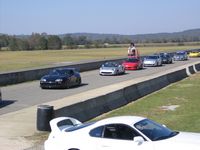
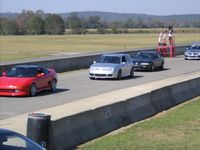
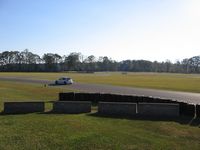
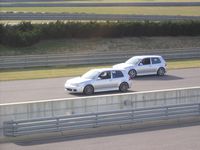
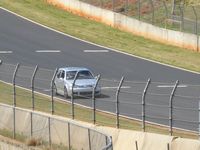
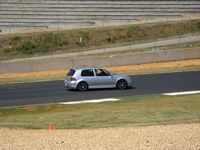
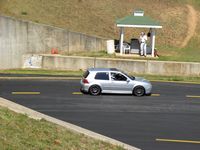
"Little Talladega" track day at Talladega Gran Prix Raceway in Talladega, Alabama on October 30, 2005. This "track" day was not a race but a HPDE (High Performance Driving Event) and the purpose of a HPDE is learning how to drive your car better. Little Talladega started life as a motorcycle track and as a result has lots of tight corners and is a little harder on brakes and tires. I was the only VW at this track day running with several other makes of cars, primarily Mustangs and Supras. This was my first HPDE event and was lots of fun and a HUGE learning experience, you really don't know how good this car is until you do one of these. Some video footage taken by my wife here:Video 1 and Video 2 and some pics (note the faded caliper paint due to heat, time for some G2 epoxy caliper paint


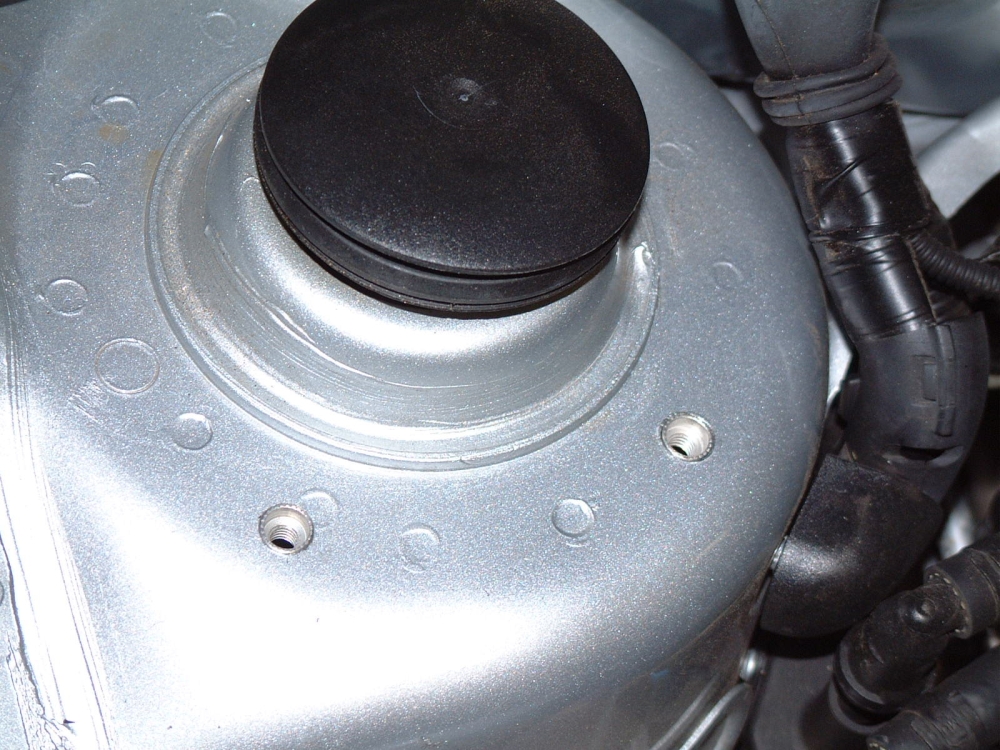
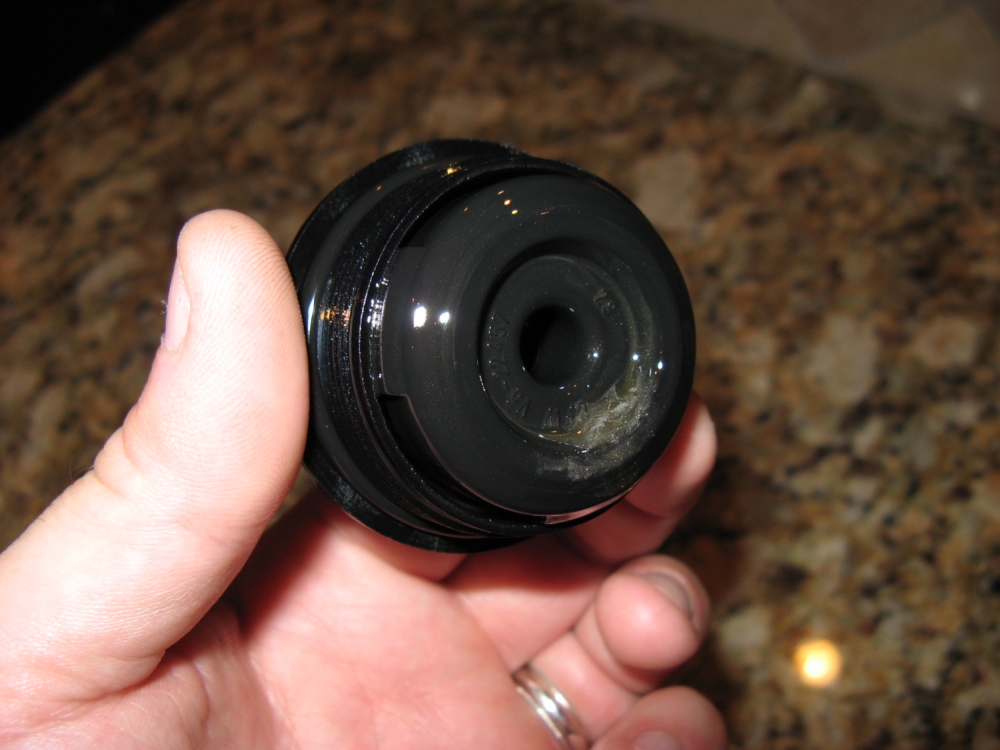
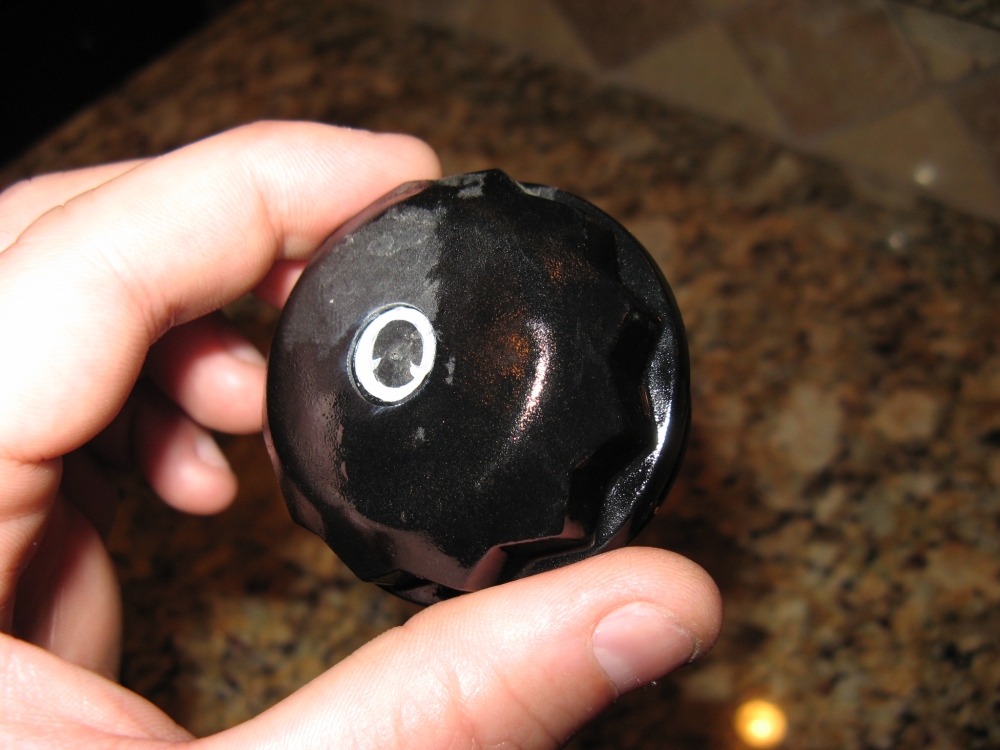
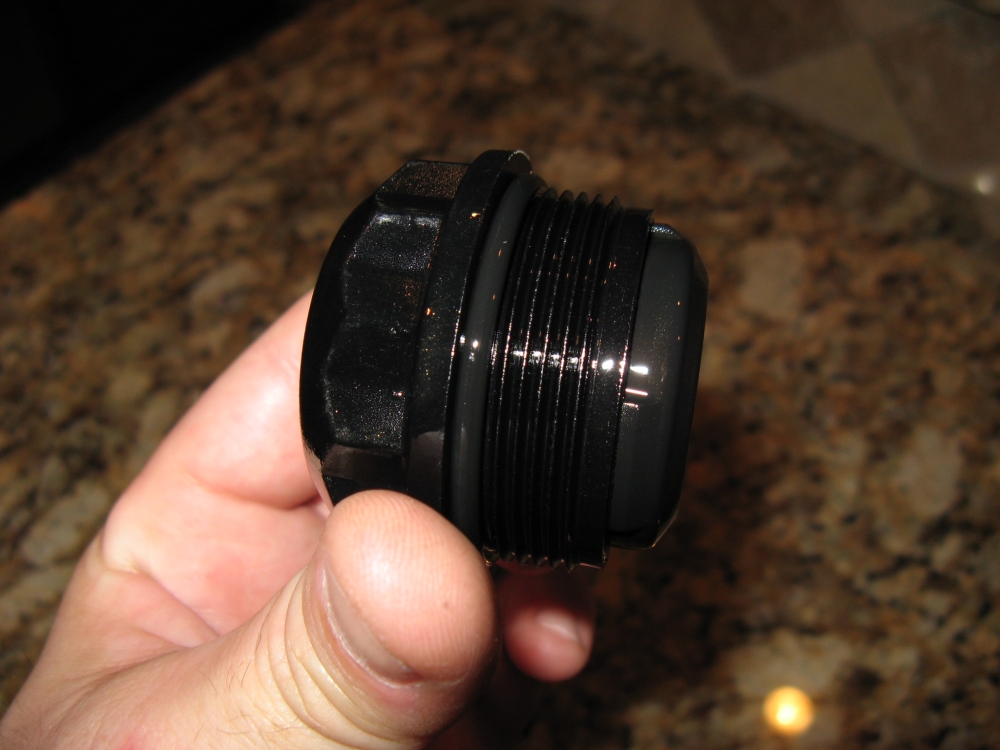
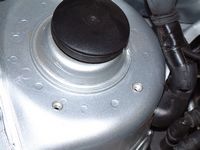
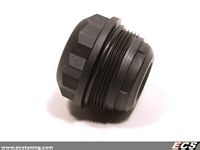
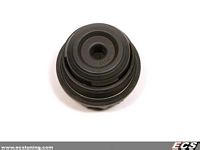
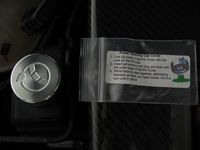
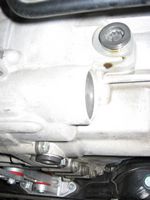
Fumoto Oil Drain Valve from DieselGeek - This valve allows you to quickly drain your oil without worrying about stripping the threads on the aluminum oil pan....DG has packaged this with the adpaters and hose for quick install, all you have to do is remove the oil drain bolt and replace with this assembly
New Tag:
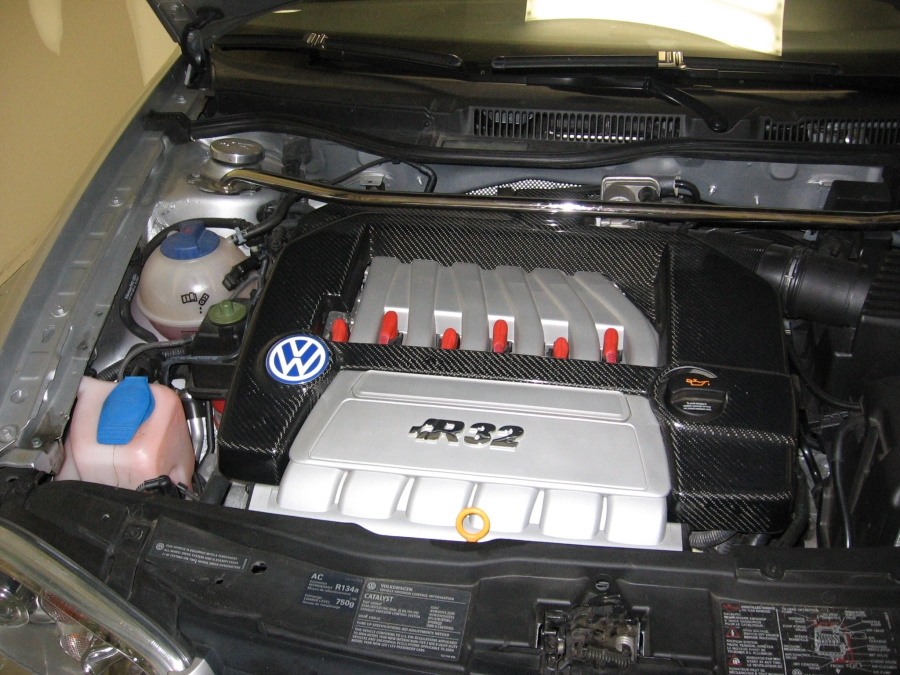
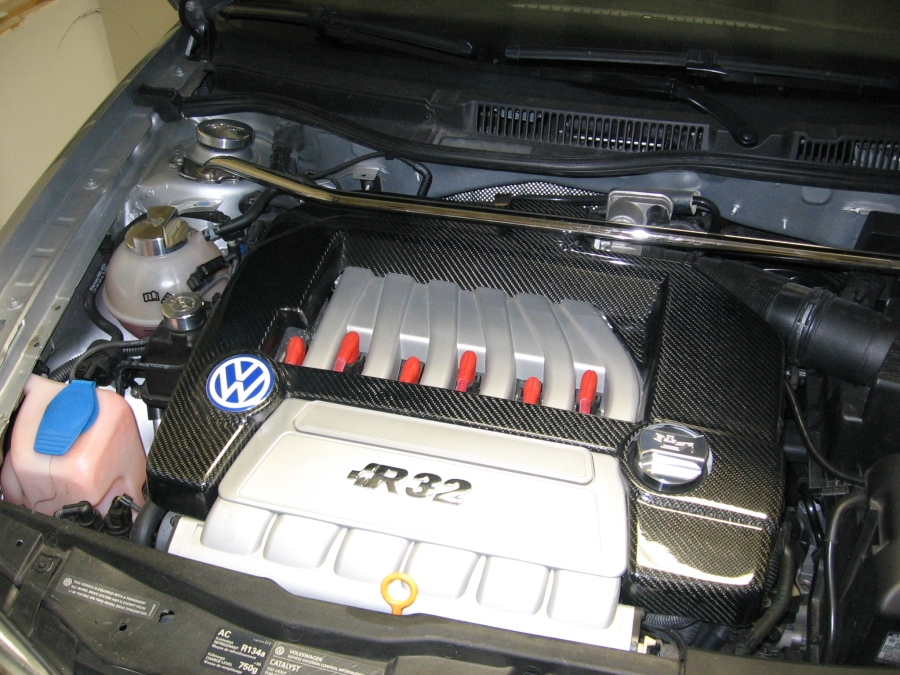
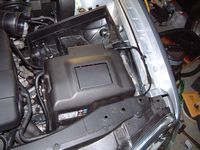
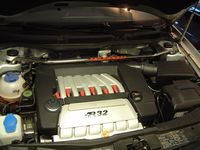
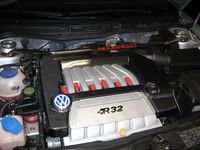
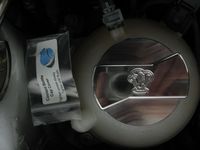
HPA Carbon Fiber engine cover installed, matches my intake. Metal clips have to be carefully removed from OEM cover and press fit to new cover, pliers help to make the clamp that is pressed onto the cover posts tighter and hold. Does not fit as well as the OEM but the one piece construction and improved appearance is worth the trade-off. I found a VW emblem to attach over the embossed emblem:
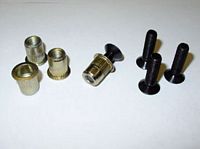
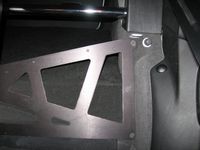
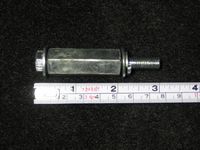
Tomas Sport Tuning rear upper stressbrace by Bruce Levin, purchased from TunerShop. Constructed of laser cut hard anodized aluminum for low weight: 5.6lbs. Comes with nutserts and hex/tapered head bolts and a nutsert tool, installation instructions HERE. I didn't have the success with this nutsert tool that I have had in the past, so I dug out my old DieselGeek nutsert tool and improvised. The large sleeve is held stationary while the bolt is tightened to compress the nutsert, worked much better. I know Bruce and TomasSport are working to make this kit as good as it can get and may be supplying a different nutsert tool by the time your read this.
Pics L to R: Brace placement (TomasSportTuning), Hardware (TomasSportTuning), finished install rear, finished install front, and my improvised nutsert tool (bolt, flat washer, DG sleeve, flat washer, lock washer):

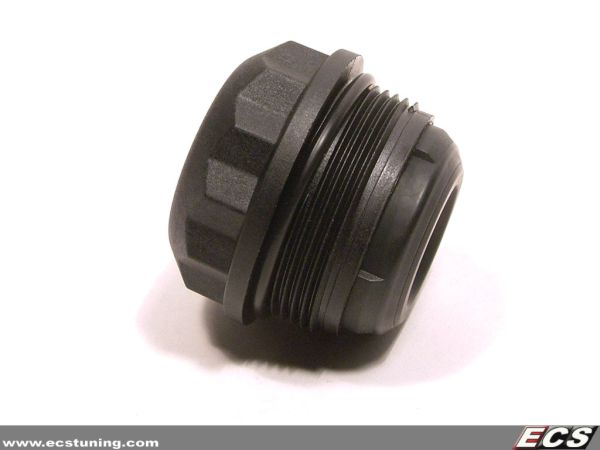
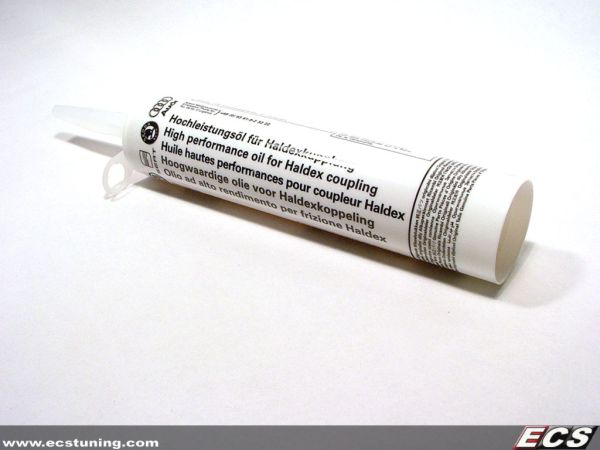
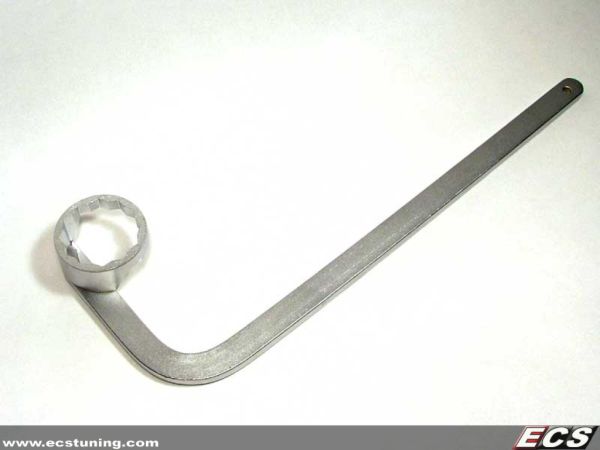
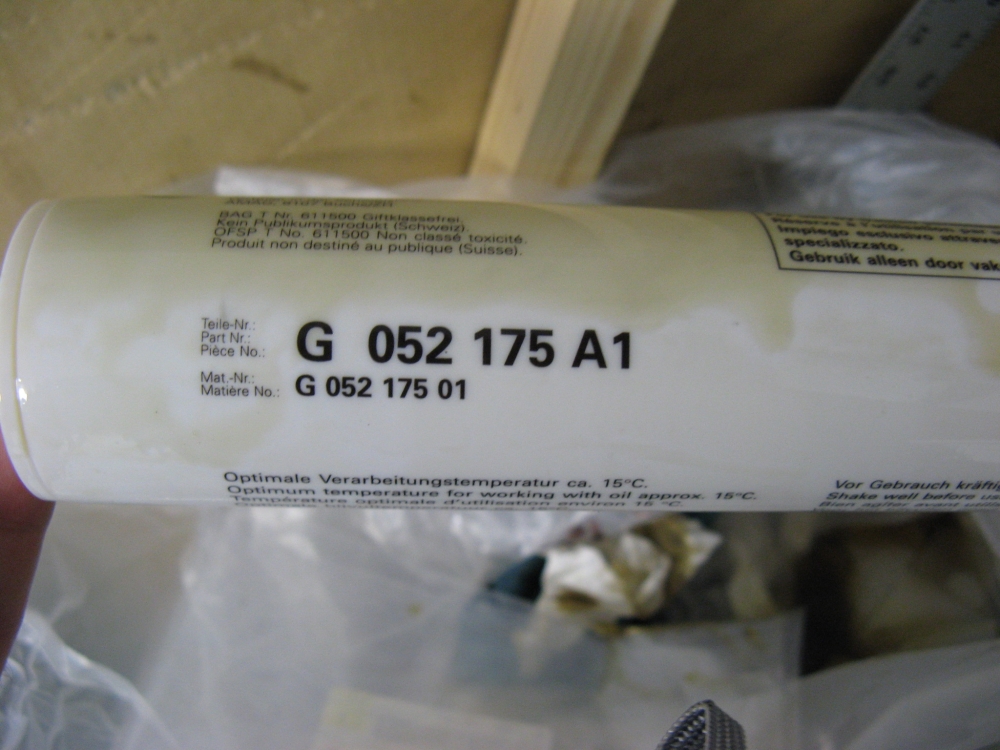
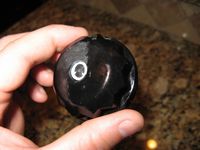
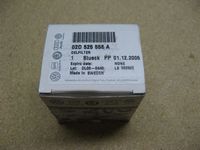
Haldex tool, filter and oil purchased from ECS Tuning for fluid and filter change at 21k miles (Haldex oil cartridge- Part # G 052 175 A1, Haldex filter- Part # 02D 525 558 A, and Haldex filter tool- Part # T10066). The process was quicker than a regular oil change. I screwed the end of the oil tube into the drain hole after draining the oil, bent the tube 90 degrees, and used the long end of the Haldex tool to push the plunger and the oil out of the tube. VW Driver DIY is HERE and the Audi TT DIY (applicable) is HERE. Haldex oil analysis results are HERE.


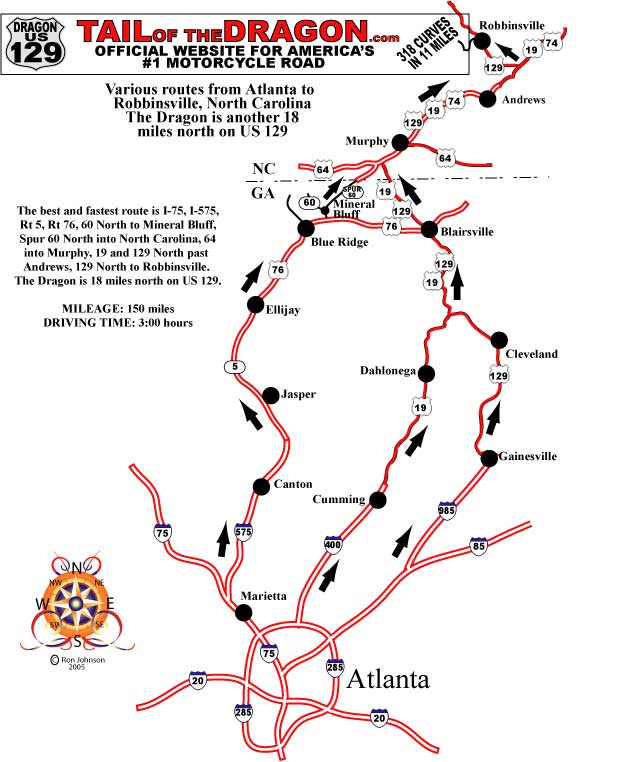
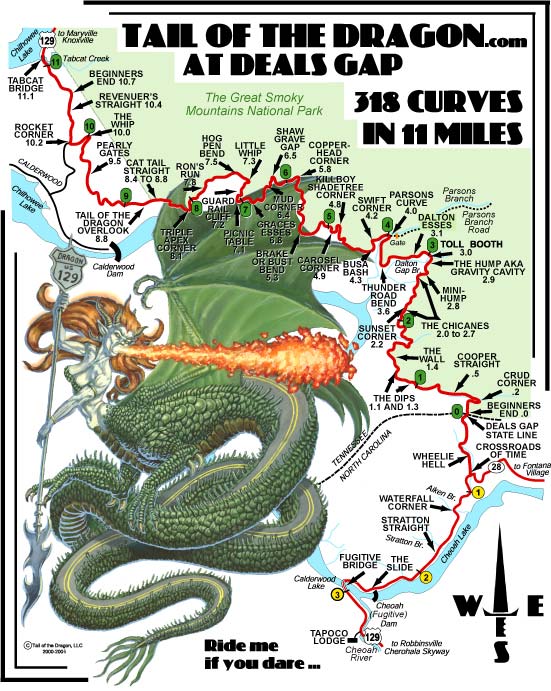
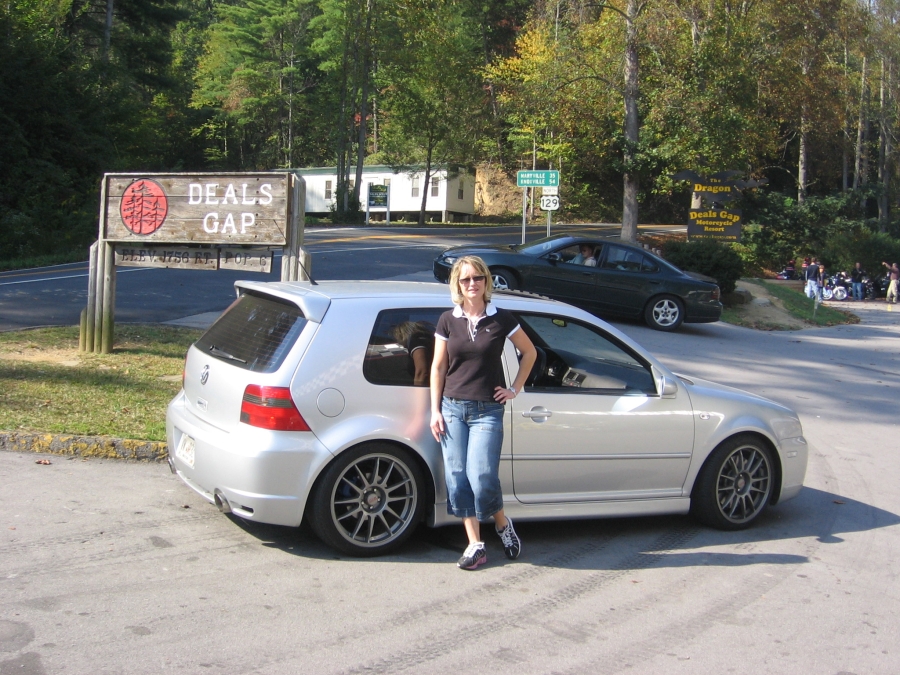
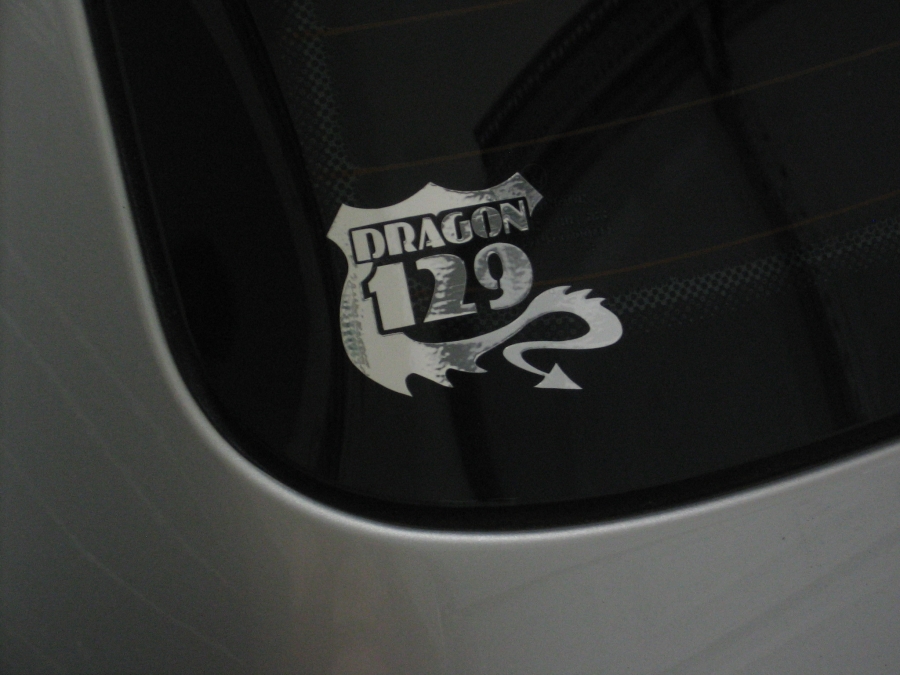
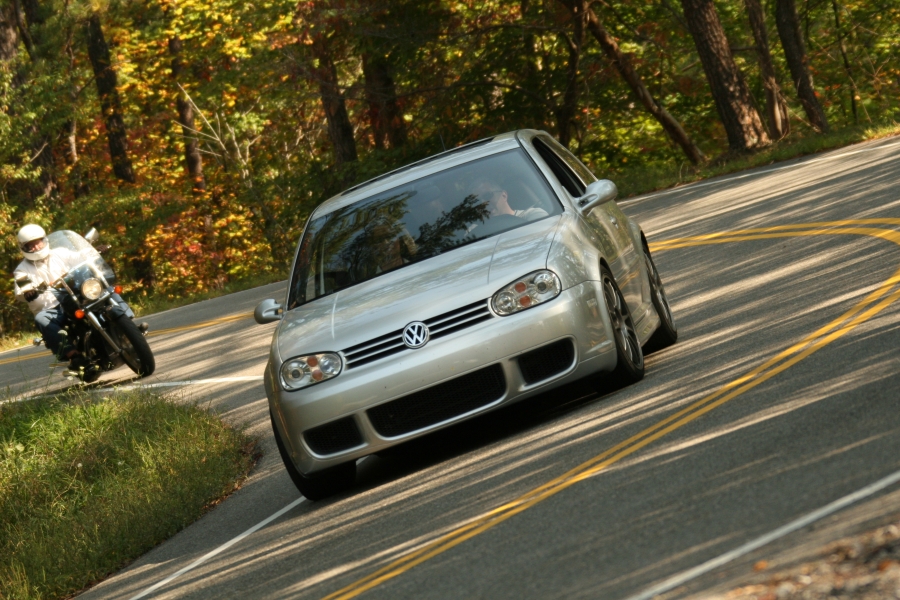
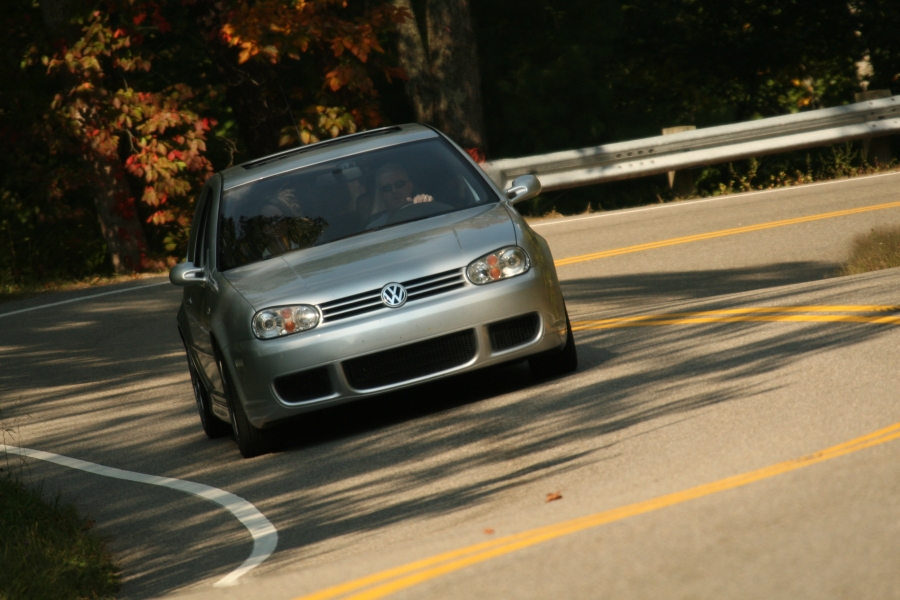
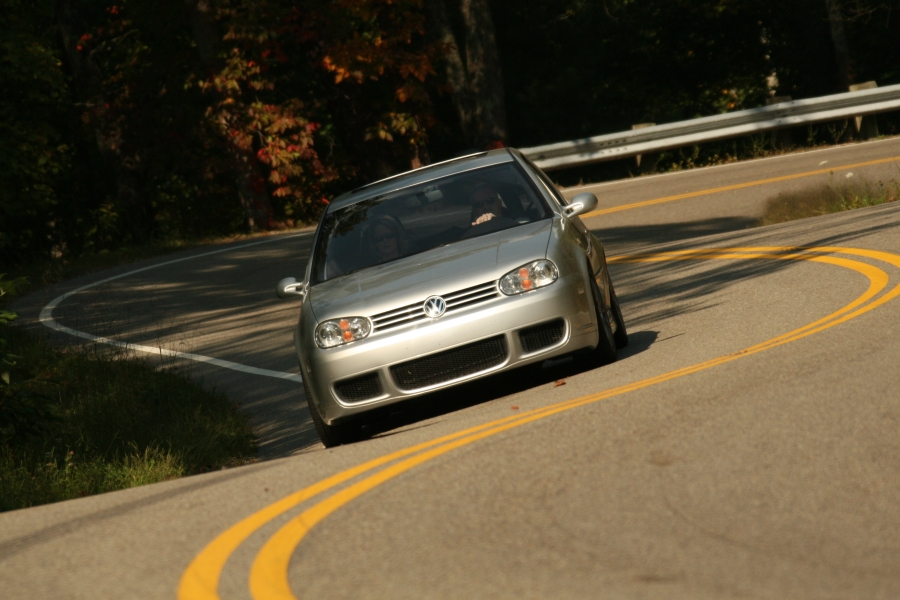
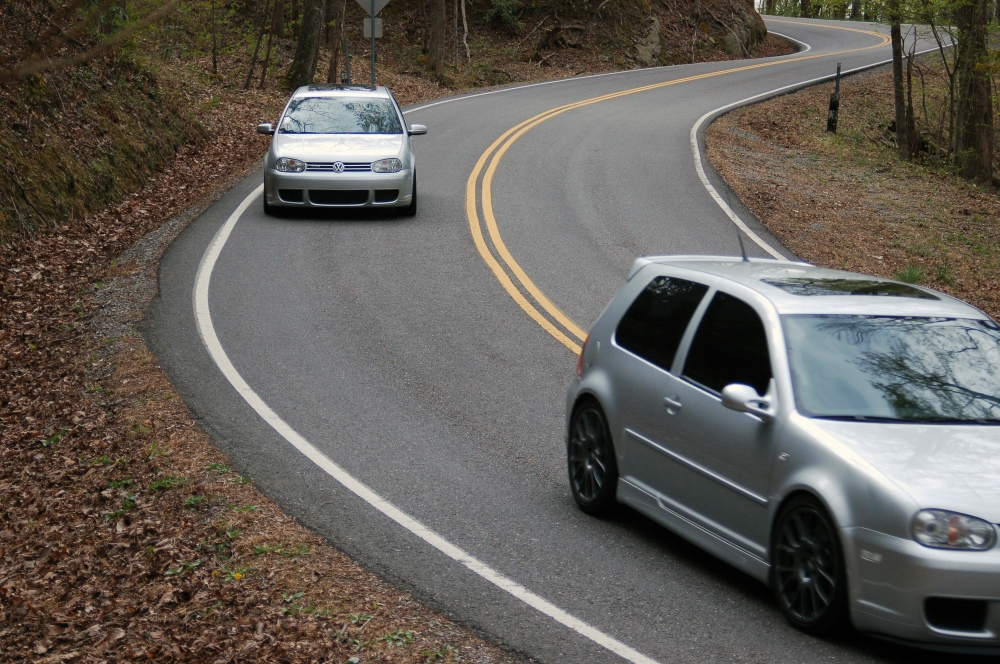
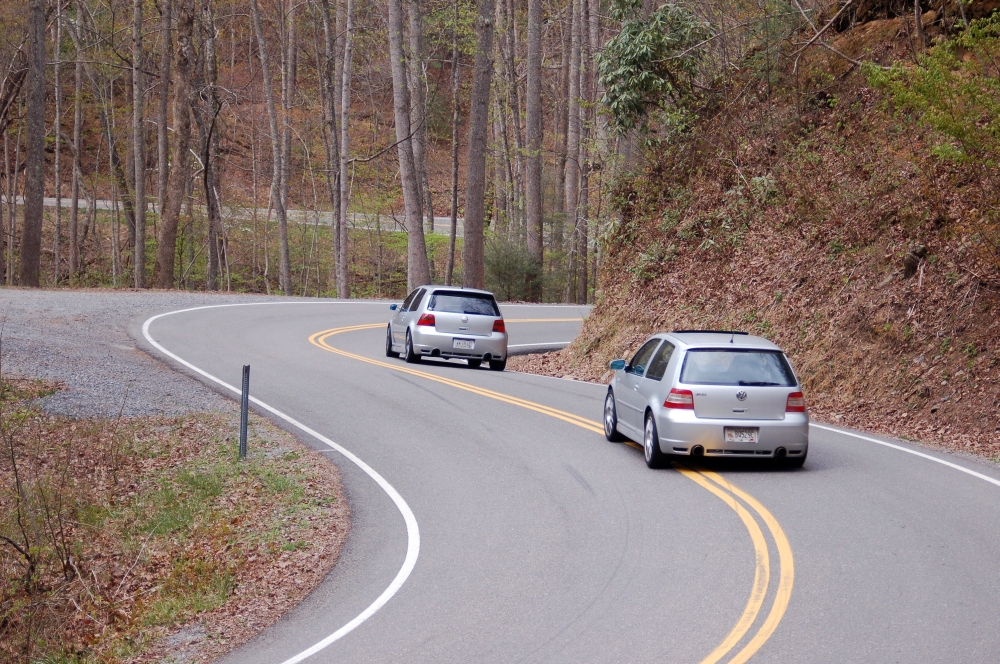
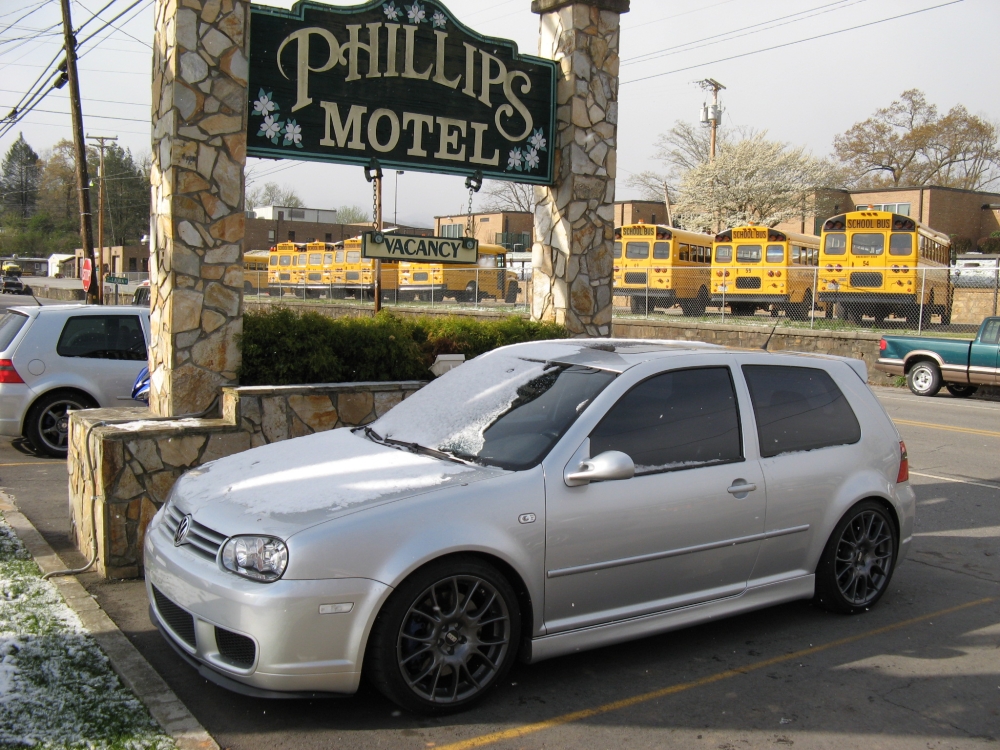
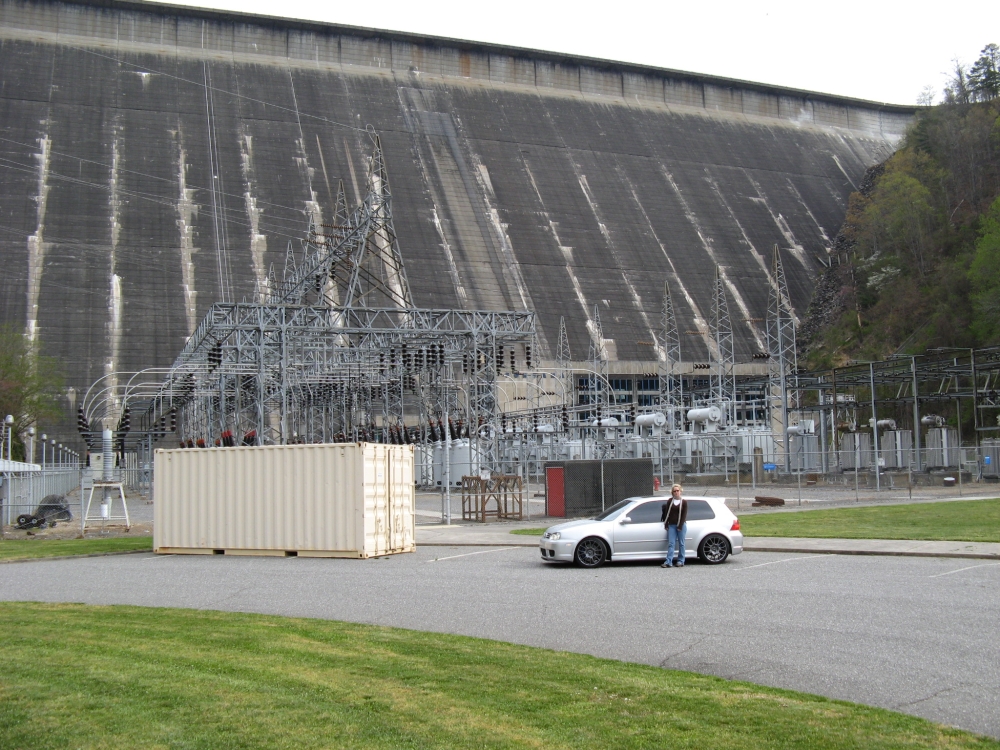
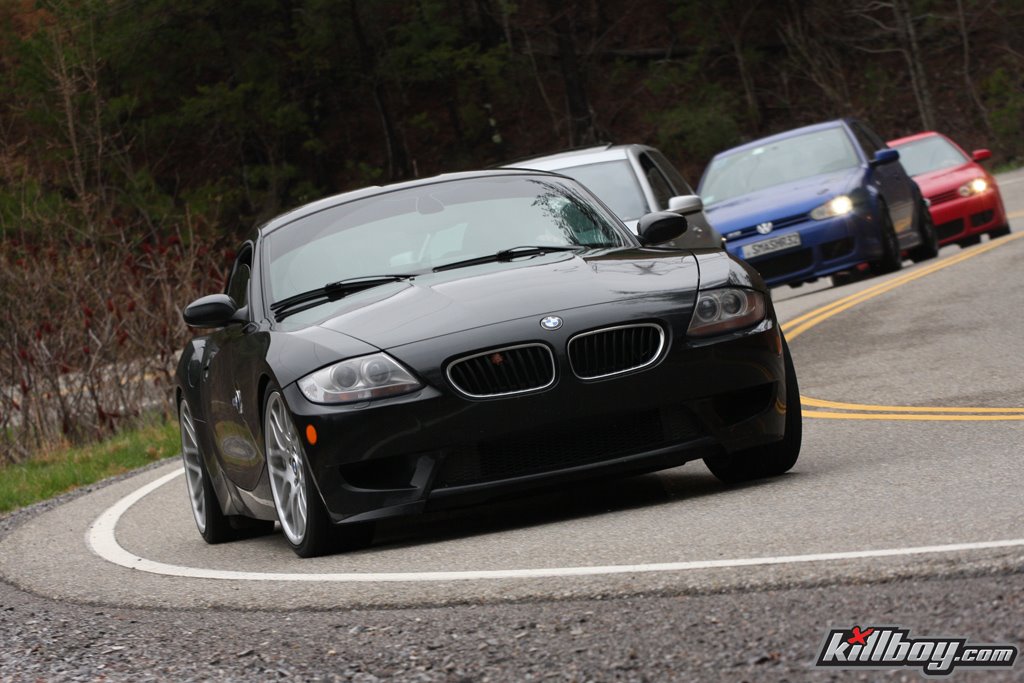
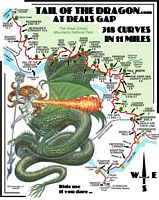
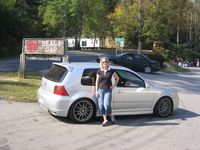
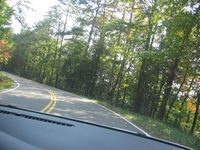
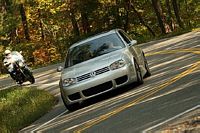
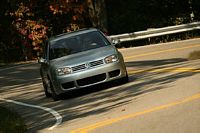
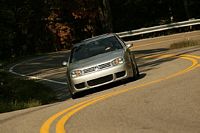
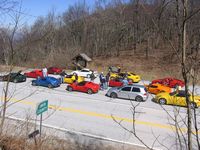
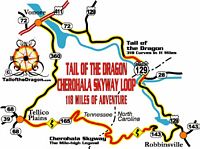
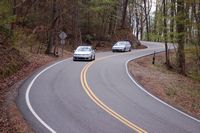
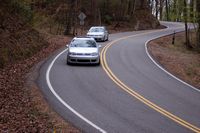
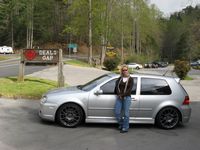
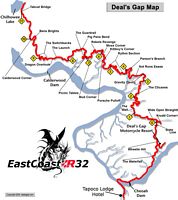
Visited Tail of the Dragon on a day off, aka HWY 129 located in NC and TN. We made the trip on a weekday so it was not crowded, weather was perfect and the drive was awesome. Only about 3 hours from ATL, lots of other sightseeing that can be done as well in the same area.


New Mirror Mod- "Objects In Mirror Appear to Be Losing"
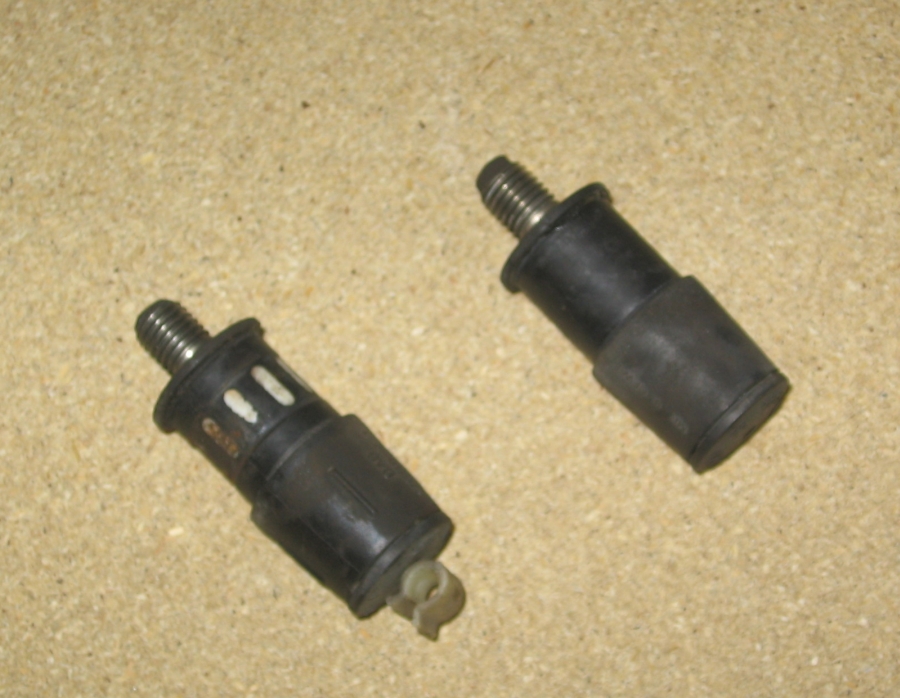
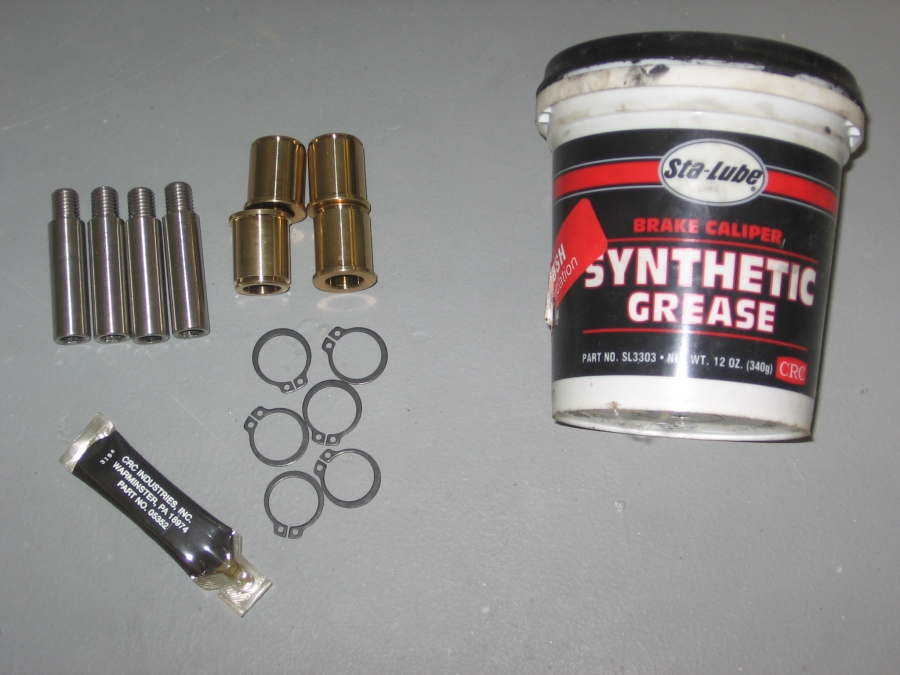
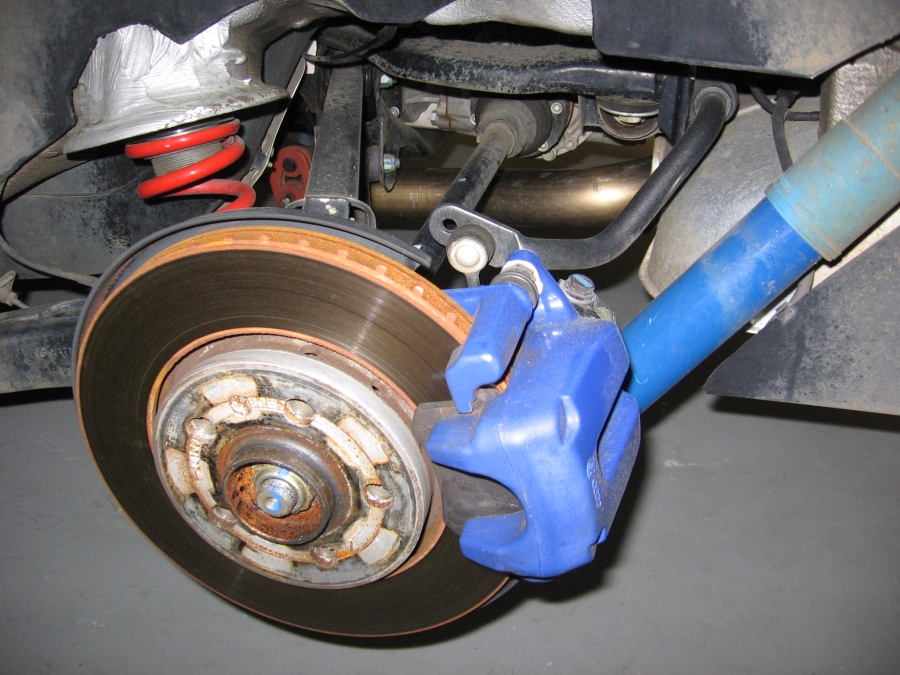
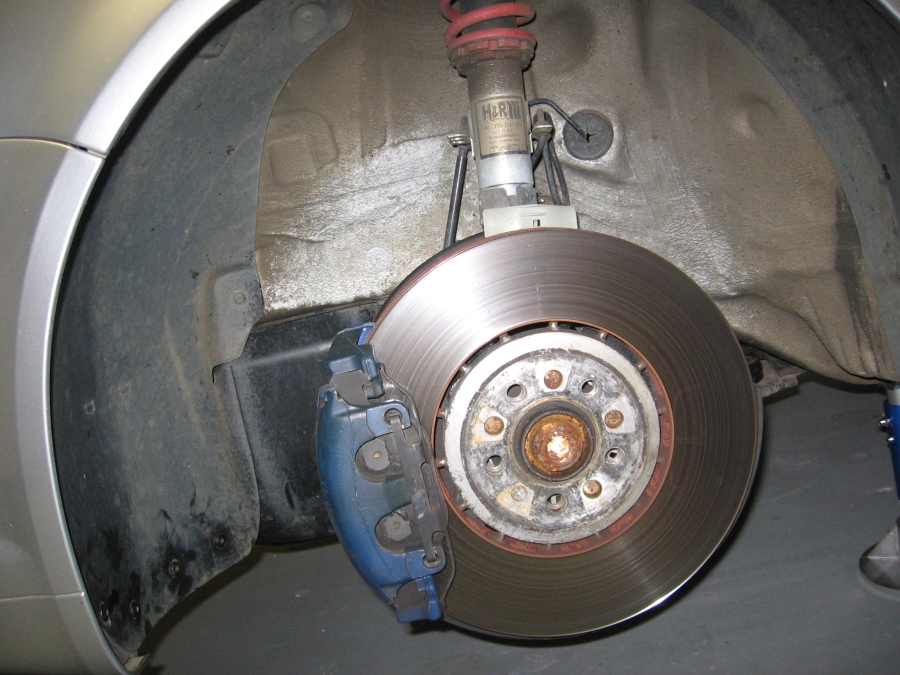
Tyrolsport Brake Stiffening Kit installed- This kit replaces the factory rubber/plastic caliper bushings with sturdier bronze bushings. This should make the pads wear even (orginal pads were not evenly worn) and provide better brake feeling.
Easy to install (installation instructions HERE). TyrolSport technical information on these HERE.
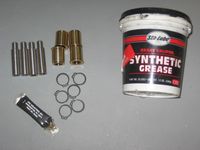
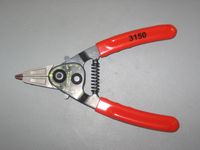
PICs L to R: OEM Rubber/Plastic Bushings, TyrolSport Kit and Synthetic Grease from NAPA, Snap-ring Pliers from NAPA:
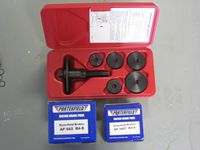
Porterfield R4-S Brakes purchased from PAP Parts and installed. Lisle Caliper Piston Tool (P/N LIS25000) puchased from ToolTopia for rear caliper piston reset. Brakes and Clutch bled using a Black Label Motive Pressure Bleeder sourced from Pelican Parts, and ATE Typ 200 brake fluid.
Anthony on VWVortex assembled excellent DIY guides for both of these processes:
R32 Brake Pad Installation and R32 Brake and Clutch Pressure Bleeding.
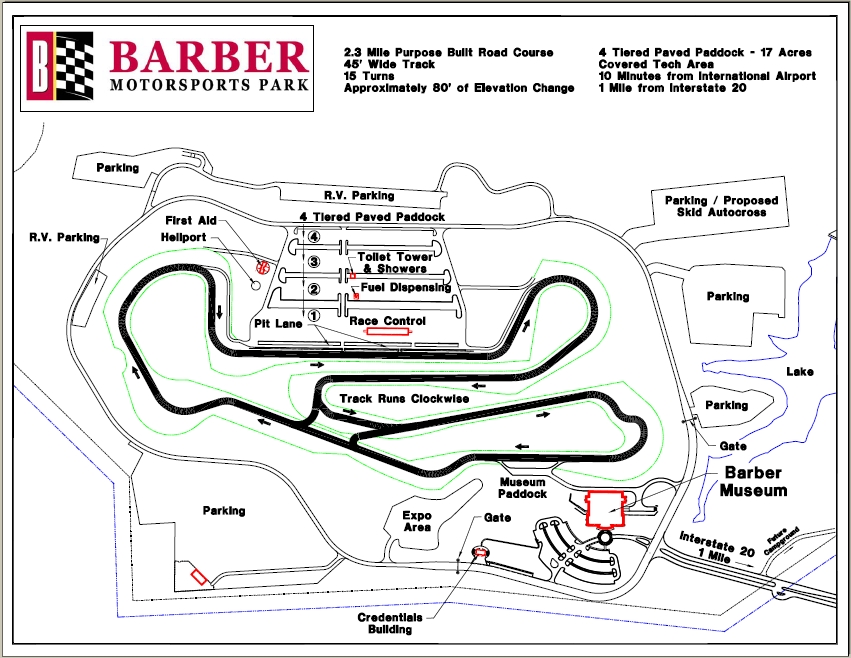
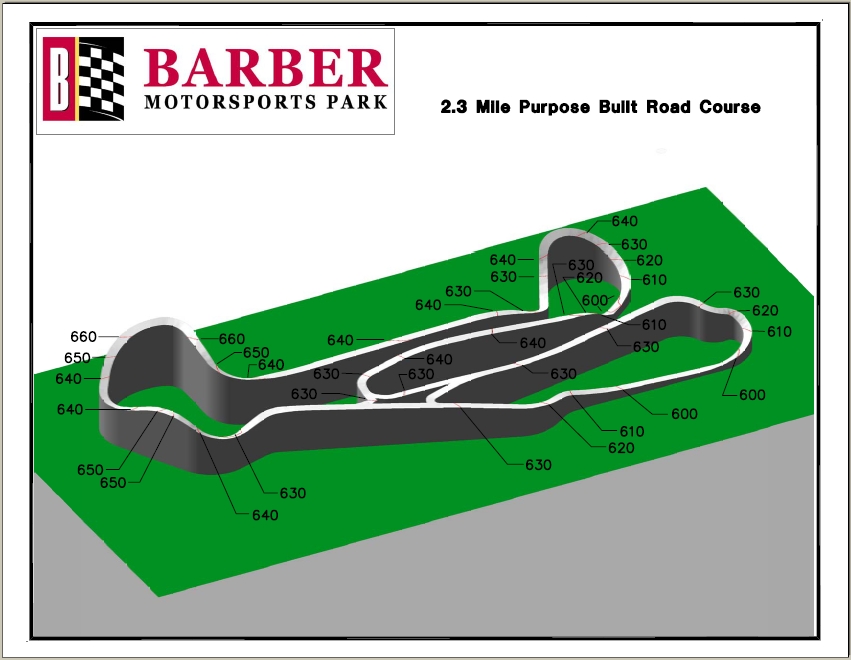
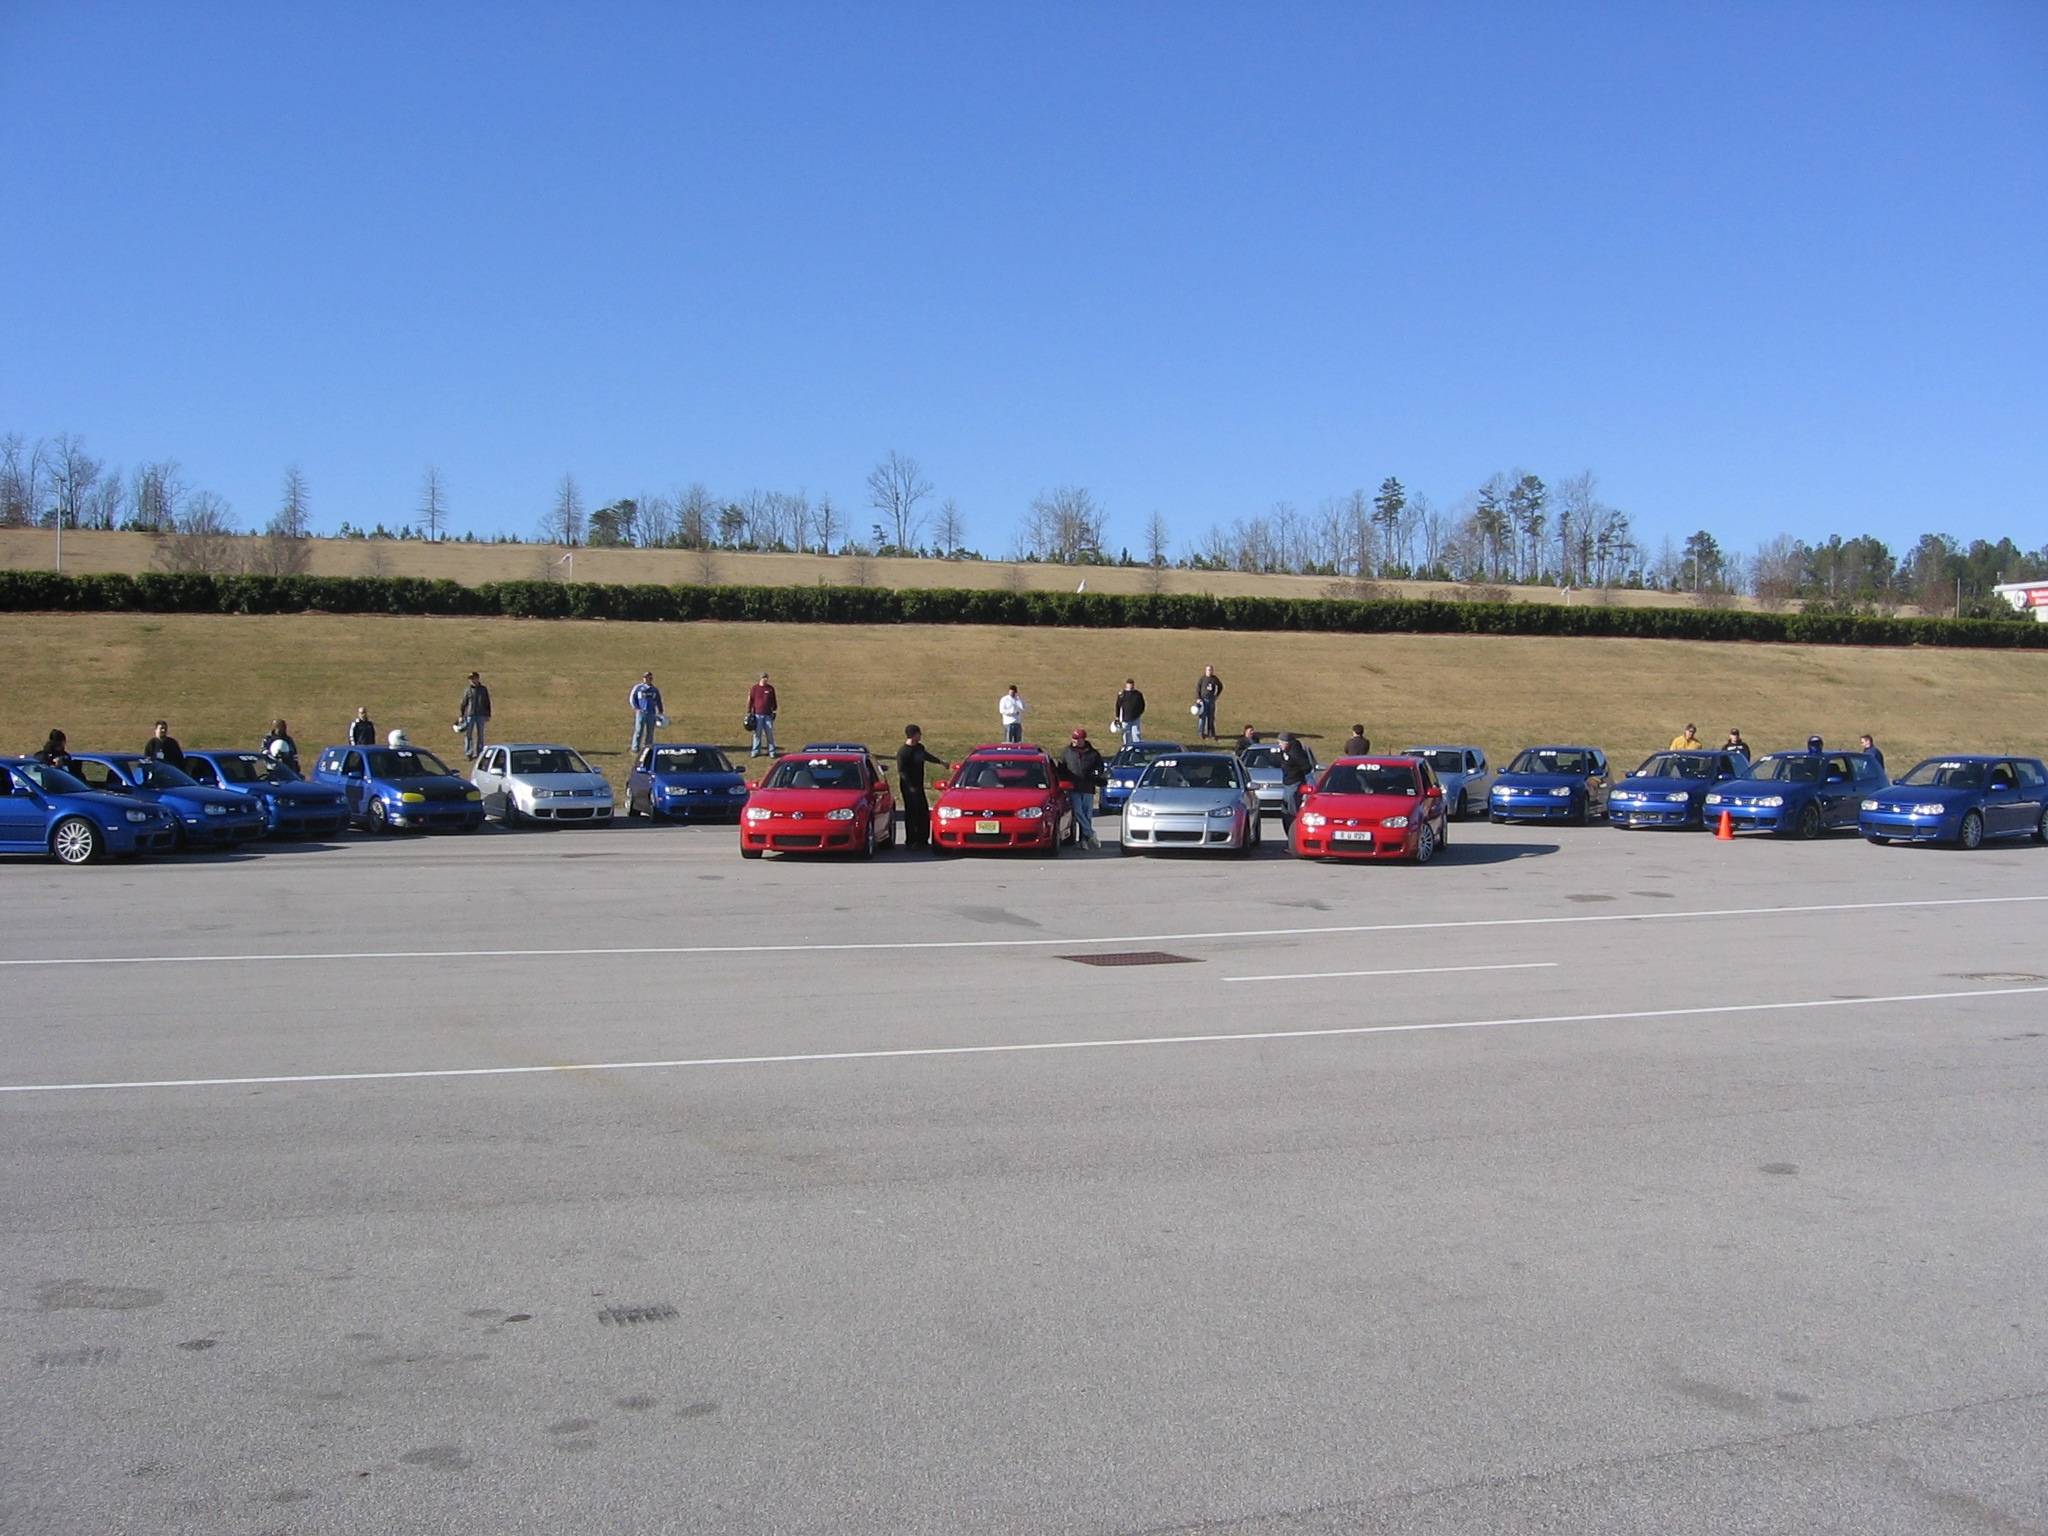
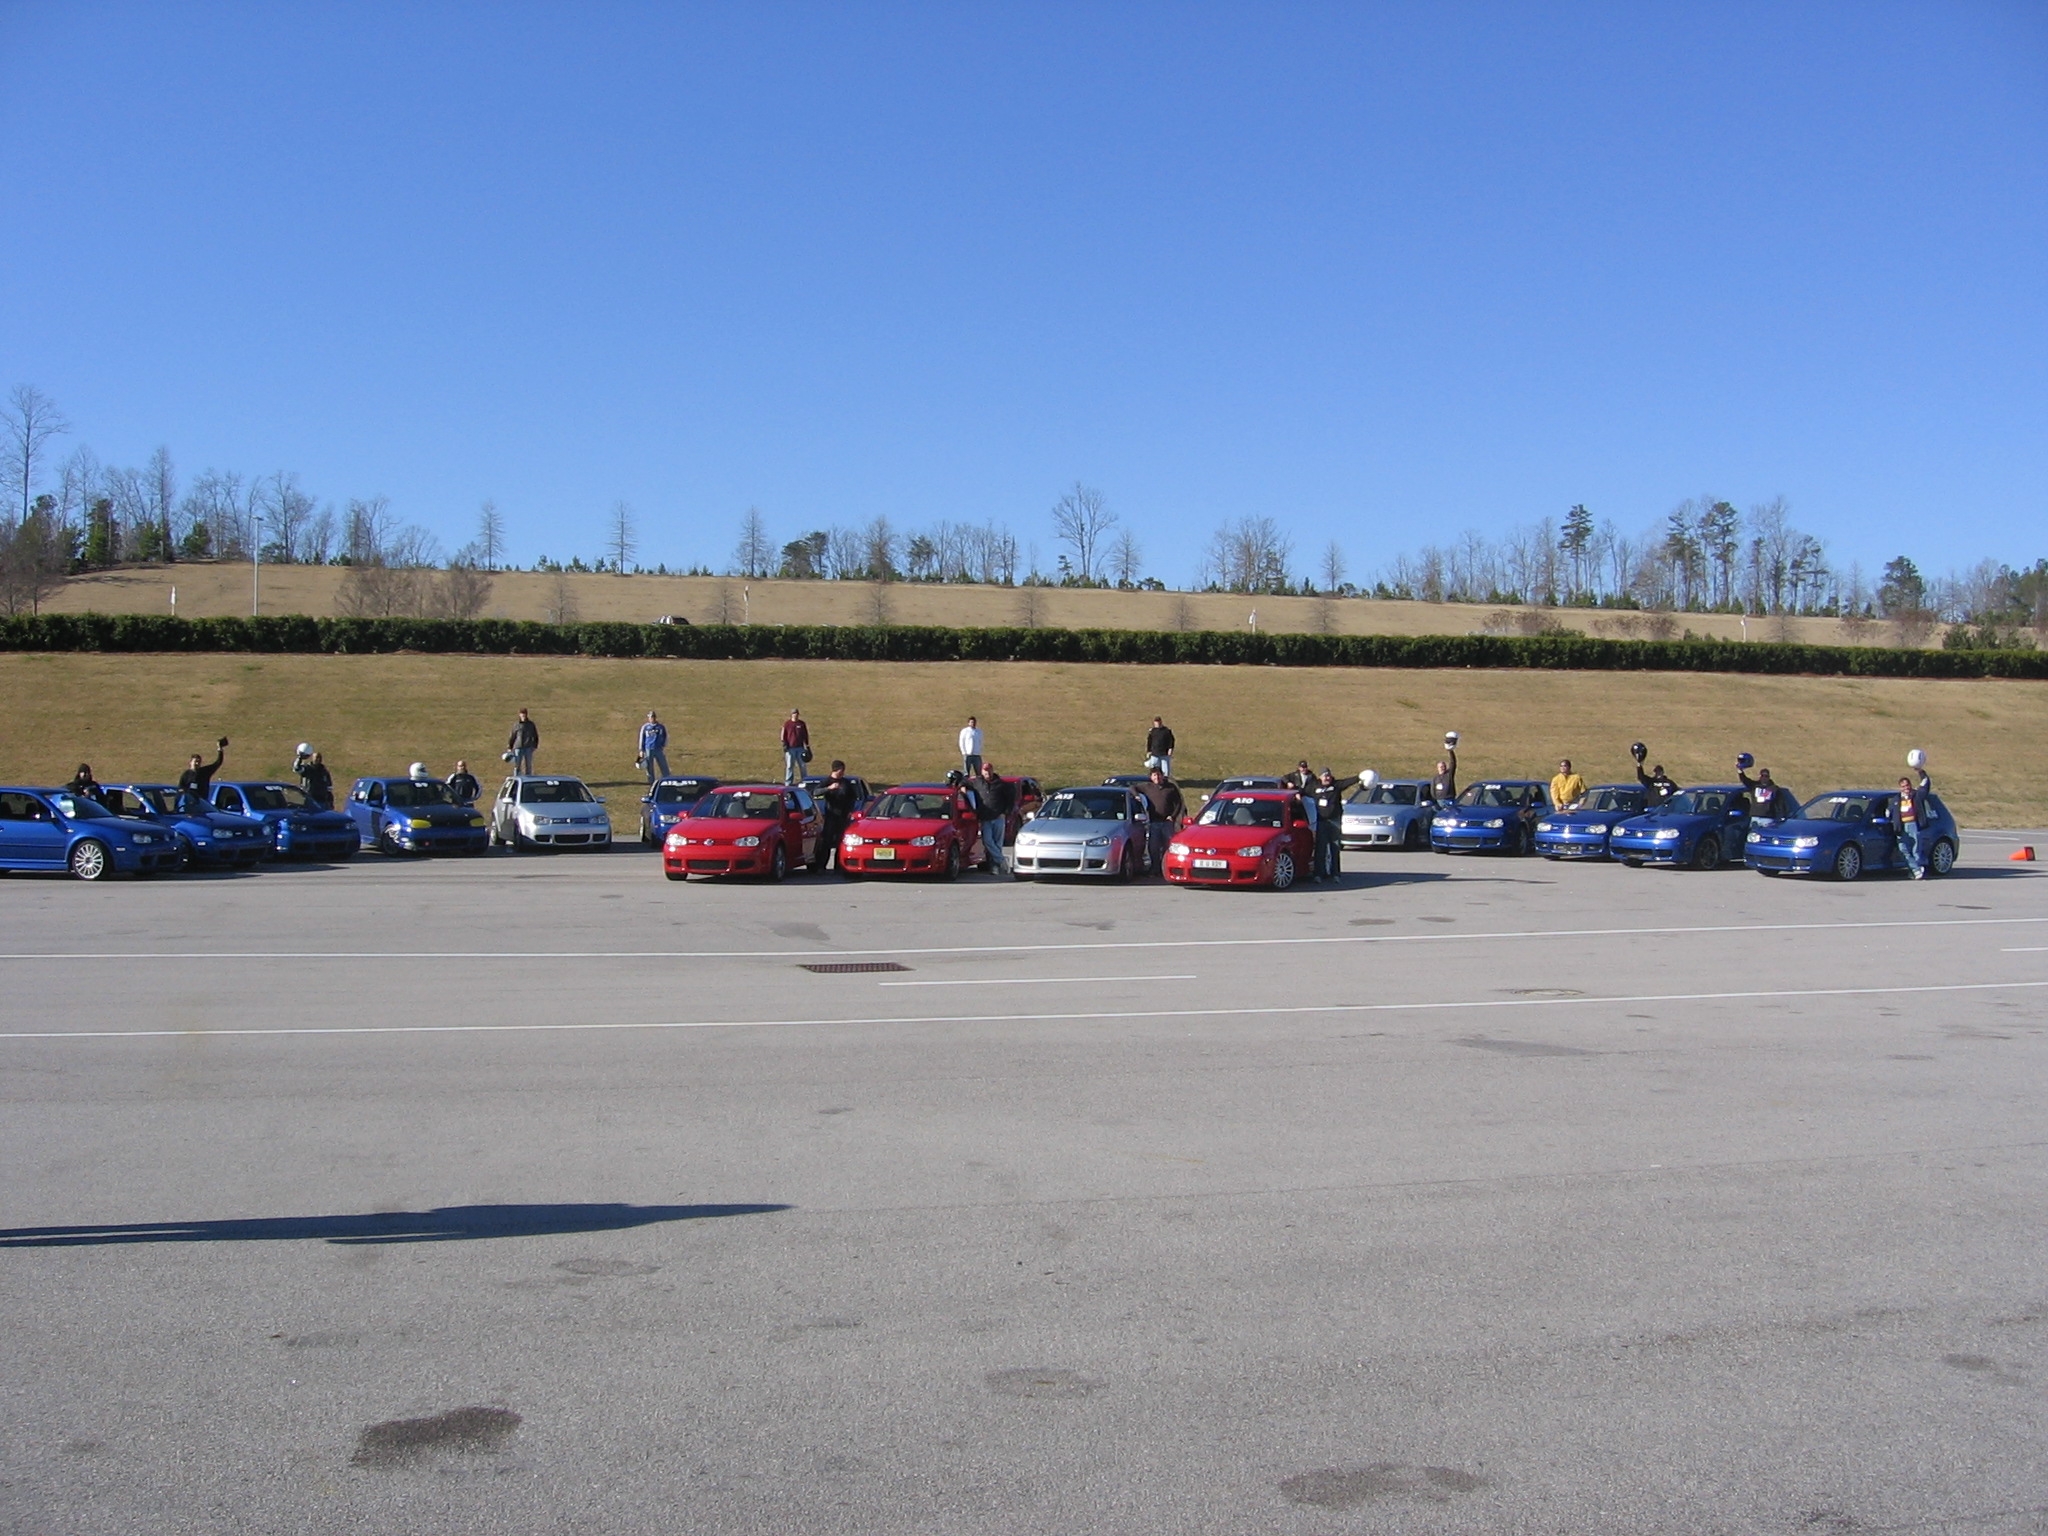
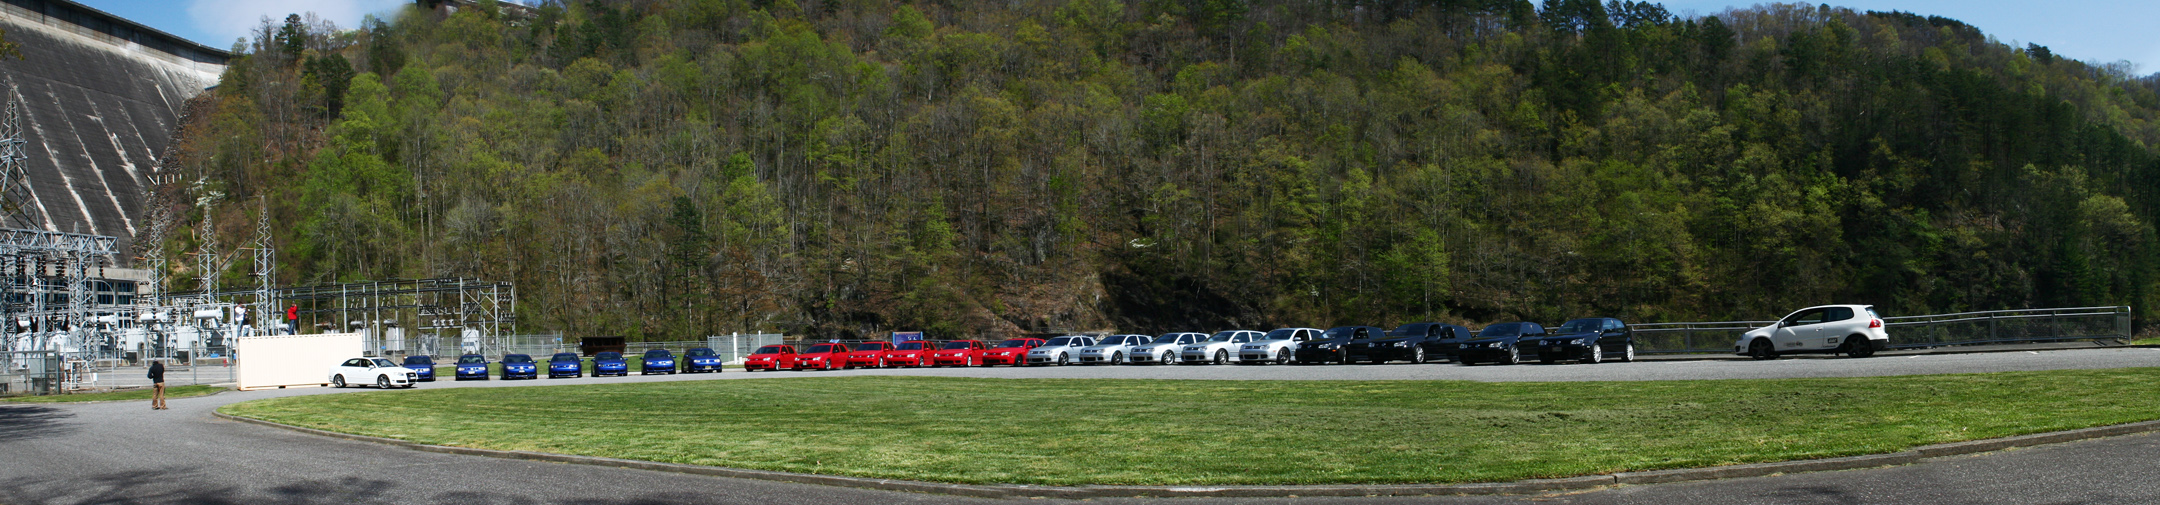
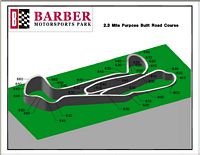
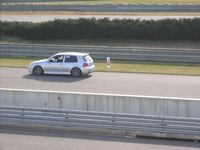
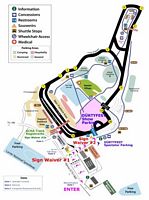
32Project:R32 Track Day at Barber Motorsports Park in Birmingham, Alabama on February 5th, 2007 - organized and sponsored by VW Driver Magazine. Event information packet HERE. Promotional event for 32 R32 owners and preview of the MKV R32. BIG THANKS to Event Coordinator -Tamzen Grimes: Volkswagen Driver Magazine, VWoA Representative Andres Valbuena, Chief Instructor: Mark Kingsbury, and all of the other support staff, instructors, and sponsors that made this event so great. This "track" day was not a race but a HPDE (High Performance Driving Event) and the pupose of a HPDE is learning how to drive your car better. Barber is a very technical track with lots of elevation changes, challenging and rewarding. The day started off with a Follow-The-Leader session where we all followed instructors around the course to see the line to drive, the next run was an actual run with an instructor in the car who critiqued our driving ability and offered suggestions, and HERE is a video of a driver following me. We also got together for "several" group photos until we finally had one good enough that we could get back to business


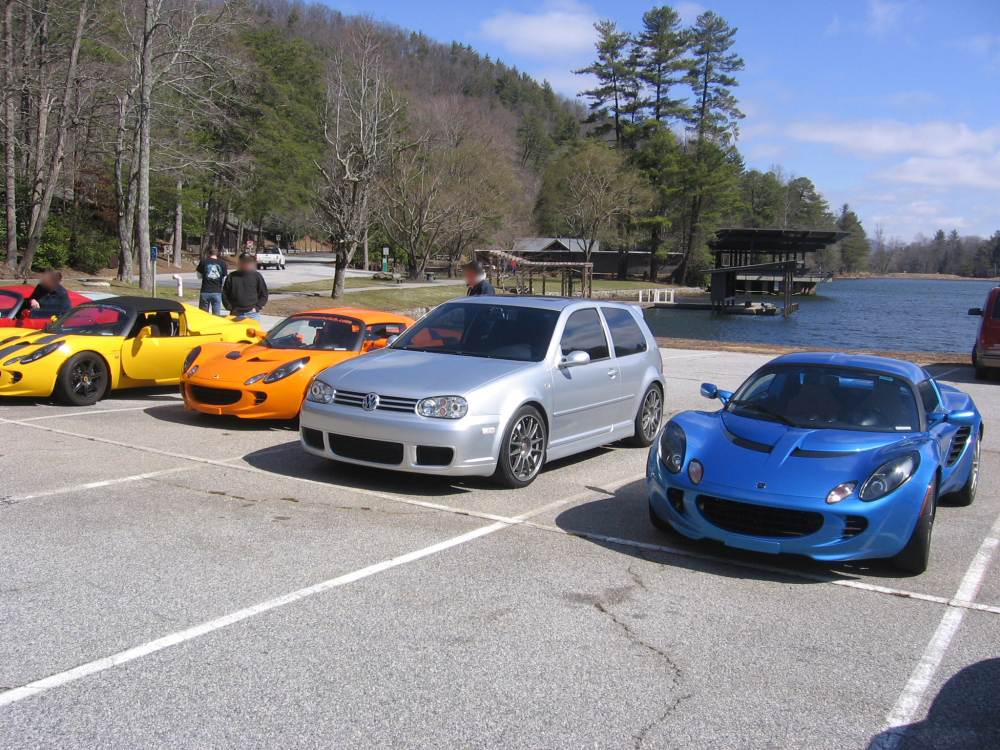
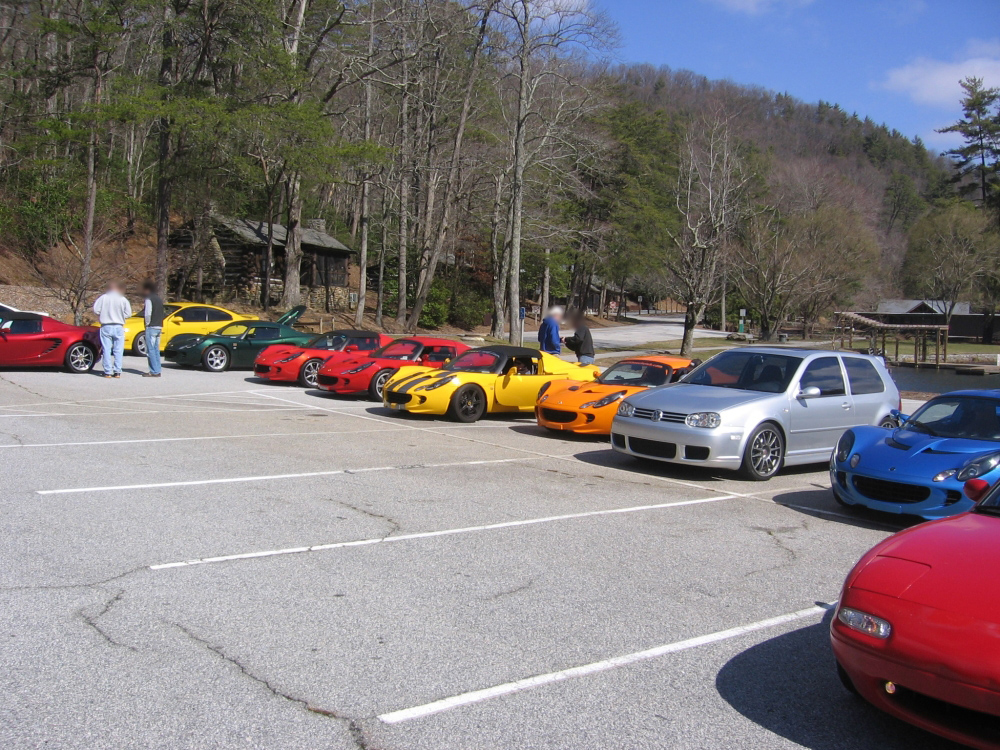
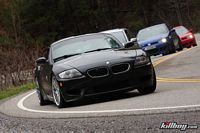
Mountain drive with Lotus group in North GA mountains in March 2007 - organized and sponsored by LLSE local chapter. The Lotus was out of commission because UPS had lost my ECU being returned from PES with a performance chip. So the R32 was driven in place of the Lotus, and actually hung in there quite well with my Lotus friends. Anyone who thinks an R32 is small should park one next to a Lotus
North Georgia mountain drive route by Frank (with notes) HERE or by Phil on Google Maps HERE:
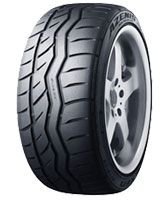
BBS CK wheels (18" x 8") and Falken Azenis RT615 tires (225/40/18) installed. After having the OZ Superleggeras for a while I decided I needed a change. Since the R does not see many miles now I decided the Azenis RT615 fit the bill as a more performance oriented tire - Read the Grassroots Motorsports tire comparison HERE where they ranked #1. The OZ SL/Pirelli combo weighed in at 40 lbs, the new BBS/Falken combo weighs in at 46 lbs. The OZ SL looked smaller than the diameter it was and the BBS look larger. As always, Brian and Robby at Kauffman Tire (770-614-5650) took care of me. Here are pics the day I went to the tire store and made the change:

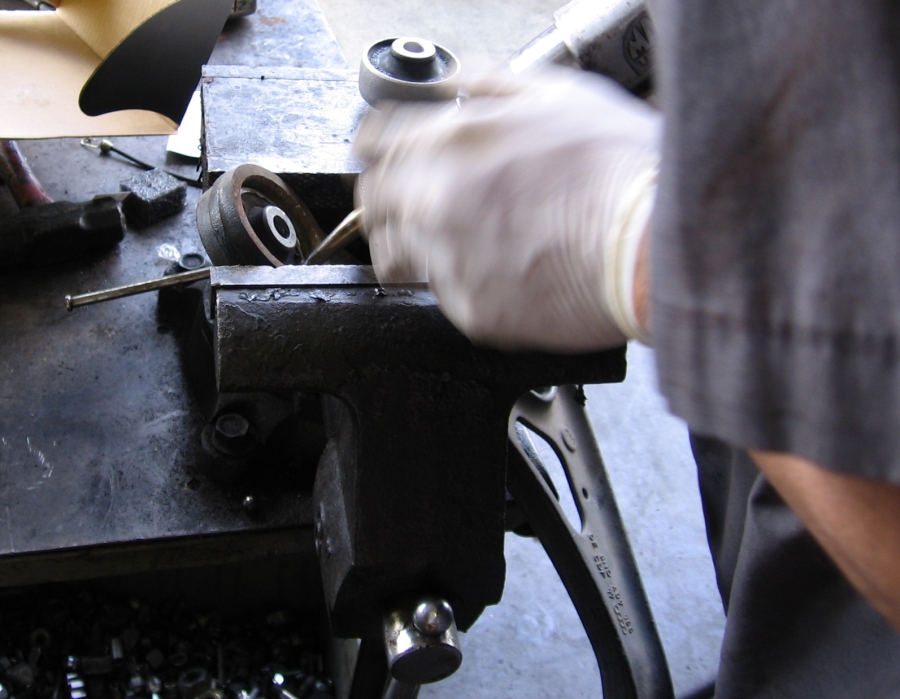
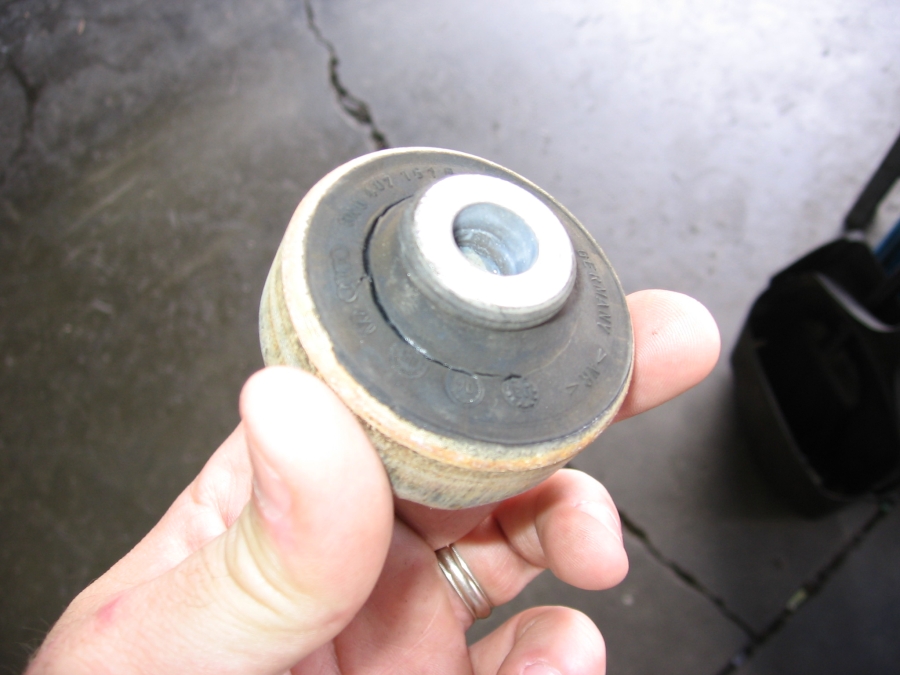
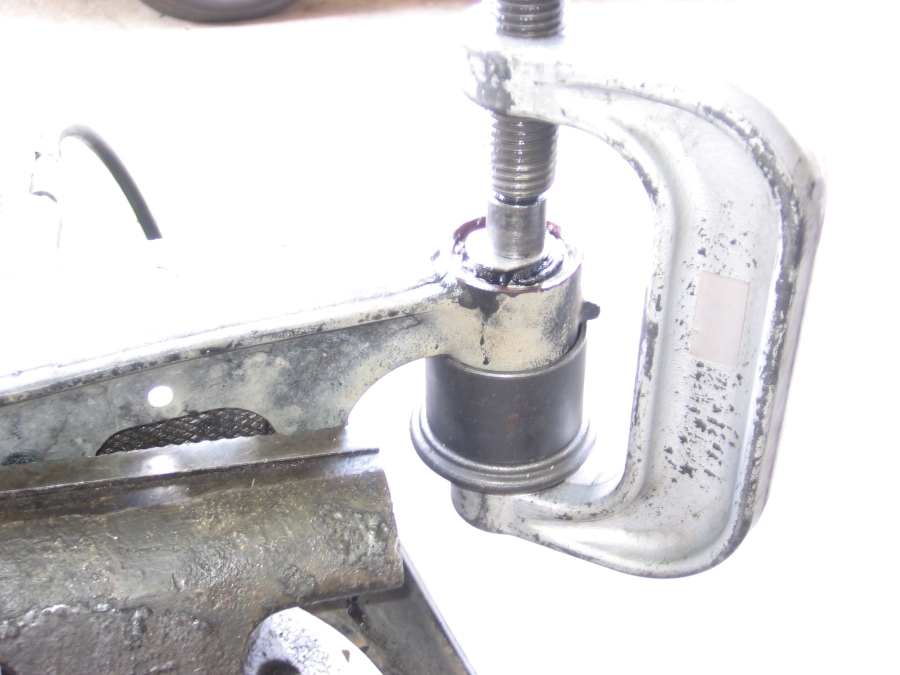
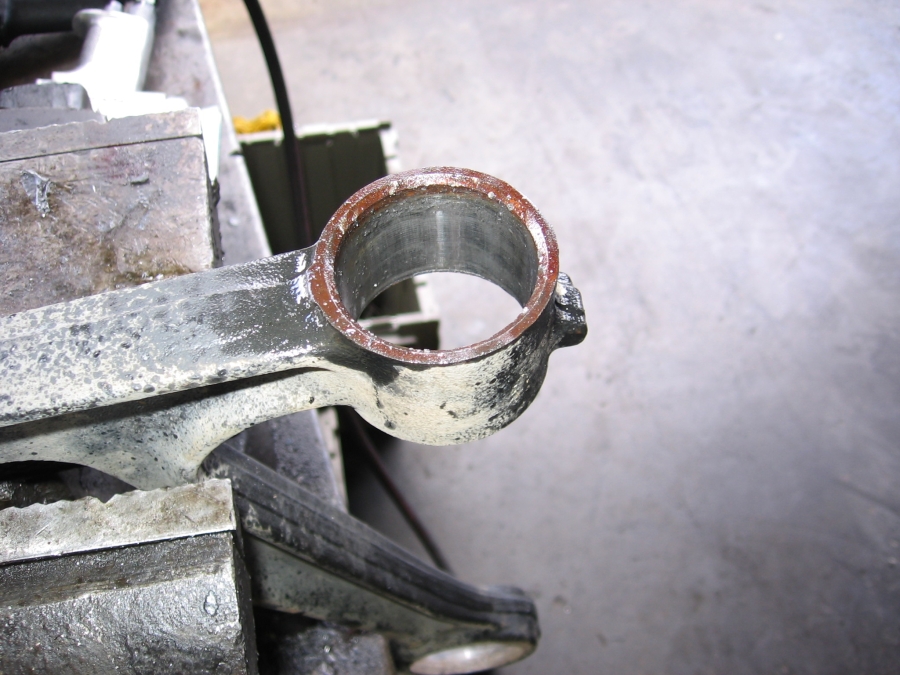
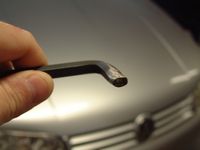
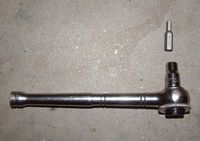
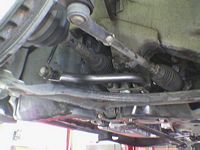
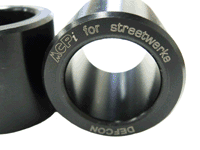
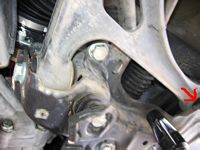
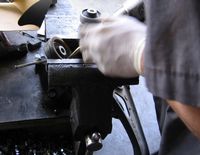
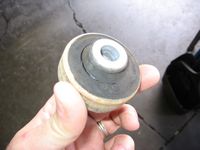
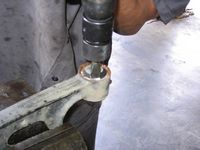
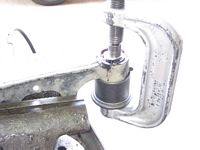
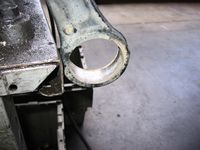
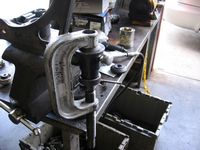
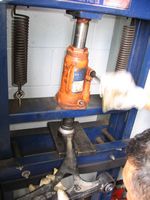
Defcon2 front control arm bushings from Streetwerke installed. These adapters allow for the smaller, original design bushings to be installed in later model control arms to reduce understeer/numbness and tighten up the steering for quicker response. In addition to the adapters and smaller bushings, it was also a good time to install new rear bushings in the front control arm and I also ordered new control arm and subframe bolts since they are torque-to-yield (stretch) bolts and need to be replaced. Arrived neatly packaged and installed by my friends at Kauffman Tire (770-614-5650). Streetwerke Installation guide HERE. My pics are not great but - Pics L to R: Place Defcon bushings in freezer so they will contract and be easier to press in, remove the skid plate and associated plastic under tray pieces, remove the dogbone mount, remove the front and rear subframe bolts for both sides (4 total) for access to the engine side A-arm bolt, remove the 3 bolts for the lower ball joint to A-arm (not pictured), after the subframe drops the front and rear A-arm bolts can be removed, remove the rear bushing using an air chisel- notice bushing with 23k miles shows deterioration, remove the front bushing using a combination air chisel and press, views with both bushings removed, use a hand press for the front bushing and a hydraulic press for the rear, reassembly is reverse of removal, get an alignment.
Re-installation Torque Specs:
Subframe Bolts: 74 ft-lb (100 Nm) PLUS quarter turn (90 degrees).
Control Arm Bolts: 50 ft-lb (70 Nm) PLUS a quarter turn (90 degrees). Note: Per the Bentley manual, these bolts should be torqued on the ground/with the arms "loaded".
Lower Ball Joint Nuts: 55 ft-lb (75 Nm)


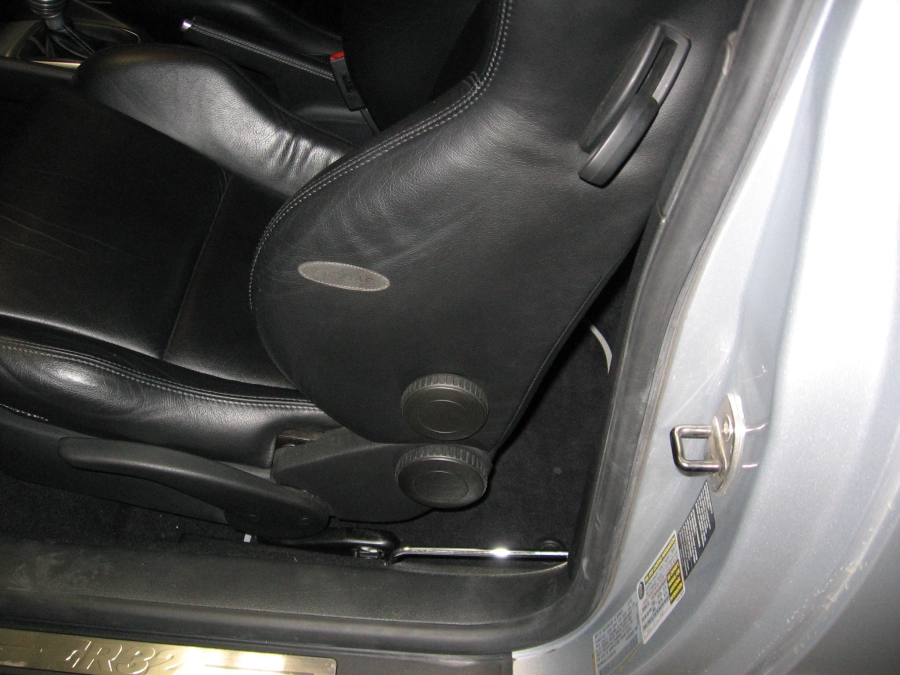
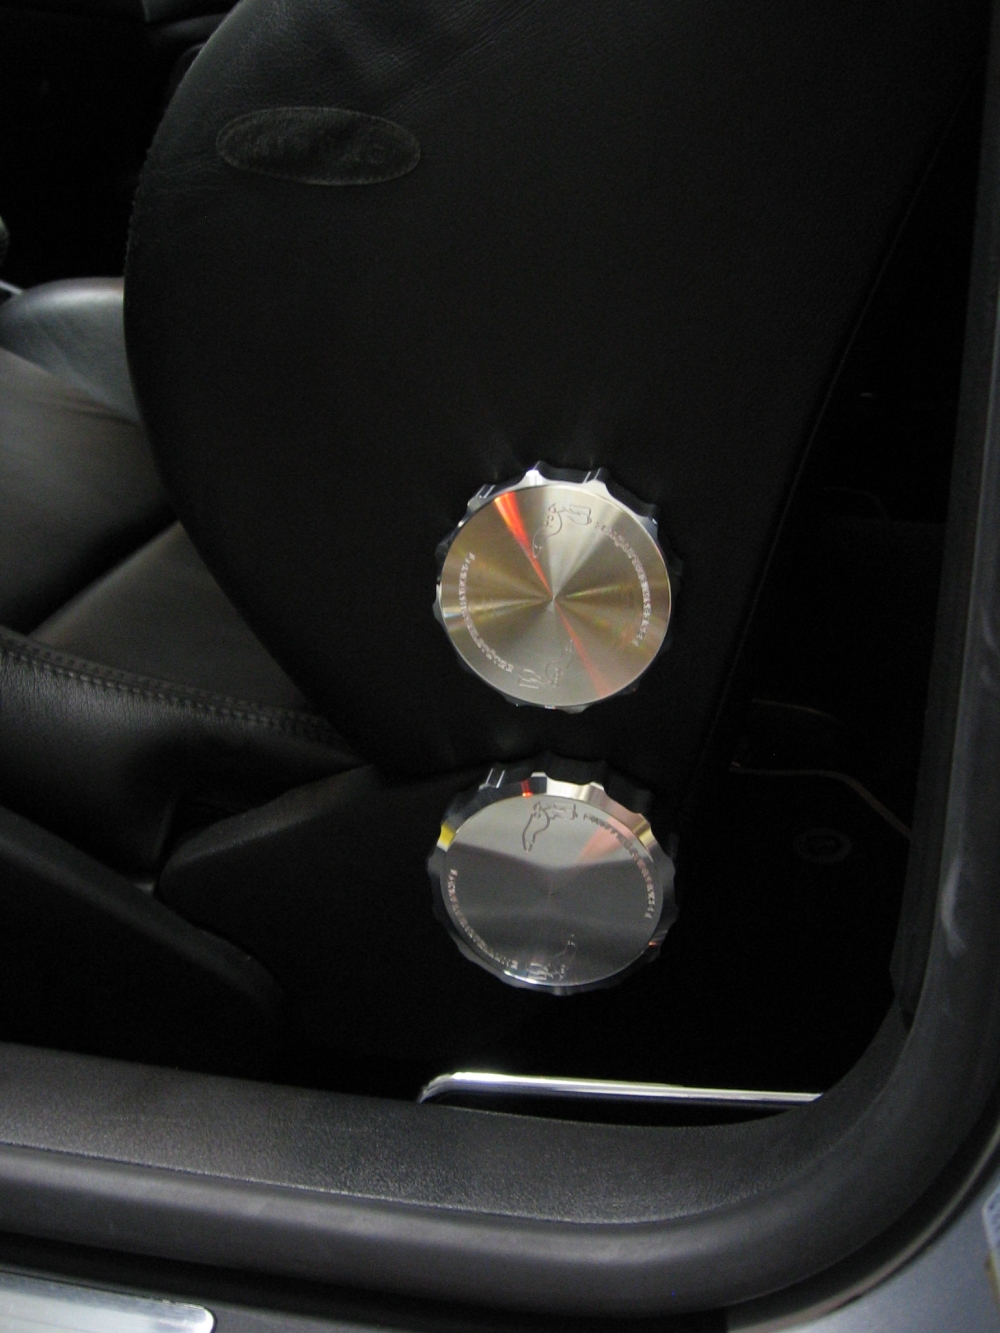
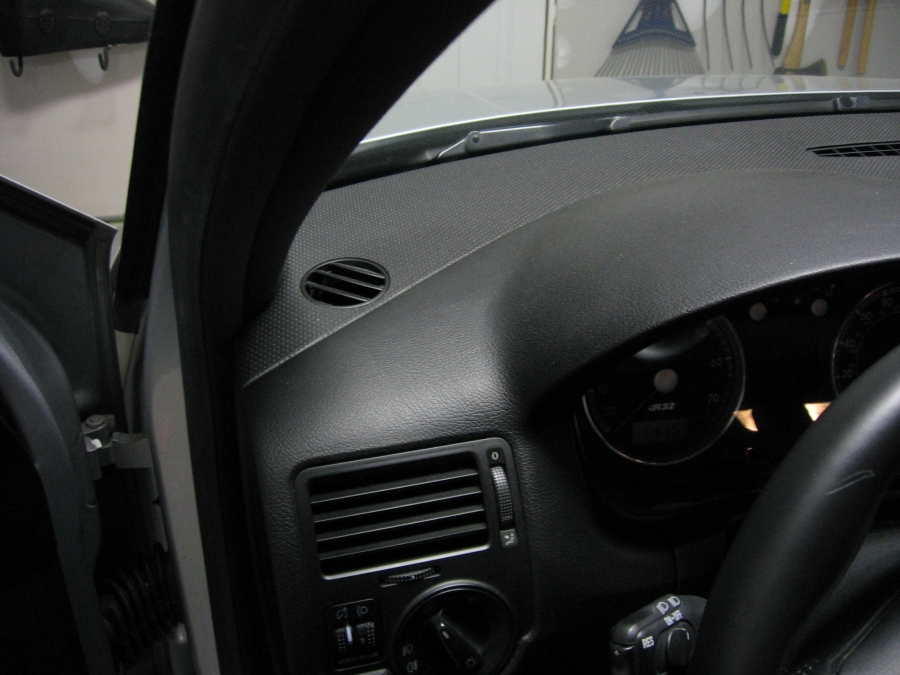
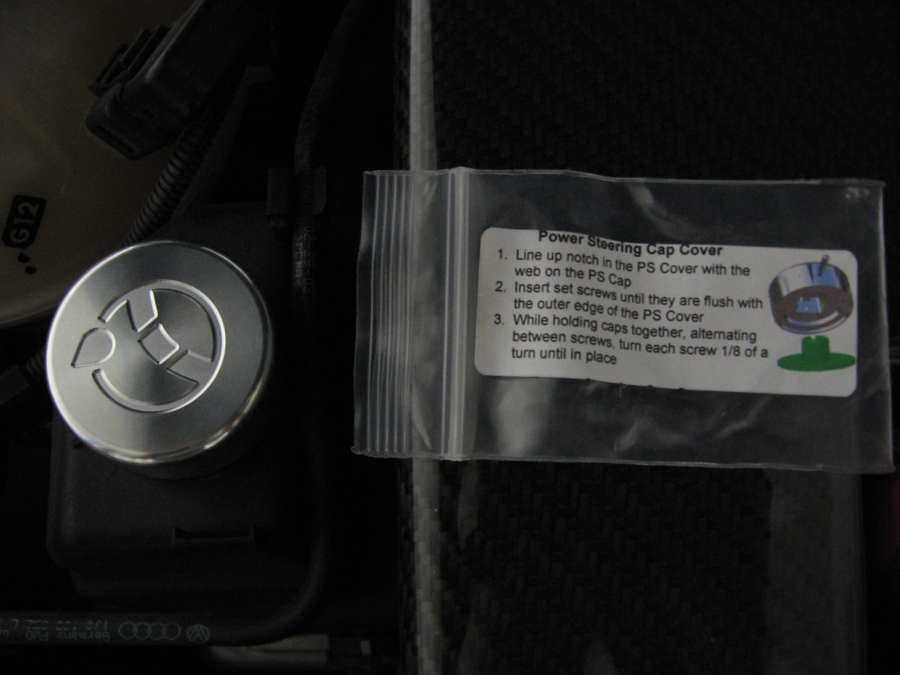
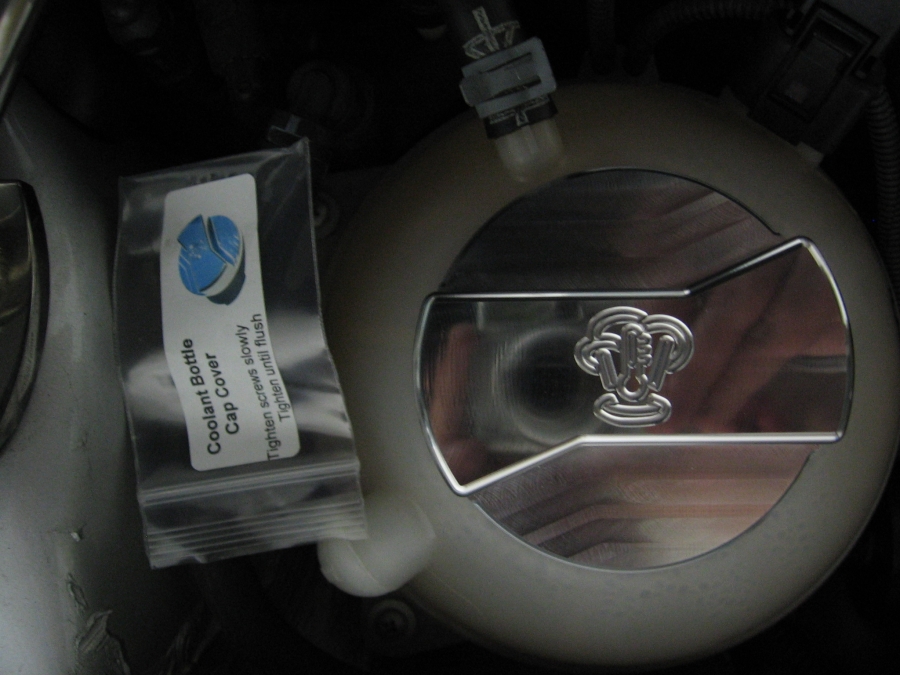
JayCap Billet Engine and Interior Dash Defrost Vents/Seat Knob Covers from EIP Tuning installed. After payment it only took FIVE weeks for EIP to ship these and on delivery the oil cap plastic guides were broken. Jay offered to take care of me when he found out about the "service" EIP was providing, GREAT service considering he was the manufacturer with no control over EIP as a retailer.
[UPDATE] Jay no longer sells these through EIP but has opened his own business and website- you can get these directly from Jay at J Caps Online (VW Vortex member cricket or Gruppemotorsports) where you can be sure the products AND service are top notch
These caps really dress up the engine compartment and interior, almost worth the wait/hassle. The dash defrost vents just pull out, the new ones are installed noting the proper orientation and pressed in. The seatback lumbar and tilt knob covers are pressed over the existing plastic knobs and fit tightly- no worries they will come off. The engine power steering and coolant reservoir knobs are installed with set screws supplied. The oil cap comes pre-installed in the cover. The HPA engine cover required some trimming around the oil cap to fit, it was never centered around the OEM oil cap anyway and the installation of the billet caps forced me to do what I had been putting off- trimming the hole larger using a Dremel. Some pics before and after below:

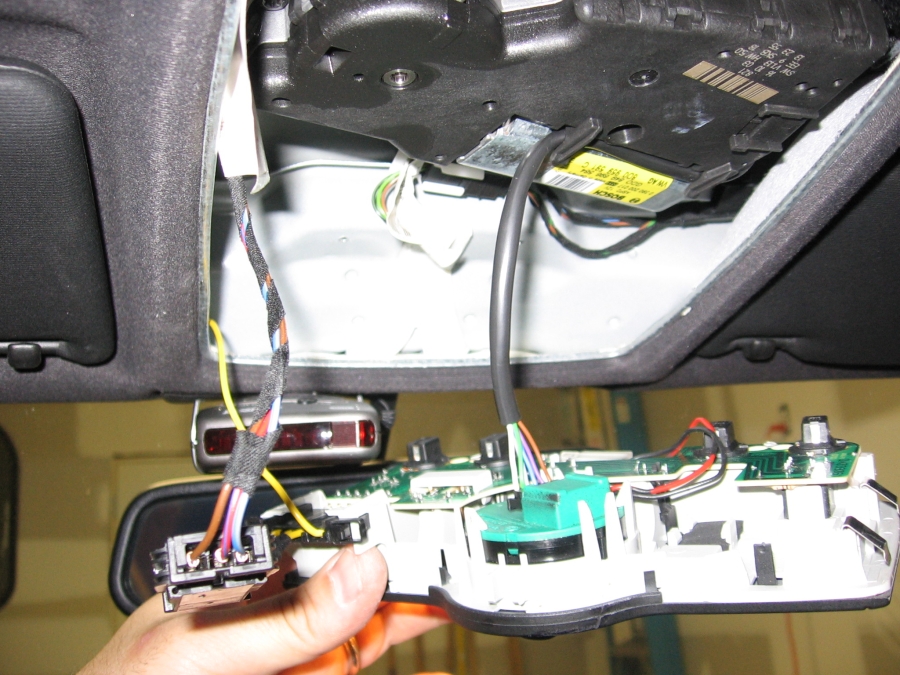
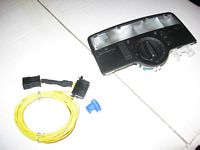
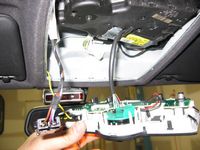
Purchased a used W8 Console, originally from European Technologies. They buy the Passat W8 grey consoles and paint them black to match the black headliners in certain MKIV models (including our R32). The console also comes with a plug and play adapter, a long wire is provided to run down to the light switch. The advantage of the W8 console is the backlit icons and the LEDs that provide some visibility in the center console area. I ran the wire along the top of the headliner, down behind the airbag, down the a-pillar, and over to splice into pin 17 from the headlight switch harness. ECS Tuning has a great installation write-up HERE.
Seat Cupra R front spoiler from GoingFast Eurocustoms on eBay installed using the DIY found HERE
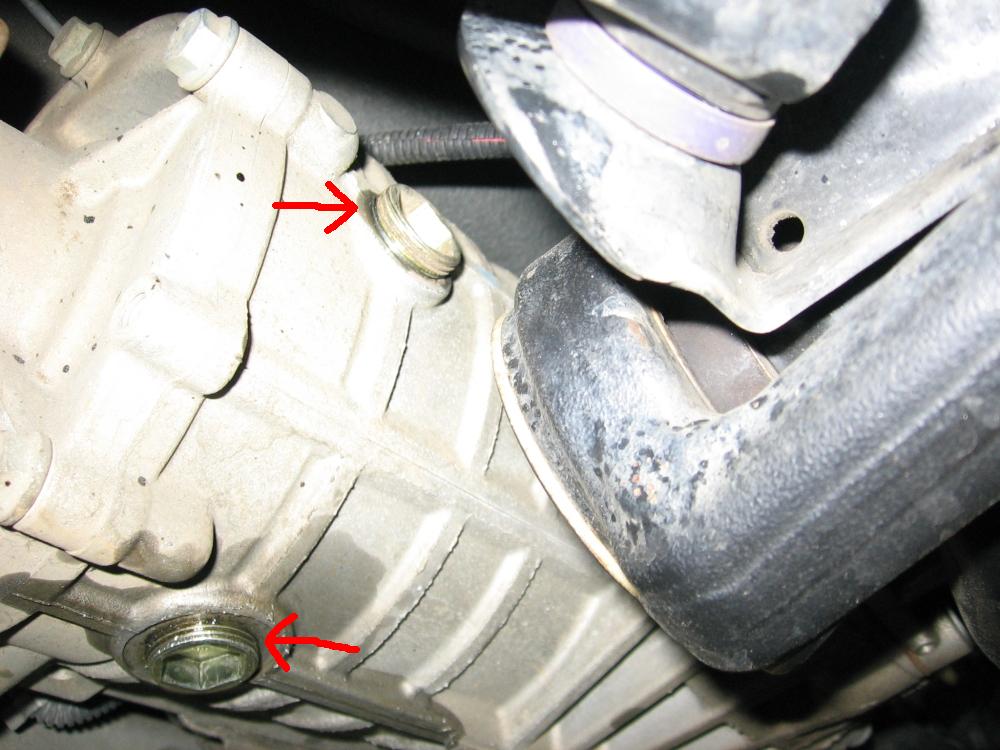
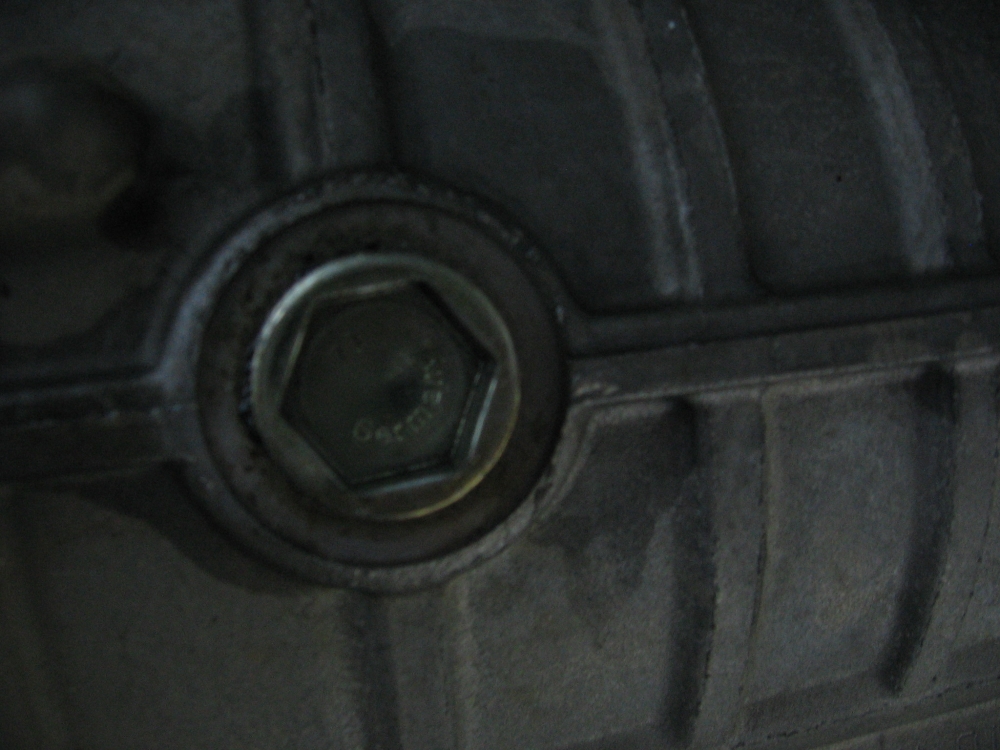
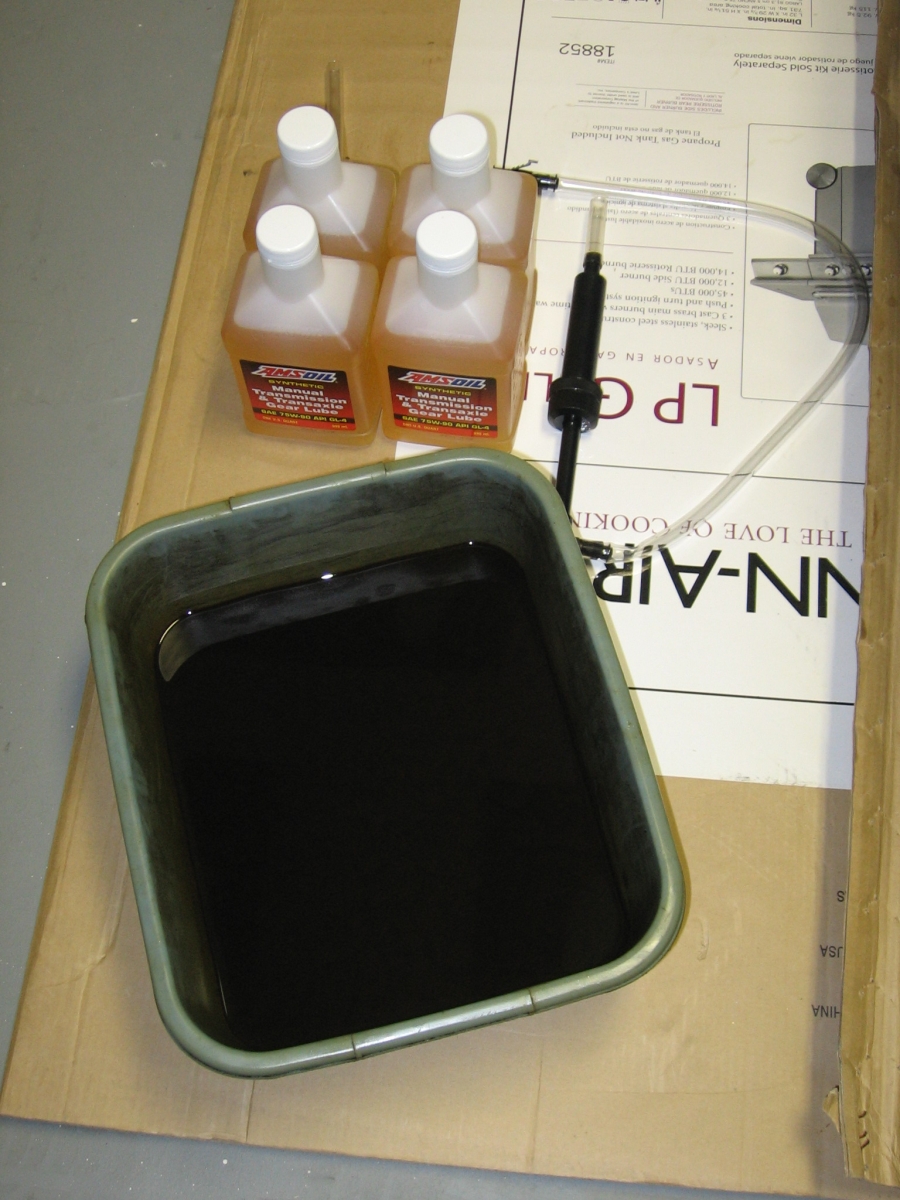
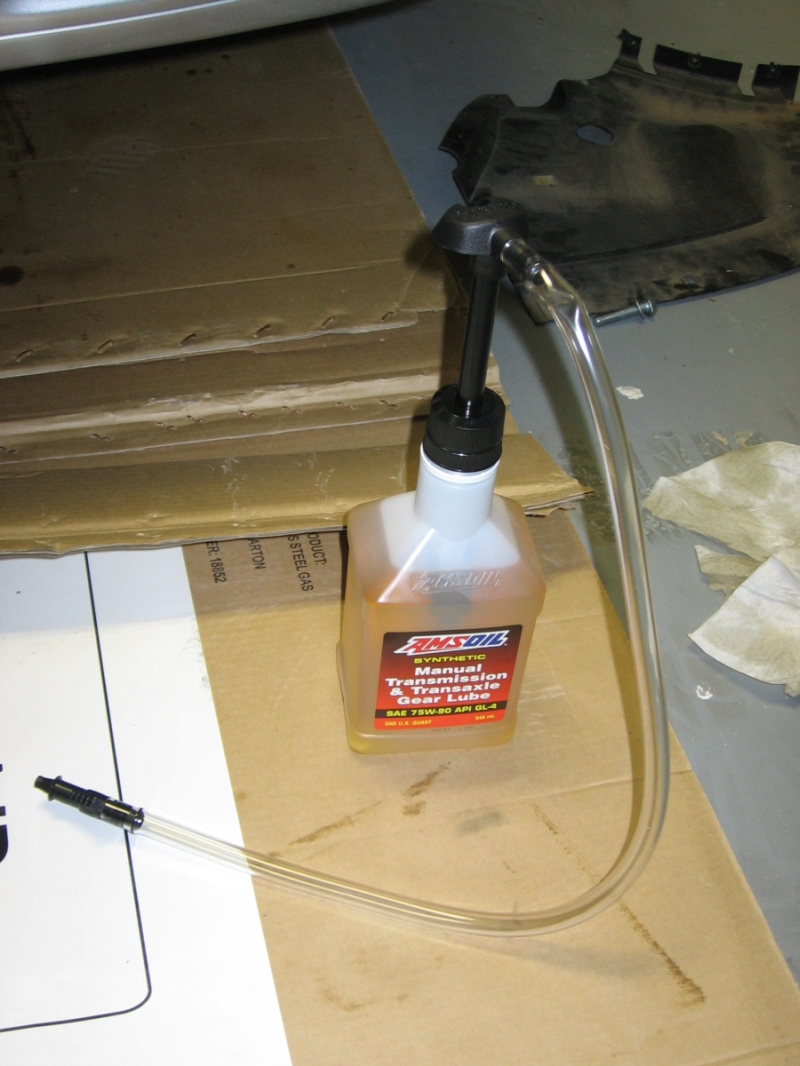
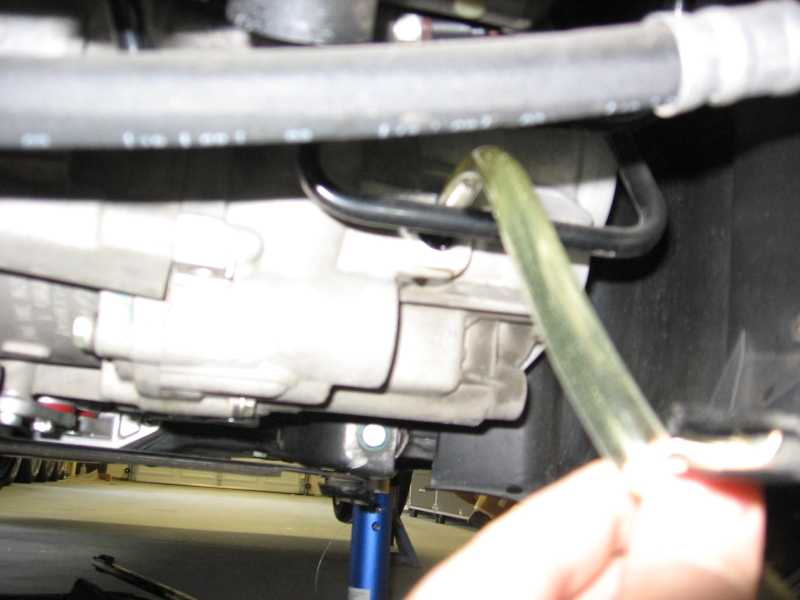
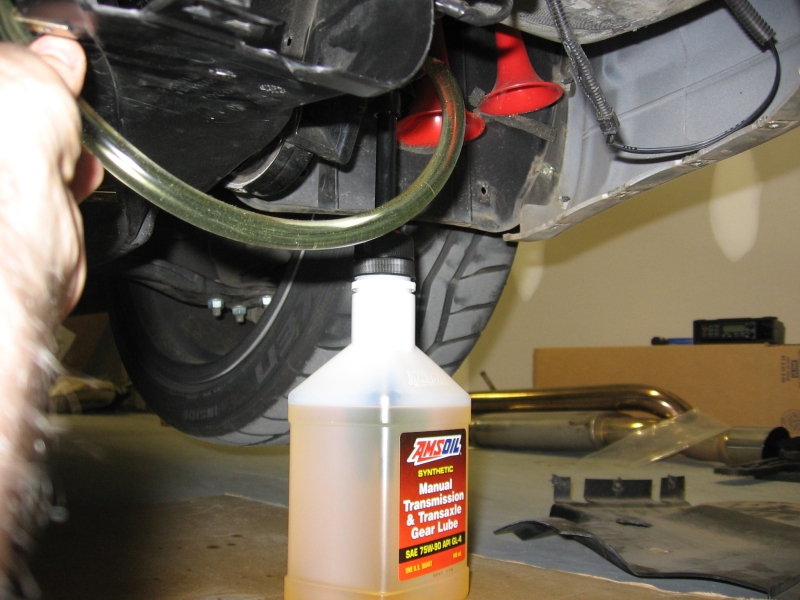
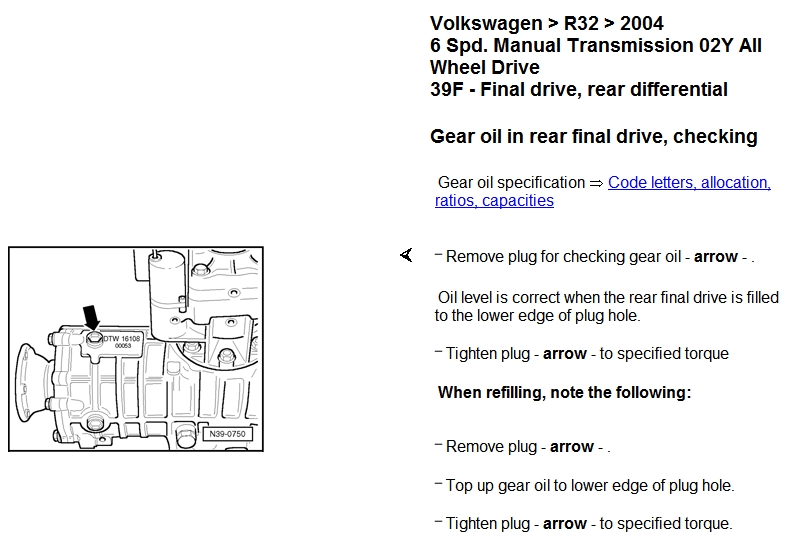
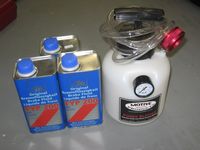
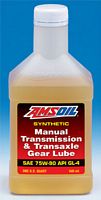
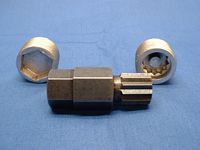
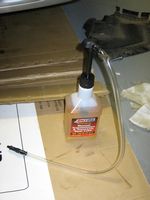
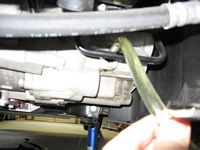
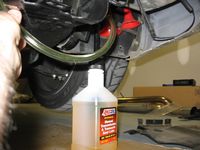
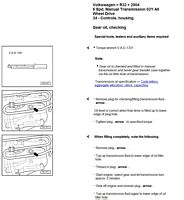
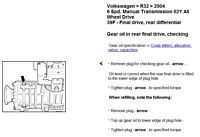
Changed transmission fluid and rear diff fluid using Amsoil Synthetic 75w90 gear oil. Easy to use tool from Metal Nerd performs both transmission and rear differential bolt R&R tasks, Part MN2567, works with a 19mm wrench. I always remove the fill bolt first, this is better than draining the fluid first and then finding out you can't remove the fill bolt to refill
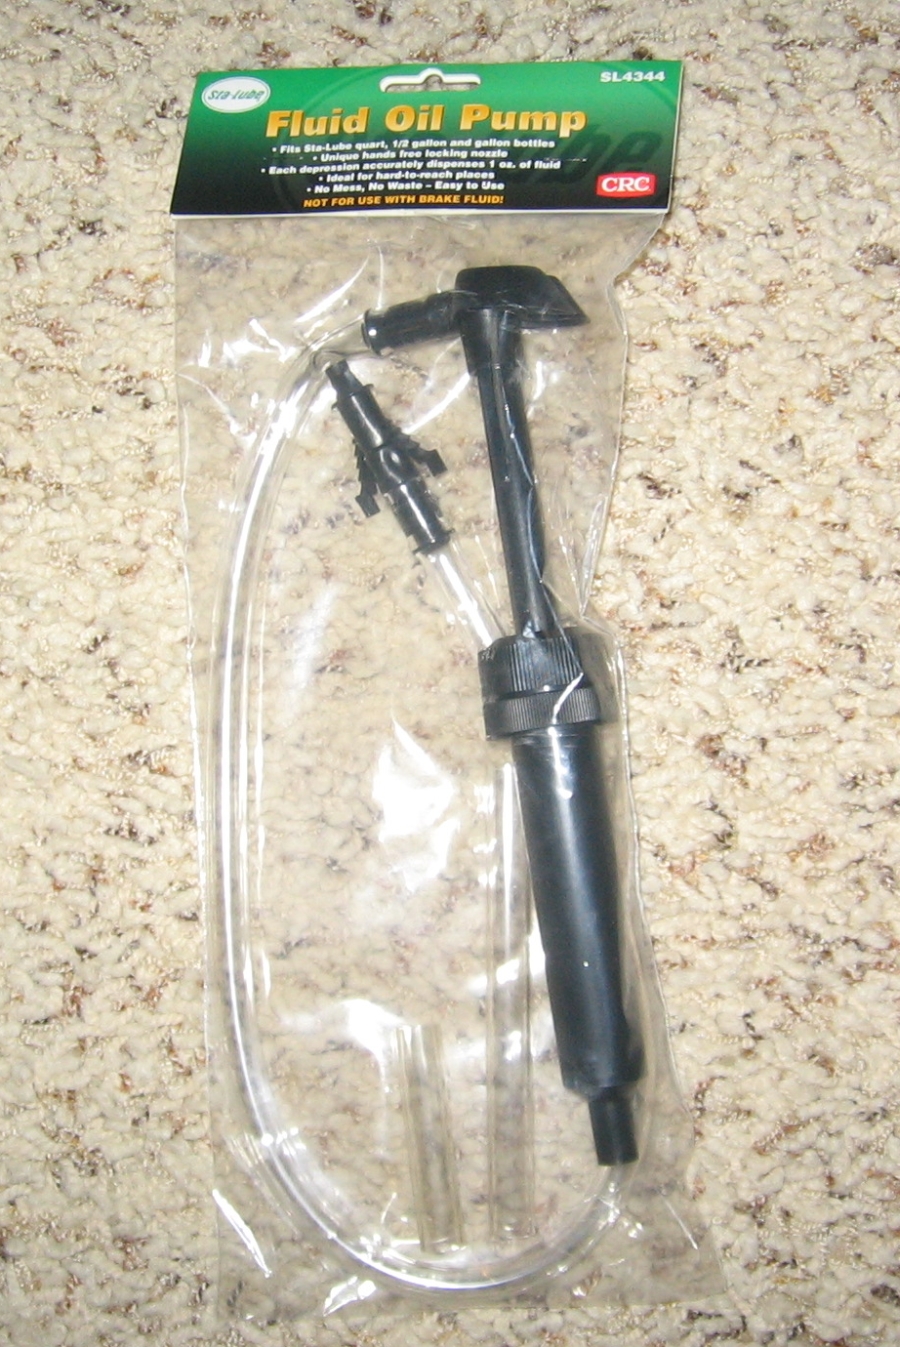
A Sta-Lube hand pump makes refilling an easy task, the only caveat being that you have to find a place underneath the car that is close to the fill hole where you can use the pump. The manual transmission (O2Y) holds 2.6 liters (2.7 quarts) of fluid and the rear differential (O2D) holds 1 liter (1.05 quarts). The VW torque spec for both drain and fill bolts for the transmission/front differential is 30 Nm or ~22 lb/ft and for the rear differential is 25 Nm or ~18.5 lb/ft.
EDIT: If doing this again, I would use the same GL4 (Manual Transmission & Transaxle Gear Lube 75W-90, Product Code: MTGQT-EA) I used for the trans and get GL5 (Severe Gear 75W-90, Product Code: SVGQT-EA) for the rear differential. Amsoil is great stuff but their product guide is sometimes lacking, and GL5 contains additional additives that provide better lubrication for the rear diff.
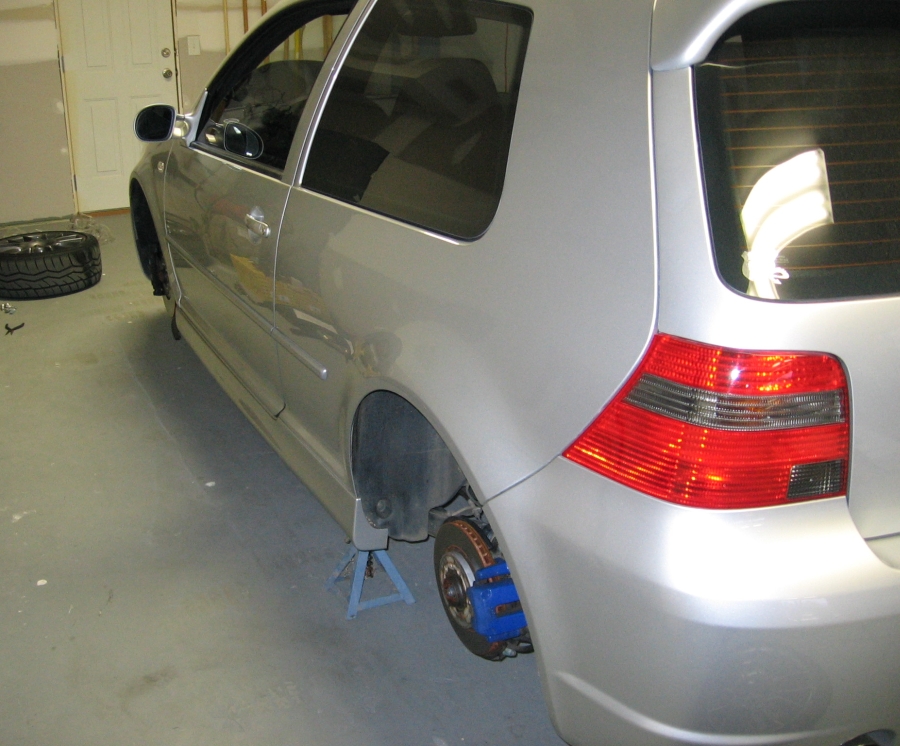
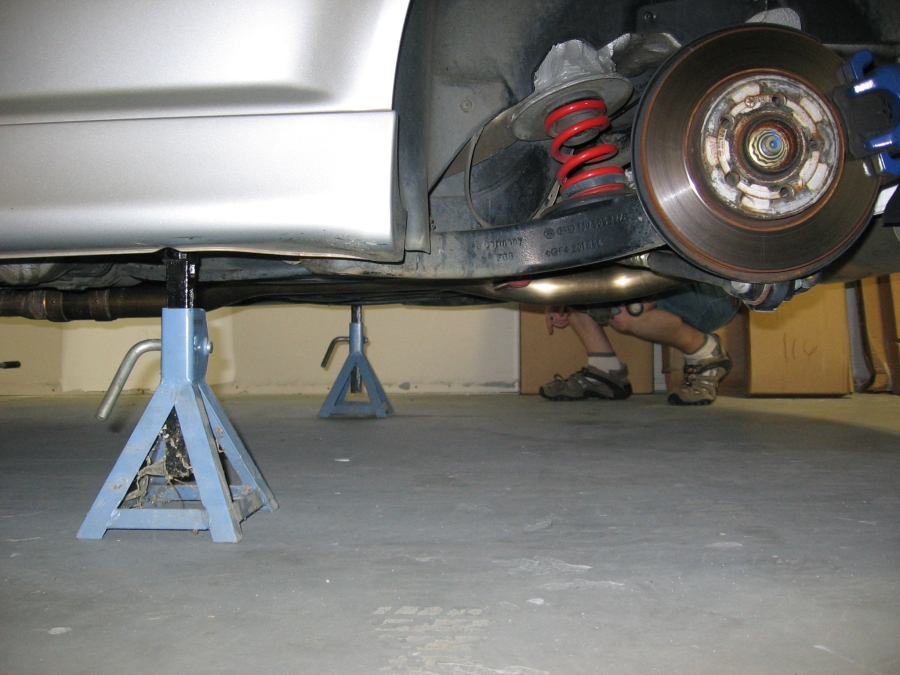
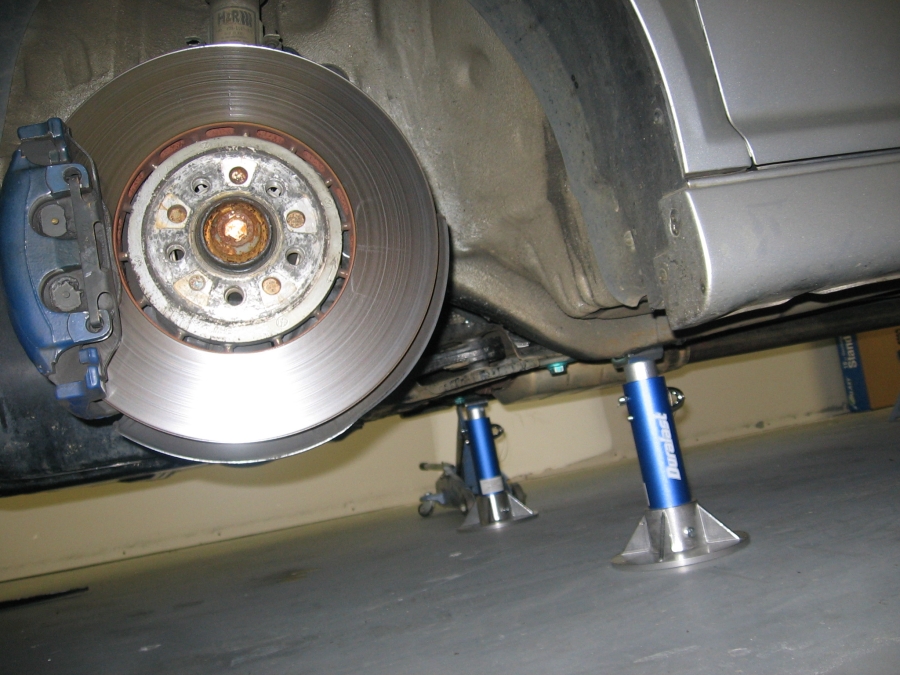
Pics of the rear differential drain/fill locations, transmission drain/fill locations, required tools/supplies, old fluid sure looks dirty compared to new fluid, fill technique, and transmission/differential gear oil checking as per the VW Service Manual (note the requirement to run the motor with transmission in gear and rechecking transmission/front differential oil level at fill hole):

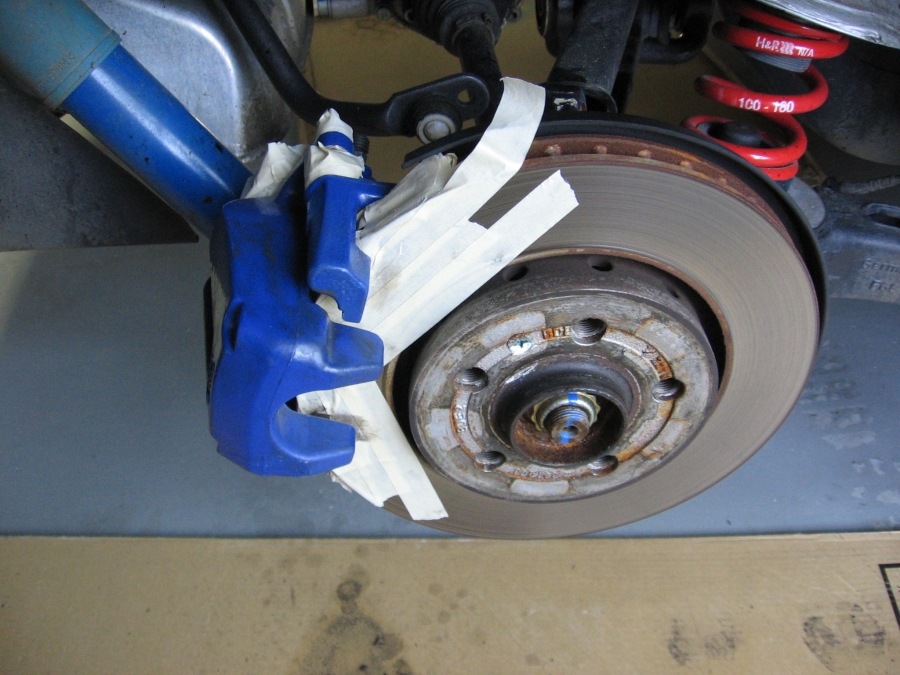
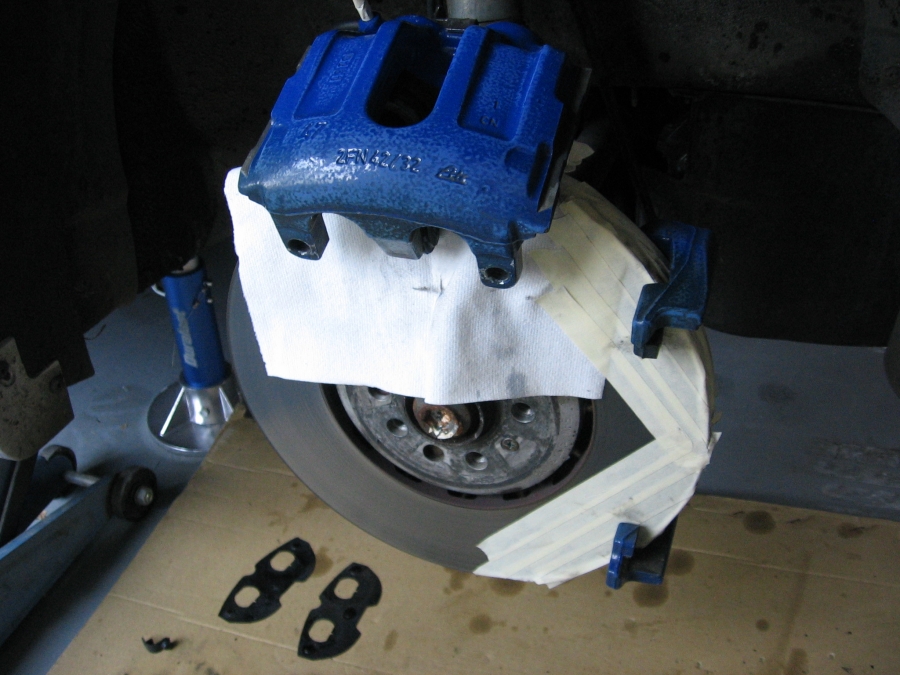
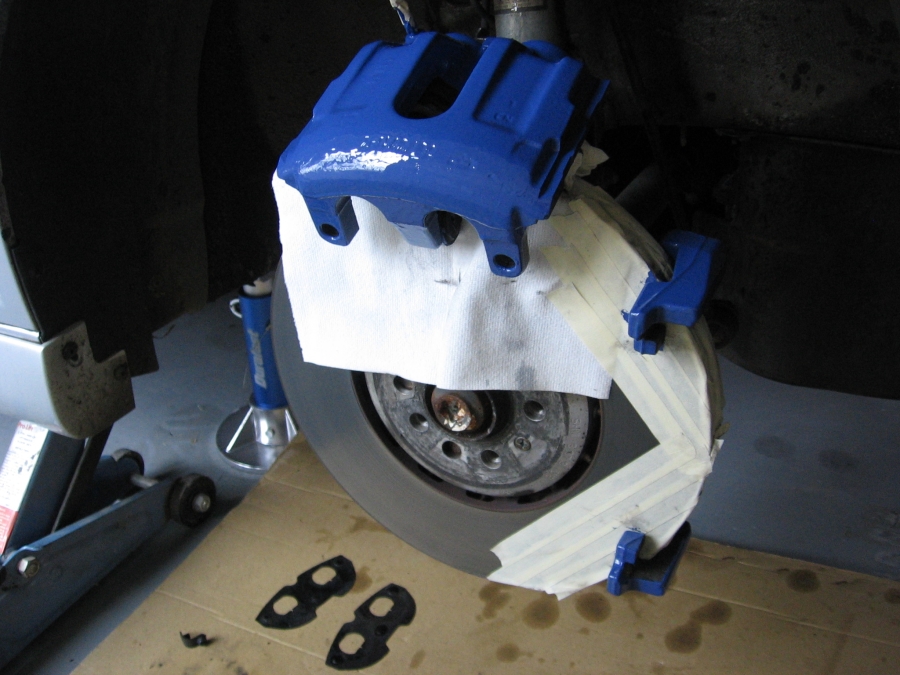
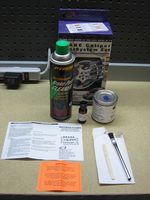
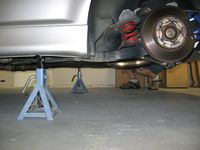
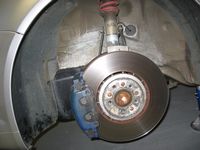
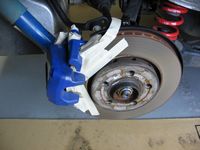
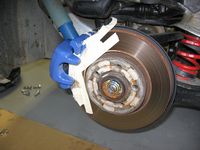
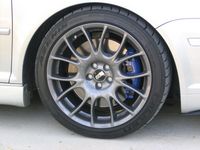
My calipers had faded from the vibrant VW Racing Blue color they were when I bought my car to a lighter blue in back and to a greyish blue up front from track day heat. I decided to repaint my calipers with G2 Epoxy Caliper Paint from Hubcaps Plus on eBay. Application Instructions HERE. I started by placing the car on jackstands at each corner, pictures show locations I use but not approved by VW. Next the wheels were removed. The calipers can either be masked or unbolted to paint. The surface has to be scuffed up and free of grease so the new paint will stick. It takes several coats but with easy access to all four calipers this can easily be accomplished before the few hours of cure time has made the paint unusable (this time was about 6 hours in my case, temp was between 60 and 70 degrees). I chose to unbolt mine and remove the pads/shims for easy and complete coverage. A little application of a red ScotchBrite pad from the local auto paint/body shop was used to scuff up the surface. Next brake cleaner was used to wipe down the surface and remove any grease, this was done several times (REMEMBER: 90% of the paint job is prep, you want to make sure there is NO grease/oil on the calipers). After masking the rotor, bleeder screw, and some other parts with masking tape the first of several coats was brushed on. This paint is self leveling so it looks better after you let it sit for a while than right after you brush it on. After four coats I thought the coverage was sufficient and left it to dry. One kit could probably do 8 rotors (2 cars) as I had about half of the mixed paint left when I was finished. This epoxy paint looks great when dry and I believe it will hold up much better to the heat, wheel cleaner, and average wear MUCH better than the automotive paint VW used for the OEM finish. The G2 blue is a close match to the OEM color, hard to tell in some of my pics because the flash made it look a little lighter.


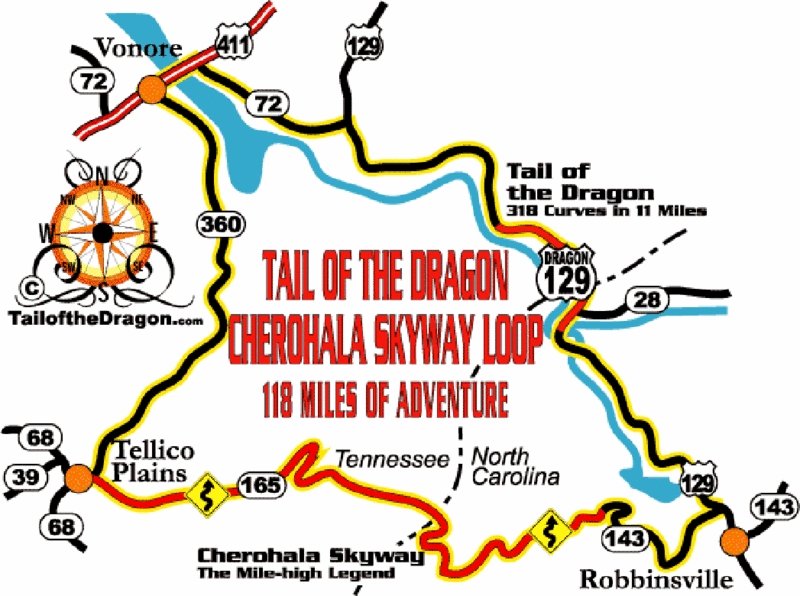
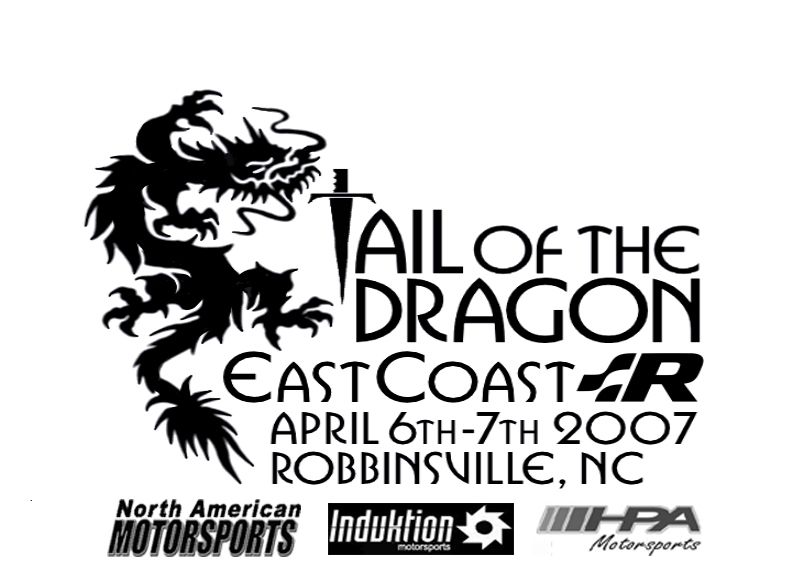
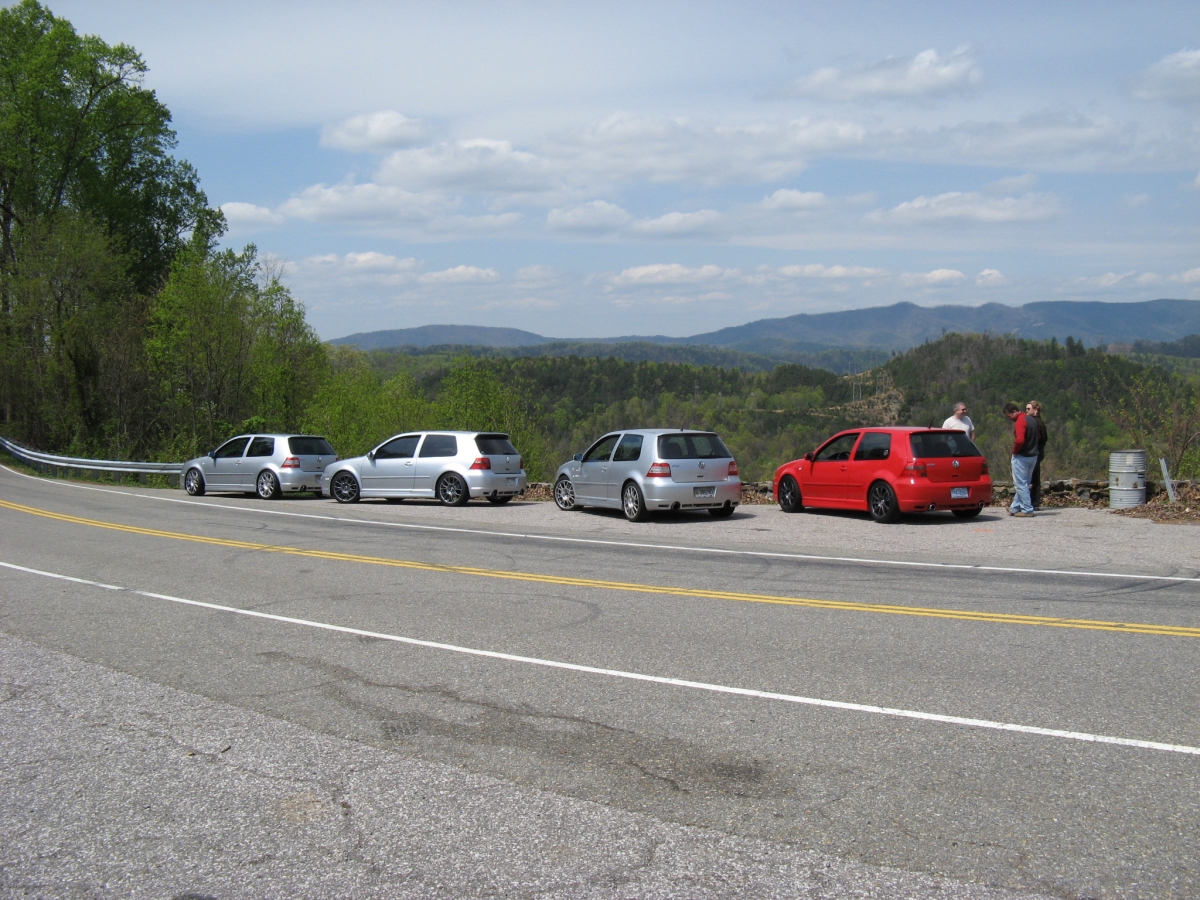
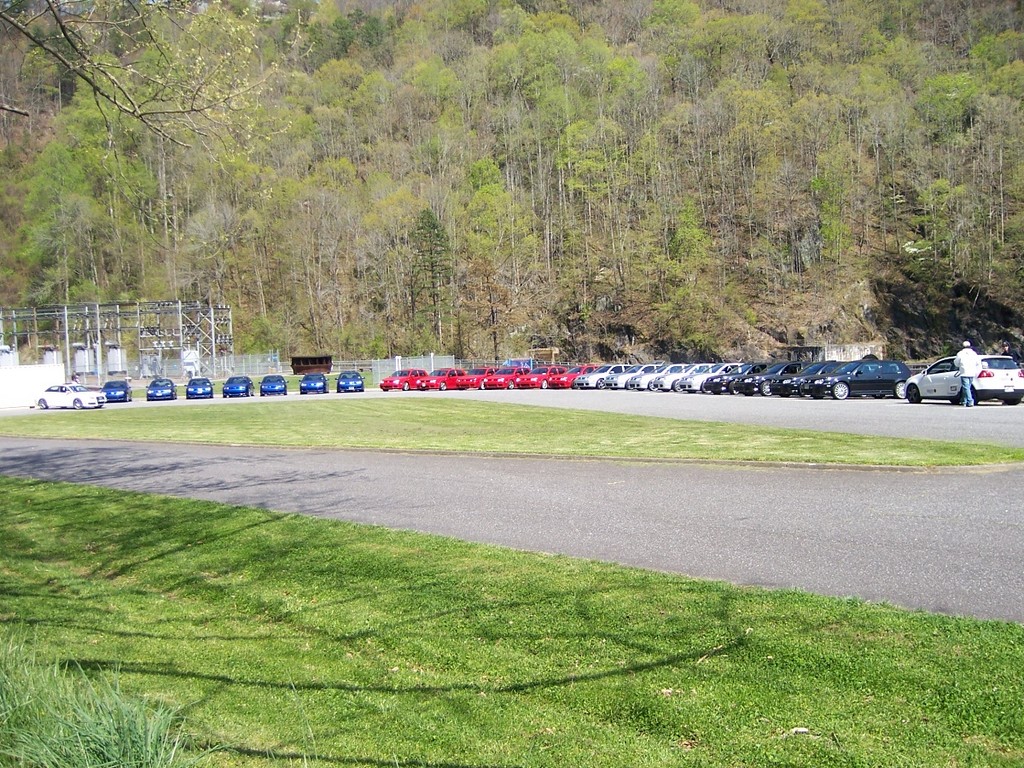
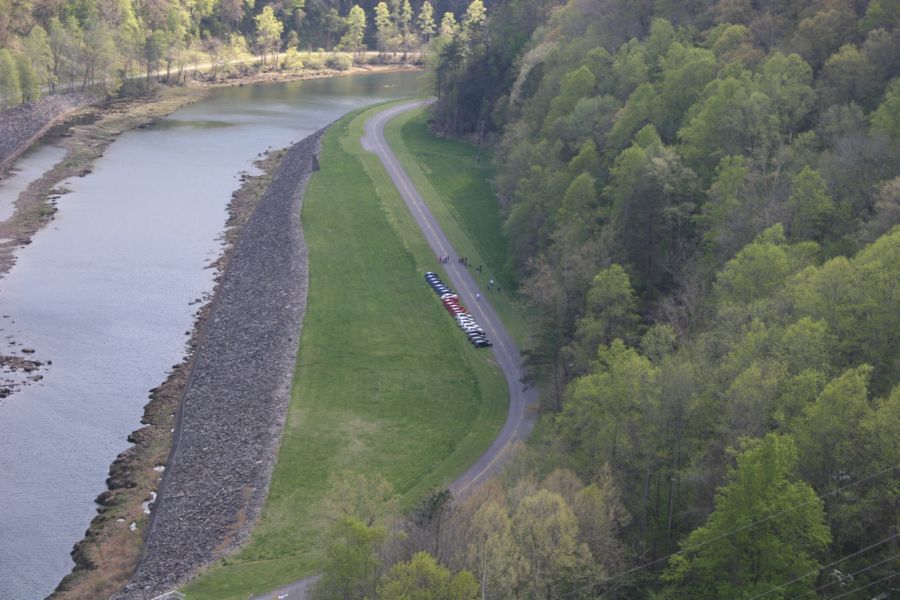
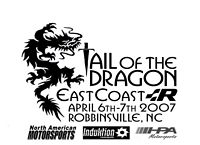
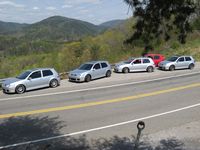
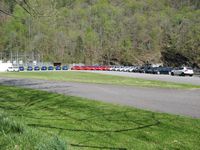
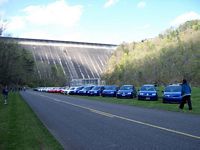
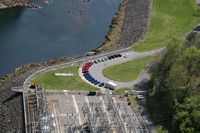
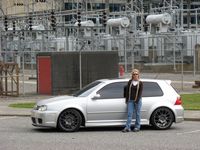
East Coast R32 Tail of the Dragon GTG- April 6-7, 2007: R32s from all up and down the East coast get together in NC/TN to ride Tail of the Dragon and HellBender/Fontana Dam.
AM Caravan to TOD with Charles (jettacabby), John (Hilandscott), and Tim (SRQThunder) followed by LOTs of great roads to drive and good times with fellow R32 owners:


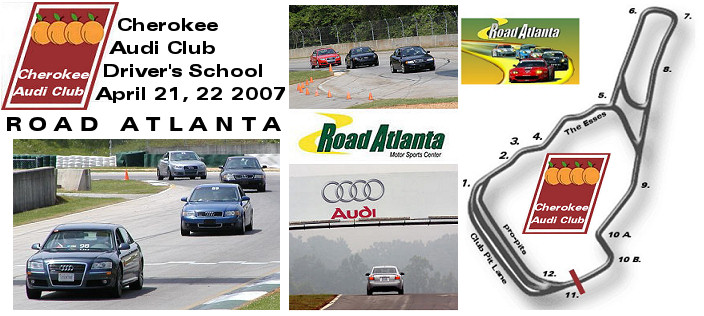
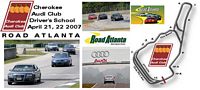
HPDE track event at Road Atlanta with the Cherokee Audi Club and DurtyDubs. Event Packet HERE and Event Information HERE. I drove my R32 for the Saturday sessions and put the Lotus in the infield show. I was back on Sunday to drive the Lotus after becoming familiar with the track on Saturday....WOW. You can't truly appreciate how good these cars are until driving them at a HPDE. I met Randy Pobst who was there driving the APR cars for some of the journalists- Video HERE. I let Mark and Nadine Kingsbury go for a ride in the Lotus before I left, the least I could do for the time they volunteered to help organize this event (and there were a LOT of volunteers that helped make this a success- THANKS
!!


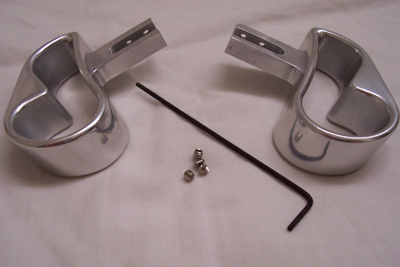
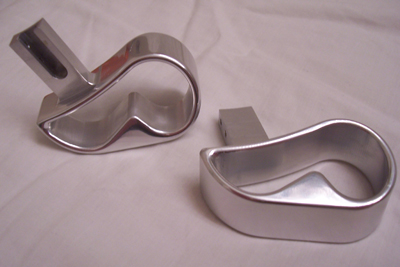
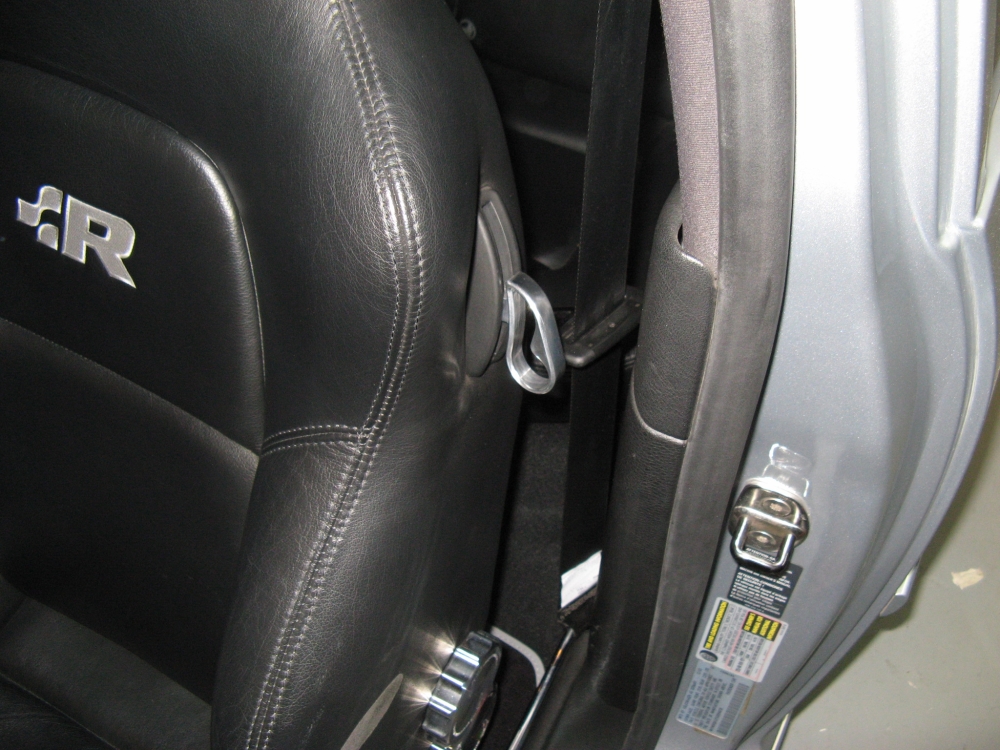
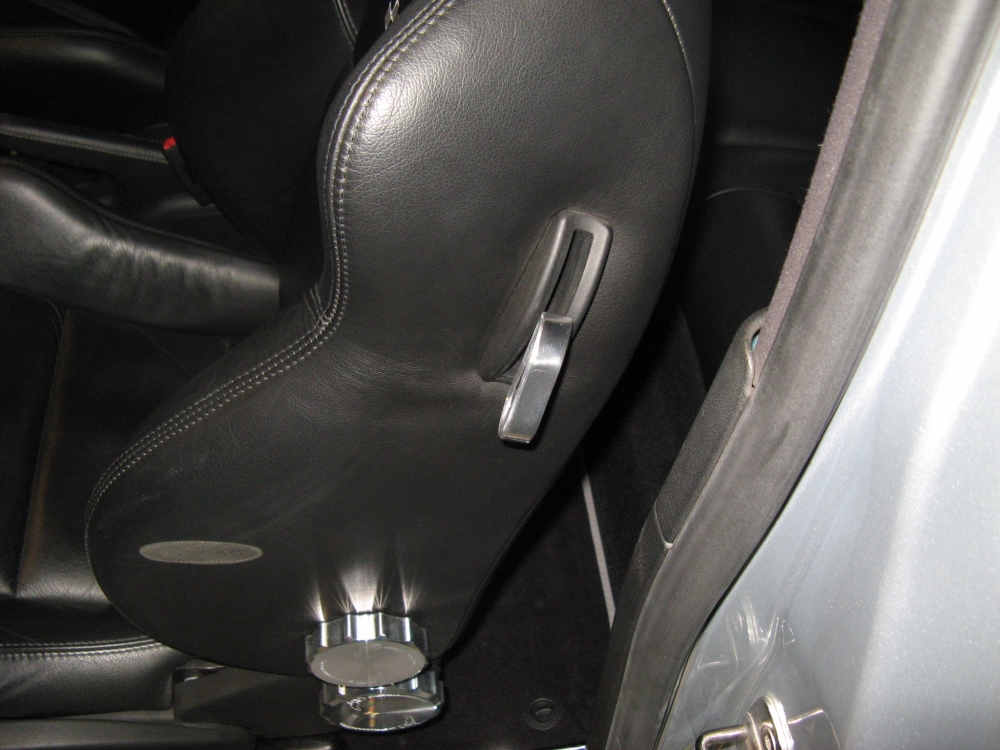
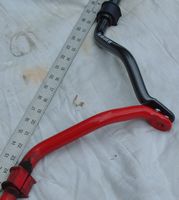
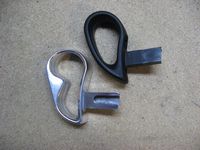
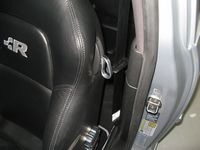
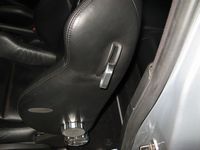
Billet seat latch handles from Rich installed to replace flimsy plastic pieces, installation instructions HERE. This started out in a bad way - the manufacturing machine shop that the original supplier (VDubMax) contracted took all of the money and ran, leaving us with nothing. Prepared to write it off, I was surprised when VW Vortexer bluer3204 (Rich) stepped up and took ownership of the issue and provided a resolution in the way of finished parts- THANKS Rich


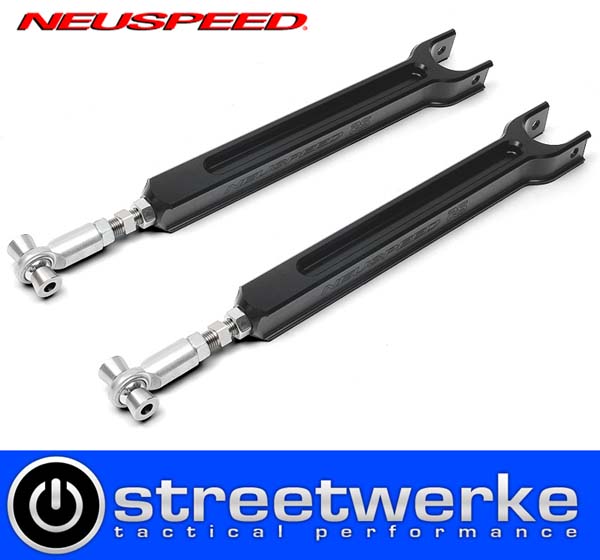
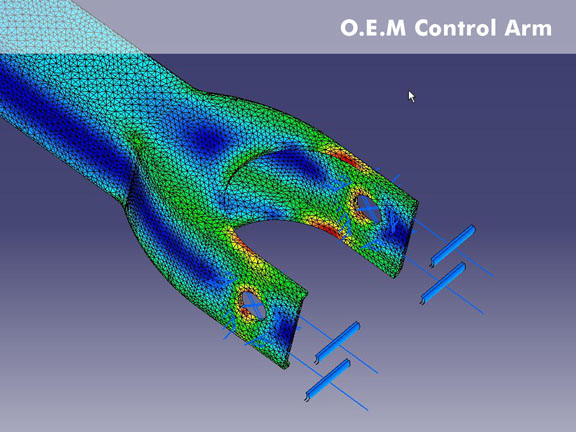
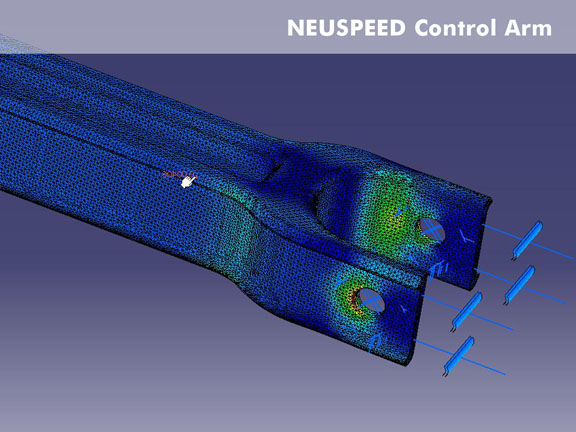
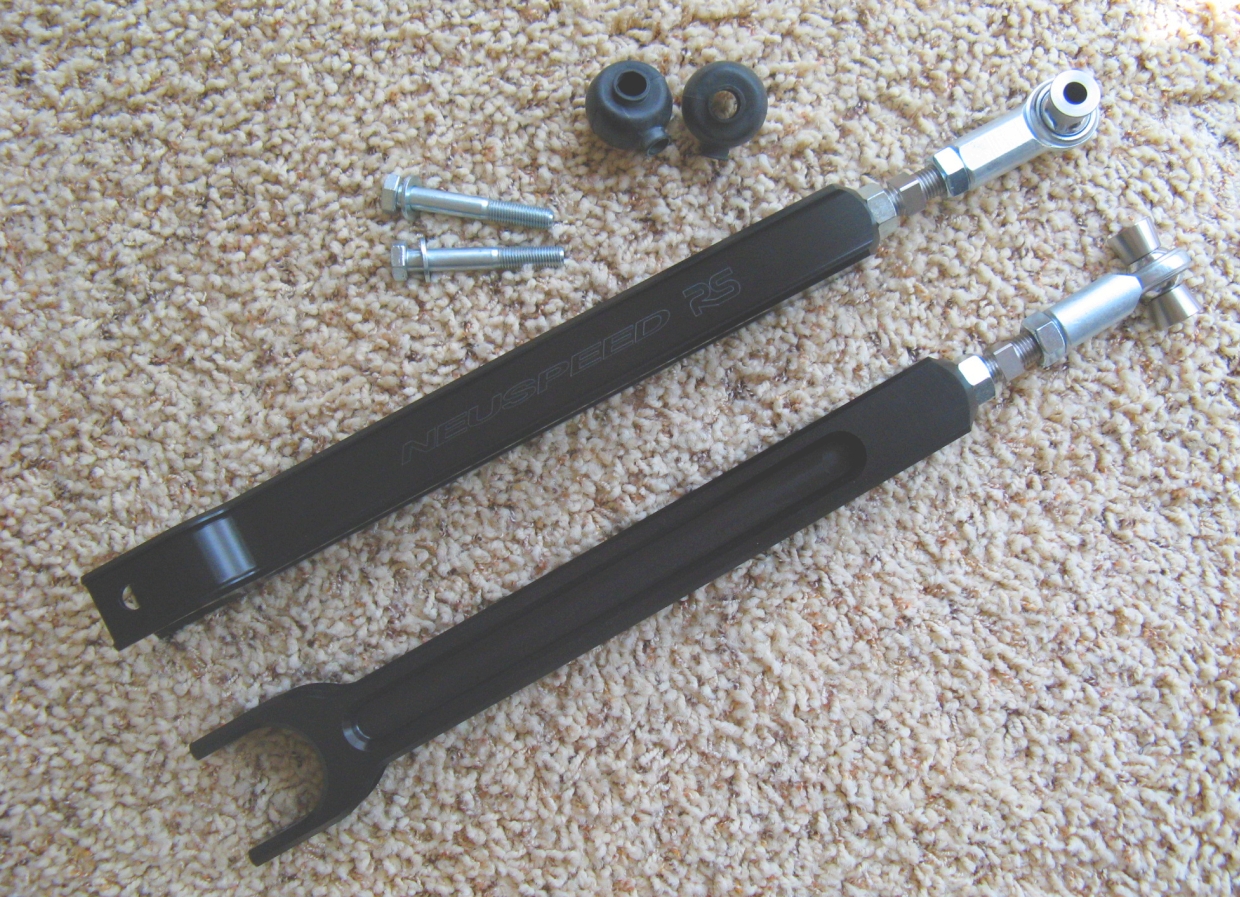
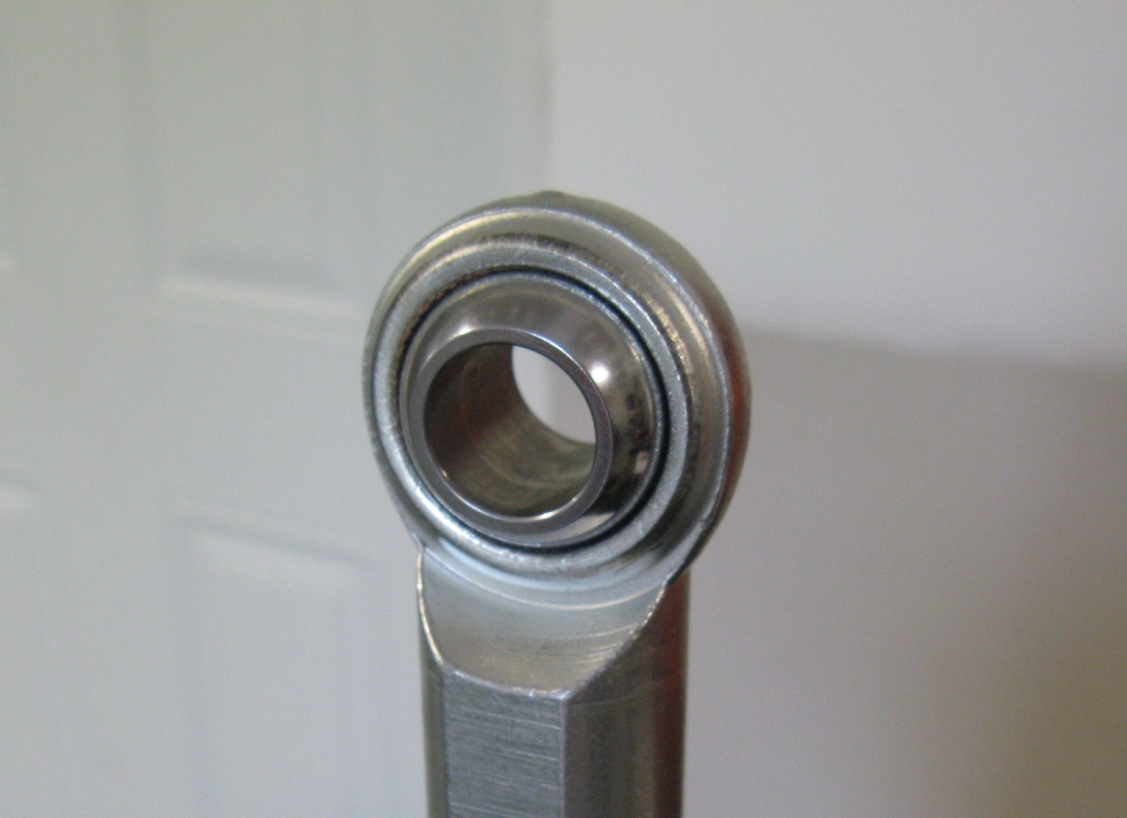
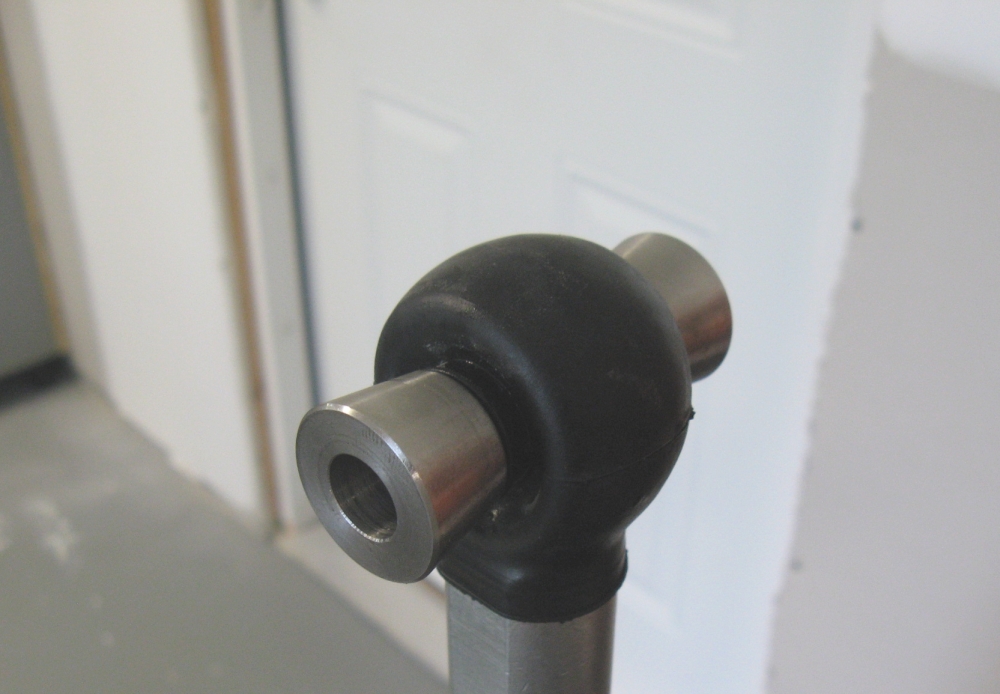
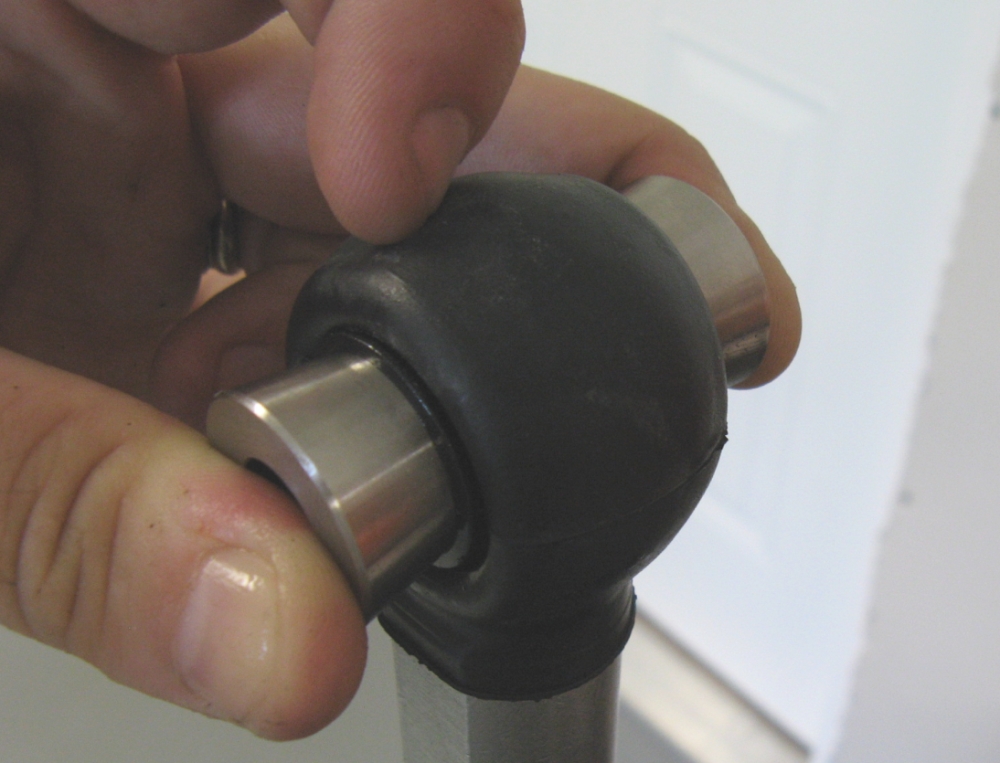
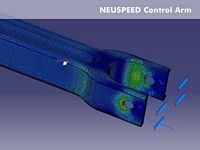
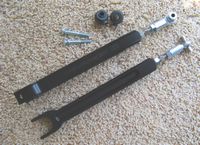
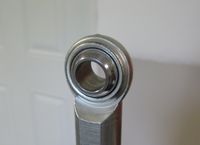
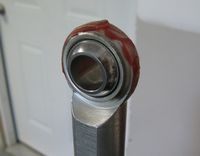
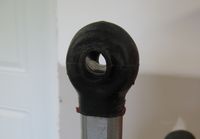
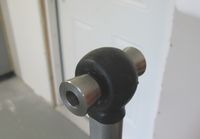
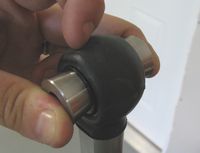
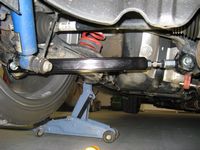
Neuspeed Adjustable Control Arms from StreetWerke installed to replace existing Forge ACAs. In the two pics below, Finite Element Analysis (FEA) analysis conducted by Neuspeed shows improvement offered over the OEM part- the lighter colored areas shown reflect stress areas in the part. I also ordered boots for the Heim joints for a little added protection/longevity.These arms look almost too nice to put on the car, control arm installation instructions HERE, the Heim joint boot installation instructions HERE.
NOTE: The supplied bolts are for the outer mounting points, the inner mounting points re-use the OEM TTY bolts and the torque specified in the installation instructions takes into account the original TTY installation, THANKS to Neuspeed for the clarification
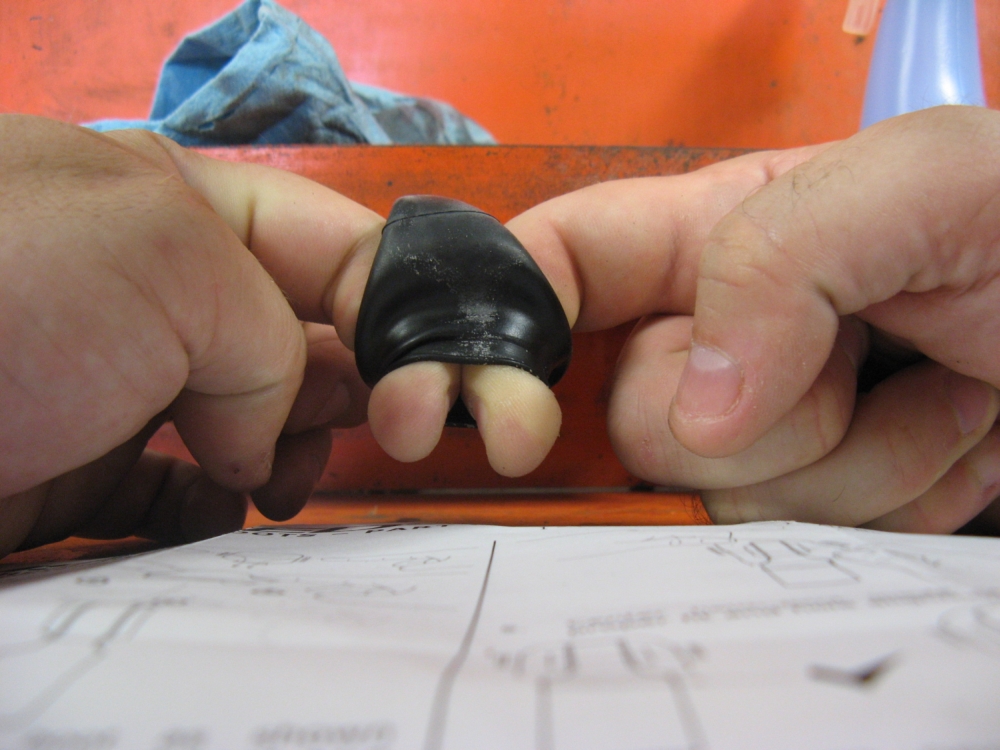
The boots are not hard to install. Per the directions, the Heim joint should be clamped in a vice, the outer edge greased (maybe lighter than pictured), and then you do some finger Yoga to stretch the boot over the Heim joint


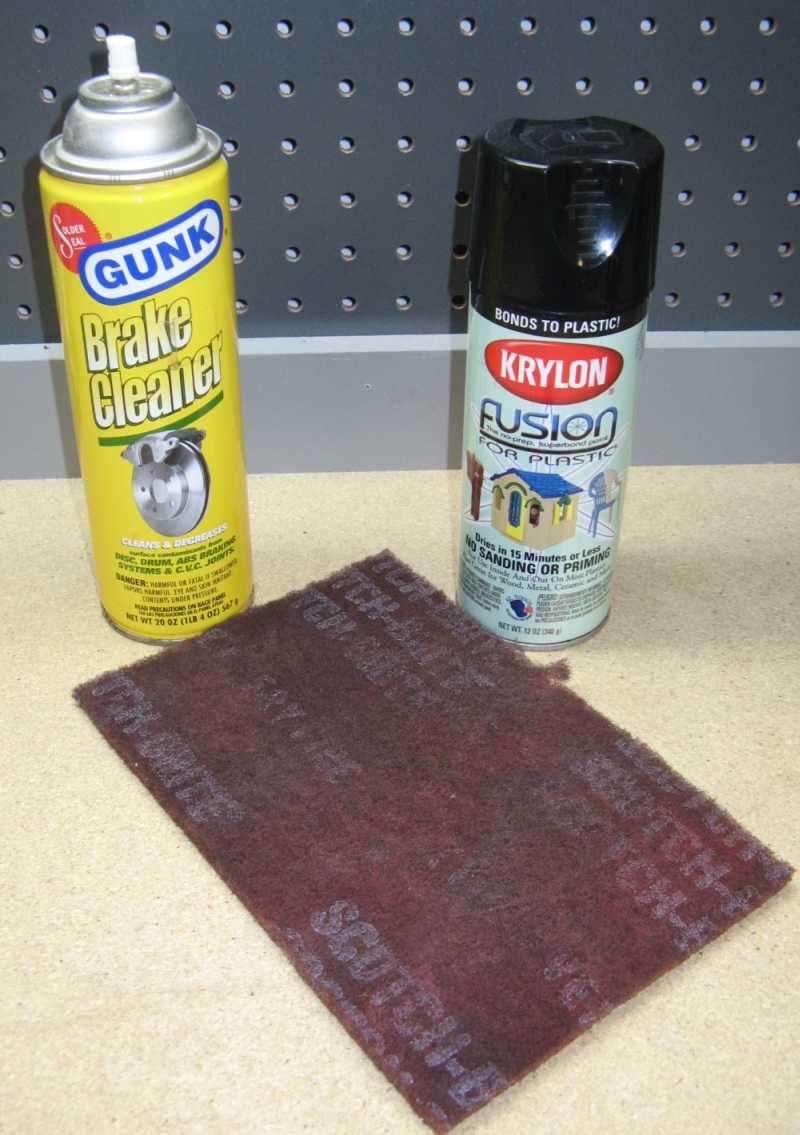
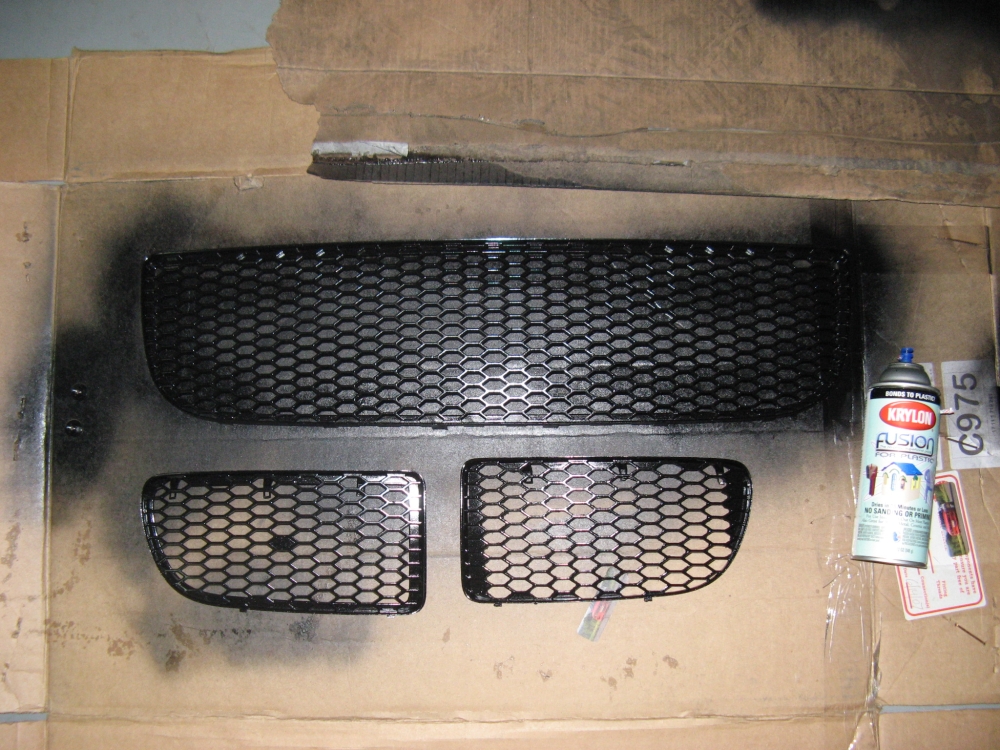
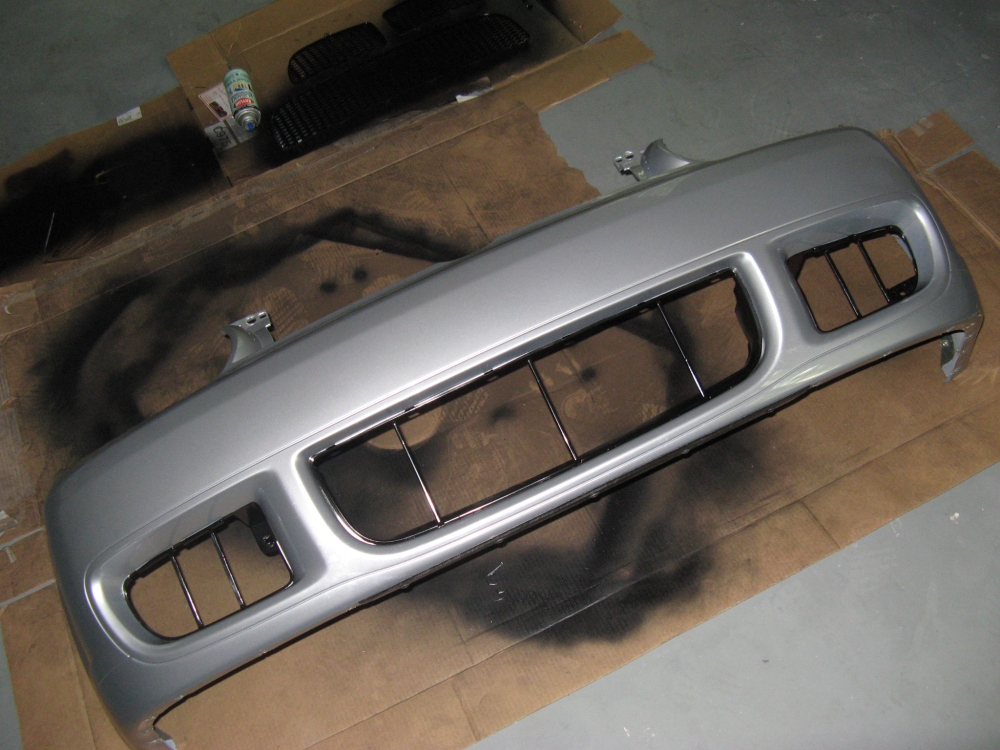
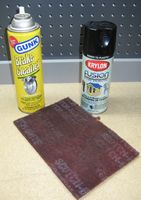
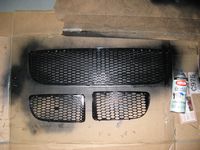
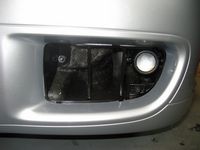
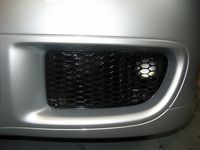
The front bumper had recently been replaced under warranty. It was removed so that I could paint the silver supports behind the grilles black and repaint the grilles black. I used a red ScotchBrite pad to scuff the surfaces I planned to paint and then wiped the surfaces down with brake cleaner to remove any oil, grease, or other contaminants. The bumper was taped off and several coats of Krylon Fusion paint with built in adhesion promoter were then applied, tack time between coats is 10 minutes, total dry time one hour.
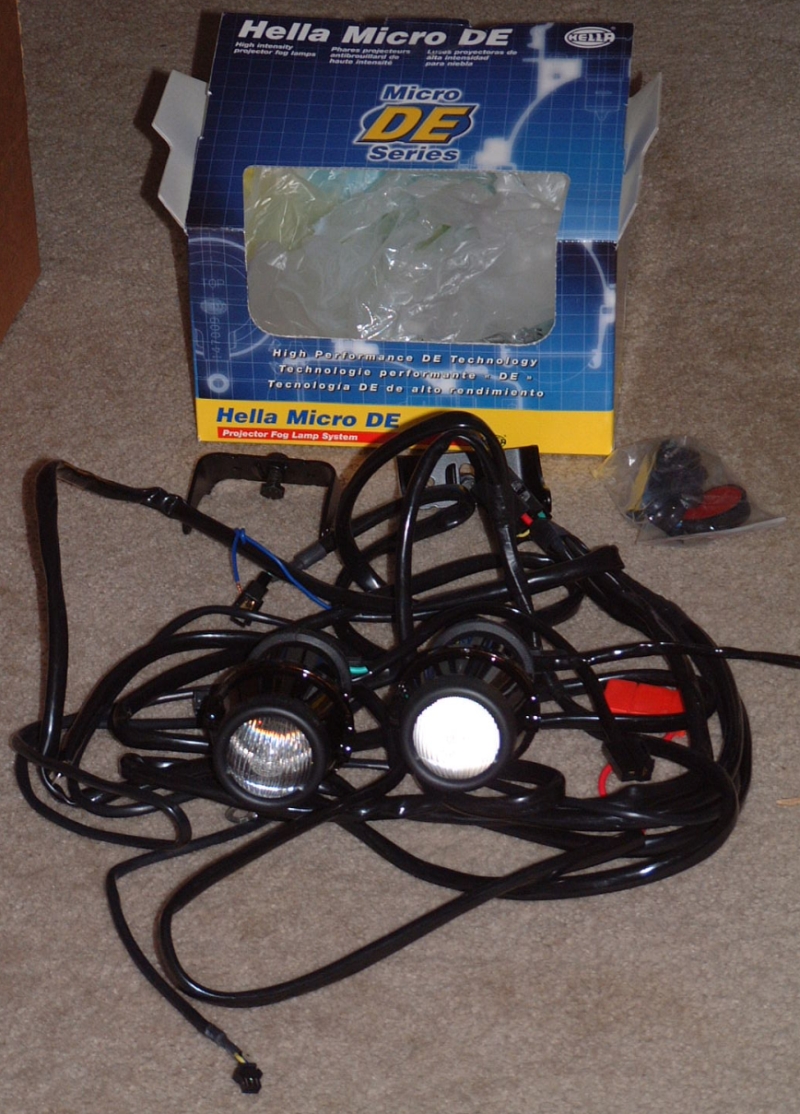
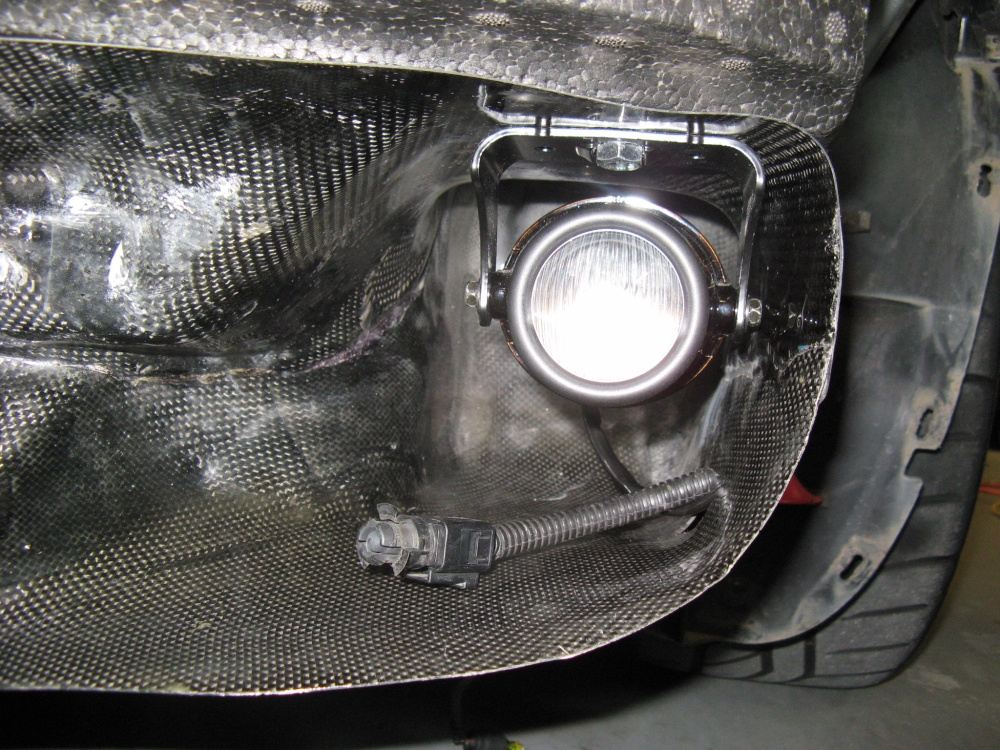
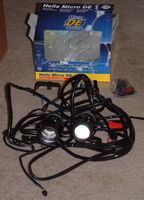
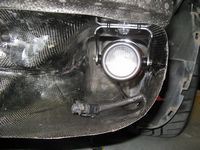
While the bumper was removed, Hella Micro DE fog lights from Susquehanna MotorSports were installed to replace fog lights lost with E-code HID headlight installation. Hella installation instructions HERE, my installation guide with pics is HERE. I modified the supplied wiring harness to use the trigger wire from the OEM headlight harness for the fog lights in place of the supplied switch. The rebar was drilled for mounting, see above installation guide for more details. Both projects turned out pretty nice:


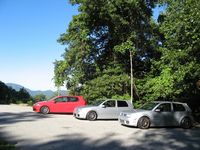
September 2007 North GA mountain drive: Proving the MKIV and MKV can play nice together


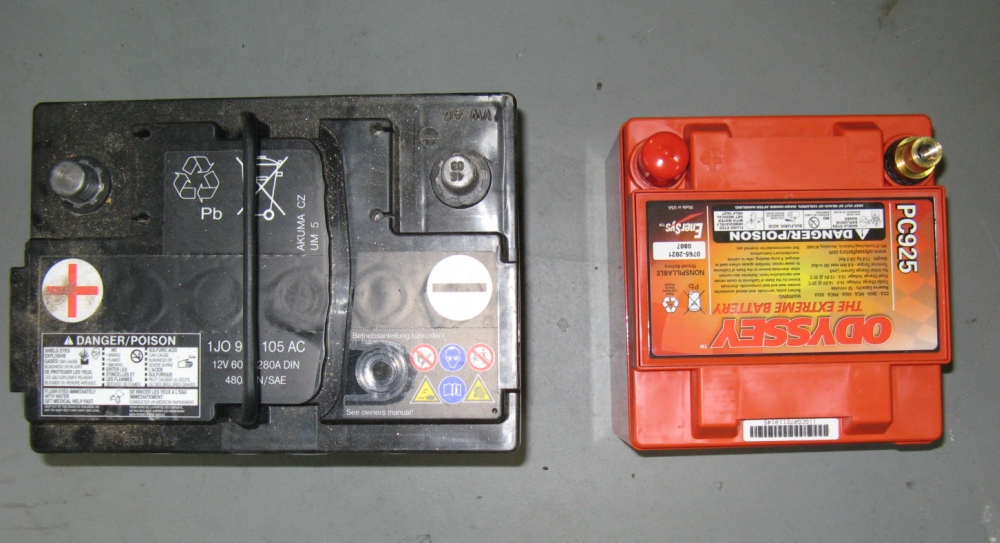
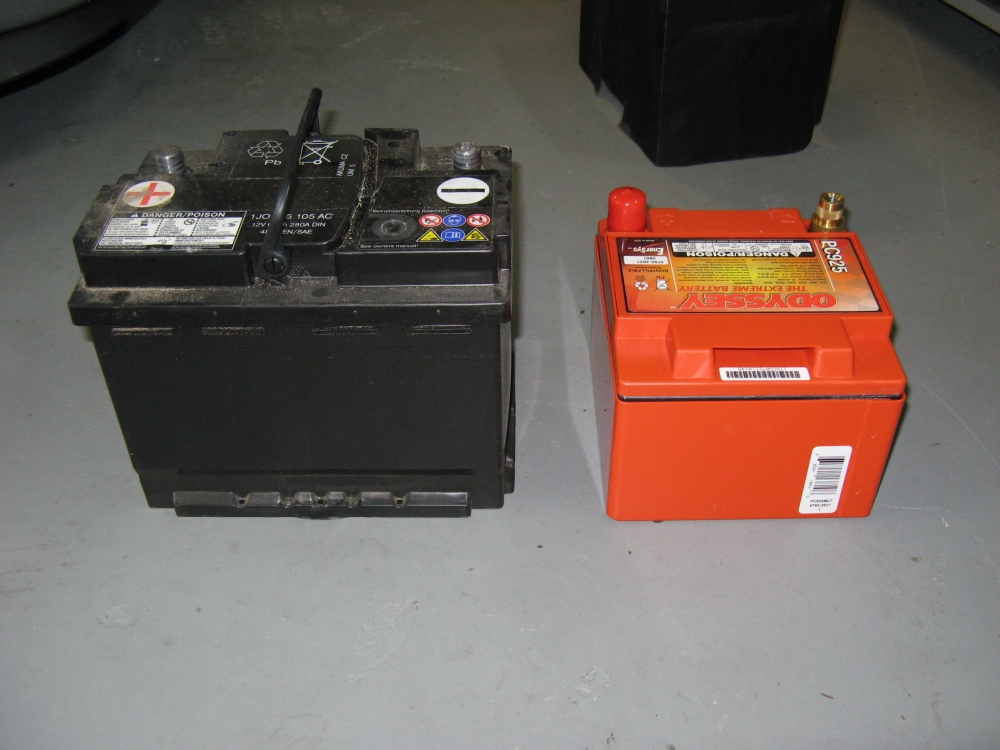
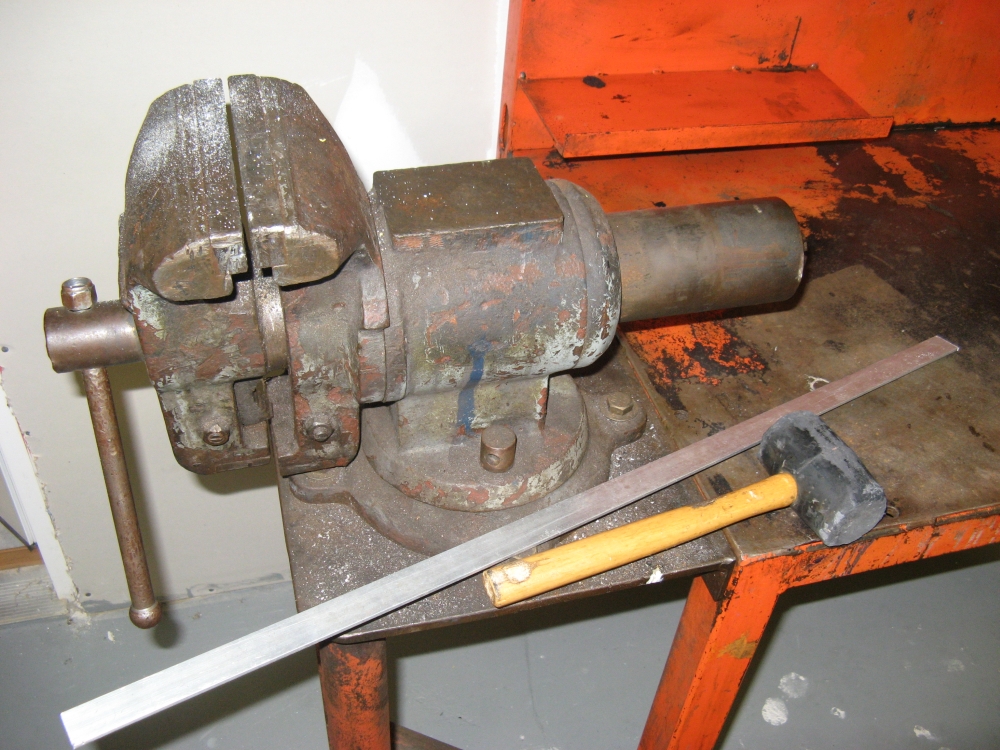
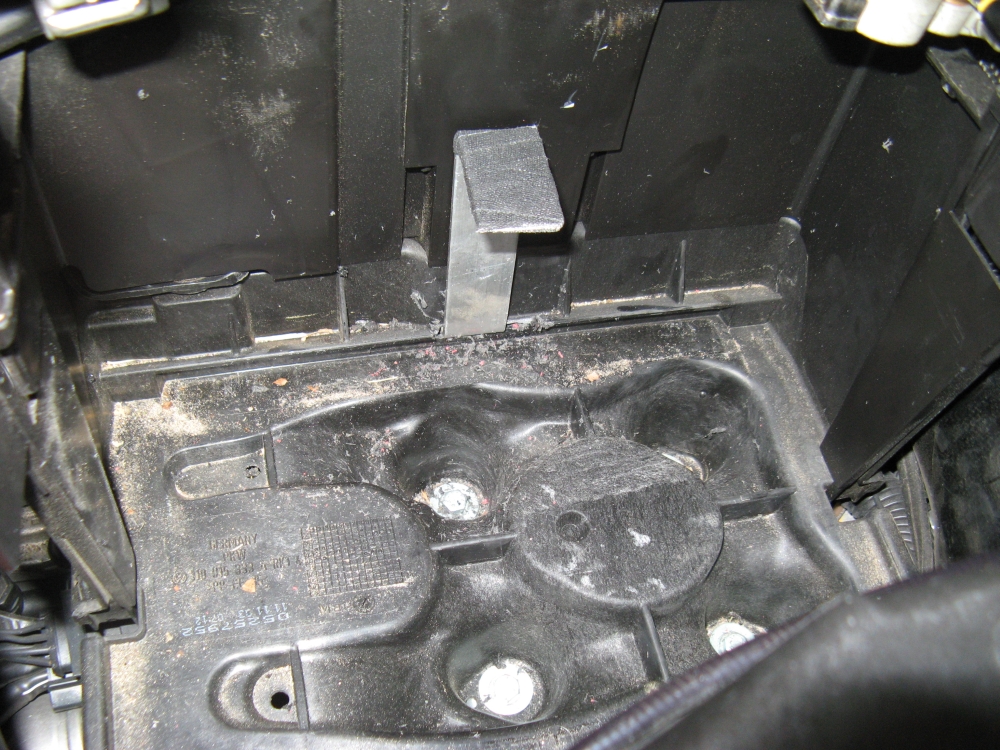
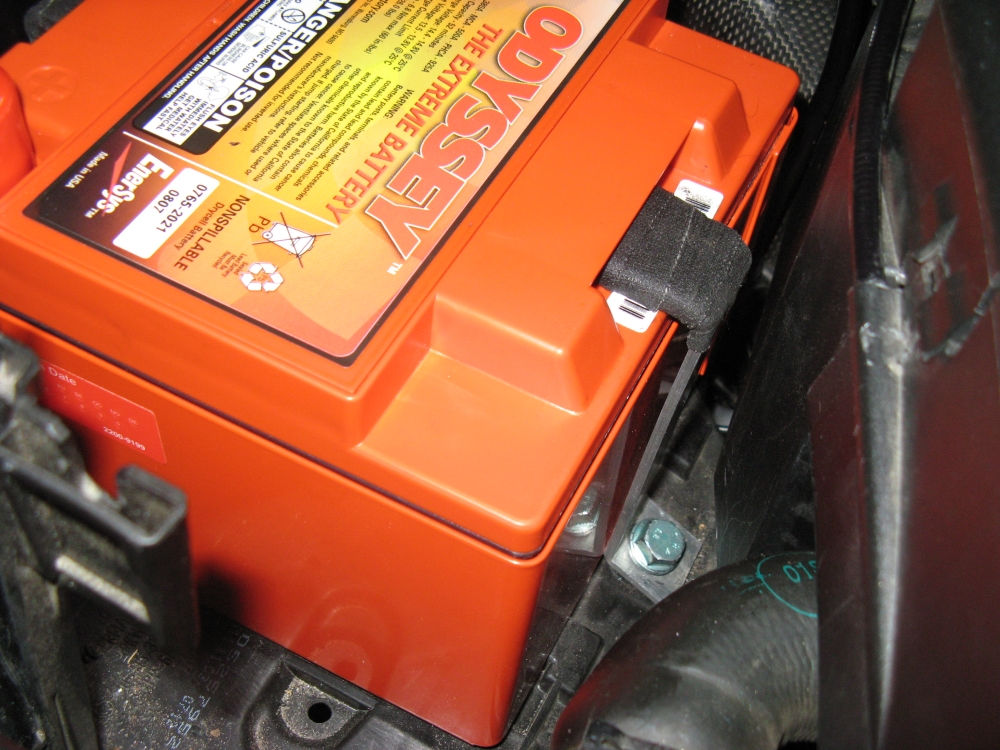
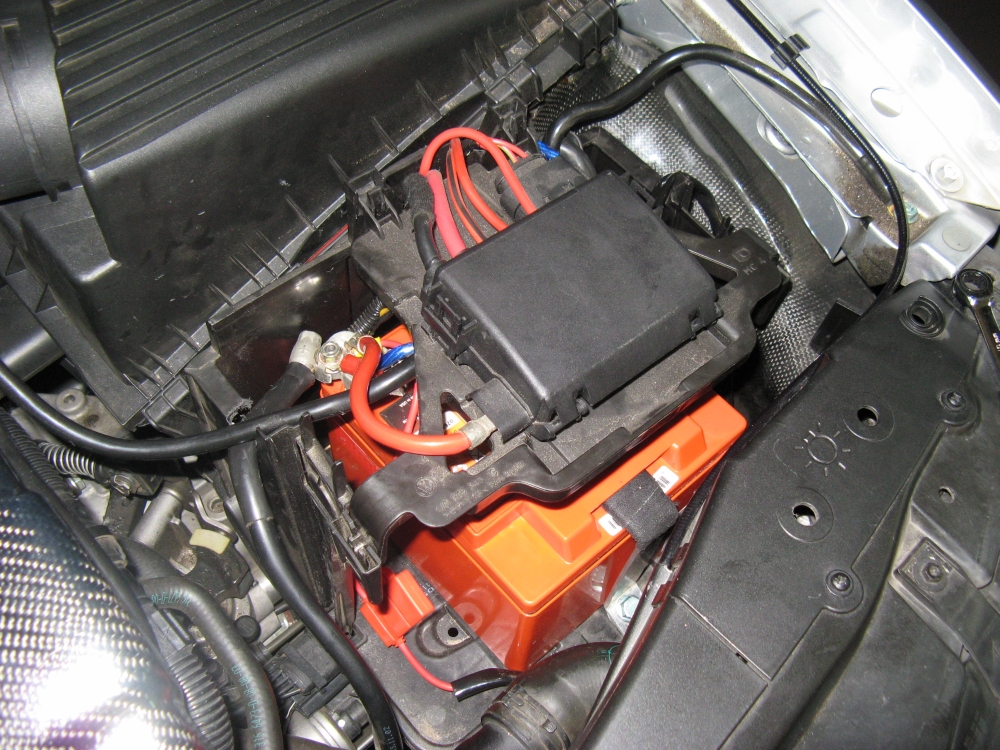
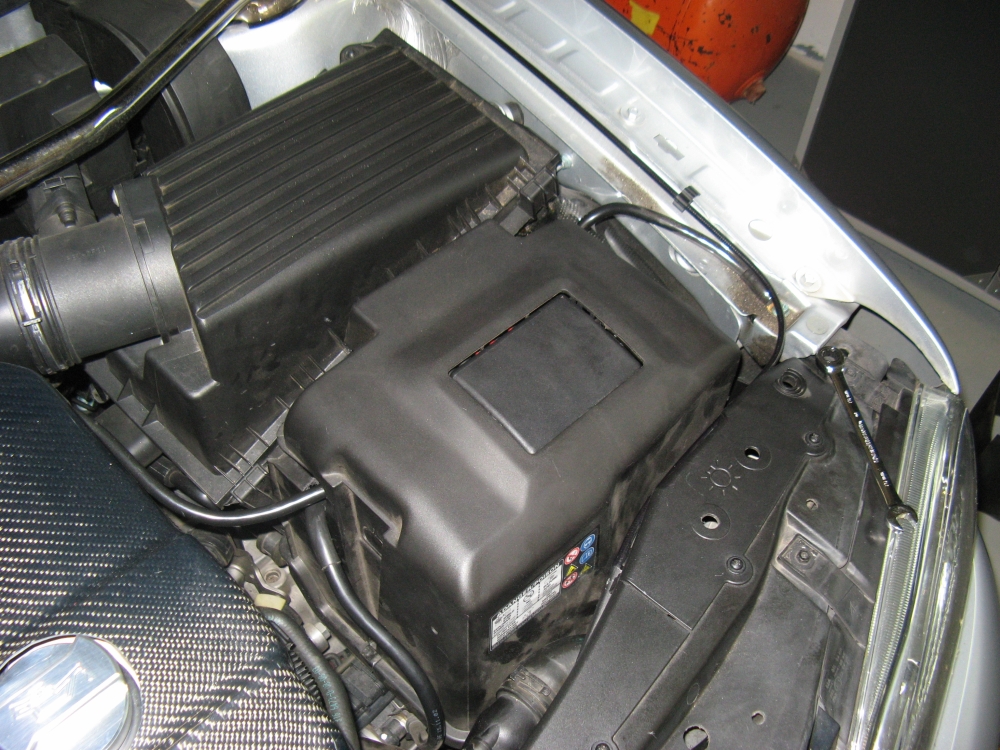
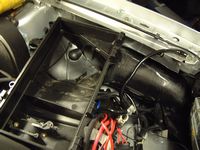
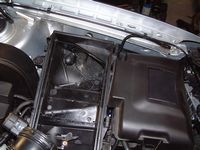
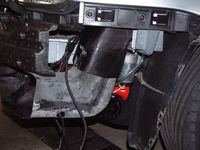
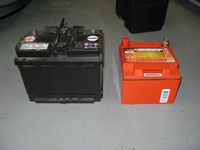
My battery of 3 years and 6 months finally gave up. No warning signs it just decided one day not to crank or charge, at least it didn't leave me stranded. I decided to replace it with an Odyssey PC925MJT from Summit Racing. The Odyssey battery weighed in at 23 lbs compared to the OEM battery weight of 34 pounds and was a bit smaller in size. I knew I would have to make some custom mounts for it, all it took was some flat aluminum stock, a rubber mallet, a drill, a hack saw, and a big vice. I first made a piece to hold down the front of the battery and wrapped the top with fabric electrical tape for padding, a hole was drilled at the bottom to utilize the OE mounting bolt. For the rear, I fashioned another hold down and modified the box slightly with a Dremel tool for clearance. I had to use the Dremel to also make a notch in the left side for the battery positive wire. With everything bolted in place, the battery does not move and all of the OE brackets and cover still work fine, although I did not re-use the battery blanket.
Odyssey manuals are here: Owner's Manual, Technical Manual, and Brochure


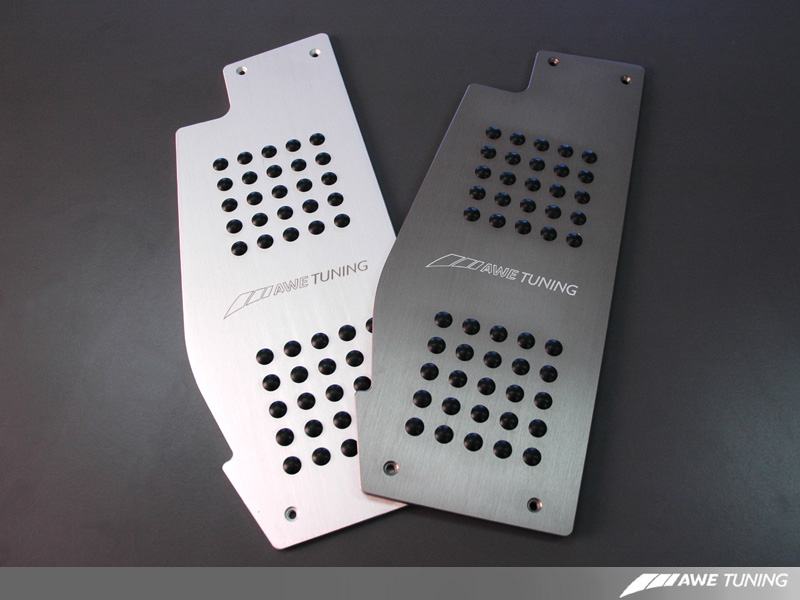
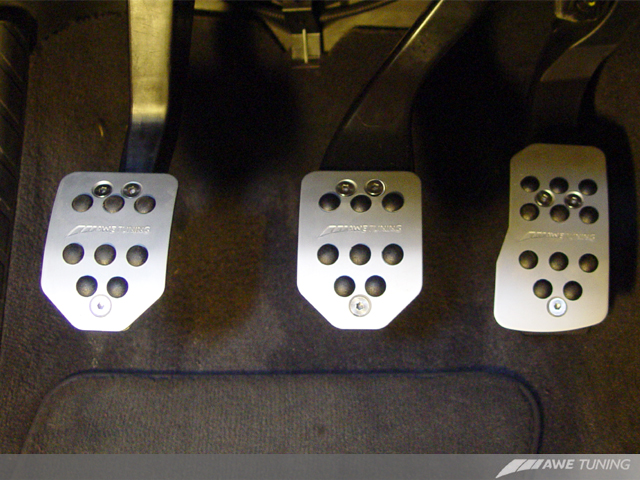
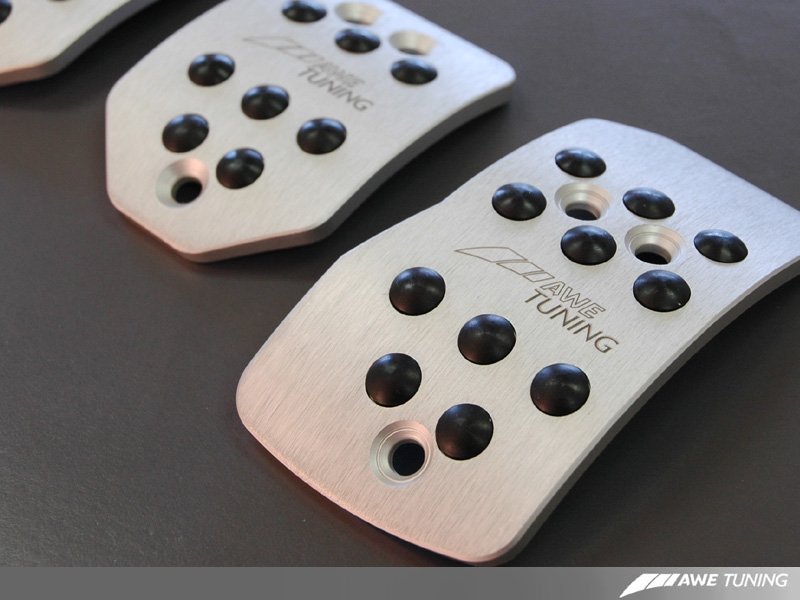
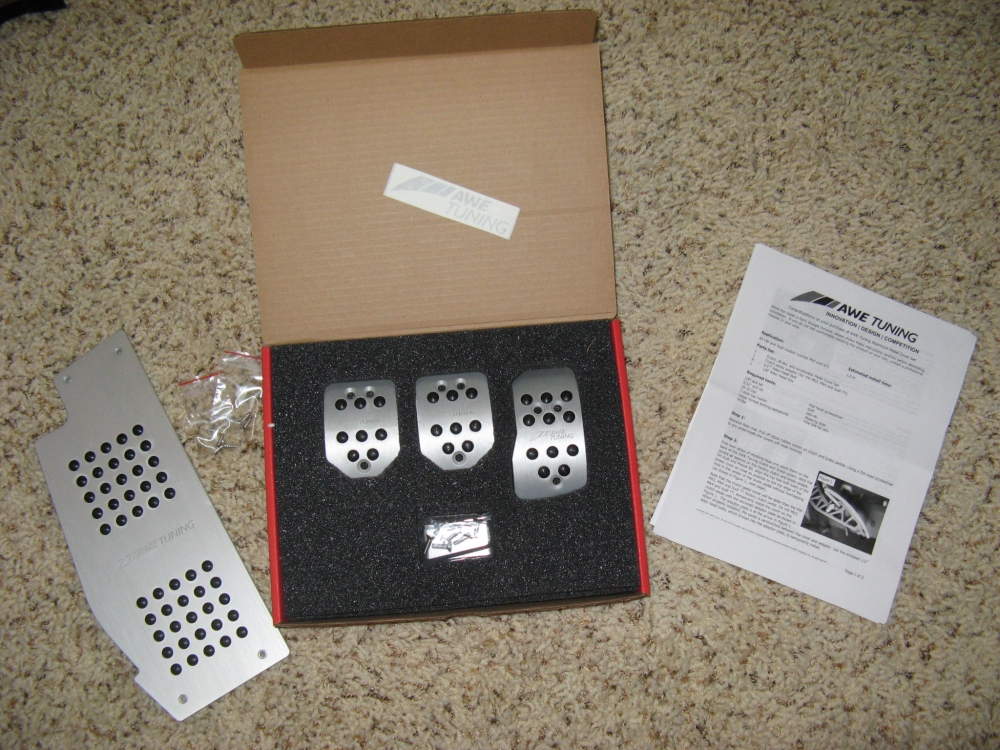
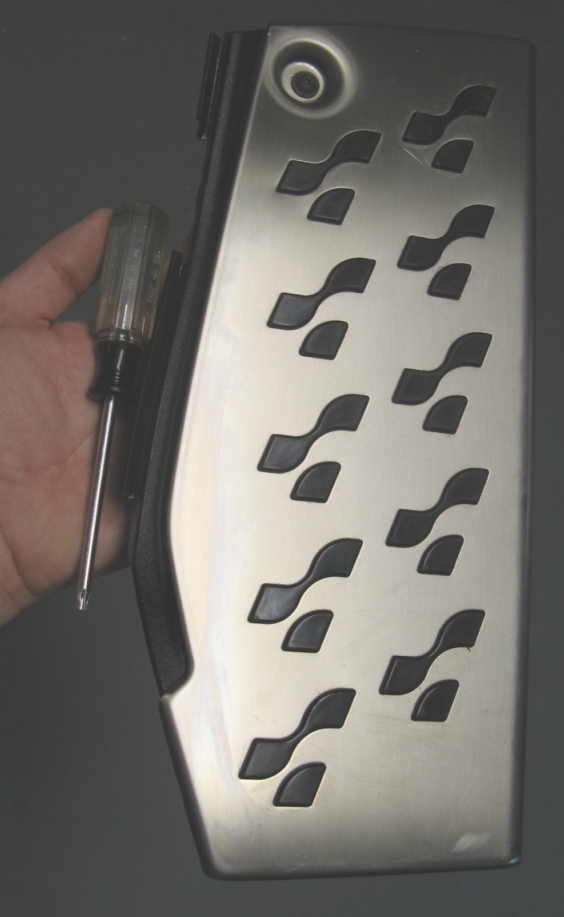
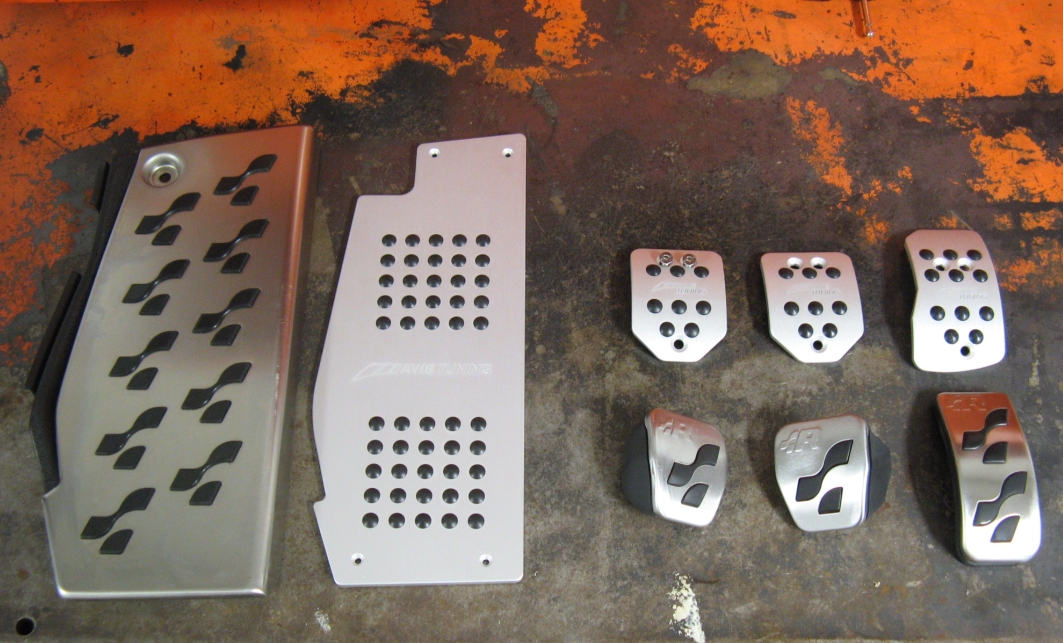
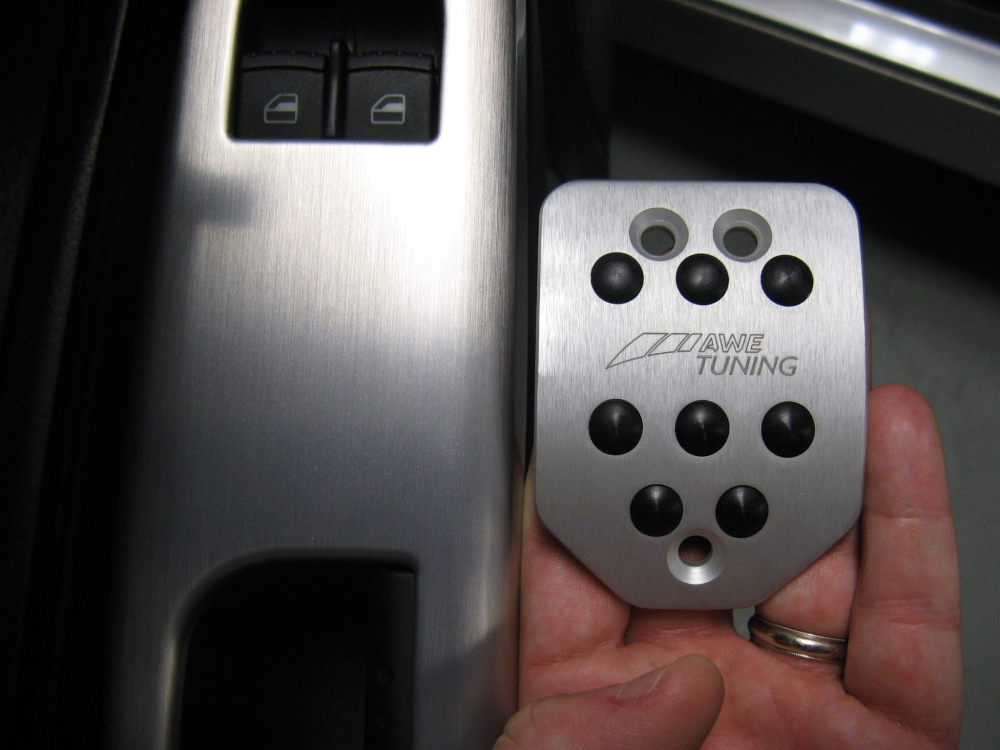
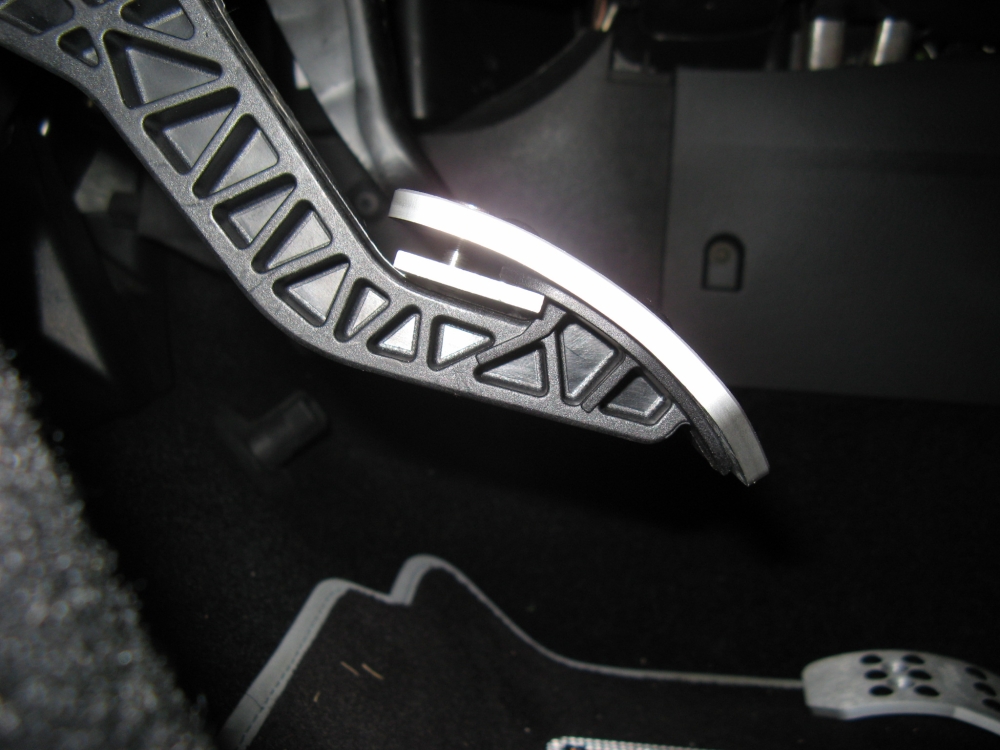
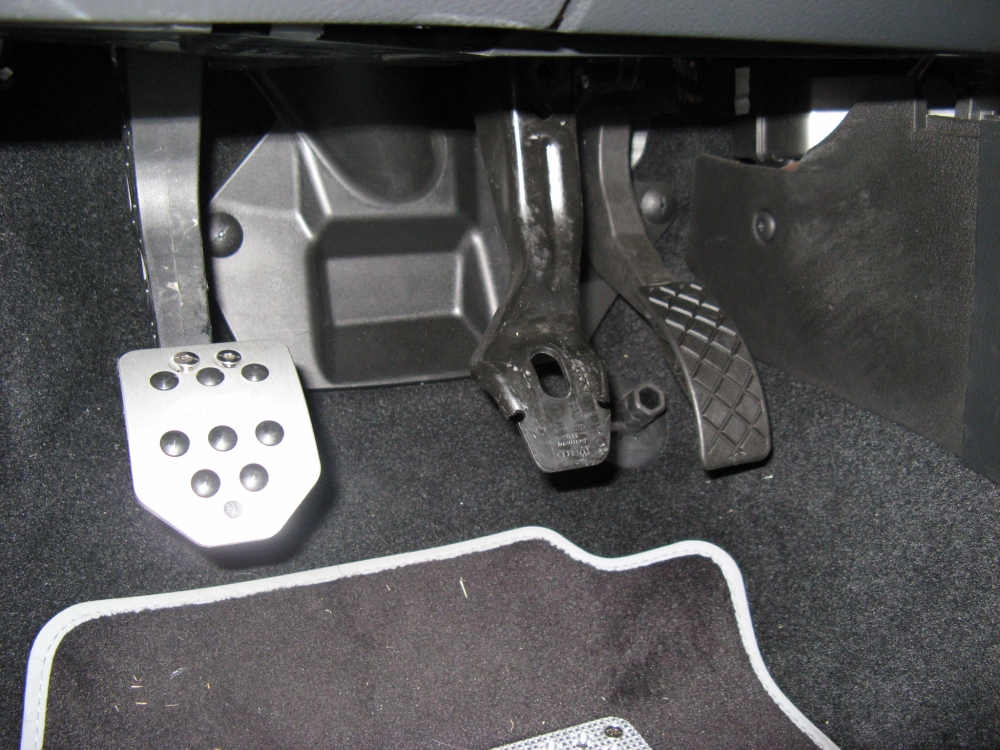
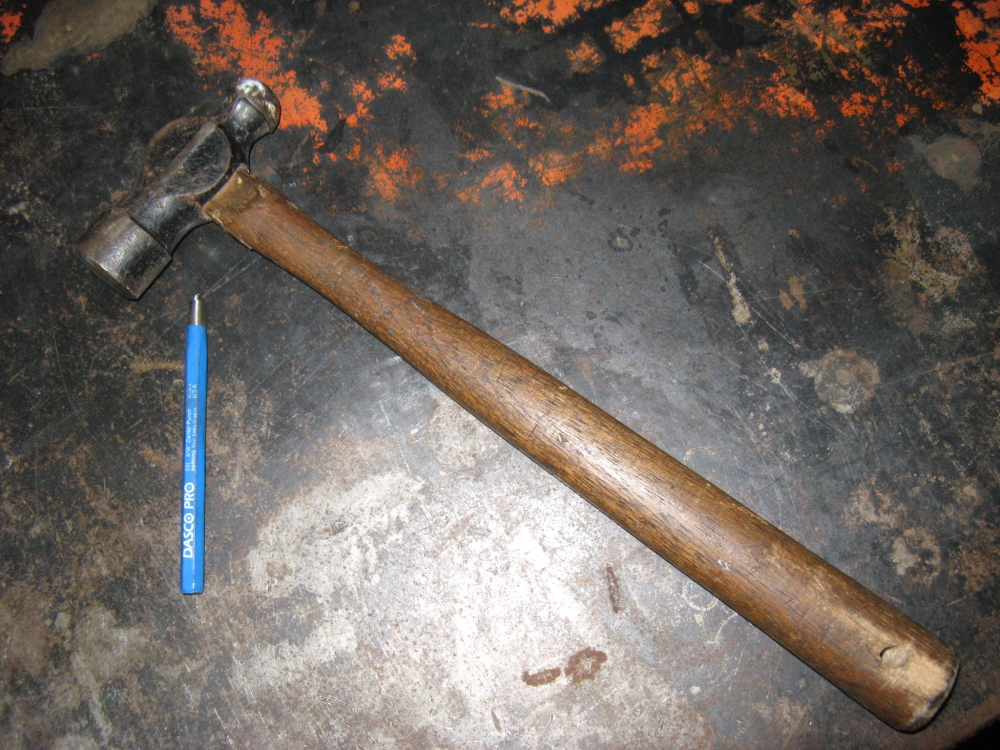
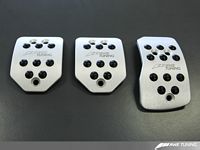
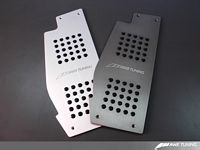
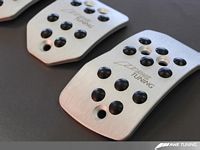
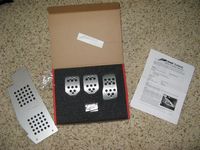
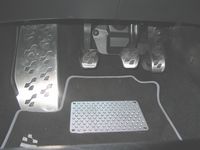
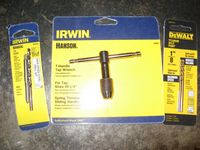
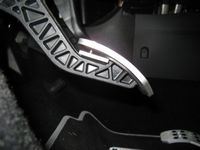
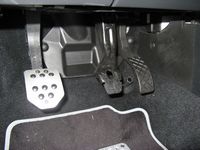
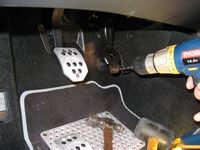
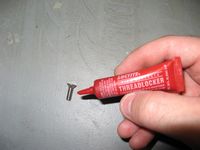
OE pedal covers removed/cleaned/stored and replaced with this pedal set from AWE Tuning. The silver anodized finish is a close match in color and brushed texture to the OE trim. OE dead pedal removed and replaced with standard black plastic MKIV version (P/N 1J1864777AB41) and installed after AWE dead pedal is attached. Dead pedal removal involves removing the Torx T20 screw from the upper left corner and then sliding the pedal up to release the clips on the back, it can then be released from the side trim panel (you can see the clips on the back and on the side in the pics below). To attach the dead pedal I marked holes, drilled with a 1/8" bit and then screwed them together using a 3mm HEX wrench. OE pedal covers are press-fit and are removed by carefully pulling off. The first step for installation is to loosely attach the metal bracket with supplied screws to the top of the clutch pedal and slip it over the plastic clutch base. After positioning/aligning ALL pedals, a scribe/pencil/sharpie can be used to mark the holes. A center punch is used in the center of marked holes to prevent drill bit wandering. For the main 3 pedals, holes are drilled first with a 1/8" bit, then a 5/32" bit and tapped with a 10-32 tap - pedal set is then installed with supplied hardware and hex wrench:


Spent some time with my R32 friends up at Tail of the Dragon (HWY 129) at the East Coast R GTG 2008. We drove all of the surrounding roads as well, Hellbender/Fontana Dam (HWY 28) and on the way up hit Wolf Pen Gap (HWY 180) in N. GA:
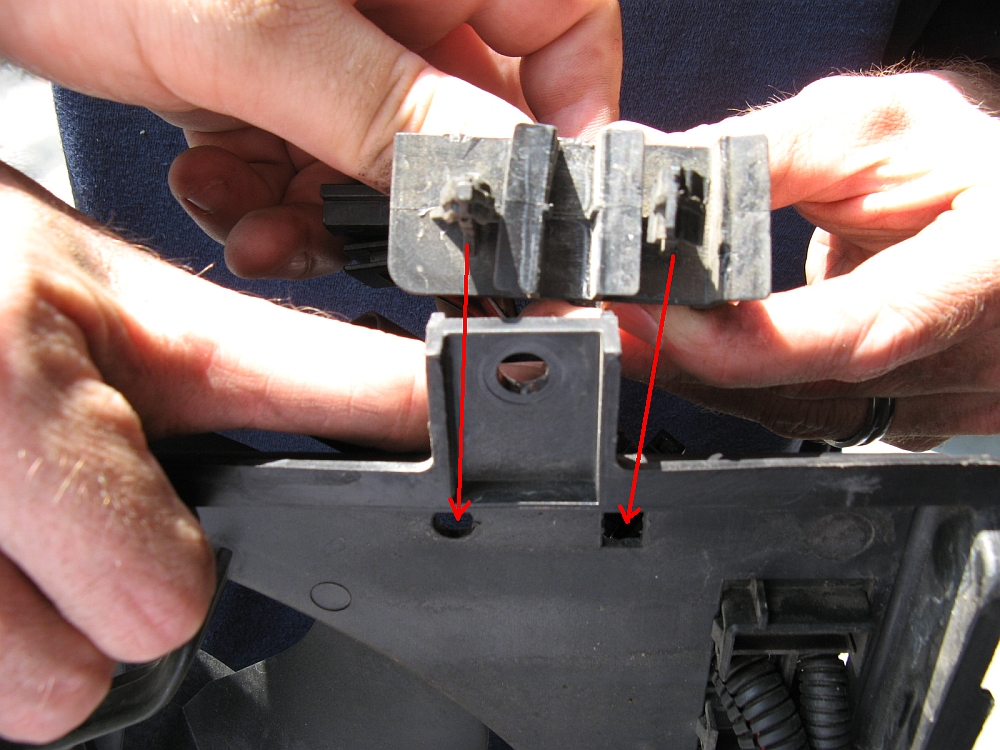
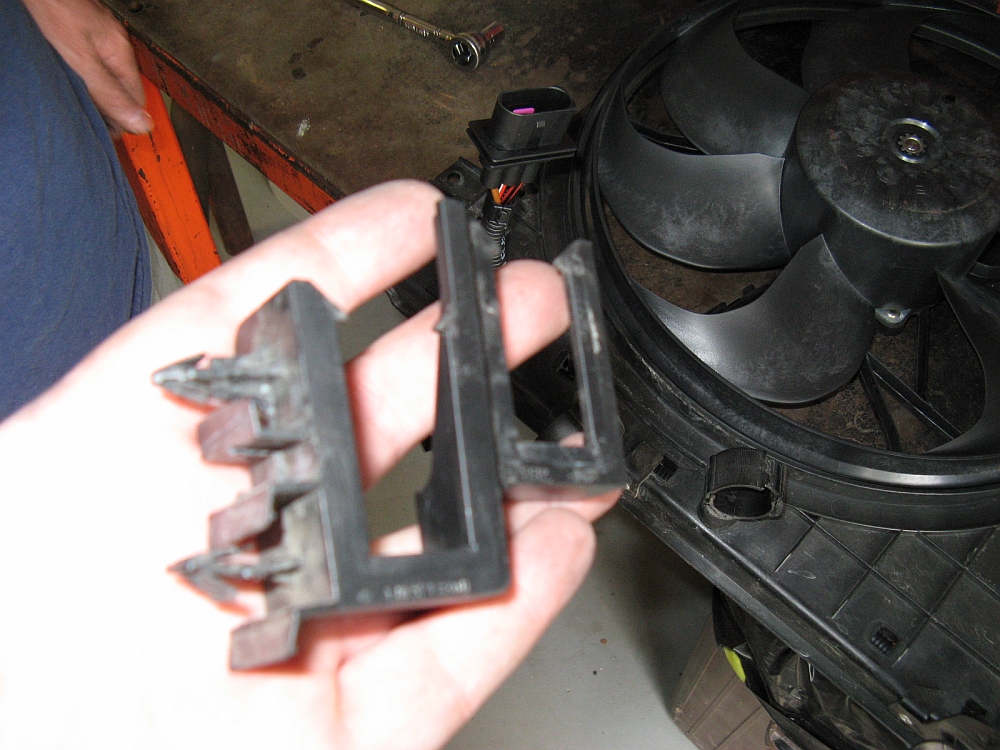
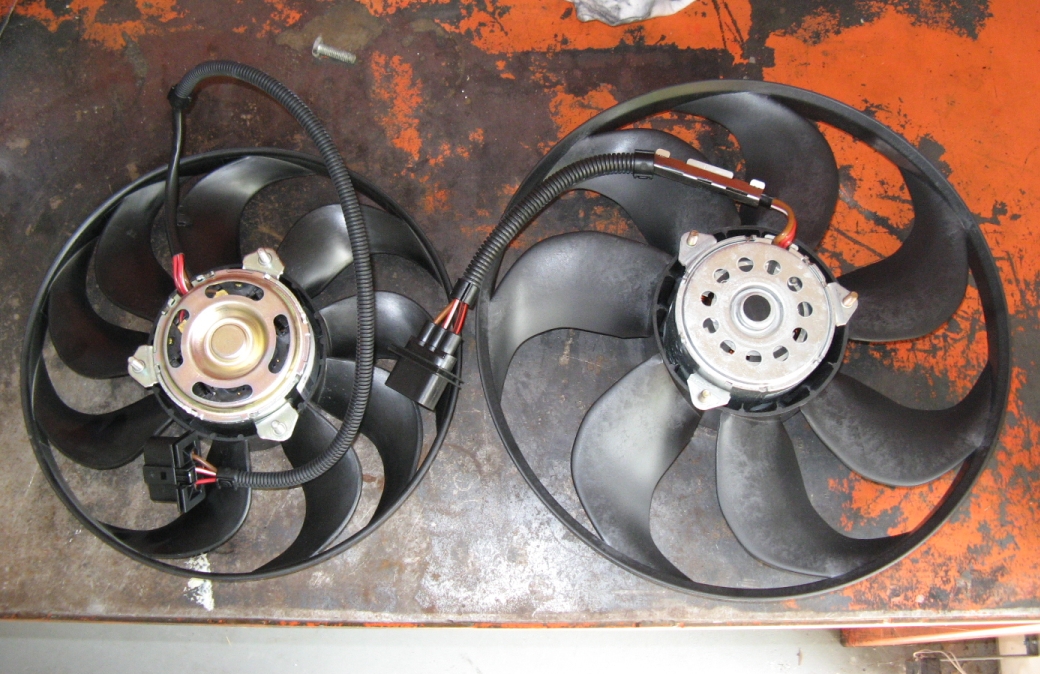
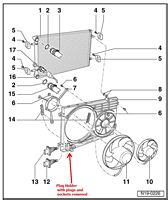
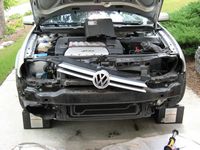
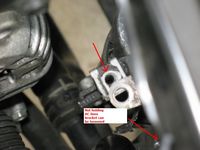
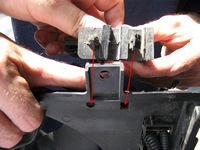
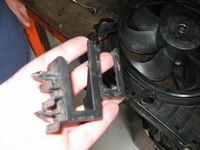
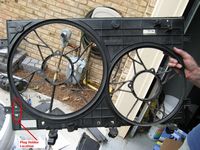
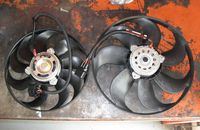
I helped a friend with an R32 R&R his dead fans. We started by removing the bumper and headlights for access to the four bolts holding the fan shroud assembly to the radiator and some additional nuts/bolts that required removal to access these four bolts- Bentley recommends setting the front lock carrier to the service position but that is a lot of work that is NOT needed. We did find that removing the plugs, sockets, and plug holder on the lower driver's side helped for access to that bolt and assembly removal, on the passenger side we removed the bolt on the AC receiver/drier bracket so that the part in the way could be moved for access to the upper bolt, the nut holding the AC hard lines bracket was also removed and the bracket moved as far out as possible to allow the lines in the way to be moved to work around. The hose clamps at the bottom of the shroud need to be undone so that the hoses can hang and allow for the fan assembly to be removed. Once the fan assembly was removed, there were three bolts holding each fan to the shroud that were removed, the wire looms were clipped in place with metal conduit retainers-these may need to be re-used depending on where the OE/OEM fans were sourced from. Installation is reverse of removal

Pending Projects:
UPDATE: The R was traded, maybe one day I will have another VW. I really enjoyed the car but wanted to try something new. I made some new friends over the course of VW ownership and shared in the VW community experience, one of the best
Oil Analysis performed by Blackstone Laboratories
Oil Analysis at 19943 miles- Mobil1 0w40
Haldex Oil Analysis at 21000 miles- VW OEM Haldex Oil
Transmission Oil Analysis at 23711 miles- VW OEM "Lifetime" 75w90 Gear Oil
Rear Differential Oil Analysis at 23711 miles- VW OEM "Lifetime" 75w90 Gear Oil
2004 R32 Click on thumbnail for fullsize print:
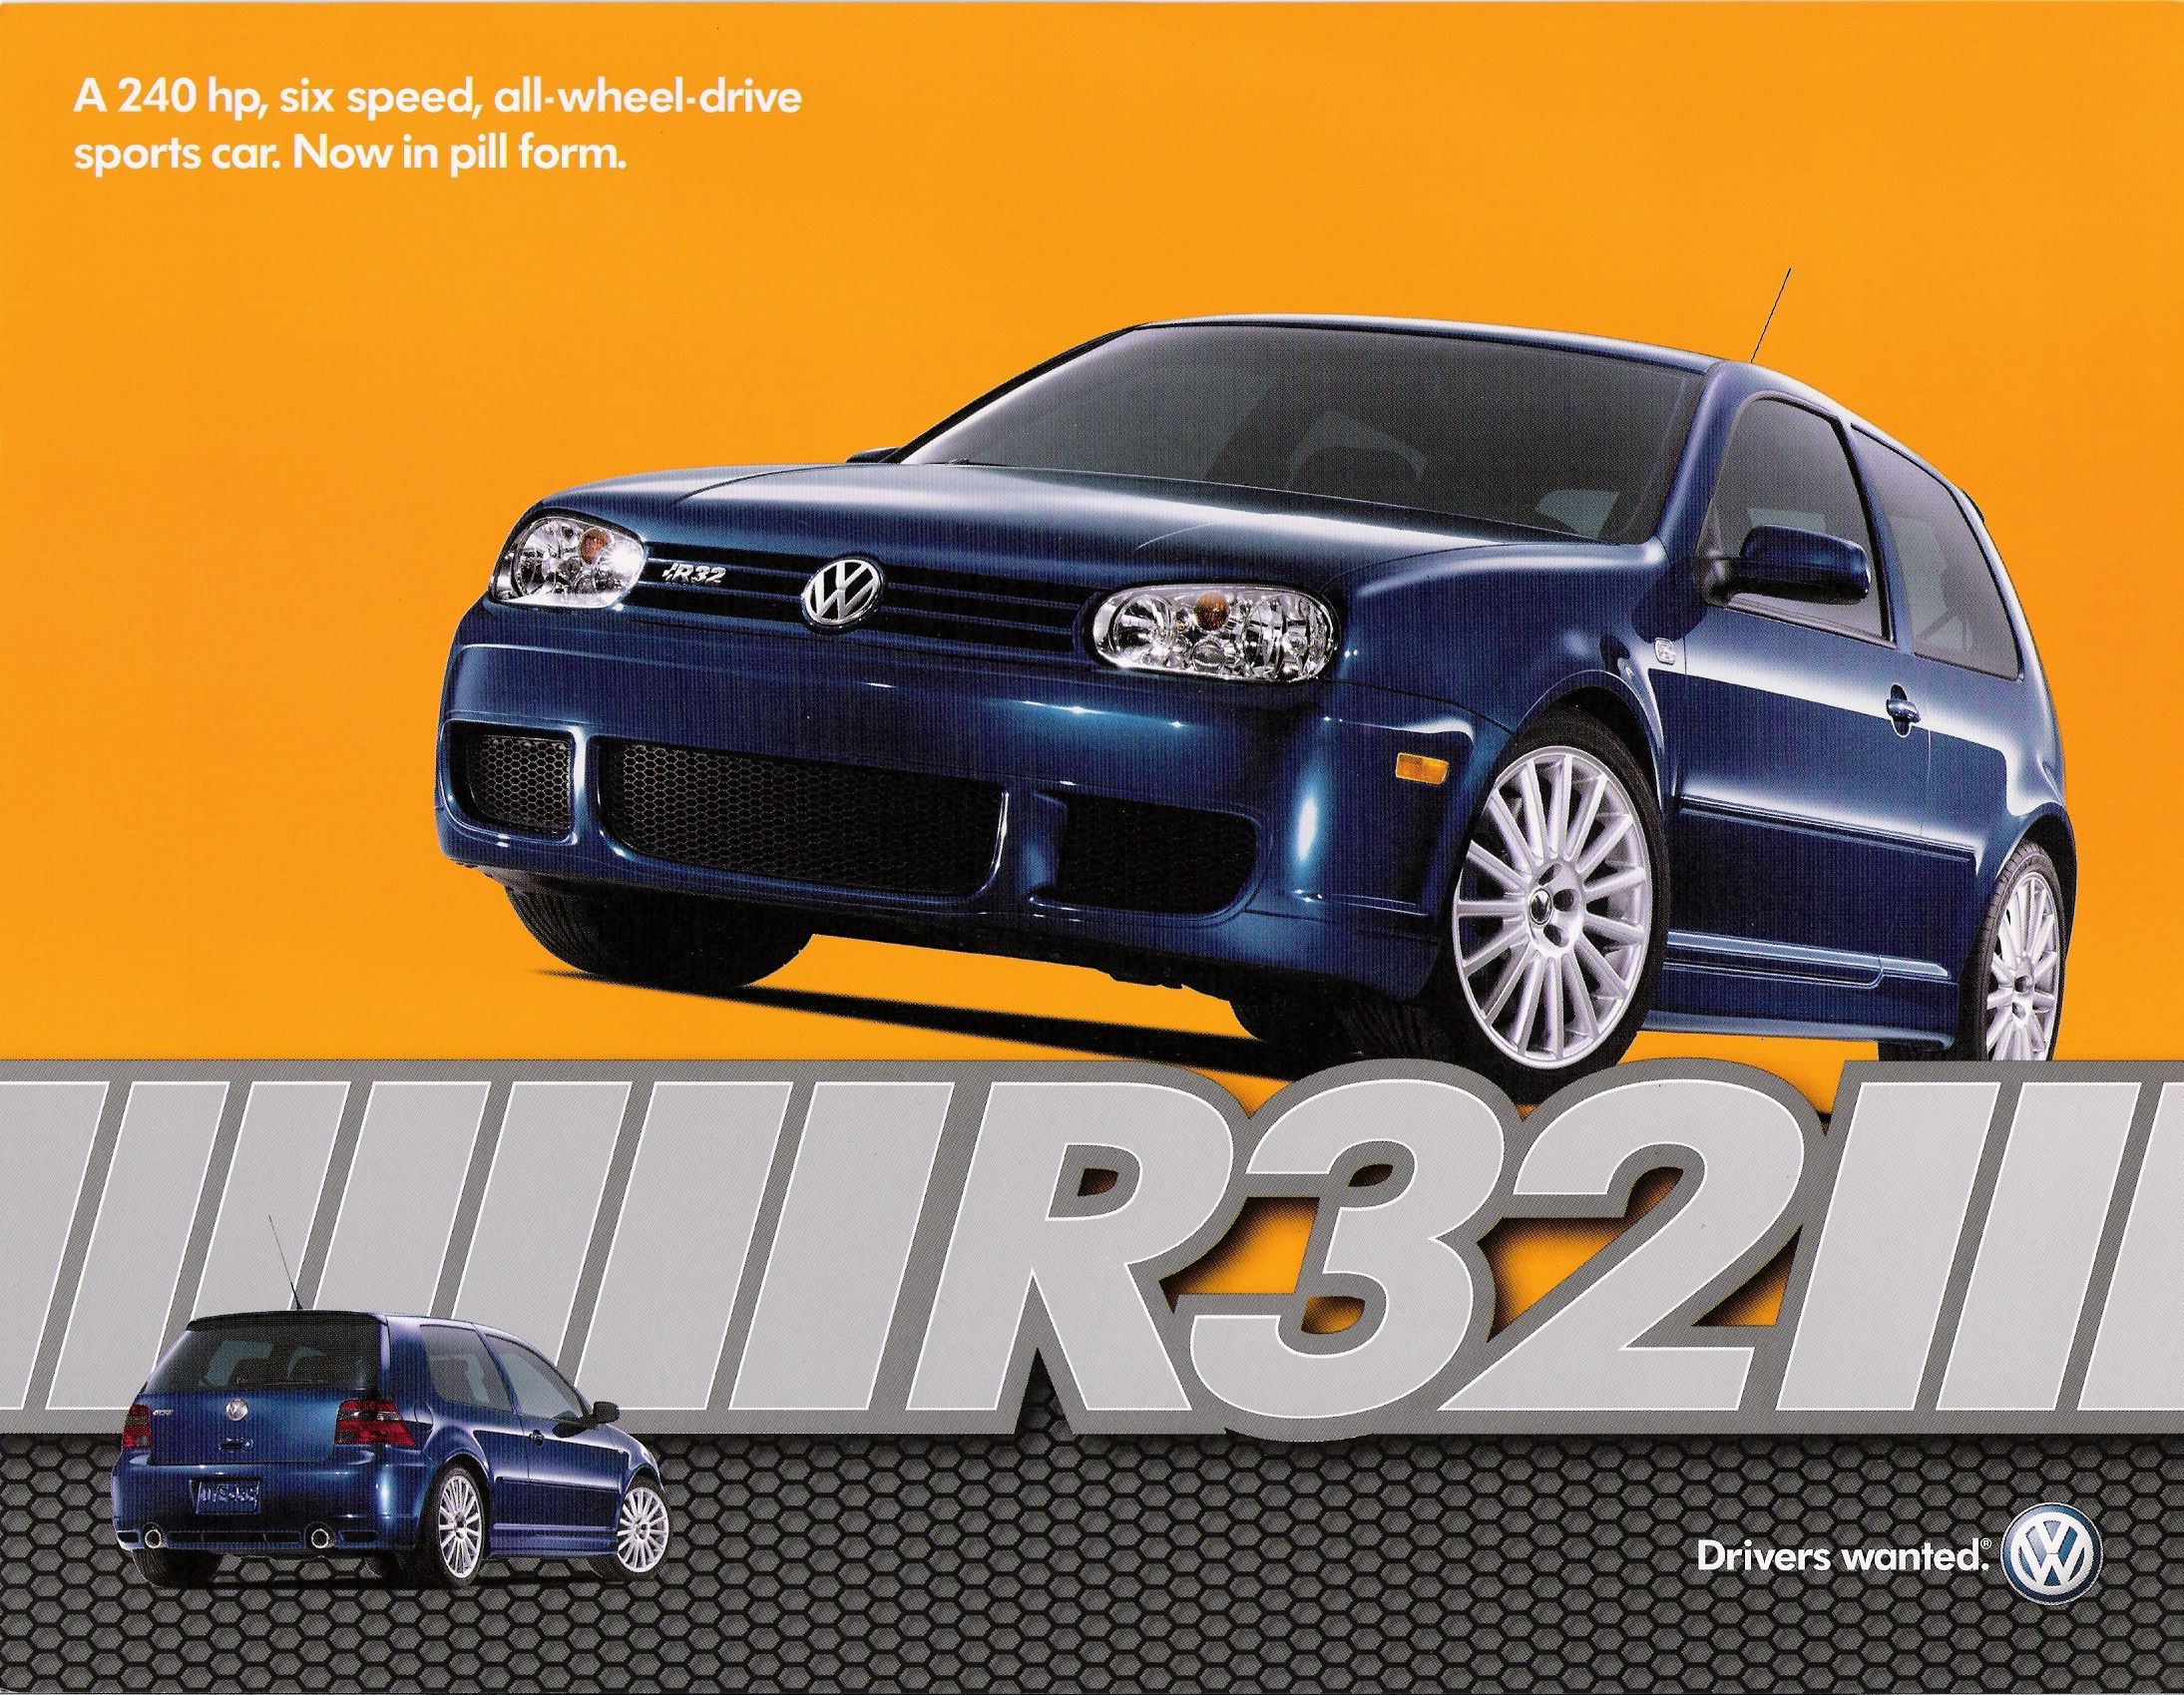
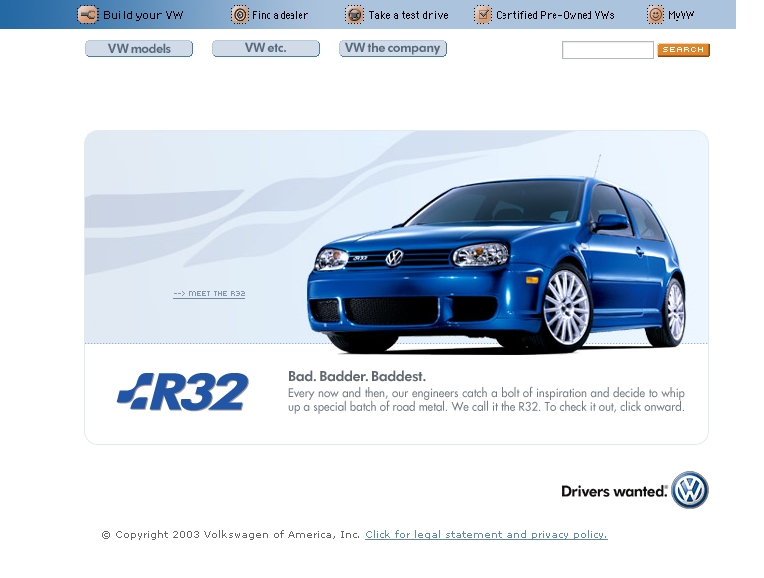
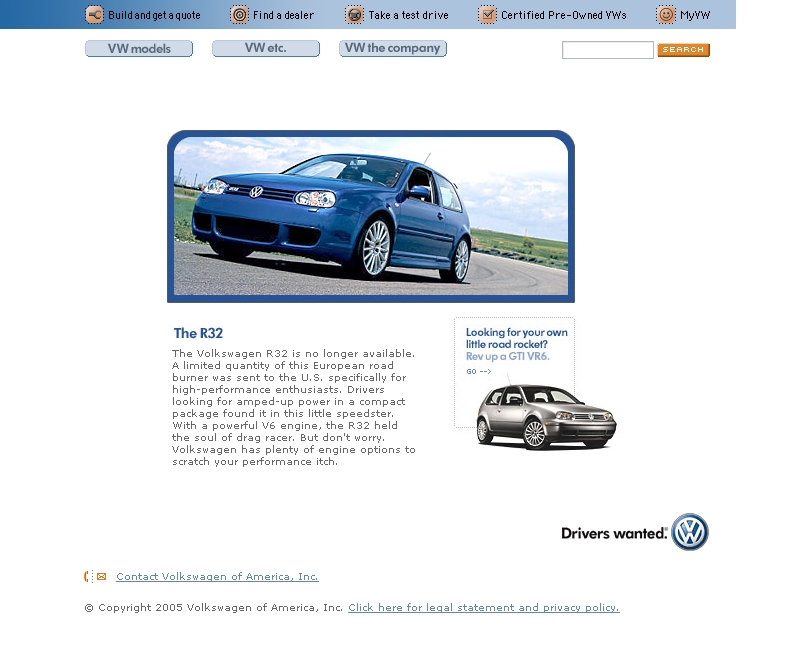
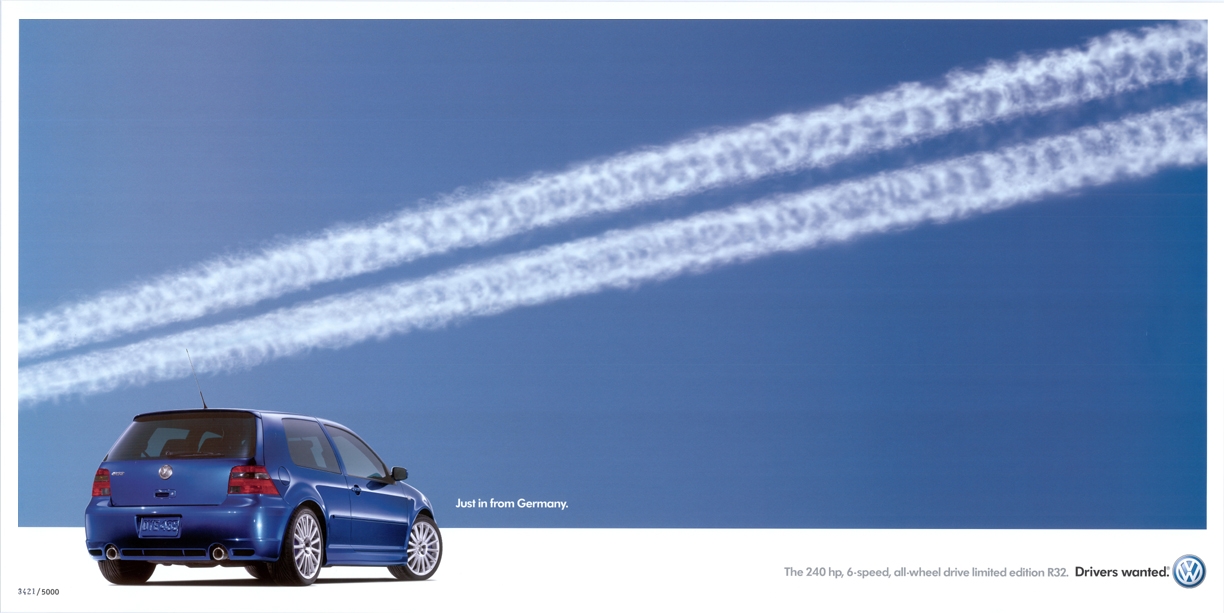
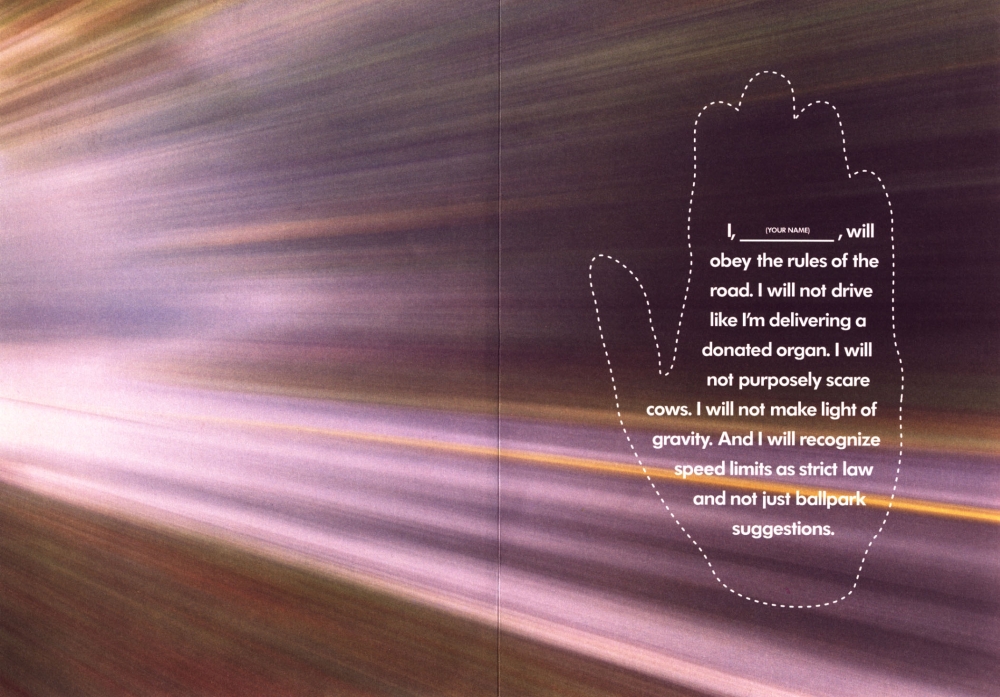
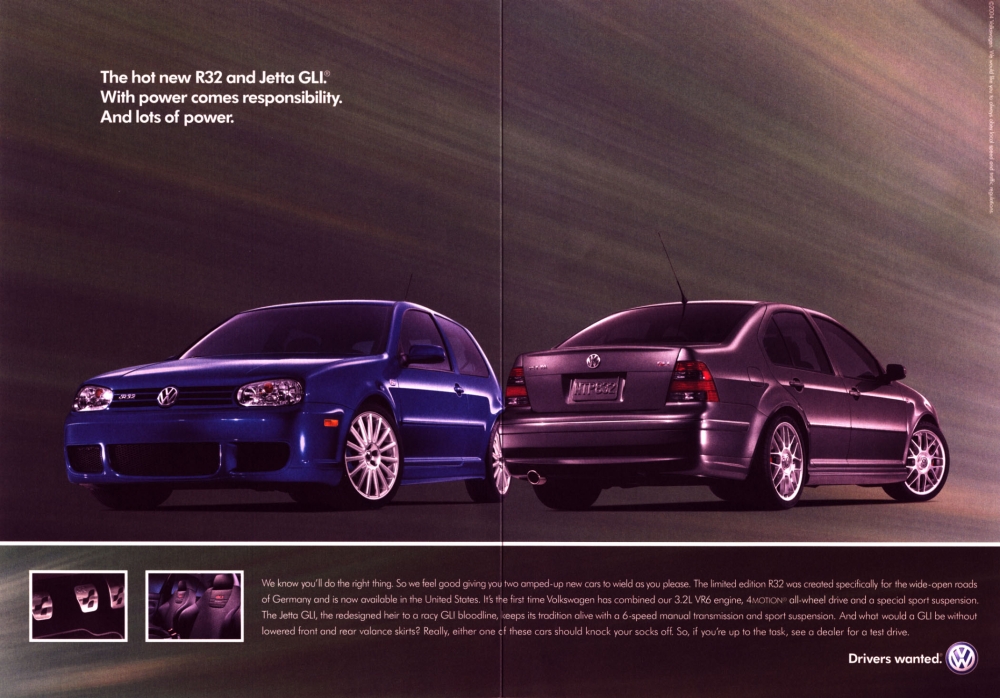
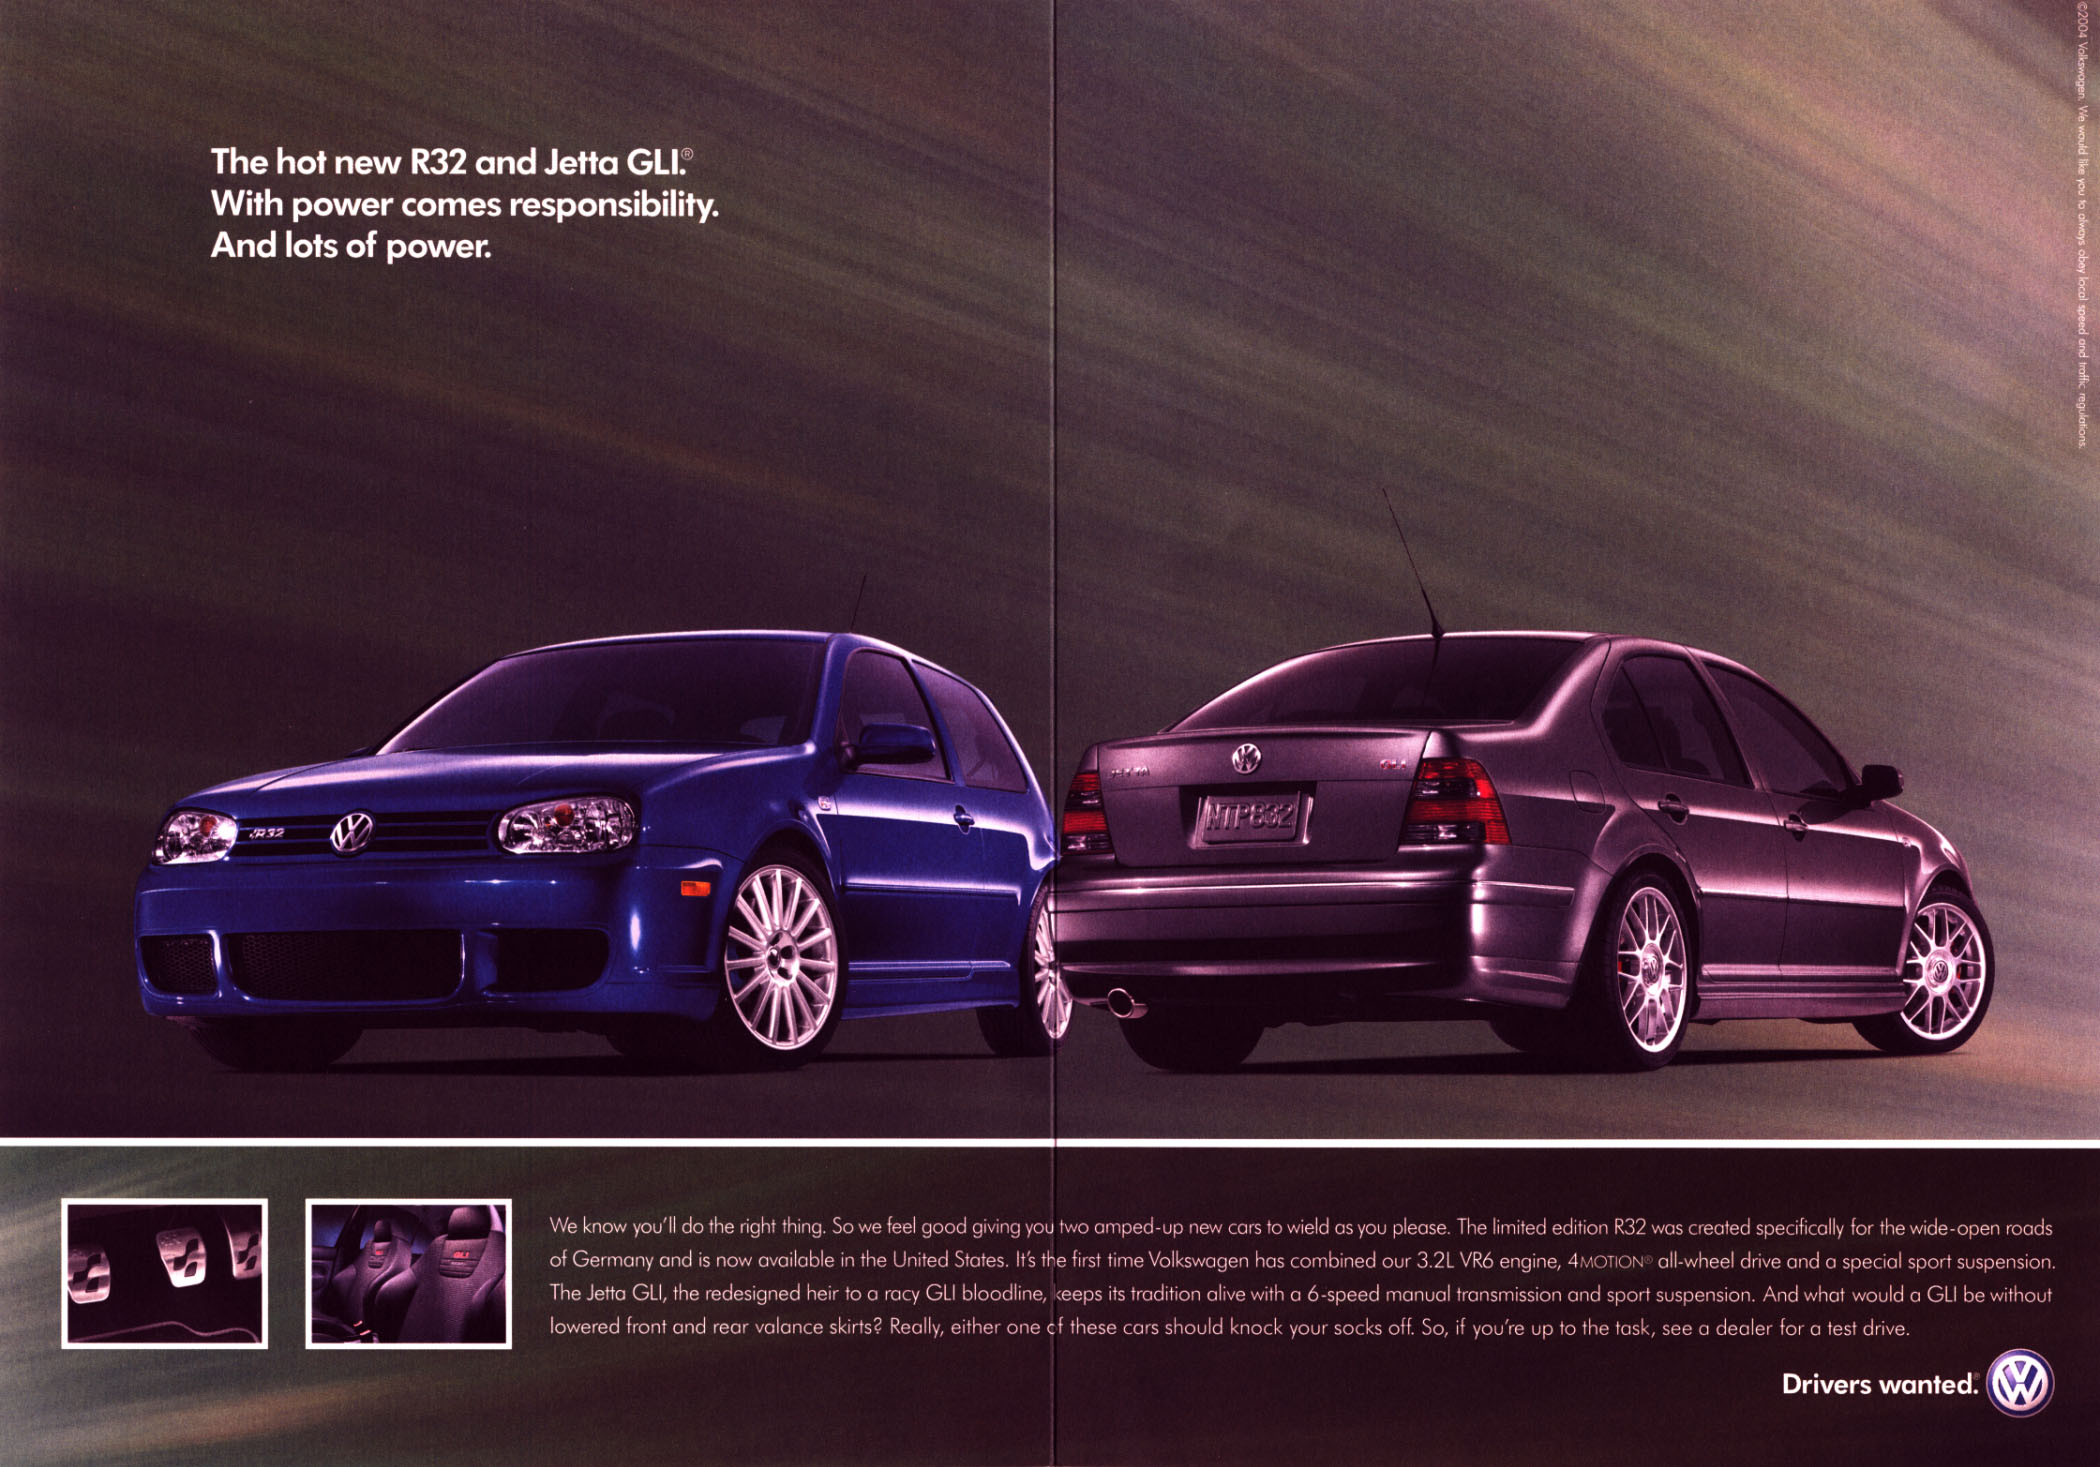
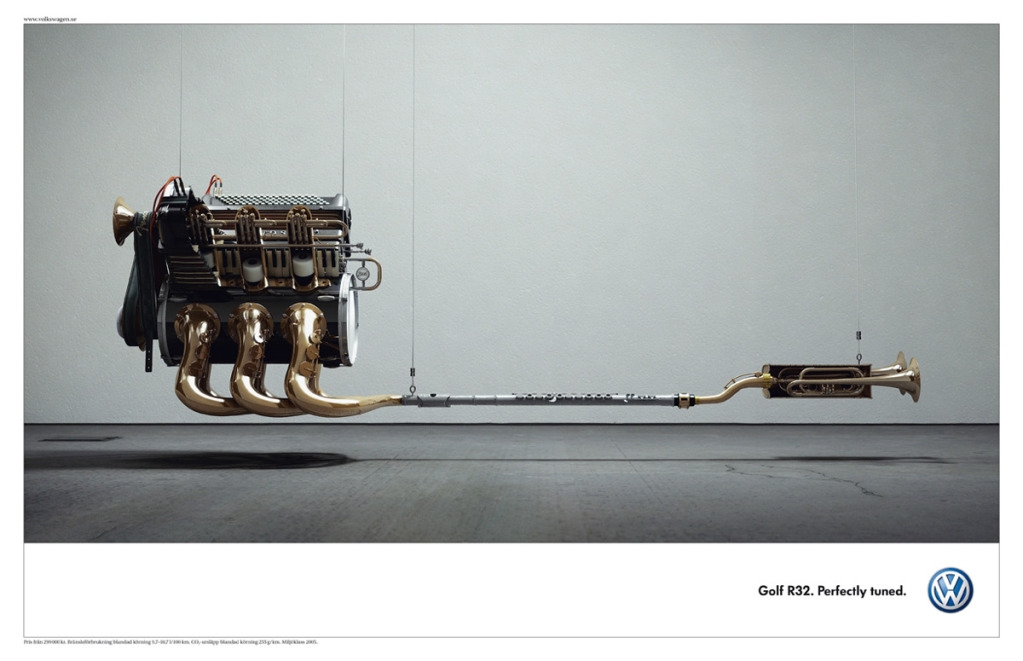
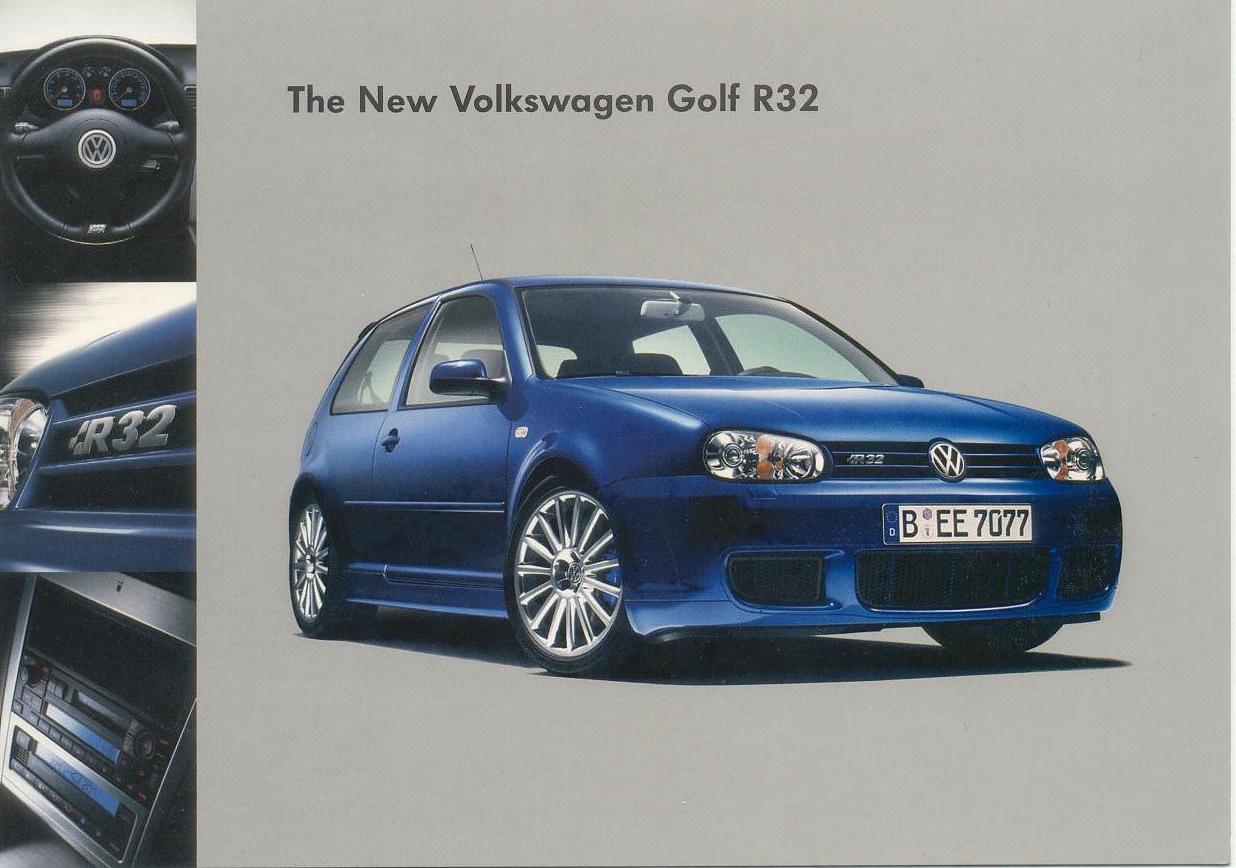
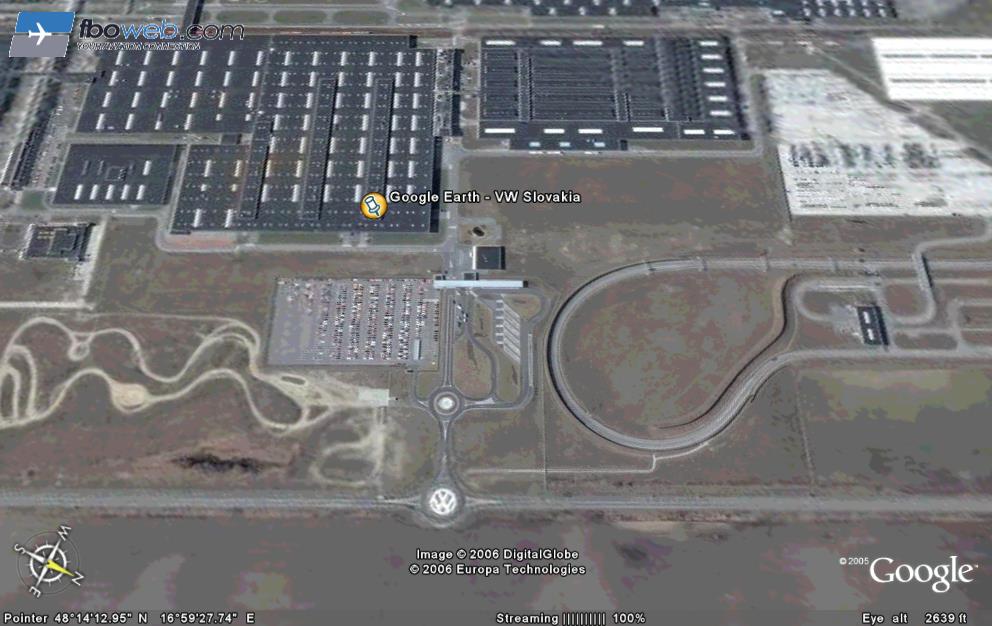
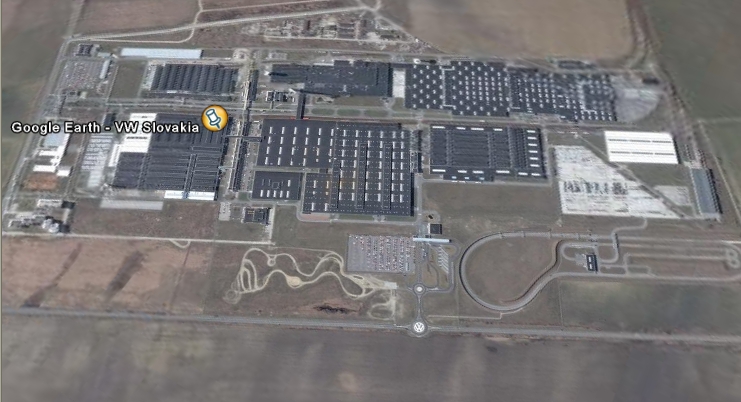
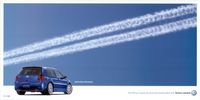
(L to R: VWOA R32 Brochure Front/Back, VWOA Website: R32 Introduction Page, VWOA Website: R32 No Longer Available, VWOA R32 Poster sent to all US owners (Low/High Resolution), R32/GLi advertisement (Low/High Resolution), German R32 Page Ads, MKV R32 "Wolf in Sheep's Clothing" Ad, VW "Overtake Faster" Page Ads, Australia R32 Brochure Front/Back, Slovakia VW Plant


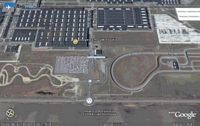

Download Google Earth and open the interactive VW Slovakia Plant map file: VWSlovakia.kmz
R32 Reviews:
Car And Driver - September 2004
The Car Connection - February 2004
EVO compares MKV R32 to the MKIV R32 - July 2007
VW Maintenance Schedule:
VW/R32 DIY Guides:
Ian's House of Thud- Ian's R32 Page with Information/Tech Info/DIYs
4Motion Maintenance:Haldex Servicing- from VW Driver March 2004 (.jpg)
Haldex Filter Removal and Oil Change: DIY for Audi TT courtesy of ModShack(.pdf)
R32 Brake Pad Installation by Anthony@VWVortex (.pdf)
R32 Brake and Clutch Pressure Bleeding by Anthony@VWVortex (.pdf)
Green-top Coolant Sensor Installation by VWVortex's peace (.pdf)
ECU Removal made easy by VW Vortex's pl@g3 (.pdf)
MKIV Sunroof Drain Maintenance by VW Vortex's VgRt6 (.pdf)
Brake Light Switch Replacement DIY by VW Vortex's VgRt6 (.pdf)
VW Aero Wiper Insert Replacement by Ian (VW Vortex's Daemon42) (.pdf)
24v VR6 Sparkplug DIY by VW Vortex's abydielsgli (.pdf)
Crackpipe DIY by VW Vortex's darisd (.pdf)
R32 Bumper Removal and HID Installation by VW Vortex's notjcs (.pdf)
Removing Front Lock Carrier to Service Position DIY by VW Vortex's darisd (.pdf)
Installing VW MFD in MKIV Golf/Jetta DIY by VW Navi's GTi 1.8Turbo (.pdf)
Extending the MKIV Key Fob Transmitter Range by VW Vortex's bootymac
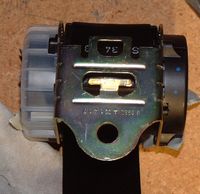
VW MKIV Climatronic Fan Problem Diagnosis from UK-MKIVs.net
VW MKIV Climatronic Fan Problem Repair by UK-MKIVs.net's BigAl
VW MKIV Climatronic Fan Problem Repair by Nime Consulting
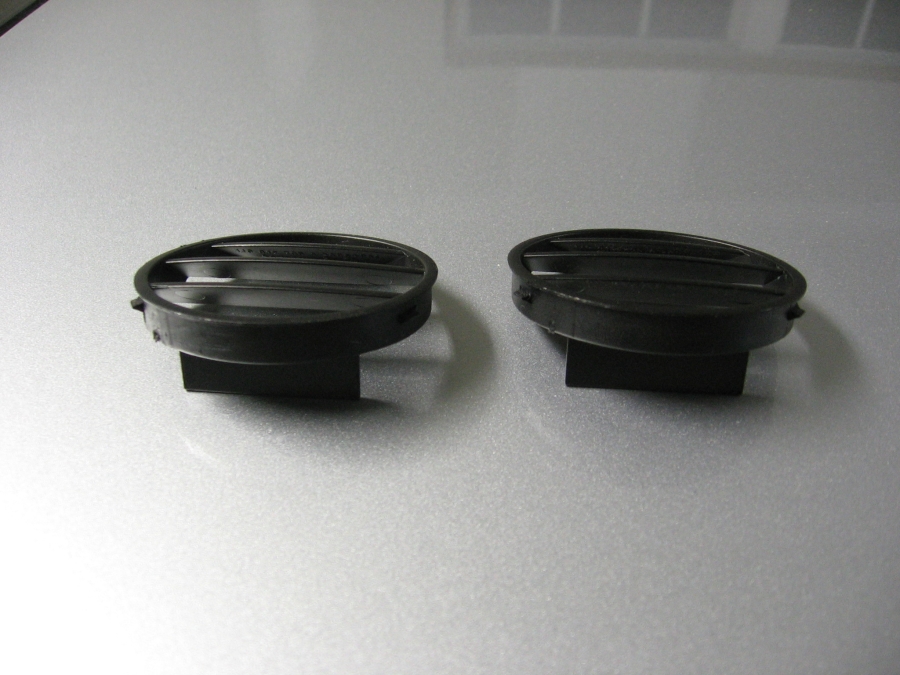
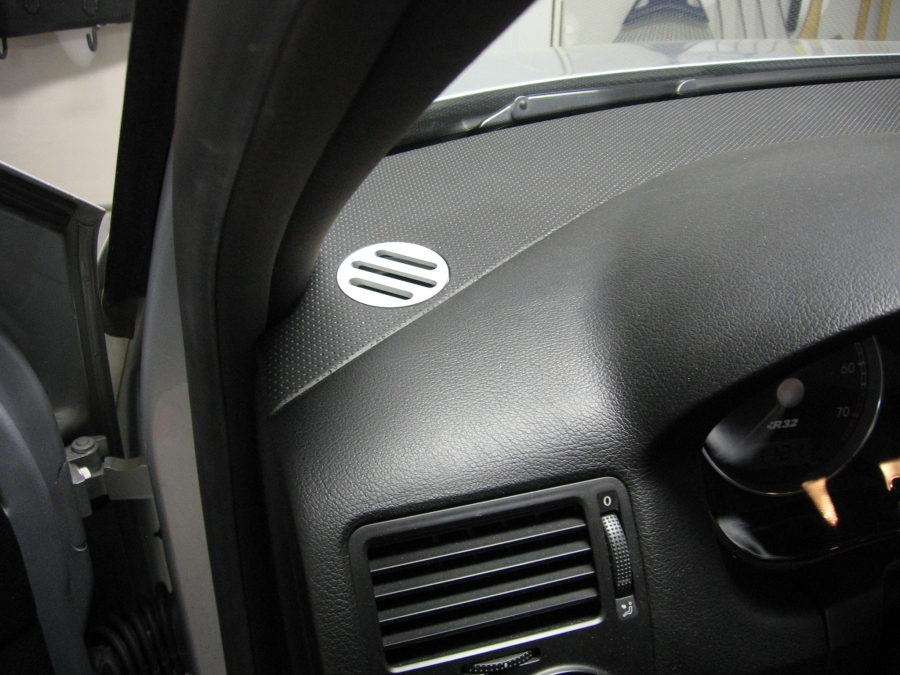
VW Golf-Jetta Vent Removal and Lighted Vent Wiring by VW Vortex's London Dub
Delocking a VW MKIV by strictlyea.com s steffenme1
EIP Short Shifter Installation Instructions (.pdf)
EIP Exhaust Installation Instructions (.pdf)
EIP Cold Air Intake (CAI) Installation Instructions (.wmv)
AFE Air Filter Cleaning and Oiling Procedure (.pdf)
European Turn Signal Part Numbers and Wiring Diagram (.pdf)
How to Remove Your R32 Intake Manifold- A Quick Video Illustration by VW Vortex's Daemon42 (Ian)
Wheel Paint and Light Scratch Repair by AudiWorld.com's NASAracer
R32 Transmission Removal and Clutch Replacement BY VW Vortex s xbluewater
Ecliptech Shift Light Installation for MKIV Volkswagen R32 BY Alastair and Graeme
VW/R32 Related Documents/Pics/Files/Links:
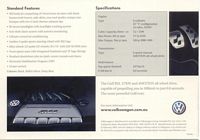
VWOA 2004 R32 Standard Equipment (.pdf)
VWOA 2004 R32 Technical Specifications (.pdf)
VWOA 2004 VW R32 Features (.pdf)
VWOA 2004 R32 Accessories (.pdf)
Online VW Parts Catalog (ETKA)
Your VW and Aftermarket Parts- From VWOA (.pdf)
VWOA Approved Engine Oil 502.00 (.pdf)
VWOA Approved Engine Oil 502.00 (.jpg)
2004 Fluid Capacity Chart (.pdf)
2004 R32 Alignment Specs courtesy of VW Vortex's osbornsm (.jpg)
2004 R32 Hunter Alignment Specs (.pdf)
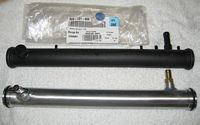
2004 R32 Radiator Hose Issue for early VINs (.pdf)
Audi Tech Introduction to HALDEX system (.pdf)
Audi Tech Introduction to TT 3.2/DSG (.pdf)
Ian's House of Thud- Ian's R32 Page with Information/Tech Info/DIYs
APR EMCS Owner's Manual (.pdf)
VW Racing Logo (.dwg) by VW Vortex's vr6gtispeed
VW Racing Logo (.dxf) by VW Vortex's vr6gtispeed
VW Racing Logo (.eps) converted by VW Vortex's MIMDesign
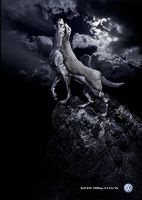
VW German R32 Ad- Wolf in Sheep's Clothing (.jpg)
VW German R32 Ad- The Car (.jpg)
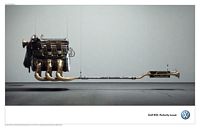
VW German R32 Ad- Smeared Lipstick (.jpg)
VW R32 Ad- Overtake Faster-Bus (.jpg)">
MKV R32 "Wolf in Sheep's Clothing" Ad
VW R32 Ad- Overtake Faster-Concrete Truck (.jpg)">
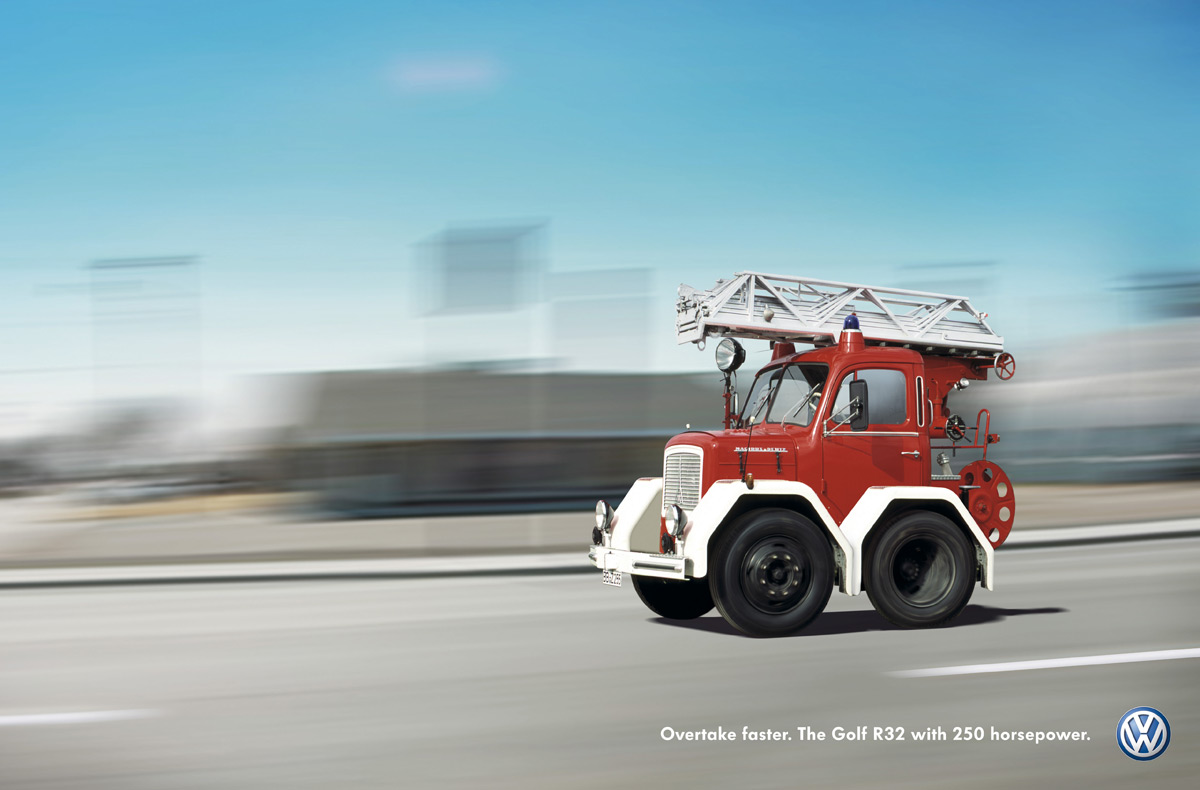
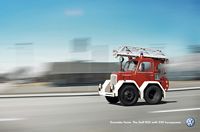
VW R32 Ad- Overtake Faster-Firetruck (.jpg)">
VW R32 Ad- Overtake Faster-Transporter (.jpg)">
VW R32 Ad- Overtake Faster-LogTruck (.jpg)">
1979 Nordstadt 928 VW Golf - Excellence Magazine Dec. 2000 (.pdf)
The Volkswagen GTI:The True Story Behind Number 1 - VW Vortex Oct. 2004 (.pdf)
2006 R32 Brochure (UK Market) (.pdf)
2006 GTi Brochure (UK Market) (.pdf)
2006 GTi Online Brochure (.pdf)
R32 Video: *High Speed Connection Recommended*
Motorweek R32 Test Drive (19.7MB)
Edmunds MagRack Auto Access R32 Test Drive (15.2MB)
Top Gear R32 Test Drive (71.8MB)
Redline/Spike TV- HPA R32 (17.4MB)
Spike TV- Car and Driver Super Car Challenge (featuring HPA R32) (109MB)
Euro R32 Commercial- Introduction (5.55MB)
Euro R32 Commercial (Twin pipes?)- Drehzahlmesser Werbung VW Der Golf R32 (4.37MB)
Euro R32 Commercial (Tachometer?)- Doppeltendrohr Werbung VW Der Golf R32 (933kB)
Japanese R32 Commercial (17.1MB)
HGP R32 bi-turbo video from www.r32-club.de (20MB)
Euromelee Fun Winter Drive (36MB)
HPA Stage 2 Twin Turbo R32 Run (4.5MB)
HPA Stage 2 Twin Turbo R32 Dyno- 409 WHP, 4 wheel dyno (1.14MB)
EIP Stage 4 Turbo R32 Dyno- 600 WHP , 2 wheel dyno, Haldex disabled (14.8MB)
HPA vs EIP, Dubwars 2004 (5.45MB)
R32 at Thunderhill, March 2004 (4.65MB)
Jugge's 2003 R32 Home Video-Sweden (20.1MB)
R32 Demo Compilation- Germany (13MB)
Ian's Afternoon Drive in Colorado (19.5MB)
170 Top Speed Run for US NA R32 (9.1MB)
Secrets of Speed- Unfair Advantage:Audi Quattro (ZIP 129MB)
VAG DSG: Benefits and Function (7.8MB)
'Herbie Fully Loaded' movie trailer with R32 (6.5MB)
K1 R32 Review/First Drive-German (14.1MB)
VOX R32 Review/First Drive-German (29.6MB)
MotorVision (Germany) R32 Track Test (9.8MB)
MKV Golf GTi Video: *High Speed Connection Recommended*
Fifth Gear Review/First Drive (12MB)
Top Gear Review/First Drive (32.7MB)
2005 Golf GTi Commercial- Gene Kelly/Singing in the Rain (5.7MB)
2005 Golf GTi Commercial- 30 Years in the Making (15.4MB)
2005 Golf GTi Commercial- South Africa Release (2.8MB)
2005 Golf GTi Commercial- VW For Boys Who Were Always Men (6.31MB)
2005 Golf FSI (Fuel Stratified Injection- aka Direct Injection) Commercial-
MKV GTi- My Fast "Hair" (1.17MB)
MKV GTi- My Fast "Officer" (1.17MB)
MKV GTi- My Fast "Streamlined" (1.19MB)
MKV GTi- My Fast "Takeout" (1.19MB)
MKV GTi- Unpimp Your Ride "Catapult" (1.18MB)
MKV GTi- Unpimp Your Ride "Crate" (1.14MB)
MKV GTi- Unpimp Your Ride "Wrecking Ball" (1.16MB)