![]()

R32 Transmission Removal &
Clutch Replacement BY VW Vortex’s xbluewater
http://forums.vwvortex.com/zerothread?id=4045505
[+] xbluewaterx
Member
![]()
Offline
Member Since
7-20-2006
202 posts
Arvada CO
2004 VW R32 Tornado Red N/A
![]()
![]()
![]()
|
|
Clutch Replacement
First off I wanted to make this to show everyone that you
don't need a huge shop with a lift to do this. Also as some others have
mentioned before you do not need to drop the subframe
whatsoever. People always ask me if it can be done in their garage and it
can. I tried to take pics of every step and be thorough in my descriptions.
This should take you around 3 hours if it is your first time. If you are an
experienced mechanic it should only take around 1.5 hours. I took me 3 but I
was taking pics and writing this diy ![]() I do not take any responsibility for you breaking anything. If
anyone with lots of experience feels that I have left anything ut please let me know. PM me if you have any questions and
enjoy!
I do not take any responsibility for you breaking anything. If
anyone with lots of experience feels that I have left anything ut please let me know. PM me if you have any questions and
enjoy! ![]() Also special thanks to VTEC976 for helping pull the tranny out and my wife Nina for taking the pics.
Also special thanks to VTEC976 for helping pull the tranny out and my wife Nina for taking the pics.
![]()

-Gabe-
G&G Motorsports
1. Secure front car on jack stands. Make sure the car is raised enough that you
will be able to drop the transmission out.
2. Remove air intake or factory air box I will not go into to much detail
because if you can’t remove this then you probably should not be replacing the
clutch.
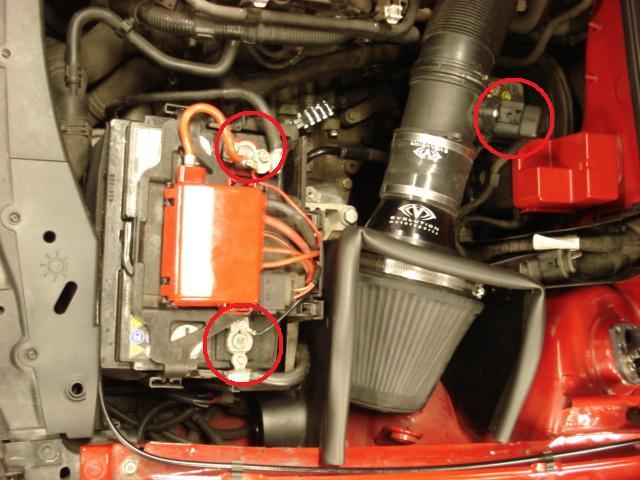
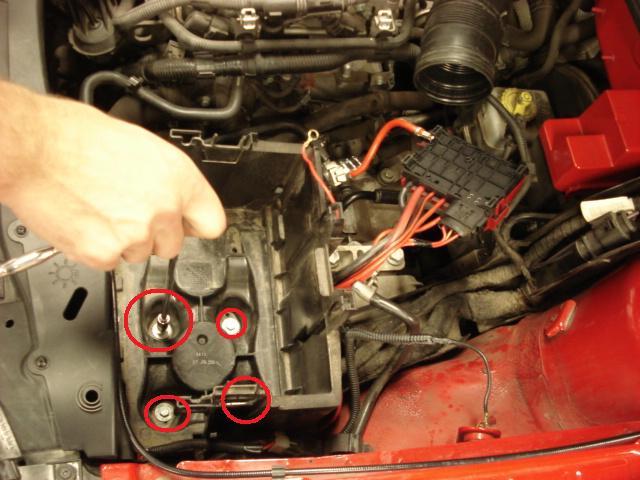
3. Remove battery and battery tray with 10mm socket to give yourself
enough room. There is 4 10mm Bolts holding the tray in.
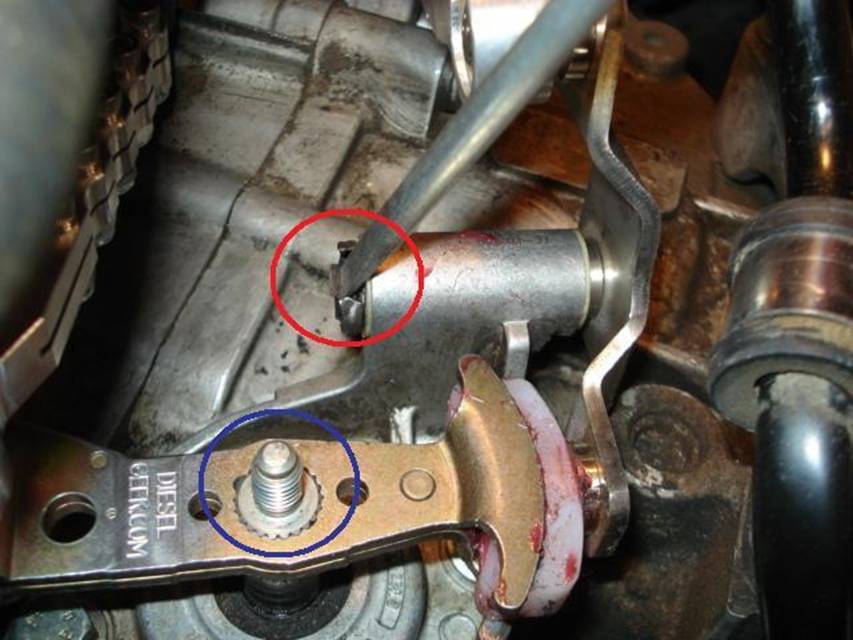
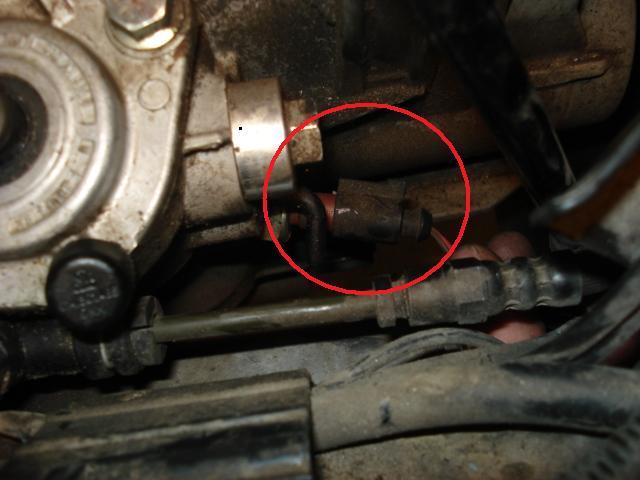
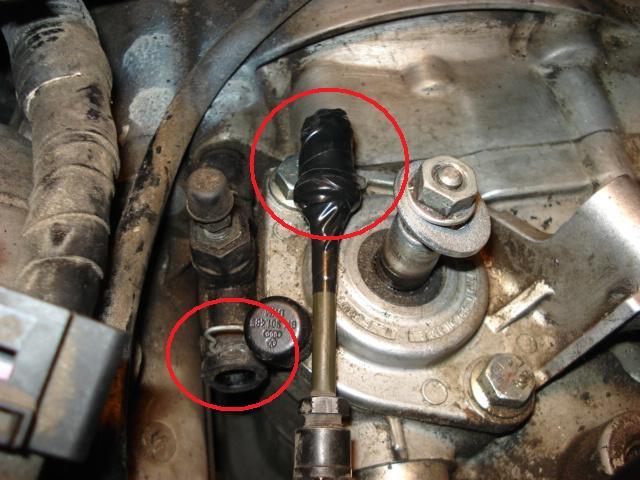
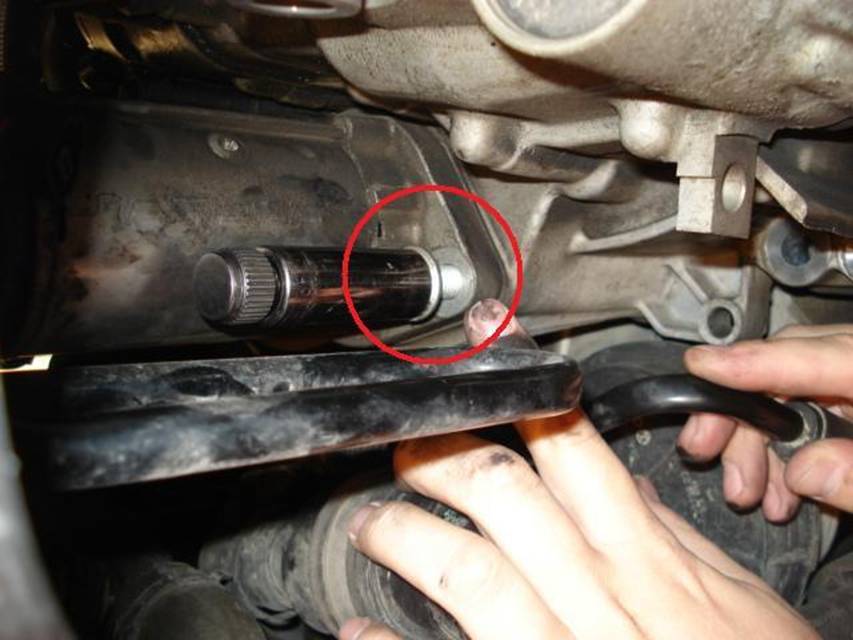
4. Remove shifter, shift cable and shift mounting bracket using a 13 mm socket zip tie all shift components together out of the way When removing the main body of the shifter be sure to pull equally at both sides. Do not pull one side and then the other back and forth. Shaft is shown in Blue circle

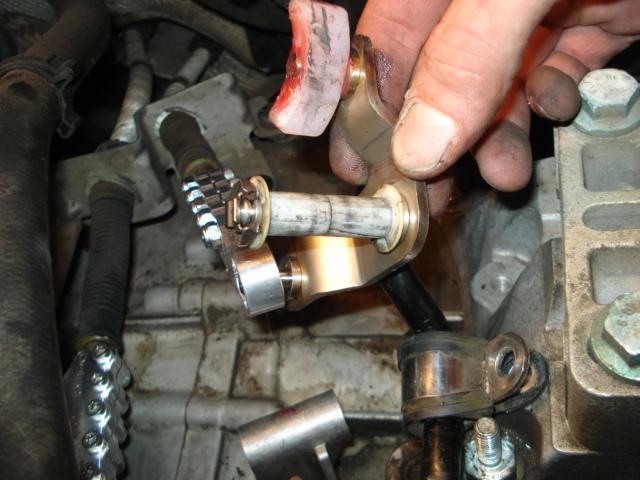
5. Using a flathead screwdriver, remove the clip that holds shift cable mechanism on. Be sure to not lose the two plastic bushings. I placed the bushings back onto the shaft and then put the clip back on as to not lose anything. As a side note. I replace every bolt or nut that I can as to not lose them. Also it will tend to not have a pile of bolts just laying around on a box.
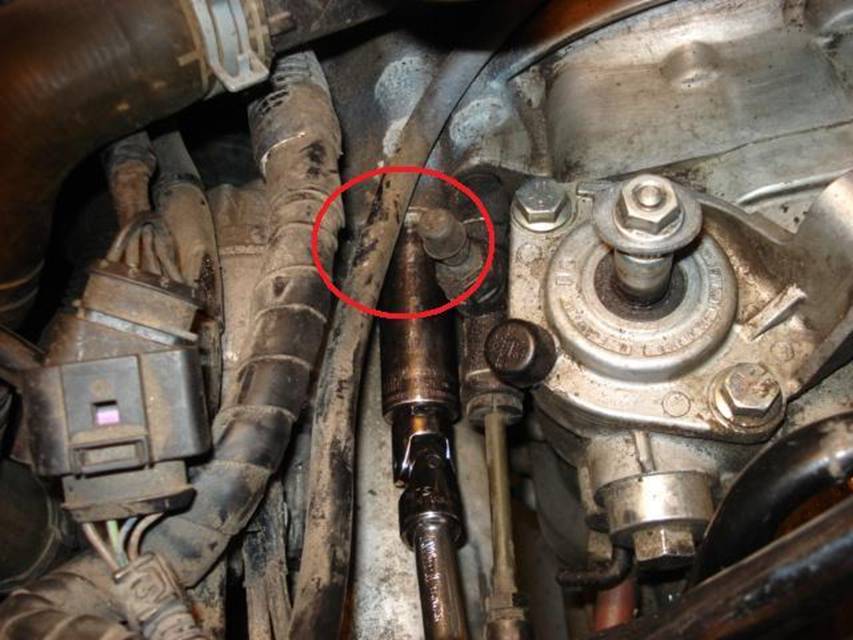
6. Remove Hard Line From Engine/Transmission Mount
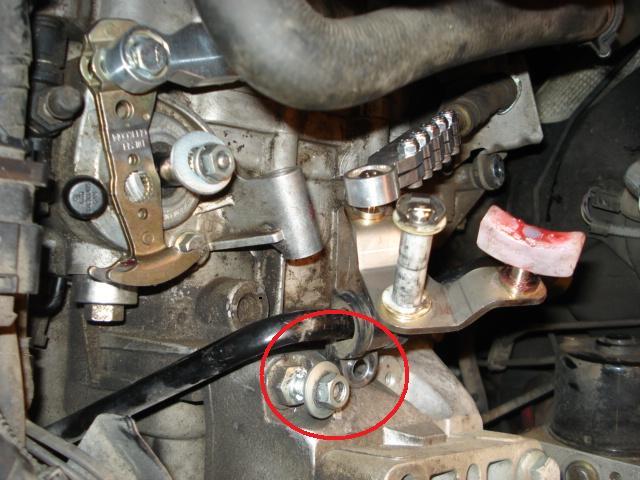
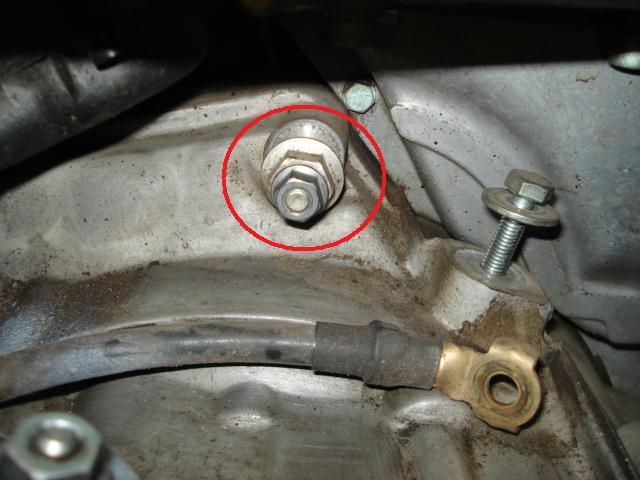
7. Remove ground strap from connecting bolt at top of engine/transmission
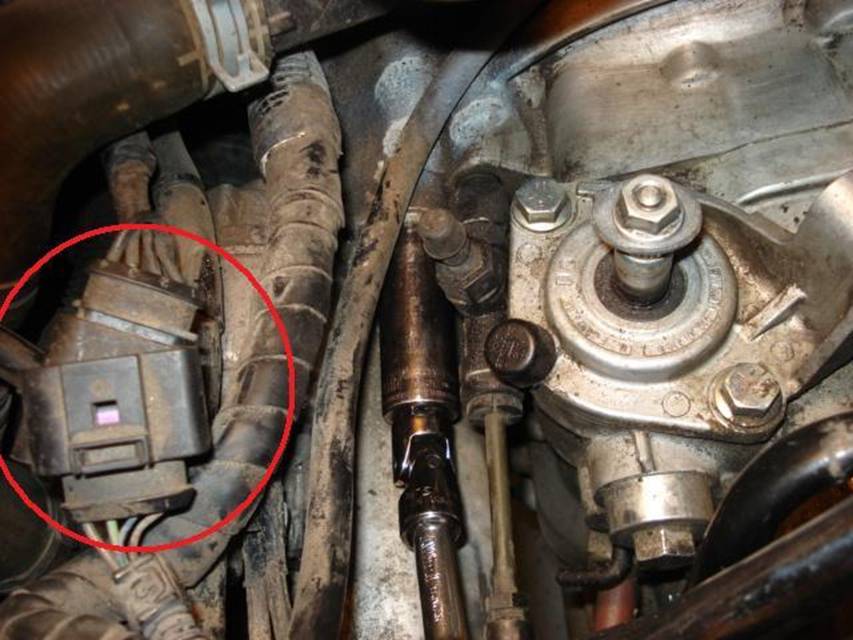
8. Disconnect connector for back up lights and other connectors on top of the starter
9. remove 13mm nut from cable bracket then remove cable bracket from starter
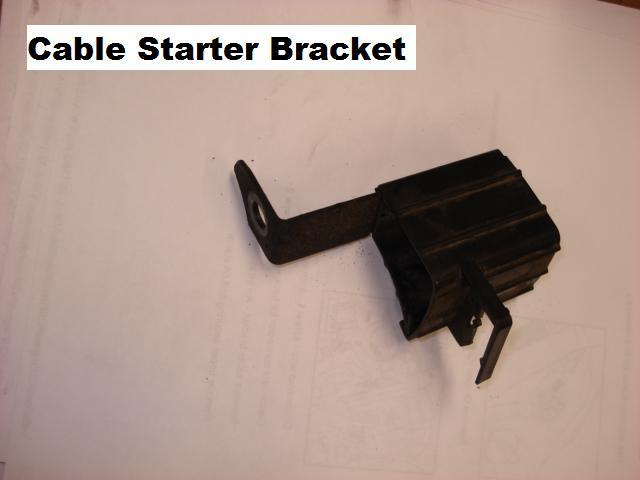
10. Remove upper starter securing bolt located in the same place as the cable mounting bracket was
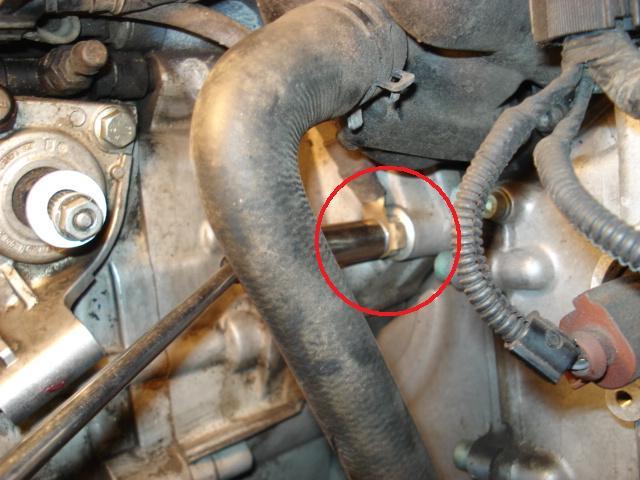
11. Unclip and remove hose to slave cylinder. To unclip pull the metal retaining clip up and just pull back on the line.
12. Use electrical tape to plug off hose removed from slave cylinder. Make sure you don’t touch the clutch pedal otherwise fluid will come out.
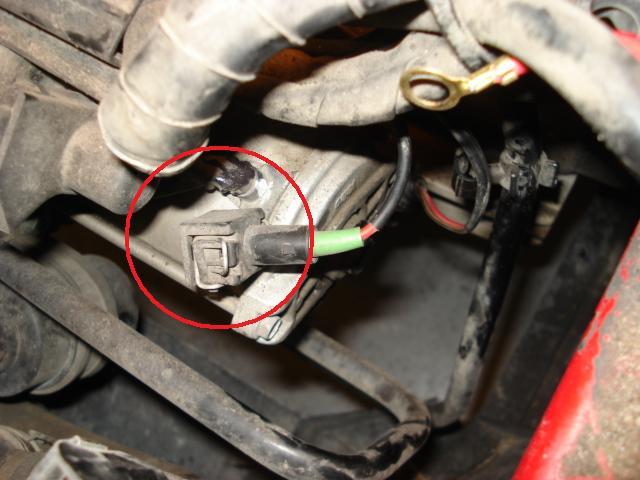
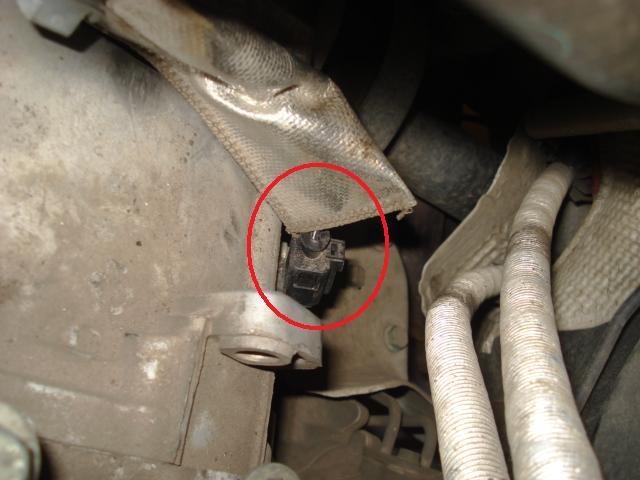
13. Remove connector on back of transmission. The wires are covered with a heat shield wrap.
14. Remove both front wheels
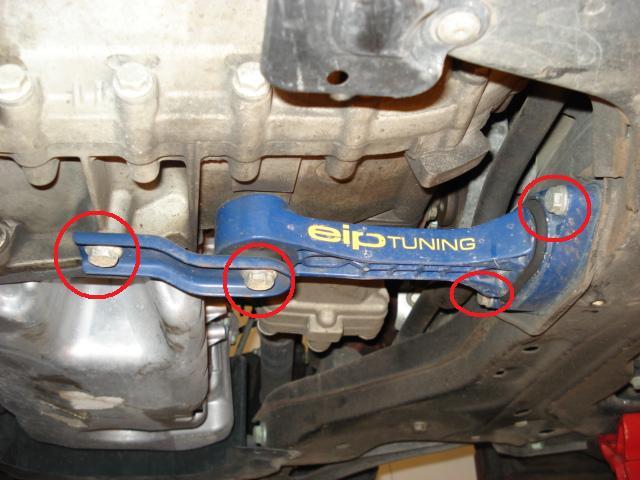
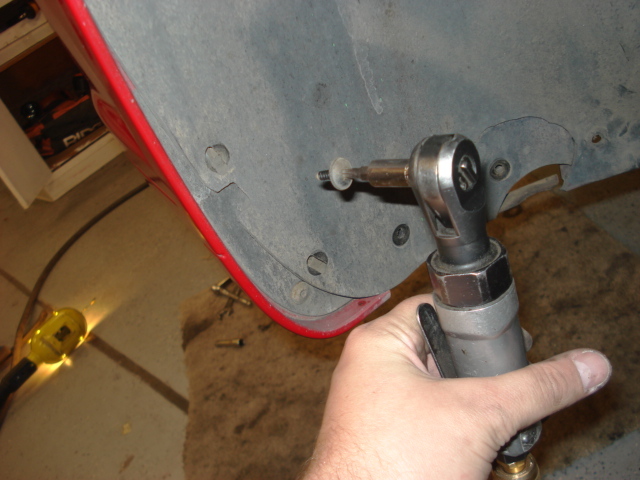
15. Underneath the car, remove the lower dog-bone mount. Replace stretch bolts
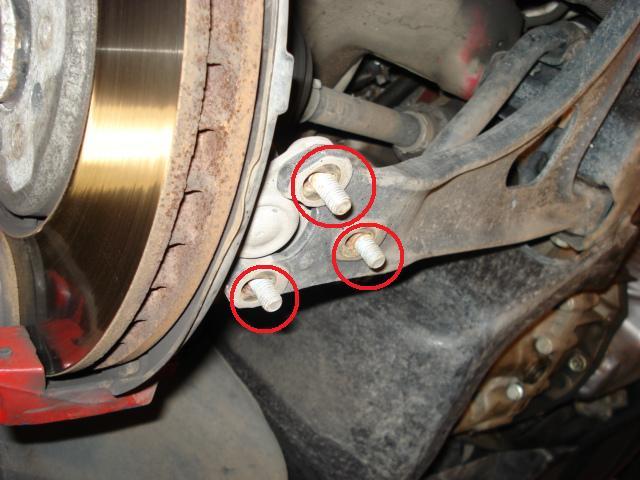
16. Disconnect lower ball joints( three 16mm nuts)
17. Remove the 6 axle bolts on each side and pull axles out of the way. To do this you will need a 12 point 12mm socket. I zip tied mine up out of the way.
18. Remove three 13mm bolts from shield on passenger side around axle Sorry No Pics.
19. Remove four 16mm bolts connecting transfer case to transmission Be patient. These can take some time and be a pain but they all are accessible
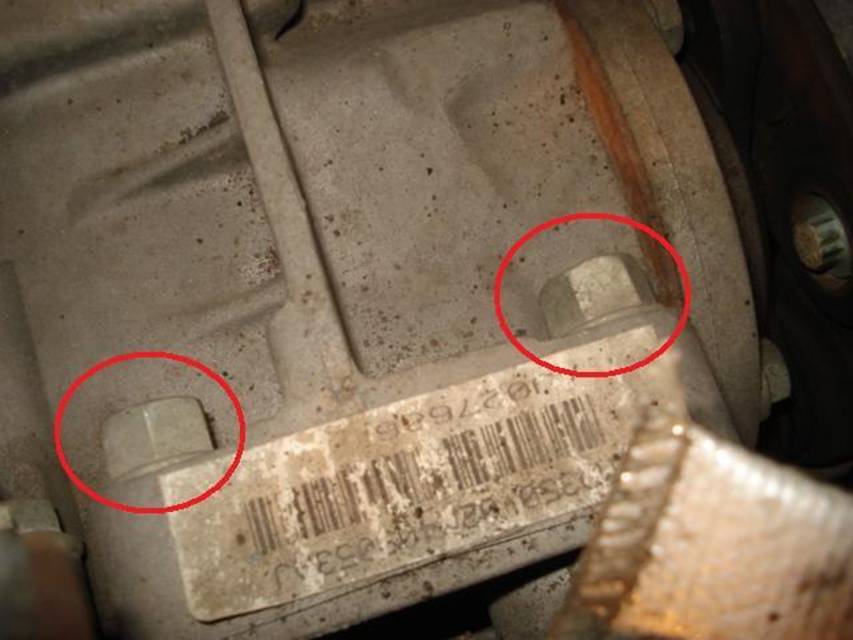
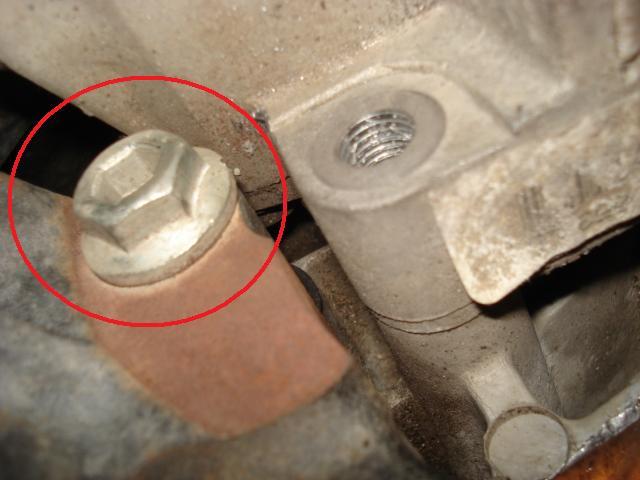
20. Remove 2 16mm bolts holding the mounting bracket from the transfer case to the engine.
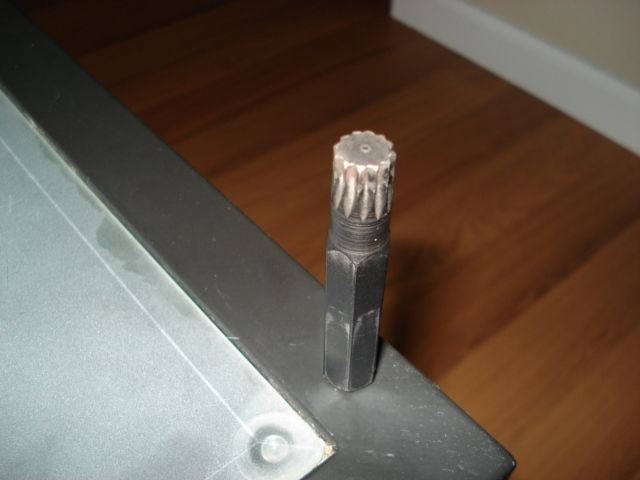
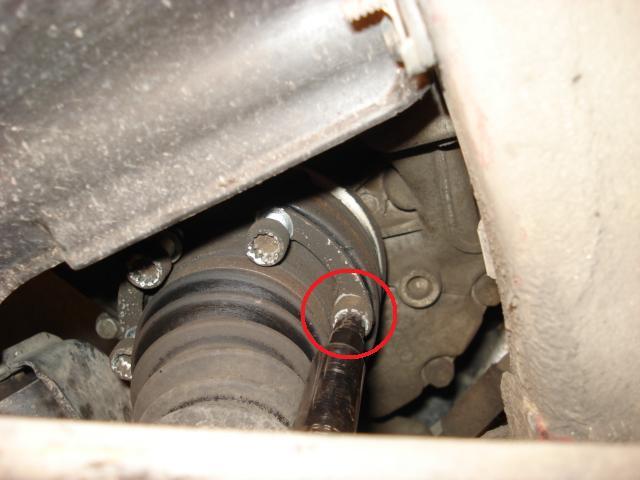
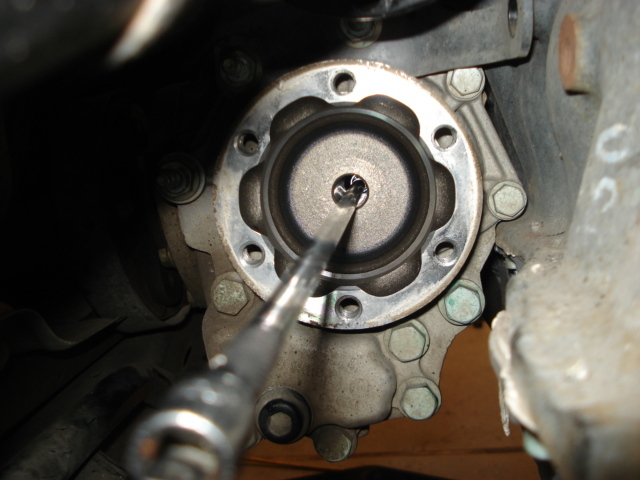
21. Remove 6mm Allen Bolt from inside the passenger side drive shaft. This requires a long extension and a 6mm allen socket. Regular allen wrenches will not work. This is a hard one to find.

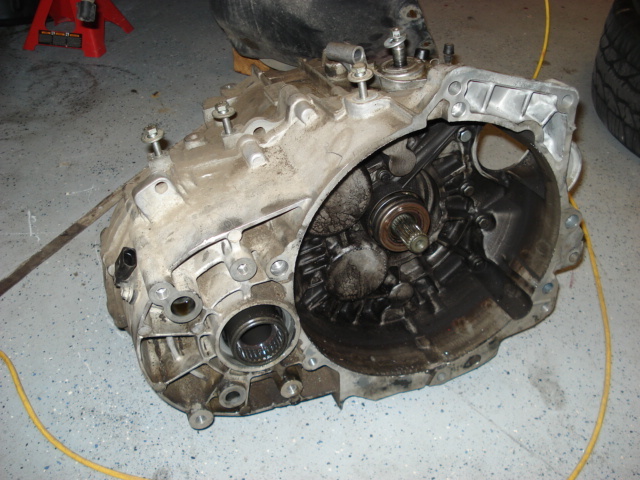
22. You should now be able to easily pry the transfer case away from the transmission.
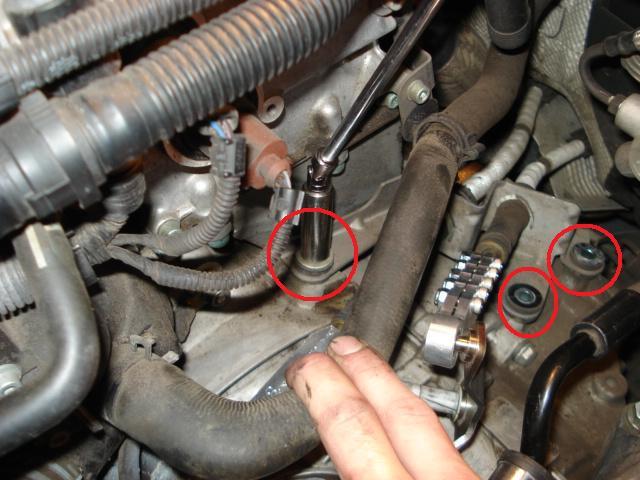
23. Remove the lower starter mounting bolt and remove starter
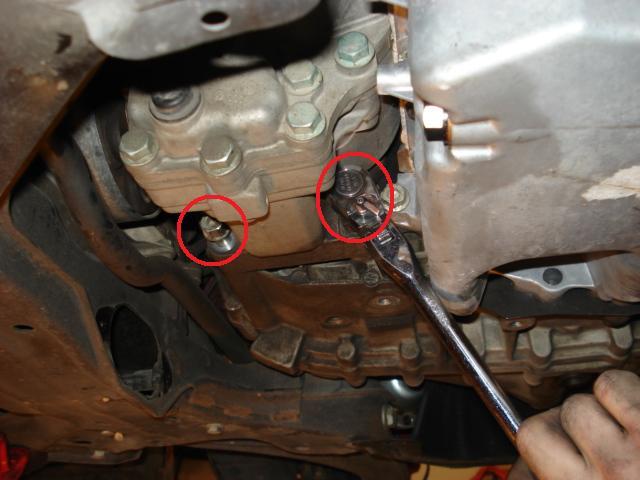
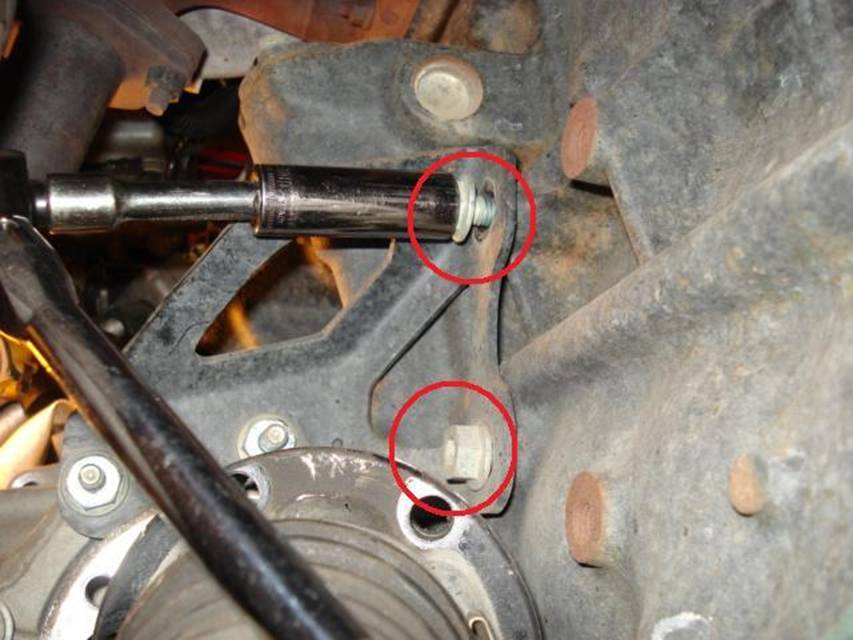
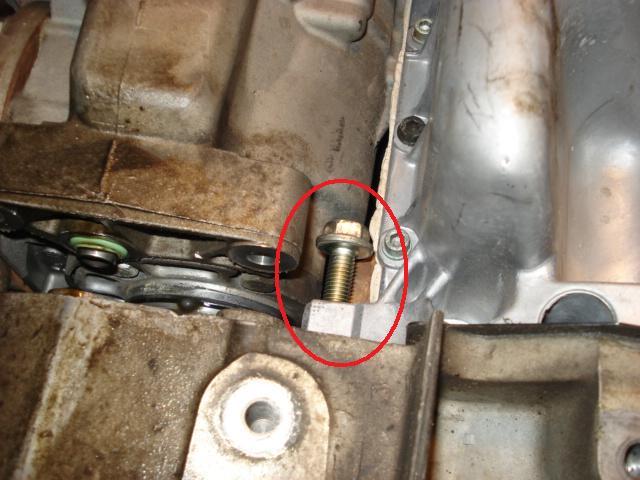
24. Remove All but one of the engine to transmission bolts. I usually prefer to leave one of the easy to access bottom bolts on. There are a couple of hidden ones. One is facing the passenger side and is right next to the top right transfer case to transmission bolt if you are facing the drivers side standing on the passenger side.
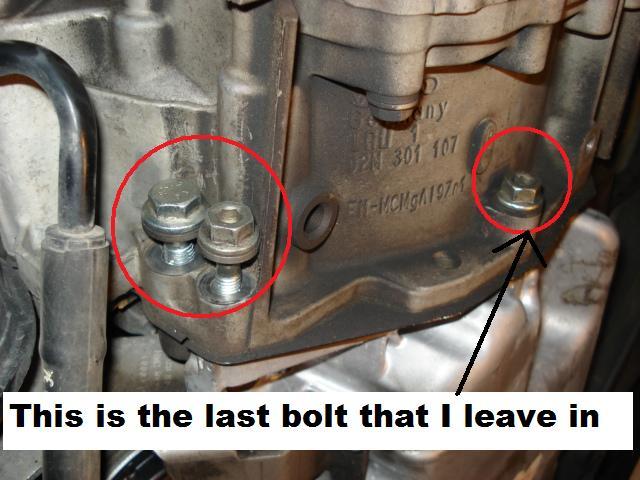
Passenger side near transfer case bolt
25. Stabilize the motor and transmission with separate jacks that way you can lower the motor and tranny separately.
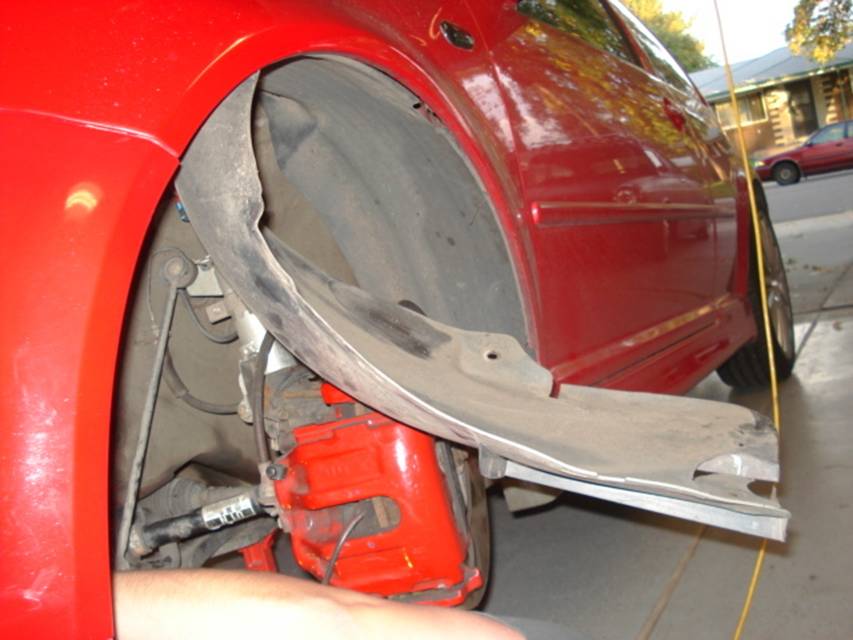
26. Remove the drivers side fender liner and splash shield. The fender liner does not have to be fully removed. I usually just unbolt the front half and move it out of the way.
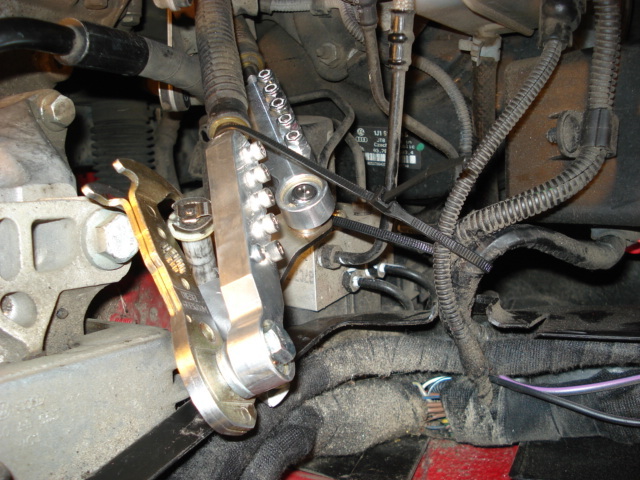
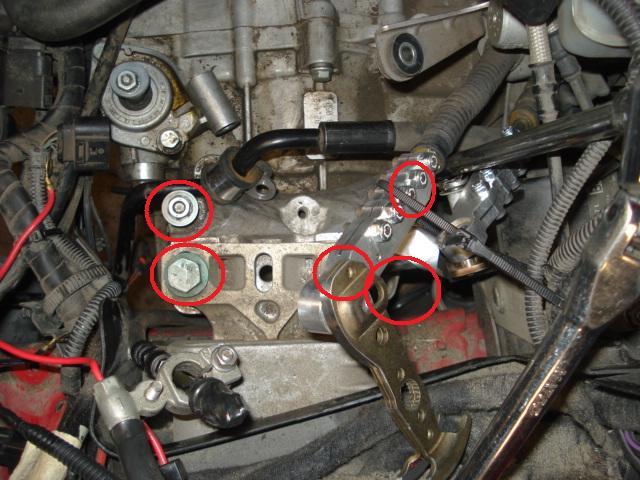
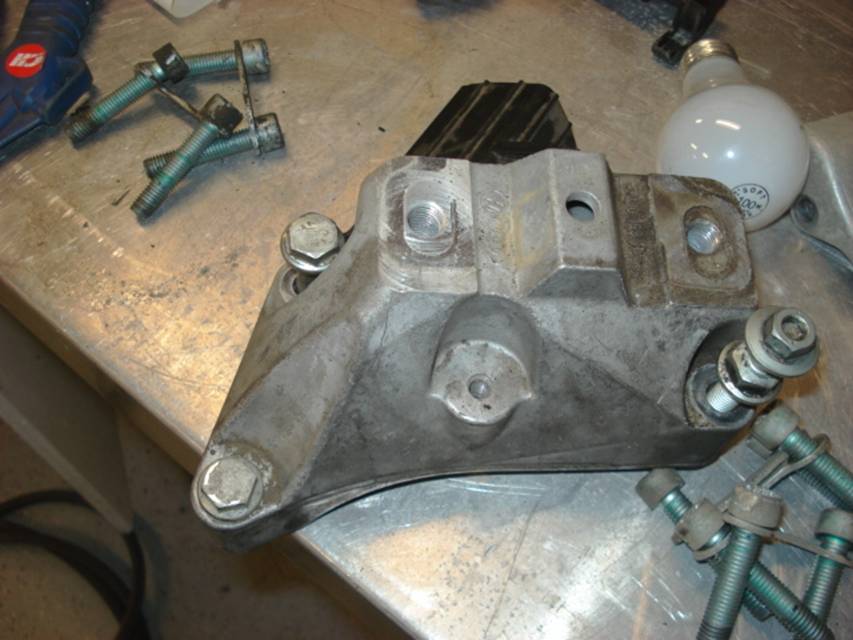
27. Remove the driver side engine mount. This will require removing the 3 bolts that attach to the transmission along with the 2 stretch bolts on the mount itself. Then remove the mount and set it to the side.
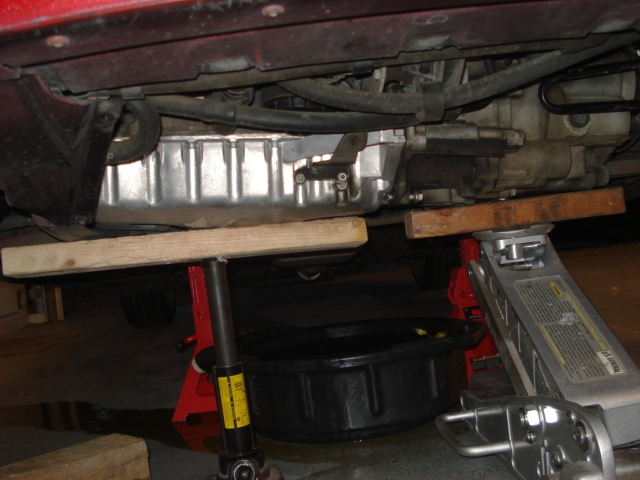
28. Begin to lower the engine and transmission together but make sure that the motor is not lowered to where it could potentially fall out of the passenger side mount. Make sure it is lowered enough that it can clear the front stub/subframe
29. Now comes the awkward and frustrating part. Remove the last engine to trans bolt and start to pry out. Work it slowly away from the engine and transfer case. Eventually it will pull out far enough to where it looks like it is going to hit the lower subframe. When it gets to this point start jacking up or push up on the rear of the transmission so it clears the subframe and it should simply drop out.
30. Now go have a beer
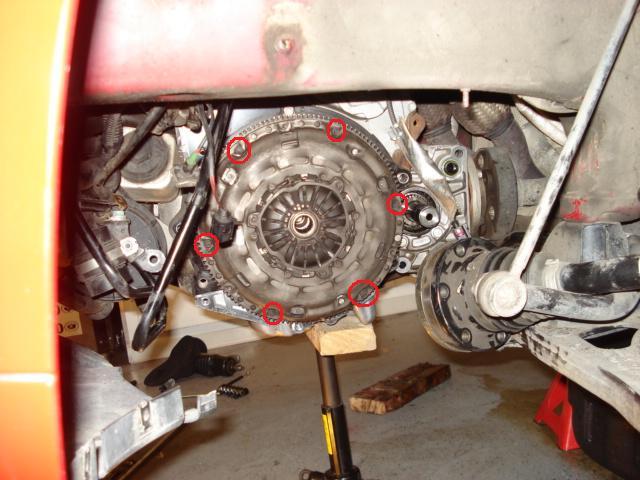
31. Next remove the pressure plate bolts. These are 12 point bolts. They require a 11/32 12 point socket.
32. Remove all flywheel bolts. These bolts are removed using the same socket as you used to remove the axle bolts.
33. Replace all stretch bolts including the engine mount bolts and the dog mount bolts. Also replace the pressure plate bolts and flywheel bolts.
34. Replacement Part #s
a. Socket Head bolt with inner multipoint head/Flywheel Bolt N 909 294 01 x10
b. 12 point head pressure plate bolt +N 903 207 01 x6
c. Rear Main Oil Seal b 021 103 051 c
d. Clutch Release Bearing 02M141671B
e. Clutch Master Cylinder N/A
f. Clutch Plate and Pressure Plate b o22 141 015 t(or)tx
g. Stretch bolts for dogbone mount and drivers side
engine
mount (Drivers Side Engine Mount N 102 096 03 x2)
(Dogbone Mount n 102 683 02 X2 N 102 466 04 X1 N 905
970 02 x1)
h. Replace seals/o rings between transmission and transfer case 02M 409 203
& N 904 837 01 & N 028 222 2