

Click on thumbnails below for larger pics....
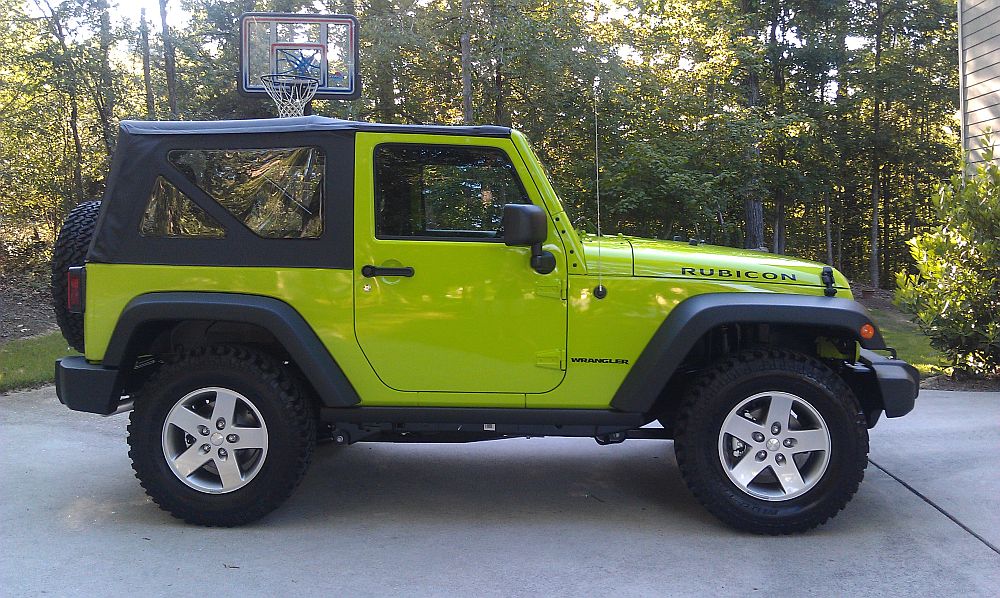
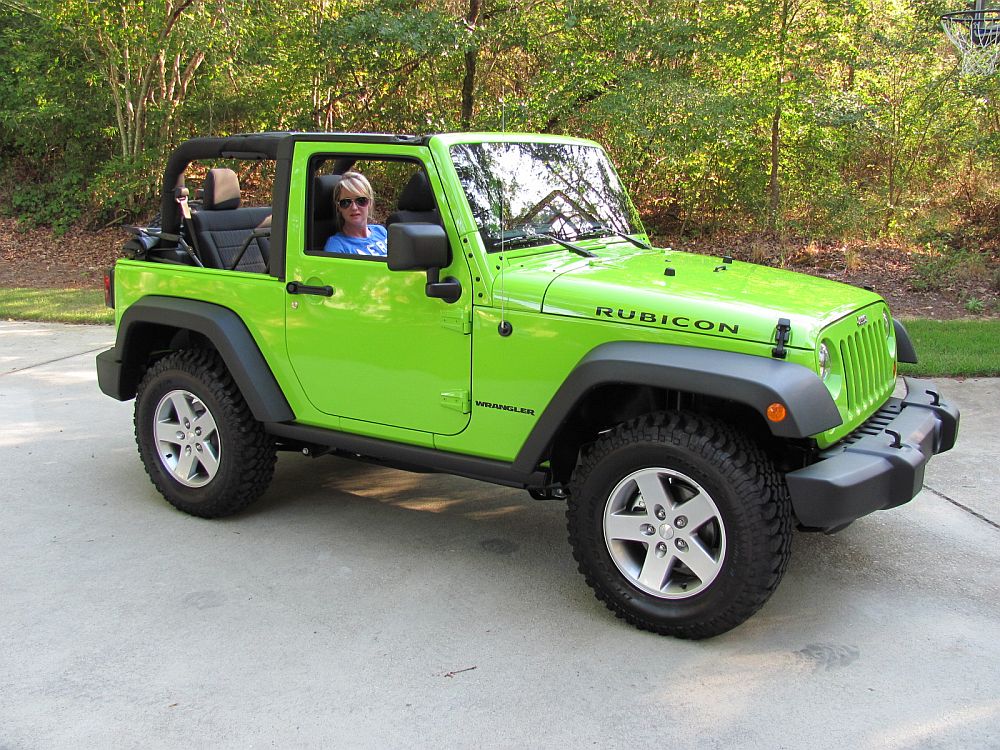
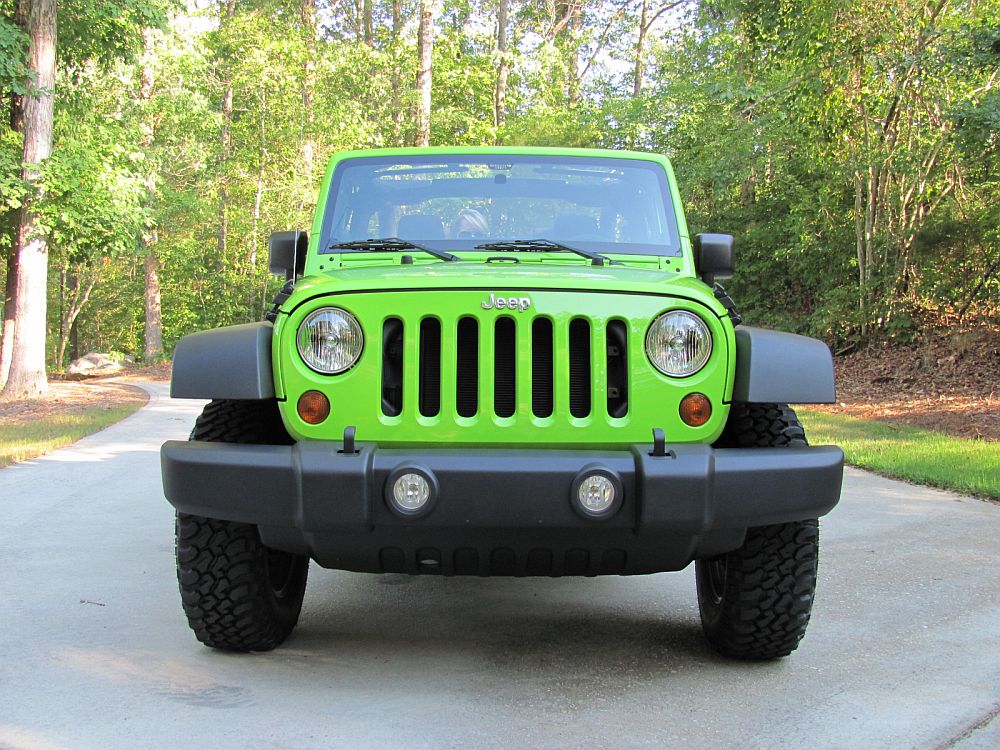
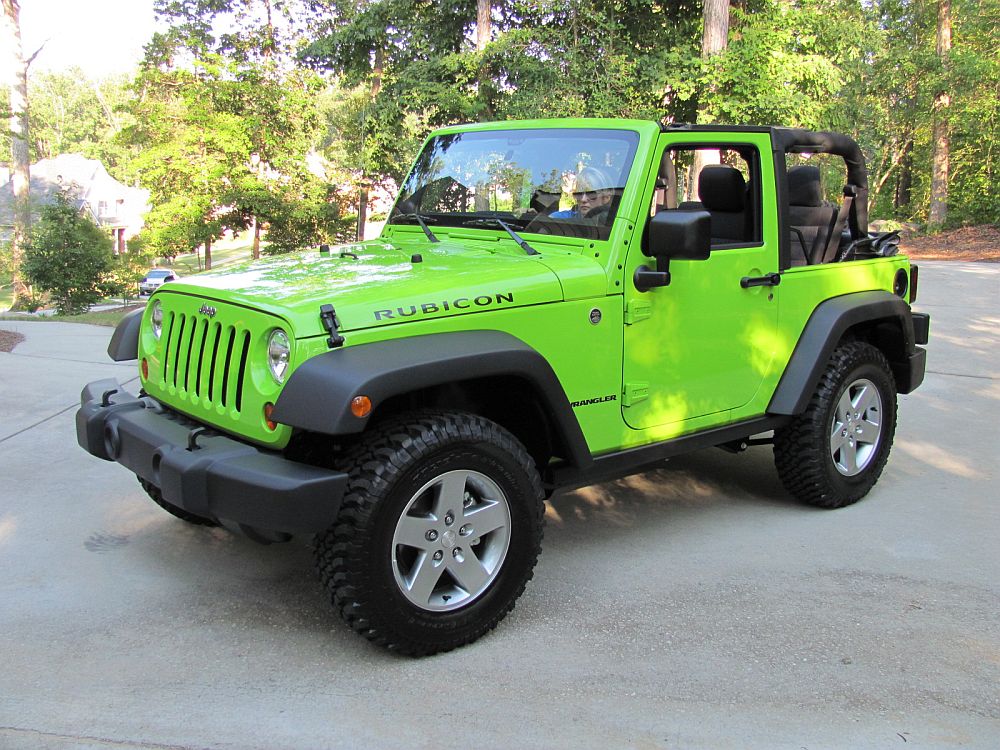
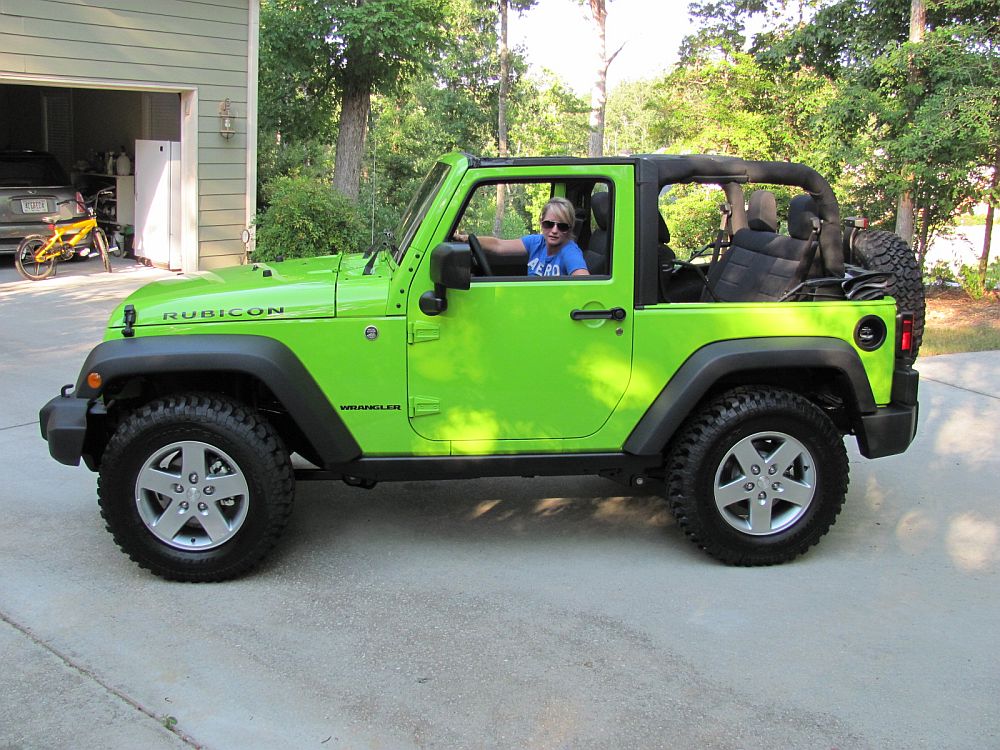
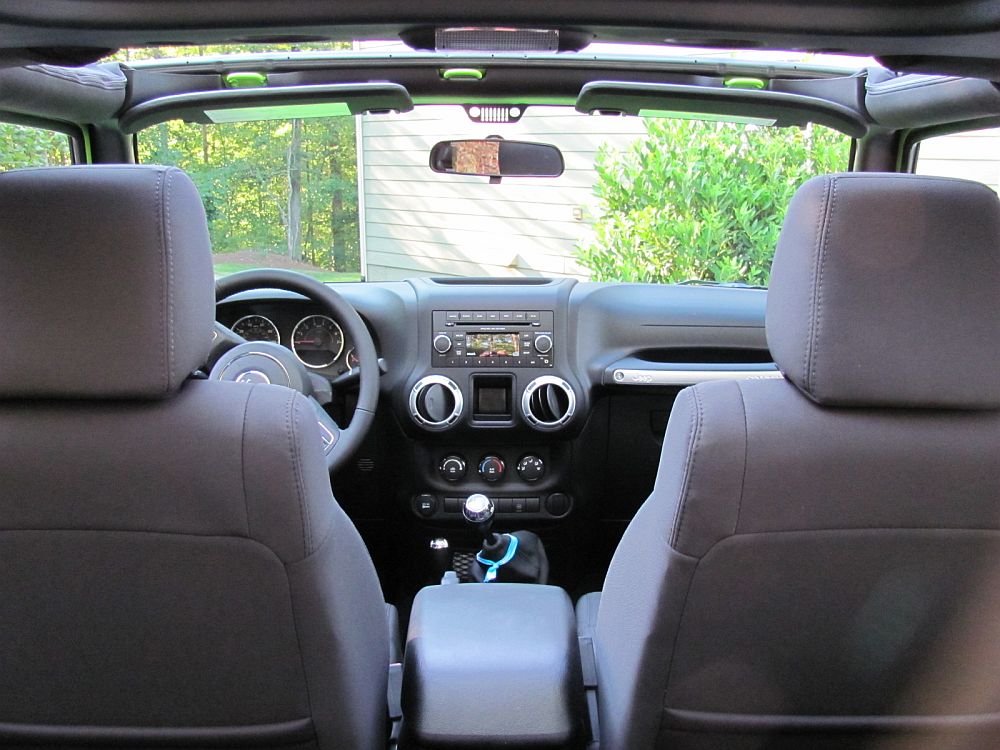
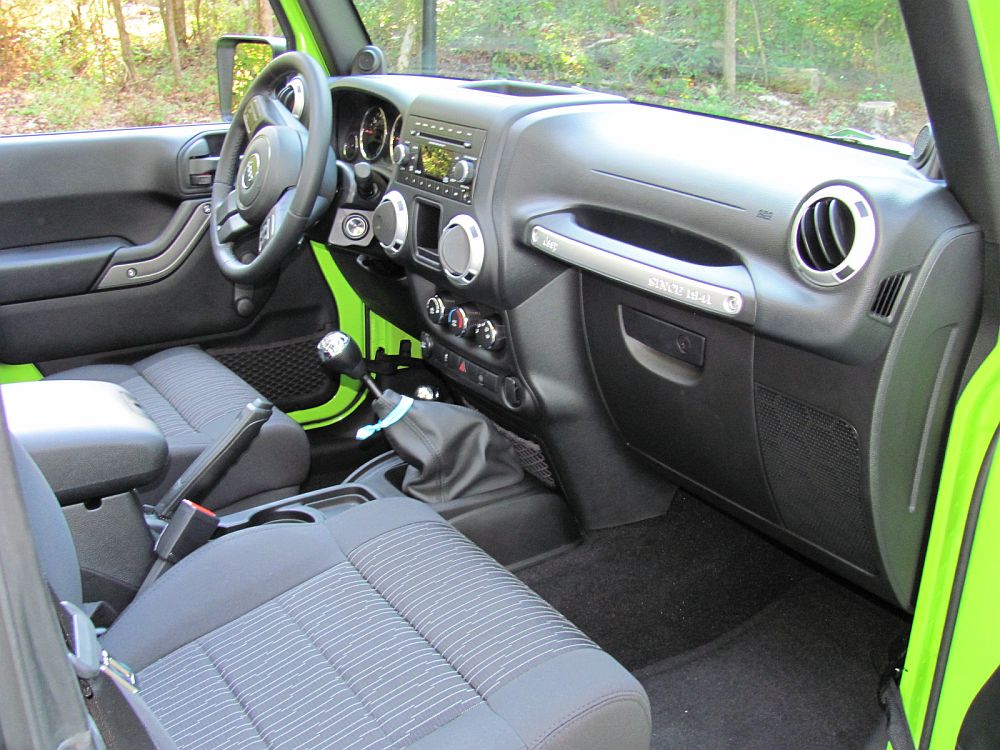
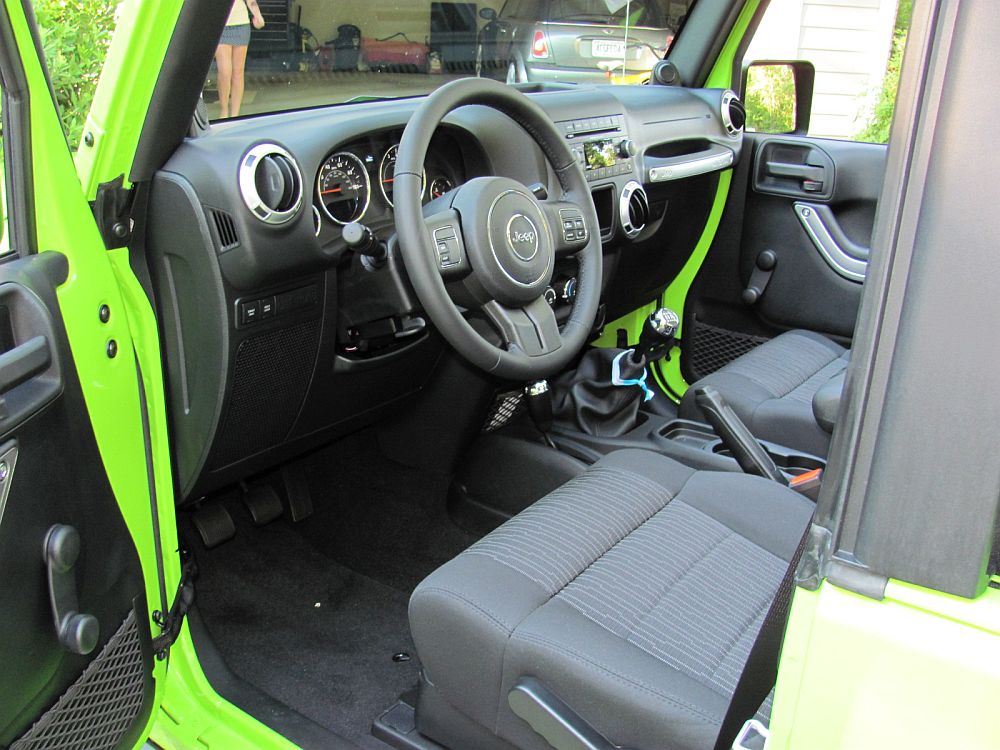
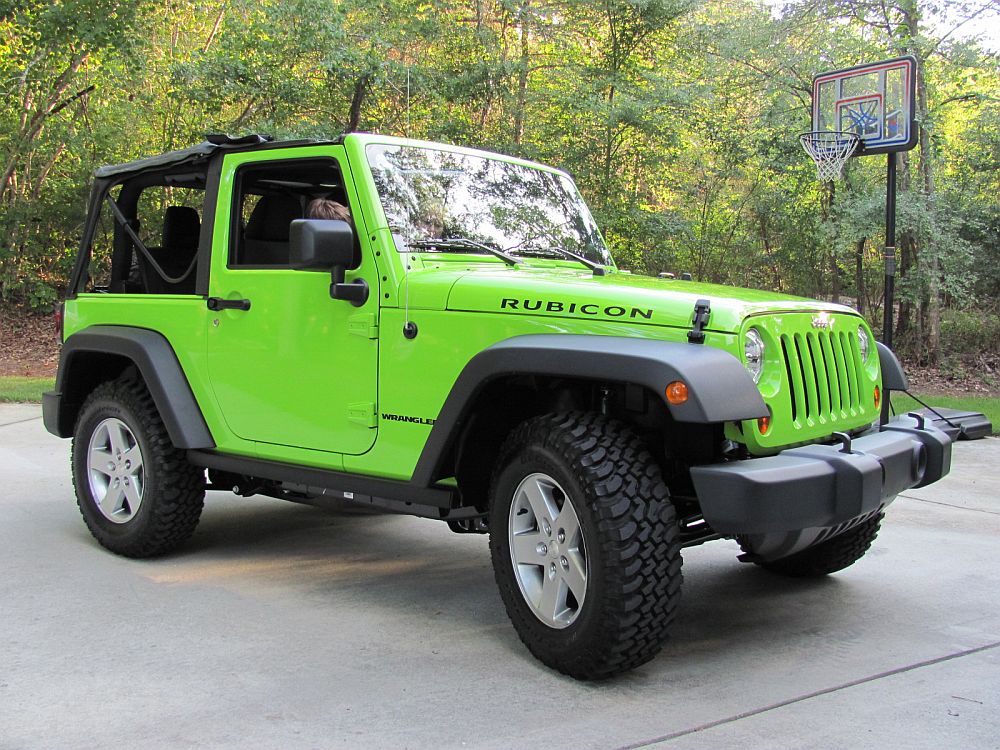
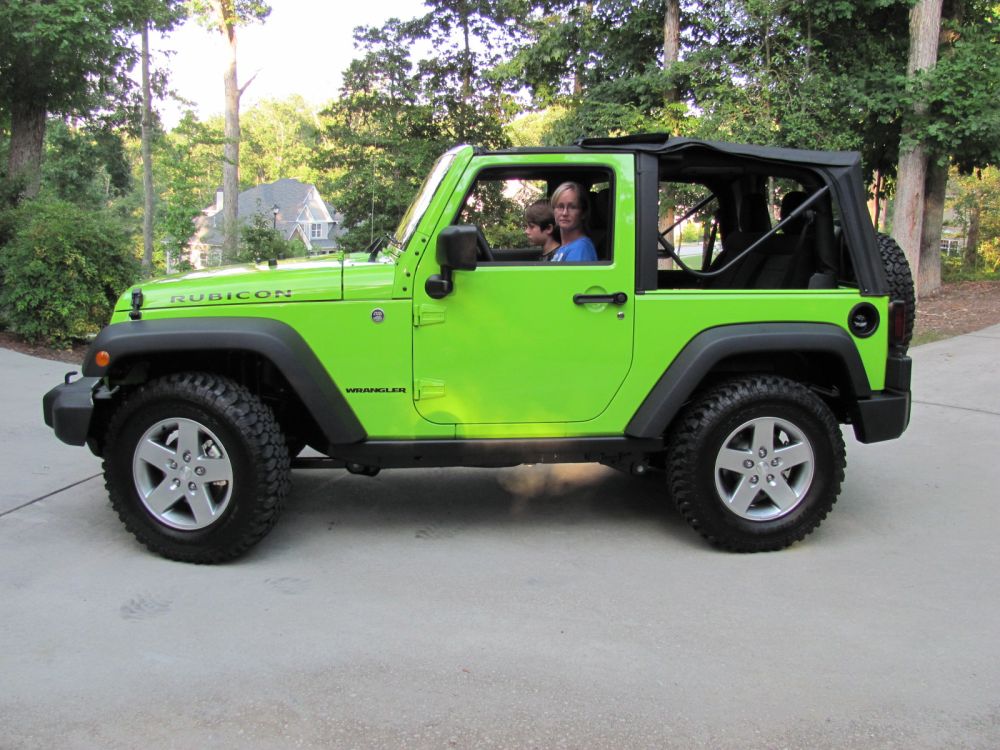
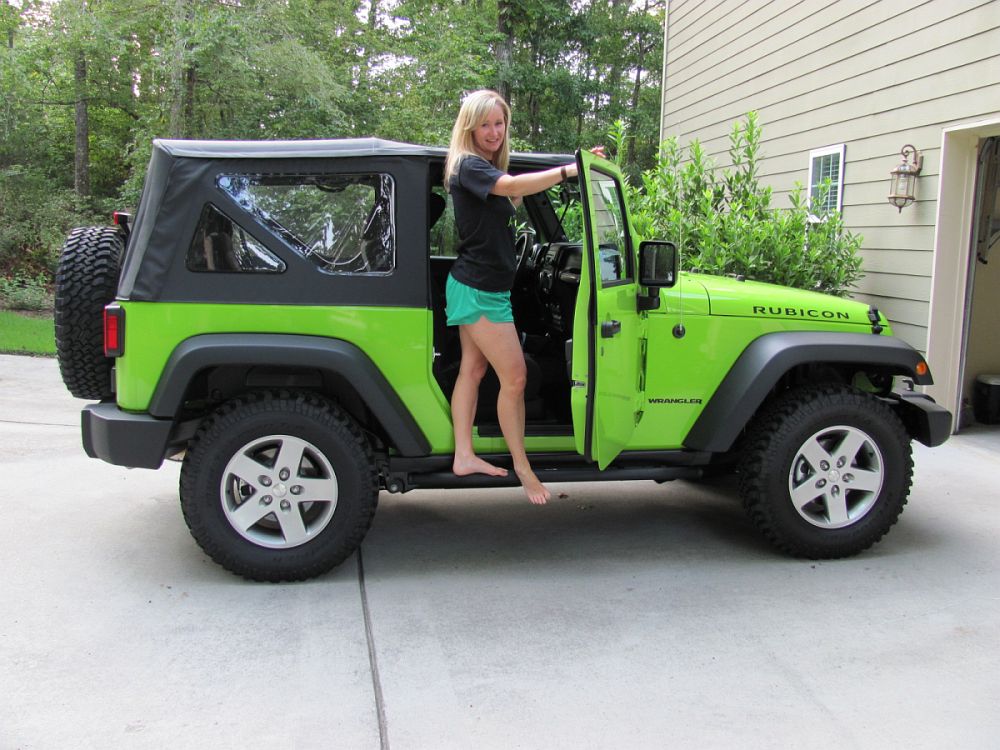
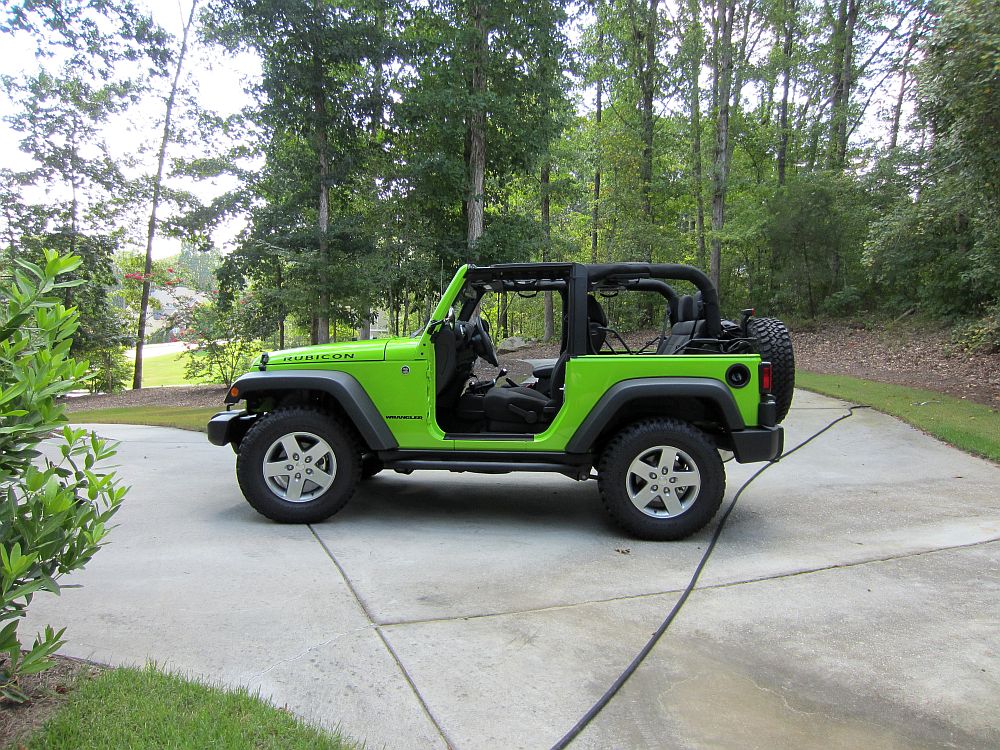
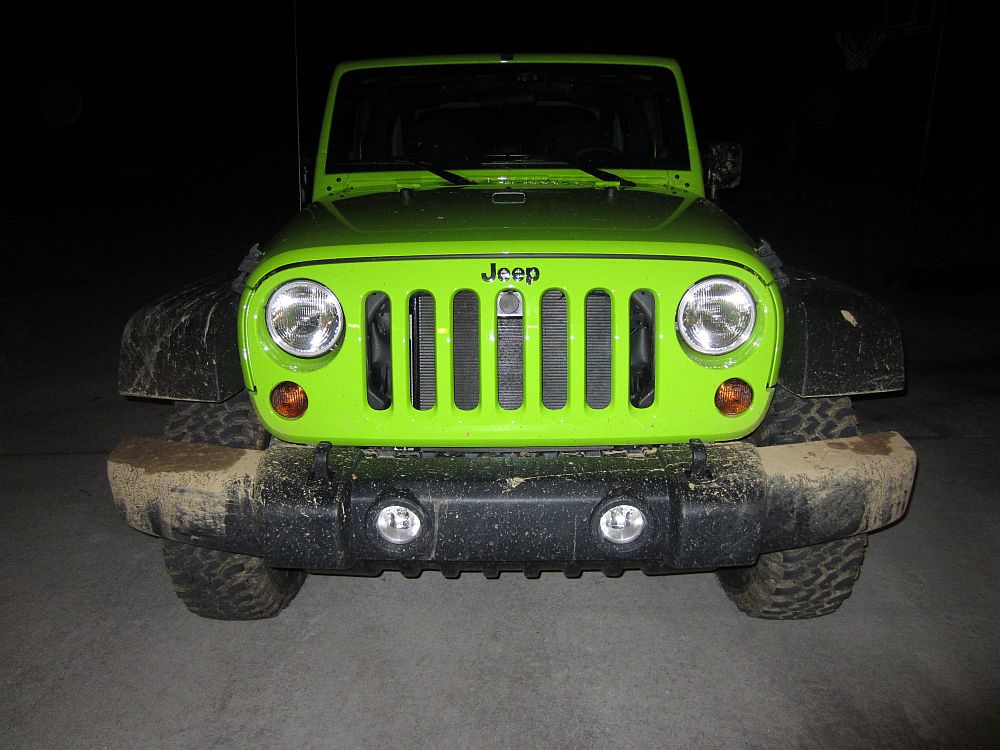
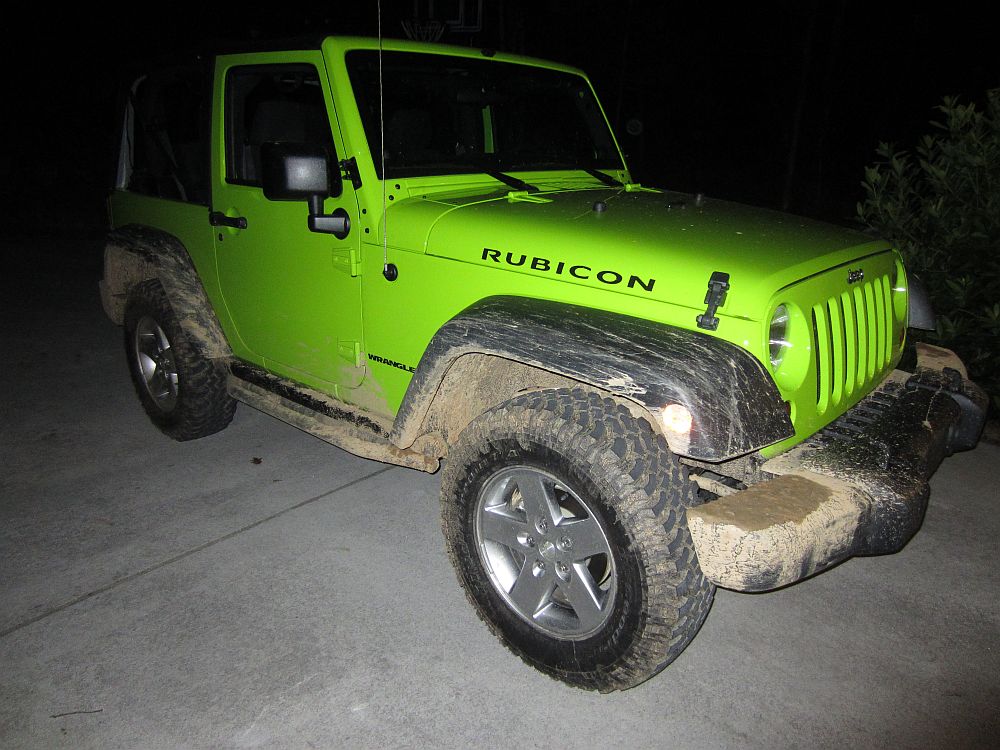
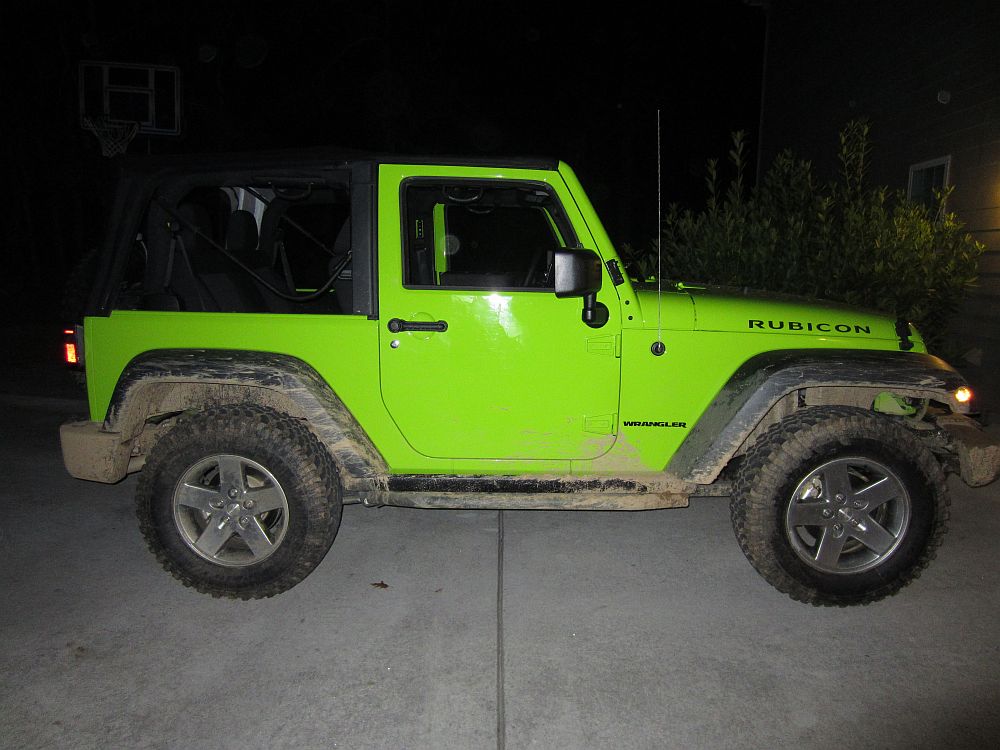
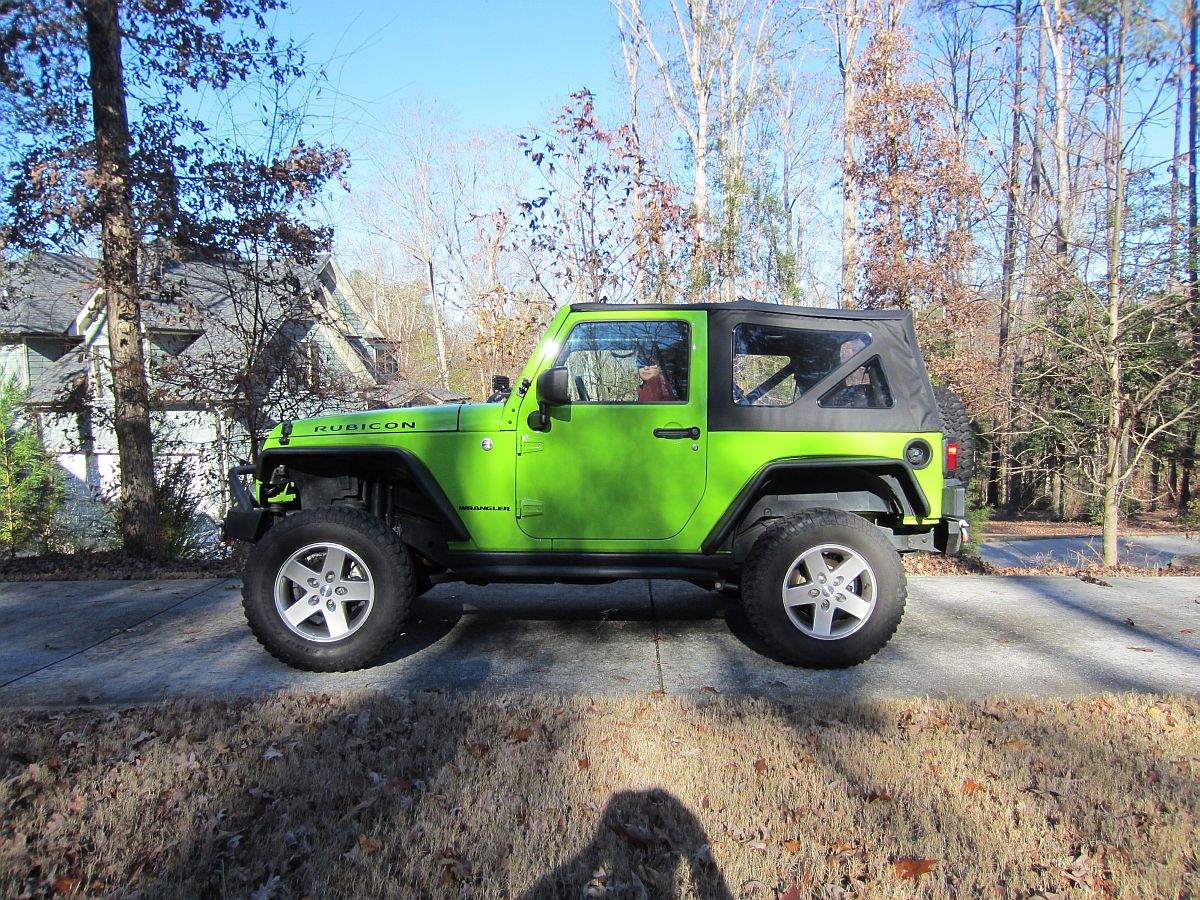
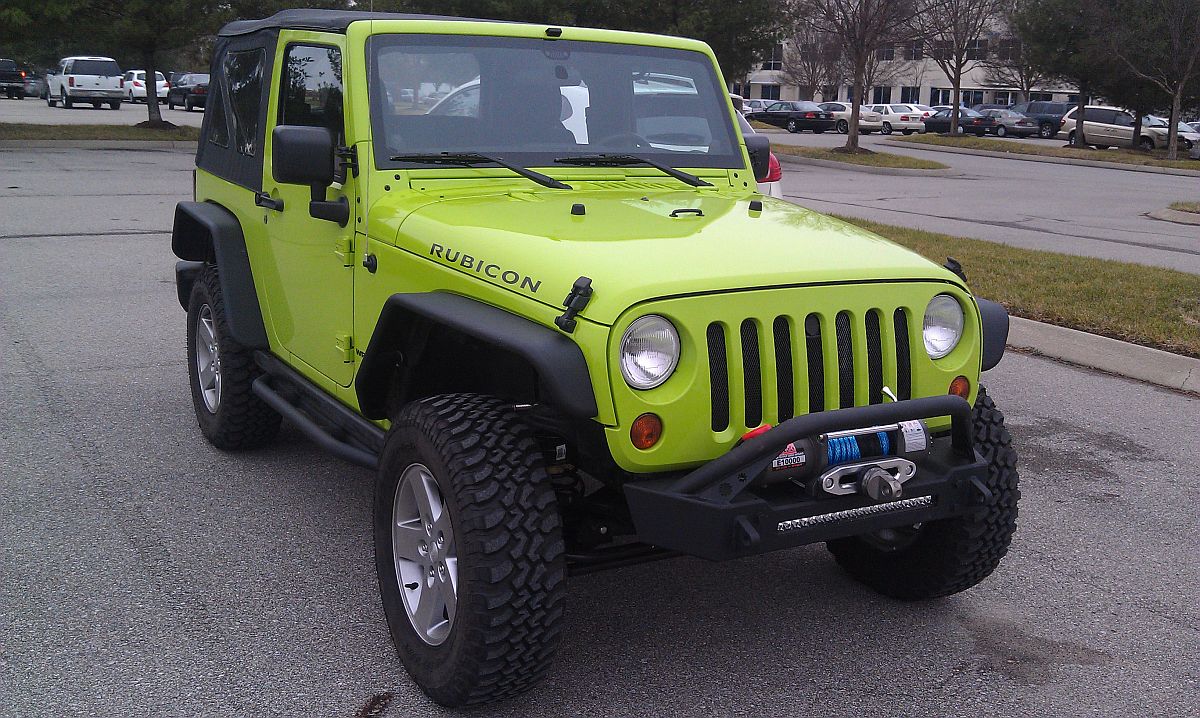
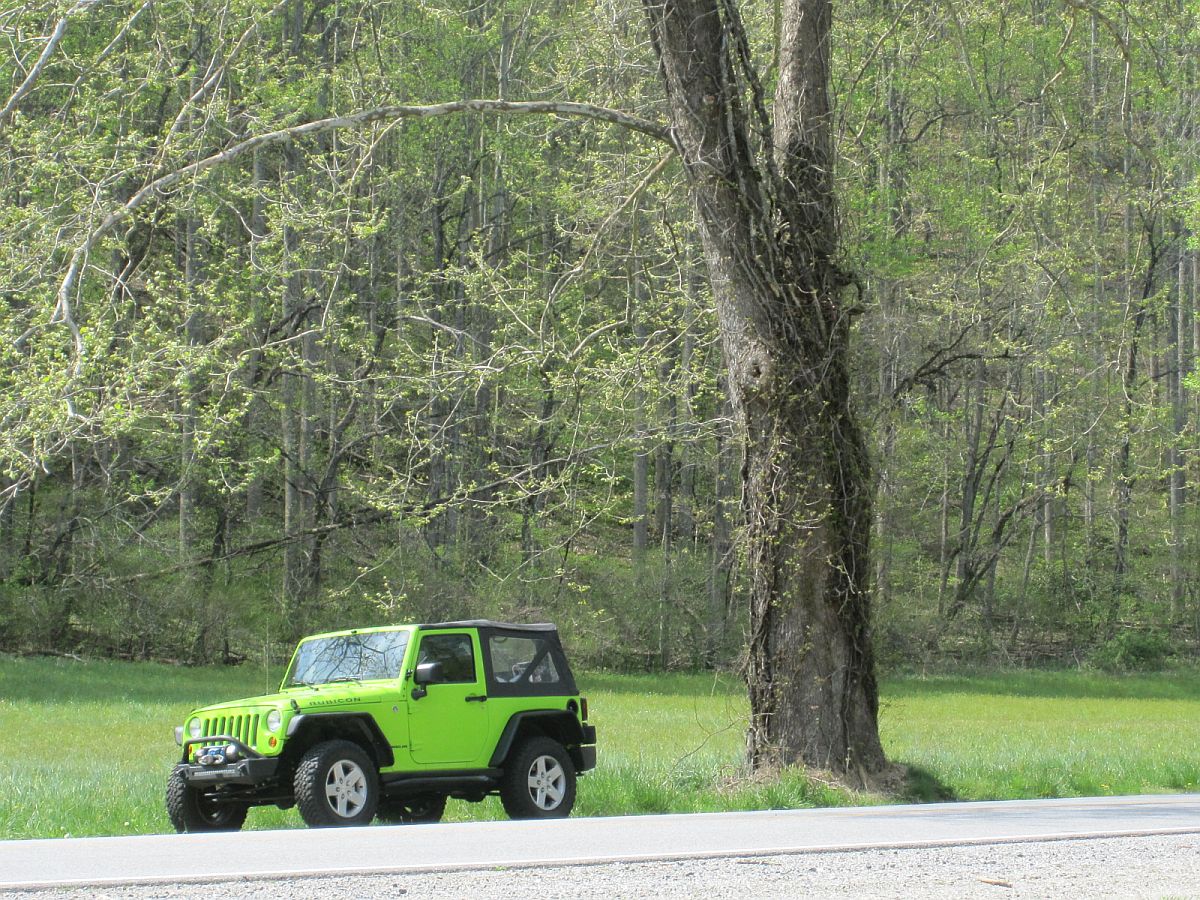
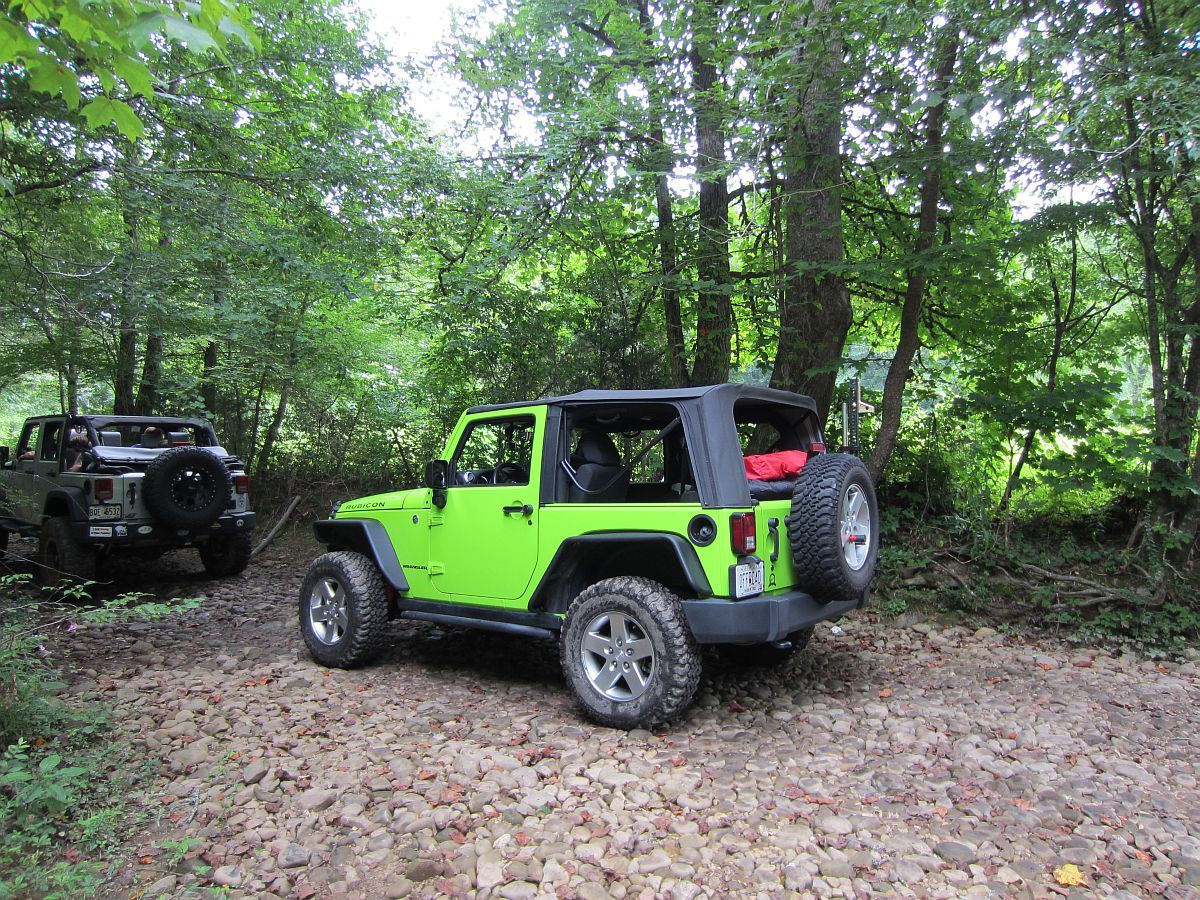
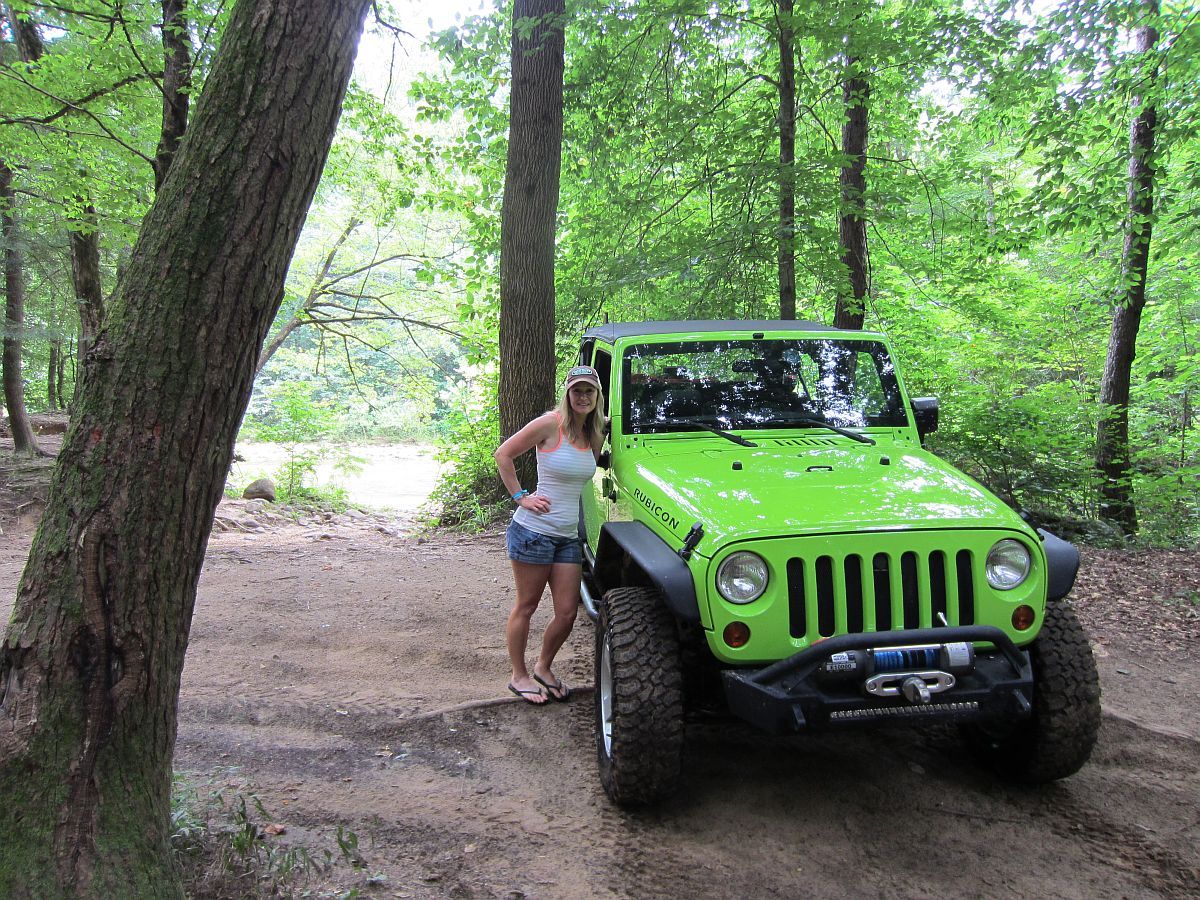
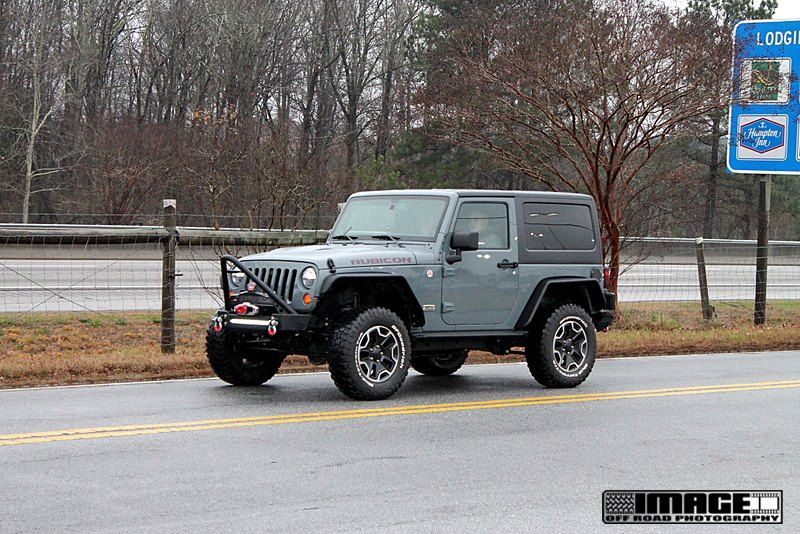
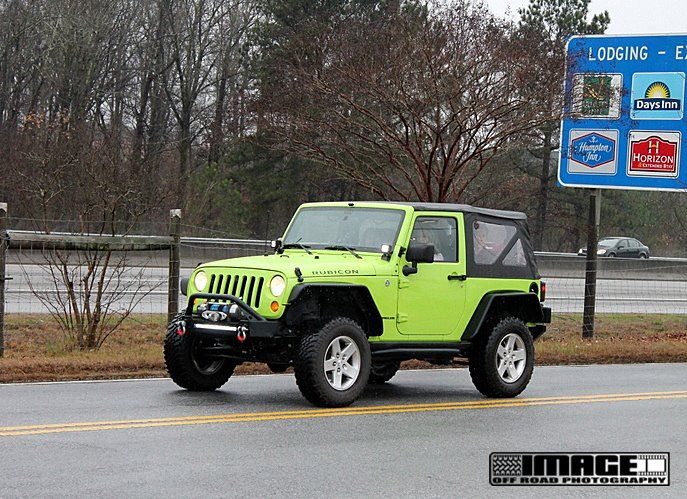
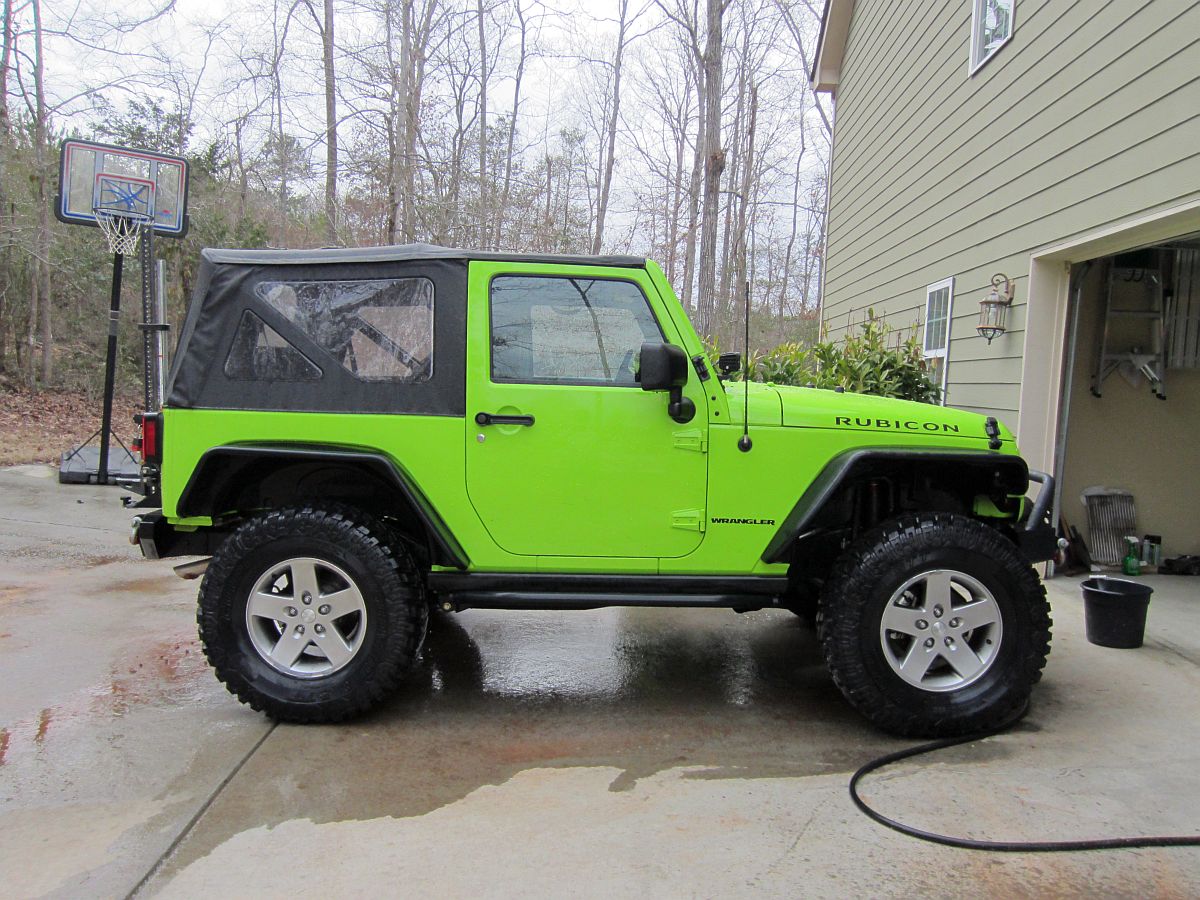
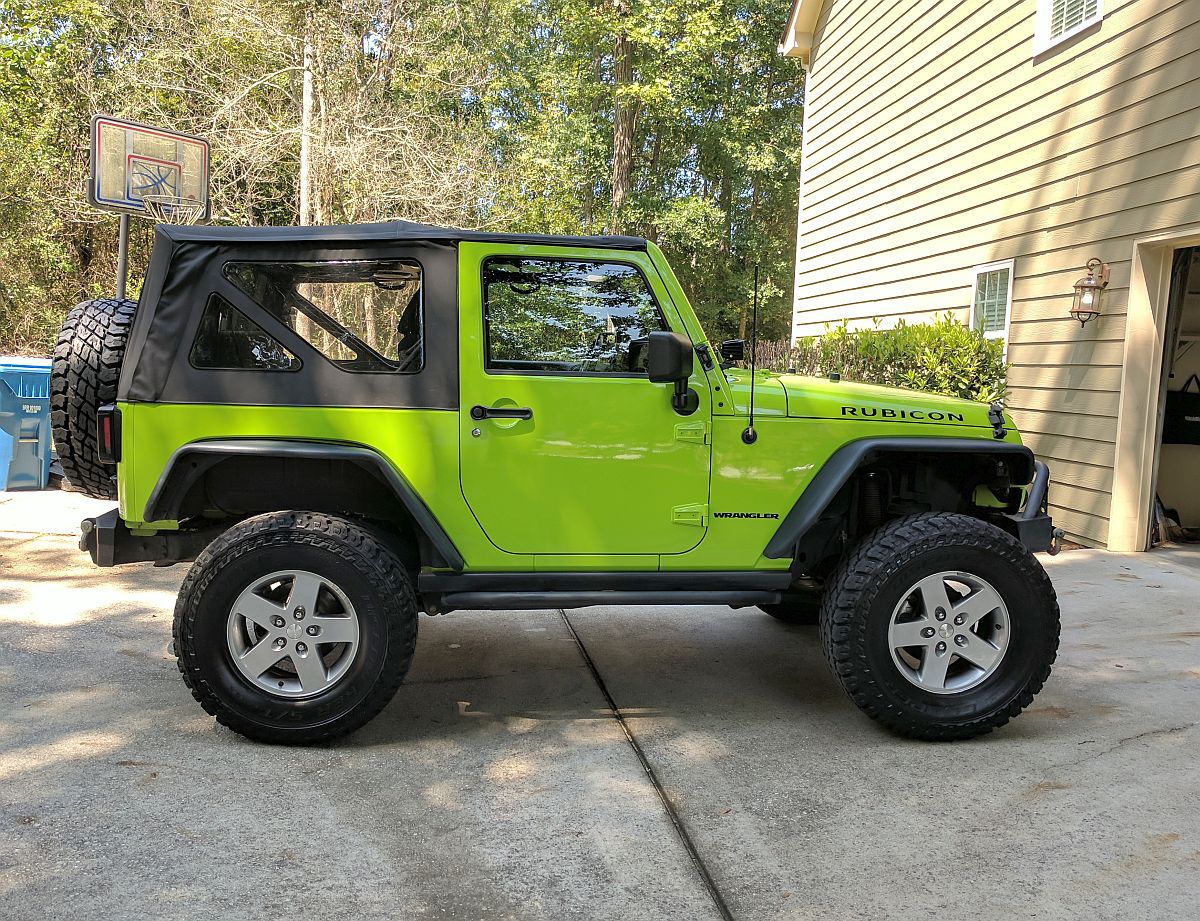
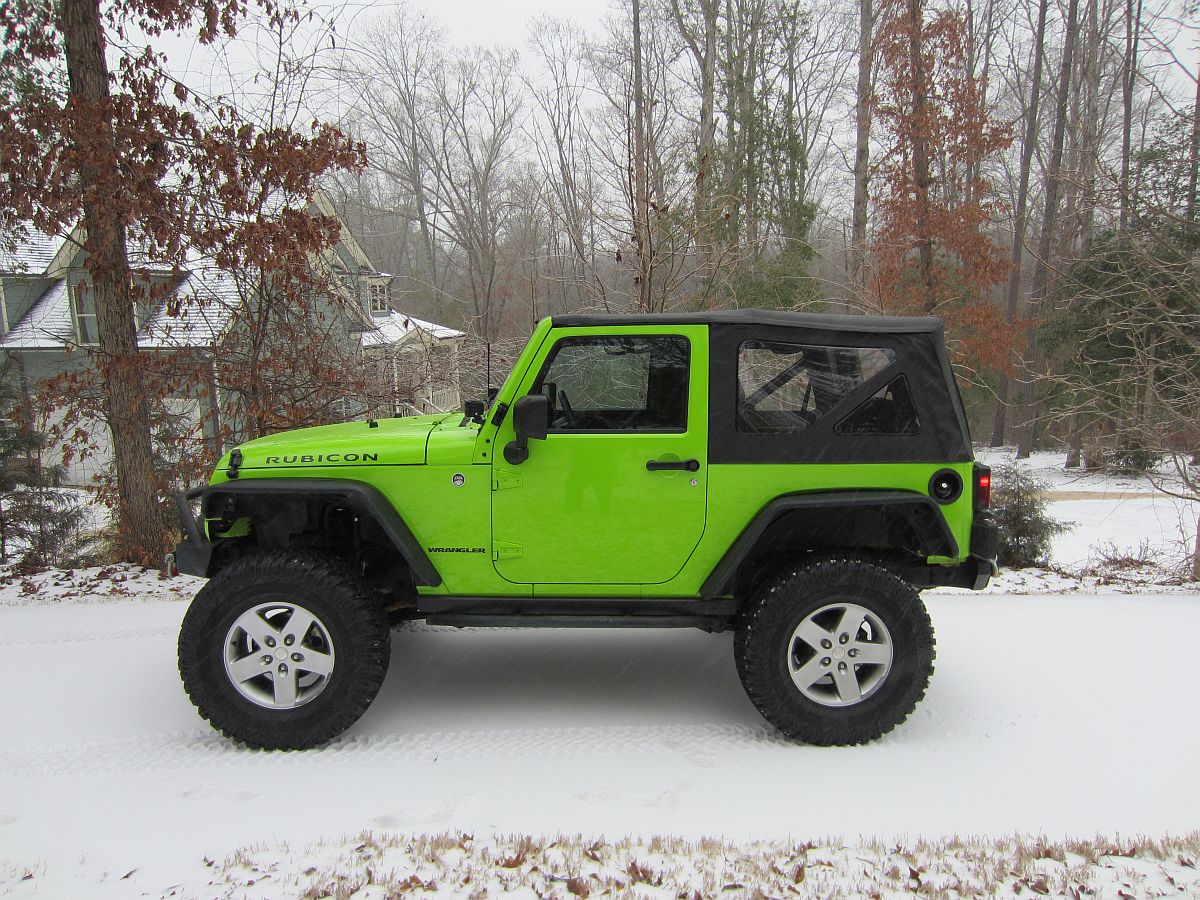
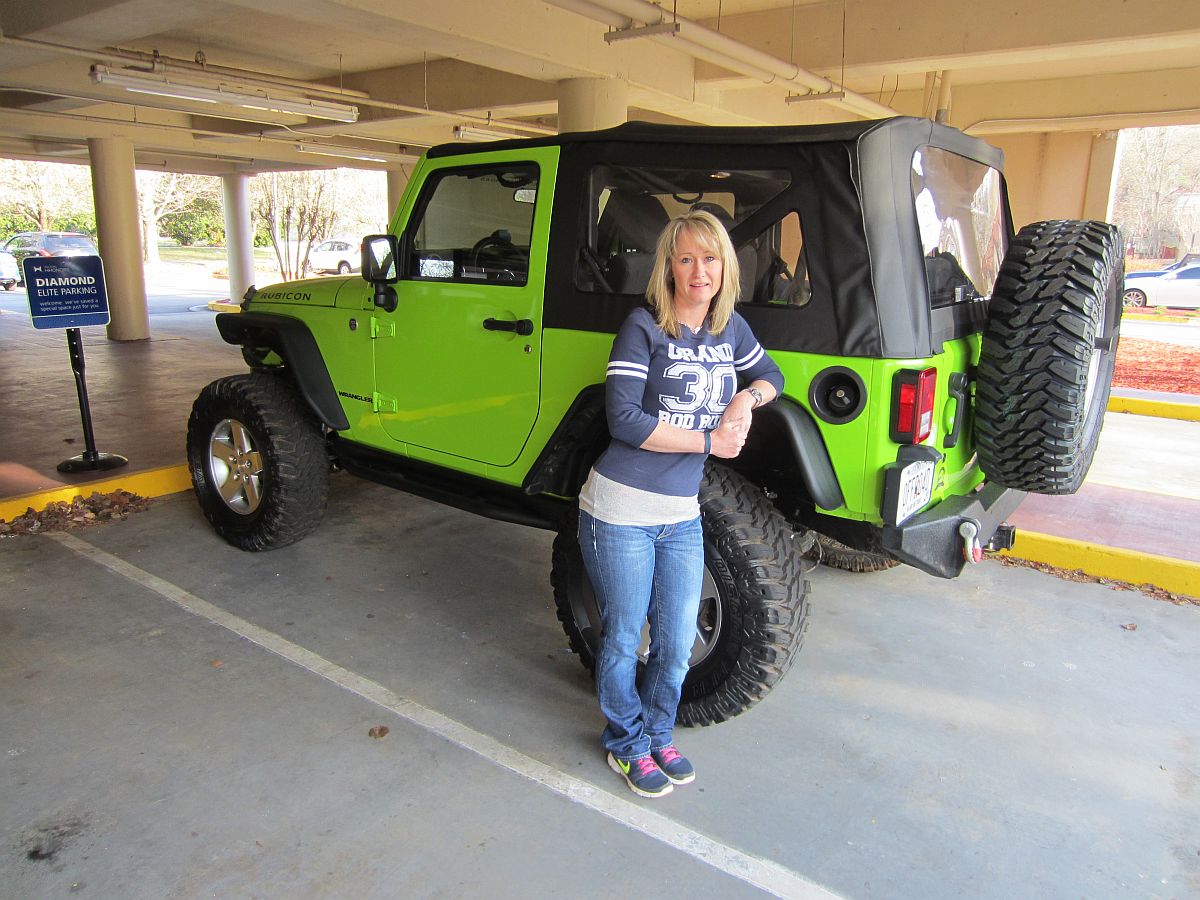
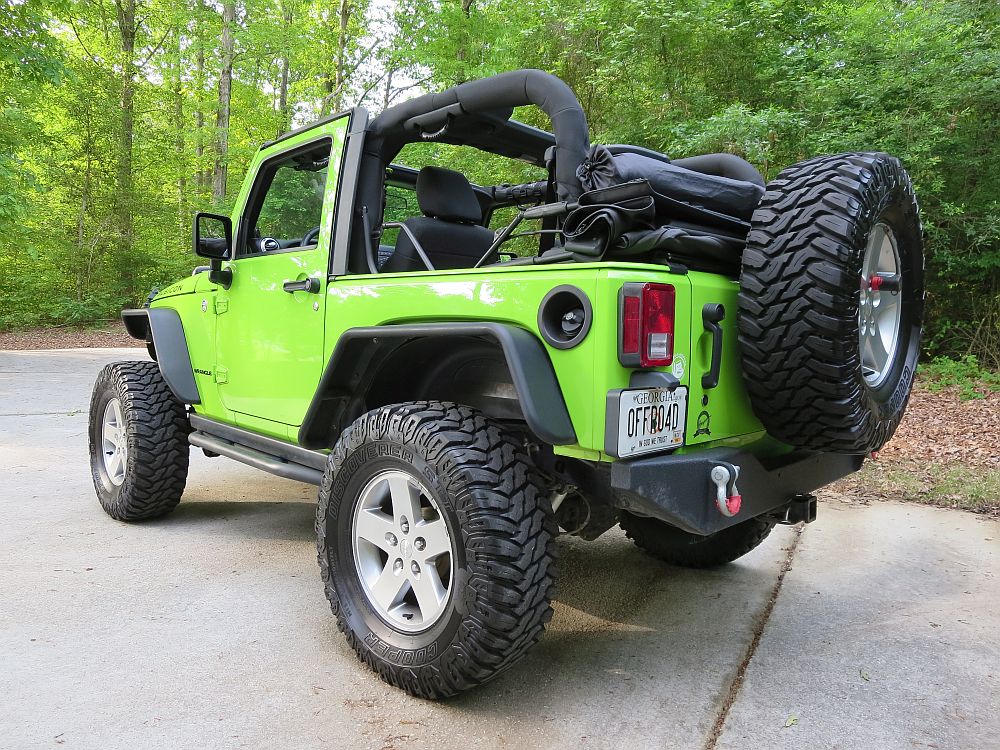
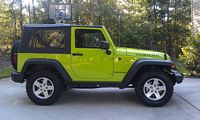
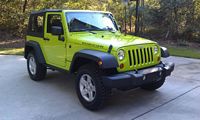
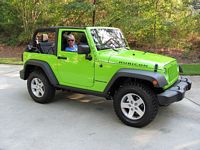
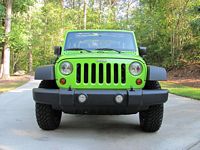
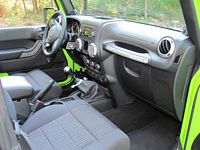
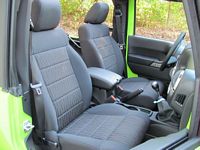
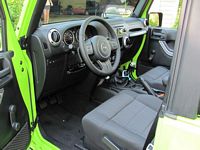
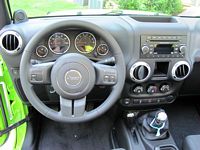
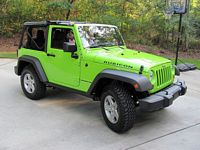
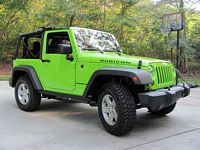
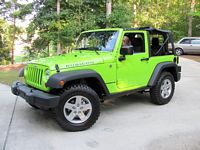
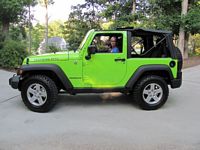
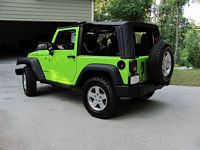
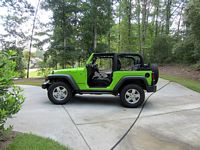
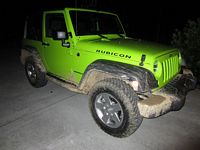
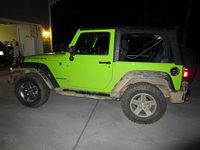
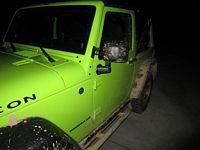
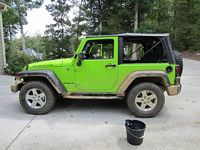
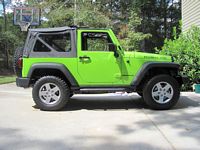
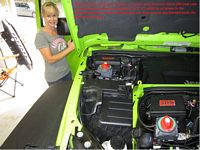
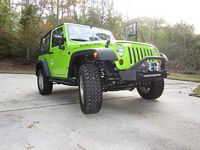
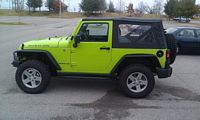
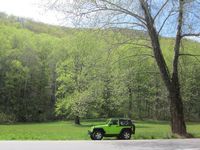
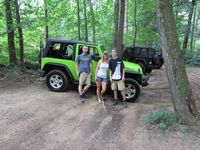
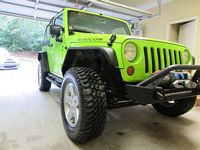
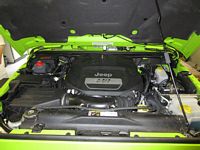
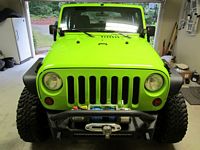
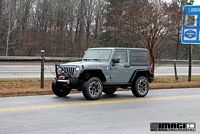
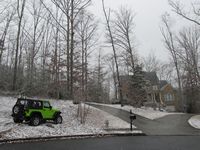
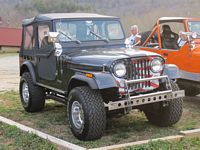
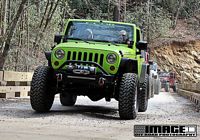
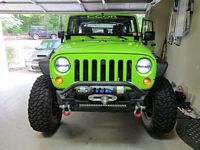
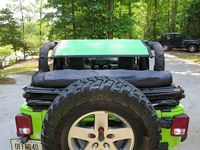
This 2012 Jeep Rubicon was purchased from Richard Burnham at Hayes Jeep. My wife had test driven several and decided this was the one she wanted, in Gecko green. New for 2012 is the Pentastar 3.6L motor (more Pentastar info HERE), definitely feels stronger than the outgoing 3.8L motor and was a primary reason for us closing the Jeep deal after waiting a few years for a motor that seemed to better fit- more Pentastar engine information can be found HERE.
Dealer Ad is HERE, window sticker is HERE, window sticker 2 is HERE, build sheet is HERE.


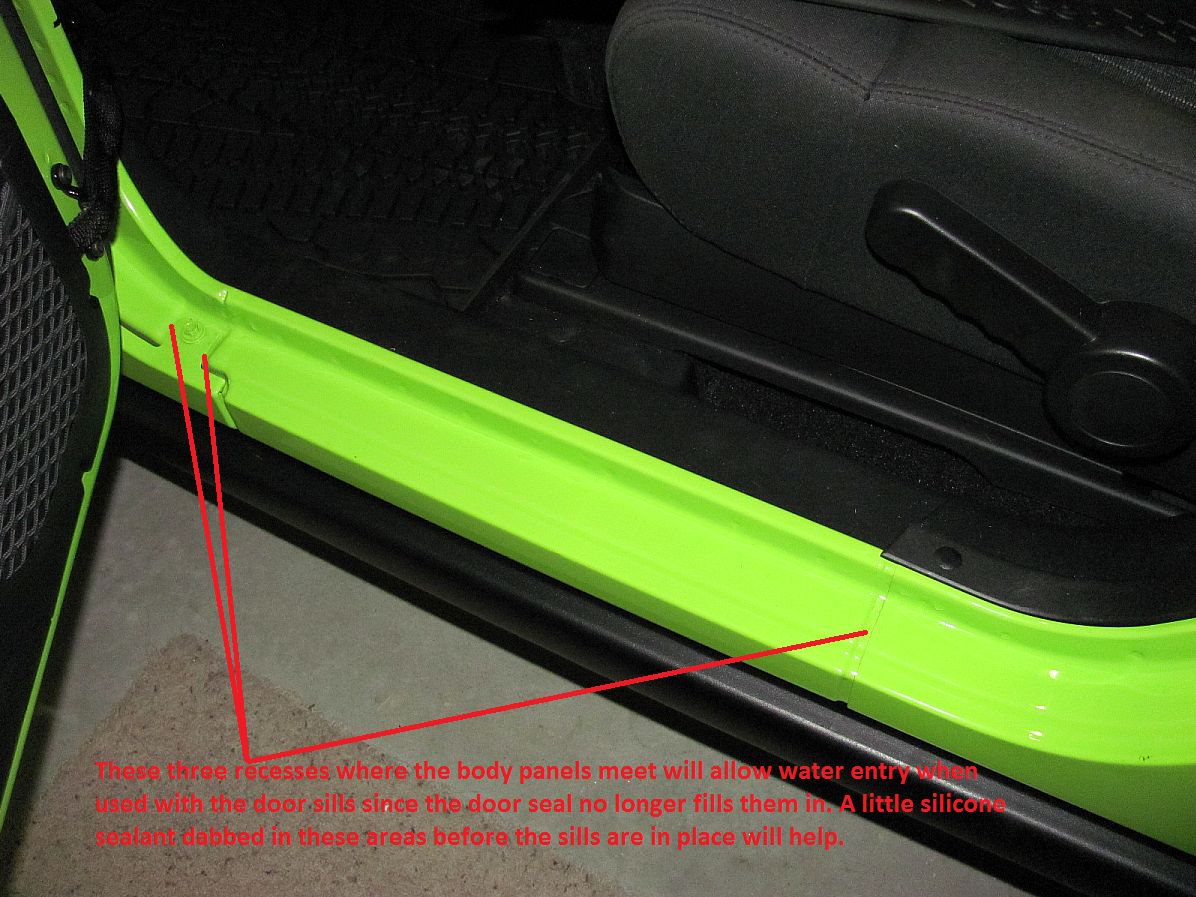
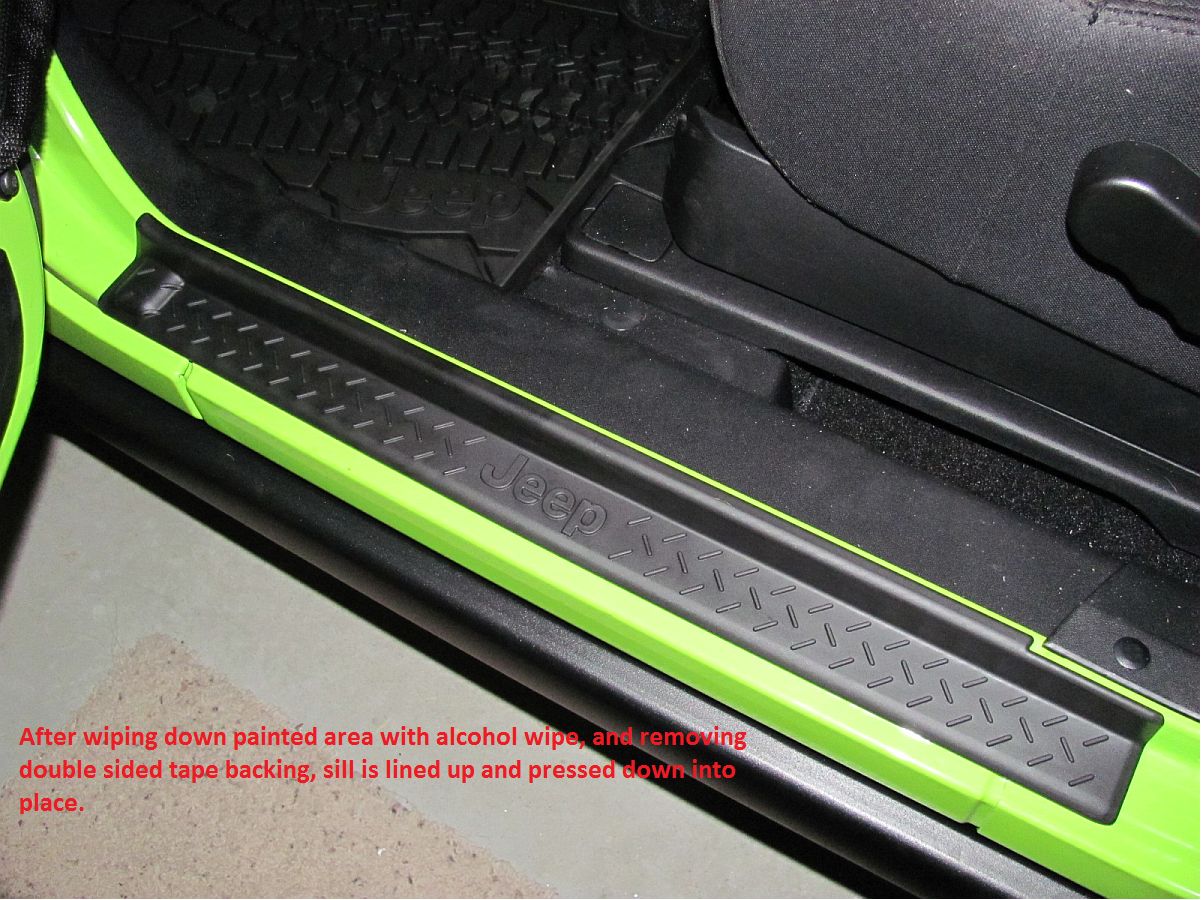
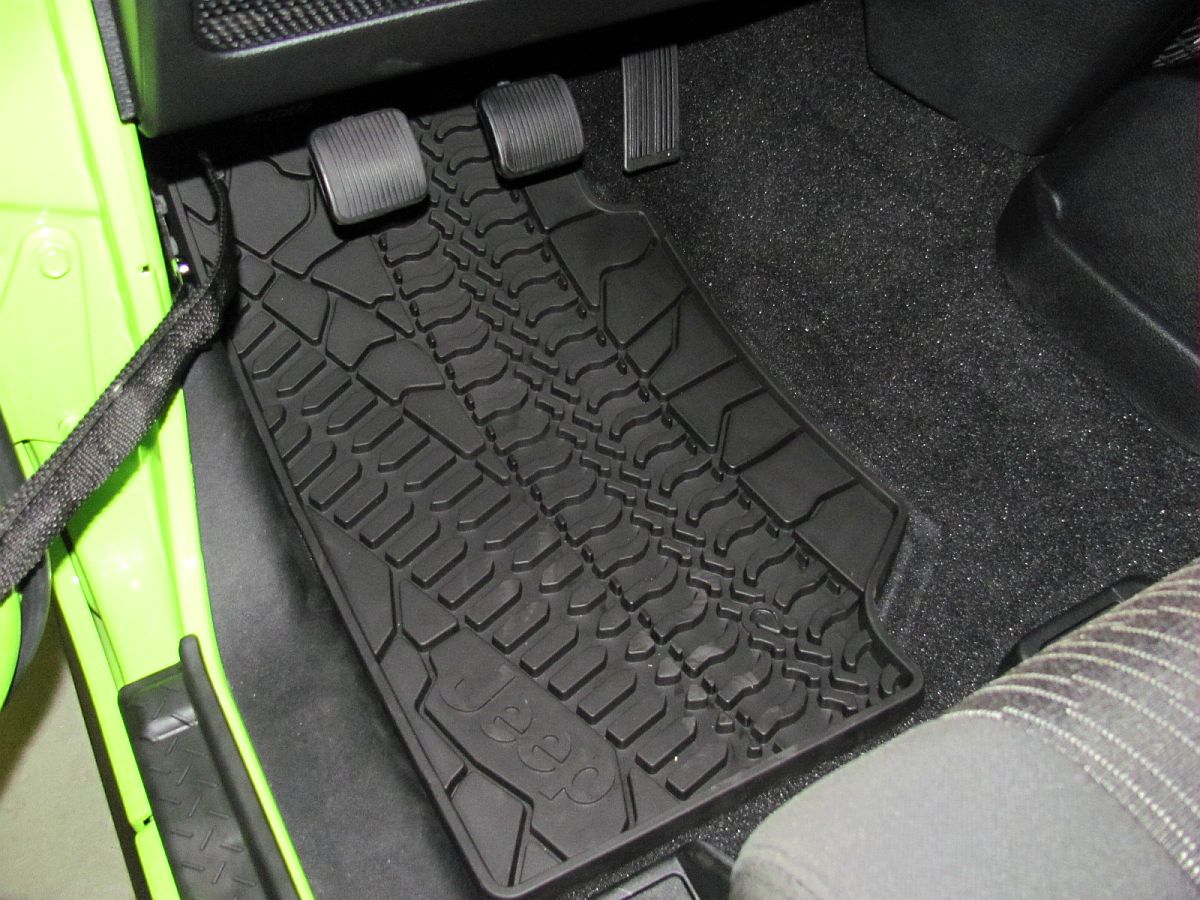
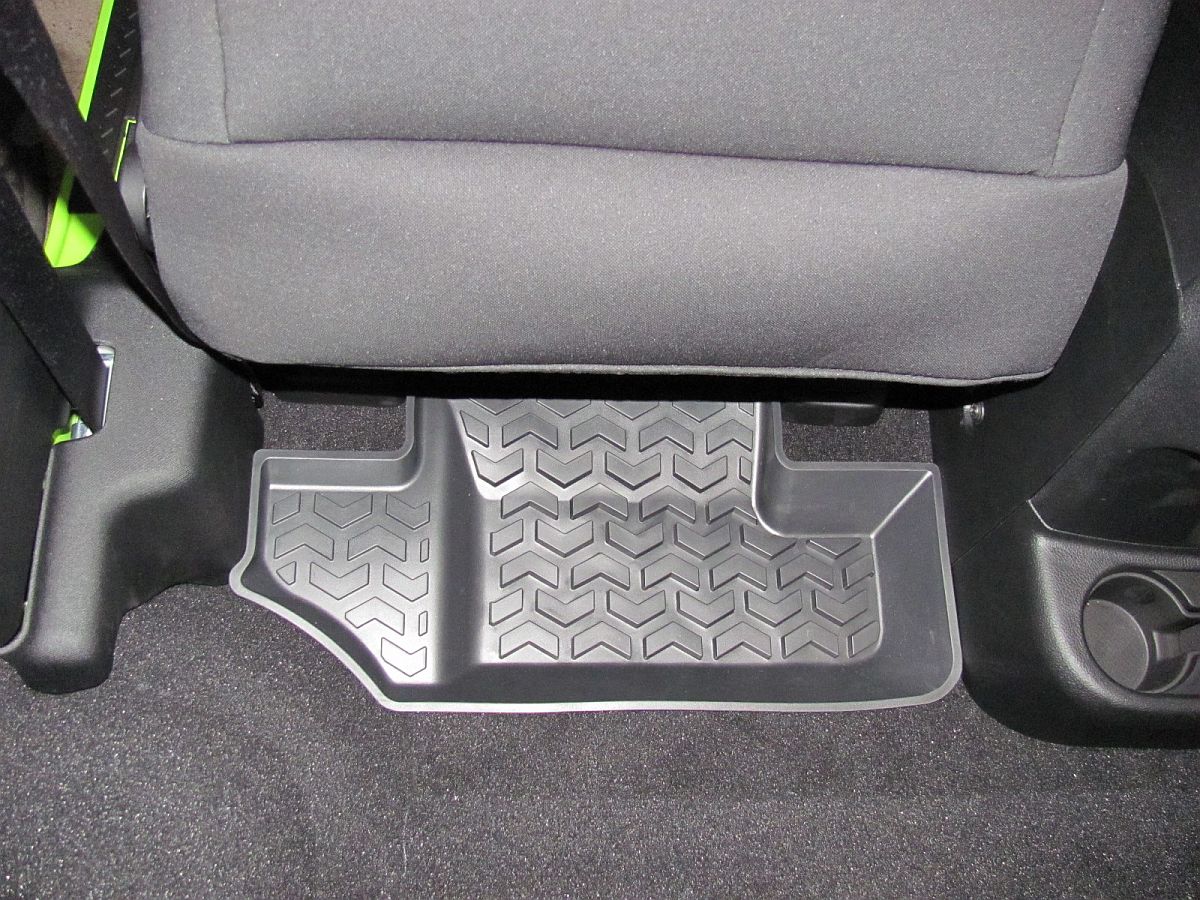
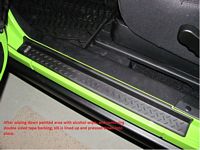
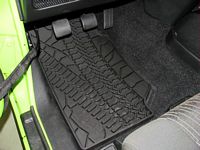
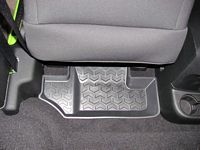
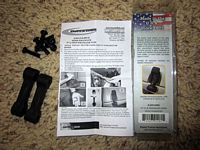
First things purchased were some better floor mats (JEEP Front Slush Mats and Quadratec Rear Floor Liners), JEEP Door Entry Guards, and some Rugged Ridge Grab Handles (P/N 13505.04 for the front doors, P/N 13305.14 for the rear sides- installation instructions HERE).


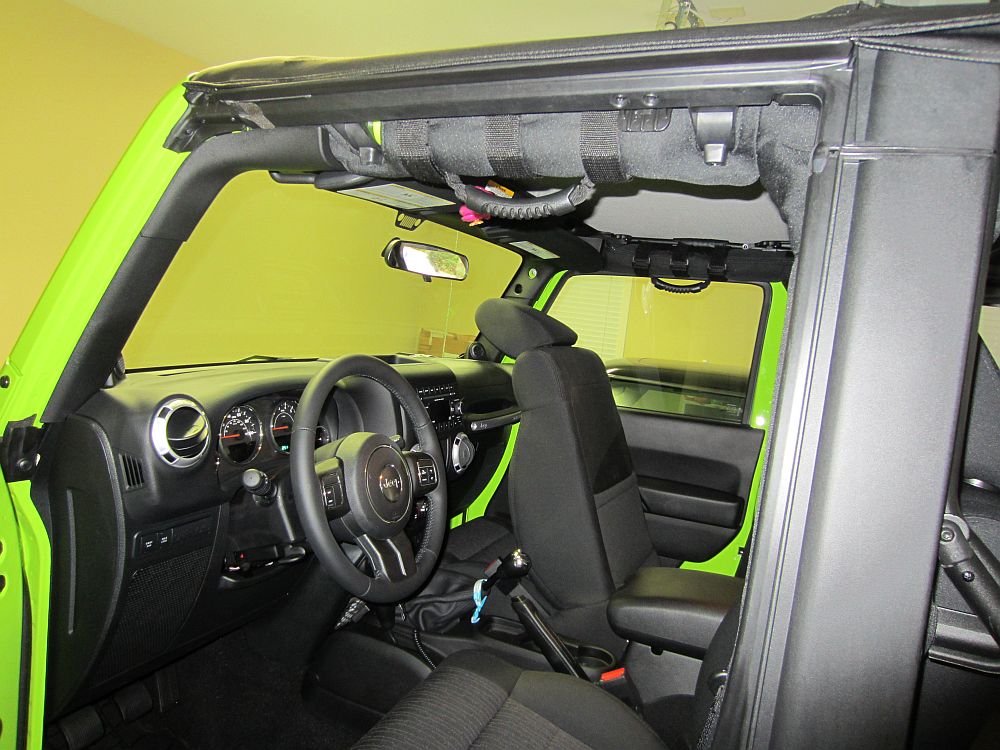
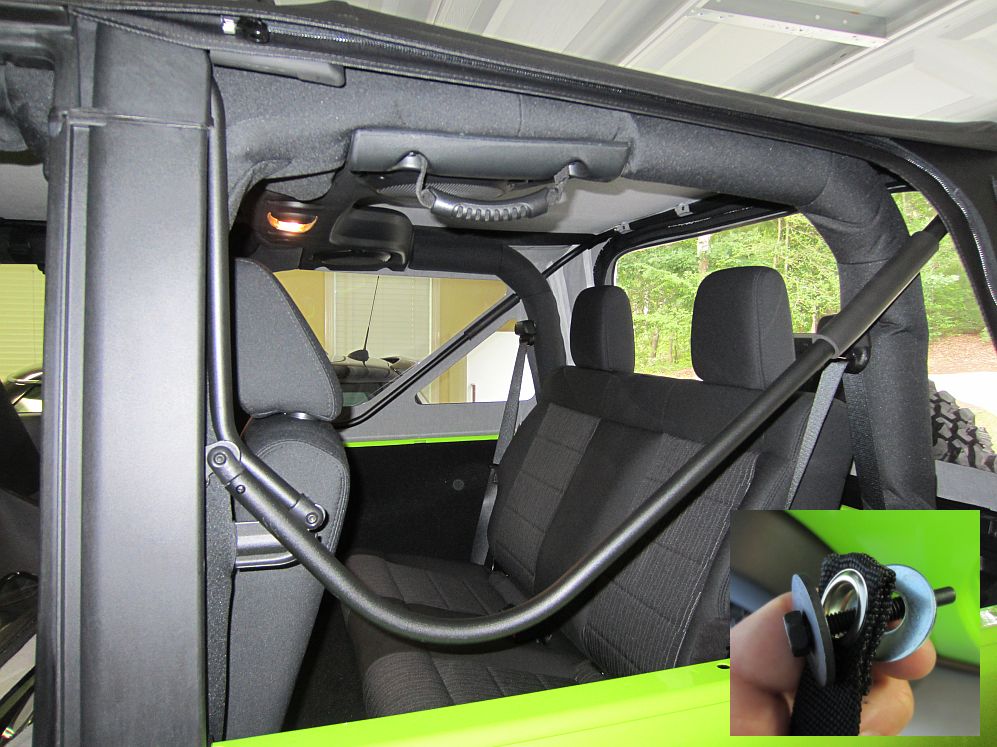
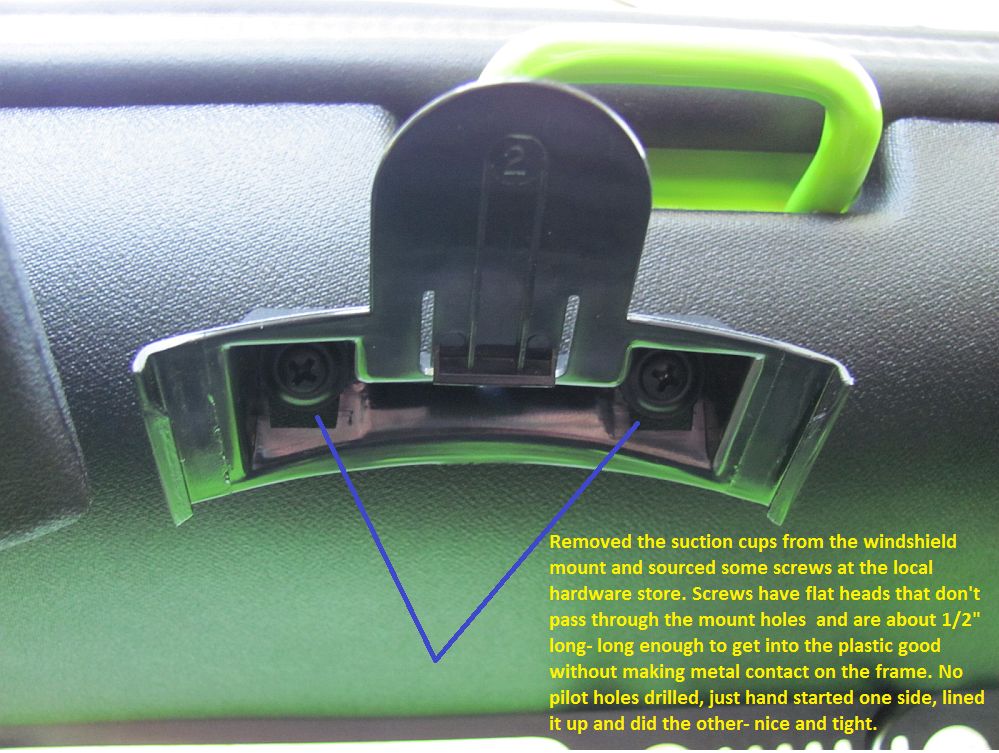
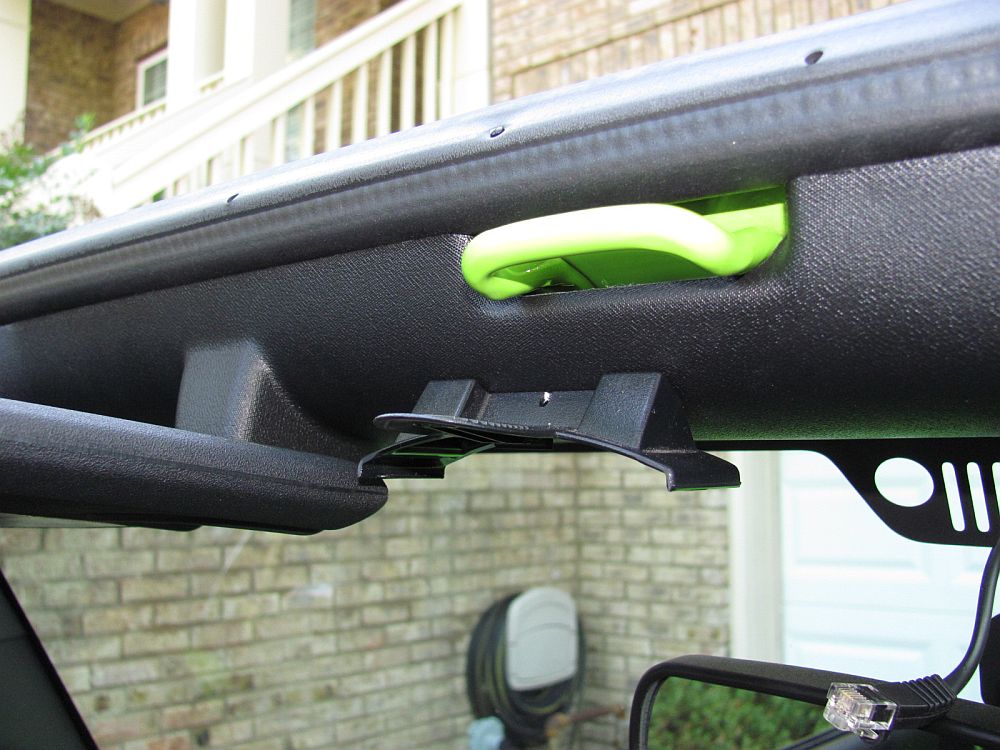
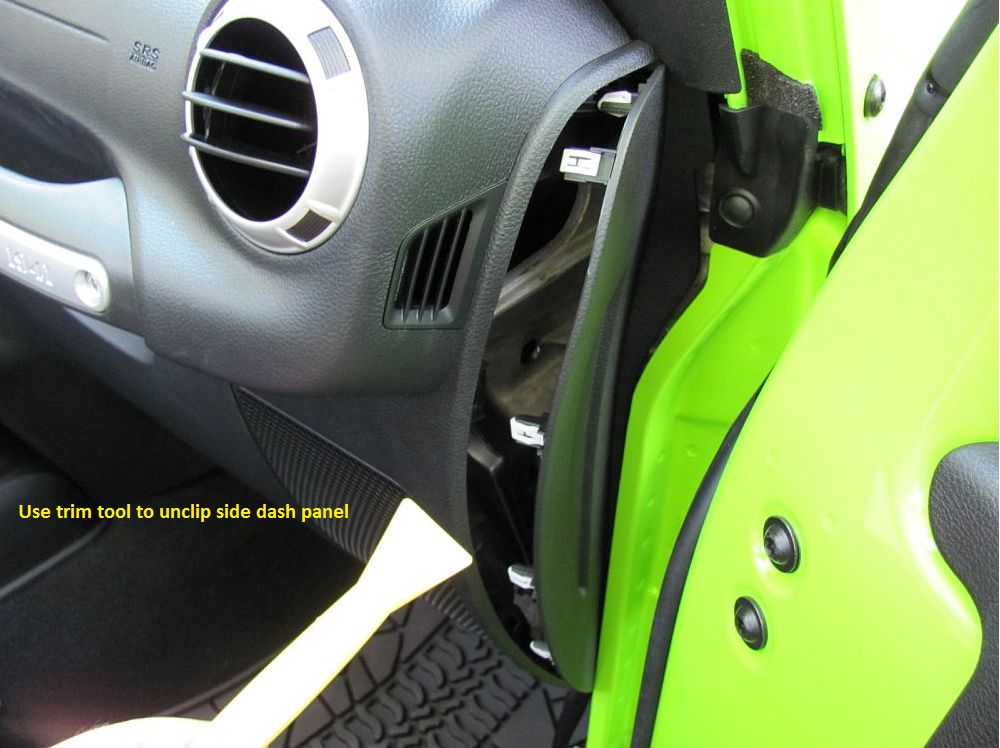
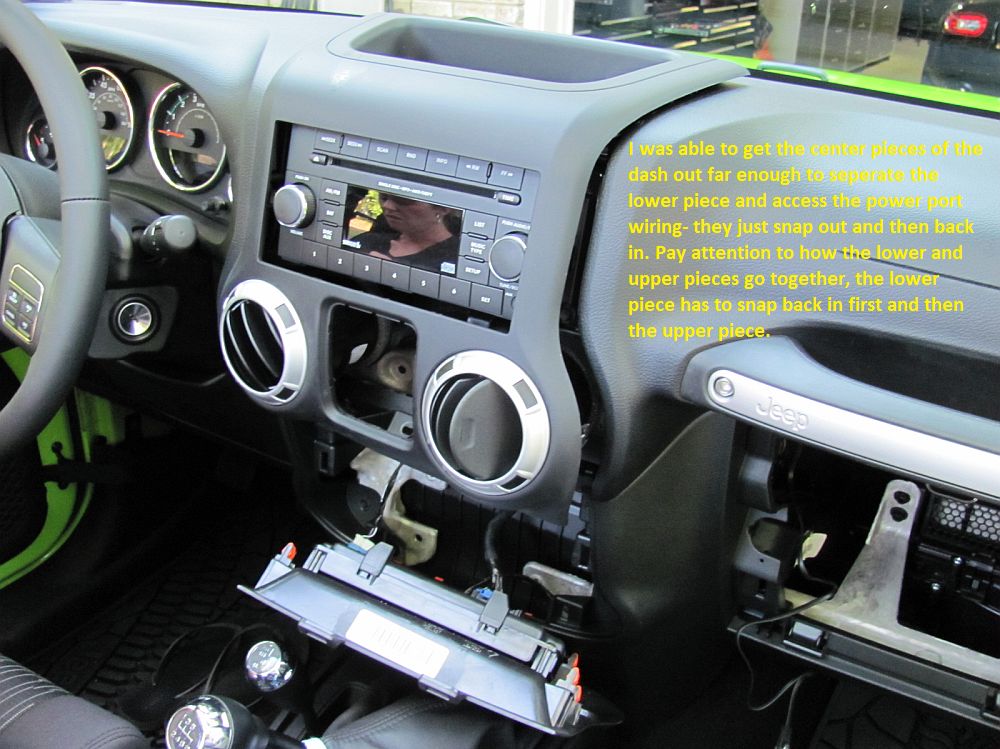
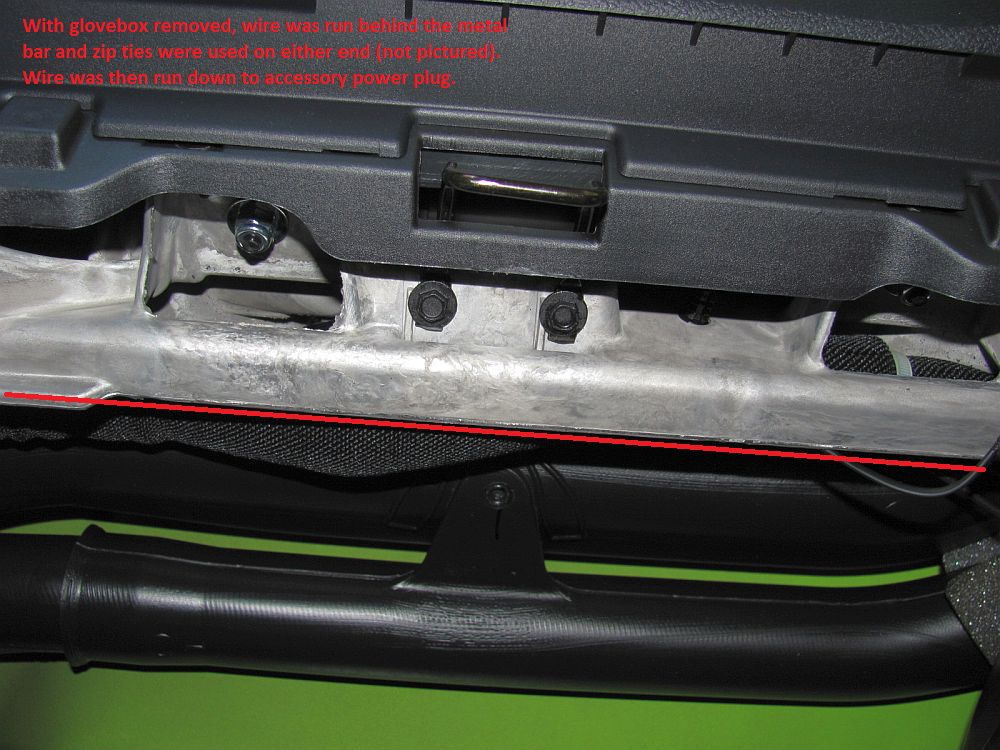
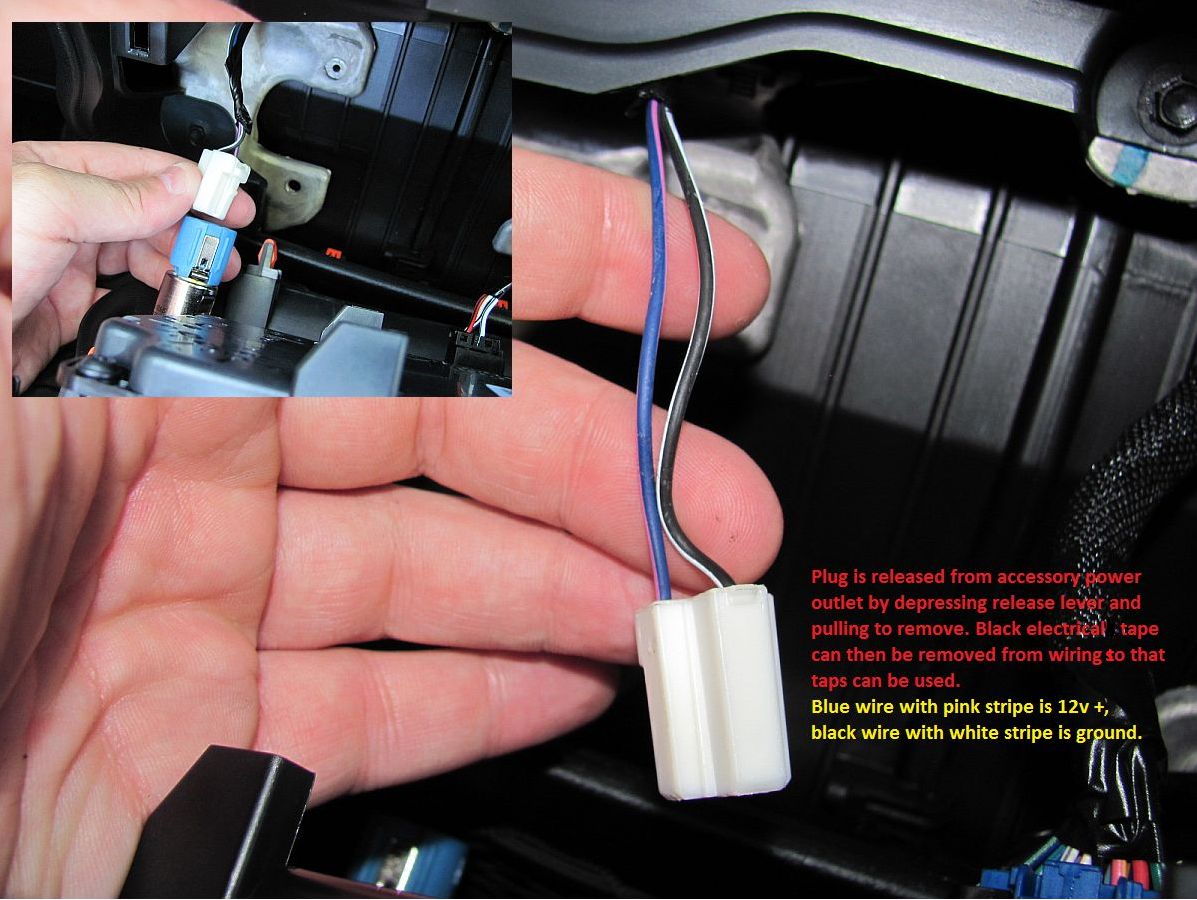
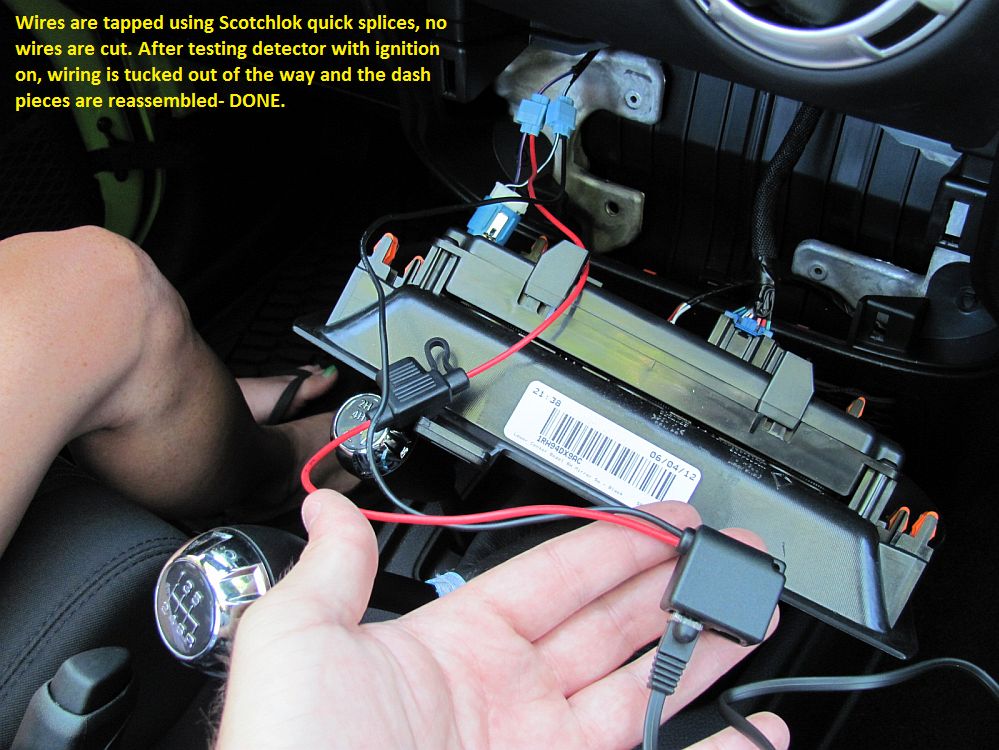
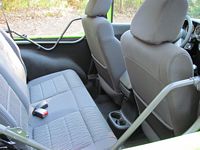
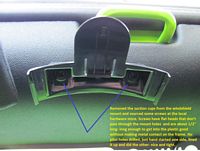
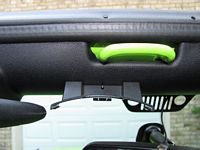
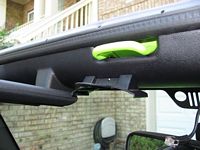
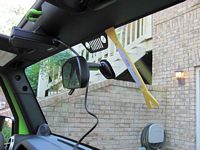
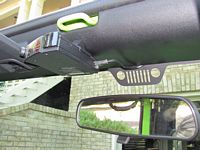
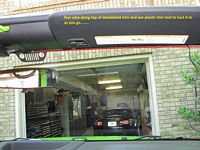
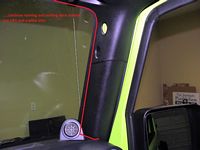
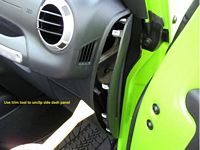
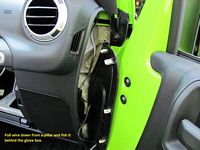
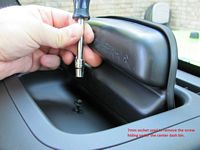
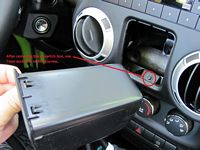
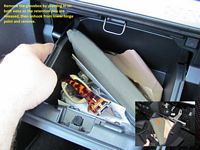
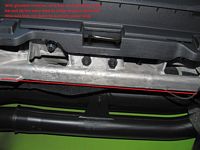
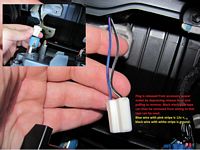
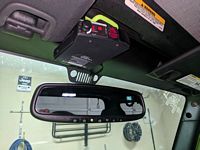
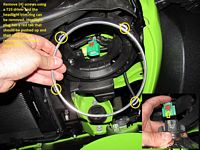
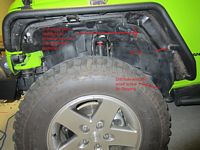
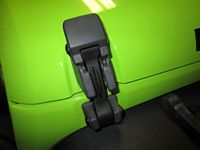
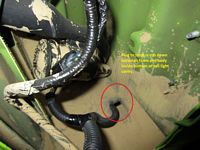
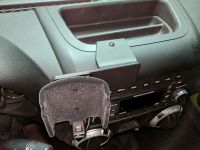
Valentine V1 radar detector installed above rearview mirror and direct wired (hard-wired)- V1 Manual HERE. The windshield mount suction cups were removed and a trip to the local hardware store was made to source two sheet metal screws with flat heads/washers that would work with the mount- about a 1/2" long so they would only go into the plastic and not contact the metal windshield frame. The mount was lined up and the sheet metal screws started by hand and tightened. Wiring was then tucked around the top of the windshield trim, down the a-pillar trim, behind the glovebox and finally plugged in to the V1 power block that was tapped into the accessory port wiring. ALL details in pics below. I got the idea for this from a JeepForum thread HERE (archived HERE) but made a few deviations. There is also a good video I found on taking the dash apart to access the wiring HERE.......but I didn't take the dash entirely apart since my shortcut worked.
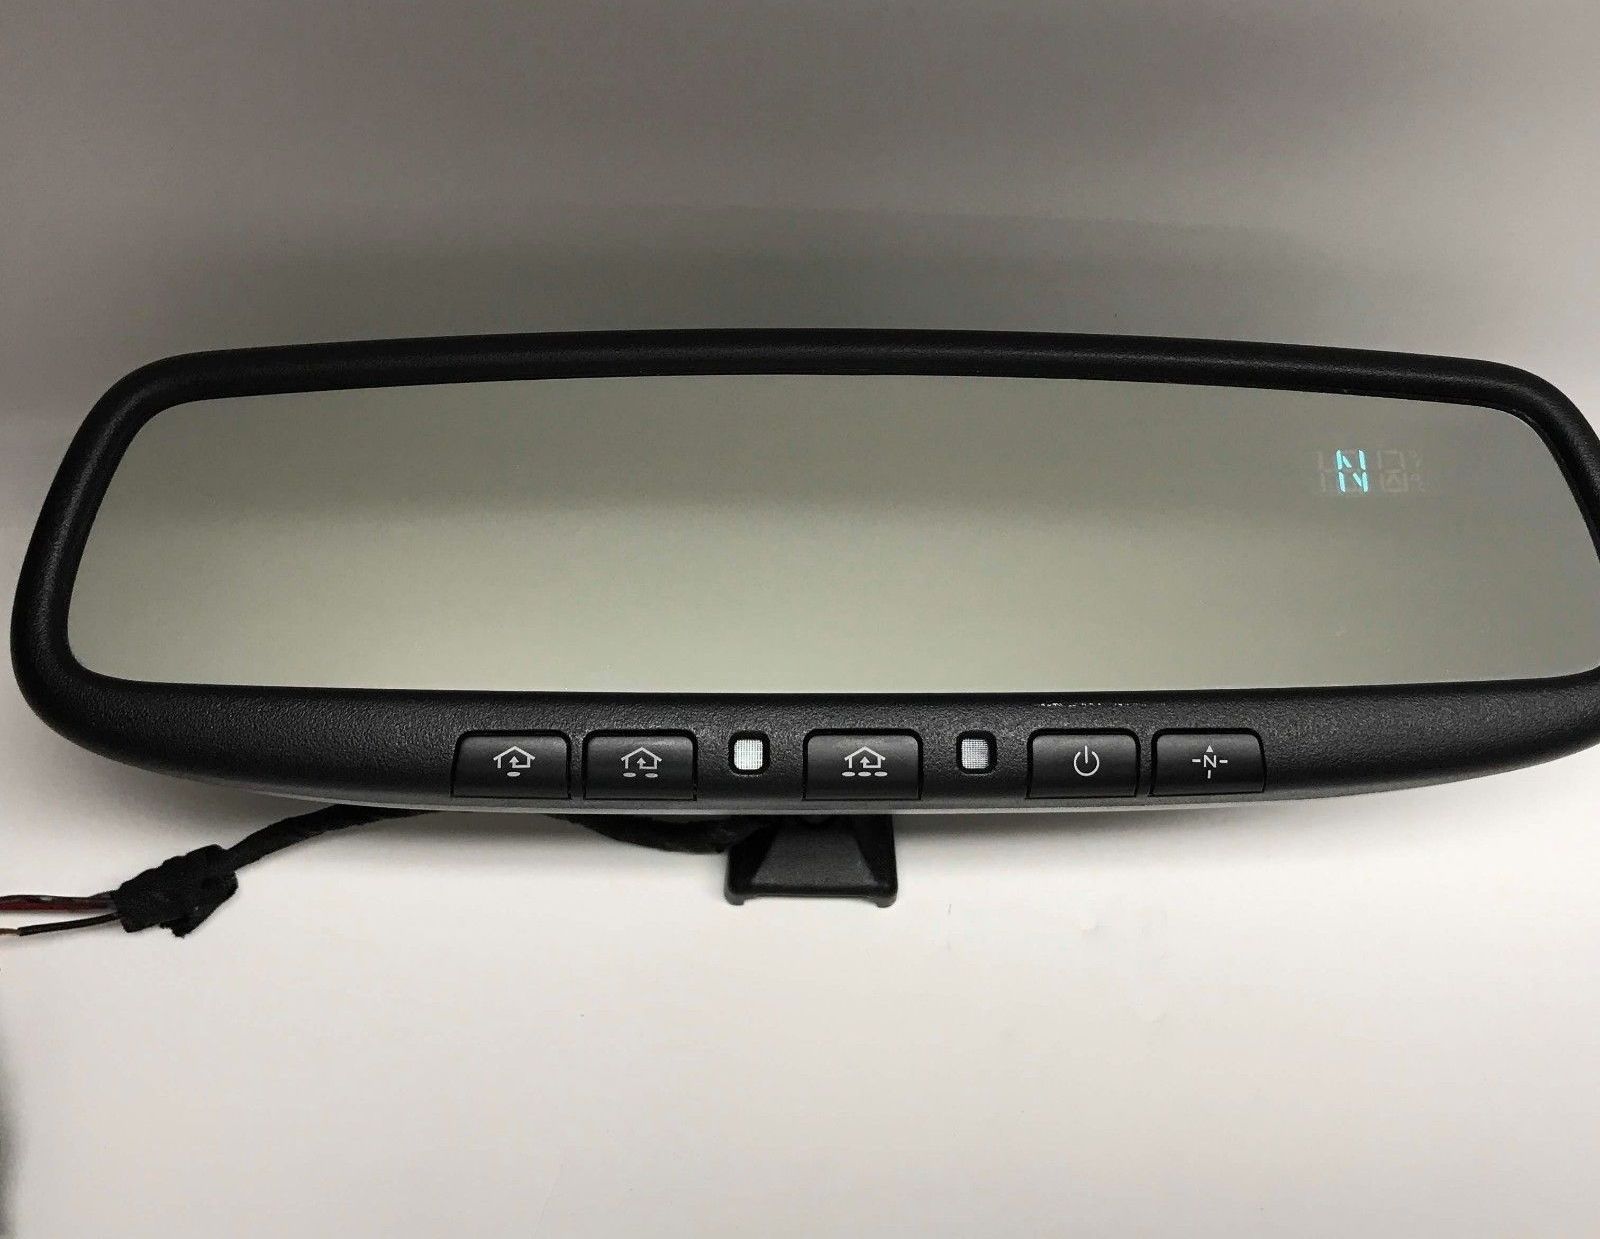
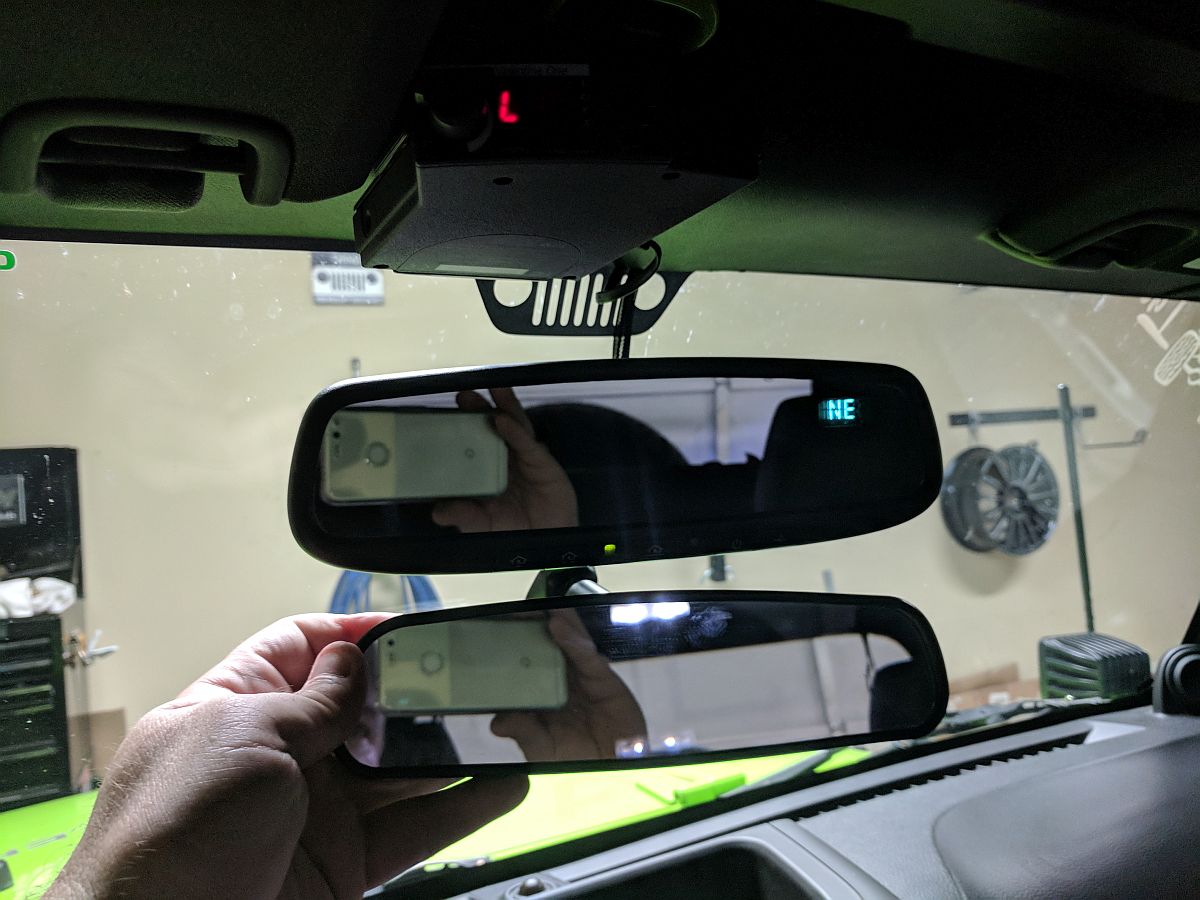
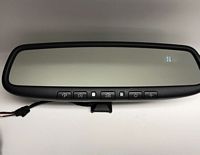
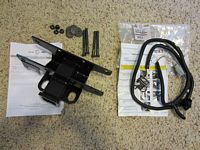
[EDIT] Years later we decided to go hard top and I decided this might be a good time to install a Gentex Homelink AutoDim Mirror with Compass (Gentex 453) distributed by Mito from Mirrors_N_More on eBay: supplied instructions HERE, Gentex generic installation instructions HERE, Compass troubleshooting guide HERE. I did not connect the 12v wires to power and accessory but wired all to accesssory, works fine.


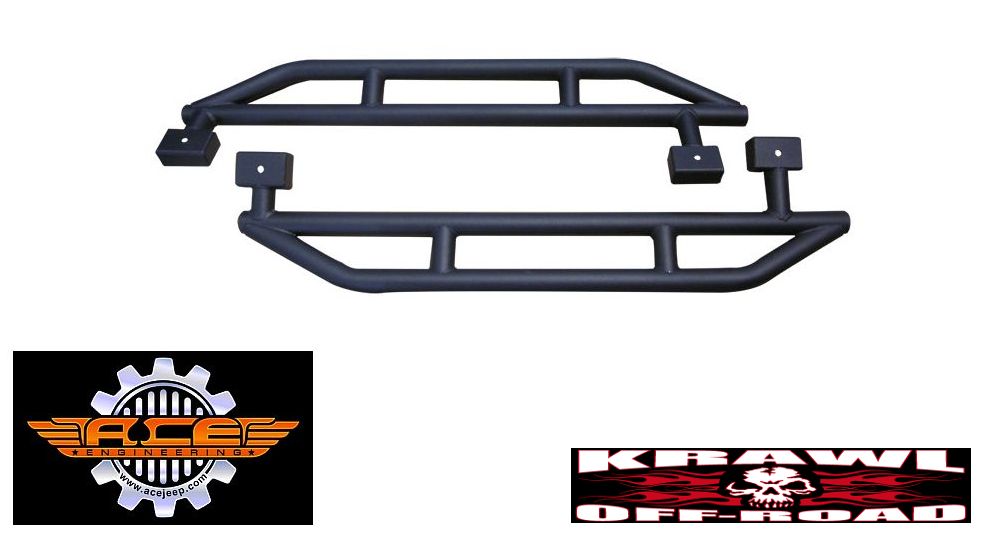
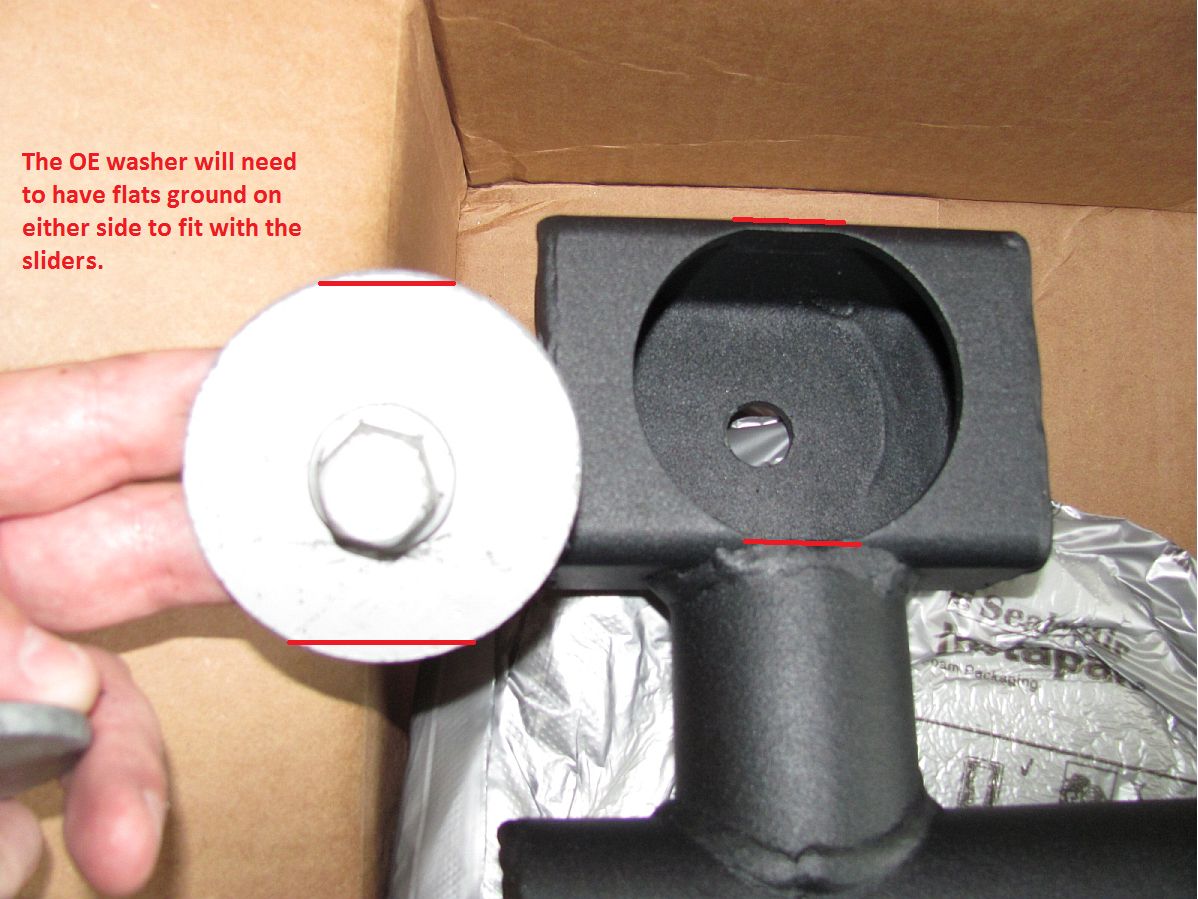
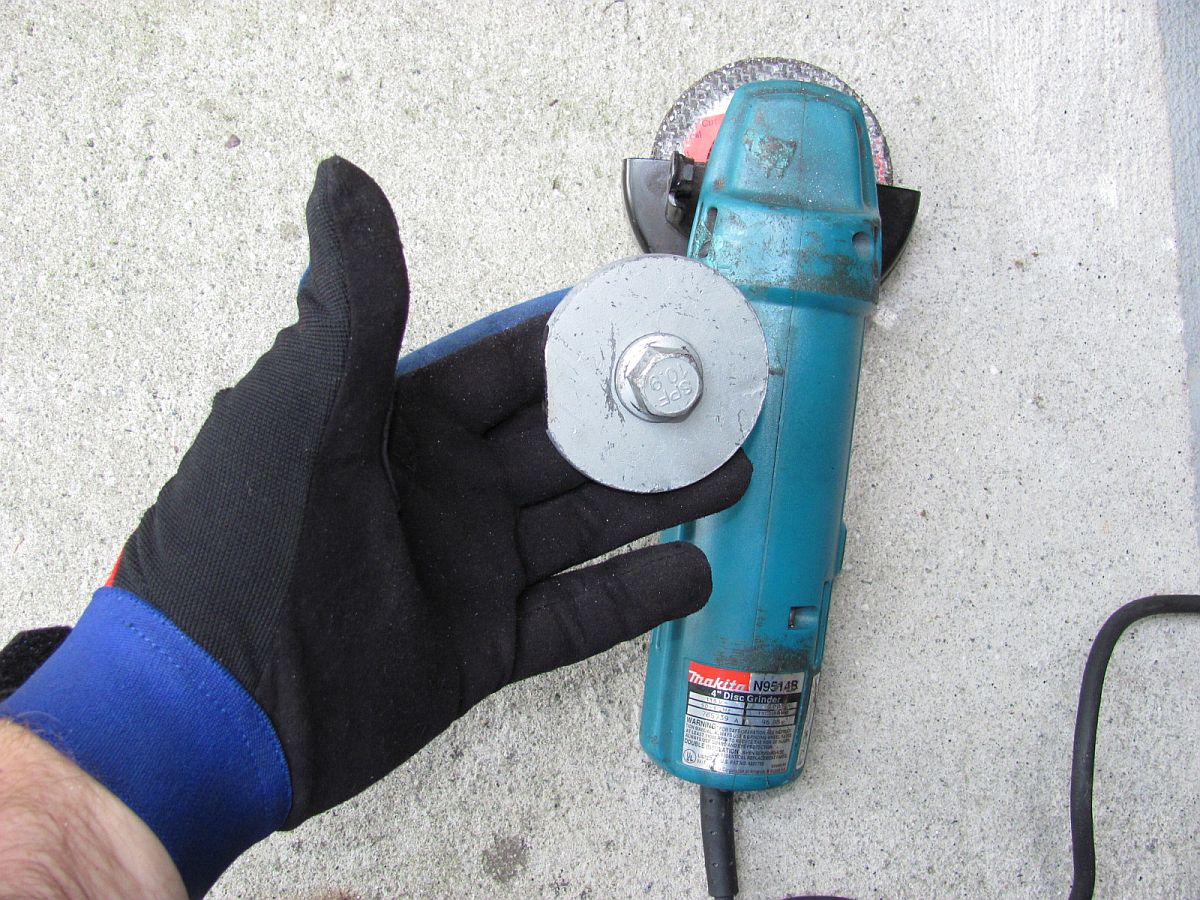
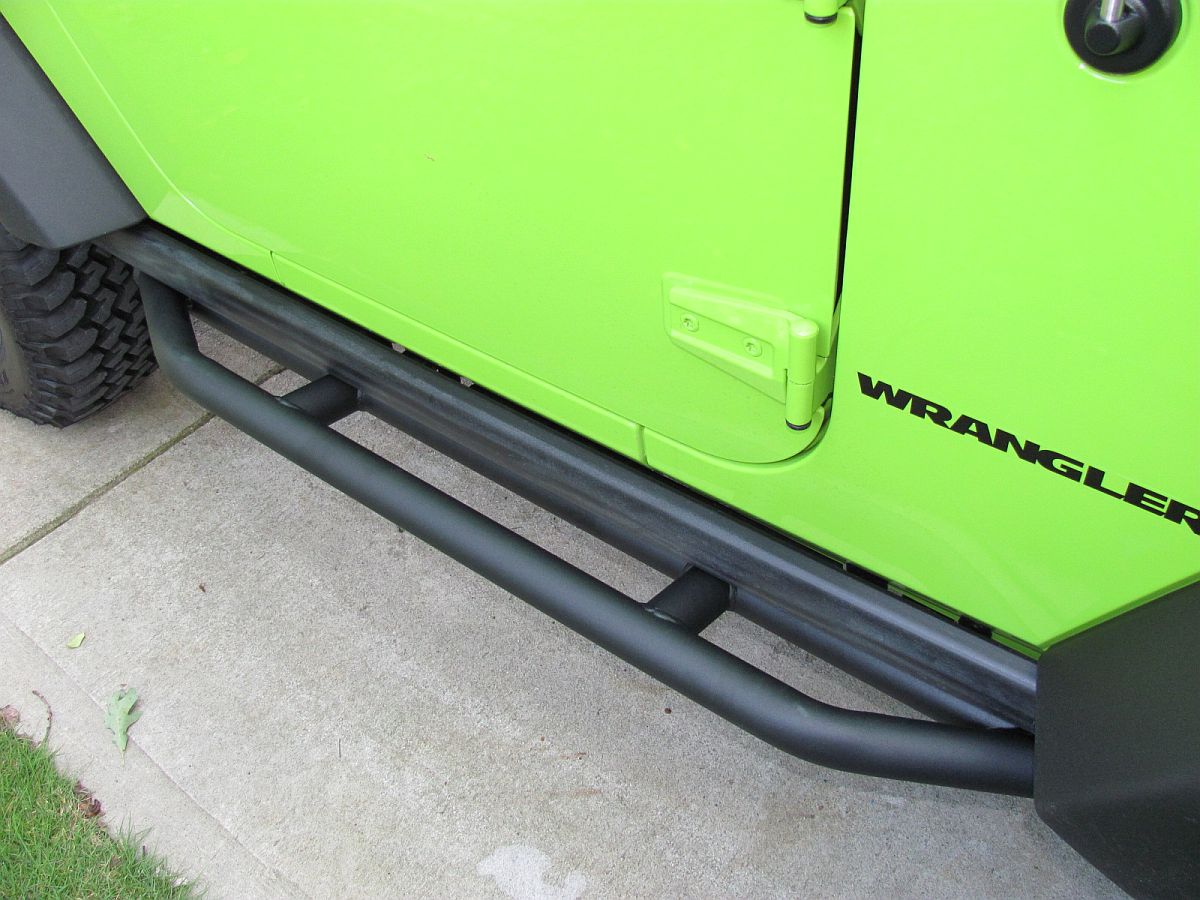
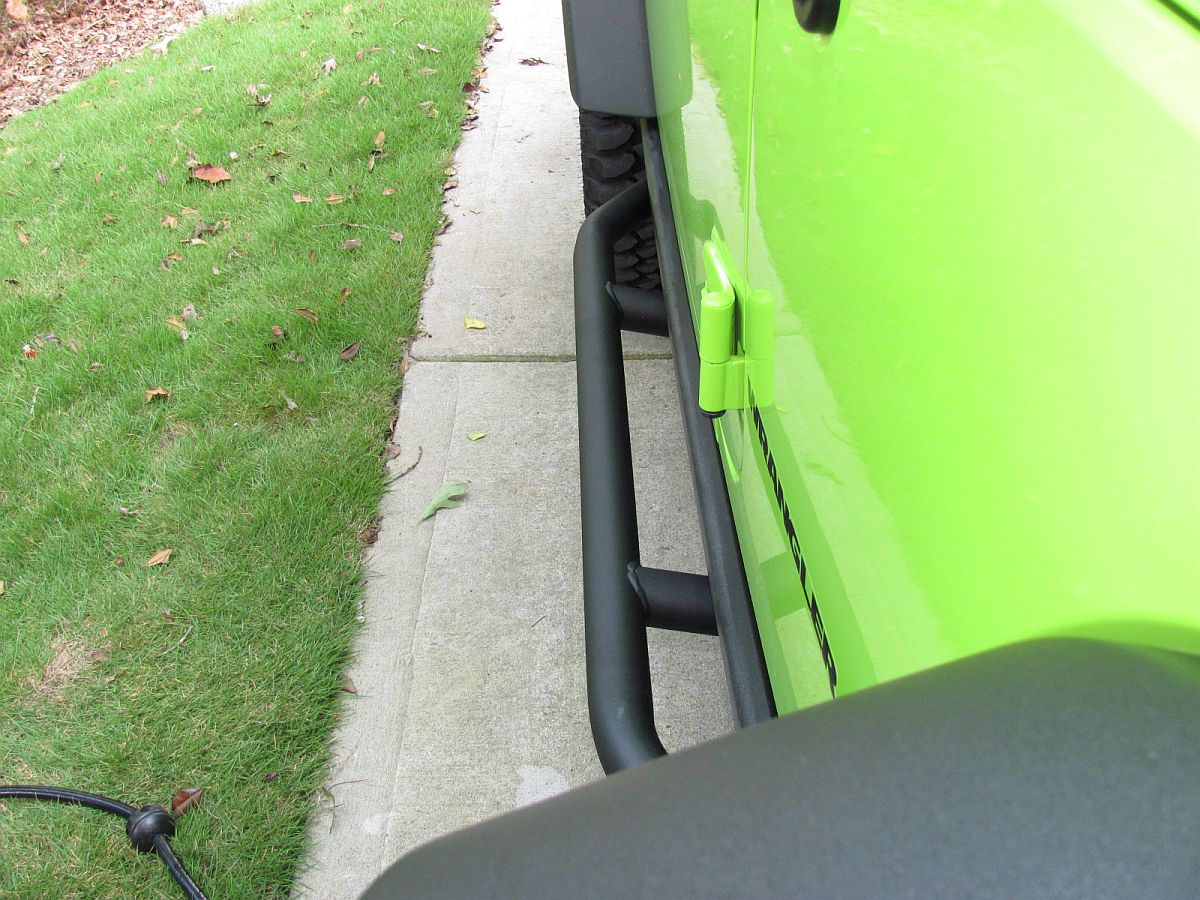
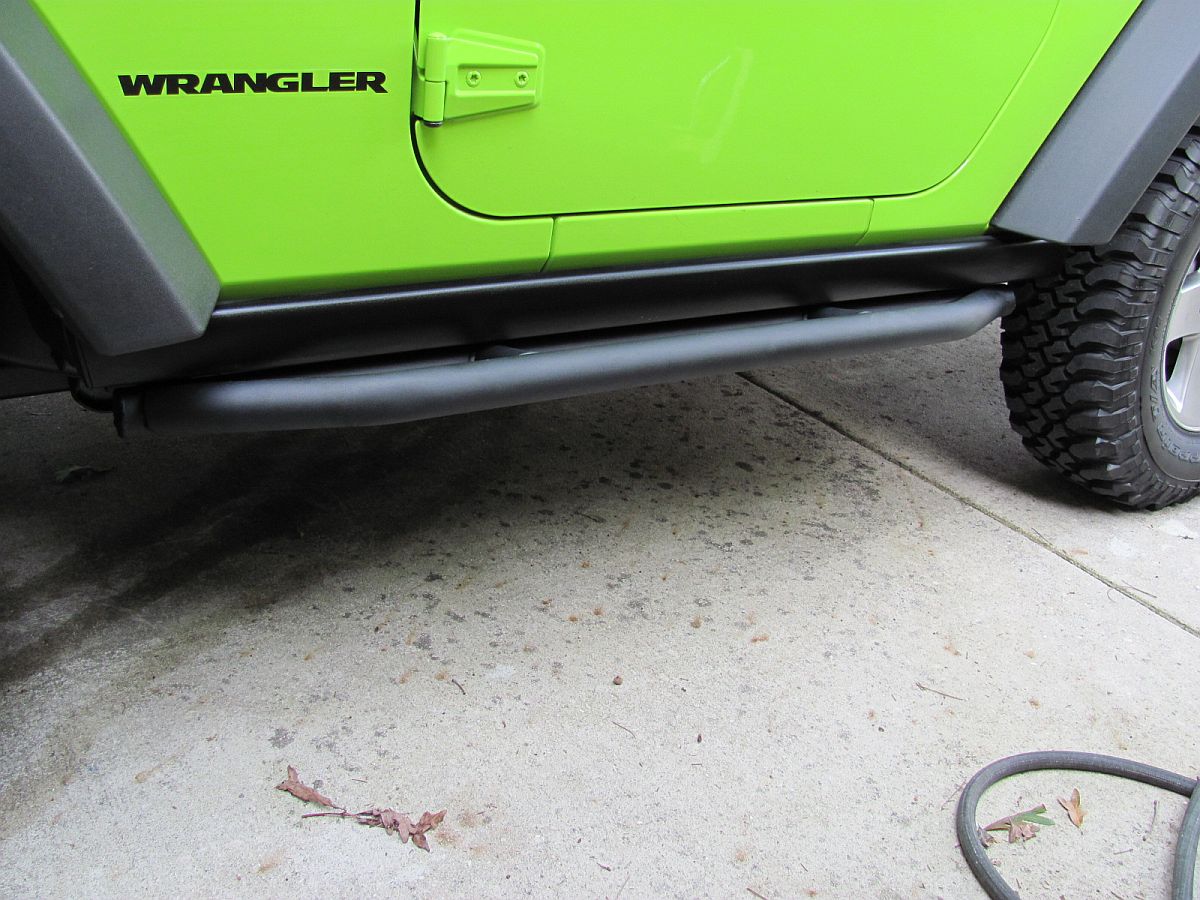
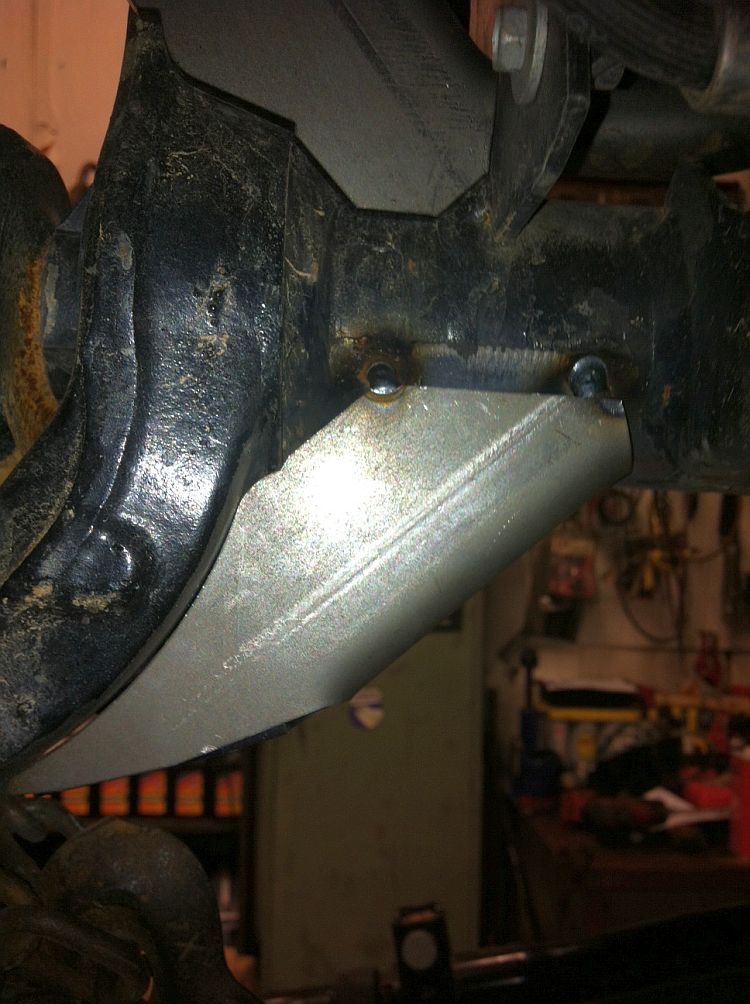
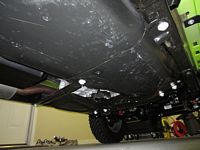
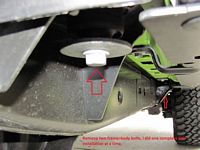
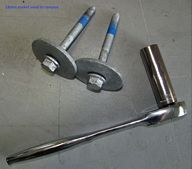
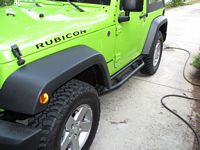
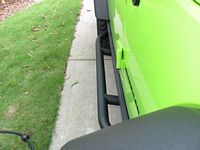
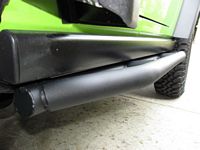
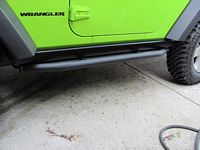
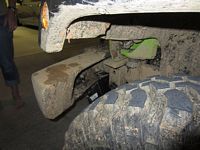
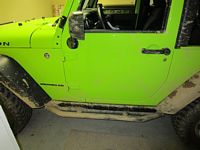
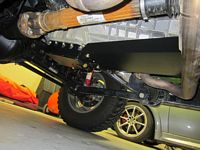
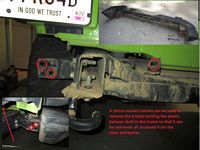
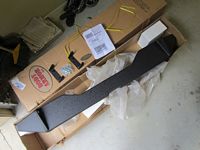
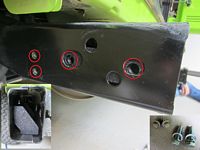
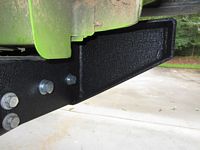
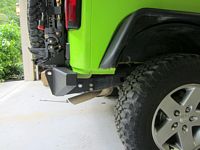
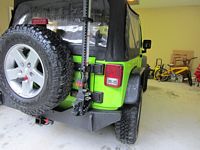
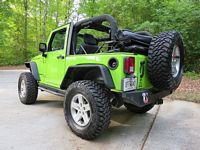
ACE Rock Sliders purchased from Krawl Off-Road- Jason has the best price shipped out there and GREAT customer service. Installation video is HERE.
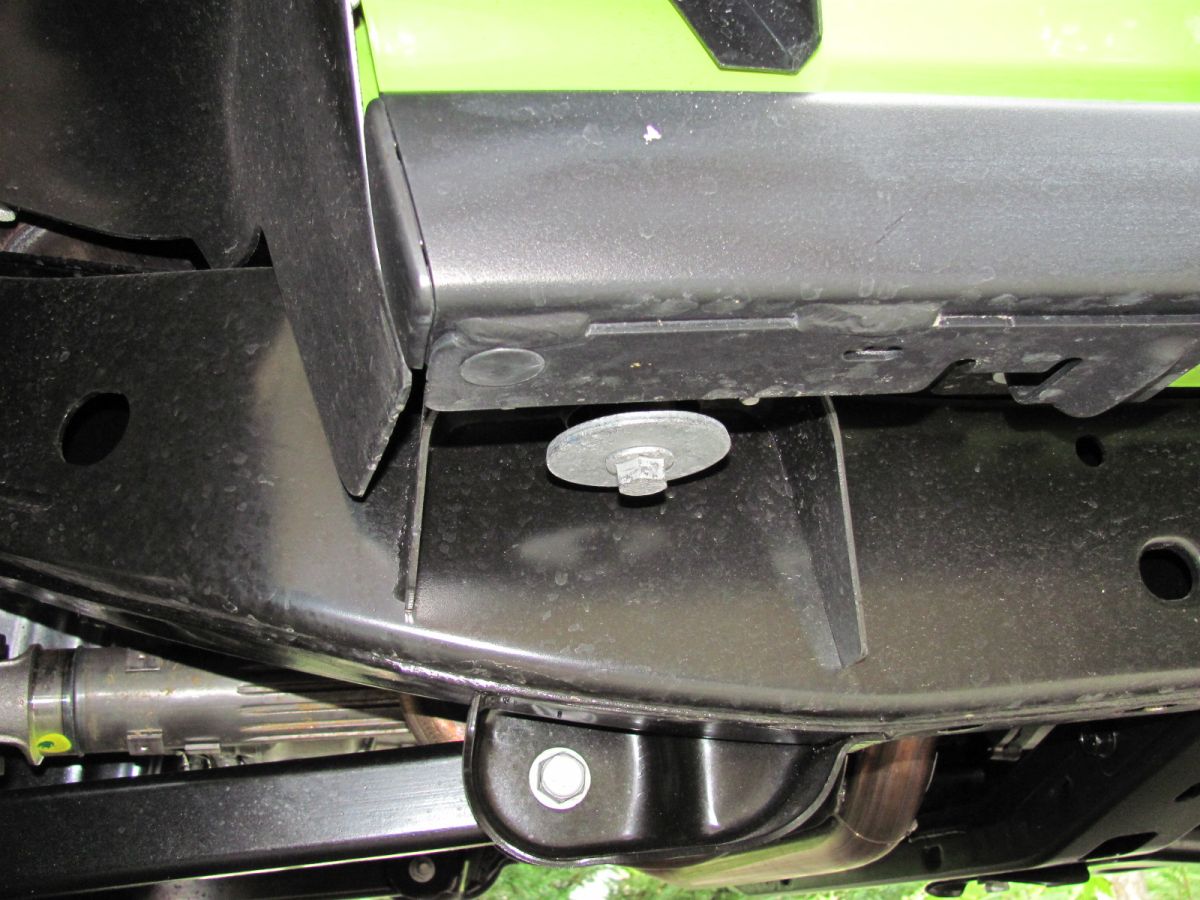
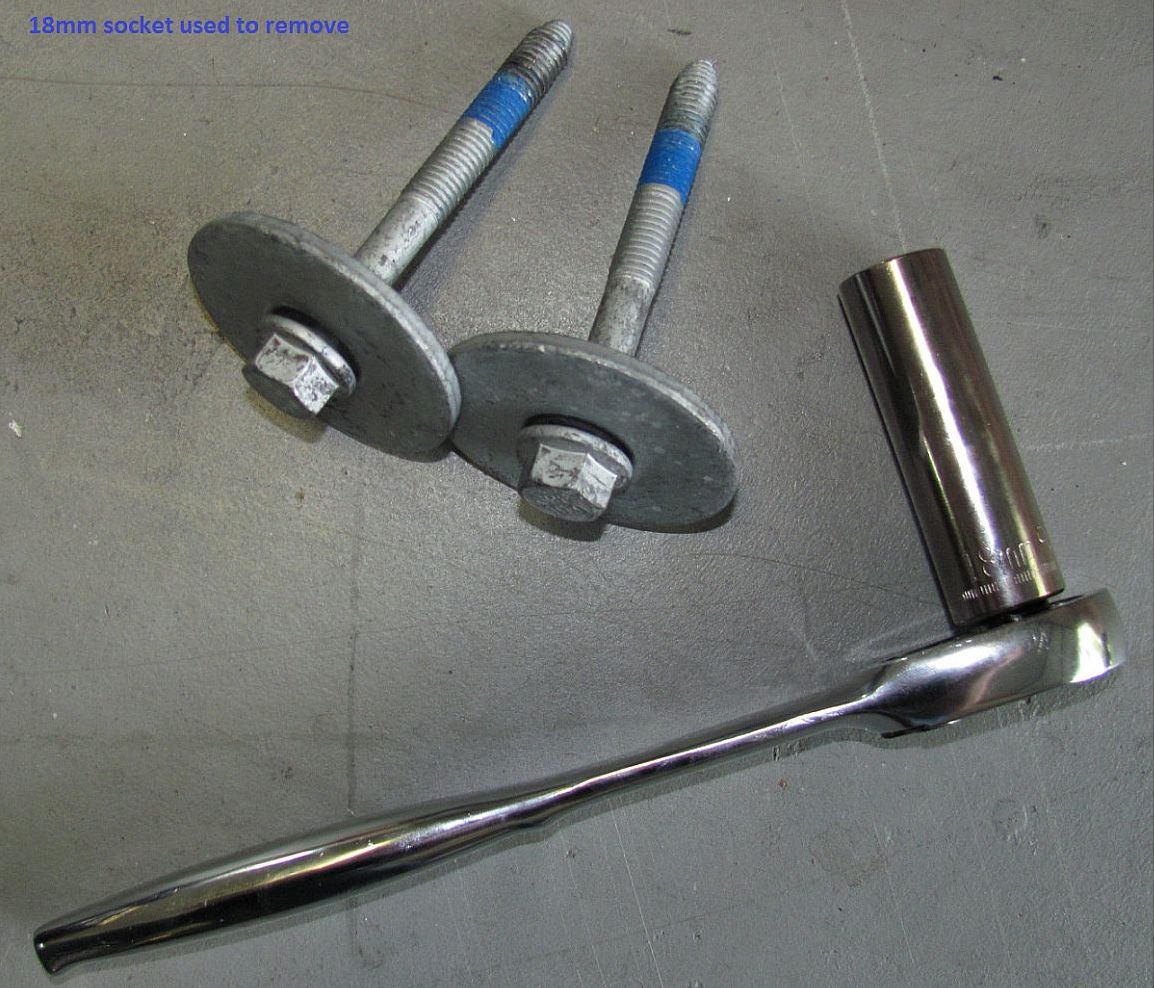
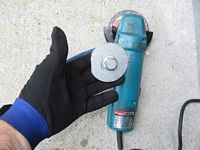
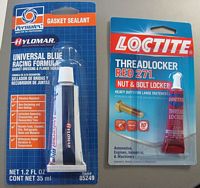
There were a few reasons I purchased these over the competition- they were a great value, they attach to the frame and not the body, and they work perfectly with the OE Rubicon rock rails. An 18mm socket wrench is used to remove two body>frame bolts, a grinder is used to grind flats on either side of the washer so they will clear the box cutout on the sliders, and then the sliders/bolts are installed with blue LocTite and torqued to 80 ft-lb (a spec I found on the forums so please verify for yourself if any doubt exists)- easy enough for me to do by myself in about 30 minutes taking my time. My wife enjoys using them as a step so they have added functionality over body protection
They do flex a little bit (very slight) but this is characteristic of the body on frame mounting point and does not inhibit function IMO.


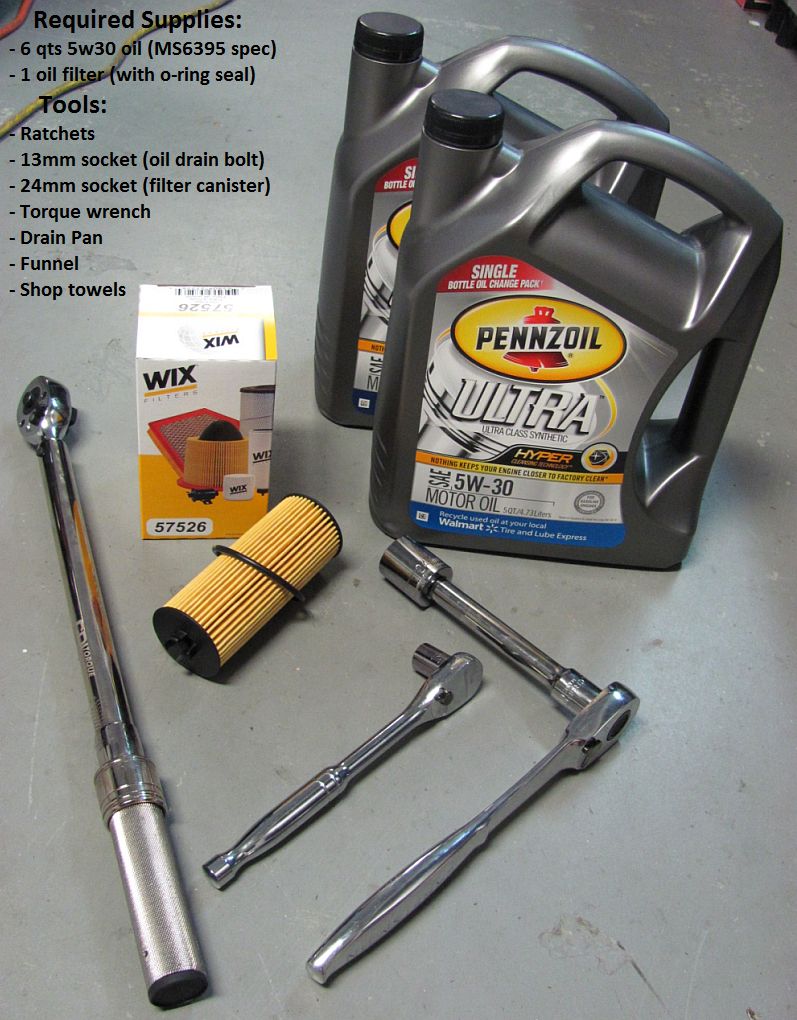
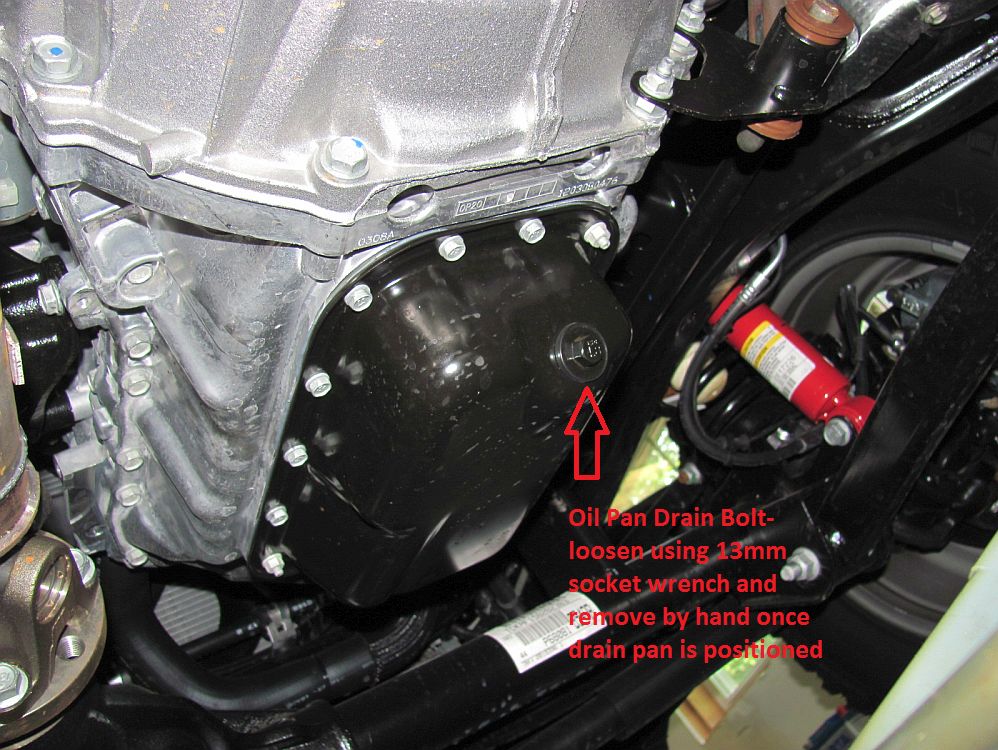
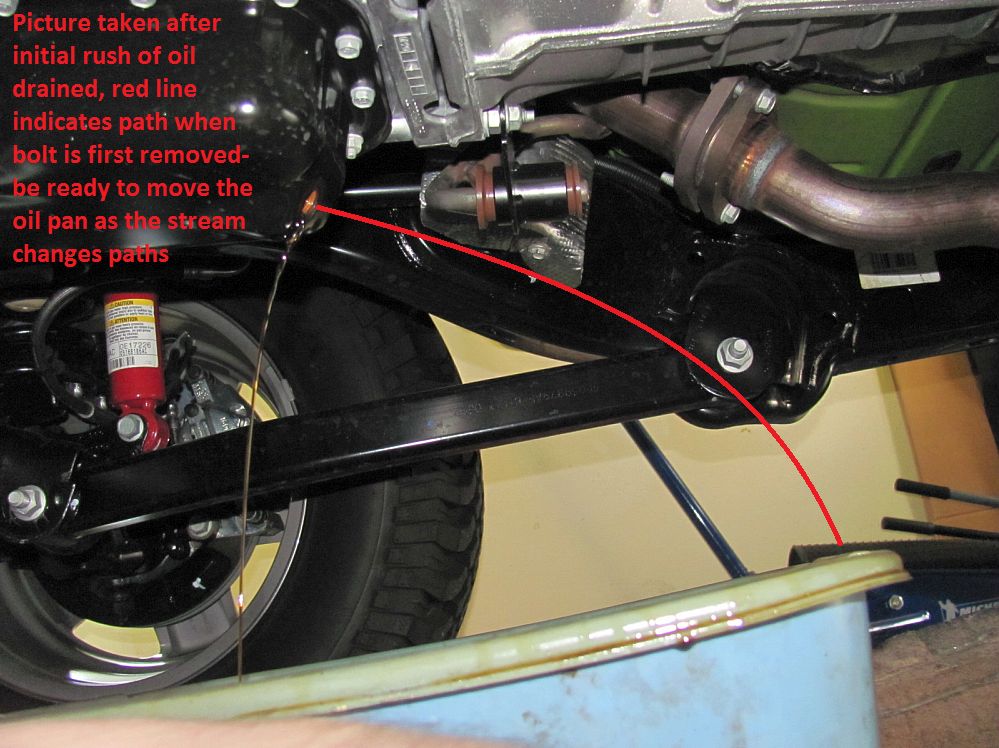
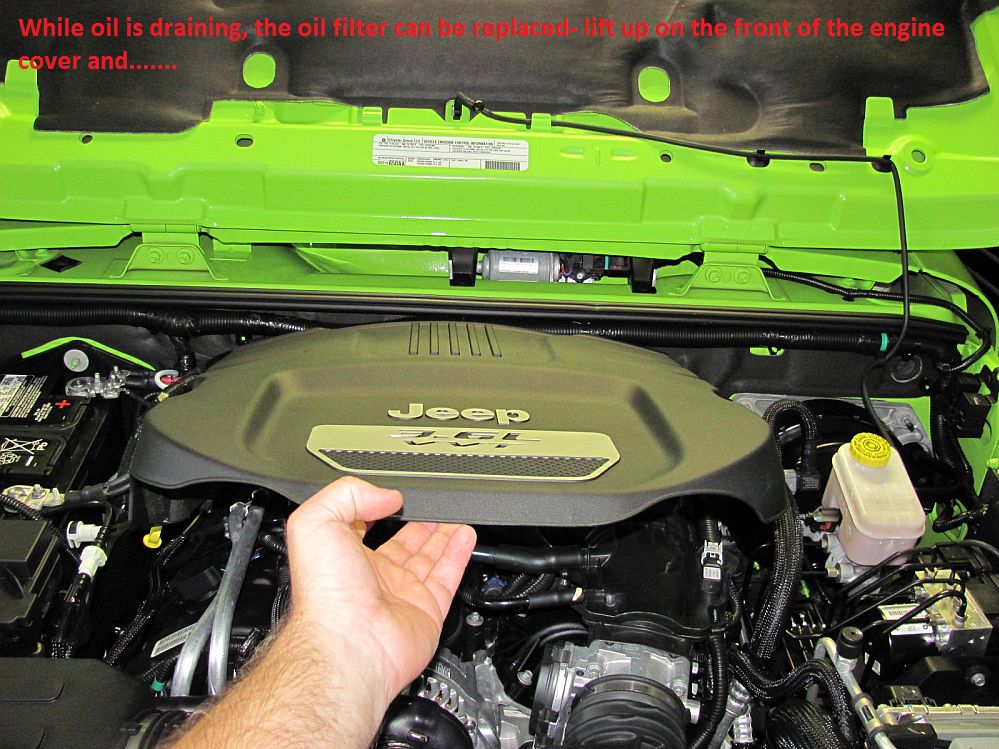
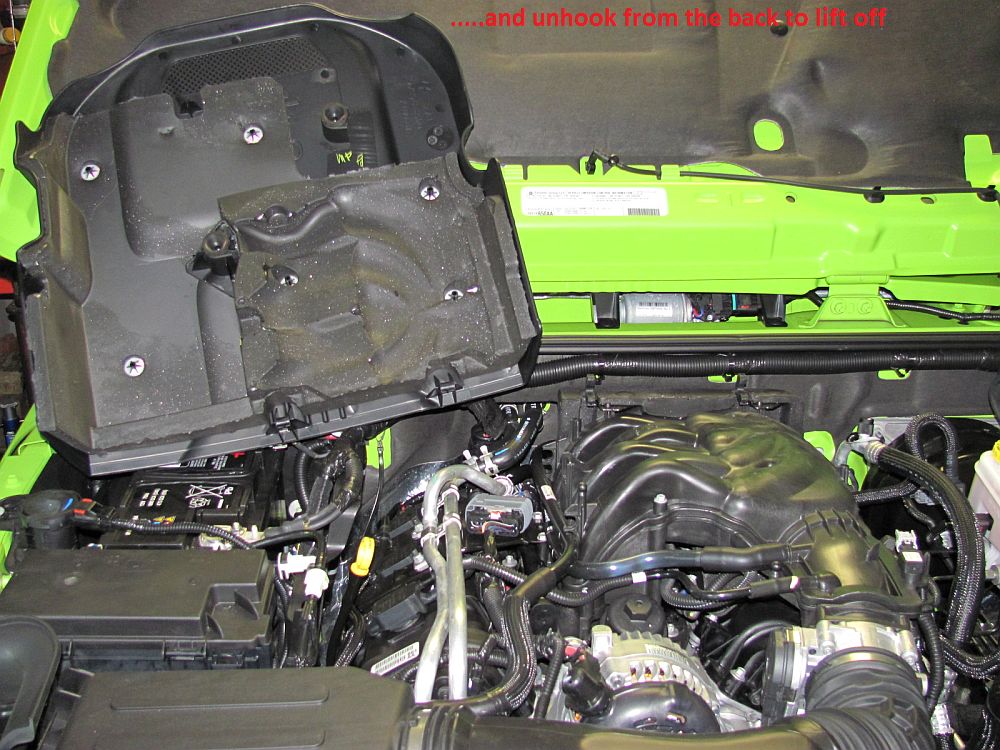
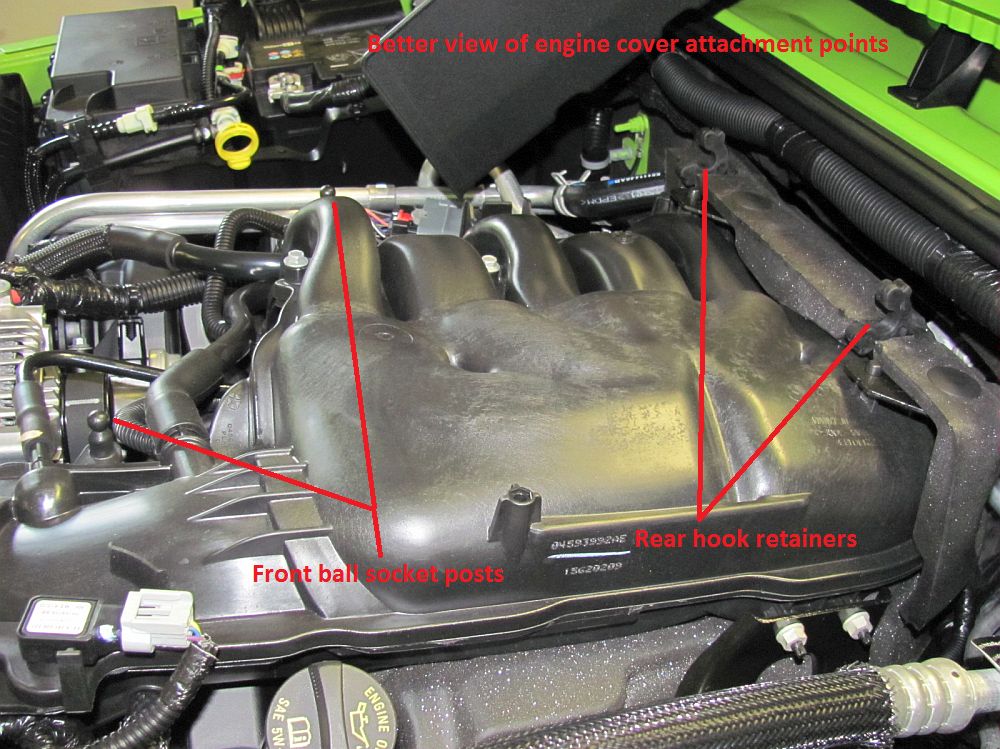
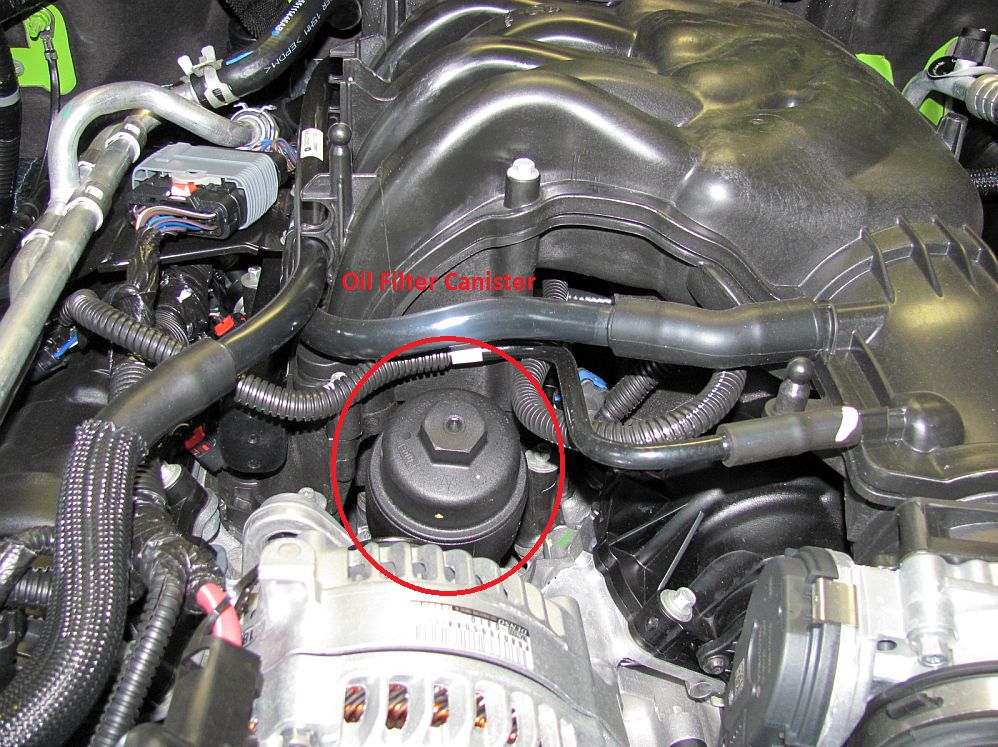
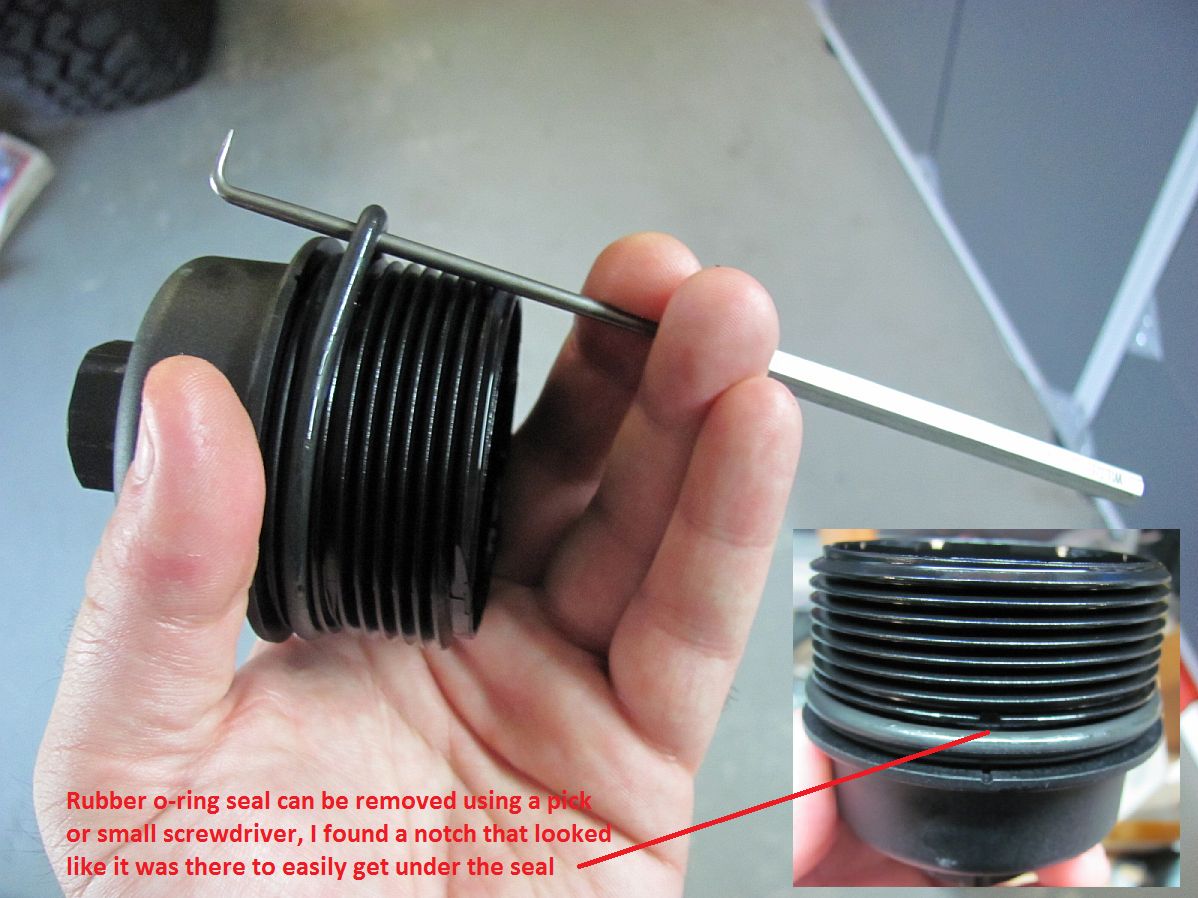
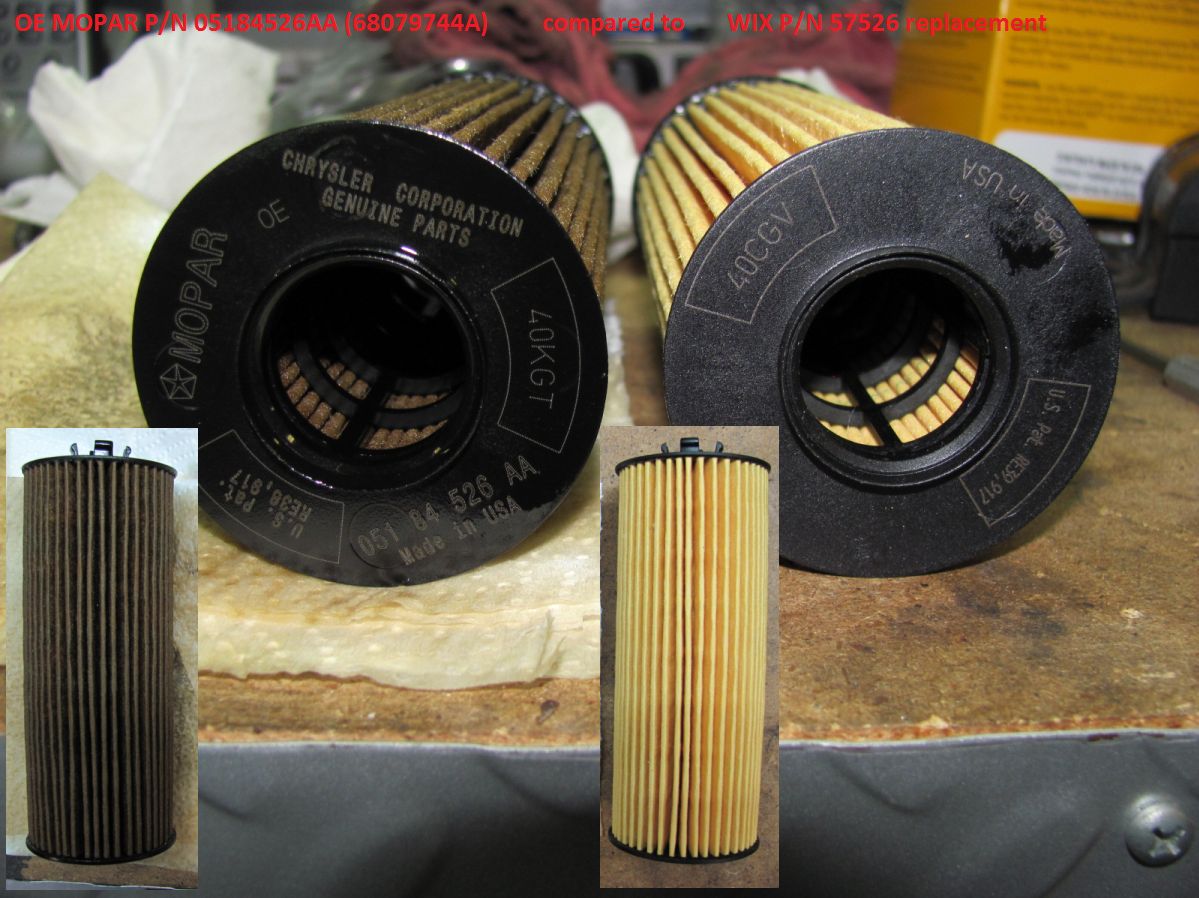
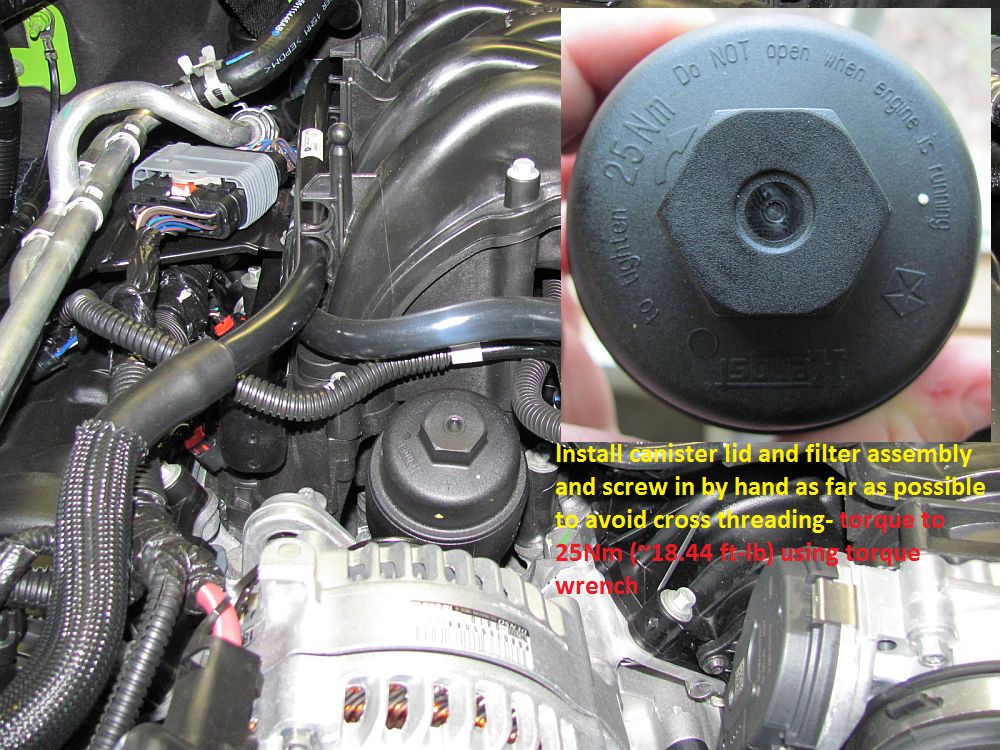
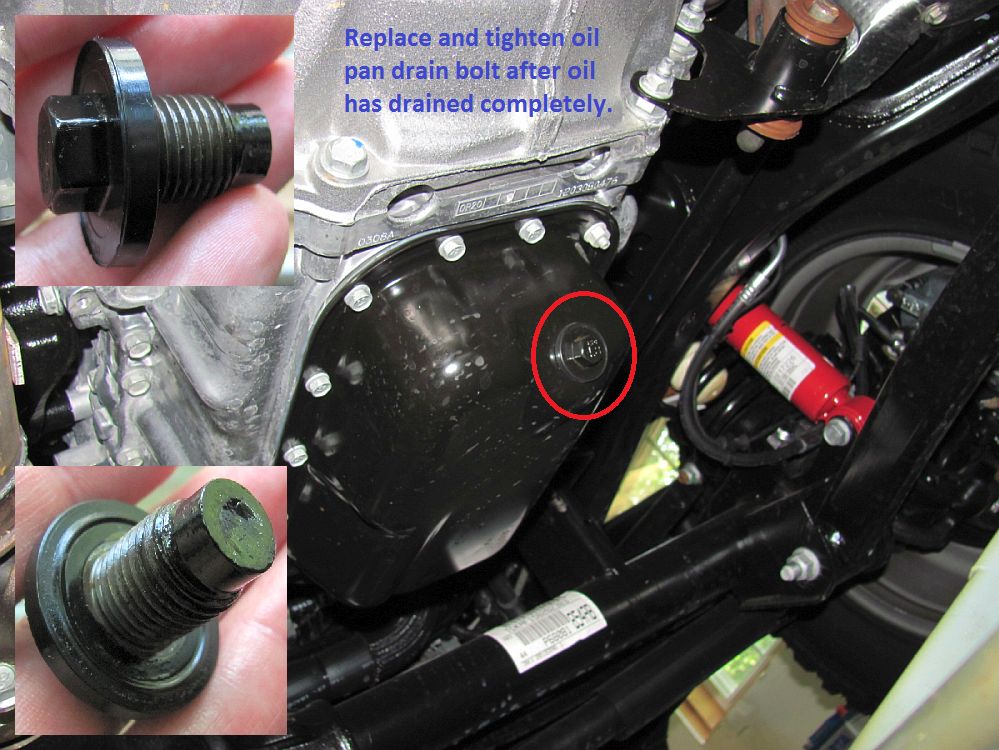
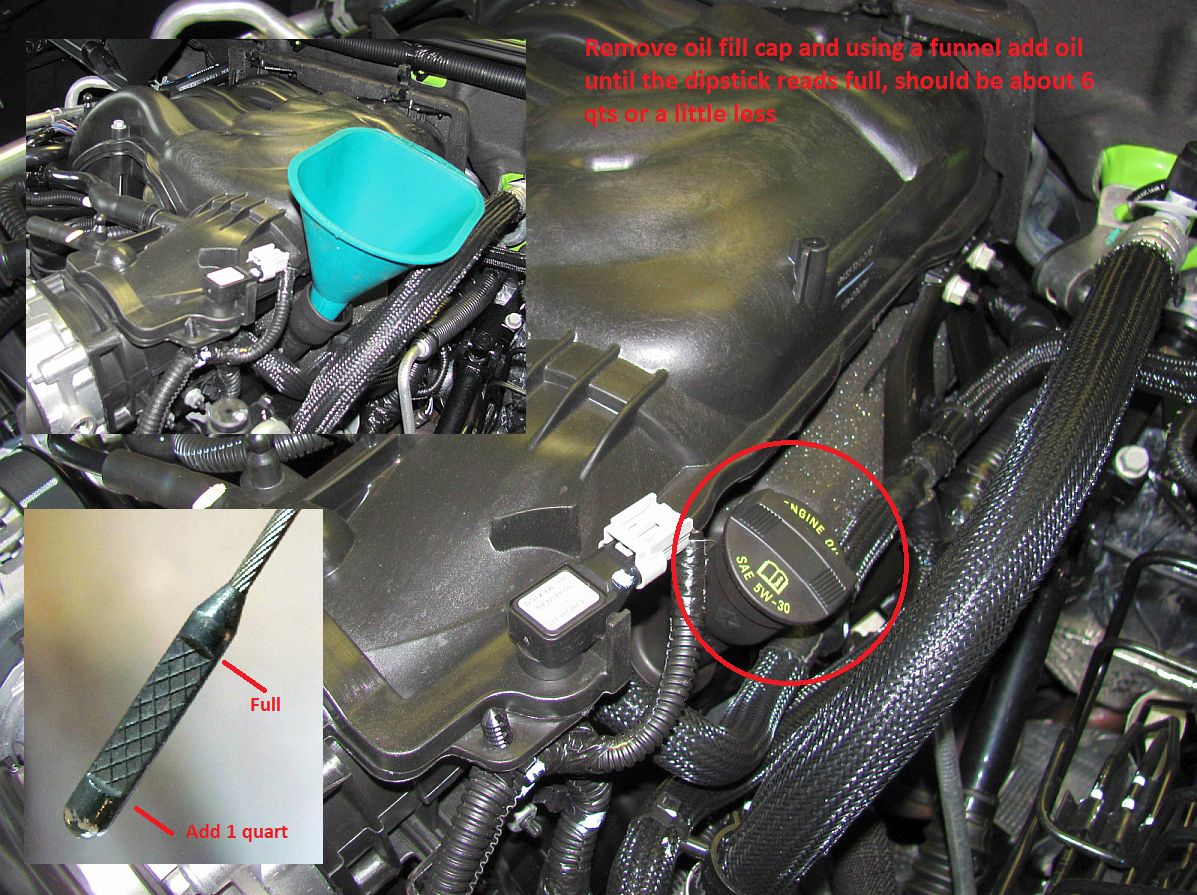
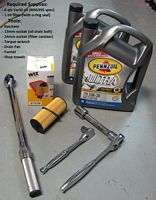
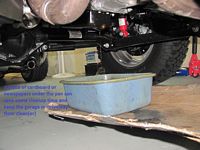
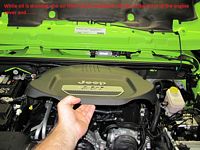
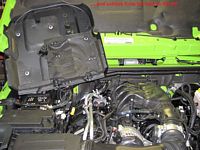
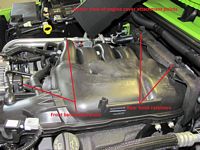
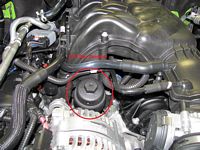
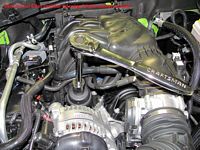
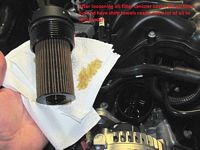
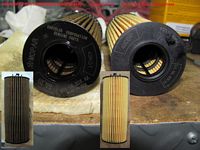
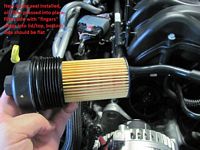
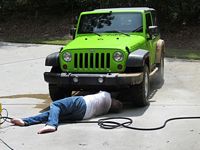
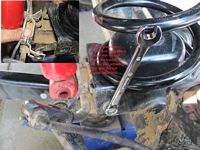
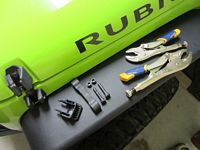
First oil change at 1000 miles, done early as a preventative measure to get rid of all the engine machining/break-in metal. I decided to use Pennzoil Ultra 5w30 Synthetic oil (Product Information, Brochure, Data Sheet), it meets the Chrysler/Jeep MS-6395 spec and is readily available at WalMart- I buy the 5 quart jugs when possible to save money and the large containers make oil recycling easier. I purchased WIX Oil Filters (P/N 57526) from Filter1.
The official oil change instructions are HERE, I have tried to supplement this with my pics below.
If the Change Oil light has come on it will need to be reset: turn key to ignition without starting, press gas pedal completely to the floor 3 times within 10 seconds, light should now be off and reset until next change is required- video HERE.


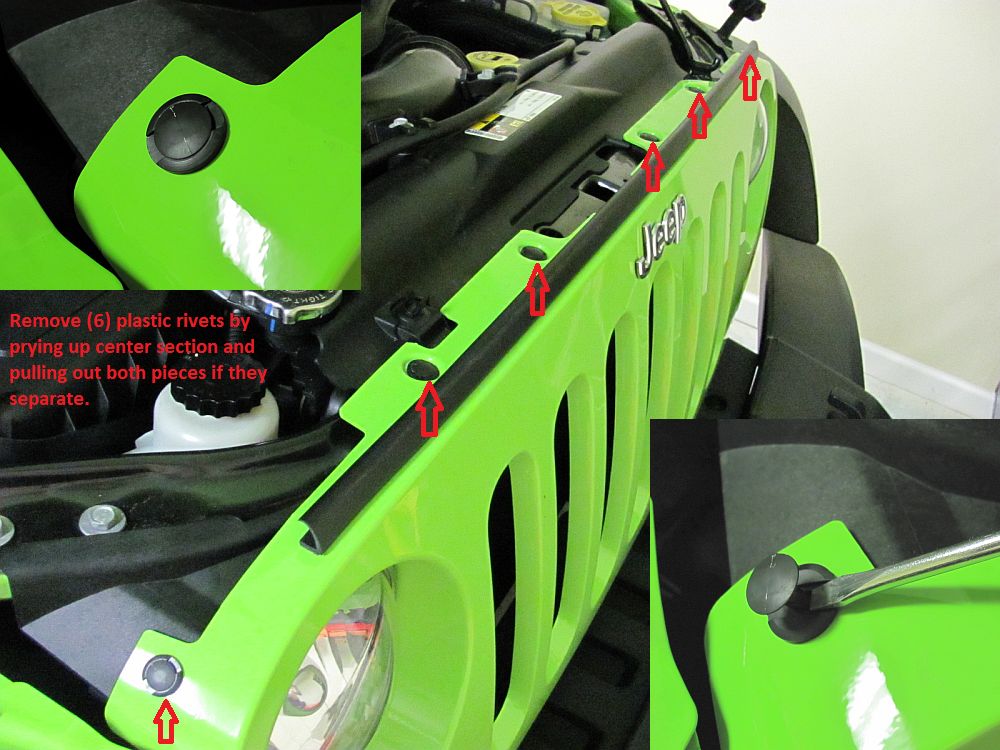
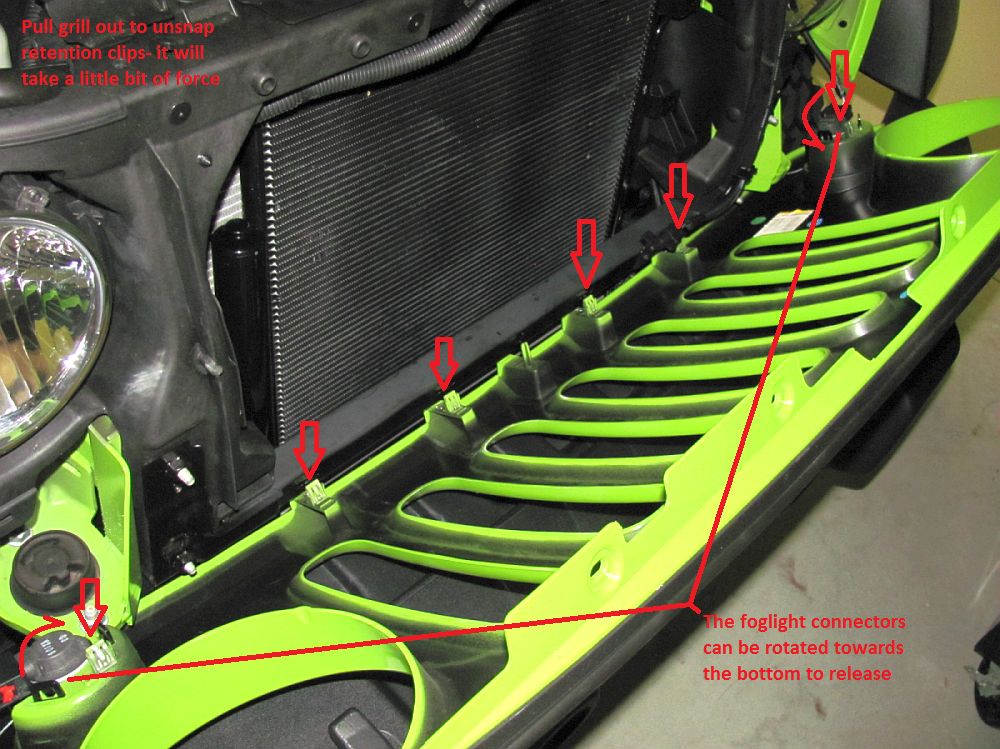
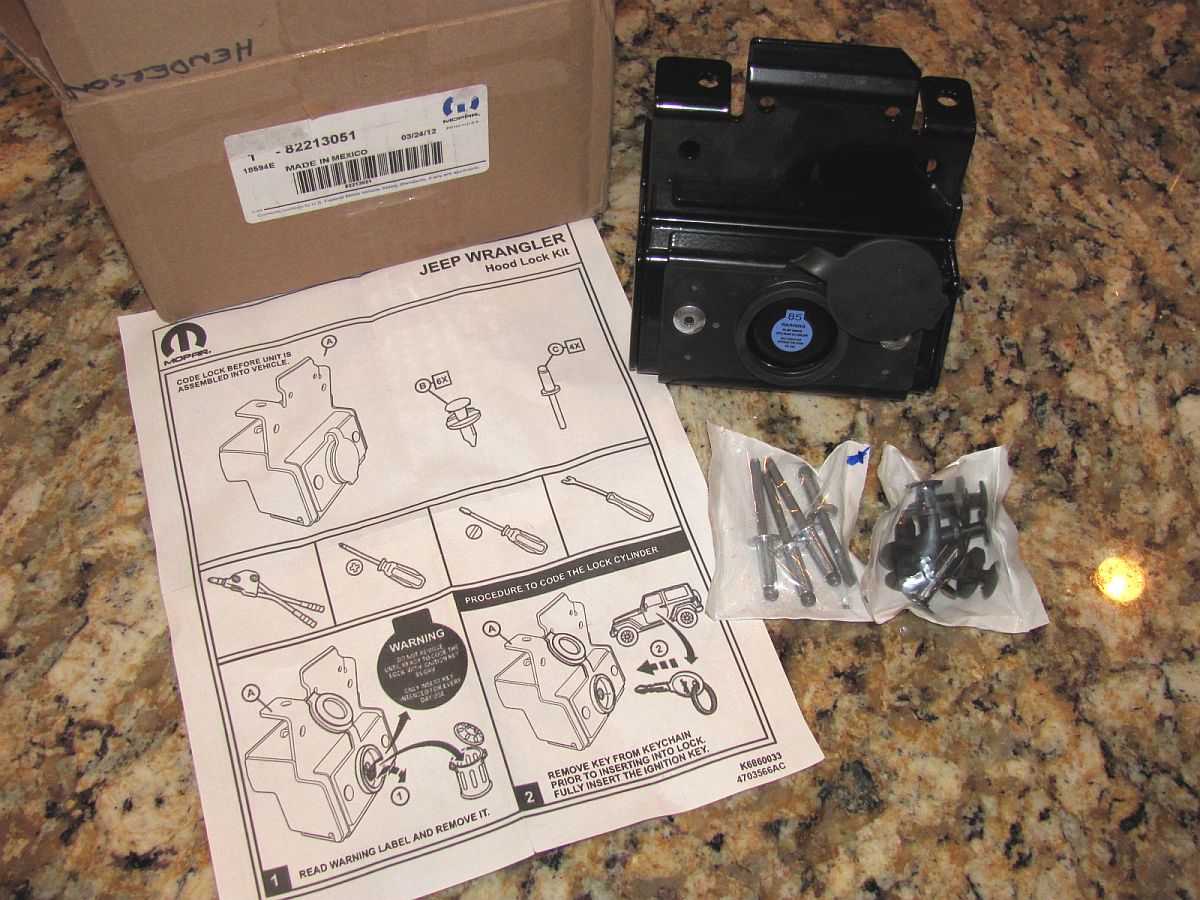
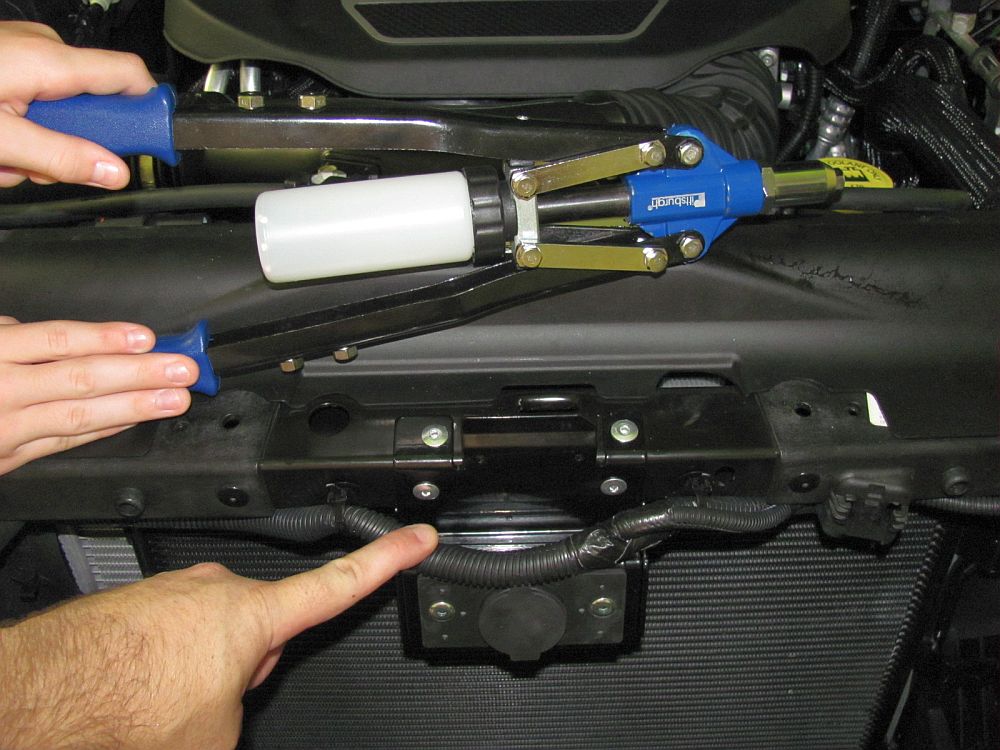
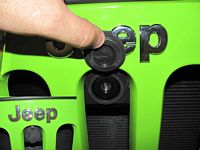
European MOPAR hood lock (P/N 82213051) ordered from Huffine's Chrysler/Jeep (bought at their eBay store HERE). I saved the supplied plastic rivets for later, the ones removed can be easily reused. The only place I found that had a hand riveter that would work with 1/4" rivets was Harbor Freight (P/N 66422)- caveat being that I could not get it to work with the Mopar rivets, I ended up using the 1/4" rivets that came with the riveter.
Hood lock installation instructions HERE.
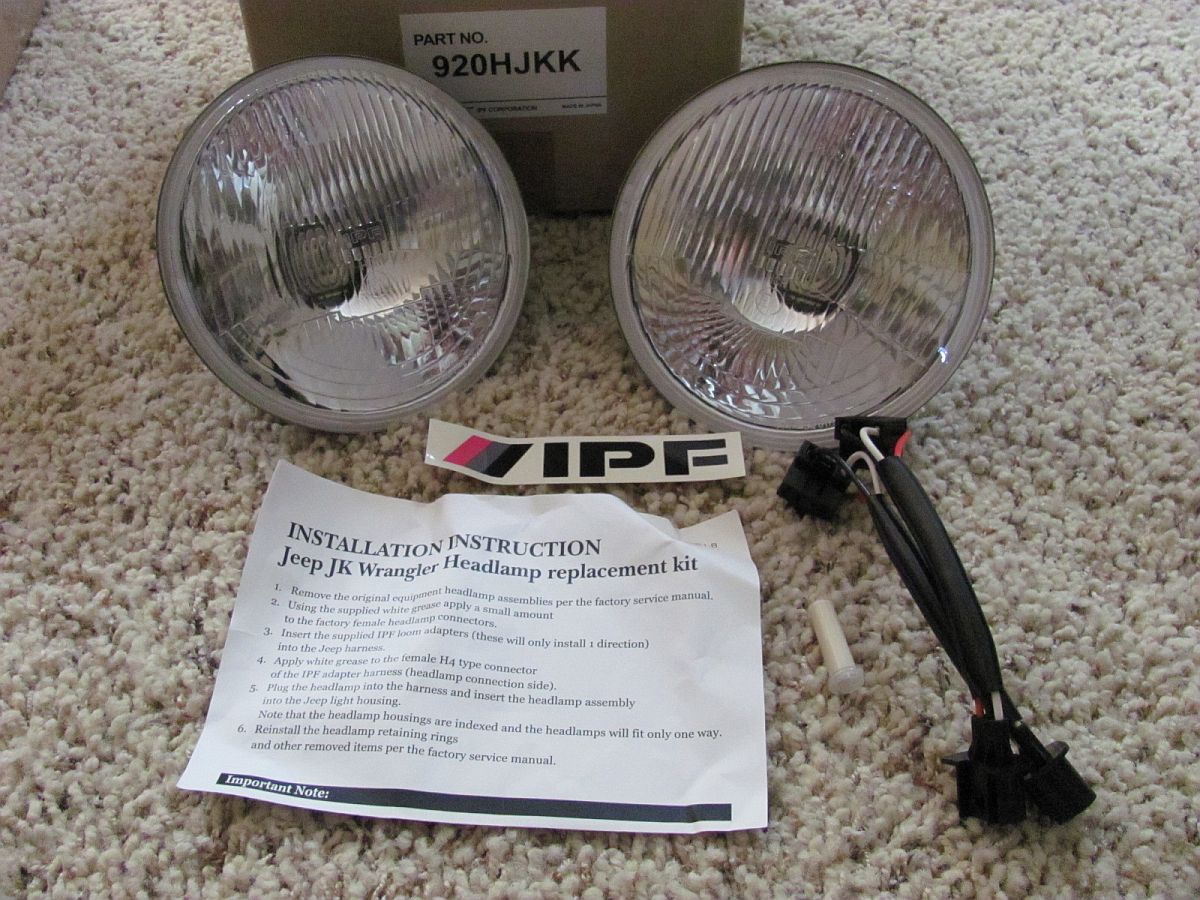
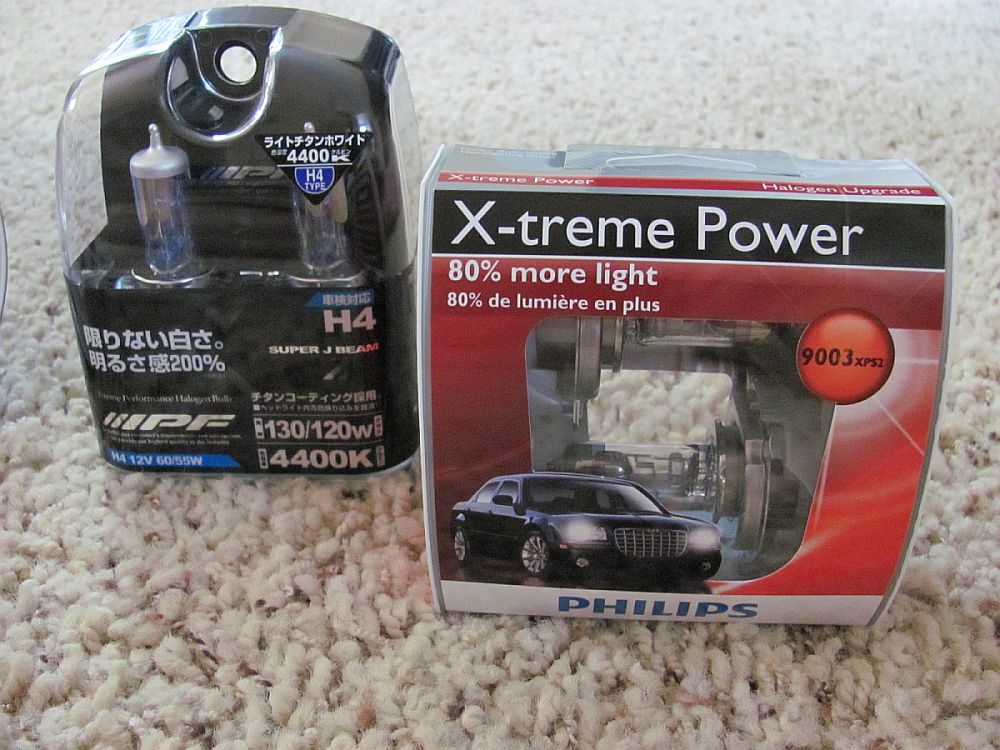
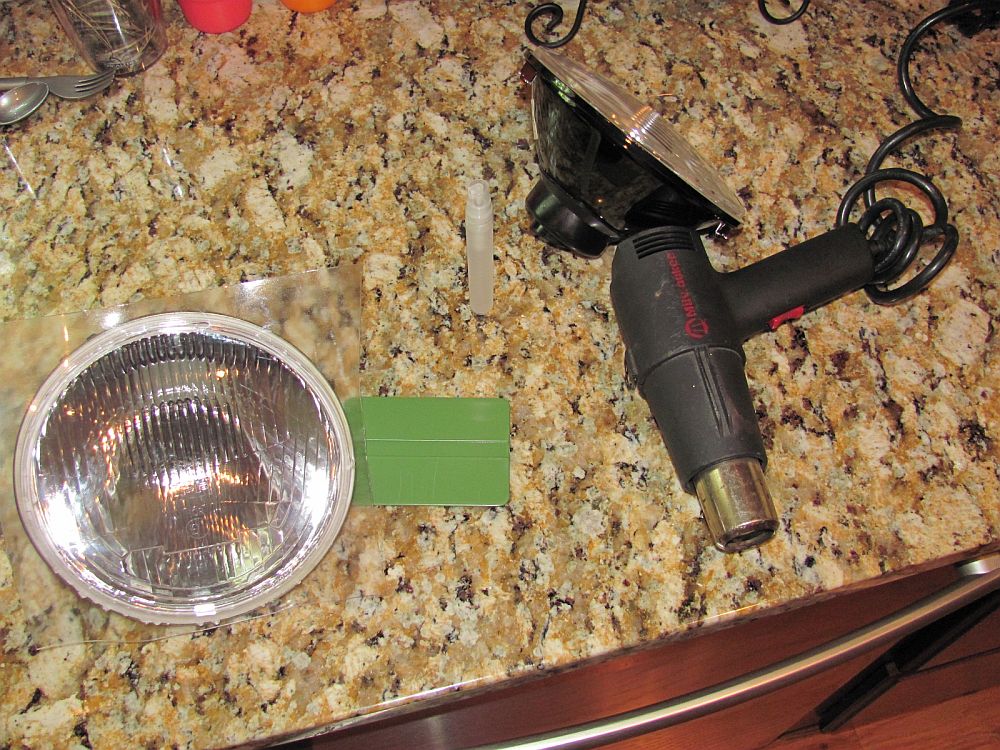
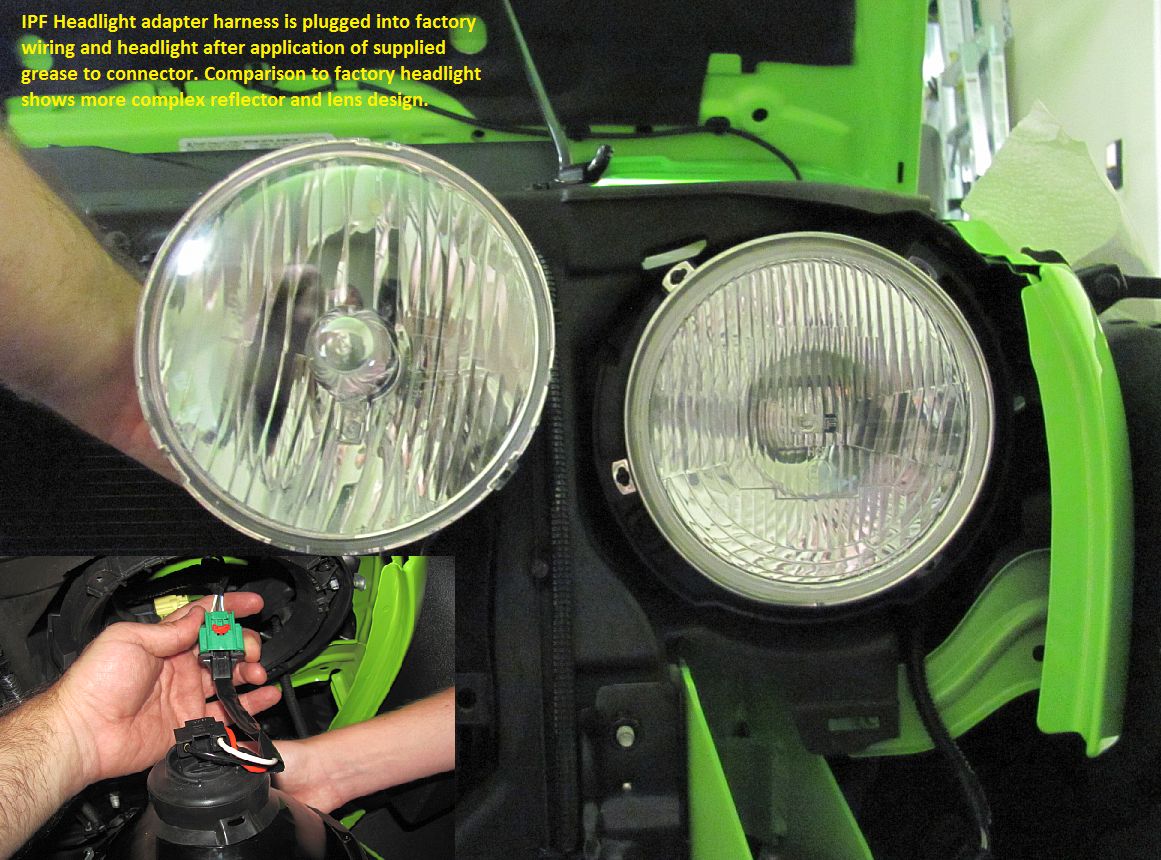
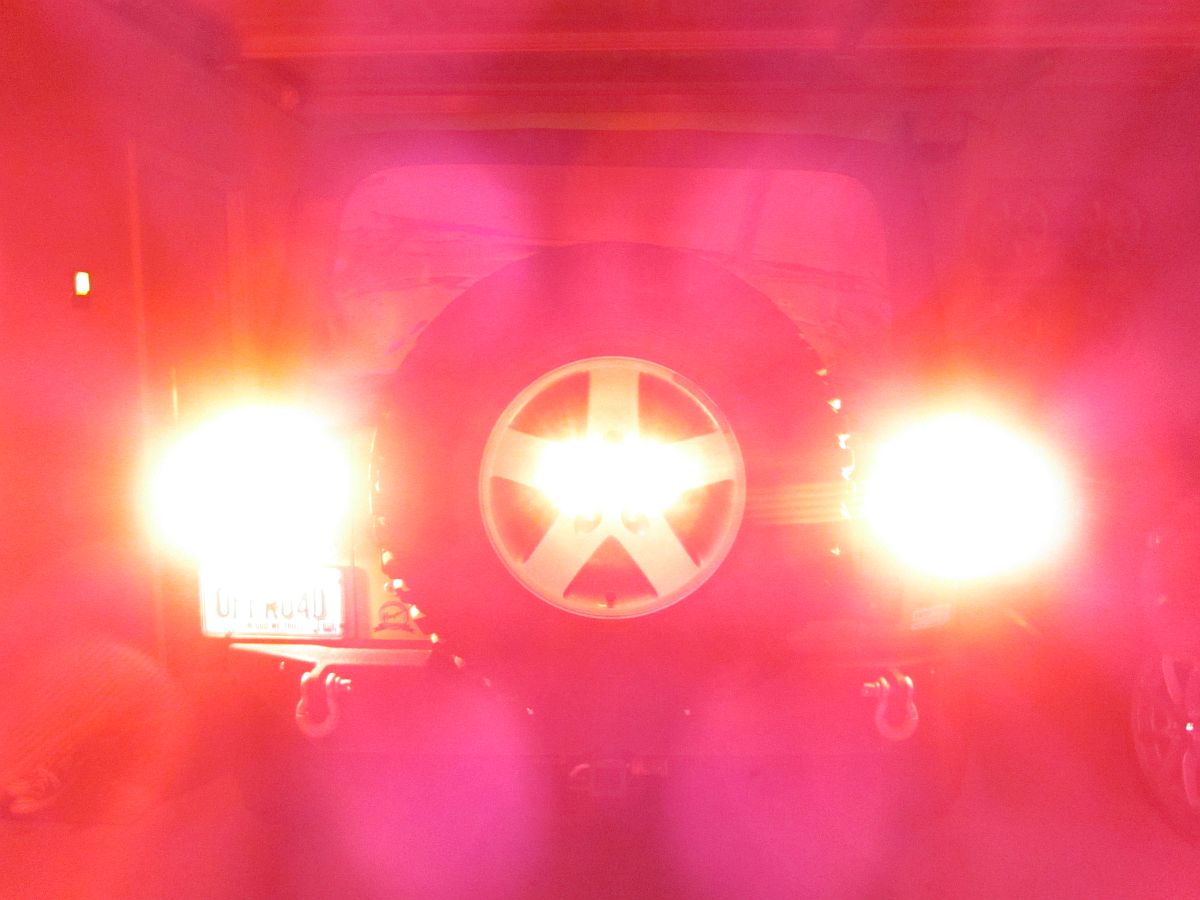
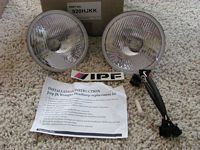
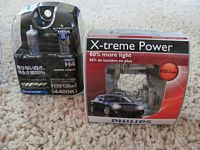
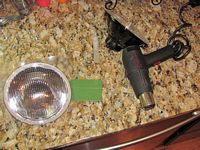
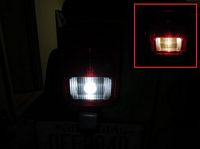
Since the grille had to come off for the hood lock, it seemed like a good time to install the IPF H4 headlights sourced from Northridge 4x4, which includes the headlights, H4 adapter wiring harnesses, and IPF H4 bulbs. After some more research I ordered the Phillips 9003 (H4) XPS2 Xtreme Power headlight bulbs that are supposed to be an improvement over the IPF bulbs, so you could save some money ordering the IPF headlights and Phillips bulbs separately instead of the IPF kit with bulbs like Edmunds did HERE. I also sourced some bulk 40mil Lamin-X film to put on the headlights before installing to protect the glass lenses (only use the kitchen counter if your wife is out
IPF Headlight installation instructions HERE, and a really good installation write-up on Edmunds.com is HERE. The IPF headlights are significantly better as seen in the Edmunds.com write-up HERE. A good unbiased review of various headlights that can be used in the JK can be found HERE.


When I was changing the oil I went to lay the hood back on the windshield and ..... no stopper/bumper for this, I thought this Jeep was an upgrade from my old Suzuki Samurai? No worries, I purchased the Suzuki part and installed it on the Jeep -works perfect as long as the hood is carefully laid back to rest on the bumper (hood sheet metal is thin and easy to dent/ding). I found the parts at Roadless Gear, still in business after all these years. I found that because of the curve difference between the Suzuki and Jeep the double sided adhesive didn't stick well in the middle so a screwdriver inserted into the hole on either side of the bumper was used to press the inside of the bumper down in the middle and work to the outside, all stuck now.

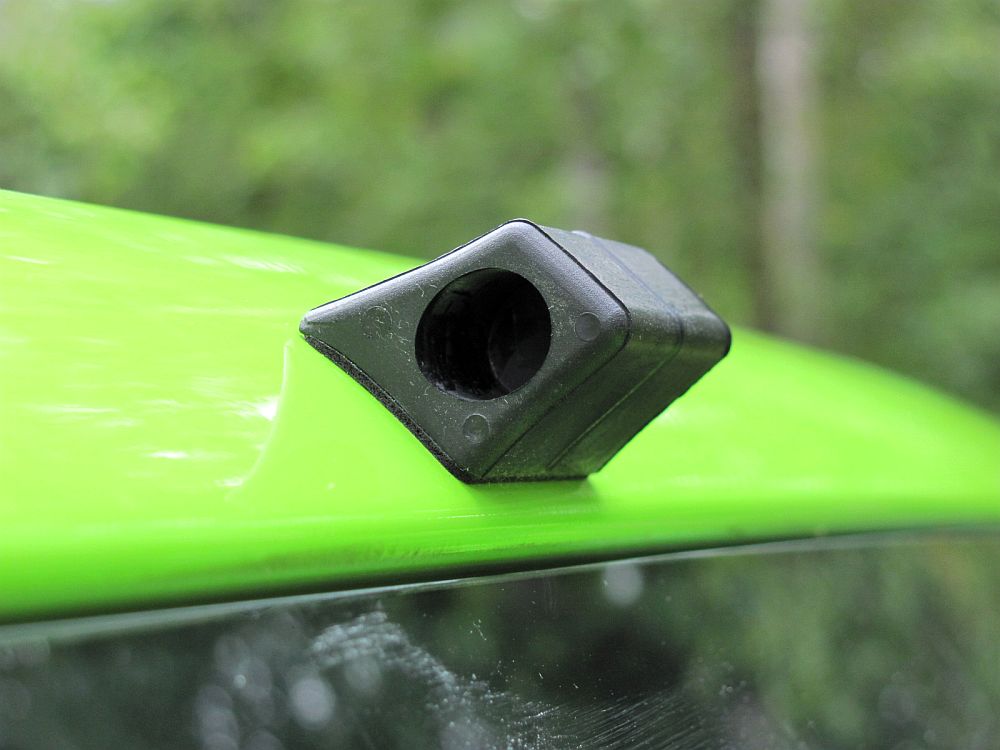
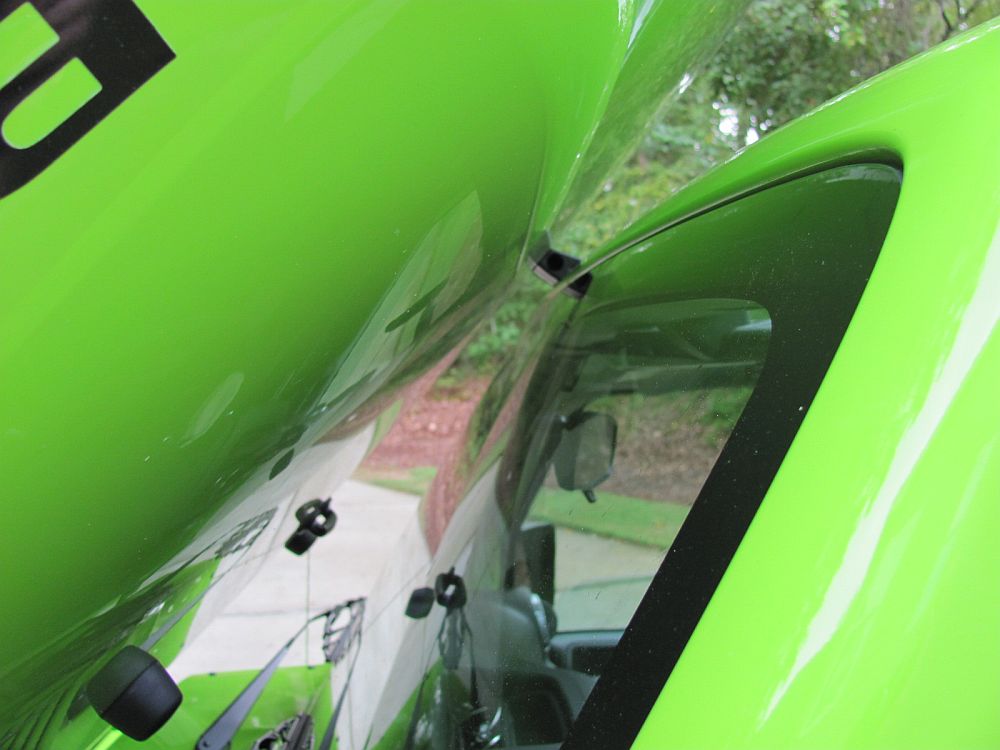
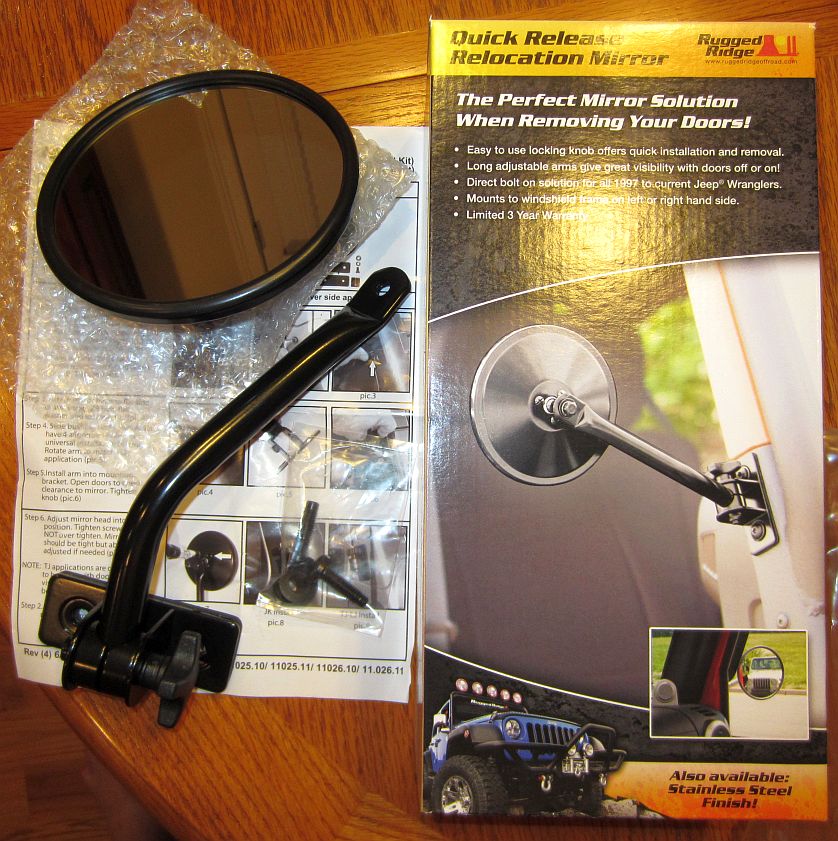
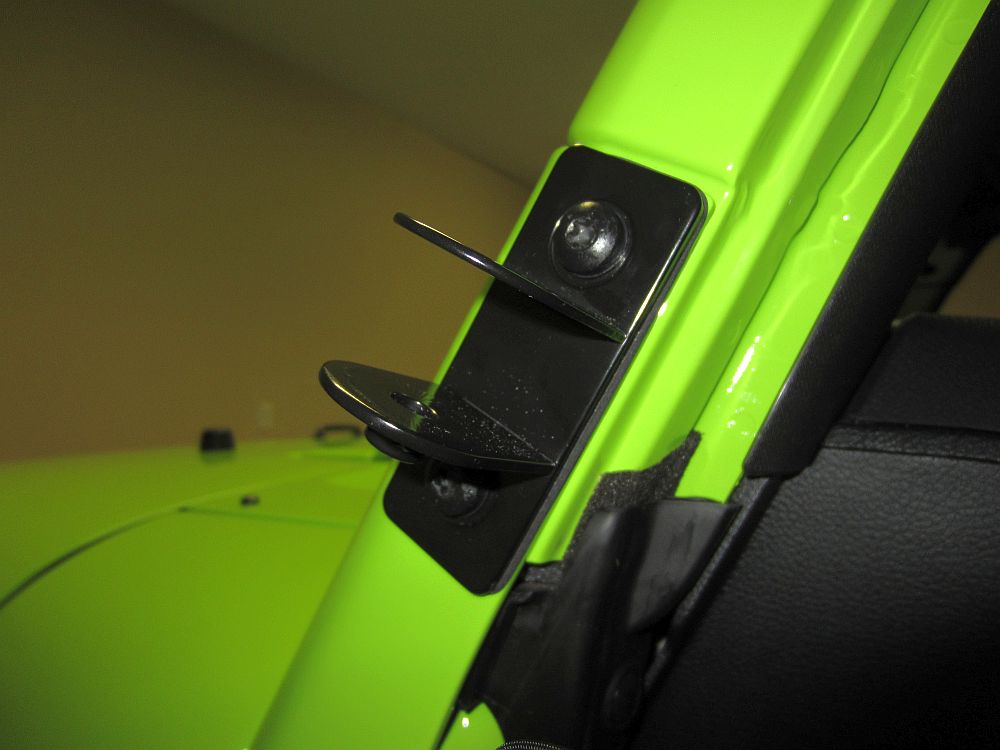
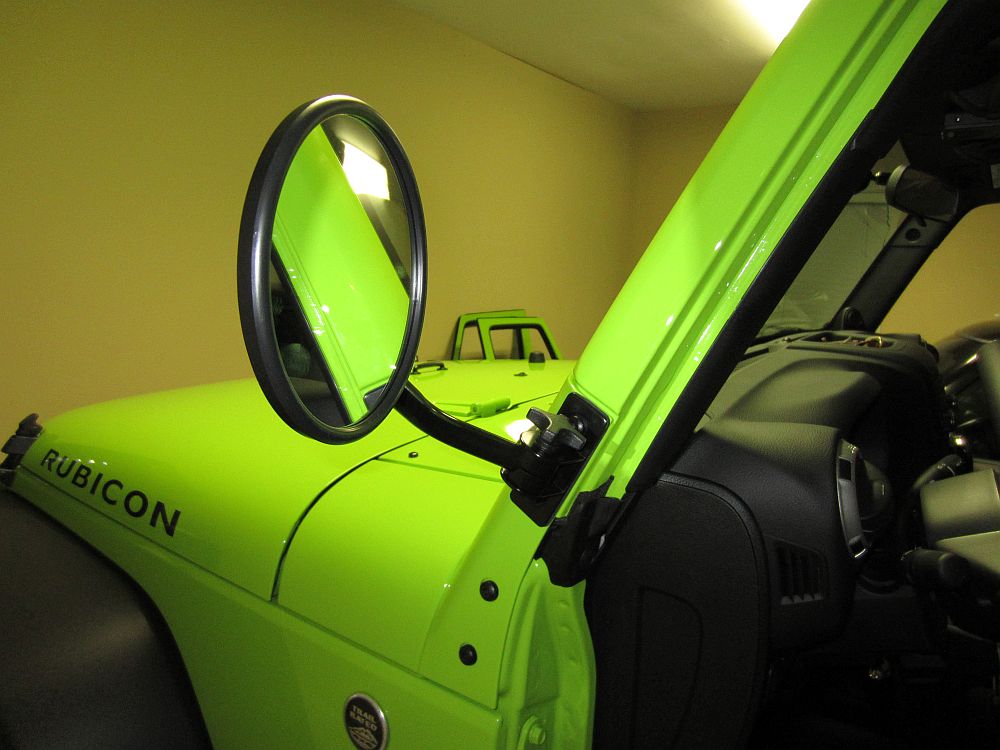
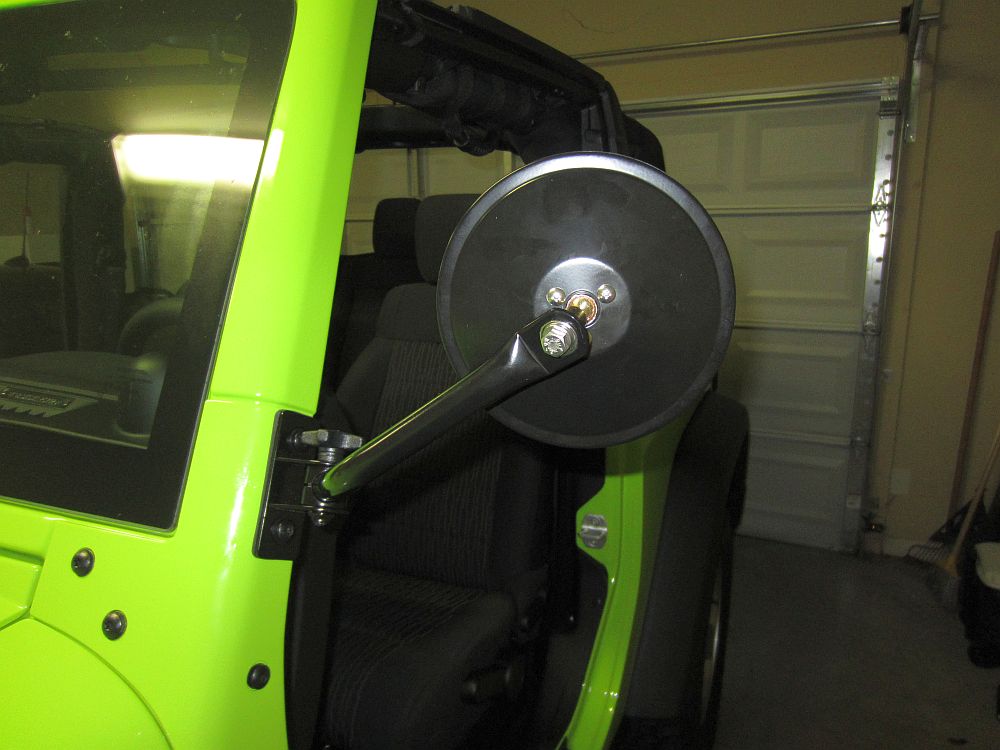
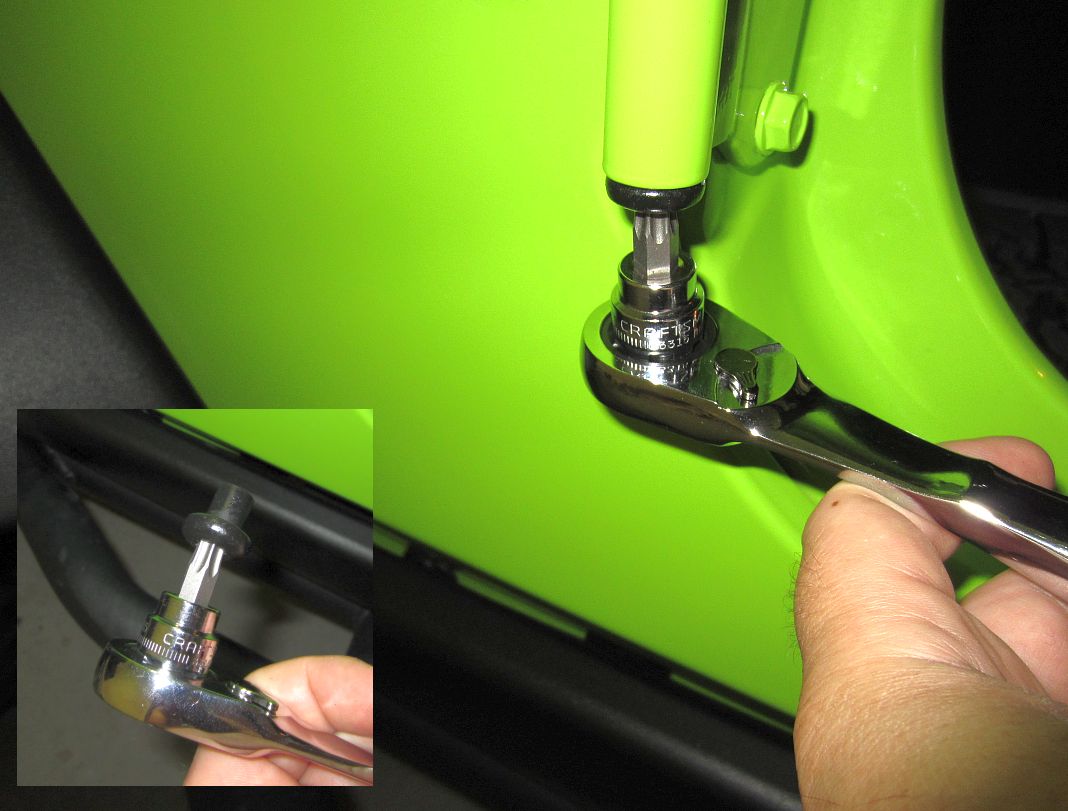
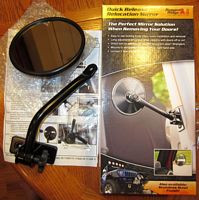
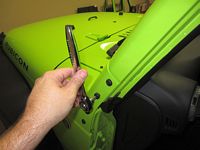
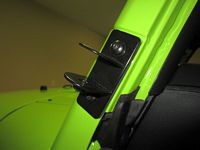
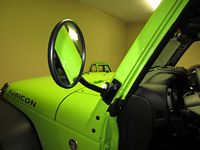
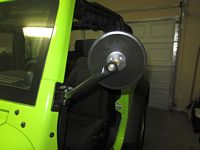
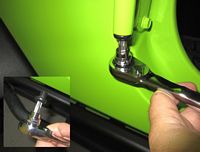
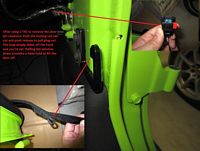
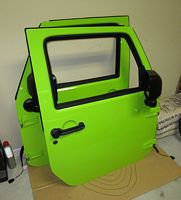
Rugged Ridge Quick Release Mirror kit purchased from Quadratec and installed, instructions HERE. I wanted to take the doors off and was not happy with the placement of the door mirrors using the Rugged Ridge Mirror Relocation Kit, the QR mirrors work better. Mirrors are on when doors are off and can be removed when doors go back on. You will have a bag of hardware that comes with these but it is not used, the JK OE bolts are reused to mount the brackets (make sure welded nut is on the bottom).

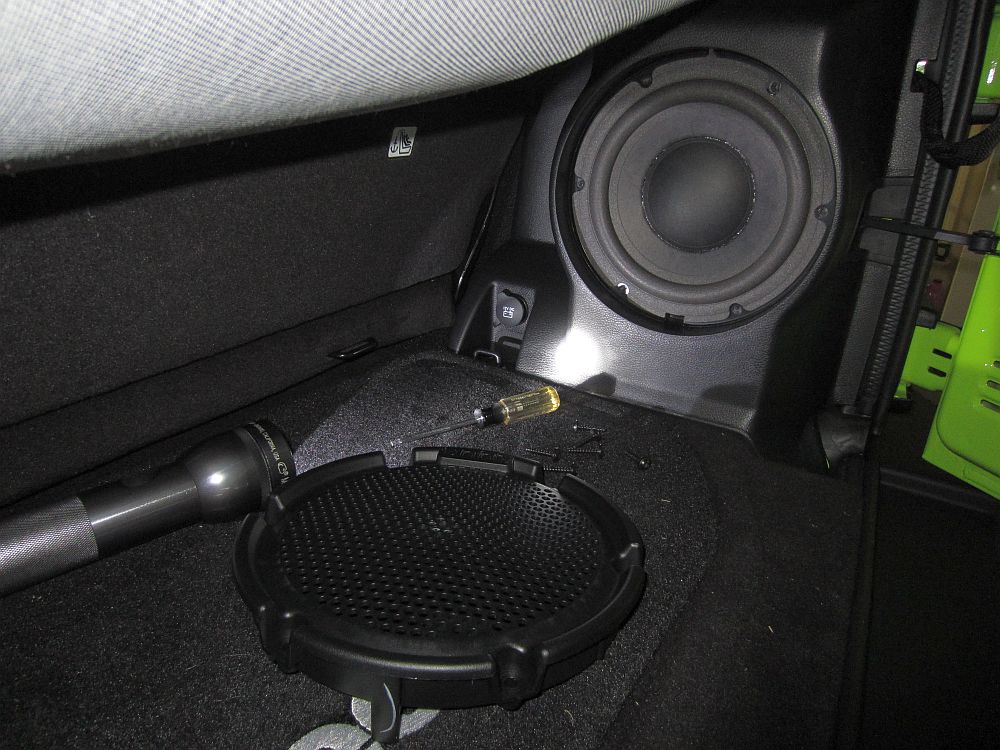
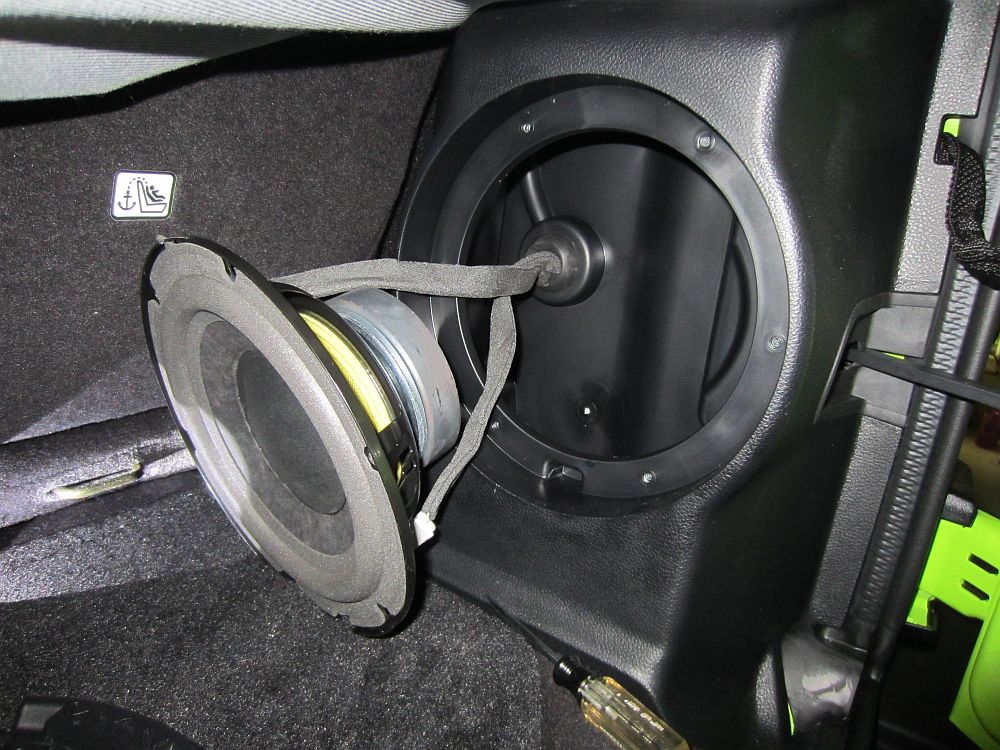
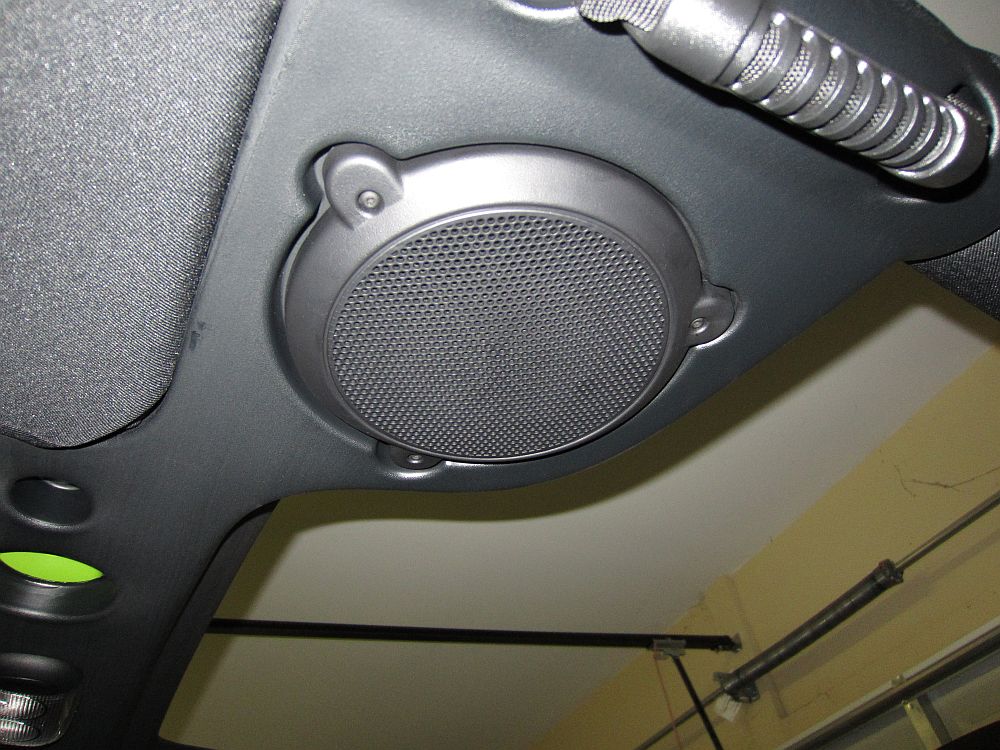
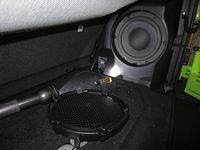
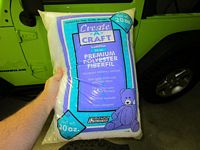
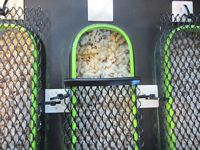
The poly-fill speaker stuffing trick is talked up on the forums, I had some laying around from past speaker box build projects and decided to try it out, For the sub, remove 6 screws using a T20 driver- the speaker can then be pried out of the hole using a screwdriver in the tab at the bottom. This tab is also used to align the grill so take note when reinstalling. After speaker is out, stuff fiber-fill loosely into the cavity allowing room for the speaker to go back in. Repeat for the sound bar speaker if desired. This makes the enclosure appear larger so theoretically the bass should go lower. It might sound a little better but nothing drastic.


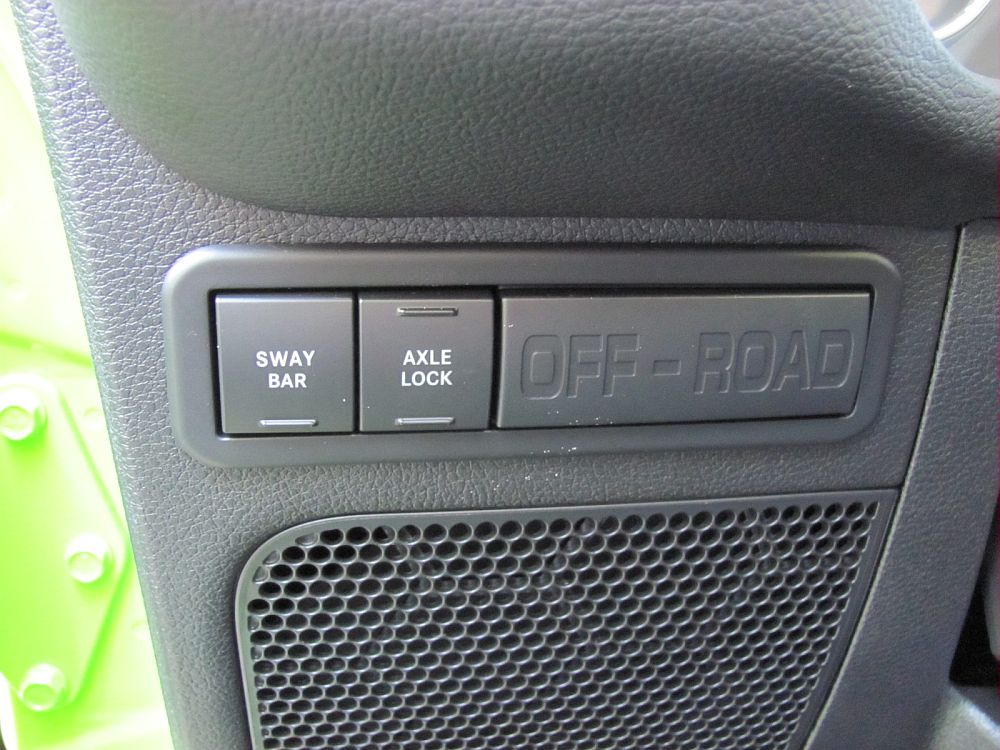
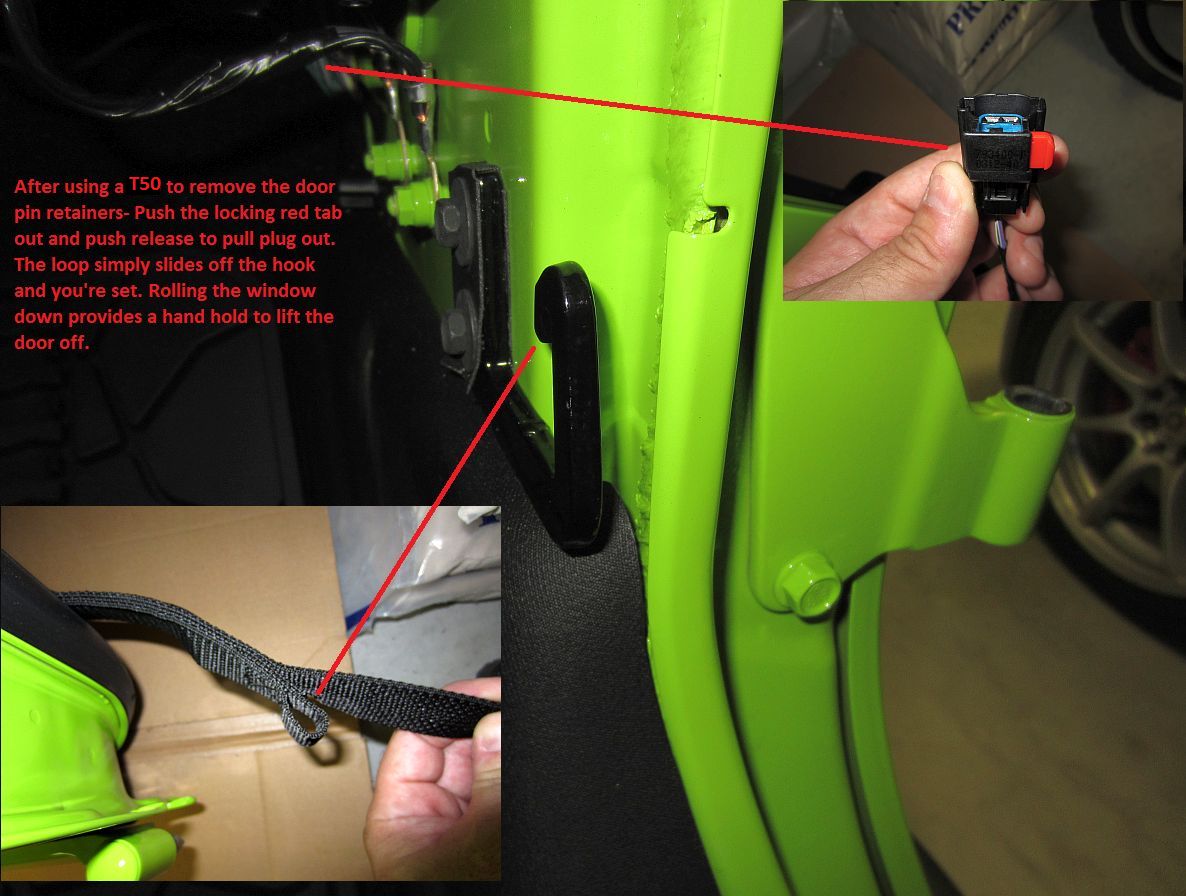
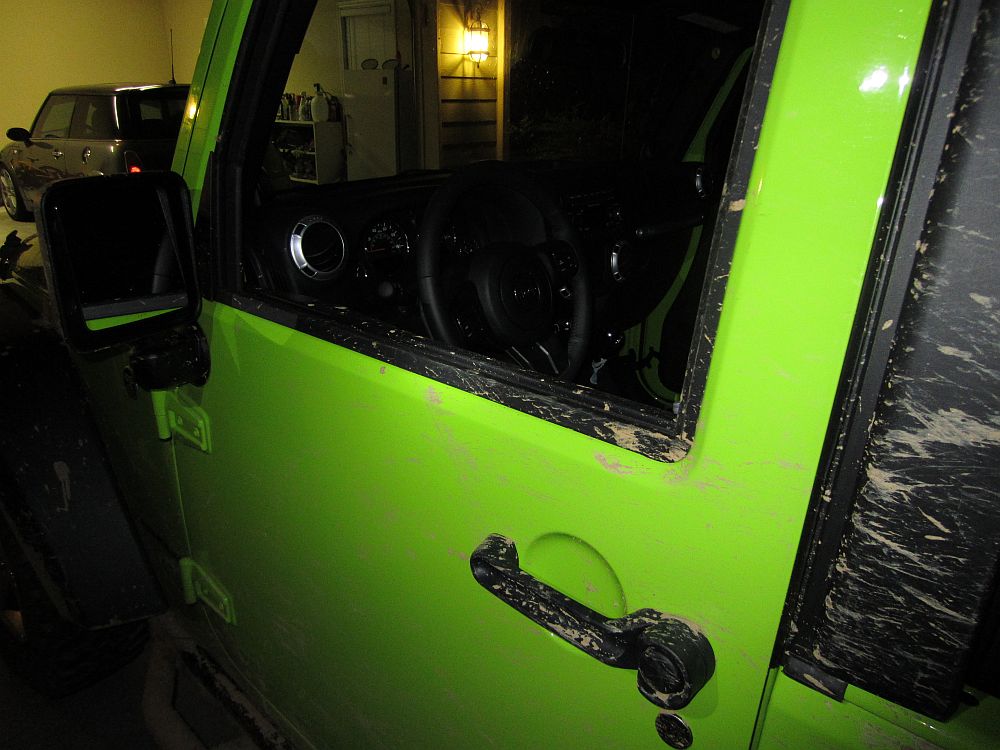
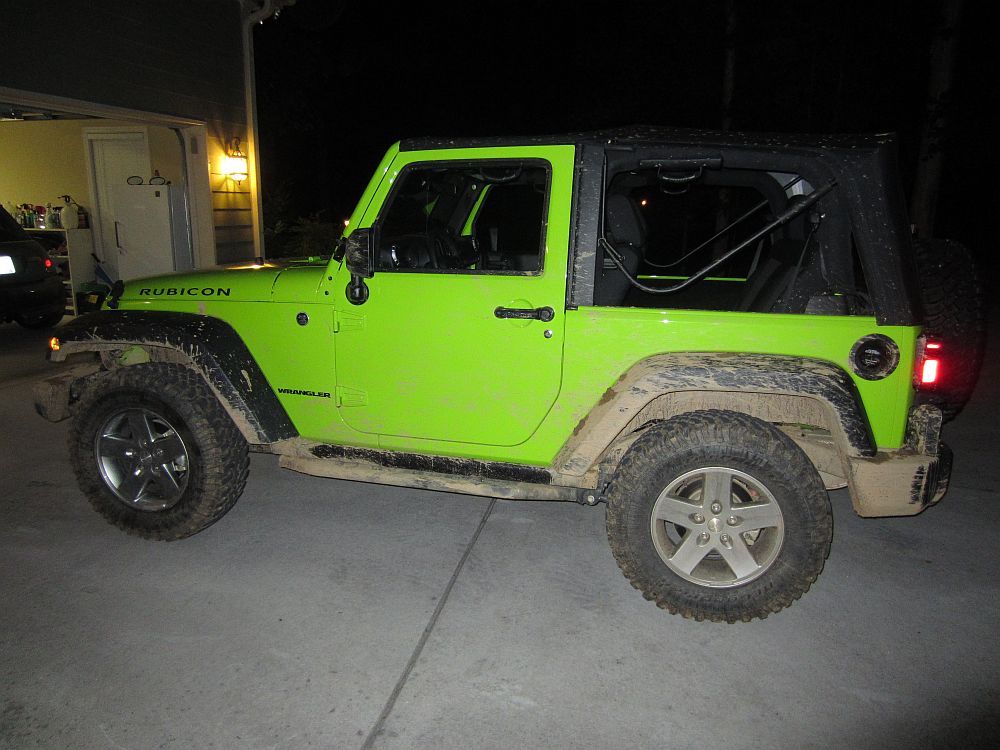
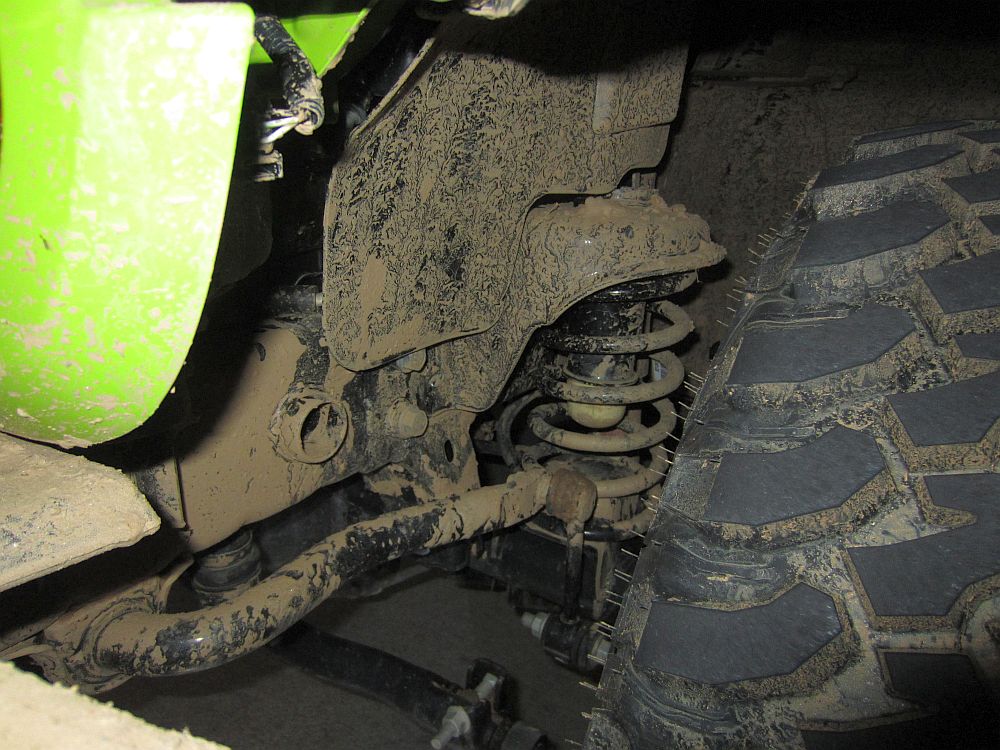
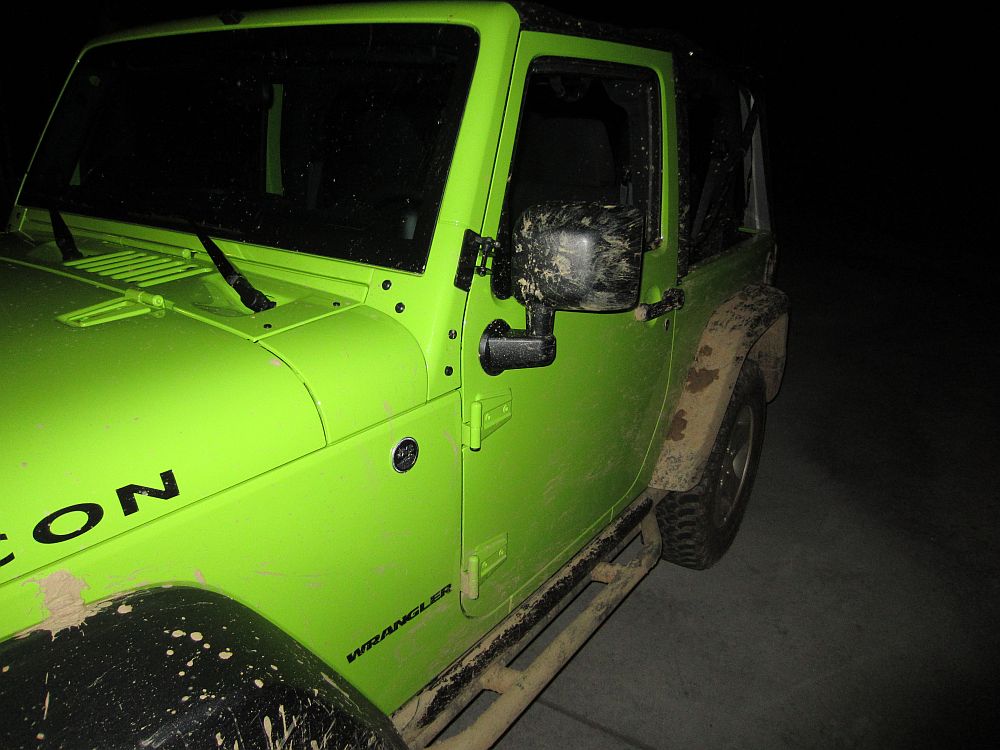
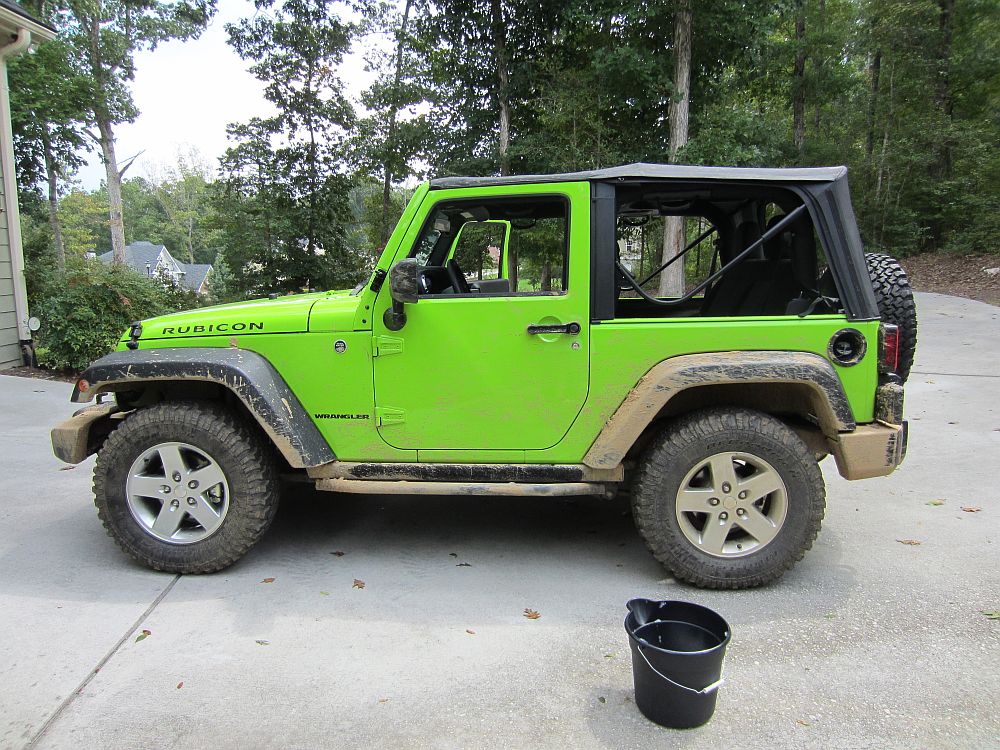
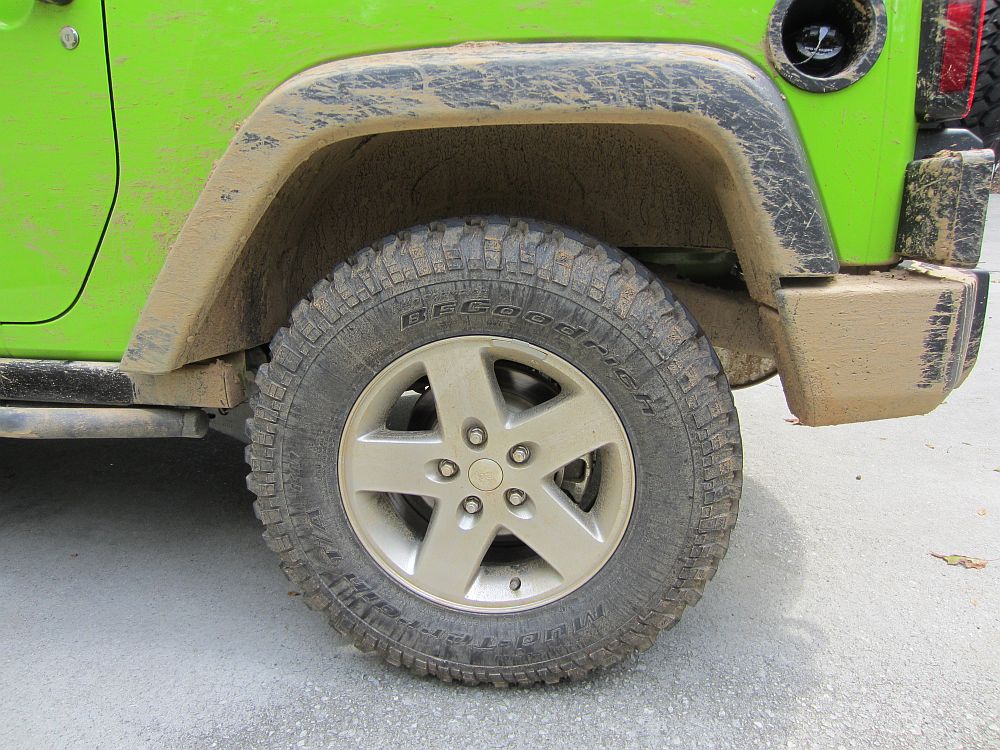
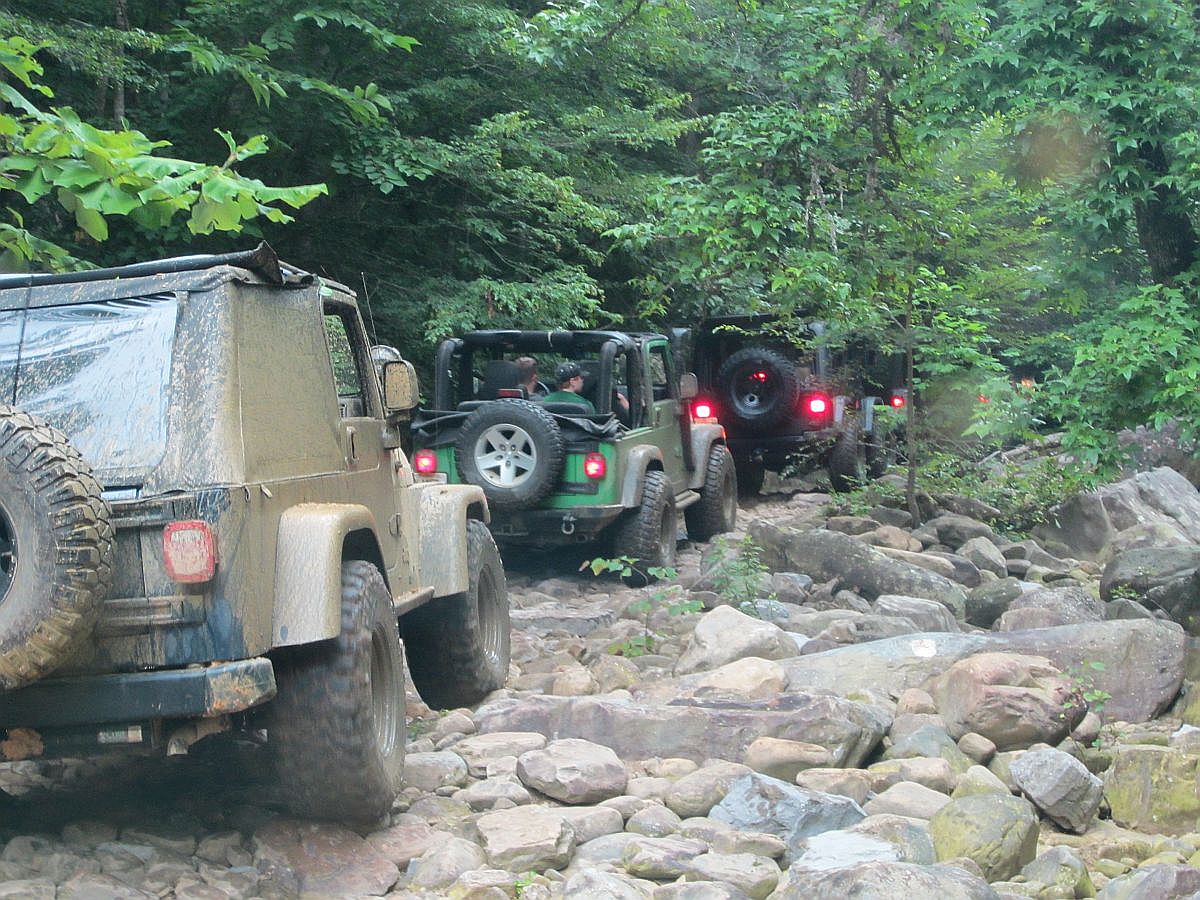
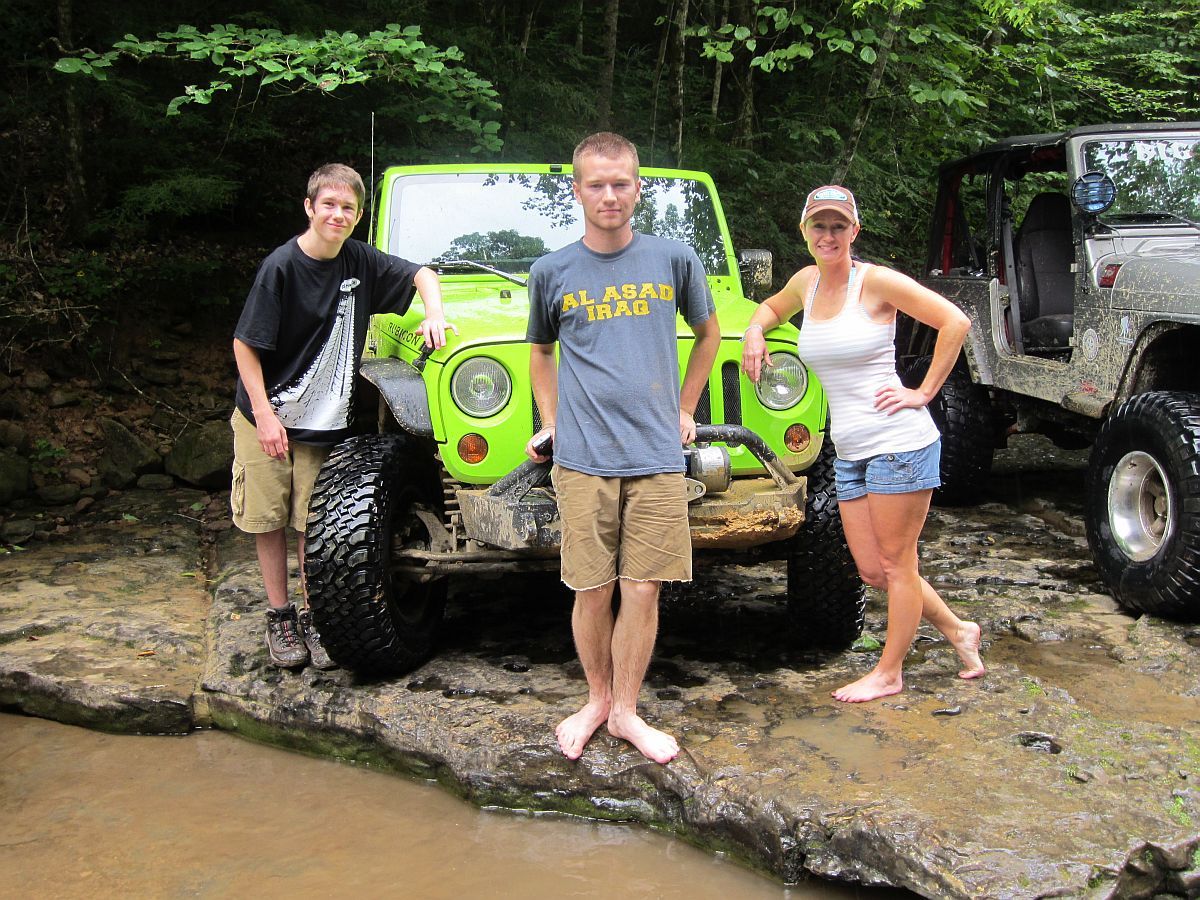
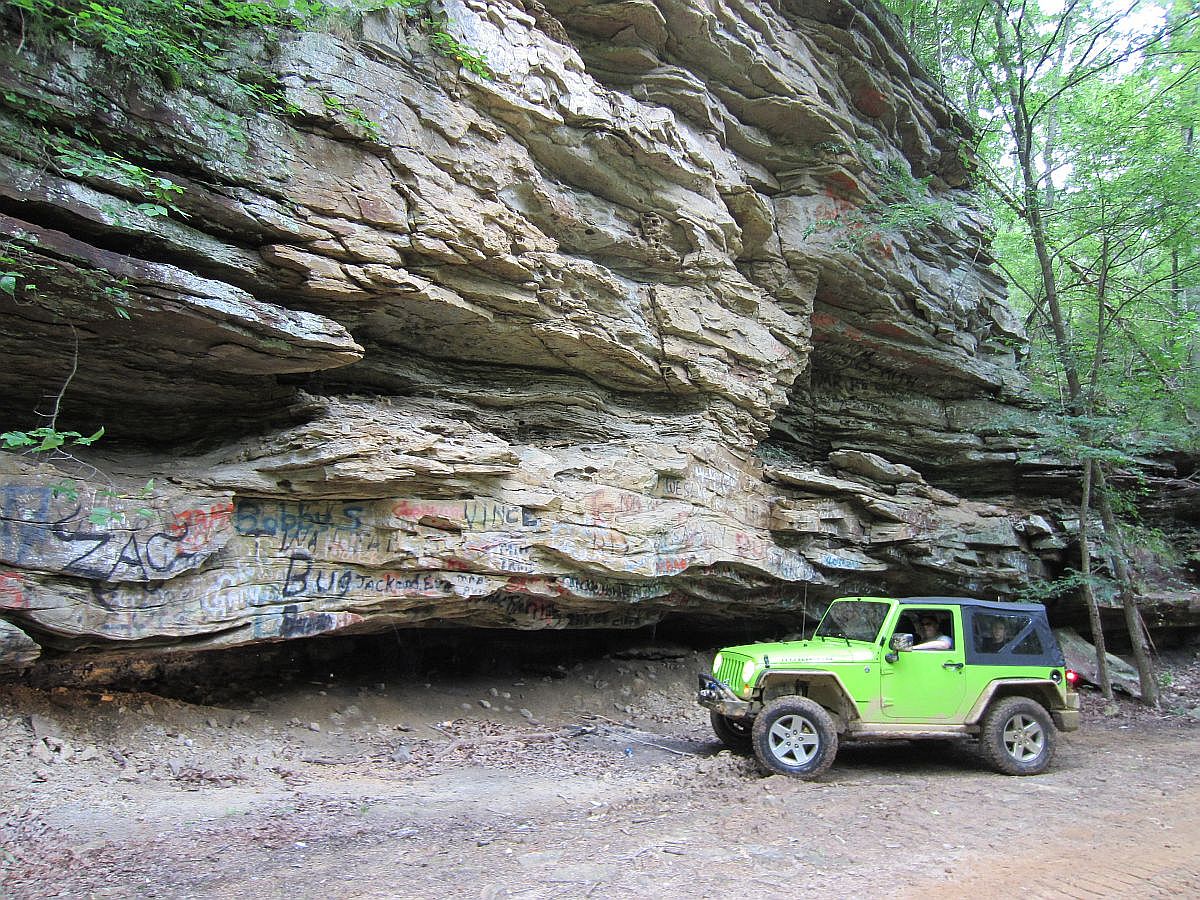
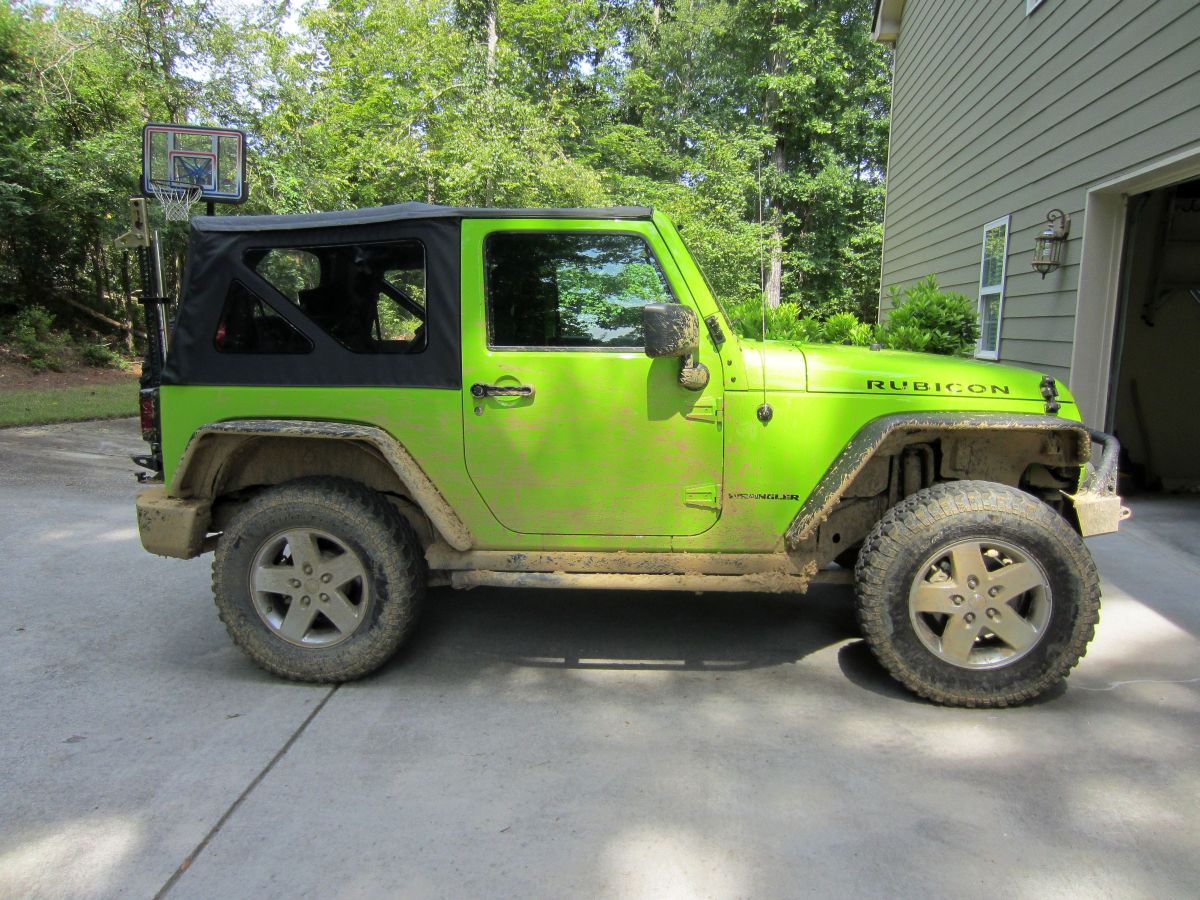
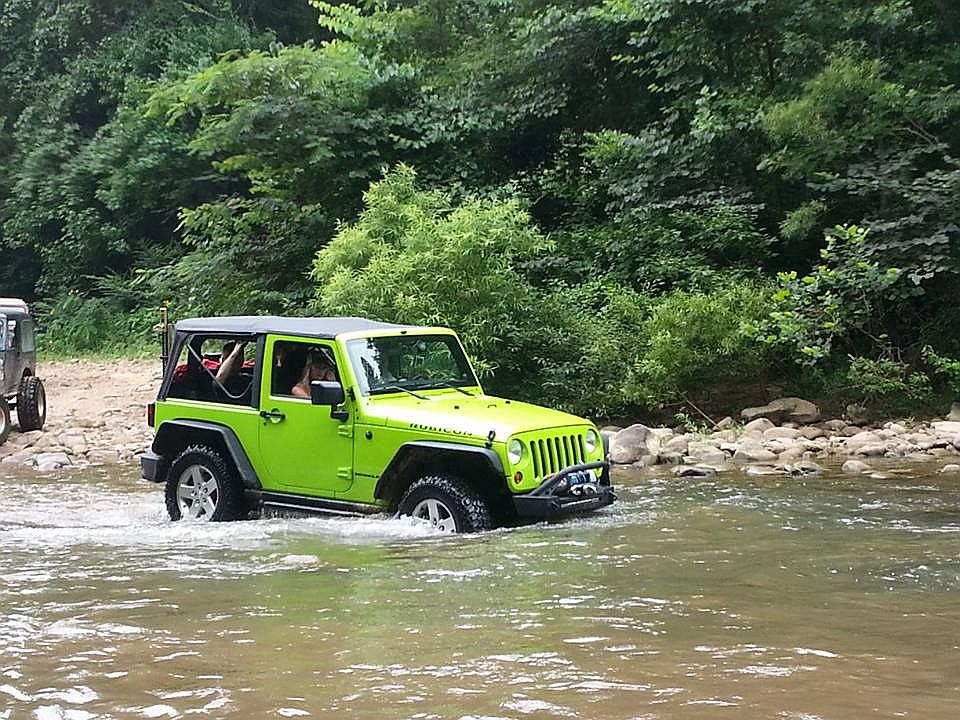
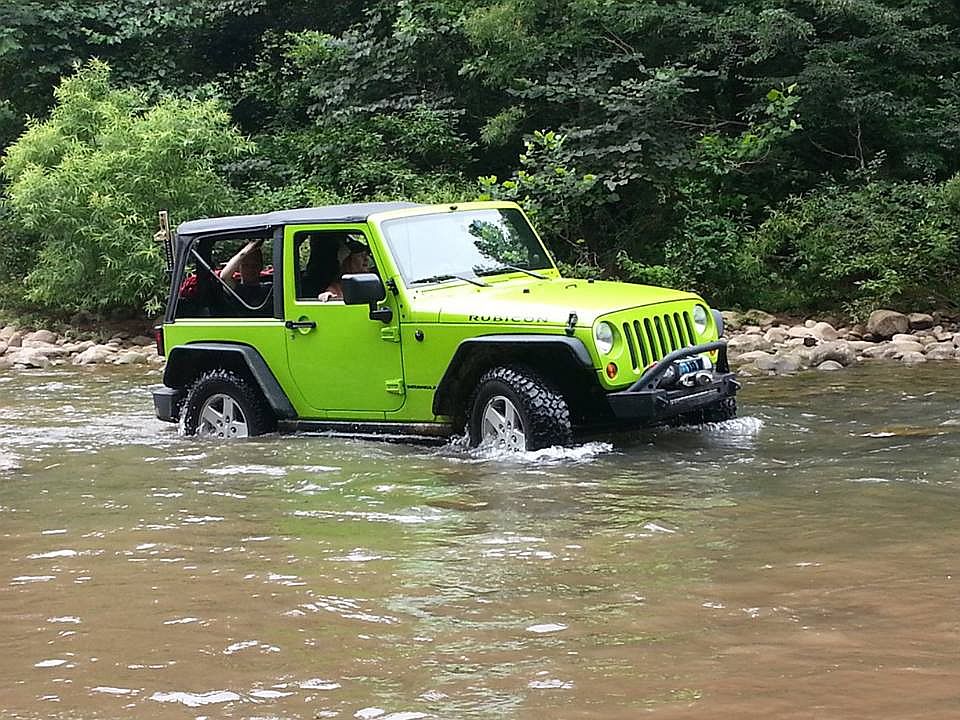
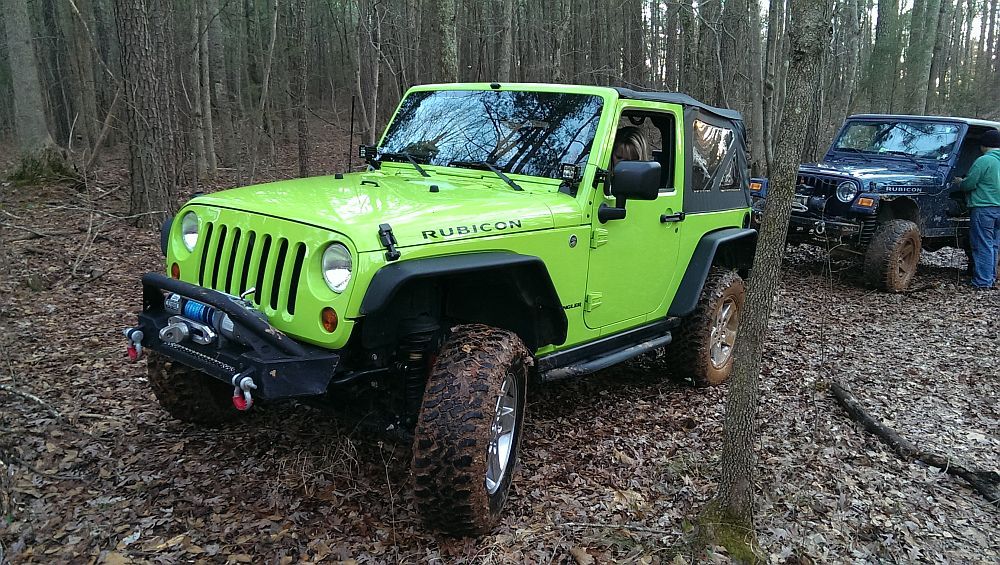
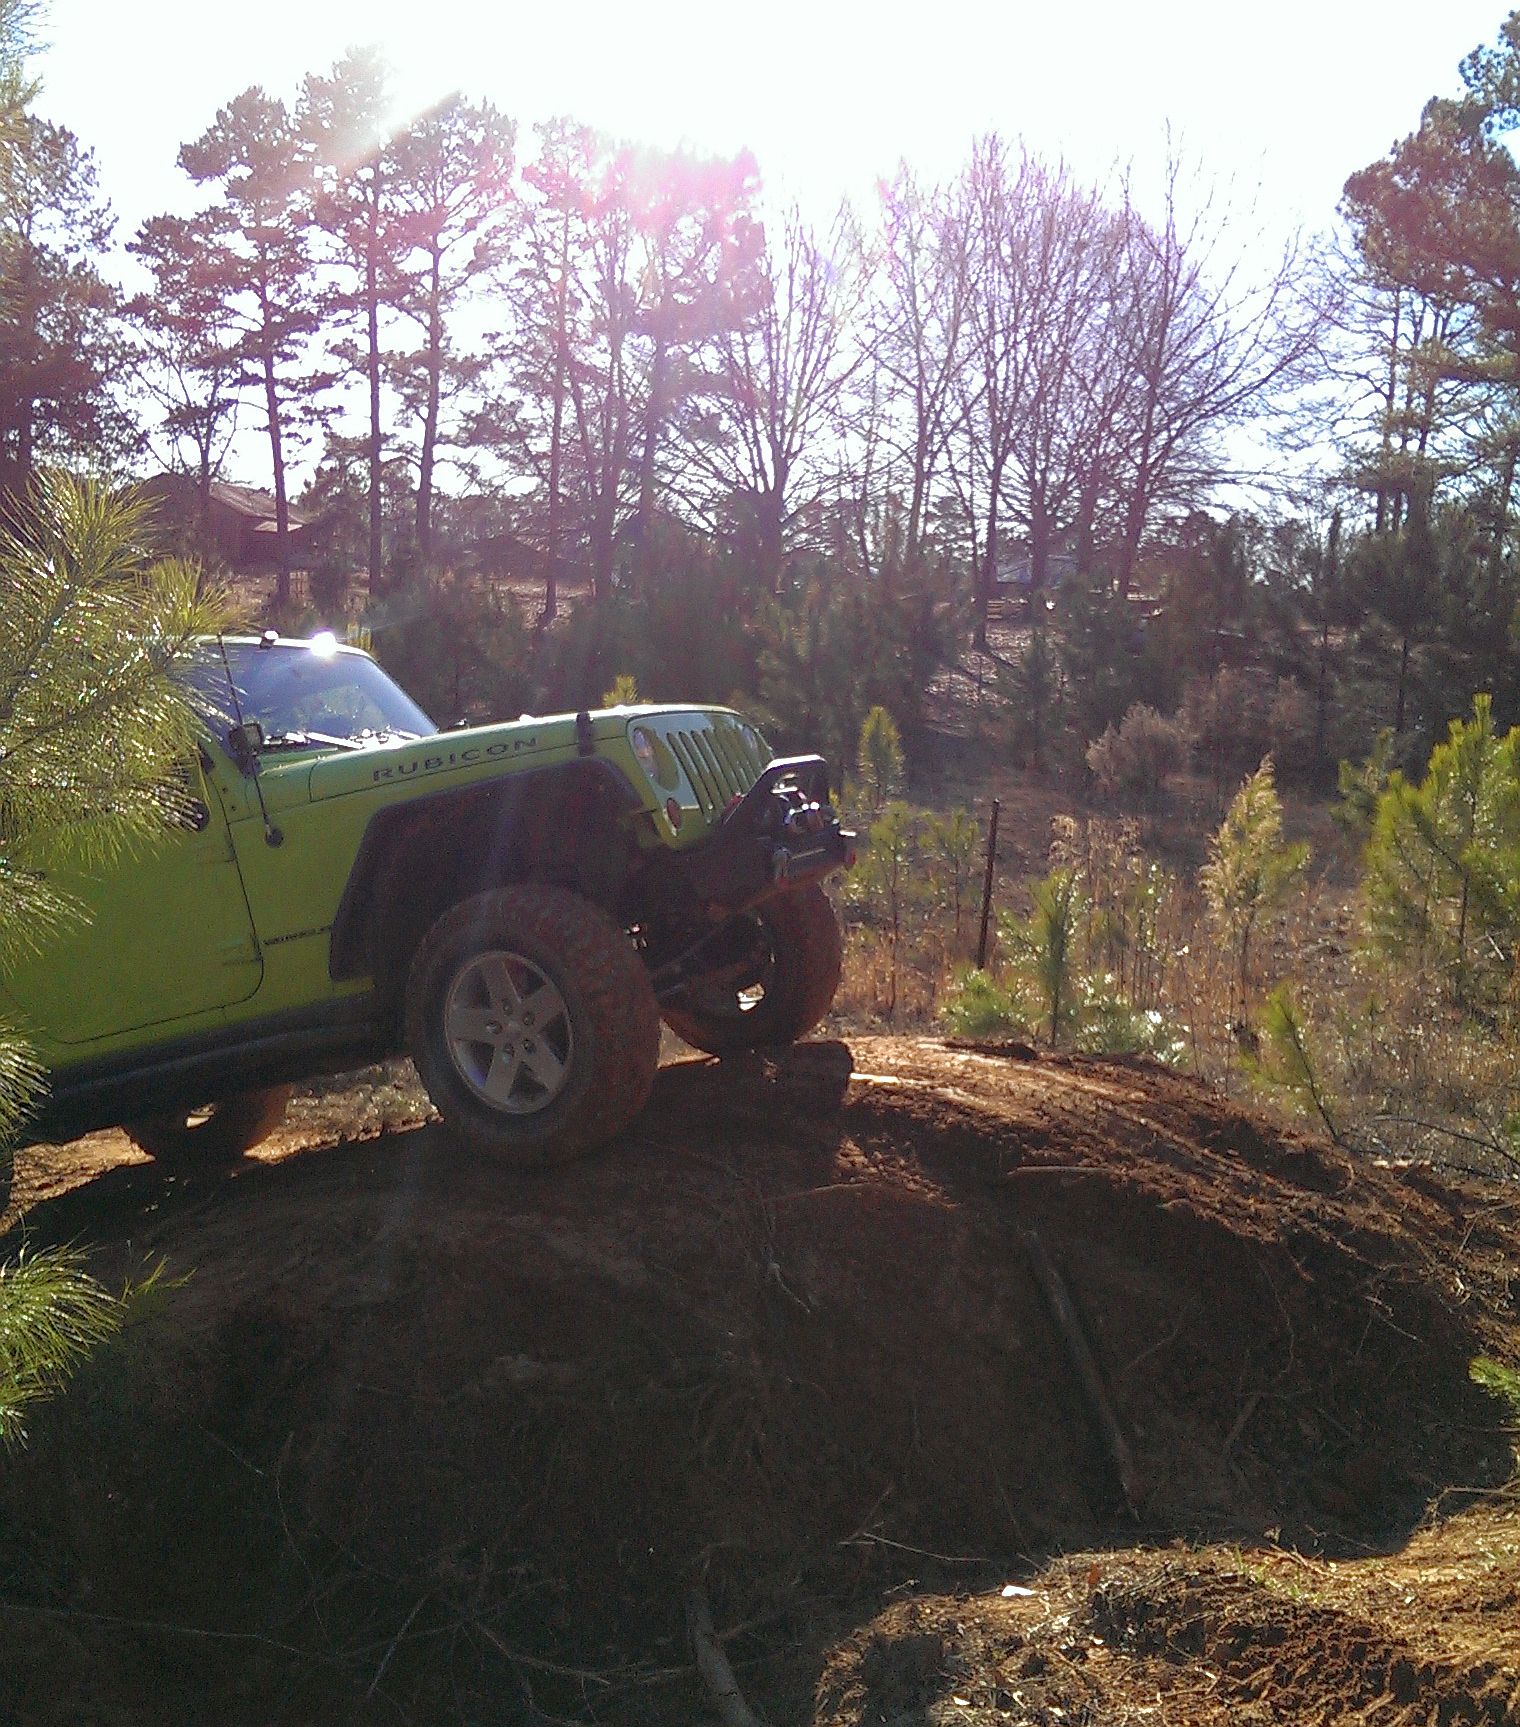
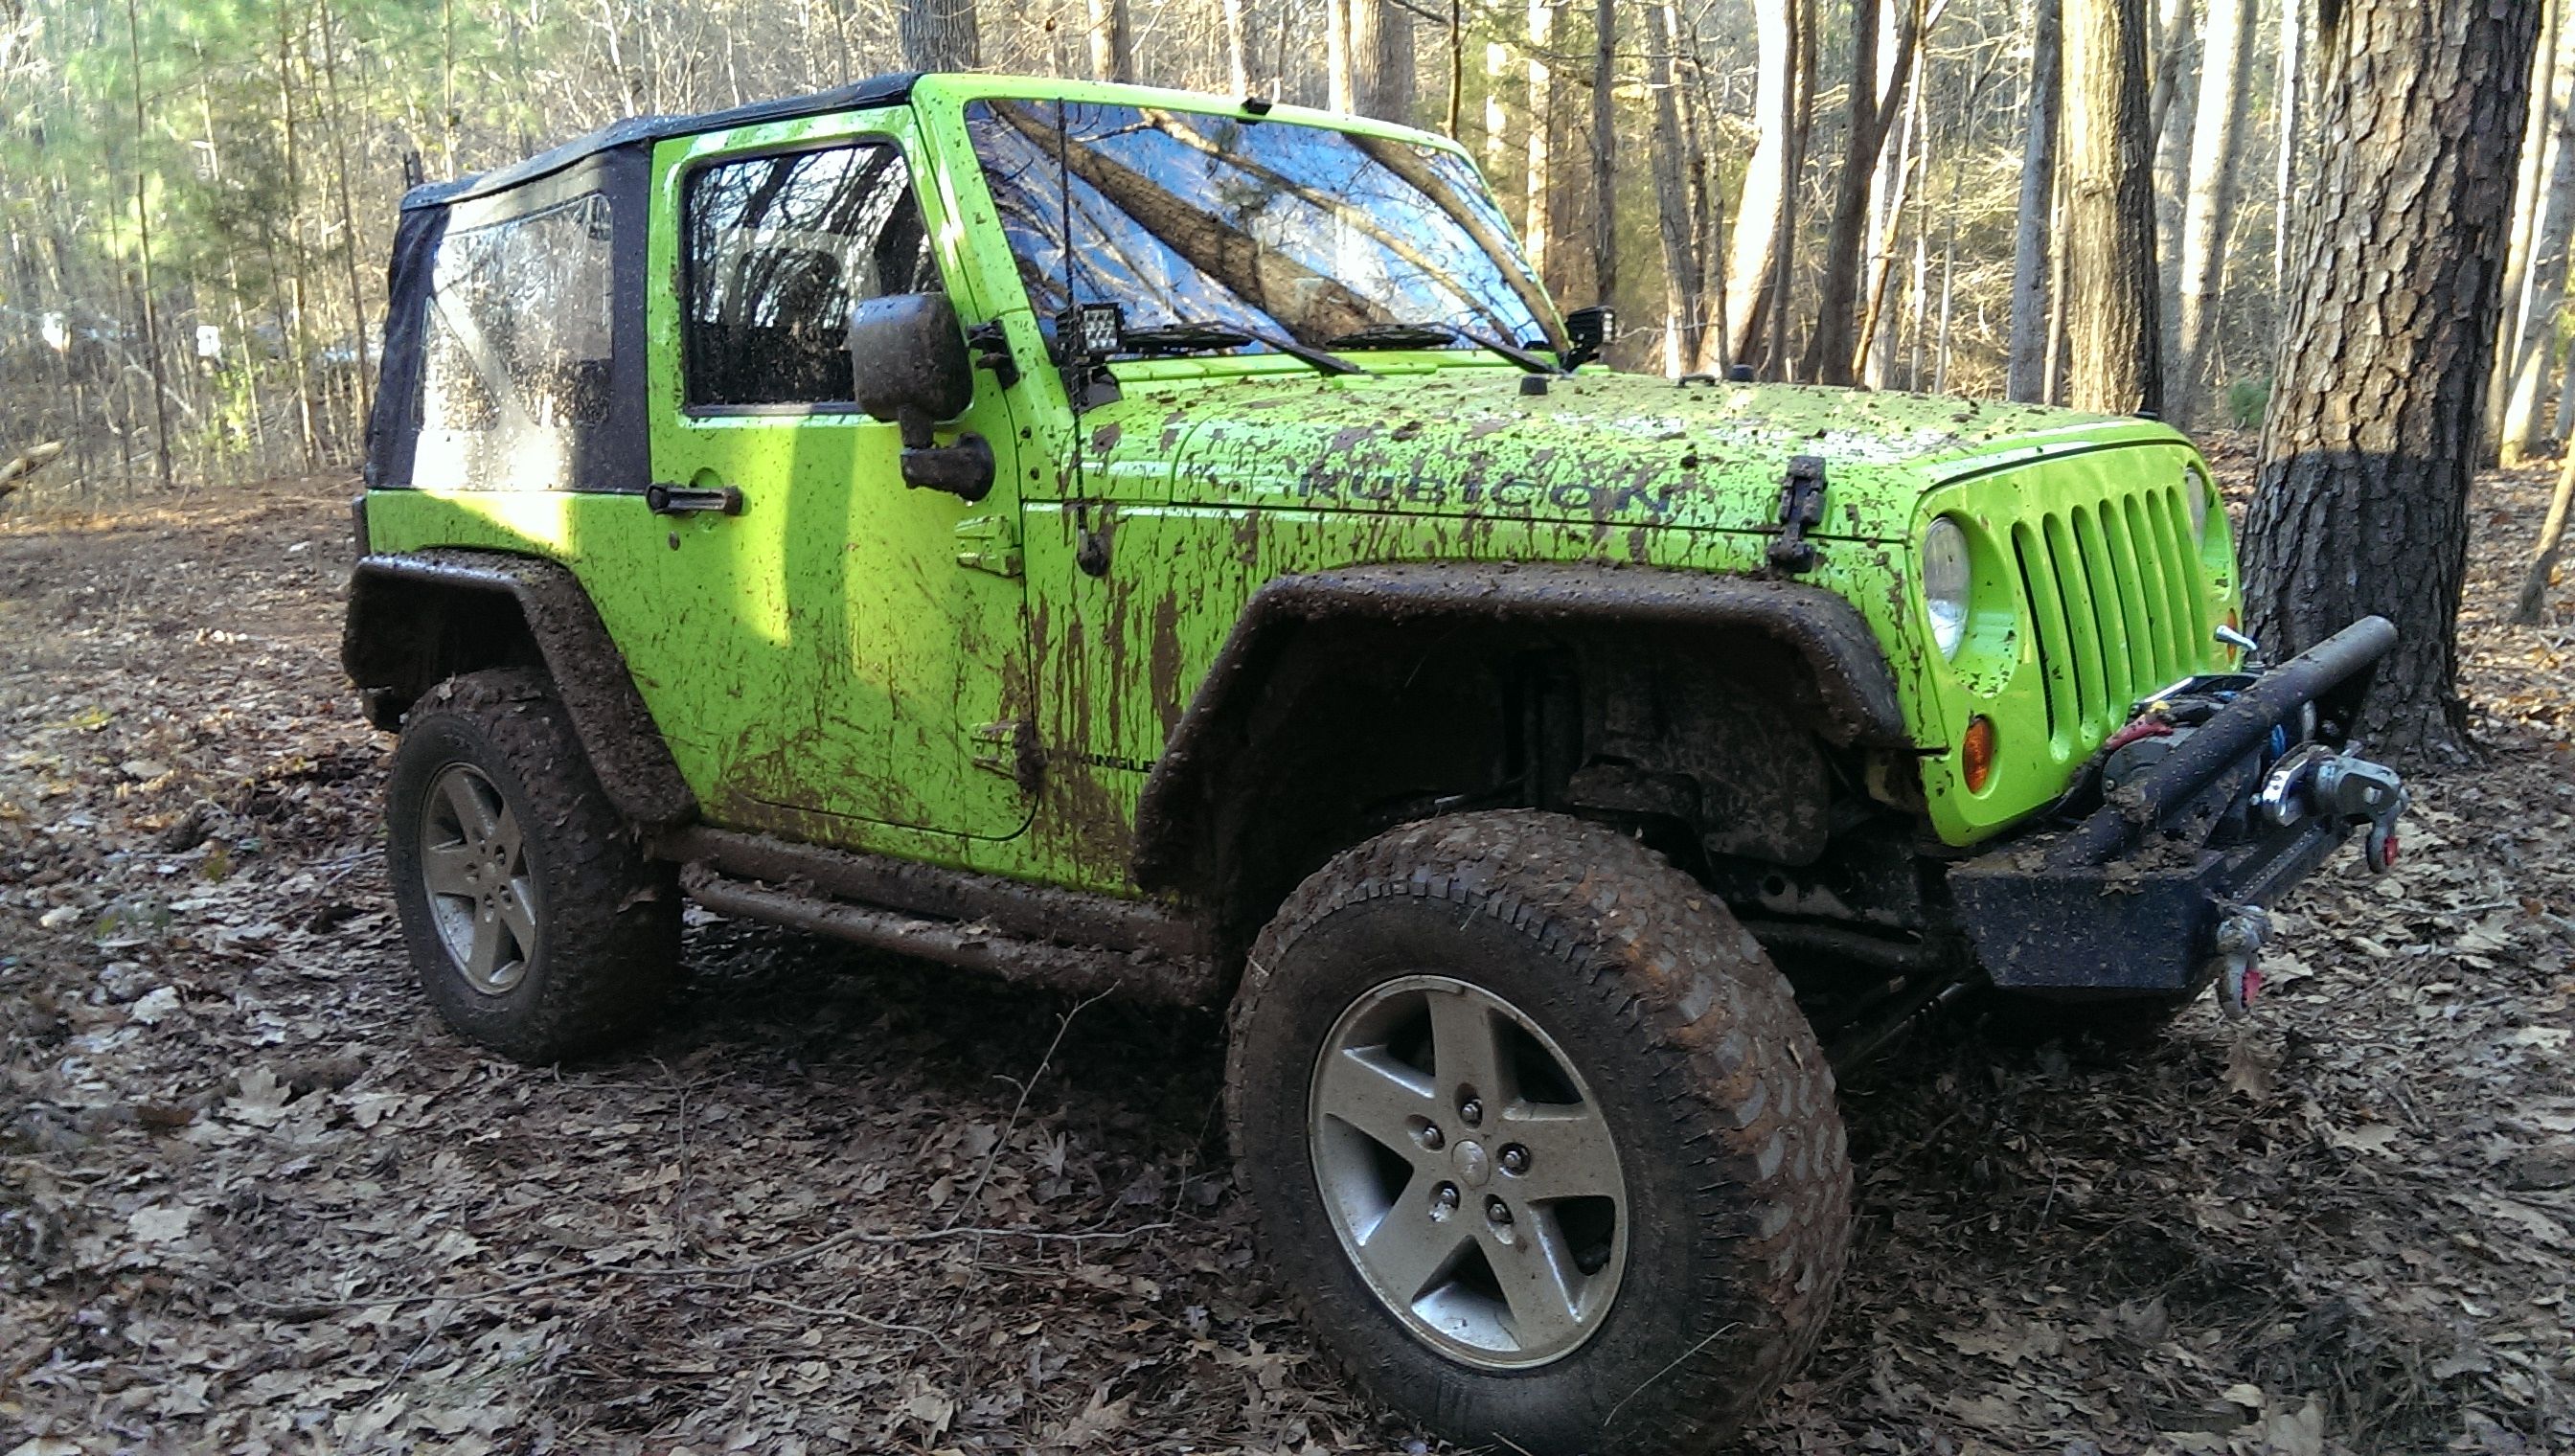
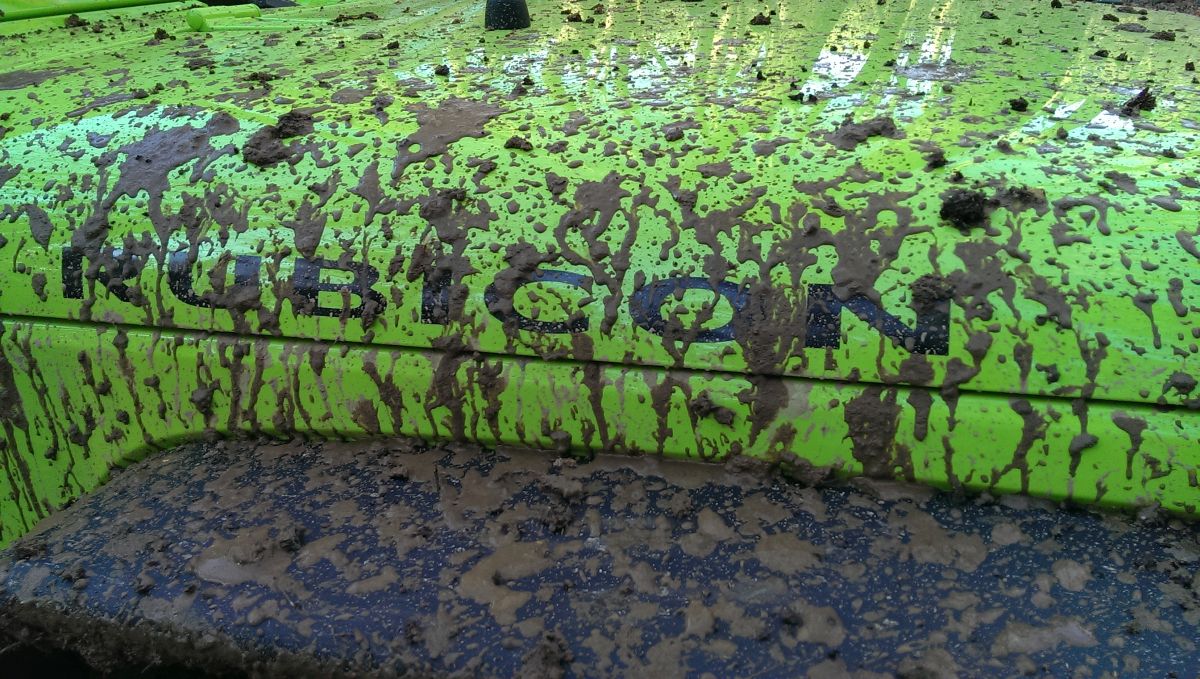
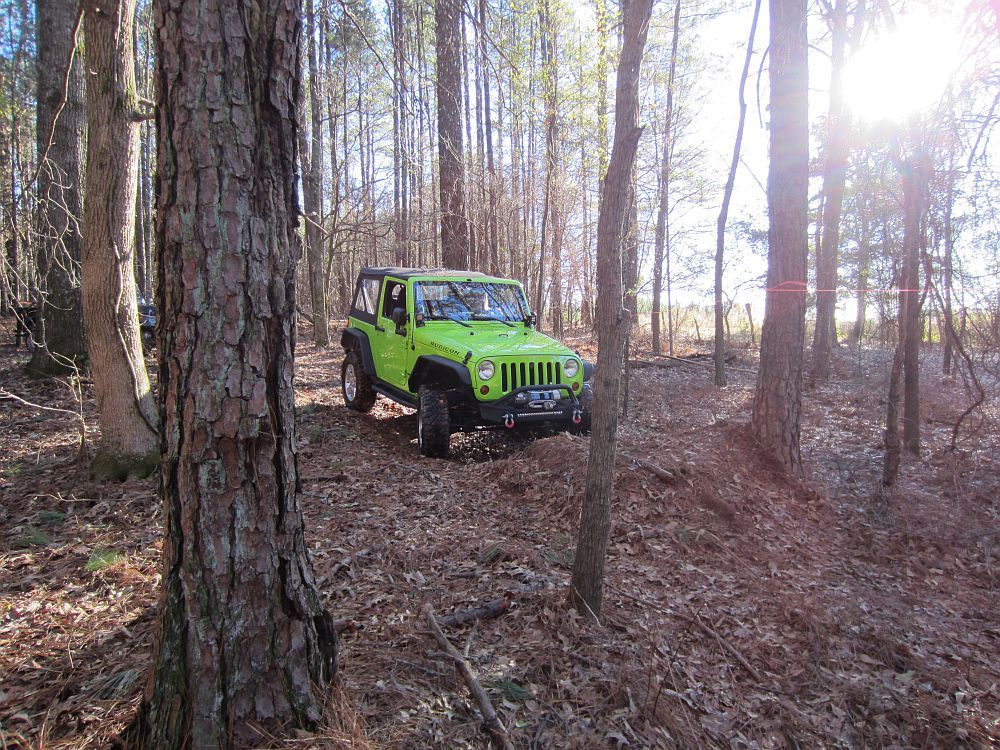
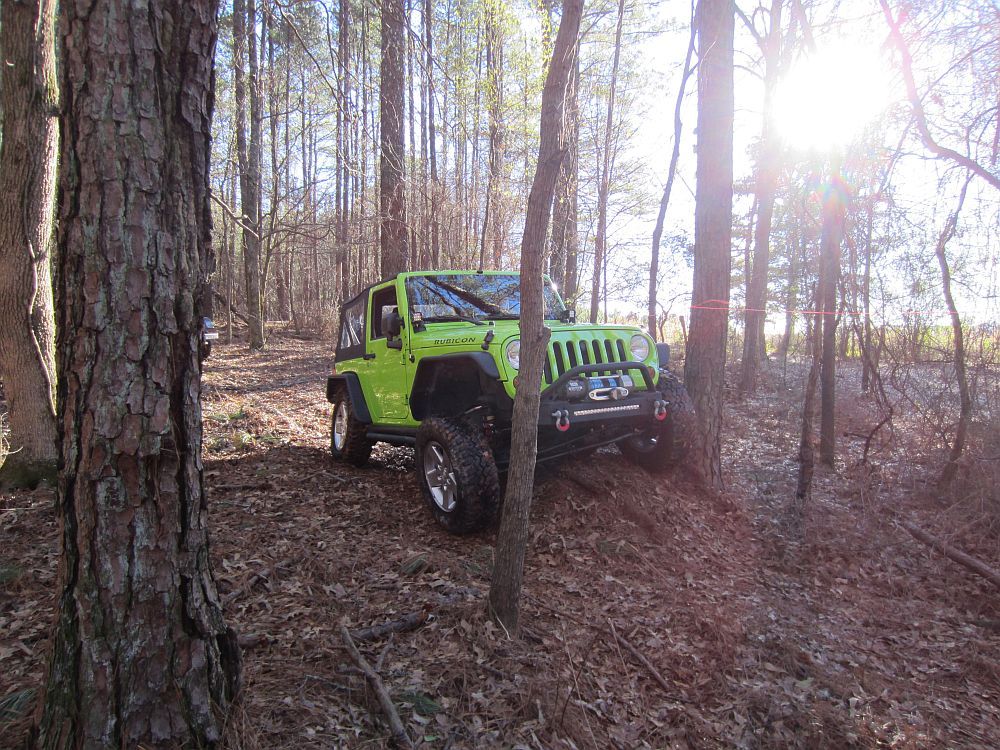
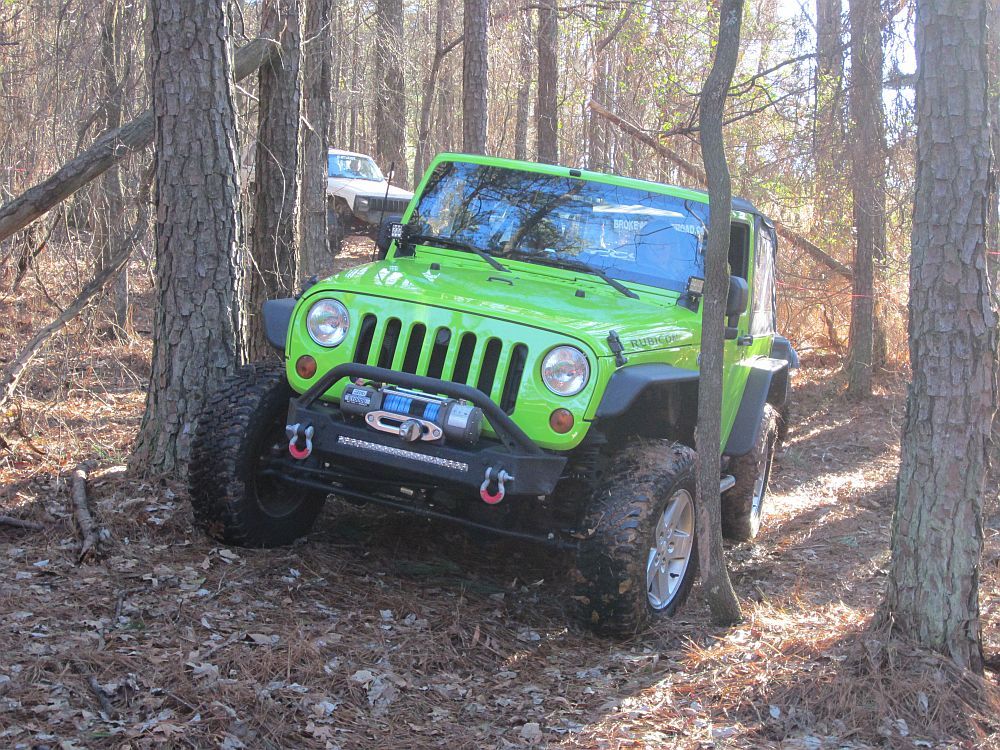
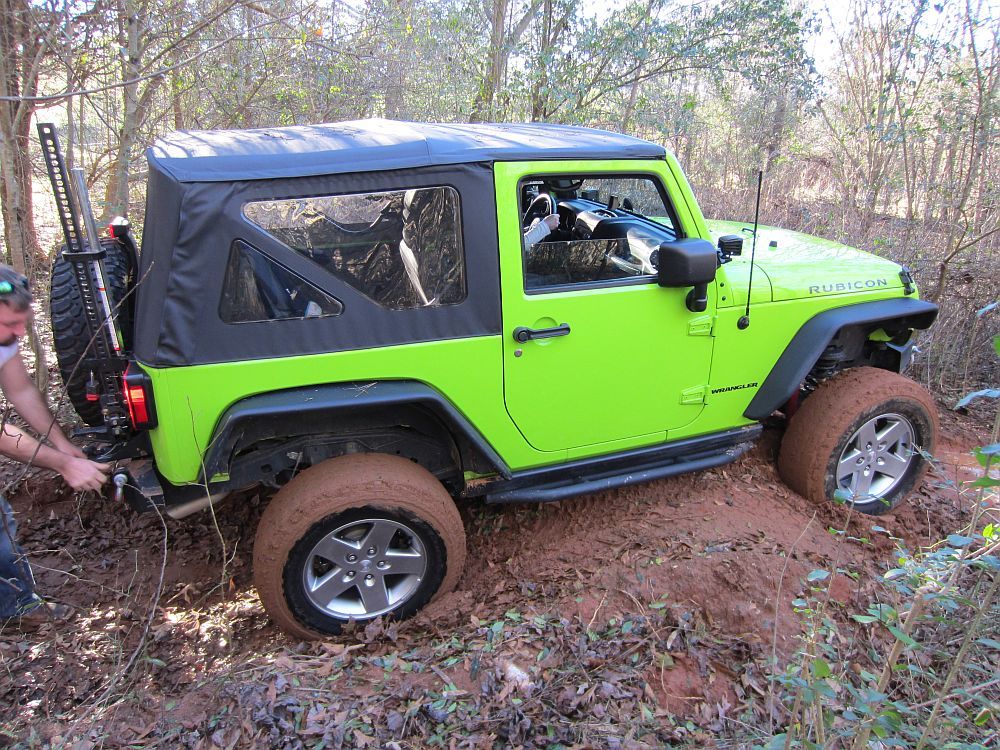
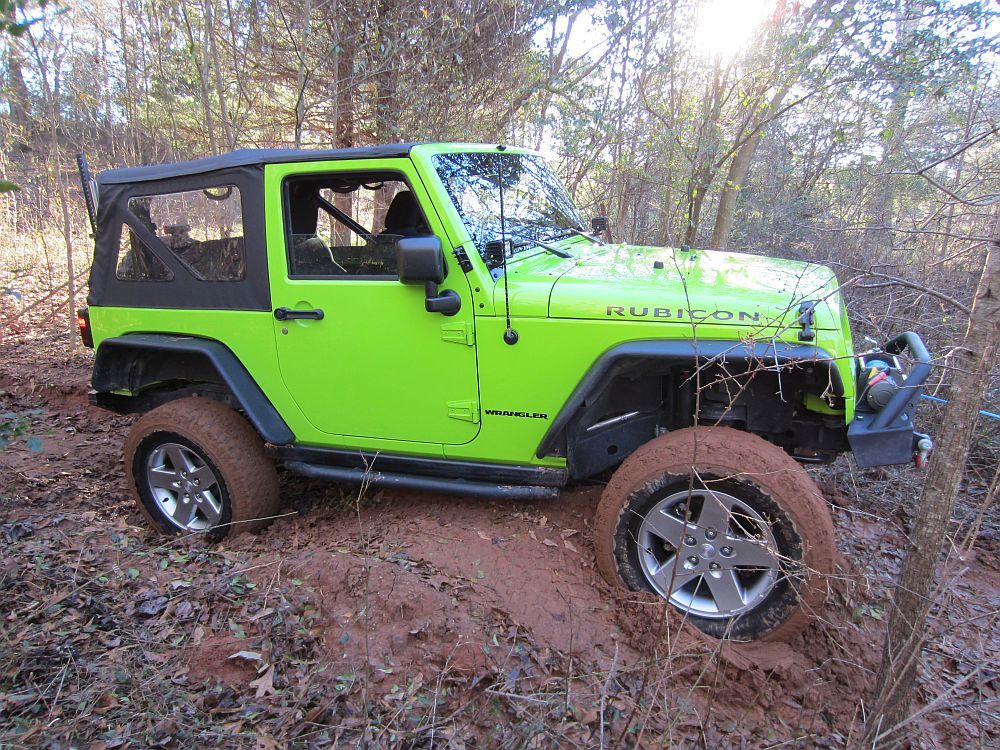
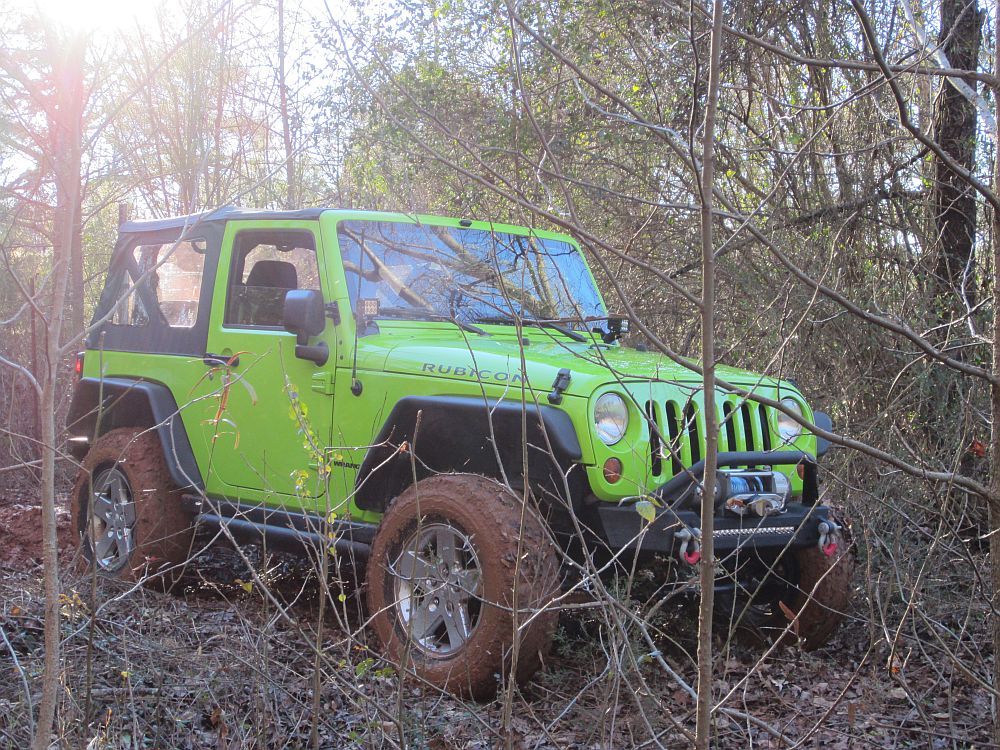
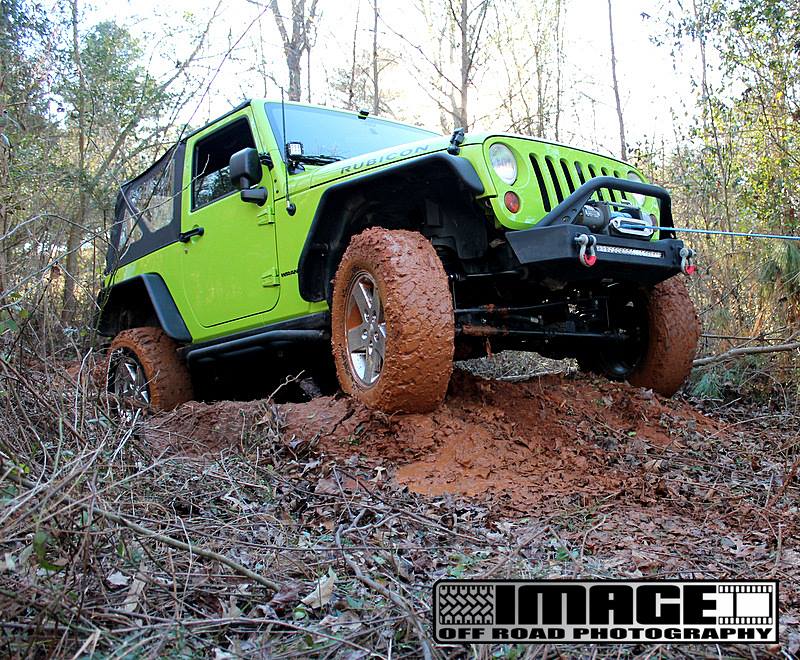
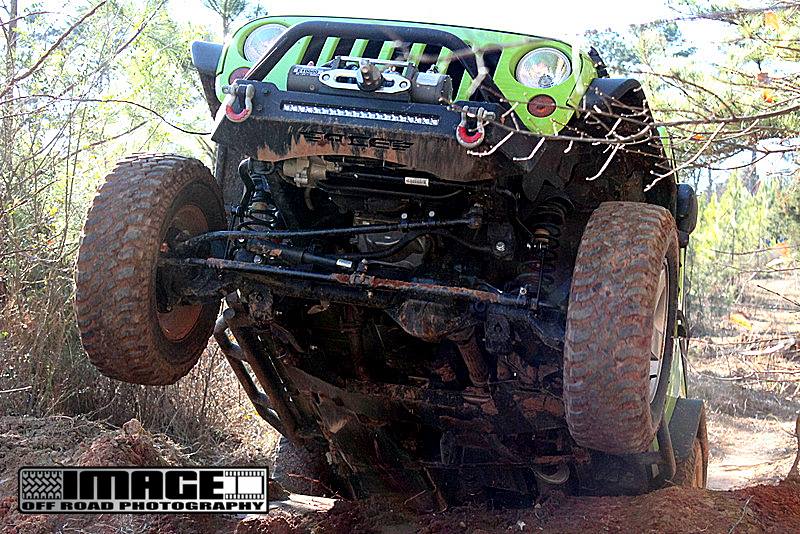
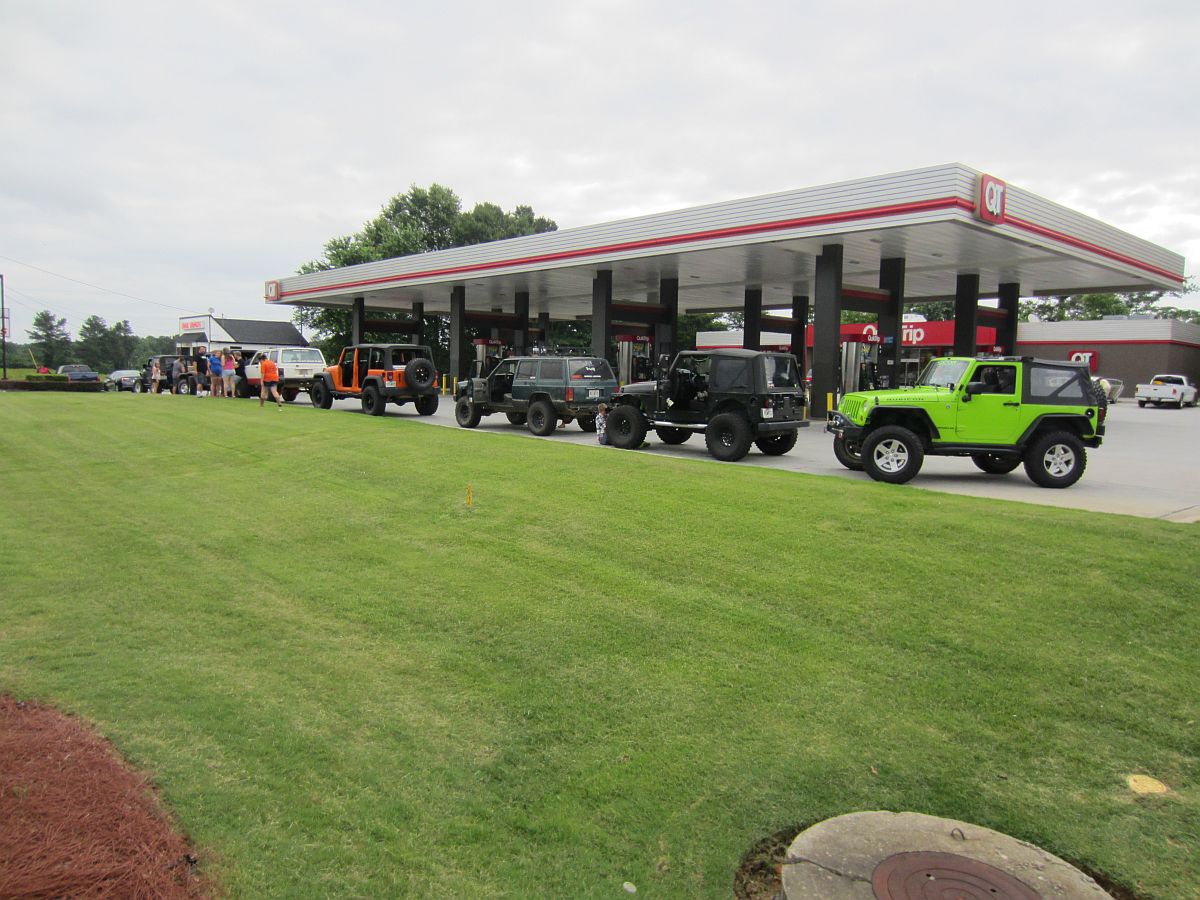
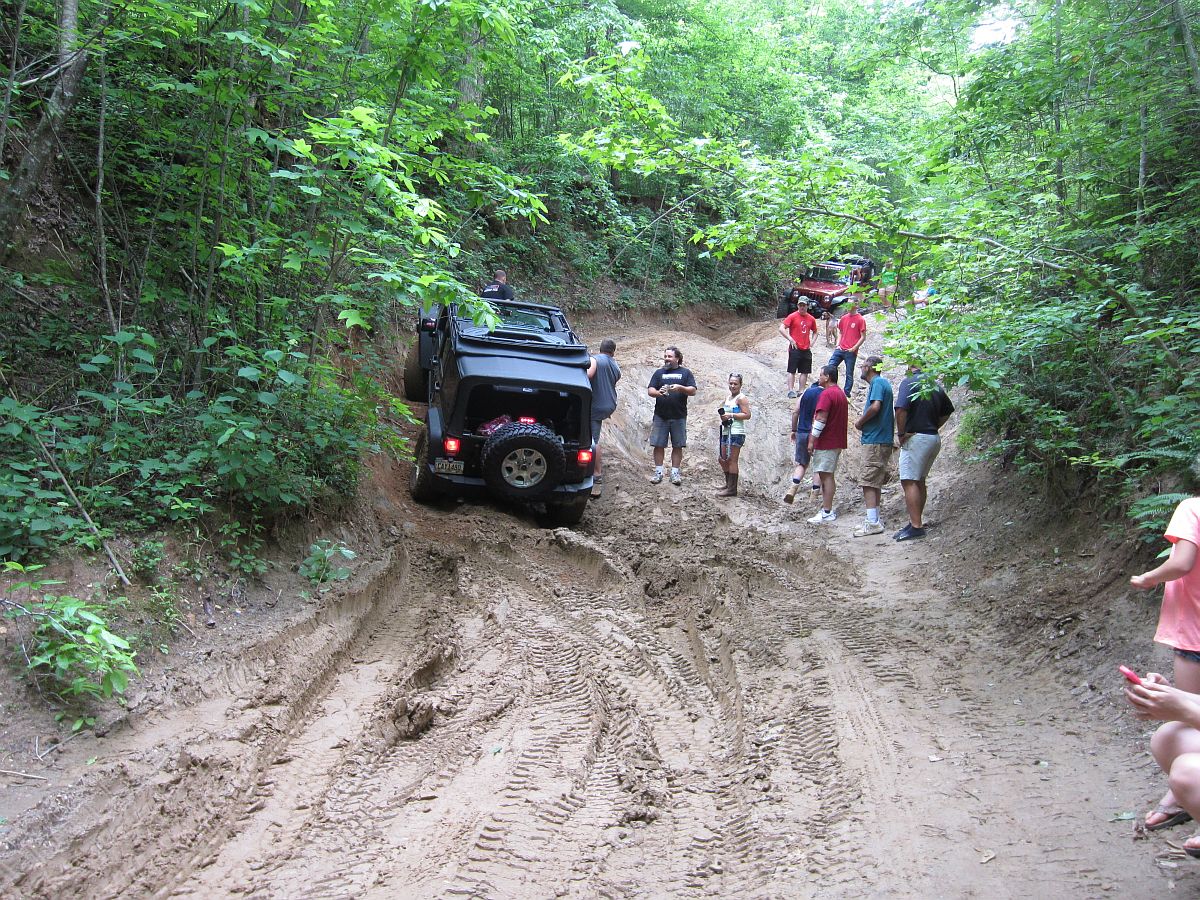
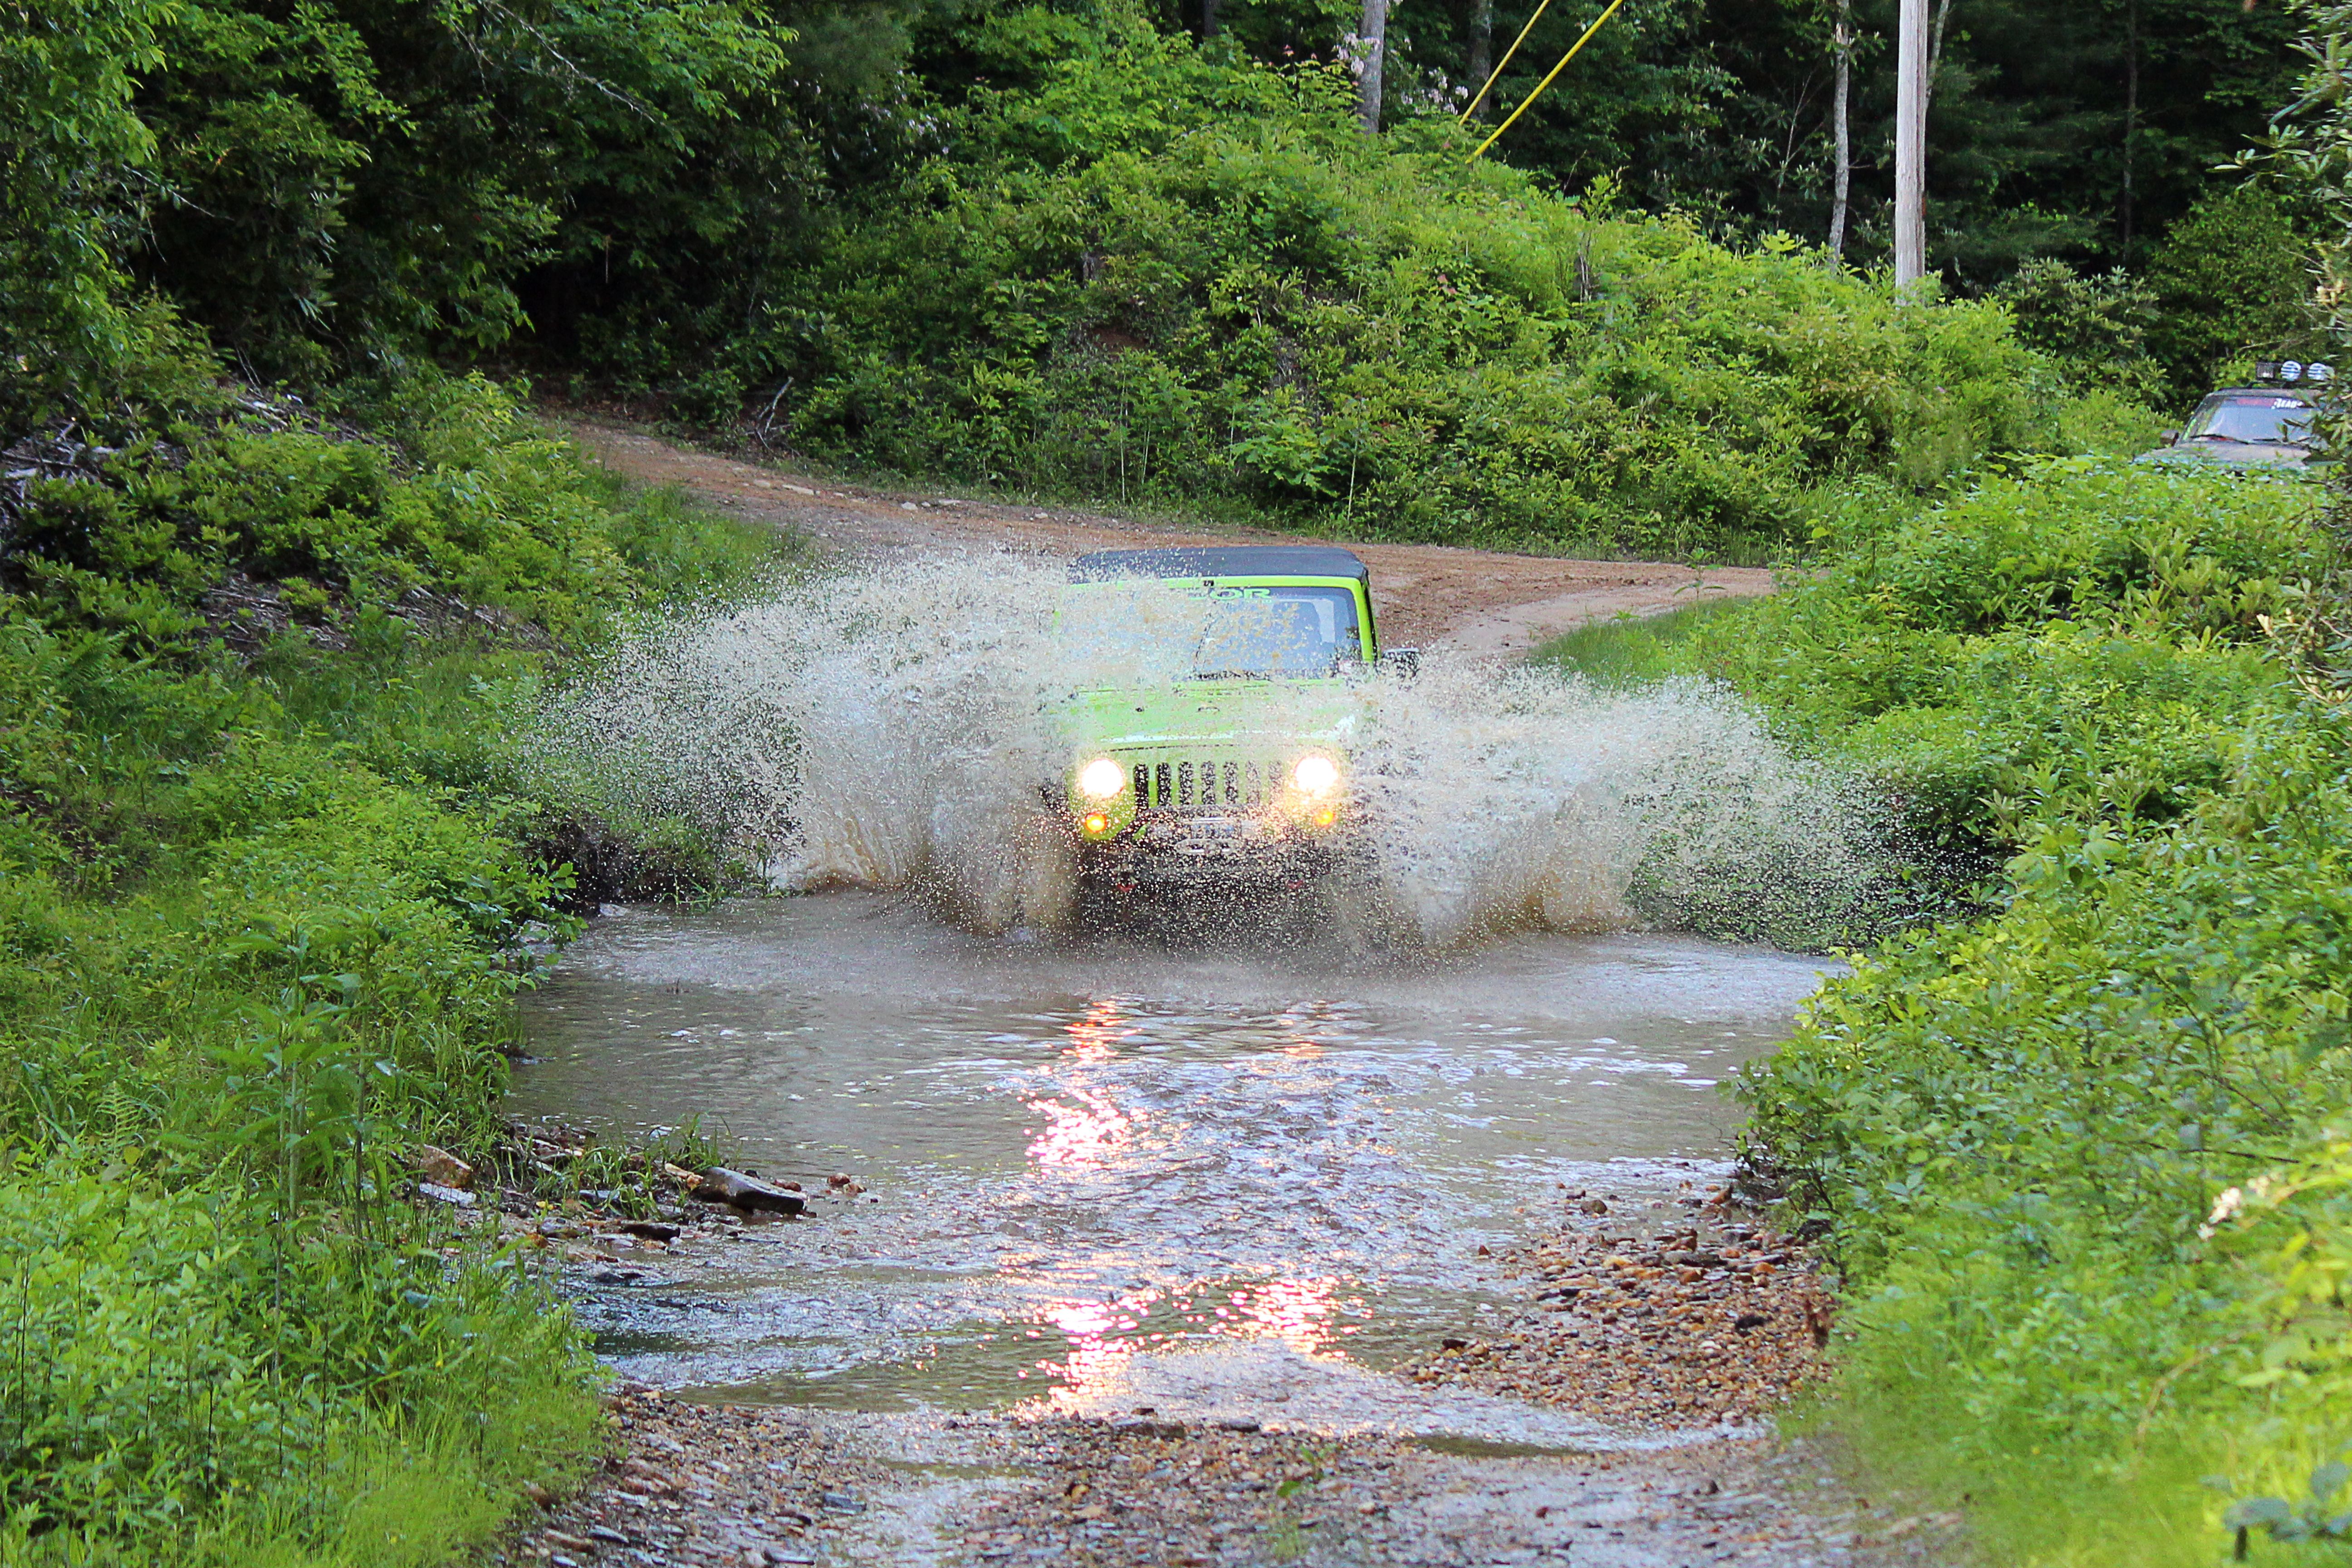
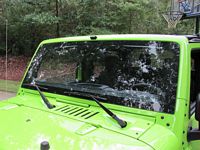
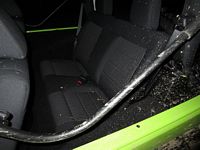
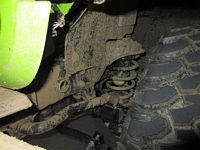
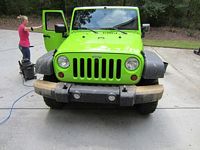
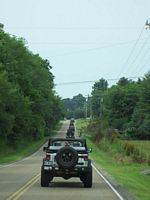
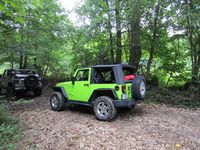
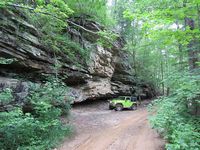
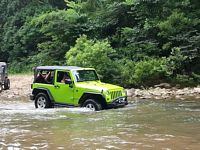
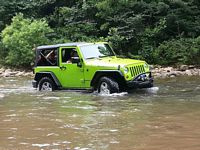
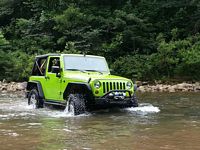
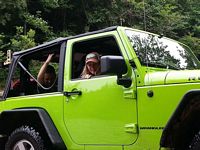
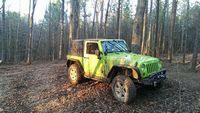
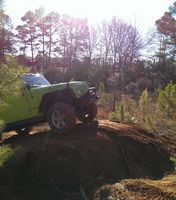
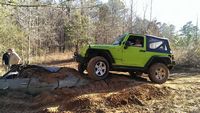
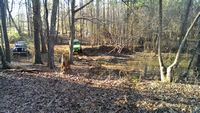
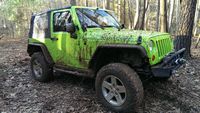
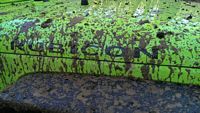
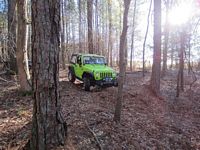
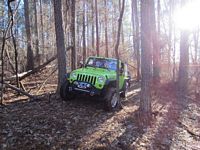
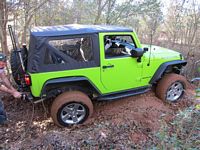
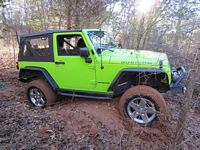
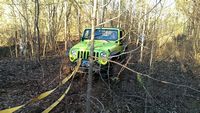
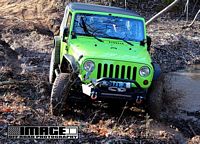
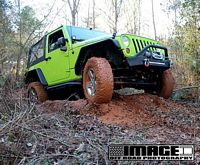
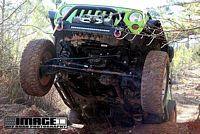
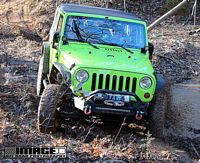
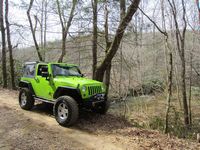
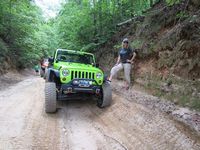
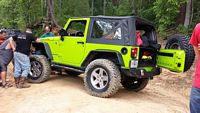
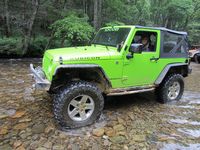
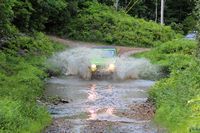
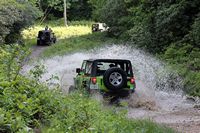
Finally christened the Jeep in its first real offroad excursion. Both front and rear lockers on and sway bar disconnect used, they all worked GREAT :-) Lots of fun making the mess, not so much fun cleaning up......lots of scrubbing, vacuuming, and pressure washing. Note to self: zip windows back in before going out so the interior is one less thing to clean


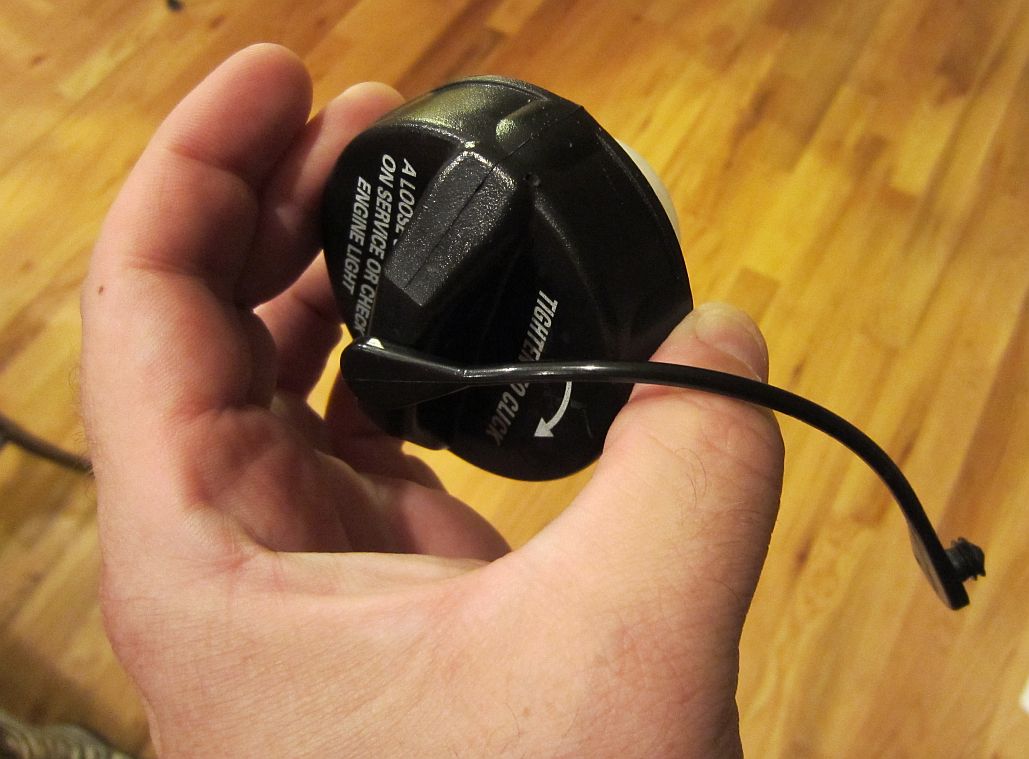
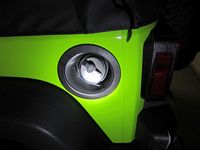
Mopar locking gas cap (works with existing key) purchased from the Airpark Jeep eBay Store. The price was competitive when you factor in that they key the lock for you, all you do is provide your VIN. Just pull the tether for the old gas cap out and plug the new one in- DONE.

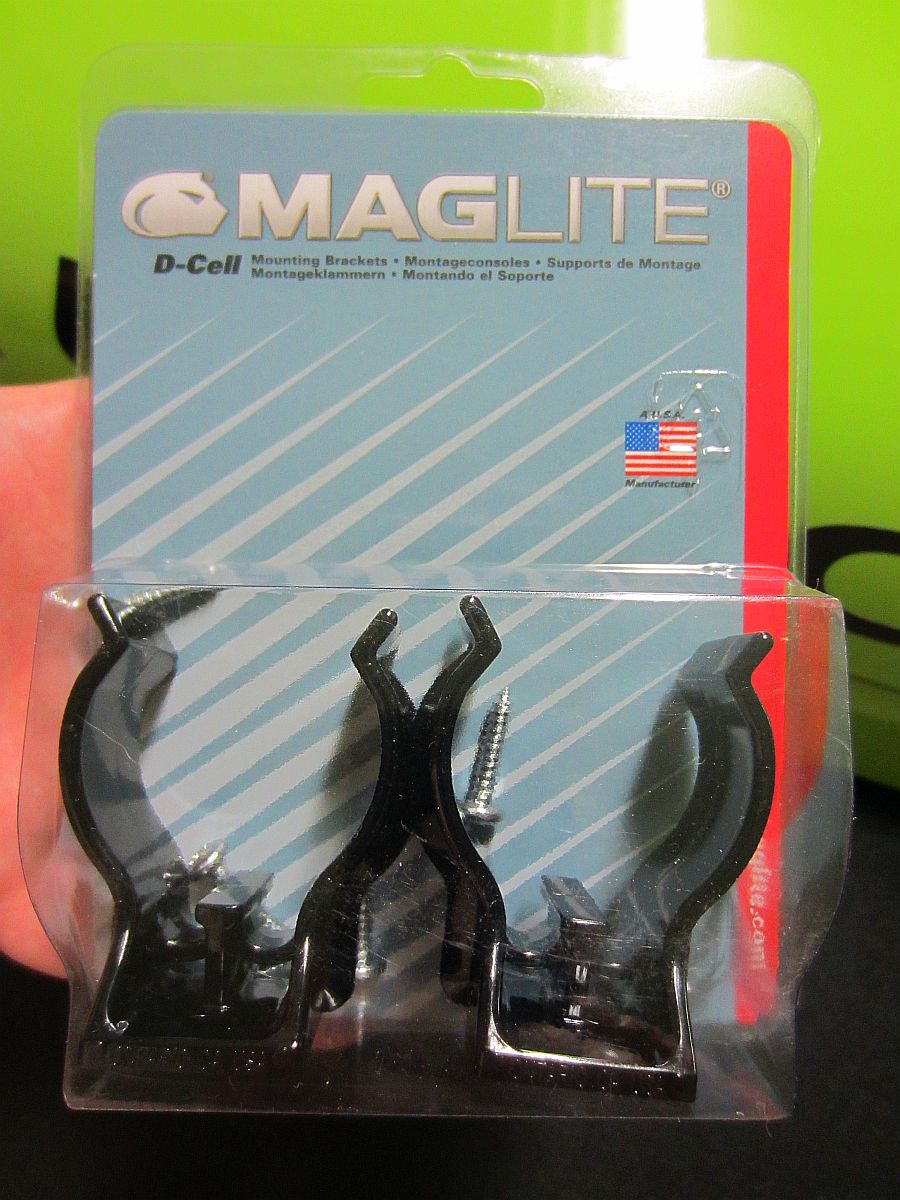
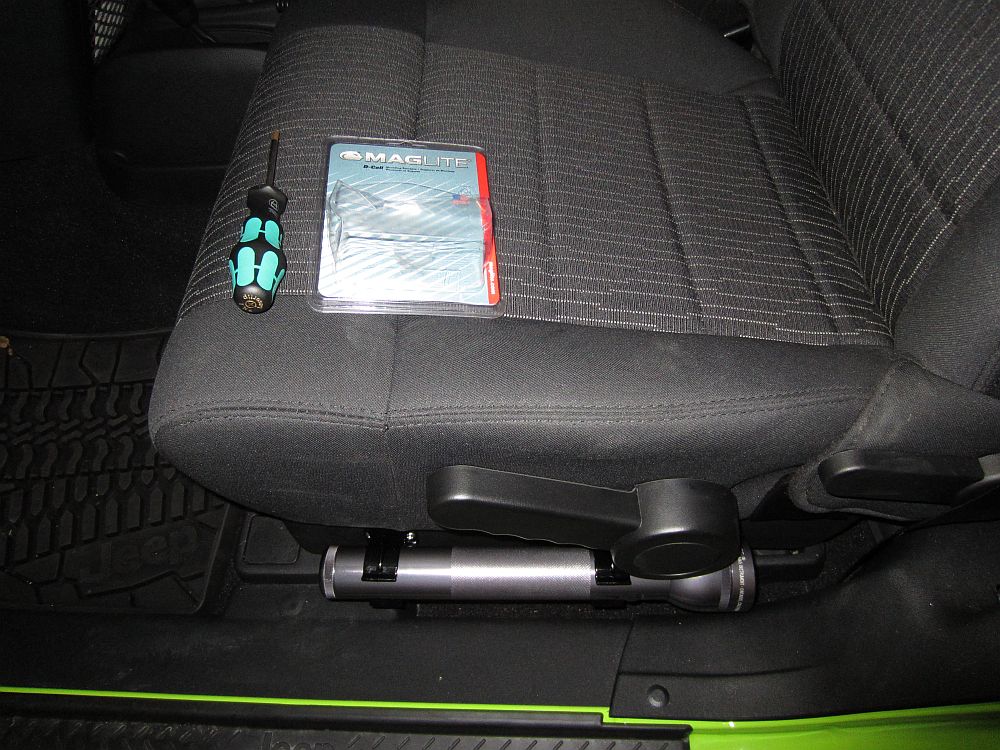
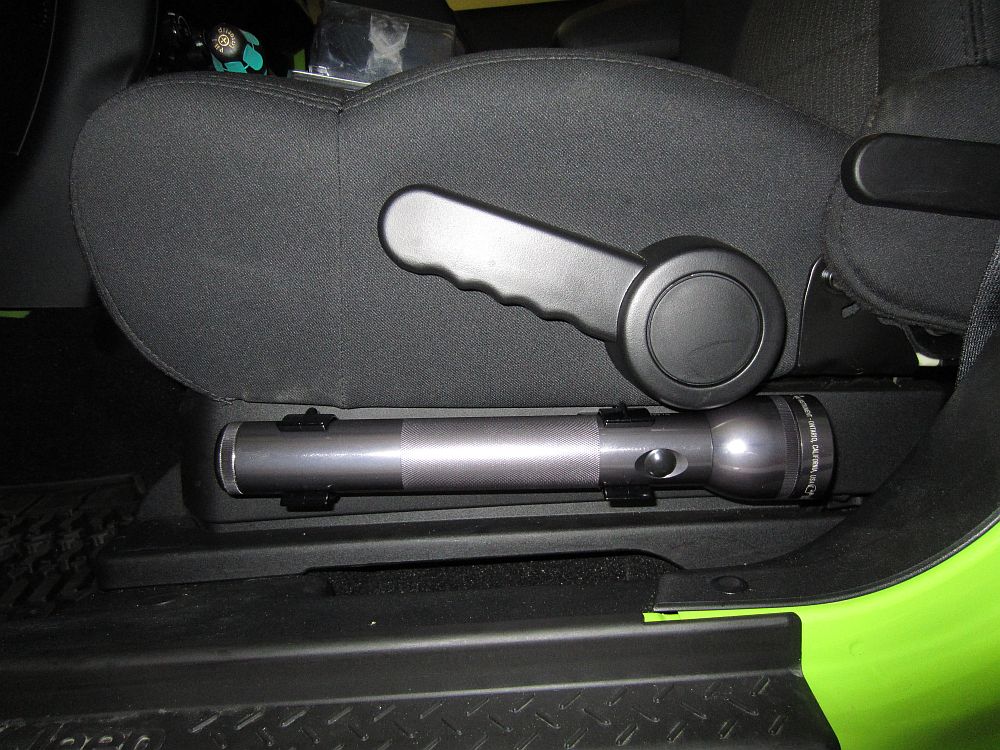
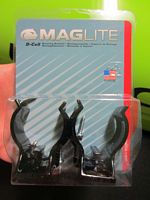
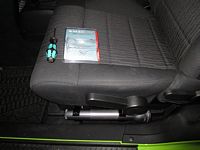
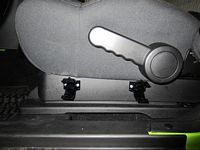
MagLite D-Cell Mounting Brackets (Model# ASXD026, P/N 108-000-426) installed to hold my 3 D-cell LED MagLite. Unfortunately for 2012, we don't have the seat metal rail to mount these on, just the plastic piece but even with the provided screws it seems to be sturdy enough. If it does not hold up I'll get some thin aluminum stock to put behind the plastic piece to act as a brace and provide something more for the screws to bite into. These mounts are cheap enough (~$5 on eBay or Amazon) that I may find some more places to put them that are out of sight.

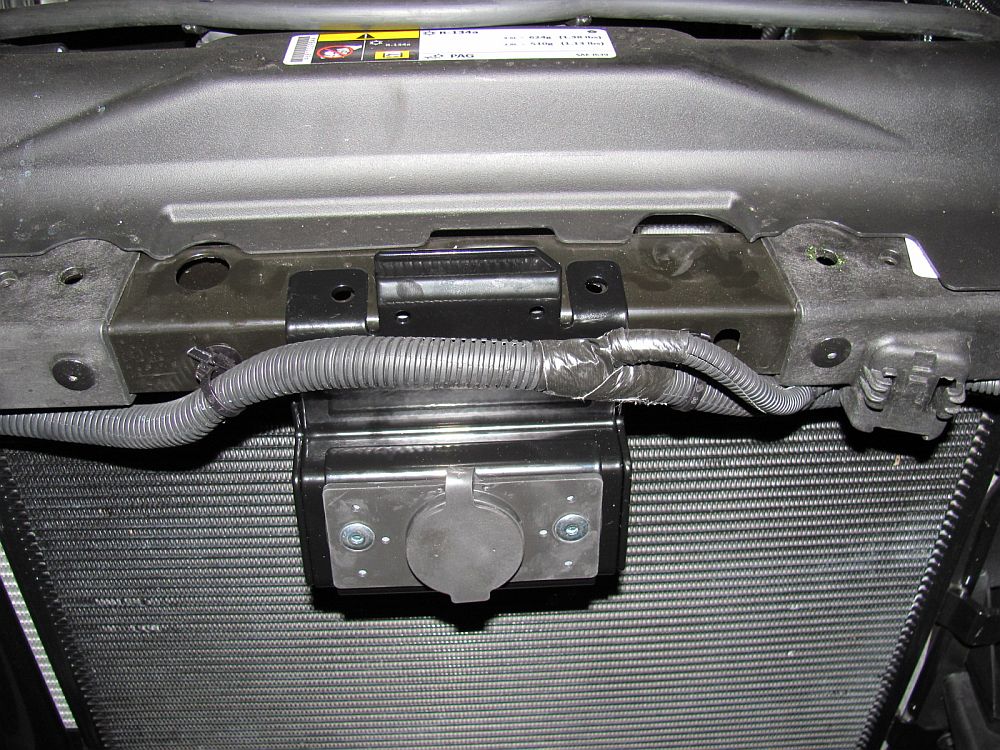
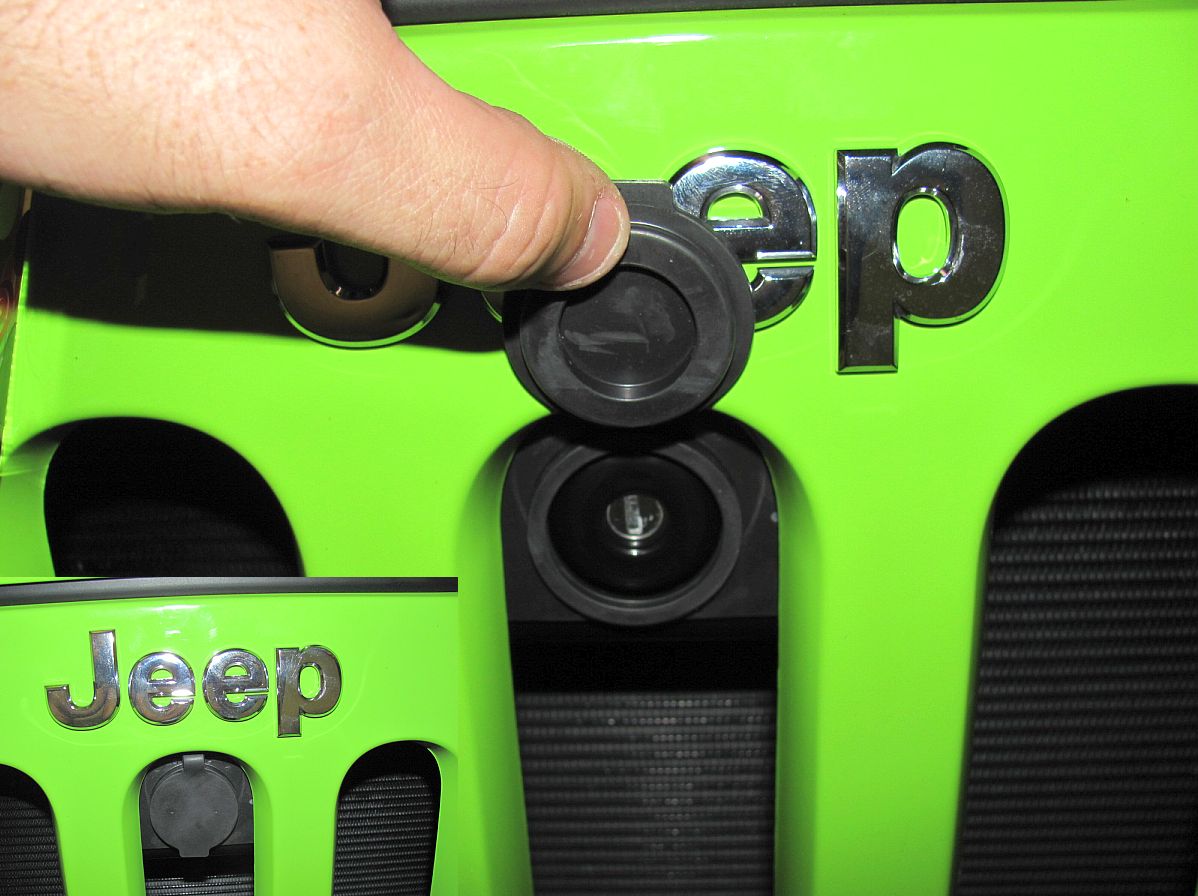
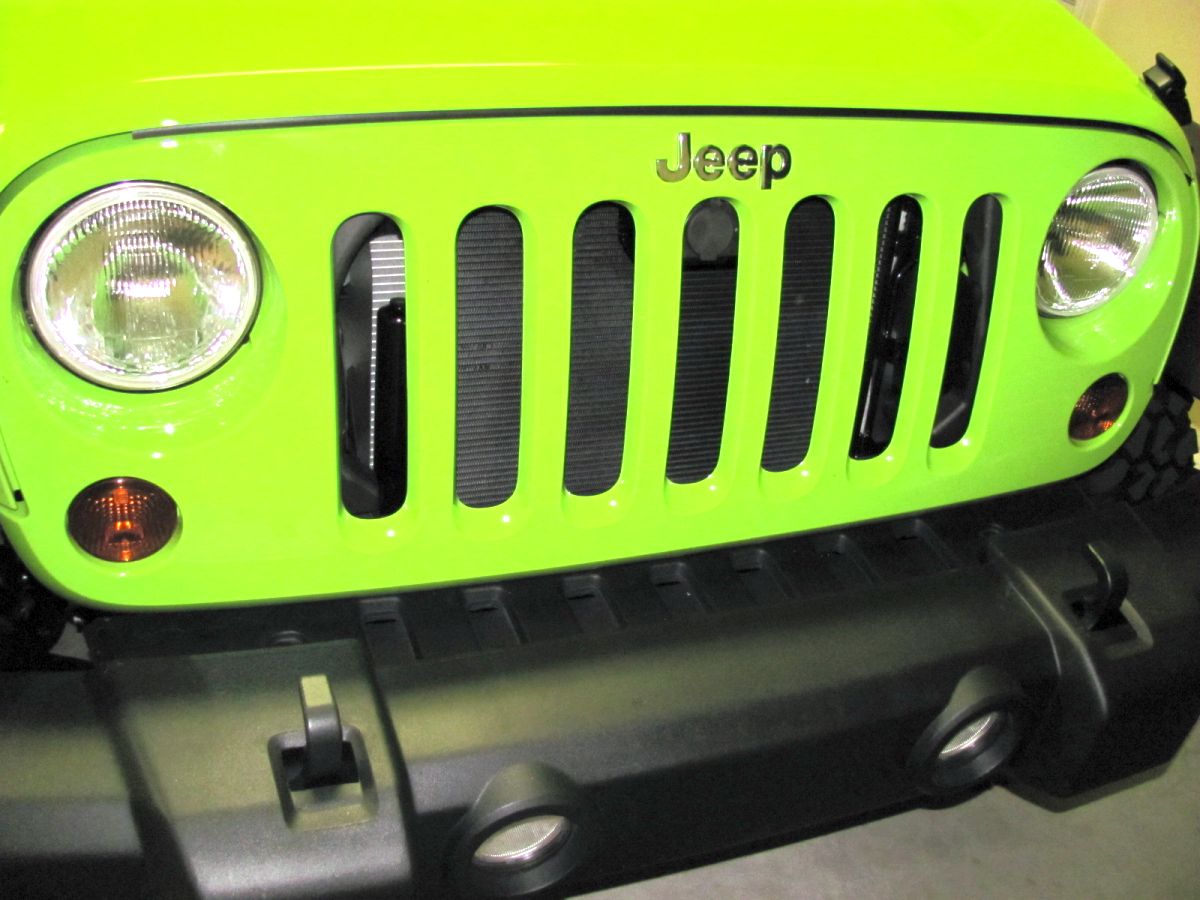
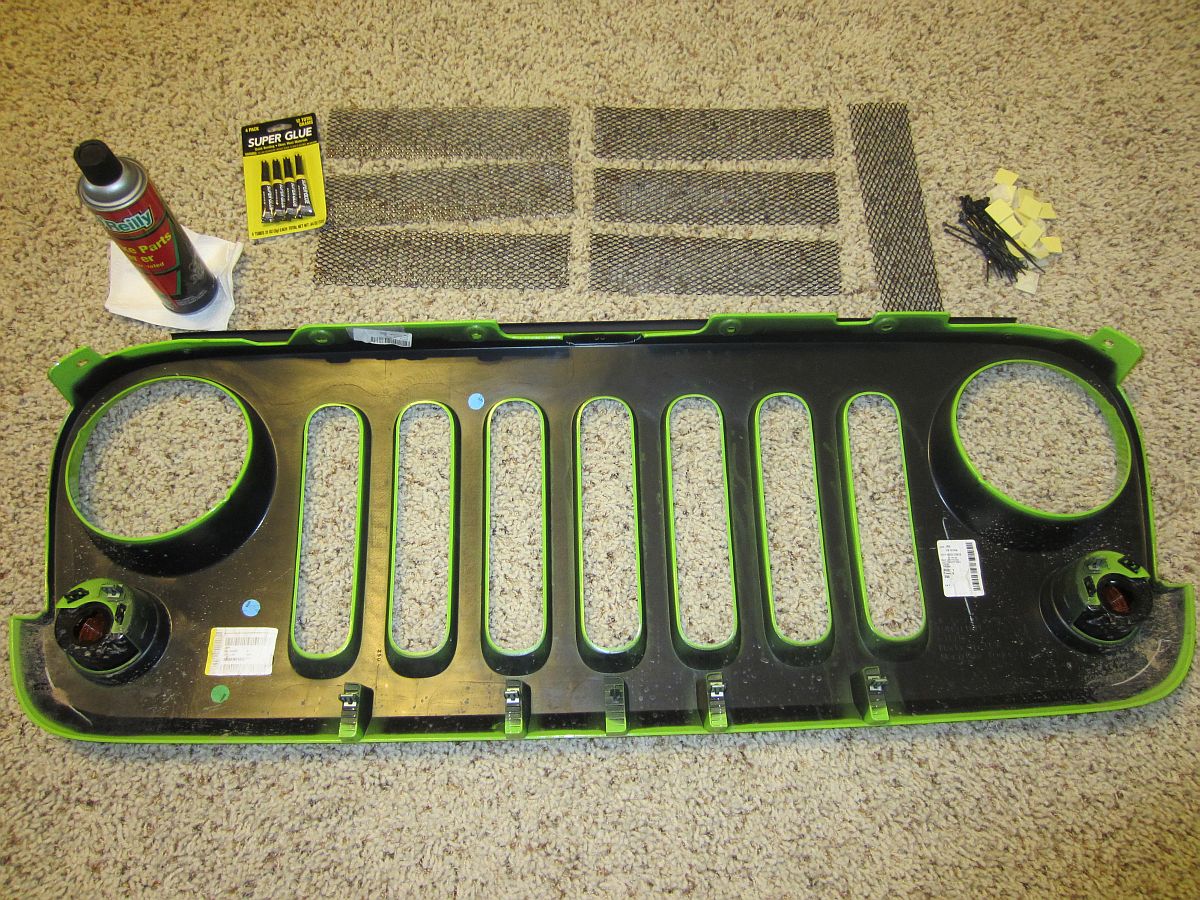
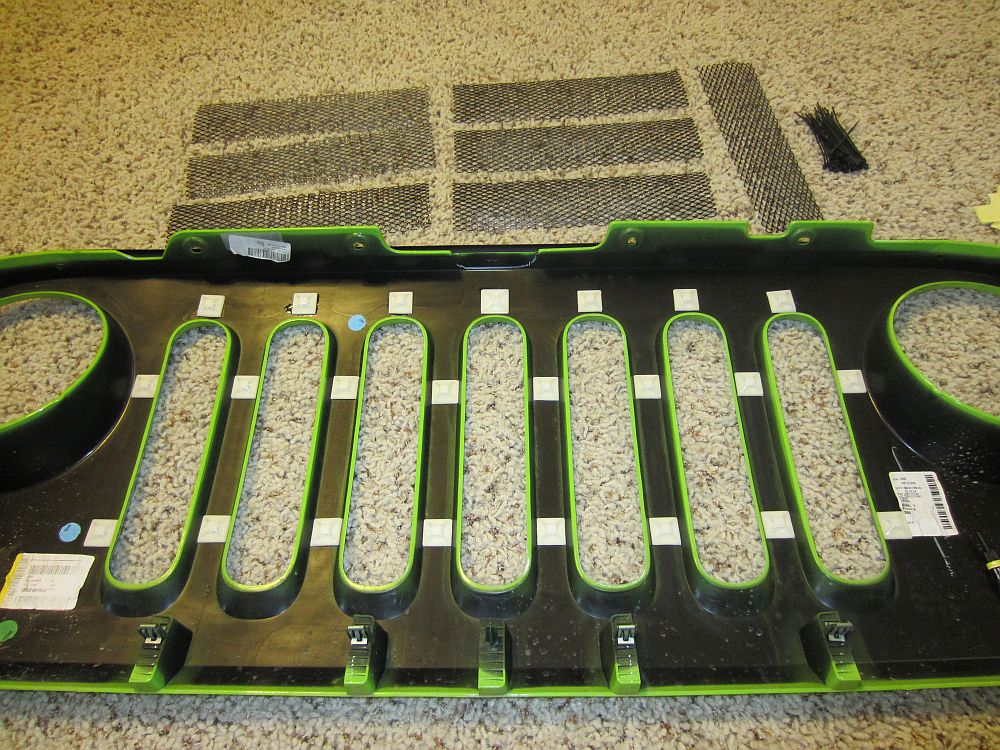
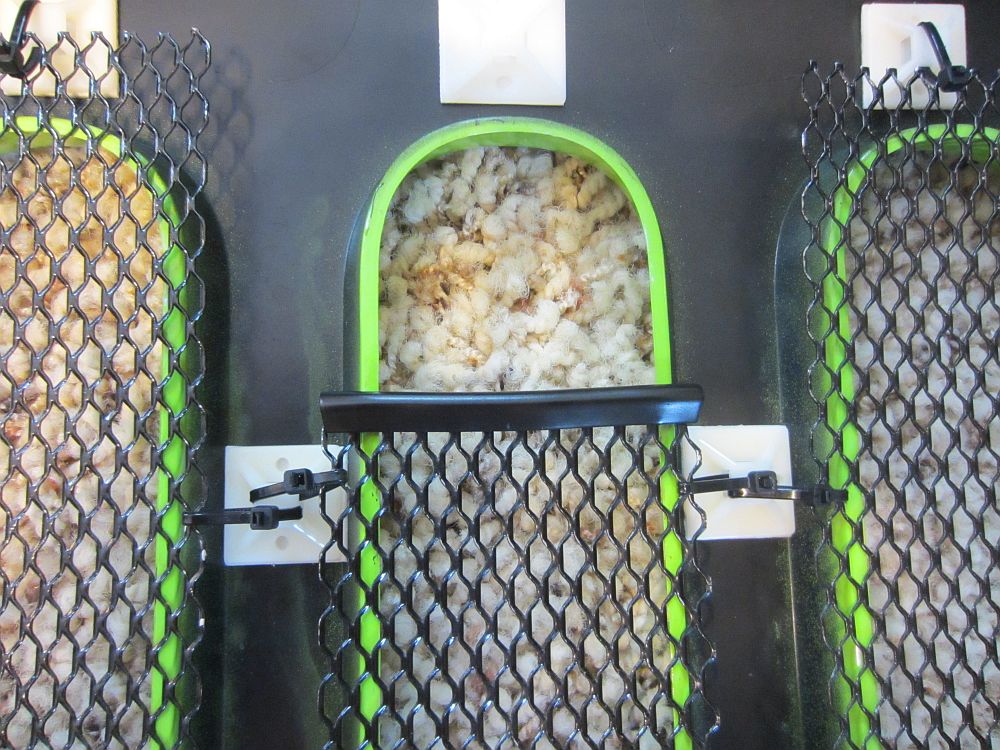
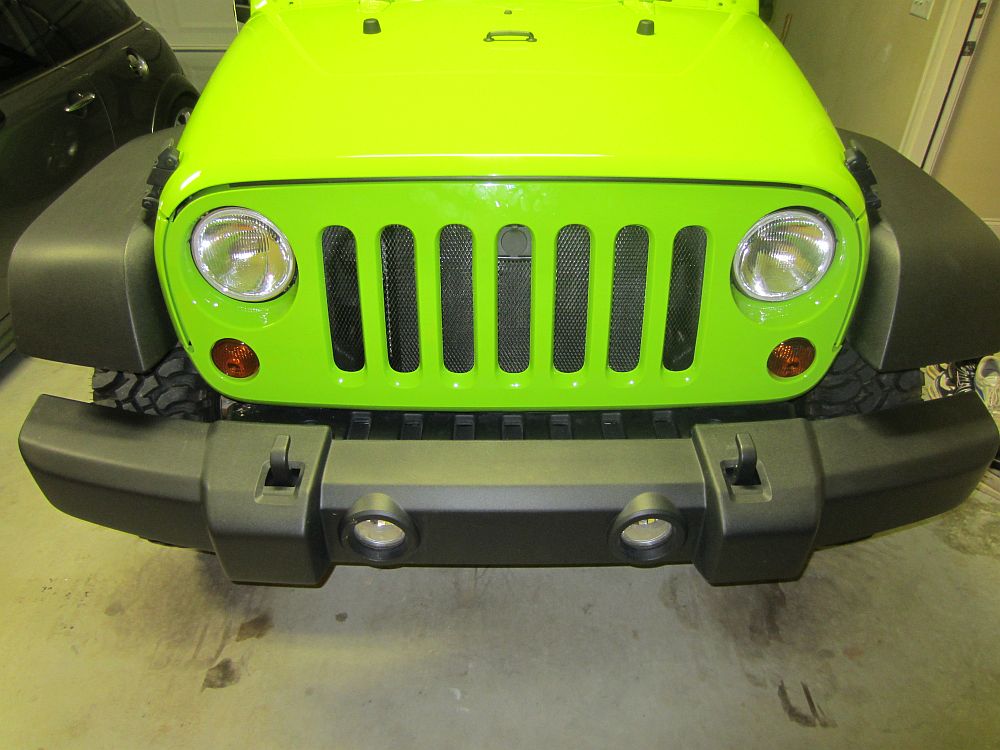
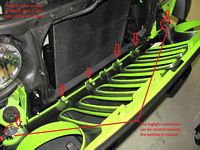
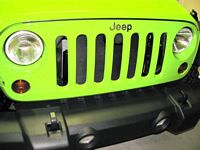
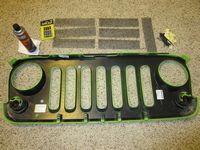
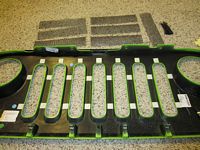
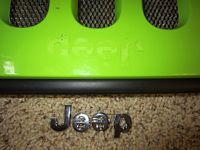
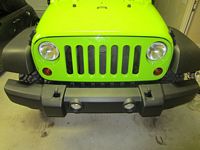
Automotive Authority Grill Inserts installed and JEEP logo removed. I purchased the inserts mainly to prevent large objects from damaging the radiator but they actually make the front end look a little cleaner too.....JEEP emblem just got in the way when cleaning so it's gone, a little fishing line used to saw it off and some WD40 to clean up the adhesive, then washed and waxed.
The insert kit comes with zip-tie anchors but at a minimum superglue should be used on the double side tape to attach these, optimally remove the double sided tape and use epoxy. I almost forgot about my hood lock so I cut the middle insert and used some of the edging you buy at the McParts store to clean the edge up and prevent my wife slicing herself. I didn't mind spending a little more for the kit since the pieces were already cut and came with almost everything needed......but I wish they had taken time to paint them evenly and waited until they were dry before packaging them up. So I may get to re-glue them if the quick SuperGlue method is a fail and/or if I decide to repaint them, but for now it works. [EDIT] Do yourself a favor and don't install anything like this. This was later removed because I got tired of re-glueing the zip tie anchors, real Jeeps don't need mesh over the grill.

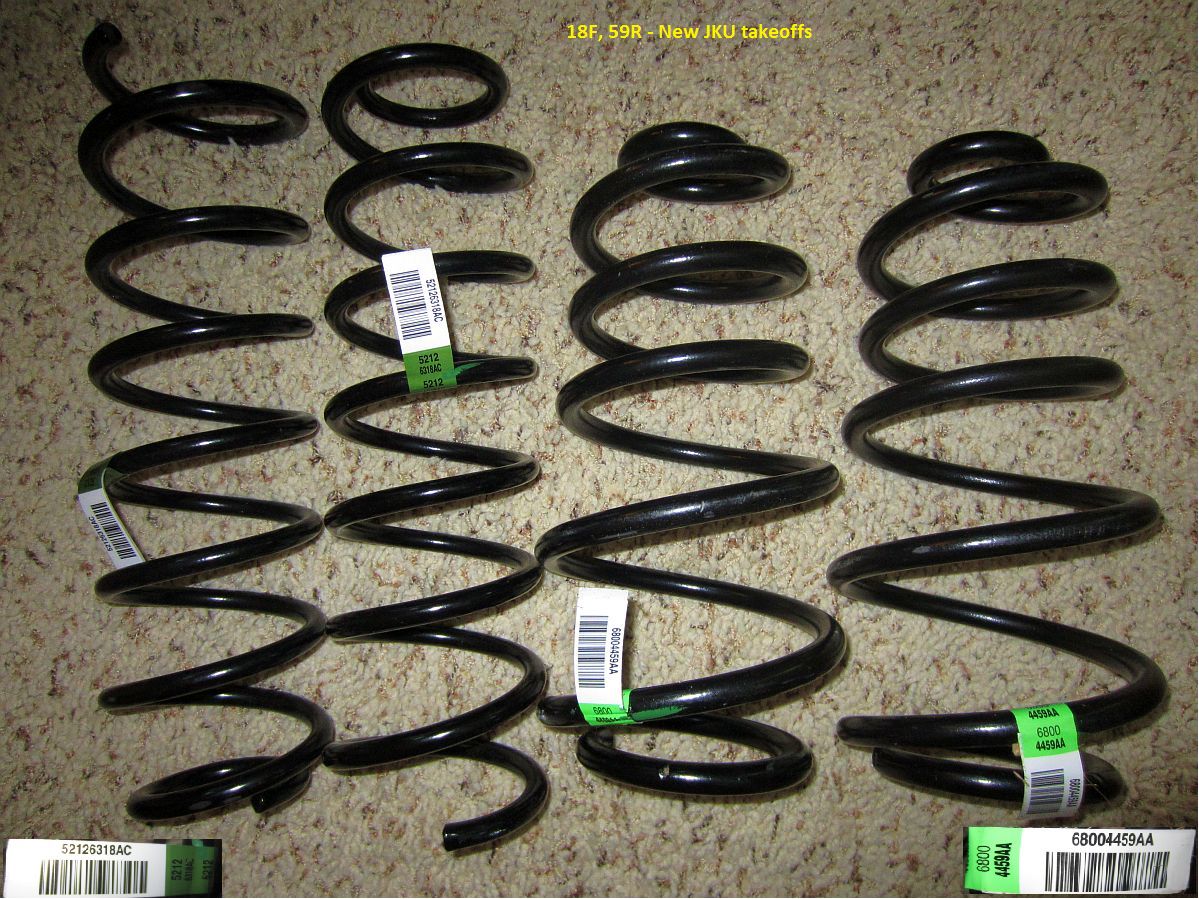
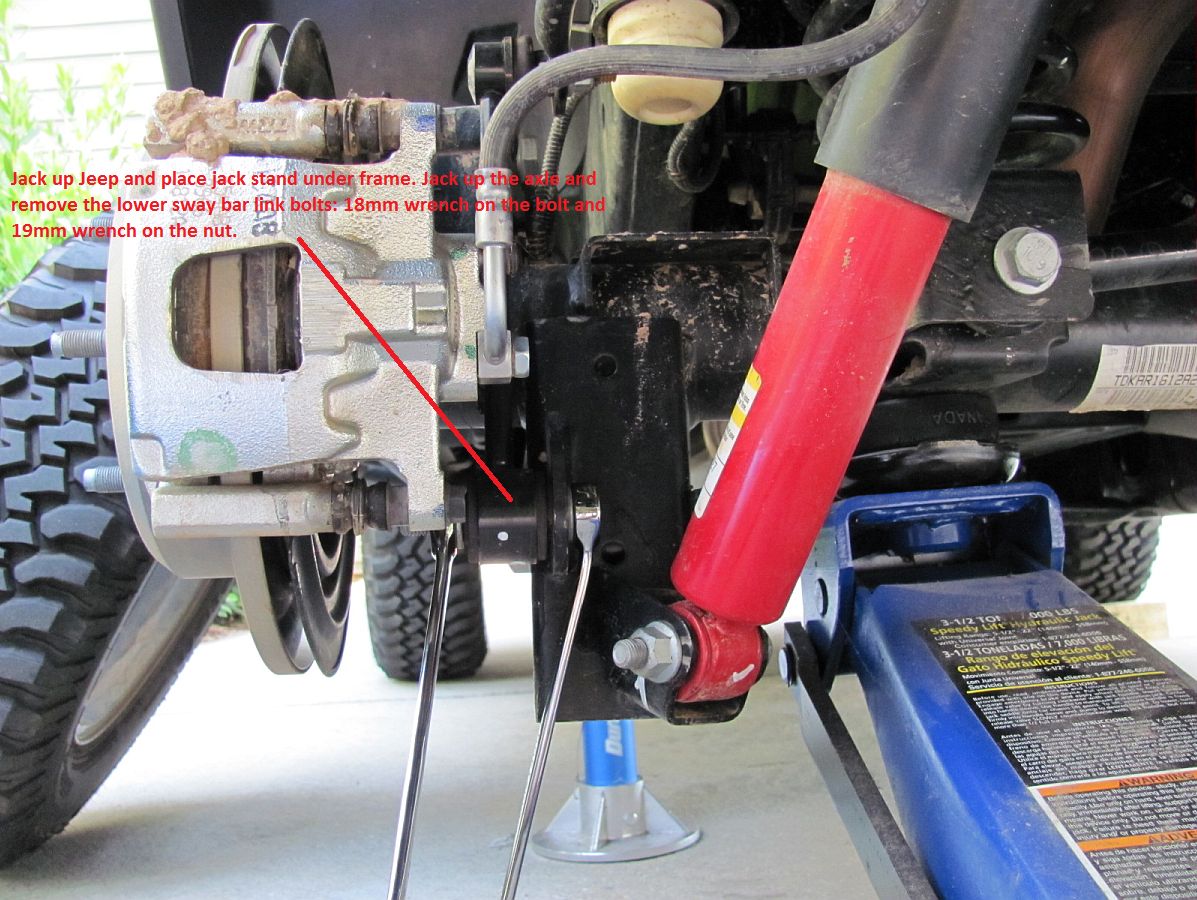
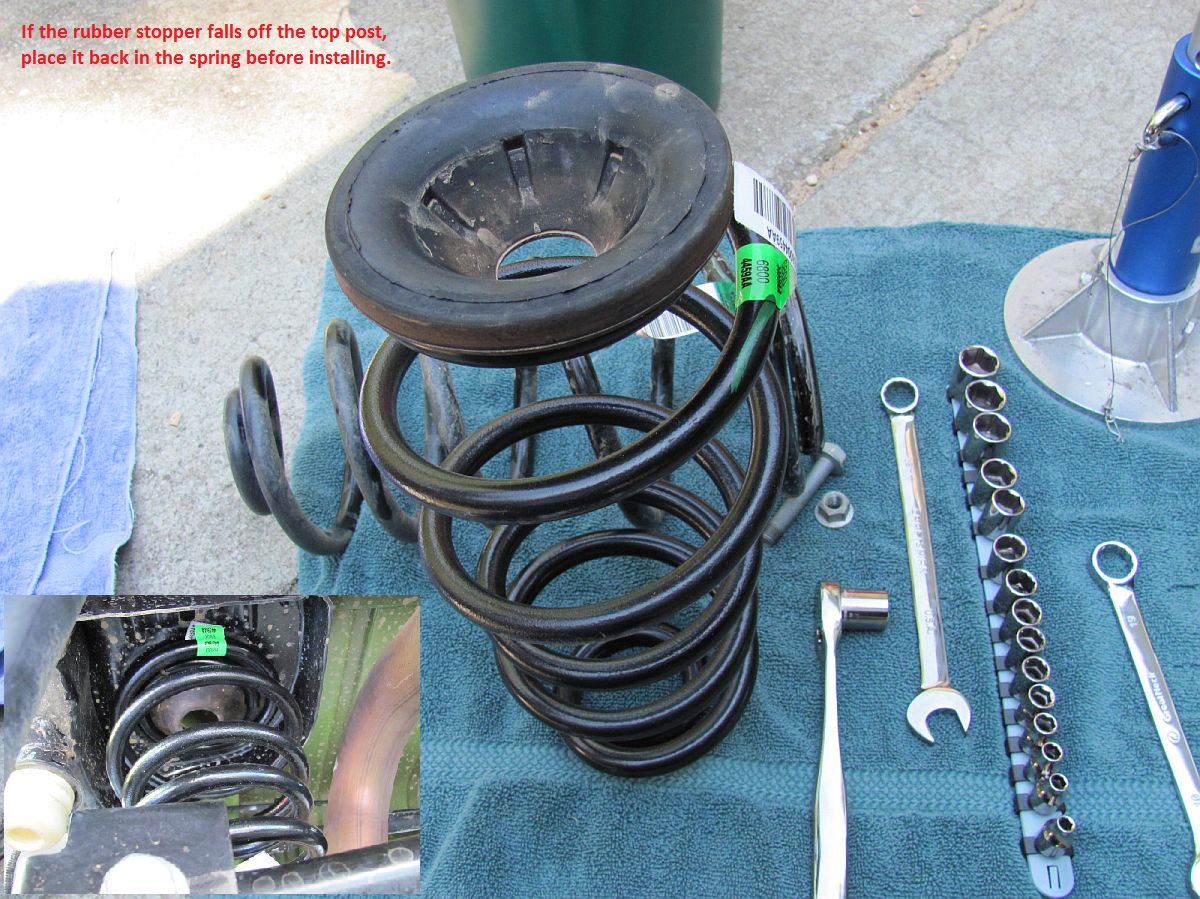
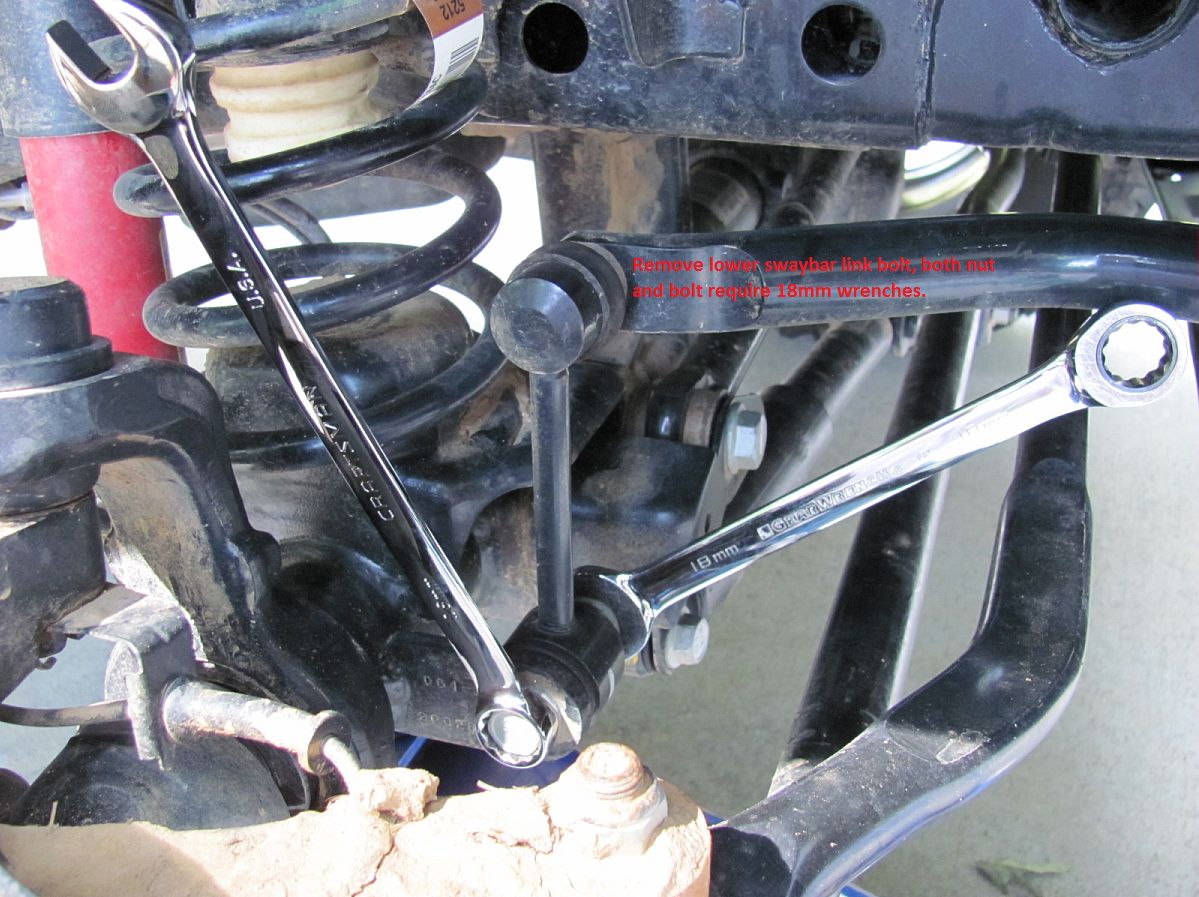
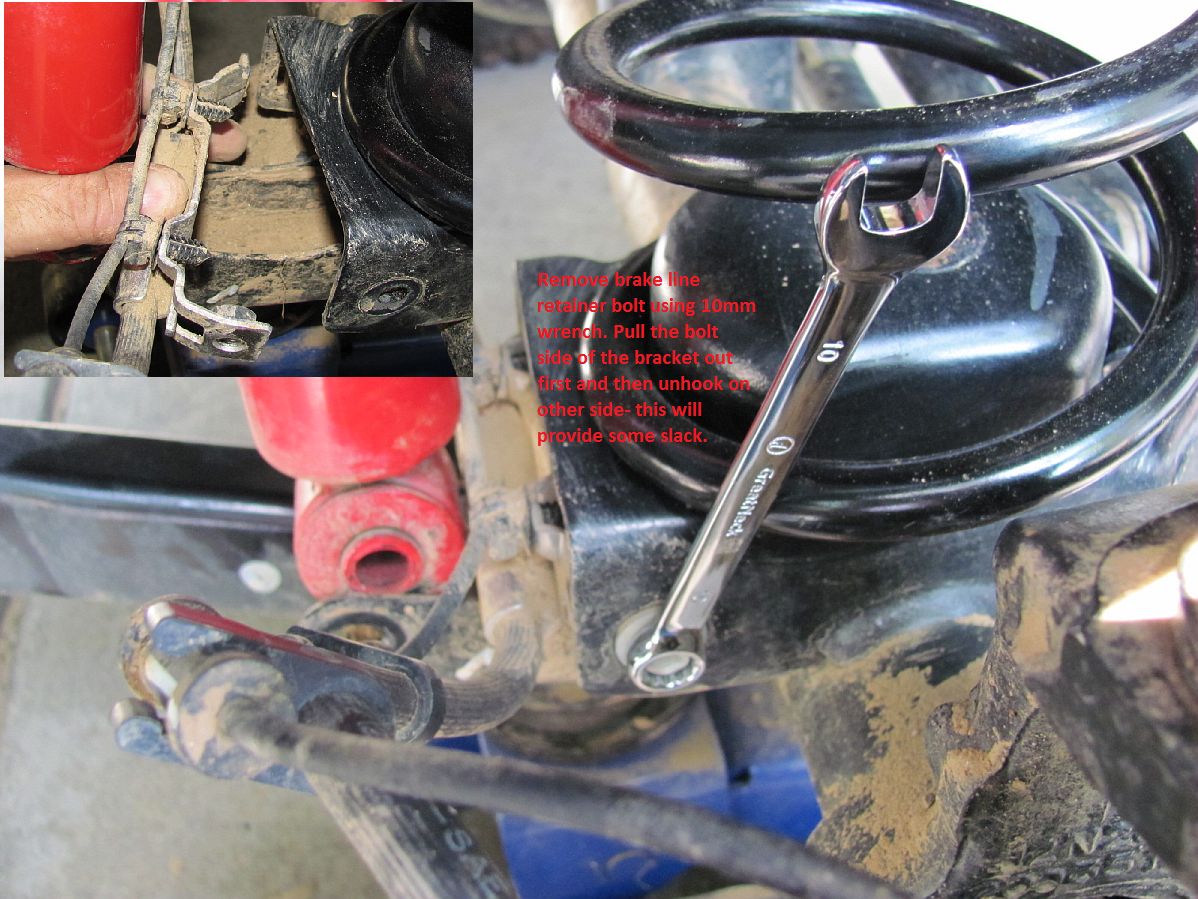
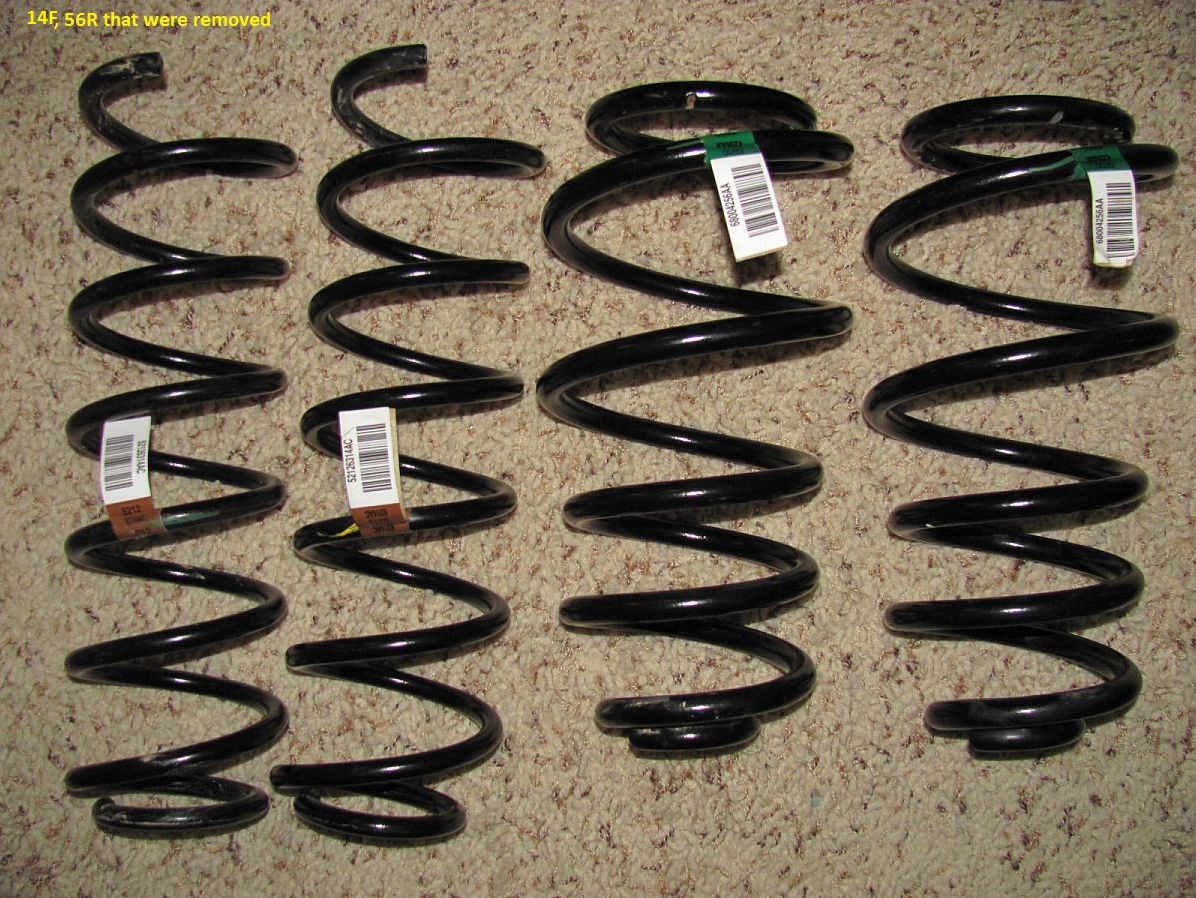
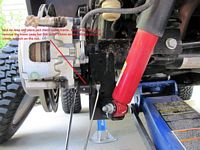
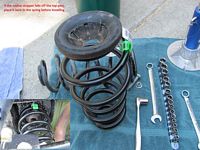
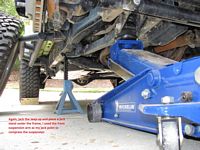
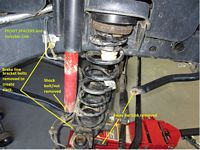
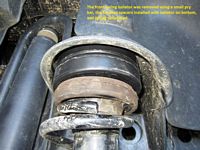
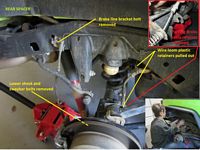
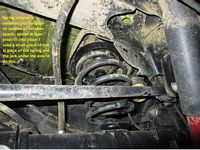
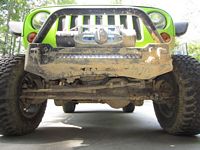
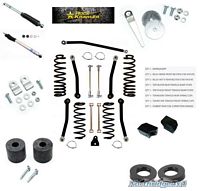
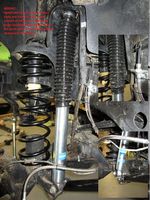
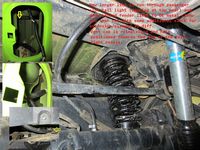
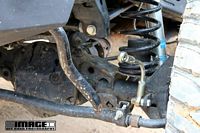
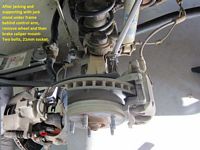
With ACE bumpers and a winch planned for the near future, I decided to pickup some JKU springs (higher rates: 18F, 59R vs. OE 14F, 56R). My thoughts were that these had a higher spring rate for the JKU and would counter the added weight of the winch and ACE bumpers. These were a cinch to install, just take your time and note the brake lines and wiring- don't allow them to get tight. I was close in the rear but OK without removing the caliper to free up some slack, in the front the only option was to remove the brake line bracket as it would have been too tight to drop far enough to allow the spring to come out. Keep in mind with the brake lines and wiring that you may have to push the axle down while removing/installing the spring so allow some extra inches of slack for that. Also, I was sure to chock the wheels on the opposite/non-jacked-up end. Make sure the springs are positioned the way they were removed and note any stops on the lower spring perch where the end of the coil should be placed.
Prior to installing the JKU springs I measured 17"F and 17.50"R from ground to bottom of rock rail, after JKU springs I measured 18.25" all around so it seems to have leveled it out for now. I may end up with some spacers up front if the winch weighs enough to drop it back down lower than the rear. These springs were new JKU takeoffs I found on eBay for $100 shipped so the risk was minimal if the results didn't meet expectations.
STANDARD DISCLAIMER: Information and pics are for informational purposes only, any use of this for your execution are at your own risk.

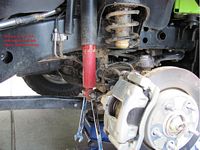

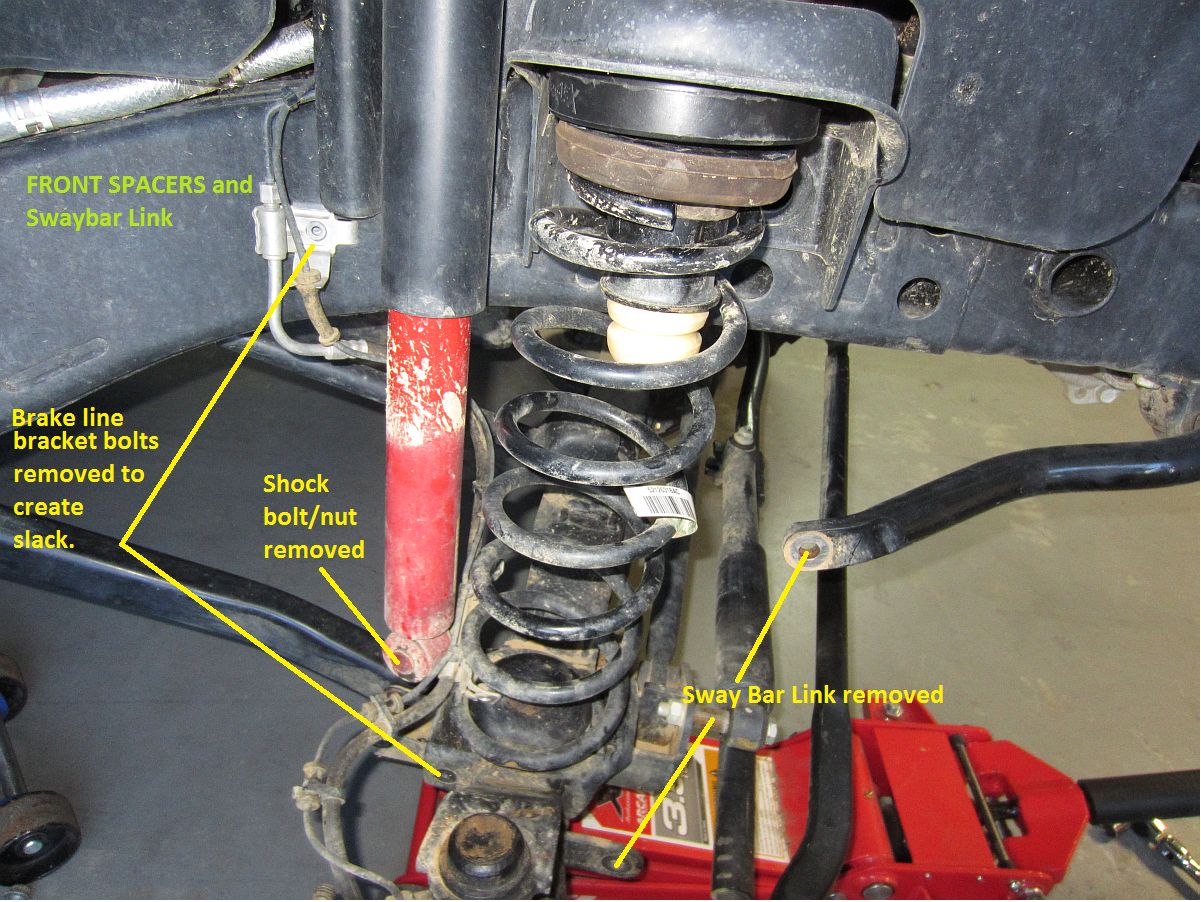
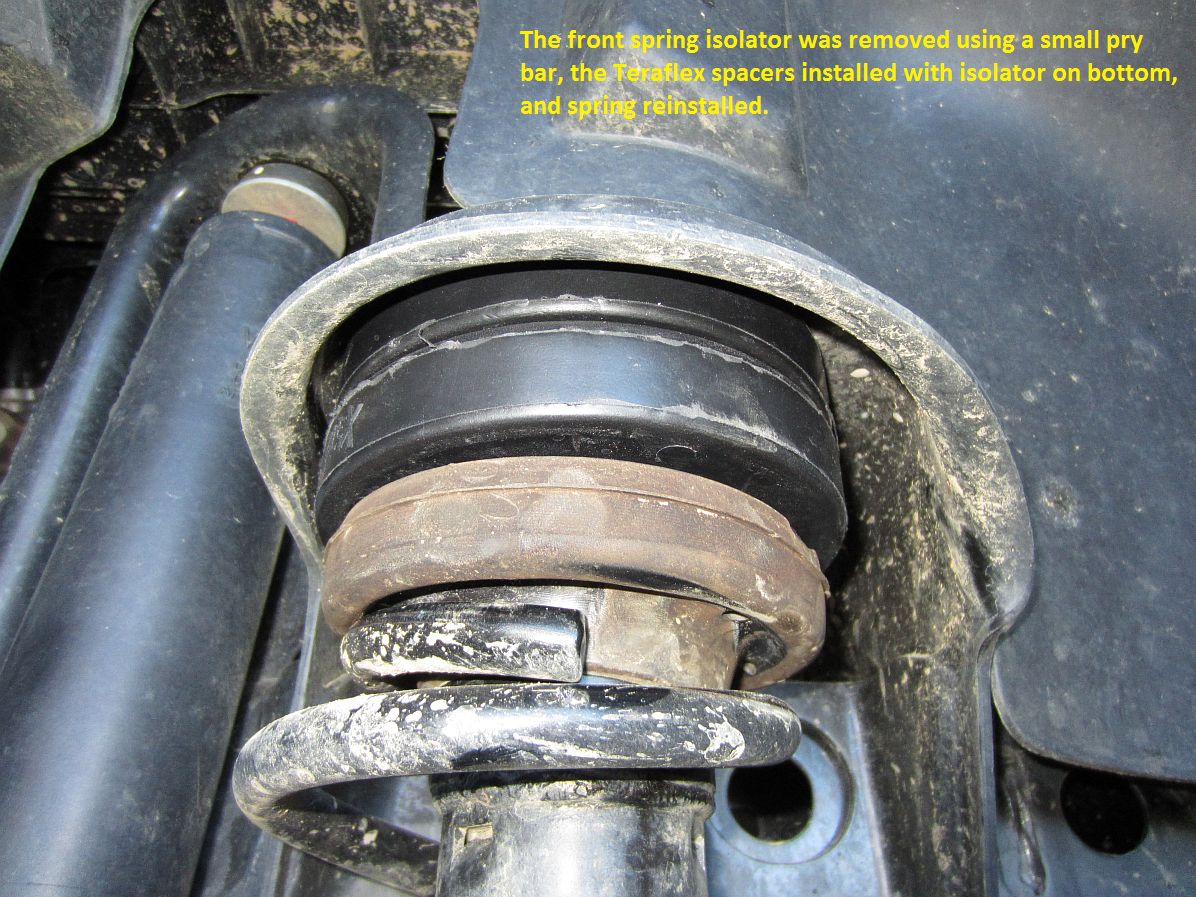
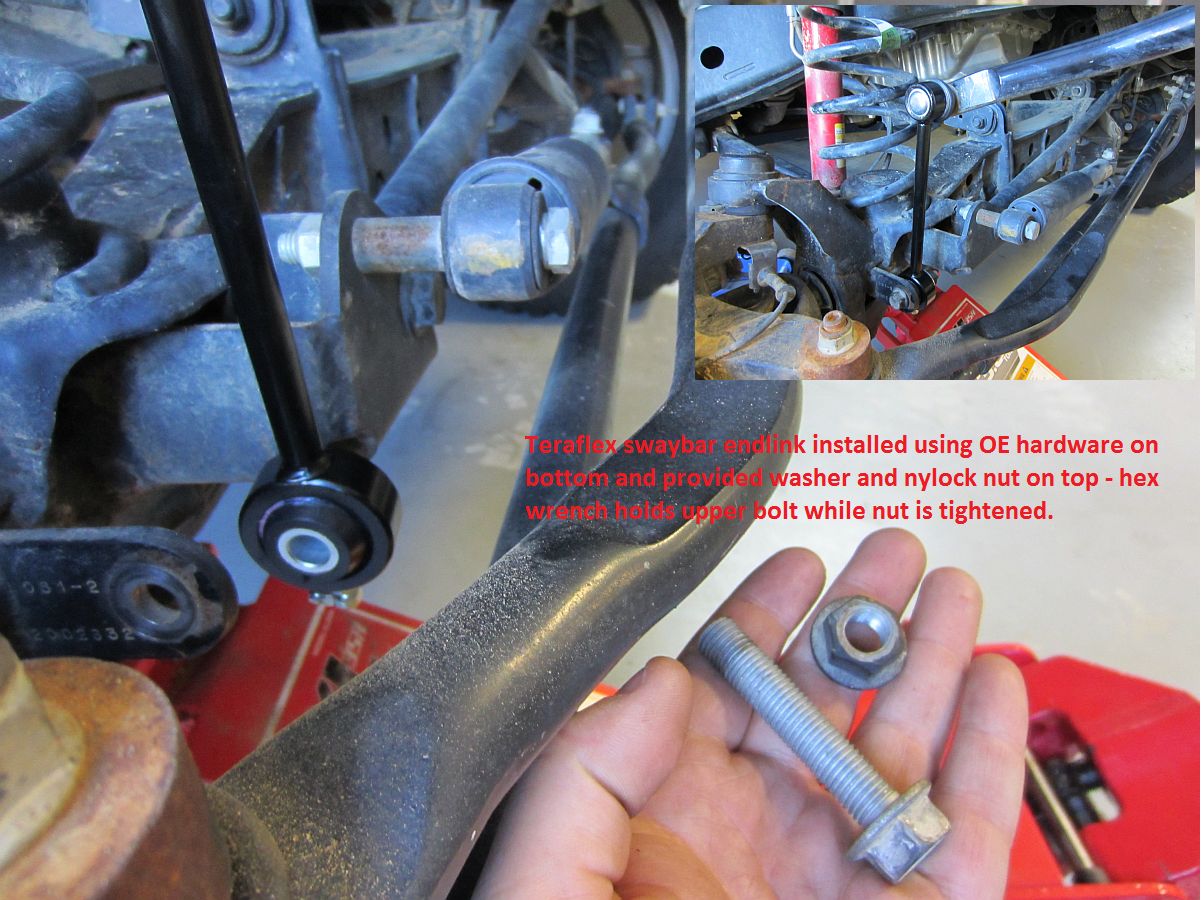
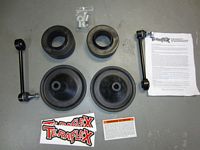
[UPDATE] A year after installing the winch, I decided the Jeep needed something in addition to the springs installed above. The Teraflex Leveling Kit was chosen and installed, installation instructions HERE (performance leveling kit instructions HERE can be used to fill in some of the gaps along with my pics below).
This leveled the Jeep and raised it a bit to clear slightly larger tires in the future, paired with the already installed JKU springs (18/59) this should be perfect for my wife.
Lots of good mods installed in this batch, details below and in pics:
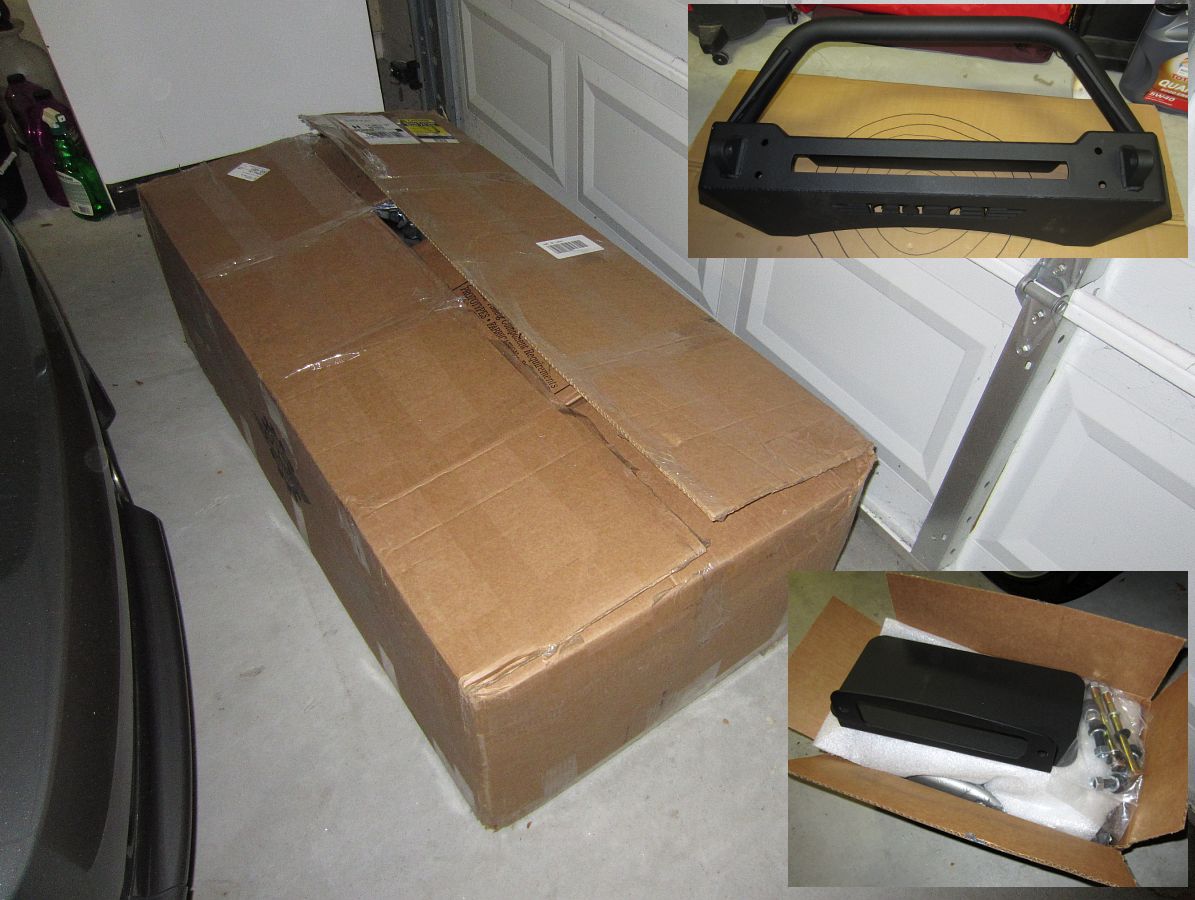
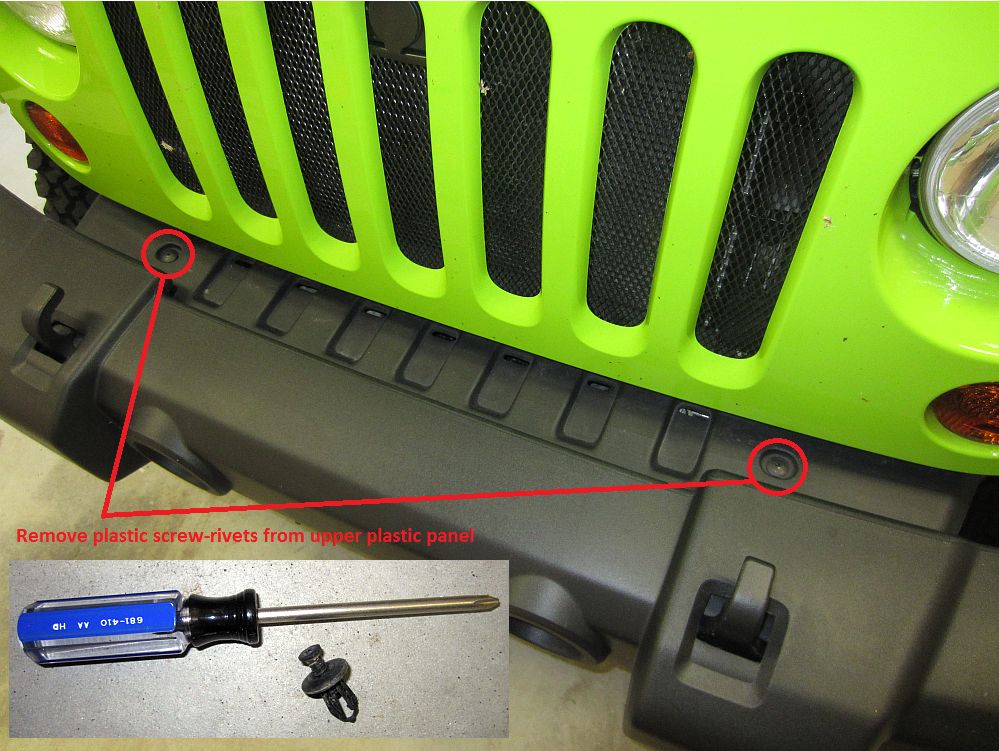
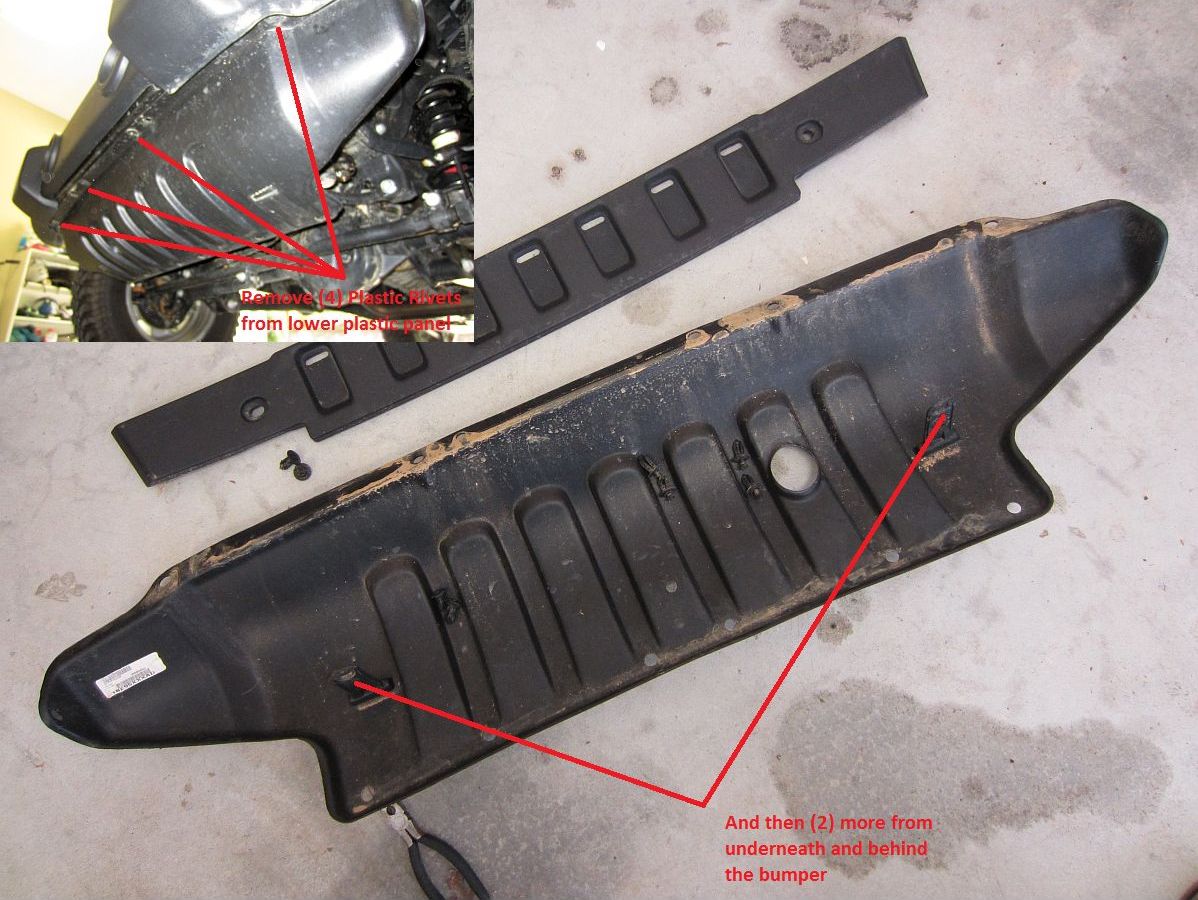
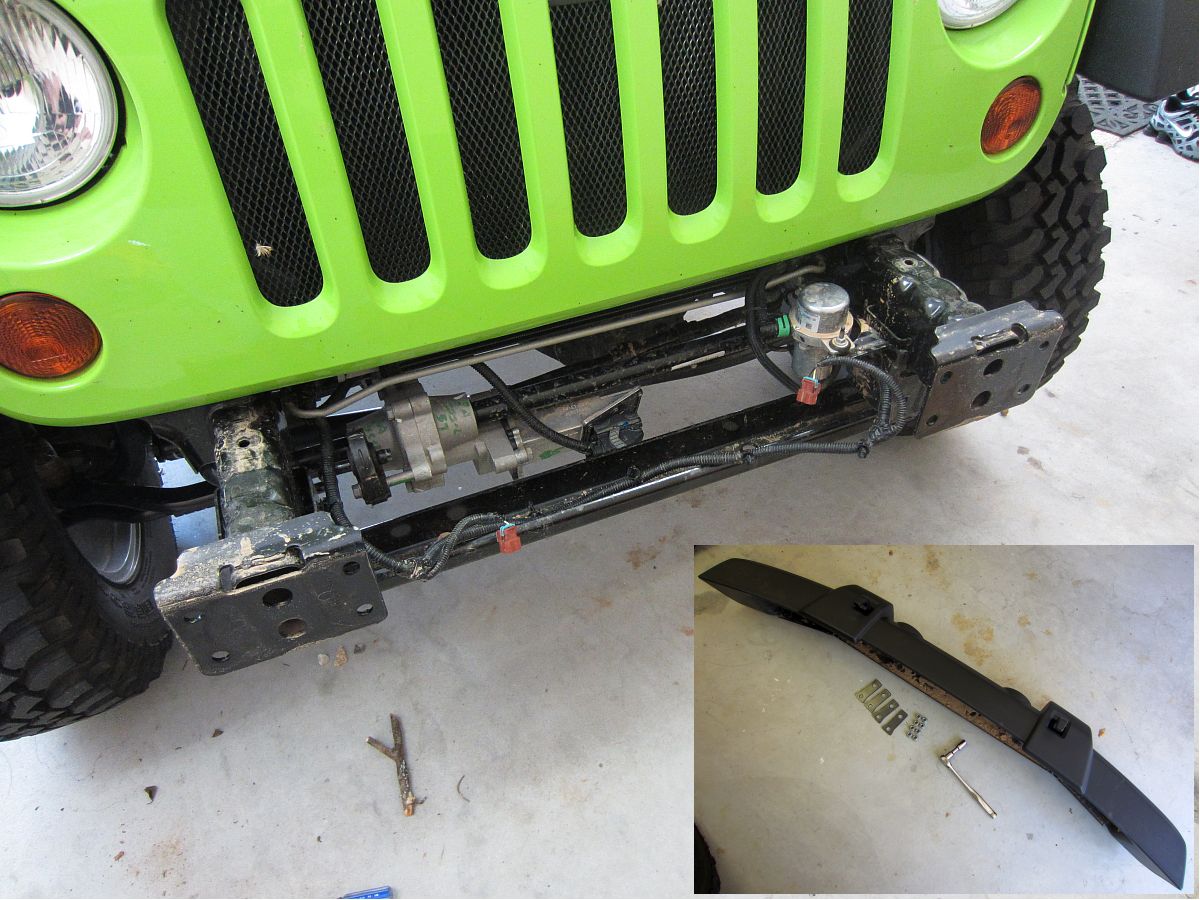
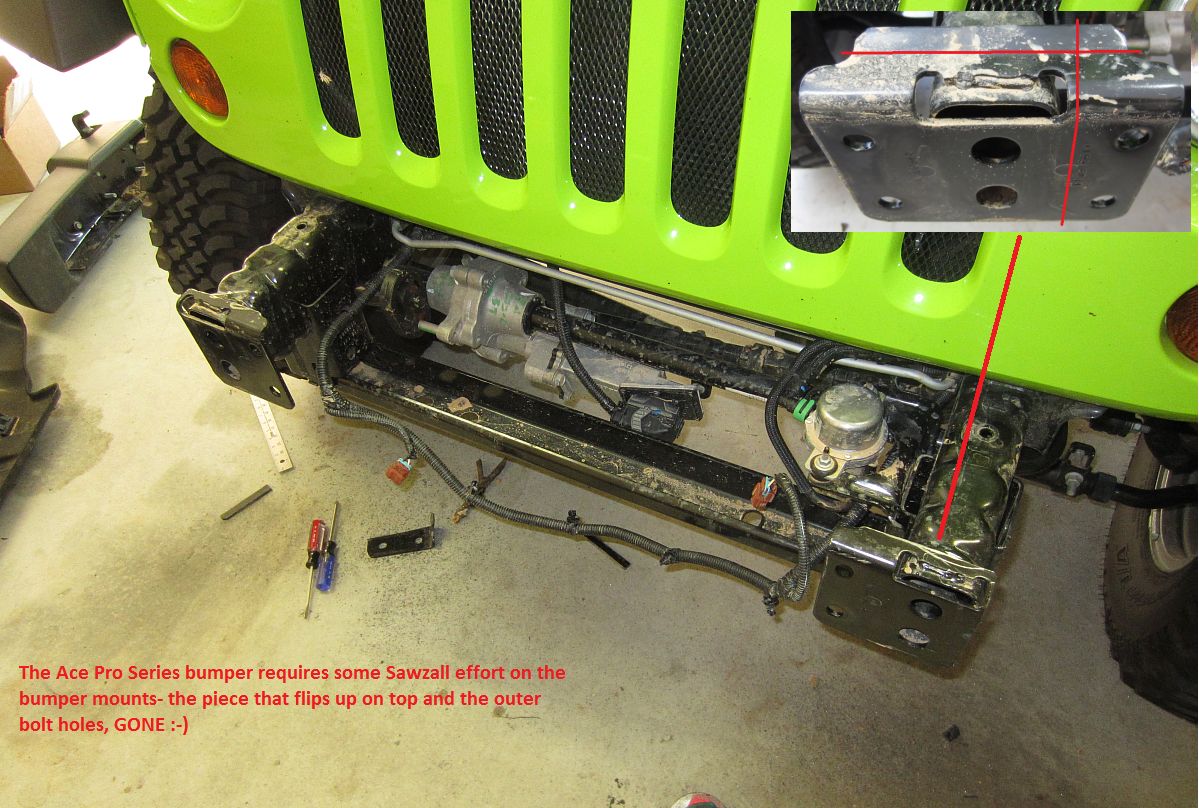
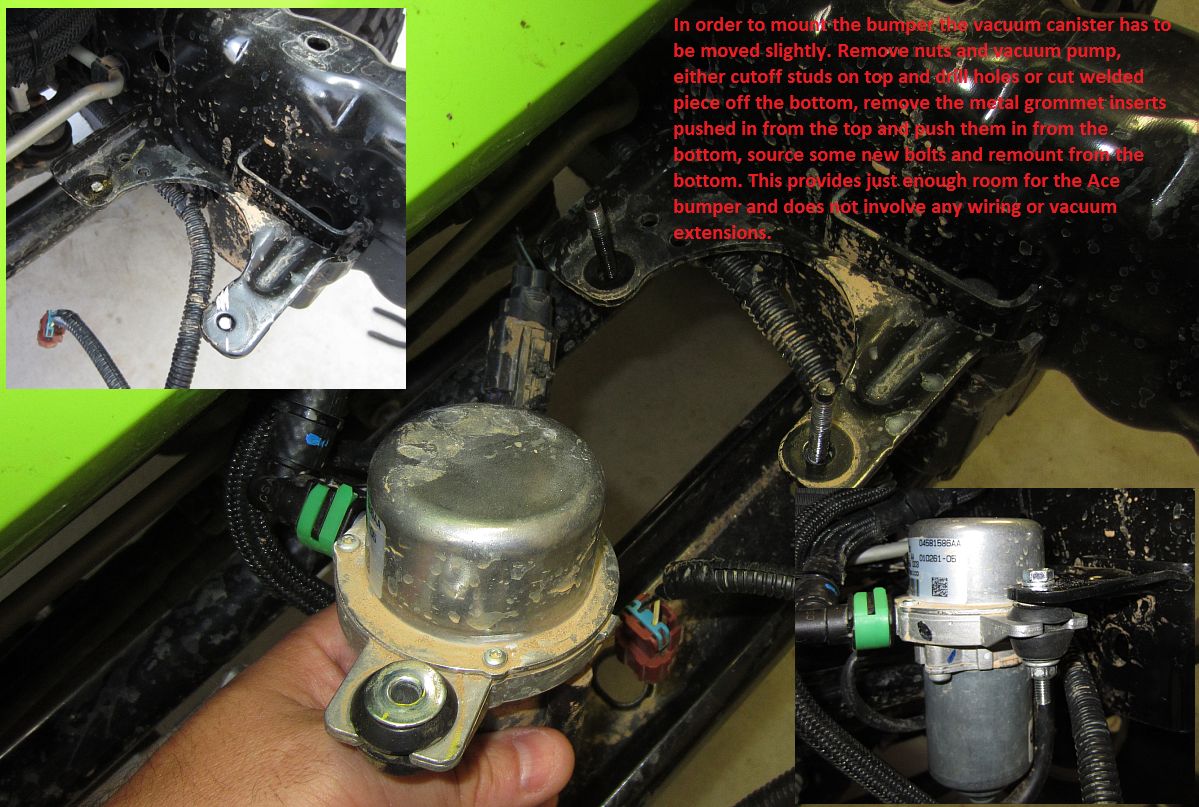
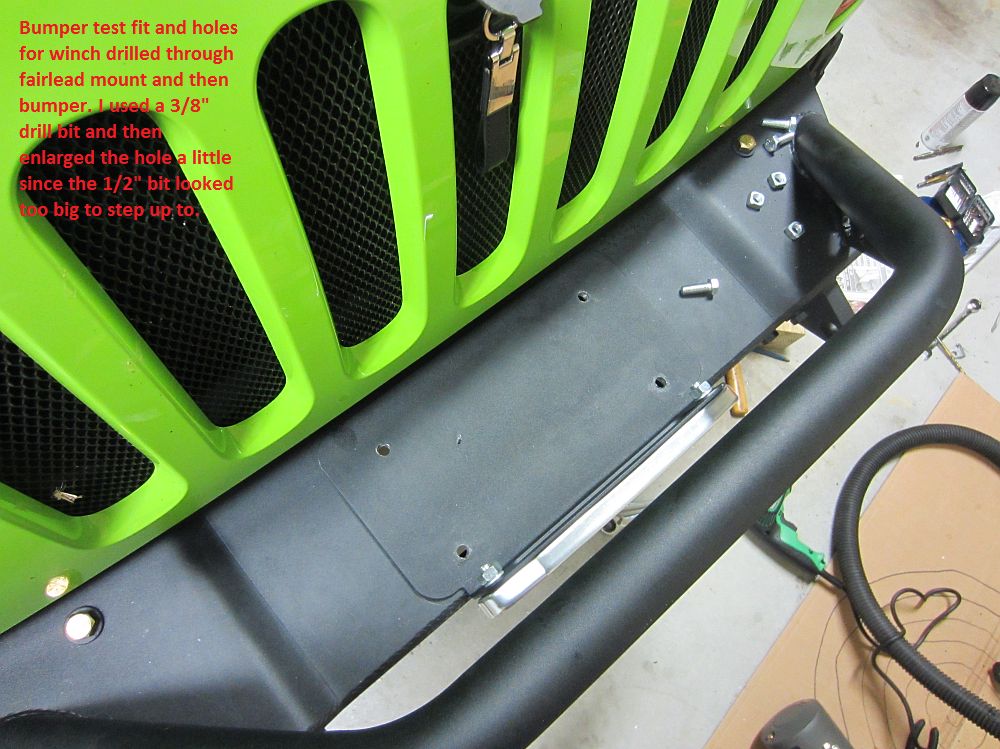
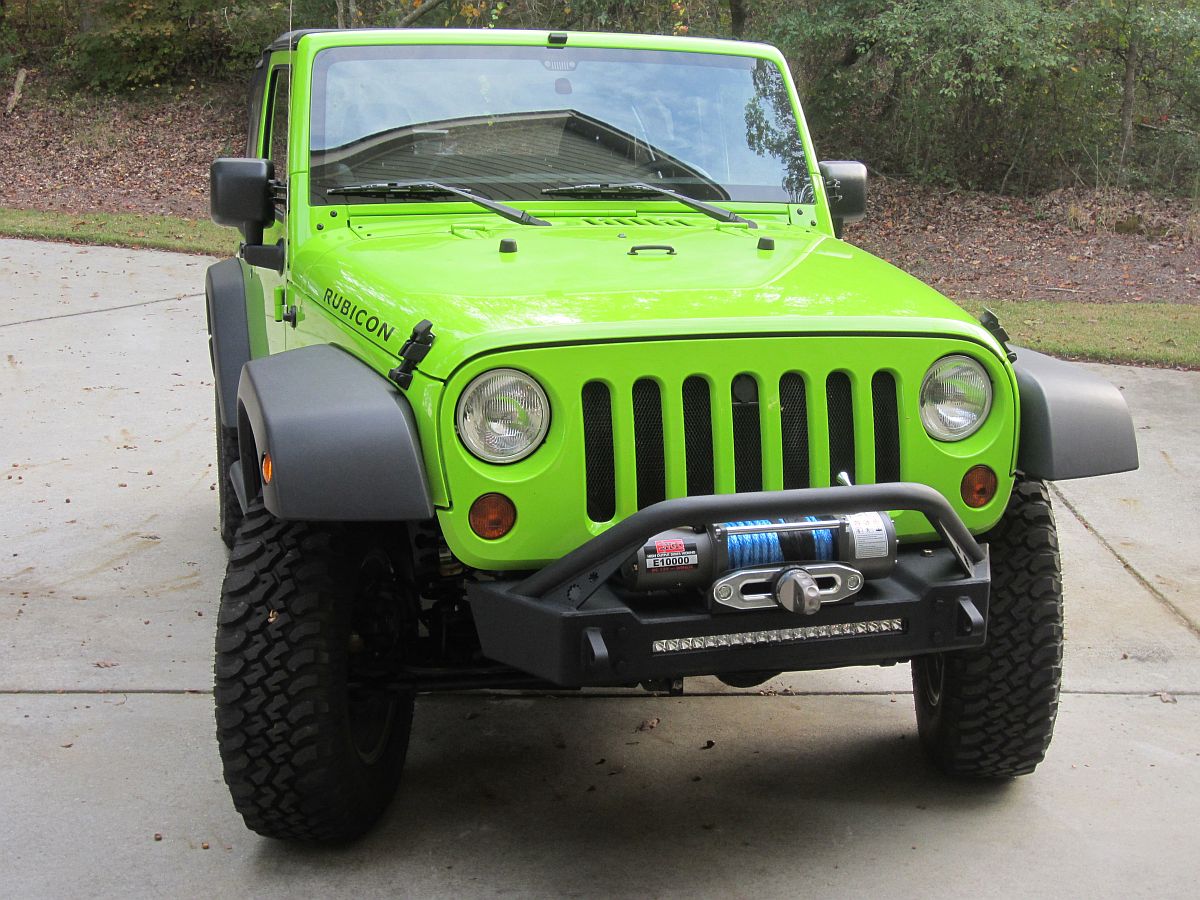
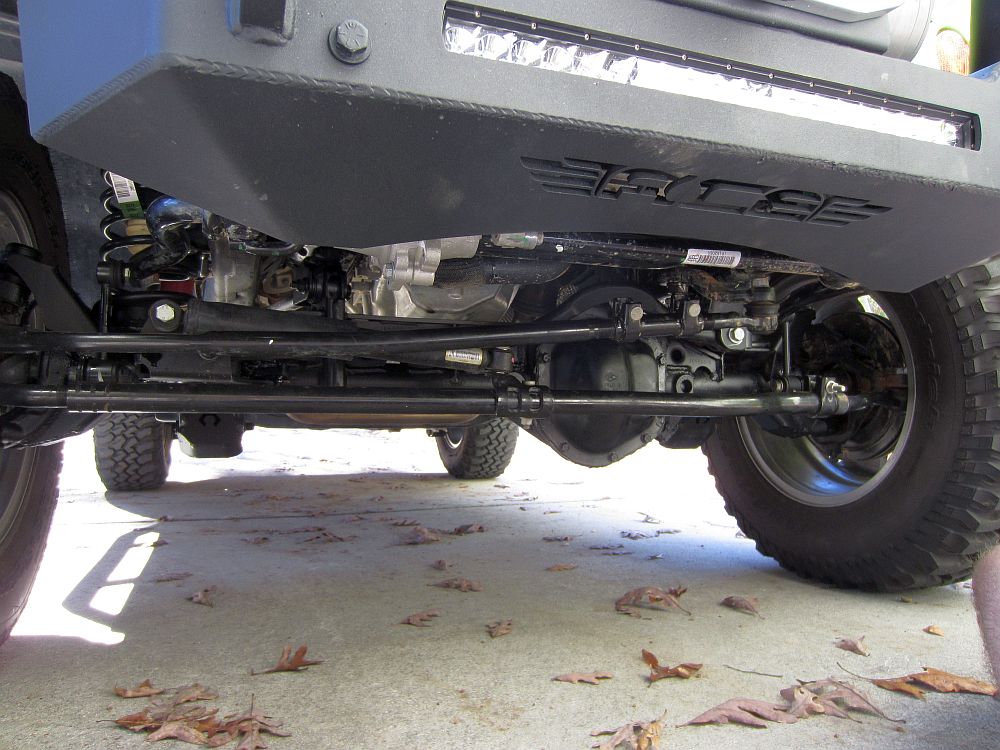
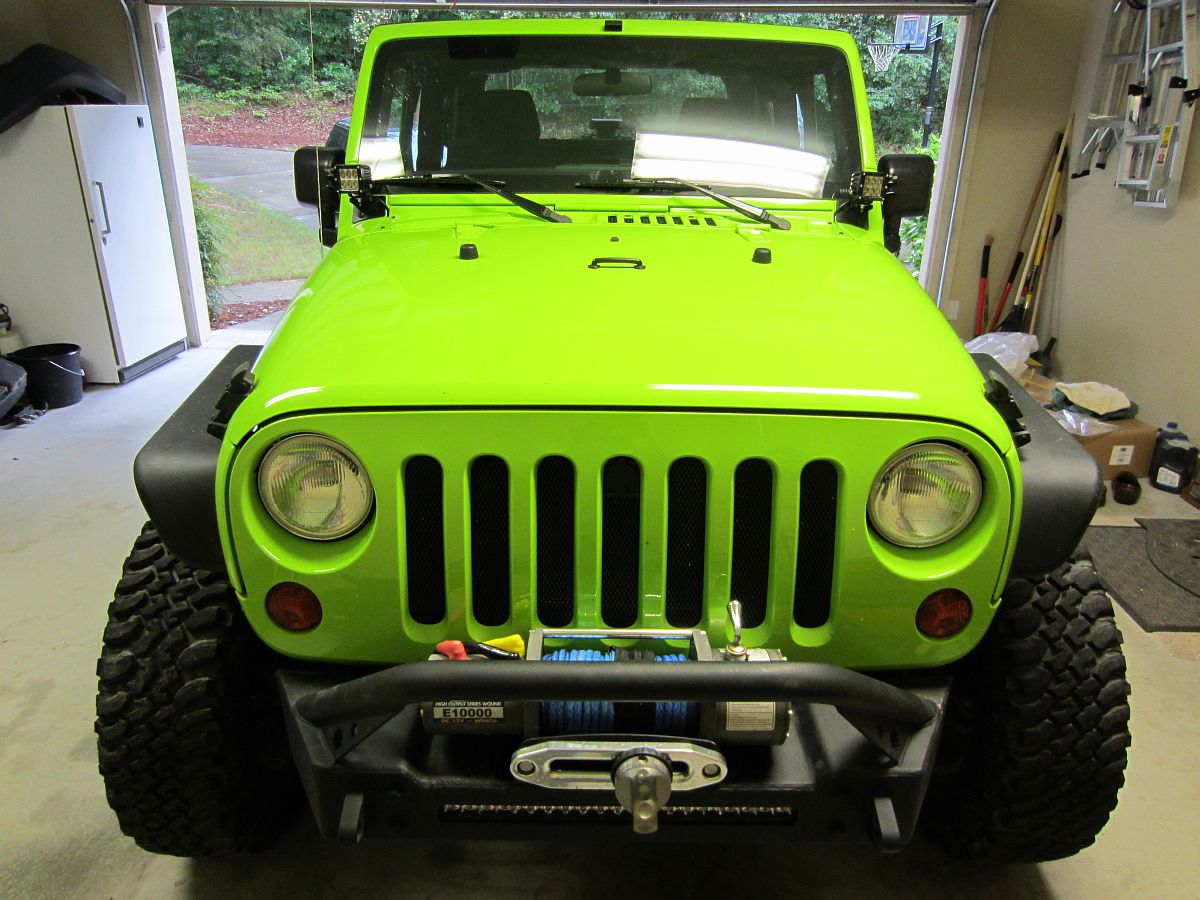
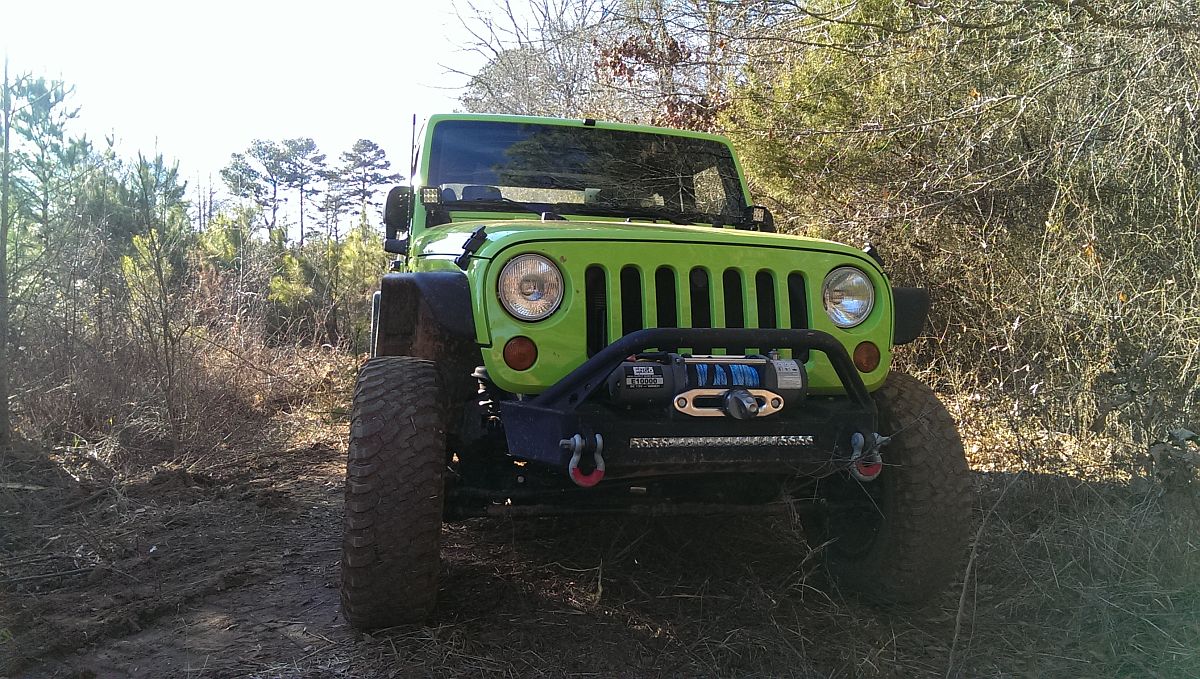
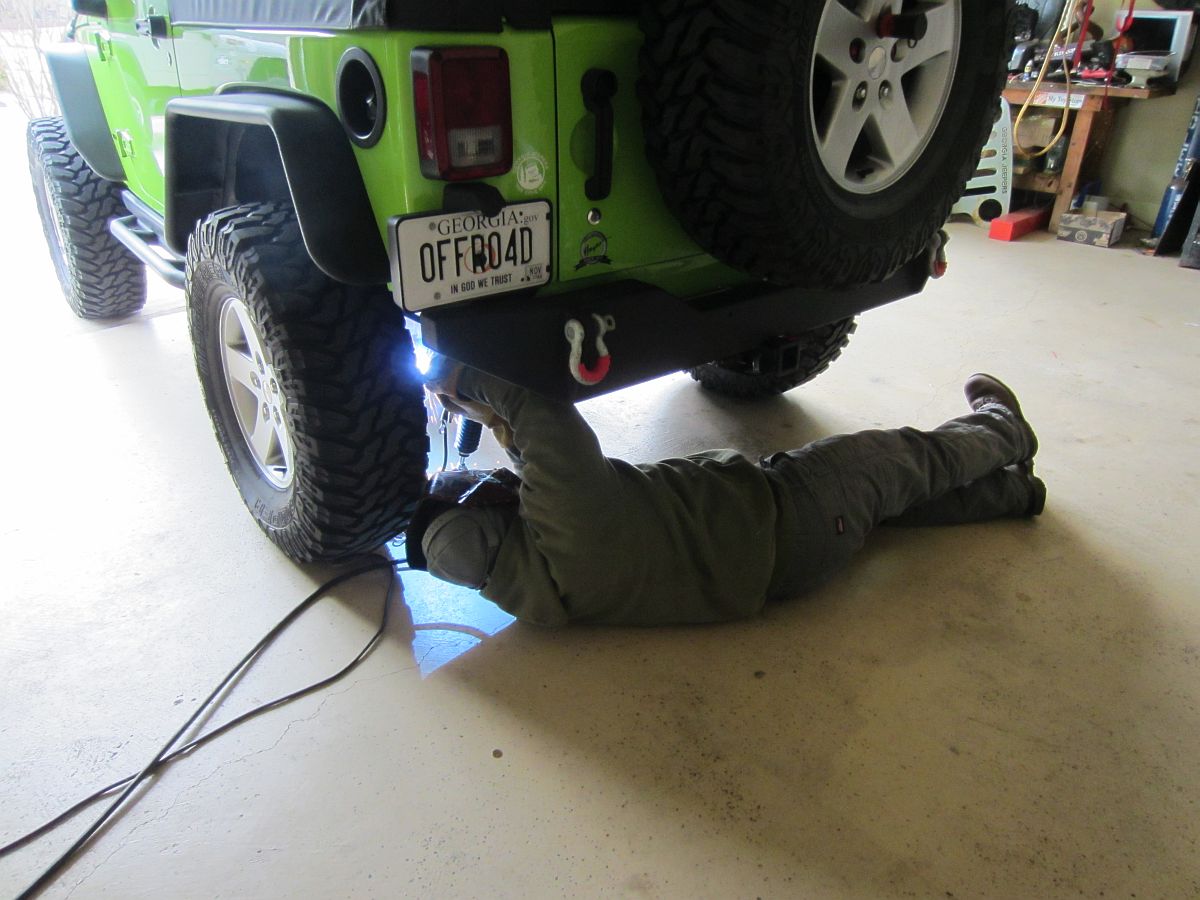
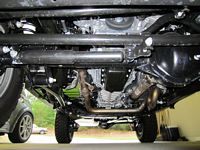
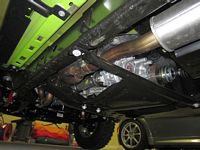
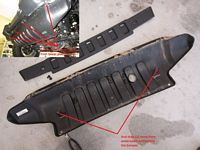
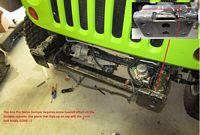
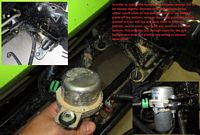
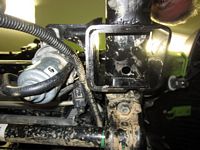
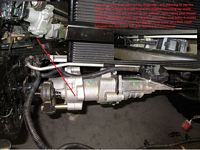
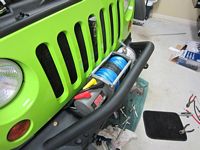
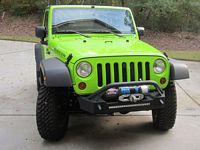
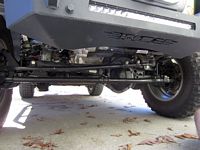
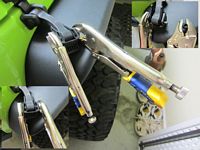
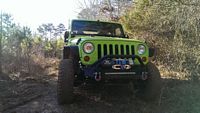
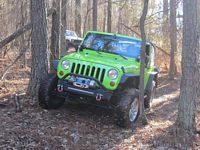
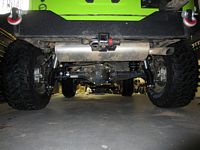
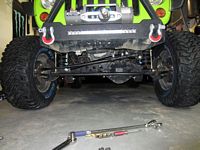
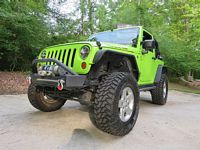
*Ace Pro Series Front Bumper (installation video HERE) from Krawl OffRoad installed. I bought the Bull-Bar version with a cutout for the Rigid SR20 light bar. This requires some slight adjustment to the mounting of the vacuum pump on 2012 models (detailed here by Ace) and removal of the crash bar and some of the factory mounting points. I used Krylon Fusion Paint in black to cover any metal where the grinder or sawzall removed the factory paint to prevent rust.
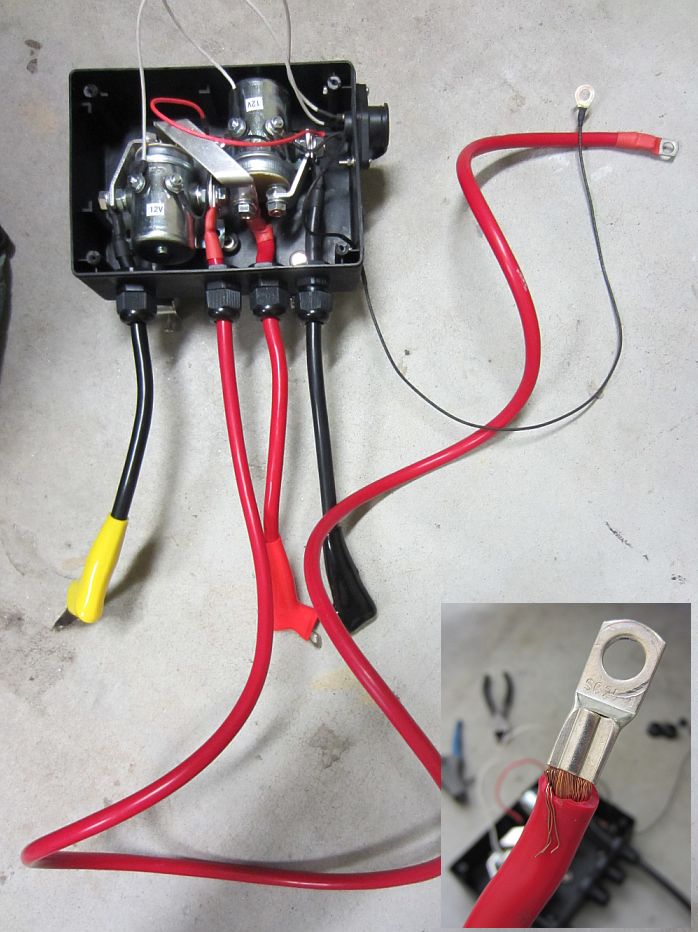
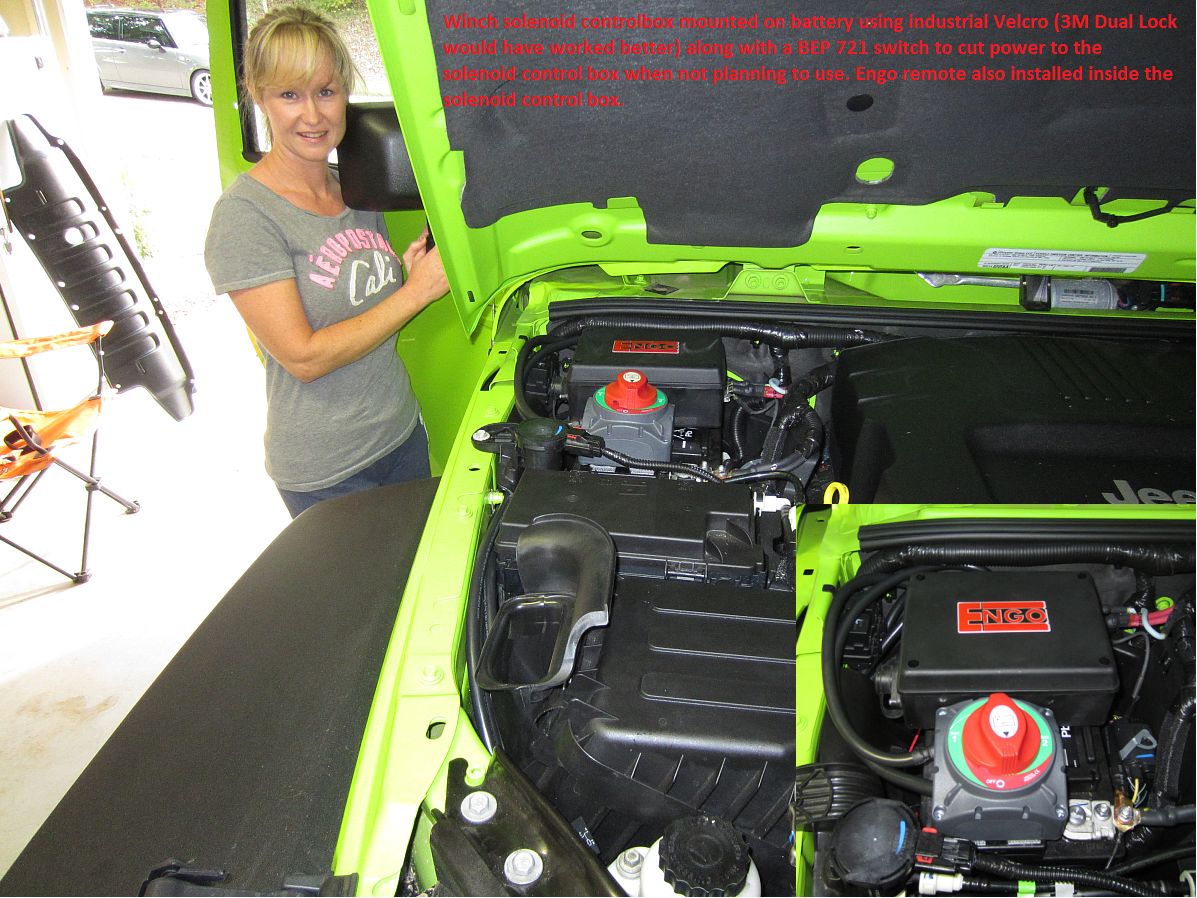
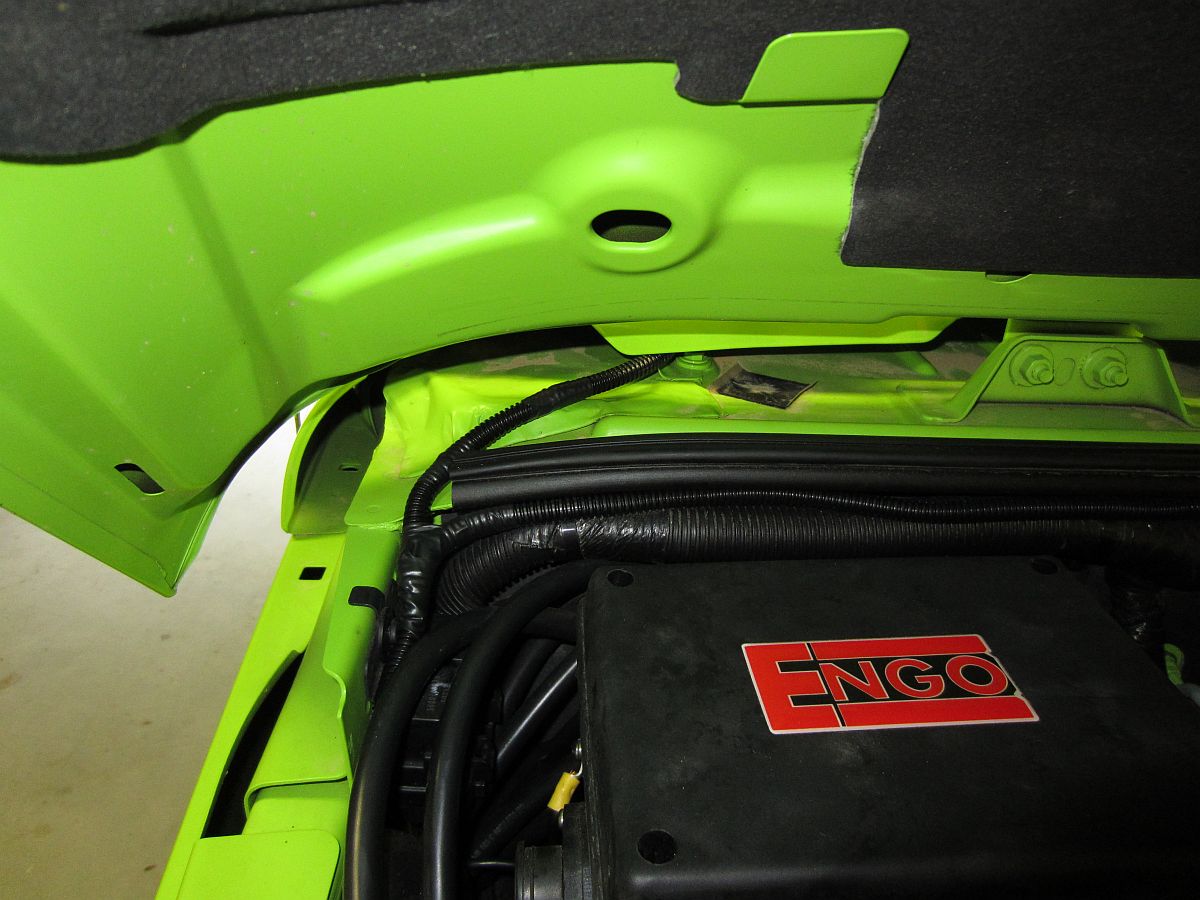
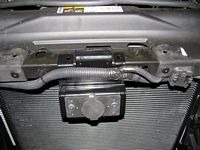
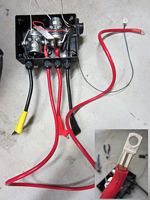
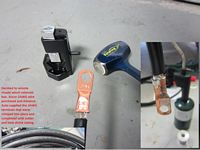
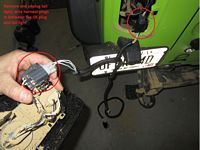
*Engo E10000S Winch (instructions HERE, be careful- the text is correct for wiring but the diagram is wrong, just match the wire boot colors and the post colors and you'll be OK) from Krawl OffRoad purchased with ACE bumper. Not the most expensive winch but a lot of good reviews on the forums and FourWheeler. I went with synthetic rope over cable for reasons outlined HERE and HERE. Also bought the Engo cover and wireless control direct from Engo. I decided to remote mount the solenoid box. The wire that came with the winch/solenoid control was in actuality about 3.5AWG and crimped shodily for some connections. As part of the relocation project I rewired all with new marine grade Ancor 2AWG wiring, this should also be better for higher current. I first crimped terminals and then soldered them- someone else was nice enough to detail the steps HERE on YouTube, I thought the hammer worked better than the vice after trying both with the same style crimper used in the video.
*Factor 55 ProLink Winch Thimble from Rebel OffRoad installed for strength, safety, and cleaner look. Review from MoabJeeper Magazine HERE
*ProMark Recovery Kit from ProMark's eBay store including (1) 20K Snatch Block,(1) 16' Grade 7 Chain with Hooks,(1) 3/4" 4-Ton D Shackle,(1) 26-Ton 9' x 4" Tree Strap,(1) Pair Heavy Duty Leather Gloves all in a nylon bag. To supplement this, I also purchased (2) Rugged Ridge 15104.02 Premium Recovery 2" x 30' Straps - 20,000 lb Capacity from Amazon and (1) Grip 30 ft x 4 in Heavy Duty Tow Strap from Amazon......and could probably still use some more recovery straps and a snatch strap or two.
*Crosby 3/4 D-Rings (G-209-A, P/N 1017538), aka screw pin anchor shackles, sourced from Mike at North State. The above recovery kit came with a Chinese D-ring but I wanted the best and one that was rated. Crosby are touted as the best: made of forged alloy in the USA and used by rigging companies. Specs HERE. I bought (4) of these- all with red Daystar D-ring Isolators.
*Winch Recovery Bandana - GREAT quick reference when you get in a bind, image HERE.
*Rigid SR20 Light Bar (P/N 92031, Spot/Flood Combo, data sheet HERE) from 4WheelOnline, on sale @ $399. This light is BRIGHT
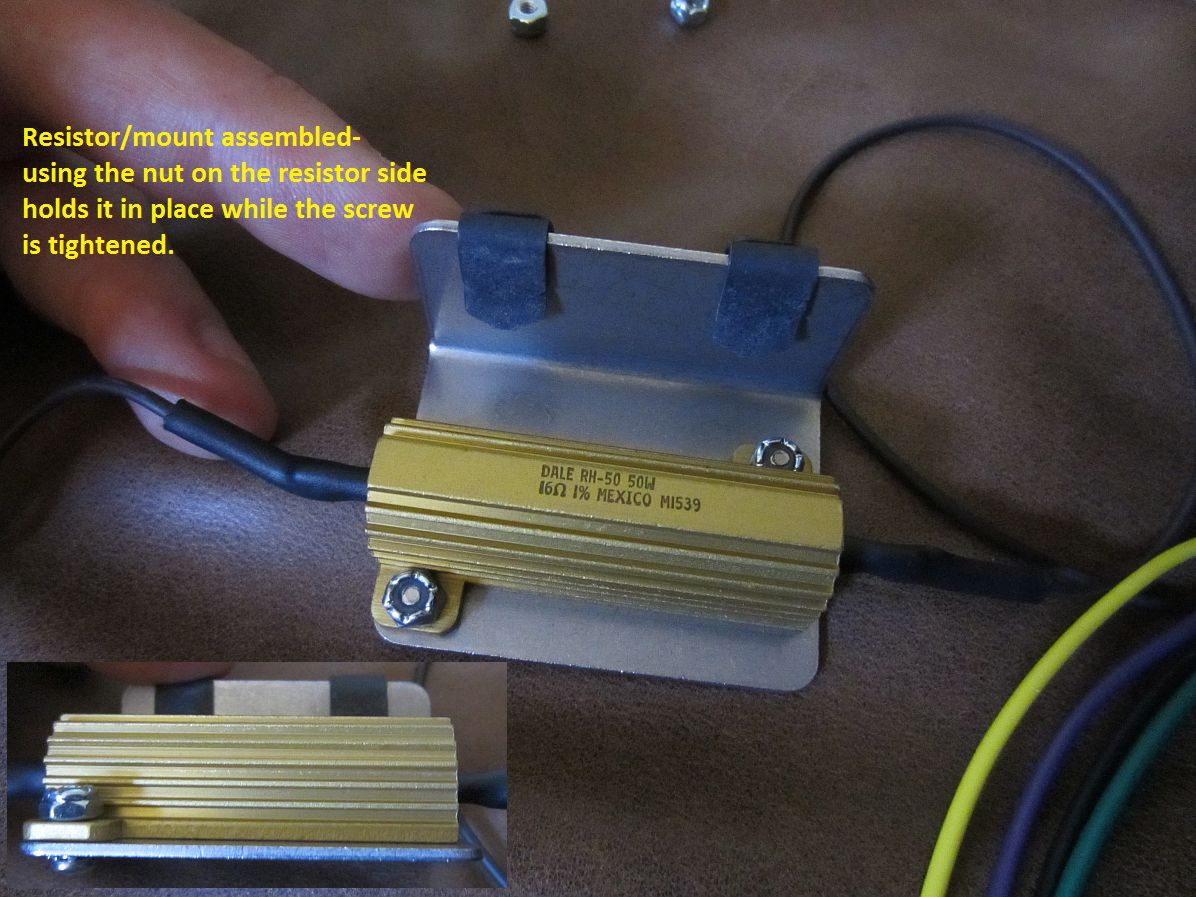
*BEP 721 Heavy Duty Switch wired in between battery and solenoid control for winch, this way I can prevent the new vandalism going on by turning on power to the winch ONLY when I plan on off-roading (no power when parked in the parking lot) and also acts as an emergency cutoff.
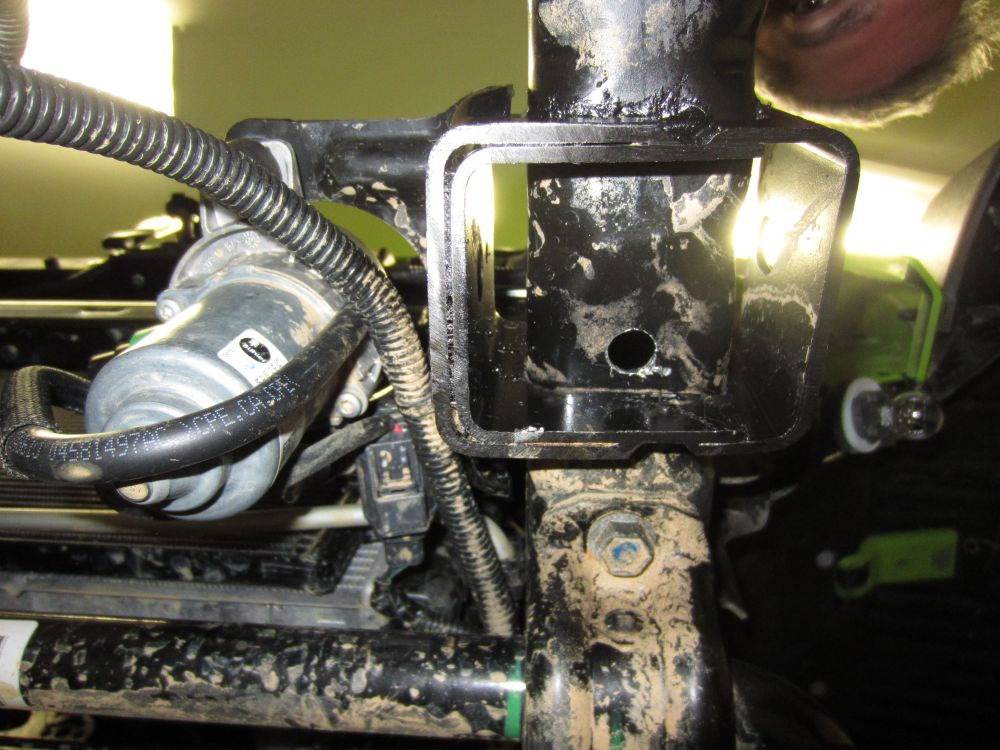
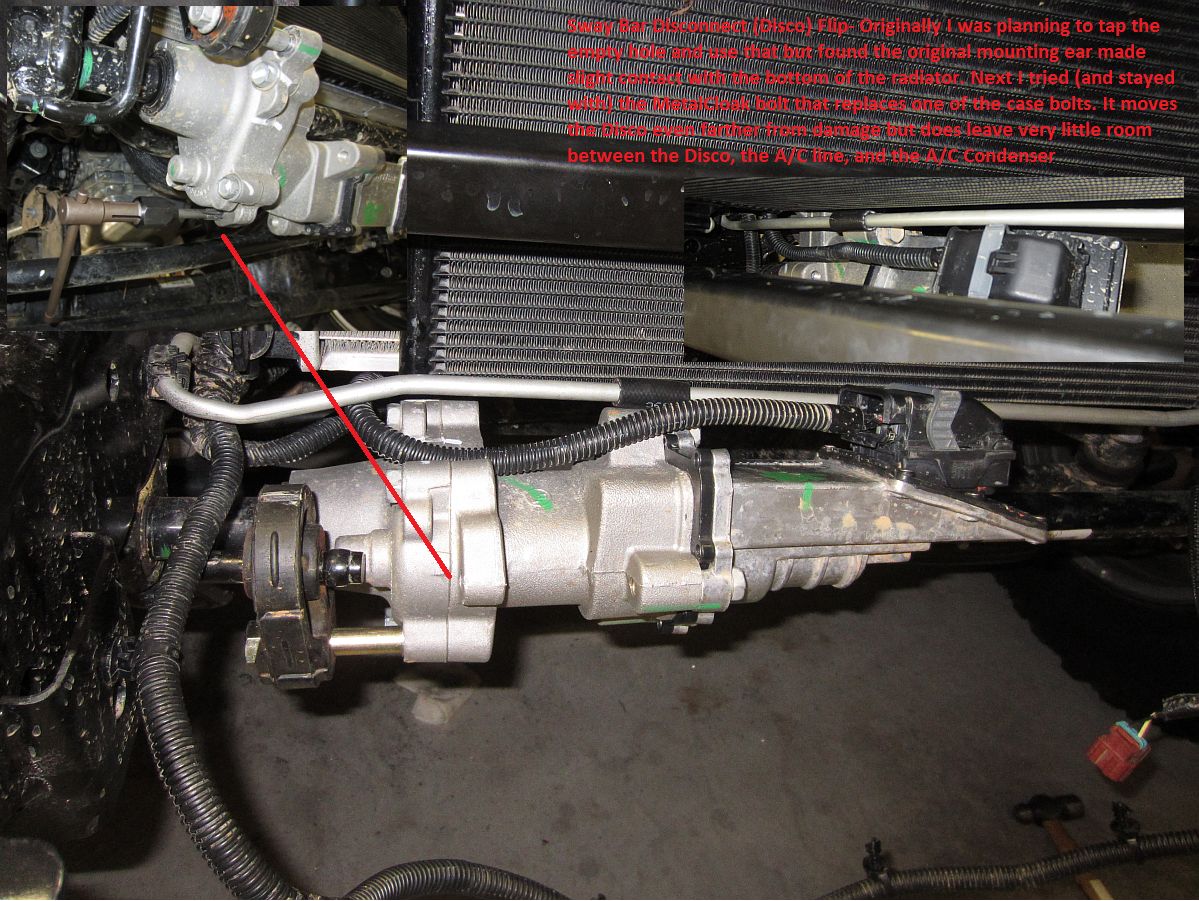
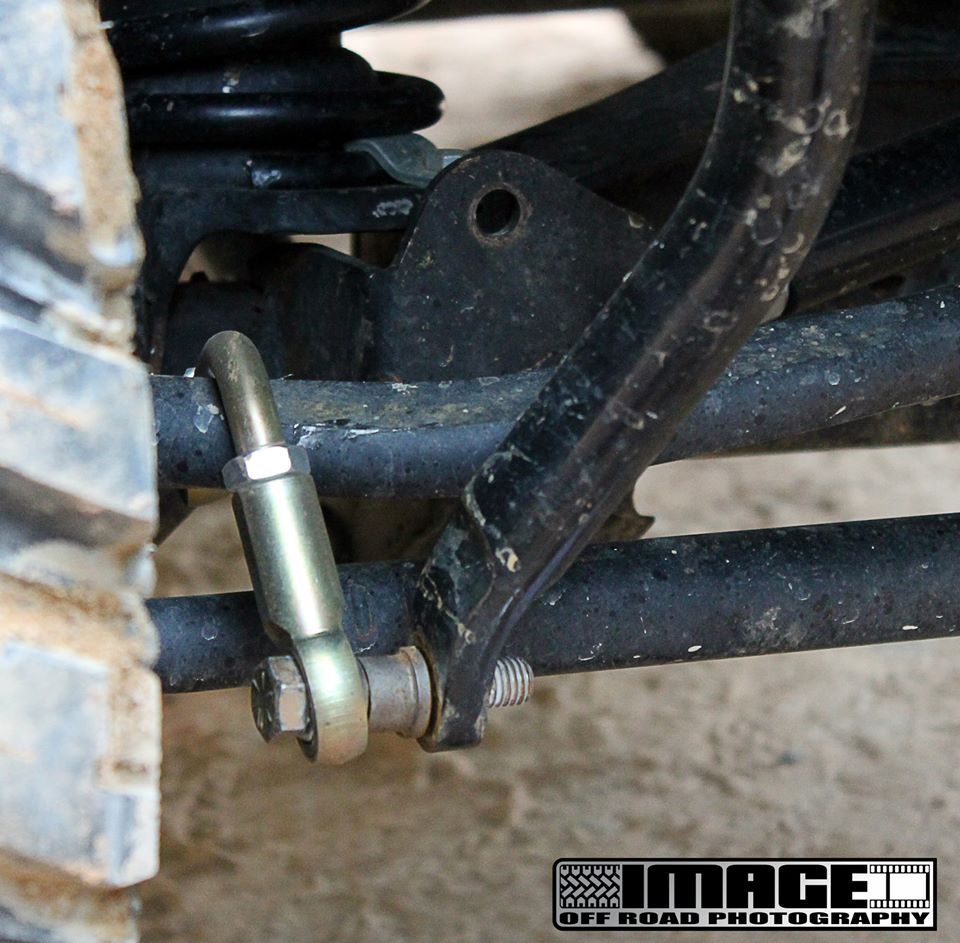
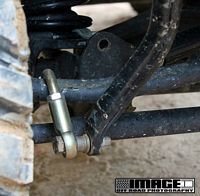
*MetalCloak Disco Flip Bolt (aka JK Sway Bar Ground Clearance Kit) installed to help protect the sway bar disconnect motor by positioning it higher- it had even less protection with the crash bar removed (installation video HERE). I'm not sure that the engineer that came up with the factory mounting location has ever been offroadI had originally ordered the Synergy Relocation Kit (installation instructions HERE) but decided I preferred the one piece design from MC, Will was great and shipped it the same day I placed the order. I found some DIY threads on JK Forum, JK Freaks, and Wandering Trails but after running to various hardware stores ran out of time and went the easy delivered-to-my-door-guaranteed-to-work route
I subsequently installed a similar ACE bumper with Warn Zeon winch on my 10A as seen HERE with some slight variations and additional pictures.


New Tag-
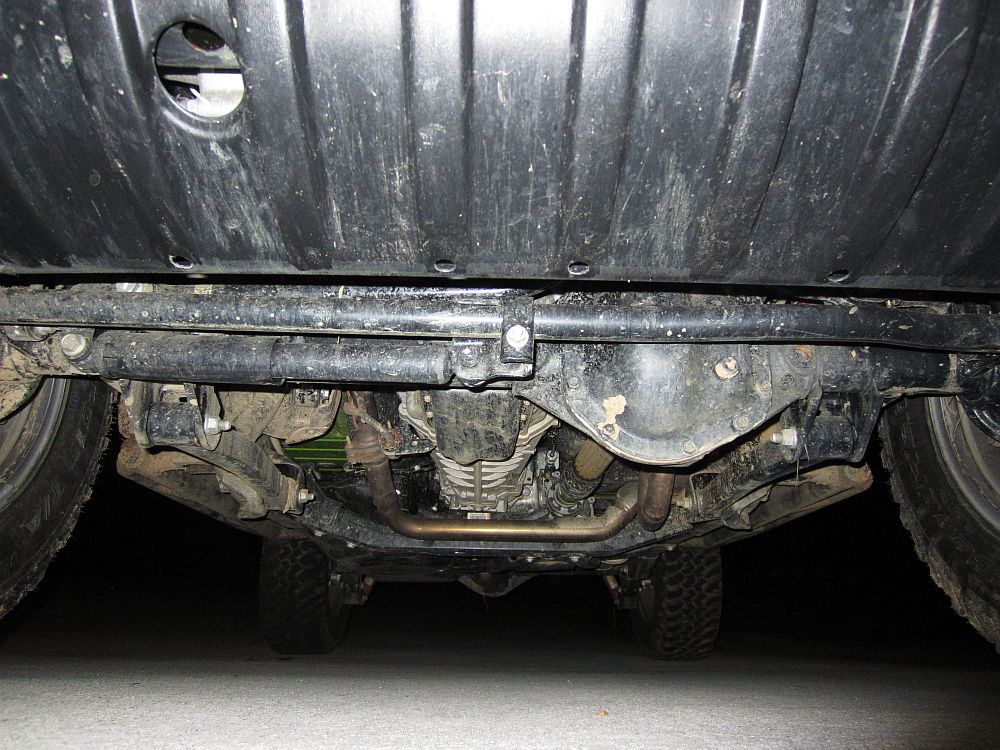
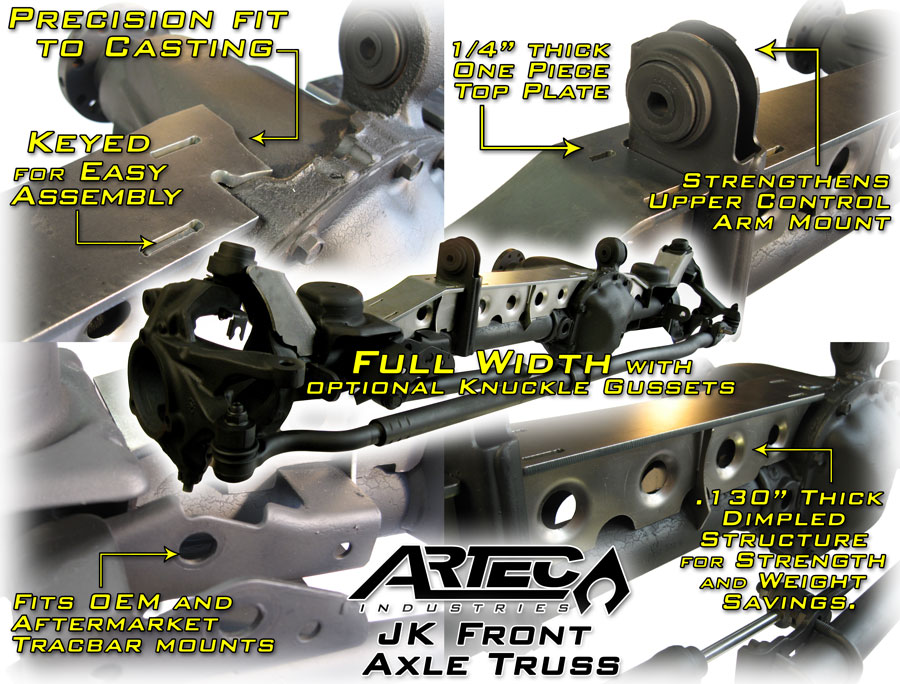
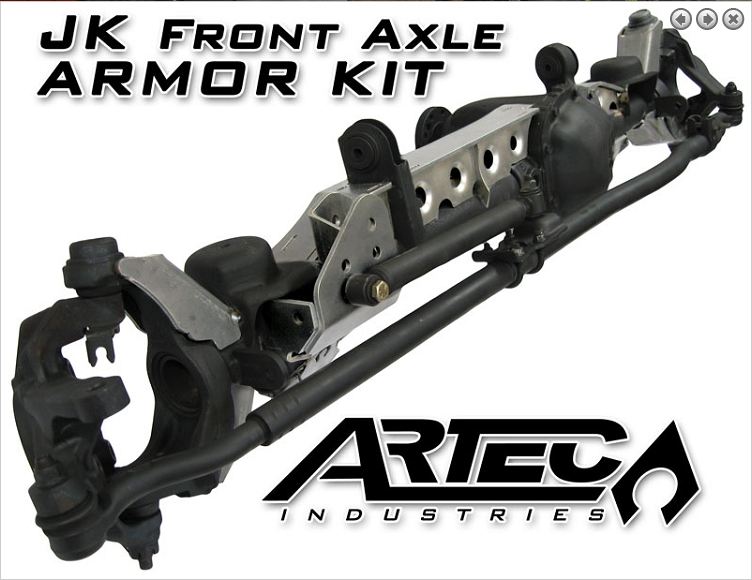
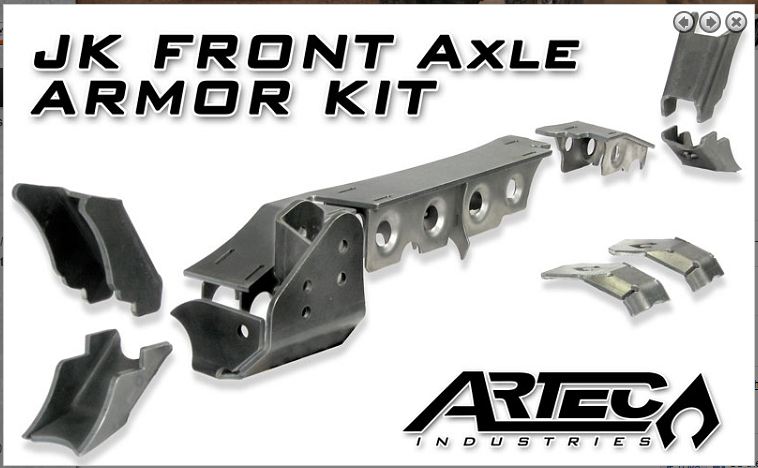
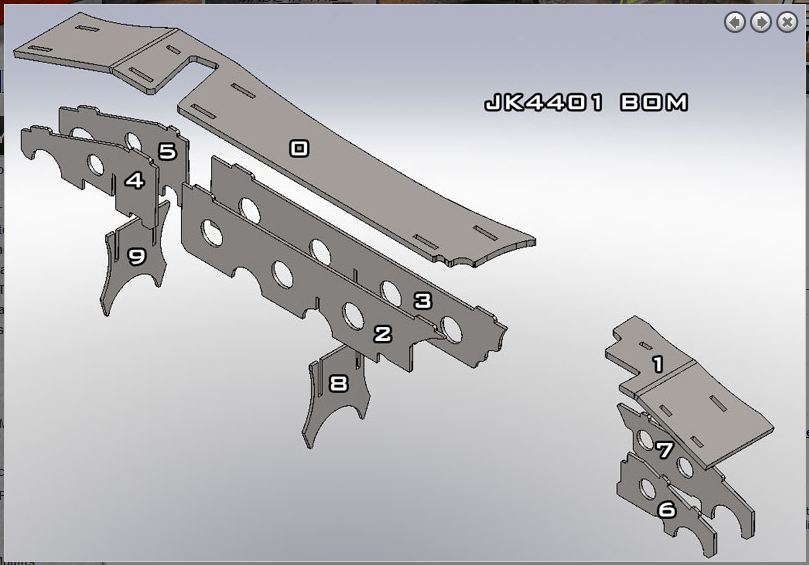
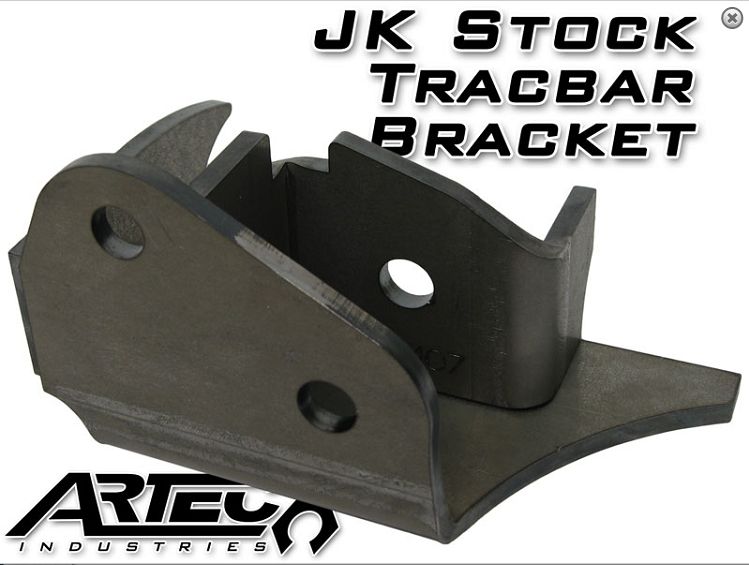
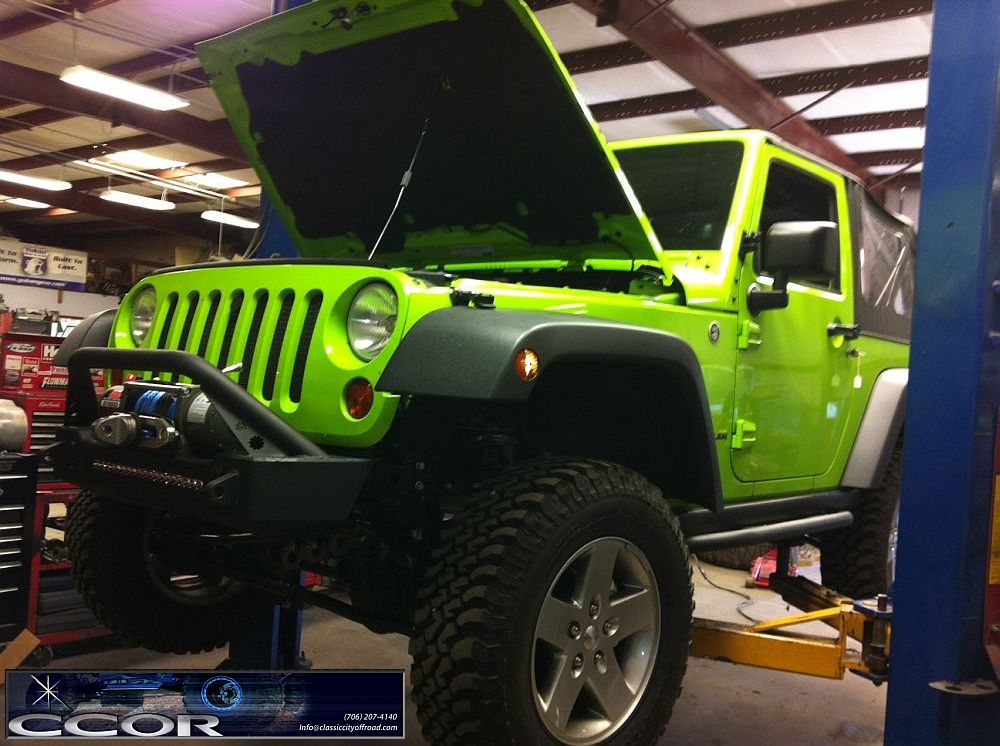
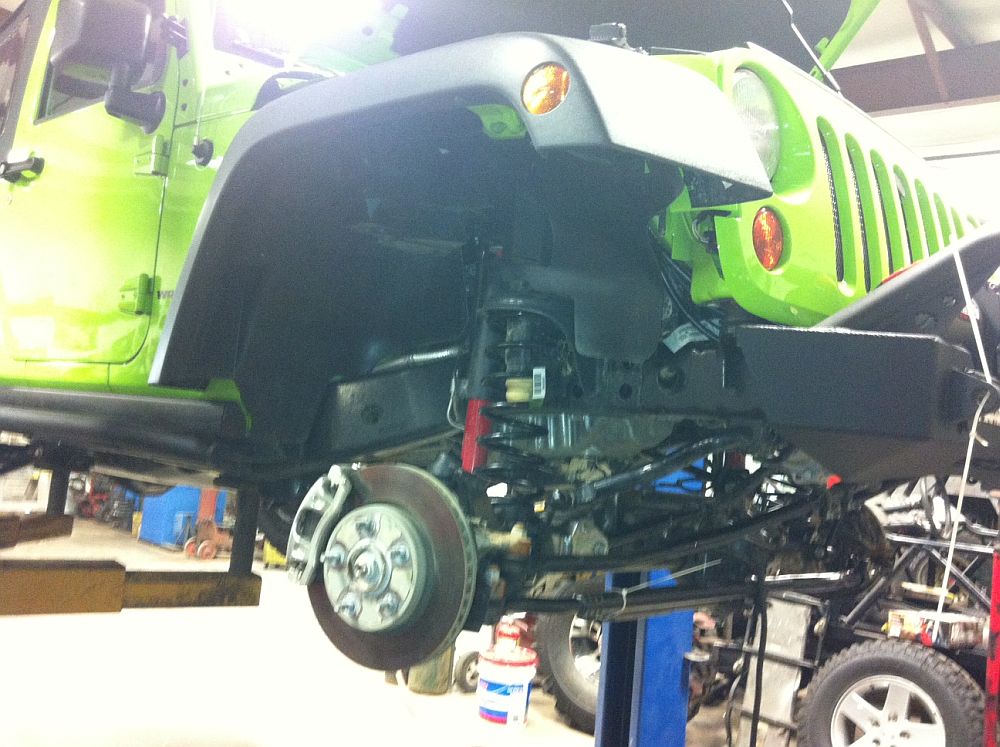
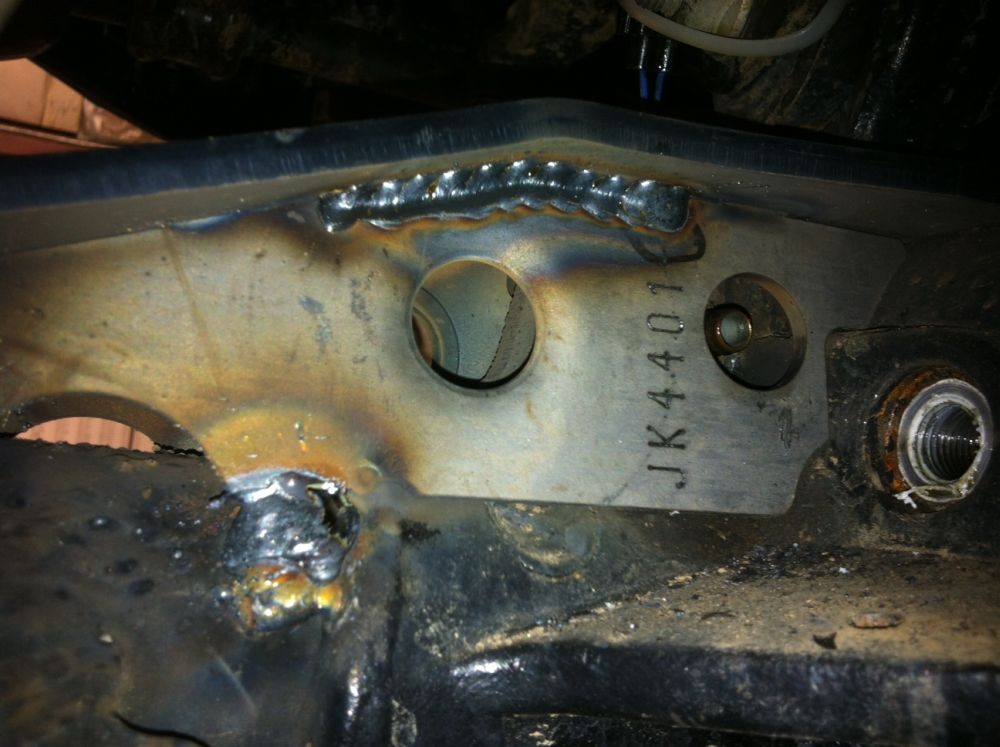
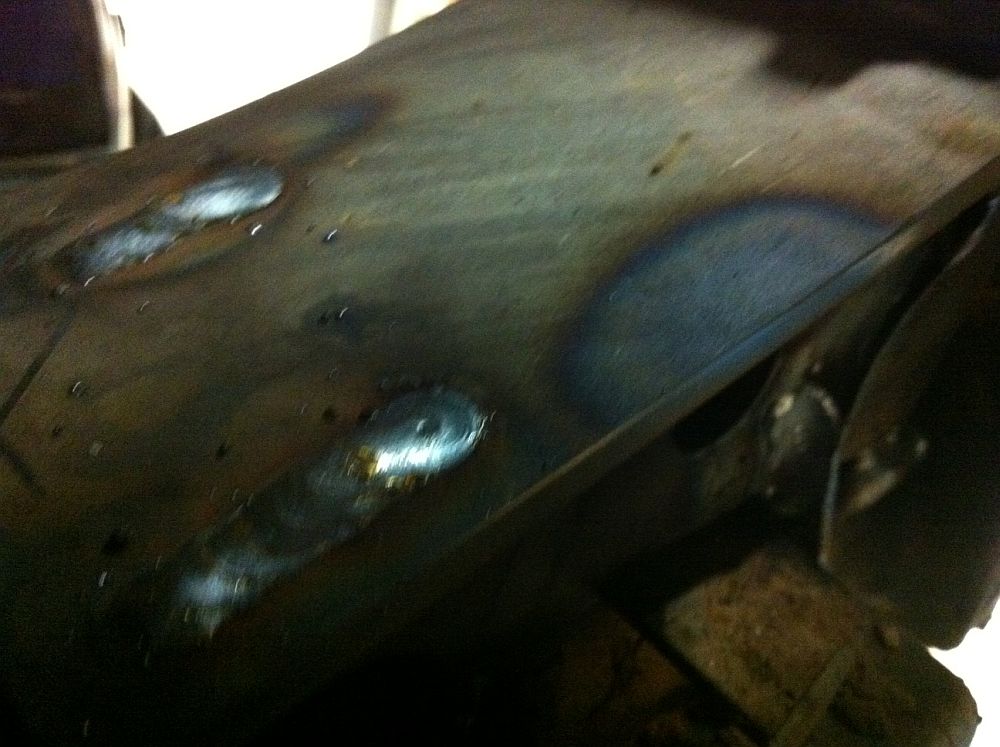
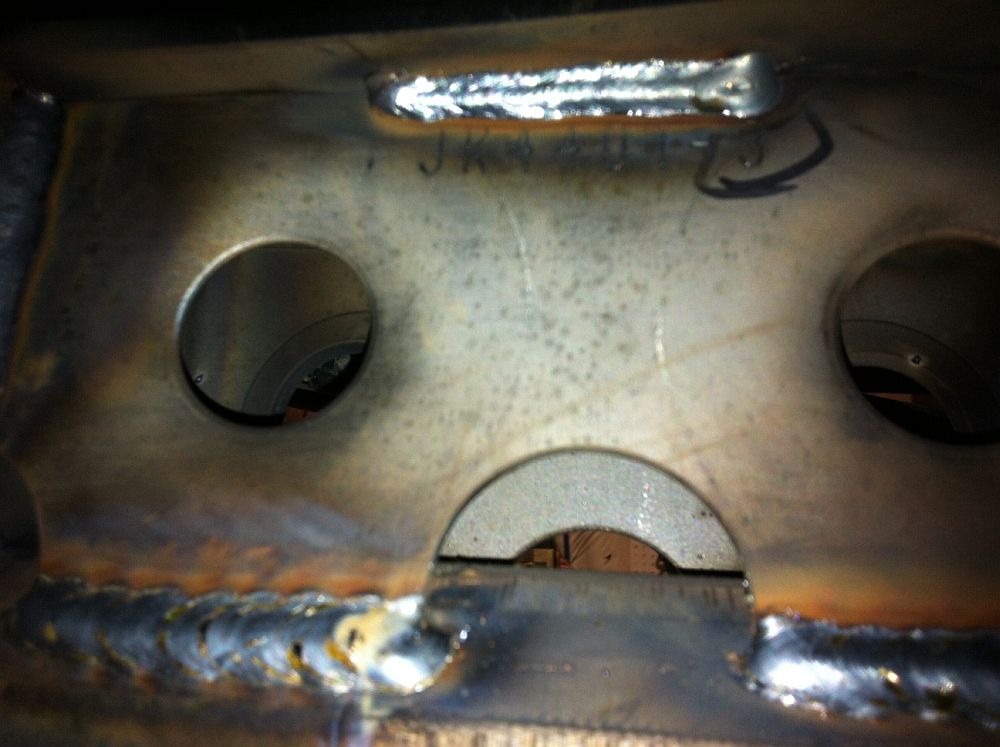
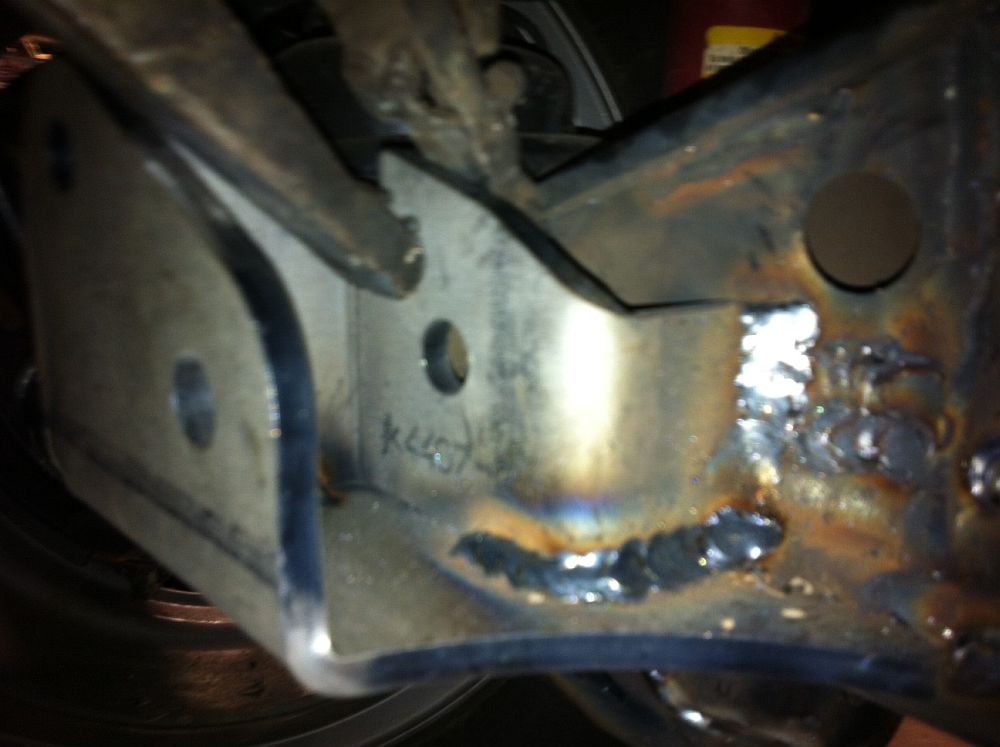
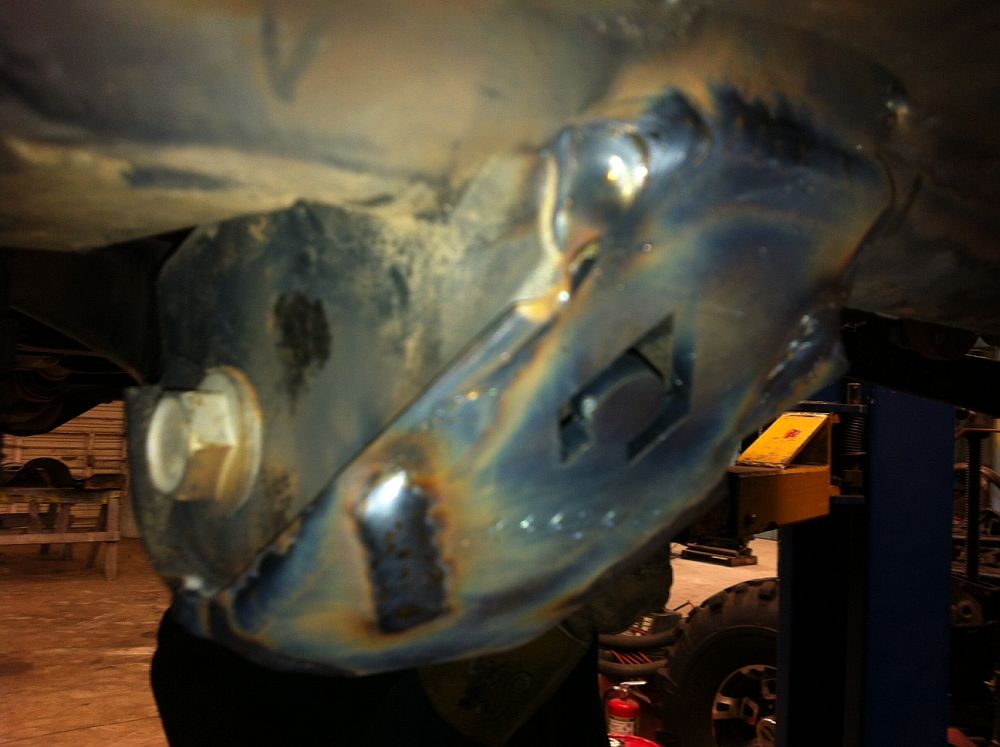
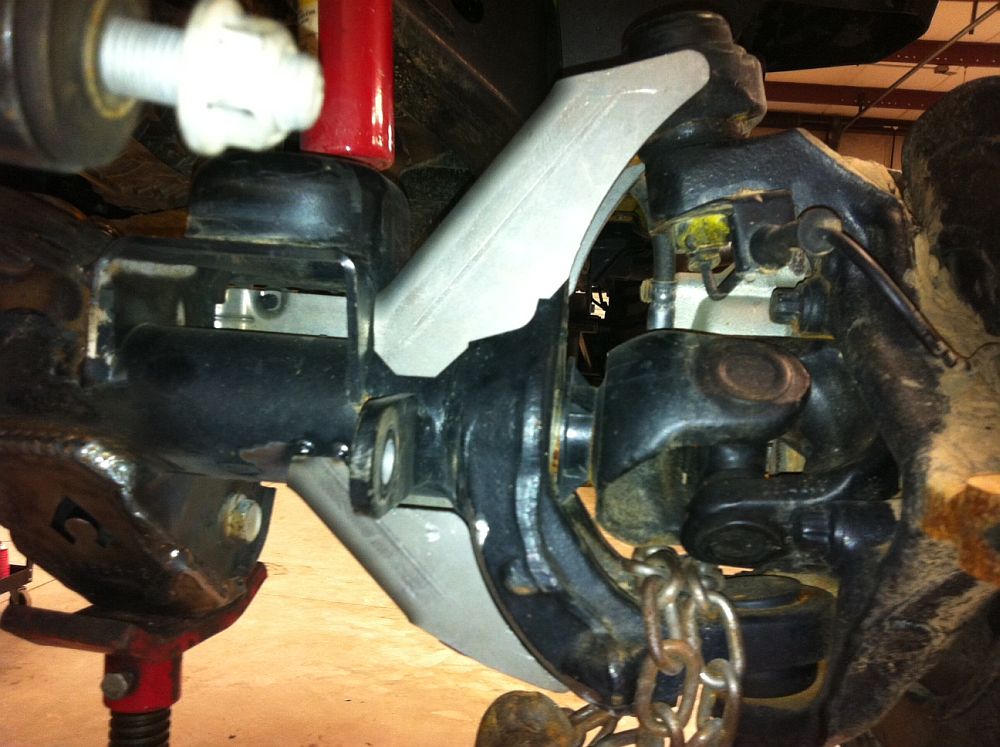
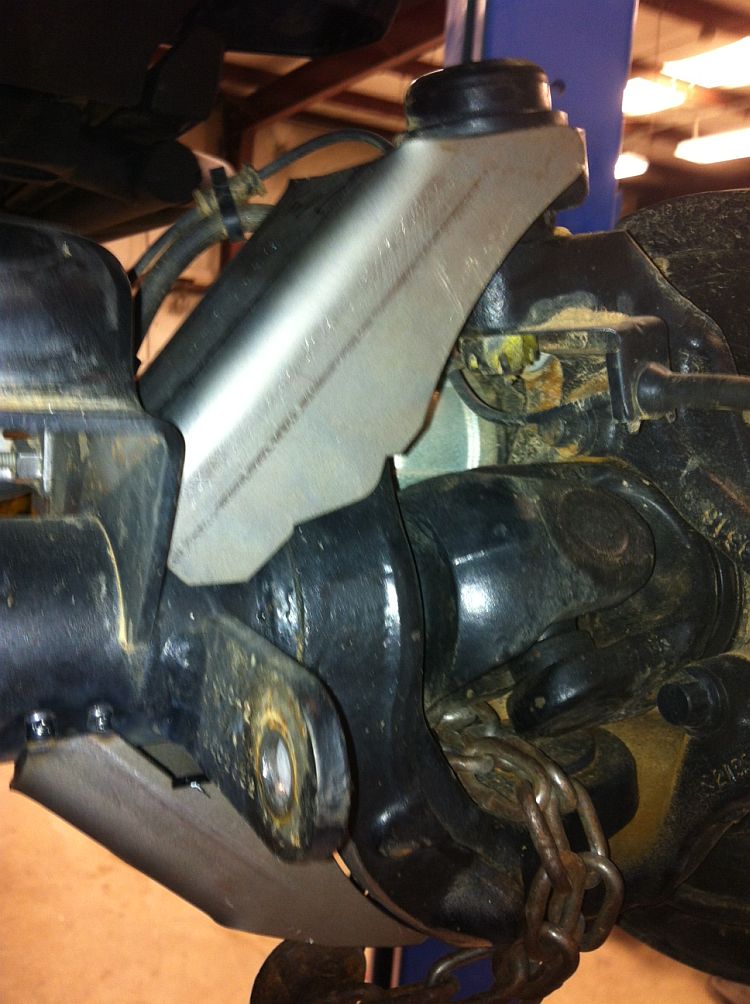
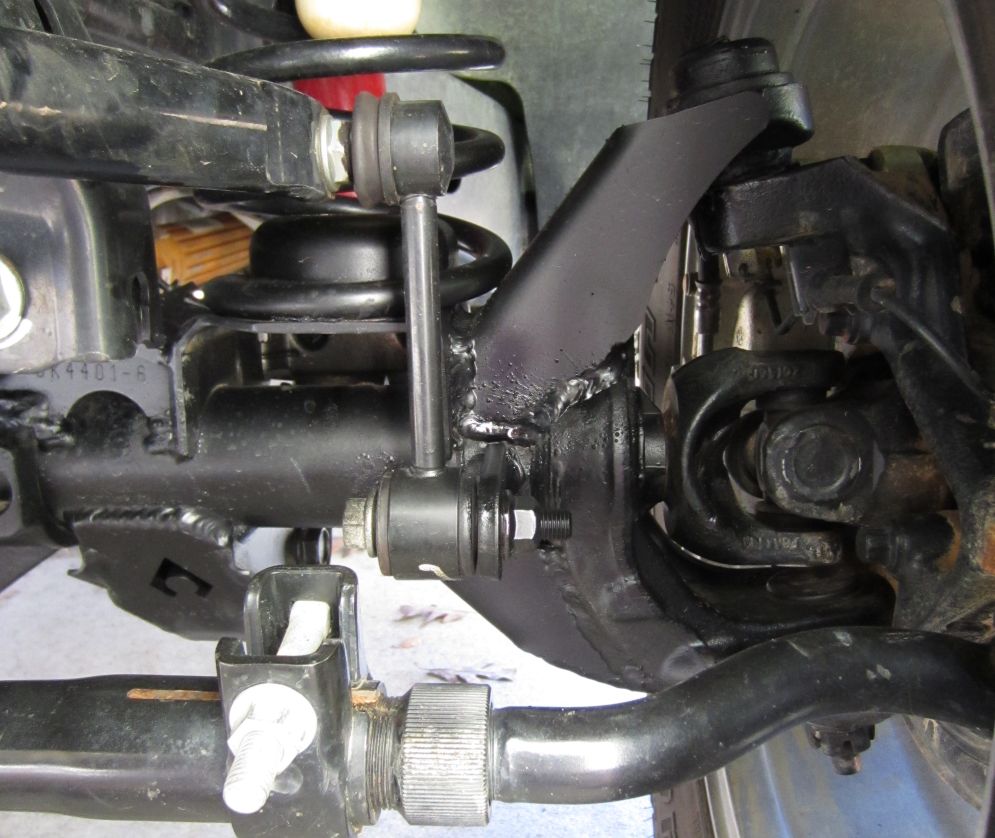
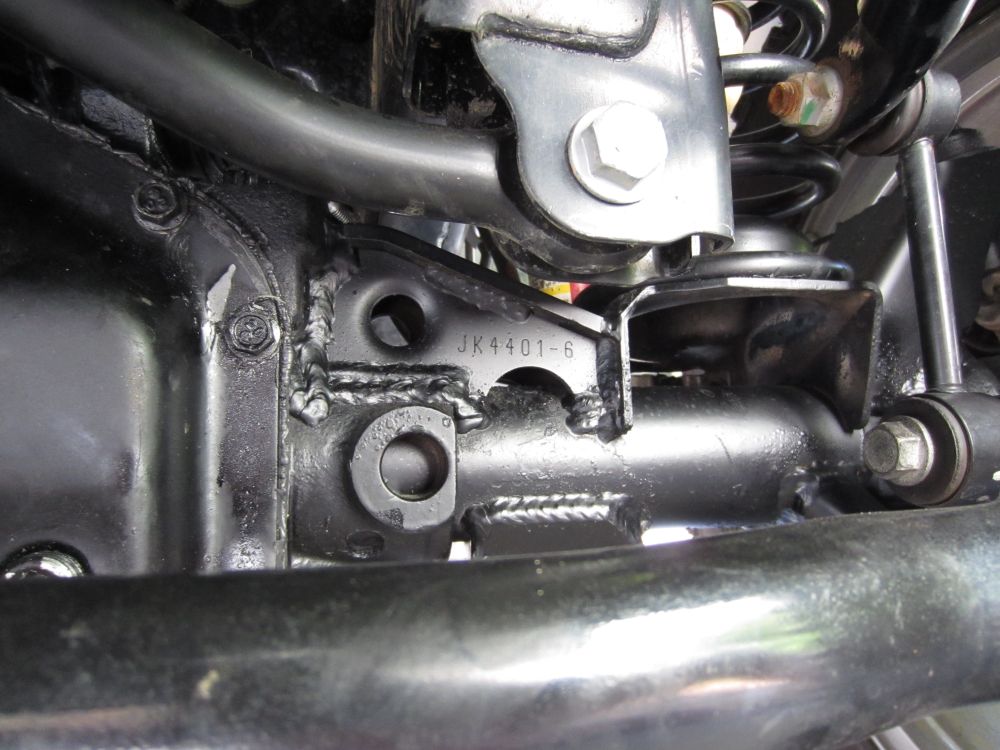
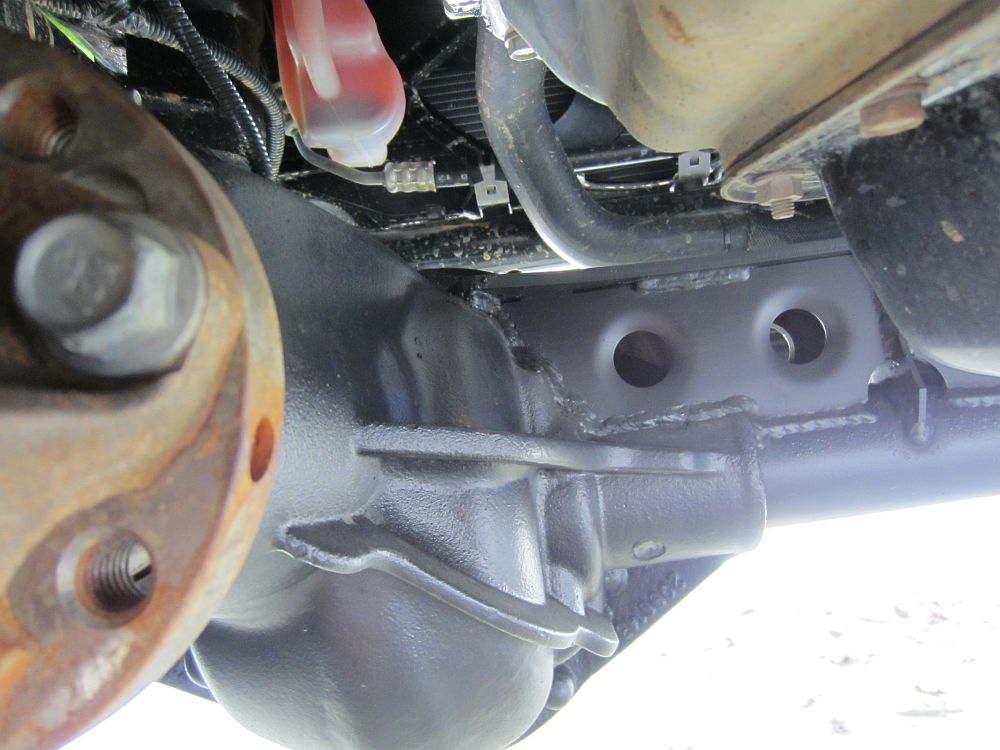
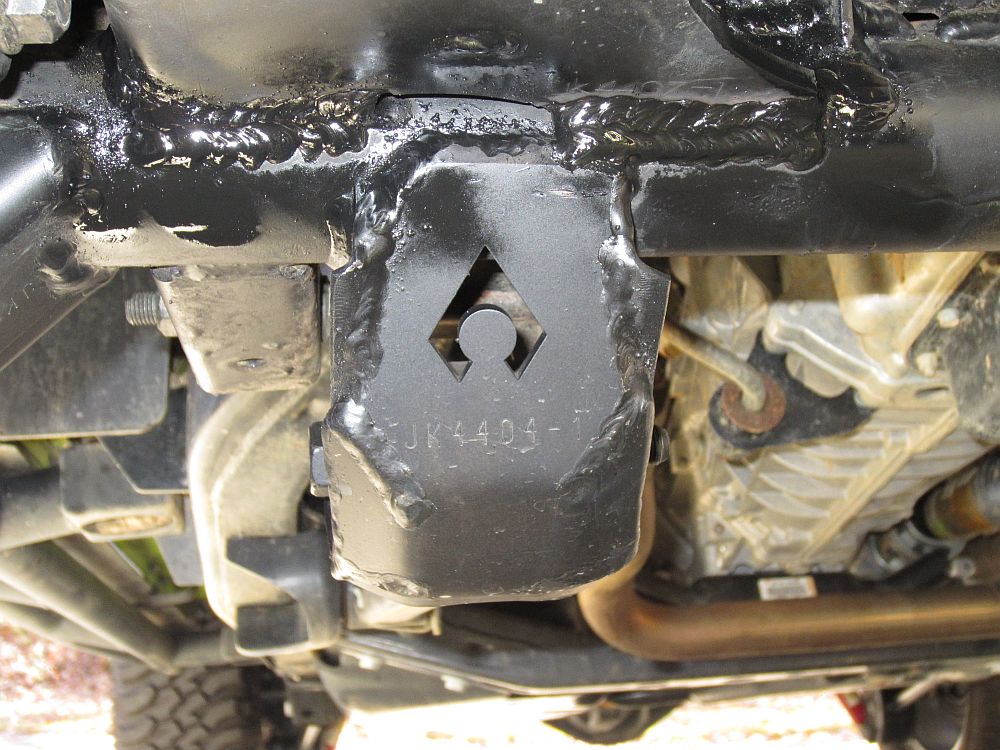
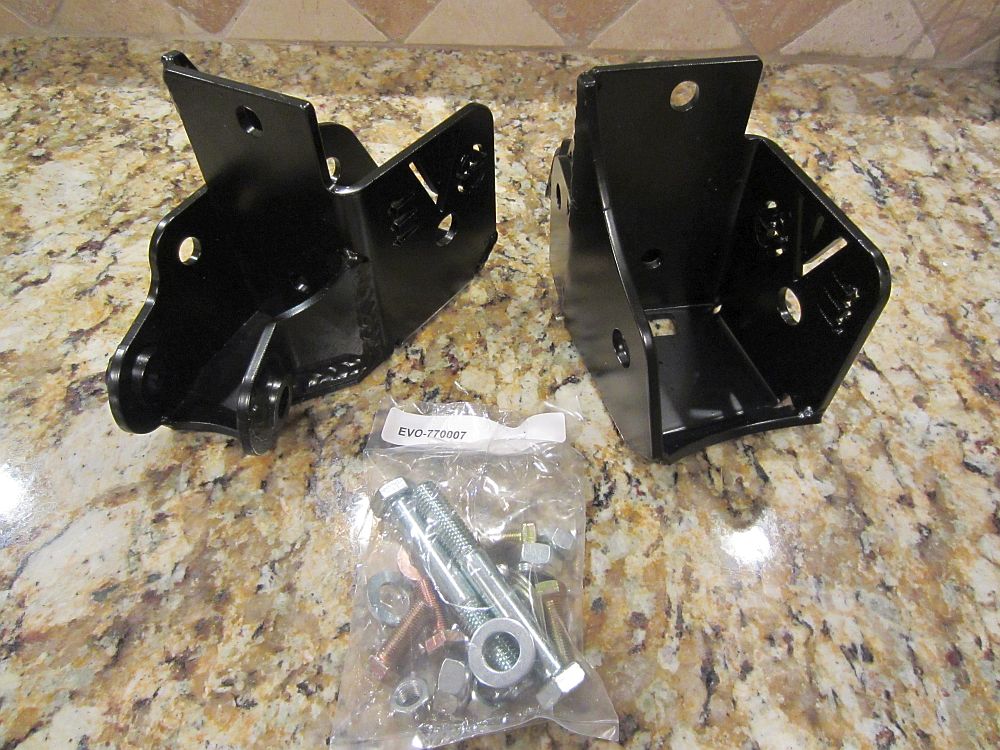
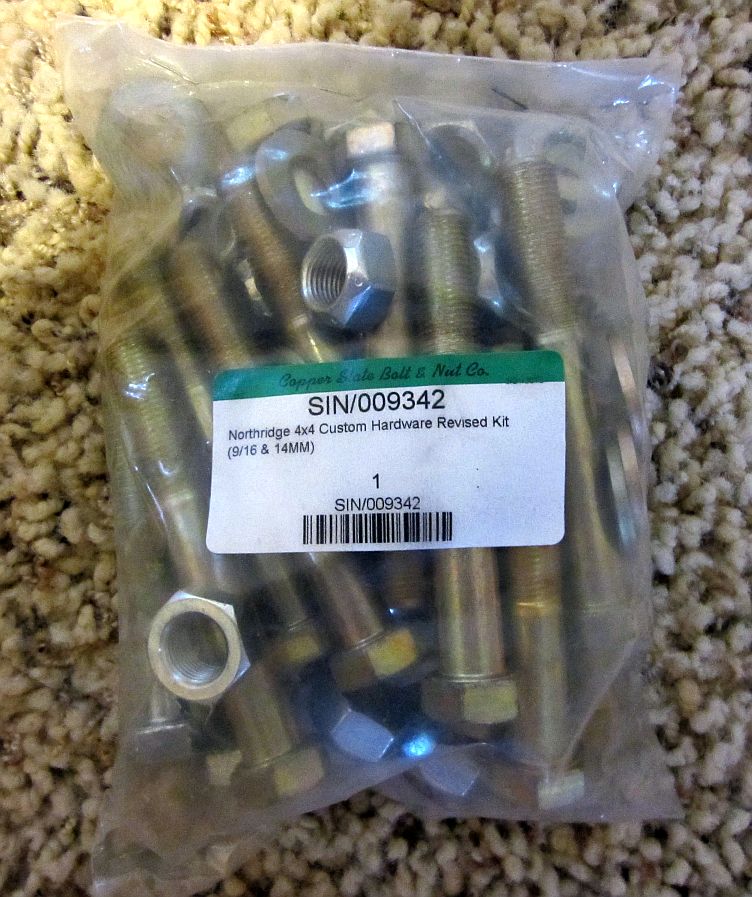
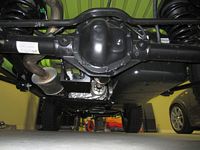
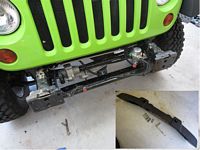
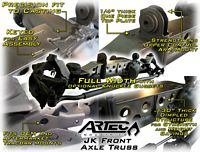
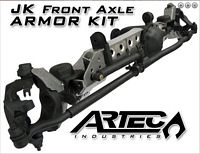
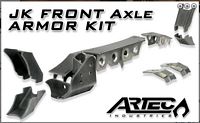
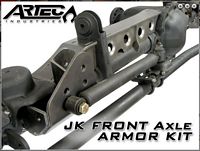
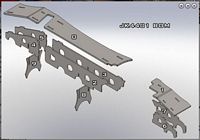
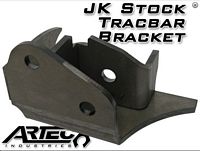
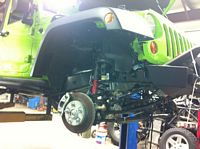
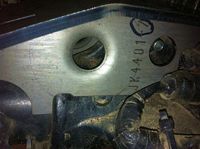
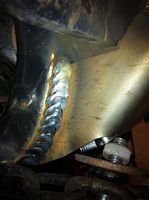
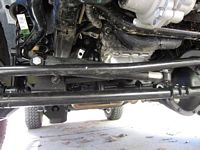
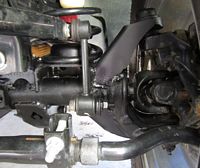
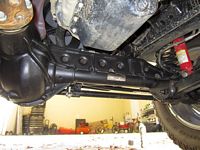
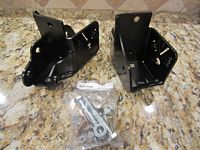
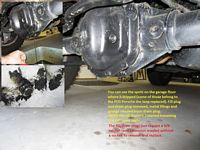
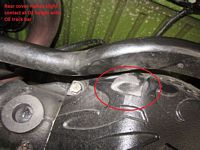
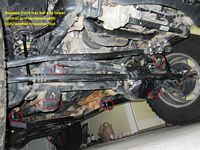
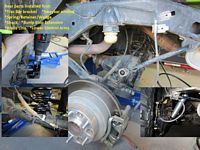
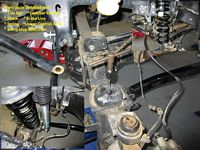
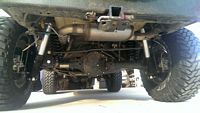
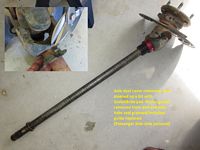
Artec Front Axle Armor Kit purchased to take advantage of the 15% off Labor Day Sale- original instructions HERE, revised intructions HERE. I stashed the Heavy Duty Tracbar Bracket that came with the kit (designed for 2+ inches of lift) just in case we ever decide to lift it and purchased the HD Stock Tracbar Bracket to install. Forum discussion threads that got me interested are HERE and HERE, and some more info on axle weaknesses are HERE.
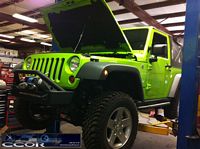
We decided to have Classic City Off Road (CCOR) in Athens, GA install the kit for us, I know Bobby that works there and toured the shop and met Matt, the owner. The Jeep was aligned first to make sure the front end was straight/within spec and then the welding started, CCOR took pics over the course of installation. This kit also allows for the steering damper to be moved to the top. No worries about a smiling axle now......
It appears the ball joints got a little cooked since they are leaking grease and the plastic is a little tweaked, saving up for Dynatrac ball joints to replace these proactively.


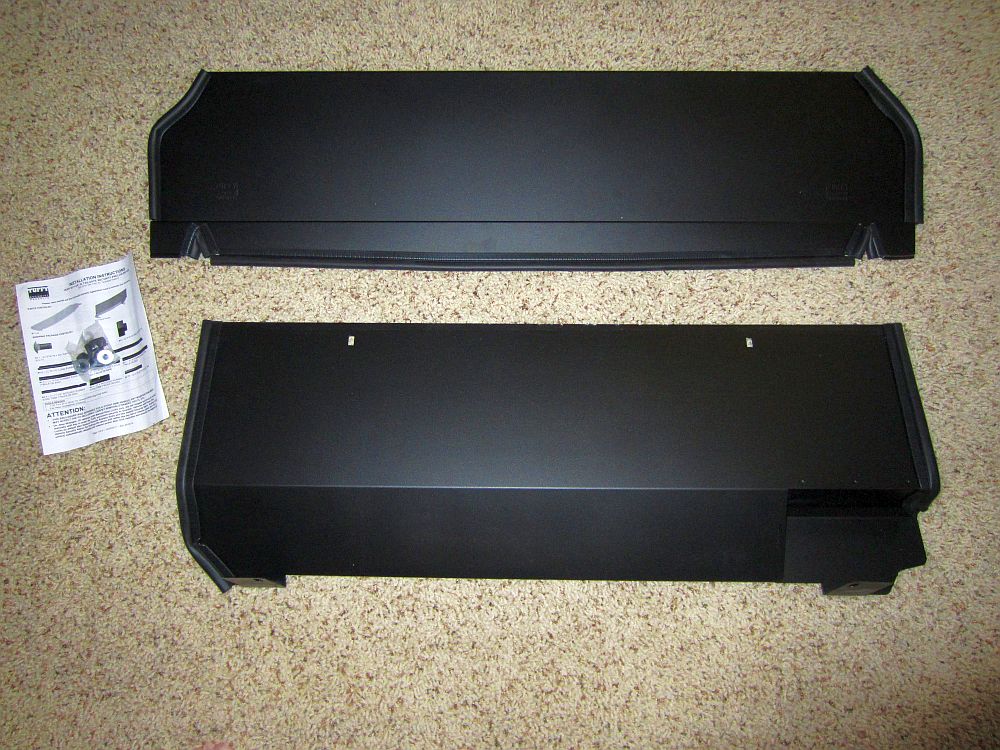
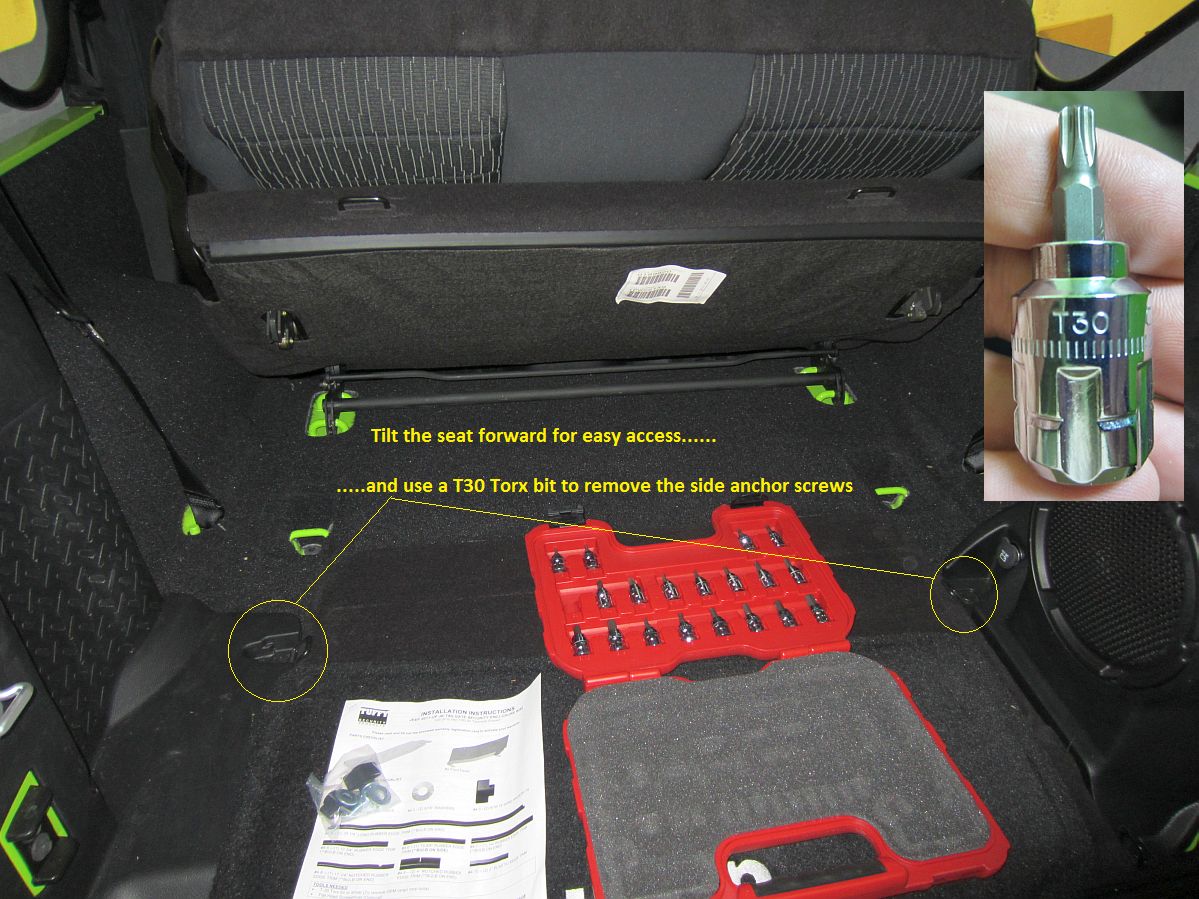
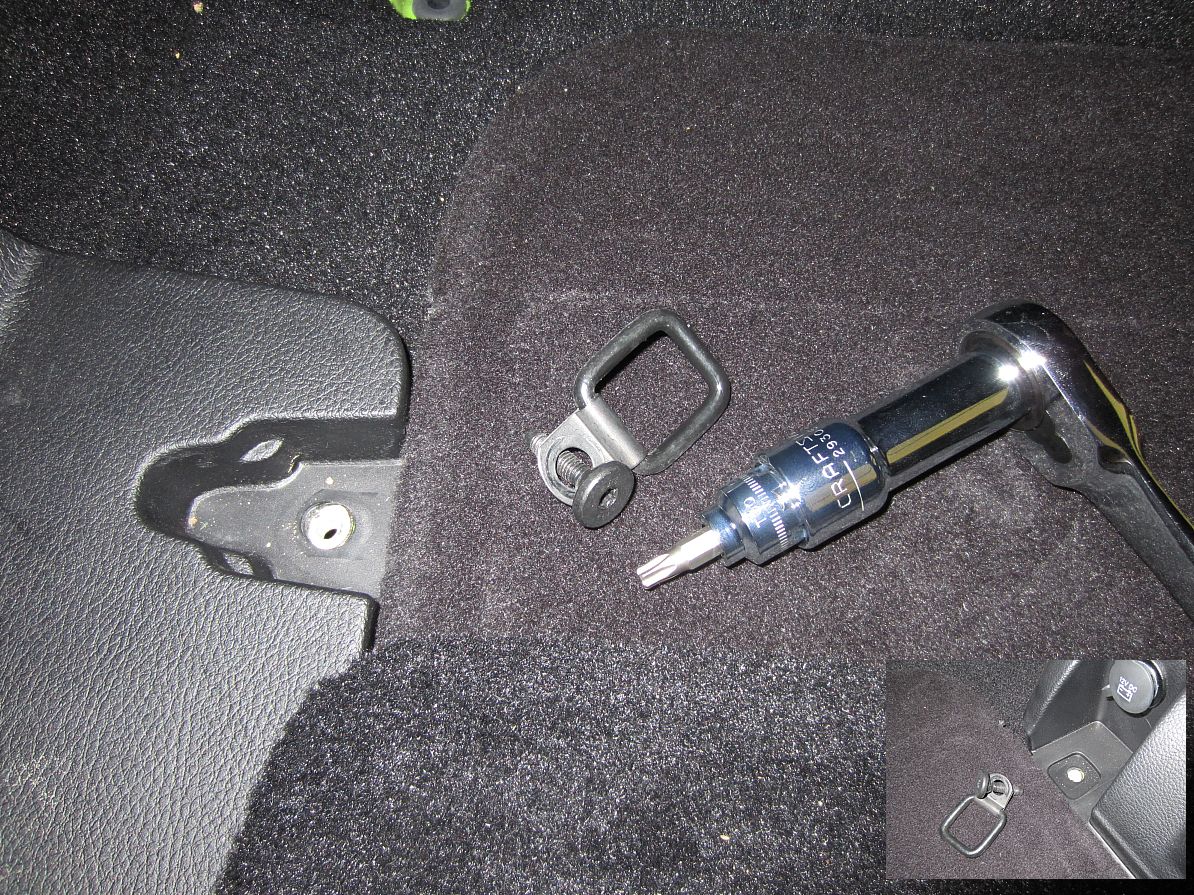
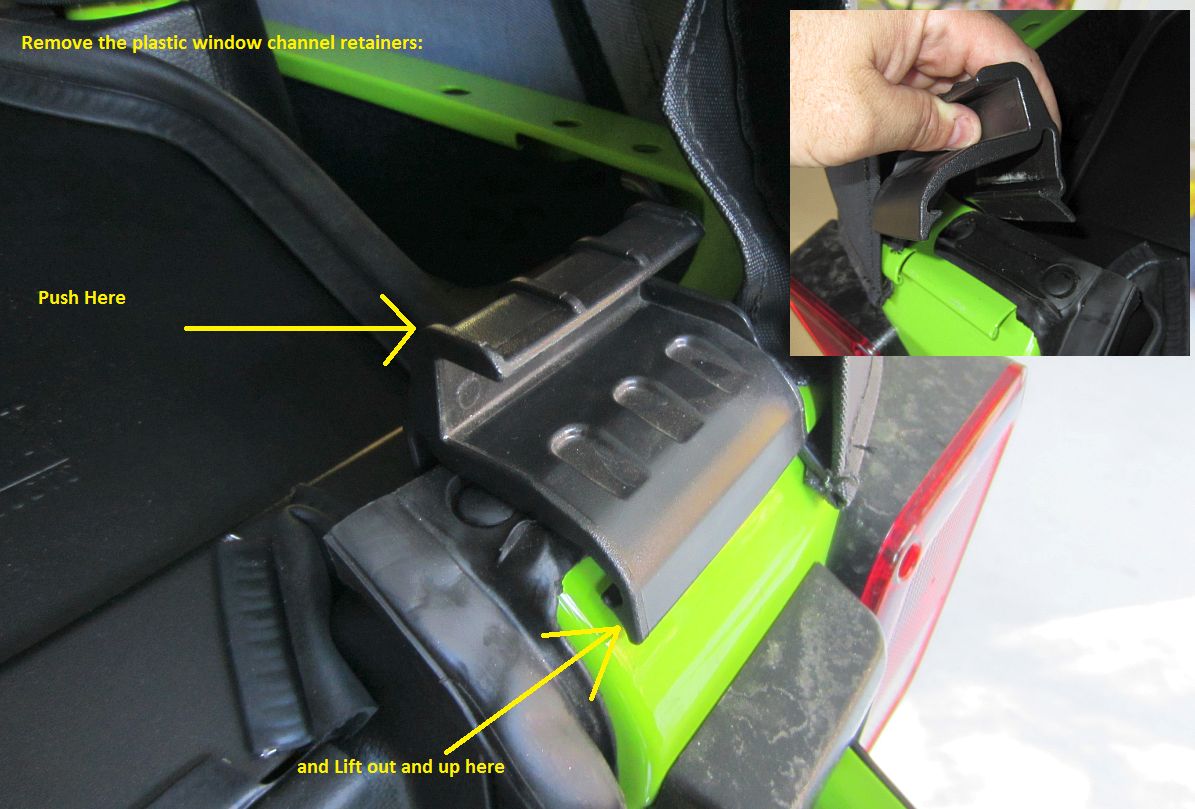
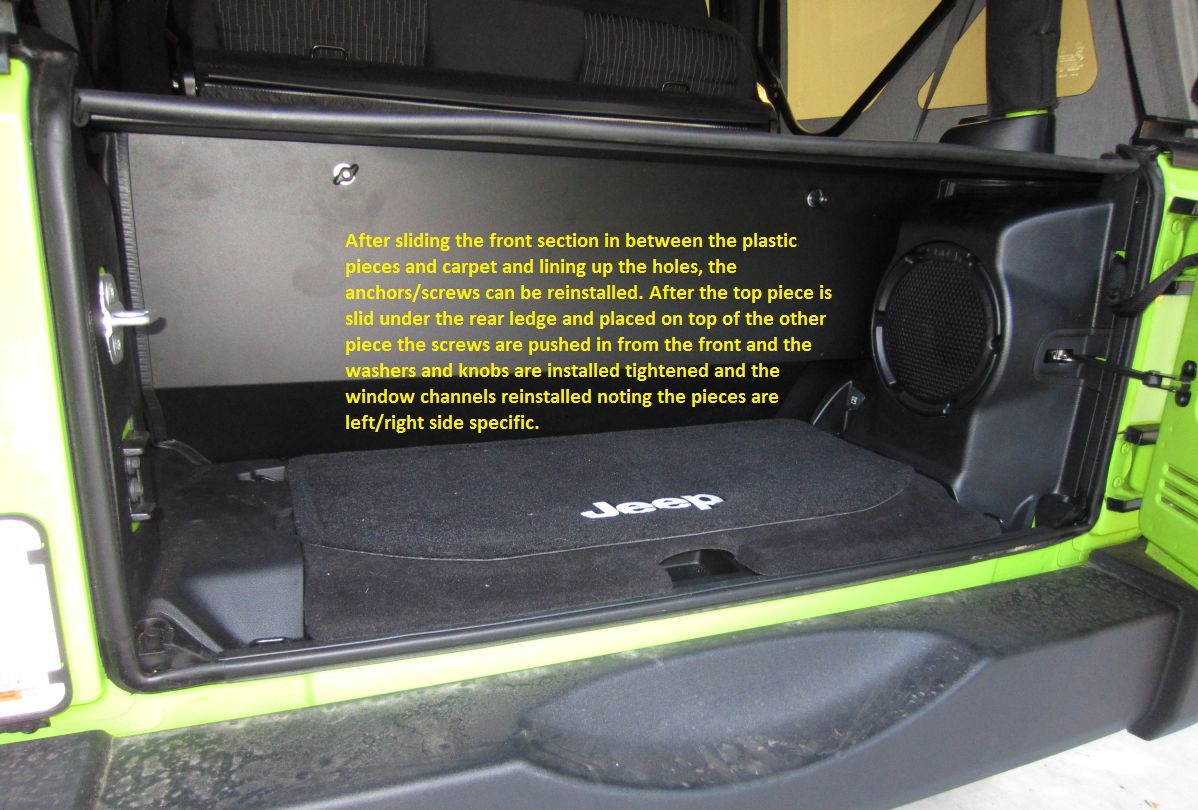
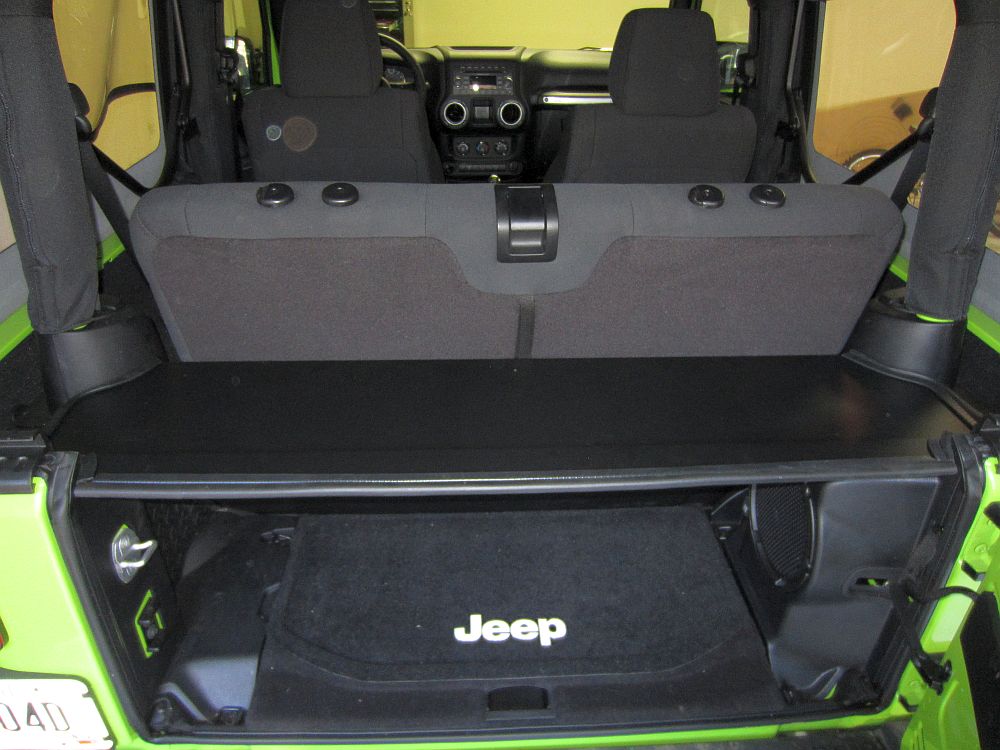
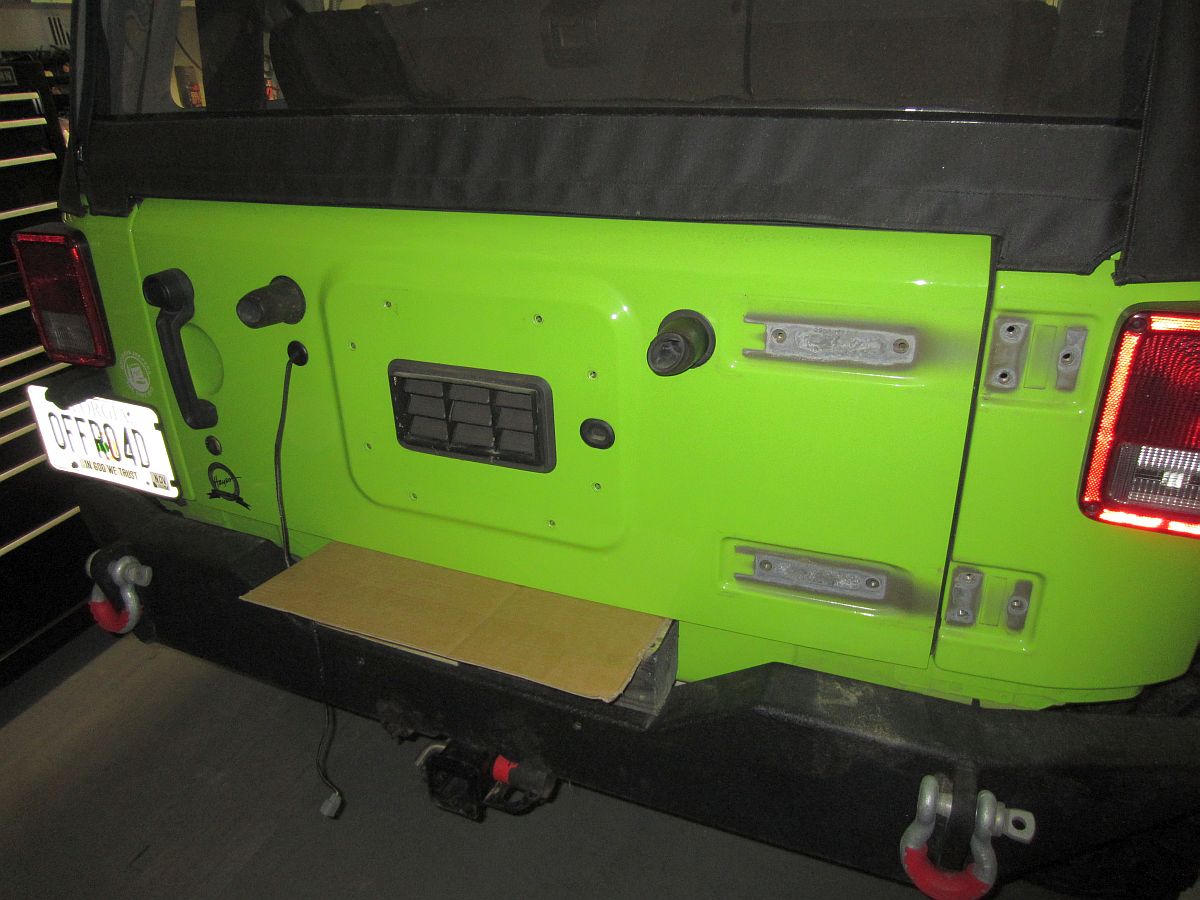
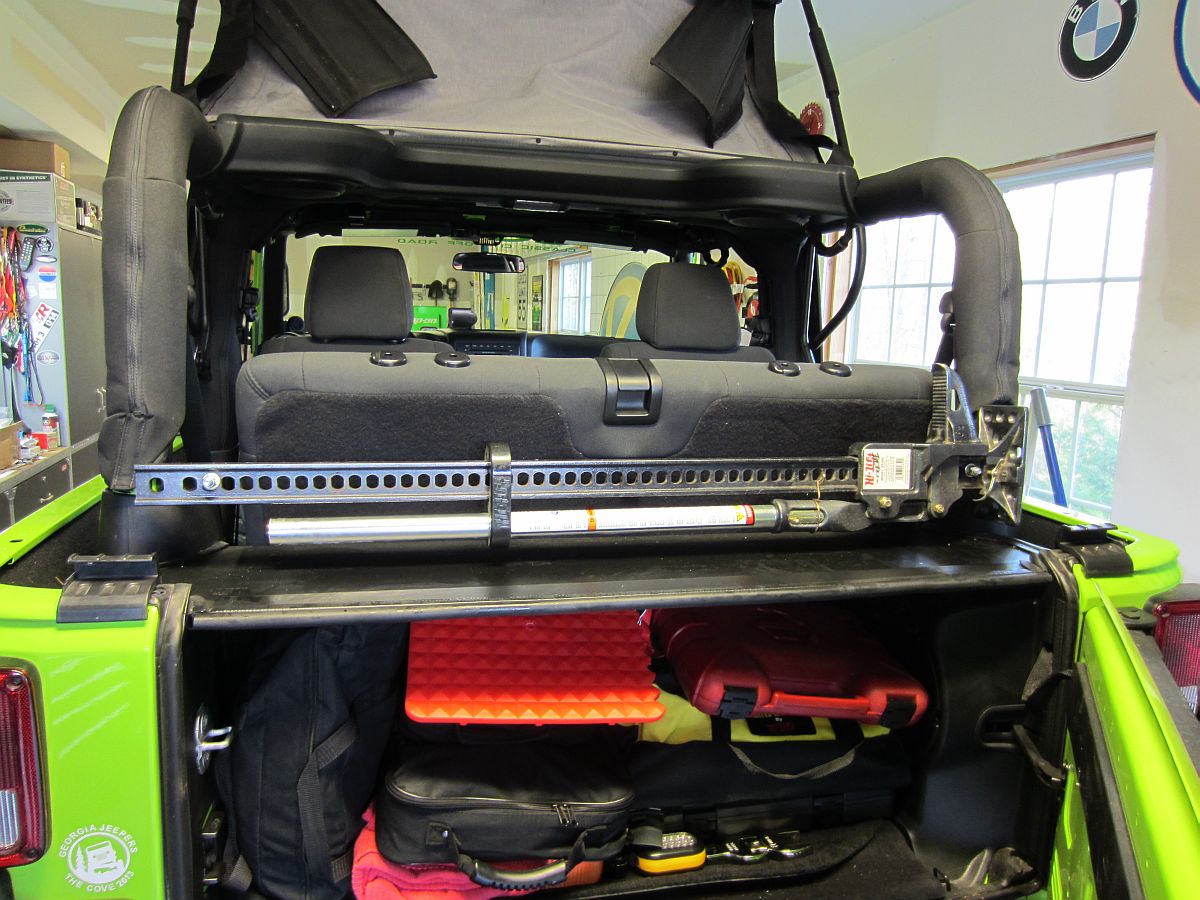
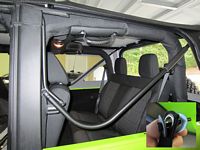
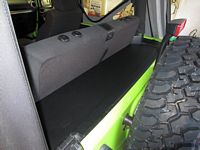
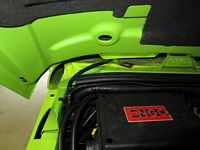
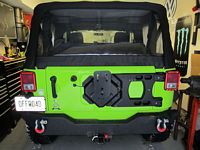
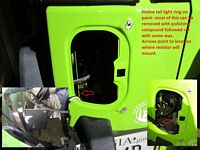
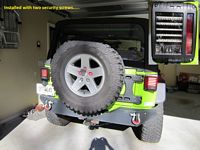
Tuffy Security Tailgate Enclosure (installation instructions HERE) from Quadratec installed. I took some pics to supplement the instructions.
[EDIT] This was later removed and sold, greatly limited use of rear storage.

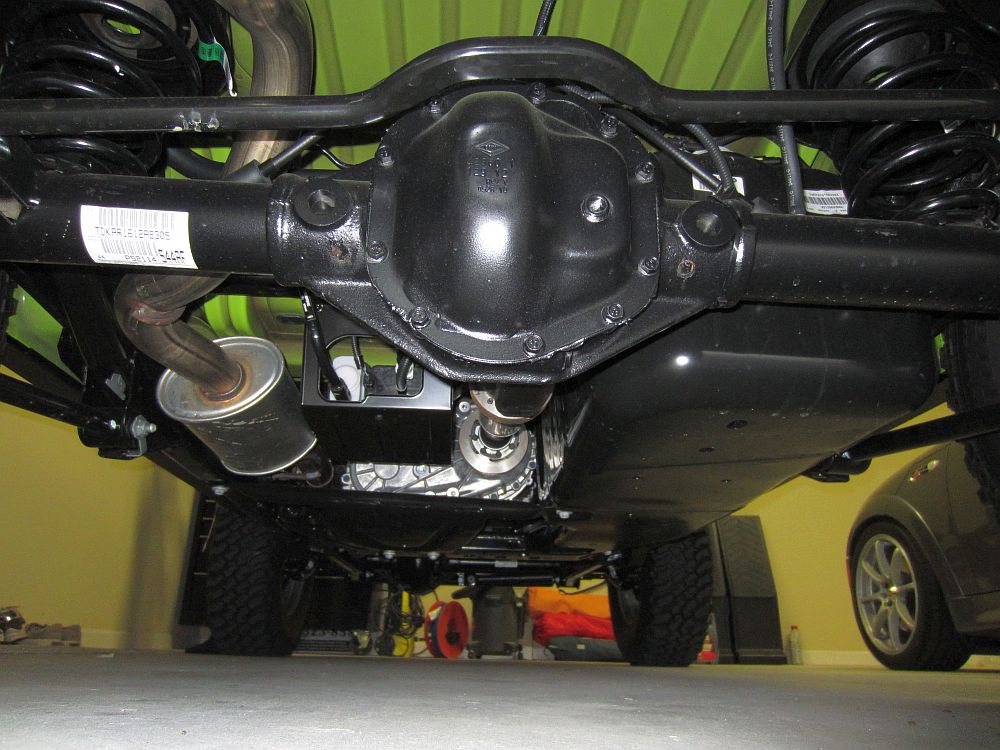
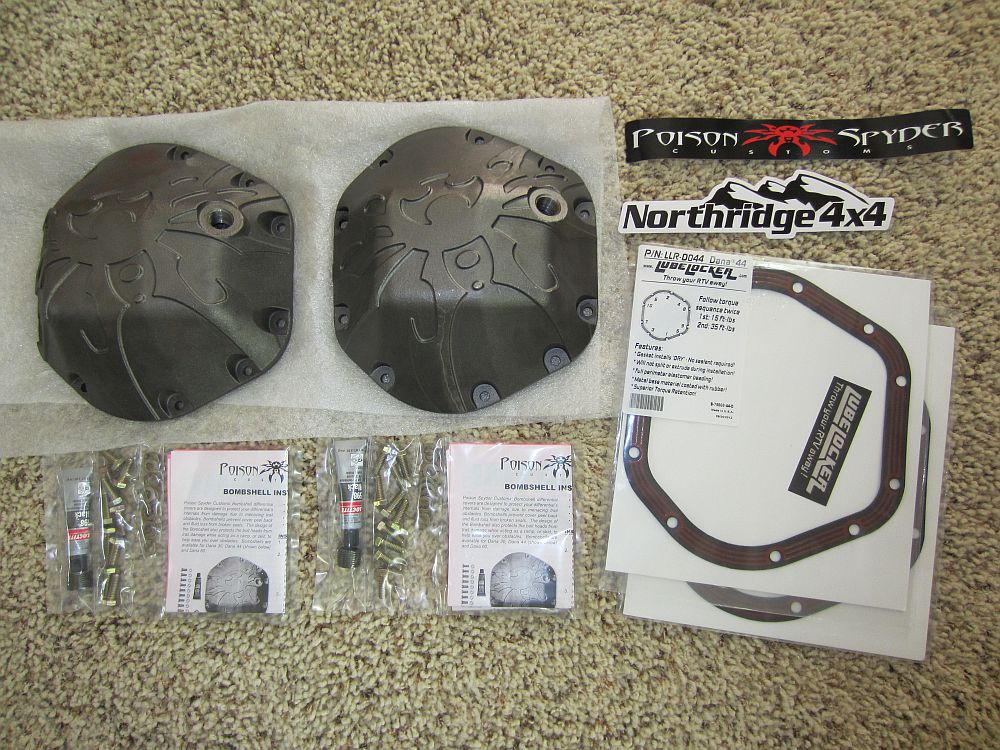
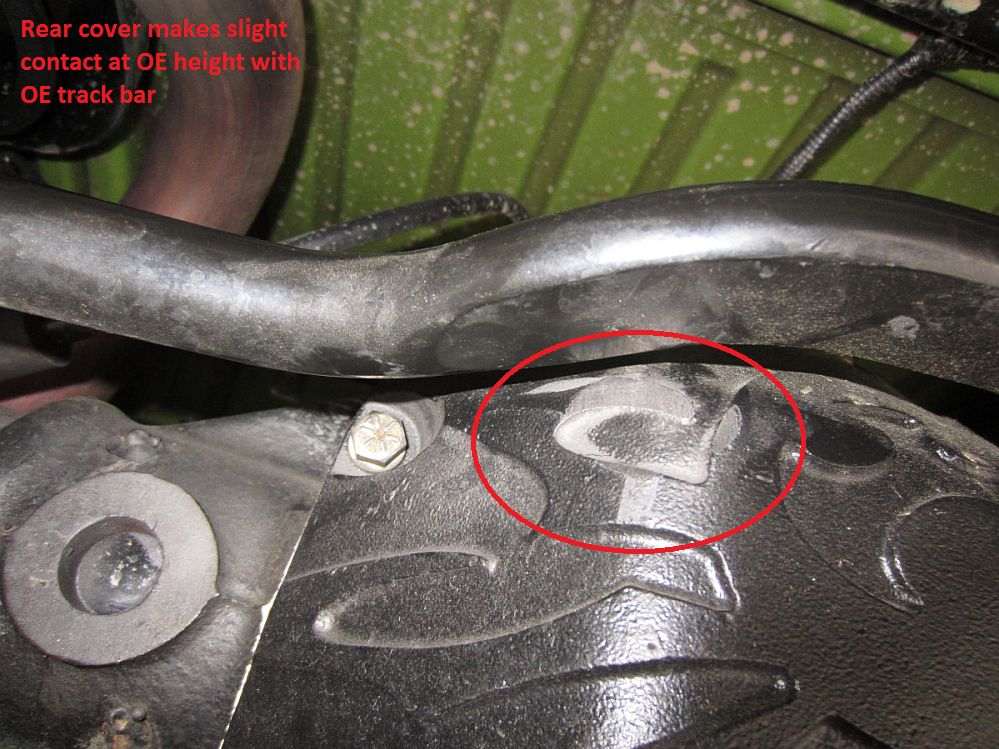
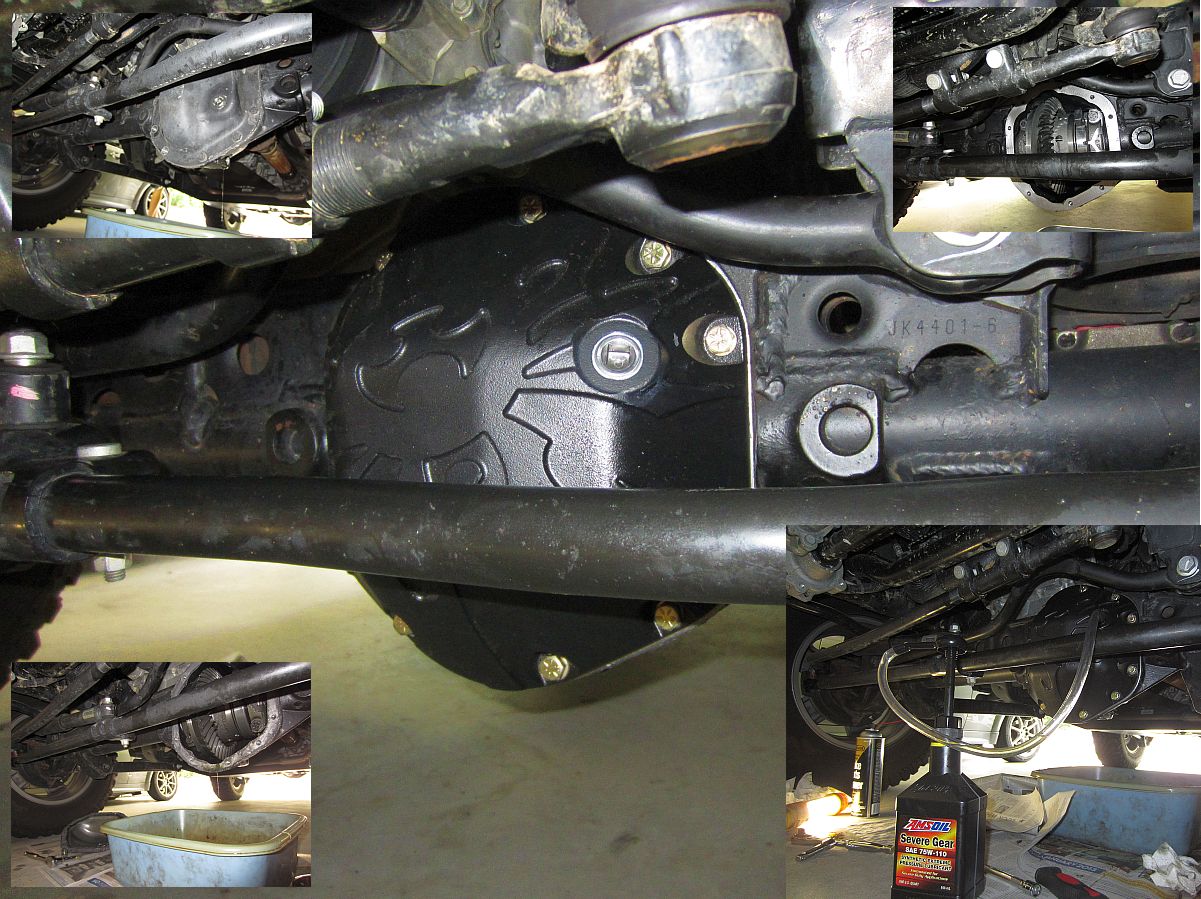
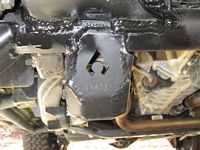
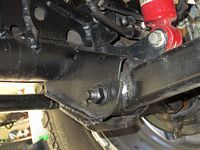
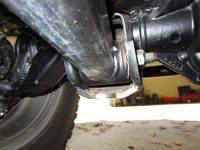
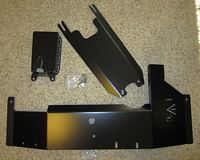
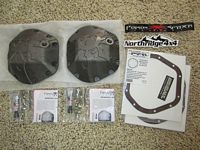
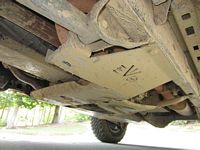
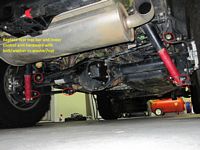
Poison Spider Bombshell Diff Covers/Lubelocker package (Bombshell instructions HERE, LubeLocker instructions HERE),
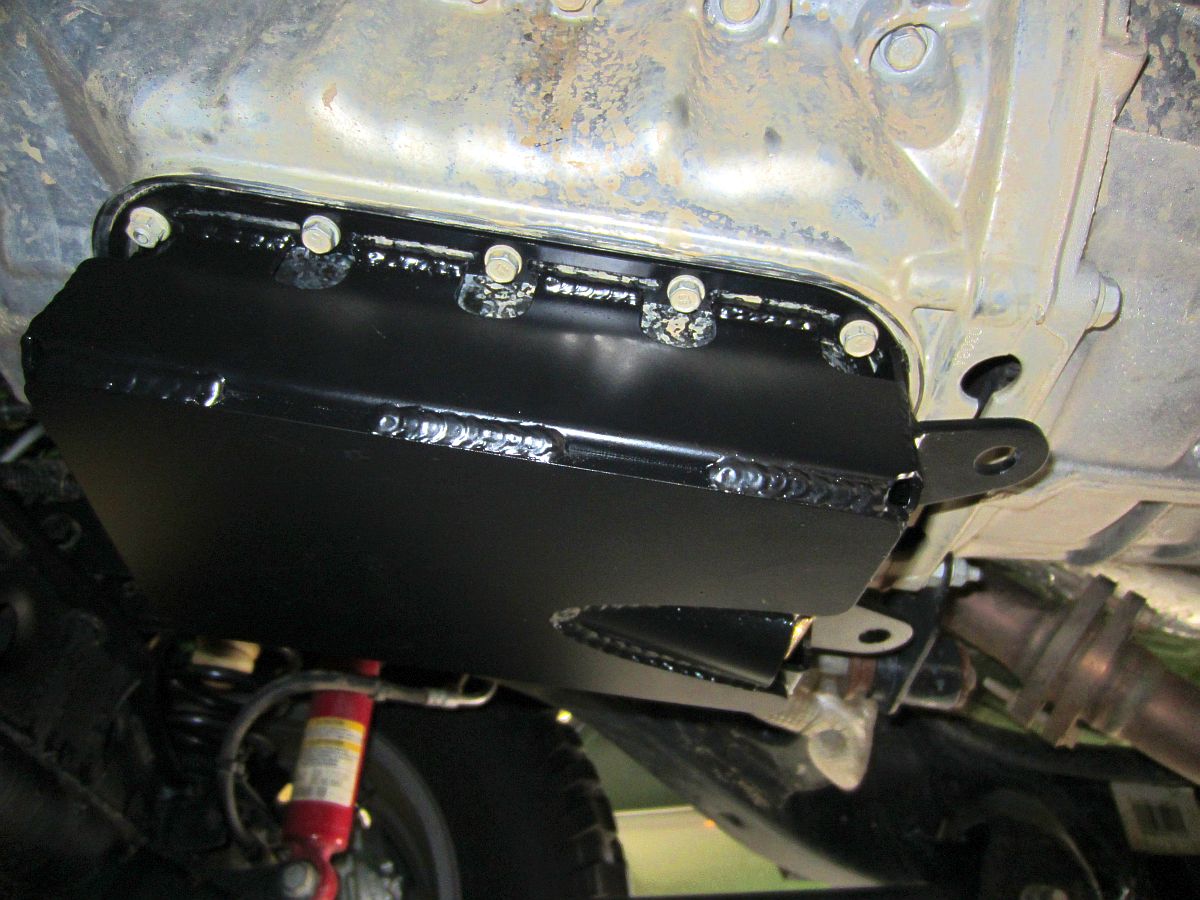
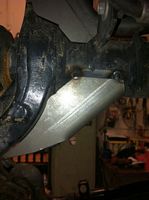
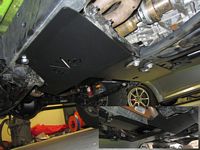
EVO Protek Skid System (installation instructions HERE, forum DIY post HERE), and
EVO Rock Star Skids (installation instructions HERE, forum DIY post HERE) purchased from Northridge 4x4.
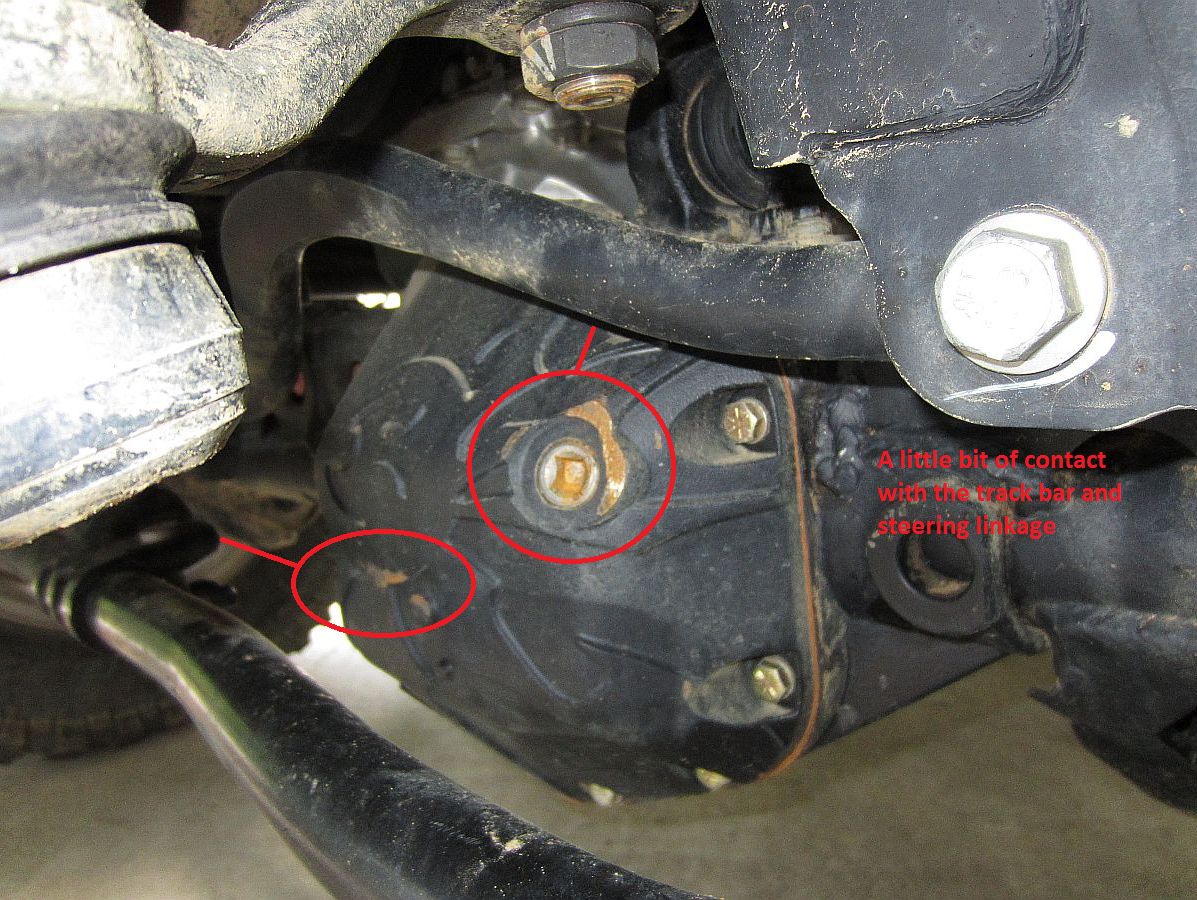
NOTE: Be careful when installing the differential covers, LubeLocker states 35 ft/lbs in their instructions as the final torque value but the OE torque value is 30 ft/lbs (reference for torque value). I settled on 30 ft/lbs final value and we'll see how it works. These covers od have a bit of rub/interference on my 2012 Rubicon, nothing major and it will be lifted soon enough which should alleviate this.
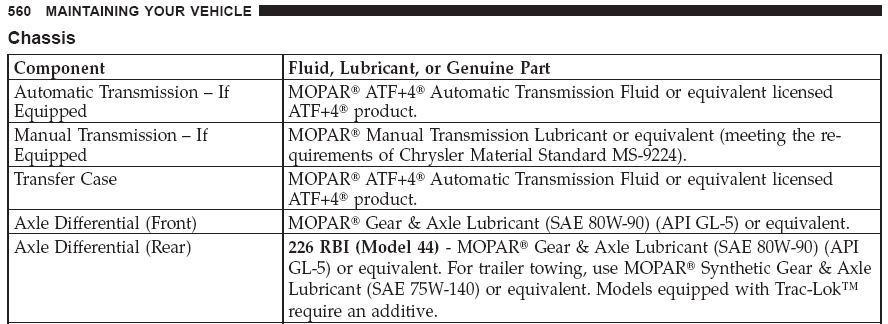
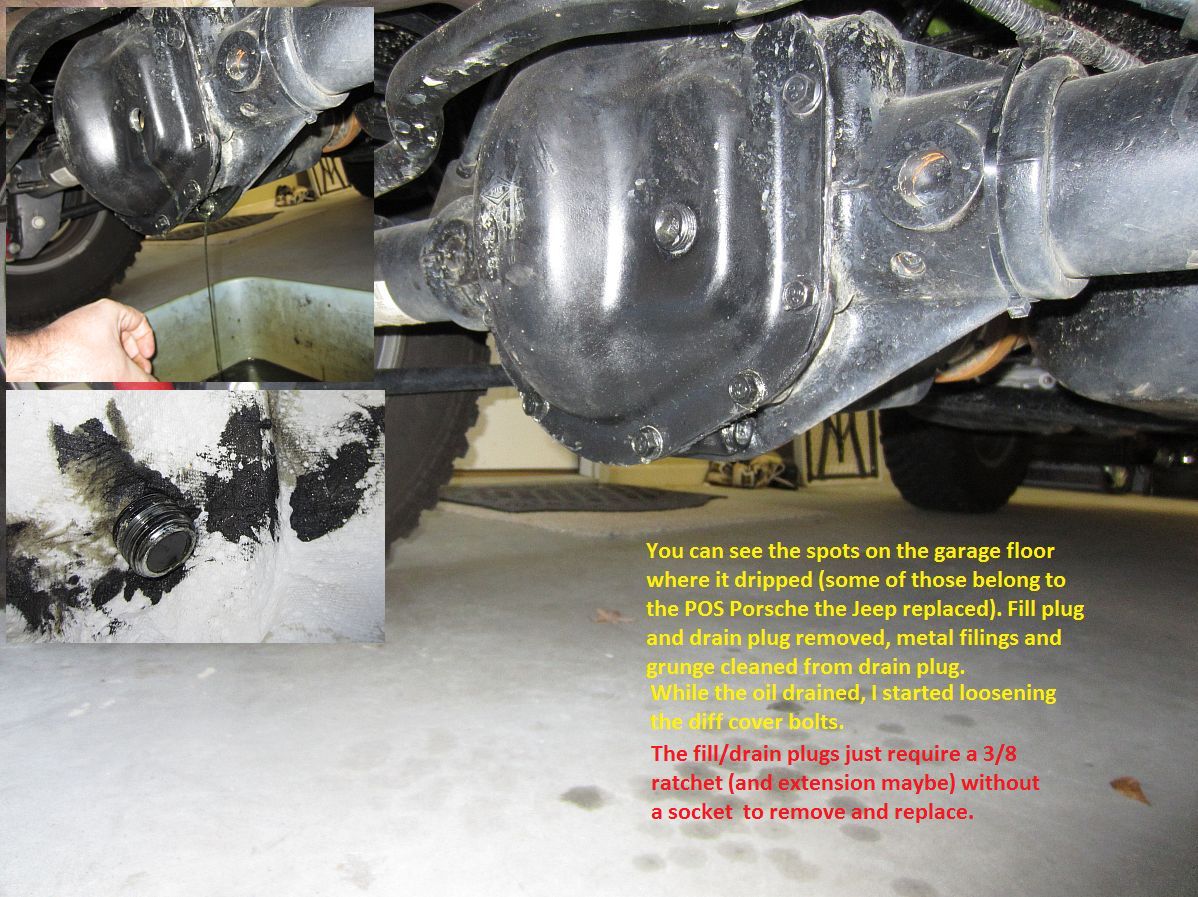
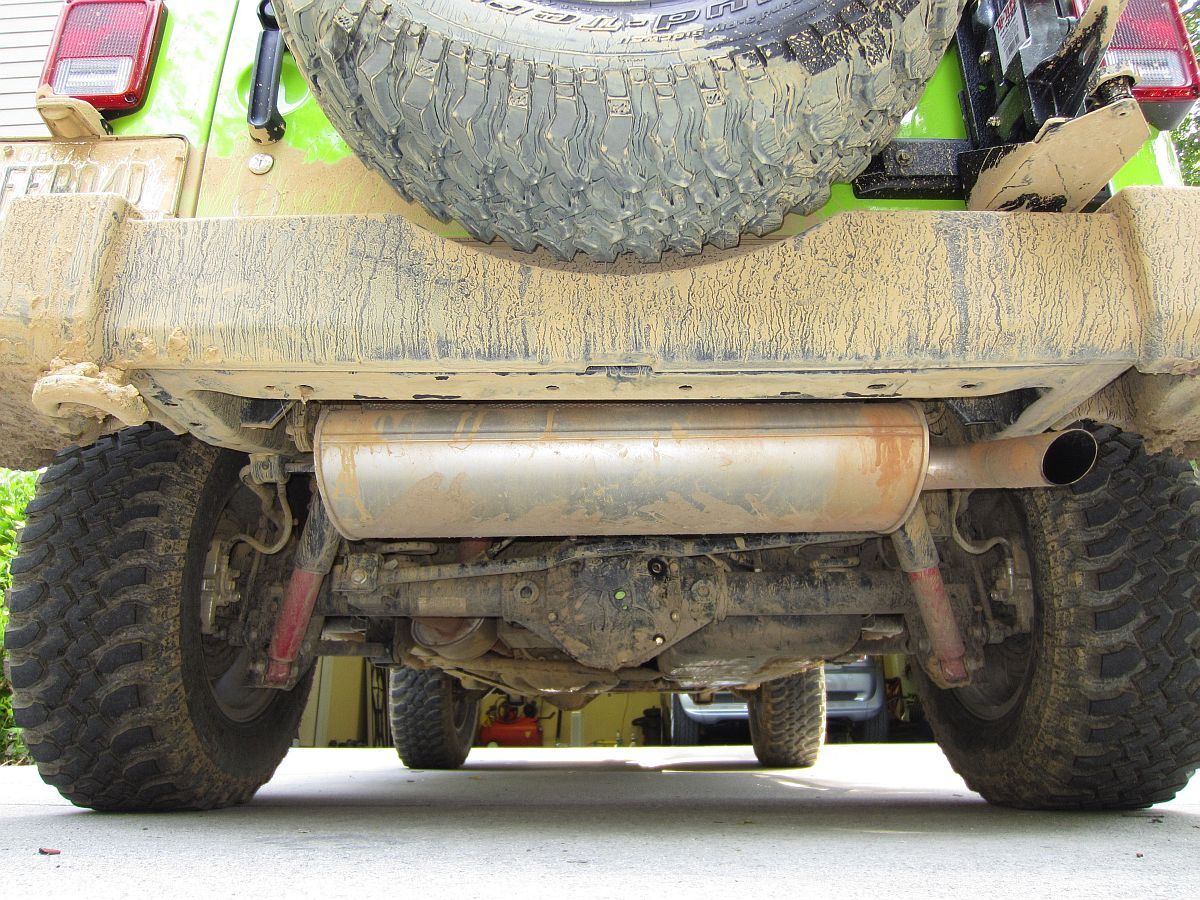
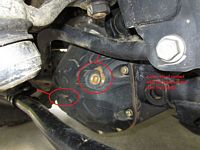
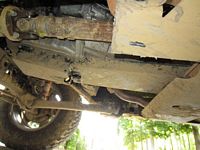
Differentials: The rear diff for our Rubicon holds 2.25 L (2.4 qts) and the front diff holds 1.3 L (1.4 qts) so I stayed close to these when refilling with Amsoil Severe Gear 75w110 (GL5) for both differentials. The PS Bombshell covers were painted with the same ACE Hardware spray paint I use to touch up the ACE bumpers/rails to keep things consistent. Details in pics below.
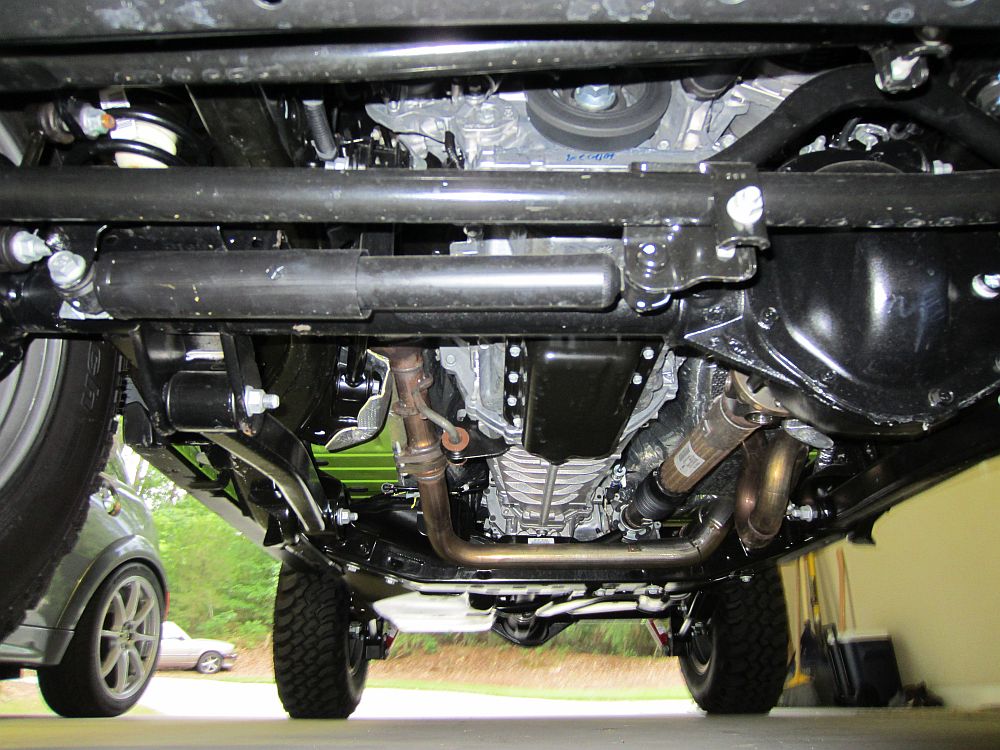
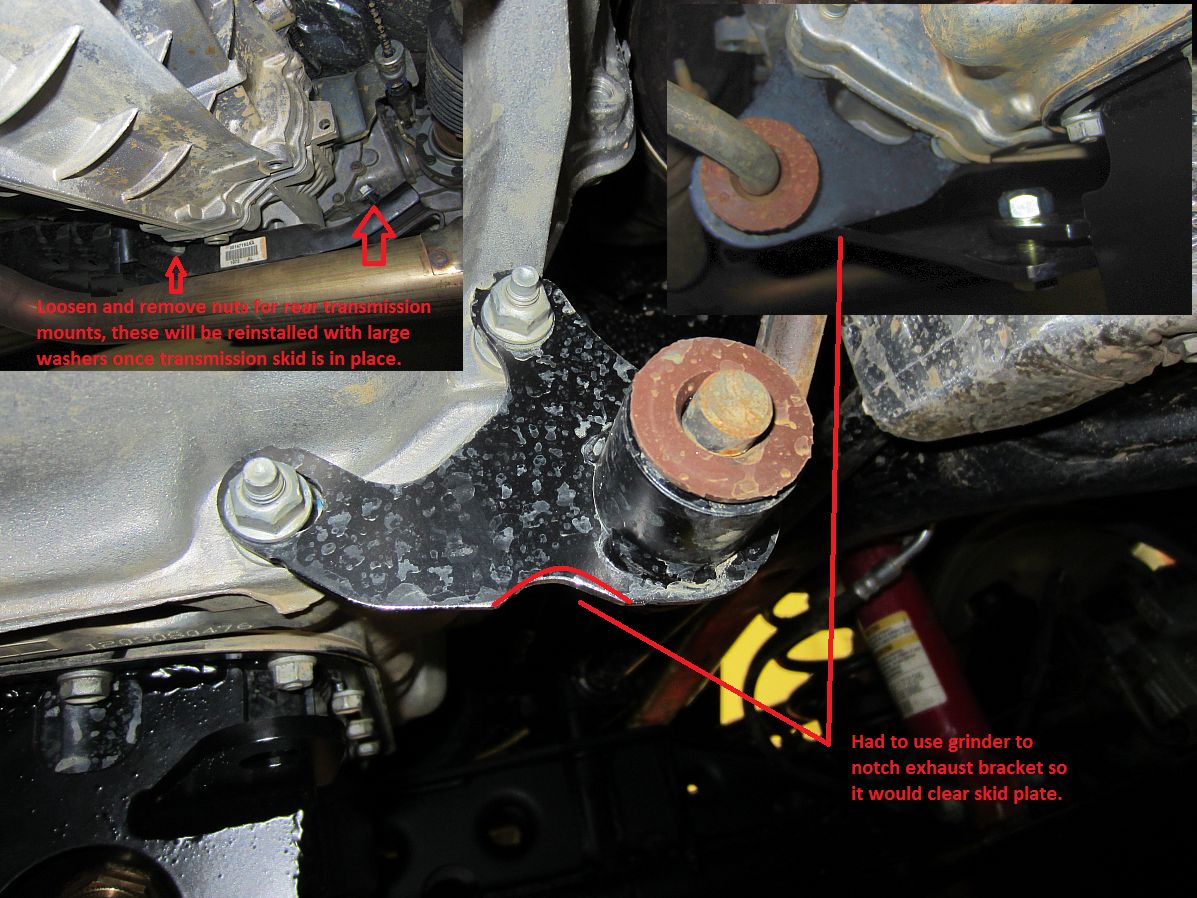
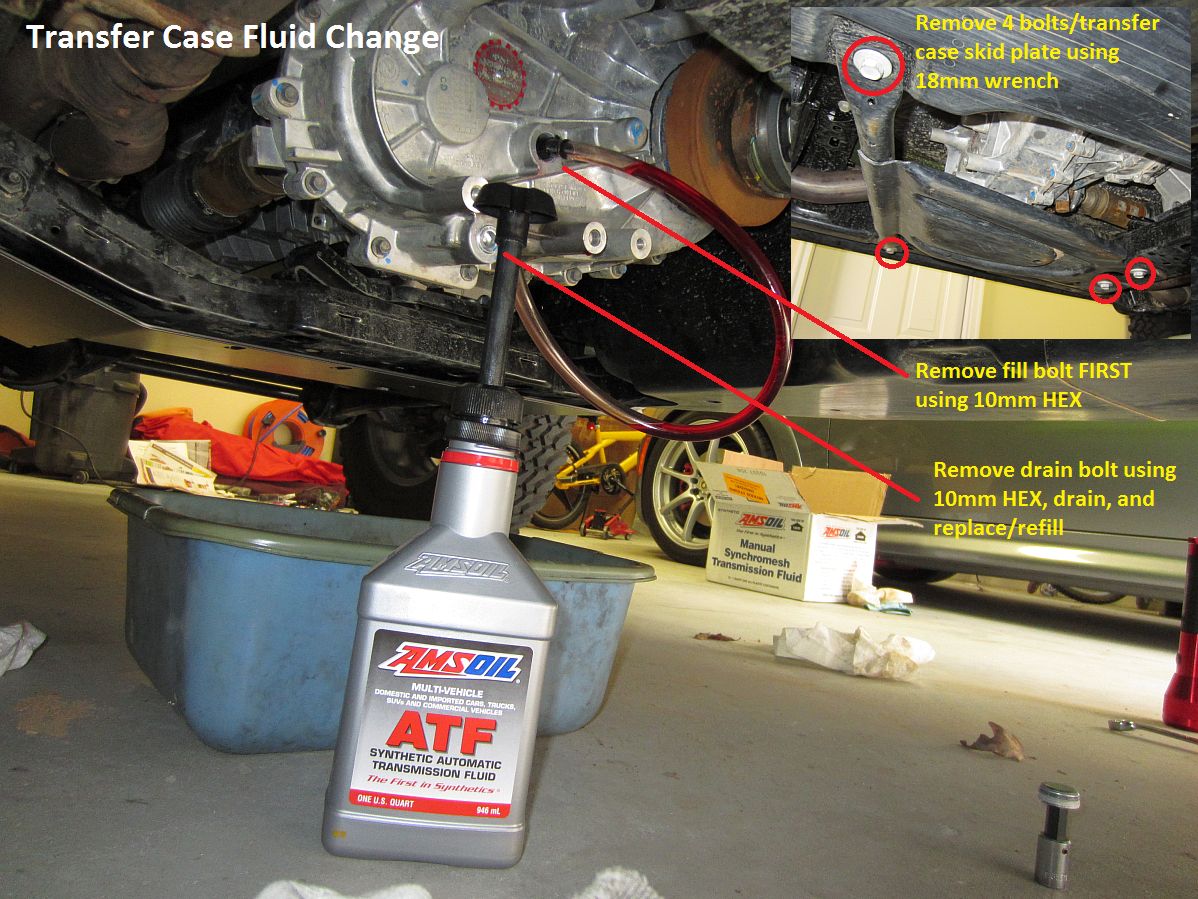
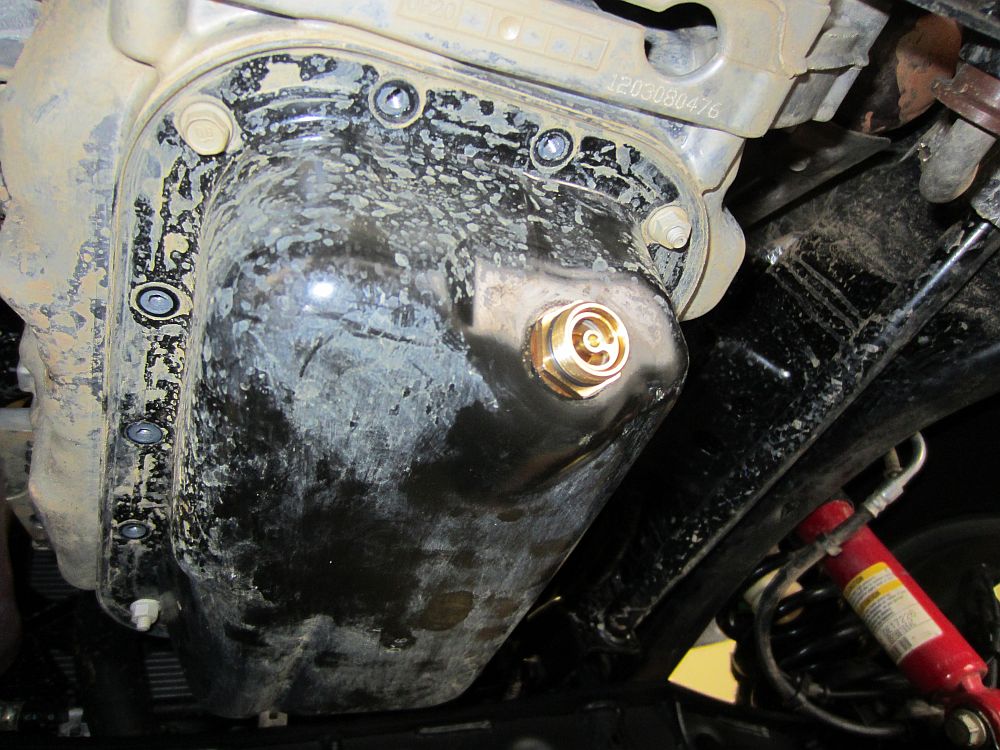
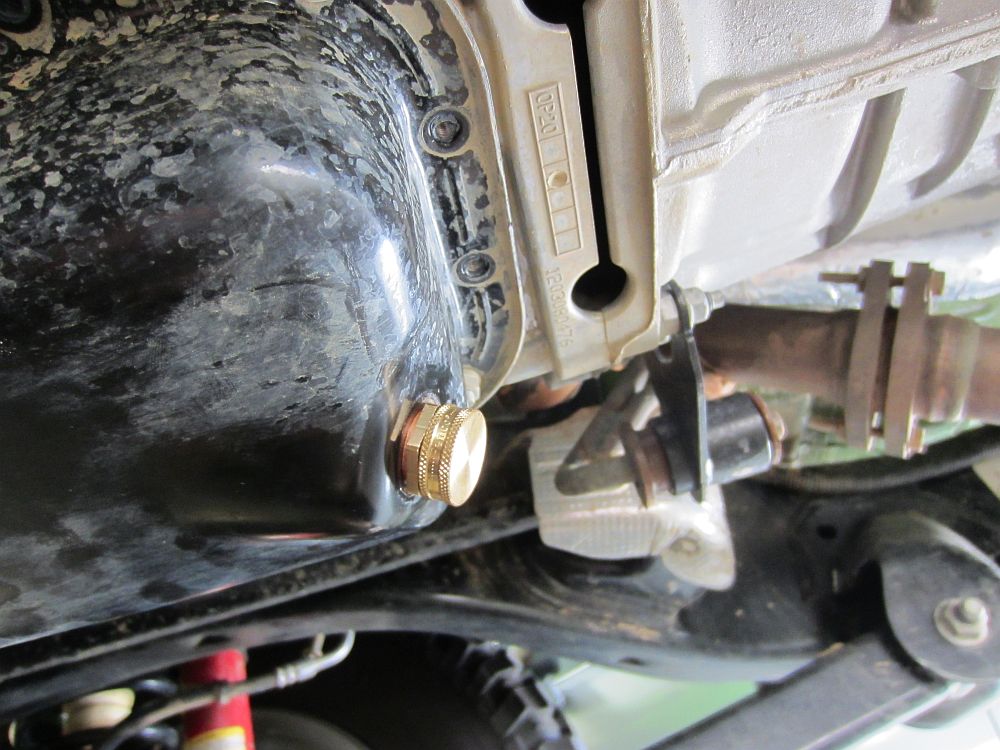
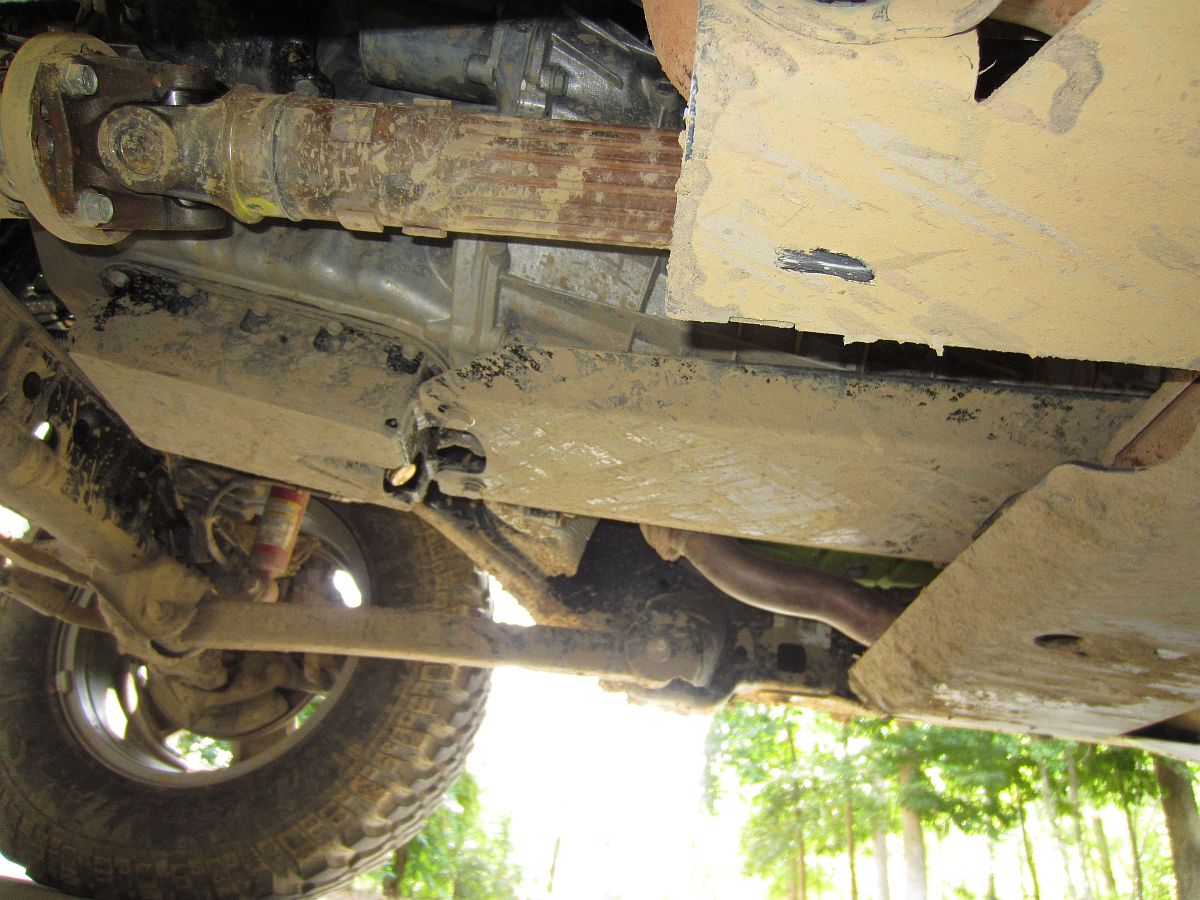
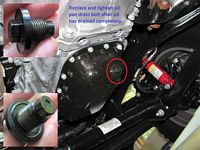
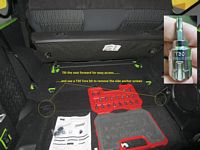
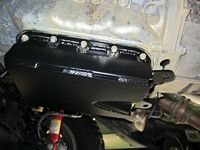
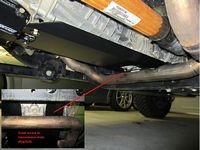
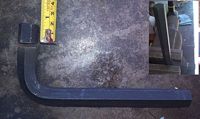
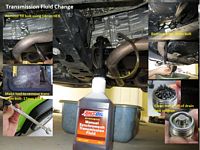
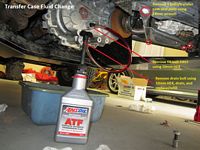
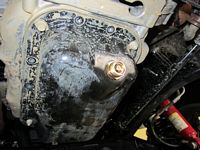
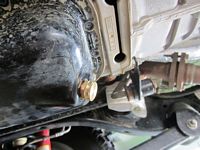
Transmission and Transfer Case: The fluid in the transmission and transfer case was changed before installing the crossmember and exhaust skid. You will need to source a special tool or make one for the drain plug- I bought a 17mm HEX wrench on eBay and cut a small piece off to make my tool, pictured below. The NSG370 manual transmission capacity is 3.2 pints (1.6 qts) and was filled with Amsoil Manual Synchromesh Transmission Fluid 5w30 (meets MS9224 spec)- my experience is that filled to the bottom of the fill hole is about 2 quarts or a little over. The NV241 transfer case fluid capacity is 4.2 pints (2.1 qts) and was filled with Amsoil Synthetic Automatic Transmission Fluid (meets ATF+4 spec). Shift feel improved noticeably over OE fluid. Details in pics below.
Project JK also has writeups on the Differential Fluid Change, NSG370 Manual Transmission Fluid Change, and NV241 Transfer Case Fluid Change.


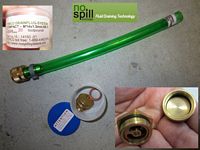
The "Change Oil" message came on ~3500 miles so perfect opportunity to install the EVO oil pan skid (above) and the No Spill Systems Compact Oil Drainer. I had originally looked at the Fumoto valve I had used on other cars but felt it posed one more thing to snap off on obstacles given the chance, the low profile of the NSS oil drainer offers the same pros without the cons. Video of how it works HERE.
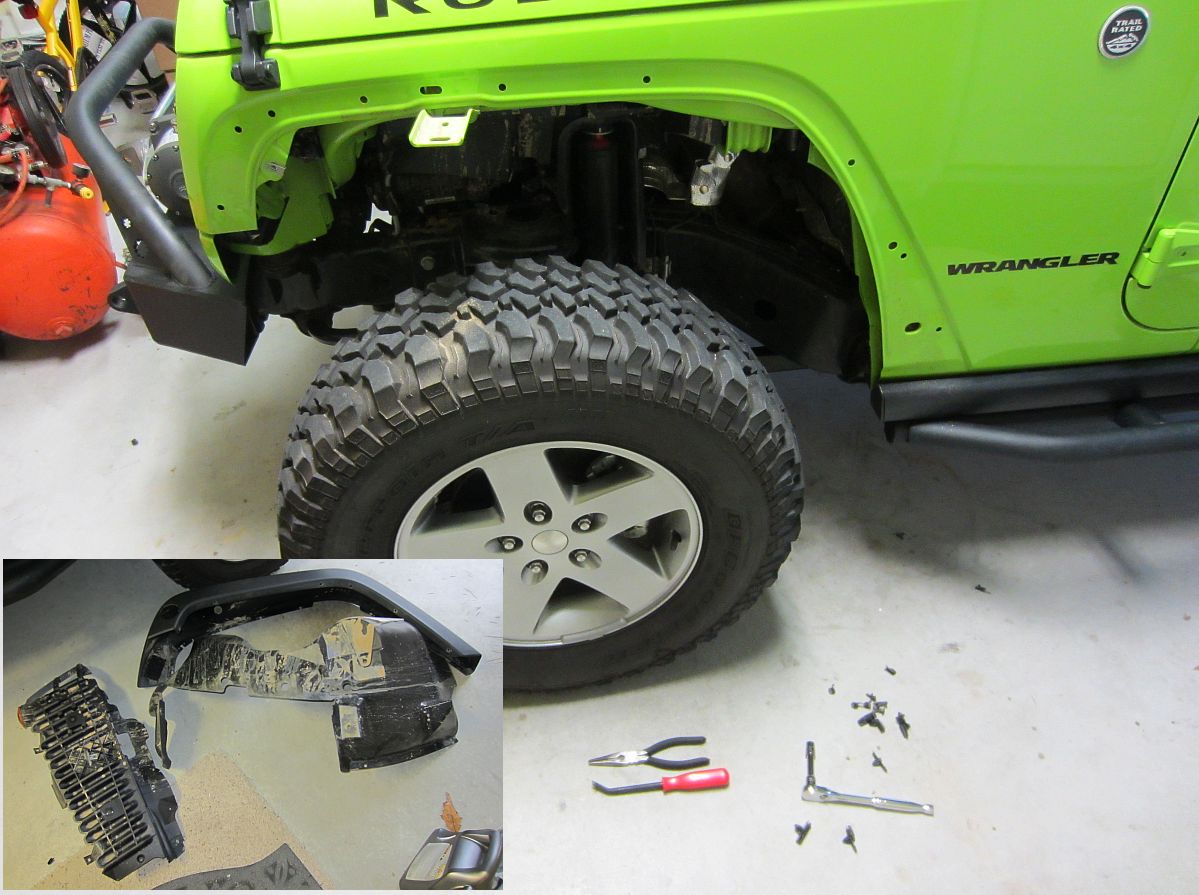
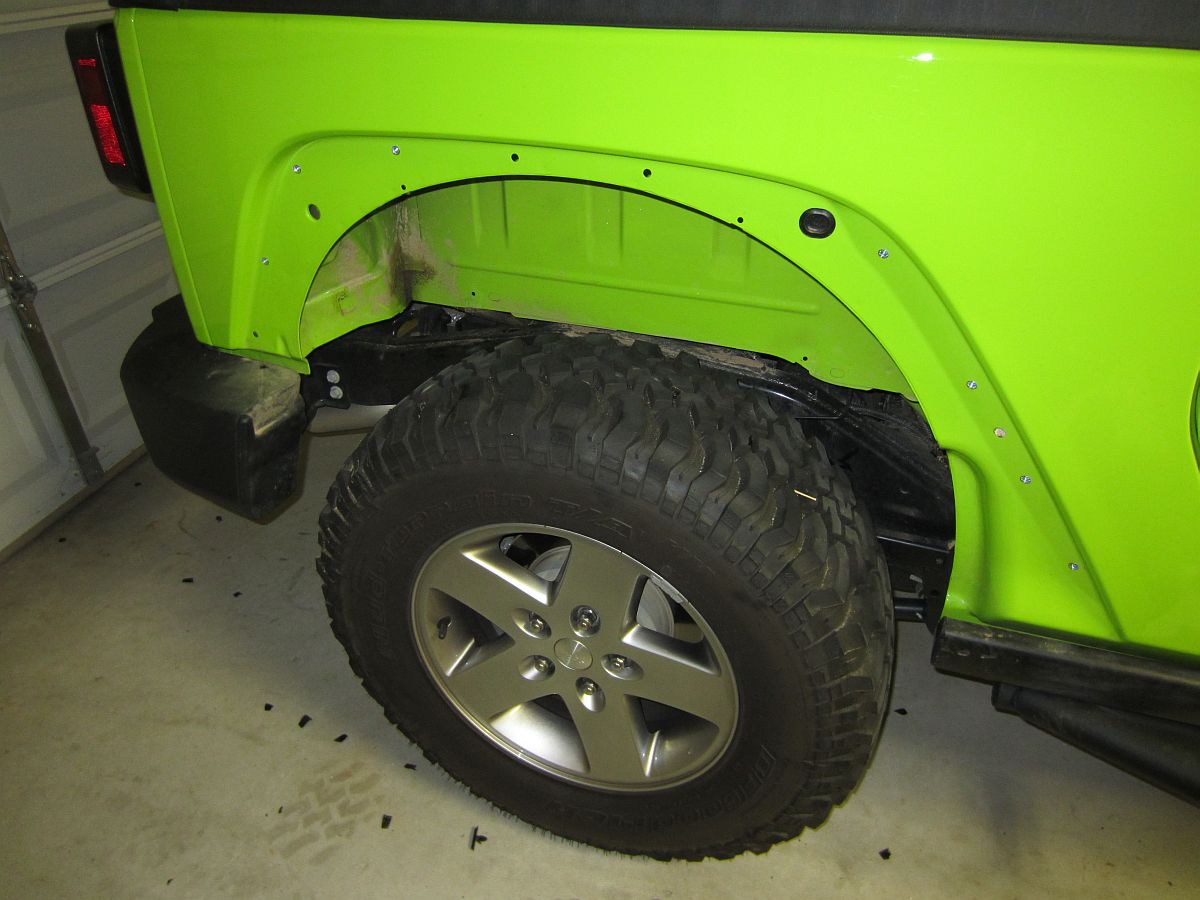
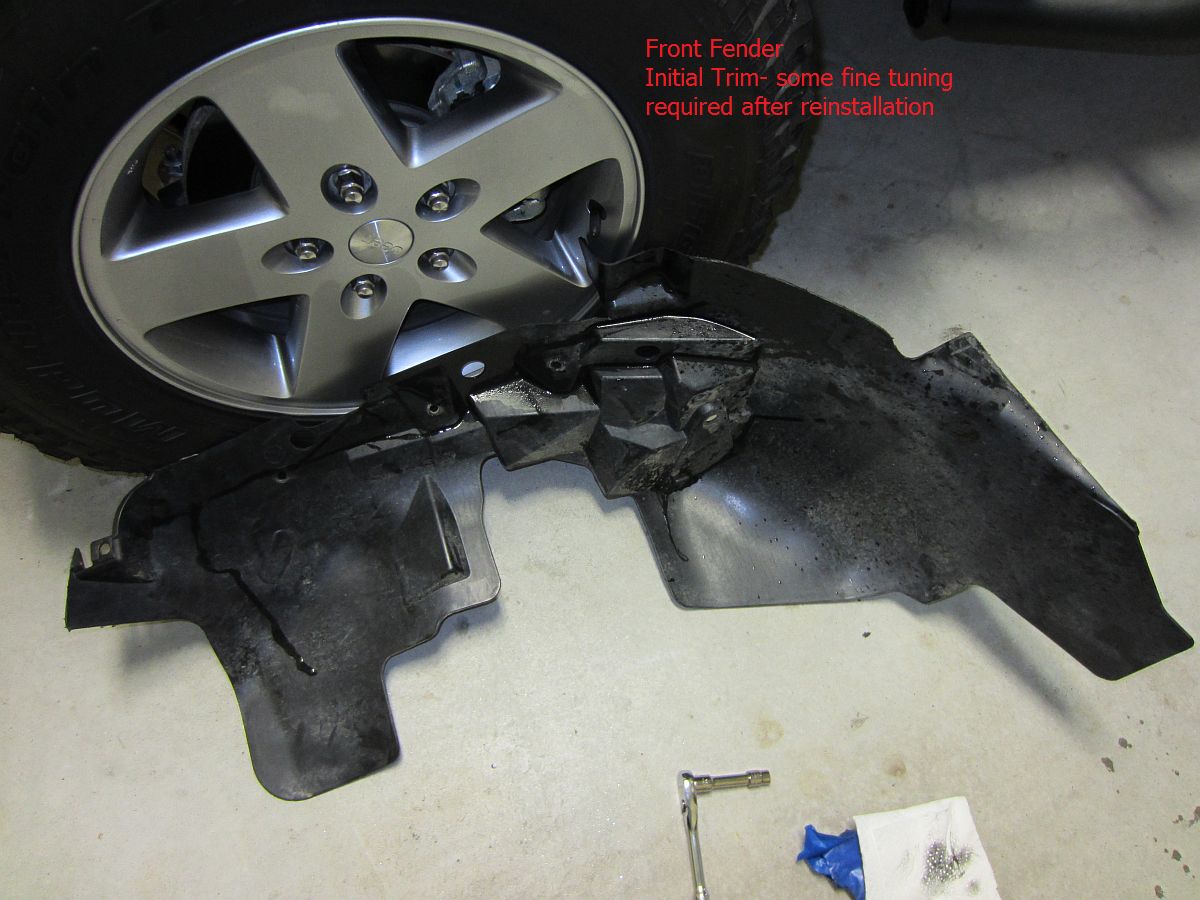
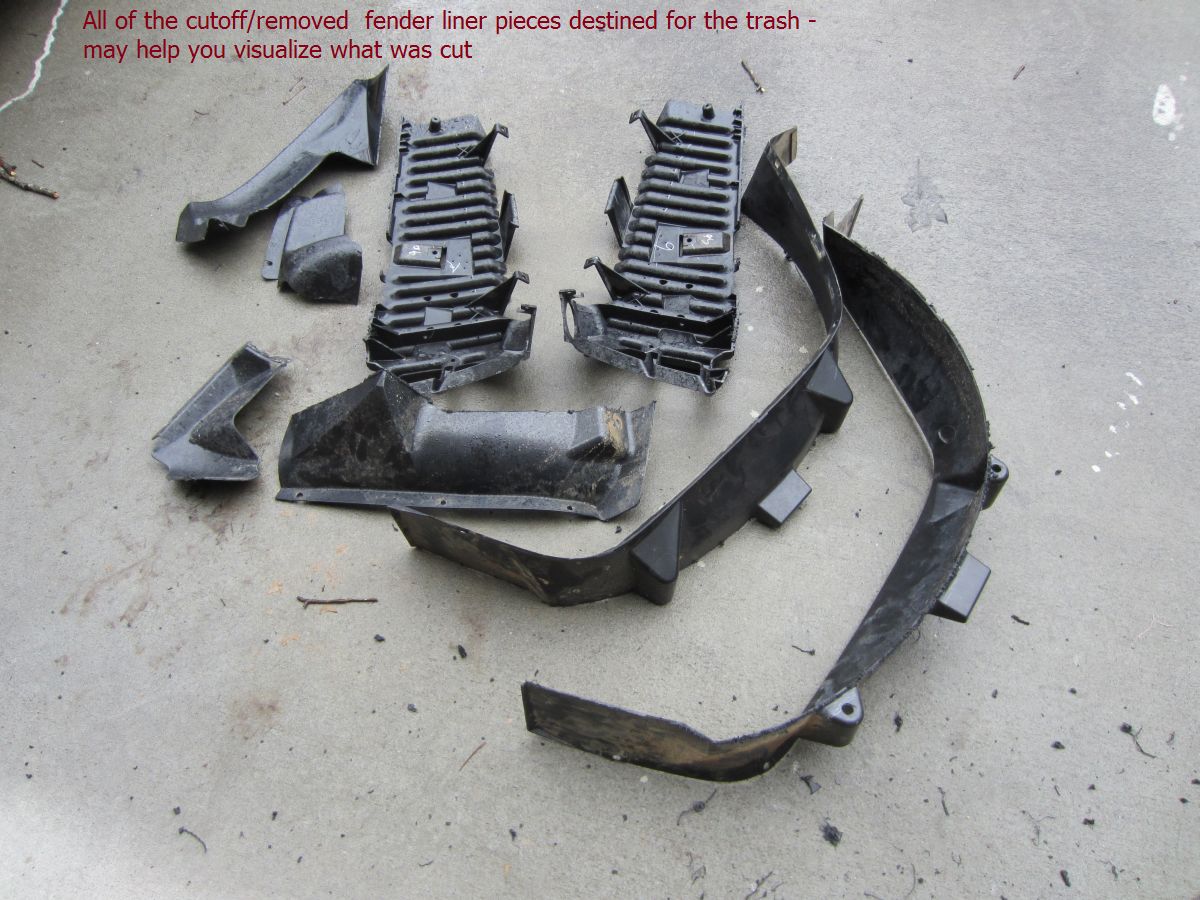
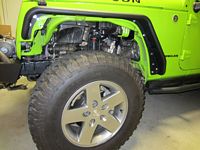
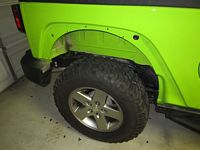
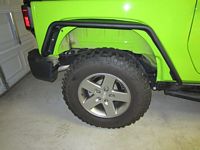
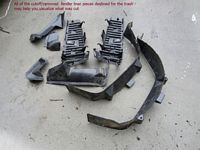
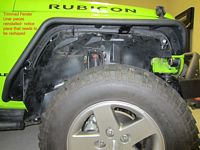
ACE Engineering Narrow Tube Fenders from Krawl Off-Road installed- Ace Overview HERE, Ace Installation DIY Guide HERE, and another video on how the inner fender liners can be removed, cut, and reinstalled HERE. Also some good pics of where the fenders can be cut in the Bushwacker fender installation guide HERE.
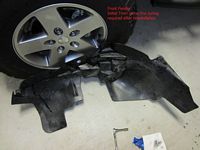
I found the tool in the ACE video at the local McParts store, this is worthwhile to purchase as it makes removing the plastic retainers SO much easier, I actually sharpened mine a bit to make it easier to slide under the retainer head. The tool I bought is HERE and the plastic retainers I bought to replace the ones removed and unusable were sourced at the same parts store HERE.
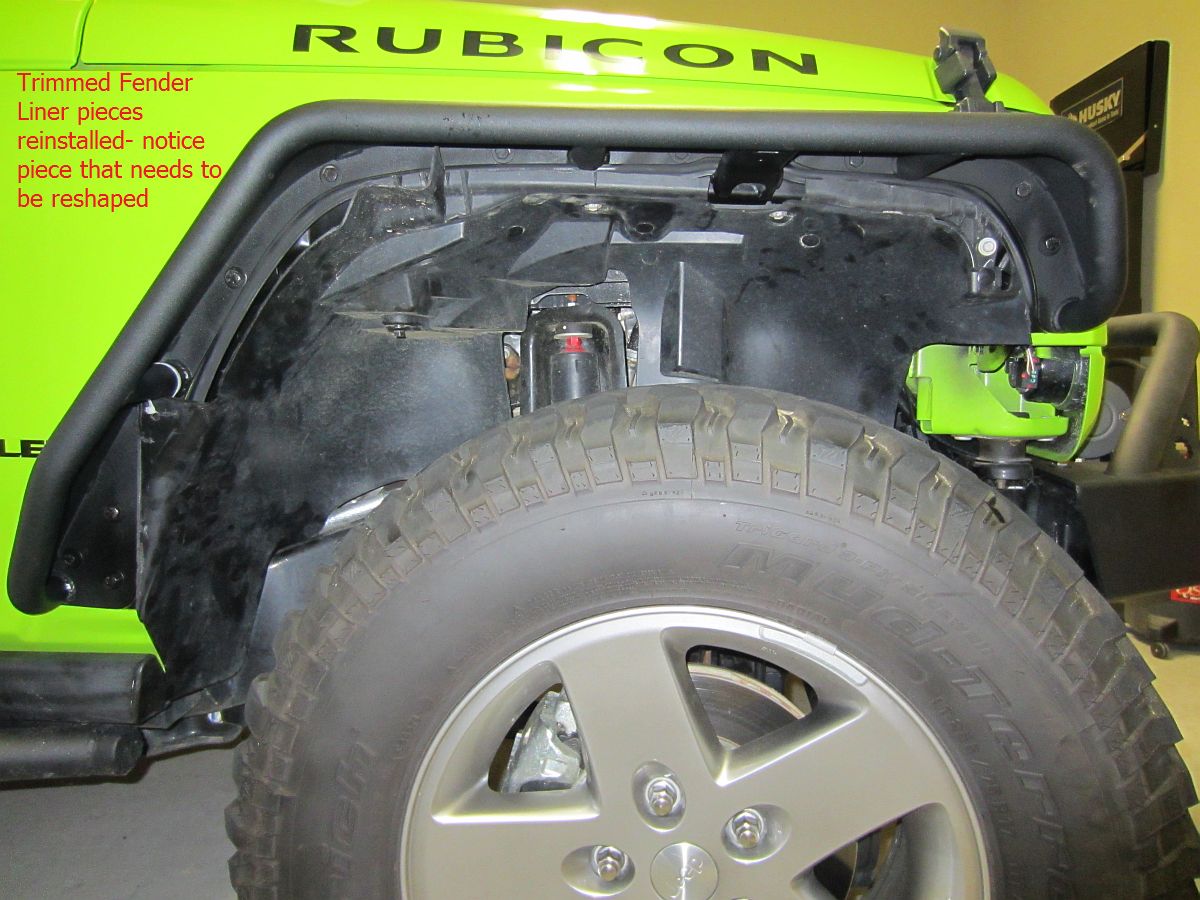
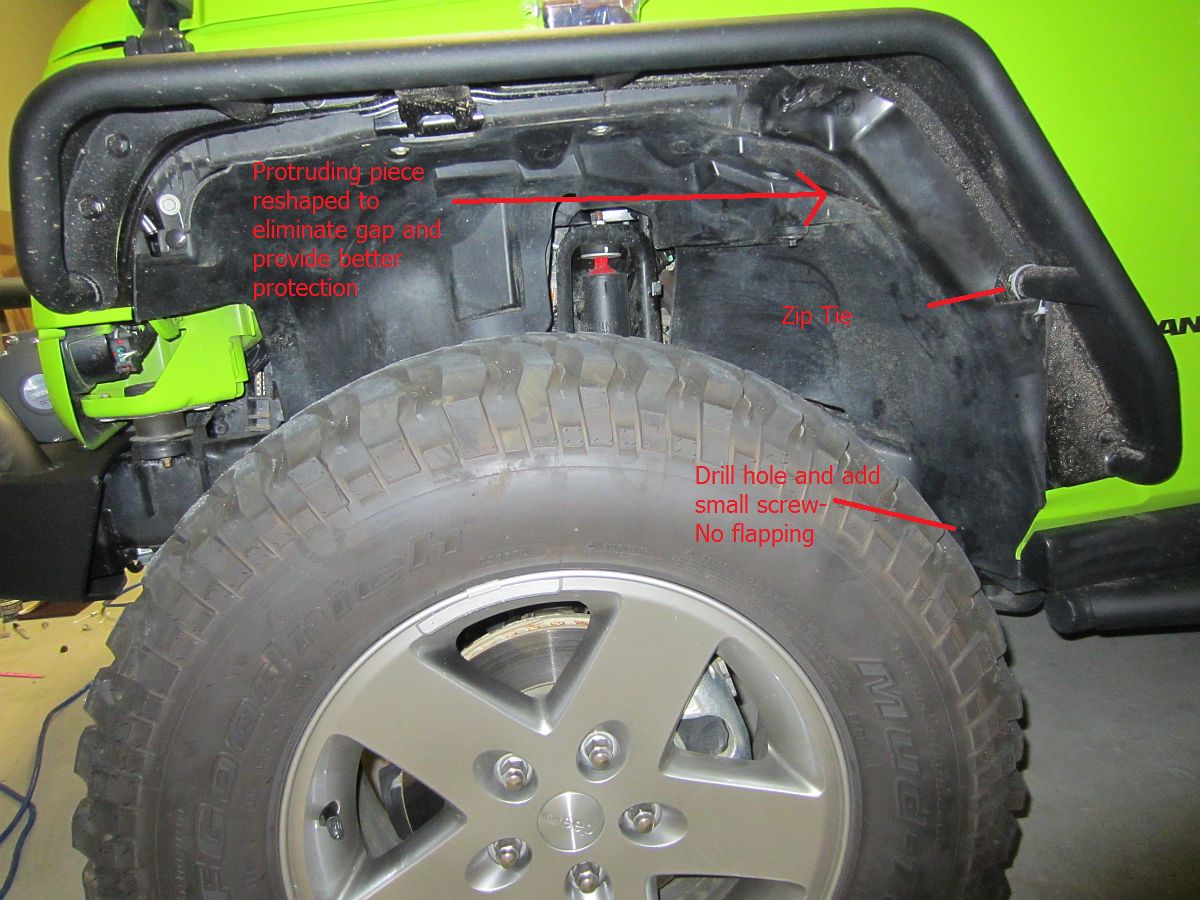
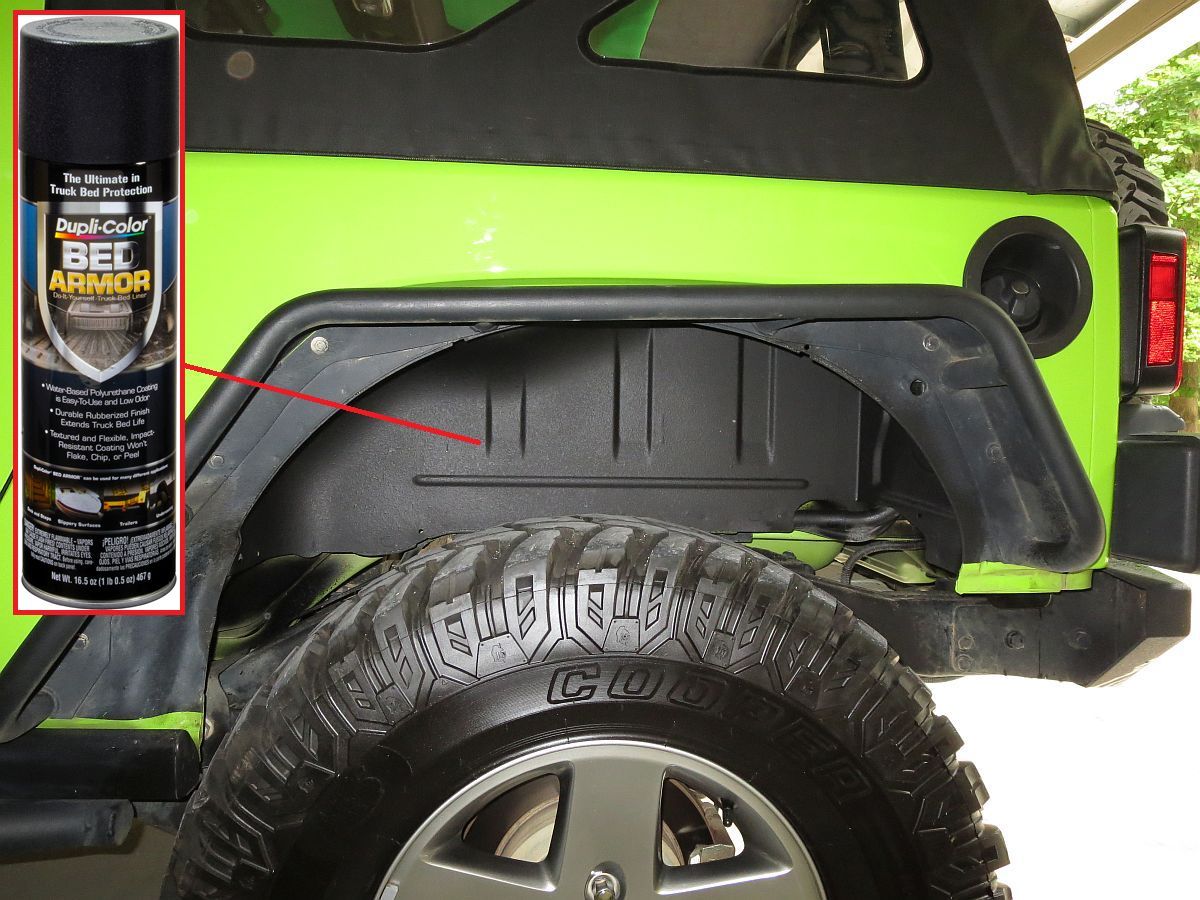
I was able to trim the front fender liners for re-use, I wanted to keep water off some of the electronics/computer harnesses that are exposed up front. I also painted around the inside of the fenders but will end up going back and redoing this in some kind of bedliner. After trimming the fenders the outside anchor points used with the OE plastic fenders are removed so there are some adjustments required for stability of the liner. I was able to use most of the inner fasteners and add a screw up front to stabilize them. I also reshaped some of the overhanging plastic using a propane torch to heat (not burn) the plastic and gradually/carefully bend and shape. Fender liners out back were scrapped and Duplicolor Bed Armor in a spray can was used to apply a few coats to cover the Gecko paint and protect. Some LED side markers were sourced so that I can install later to replace the removed OE lights.


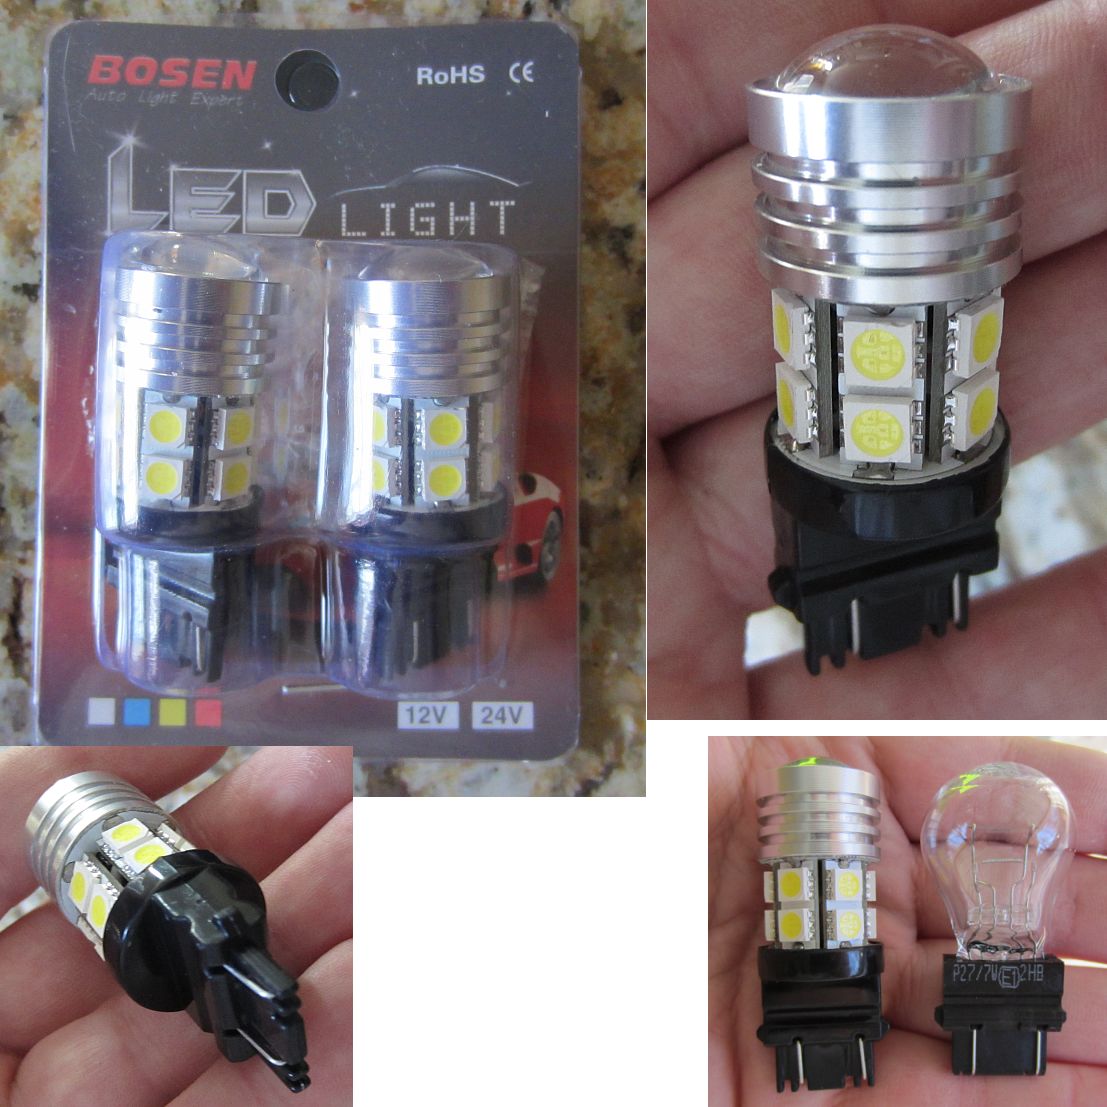
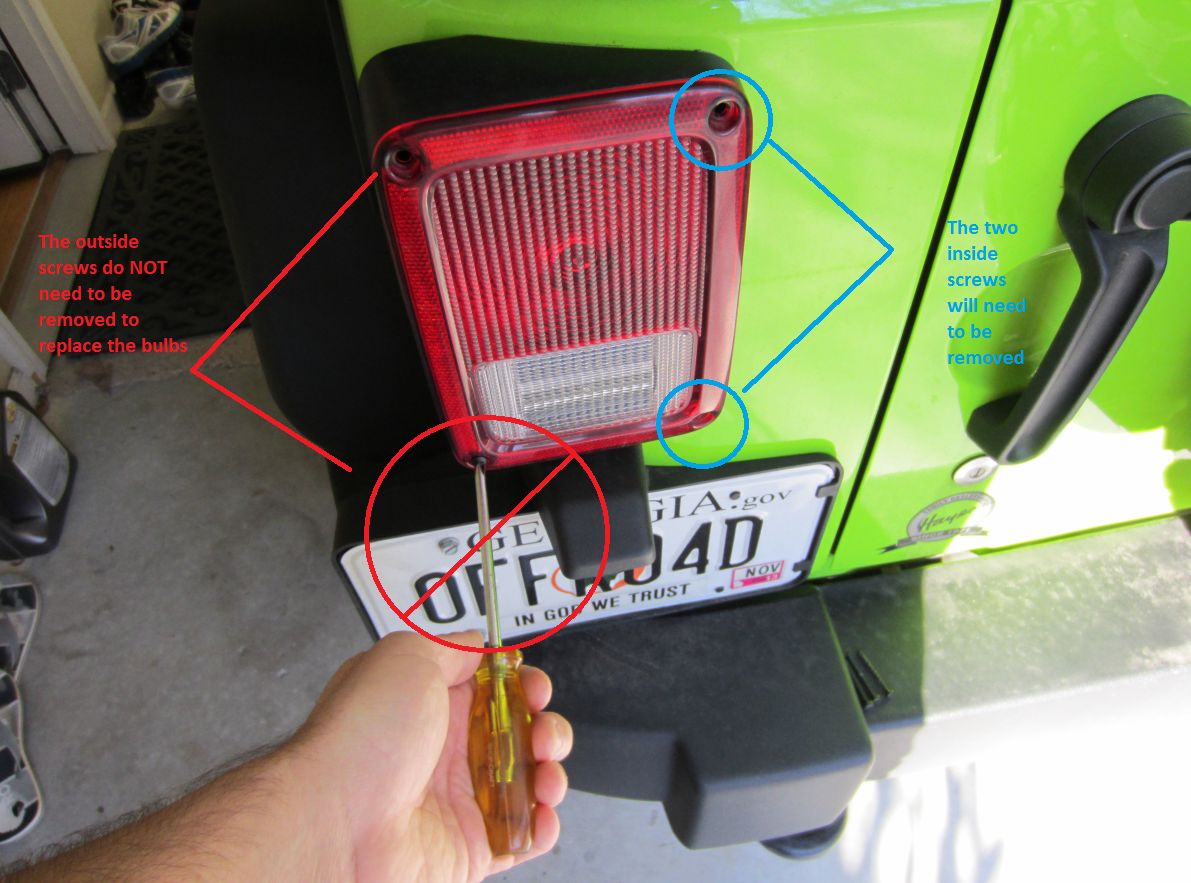
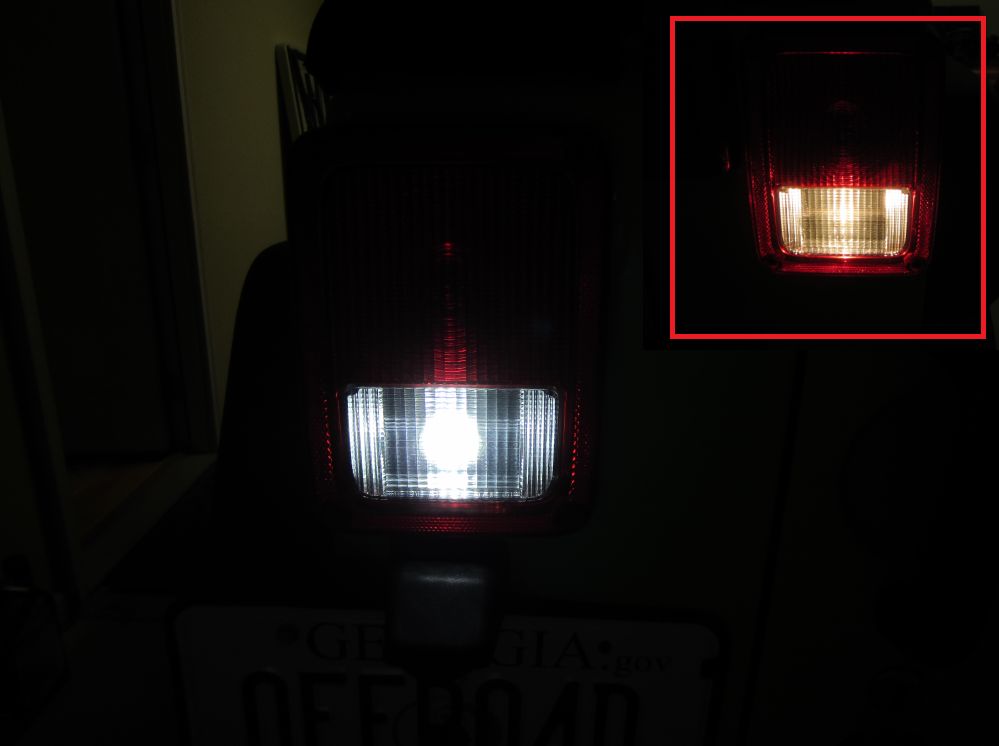
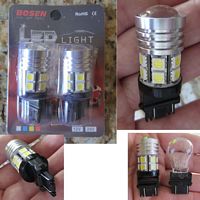
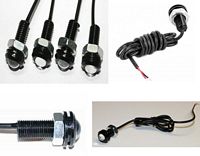
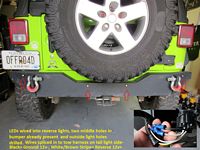
New LED 3157/3156 reverse bulbs purchased from a-integrics on eBay. Eventually we will have a new ACE Pro rear bumper with SR6 LED lights but for now these will serve the purpose of being a good bit brighter and longer lasting than the bulb they are replacing. Cheap mod at ~$30 and quick at about 5 minutes/4 screws to replace bulbs. Hard to see in the photos since the camera adjusted for the difference in light but these are brighter.
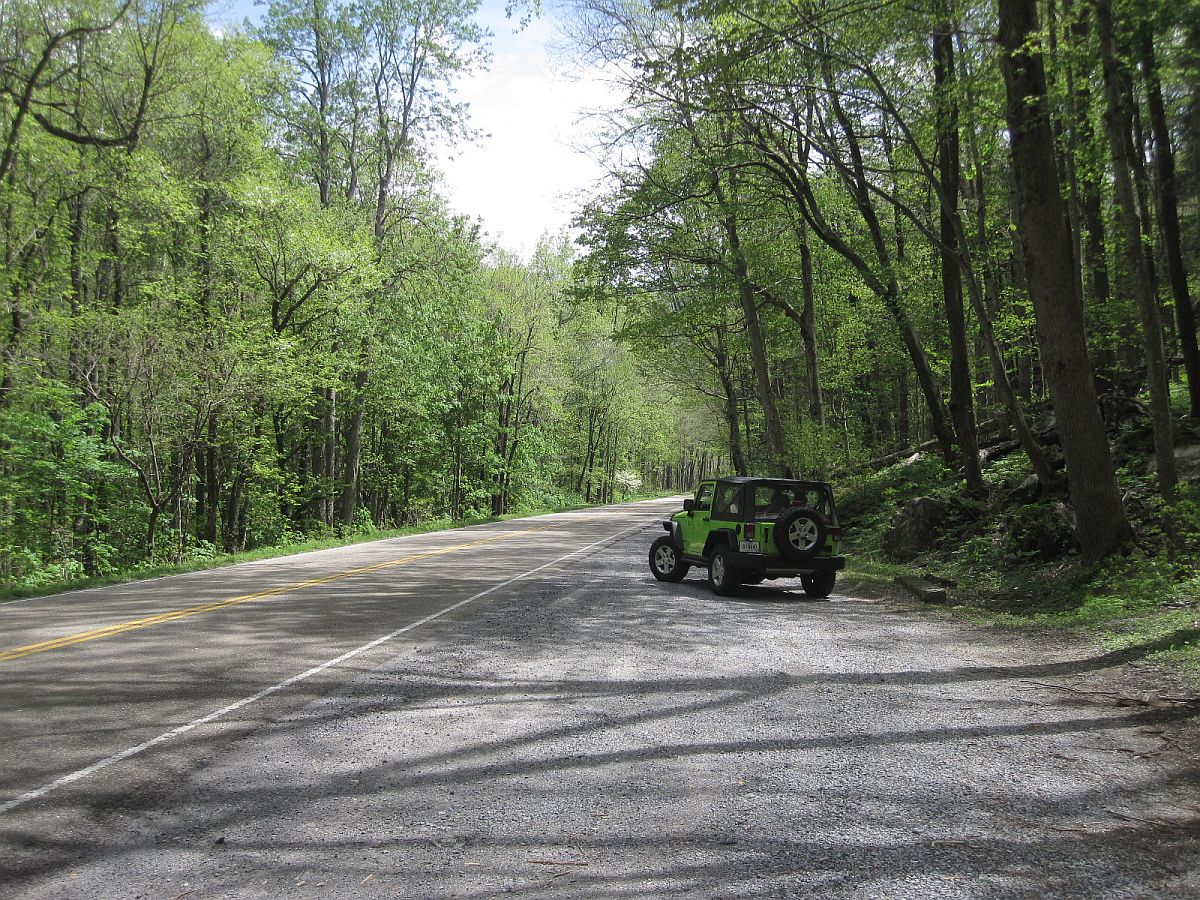
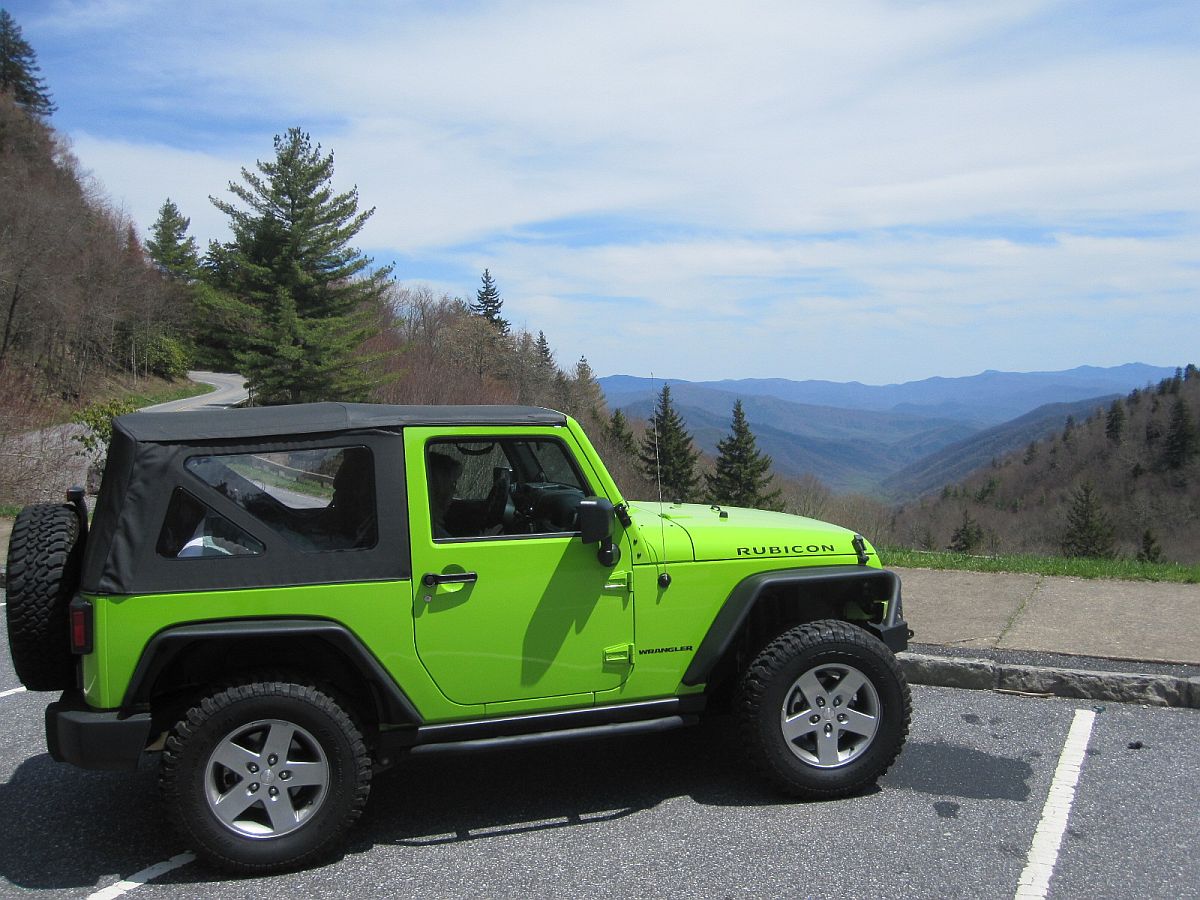
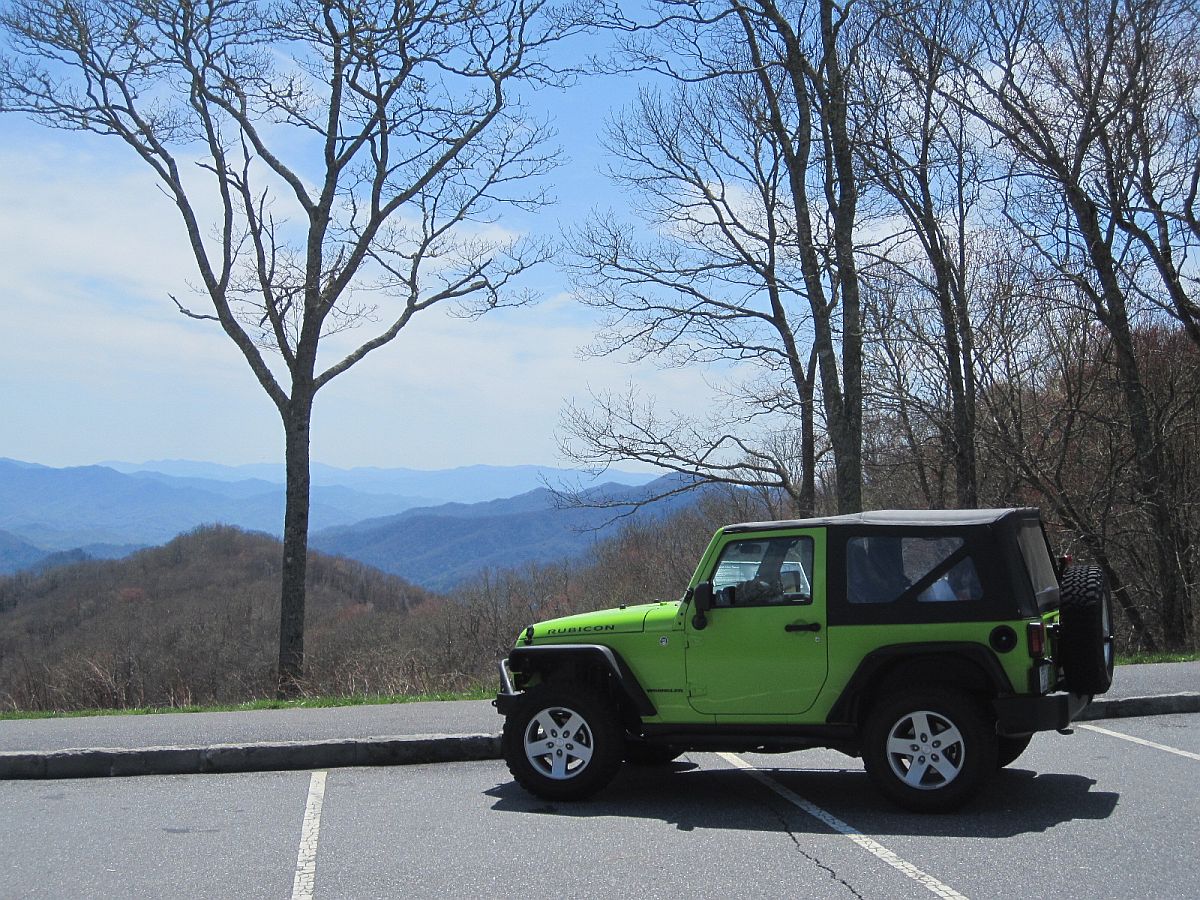
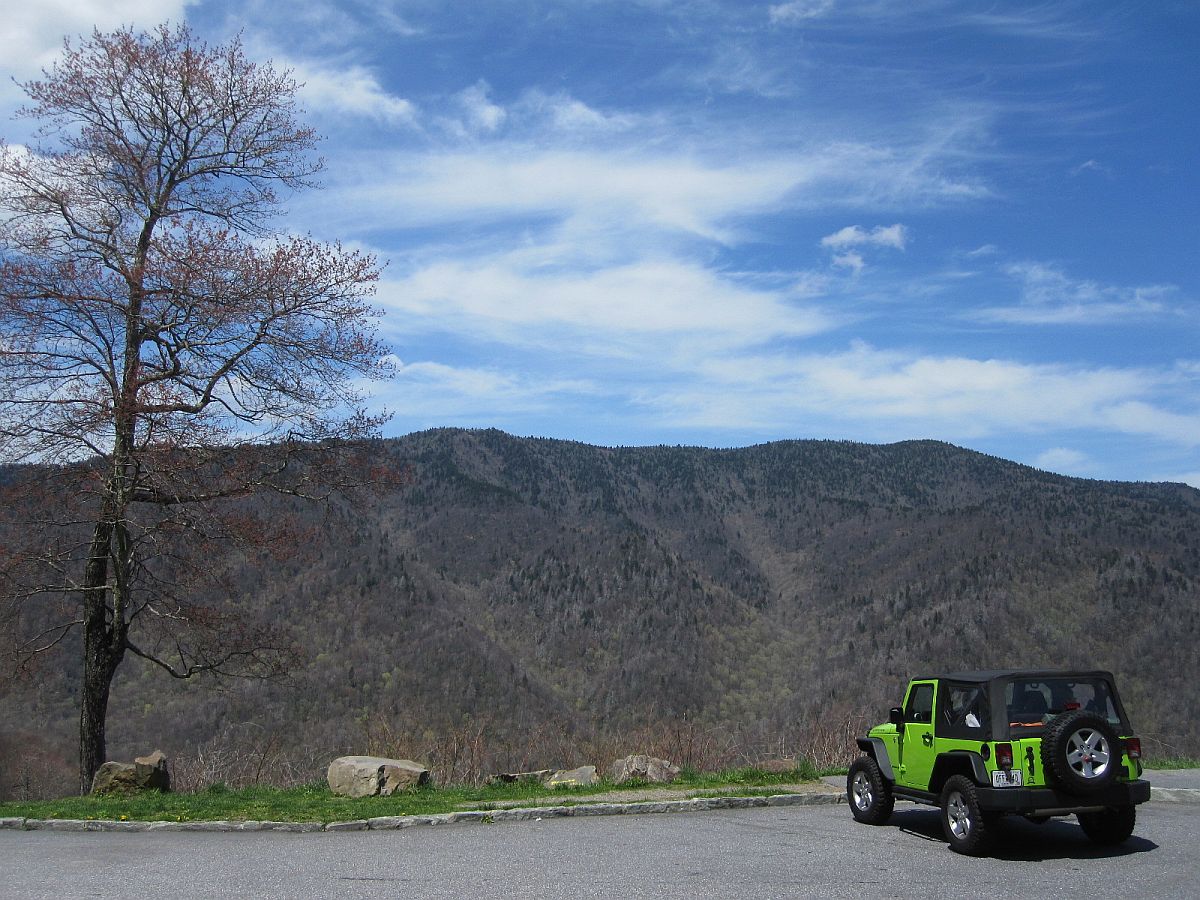
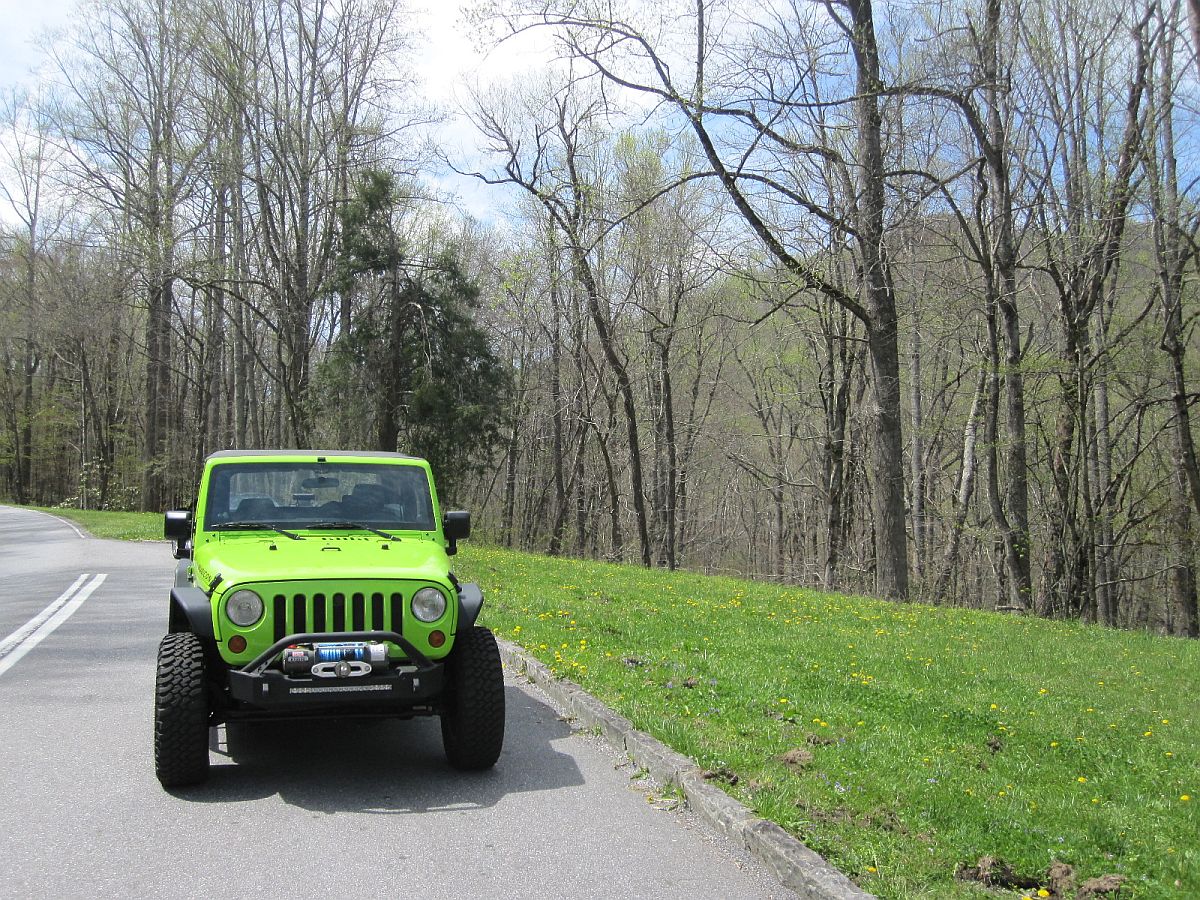
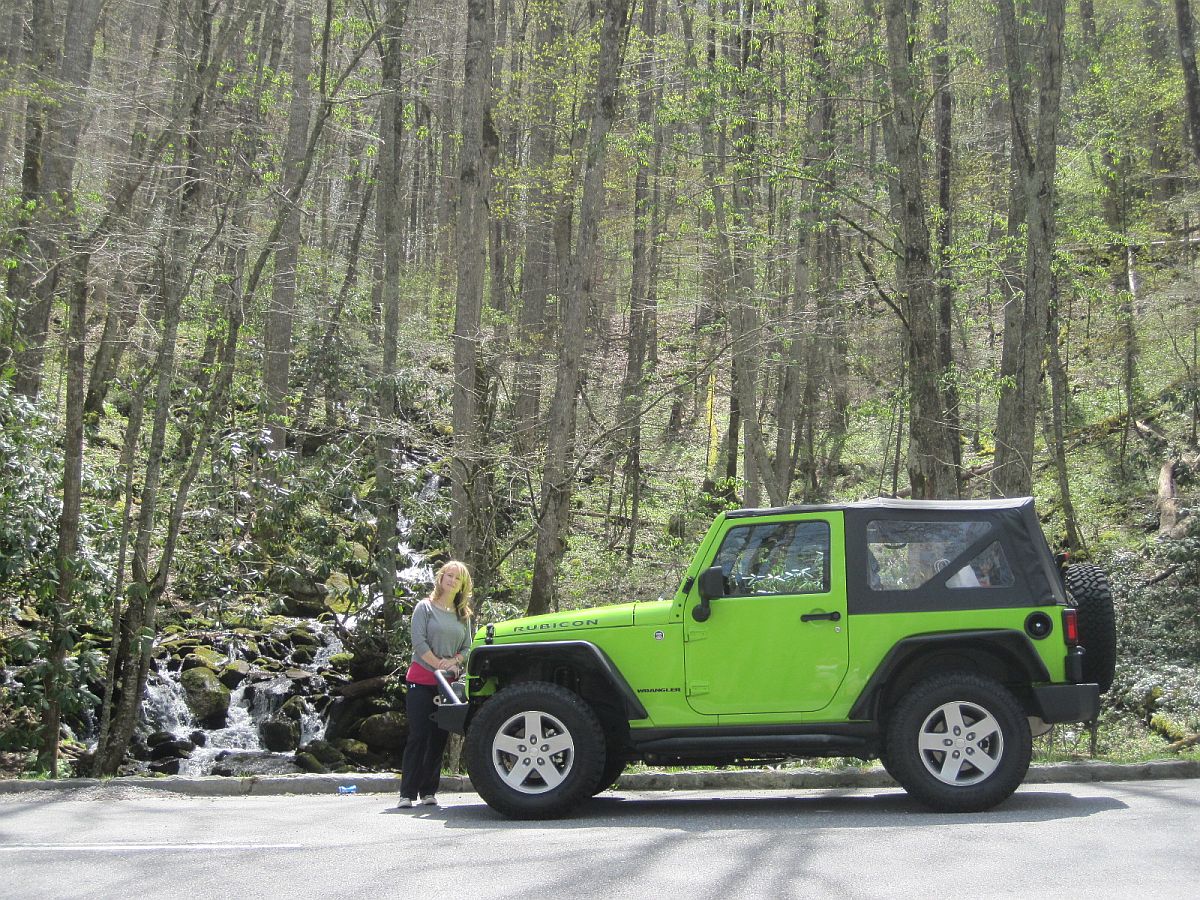
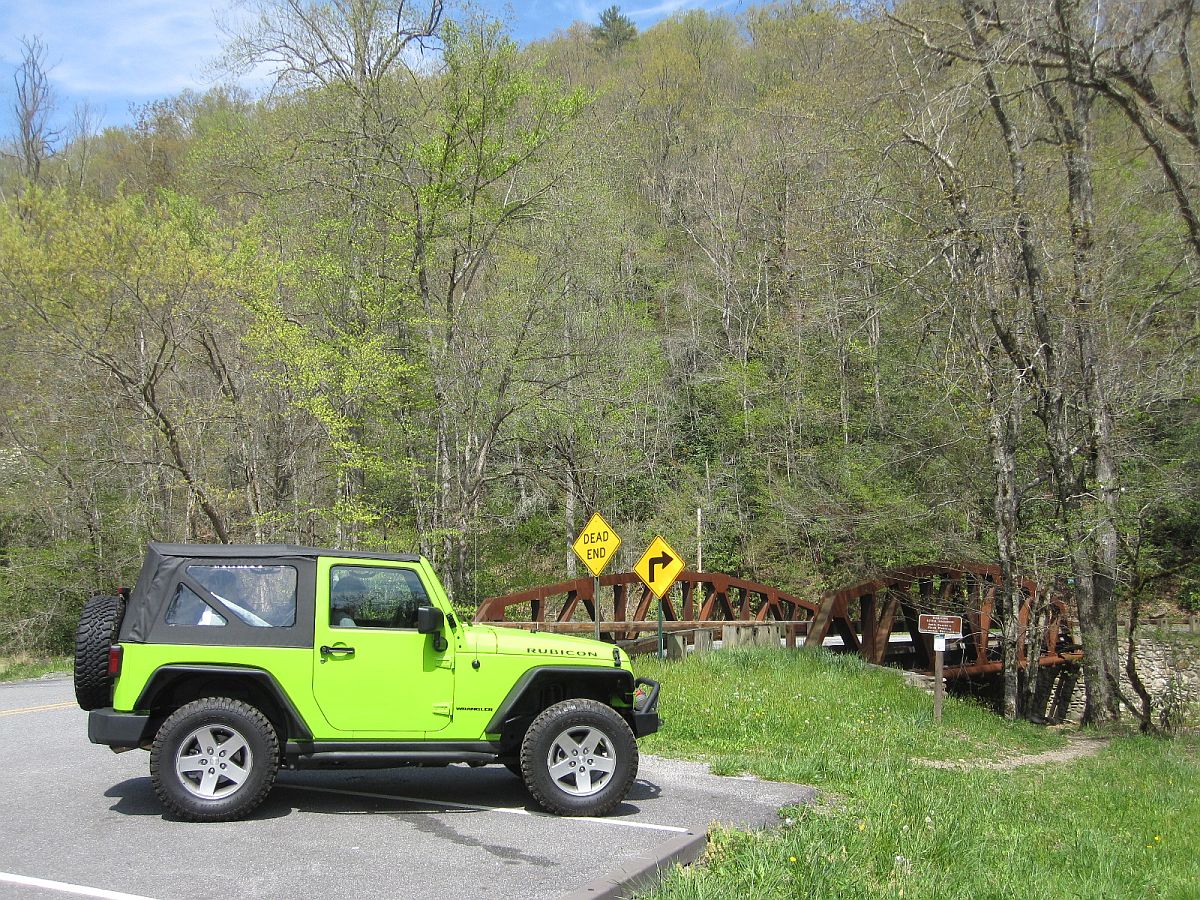
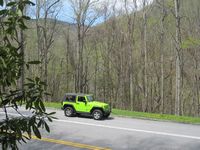
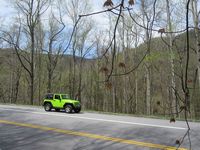
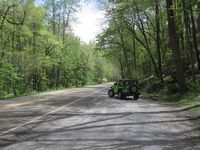
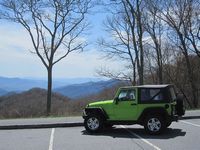
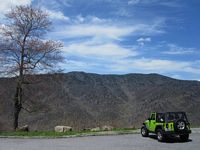
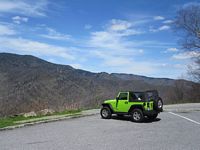
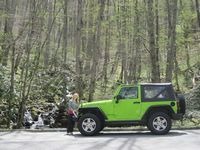
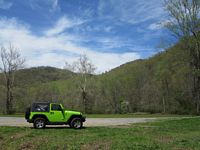
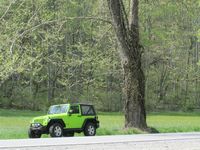
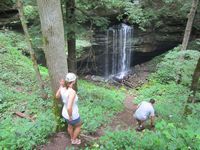
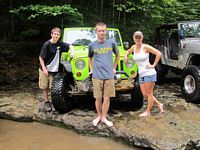
On the way home from the 2013 Spring Rod Run in Pigeon Forge, TN we stopped to take some pics with the Jeep- no mud or obstacles but scenic


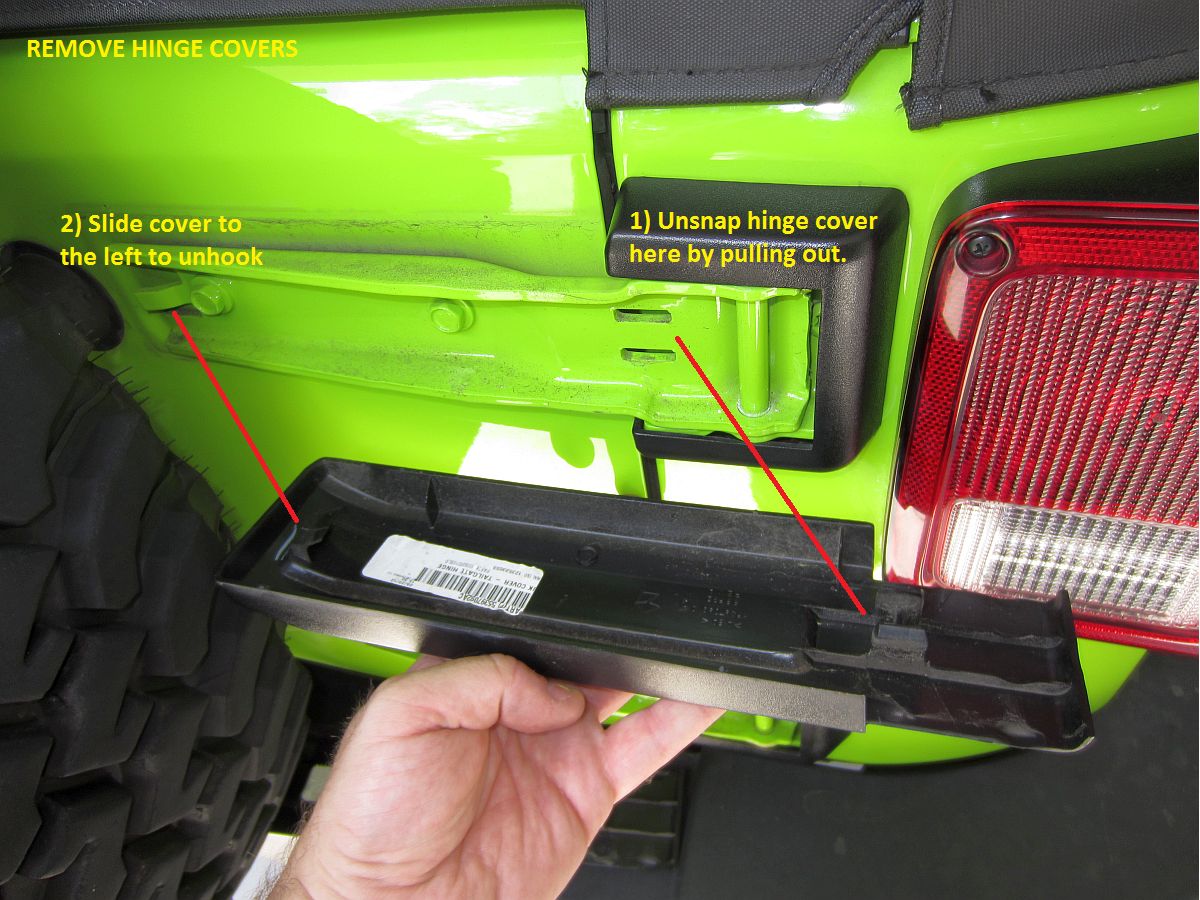
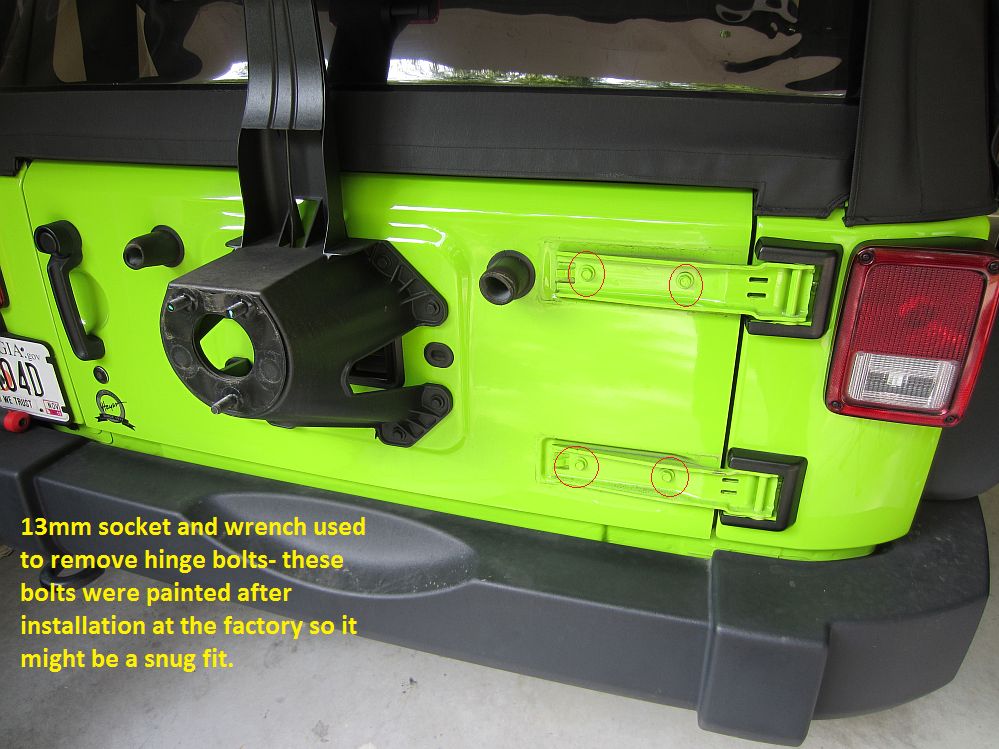
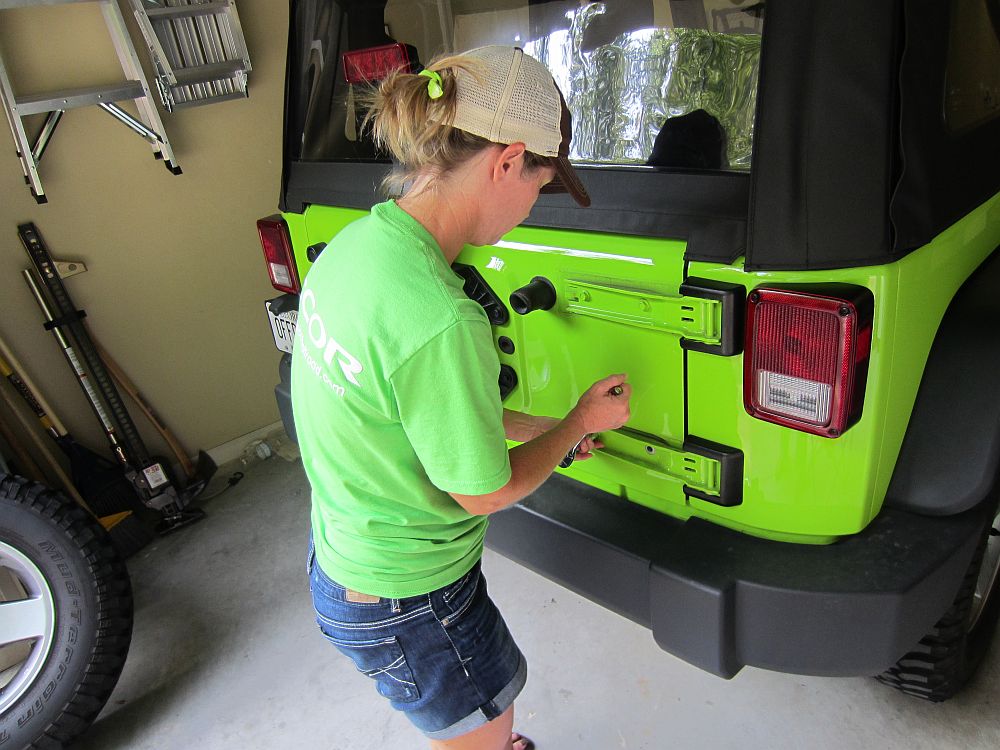
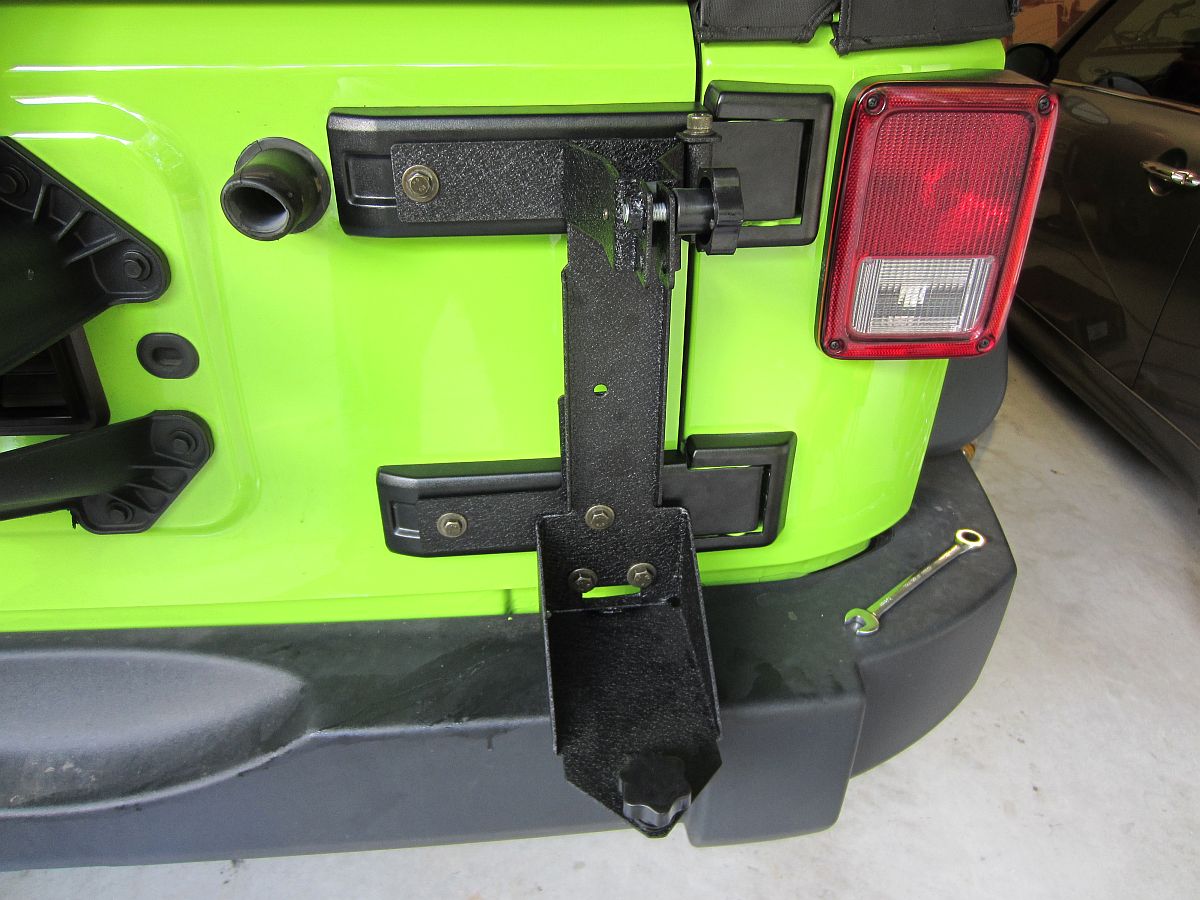
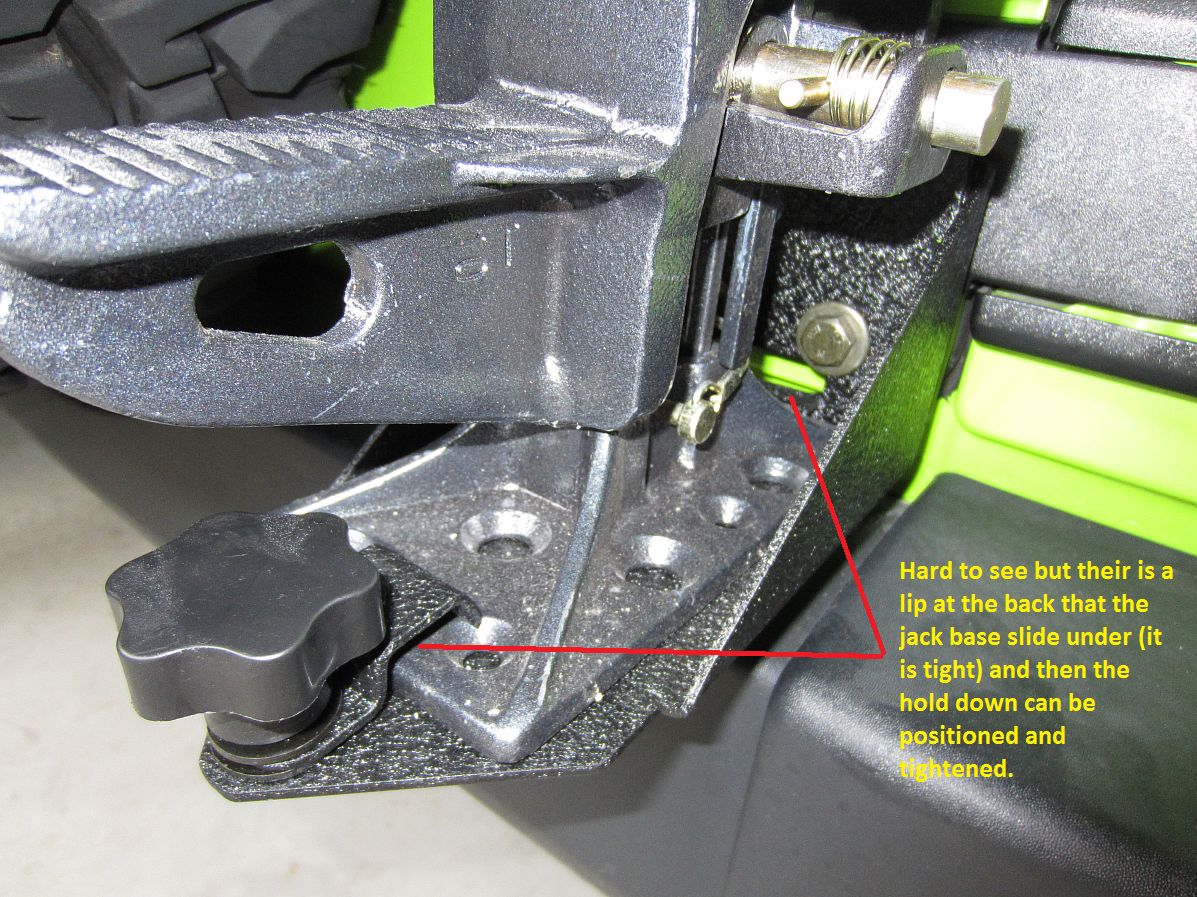
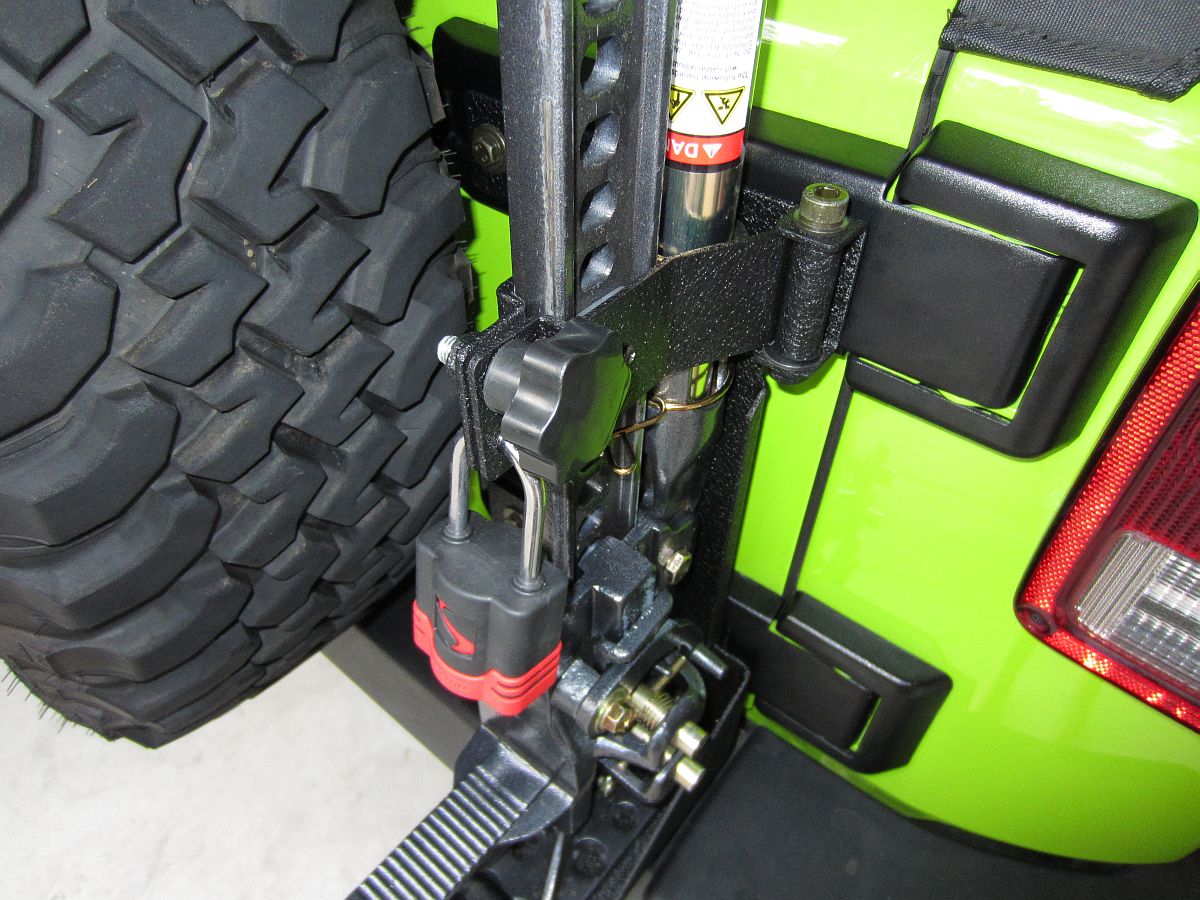
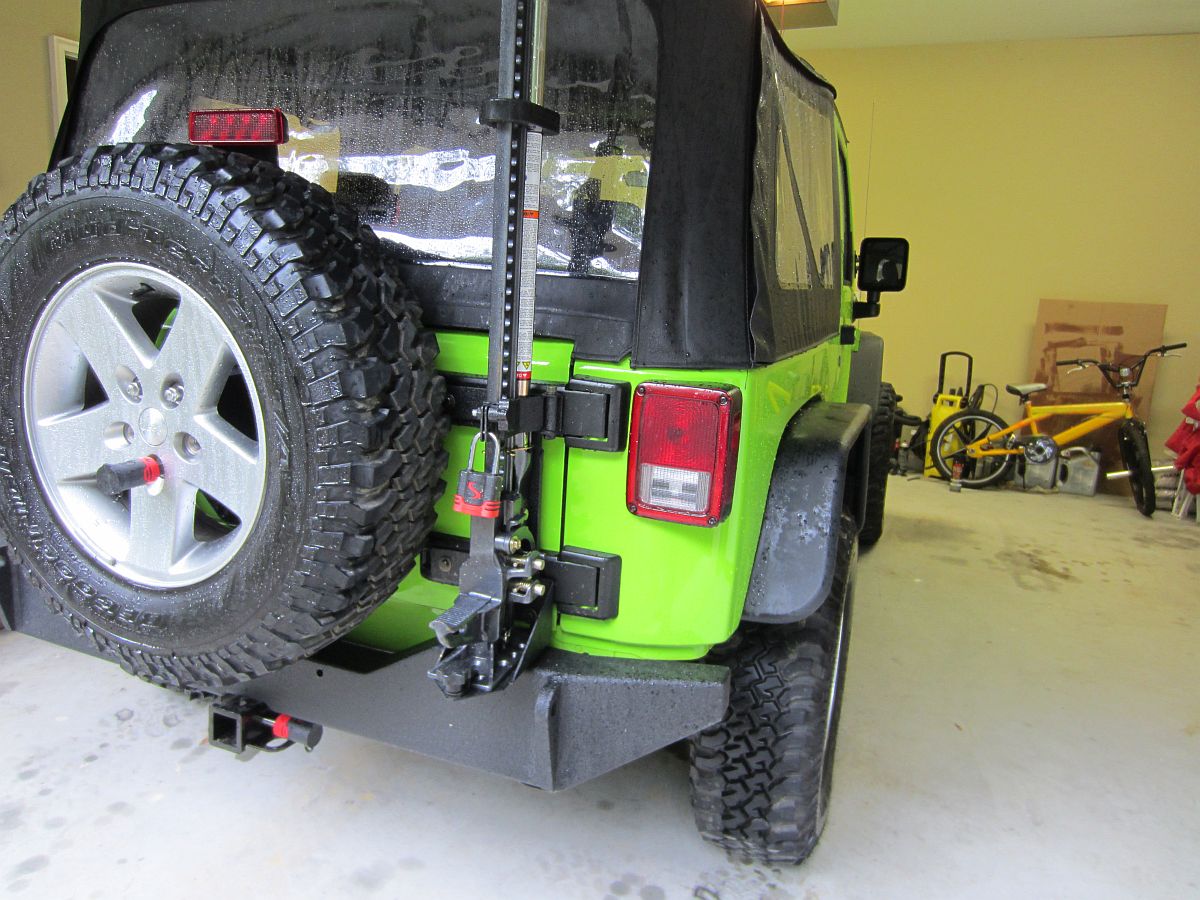
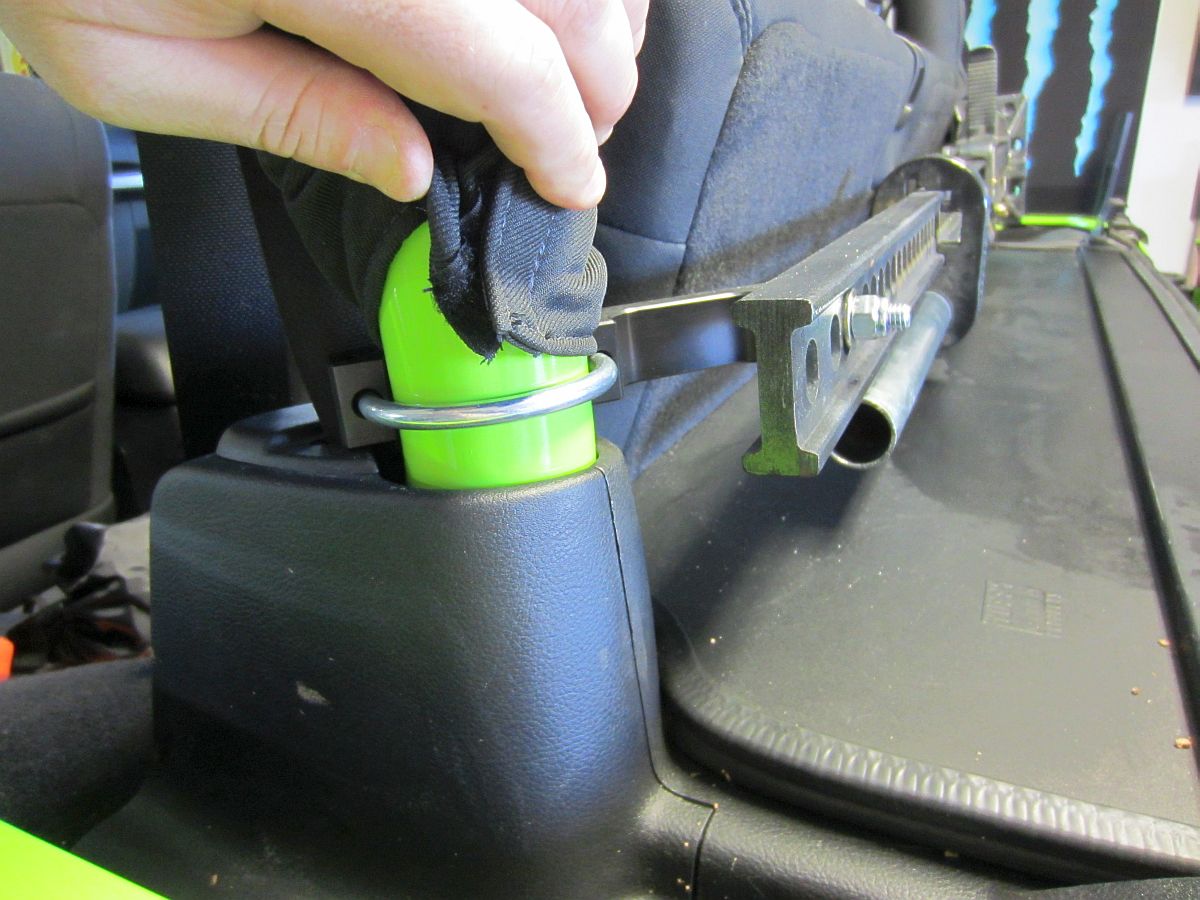
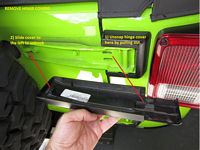
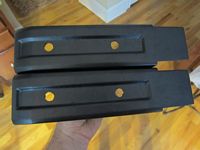
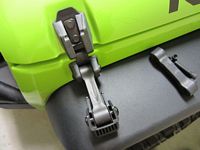
Decided to finally install a Hi-Lift mount after looking at the lonely jack in the corner of the garage for 6 months. Going on a Jeep adventure with the family and figured it wouldn't hurt to have. I had looked at hood mounts and rollbar mounts using muffler clamps- but due to space and acessibility decided on this Rugged Ridge Hi-Lift Jack Mounting Bracket from 4WheelParts because I wanted it installed today for tomorrow and they are local. Installation instructions HERE- not great so I took some pics below.
The first step is to remove the hinge covers, if you want to keep them you will have to use the included template to drill holes that the spacers can pass through- a fairly large hole. After this was finished I removed the spare tire to get as much weight off th hinges as possible before loosening/removing hinge bolts. I followed the instructions and started at the bottom and workled my way up to the top. What their pictures don't show is how you are supposed to get all of the spacers and washers in place with the hinge covers snapped on. I settled on using some adhesive to hold the washers to the hinge, snapping on the hinge covers, and then loosely bolting it all down but tightening the left lower bolt before moving to the top. Once all was lined up all botls were torqued. This mount is solid and allows for a lock to be used which might deter some thieves. Easy to get to and will work until we get our ACE rear bumper and find another mounting solution.
The Hi-Lift Extreme Jack was purchased at Amazon.com. I also picked up some additional recovery gear to work with the Hi-Lift jack: Lift Mate, Off-Road Base, Hi-Lift Handle-All: 4 Tools in 1 (HA-500), and Off-Road Kit.


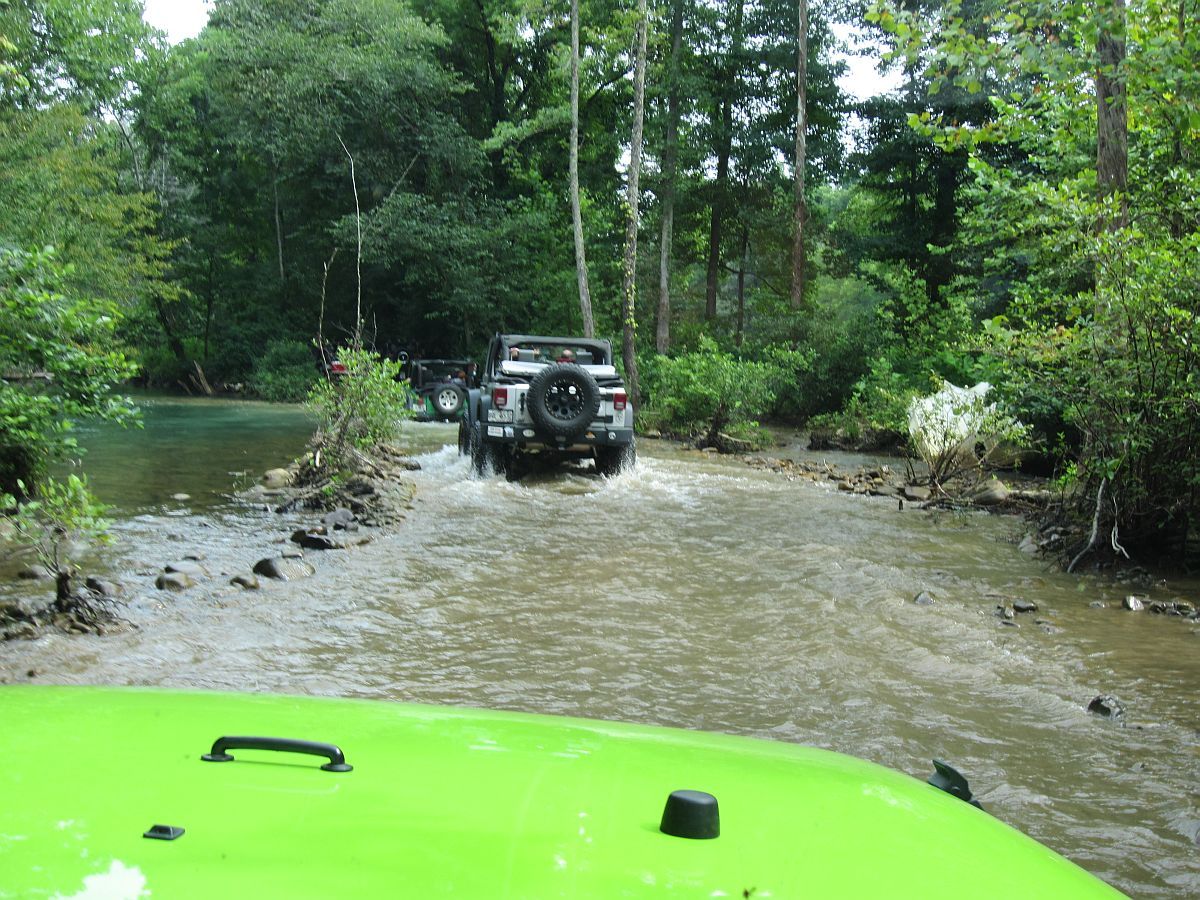
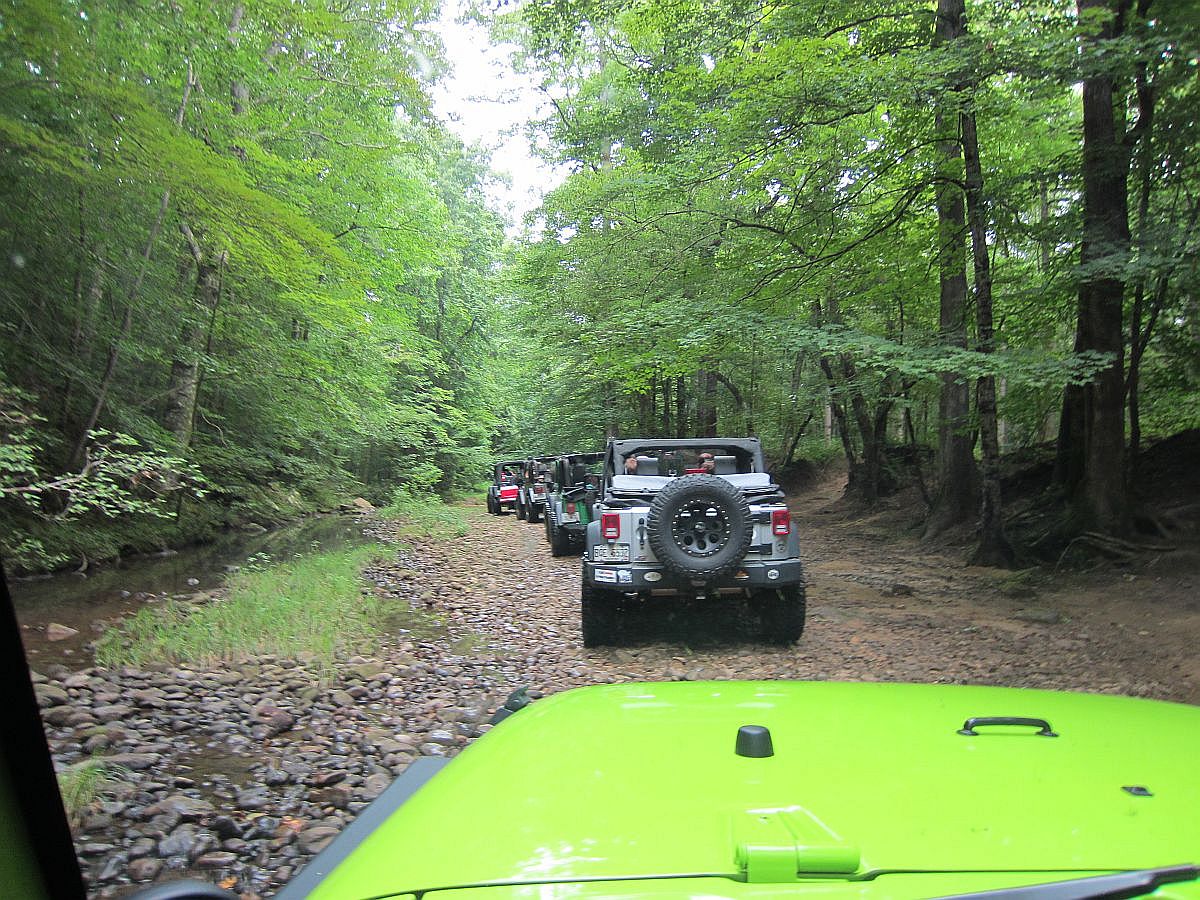
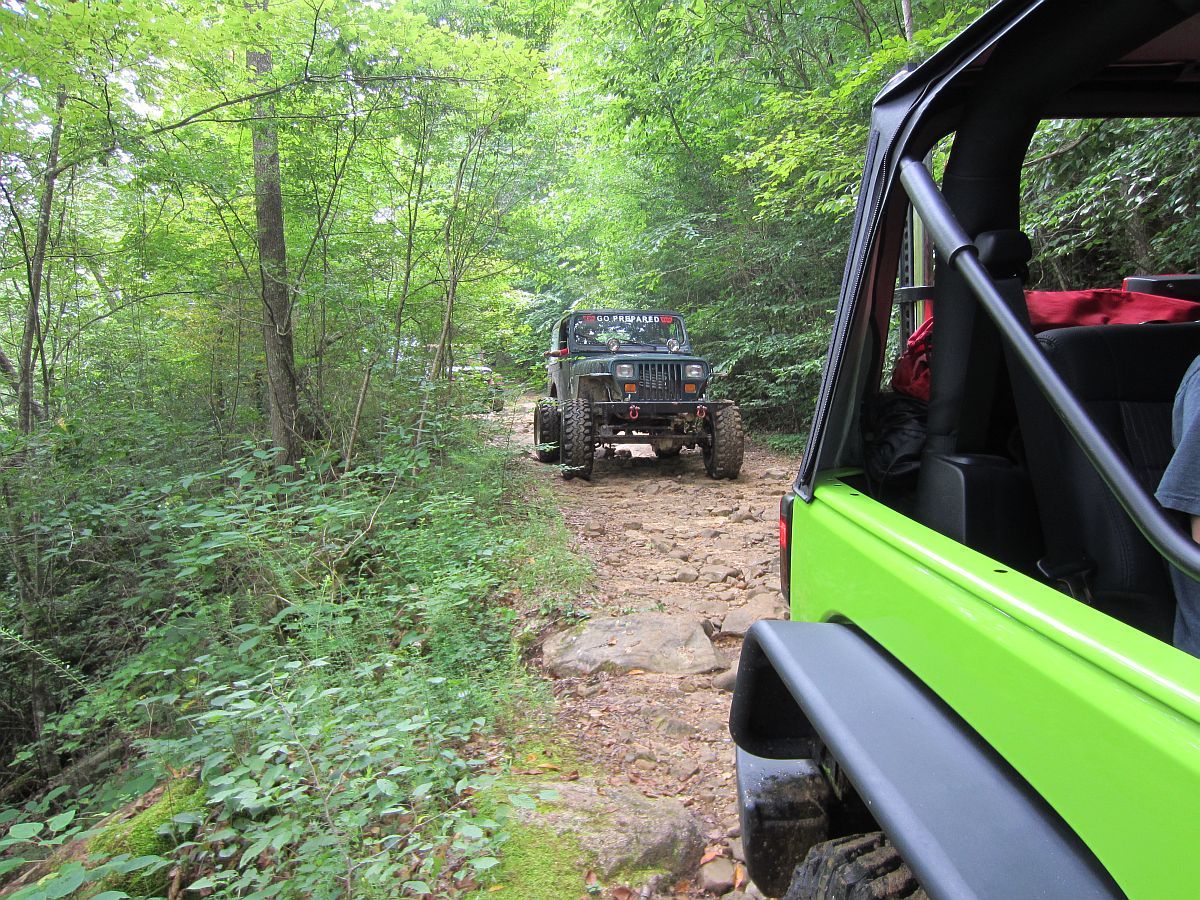
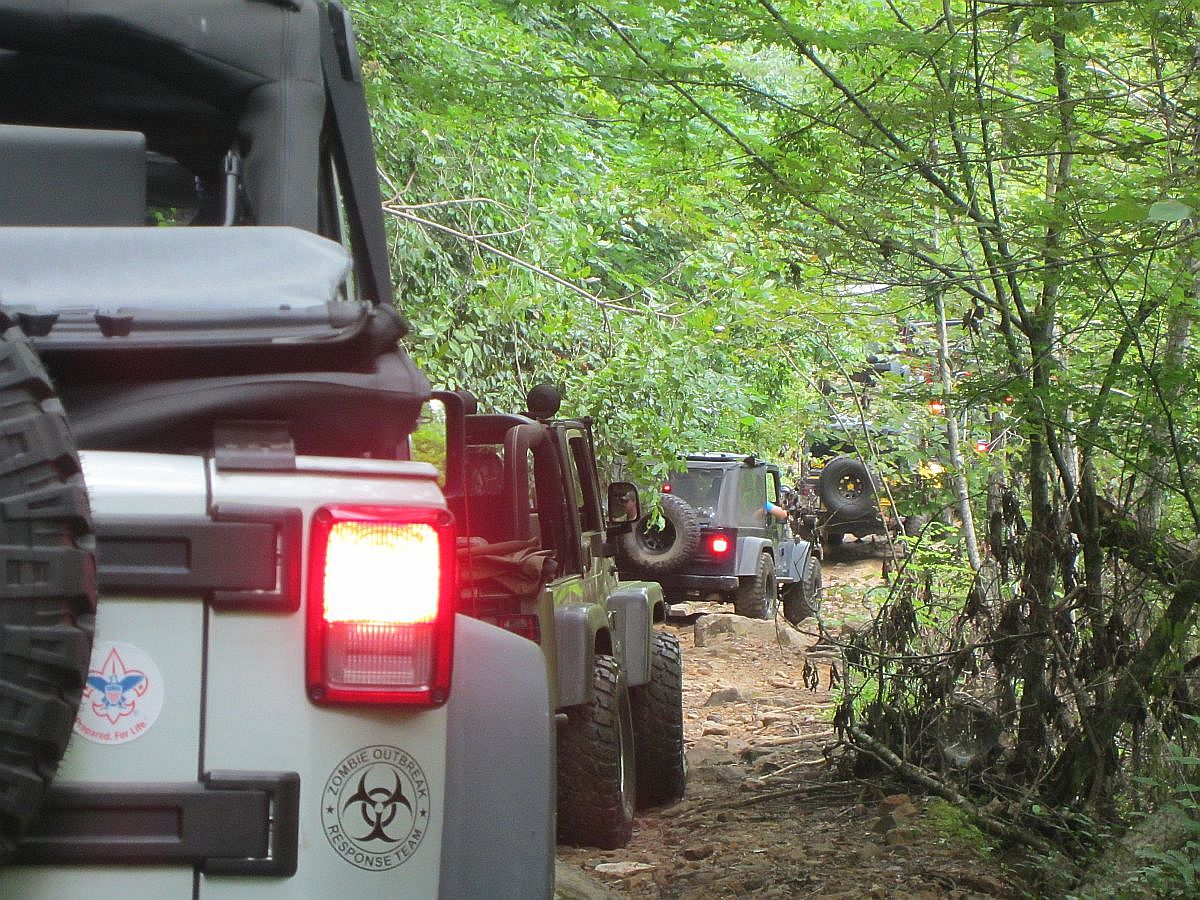
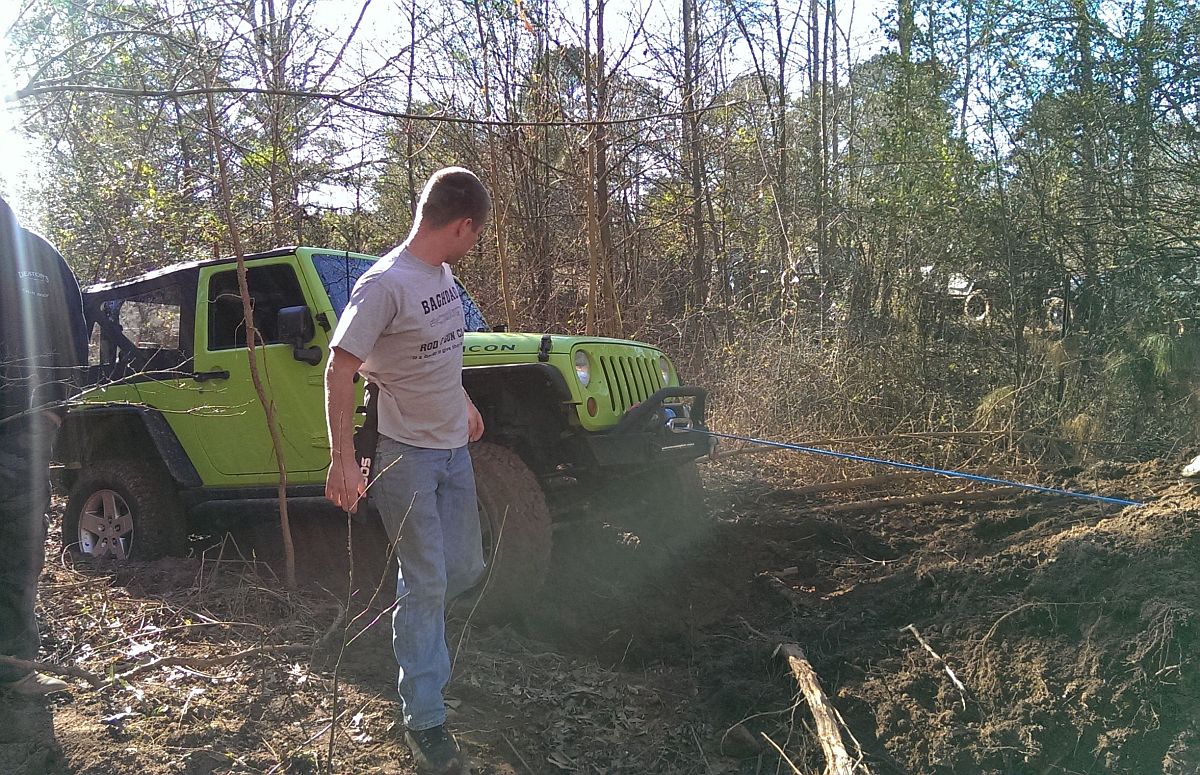
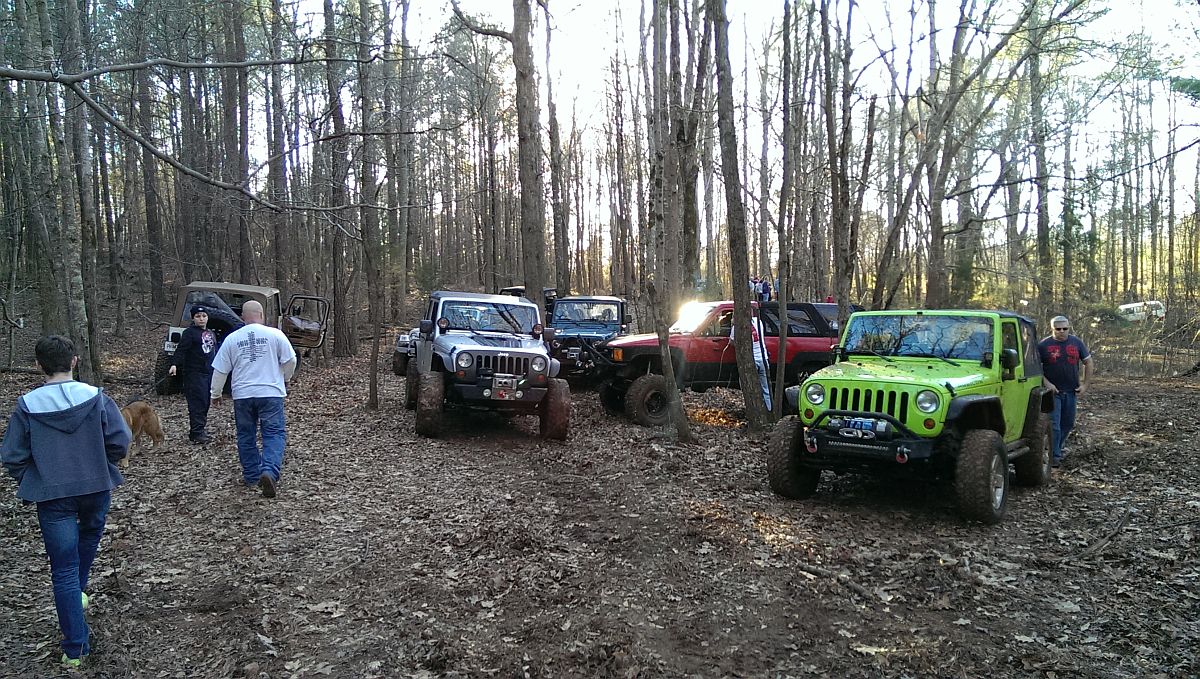
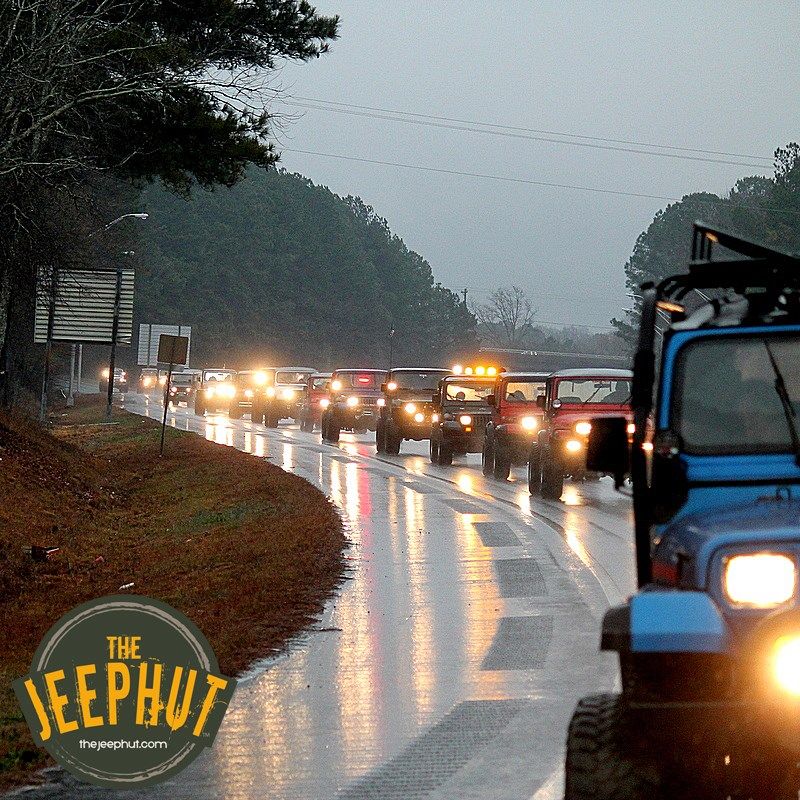
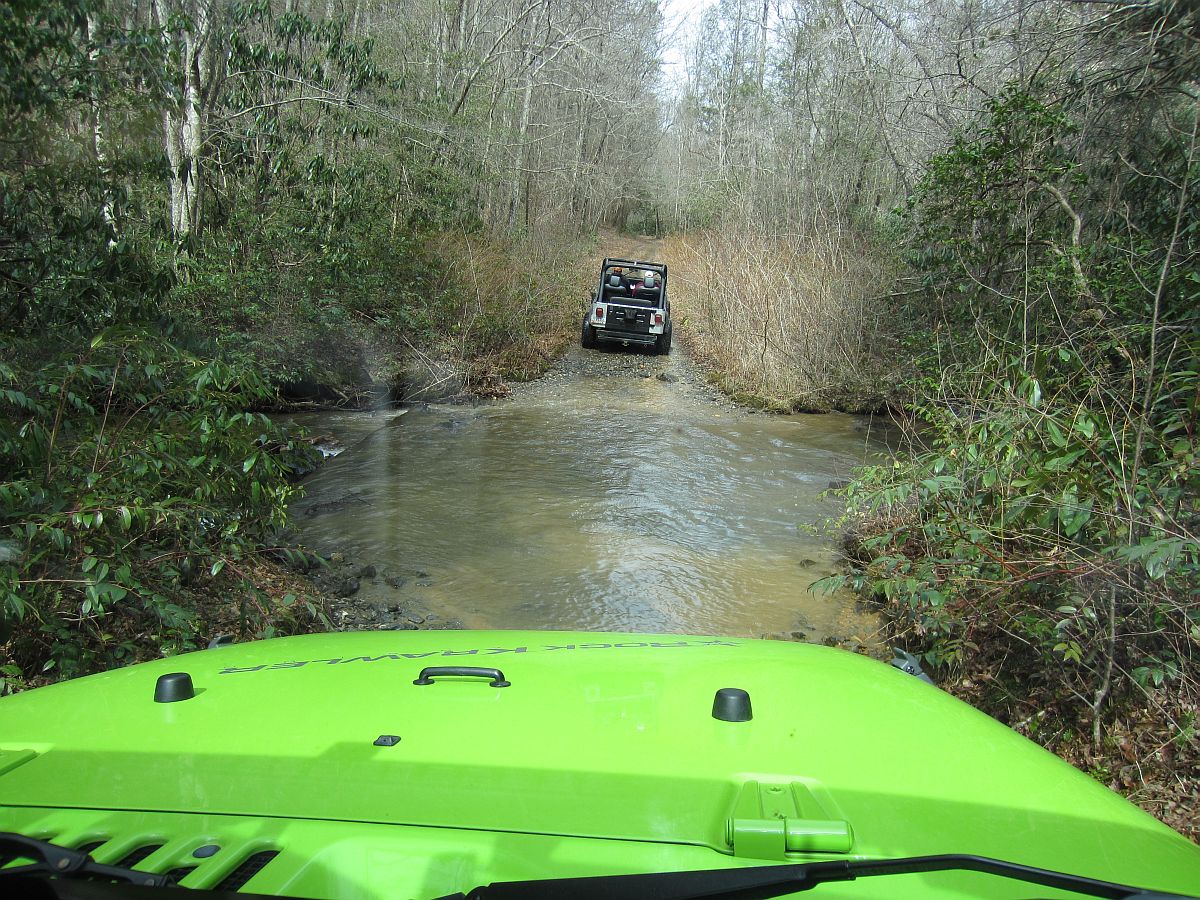
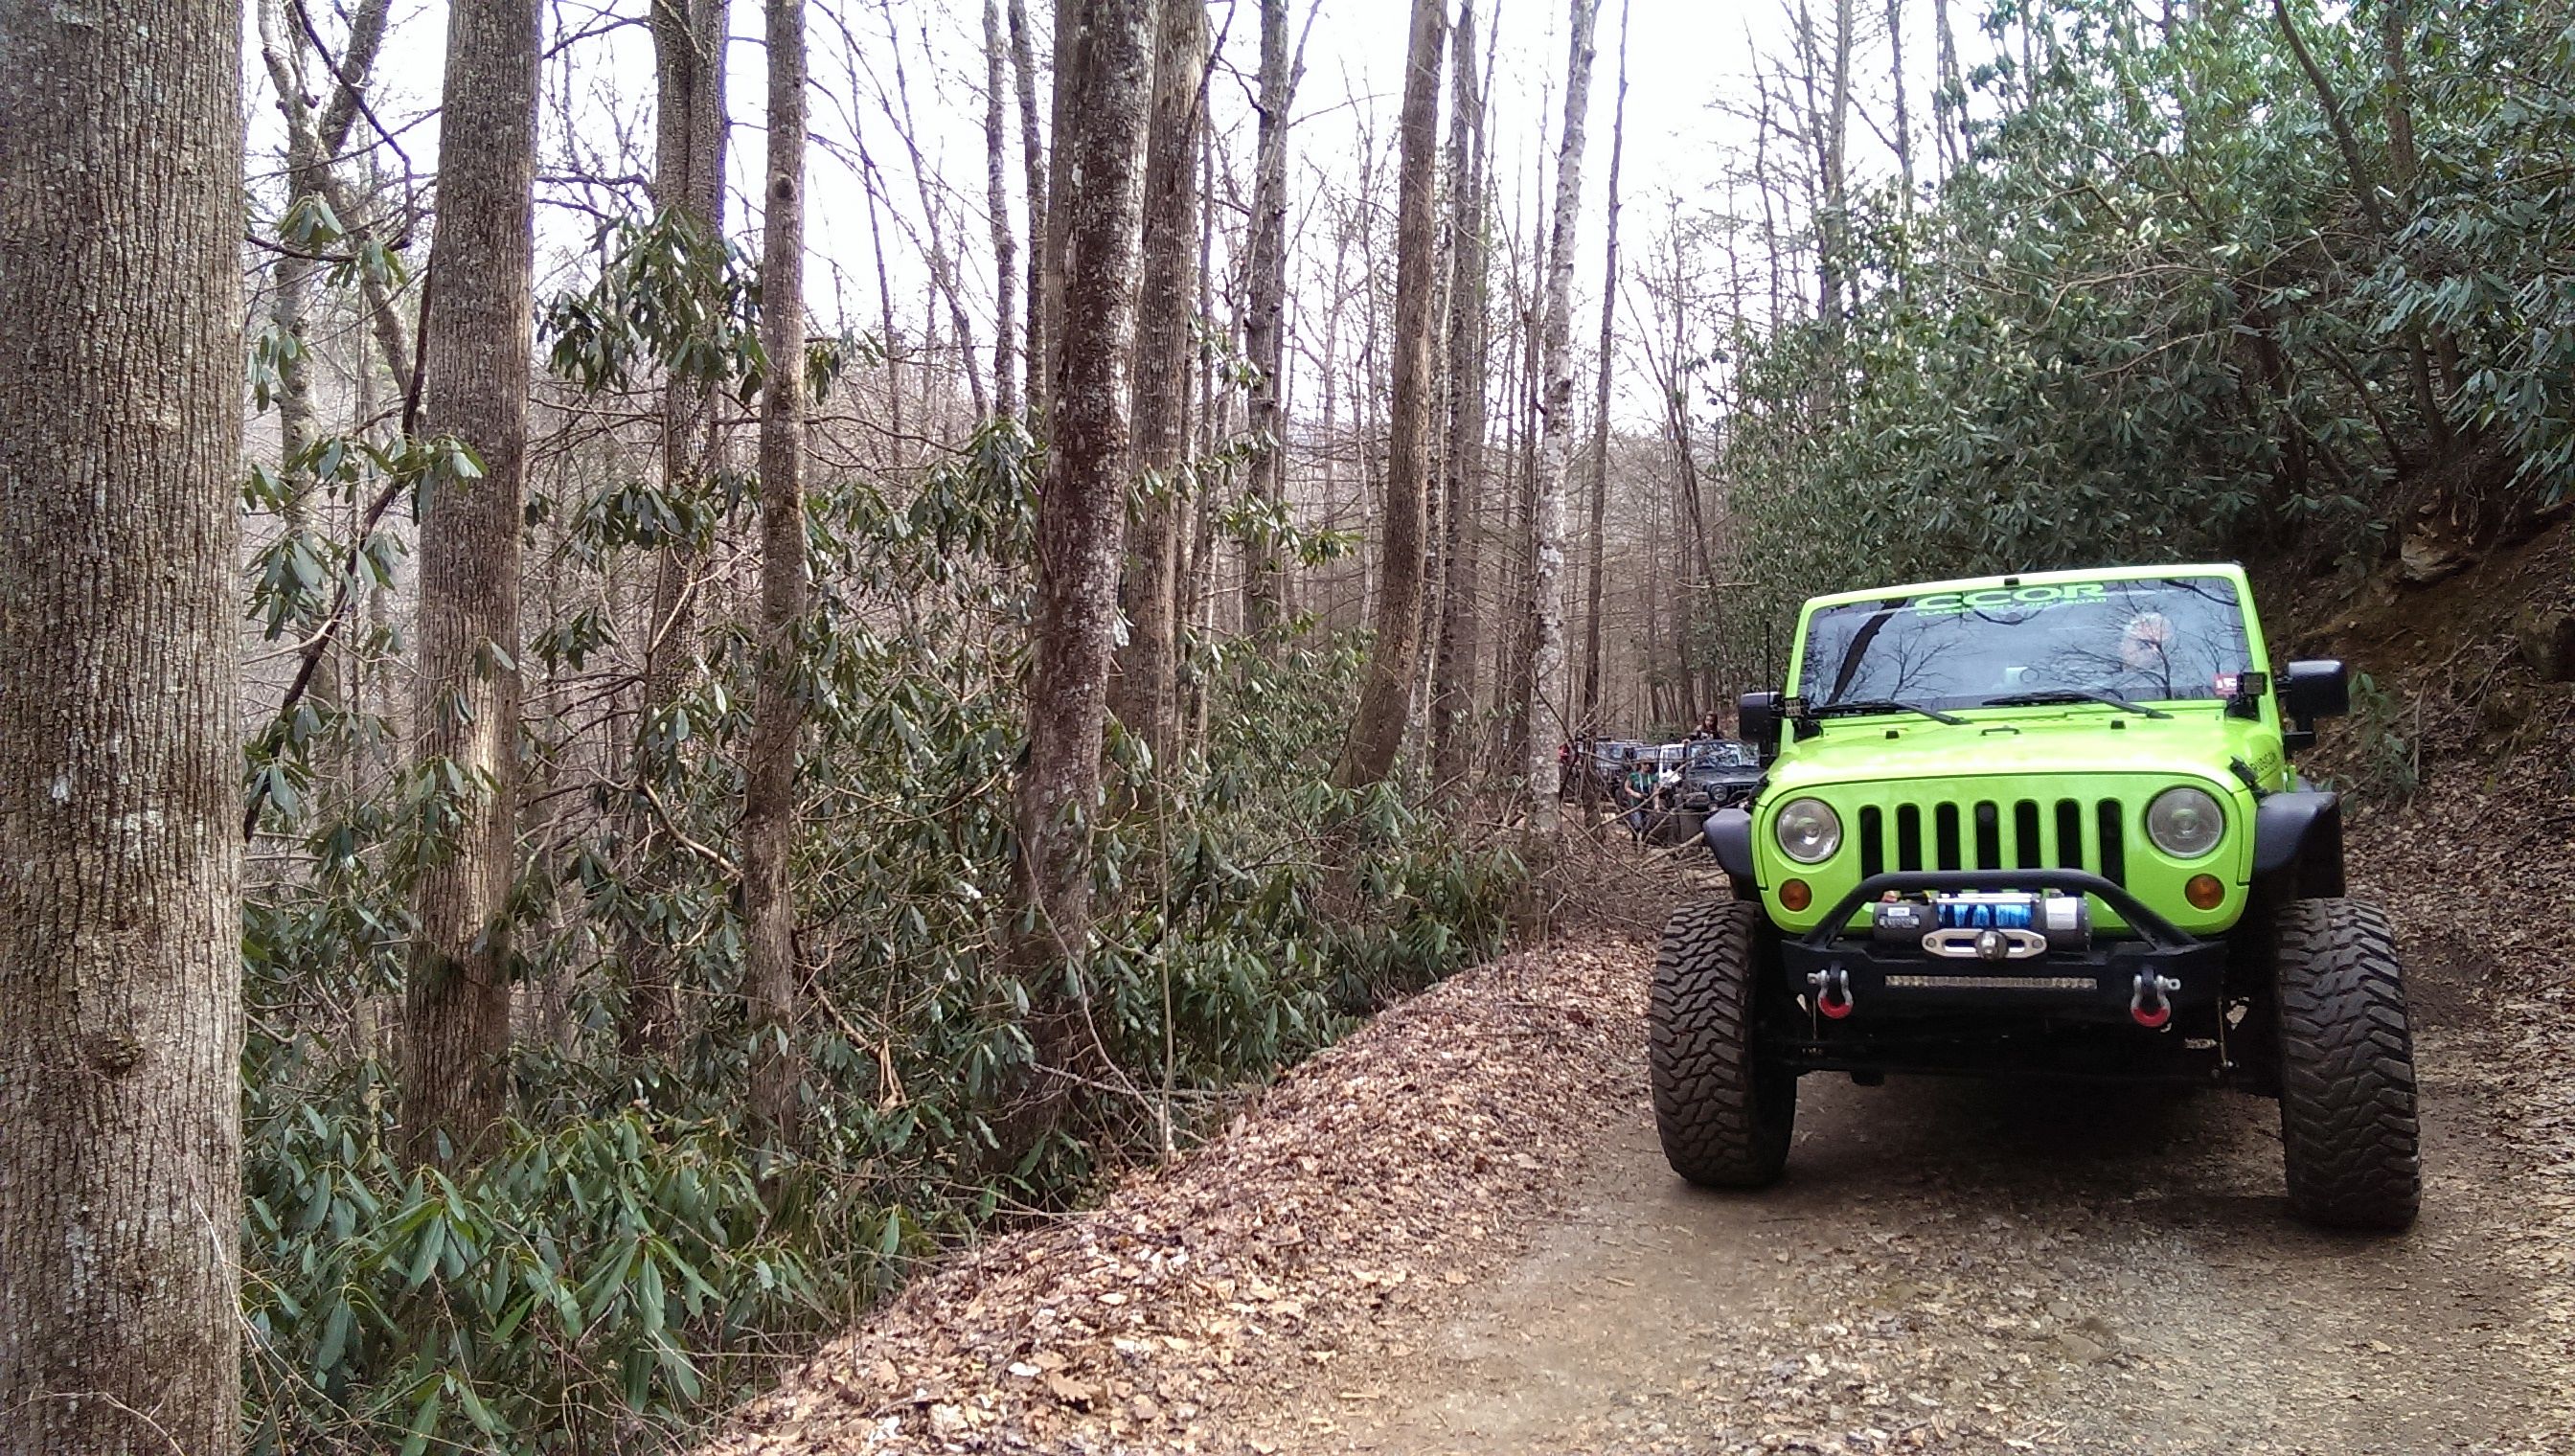
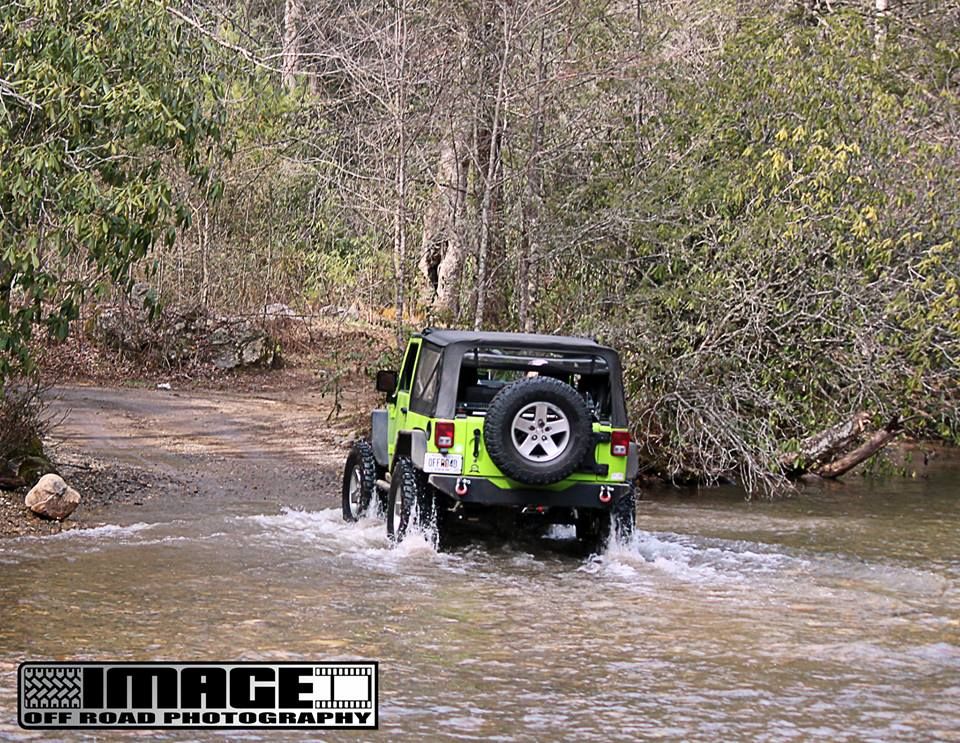
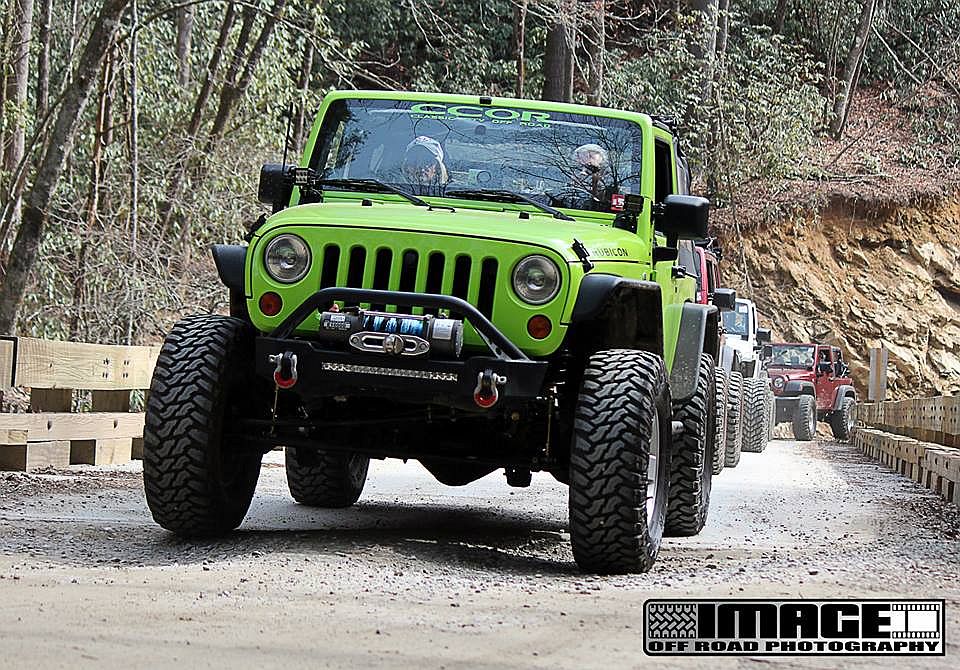
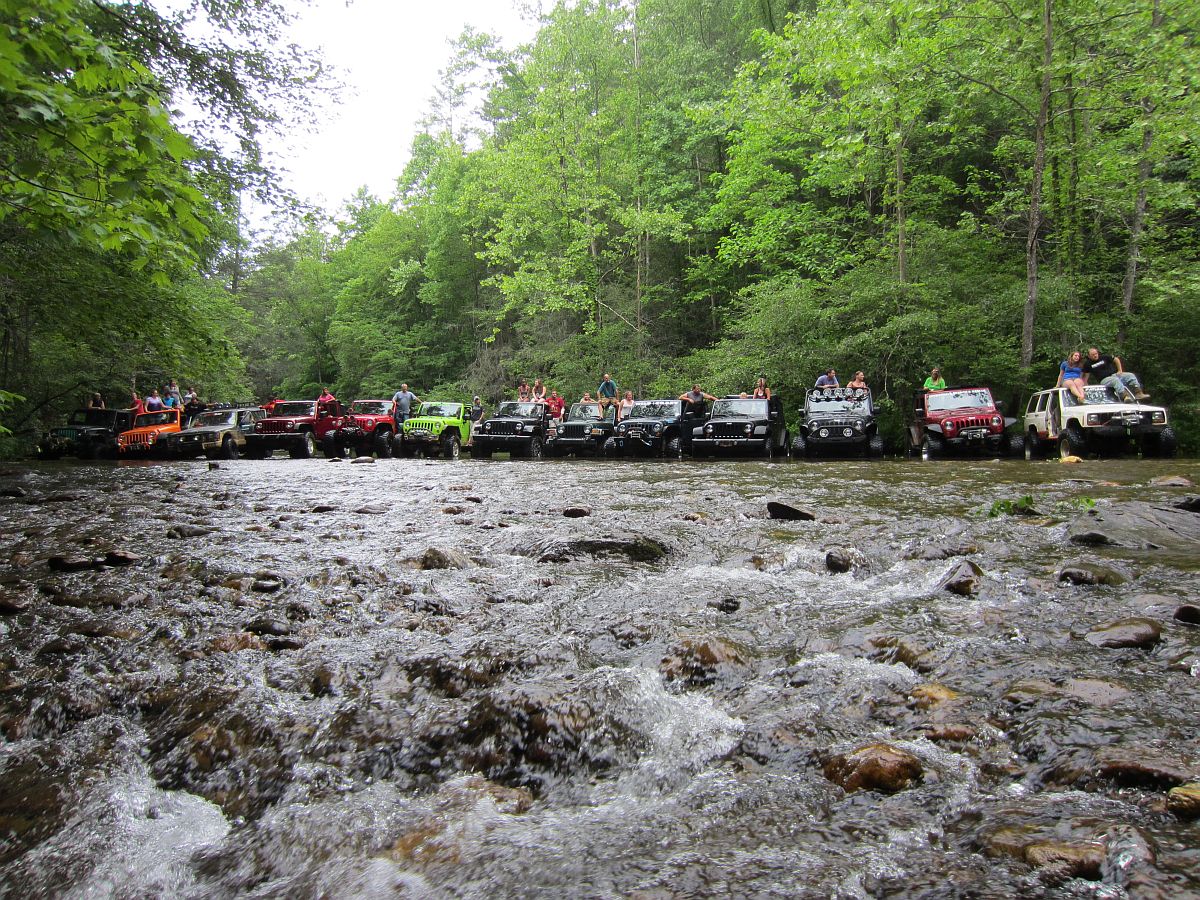
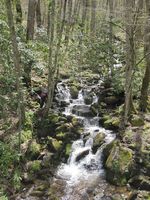
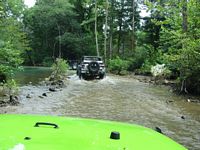
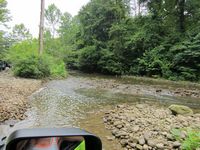
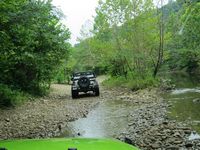
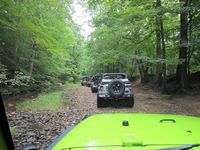
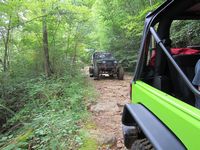
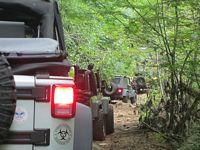
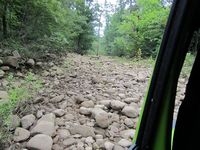
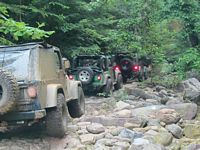
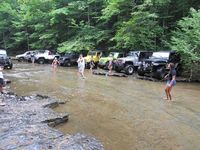
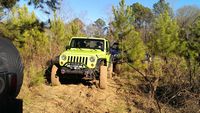
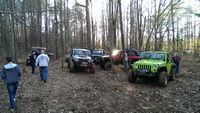
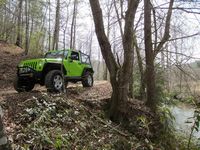
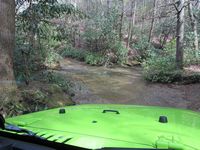
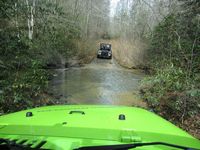
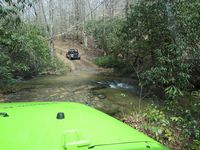
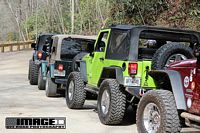
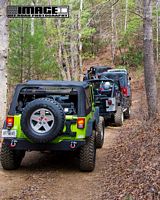
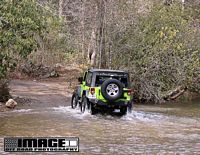
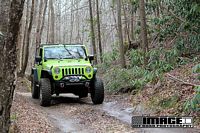
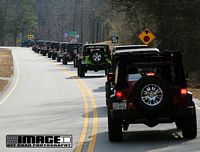
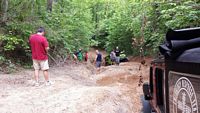
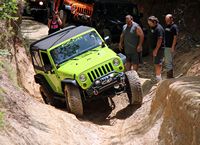
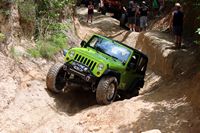
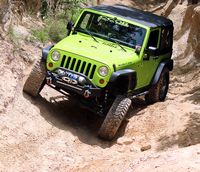
First adventure with Georgia Jeepers at "The Cove" in Tennessee- WOW. This was great- very scenic and challenging for the mall crawlers
BIG THANKS to the guides and jeepers that helped us with the winch
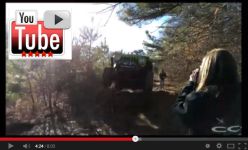
Some pics below, I also have a video on YouTube HERE with some snippets from the trail ride. Mitchel Shell also got some great video of Creek Bed Crawling (we're at about 6:50) and Wide Ford Crossing (we're at about 4:47).


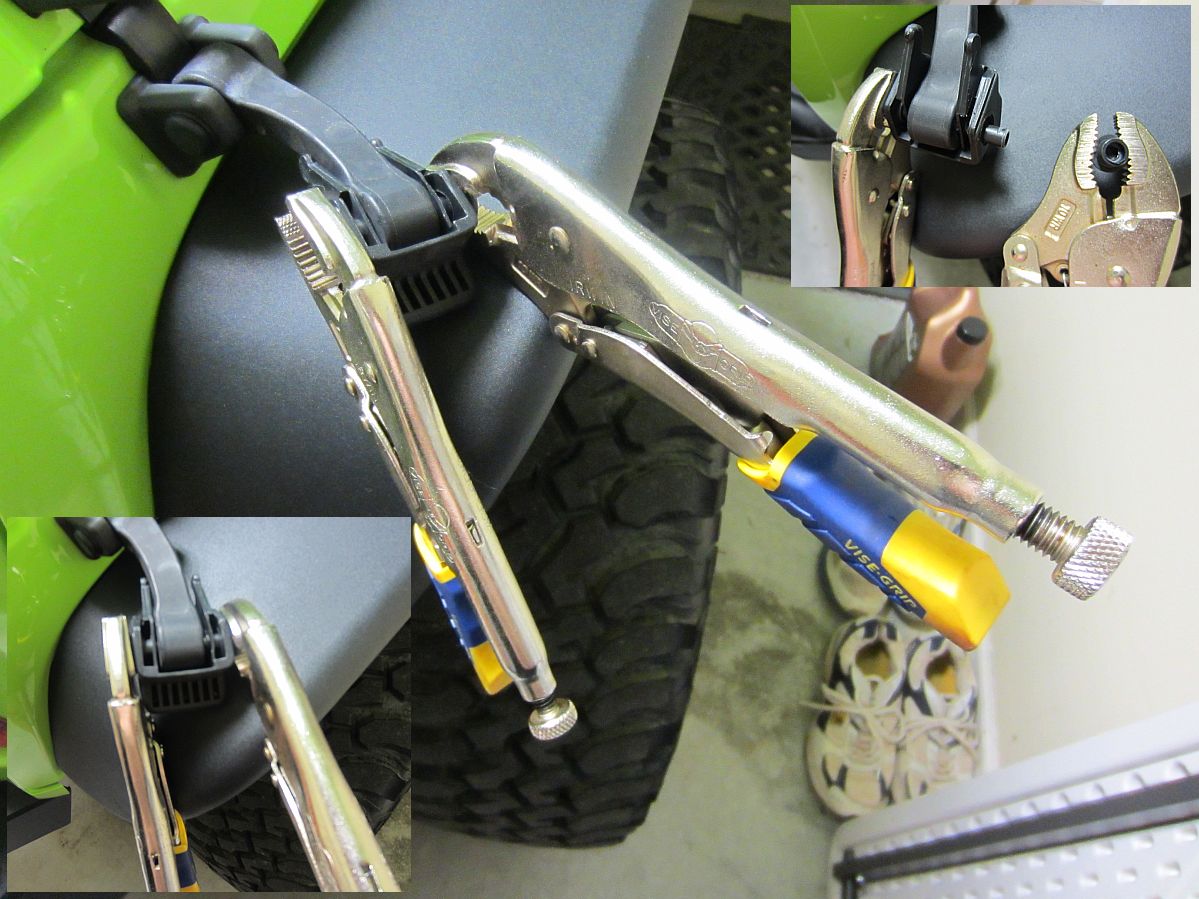
Daystar Hood Wranglers from Quadratec installed.
Installation instructions are HERE.
Simply use a pair of vice-grip pliers to twist end cap off, disassemble, reassemble with new Daystar pieces. The Daystar Wrangler looks like it will fit either way but the narrower end with the flat side goes to the lower bracket , the wider rounded end goes to the latch. VERY tight now, I'm sure there will be no more hood flutter.
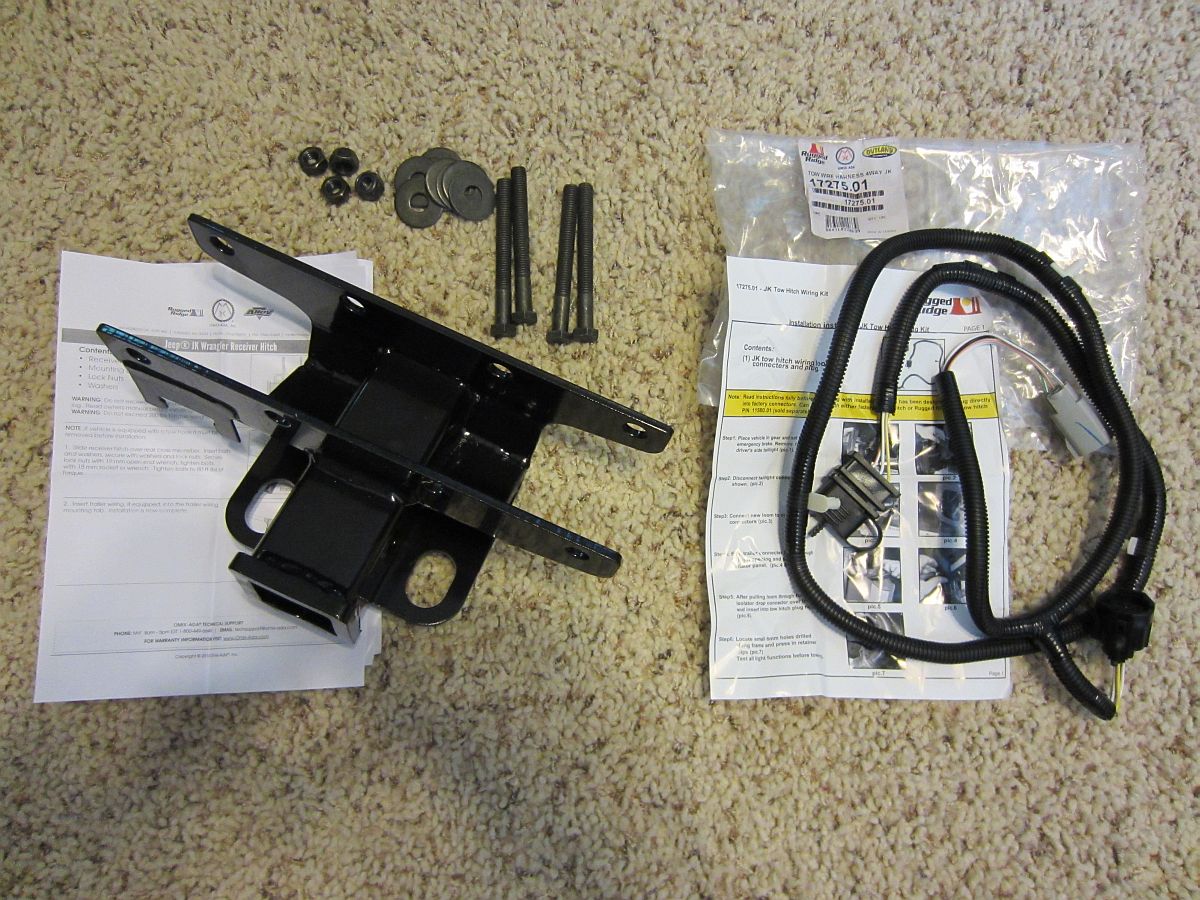
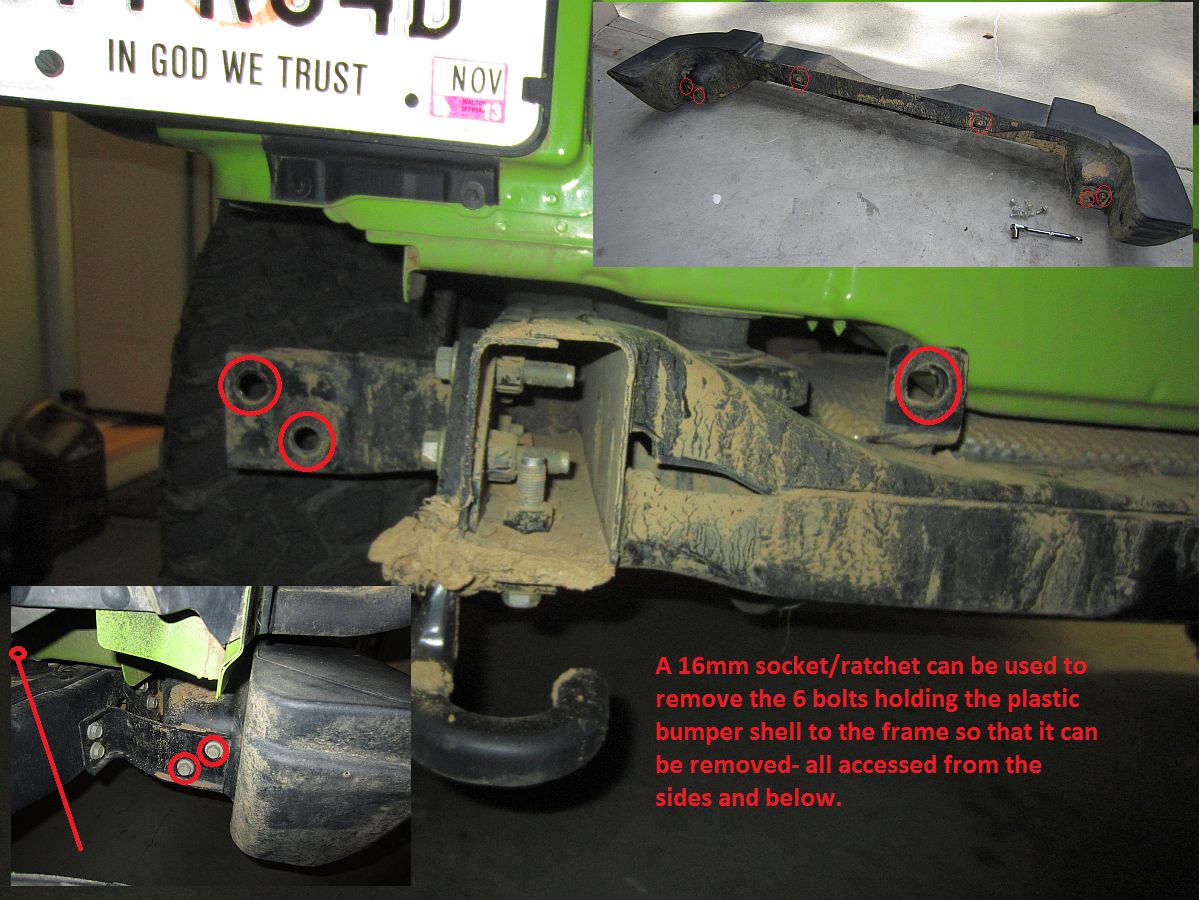
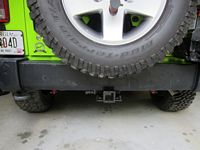
Rugged Ridge Receiver/Tow Hitch and Wiring Harness (P/N 11580.51) from Tom's 4x4 Superstore (found cheaper at his eBay store HERE) installed.
Hitch Installation instructions are HERE, Wiring Harness Installation instructions are HERE.
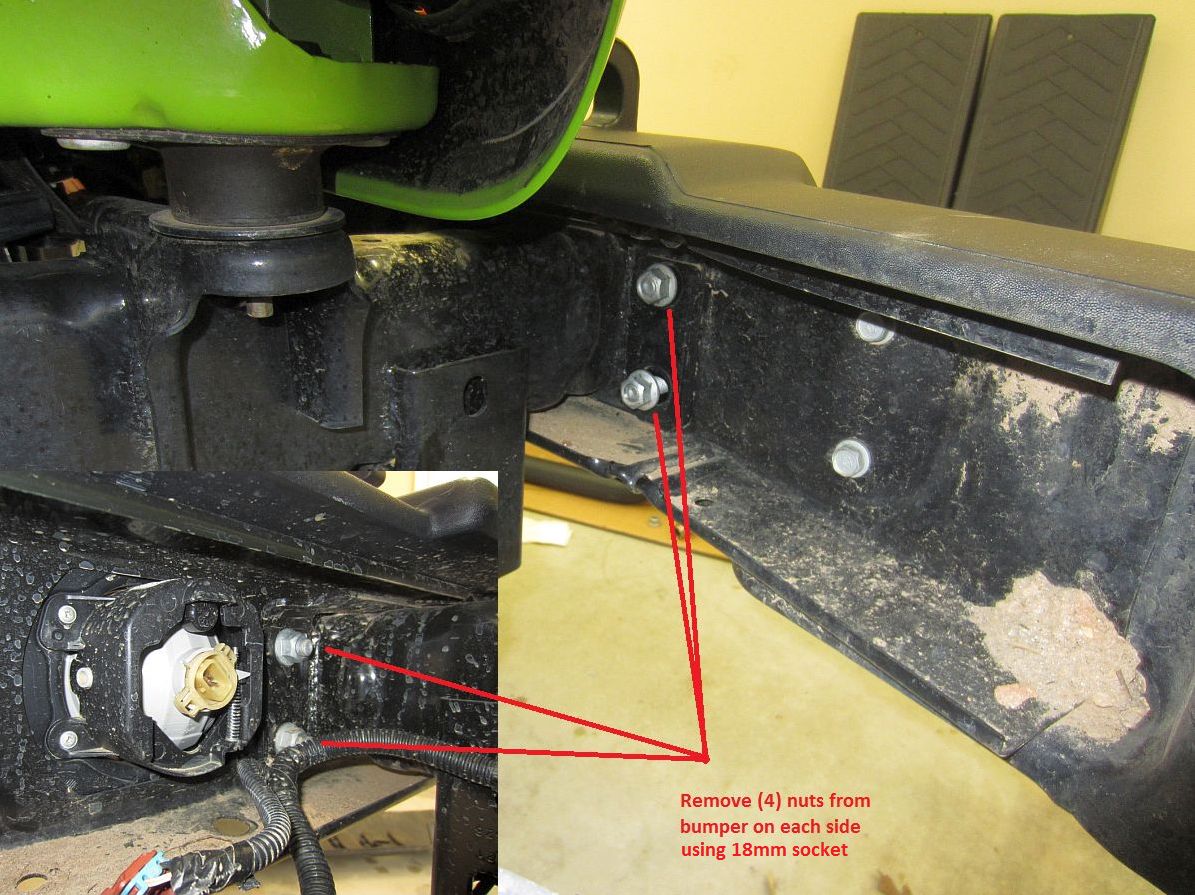
The EASIEST way to install this is to remove the bumper, it's only 6 bolts that are easy to get to and beats trying to wedge the bolts and your hands in for access. The wiring loom is snapped into place between the factory harness and tail light and run down through the bottom and along the frame to the hitch where the connector can be snapped into place. I think this will work well for the $65 shipped that it cost.


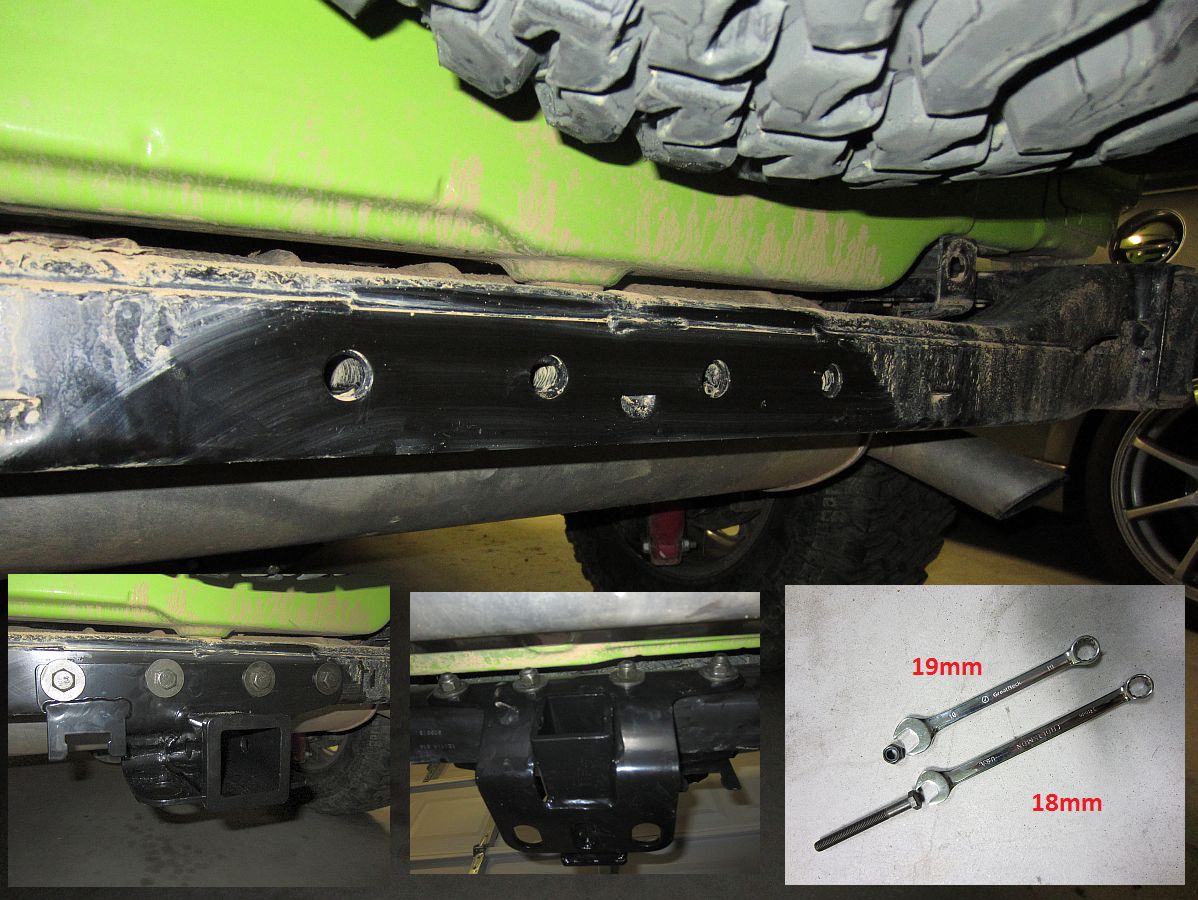
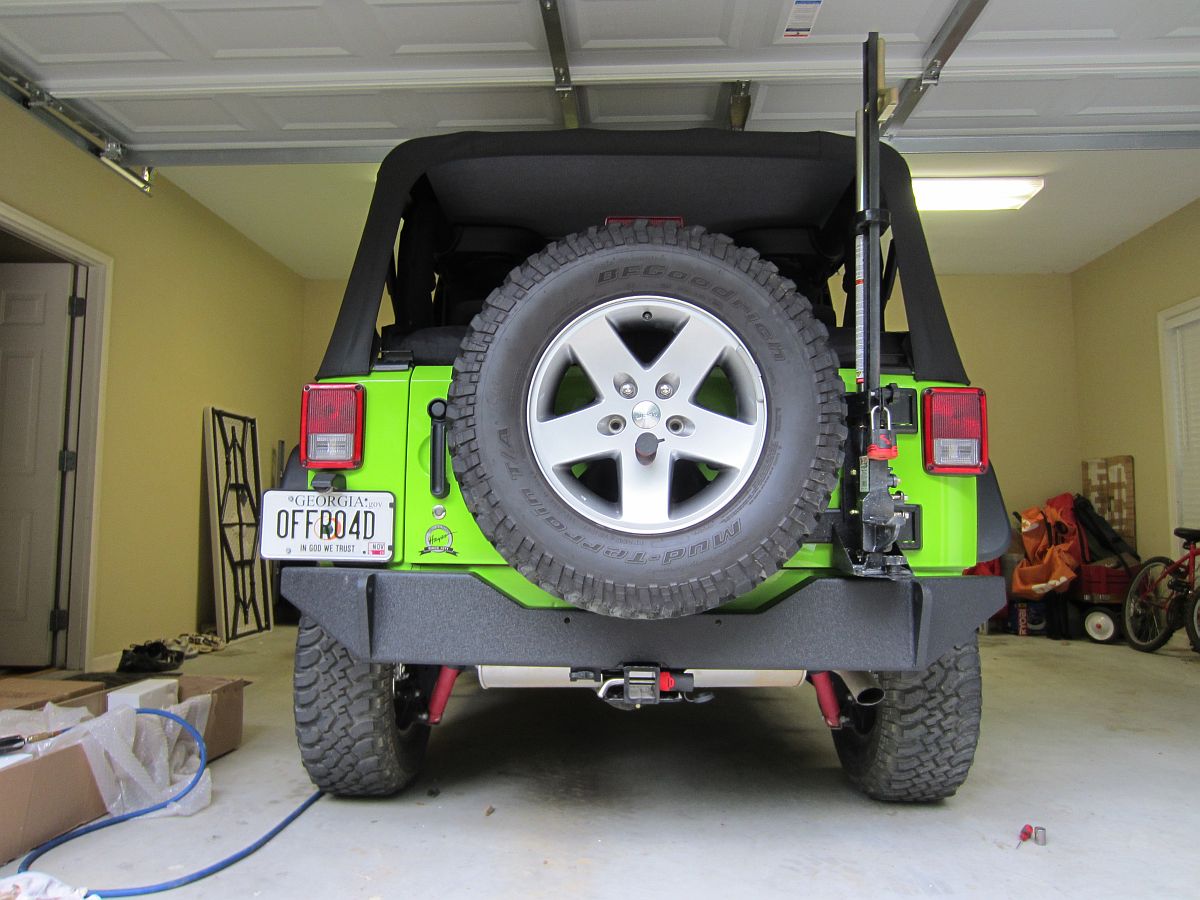
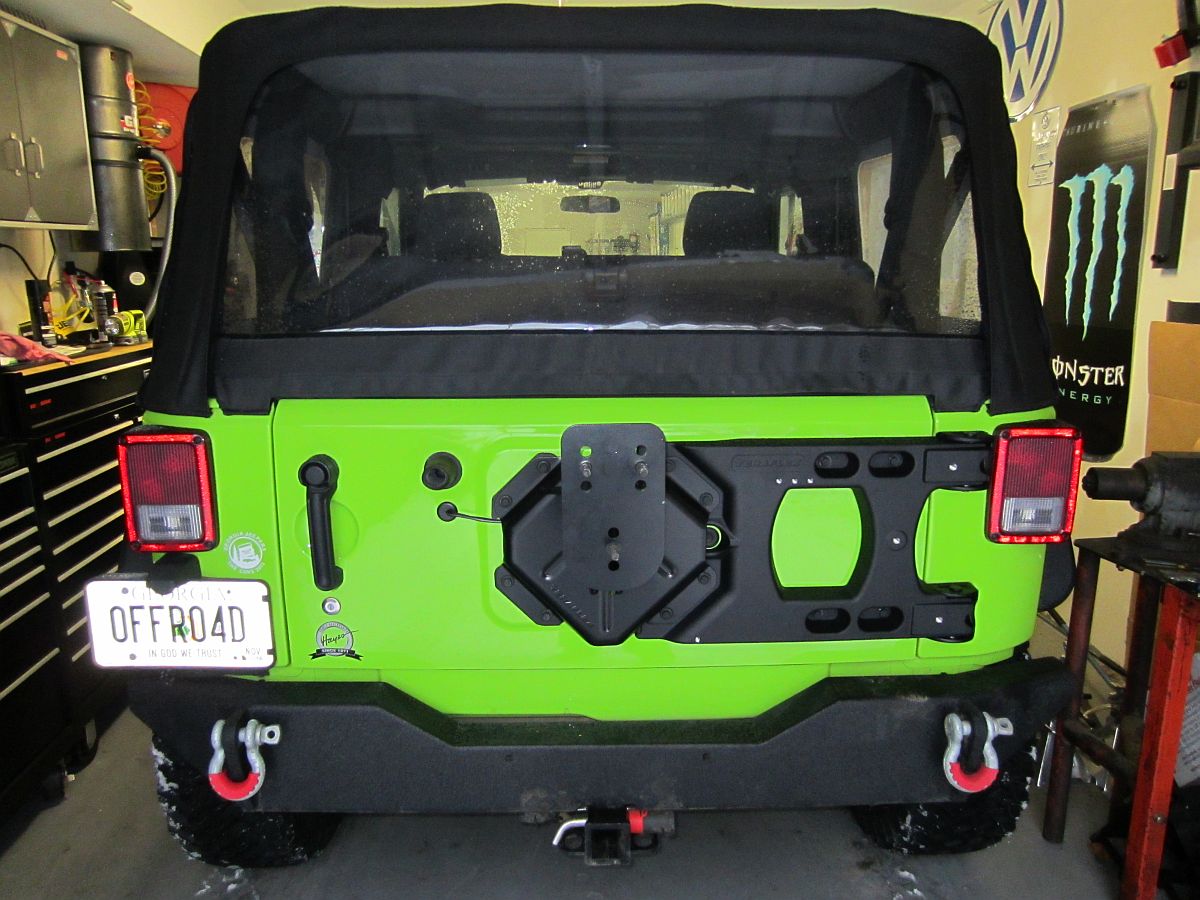
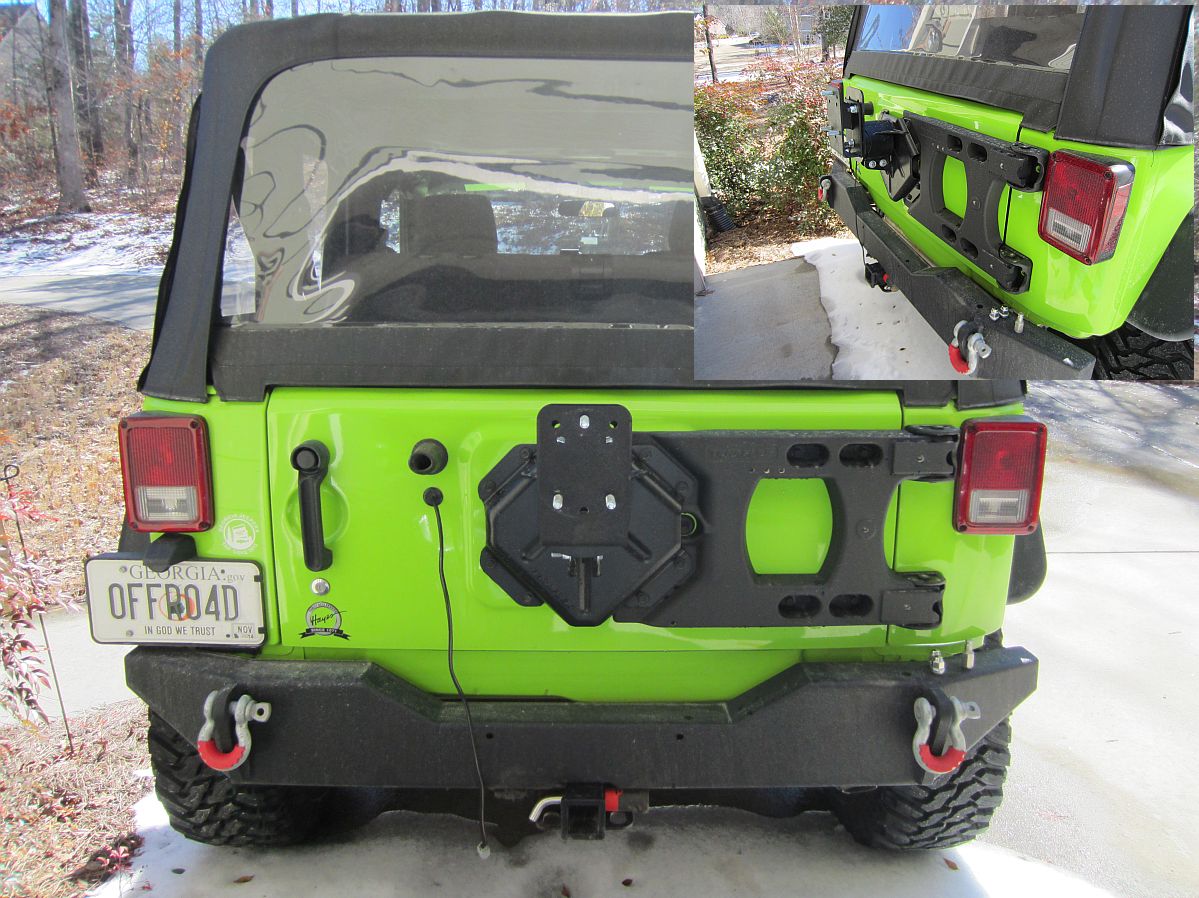
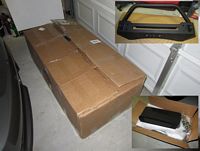
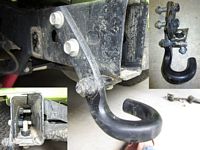
Body Armor Rear Base Bumper (P/N JK-2961) from Amazon installed, installation instructions HERE.
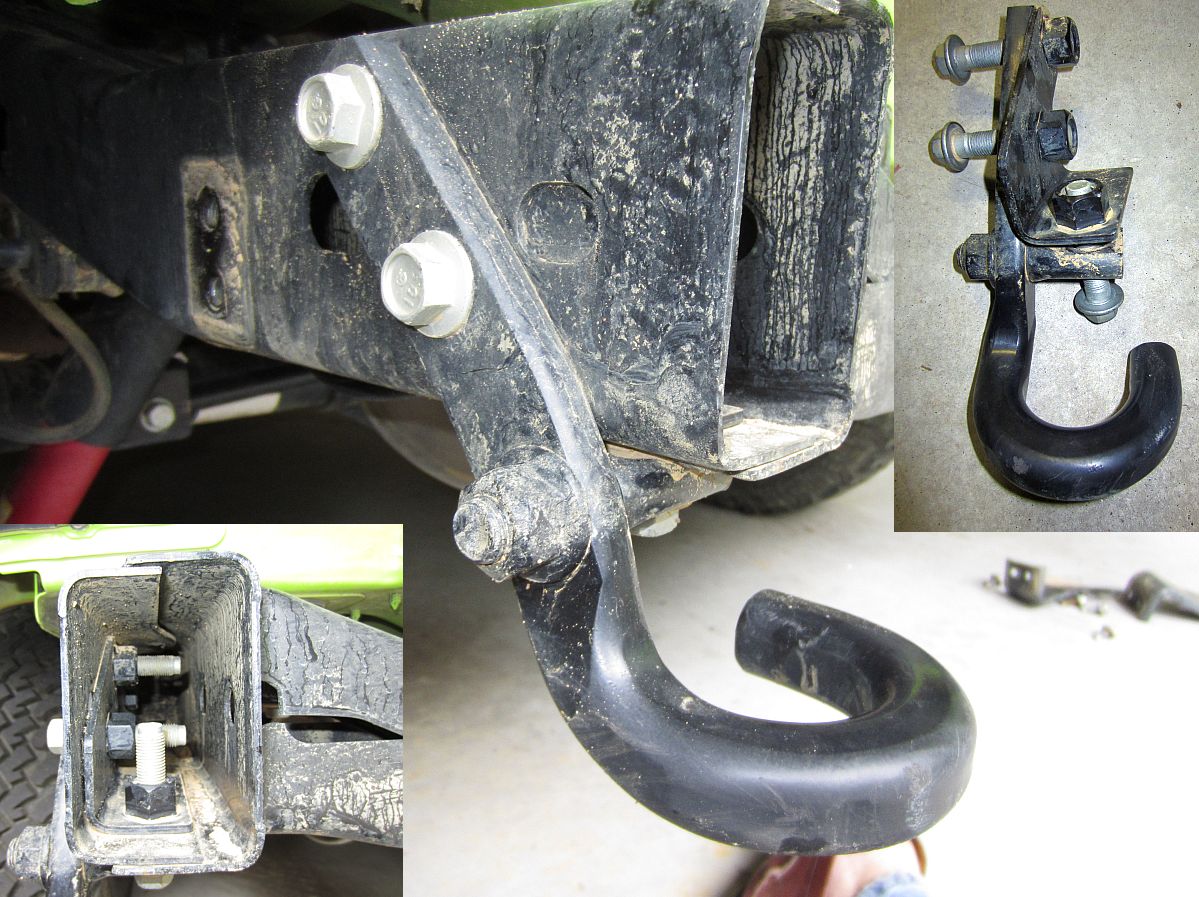
Remove 3 bolts on either side to remove the OE bumper, remove the OE tow hook on the left side if applicable, insert nut plates inside frame, lift bumper up and place on hitch (if you have one it is a nice center support while bolts are installed), install all bolts loosely, lift bumper up to level while tightening bolts, DONE
I was planning to go with the ACE Pro rear bumper to complement all of my other ACE armor but this bumper is cheap and will serve well in the interim.
Also purchased Strattec Hitch Pin Lock 5/8" (P/N 7018440) which seems to be interchangeable with or superseded by Bolt Hitch Pin Lock 5/8" (P/N 7018448).

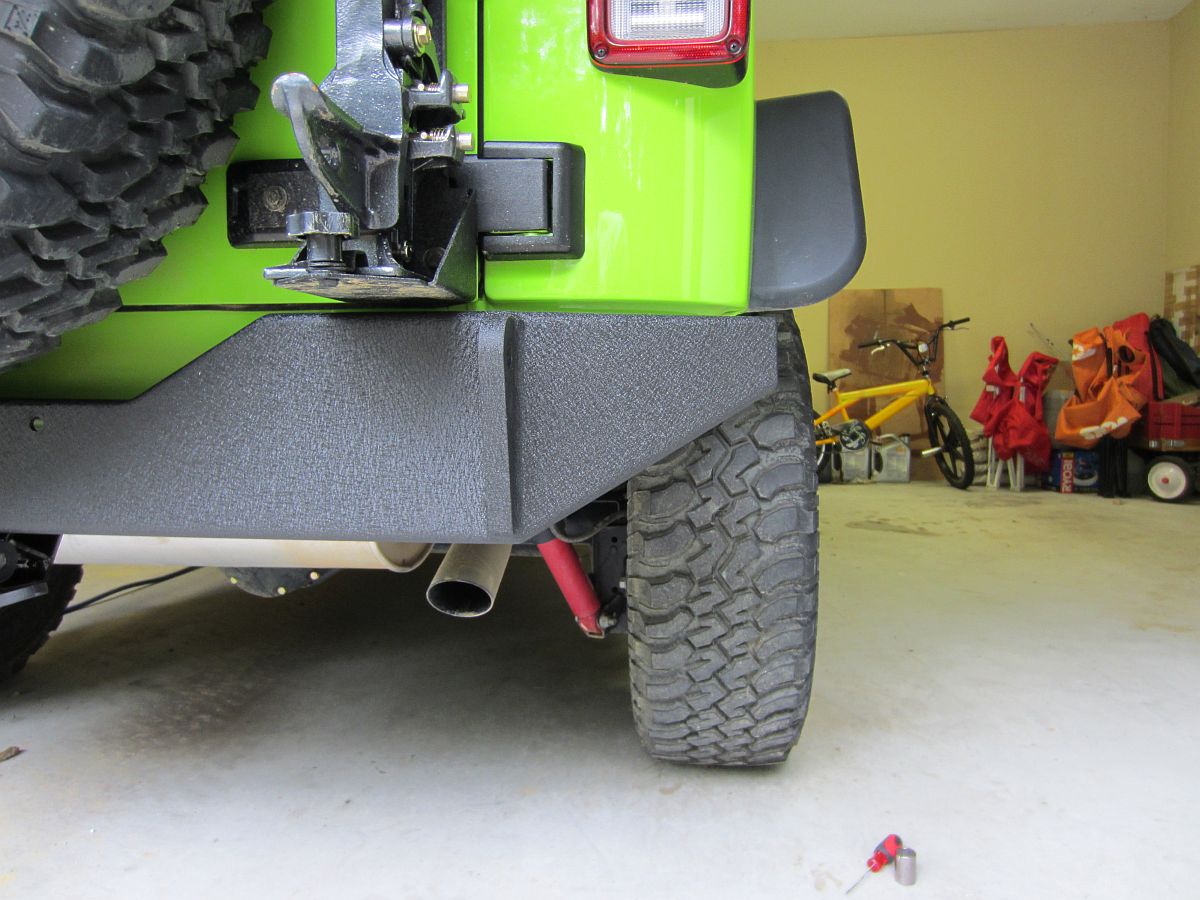
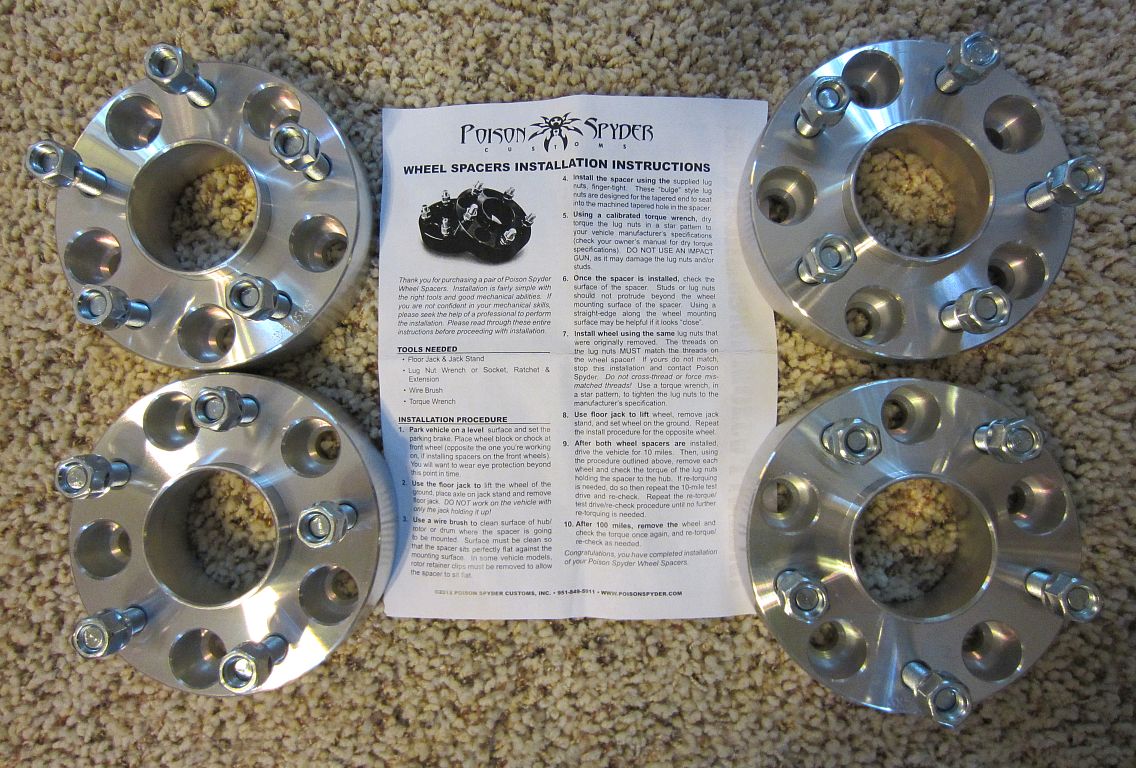
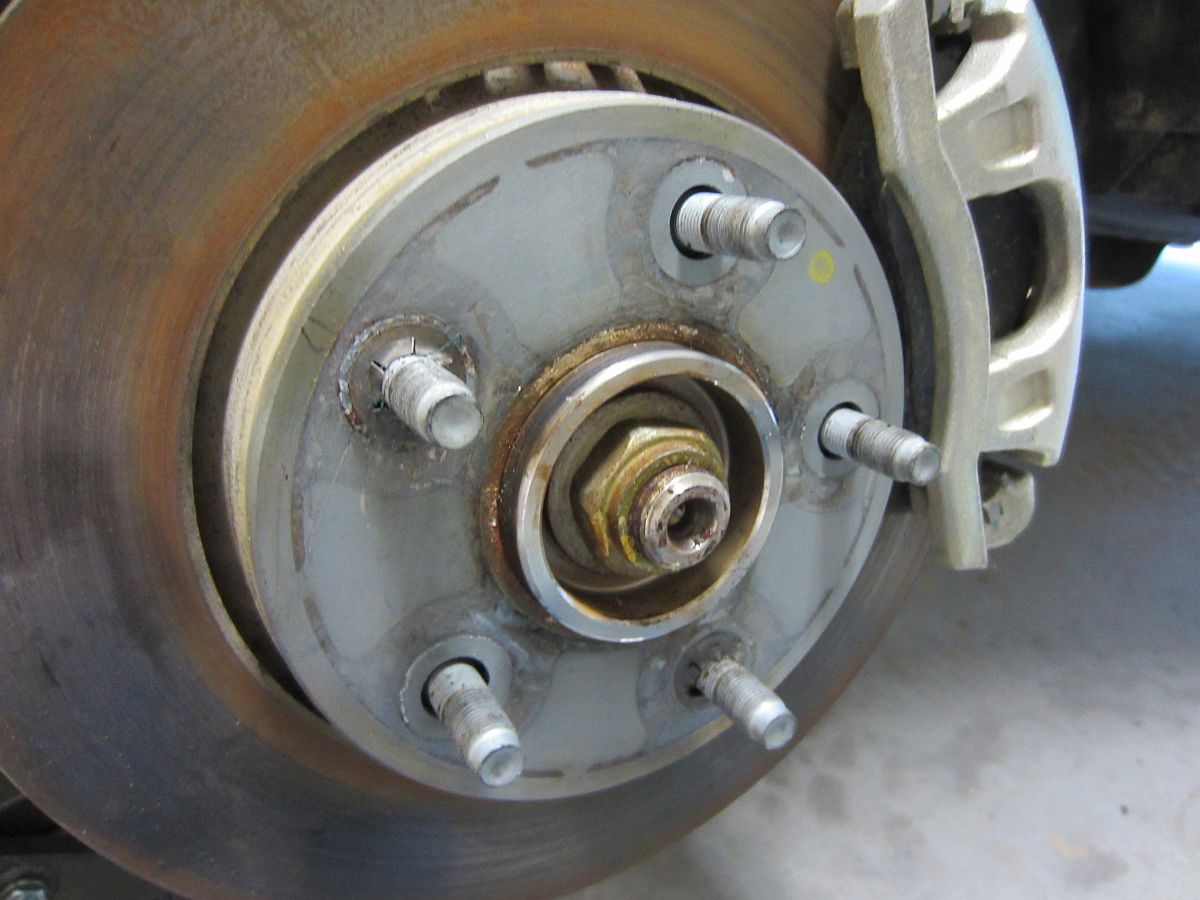
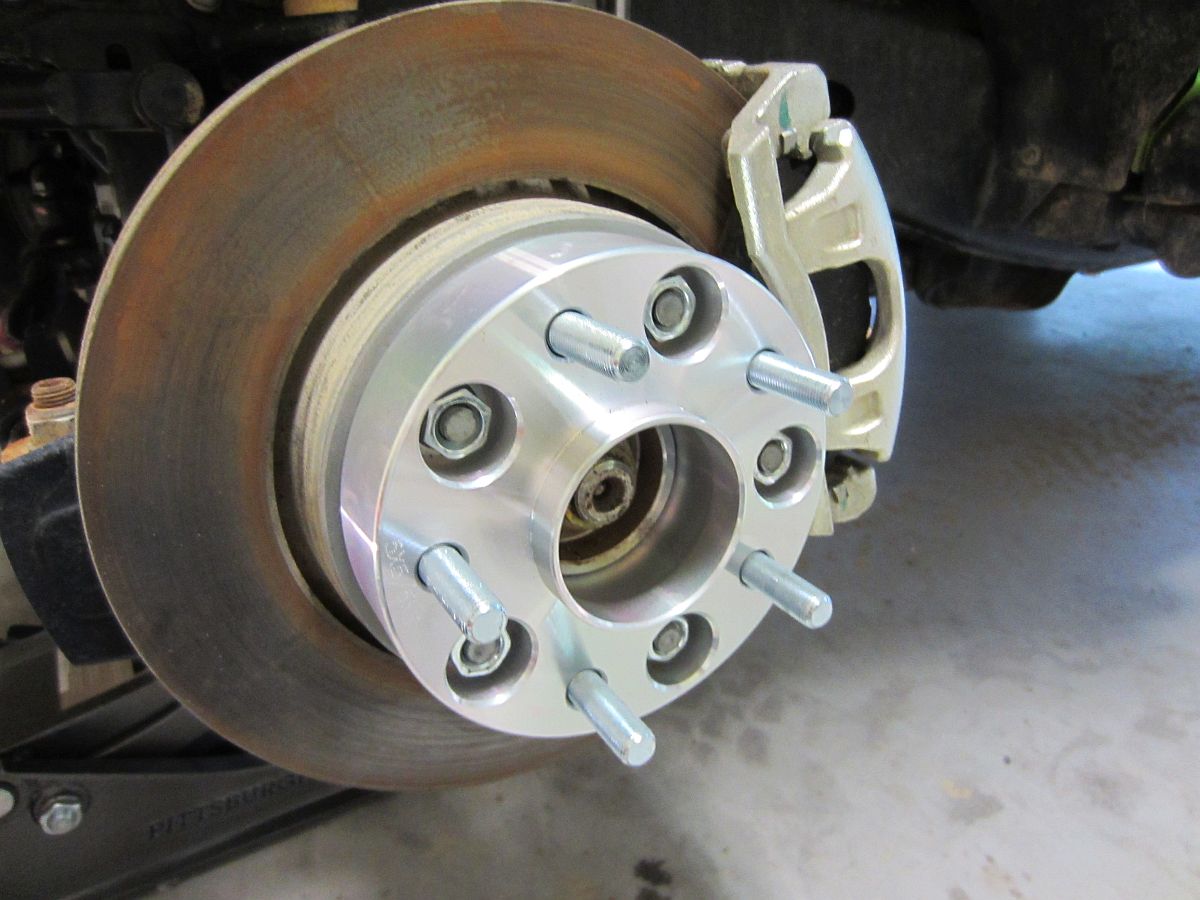
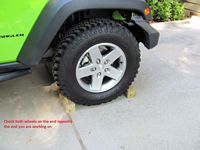
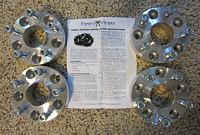
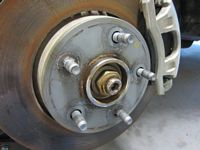
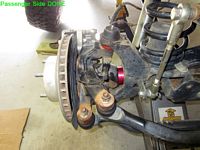
Poison Spider 1.5" Wheel Spacers purchased on closeout, Installation Instructions HERE.
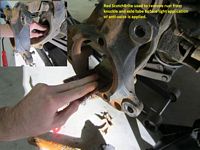
The rotor hub facing has to be cleaned up a little and the retainer clips need to be removed- a flat blade screwdriver makes quick work of the retainer clips after bending all of the prongs up and a wire brush/ScotchBrite pad remove corrosion on the hub.
The spacers worked exactly how I thought they would- the rear tire is now flush with the fender and we have room for some wider 33" or 35" tires in the future.

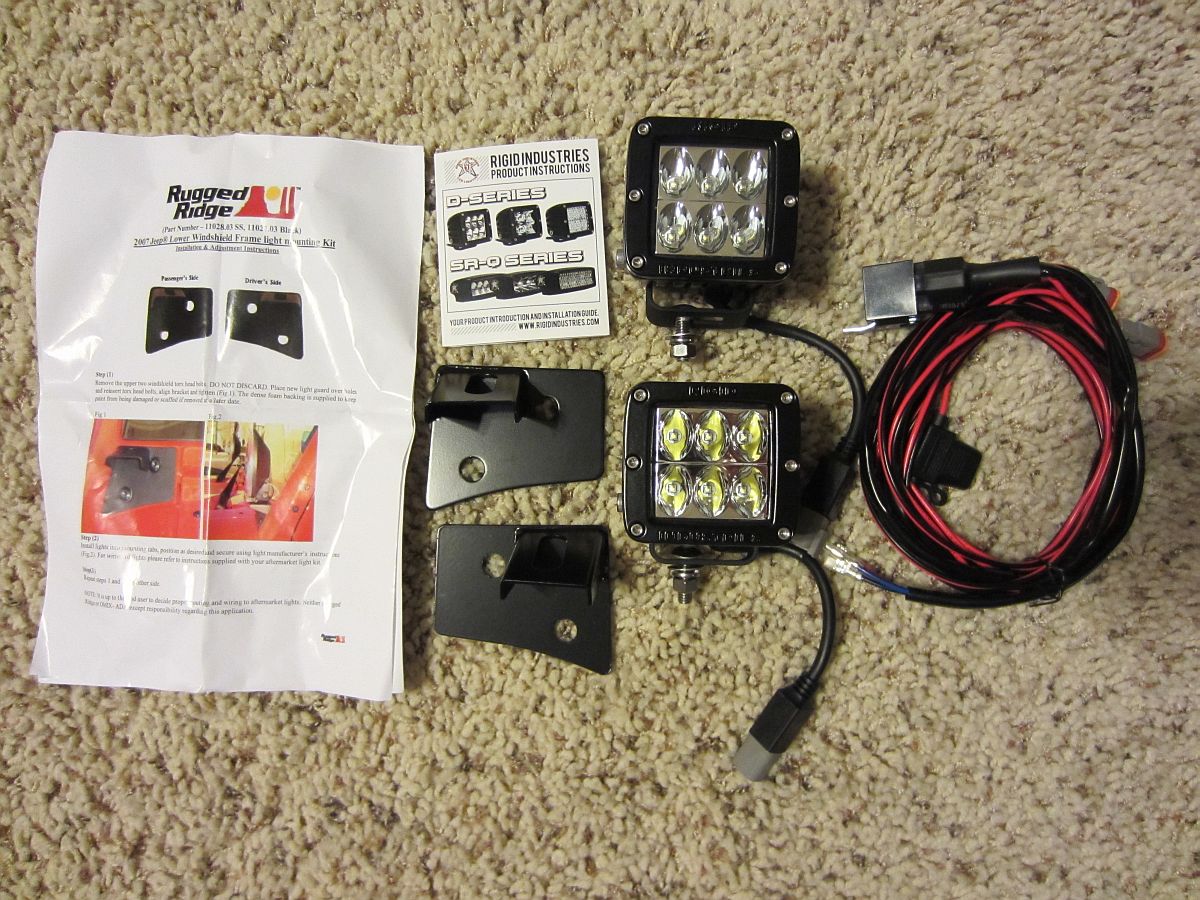
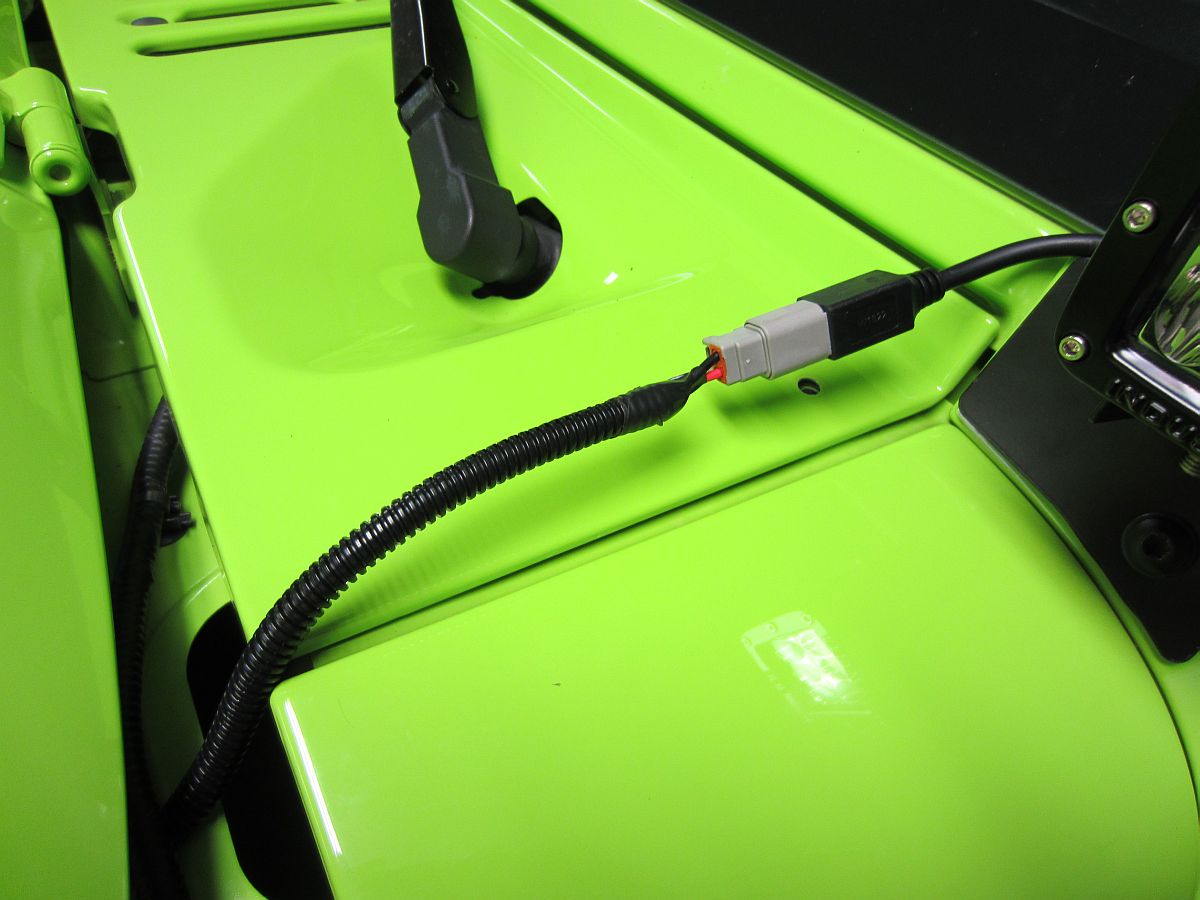
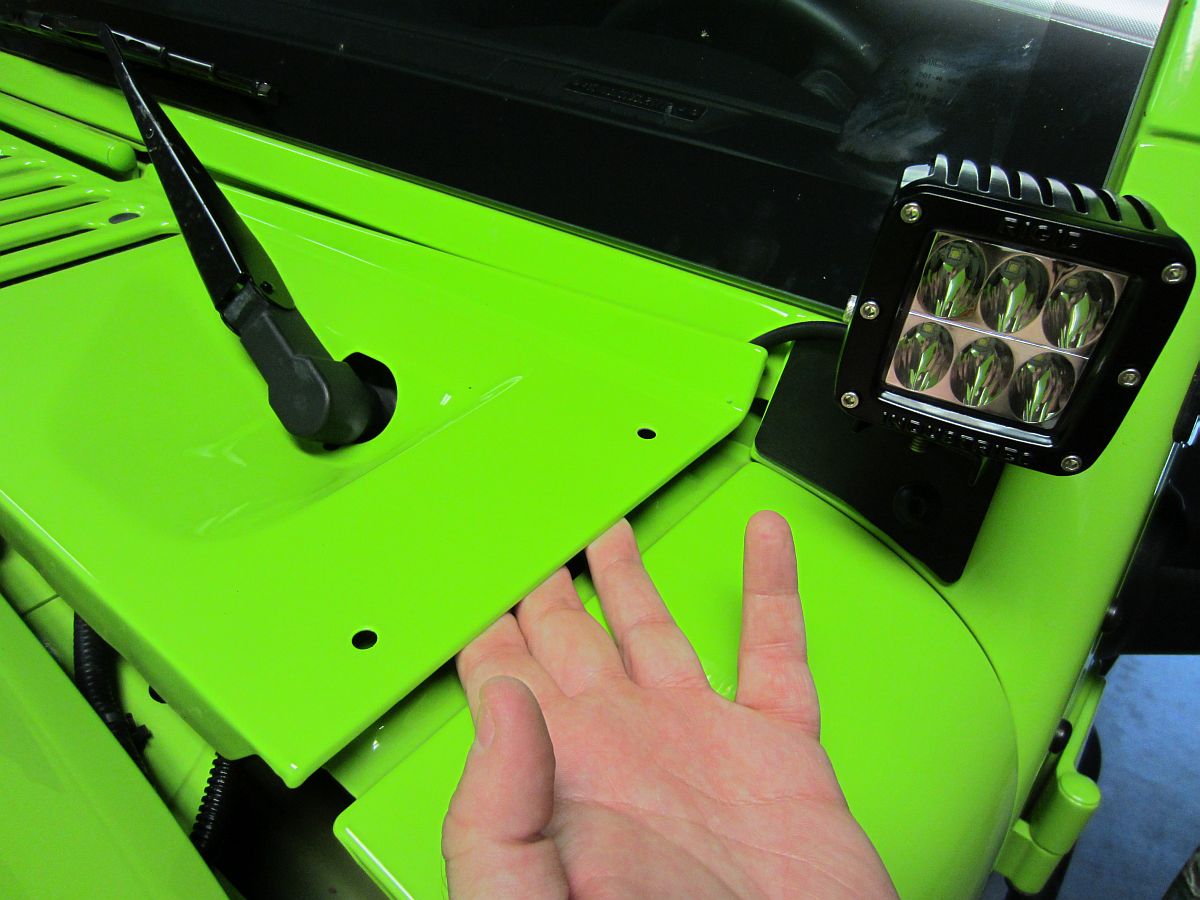
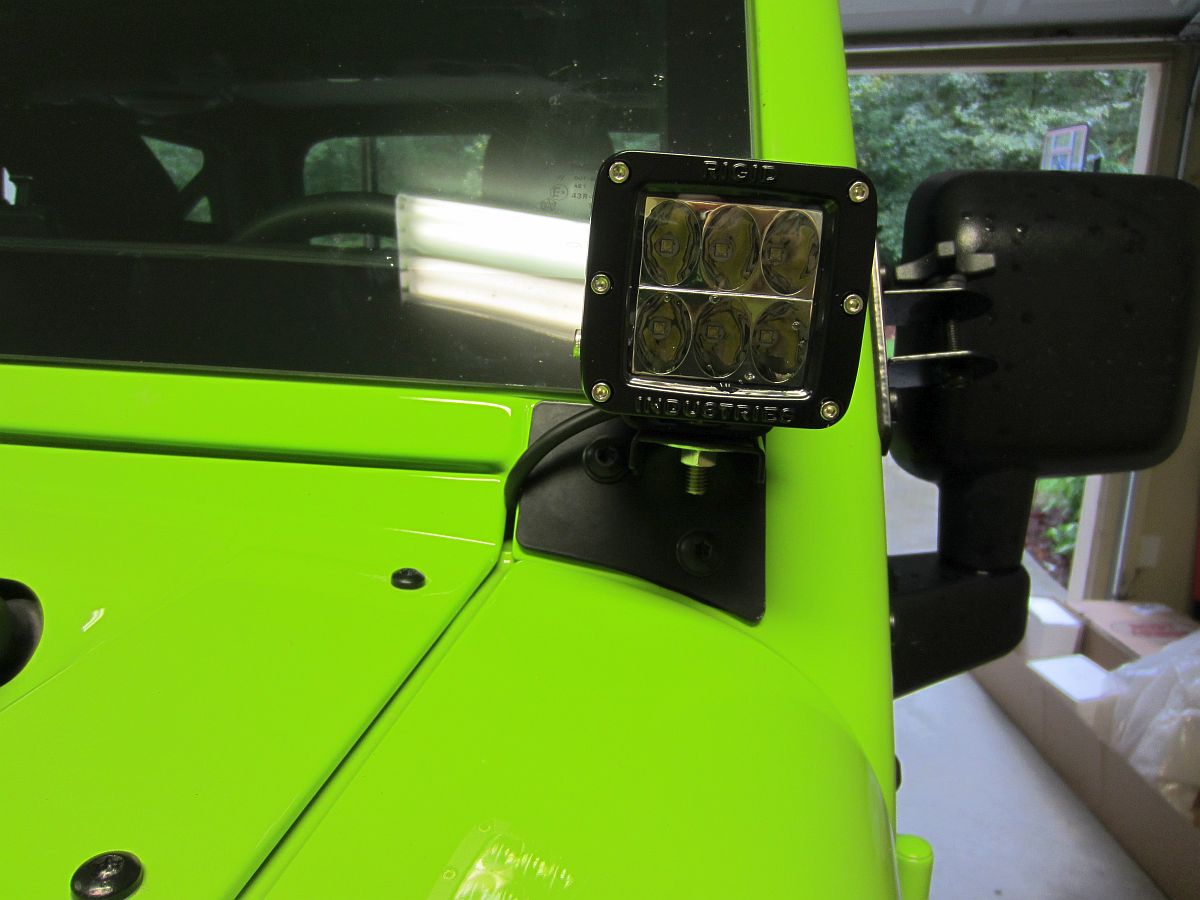
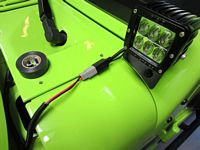
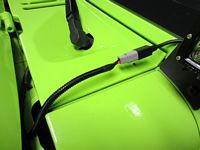
Rigid Industries D2 LED Driving Lights (P/N 50231) purchased from Amazon along with Rugged Ridge Windshield Light Mounts (P/N 11027.03) from Amazon. Rigid D2 installation instructions HERE and Rugged Ridge Light Mount installation instructions HERE.
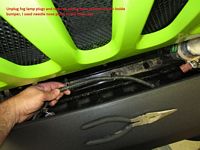
Mounts pretty easy to bolt on, light mounts a little trickier. One of the D2s had some casting flash that had to be filed off so that the screw and nut would line up. Once the lights were loosely bolted into the mounts the wiring was loomed (1/4" loom found at Napa) and run along the firewall, tucked in with the OE Wiring loom, and down to the same OE fog light wire to act as the turn on (blue wire) and hooked to the battery. The red/black wires and/for the included switch were unused as a result. I found a YouTube video HERE that illustrates what I did for the most part with the exception of the Spod mods.
These lights are pretty bright and complement the SR20 with side fill well.


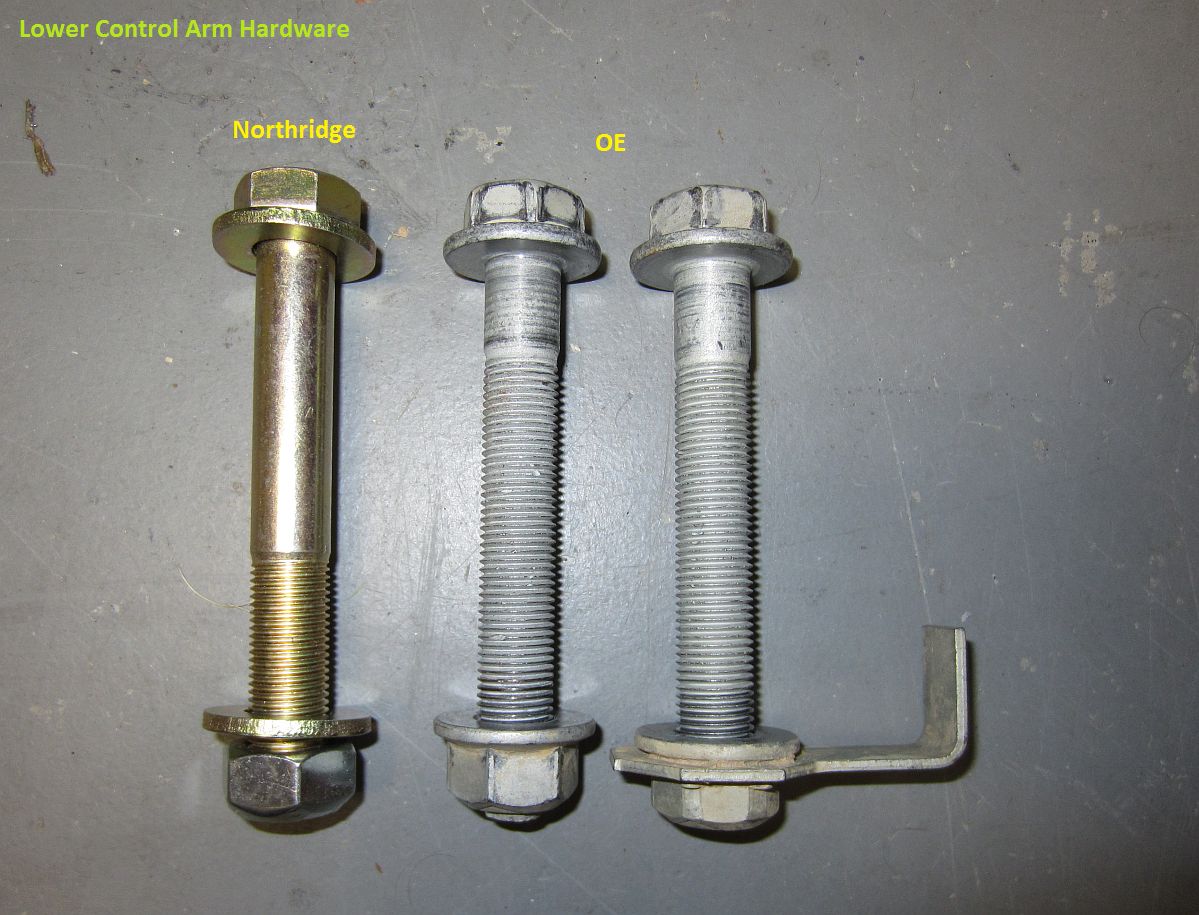
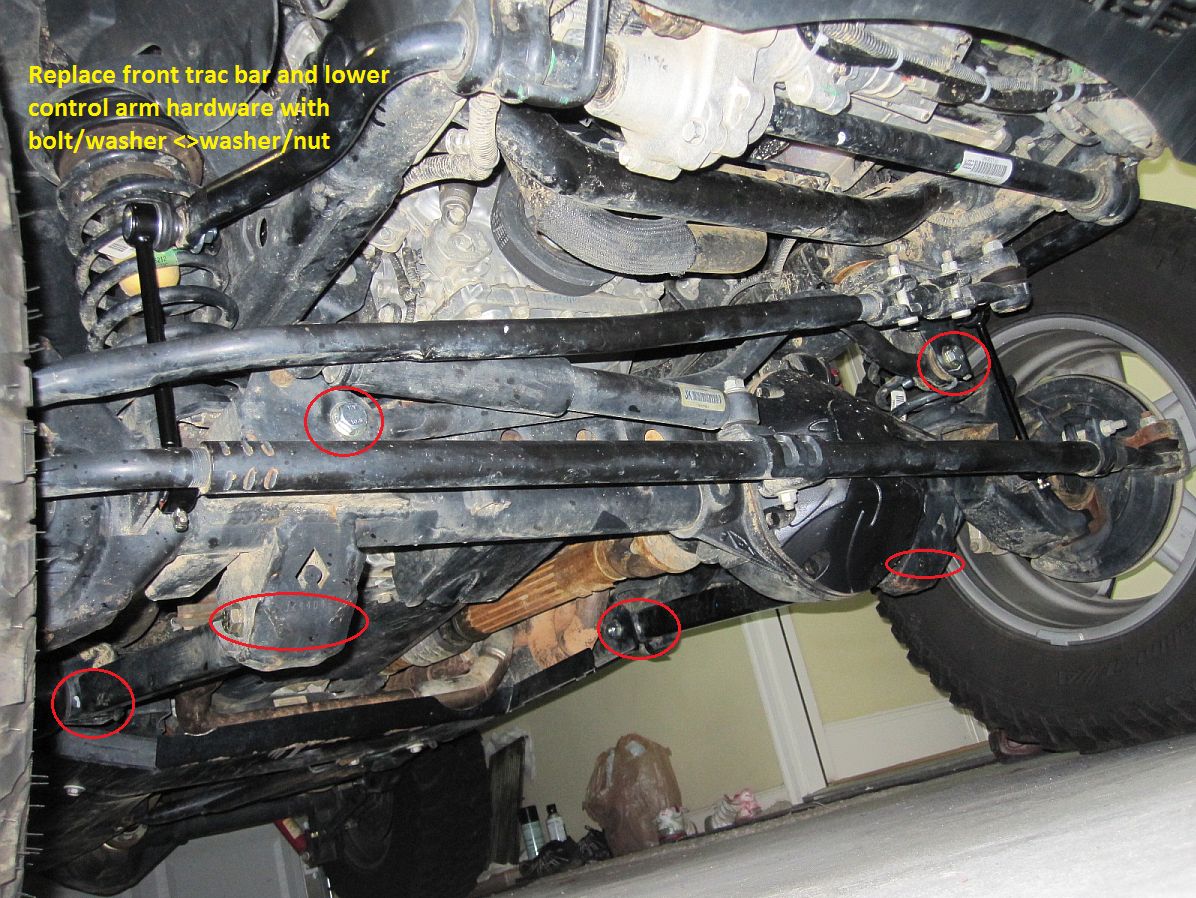
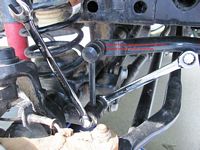
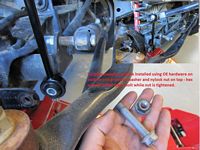
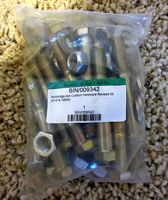
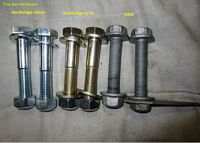
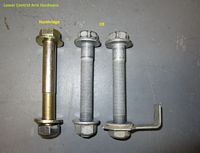
Northridge 4x4 Jeep JK Grade 8 Bolt Kit purchased back when we first bought the Jeep and I found this death wobble issue (video HERE, and another forum thread HERE) doing pre-purchase research, finally installed.
Synergy Manufacturing offers a similar Grade 9 kit and also includes hardware for the upper control arms- although overkill for this application IMO, they do have great installation instructions: V1 HERE, V2 HERE.
Easy enough replacing one bolt at a time. The front trac bar may require a helper to turn the steering wheel to help line up the bolt for R&R, the lower control arms might require rolling the tire forward/backward to line up the bolt for R&R, but most were just R&R. I had to use the Northridge supplied 14mm front trac bar bolts/nuts since I still have the OE trac bar, I'll save the 9/16 hardware for when I upgrade. I installed all bolts/nuts where I could still spin the washer and then rolled the jeep (trans in neutral) back and forward a few times by hand to settle everything and then torqued all down to 125 ft/lbs.....will periodically check.
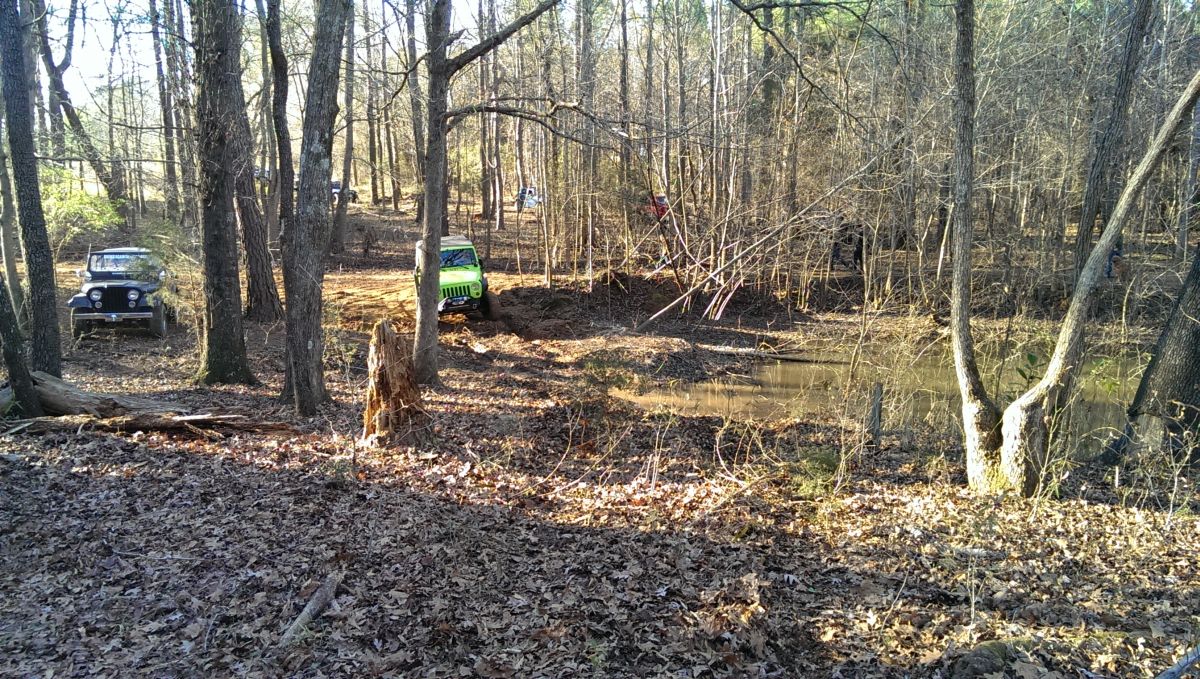
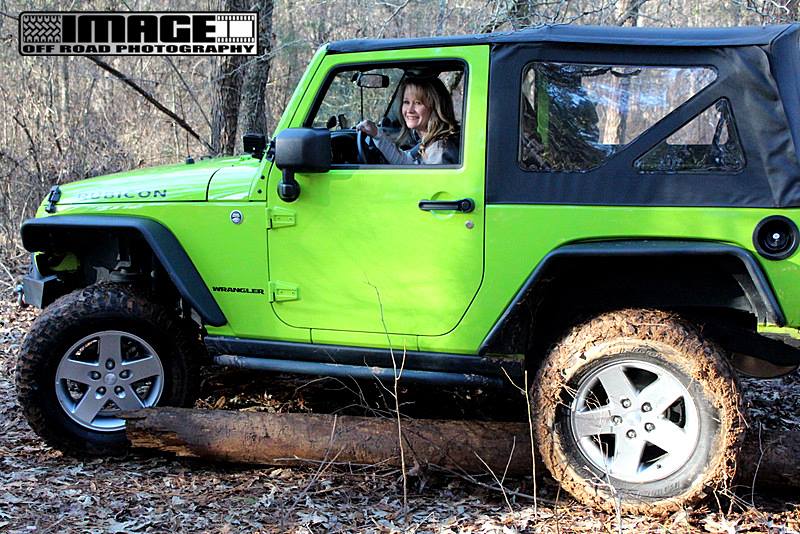
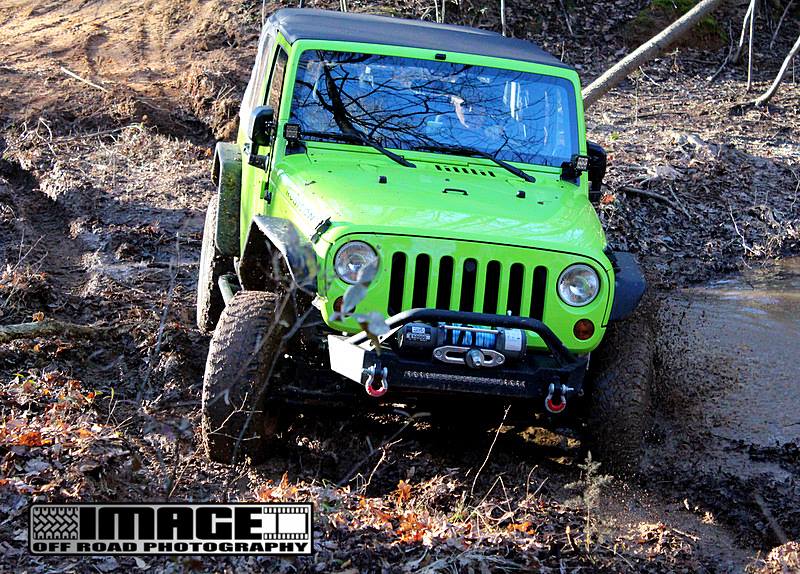
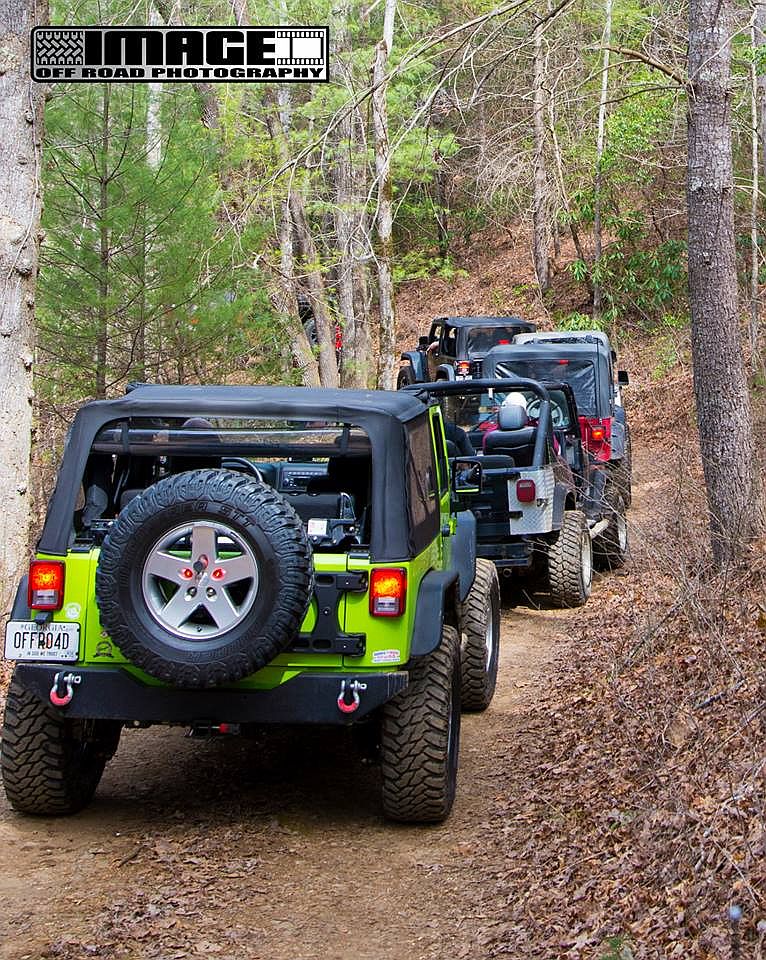
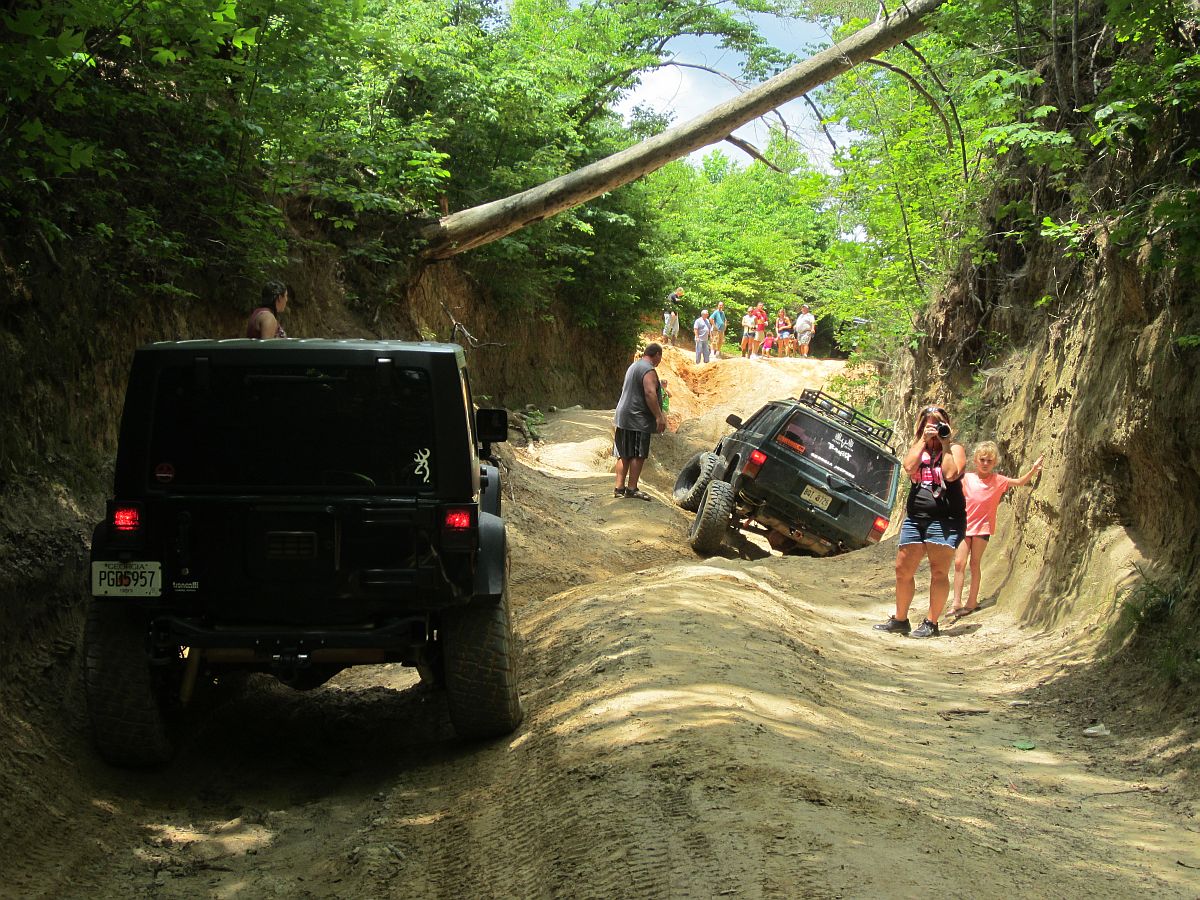
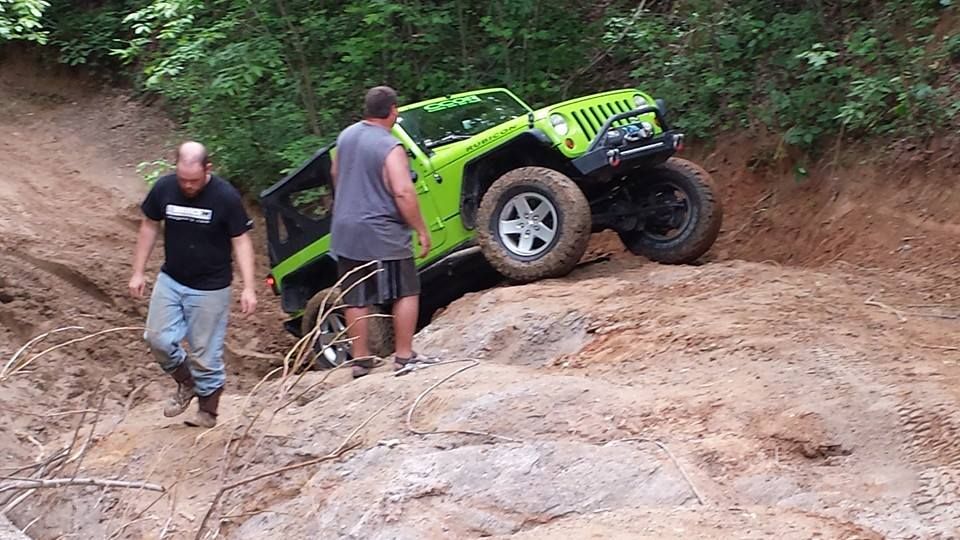
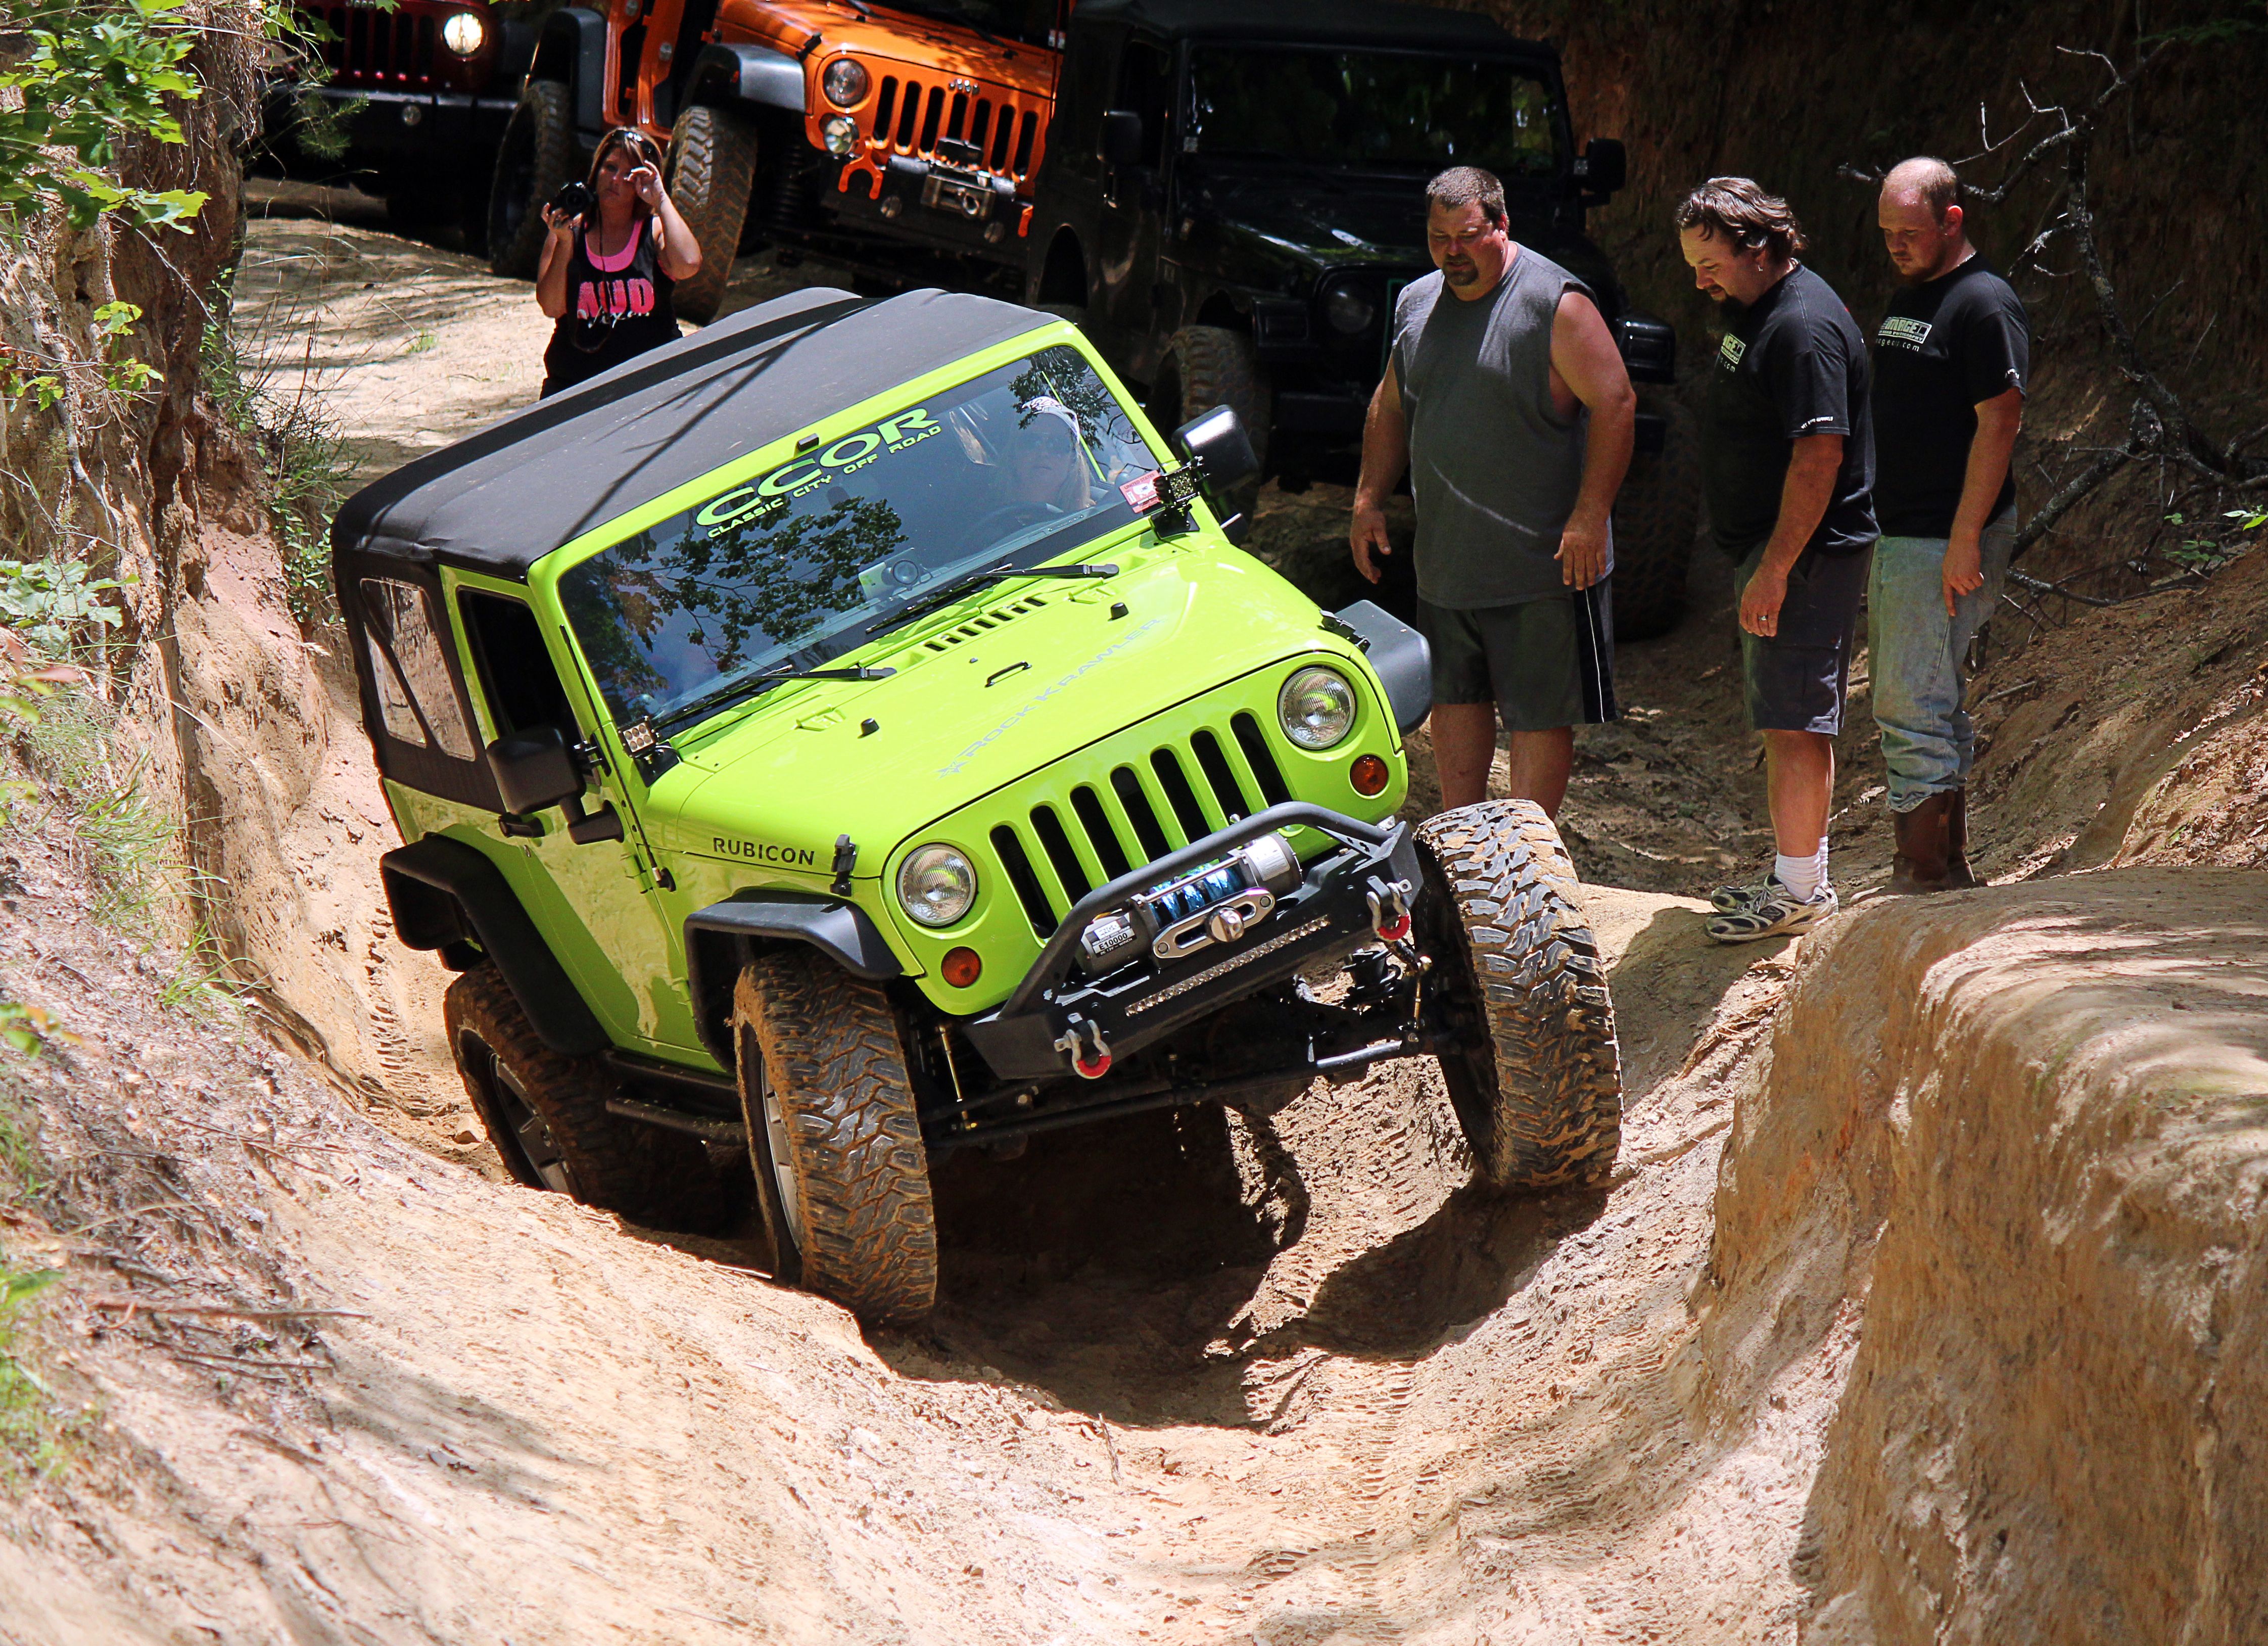
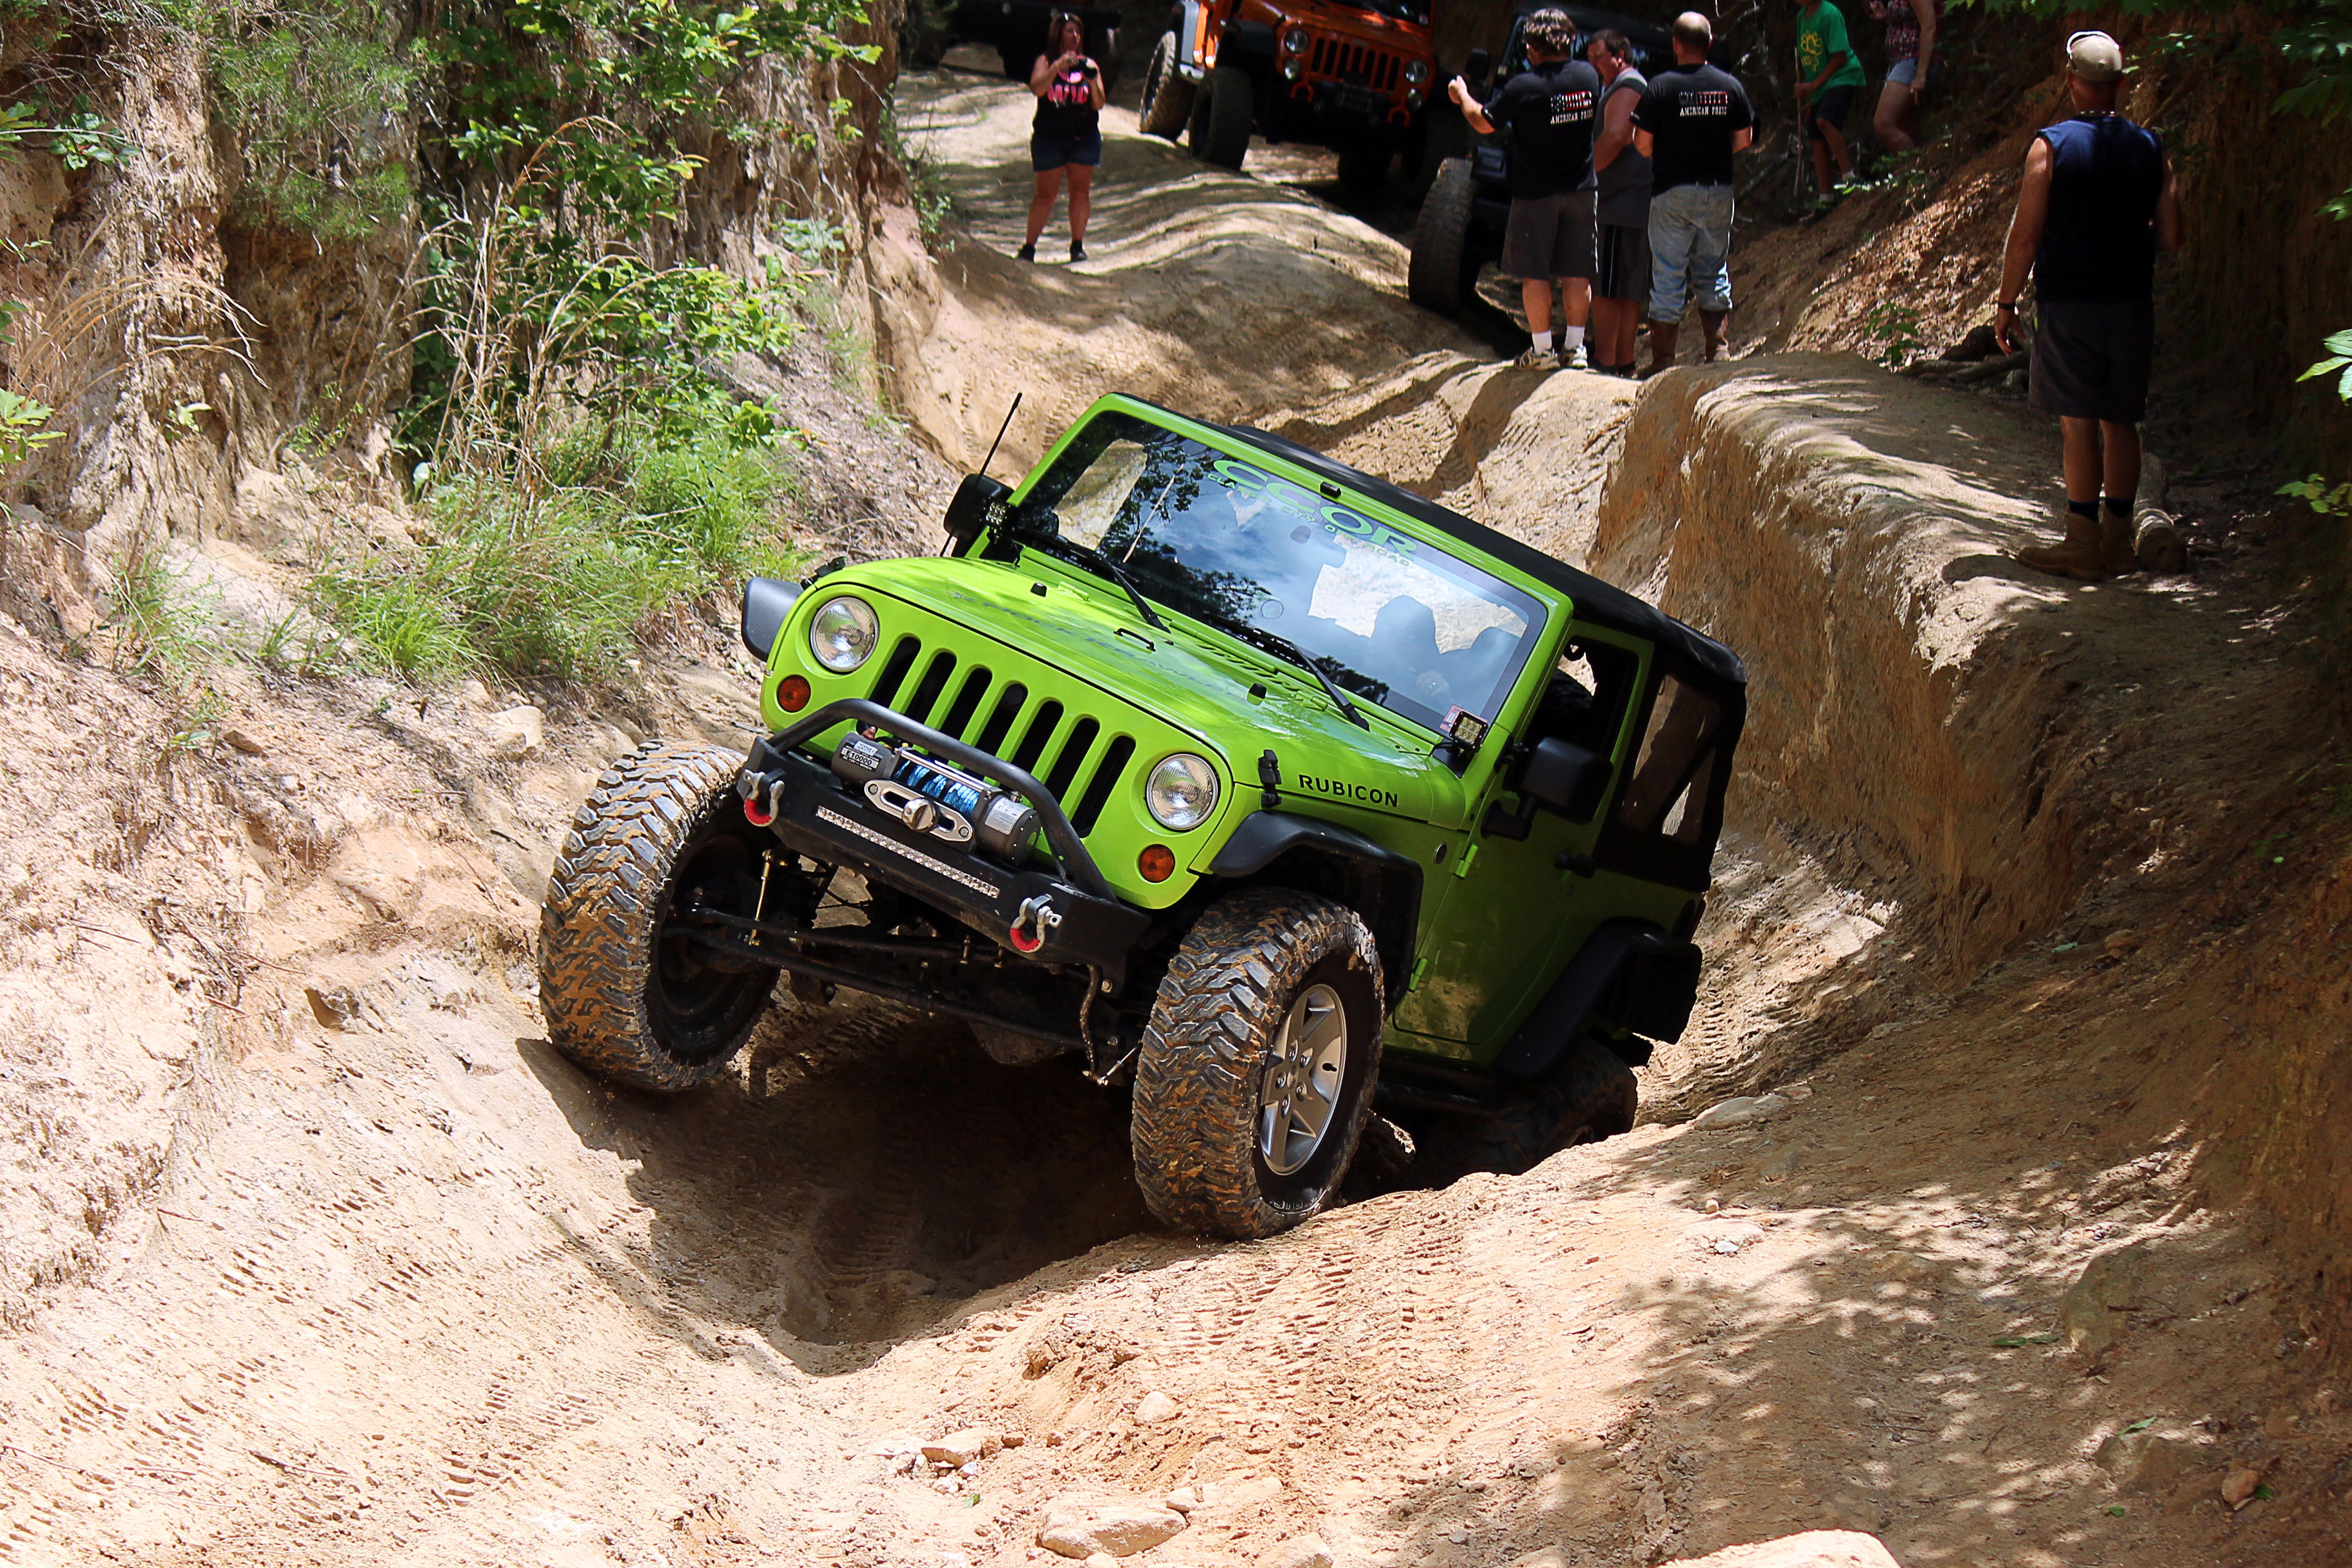
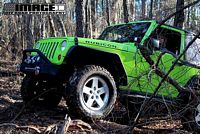
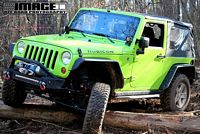
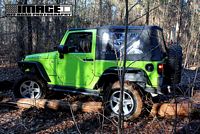
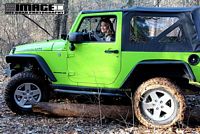
New Georgia Jeepers Jersey Club property (aka Area 7). Lavon's first time driving off-road, used the winch many times as the trails were cut with larger lifts/tires in mind- time to upgrade. As I tried to show her, lack of lift and tires can be worked around with some momentum- this is where the Artec truss demonstrates its value
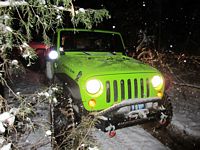
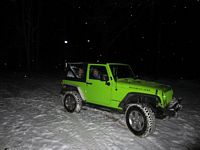
Since these first two trips, the trails have been greatly refined and were awesome during the snow- BIG THANKS to the Georgia Jeepers who volunteered time and equipment to get this done
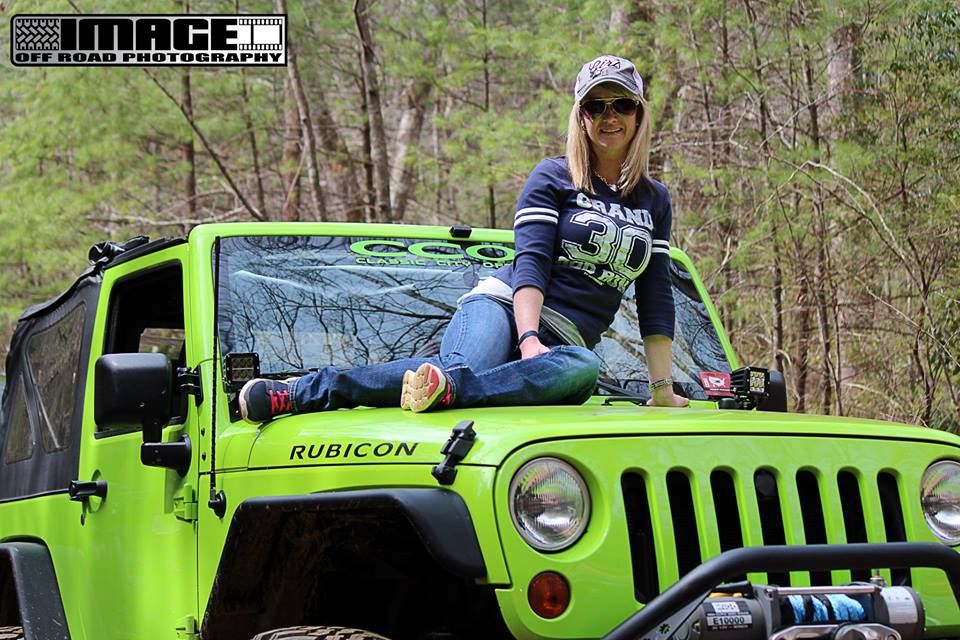
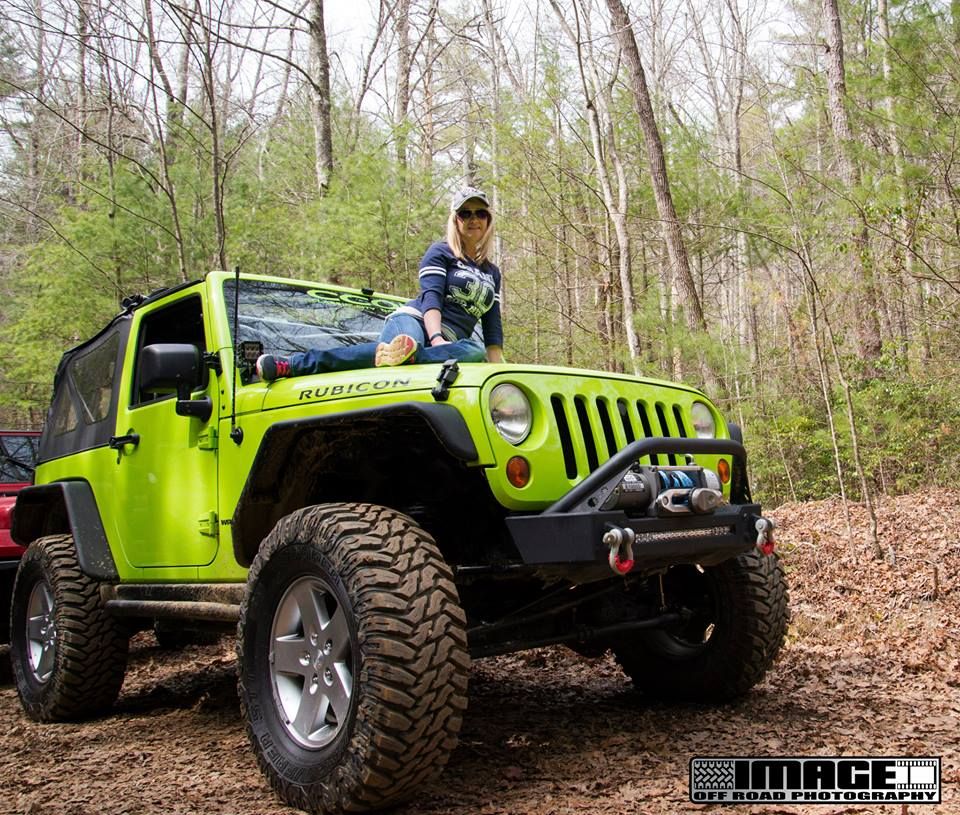
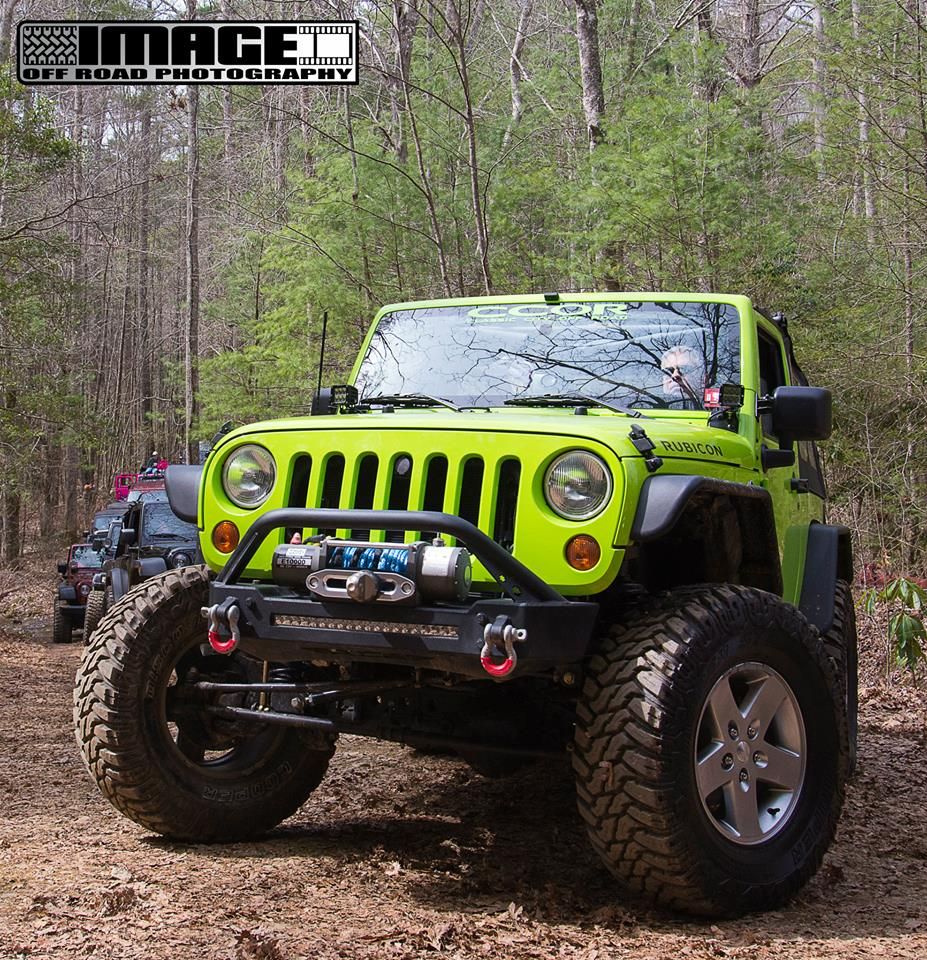
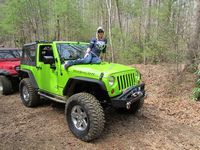
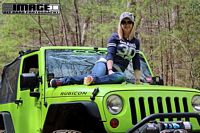
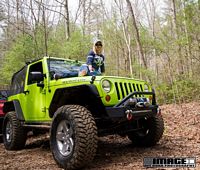
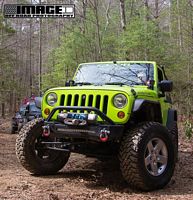
The GREAT pics from ImageOffRoadPhotography were taken by Christy Mote and team- THANKS for sharing!


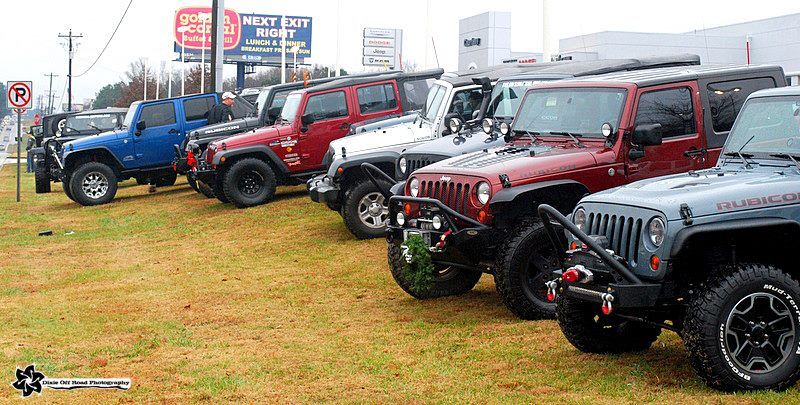
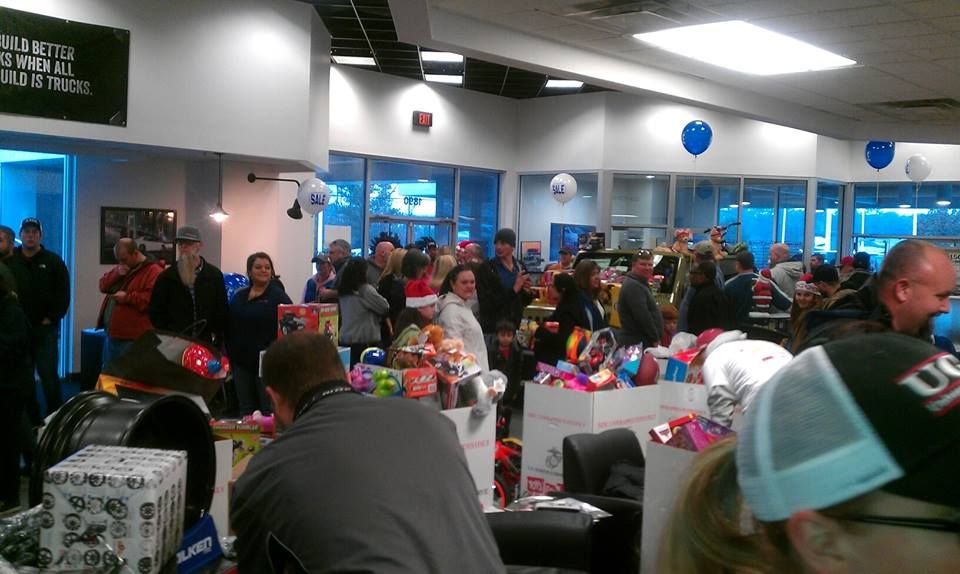
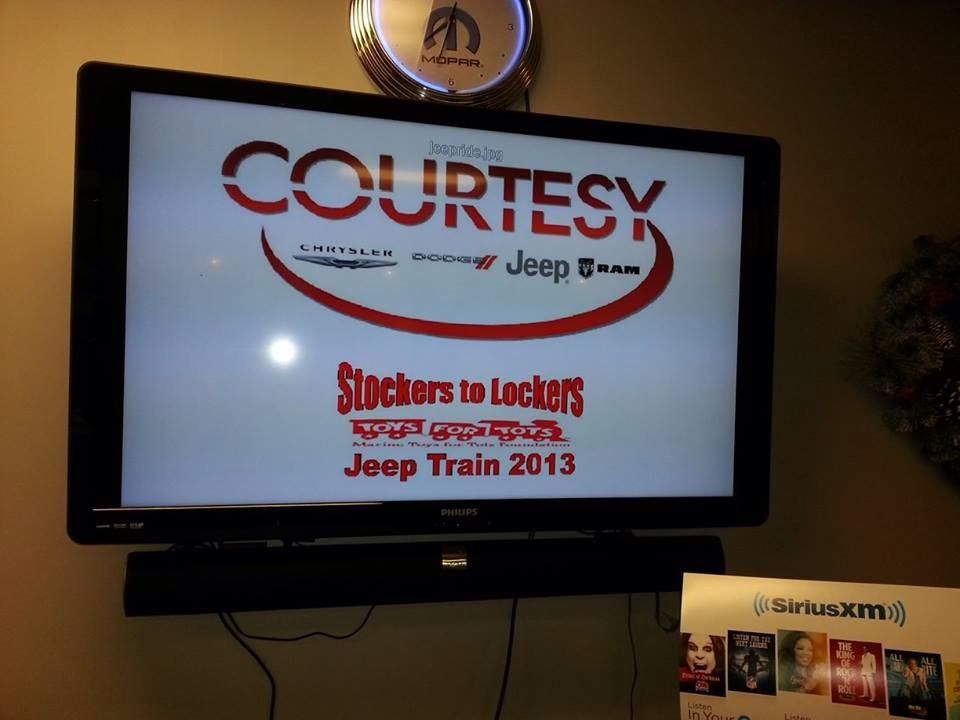
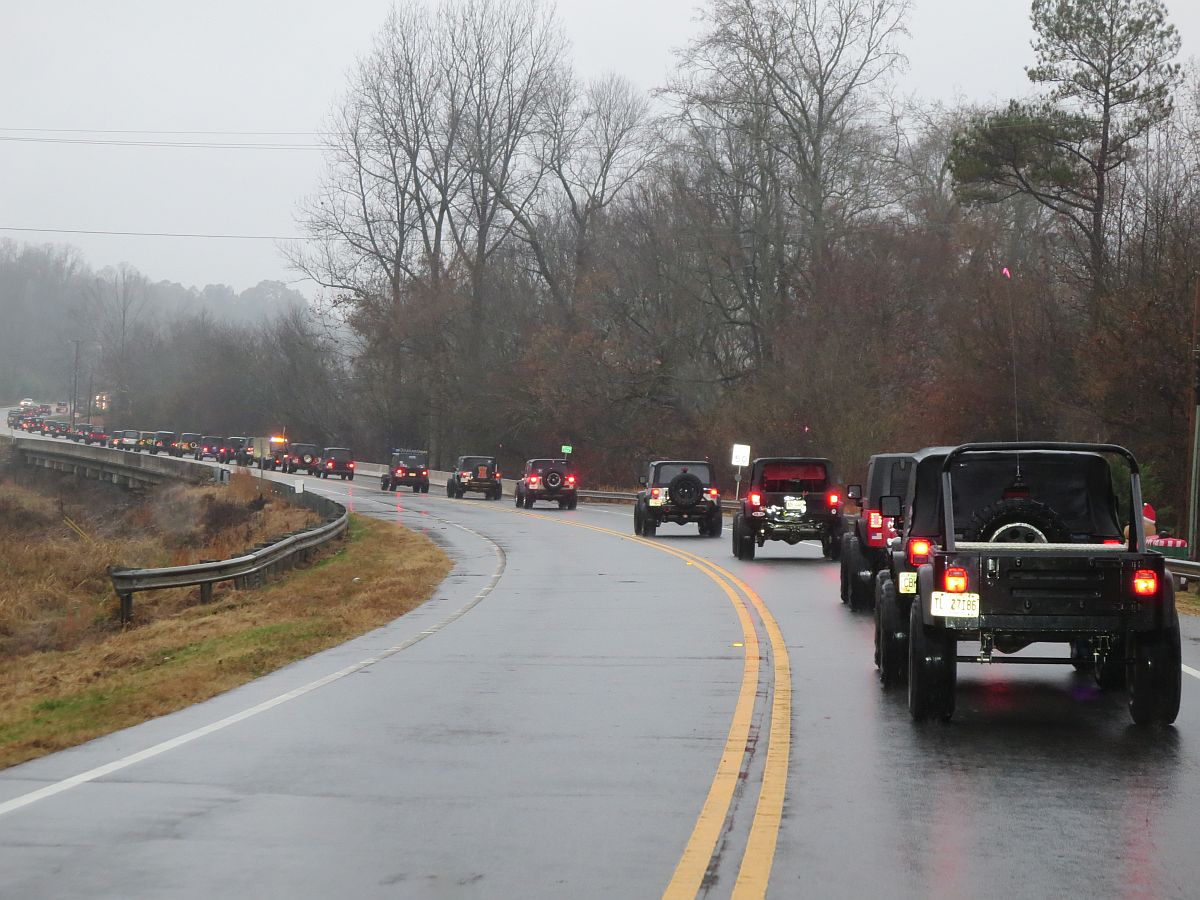
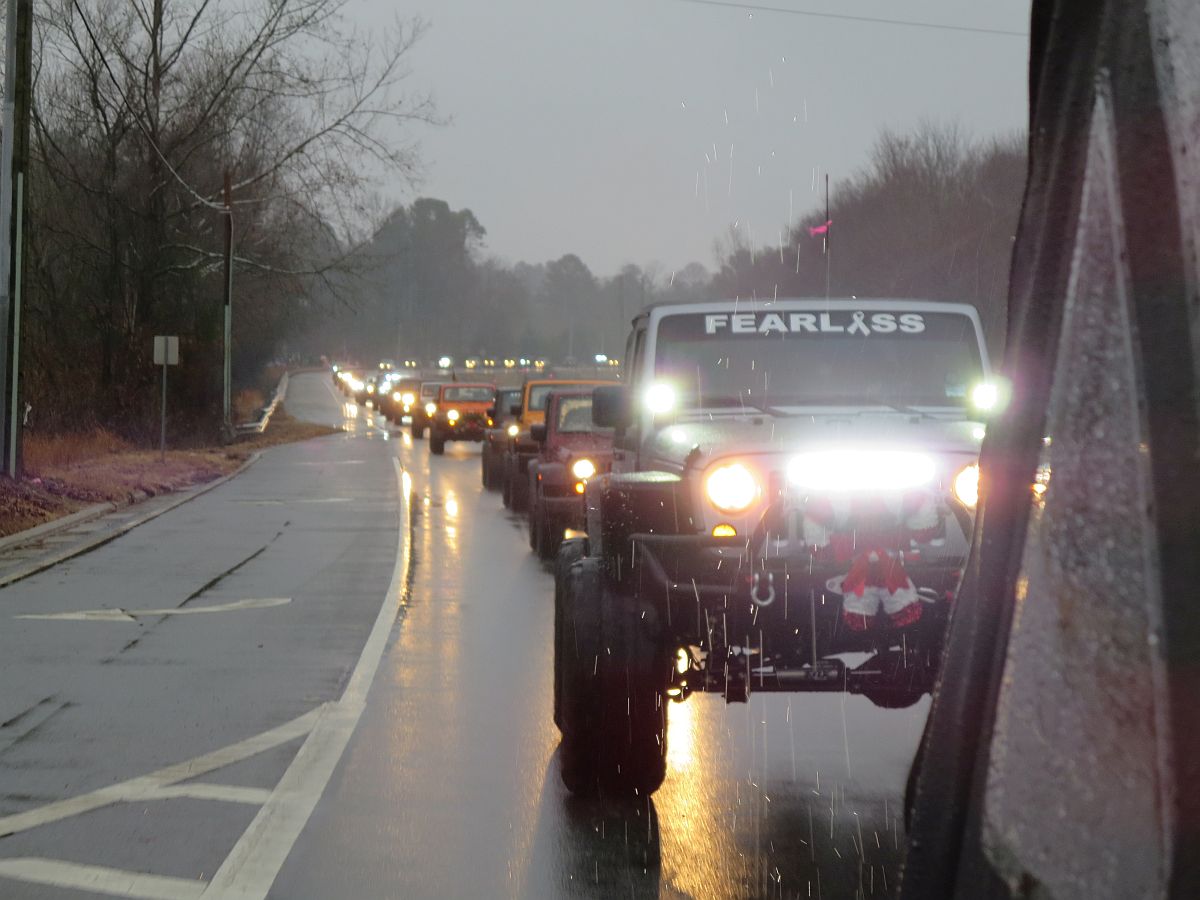
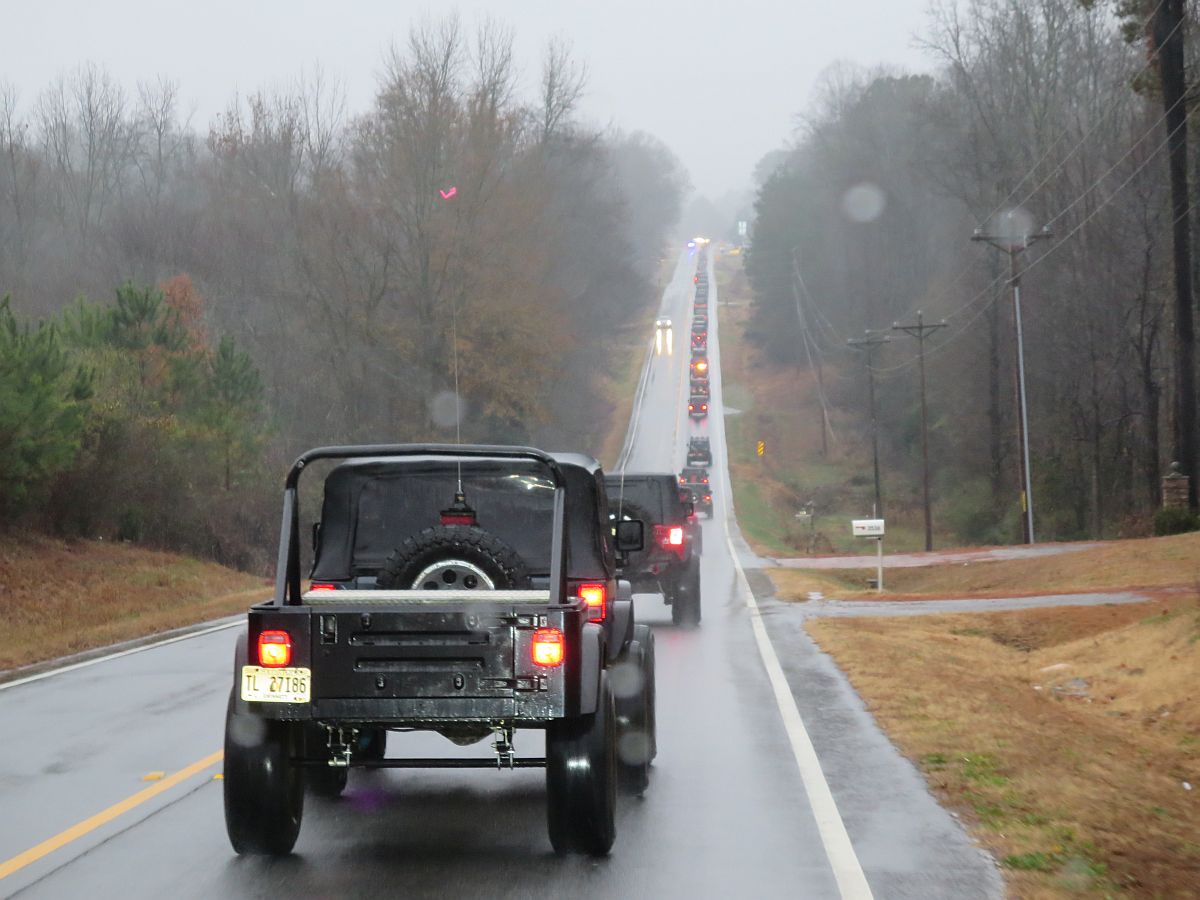
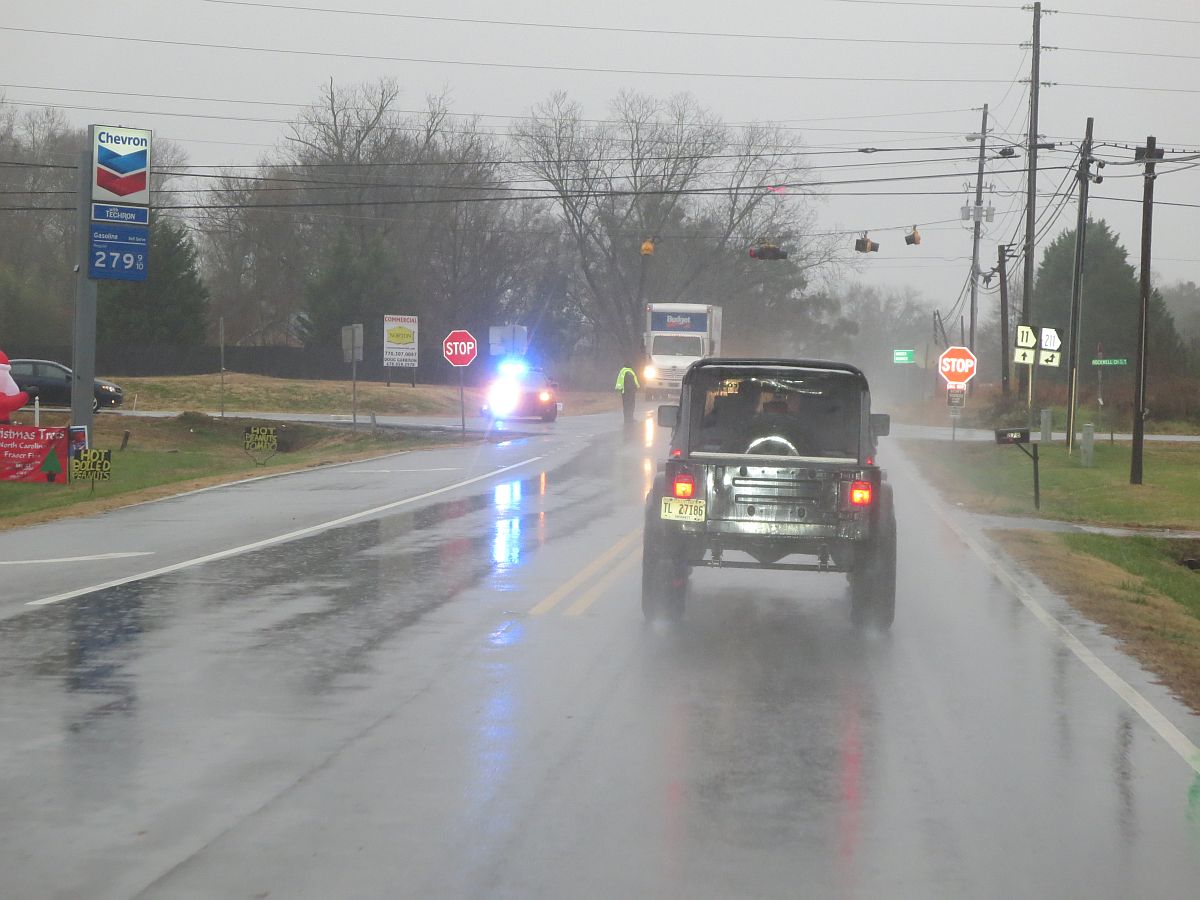
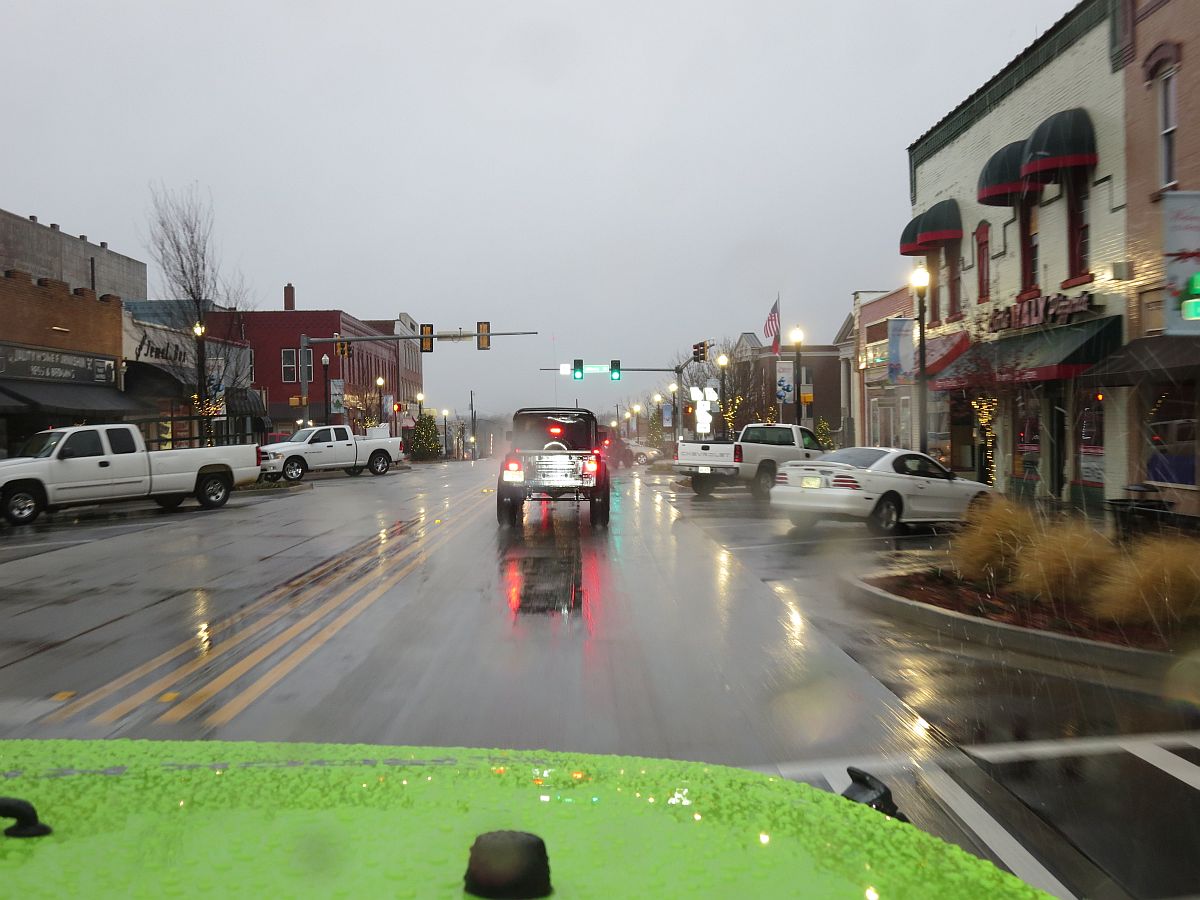
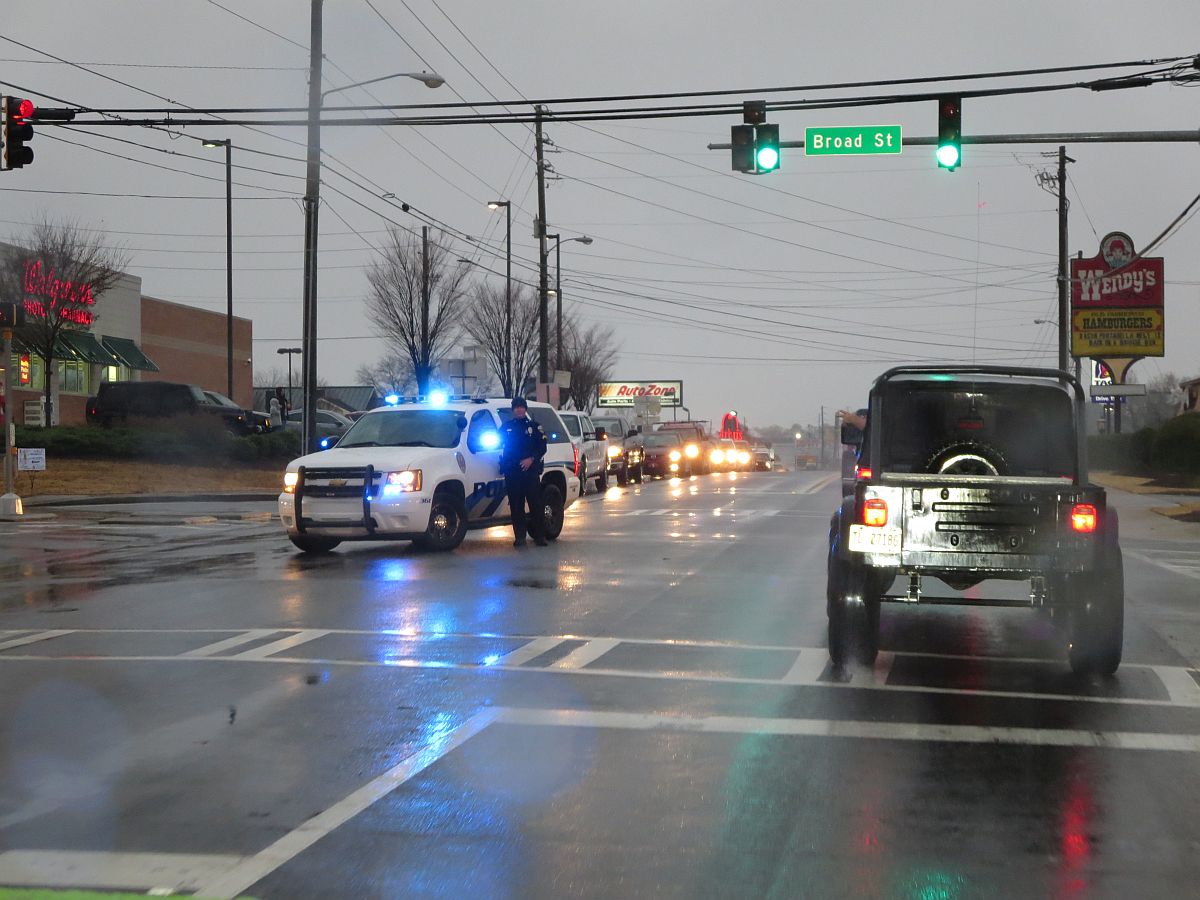
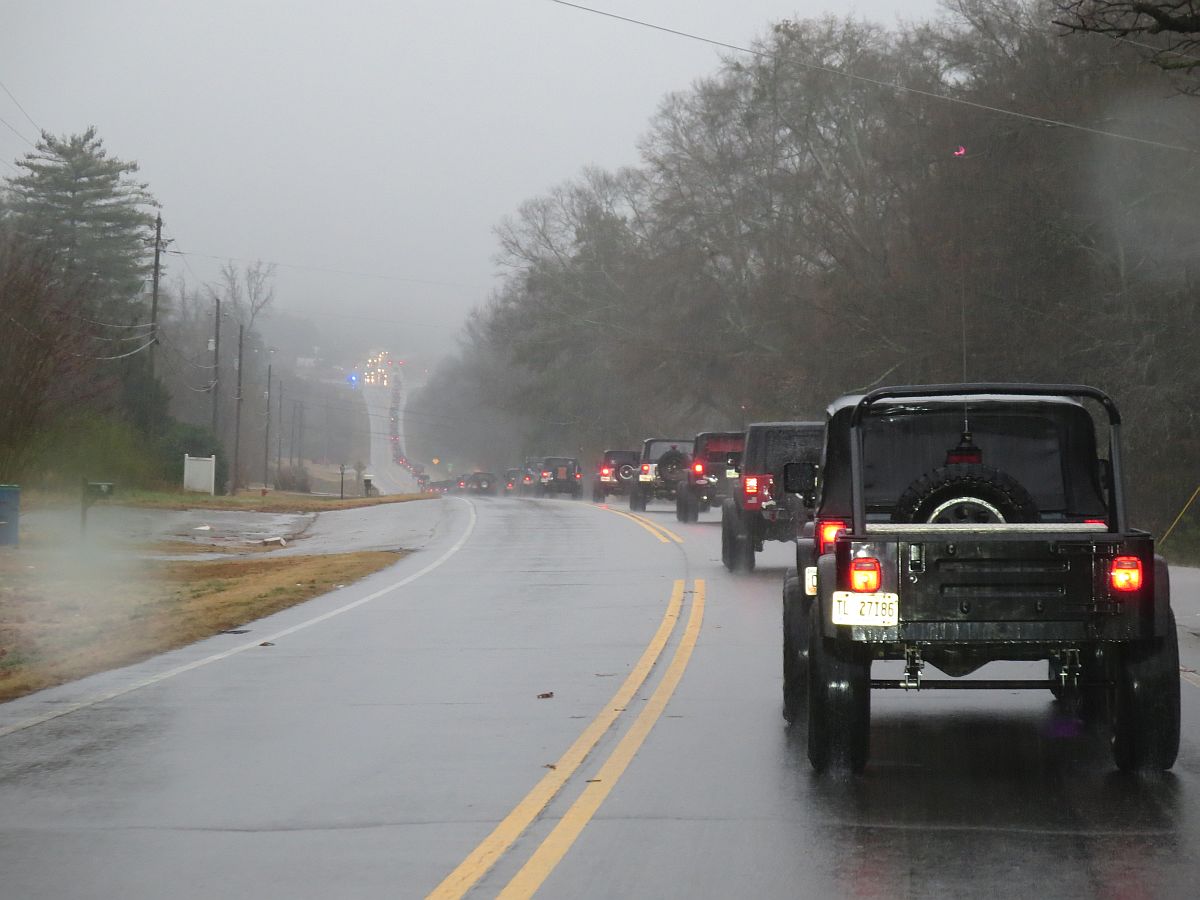
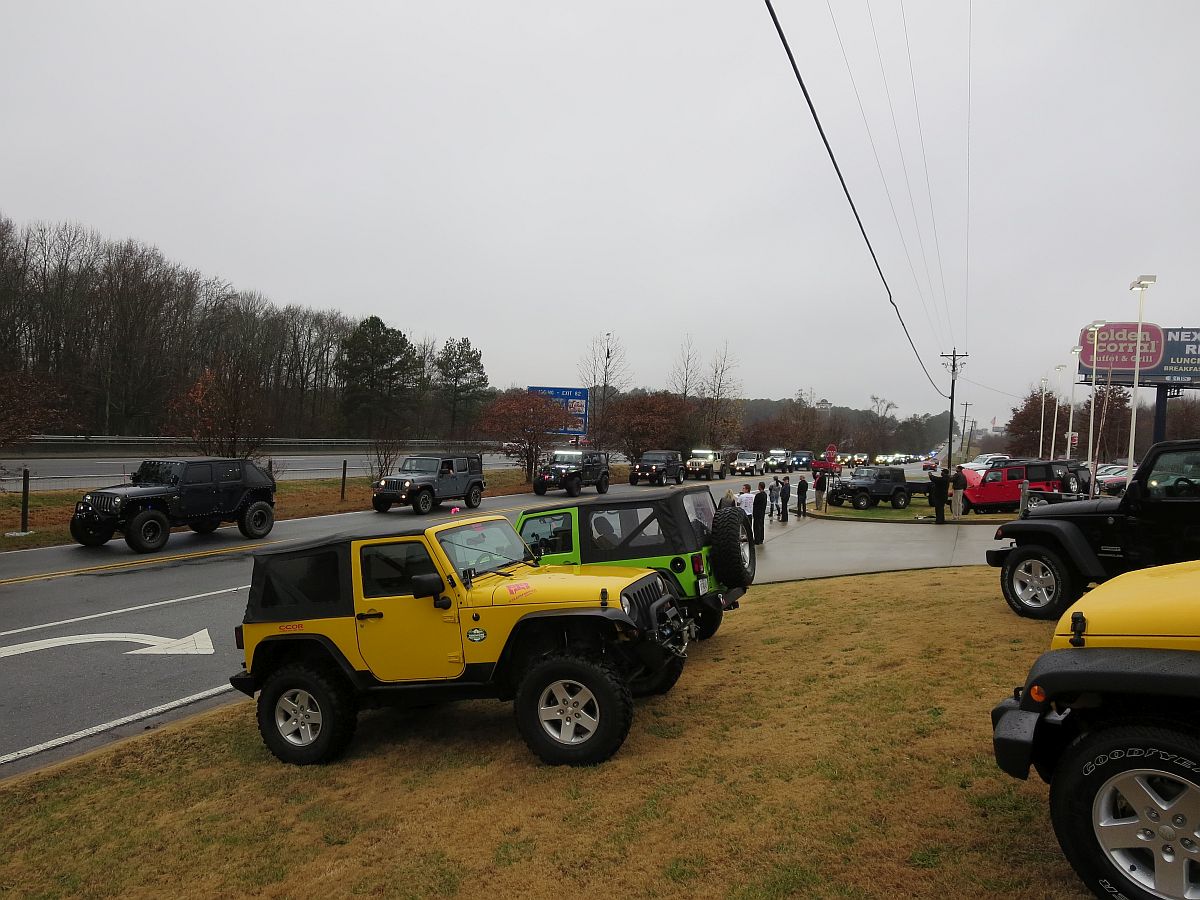
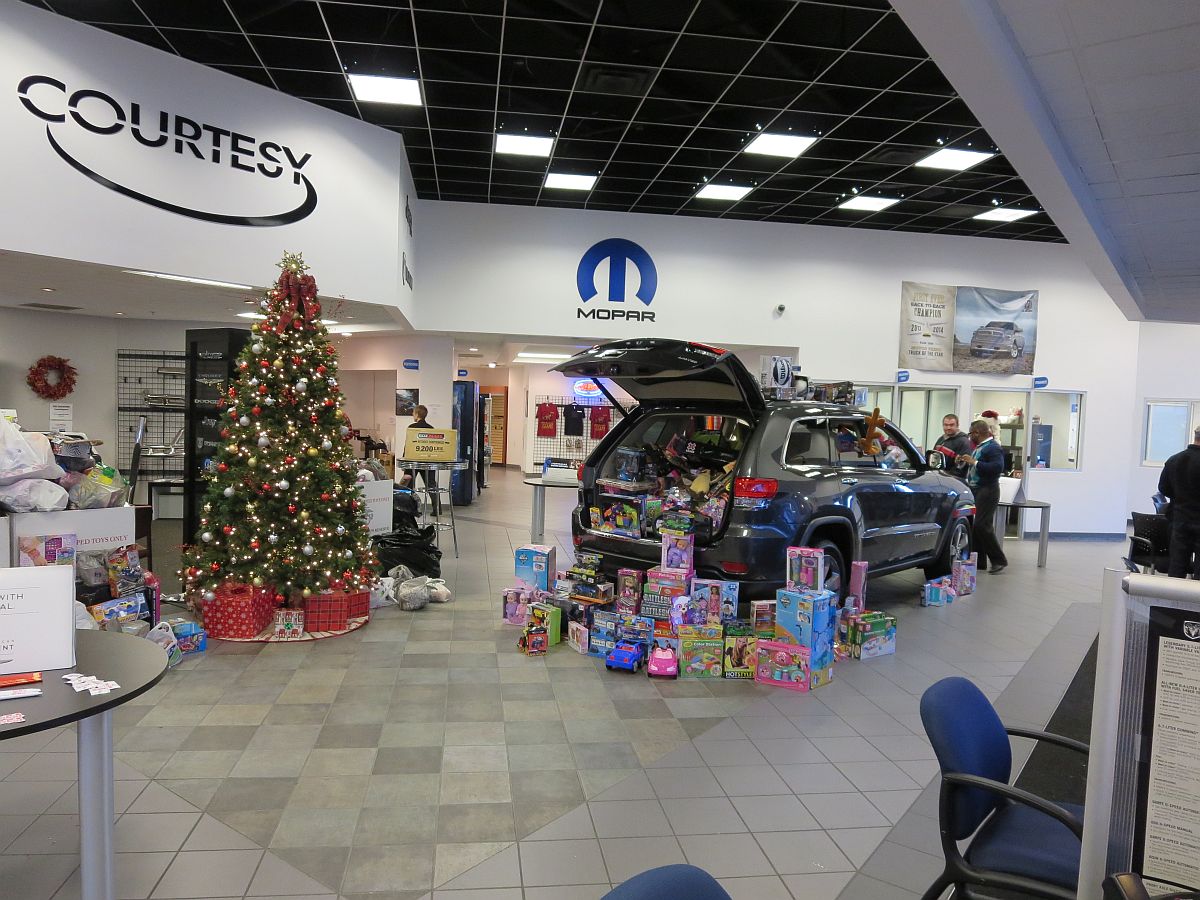
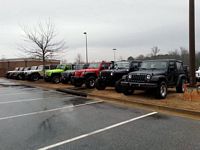
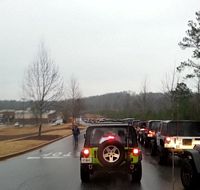
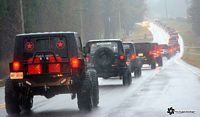
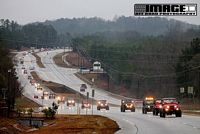
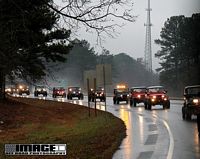
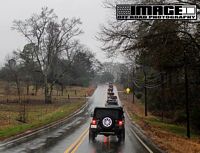
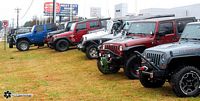
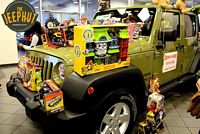
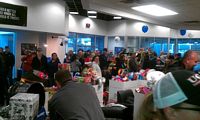
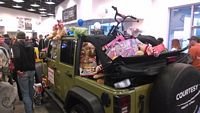
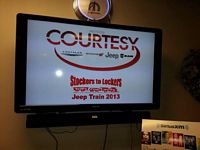
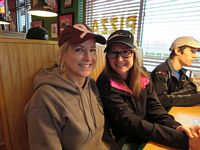
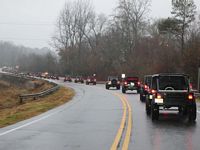
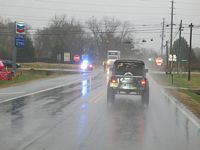
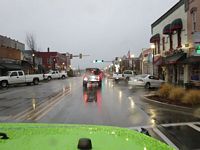
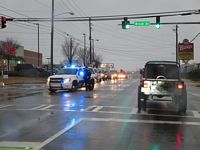
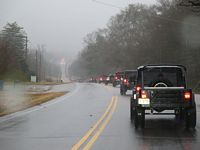
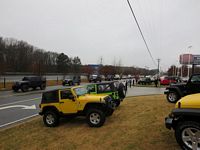
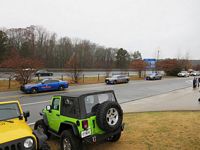
Toys For Tots train with Stockers to Lockers and Courtesy Jeep (Conyers, GA)- great ride for a great cause, over 200 Jeeps this year participated in the train and more showed up at the dealership to donate toys.
This was our first T4T event, Thanks to all of the officers that blocked traffic so we could go through red lights and to Courtesy Jeep in Conyers, GA for hosting the event. Also, THANKS to the various photographers that took these great pictures!


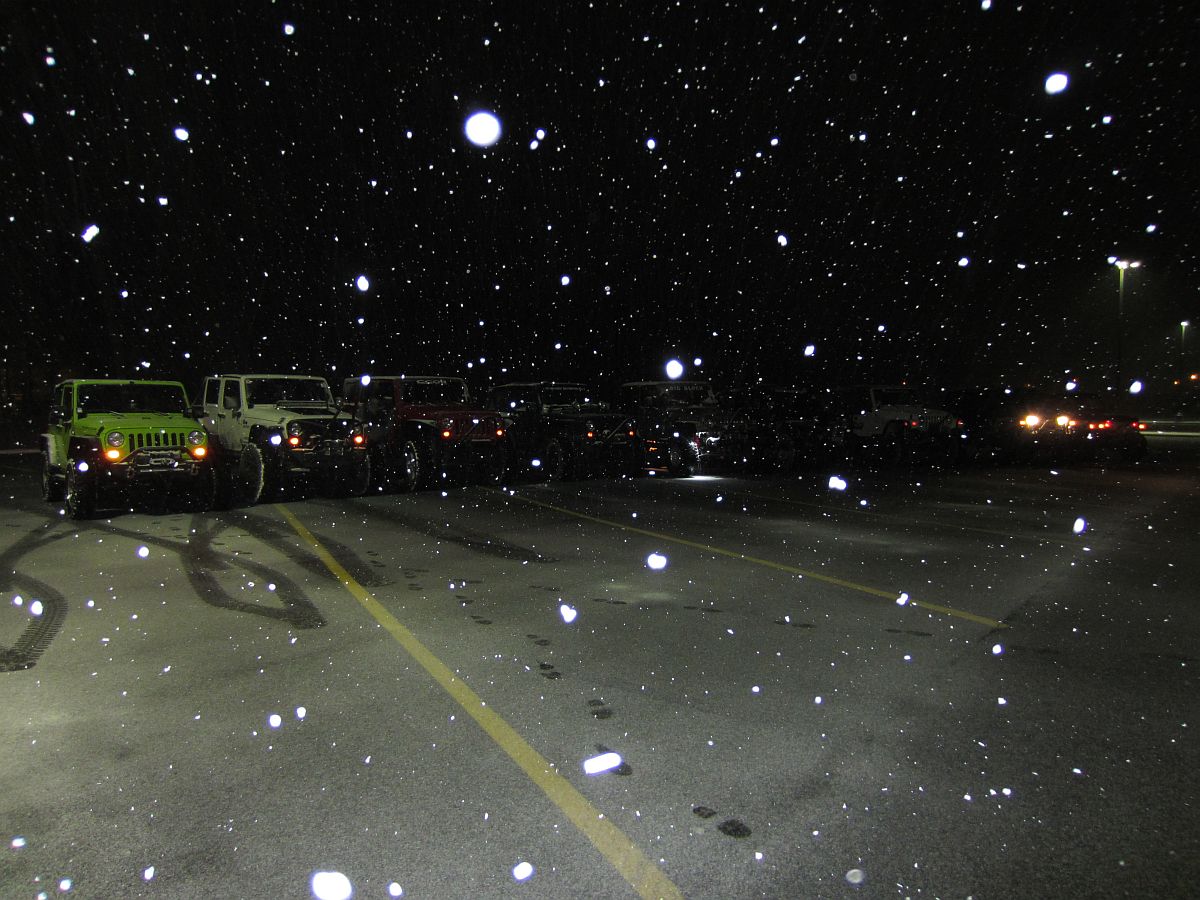
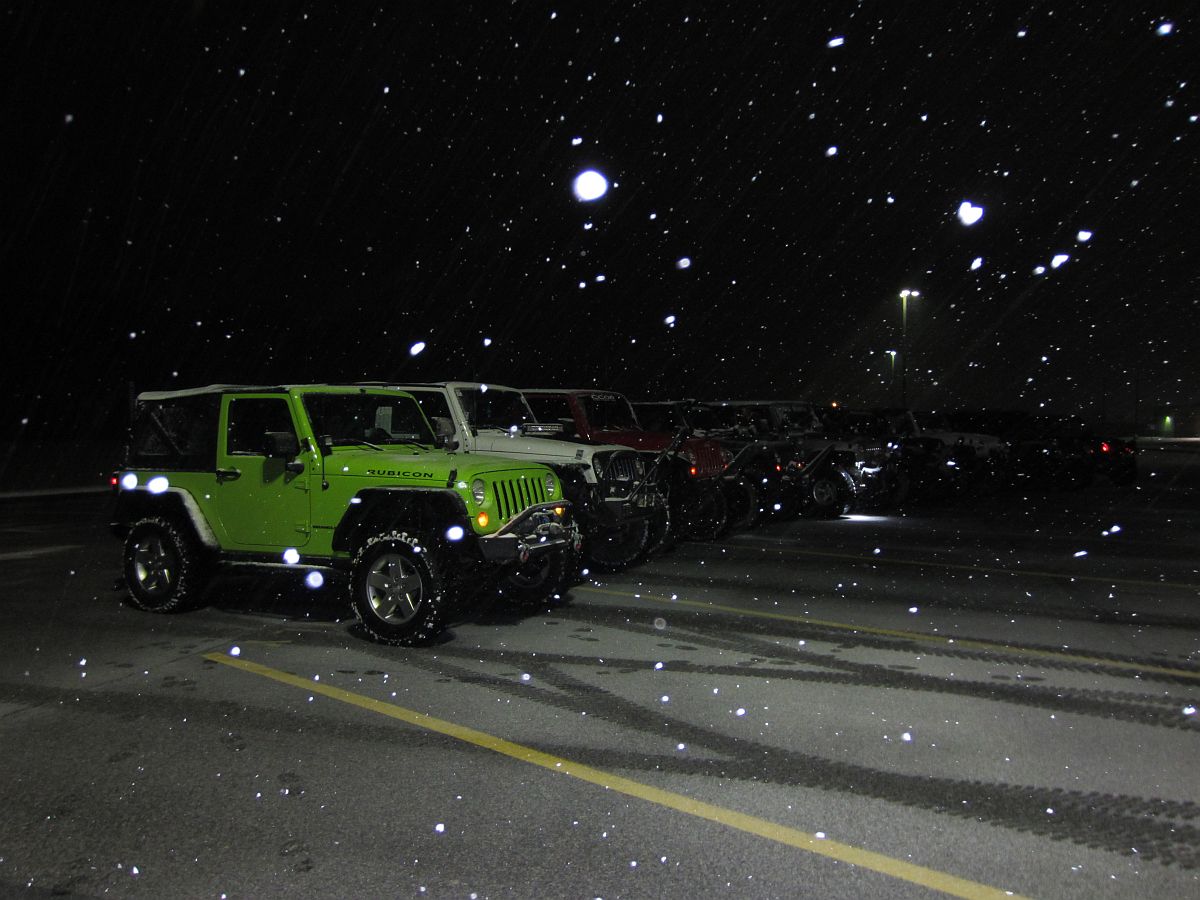
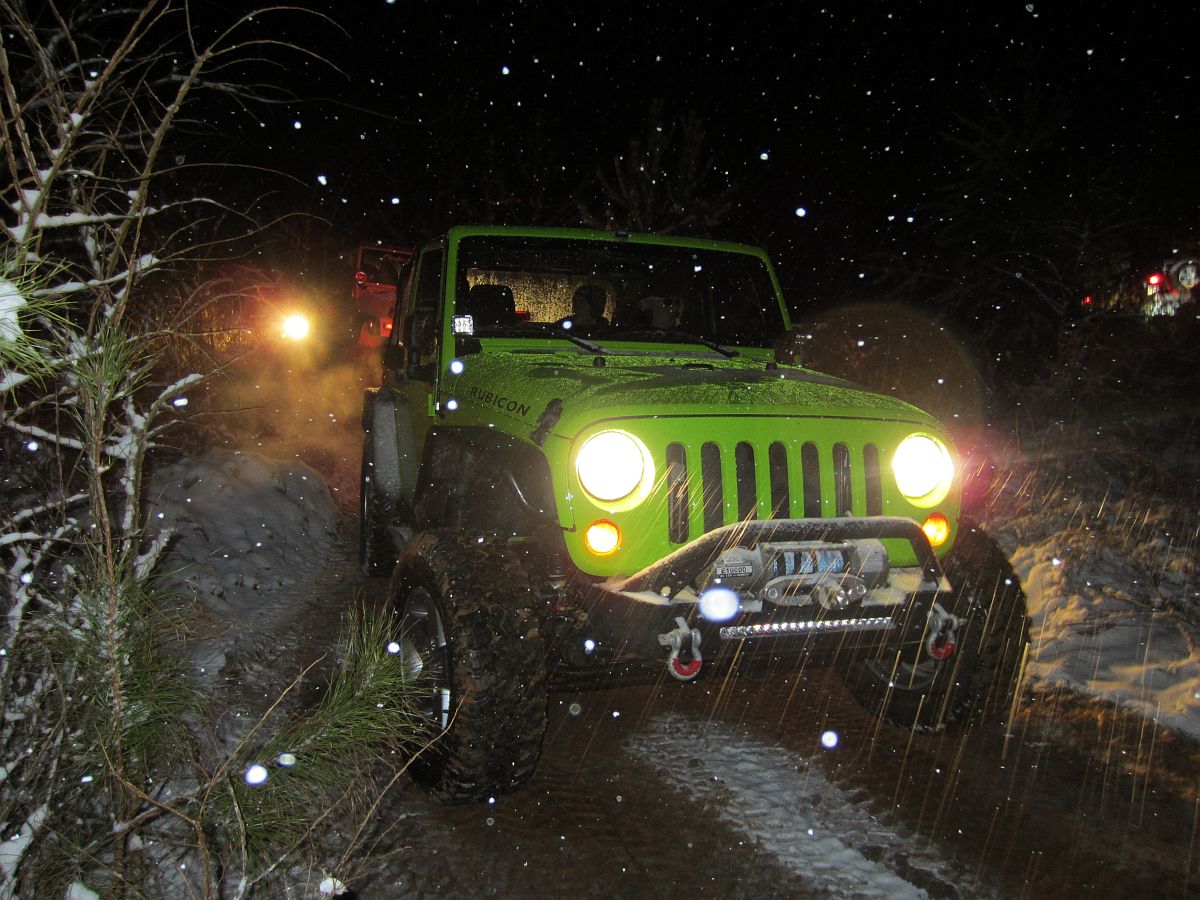
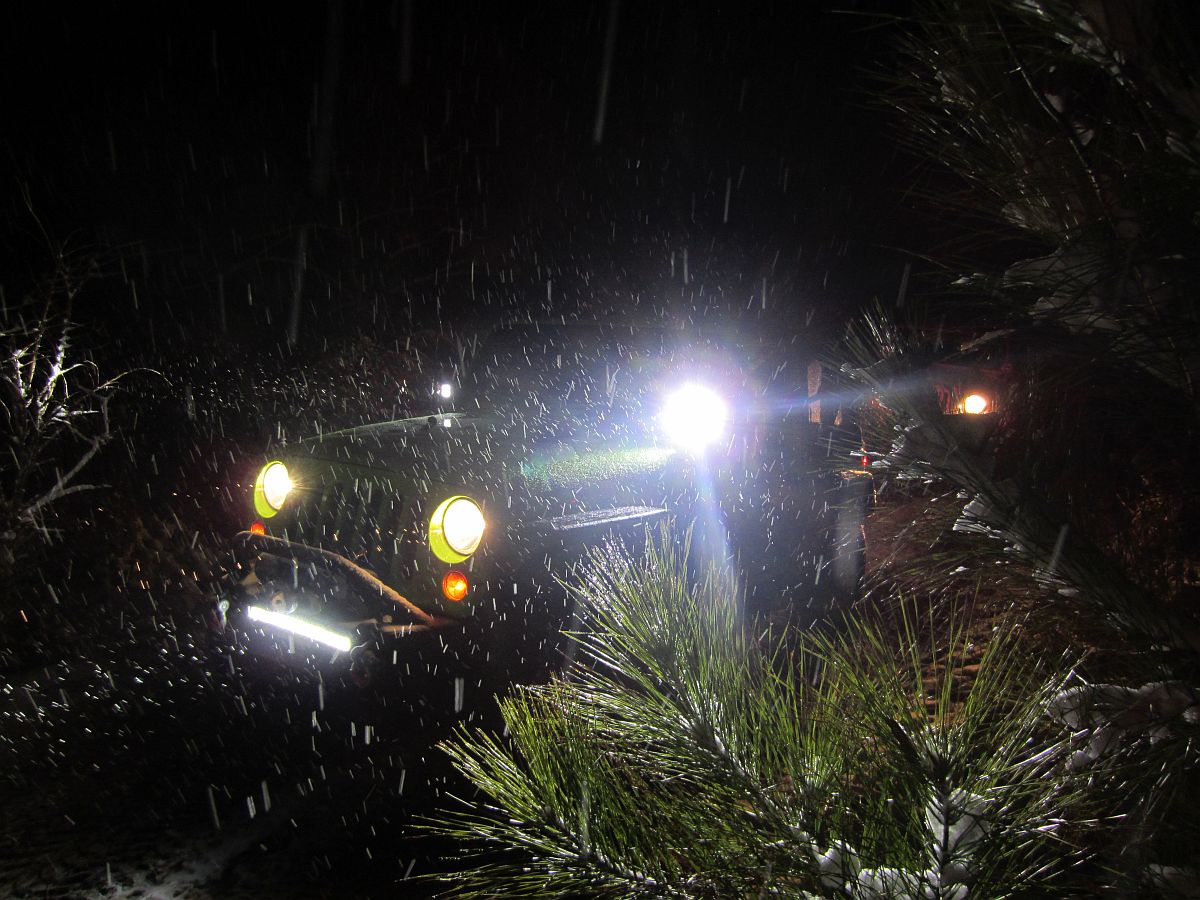
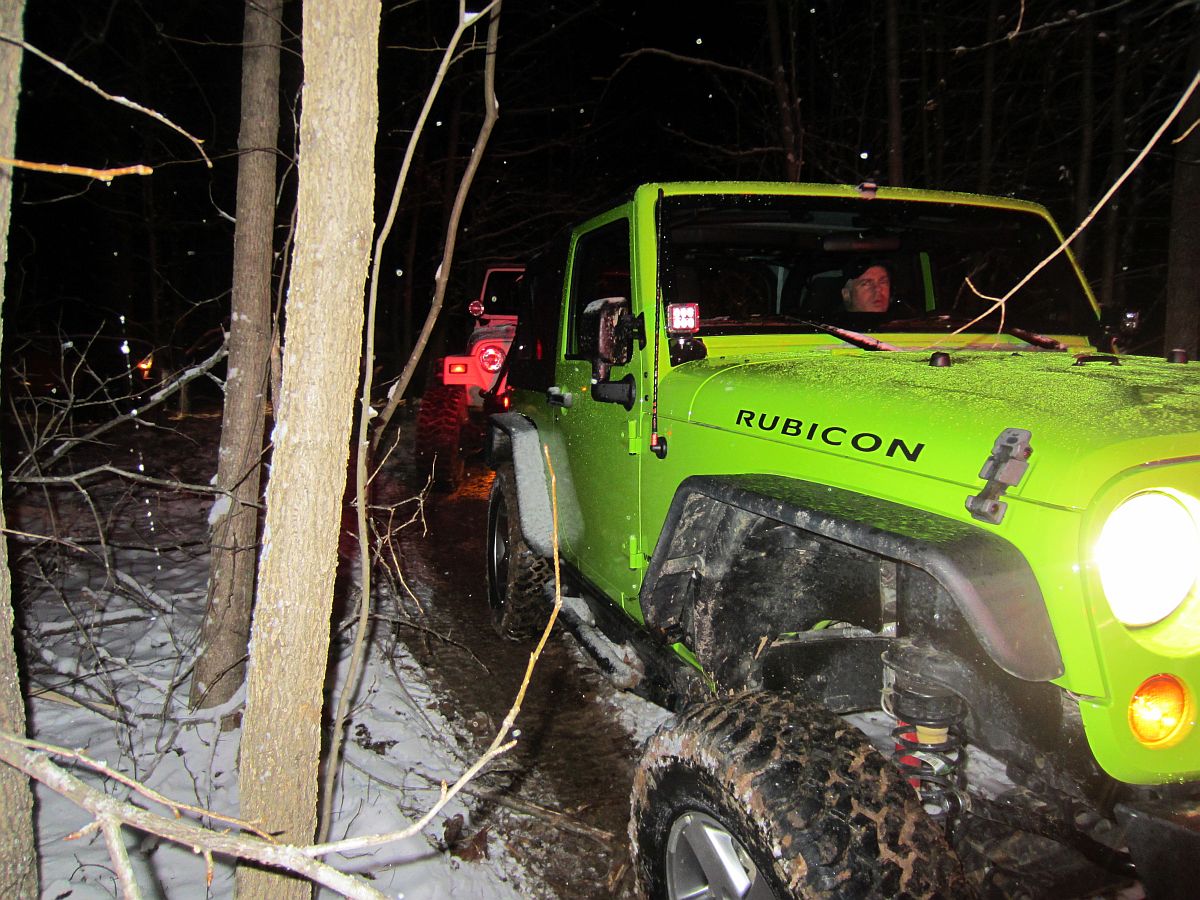
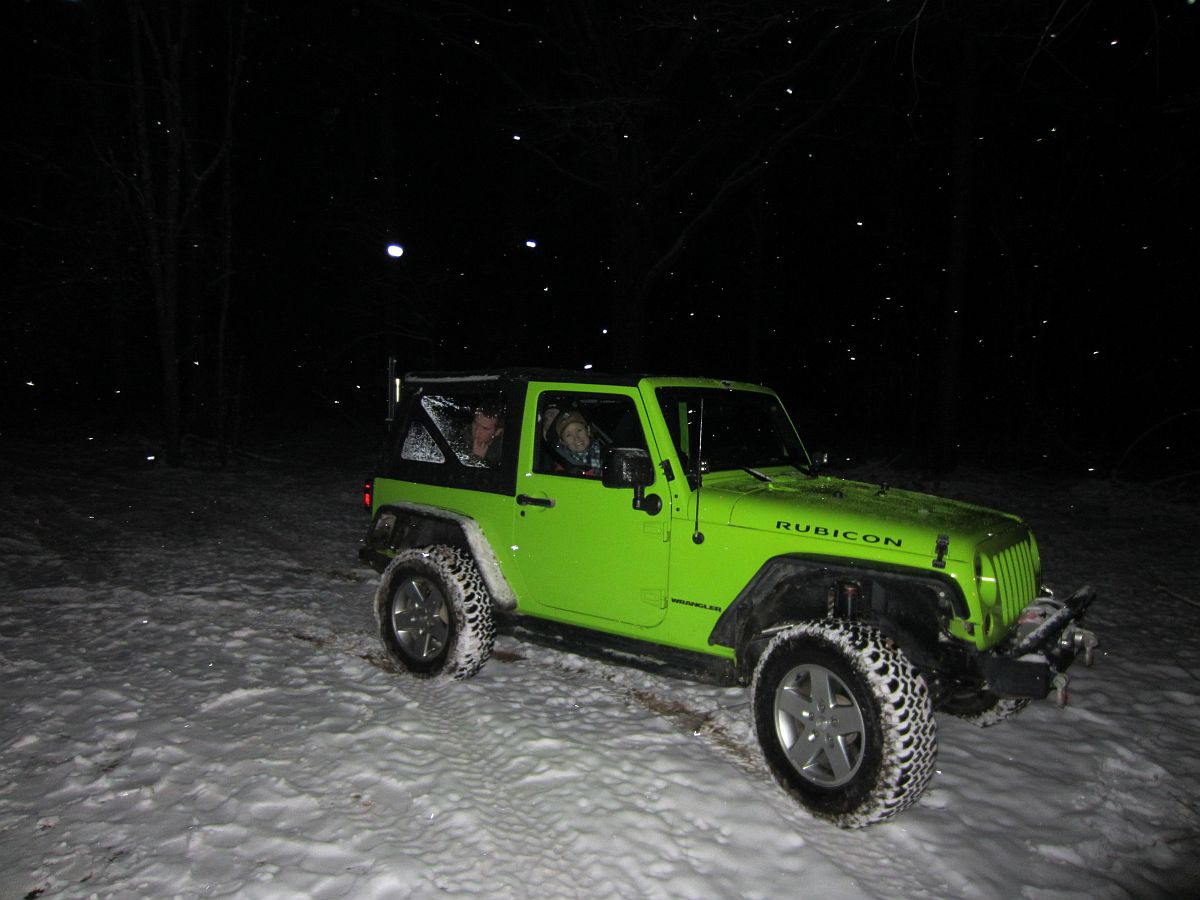
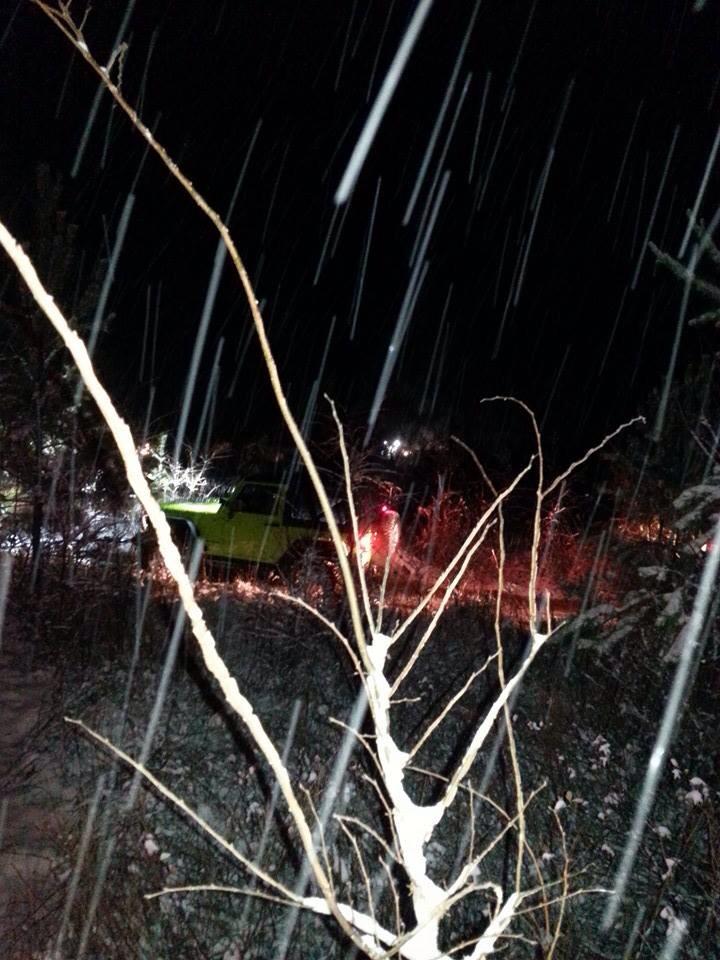
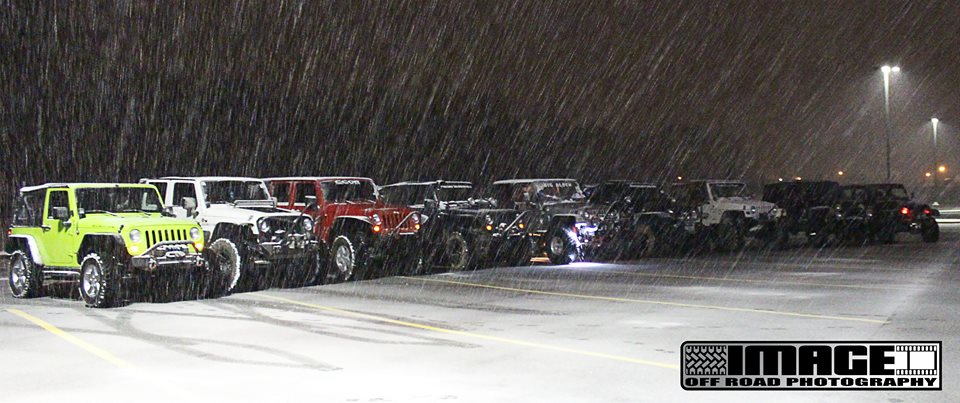
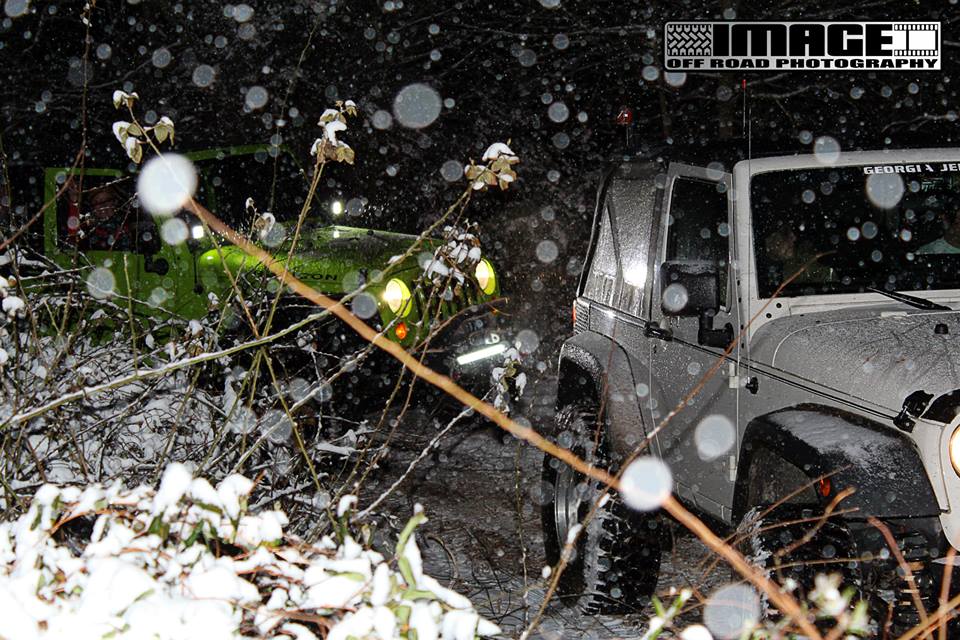
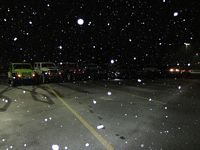
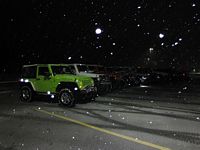
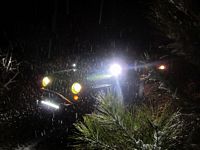
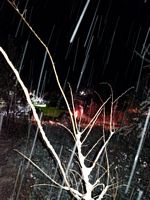
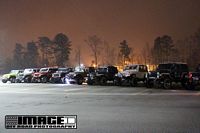
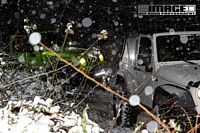
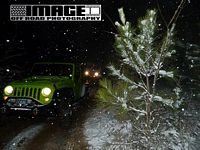
Snowmageddon January 28, 2014- Decided to go out and play at Area 7 property in Jersey with our Georgia Jeepers friends (Facebook page HERE). Night + Snow + Mud = FUN
The GREAT pics from ImageOffRoadPhotography were taken by Christy Mote and team- THANKS for sharing!


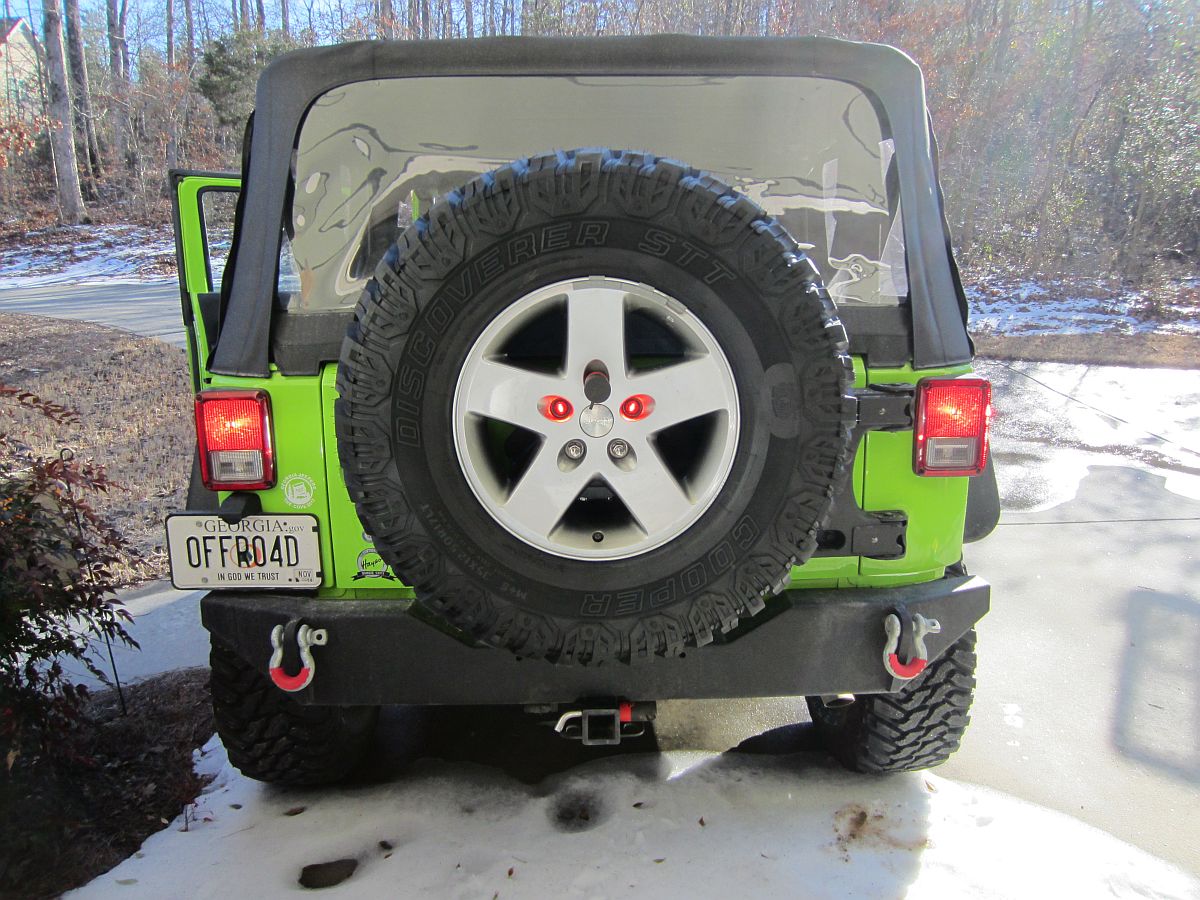
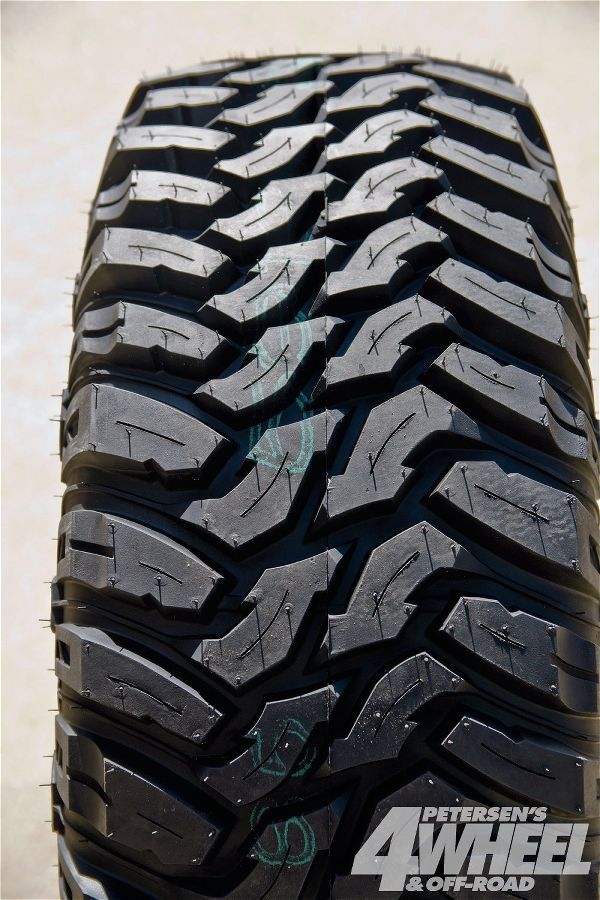
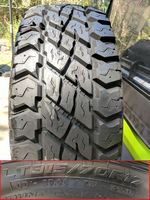
Cooper Discoverer STT (replaced by the Cooper Discoverer STT PRO) 35X12.50R17LT purchased and installed at Kauffman Tire.
Reviews on 4WD & SU HERE, FOURWHEELER HERE, and Jp Magazine HERE.
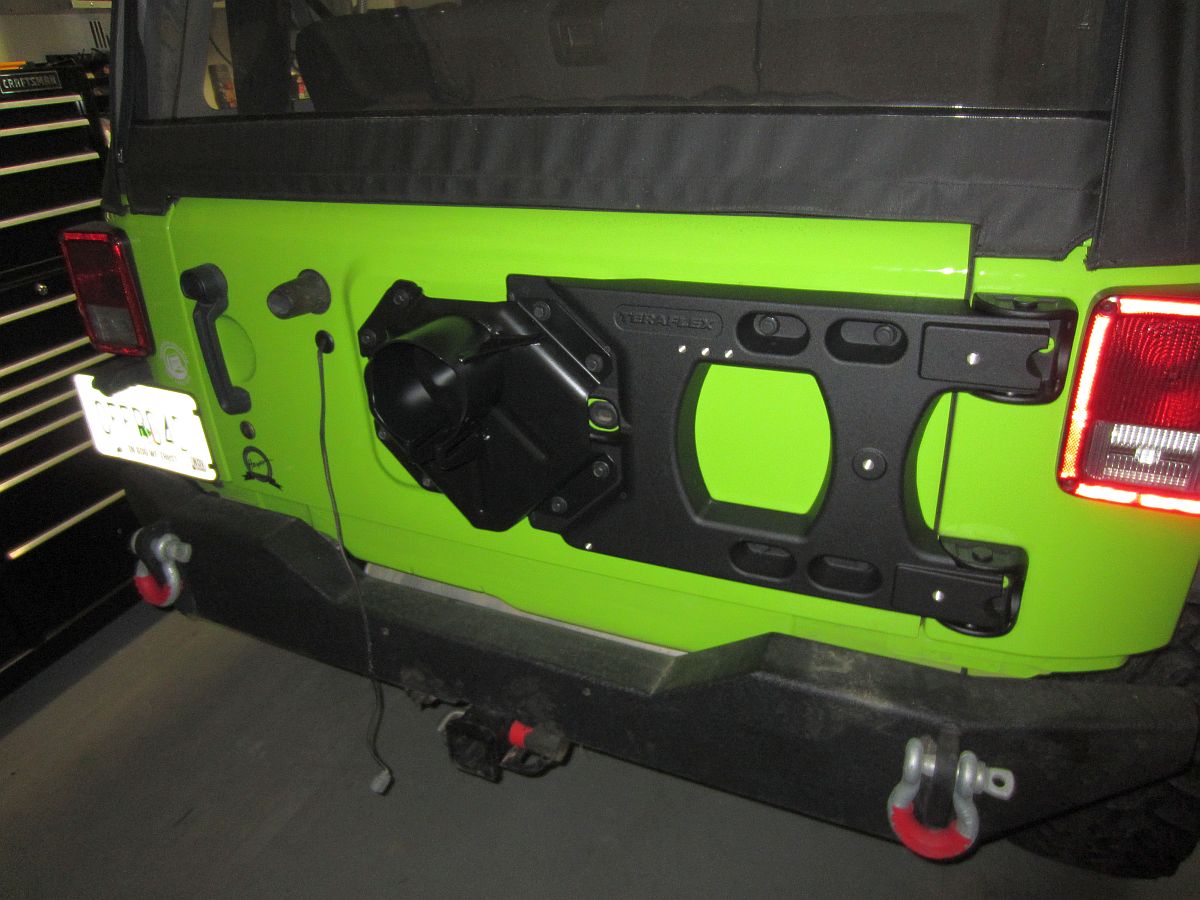
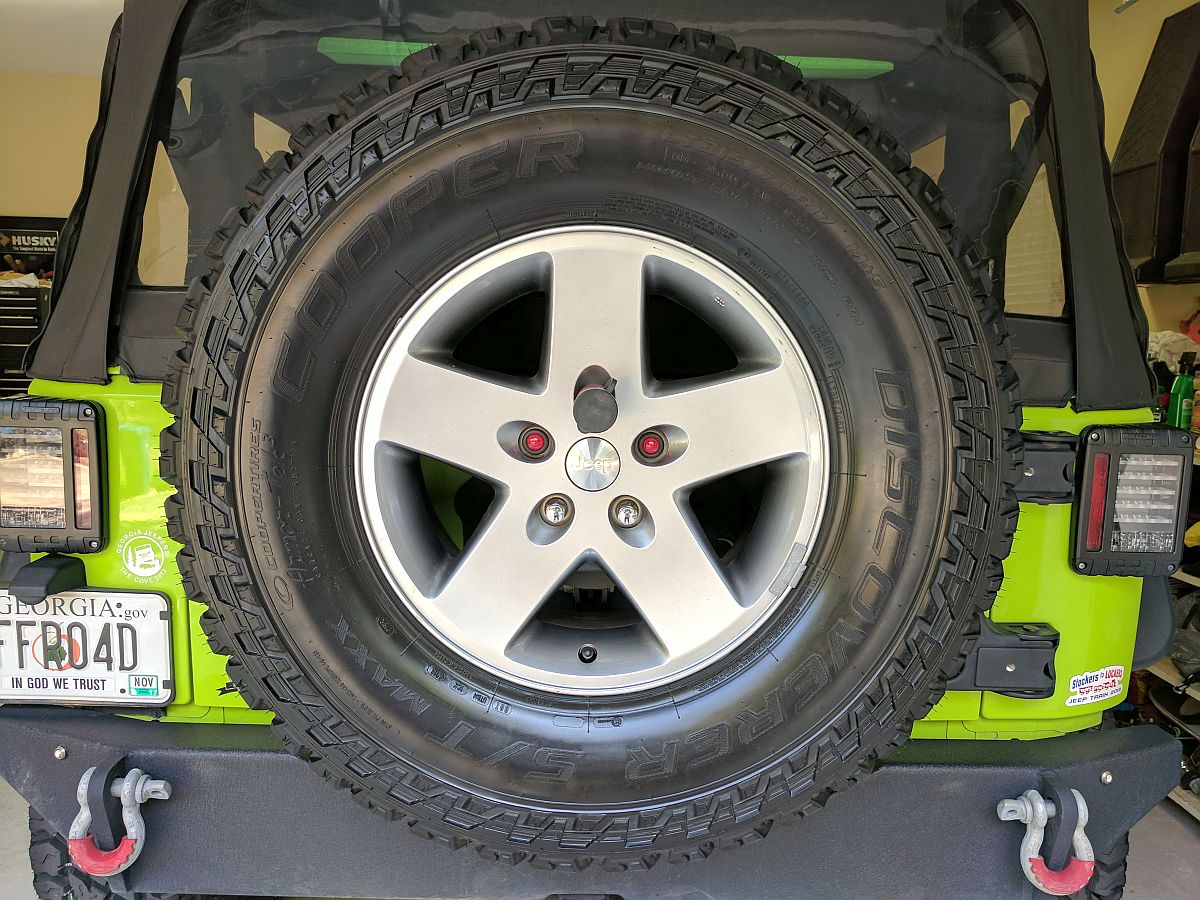
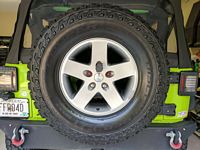
Of course the heavier tire does not play well with the spare mounting/tailgate hinges over time so the TeraFlex Hinged Carrier and Tire Mount was purchased from Krawl OffRoad. Overview and Installation Video HERE. BTW, if you are using OE wheels with 35s, you WILL need a 1.5" spacer to mount the spare. I had previously purchased a Smittybilt spare tire adapter, typical S-ittybilt quality but serves the purpose for now.
I really didn't find the Teraflex third brake light solution that functional or attractive and so I bought a Delta Lug Nut Lite which replaces the third brake light. What I didn't know is that this kit does NOT fit OE wheels, each light and plug have to be ground/sanded/cut down to fit. What should have been a plug-and-play solution turned into considerable time to work and fit each piece-don't waste your money. This ranks right at the top of my list for biggest disappointment when it comes to Jeep mods. Installation instructions HERE, modification diagram for OE wheels (not part of accessible info on the web, you'll see it when you open the box and flip the instructions over) HERE.
And the falling dominoes continue.....because we replaced the tire carrier/hinge, now I need a new HiLift jack mounting solution. Also purchased a Superchips FlashCal (manual HERE) from AutoAnything using one of their 20% off coupons to adjust for the new tire size/speedometer calibration and TPMS, among other things.


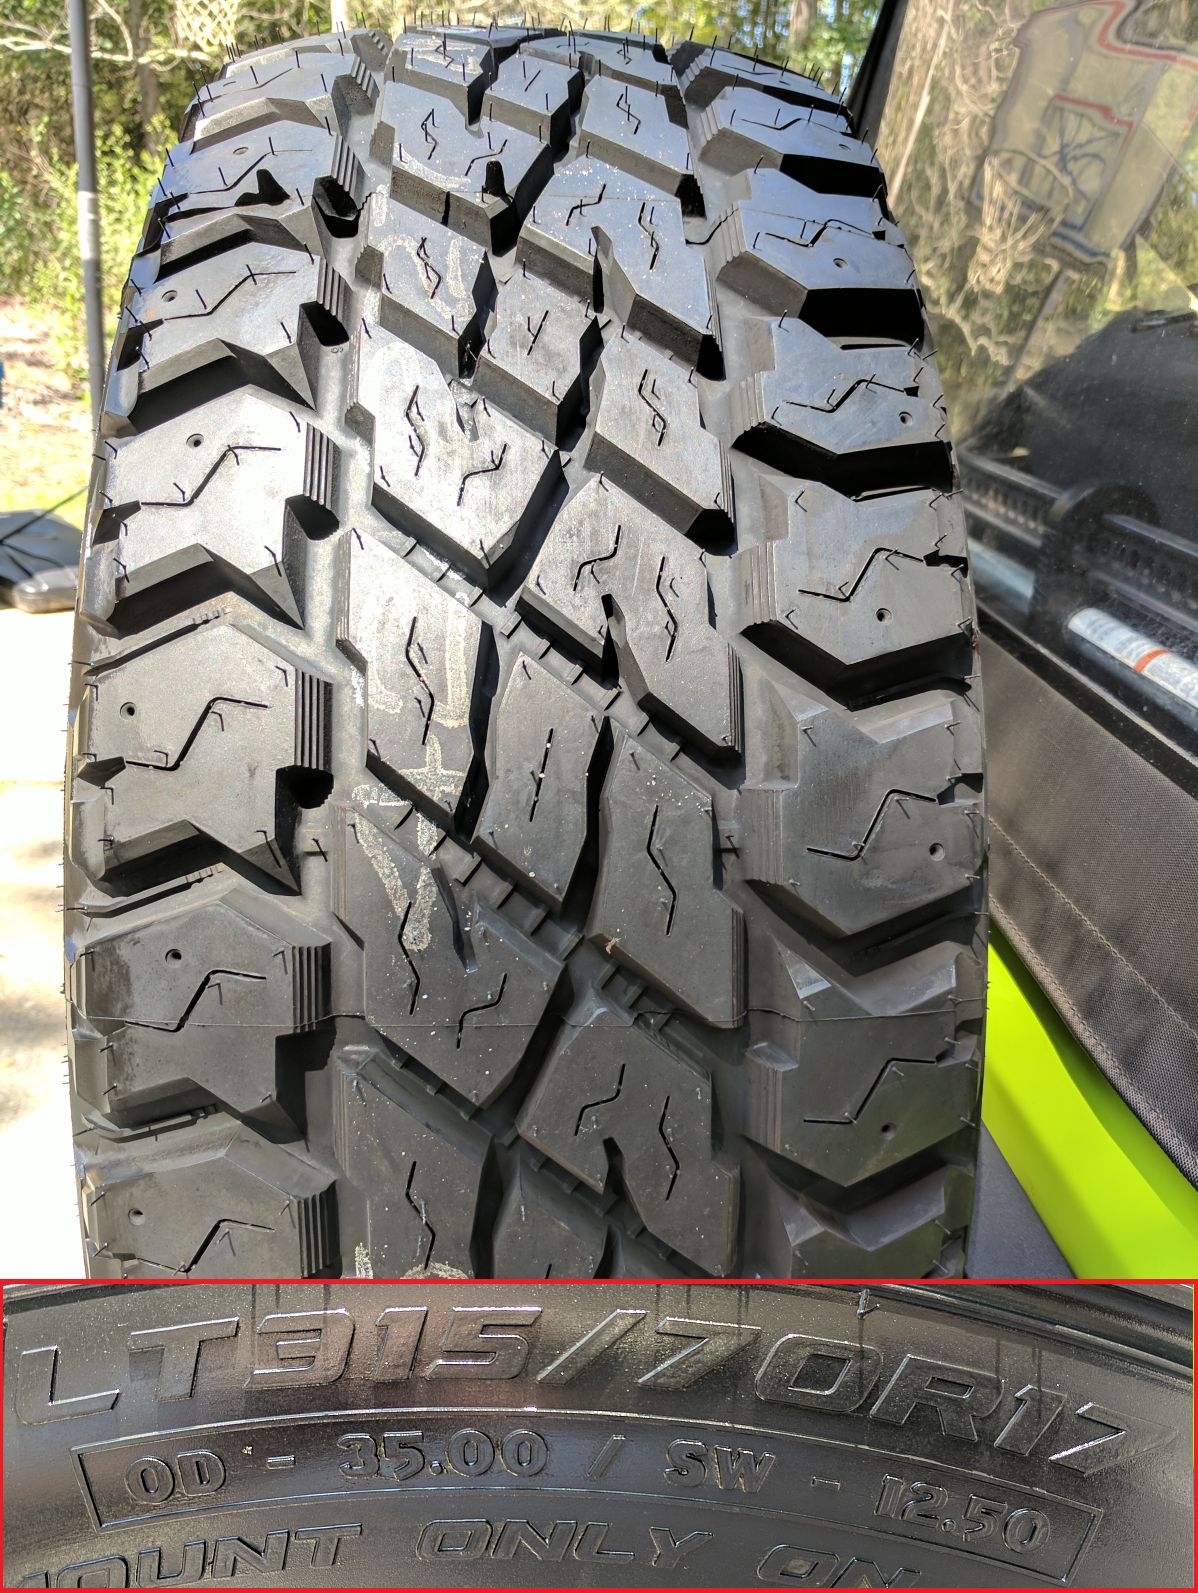
[UPDATE] After having a pretty good run with the Cooper Discoverer STT tires (After 27k miles and almost 4 years they looked like this, still service life left), we decided their replacement would be geared more towards on-road use.......lately the Jeep has seen no off-road fun and spends 99% of the time on the street. That said, we still wanted a tire that COULD pull off-road duty so we decided on the Cooper Discoverer S/T Maxx, a hybrid AT/MT tire, size LT315/70R17 (aka 35X12.50R17LT) purchased and installed at Kauffman Tire.
Reviews on Expedition Portal, FOURWHEELER, OffRoad.com, Forge Overland, and Five9341.
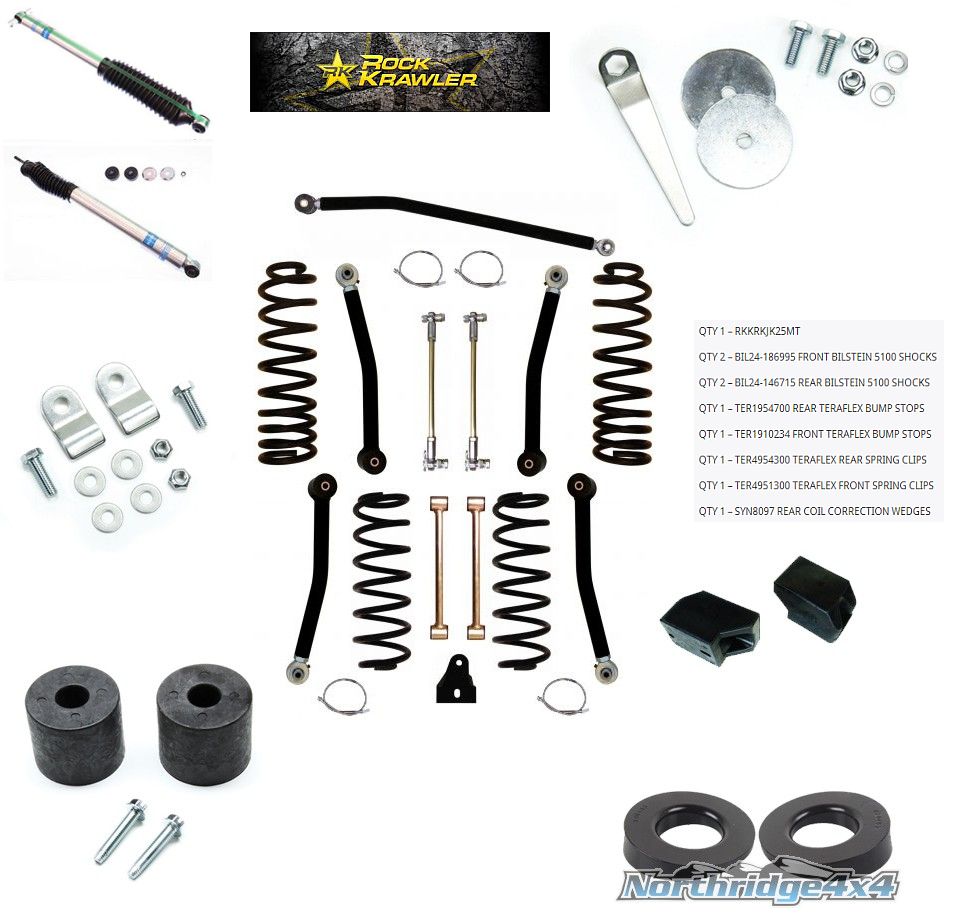
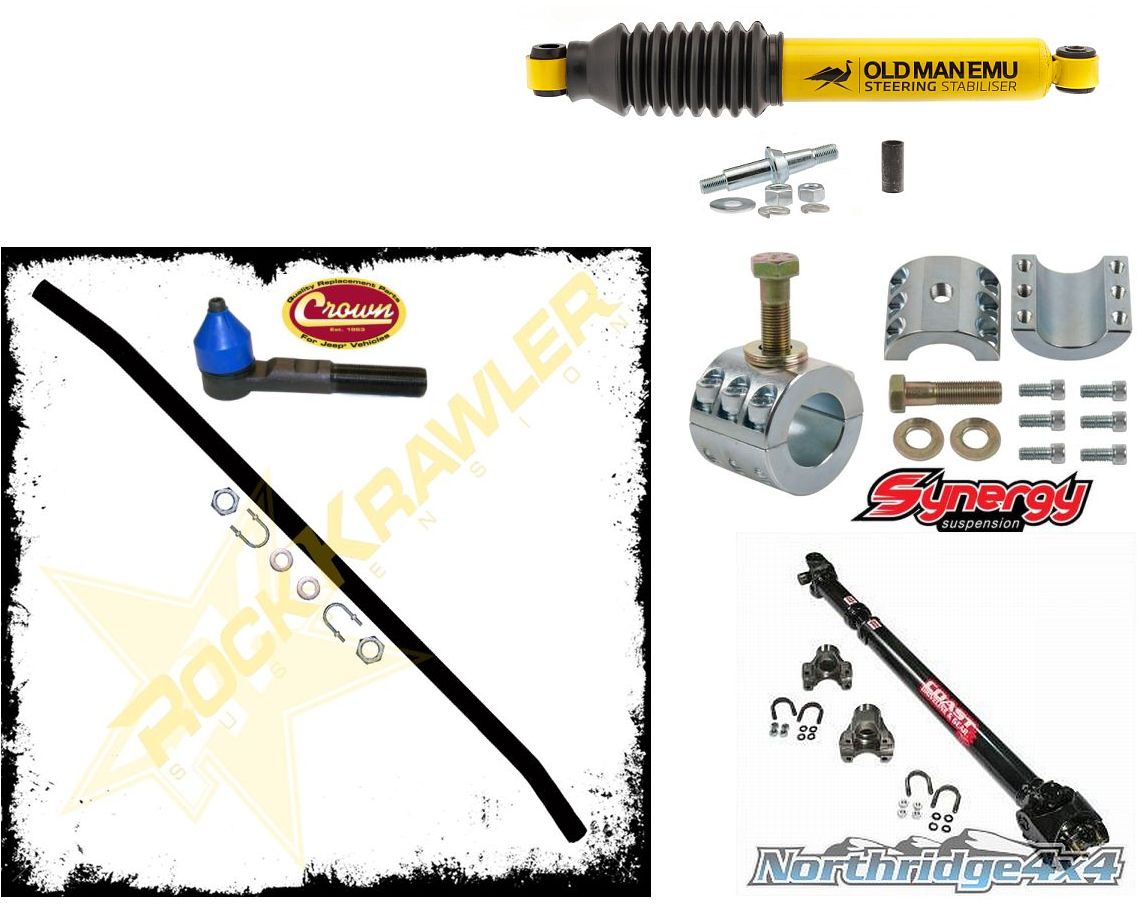
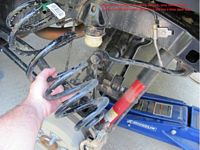
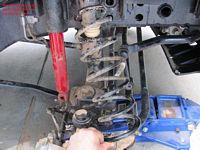
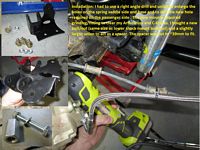
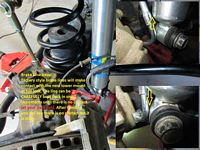
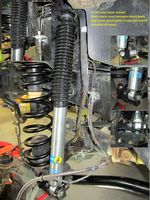
Rock Krawler 2.5 Max Travel system kit purchased from Northridge 4x4- they take the RK 2.5 Max Travel system and package it with the Bilstein 5100 shocks, Teraflex bump stops, Teraflex spring retainers, and rear spring correction wedges. I chose not to drill out the RK hardware so I lost most of my recently installed 9/16 bolt upgrade, the OE bolts will be checked periodically for issues but they are torqued to spec and working for now. FWIW, I eventually purchased the missing parts to make this an X-Factor kit with upper control arms to dial in pinion angle for the Coast driveshafts, skip the max travel and go x-factor if your wallet allows
Rock Krawler 2.5 Max Travel system installation instructions with required sections highlighted HERE, RKJK25MT Build Sheet/Contents List HERE- I used the measurements for the X-Factor upper control arms I bought/installed later. BIG THANKS to Tommy Cope (leader of our Georgia Jeepers crew) for welding up the rear trac-bar bracket
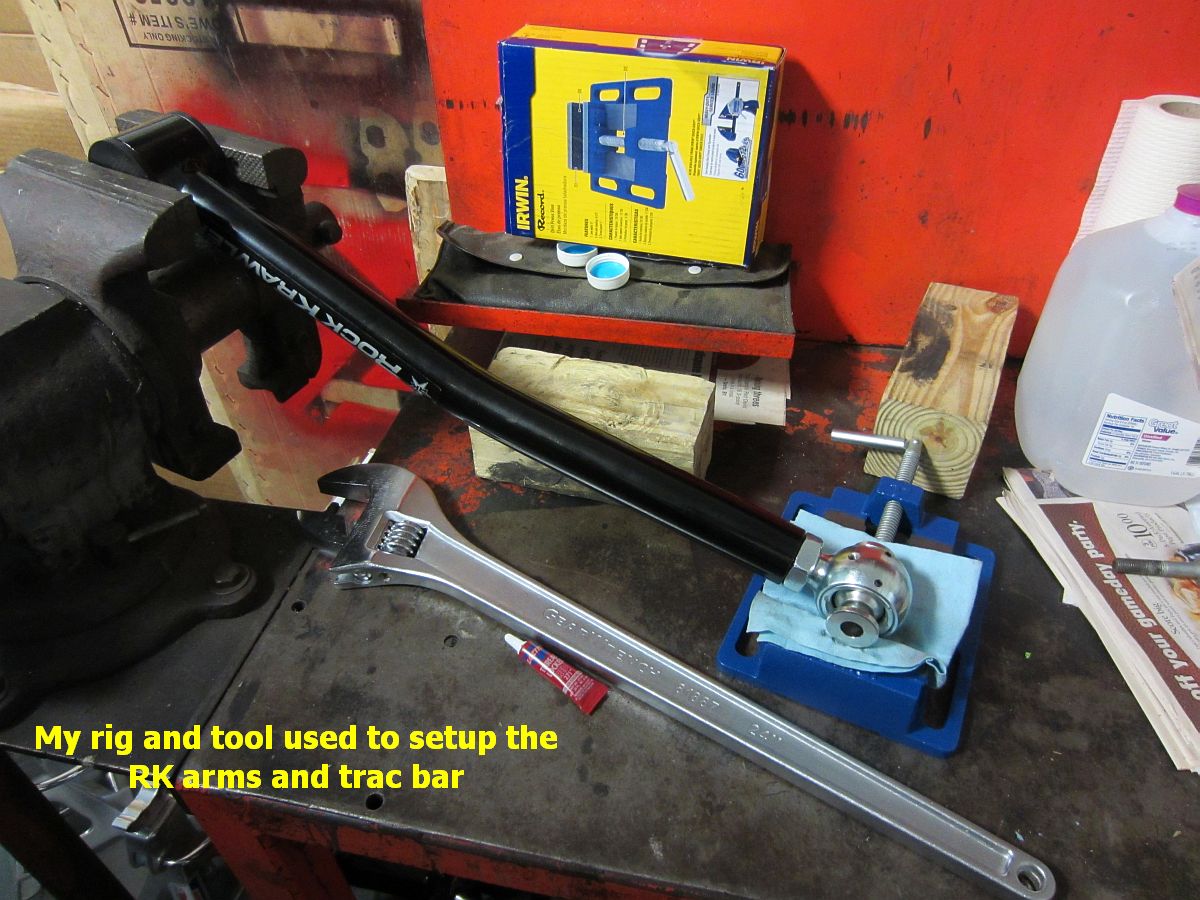
Rock Krawler tie rod installation instructions HERE, Project JK write-up HERE.
Handy calculator to figure out the torque value required when using torque wrenches with a crow foot HERE.
[EDIT] After getting the RK Max Travel installed I decided I would not be happy with the short rear lower arms and wanted to be able to better adjust the pinion angle for the rear driveshaft I decided to install- so new upper and lower rear RK arms were ordered. If I had it to do over I might have just started with the RK X-Factor from the get-go.......oh well, live and learn.To supplement the above I also purchased:
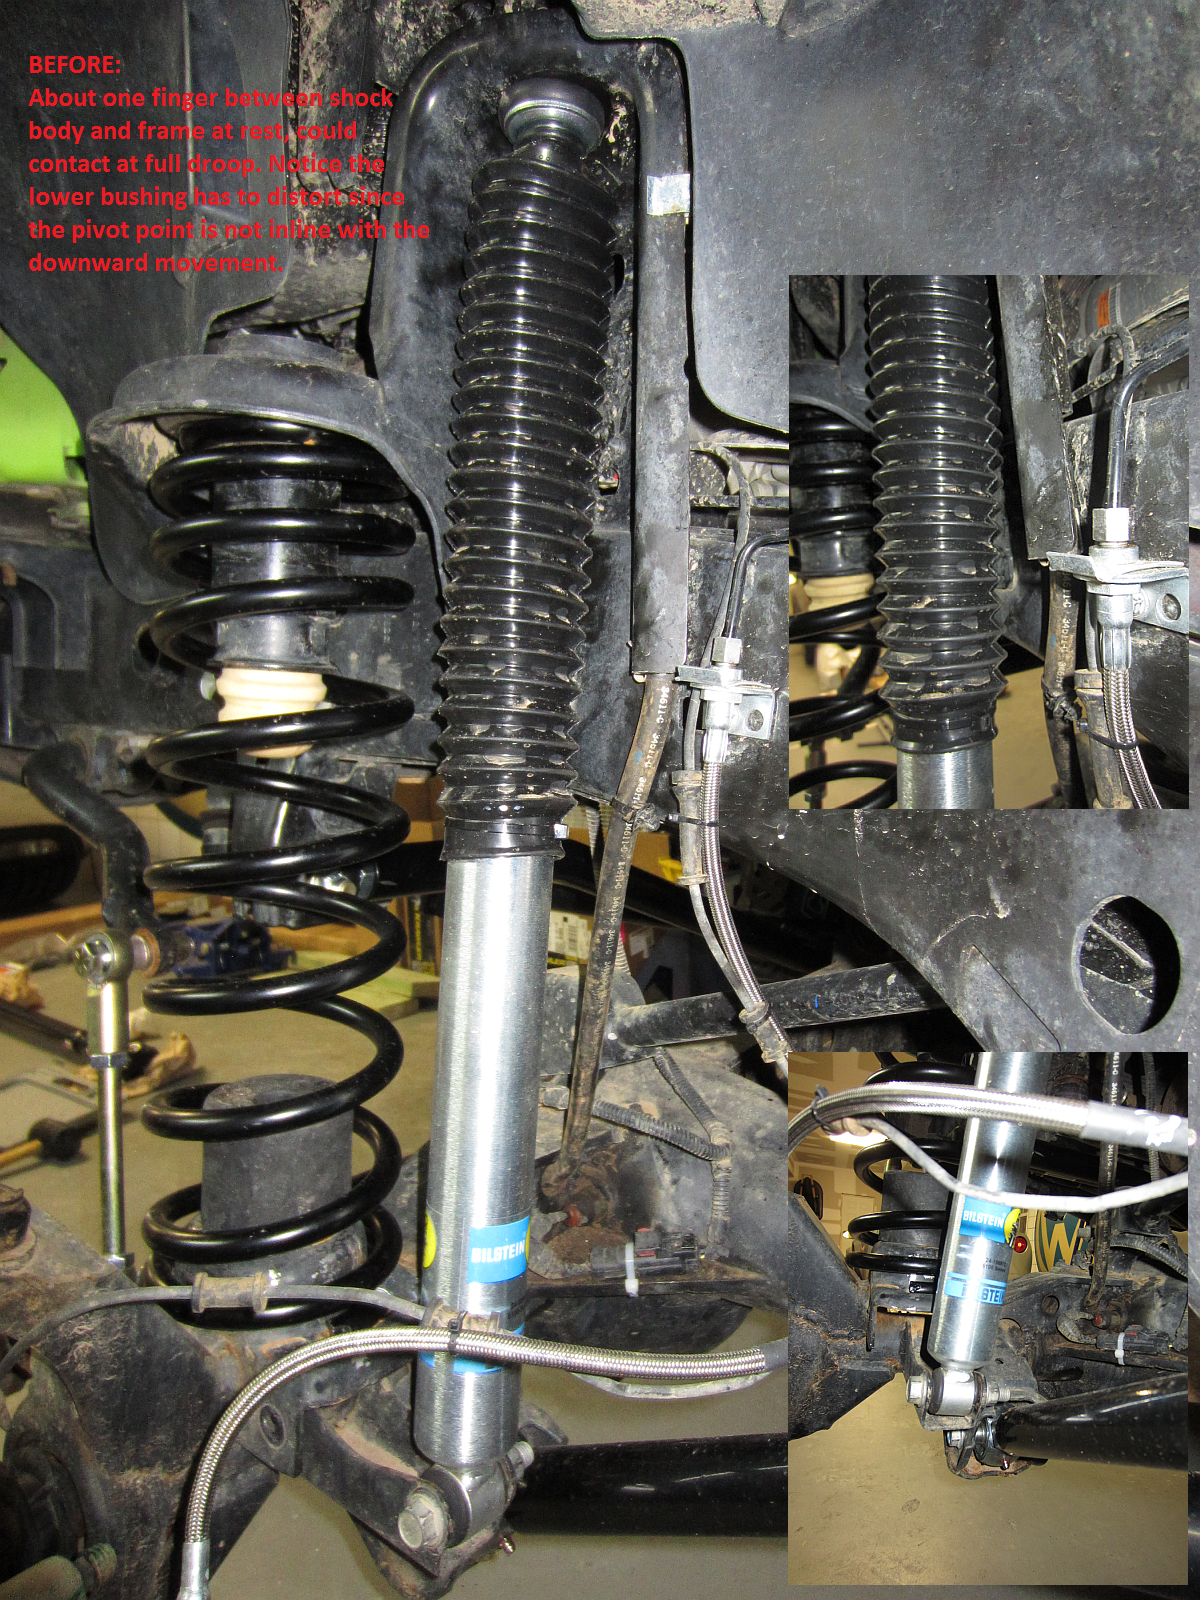
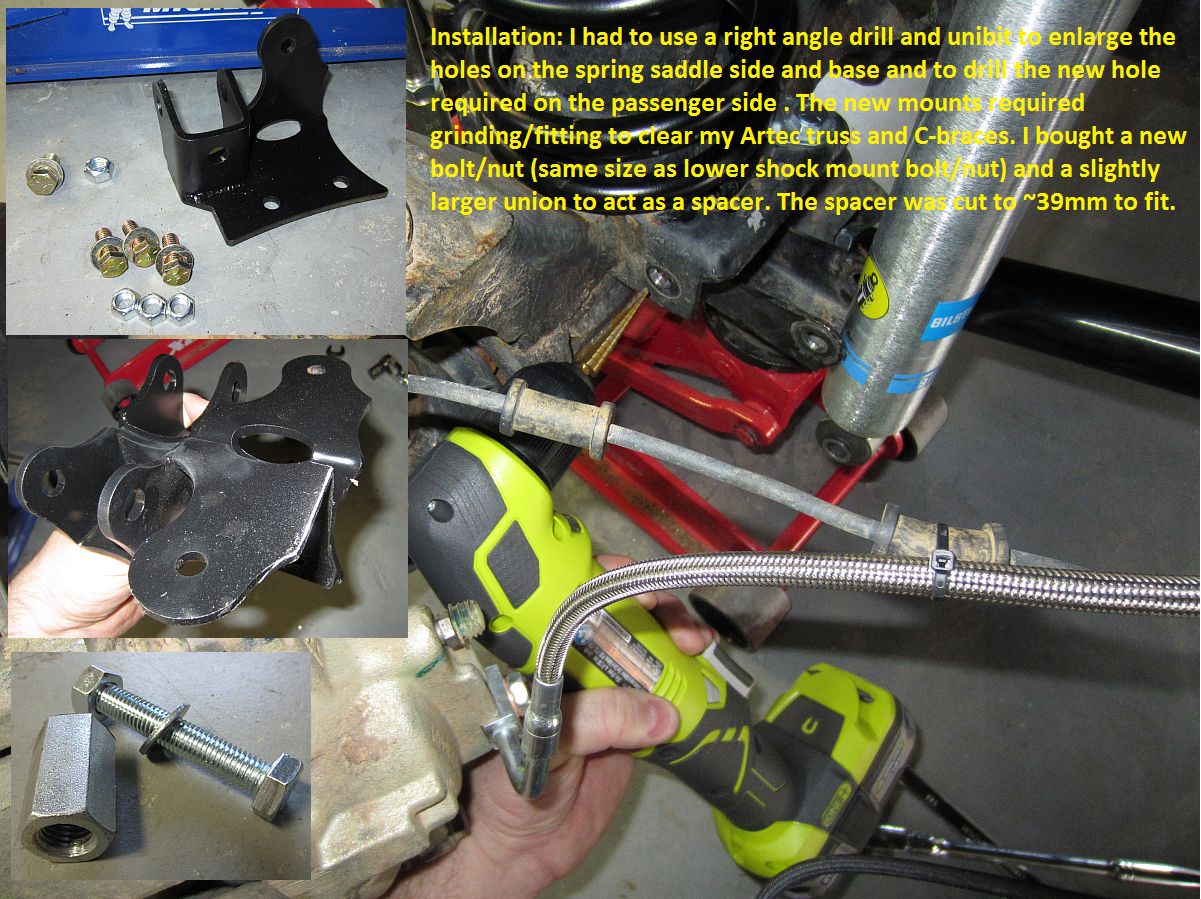
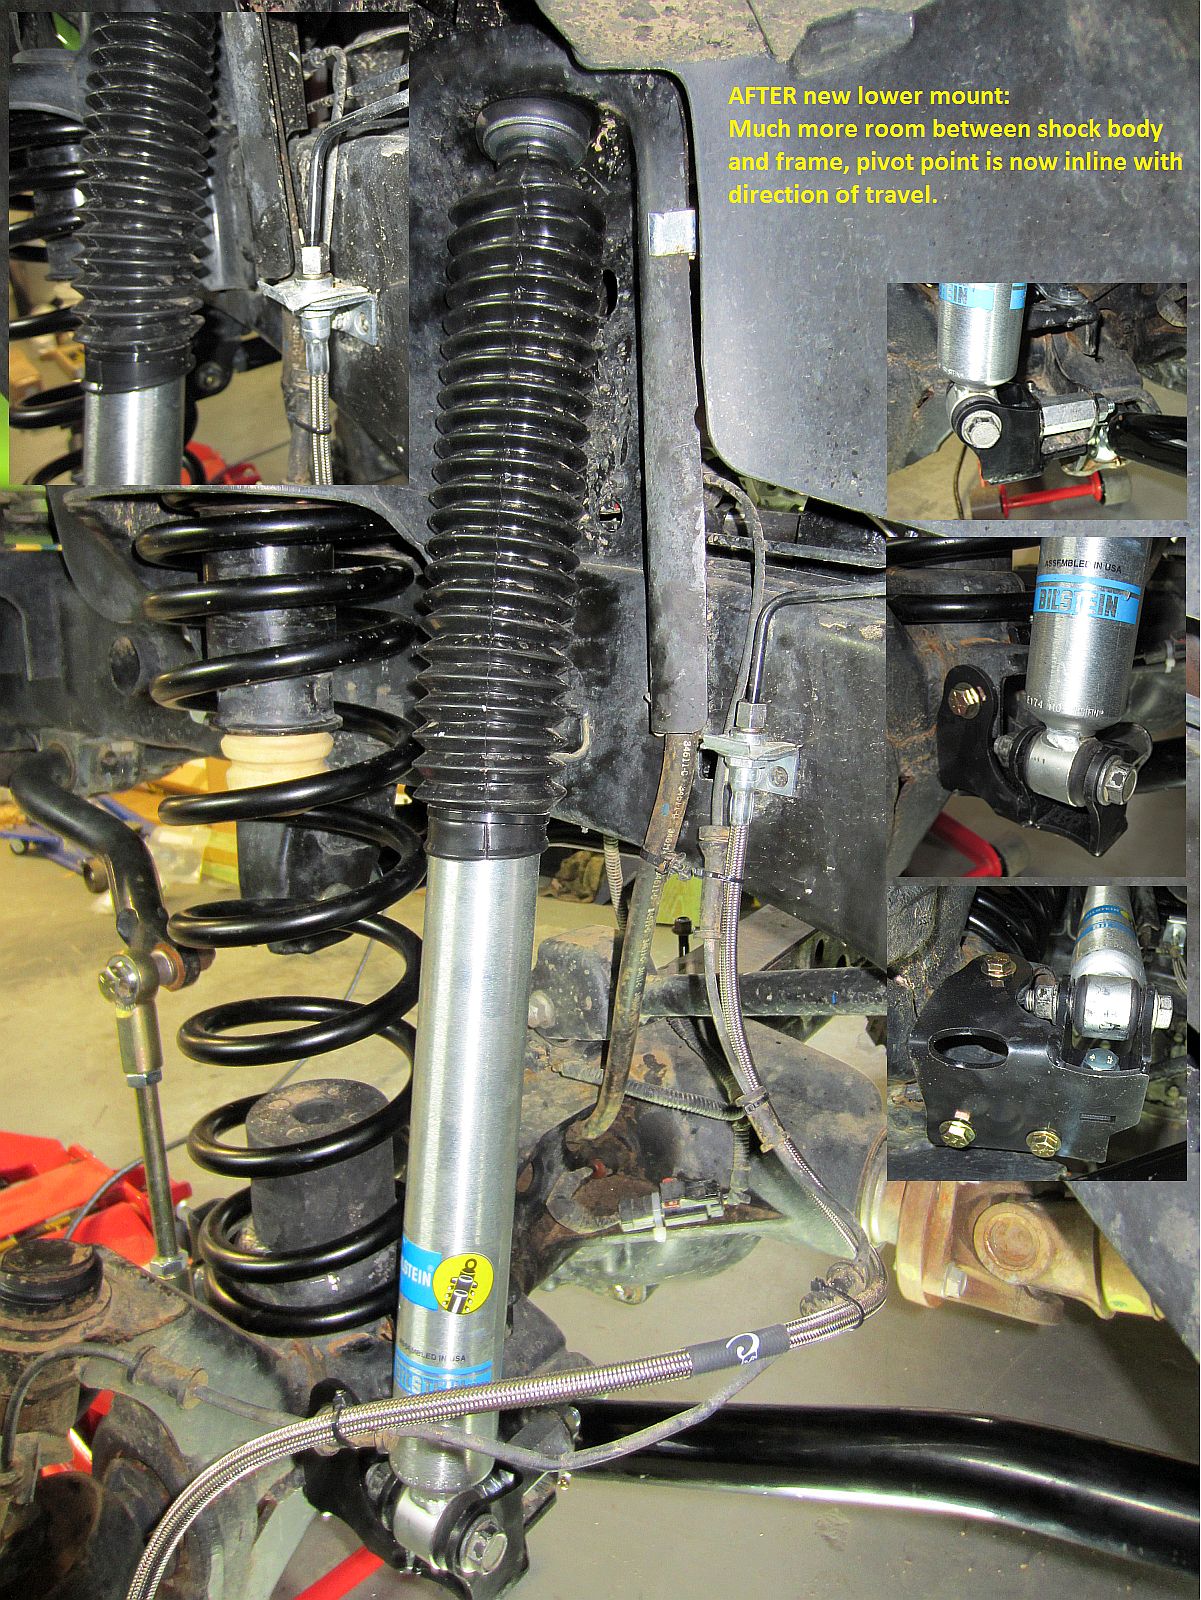
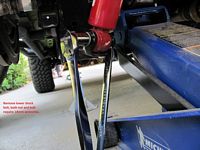
* Nemesis Front Lower Shock Mount (installation instructions HERE)
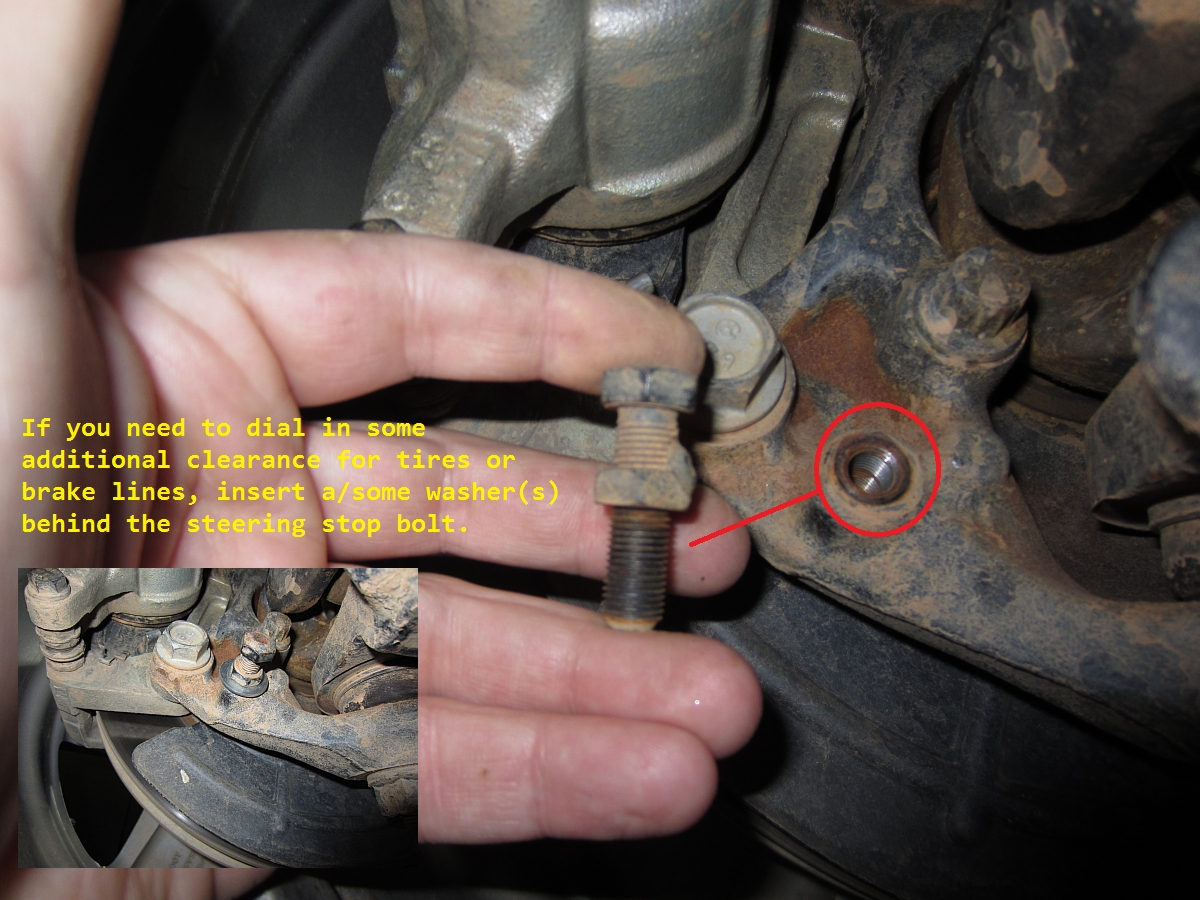
* Rock Krawler Heavy Duty PRO Tie Rod from Northridge 4x4 (JK Adventure video showing comparison HERE)
* (2) Crown Automotive Tie Rod Ends (OE Supplier, P/N 52060049AE)
* Synergy Steering Stablizer Tie Rod Clamp (PPM8003-10 1 5/8)
* OME Steering Stabilizer from Quadratec
* Coast 1310 Front Driveshaft from Northridge 4x4
* Coast 1310 Rear Drive Shaft from Northridge 4x4
* Nemesis Evap Relocation Kit (installation instructions HERE)
Some additional sources of info for this project:
- JP Magazine- Tom Woods Driveshaft Installation
- Project JK- Coast Front Driveshaft Installation
- JK Adventure- Driveshaft Installation
- Teraflex JK Driveline Installation Guide
- Wayalife Steer Stop Adjustment - Useful if rubbing the lower control arm
- Wayalife DIY Front End Alignment


With new Teraflex tire carrier and new 35" spare the HiLift jack mount on the tailgate had to go, new inside mount from Hillside Machine (archived eBay listing HERE) was installed. Top still works/folds down great with it in place and with it inside it won't be exposed to the elements.


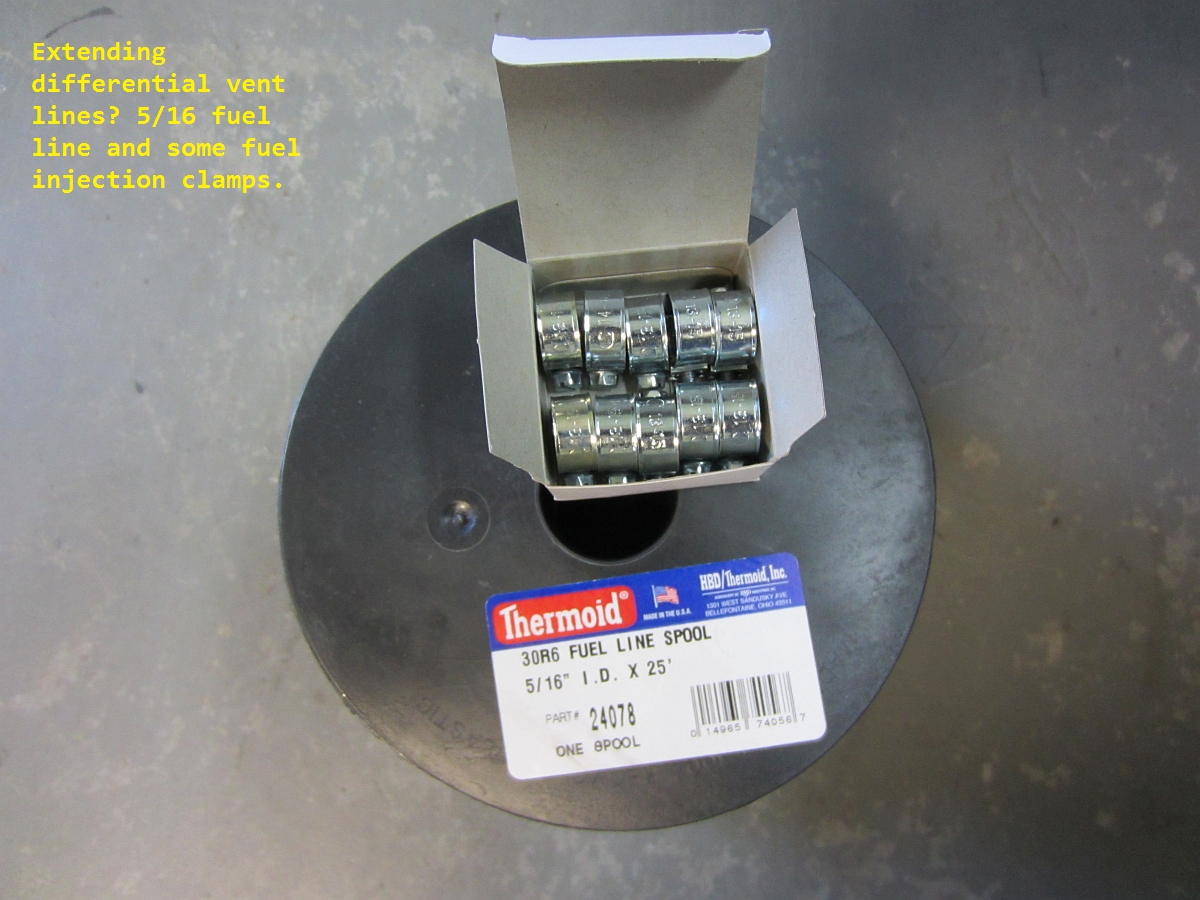
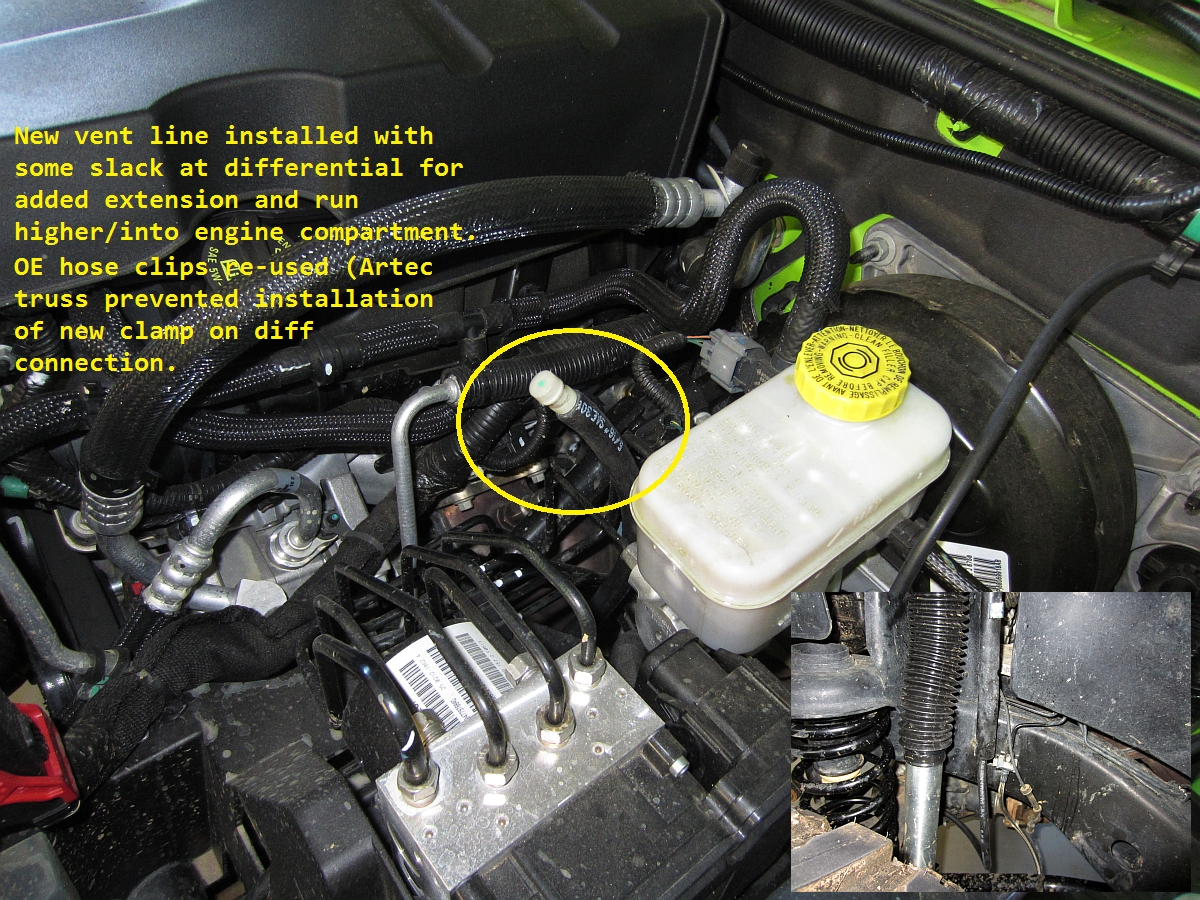
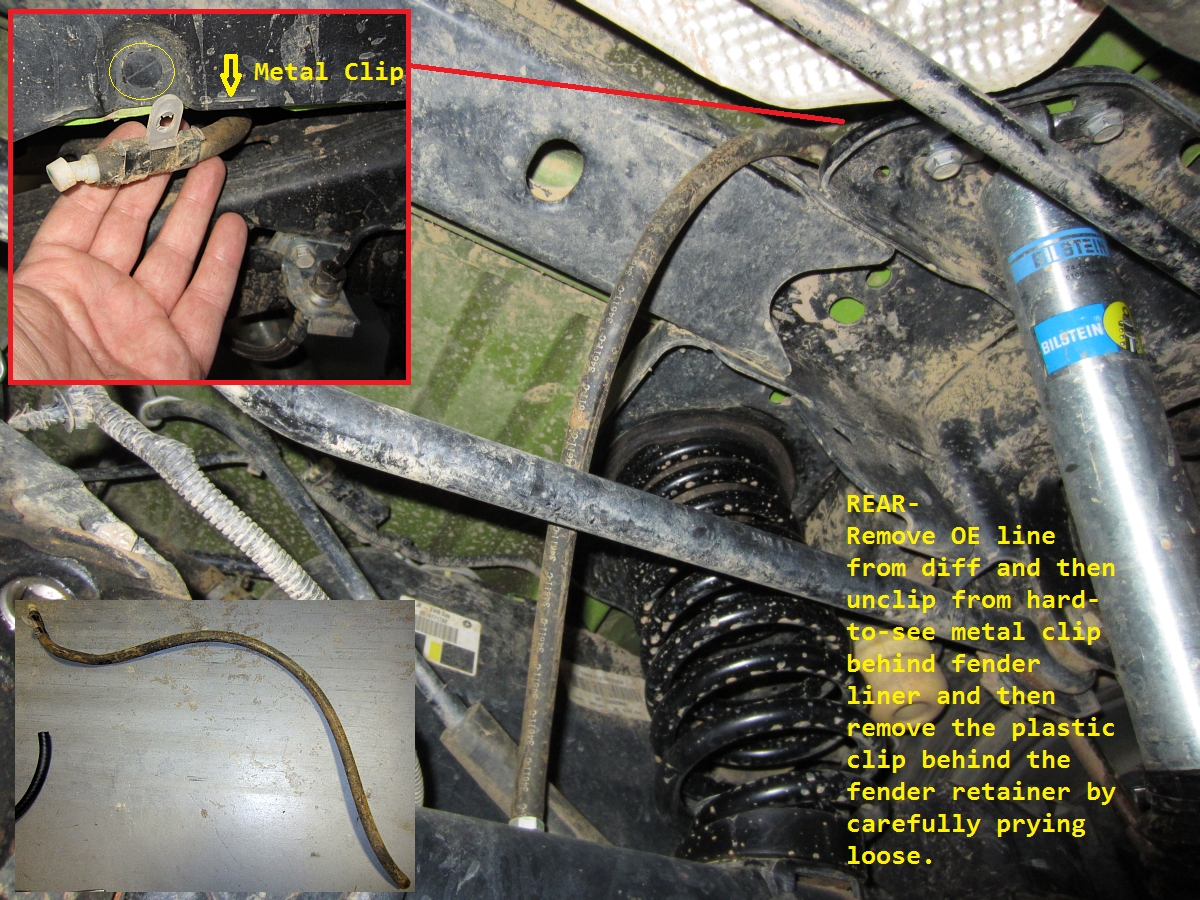
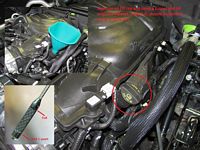
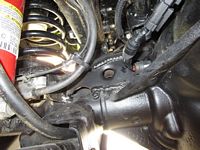
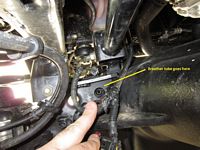
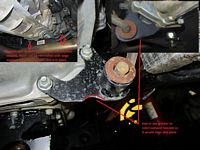
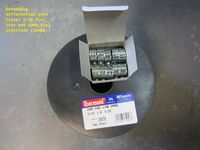
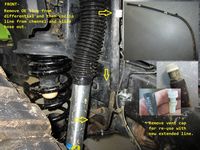
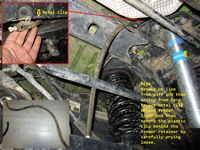
With additional extension/droop comes the need for extended differential vent/breather lines. I had been meaning to do this anyway since the OE vents don't provide the best protection from water entering the vent caps as they are low and right where the tires would throw up lots of water during a water crossing. If you want a TIGHT fit 1/4" carburetor fuel line will work, but 5/16" is the same size as OE so that is what I used along with some fuel injector clamps since they are a smooth clamp and will not cut into the hose. Pics tell the story:

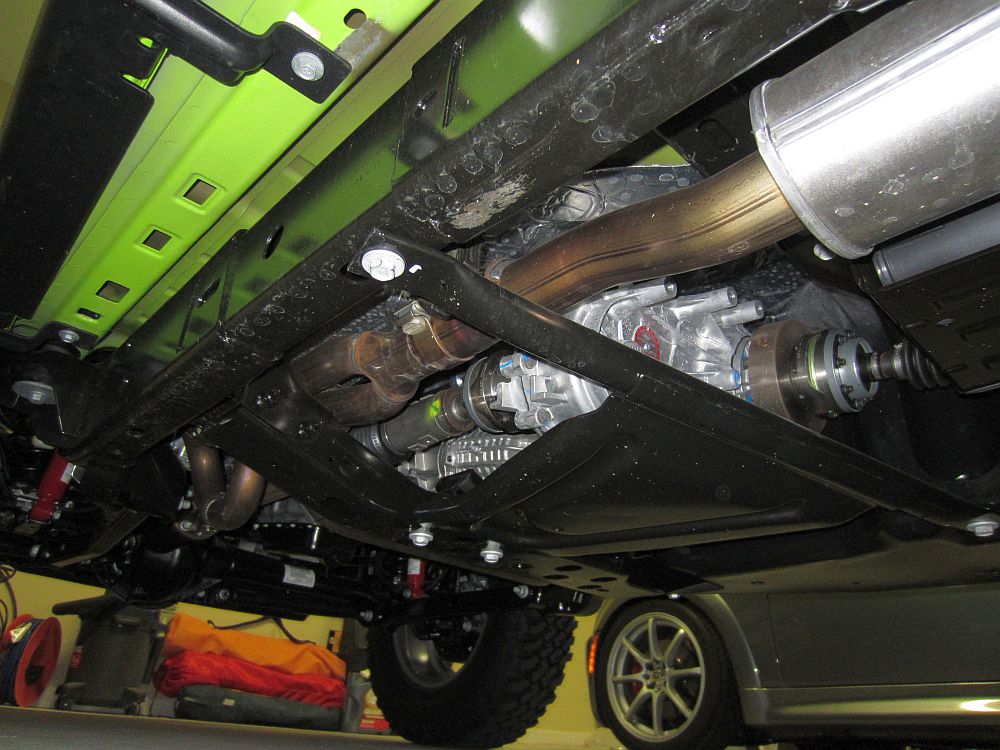
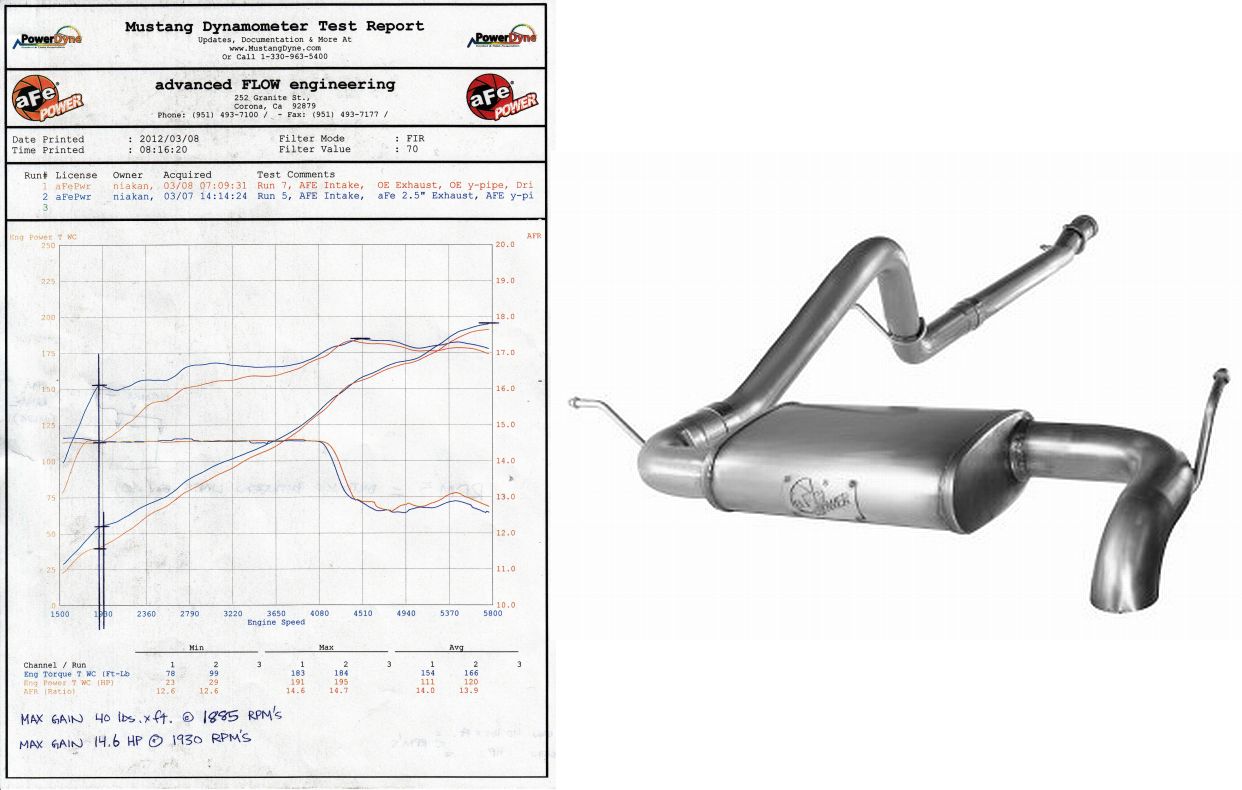
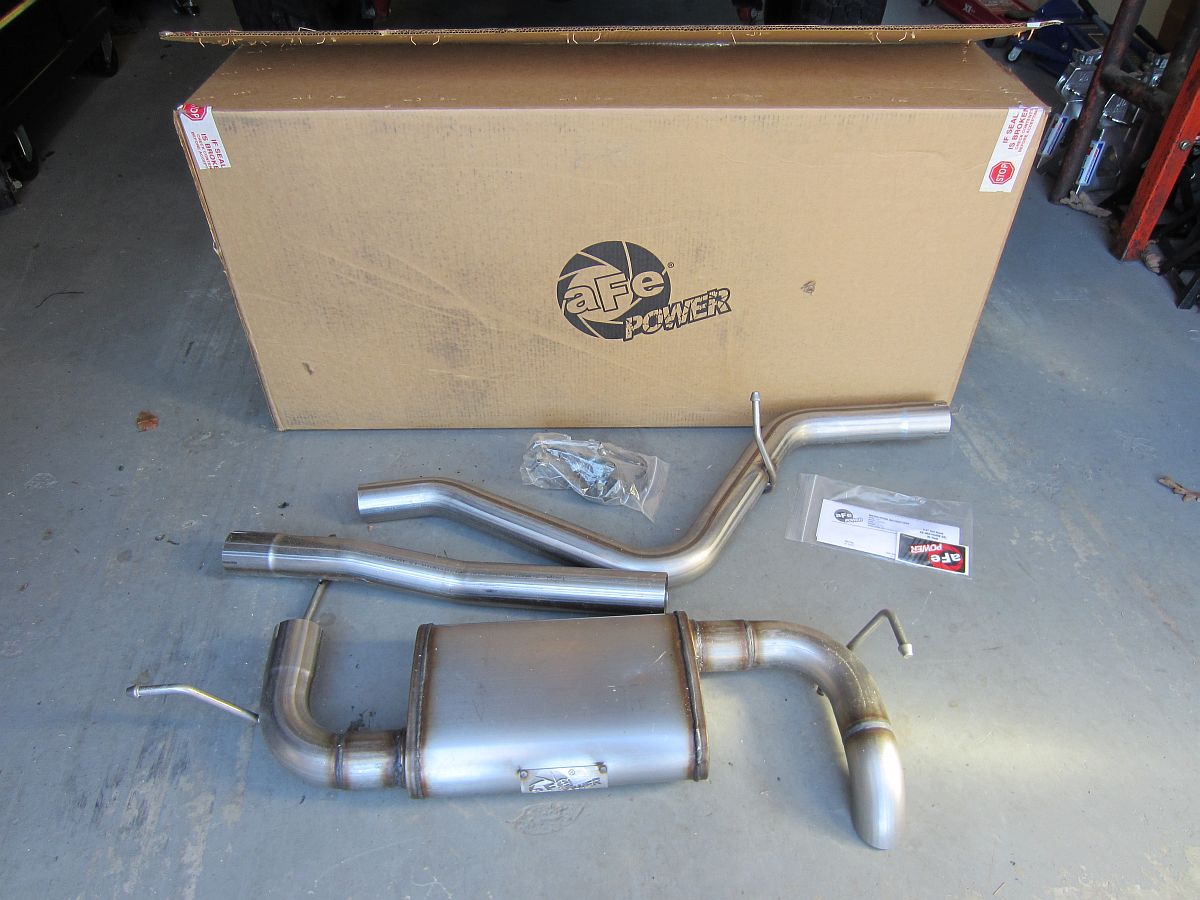
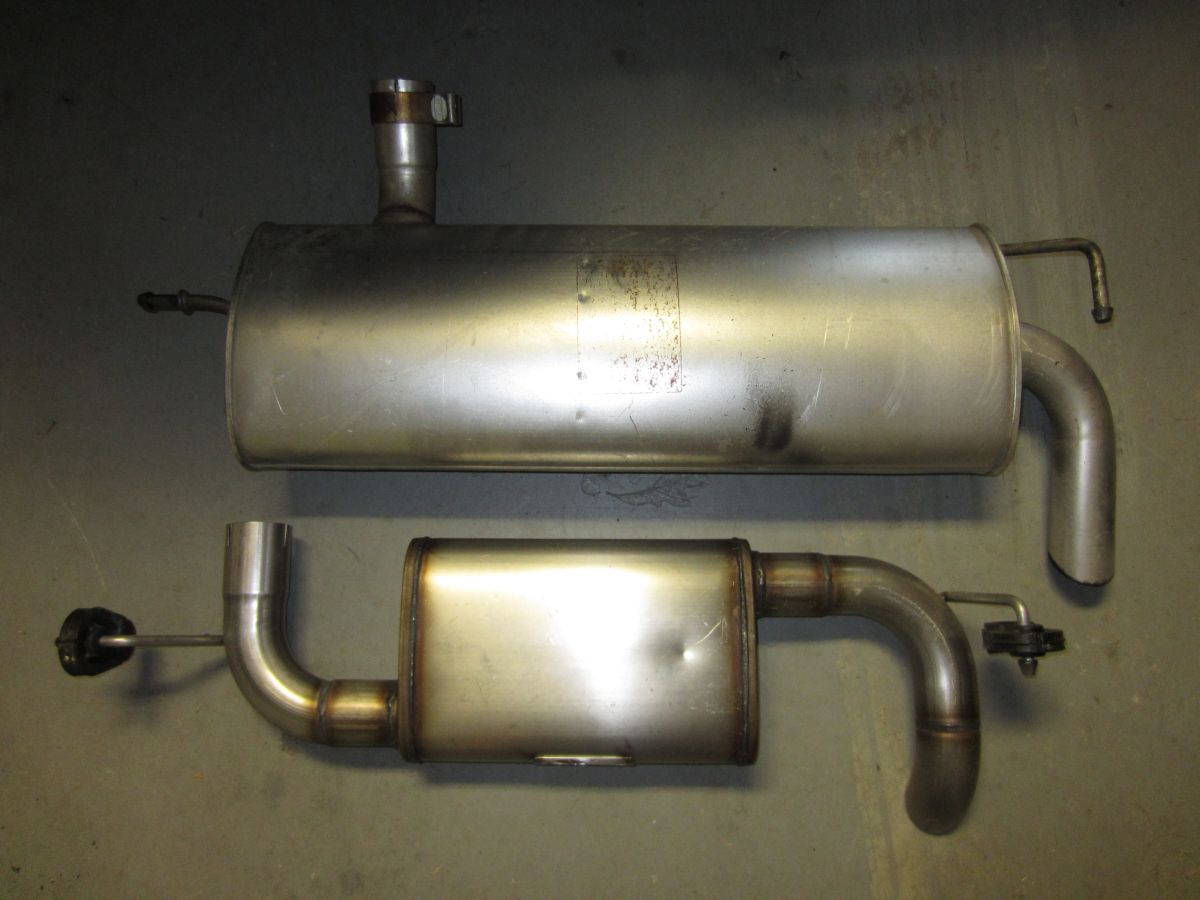
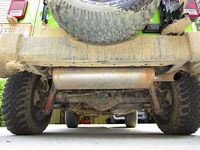
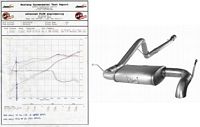
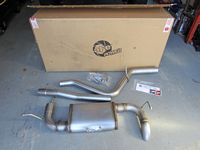
aFe Power MACHForce XP 2.5in Cat-Back SS-409 Exhaust System (P/N 49-46214, installation instructions HERE) purchased from AutoAnything using a 20% off code made this exhaust ~$250 - I couldn't build a stainless exhaust for that.
I bought this exhaust to add a little sound, get rid of the HUGE ugly OE exhaust, and get a bit more clearance- check, check, check
WD40 is your friend for the rubber isolators and the exhaust joints, it will take a bit of pulling/turning/wiggling to get the OE exhaust pieces off. The alignment dowel will have to be ground off so that the aFe exhaust can be installed, I loosely put it all together and hung it on the rubber isolators before tightening all of the clamps starting at the front- clamps angled for easy access but up and out of the way so they won't get hung up on anything.
Of all the custom exhausts I have installed on various cars I have owned over the years (most Magnaflow), this is the best one from a quality and fit standpoint. Everything fit out of the box, I didn't have to adjust or cut anything, the welds look great, and the sound is perfect with no drone (IMO)- it just works.
I have some more installation pics from my 10A HERE that also detail the OE exhaust and alignment tab removal.

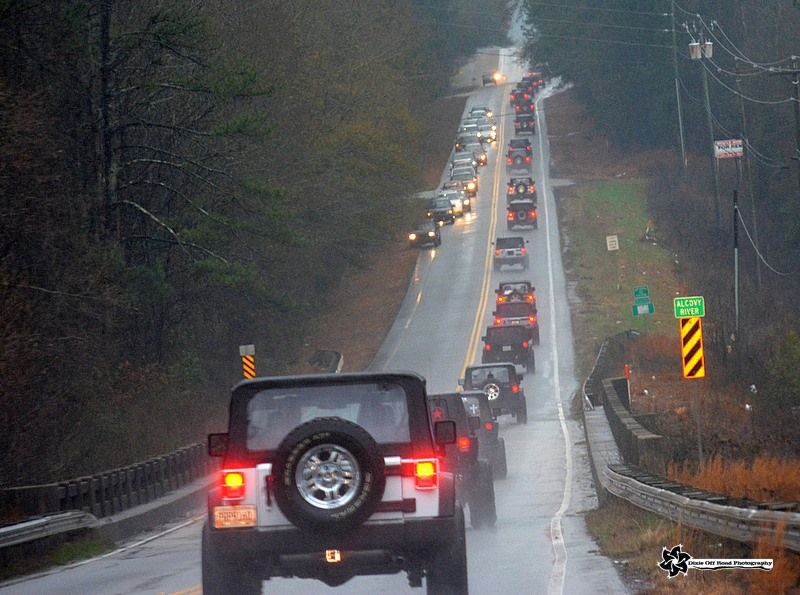
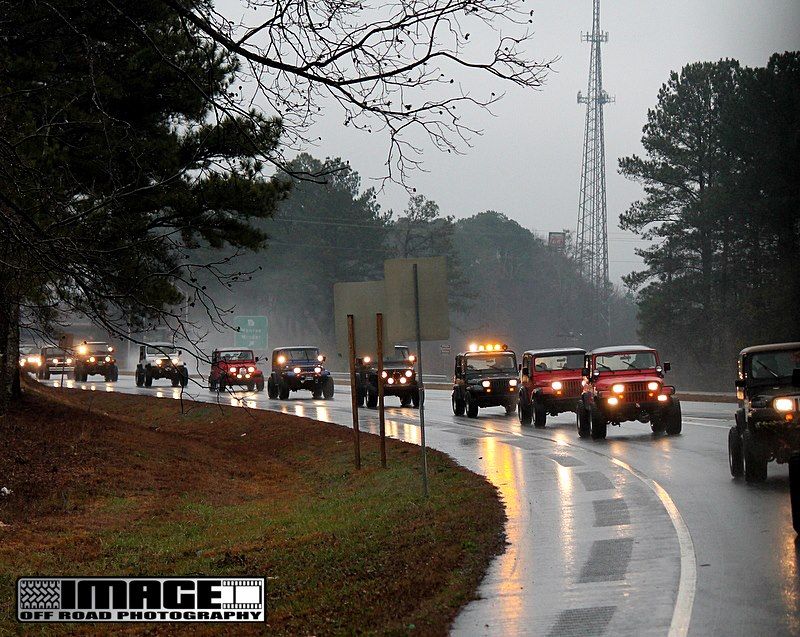
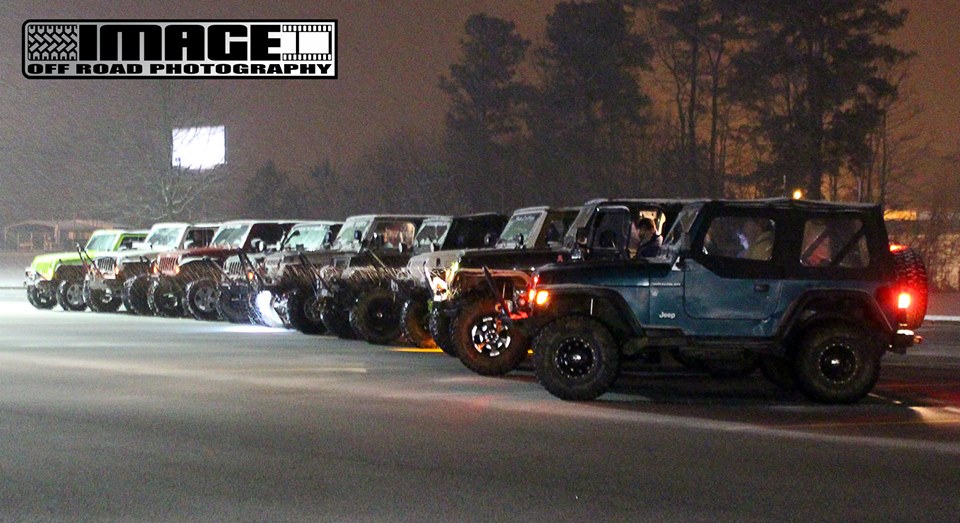
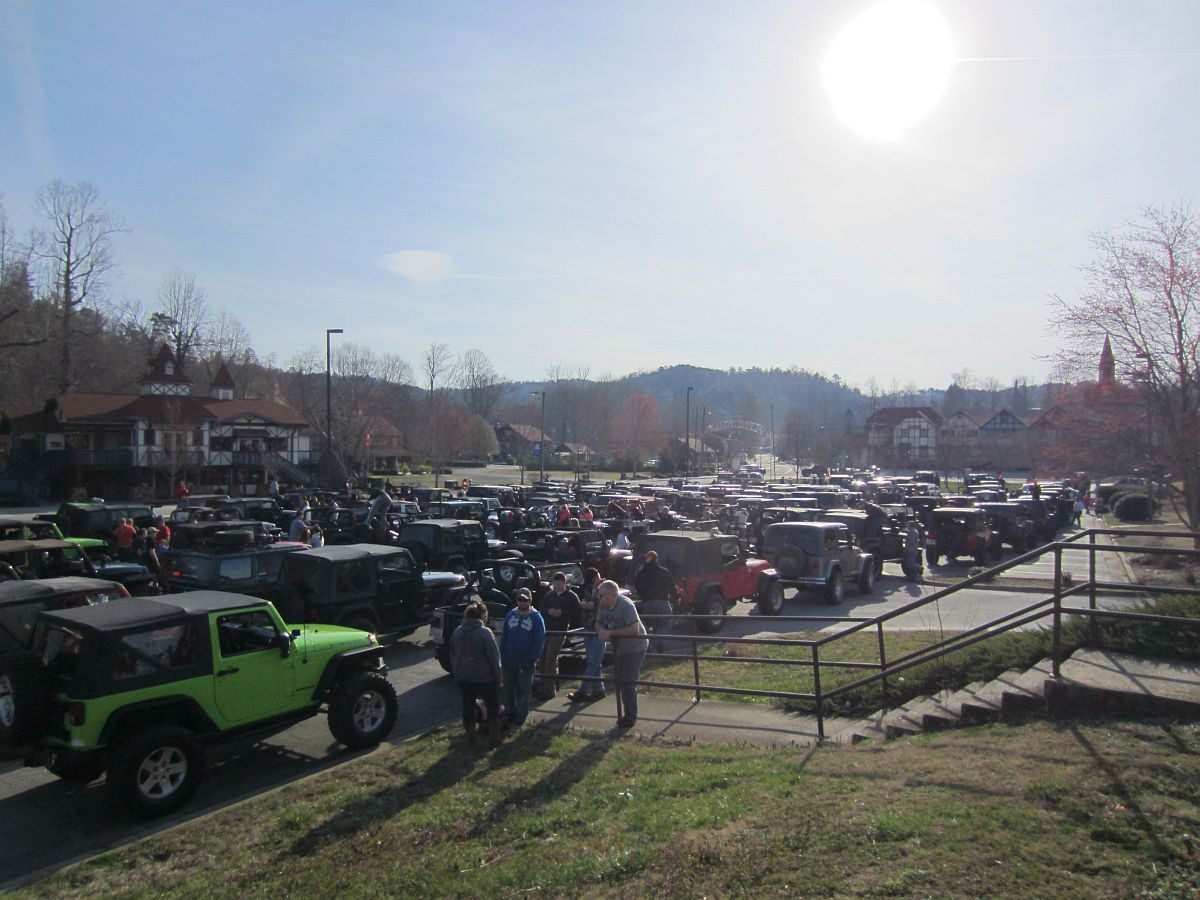
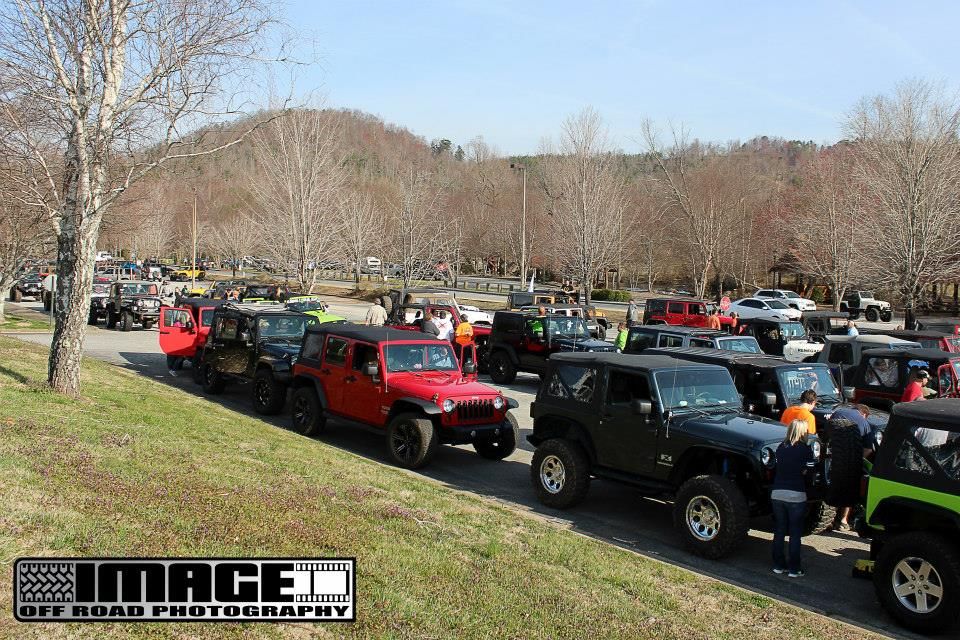
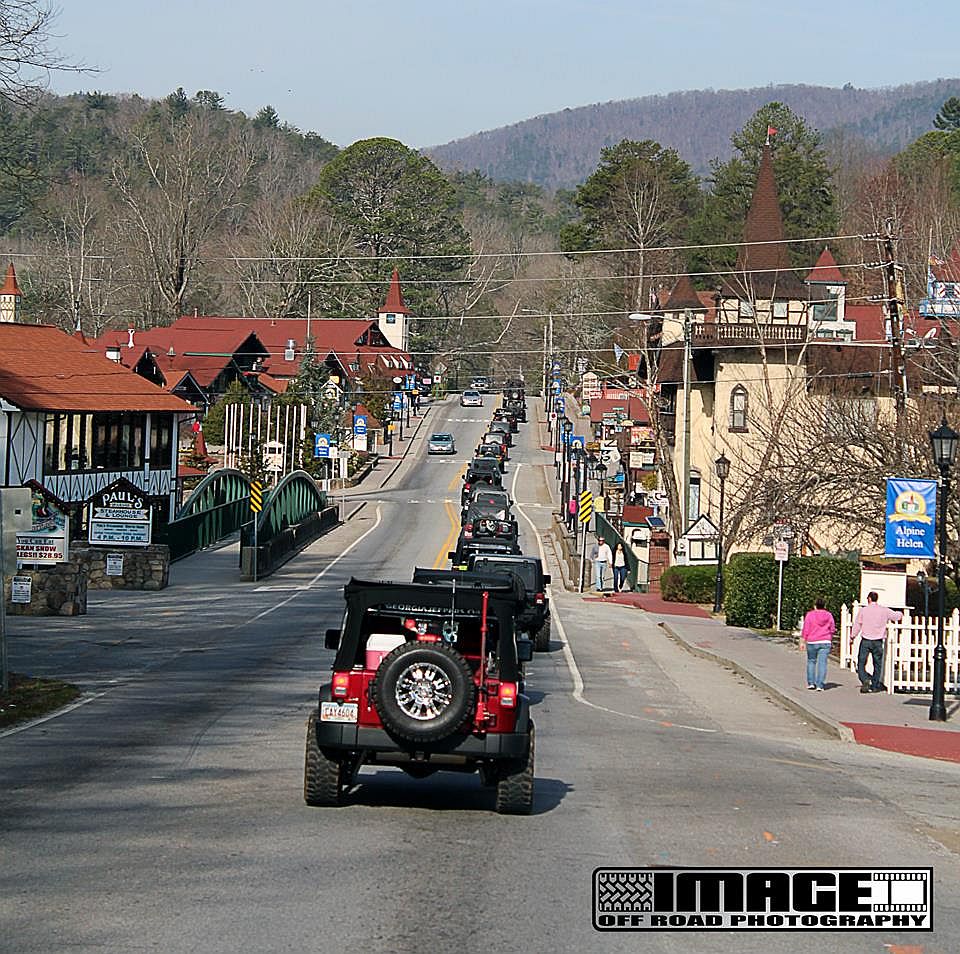
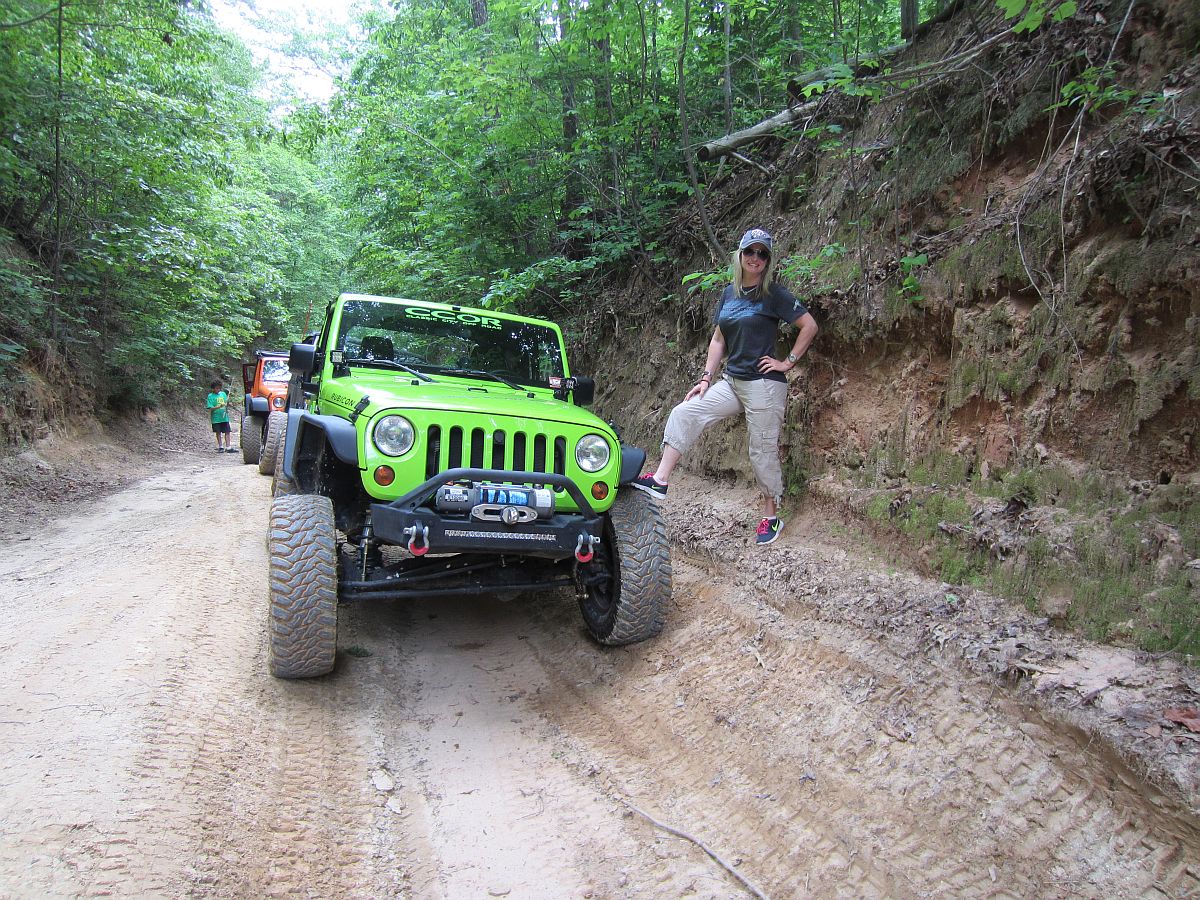
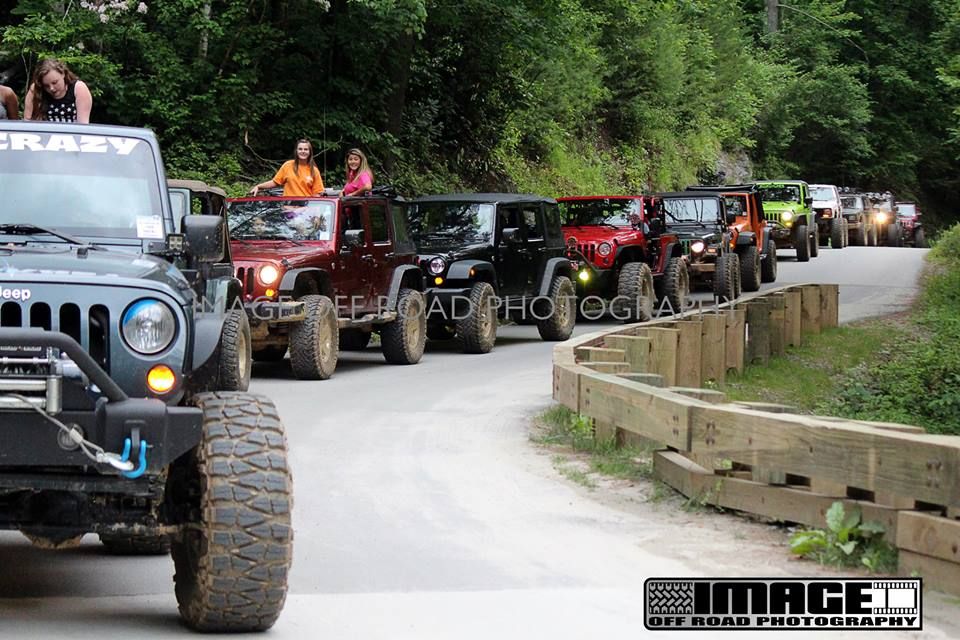
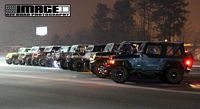
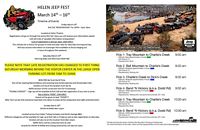
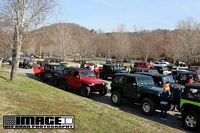
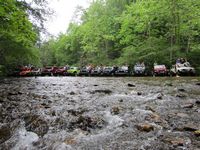
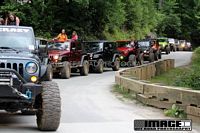
Helen JeepFest/Alpine Mountain Crawl 2014- lots of trail rides and lots of Jeeps. Originally the number attending was expected to be ~200, at last count it was 560
. Lots of great trail rides but we chose the Dicks/Charlies Creeks drives, honestly a Honda Civic could have done these but it was scenic.
The GREAT pics from ImageOffRoadPhotography were taken by Christy Mote and team- THANKS for sharing!


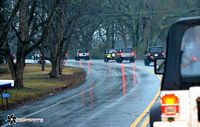
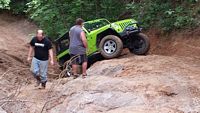
Dodd and Persimmon Road and her first time really driving the Jeep offroad- she did great. We did learn that the RK suspension and Rubi electric diconnect do not play well together, bent both sway bar endlinks when the sway bar flipped to the front while at max droop/extension. Manual disconnect will be installed for future trails
Videos of her driving HERE through the ditches and ruts and HERE through the mud hole- BIG THANKS to those that shared their video with us.


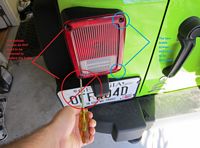
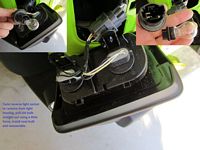
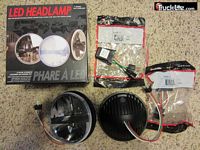
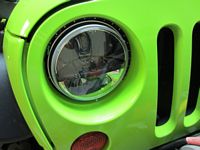
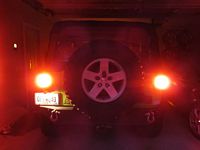
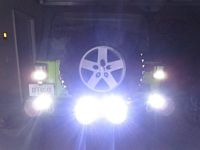
Truck-Lite 7" Round LED Headlights with Anti-Flicker PWM Adapter purchased from Drivetrain America on eBay- Spec/Product sheet HERE.
They do require two layers of electrical tape around the mouting surface so they will not sit loosely in the mounting ring, I have pics on my Rubicon 10A page of this.
The IPF headlights were much better than OE but they cracked while crossing a creek (lens hot + instant cooling?) so it was time for these.


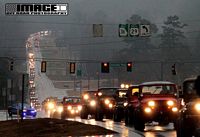
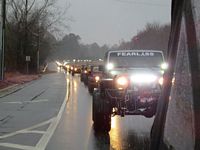
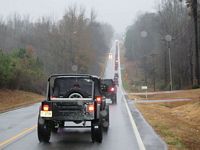
Toys For Tots train with Stockers to Lockers and Courtesy Jeep (Conyers, GA)- great ride for a great cause, ~280 Jeeps brought toys to donate.
This was our second T4T event, this year was a bit larger than last years but the same as lasy year was RAIN. Thanks to all of the officers that blocked traffic so we could go through red lights and to Courtesy Jeep in Conyers, GA for hosting the event.
Big Thanks to Officer Shane Capeheart for also getting video of all of these Jeeps driving through Winder HERE (we are at 3:33)- archived here in Low Resolution and High Definition.


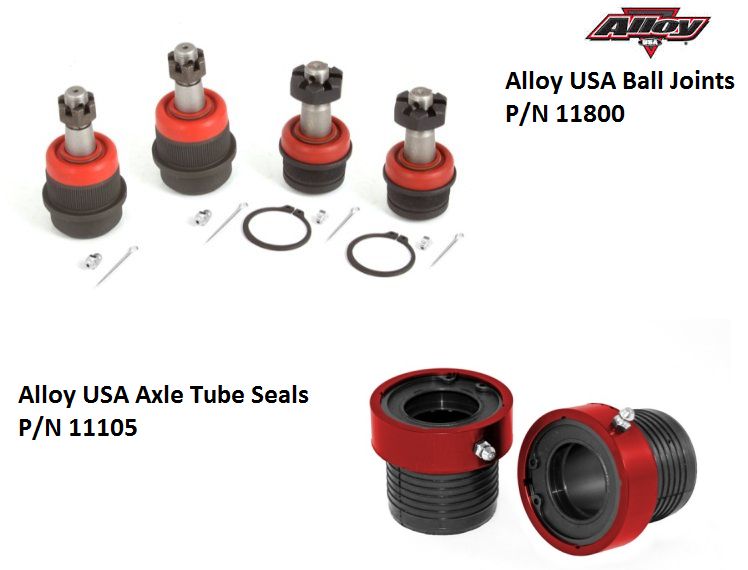
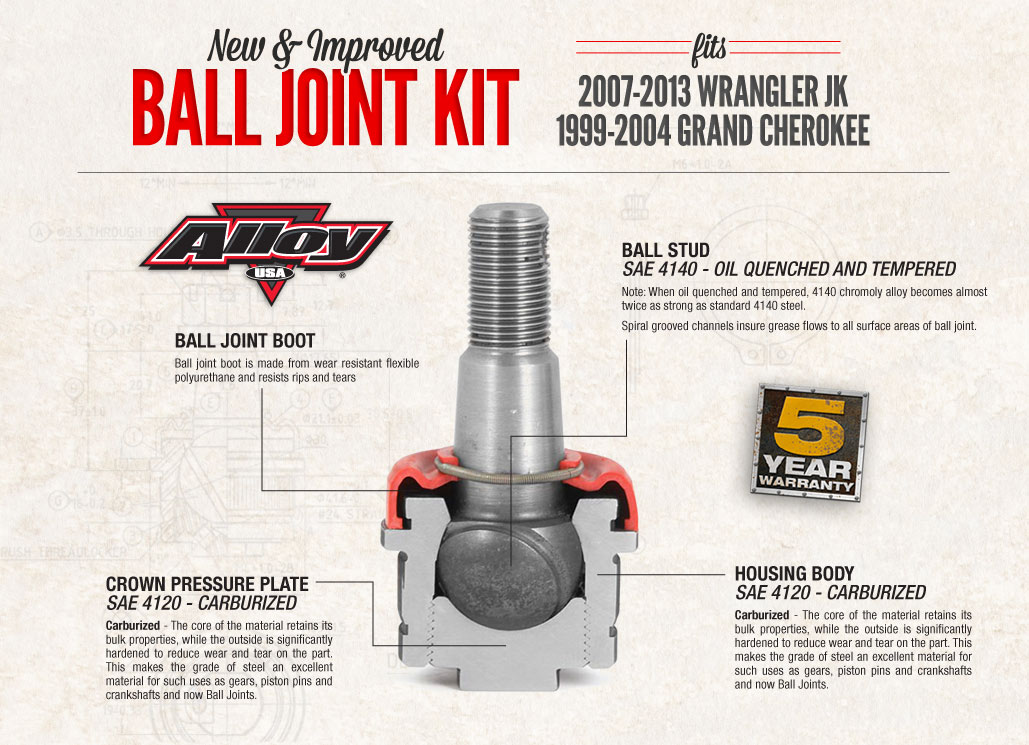
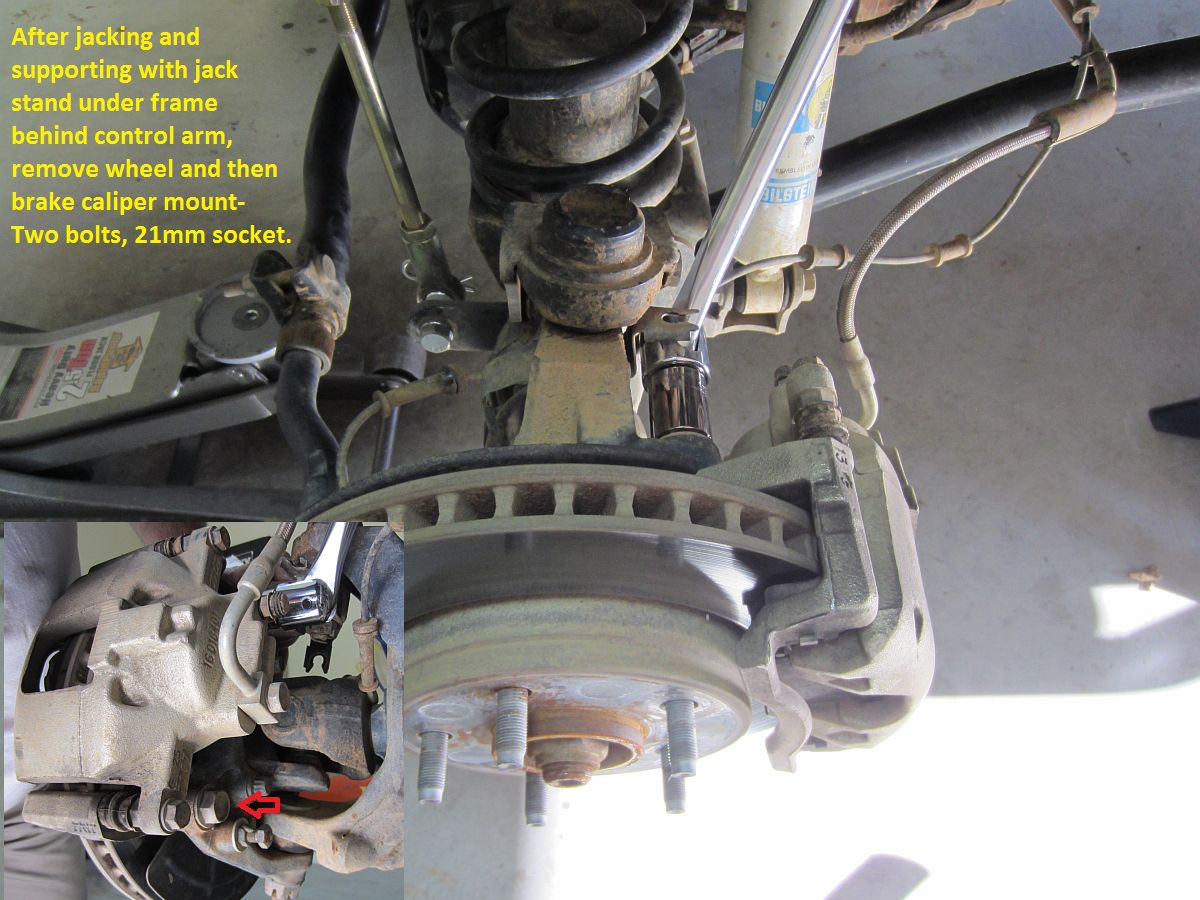
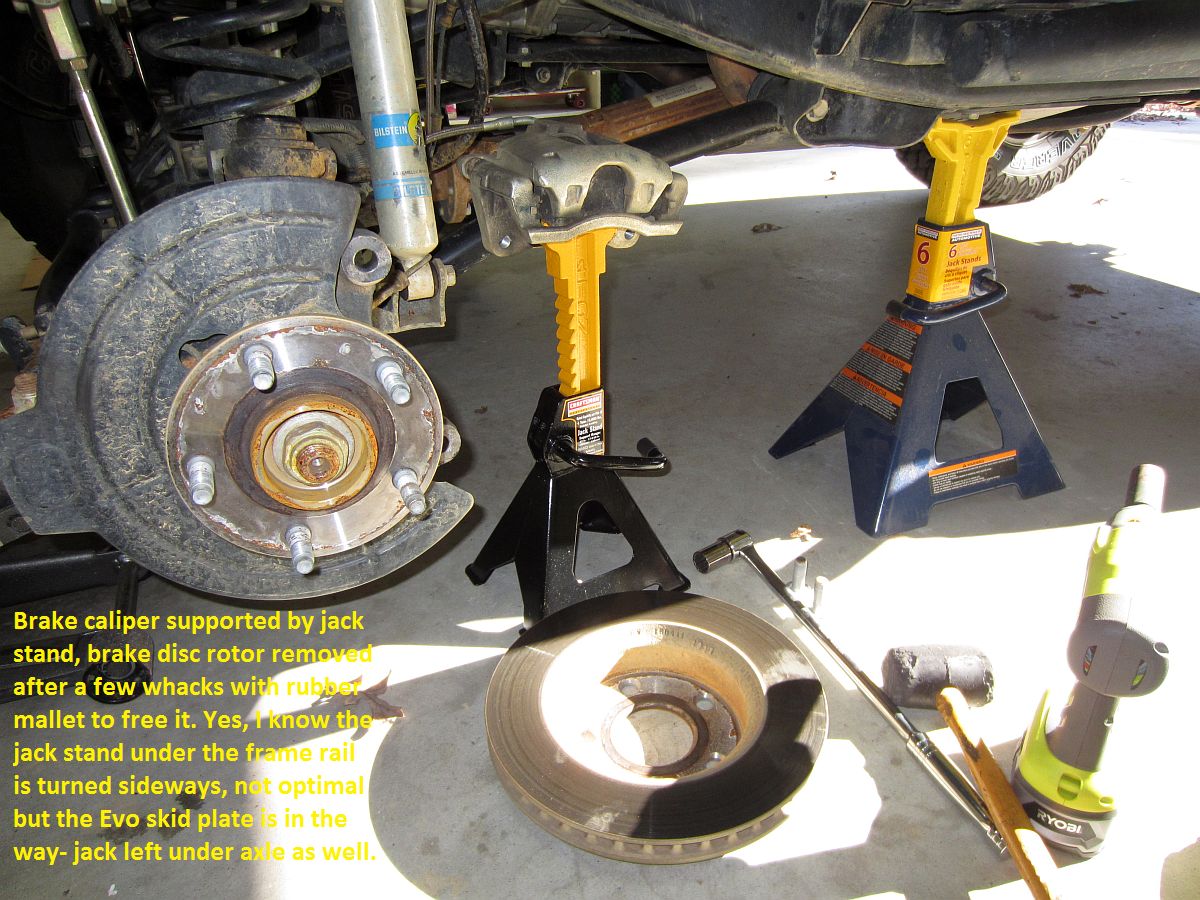
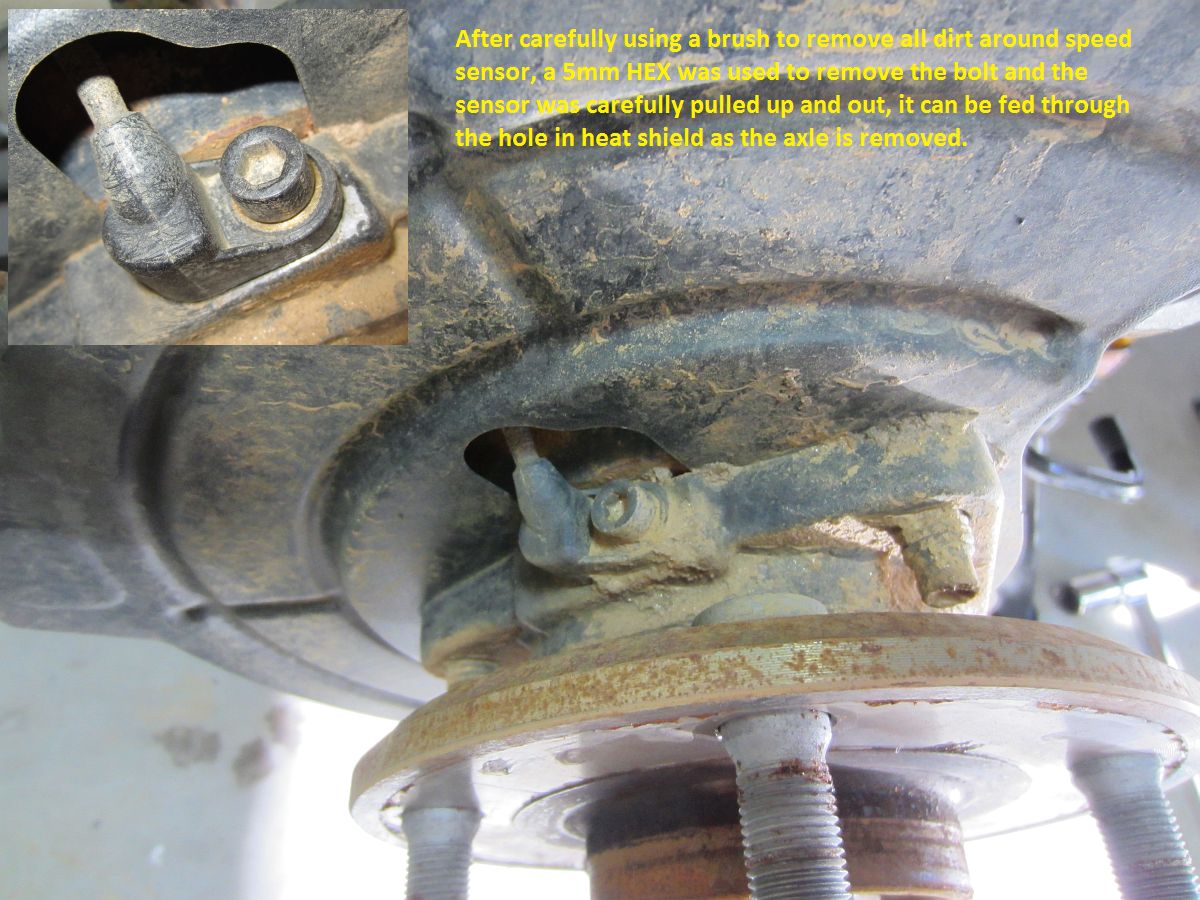
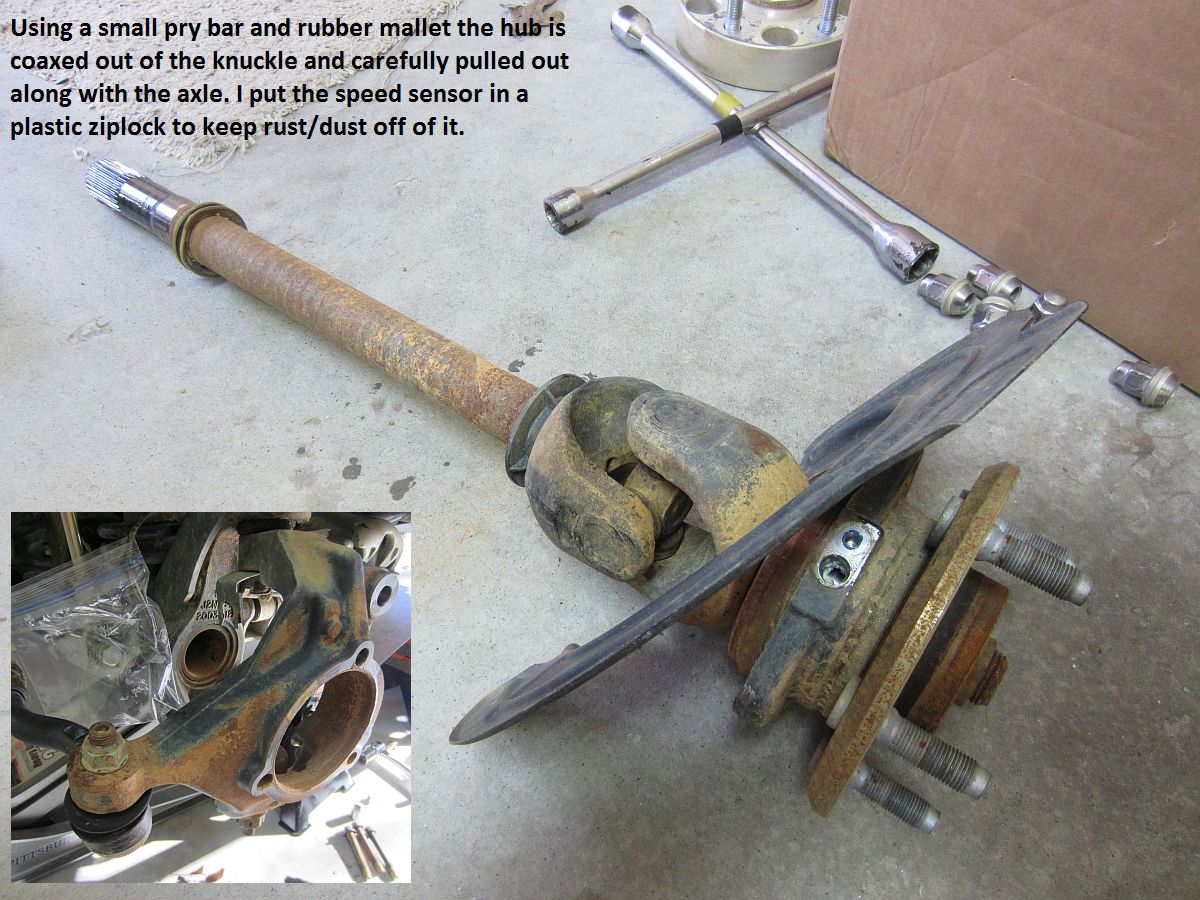
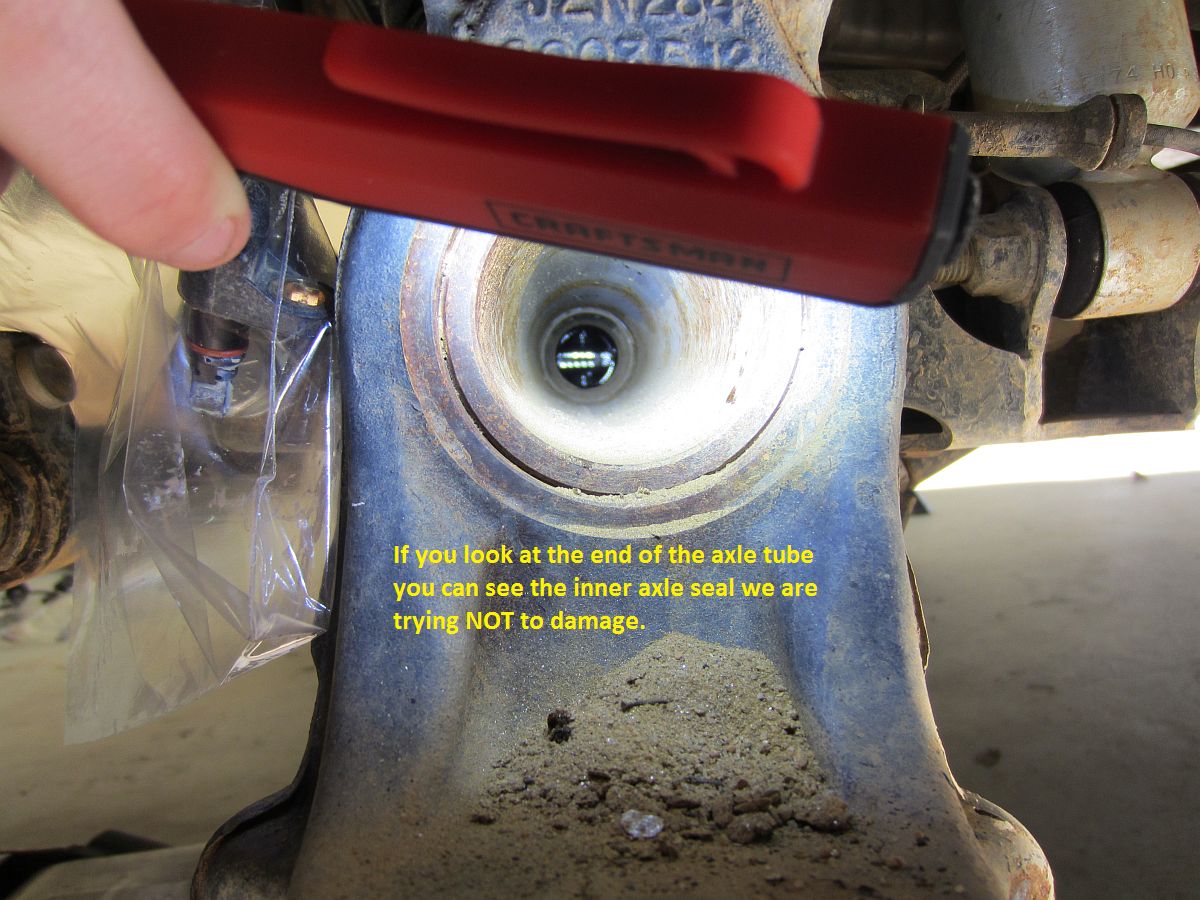
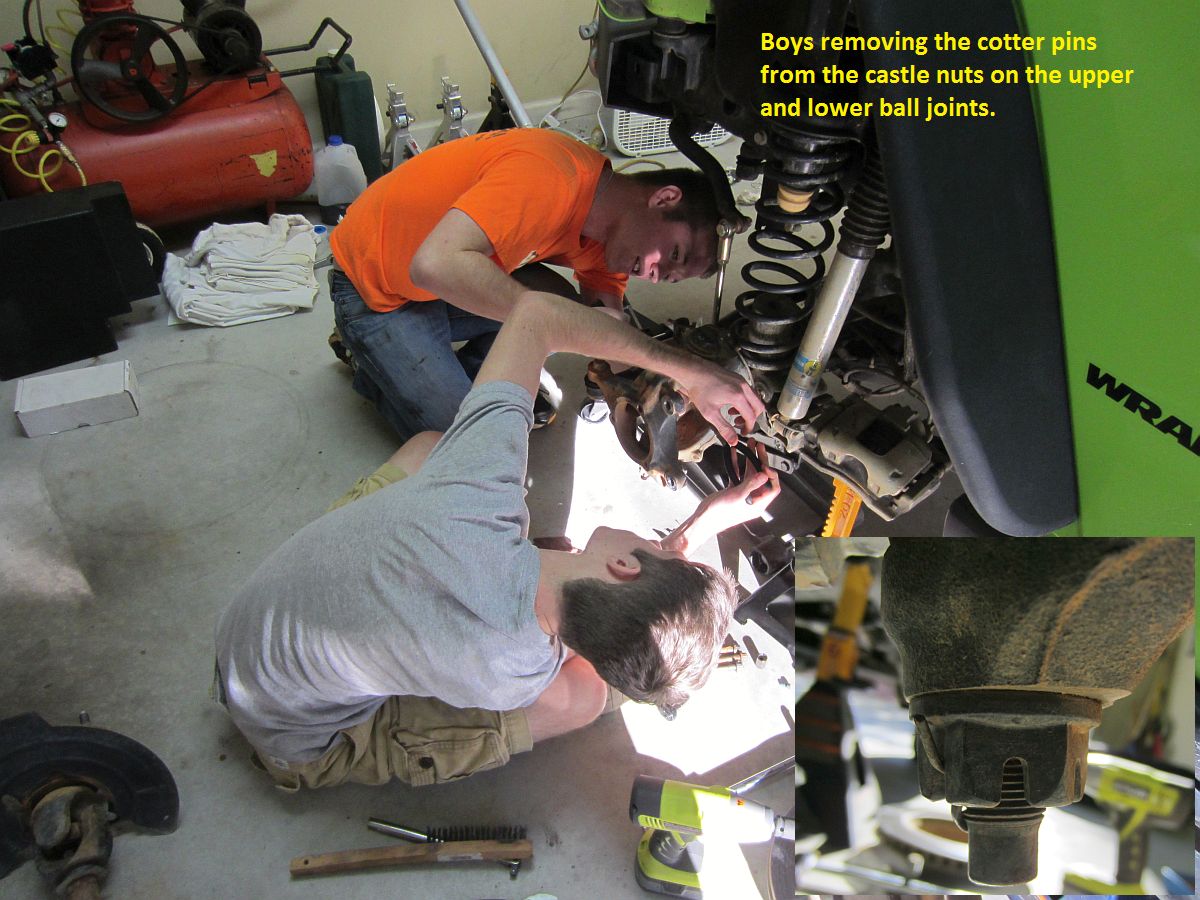
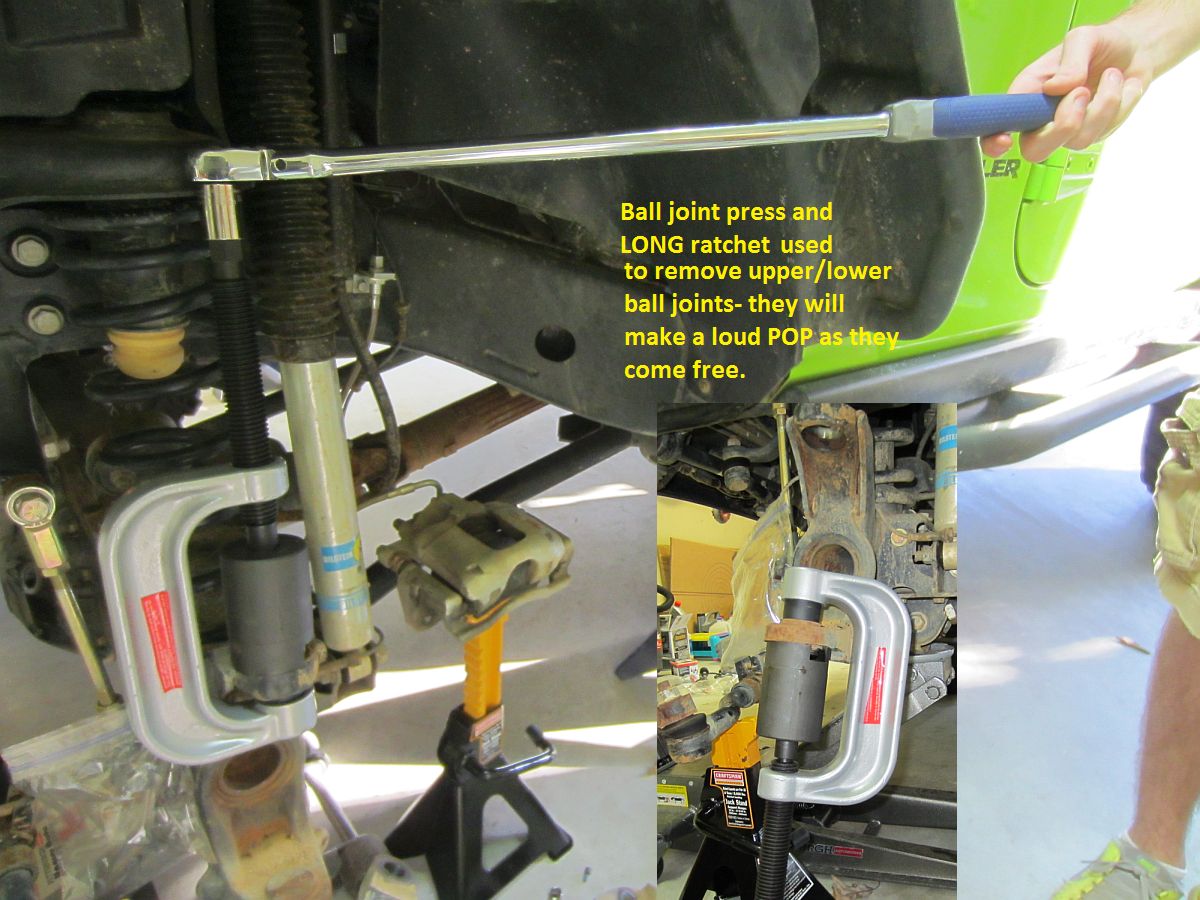
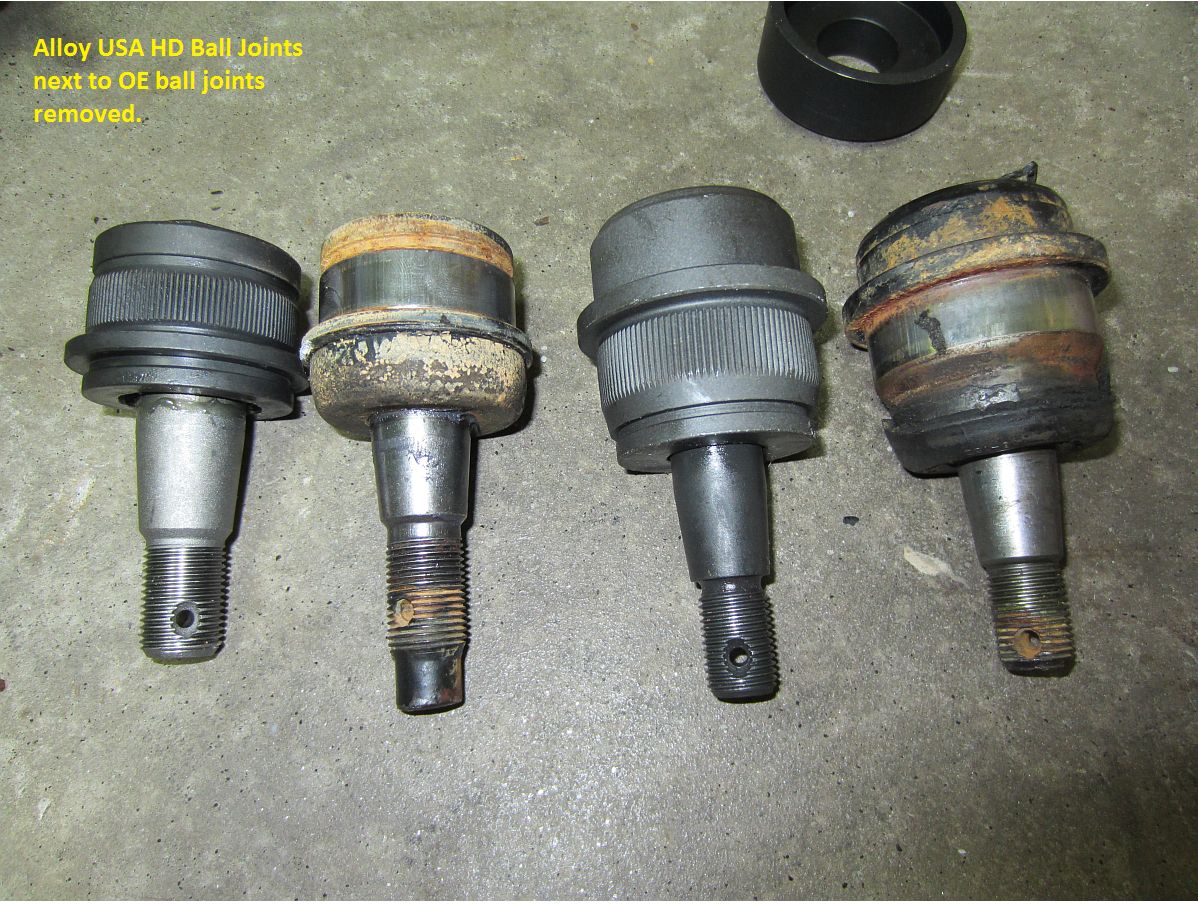
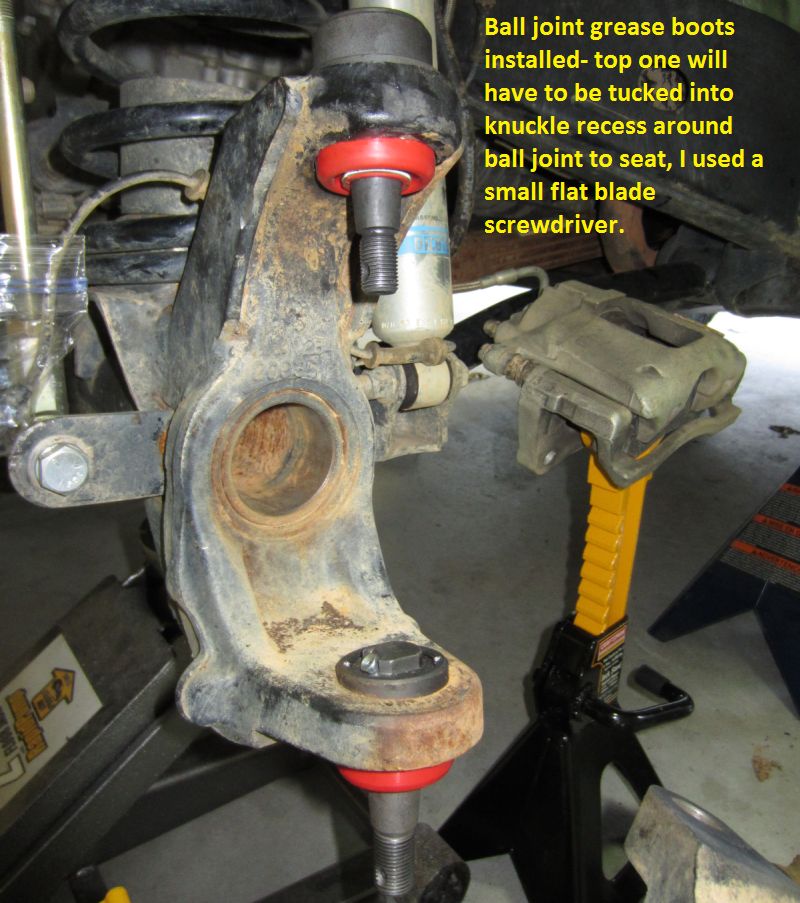
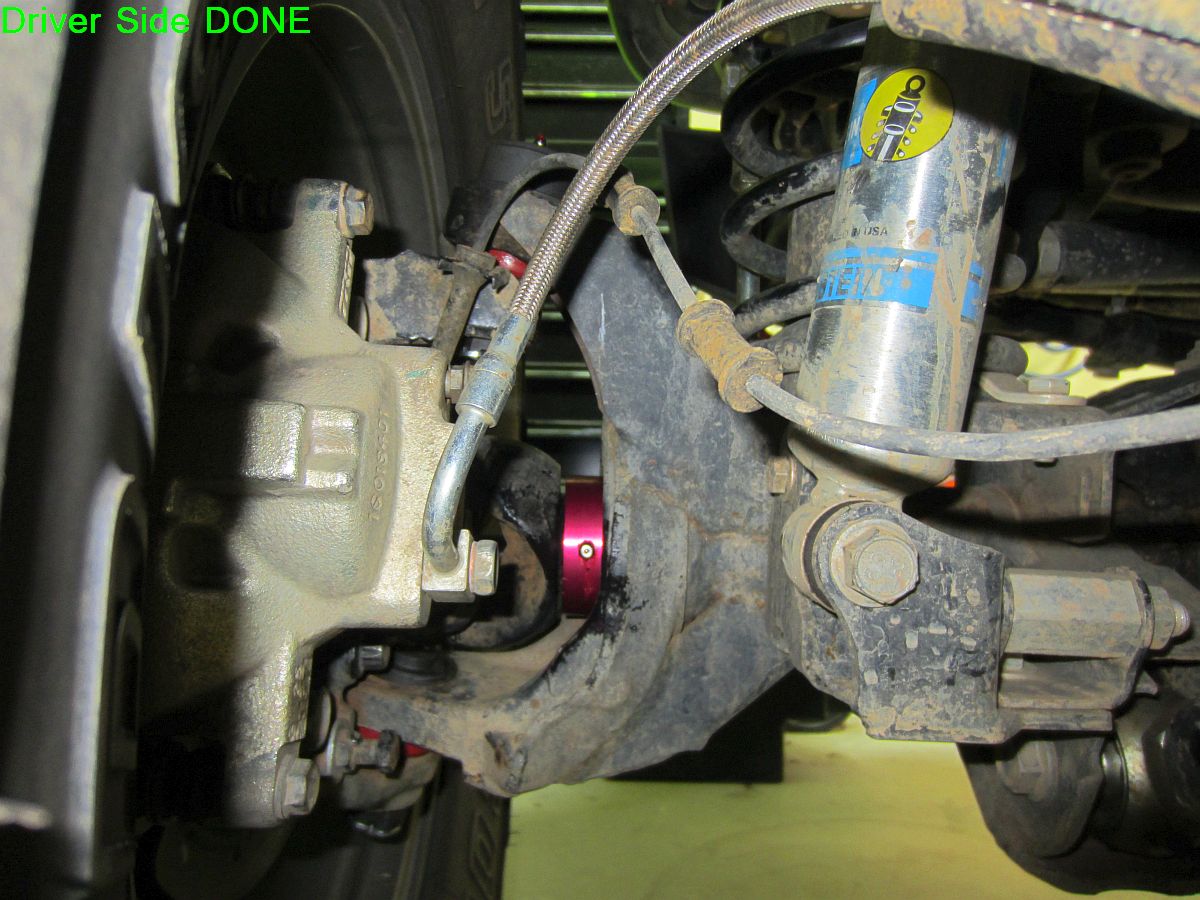
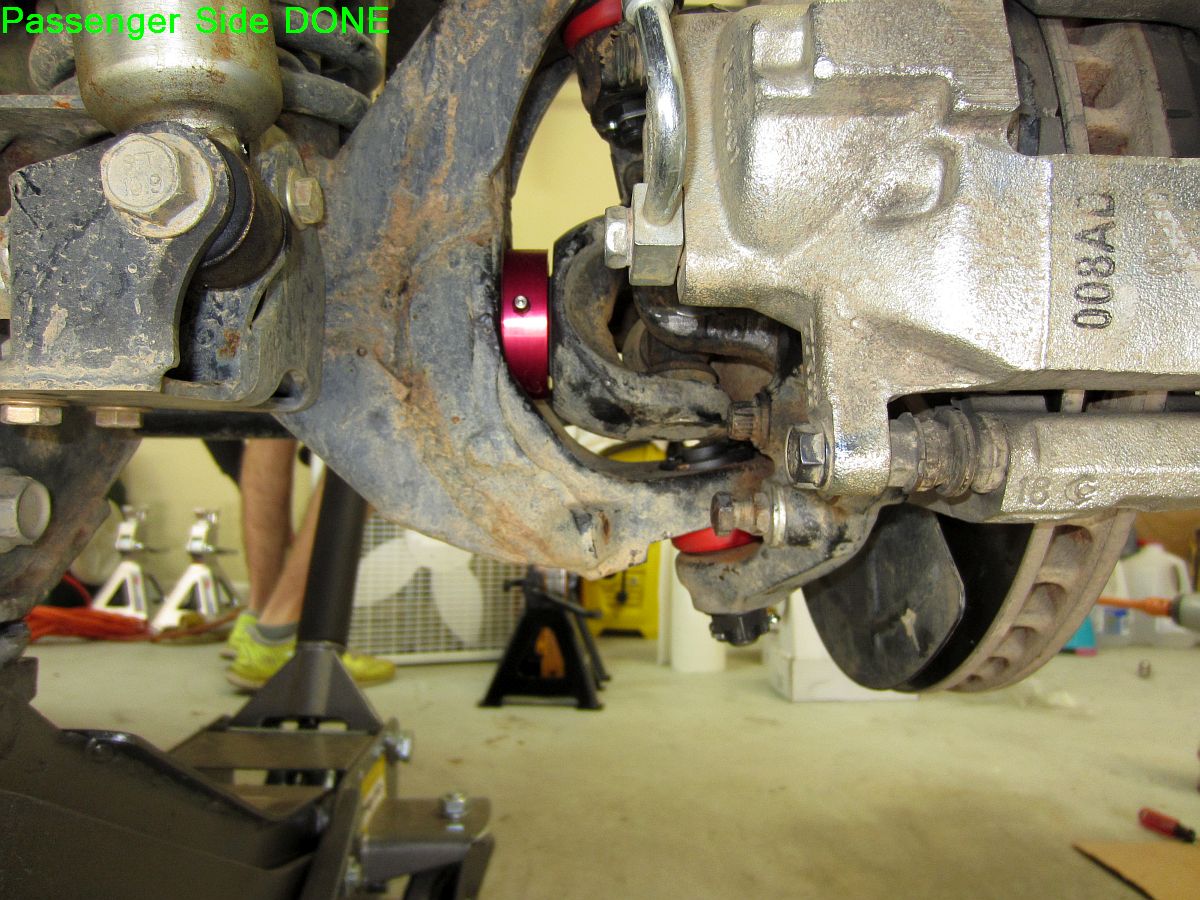
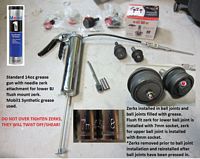
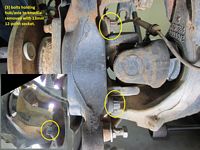
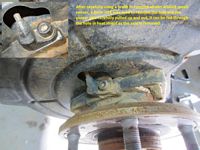
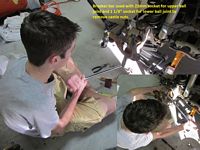
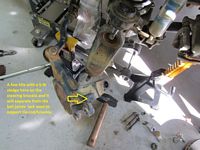
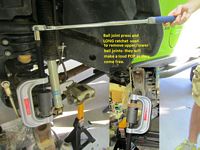
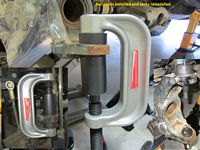
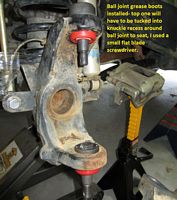
Ball joints were DONE at ~22k miles, I'm sure the heat from welding on the Artec axle reinforcements and some trail abuse didn't help- OE JK ball joints are not known for their durability. Alloy USA HD Ball Joint Set P/N 11800 (installation instructions HERE) from Amazon and Alloy USA Axle Tube Seals P/N 11105 (installation instructions HERE, introduction forum thread HERE) from Amazon purchased to service the ball joints. Mobil1 Synthetic Grease used for both ball joints and axle tube seals. This was also a great opportunity for my son and his friend to learn about ball joint replacement- they were a big help
Went ahead and changed fluid in both F&R differentials too.
I found a great write-up on both of these items on Wrangler Forum by SilverSport (archived in pdf format HERE) that I used with some slight variations. One thing I did differently due to my paranoia about screwing up the inner axle seals was that I installed the axle tube seal on the axle and then replaced the plastic centering rings before installing the axle assembly- I also did NOT silicone the axle tube seals in place for this reason, they are in the axle tube tight enough that I don't think I'll have any problems but they will be removable for future service. I did take some pics below that might supplement this write-up but everything should be there, SilverSport did an awesome job documenting his installation
Assemble in reverse order- Torque values for reassembly can be found HERE.


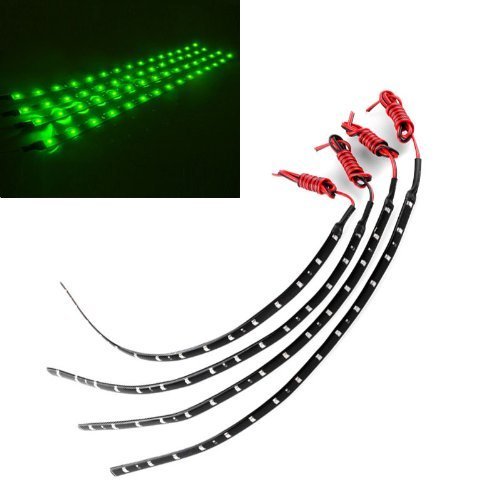
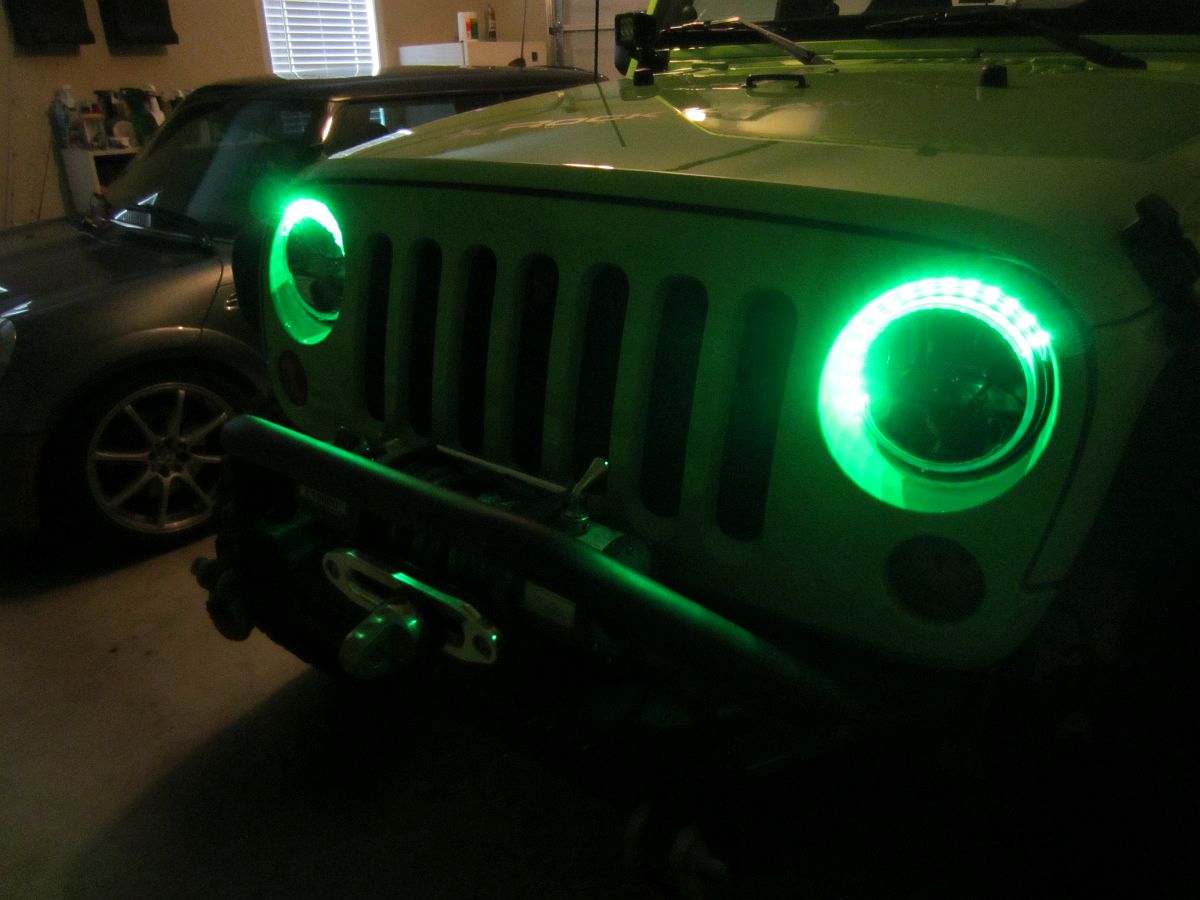
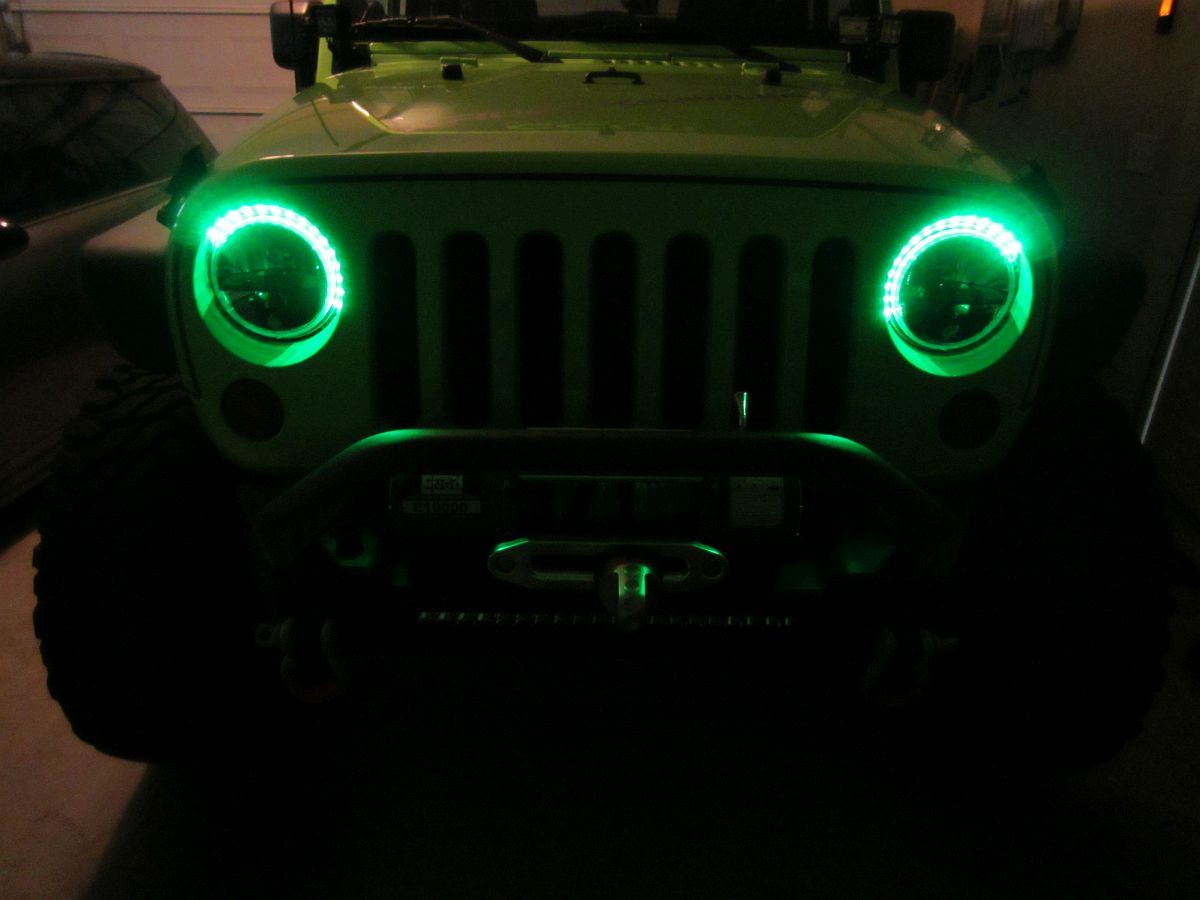
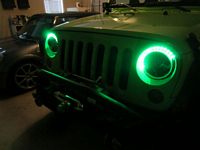
LED Angry Eye Halos made out of (2) 30cm flexible strip lights from Amazon. Clean paint so no grease/dirt, apply strip light to headlight hole edge in grill, connect wiring. I had some wiring and a unused switch from the Rigid lights so cost was ~$7.

My wife is VERY happy with the Jeep as am I, so we started looking for extended warranties. Mopar/Jeep offers a Maxcare Lifetime Warranty option which works out to last until the repairs exceed the value of the Jeep- not REALLY lifetime but good enough for me. We had originally contacted Mopar directly but found a forum vendor to be about $2000 cheaper for the same warranty plan. If you need a Mopar warranty inquire with Clay Robbins via email, he is the owner at Robbins Motors (formerly GM/VP at Zeller Motors) and was very responsive to emails and quick to process our application and deliver the warranty.

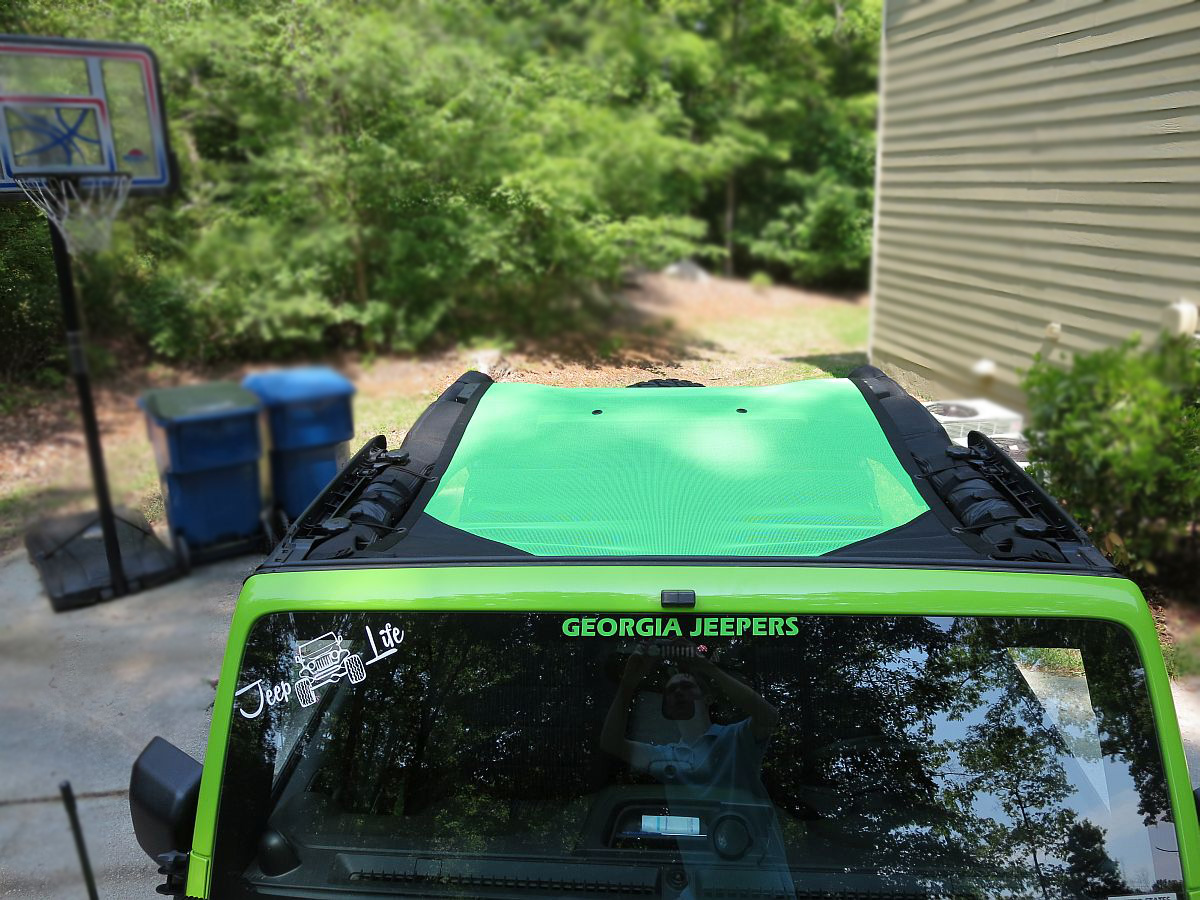
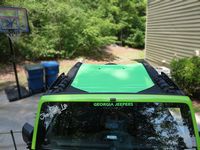
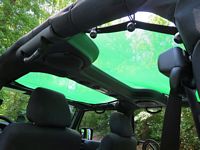
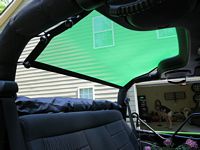
Happy Mothers Day 2015! Jeep polished in 2 stages and sealed (Adam's Polishes) and new full GearShade installed (installation instructions HERE).....coupon code 4WHLNDLN for 15% off
I chose the GearShade over the SpiderShade because I liked the zipper pockets up front, seems like both are good products though. The color not an exact match but a least it complements the Gecko color. Driving today in Atlanta humidity with 90 degree heat, it seemed to reduce heat from the sun a LOT- GREAT mod.


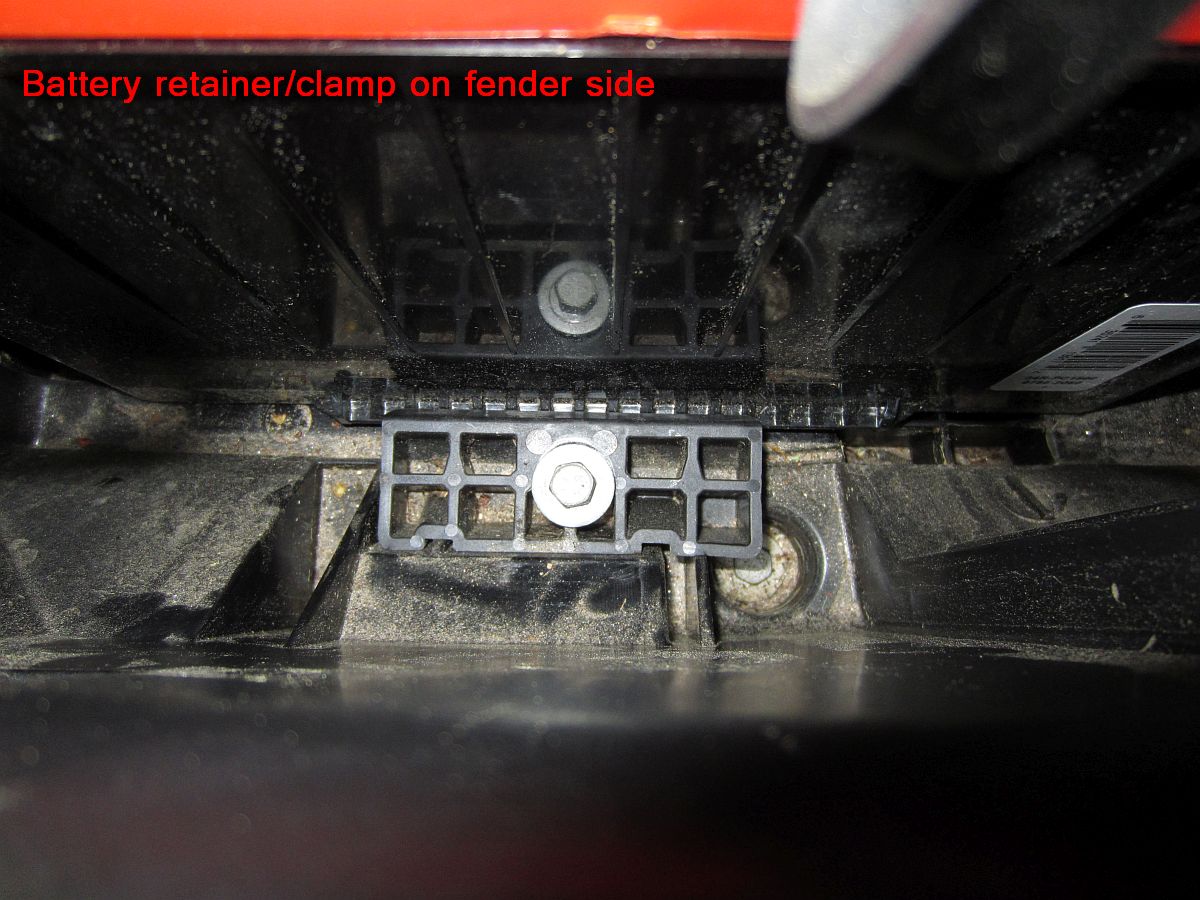
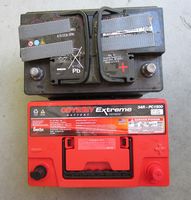
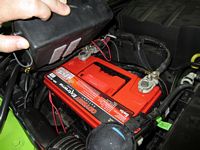
And the crap OE battery finally died. Rather than have my wife stranded at some point in the future, I opted against a free warranty replacement and bought an Odyssey 34R PC1500T from Summit Racing, a stop on my way in from the airport. The R is for reversed terminals, this battery is a direct replacement for the OE, plug and play, but unlike the OE will last a long time......I have not been able to kill an Odyssey battery yet, even my first which was 8 years old and moved from car to car until the last car was sold, might still be in service.
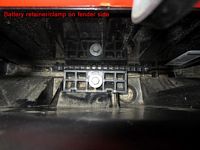
Battery is heavy, ~50 lbs, so having a helper hold wiring out of the way is a big help. Remove the bolt holding the retainer on the fender side of the battery, remove the terminals (I think all were removed using a 10mm socket), and SWAP
Specifications HERE, Owner's Manual HERE, Technical Manual HERE, Ultimizer Charger Manual HERE, Warranty Information HERE.

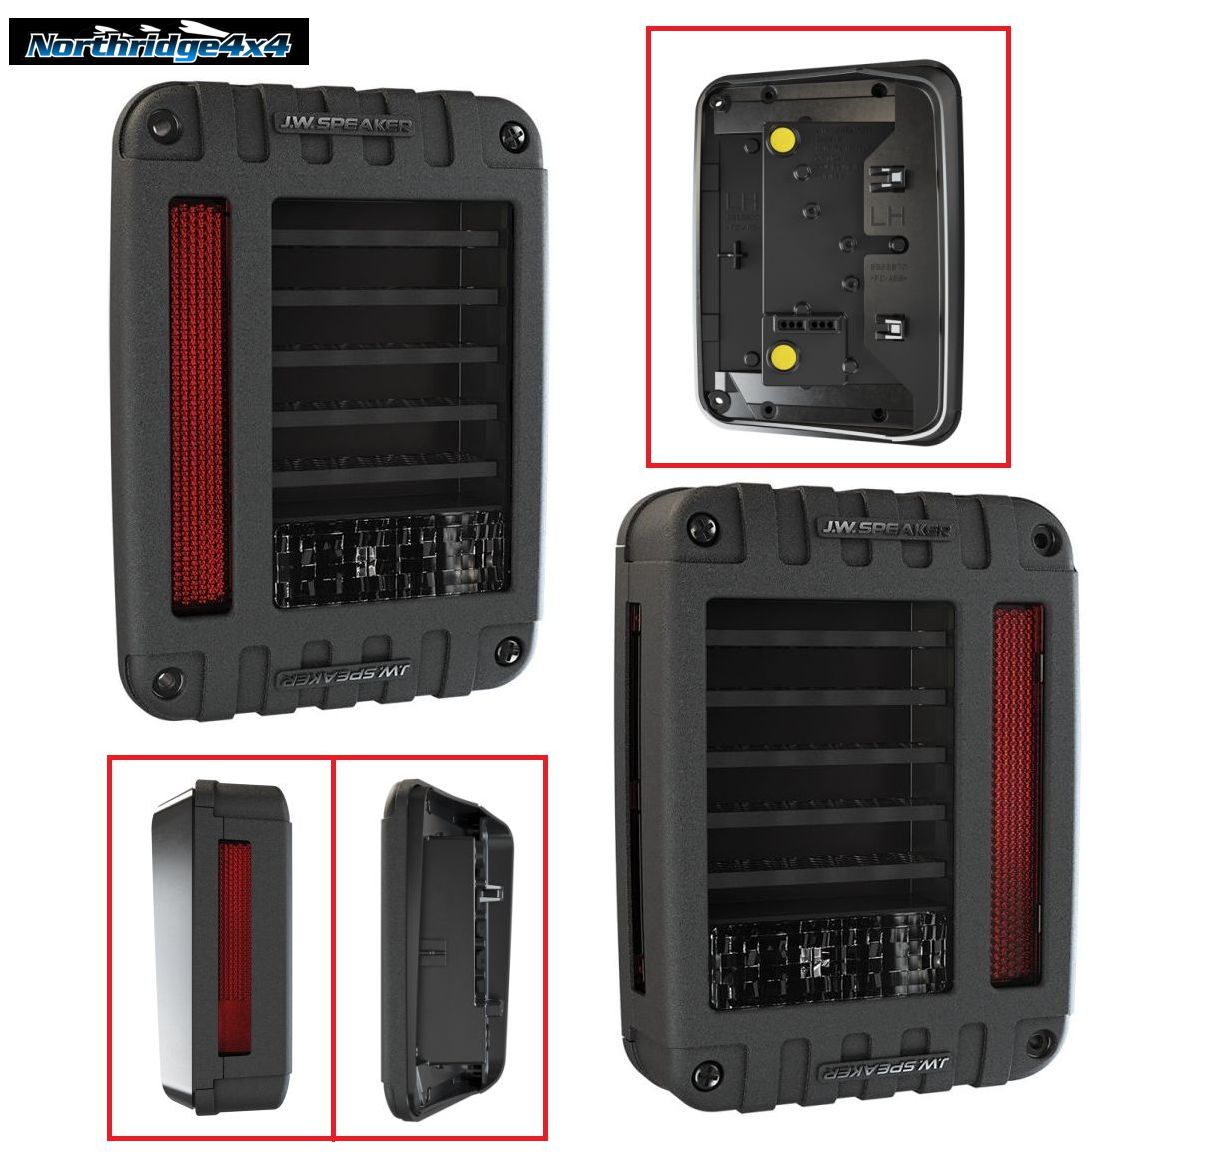
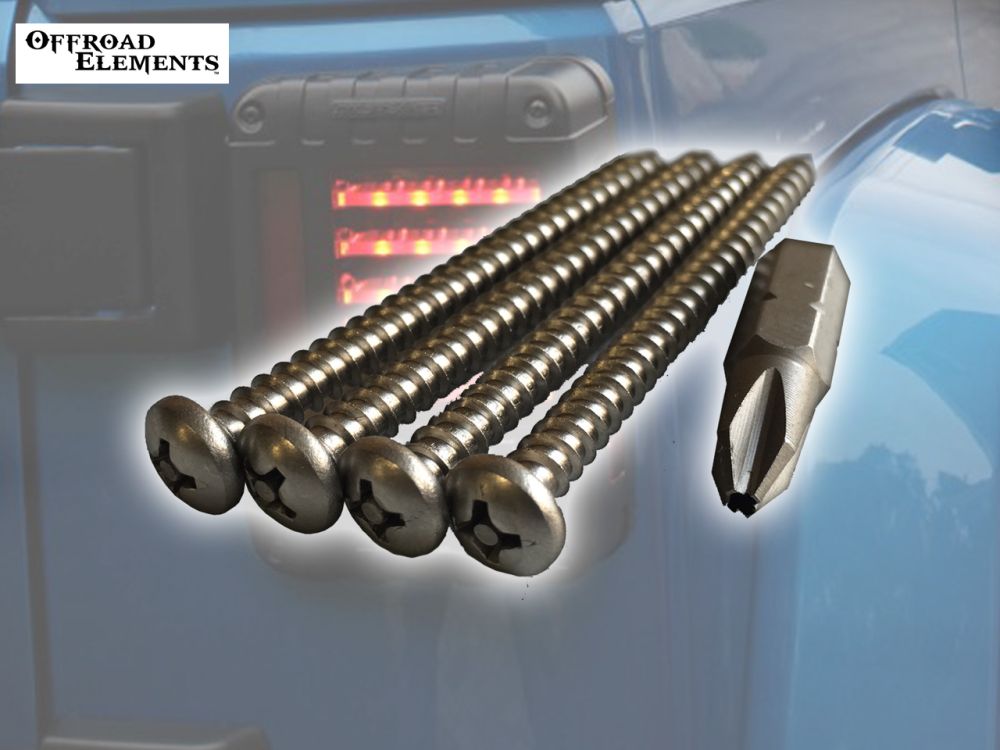
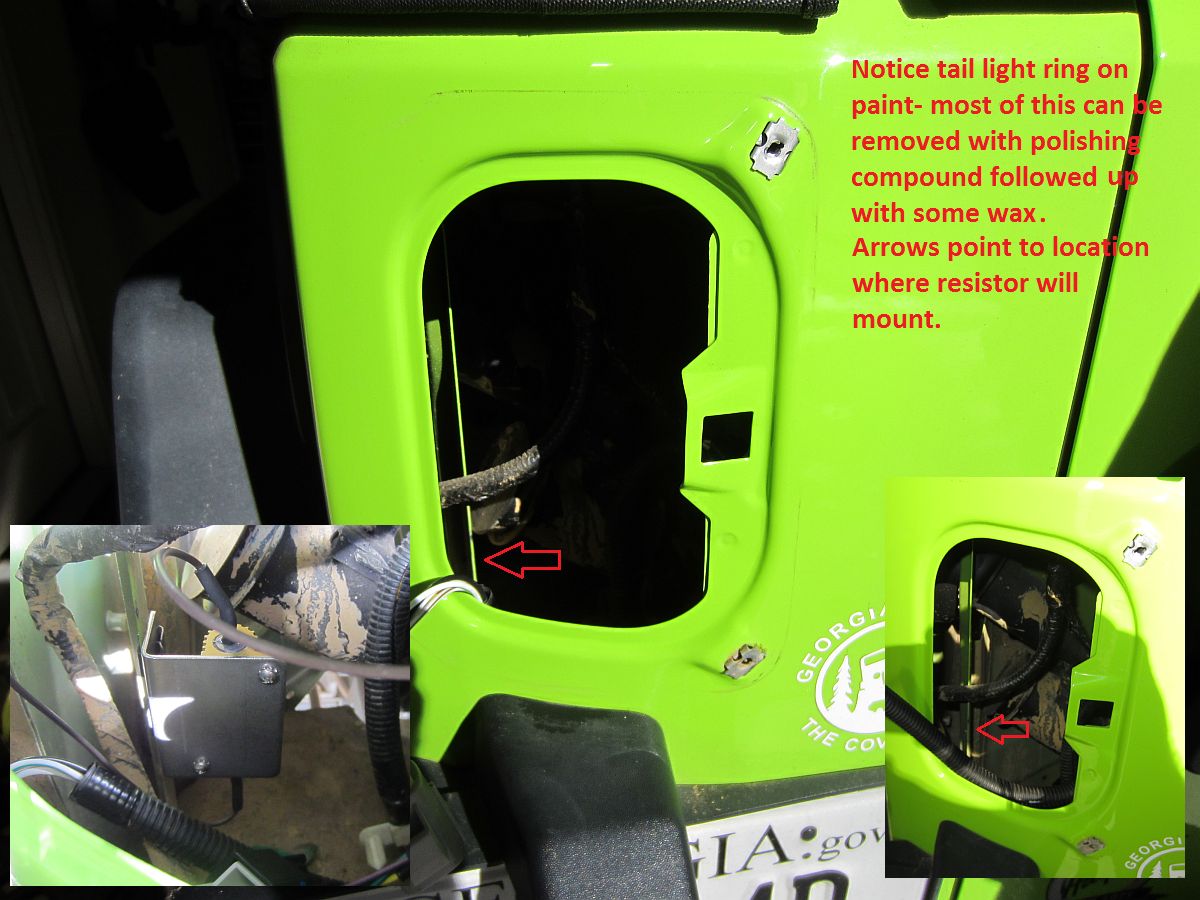
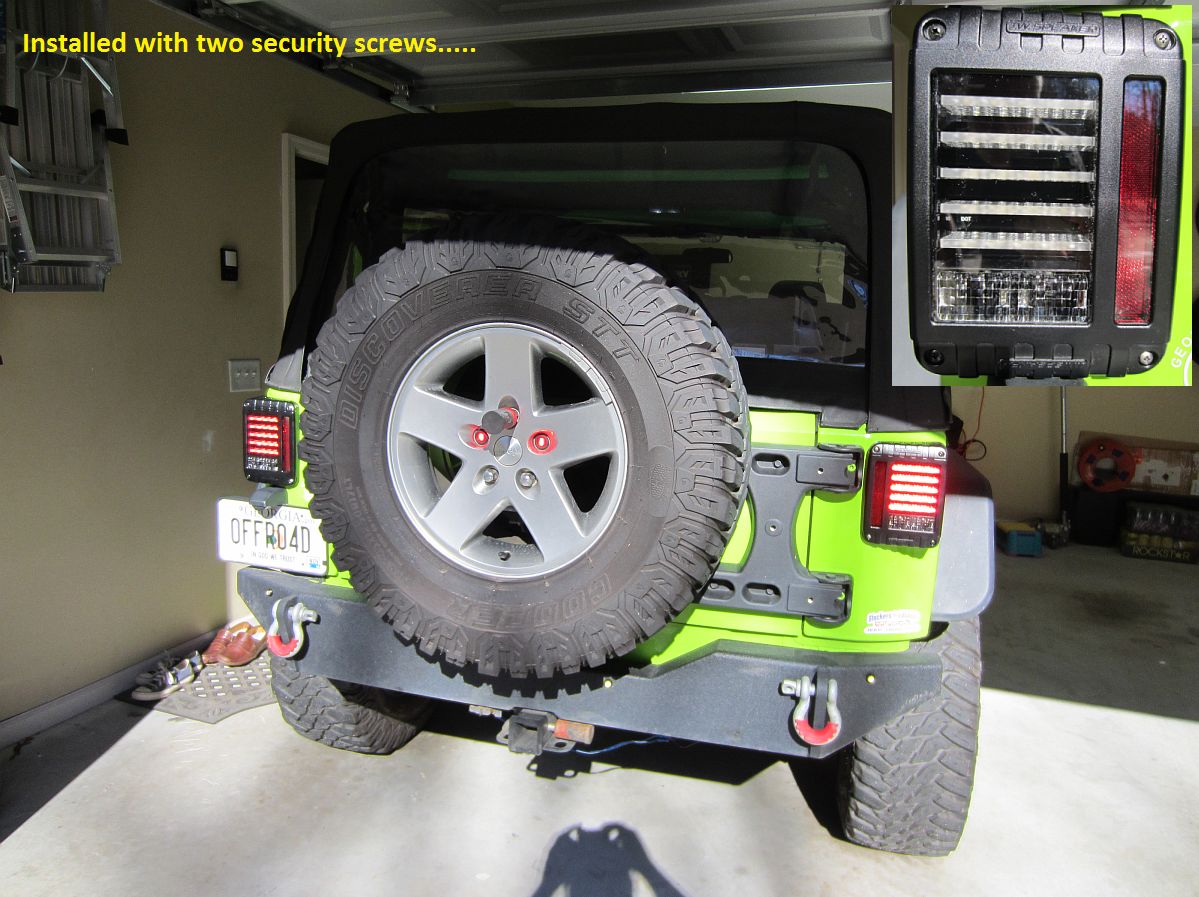
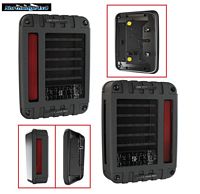
Wrangler Forum thread HERE prompted me to do a little research and eventually order the J.W. Speaker LED Tail Lights (279 J Series) from Northridge 4x4 - call them for best price. Installing these with something other than the OE Phillips head screws made sense, I don't want someone to shop for parts on my Jeep so I ordered the OffRoad Elements Anti Theft Tail Light Security Screw Kit- as noted HERE you will need to call them and ask for USPS shipping since that is not an option listed on their website but is much cheaper. I also ordered some generic rock lights from an eBay seller (Amazon turned out to be significantly cheaper.....next time) to install in the rear bumper and wire to the reverse lights, going from the bright LEDs I installed in the stock housing back to near-OE illumination was a no-go for us.
J.W. Speaker 679 J Installation Instructions HERE, Specifications/Data Sheet HERE, Warranty (Limited Lifetime) Information HERE.


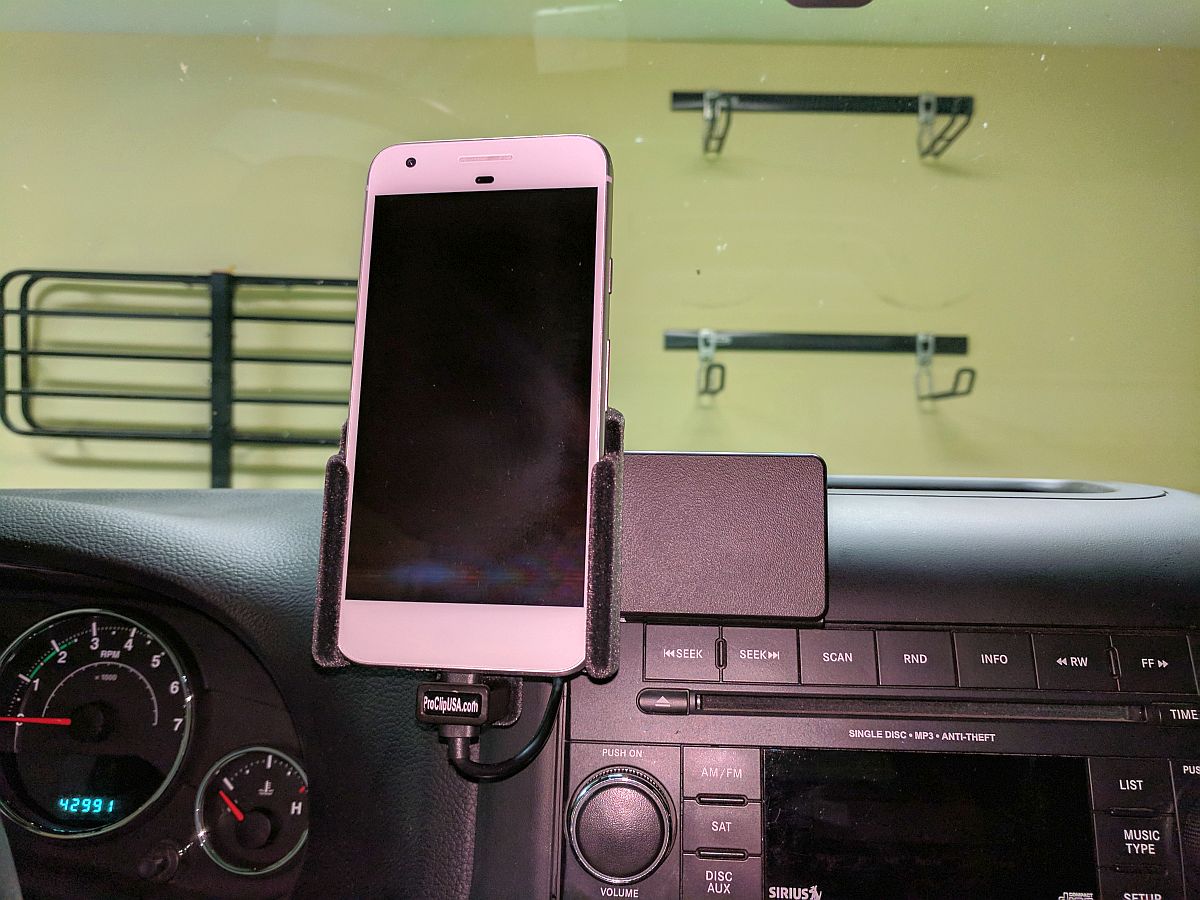
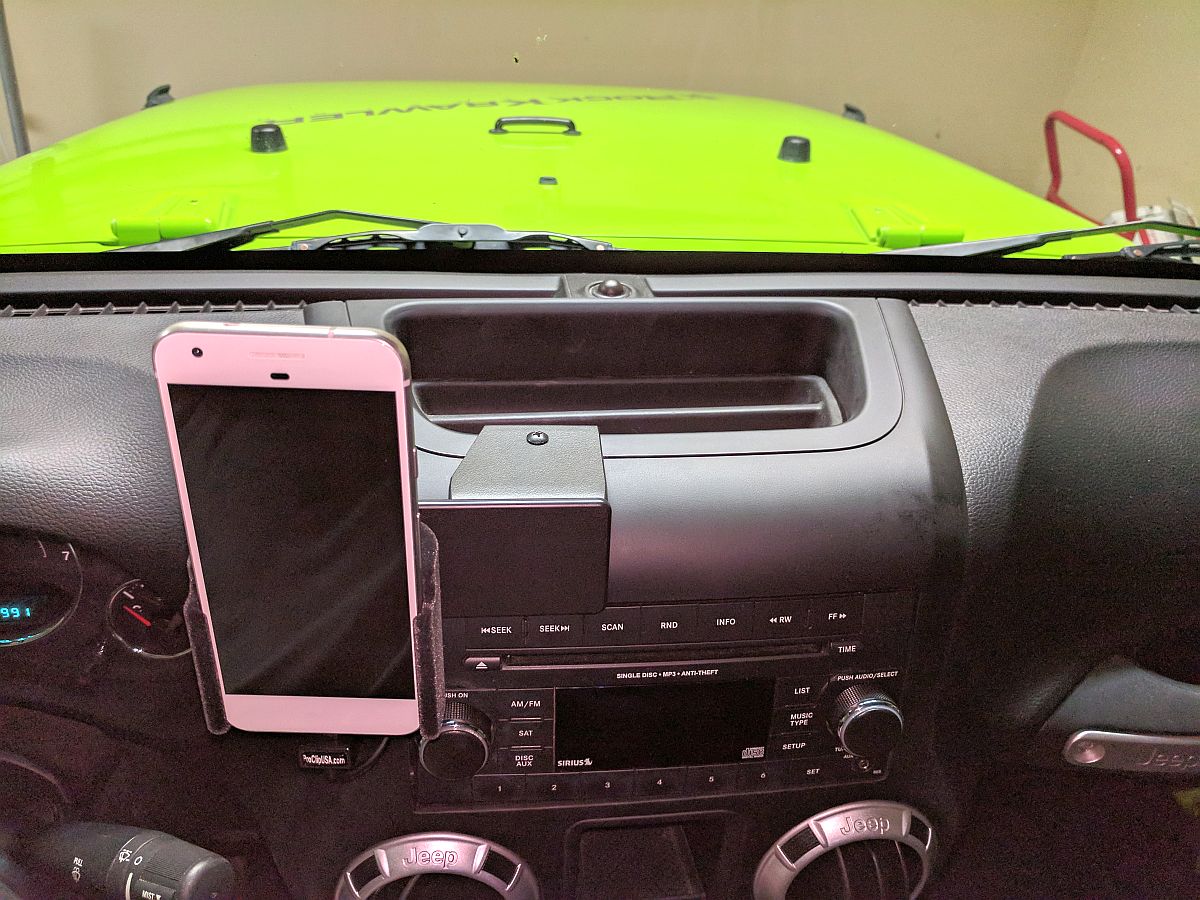
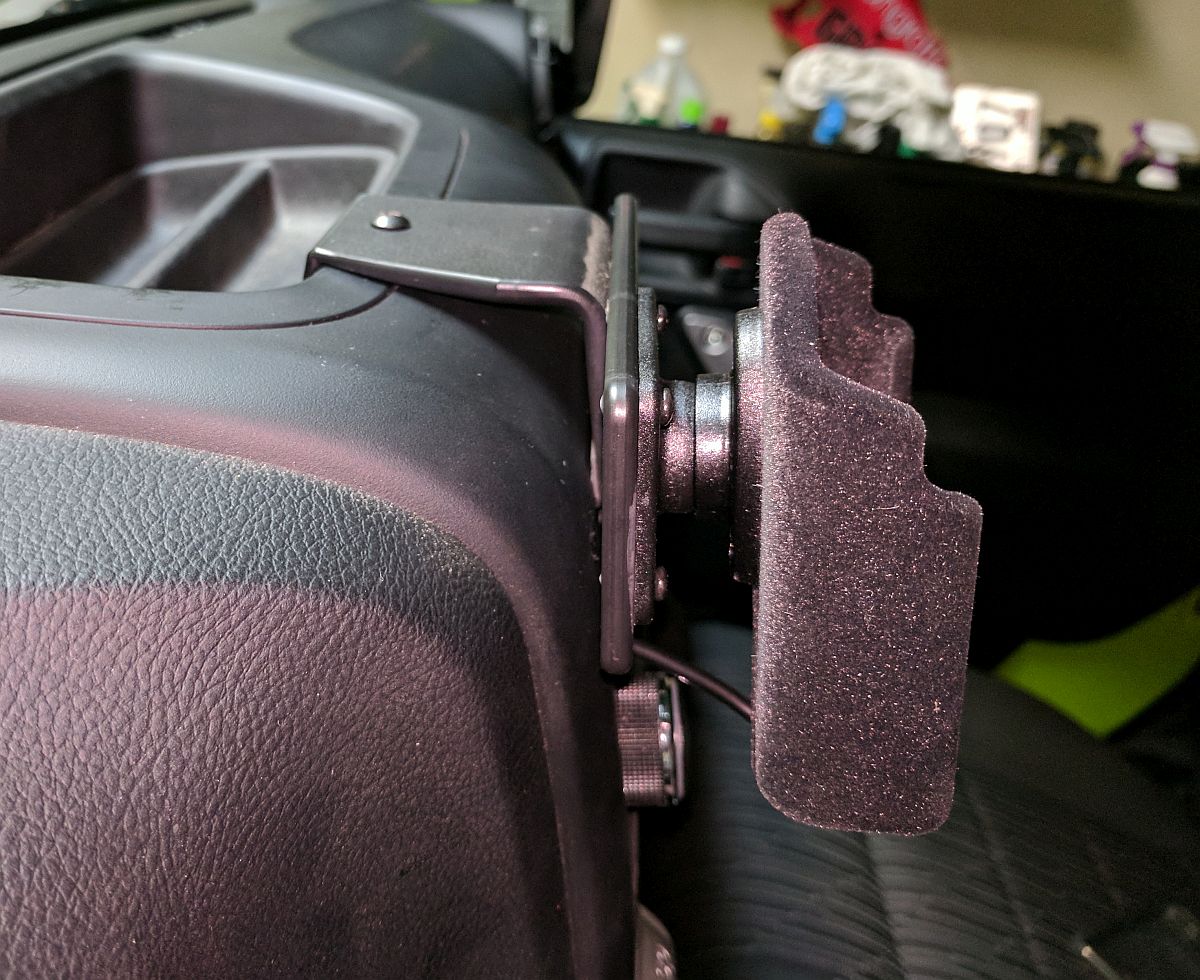
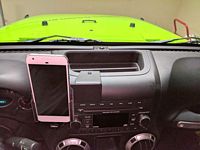
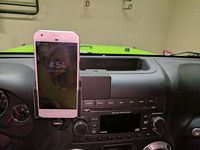
ProClip Mount and Phone Dock hardwired and installed- Mount Installation Instructions HERE and Dock Installation Instructions HERE. I did use my Dremel to cut a small notch/half circle in the dash next to the upper radio corner so the wire had a place to pass through. I also used provided taps to tie into the aux power/lighter socket wiring (this requires dash removal, 4 screws and clips (P/N 6510407AB)- don't lose them).

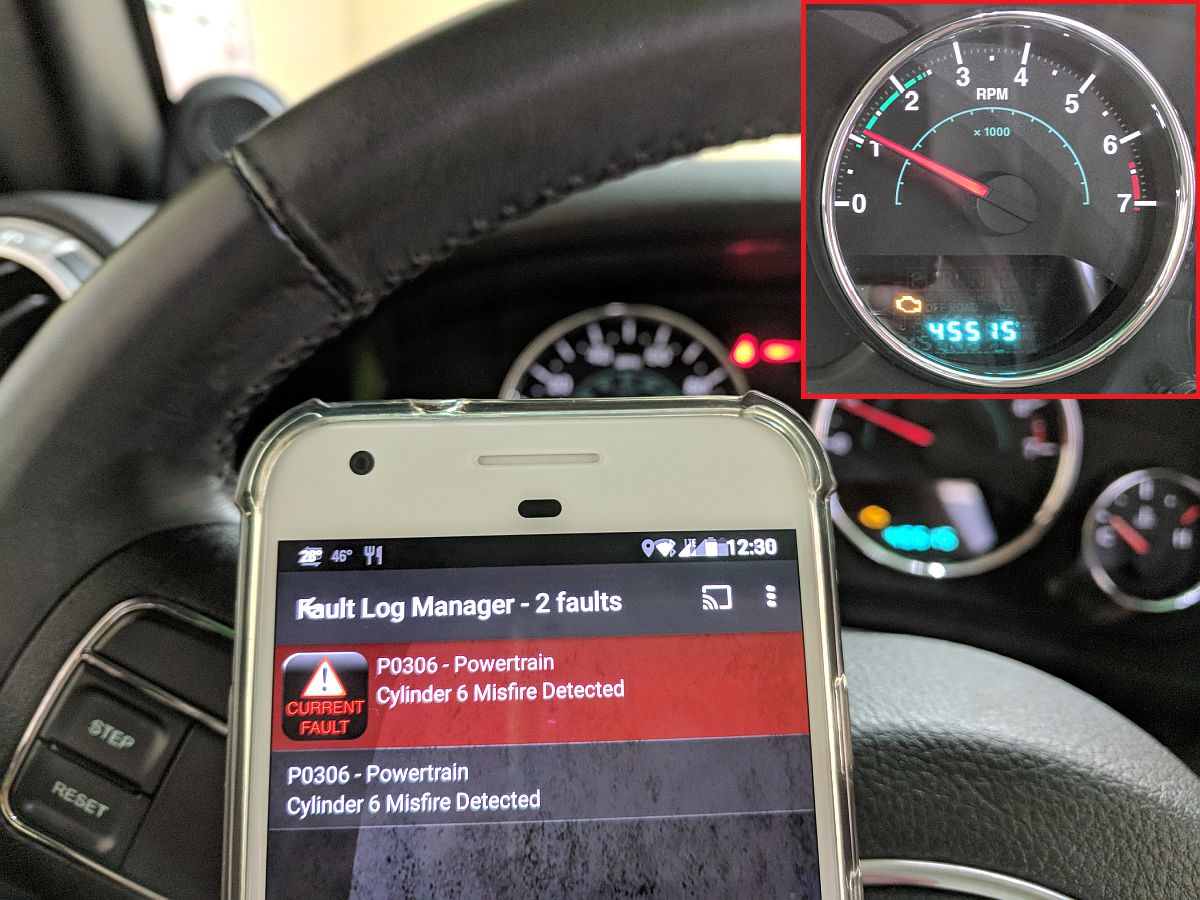
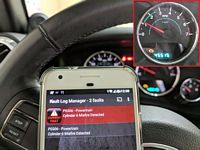
The dreaded P0306 MIL started showing up over the summer, the dealership told us to keep driving it until the MIL would come up consistently after being cleared.......so a few months later we are at that point. Be prepared for a hassle, they get confused if you have any other factory extended warranty (i.e. lifetime maxcare).....it also takes a few weeks for the head to come in post diagnosis. This should be covered under the X56 extended warranty for the left side cylinder head and TSB 09-002-14 (revised TSB 09-002-14 REV A).
After 6 years of ownership and making a lot of new friends in the Jeep world we decided.....to stay in the Jeep world but change to something more road oriented. After many mods and offroad excursions, we just were not REALLY using the Jeep a lot anymore, 99% of the time it was on pavement. So the Jeep I built for my wife was traded in on a 2018 Grand Cherokee Trailhawk Diesel.....we'll have to see what the future holds :-)
Oil Analysis performed by Blackstone Laboratories
Engine Oil Analysis at 988 miles- Factory Engine Oil
No Oil Sample Taken at 3510 miles- Pennzoil Ultra 5w30
No Oil Sample Taken at 11211 miles- Pennzoil Ultra 5w30
No Oil Sample Taken at 18983 miles- Quaker State Ultimate Durability 5w30
Engine Oil Analysis at 27059 miles- Quaker State Ultimate Durability 5w30
No Oil Sample Taken at 34691 miles- Pennzoil Platinum 5w30
No Oil Sample Taken at 42213 miles- Pennzoil Platinum 5w30
No Oil Sample Taken at 50581 miles- Pennzoil Platinum 5w30
Jeep Wrangler Reviews:
Edmunds: 2012 Jeep Wrangler Long-Term Road Tests
4Wheel and Offroad: 2012 Jeep Wrangler JK First Drive
JP Magazine: 2012 Jeep Wrangler Pentastar V6 First Drive
Motor Trend: 2012 Jeep Wrangler First Test
Car & Driver: 2012 Jeep Wrangler First Drive Review
Automobile: 2012 Jeep Wrangler Rubicon DrivenReview
Popular Mechanics: 2012 Jeep Wrangler Test Drive
Truth About Cars: 2012 Jeep Wrangler Rubicon Review
Field & Stream: 2012 Jeep Wrangler Rubicon Review
Truck Trend: 2012 Jeep Wrangler First Drive
Wrangler Forum: 2012 Jeep Wrangler Owners Review
The Fast Lane CAR: 2012 Jeep Wrangler Pentastar Technical Demo and Review
Jeep Wrangler Video: *High Speed Connection Recommended*
Autobiography of a Jeep (1943)
Winding Road: 2012 Jeep Wrangler Rubicon Quick Drive
Motor Trend: 2012 Jeep Wrangler Rubicon First Test
The Auto Channel: 2012 Jeep Wrangler Rubicon
ItaliaspeedTV: New Pentastar V6 Production at Michigan Plant
PLANMAN explains Death Wobble Diagnosis and Inspection Jeep JK Wrangler- Part 1
PLANMAN explains Death Wobble Diagnosis and Inspection Jeep JK Wrangler- Part 2
Jeep Wrangler Documents/Files:
2012 Jeep Wrangler Sales Brochure
2012 Jeep Wrangler Owner's Manual
Check for FCA Recalls/Campaigns by VIN
Jeep Wrangler JK Body Repair Manual.pdf
Autoweek: Chrysler/Jeep Pentastar Issue
Allpar: Pentastar Head Issue in Depth
Allpar: An Update on Rare Pentastar Problem
Charger Forums: 3.6L Pentastar V6 Cylinder 2 Failures
Technical Service Bulletin (TSB): 09-002-14 / X56 Warranty Extension - Left Cylinder Head Issue - MIL P0300, P0302, P0304 or P0306 (revised TSB 09-002-14 REV A)
Safety Recall S40: AIRBAG CLOCKSPRING
Jeep Wrangler DIY Guides/Installation Instructions:

BillsWebSpace: Jeep Wrangler JK Pentastar 3.6L Oil Change
BillsWebSpace: Jeep Wrangler JK Radar Detector Mounting and Wiring
BillsWebSpace: Jeep Wrangler JK Homelink Installation
BillsWebSpace: Jeep Wrangler JK Ace Bumper and Warn Zeon Winch Installation with Remote Cutoff
BillsWebSpace: Jeep Wrangler JK Armor and Transmission/Transfer Case/Differential Fluid Change
BillsWebSpace: Jeep Wrangler JK Rugged Ridge Tow Hitch and Wiring Harness Installation
BillsWebSpace: Jeep Wrangler JK aFe Exhaust Installation
BillsWebSpace: Jeep Wrangler JK Differential Breather Extensions
BillsWebSpace: Jeep Wrangler JK Rock Krawler 2.5" Installation
BillsWebSpace: Jeep Wrangler JK Ball Joints and Axle Tube Seals
Jeep Wrangler JK Water Leak Diagnosis and Repair
Jeep Wrangler JK Water Leak TSB
How to fold The Windshield of a Jeep Wrangler JK
2011 / 2012 Jeep Wrangler Dash & Radio Removal
Stu Olsen: Jeep JK Ball Joint Replacement
Charles Bloyer: Cutting JK Fenders/Liners Front and Rear
Diagnosing Death Wobble and Fixing Non-DW Shimmies and Wobbles
Forums/Clubs/Blogs:


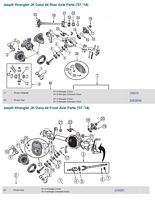
- Parts Diagrams and Wholesale Parts
- Parts Diagrams