


Click on thumbnails below for larger pics....
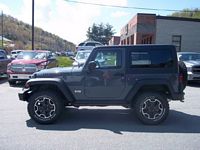
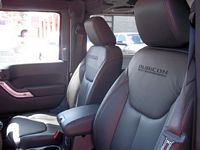
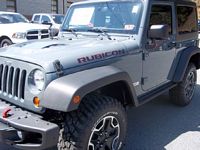
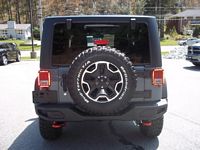
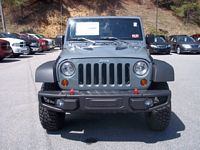
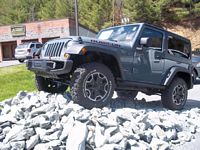
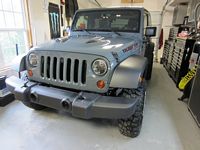
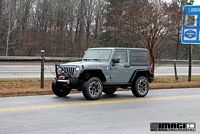
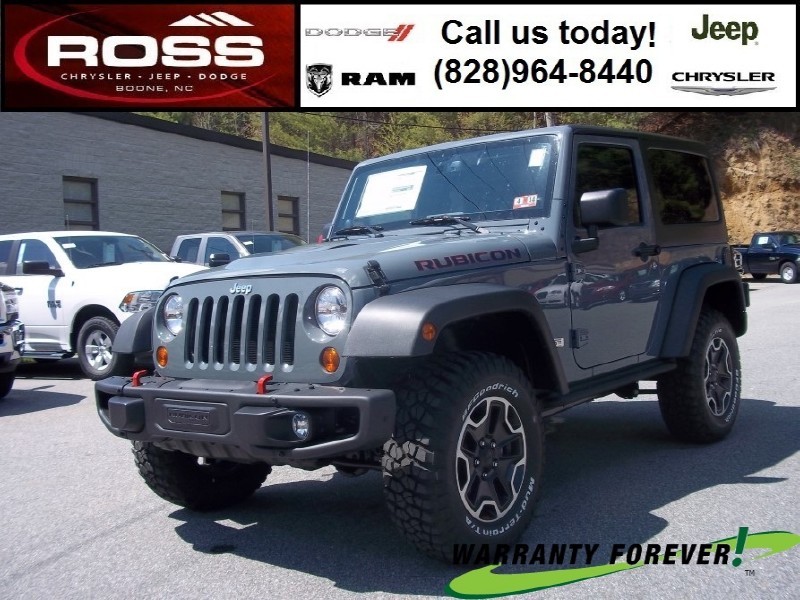
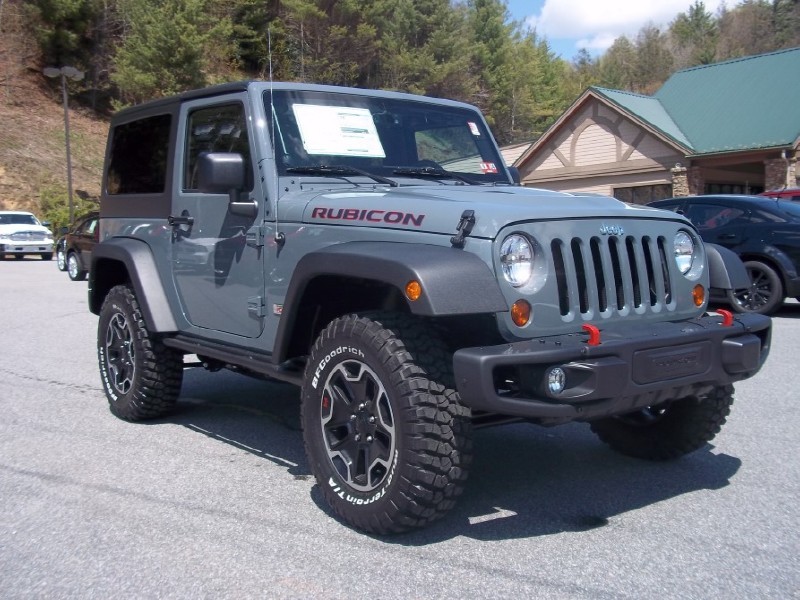
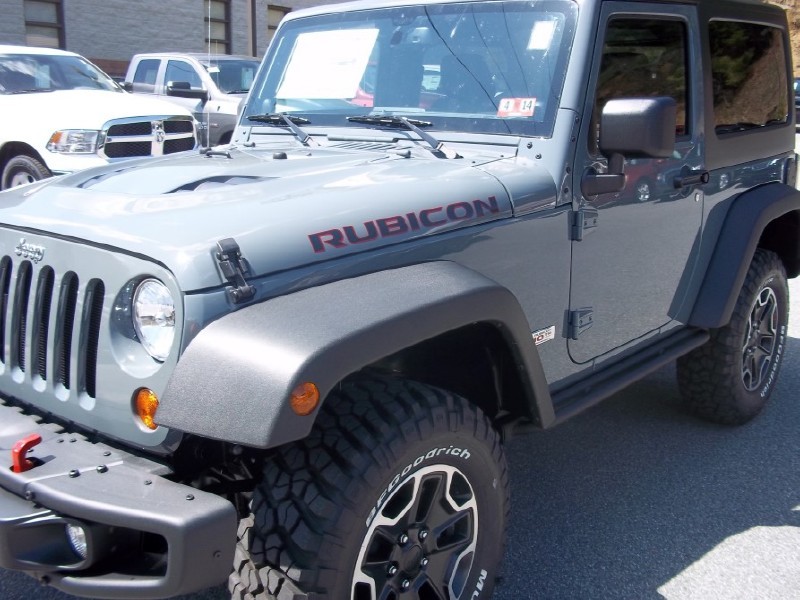
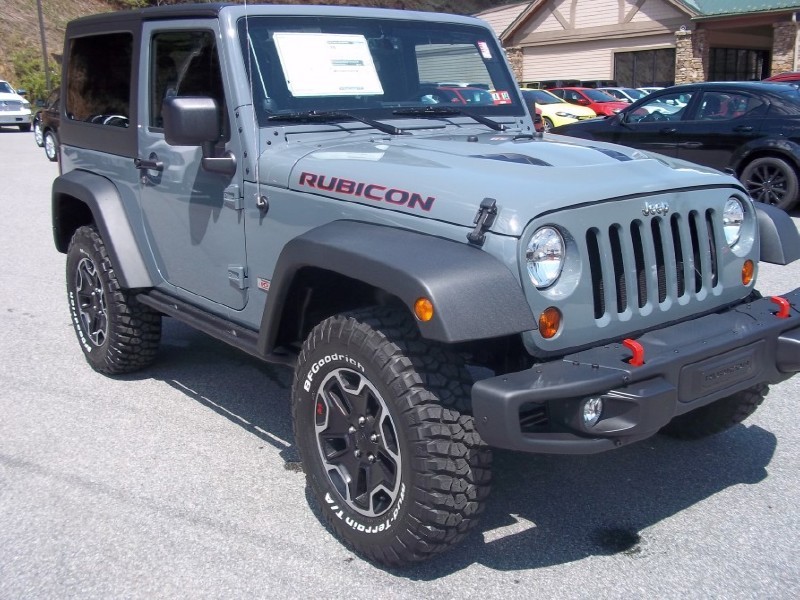
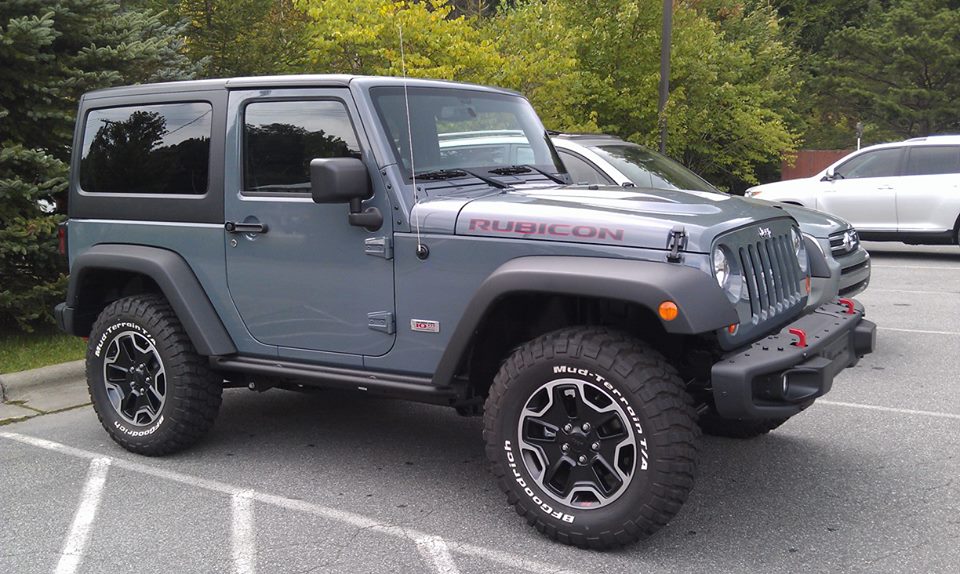
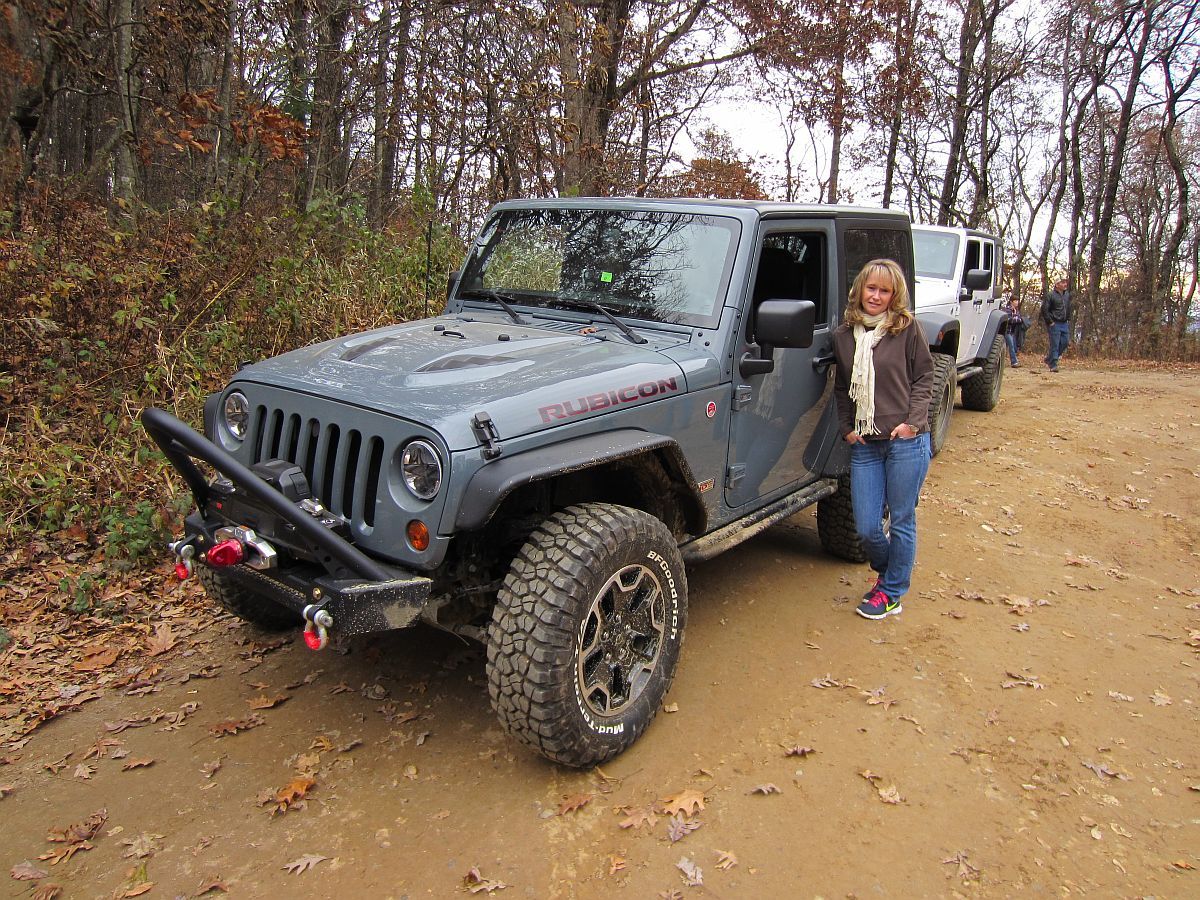
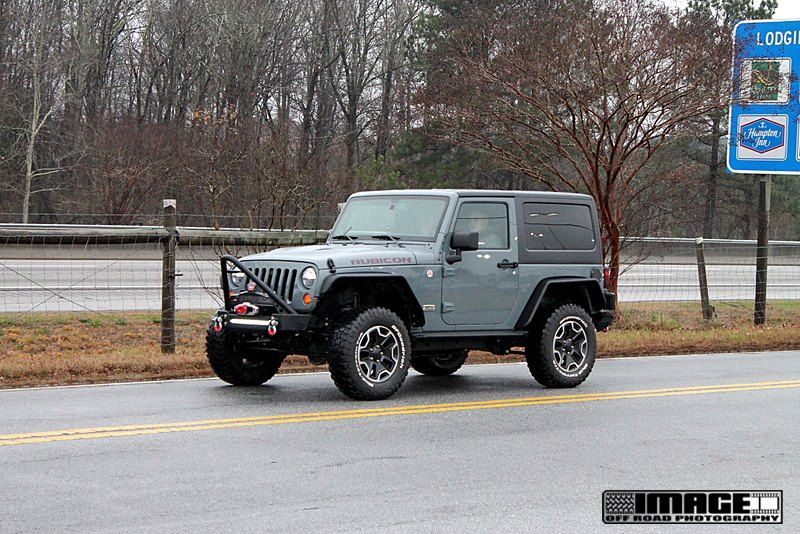
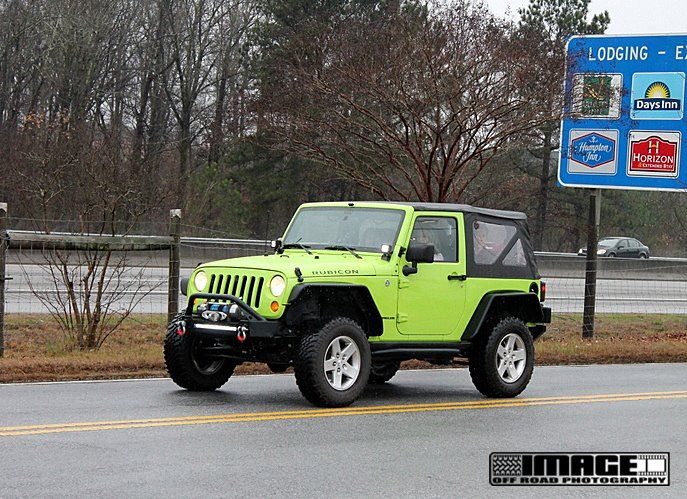
This 2013 Jeep Rubicon 10A was purchased from Brett Silver at Ross Jeep in Boone, NC. One of the easiest transactions ever and the deal was worked remotely. Fair deal on my trade, fair deal on the Jeep, and VERY easy to work with.
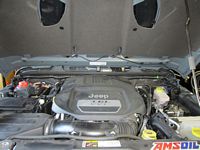
Originally introduced in 2012, the motor in this Jeep is the Pentastar 3.6L motor- more Pentastar engine information can be found HERE.
Dealer Ad is HERE (same pics below), window sticker is HERE, build sheet is HERE, MOPAR 10A Winch Info HERE.
A lot of the mods I did to our 2012 Rubicon will be repeated with this one but not necessarily listed or documented again on this page, you can reference the 2012 Rubicon page HERE.
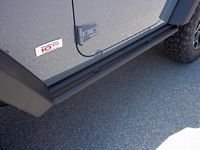
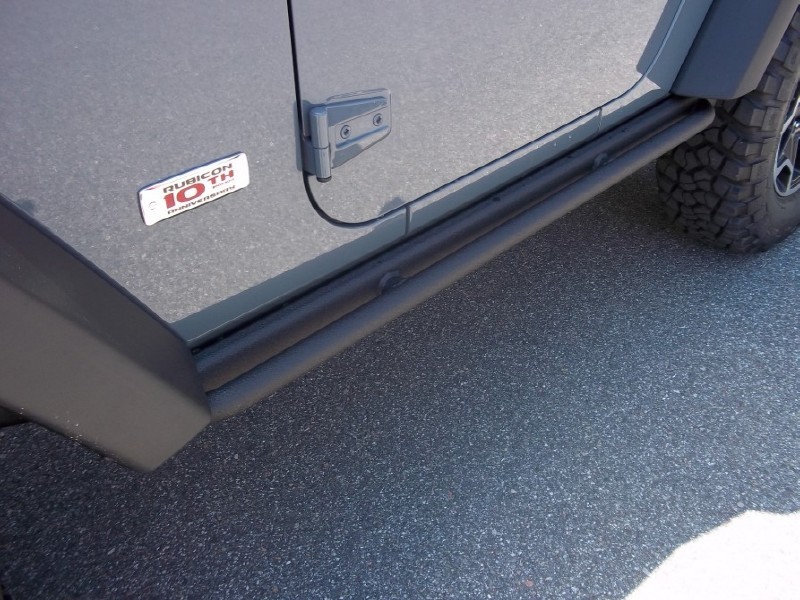
I debated for a while but decided to sell the 10A bumpers for something more substantial. I thought I wanted some weld on rock rails but am thinking now I will keep the factory Mopar Enhanced Rock Rails- write-up HERE (archived HERE) outlines the subtle differences between these and the Rubicon rock rails.


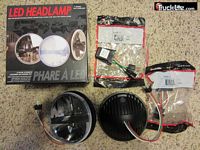
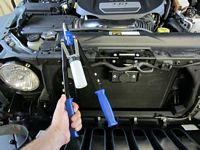
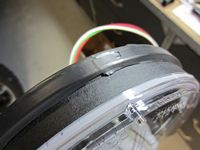
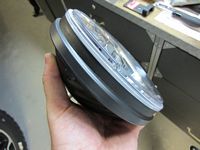
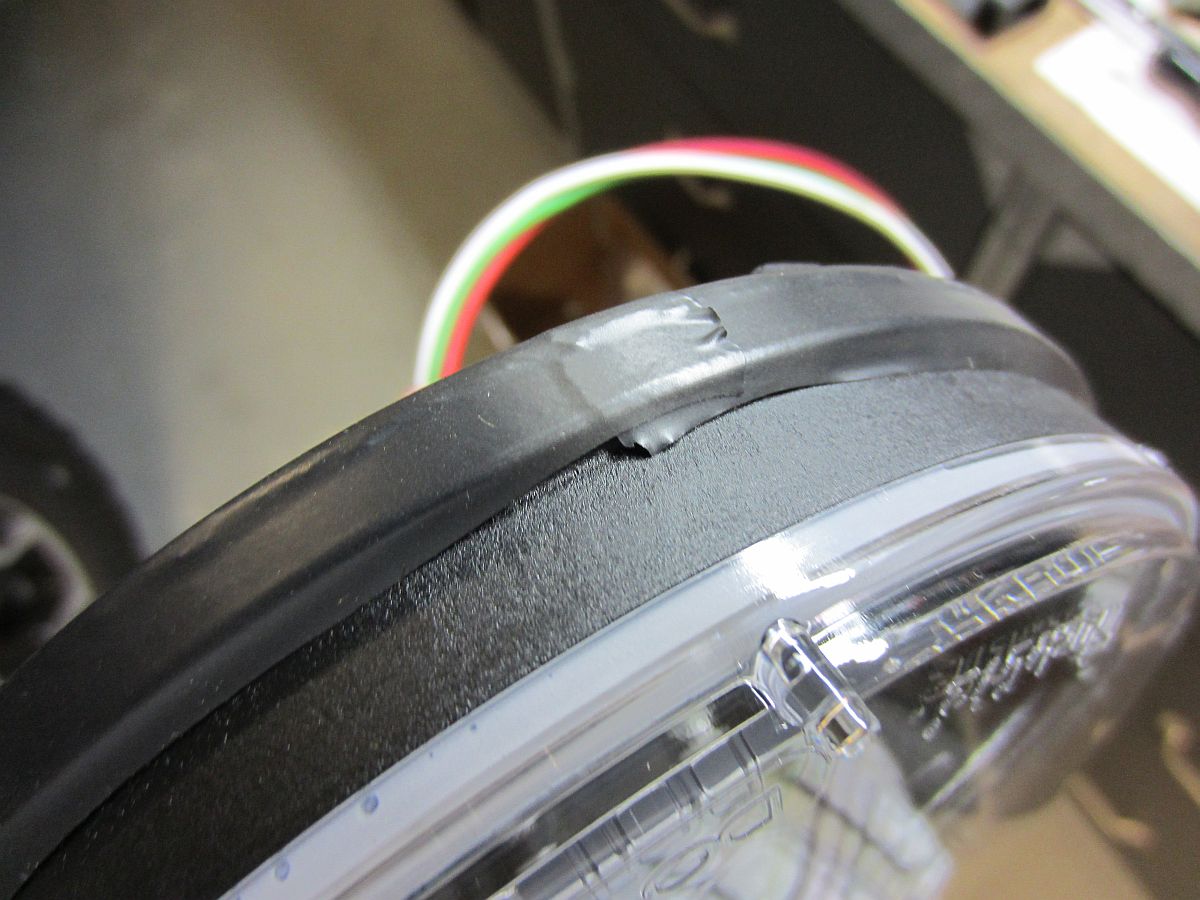
Truck-Lite 7" Round LED Headlights with Anti-Flicker PWM Adapter purchased from Northridge 4x4- Spec/Product sheet HERE.
The IPF headlights on the '12 were much better than OE but the price on LED lighting has come down a bit so I decided to upgrade the 10A with these. I did have to use electrical tape around the headlight to make it snug when bolted in, without this there is a small bit of play. For all else the pictures I took HERE when installing the IPF headlights on the 2012 are applicable.
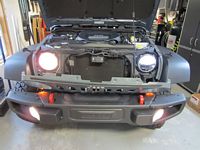
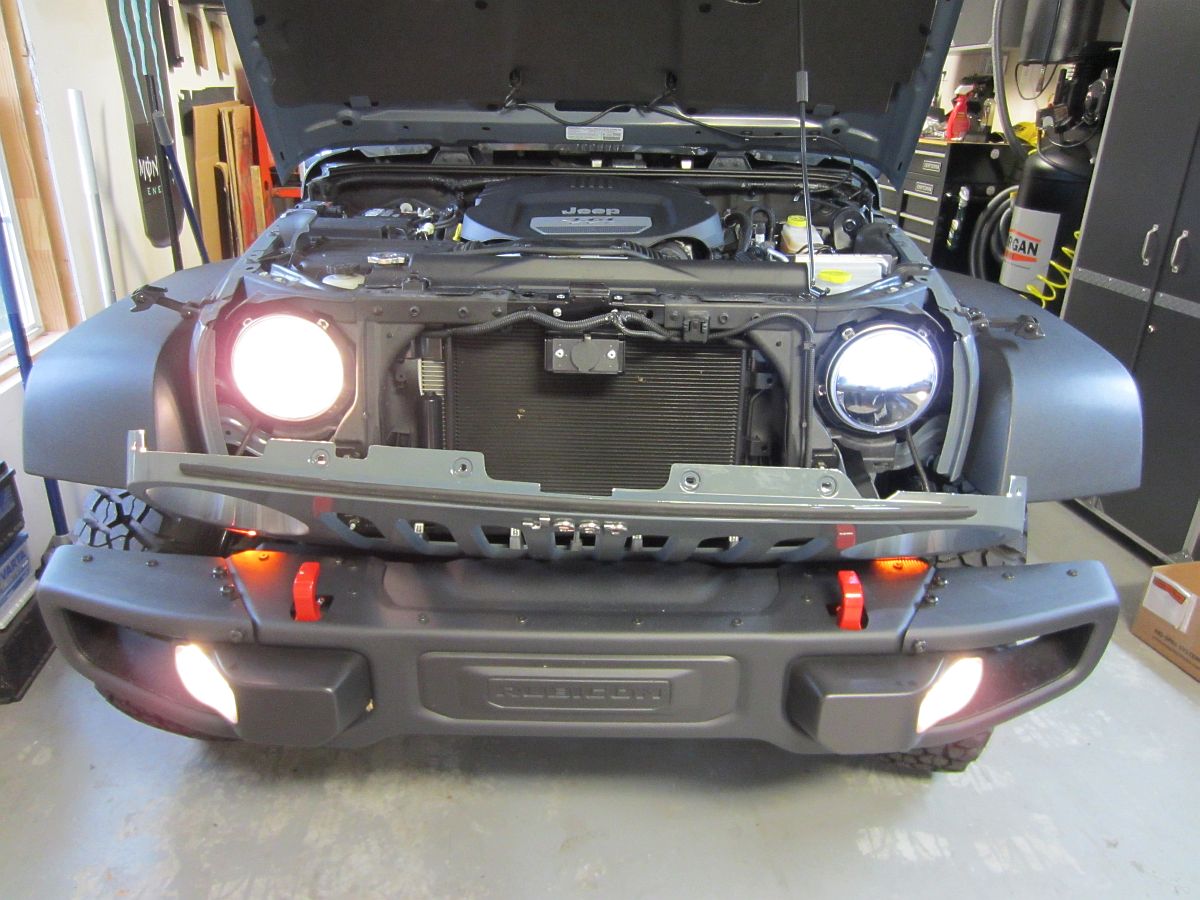
Results are great, wide dispersion of light and no flickering. A good unbiased review of various headlights that can be used in the JK can be found HERE.
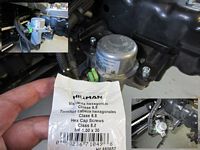
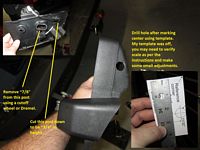
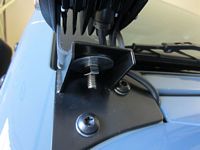
Also used the grill-off occasion to install the European MOPAR hood lock (P/N 82213051) ordered from AllMoparParts.com. I saved the supplied plastic rivets for later, the ones removed can be easily reused. The only place I found that had a hand riveter that would work with 1/4" rivets was Harbor Freight (P/N 66422)- caveat being that I could not get it to work with the Mopar rivets, I ended up using the 1/4" rivets that came with the riveter.
Hood lock installation instructions HERE.

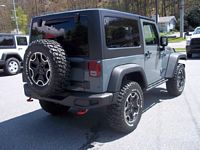
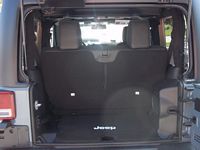
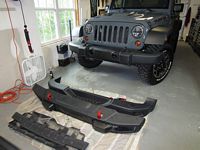
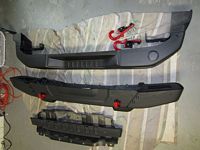
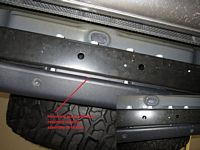
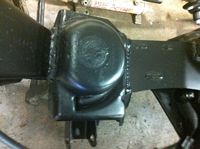
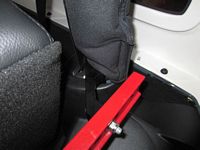
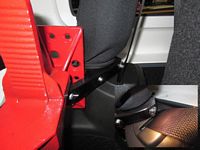
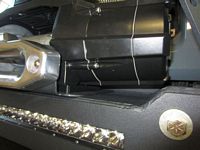
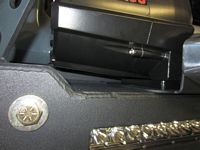
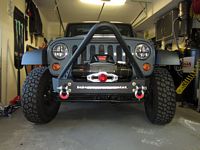
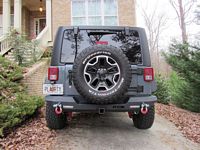
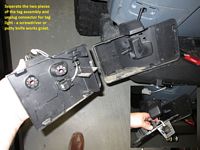
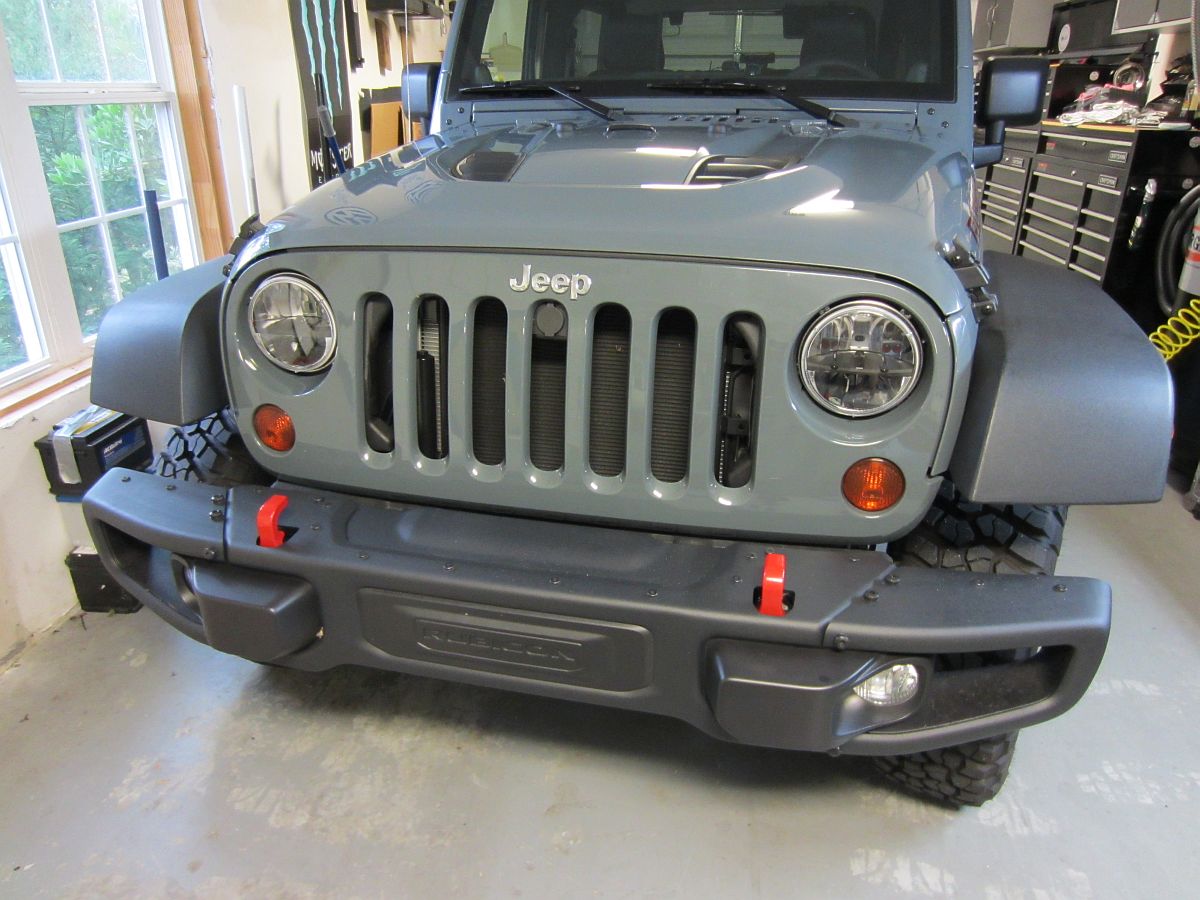
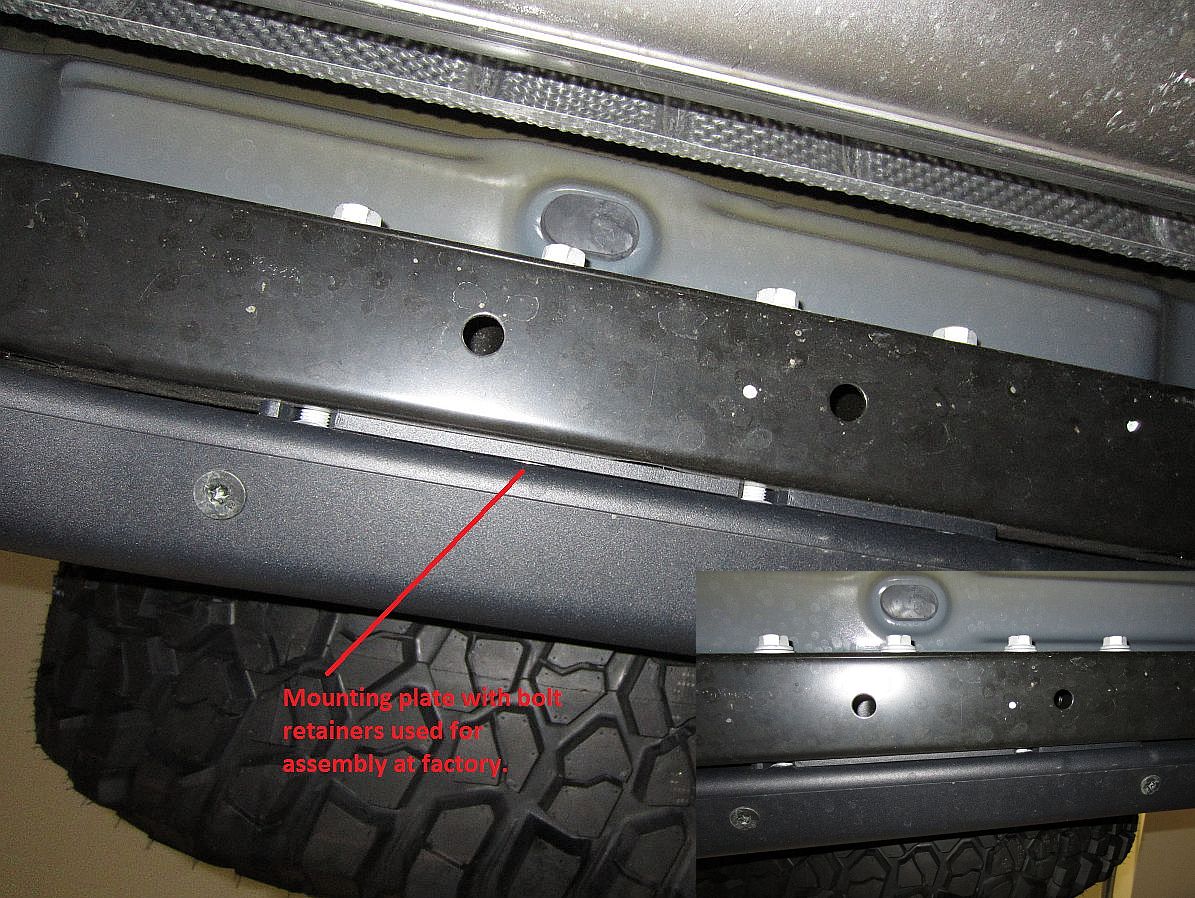
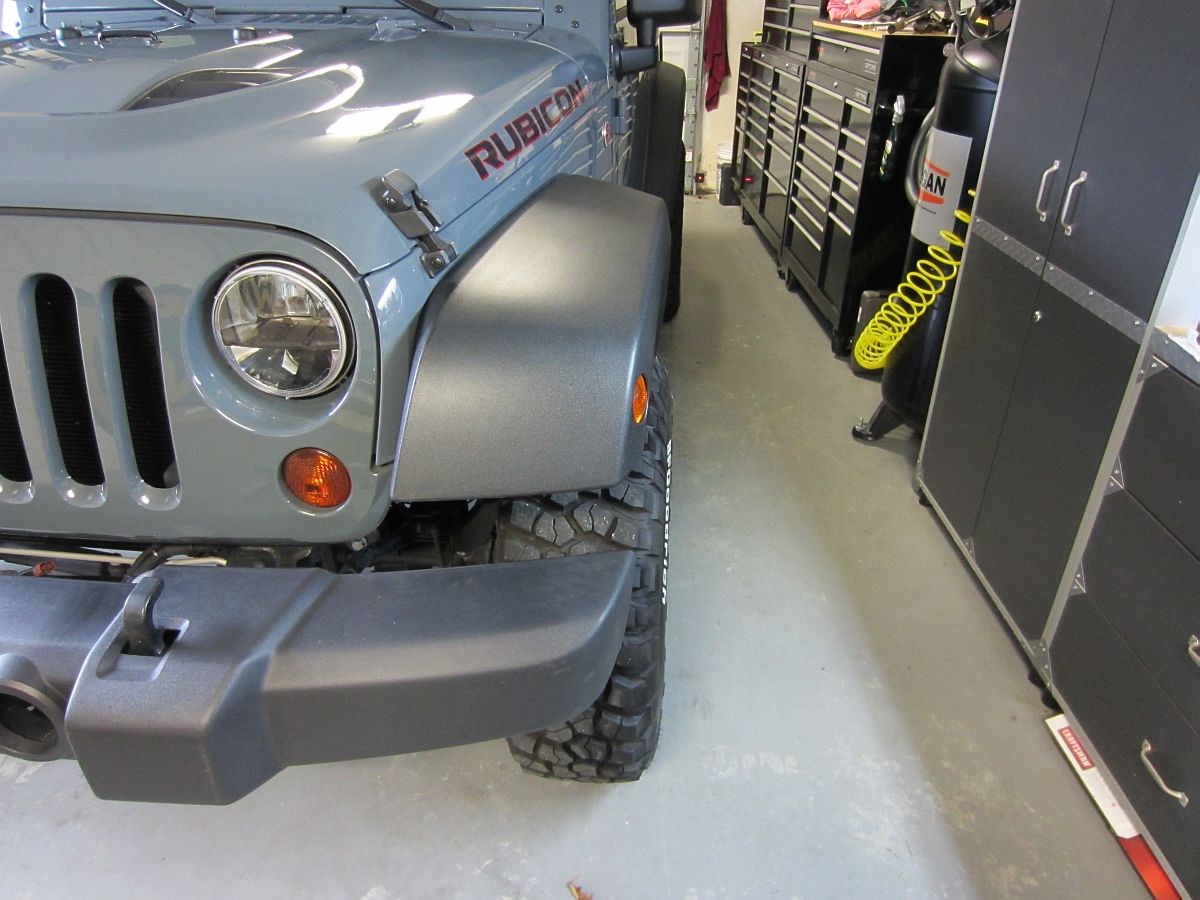
Shortly after bringing my 10A home, within a week, I decided to sell my 10A bumpers and hardware to another Jeep enthusiast so I could buy some ACE Engineering bumpers. The rear bumper mounts a little differently so I took some pics for the buyer. The Jeep looks sad with my wife's old OE front bumper but that will serve the purpose over the next few months while I wait.

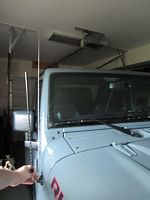
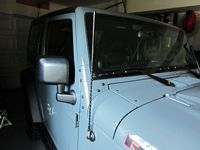
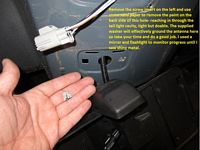
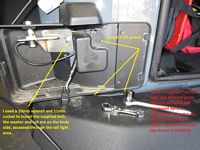
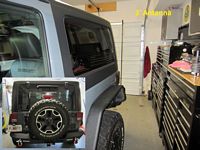
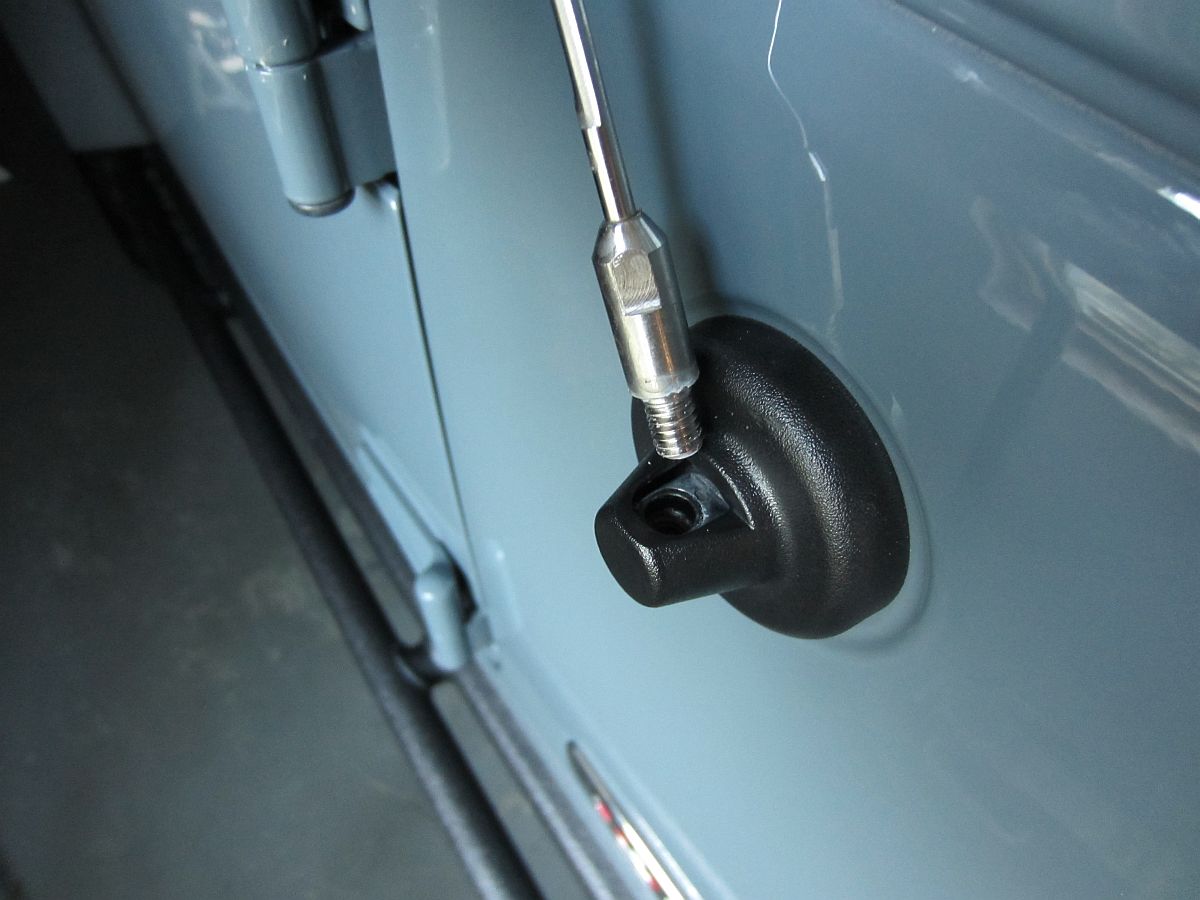
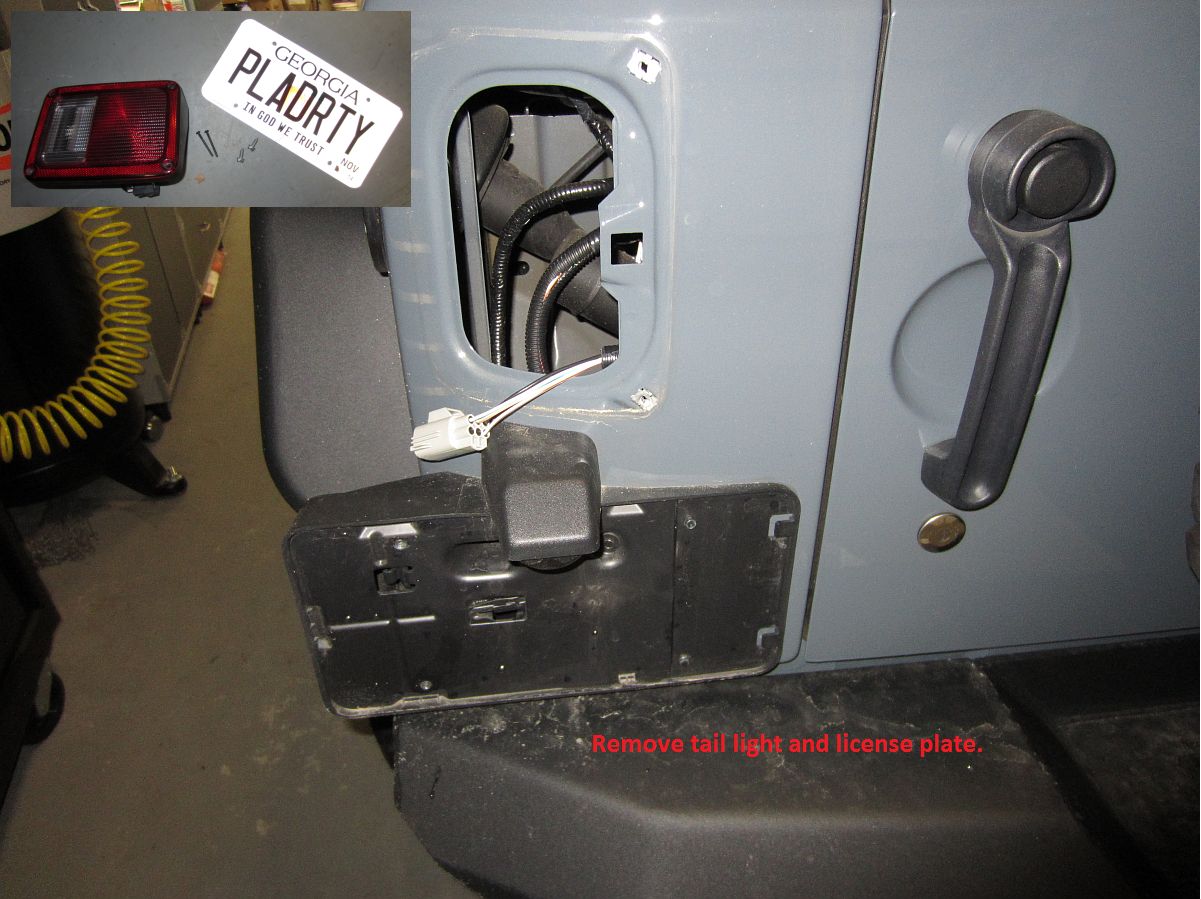
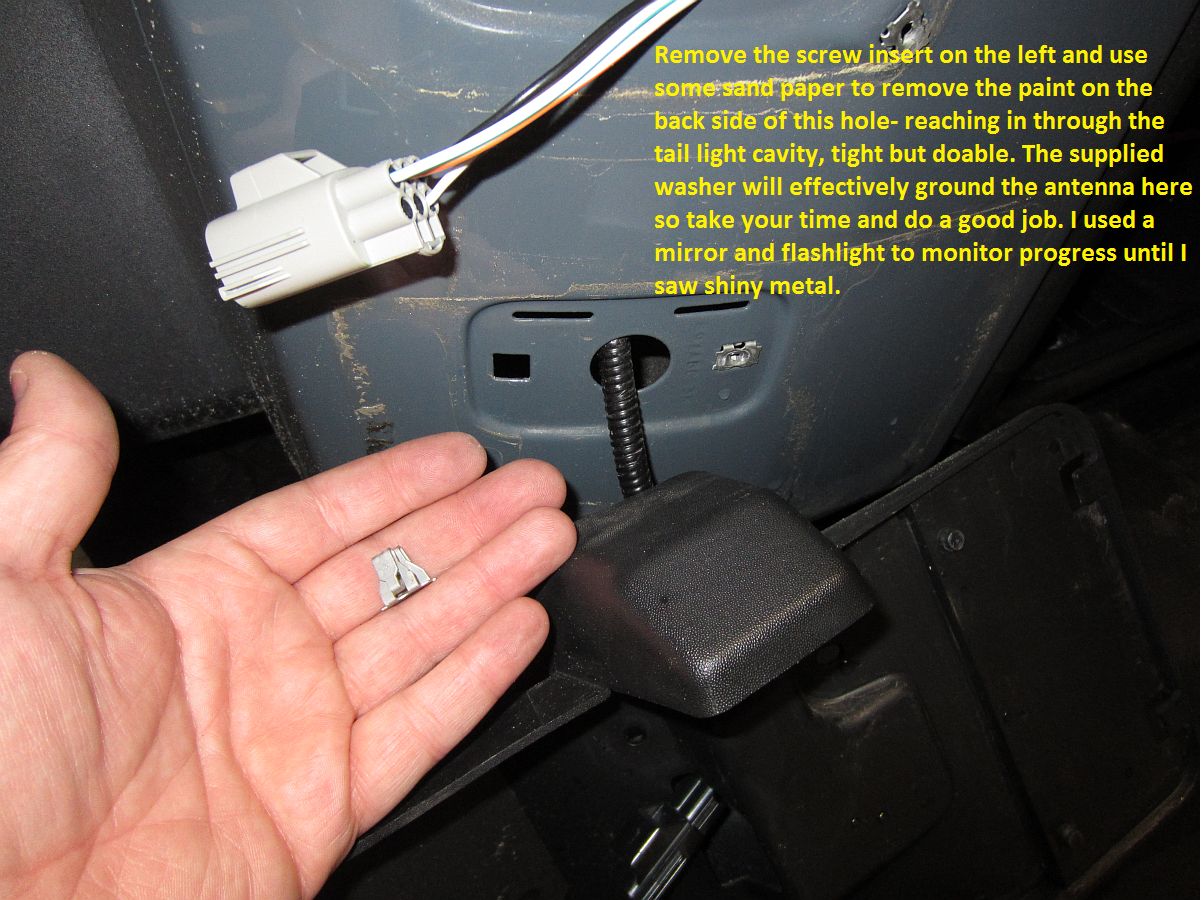
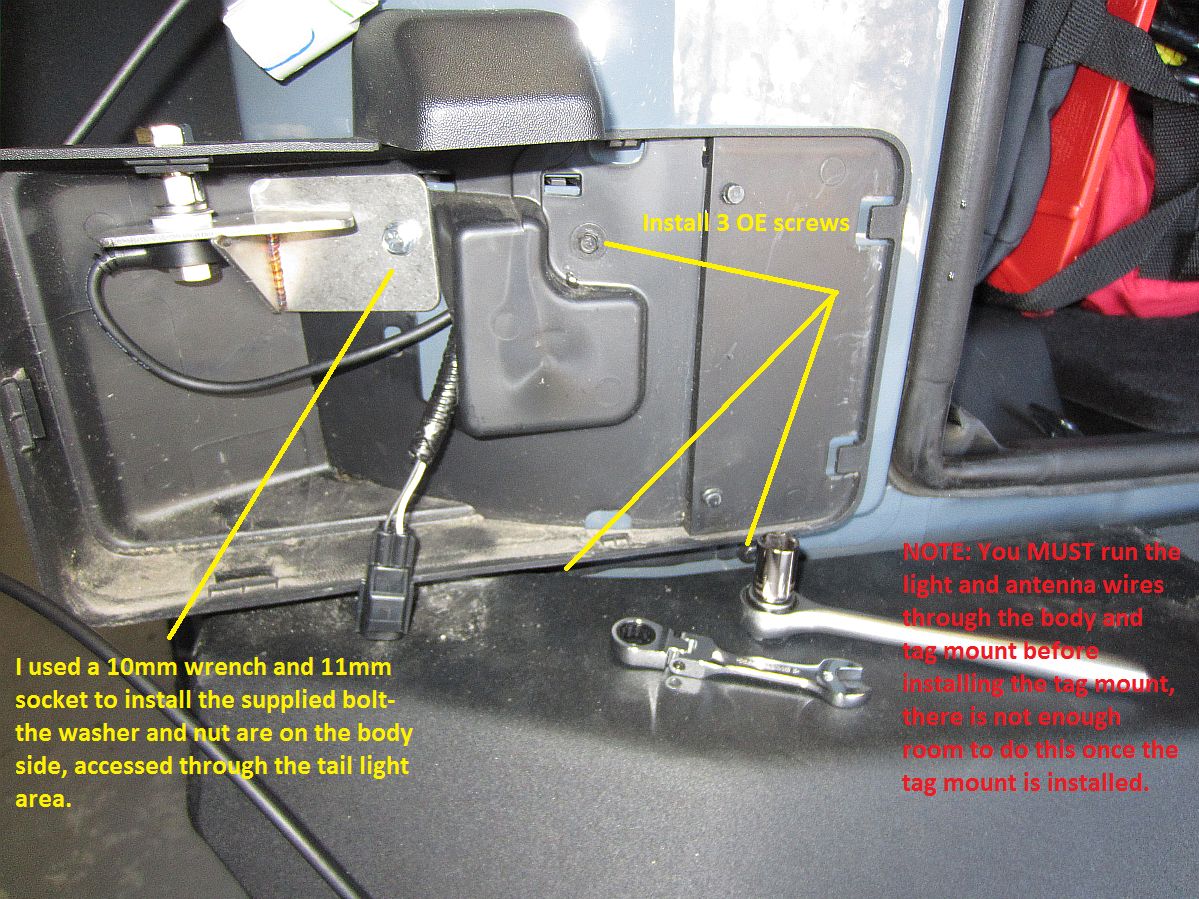
24" Antenna X AM/FM/CB antenna bought to replace OE antenna- forum post that prompted me to look into these is HERE.
Driving on interstate today it seems to work as well on FM as the OE antenna or maybe a little better, we'll have to wait and see how it works with a CB when I get one of those.

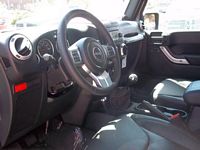
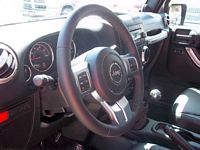
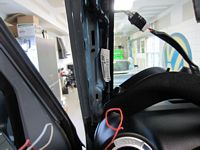
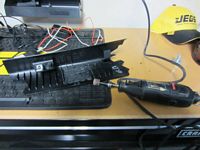
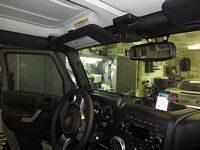
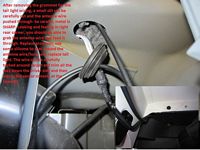
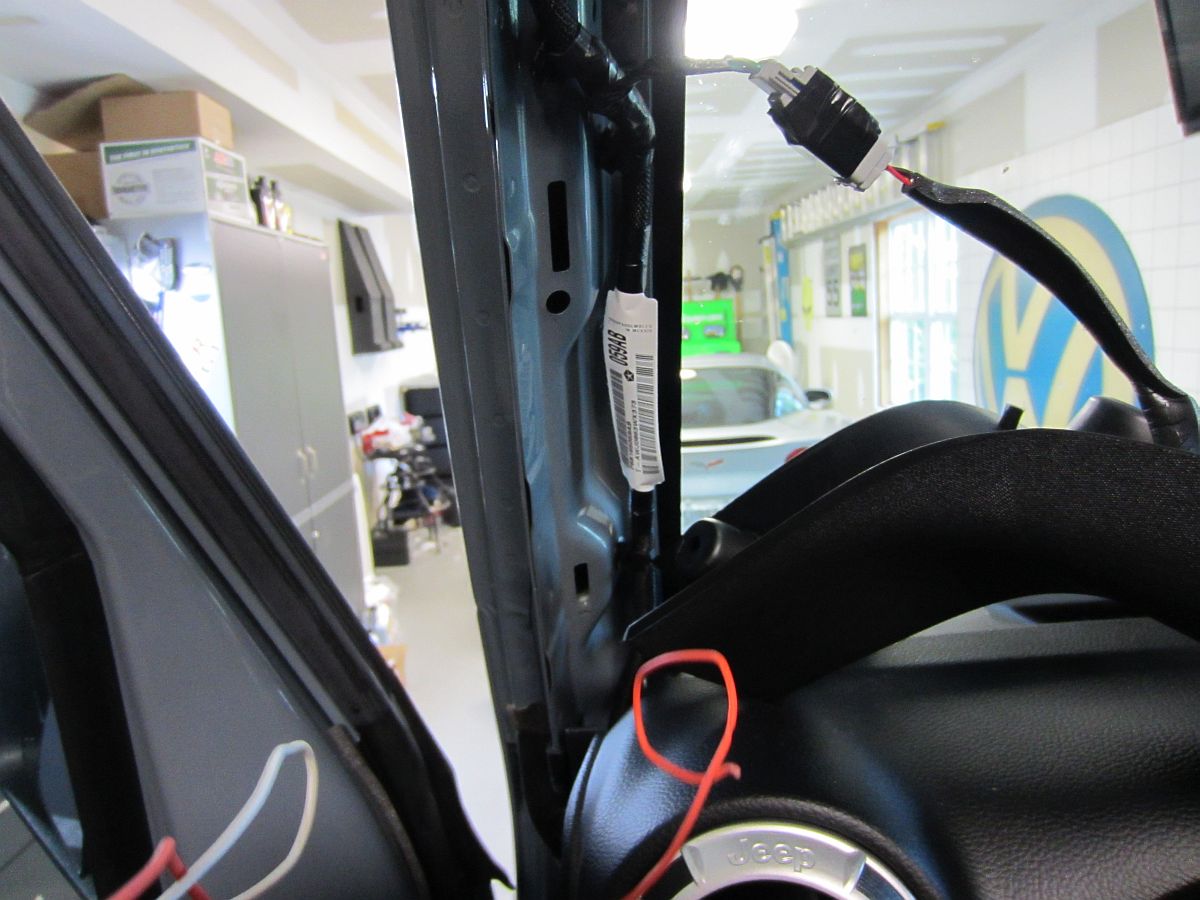
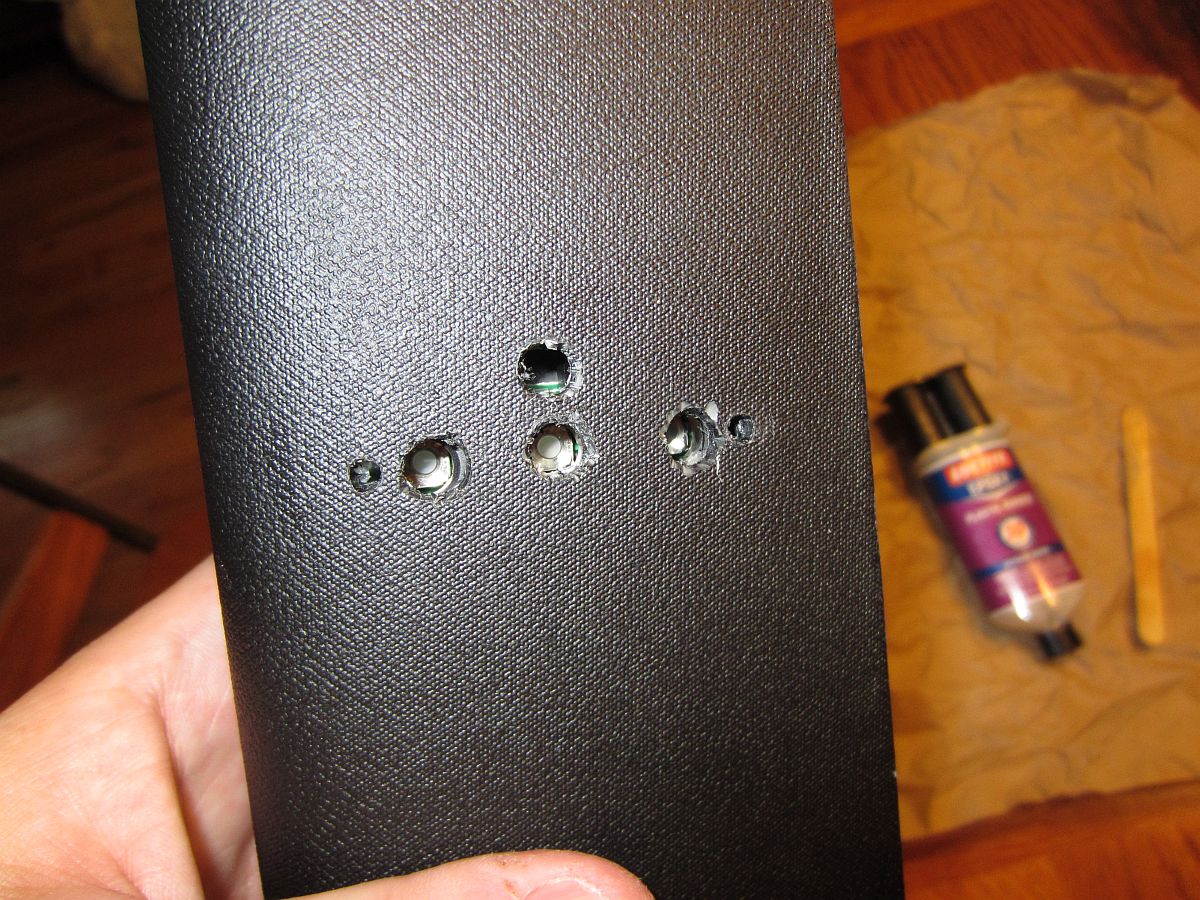
I finally had an opportunity to install my eBay Homelink unit, run a phone charger wire to the cubby, and mount/hardwire the V1 radar detector (as detailed HERE). I had found a post where some forum members had mounted them at the top windshield trim but OrangeJeepGuy had used the a-pillar trim- I thought the a-pillar piece would be easier to access and cheaper to replace so that is the way I went.
To get started I removed the two Torx (T20) screws for the driver side sun visor, unsnapped the upper a-pillar plastic piece, and then unsnapped the top of the lower a-pillar trim and lifted up to remove. I thought about the best place to mount the Homelink, and then used a Dremel to remove the ribs to allow it to sit flush. Next, I found drill bits about the same size as the holes in the Homelink unit for the faceplate clips, the push button, and the light to drill holes after making a template. After each hole was drilled I lined up the Homelink unit to make sure it was accurate. Once all was assembled and tested for functionality, I found that I needed to use mechanical pencil erasers cut into small pieces (maybe 5mm long) in between the switches in the unit and the button plunger to make up for the thicker plastic. After this tested well, all was disassembled and plastic bonding epoxy was used to attach the Homelink unit to the trim piece, set time 20 minutes and cure time 24 hours. The orange wire in this case was switched 12v+ (should always be the wire/trace closest to the edge of the unit) and the white wire was 12v-, scotch spliced to the lighter socket wiring along with the radar detector and phone charger so that all function only when ignition is on. It turned out well I think, much better than using all of the 12v sockets and having wires going everywhere.


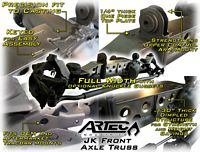
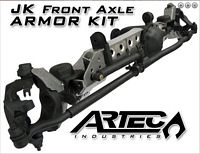
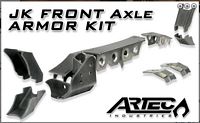
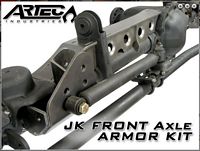
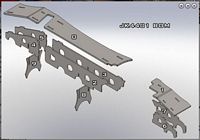
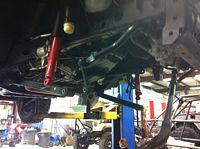
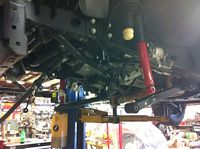
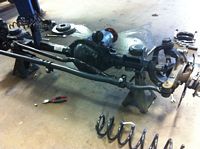
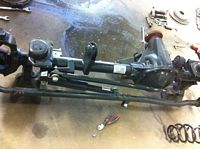
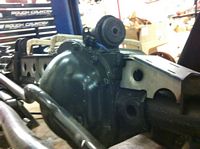
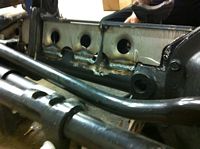
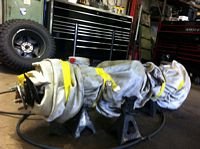
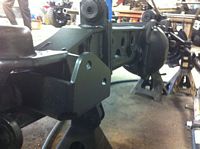
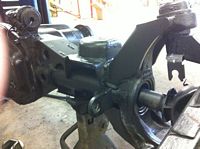
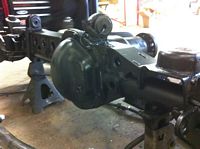
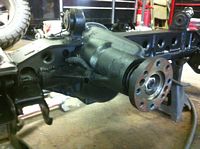
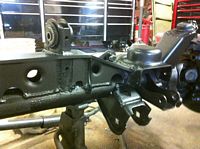
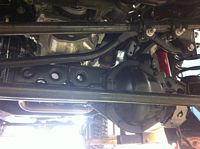
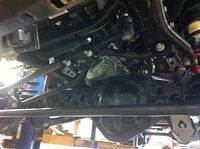
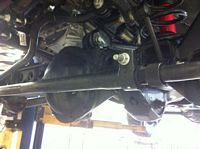
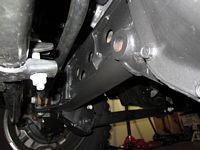
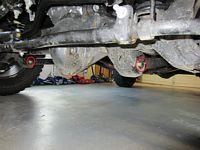
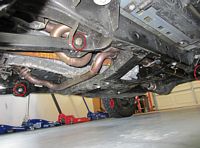
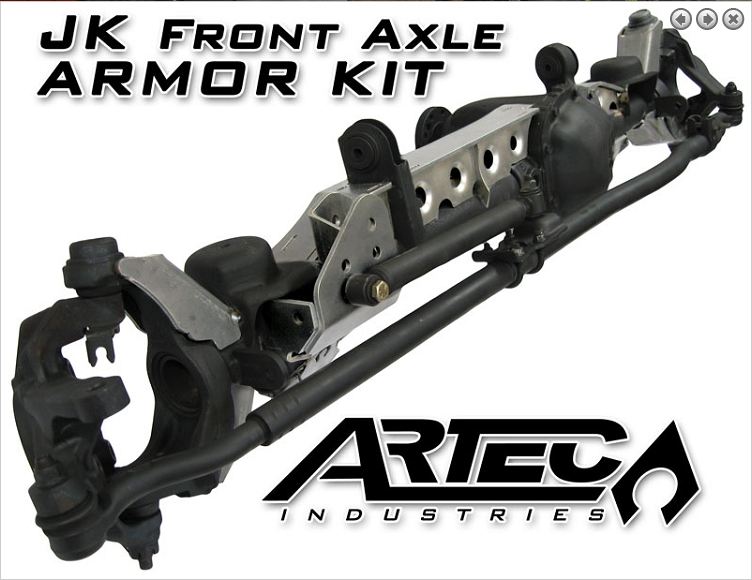
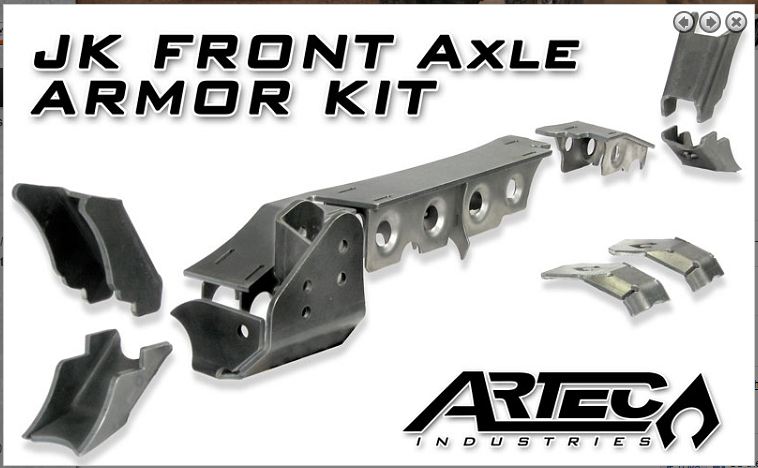
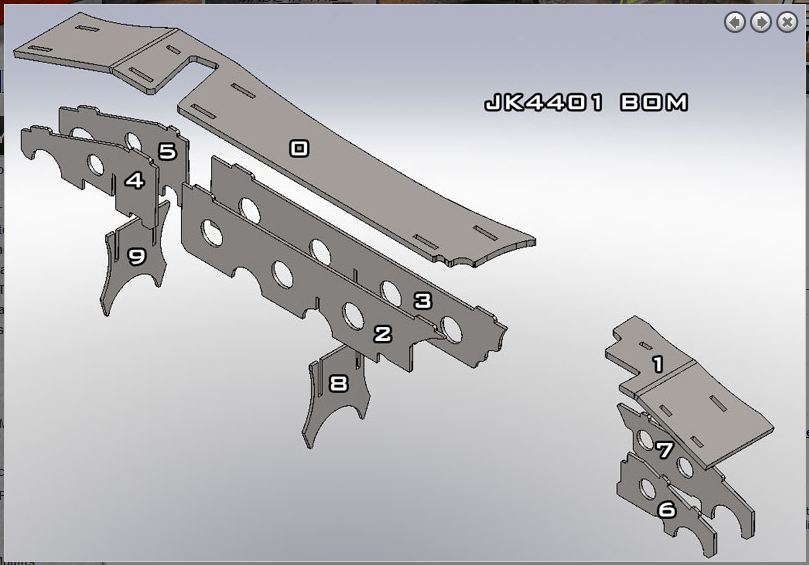
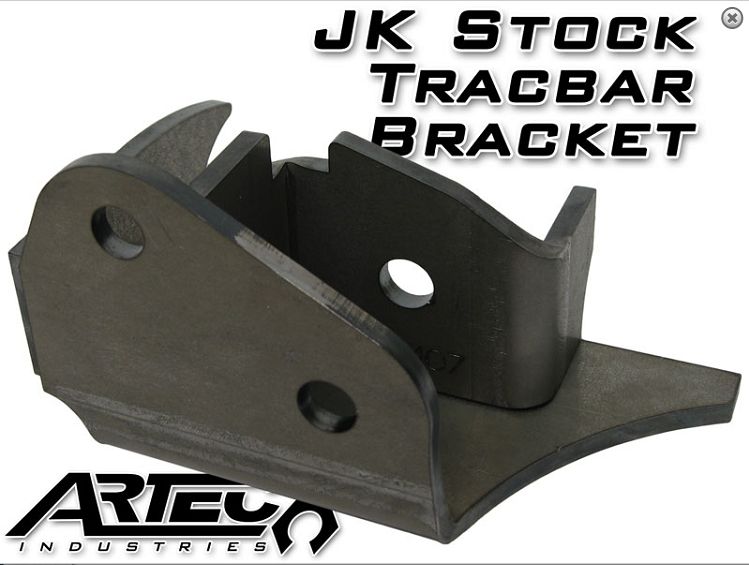
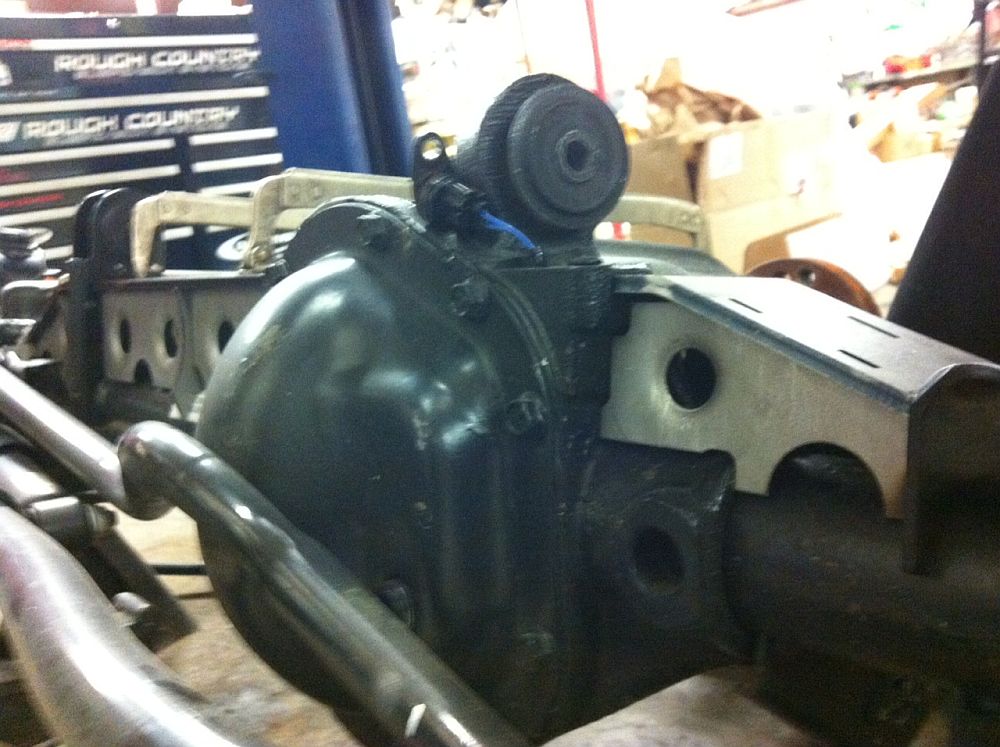
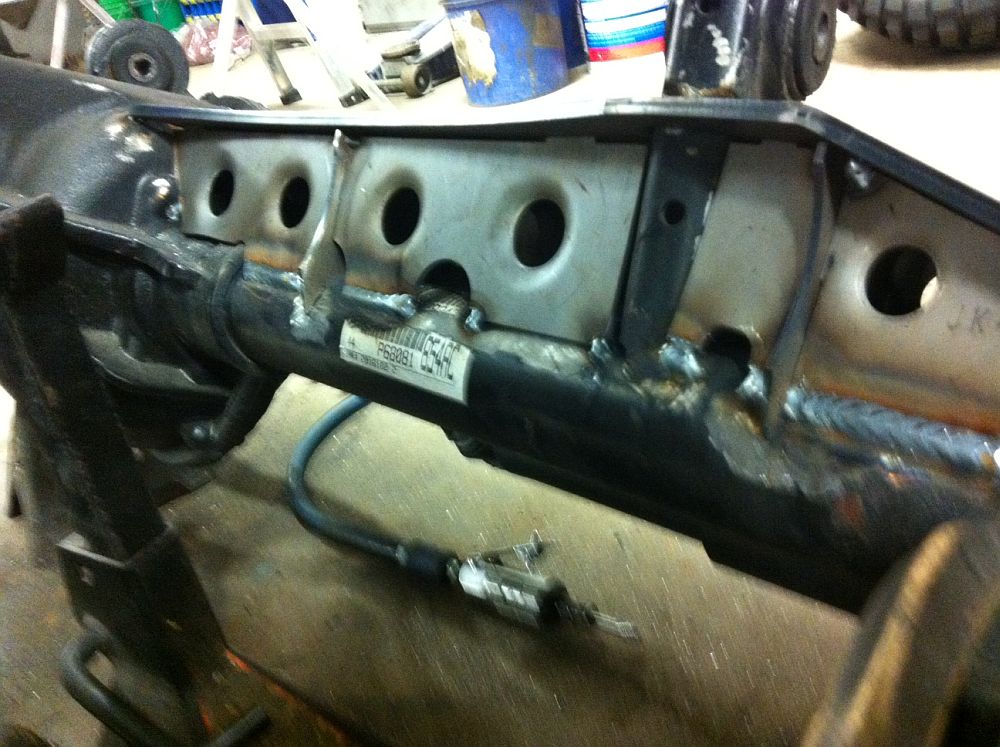
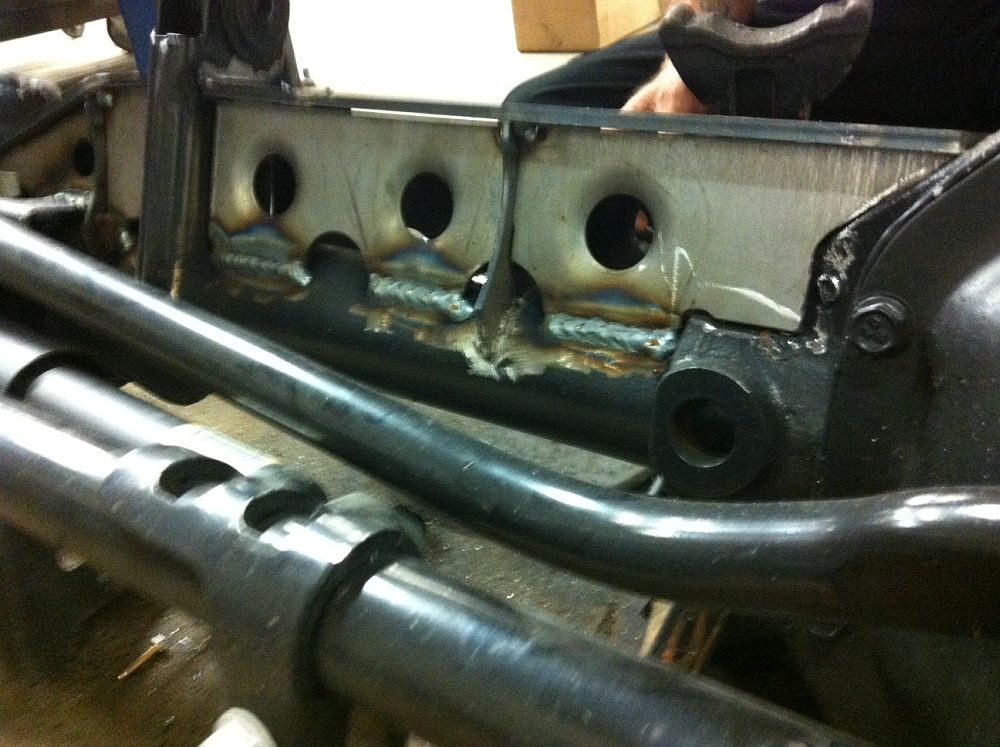
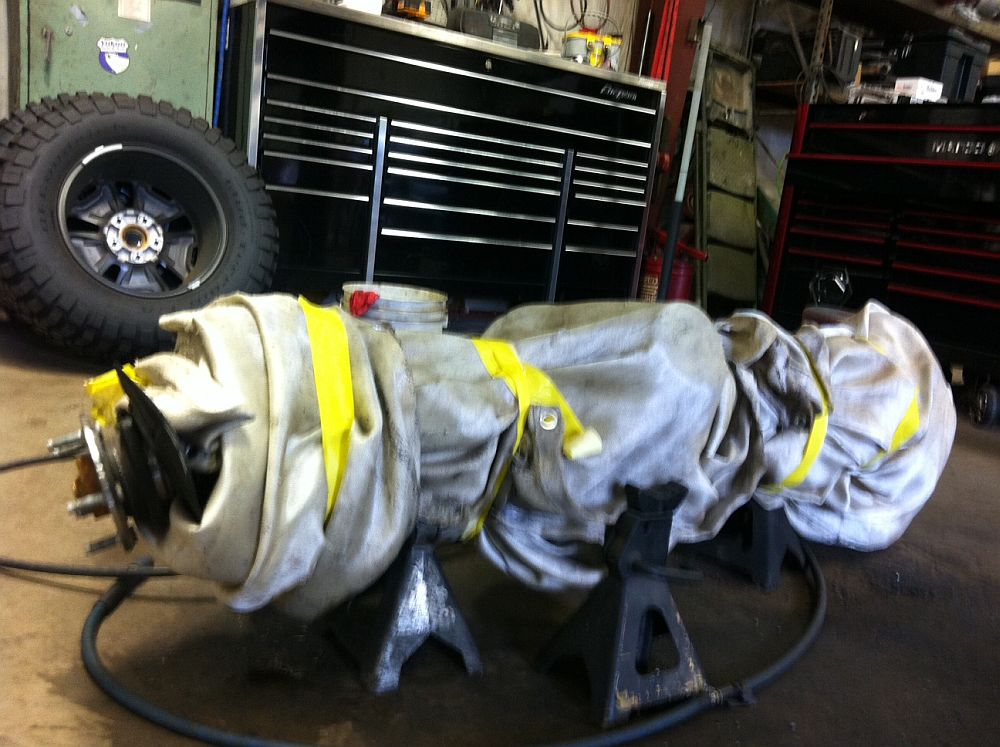
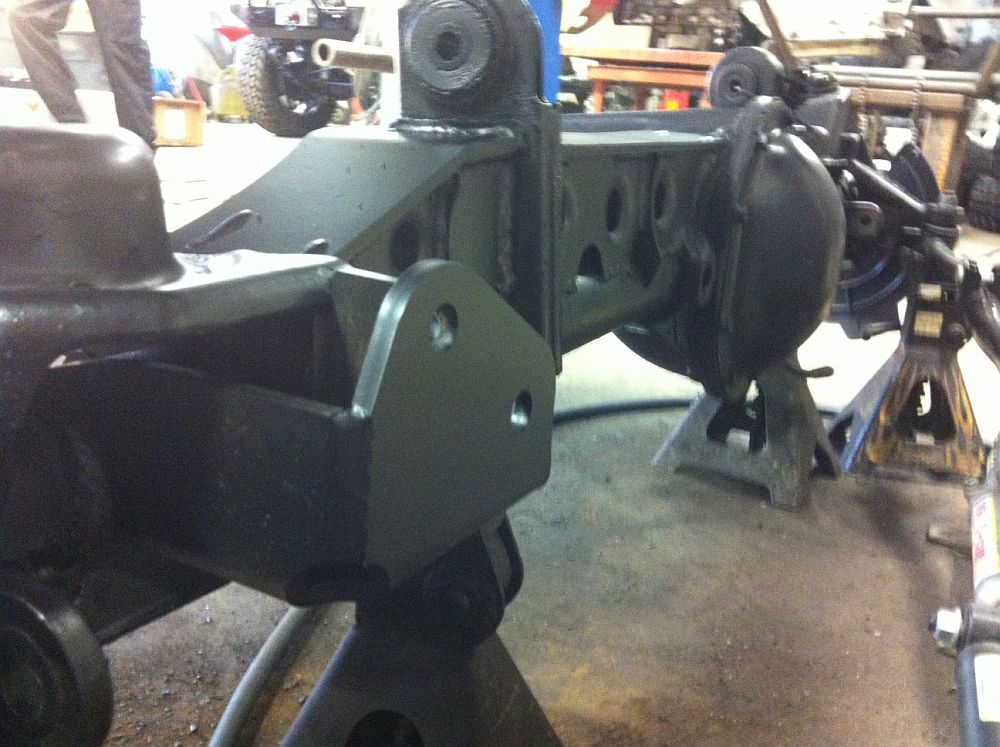
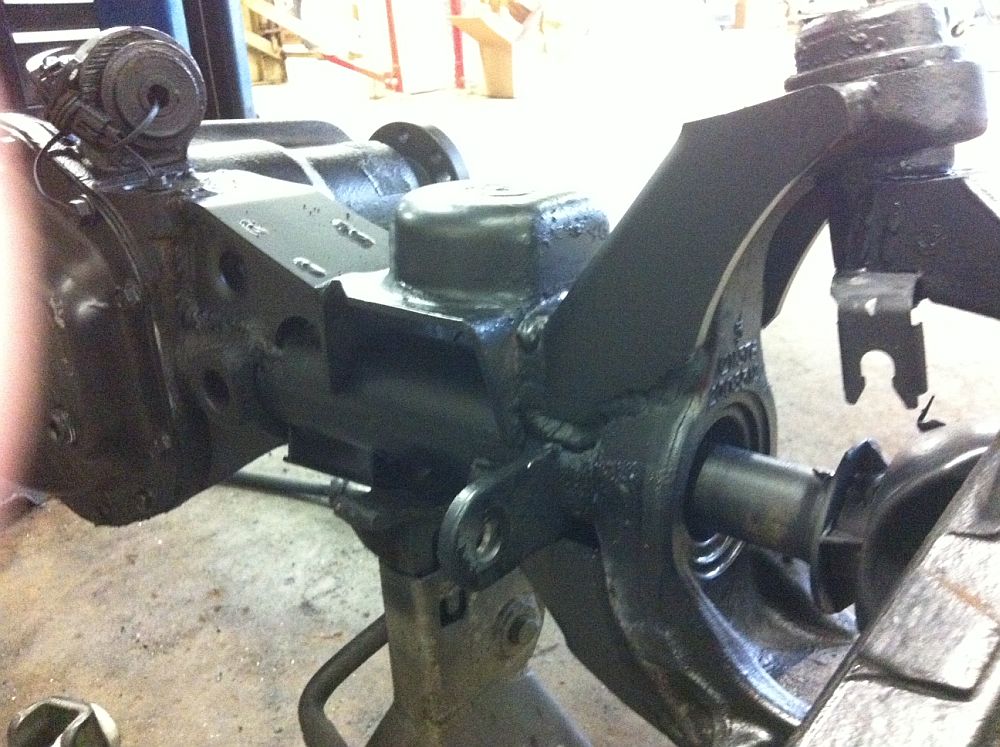
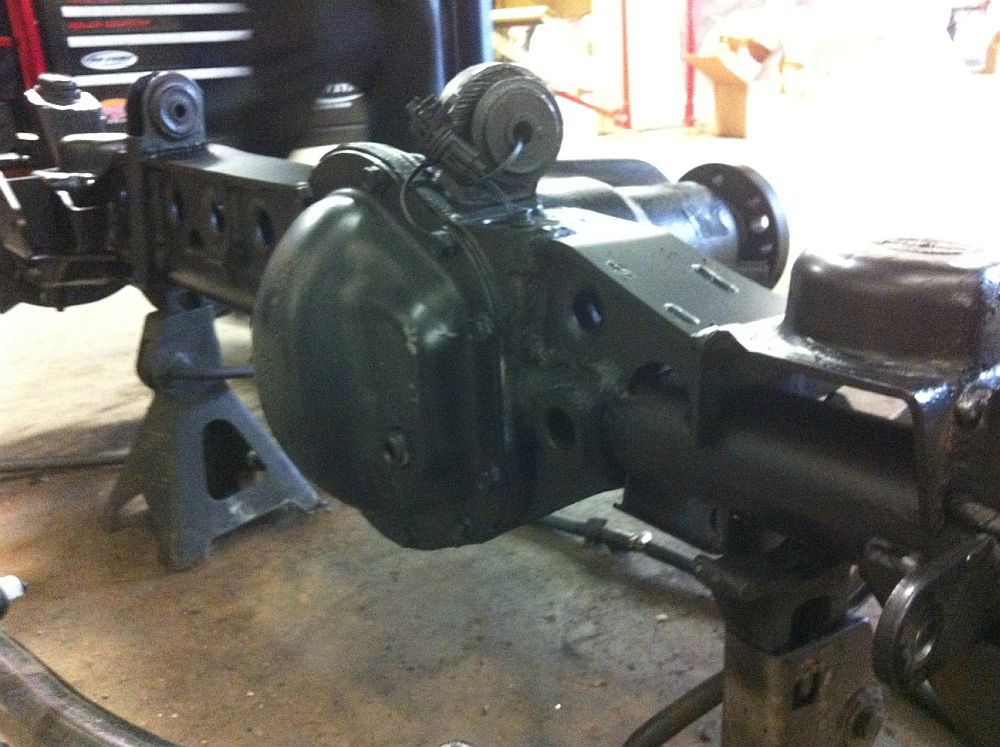
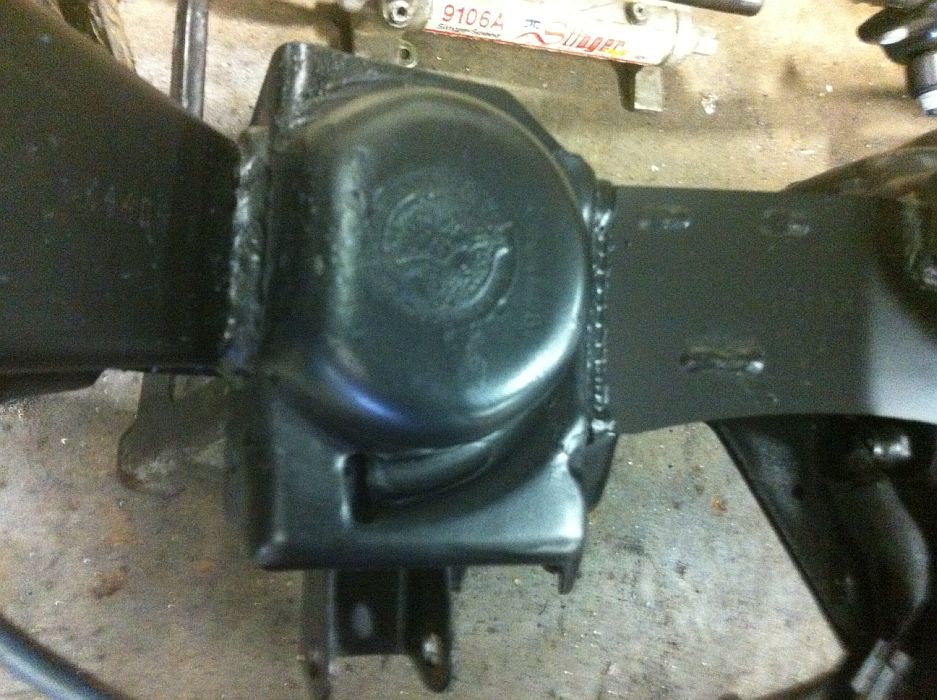
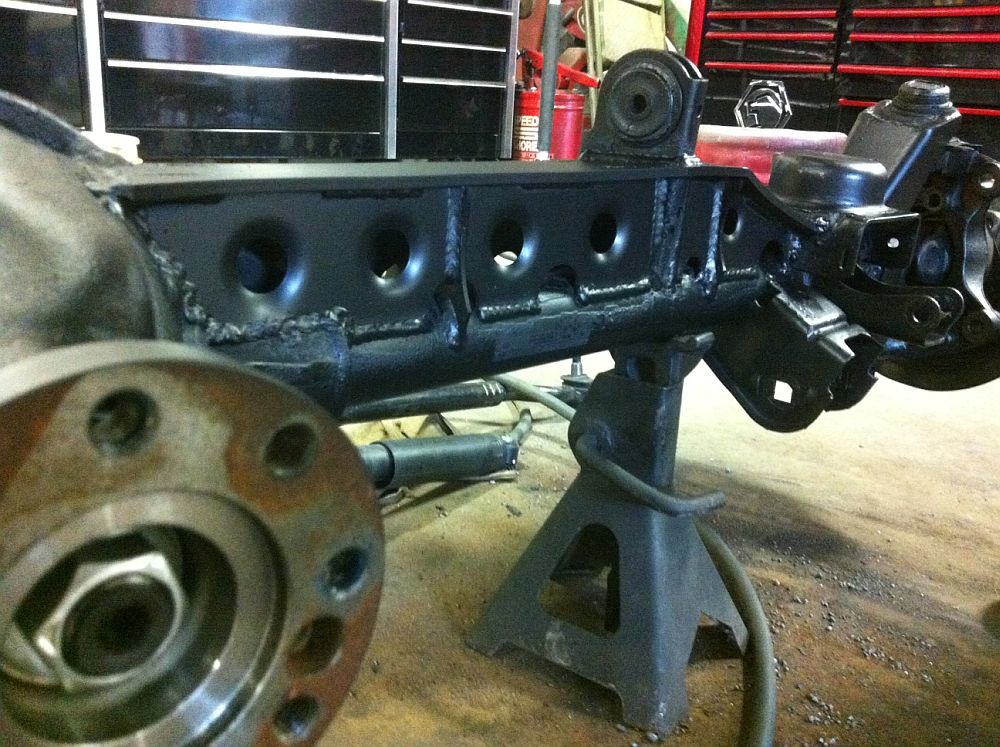
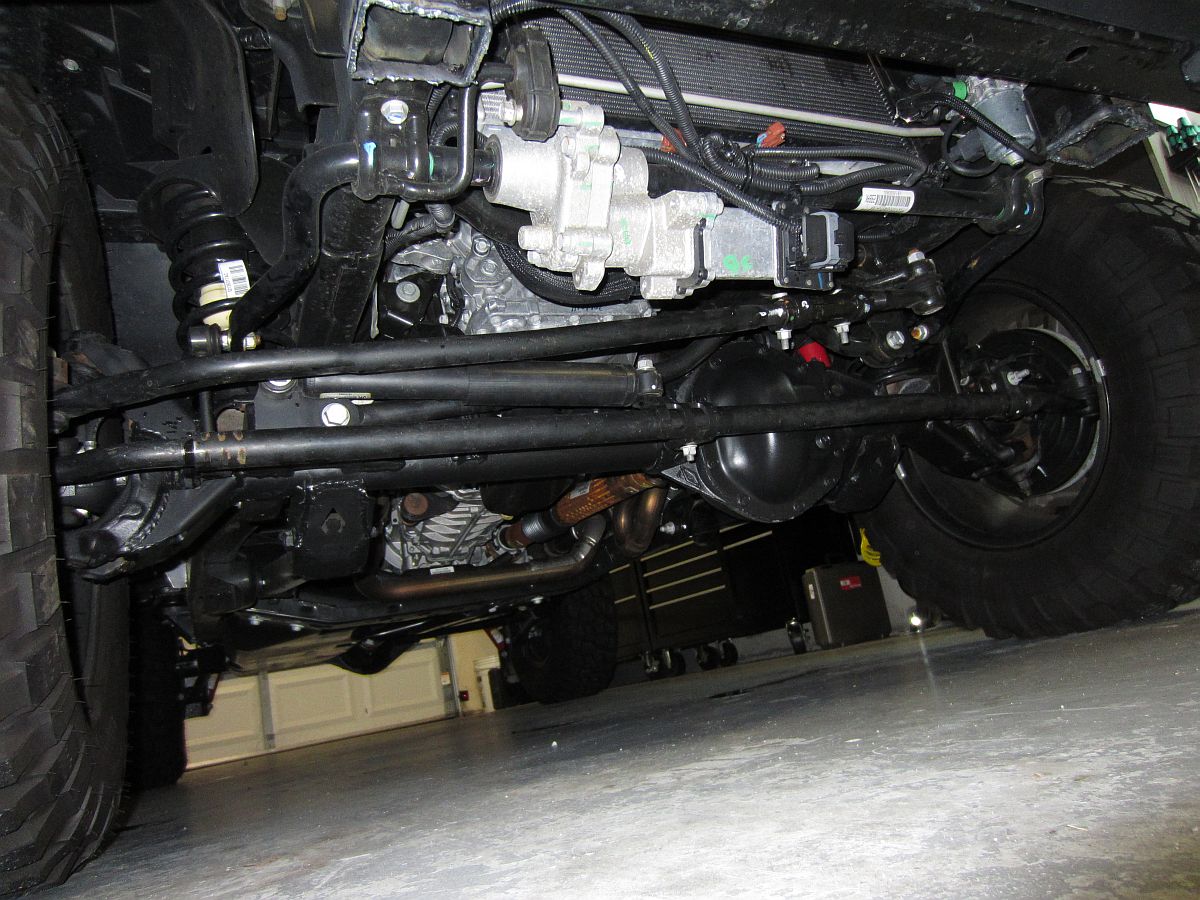
Artec Front Axle Armor Kit installed- original instructions HERE, revised intructions HERE. Forum discussion threads that got me interested are HERE and HERE, and some more info on axle weaknesses are HERE.
We decided to have Classic City Off Road (CCOR) in Athens, GA install the kit for us, I know Bobby and Matt there and they had done this prior on our 2012 Rubicon.....and are an Artec authorized installation facility. The Jeep was aligned first to make sure the front end was straight/within spec and then the welding started, CCOR took pics over the course of installation. This kit also allows for the steering damper to be moved to the top. No worries about a smiling axle now......


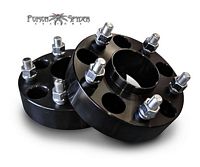
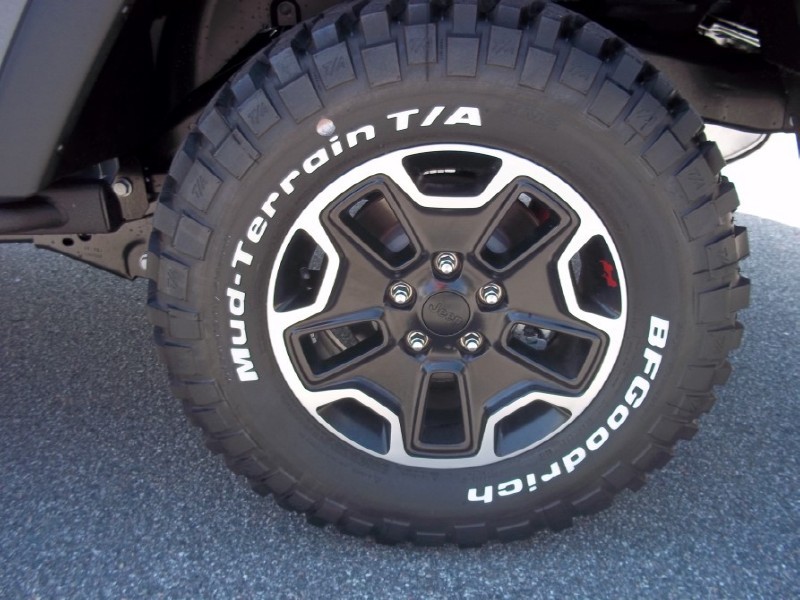
I had picked up some Poison Spider 1.5" Hub-Centric Wheel Spacers when they were closing out the clear anodized version and installed them on my wife's 2012 (my 2012 installation pics/process HERE, Installation Instructions HERE). Shortly after installing these on hers, I decided to look for, and ultimately purchased, my 2013 10A.....so I placed another order as the closeout was still on. Starlie called a bit later and told me they only had 2 clear anodized spacers left but sold me the new black anodized spacers at the closeout price since I wanted a matching set
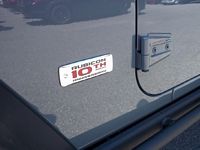
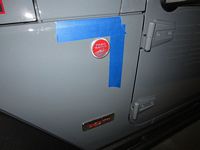
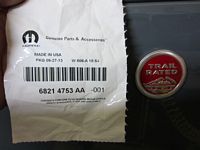
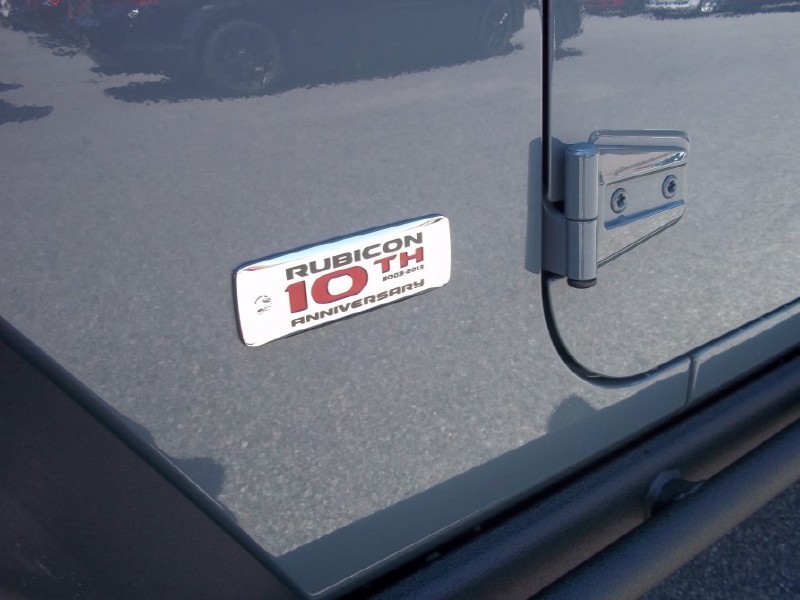
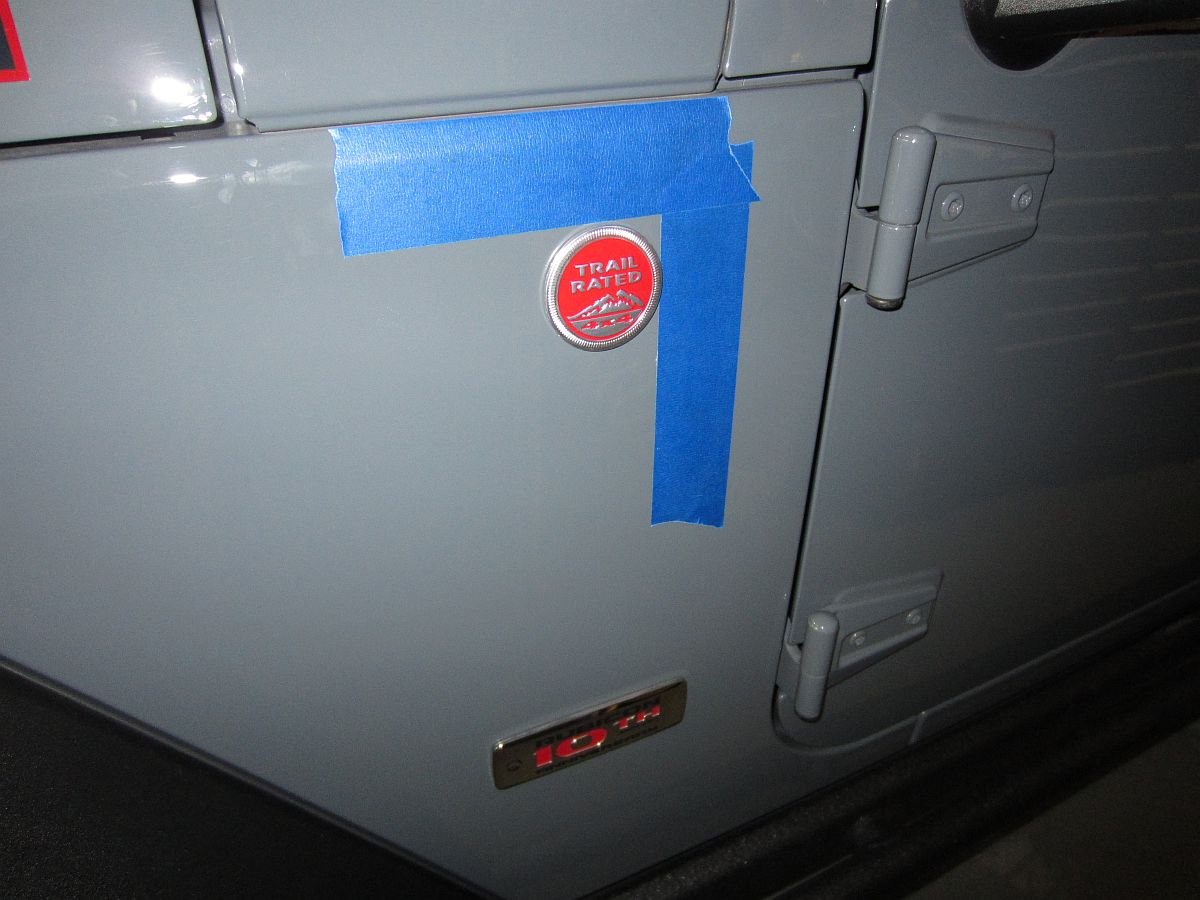
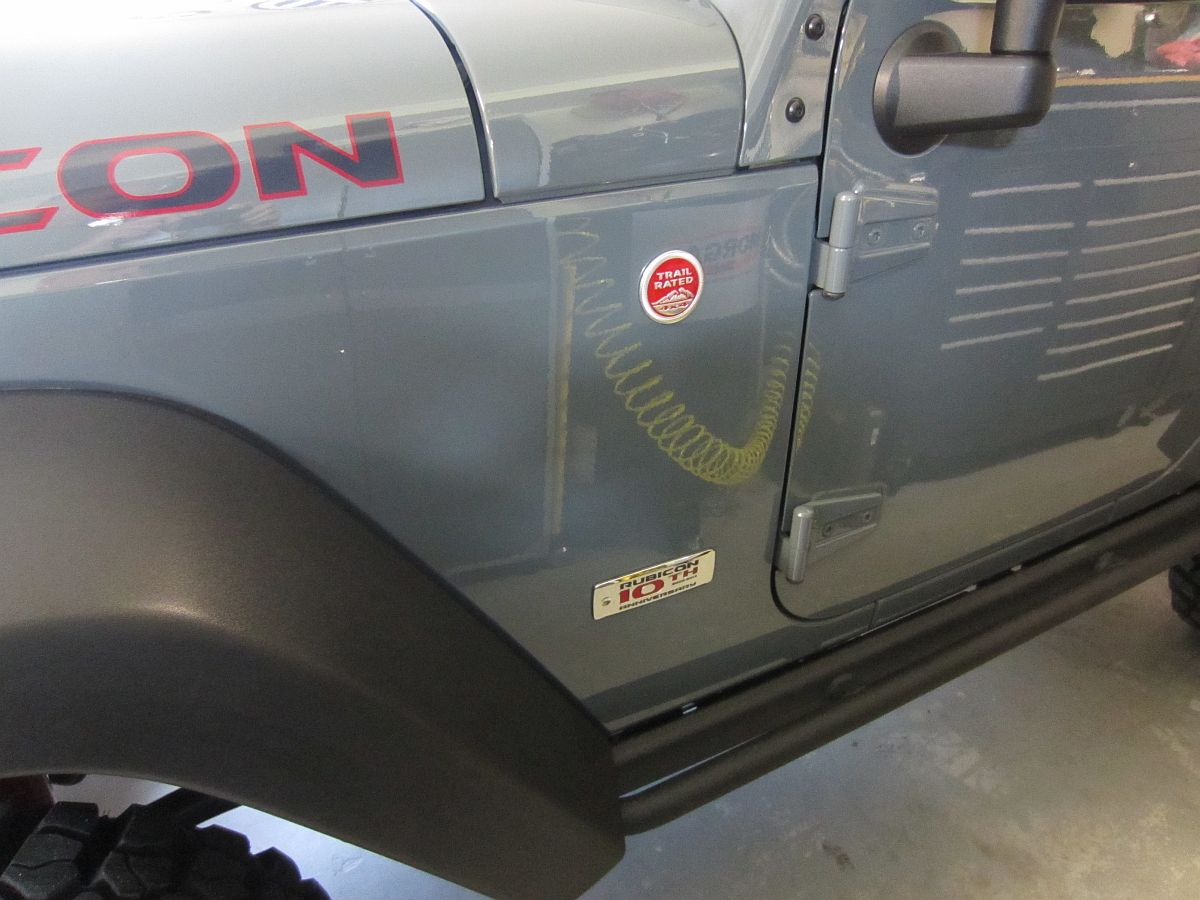
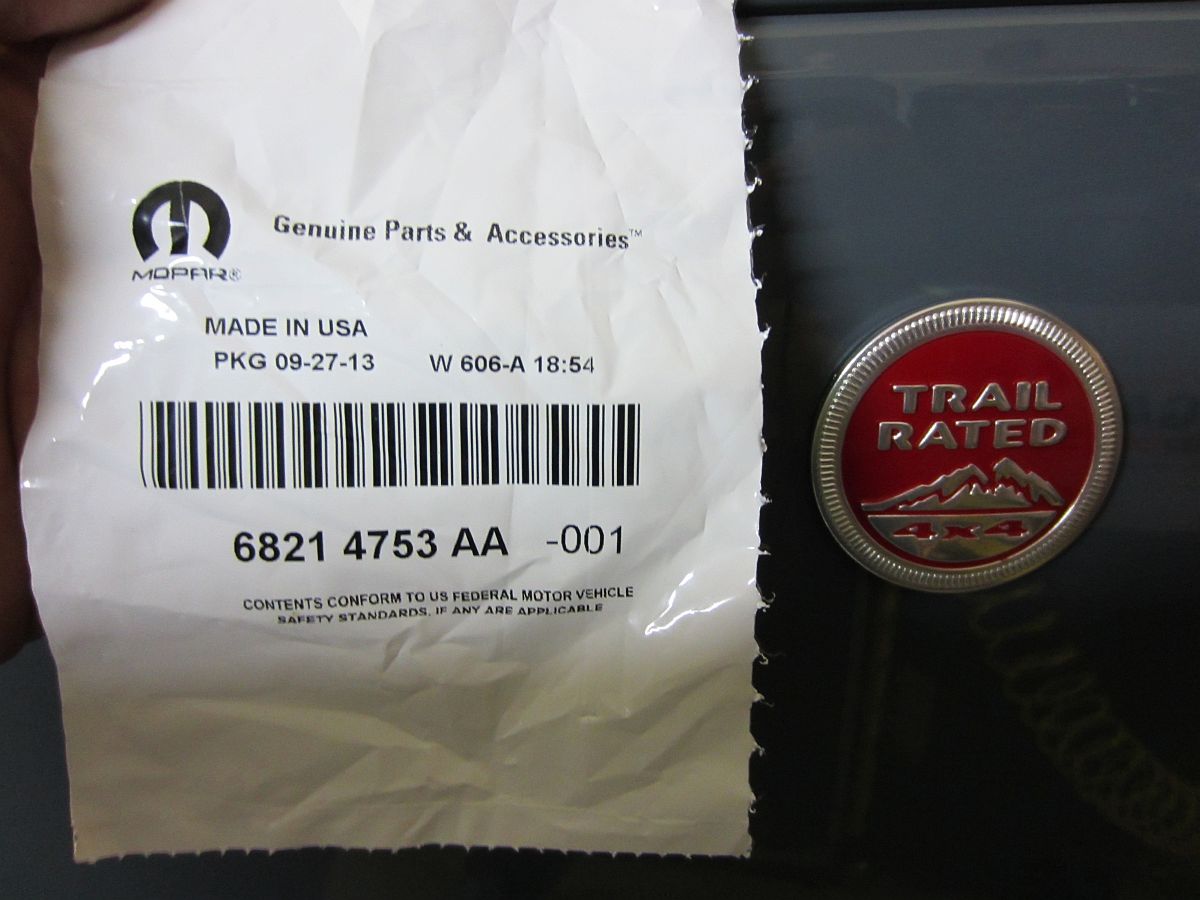
The day my 10A was made, the Union worker in charge of installing my Red Trail Rated Badge (P/N 6821 4753 AA) was out sick but the dealership procured the back-ordered badge for me. I measured the antenna bracket location on the passenger side and used painters tape to mark the location for the badge, cleaned the wax off with some brake cleaner, and applied badge.
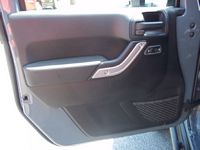
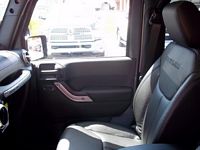
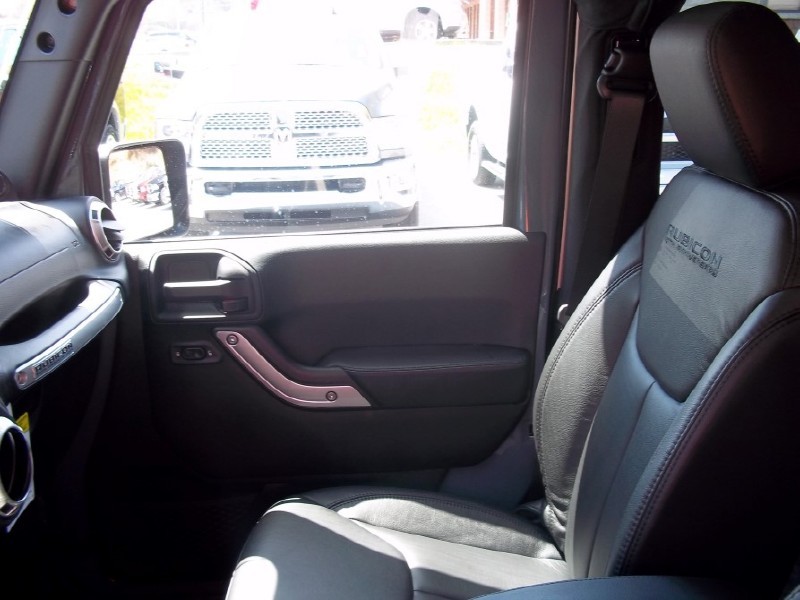
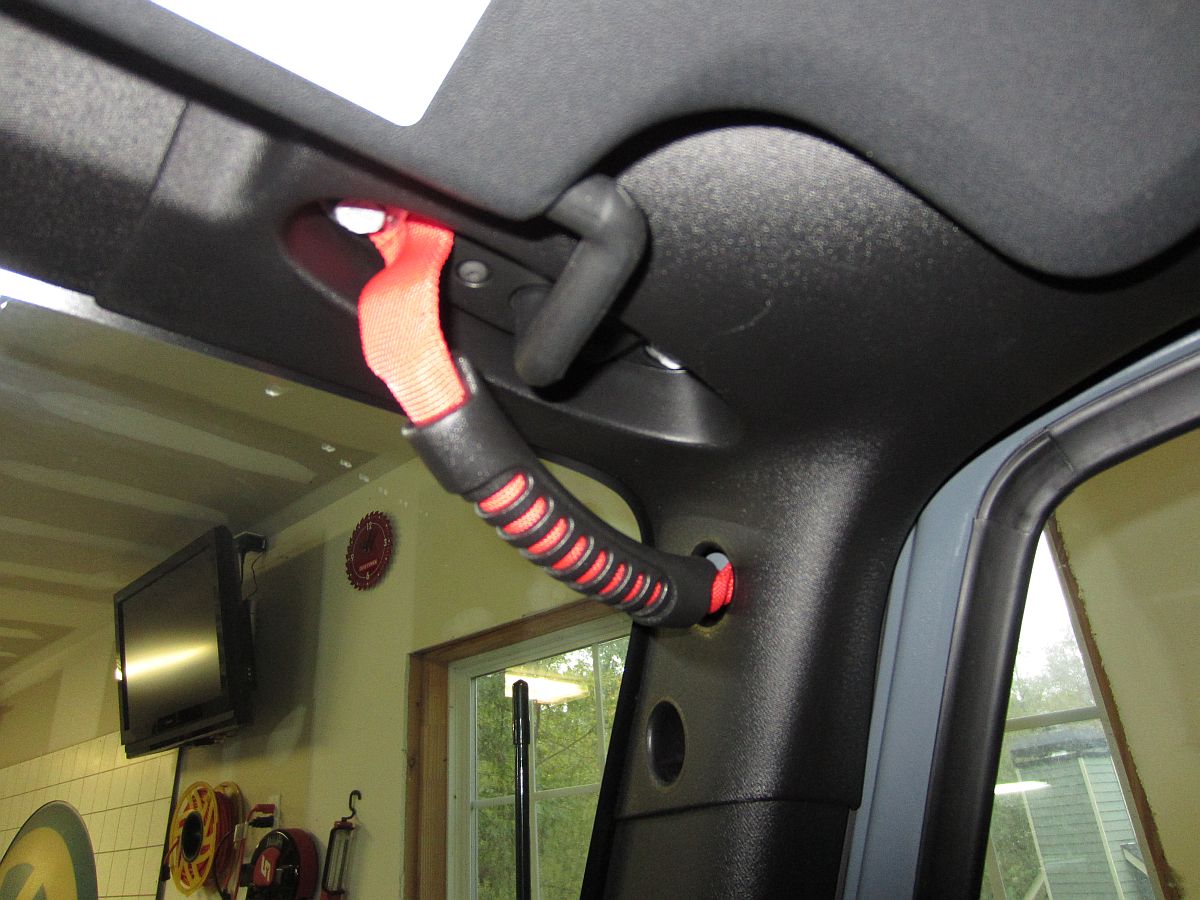
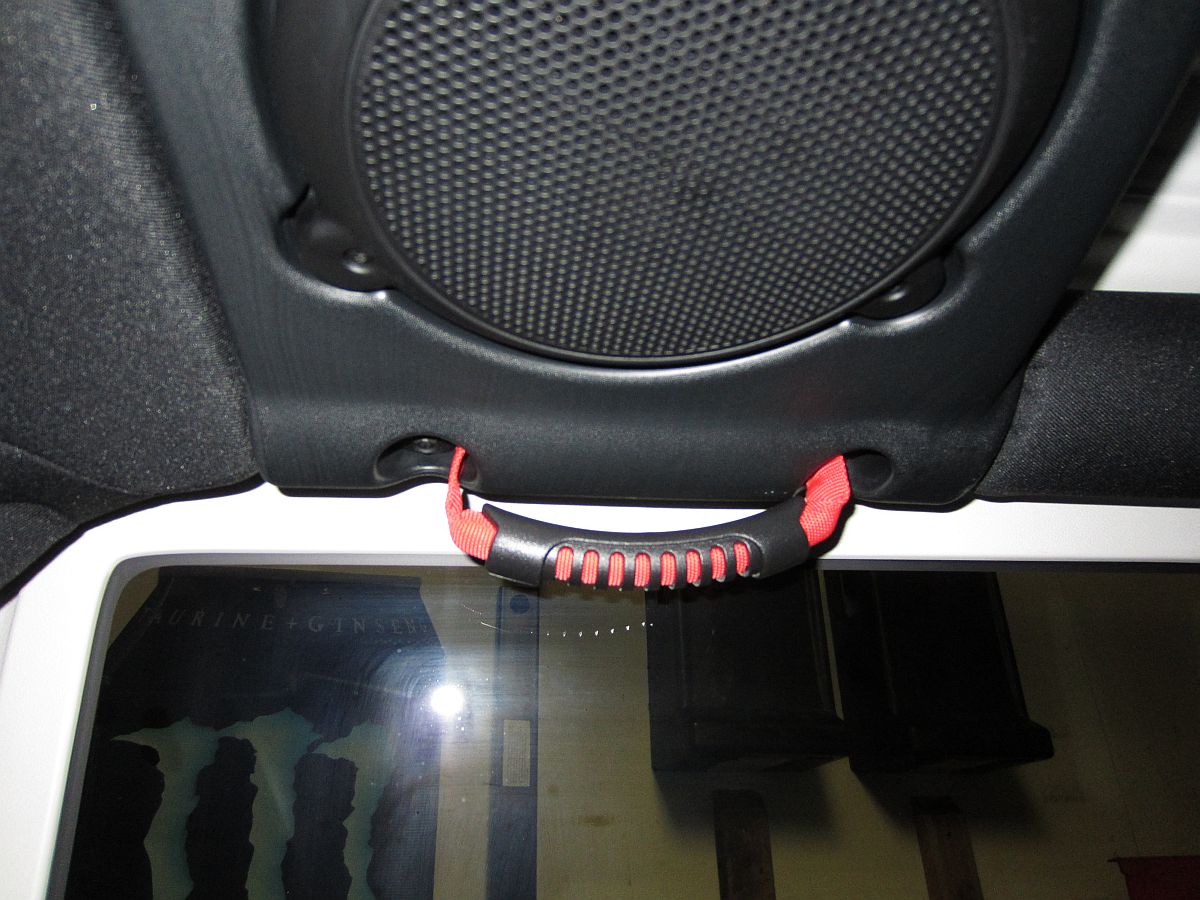
I also installed some Rugged Ridge Grab Handles in red (P/N 13305.15) to keep with the 10A theme. Following the instructions HERE, I installed these in the front corners and rear side rollbar.


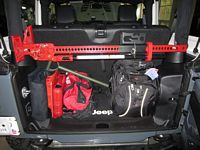
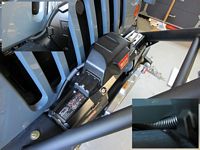
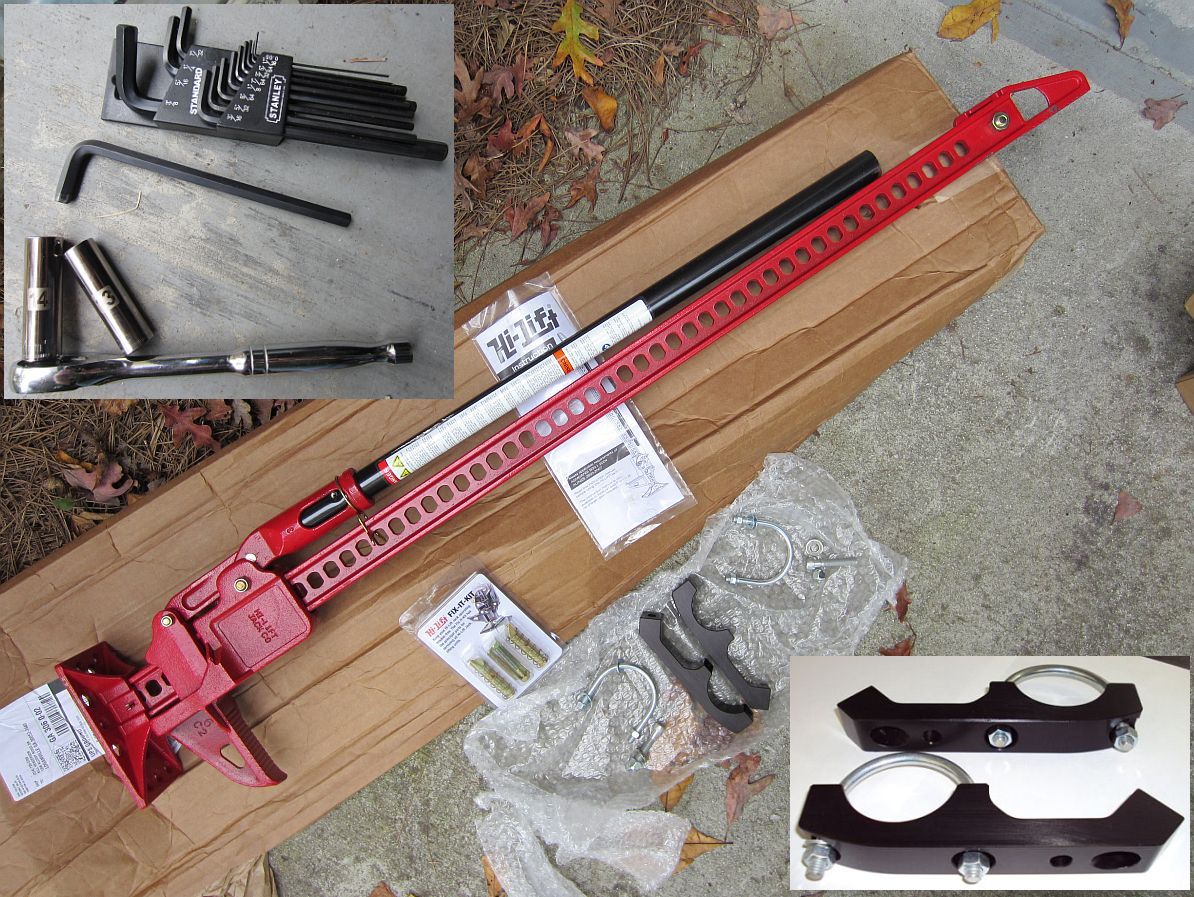
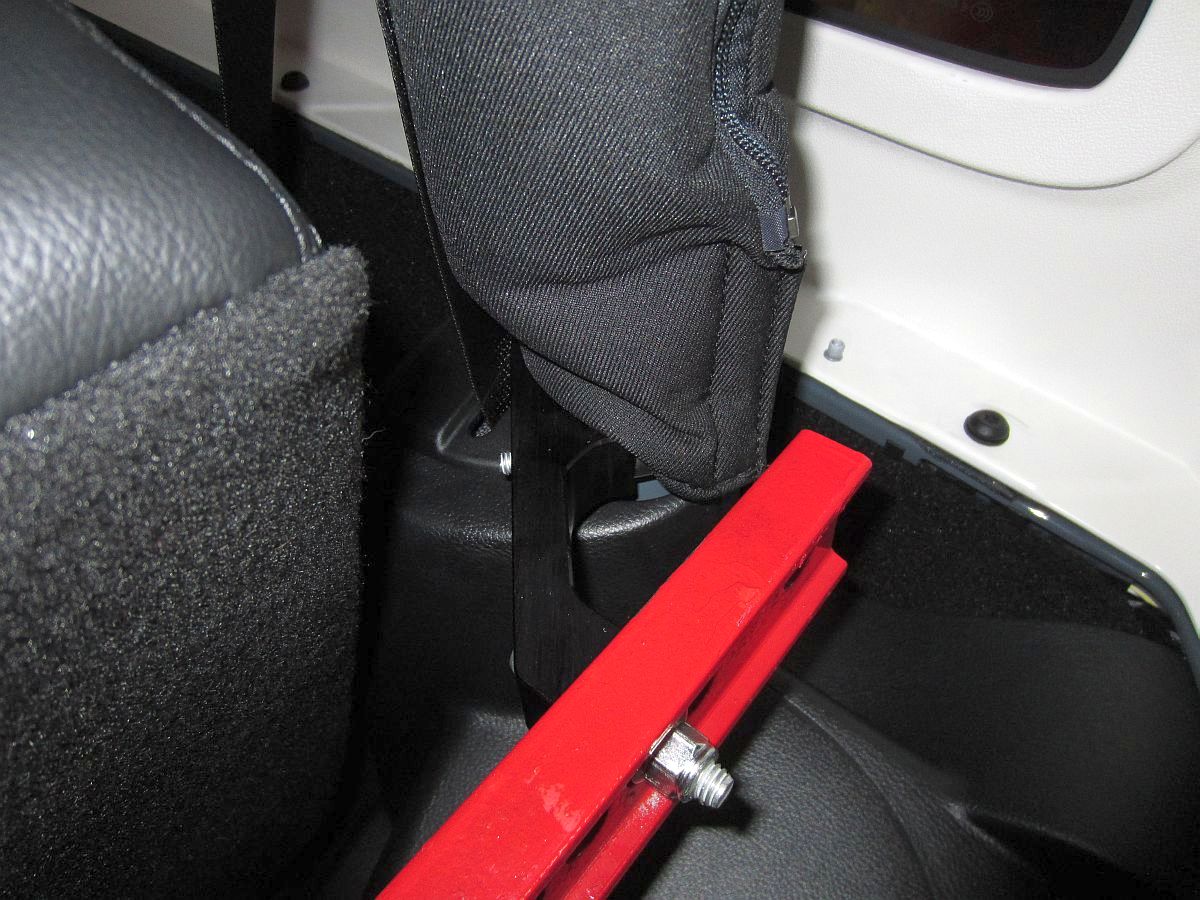
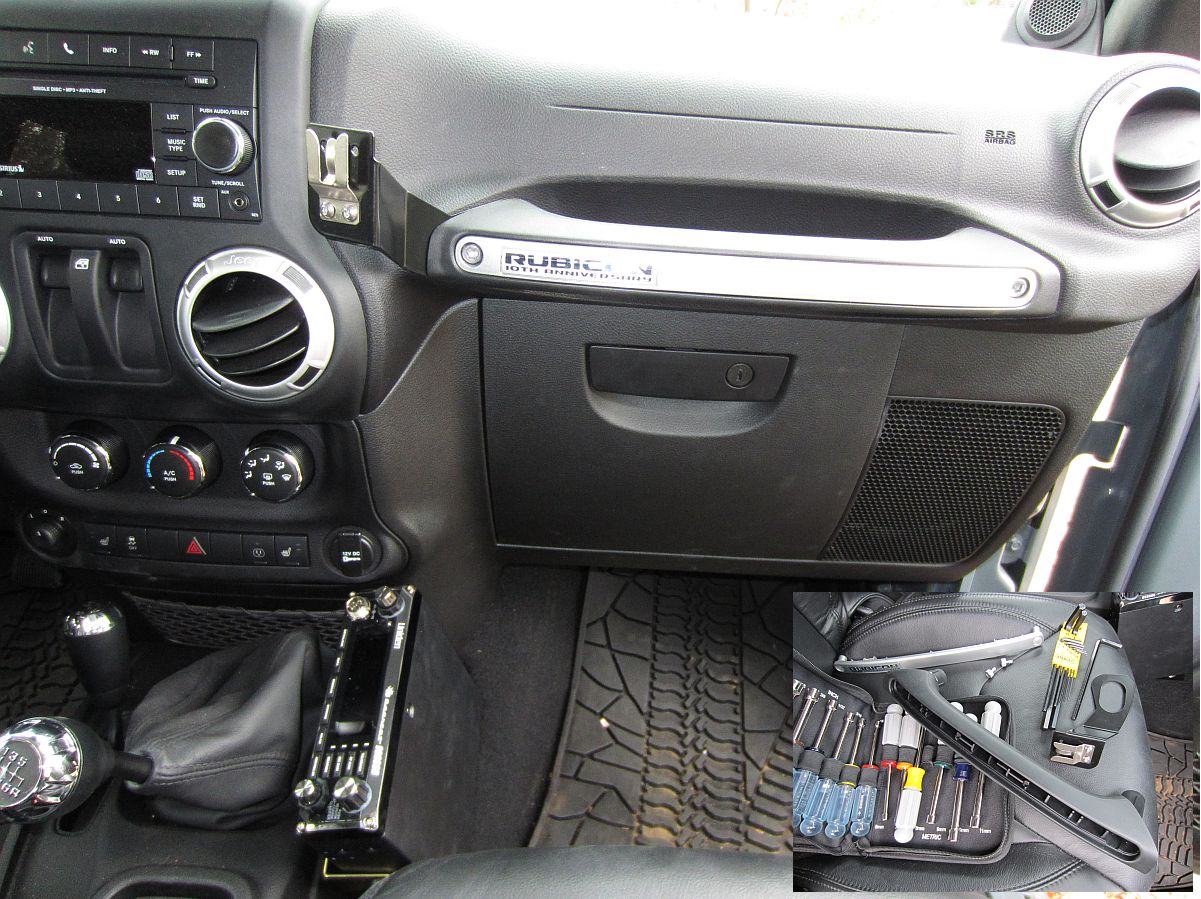
HiLift Jack (HL-485) mounted using mounts from Hillside Machine (archived eBay listing HERE). Also purchased HiLift Off-Road Base (ORB), HiLift Lift Mate (LM-100), HiLift Off-Road Kit (ORK), HiLift Jack Repair Kit (FK-1), HiLift Jack Handle Keeper in red (HK-R), and JackMate Lift Jack Accessory (demo archived HERE).
I added a few things to the mount so that the rollbar paint did not get scratched: rubber tubing over U-clamp and electrical tape on the aluminum mount facing that made contact with the rollbar. I snugged up the mounting bolts where I could still position the clamps (13mm socket), attached the HiLift jack and tightened those mounting bolts (5/16" HEX,14mm socket), and then tightened the bracket mounting bolts. I may go back later and replace the NyLoc nuts with some wing nuts for easier access. I also need to buy some rubber bolt caps to keep the seatbelts from rubbing the threaded ends.
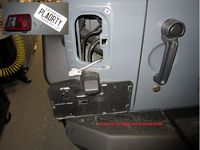
New Tag- PLAyDiRTY

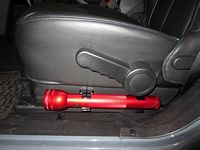
MagLite D-Cell Mounting Brackets (Model# ASXD026, P/N 108-000-426) installed to hold my 3 D-cell LED MagLite. Unfortunately for 2012 up, we don't have the seat metal rail to mount these on (or maybe it is a JK vs JKU thing), just the plastic piece but even with the provided screws it seems to be sturdy enough. If it does not hold up I'll get some thin aluminum stock to put behind the plastic piece to act as a brace and provide something more for the screws to bite into. These mounts are cheap enough (~$5 on eBay or Amazon) that I may find some more places to put them that are out of sight.

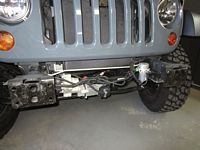
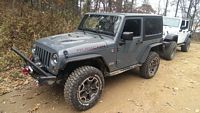
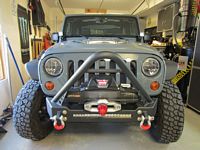
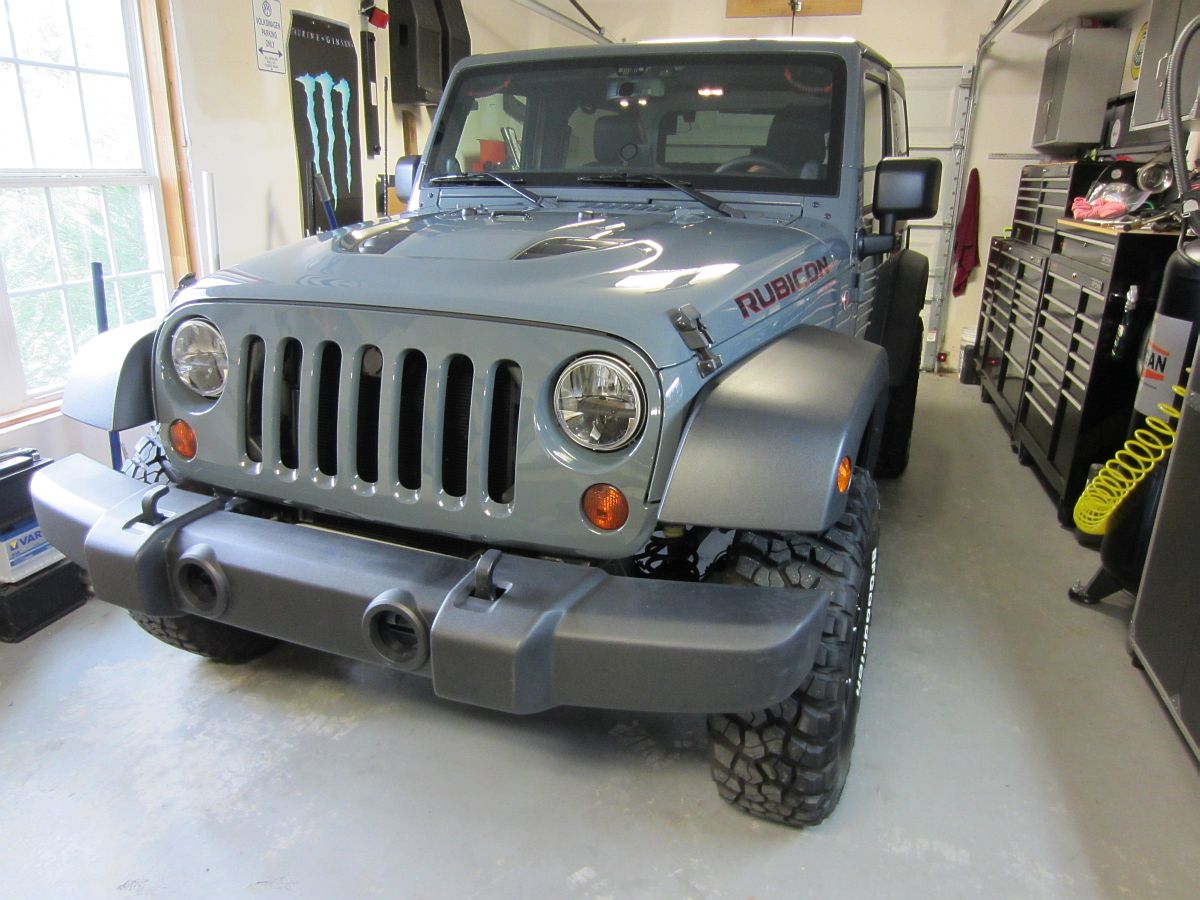
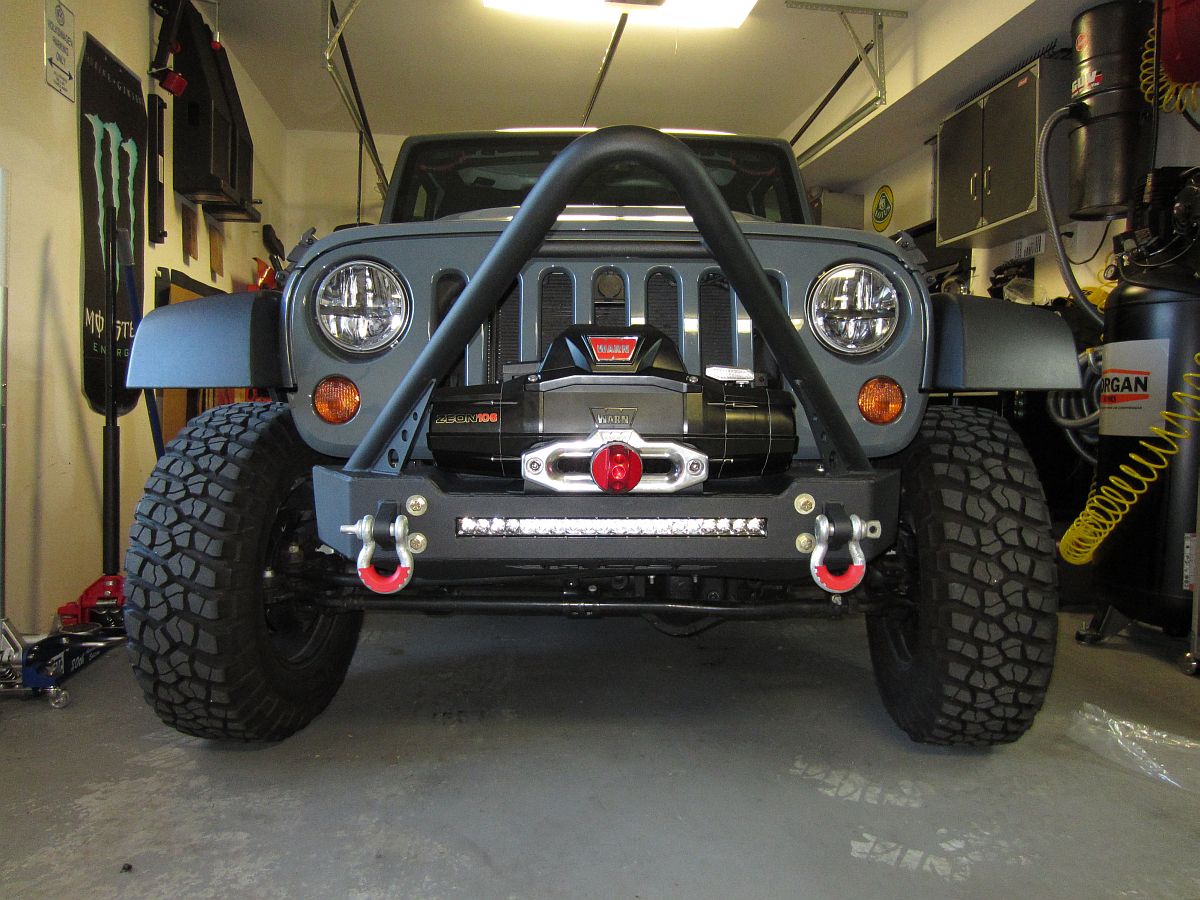
Front bumper and winch time. After selling the 10A bumpers the weekend I bought it, I installed my wife's old OEM front bumper to use for a while, waiting for my ACE bumpers to be manufactured and shipped. Kind of bummed they no longer cut the gear logo into the bar supports but I guess they are trying to bring the cost down. Anyway, here is the list of things for this go-round:
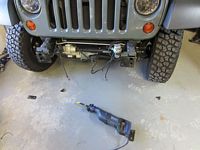
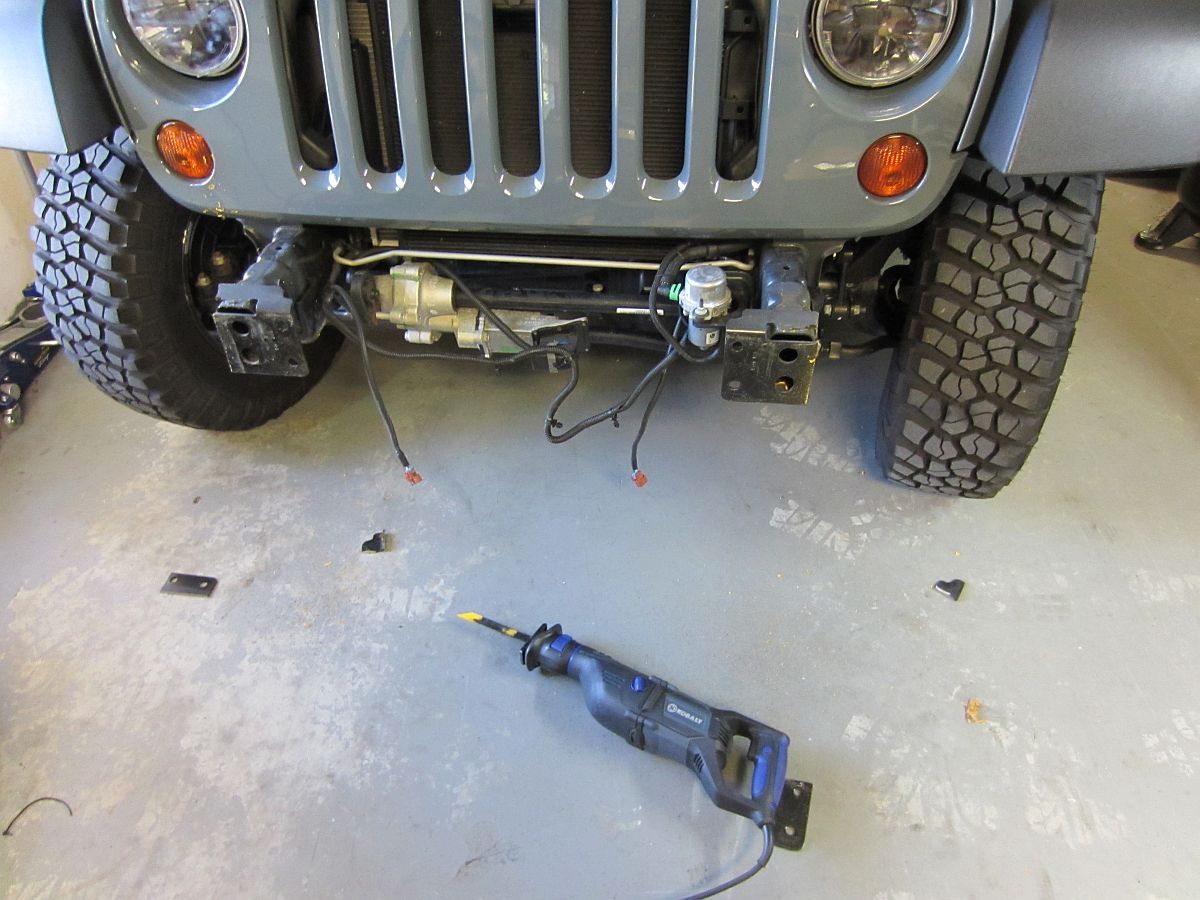
*Ace Pro Series Front Bumper (installation video HERE) from Krawl OffRoad installed. I bought the Stinger version with a cutout for the Rigid SR20 light bar. This requires some slight adjustment to the mounting of the vacuum pump on 2012 and up models (detailed here by Ace) and removal of the crash bar and some of the factory mounting points. I used Krylon Fusion Paint in black to cover any metal where the grinder or sawzall removed the factory paint to prevent rust. Also purchased some ACE winch mount spacers to allow the LARGE Zeon winch to clear the bumper, painted black before installing. I had Classic City Off-Road (CCOR) in Athens torch off the crash bar while they were installing my Artec kit, so I only had to sawzall and grind the front mounts.
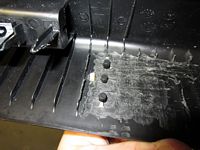
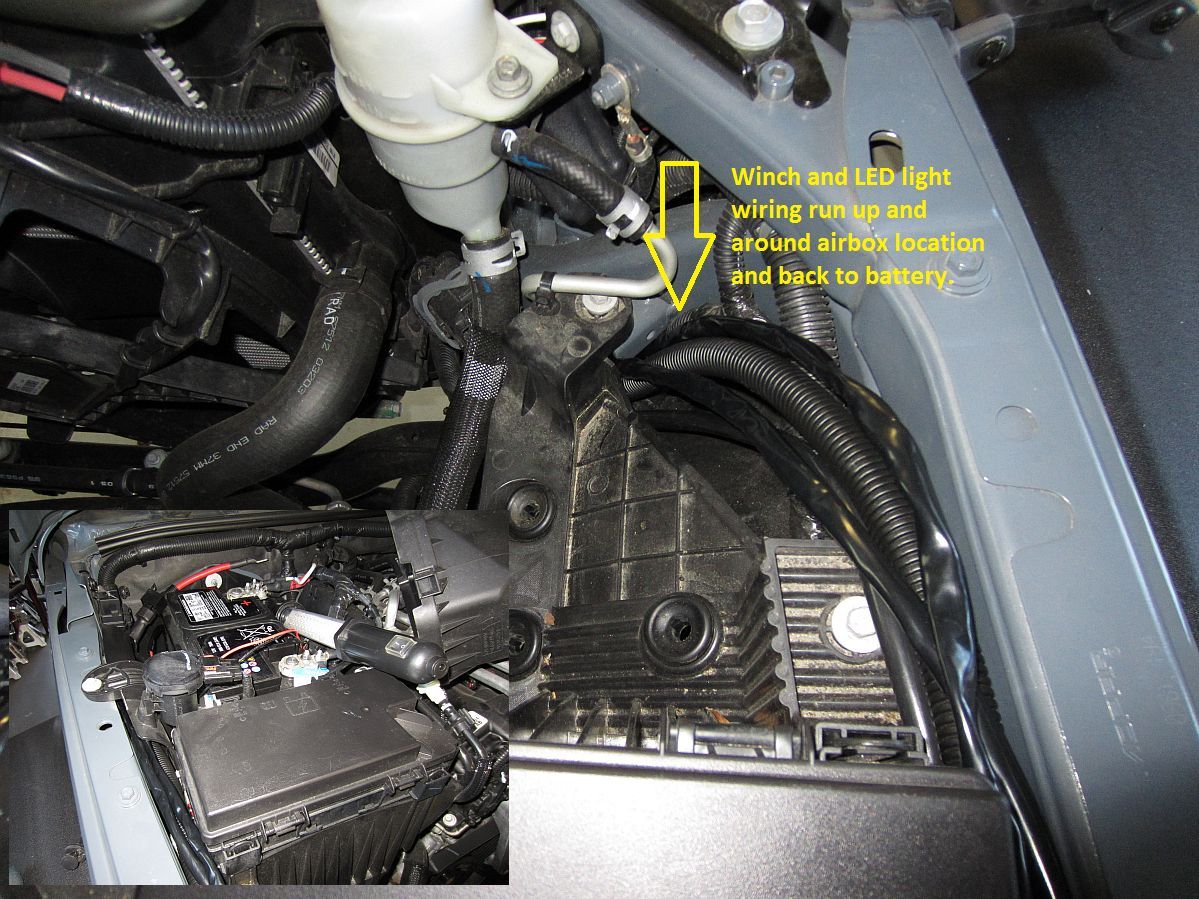
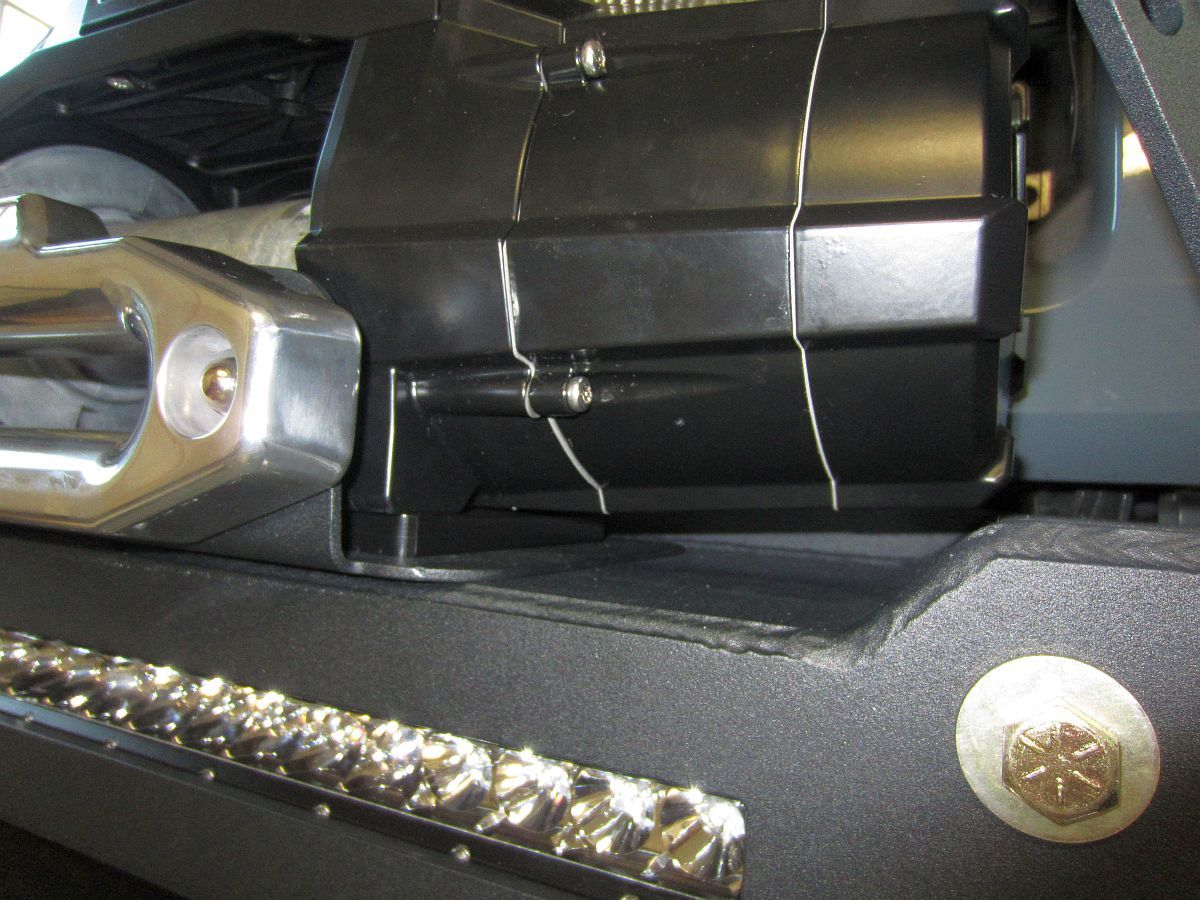
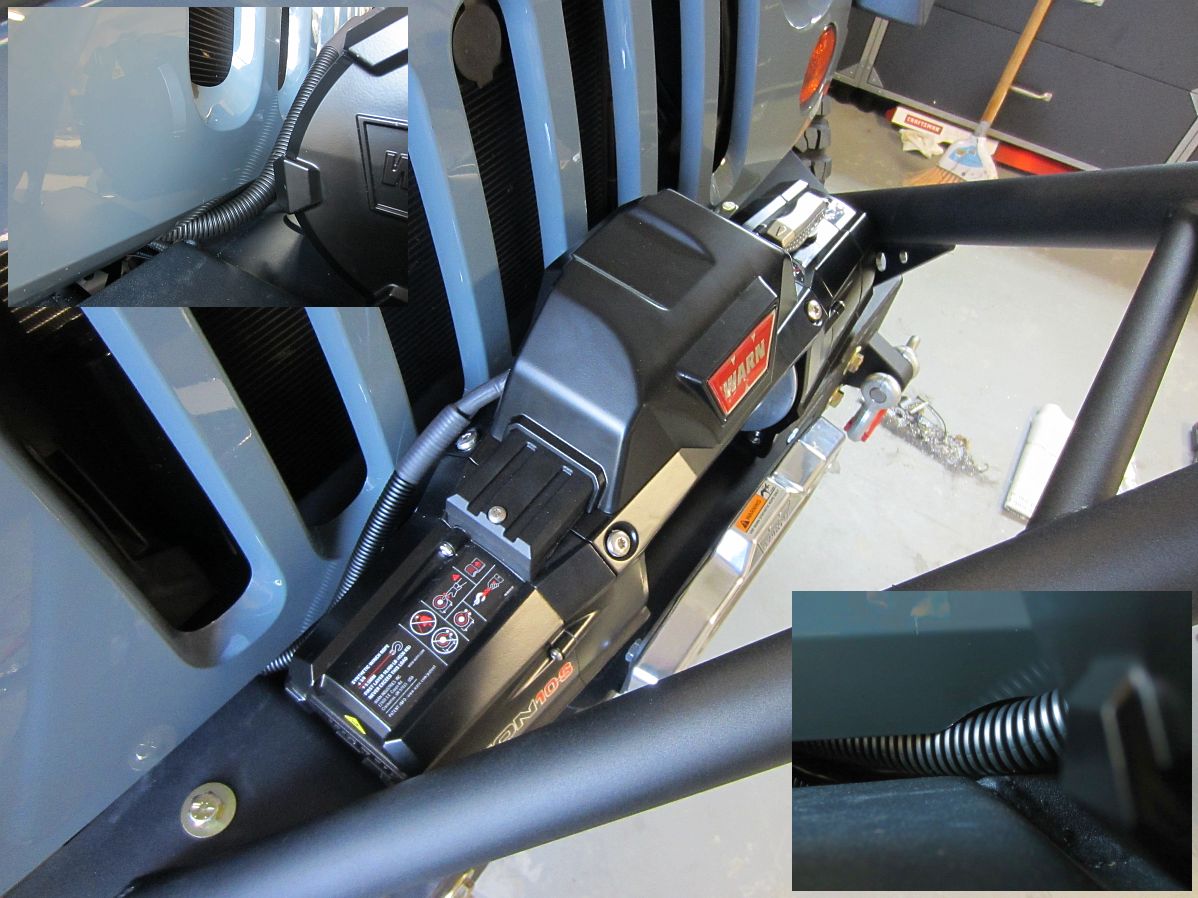
*Warn Zeon 10S Winch (Installation Guide/Owner's Manual, Synthetic Rope Installation (video HERE), Parts List, Winch Techniques, and archived Specs/Features Page. purchased from Krawl OffRoad with ACE bumper. This winch is pretty new but I found some info on Expedition Portal, Crawl Magazine, and of course, the JEEPForum. I went with synthetic rope over cable for reasons outlined HERE and HERE. Also found a video on synthetic rope repair HERE. I decided not to run the wiring through the grill slot but used a belt sander to carefully clearance a recess at the bottom of the grill and run the wires there for a cleaner look. Also got the solid Warn Zeon Rope Cover (P/N 89775) to minimize exposure of the rope to UV, installation instructions HERE. It was a tight fit and I ended up shaving the lower tabs down by about half to make it work.
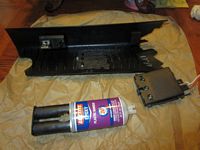
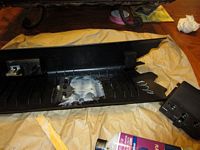
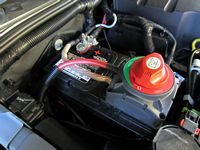
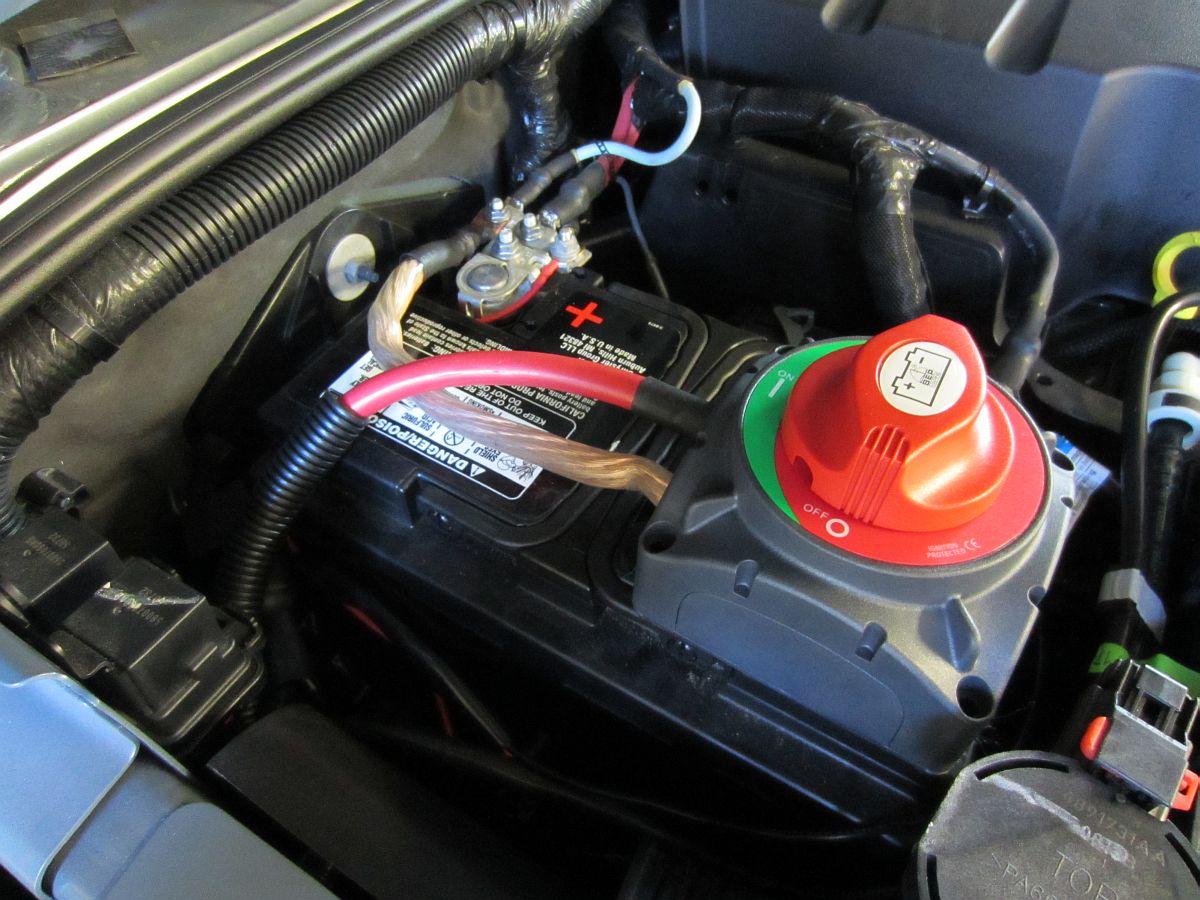
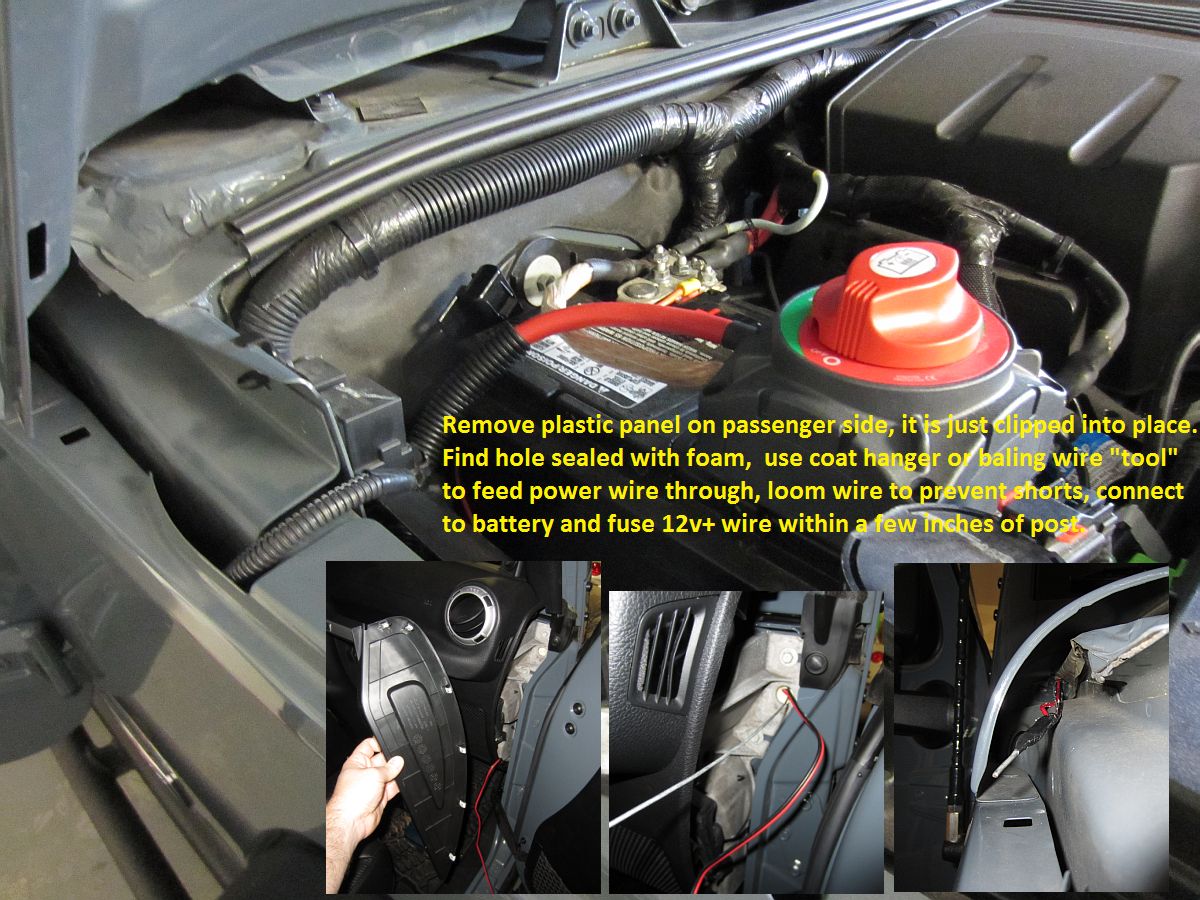
*BEP 720 Heavy Duty Switch wired in between battery and solenoid control for winch, this way I can prevent the new vandalism going on by turning on power to the winch ONLY when I plan on off-roading (no power when parked in the parking lot) and also acts as an emergency cutoff.
*Factor 55 ProLink Winch Thimble from Rebel OffRoad installed for strength, safety, and cleaner look. Review from MoabJeeper Magazine HERE
*ARB Recovery Kit from Quadratec including (1) Snatch Block, (2) 3/4" D-Ring Shackles, (1) 10' x 2 3/8" Tree Strap, (1) 30' x 3" Snatch Strap which was supplemented with (1) Pair MileMarker Recovery Gloves and (1) ARB Winch Cable Dampner.......and could probably still use some more recovery straps and a snatch strap or two.
*Crosby 3/4 D-Rings (G-209-A, P/N 1017538), aka screw pin anchor shackles, sourced from Mike at North State. The above recovery kit came with a Chinese D-ring but I wanted the best and one that was rated. Crosby are touted as the best: made of forged alloy in the USA and used by rigging companies. Specs HERE. I bought (4) of these- all with red Daystar D-ring Isolators.
*Winch Recovery Bandana - GREAT quick reference when you get in a bind, image HERE.
*Rigid SR20 Light Bar (P/N 92031, Spot/Flood Combo, data sheet HERE, installation instructions target="_blank">HERE, more information HERE) from ATV Galaxy on eBay, best offer price a bit lower than list price and cheaper than any of the forum(s) vendors. This light is BRIGHT
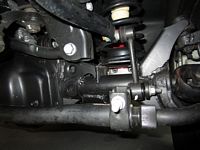
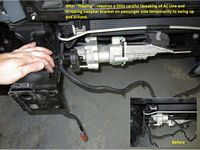
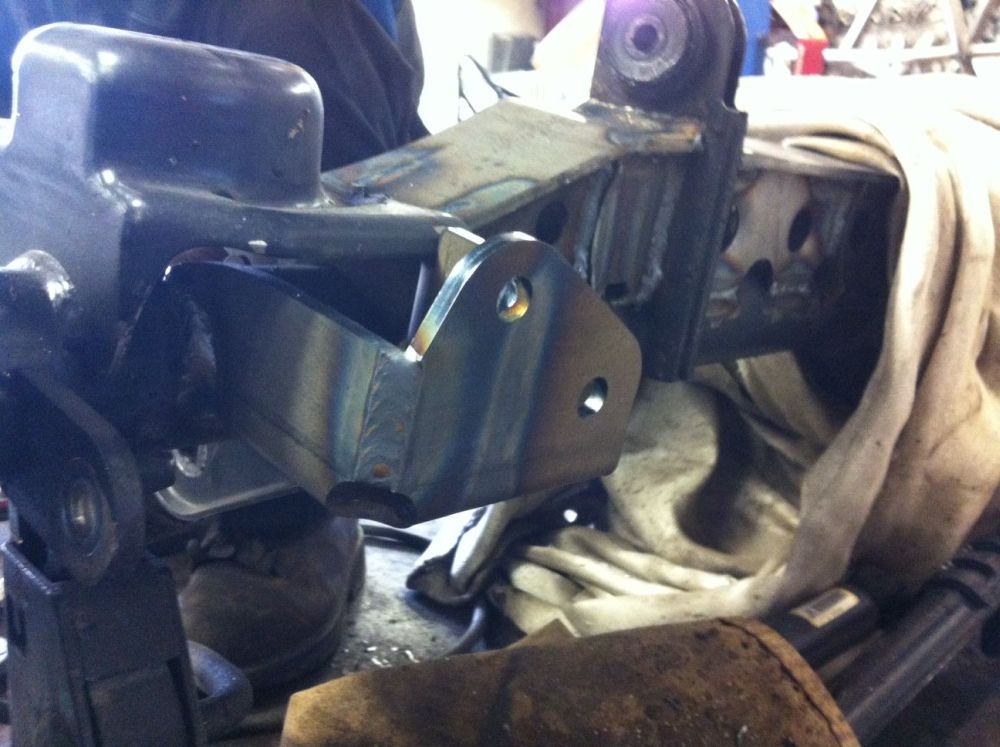
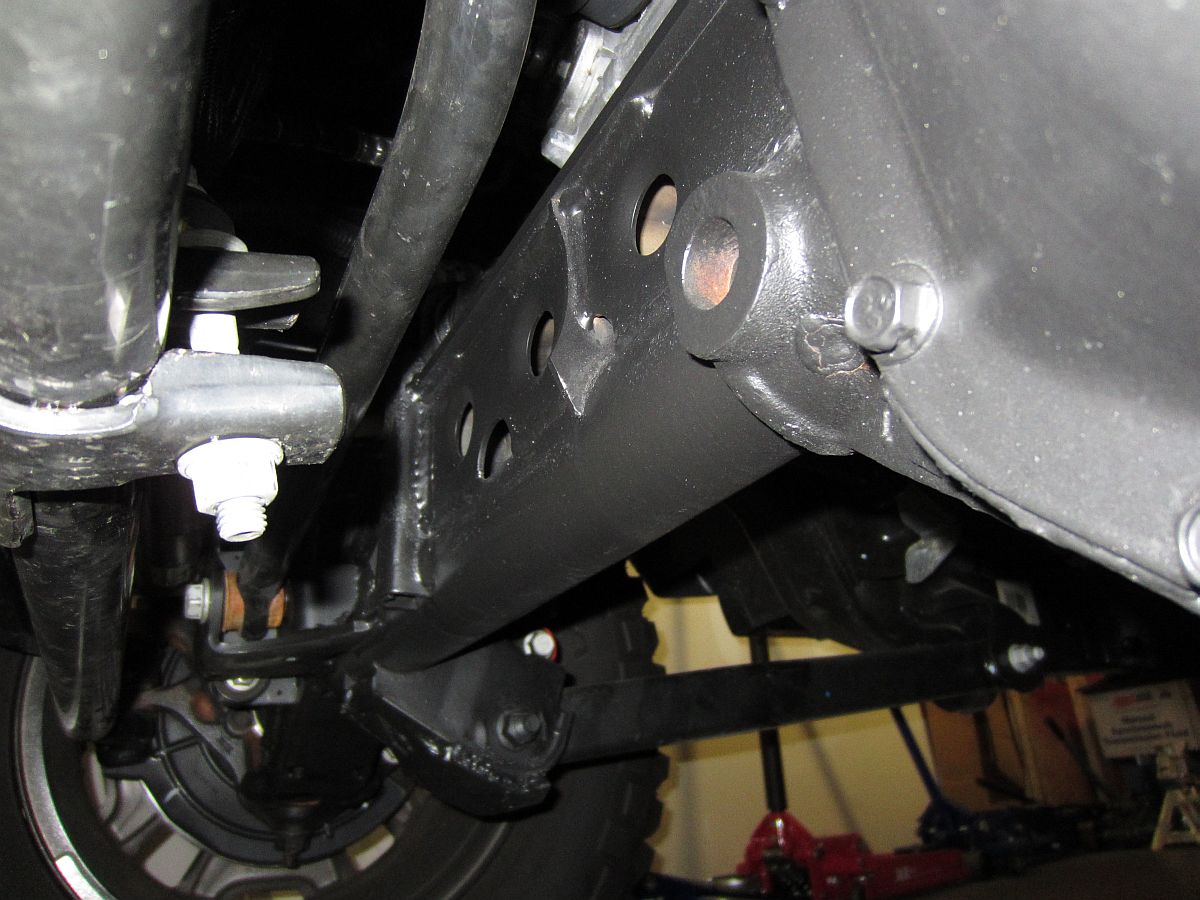
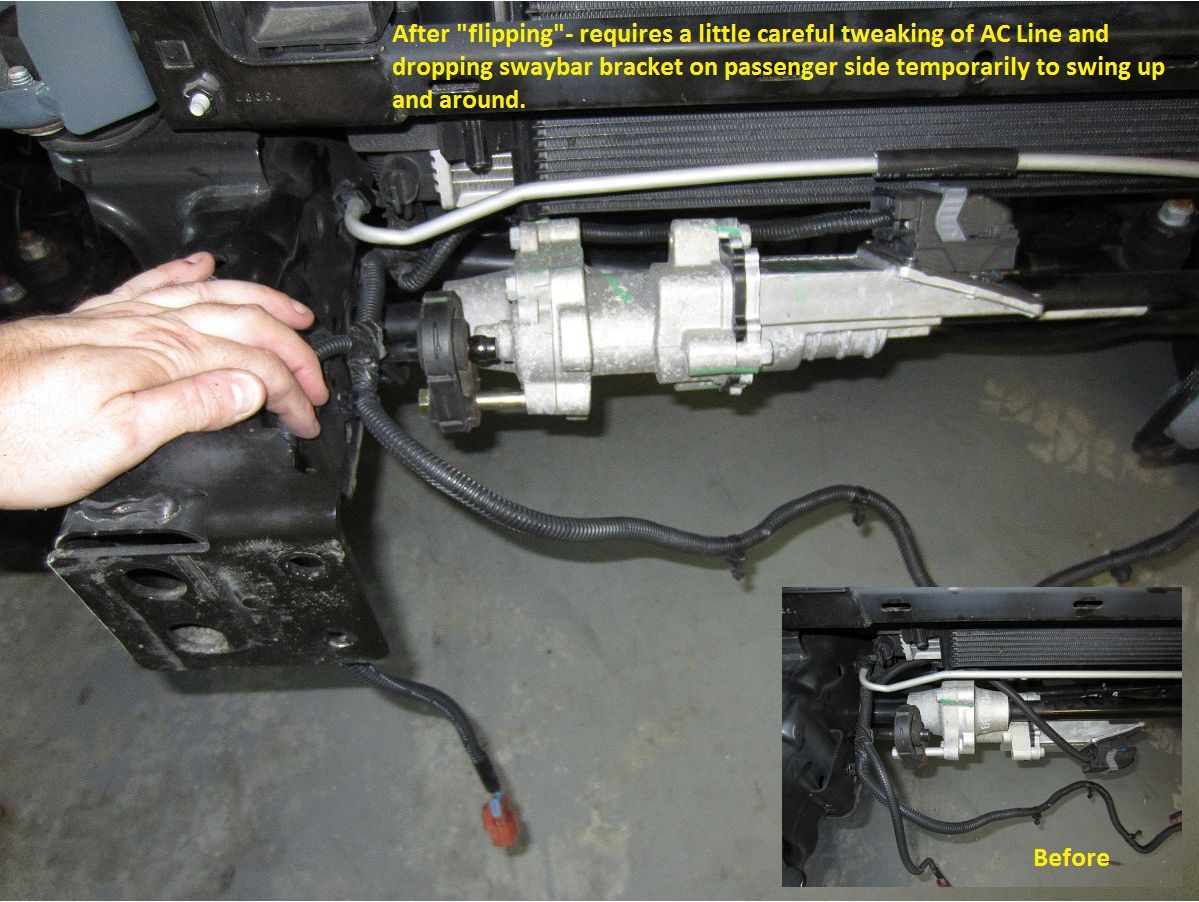
*MetalCloak Disco Flip Bolt (aka JK Sway Bar Ground Clearance Kit) installed to help protect the sway bar disconnect motor by positioning it higher- it had even less protection with the crash bar removed (installation video HERE). I'm not sure that the engineer that came up with the factory mounting location has ever been offroad
I had originally ordered the Synergy Relocation Kit (installation instructions HERE) but decided I preferred the one piece design from MC, Will was great and shipped it the same day I placed the order. I found some DIY threads on JK Forum, JK Freaks, and Wandering Trails but after running to various hardware stores ran out of time and went the easy delivered-to-my-door-guaranteed-to-work route
. The flip was a bit different on the 2013 in regards to interference with the radiator and AC line, maybe a bit better than the 2012.
NOTE: A lot of the things mentioned in the write-up for my wife's bumper and winch installation are applicable here so I did not take a lot of pictures this time, just a few to supplement what is already HERE.


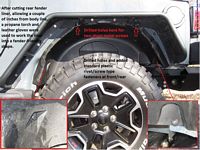
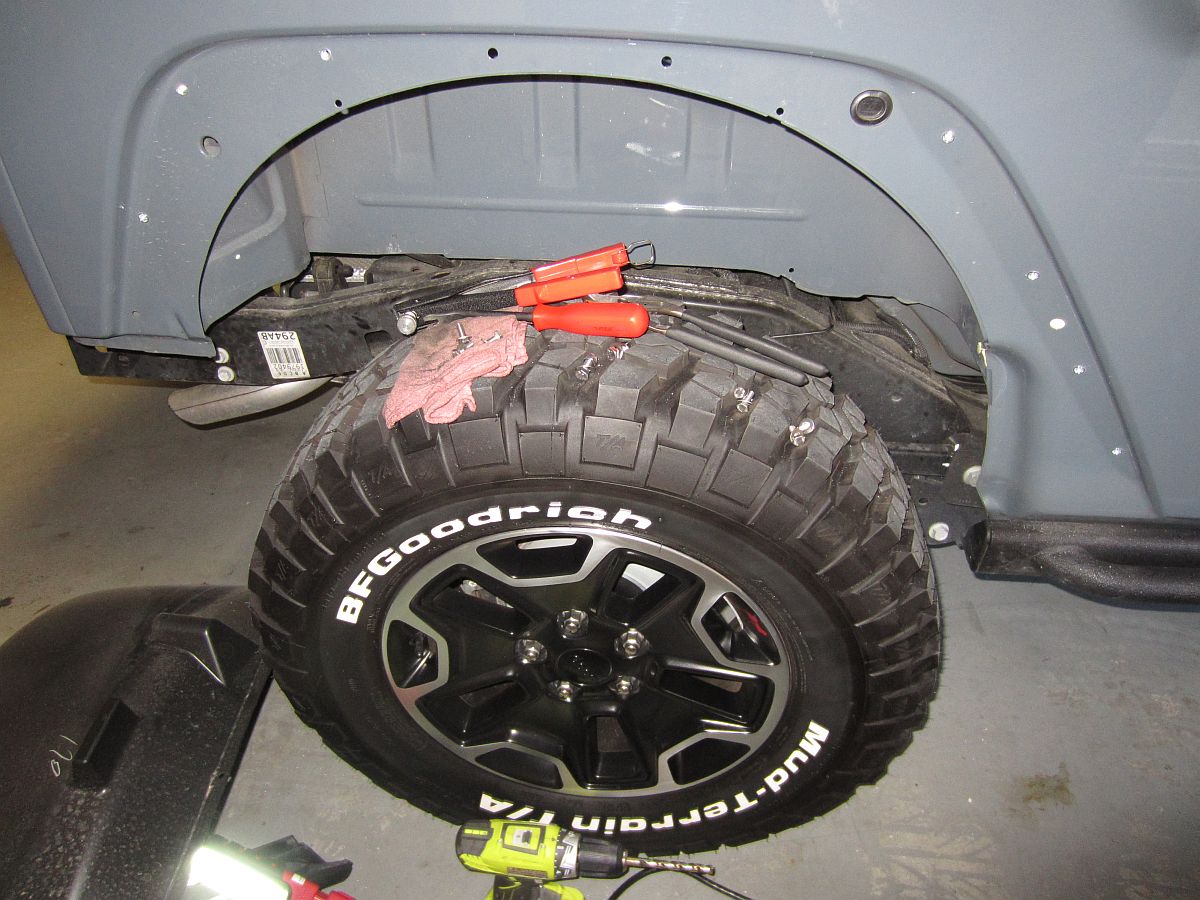
ACE Engineering Narrow Tube Fenders from Krawl Off-Road installed- Ace Overview HERE, Ace Installation DIY Guide HERE, and another video on how the inner fender liners can be removed, cut, and reinstalled HERE. Also some good pics of where the fenders can be cut in the Bushwacker fender installation guide HERE.
I found the tool in the ACE video at the local McParts store, this is worthwhile to purchase as it makes removing the plastic retainers SO much easier, I actually sharpened mine a bit to make it easier to slide under the retainer head. The tool I bought is the OEMTOOLS 25313 Door Panel Remover and the plastic retainers I bought to replace the ones removed and unusable were Dorman 700-333 Trim Panel Retainer, Pack of 15.
I was able to trim the front and rear fender liners for re-use, I wanted to keep water off some of the electronics/computer harnesses that are exposed up front and make it a little quieter in the back when rocks are thrown up. After trimming the fenders the outside anchor points used with the OE plastic fenders are removed so there are some adjustments required for stability of the liner. I was able to use most of the inner fasteners and add some screws to stabilize them. I also reshaped some of the overhanging plastic using a propane torch to heat (not burn) the plastic and gradually/carefully bend and shape, and may go back later like I did with the other Jeep and spray bedliner on the painted surface under the fender not covered by the liner. I sourced some LED side markers that I might install later to replace the removed OE lights.
I had already done this for my wife's 2012 Rubicon, as detailed HERE so I was a little ahead of the learning curve this time.
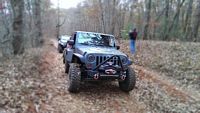
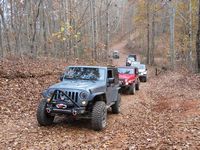
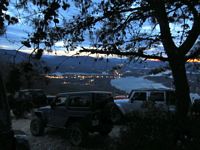
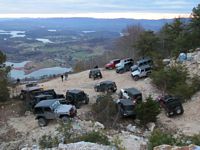
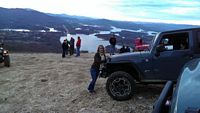
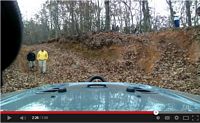
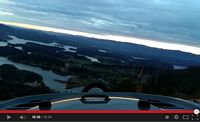
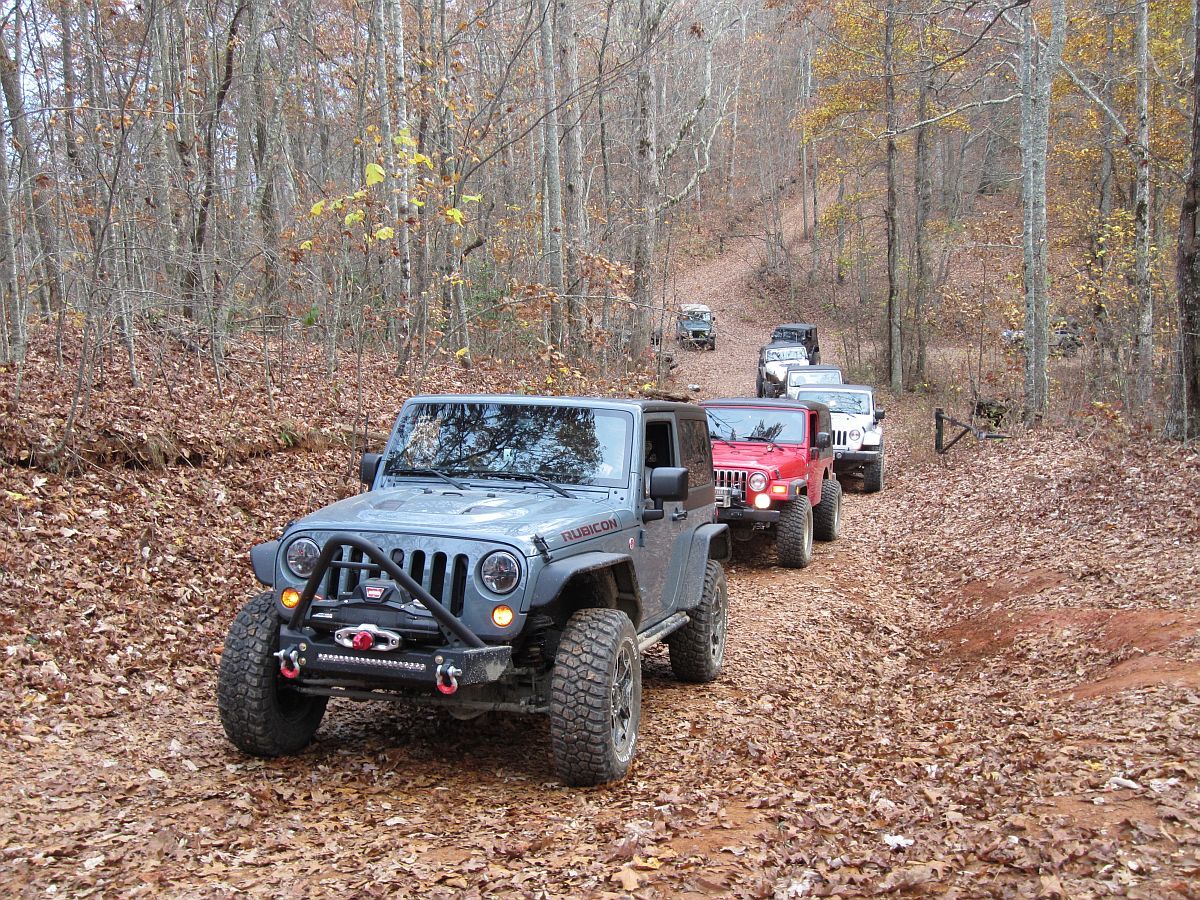
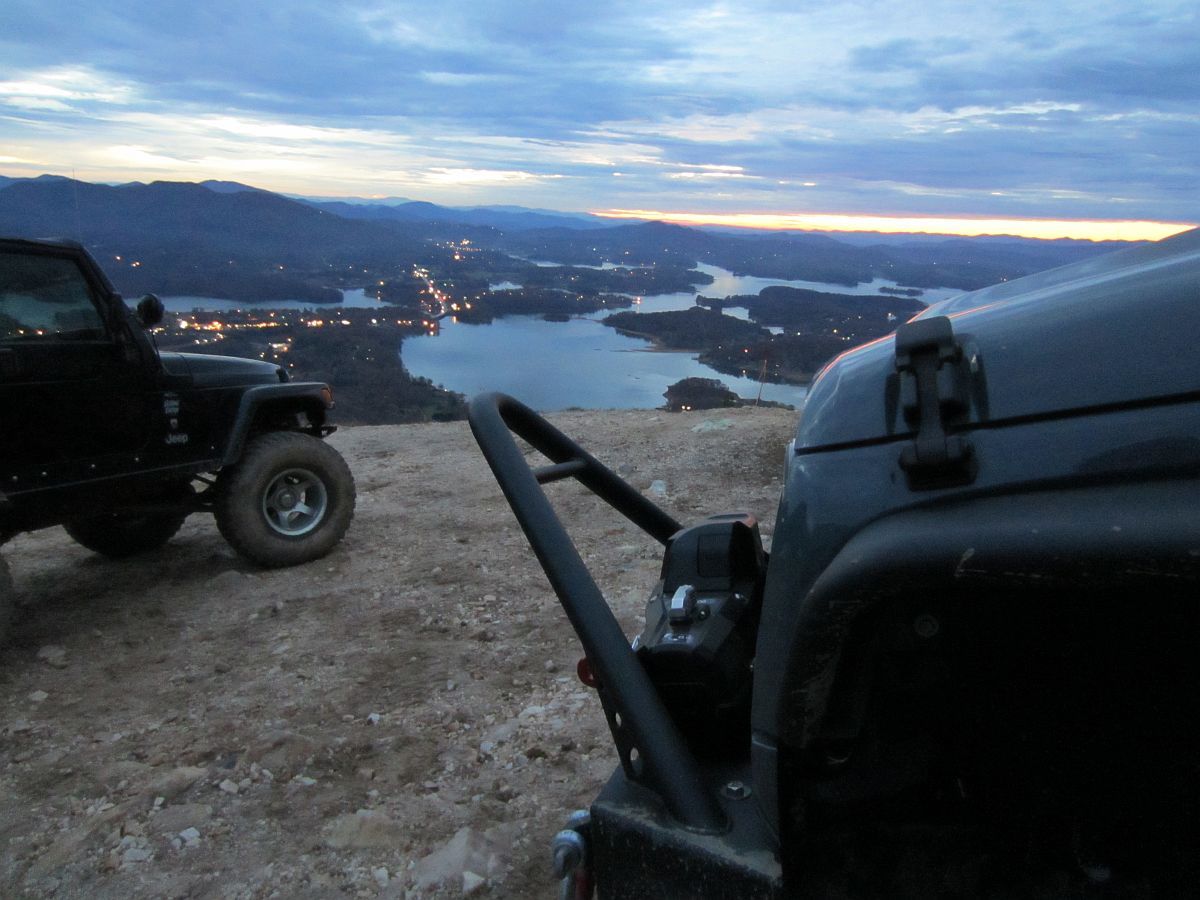
I installed these the night before our trip to Tray/Bell Mountains in North GA around the Hiawassee area with the Georgia Jeepers- lots of great scenery during one of the last weekends of fall leaves and a very scenic view of Lake Chatuge from the top of Bell Mountain. I captured some video HERE and HERE.

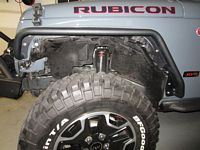


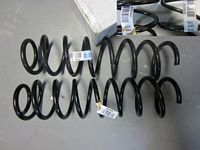
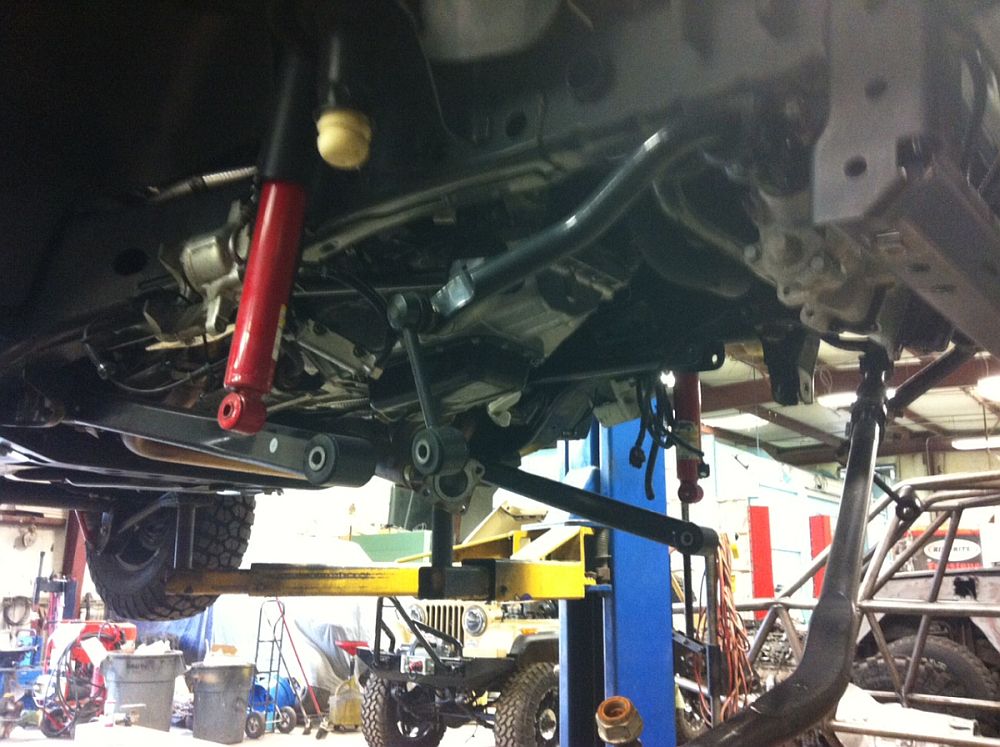
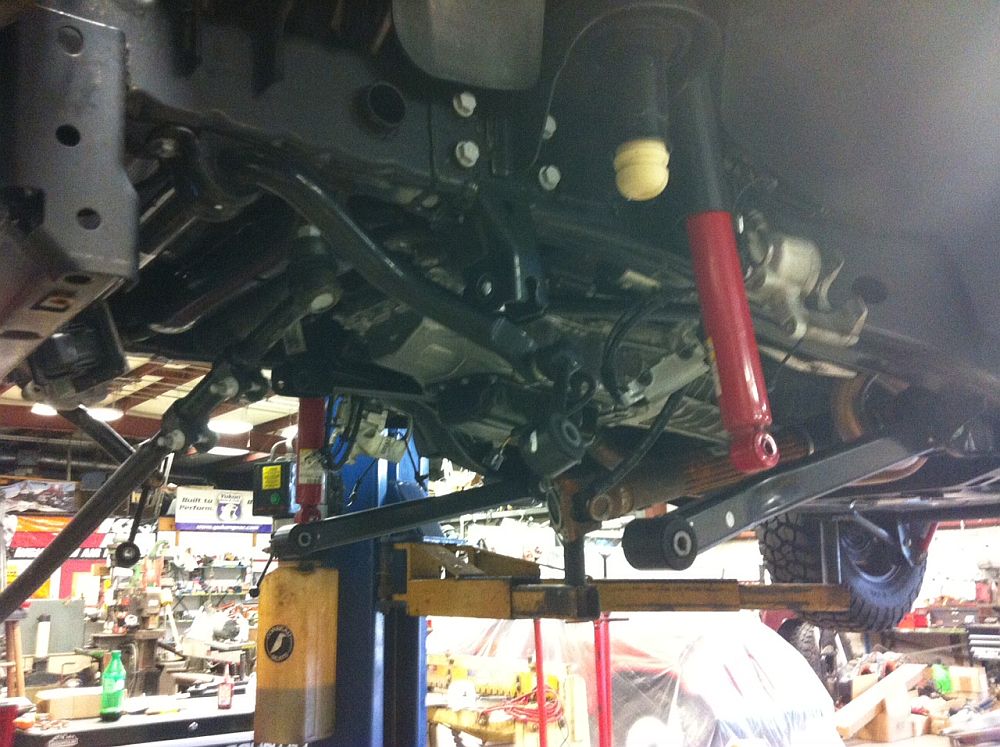
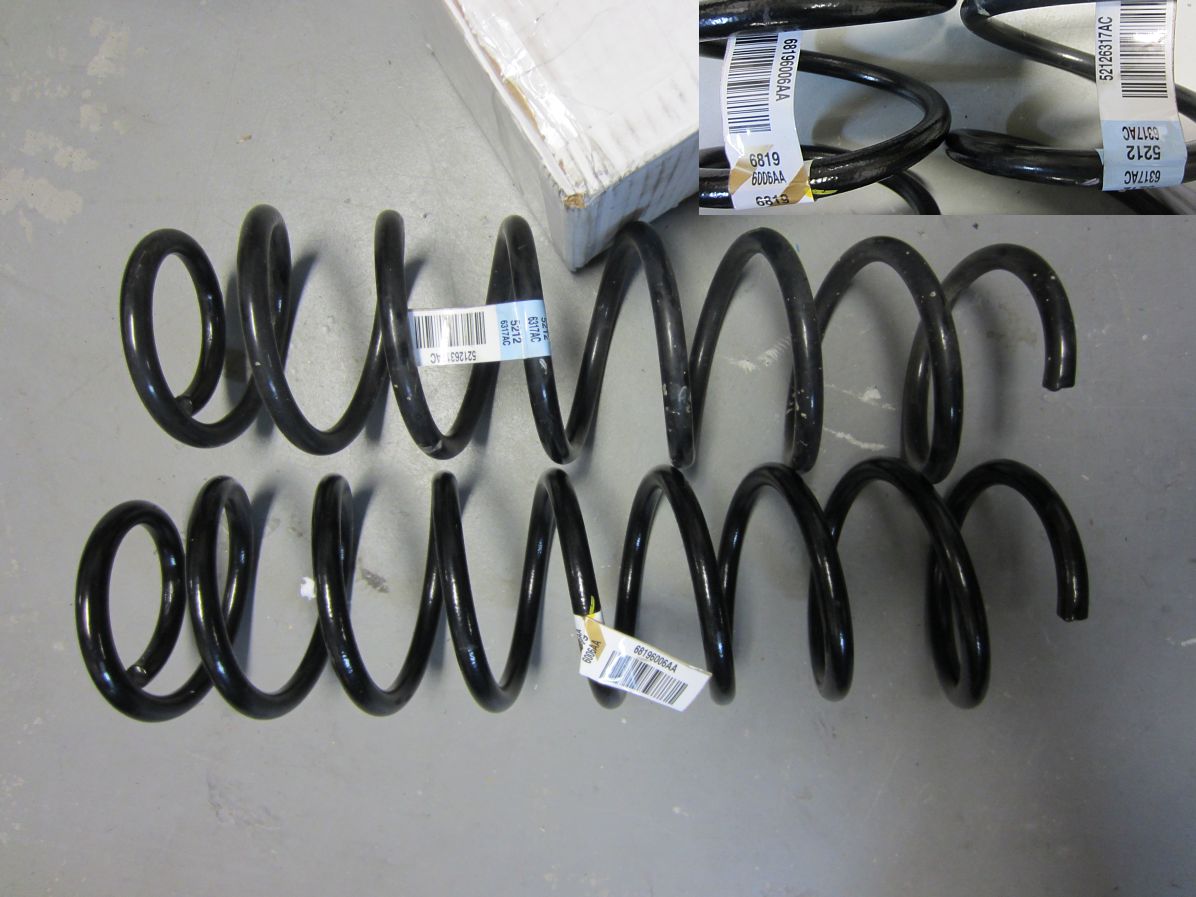
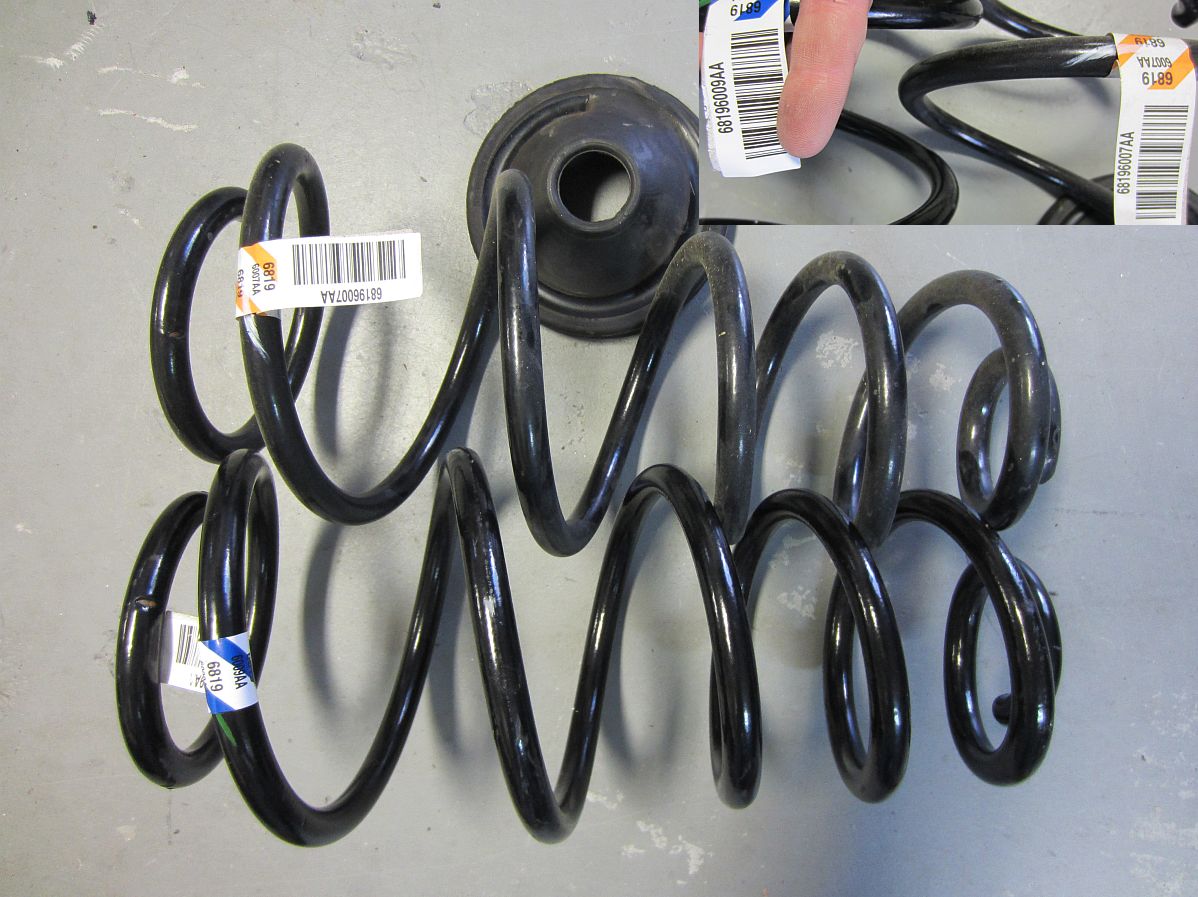
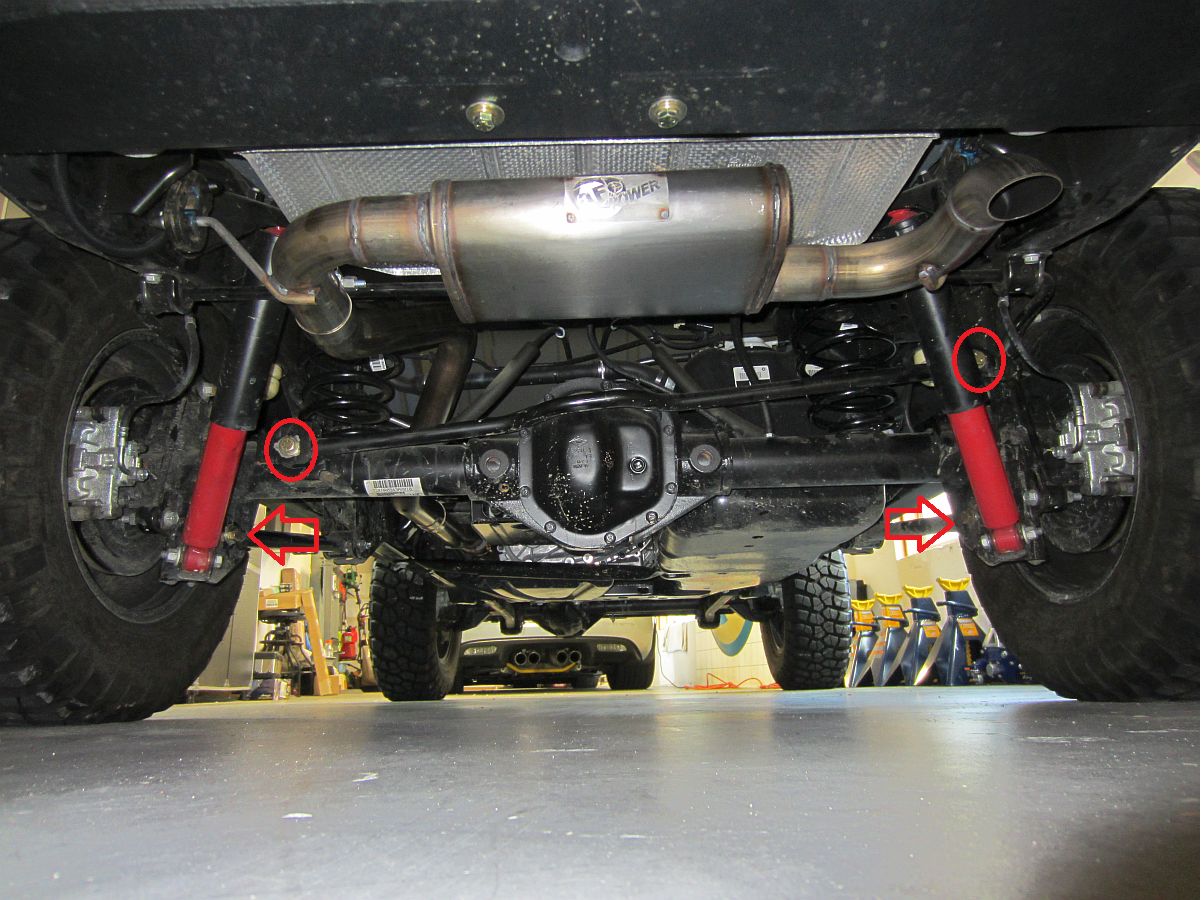
The 10th Anniversary (aka 10A) Rubicon comes with springs that are a little longer than the regular Rubicon and maybe a bit stiffer to give it a little lift and to support the weight of the 10A steel bumpers. After installing my winch I lost a little bit so like I did for my wife's Jeep (installing JKU springs on her JK), I decided to find some 10A JKU tow package springs. There are a lot of new dealer take offs on eBay for a reasonable amount. The JKU springs are typically a bit stiffer than JK springs and lift the JK back up to or a little above where it was prior to winch installation. I think I have a little more now with the JKU springs than I had OE before the winch but imagine after I add skids I might be back to about the same which is fine- This is my highway traveler so no plans for a big lift/tires, that will be what the other Jeep is for.
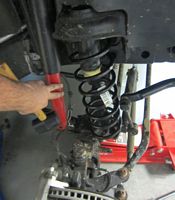
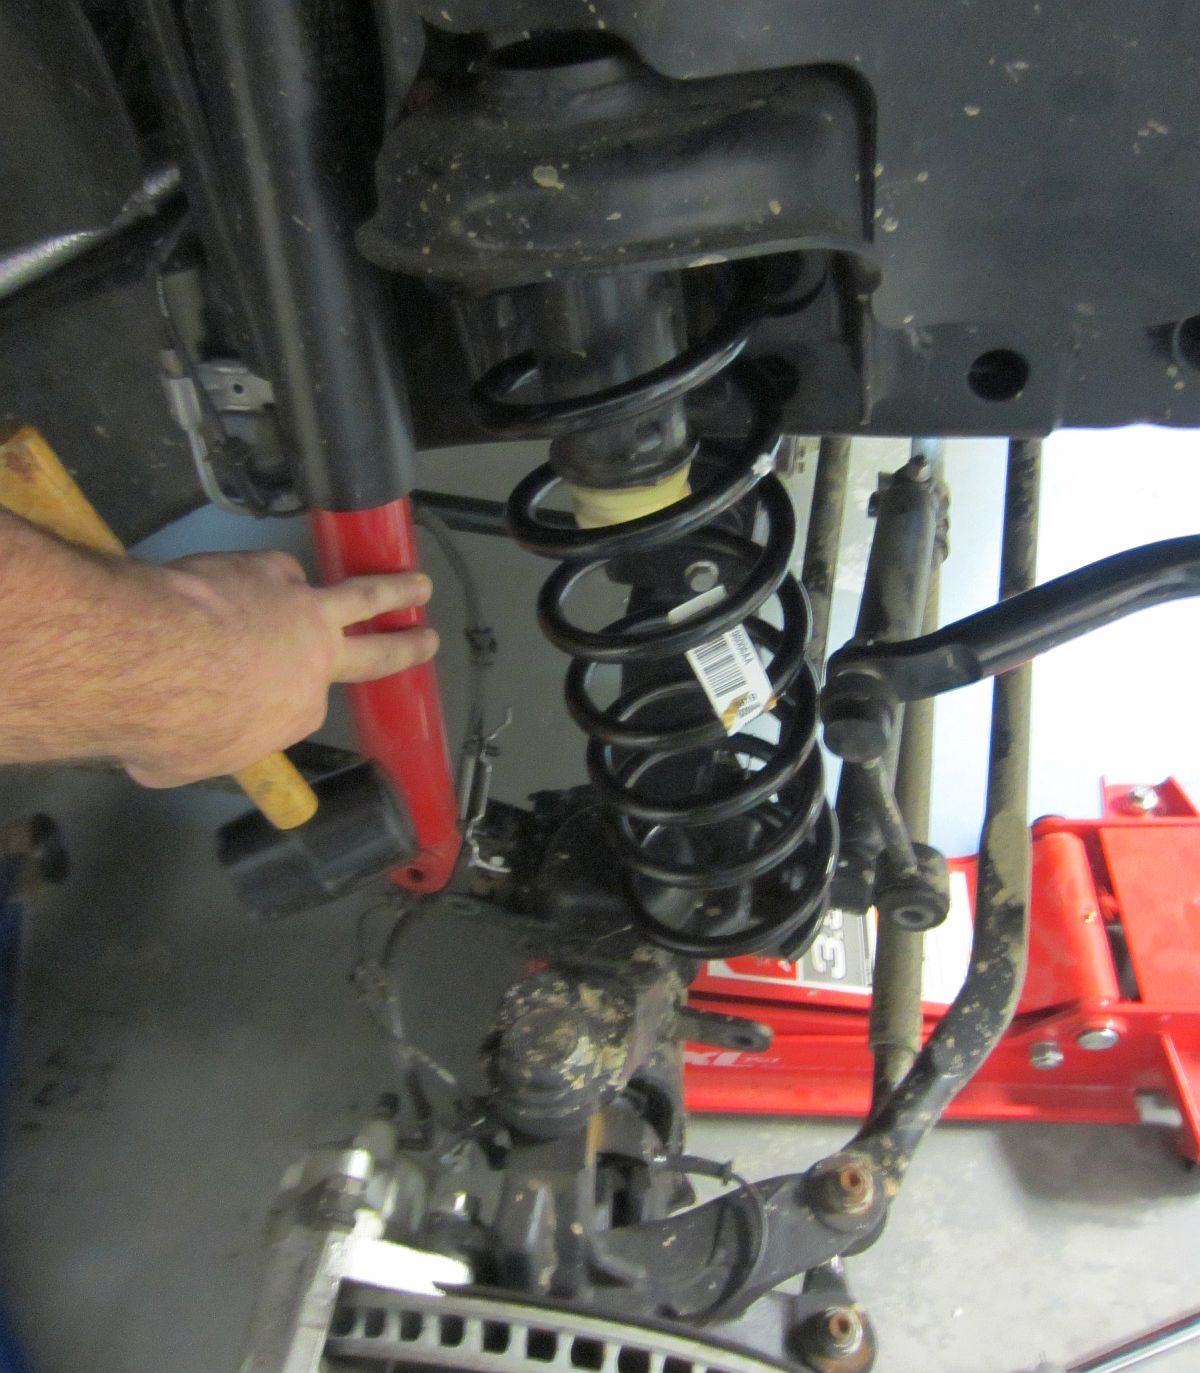
R&Ring the springs is not a big deal, a few jacks and jack stands are used: jack up the frame and place jack stand (I leave the jack for safety redundancy), jack up the axle under the control arm mount, remove the lower bolt/nut from the sway bar link, remove the lower bolt/nut from the shock, remove the retainer bolt for the brake line bracket and make sure it is free, lower jack and the spring should be able to remove easily. For installation you may need to exert a bit more force to get the spring into the lower seat once the spring is positioned into the upper seat. Replace and tighten the brake line bracket bolt, Replace and torque shock and sway bar link bolts with the suspension under load. DONE.
For my 10A JK, the OE springs were P/N 52126317AC (Front) and 68196007AA (Rear).
The 10A JKU springs I installed were P/N 68196006AA (Front) and 68196009AA (Rear).
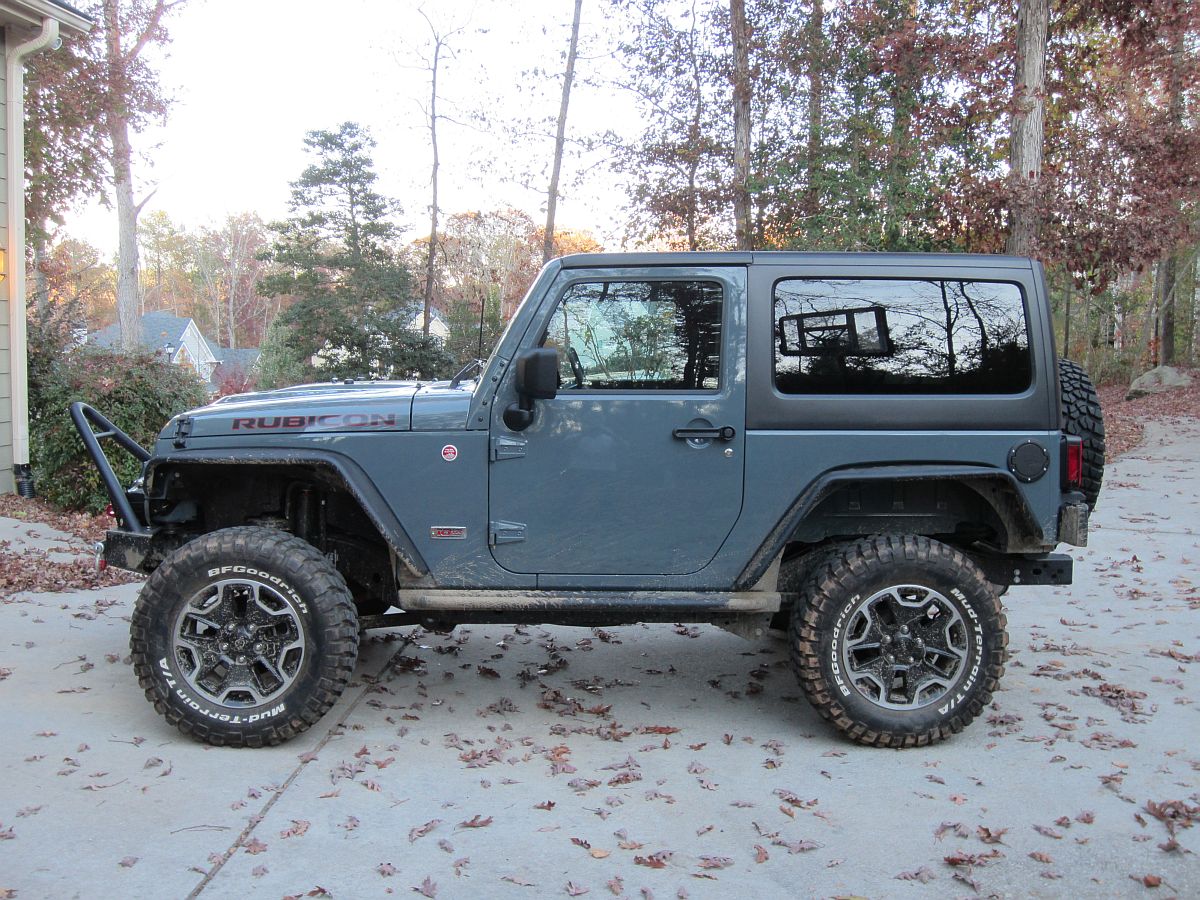
And yes, after installing the springs and taking the pictures I finally washed it


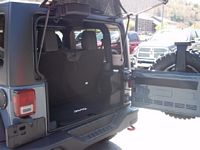
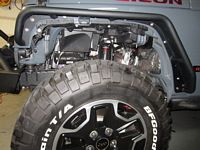
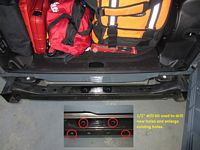
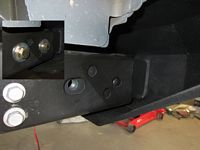
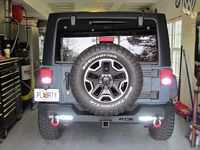
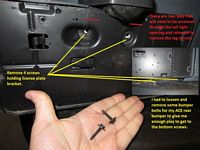
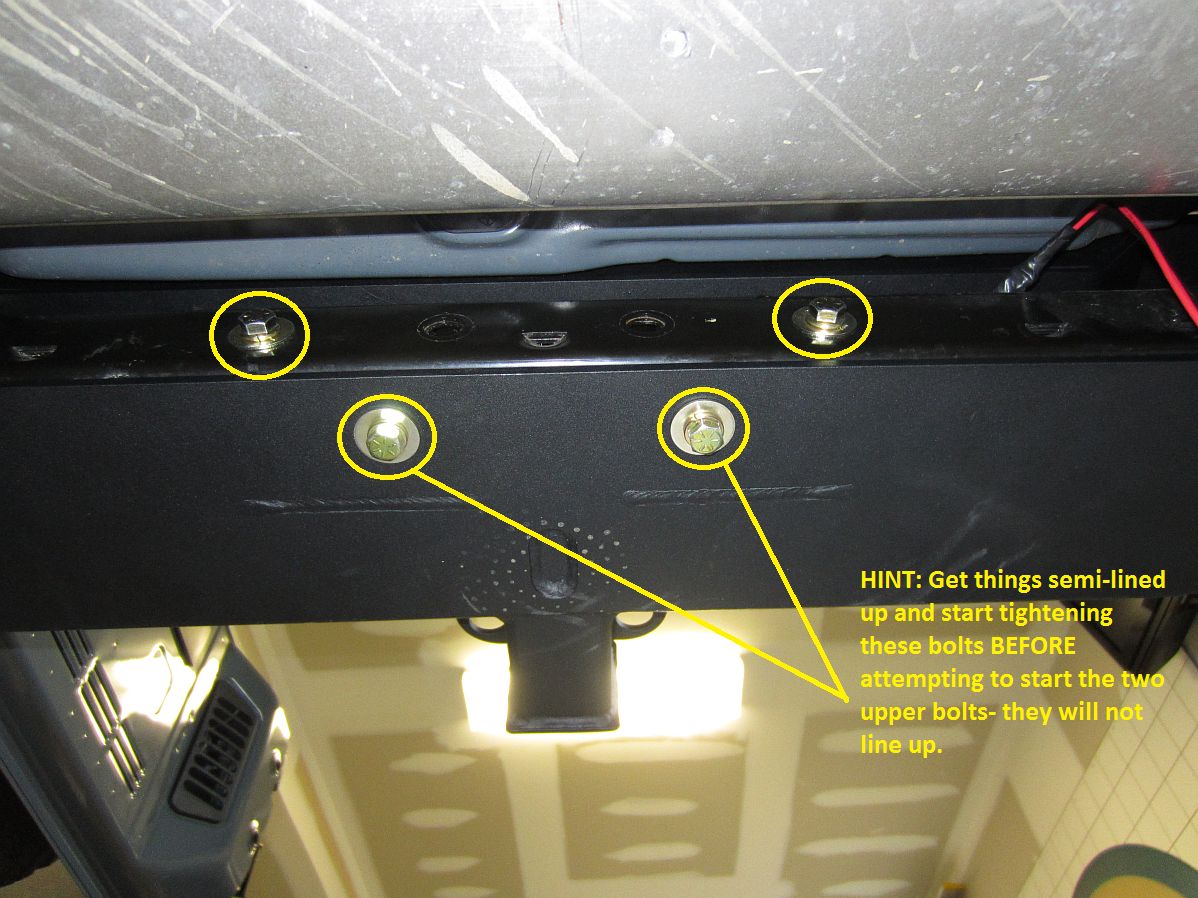
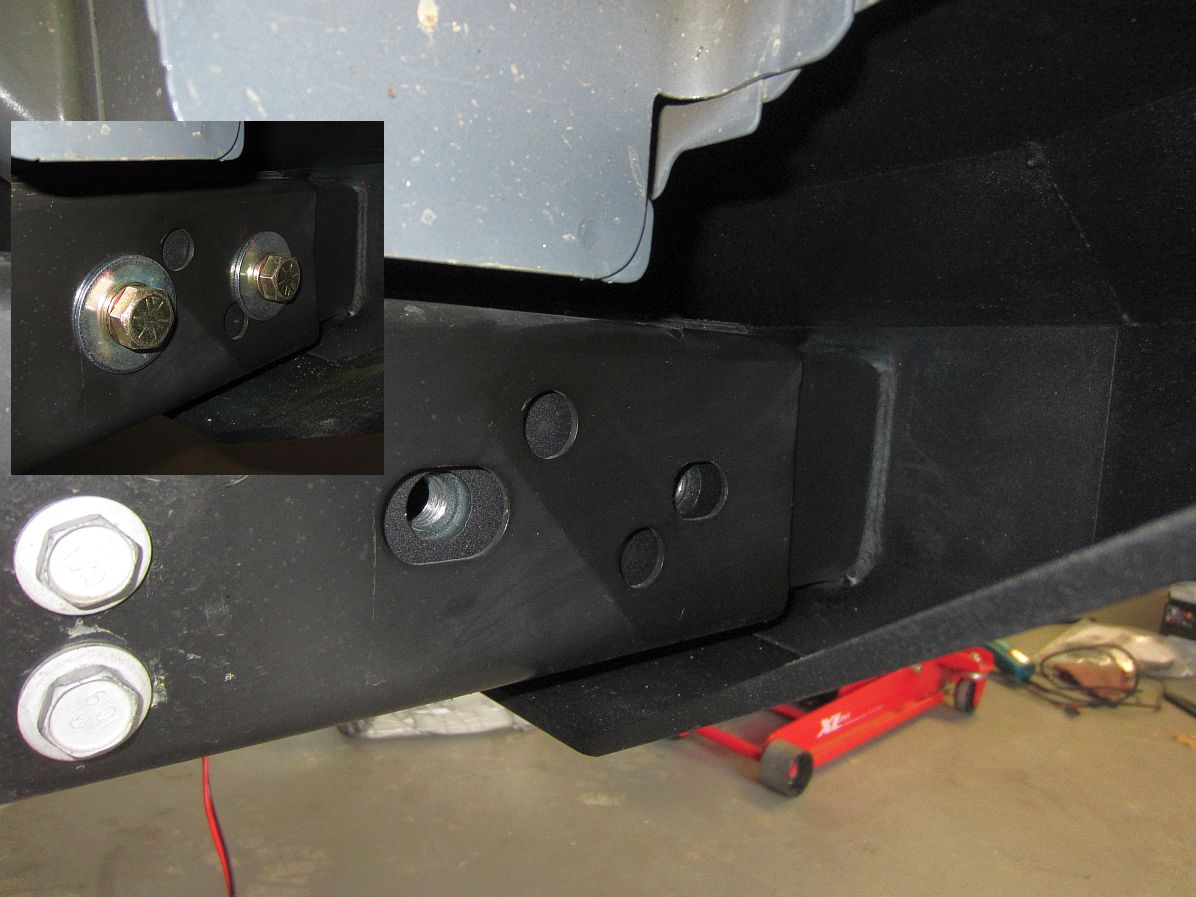
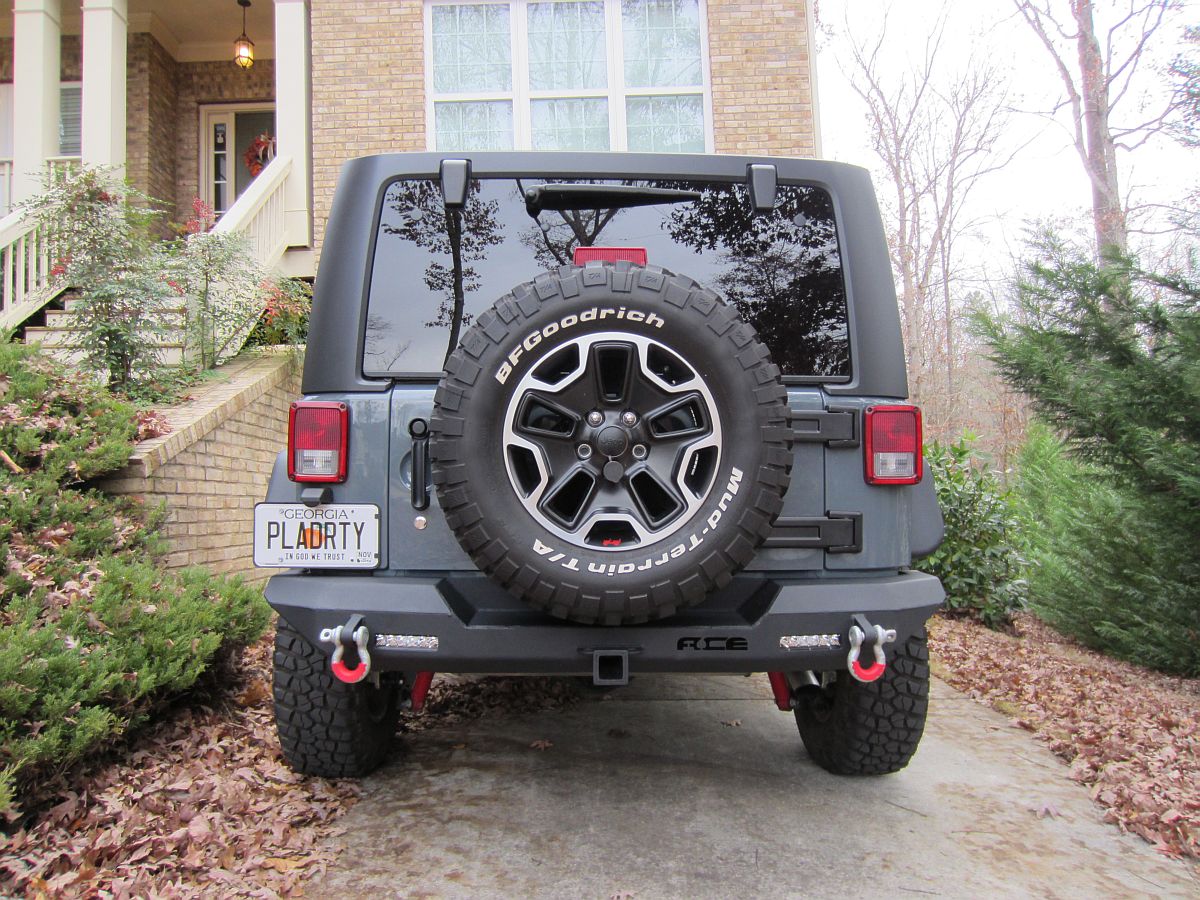
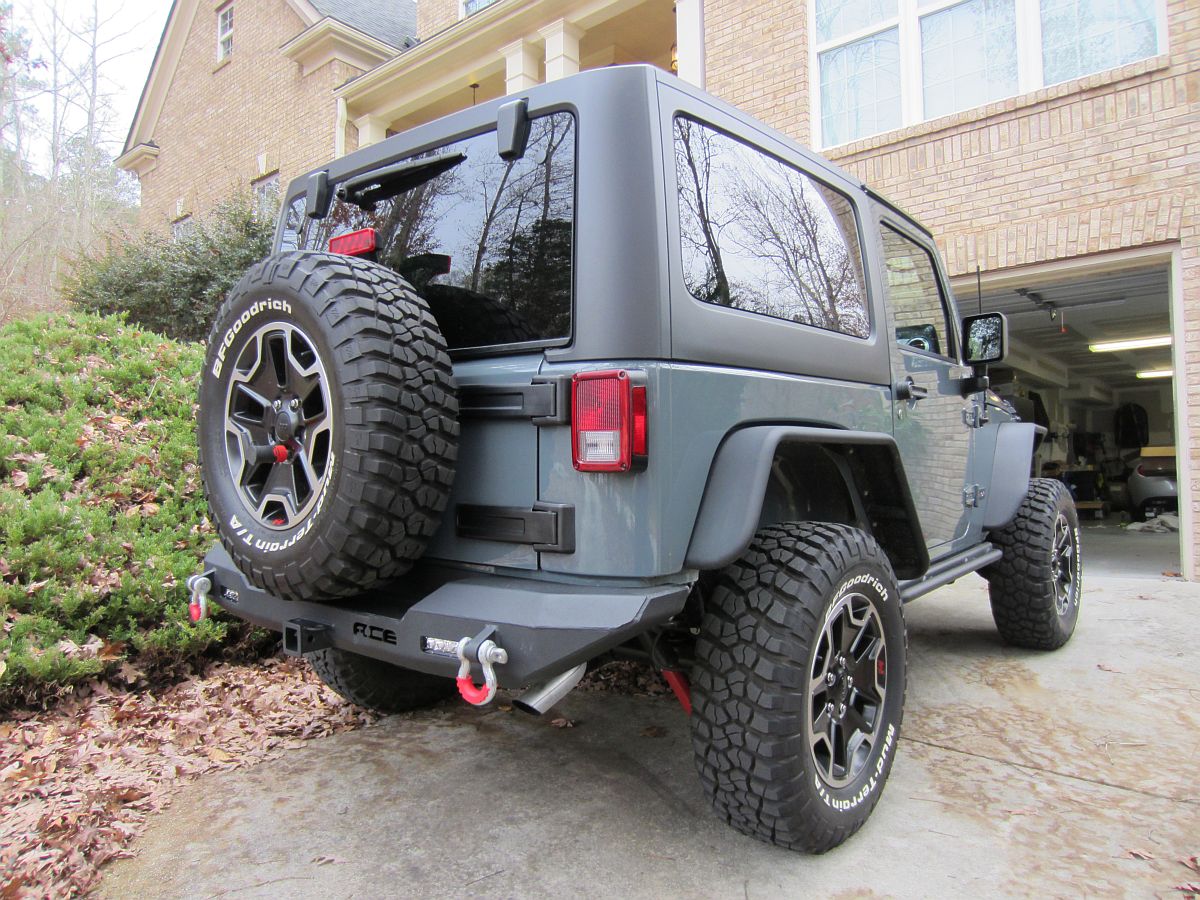
ACE Pro rear bumper purchased to complement all of my other ACE armor- Ace Engineering installation video HERE. I also have some pics below to supplement the video but they do a pretty good job of showing how/what/why/where/when.
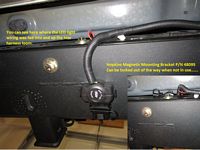
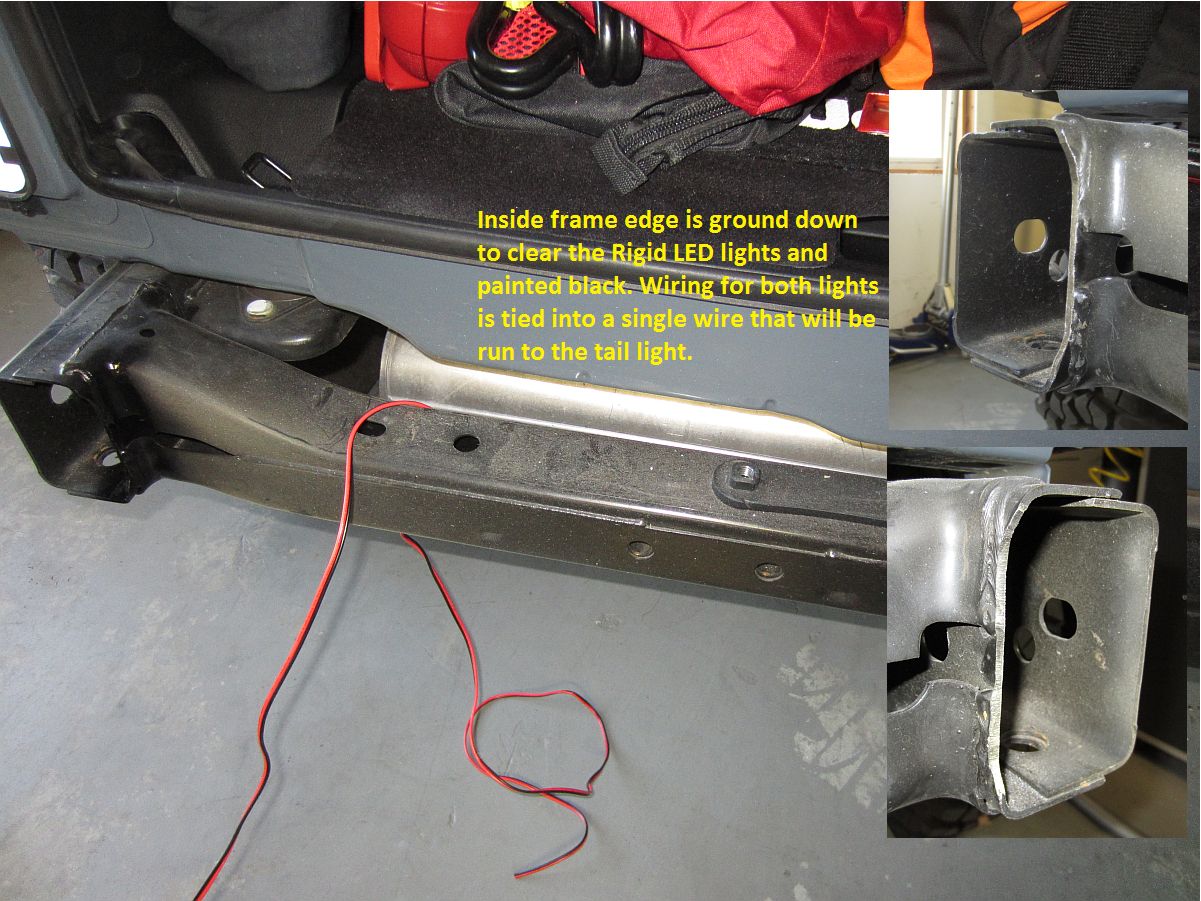
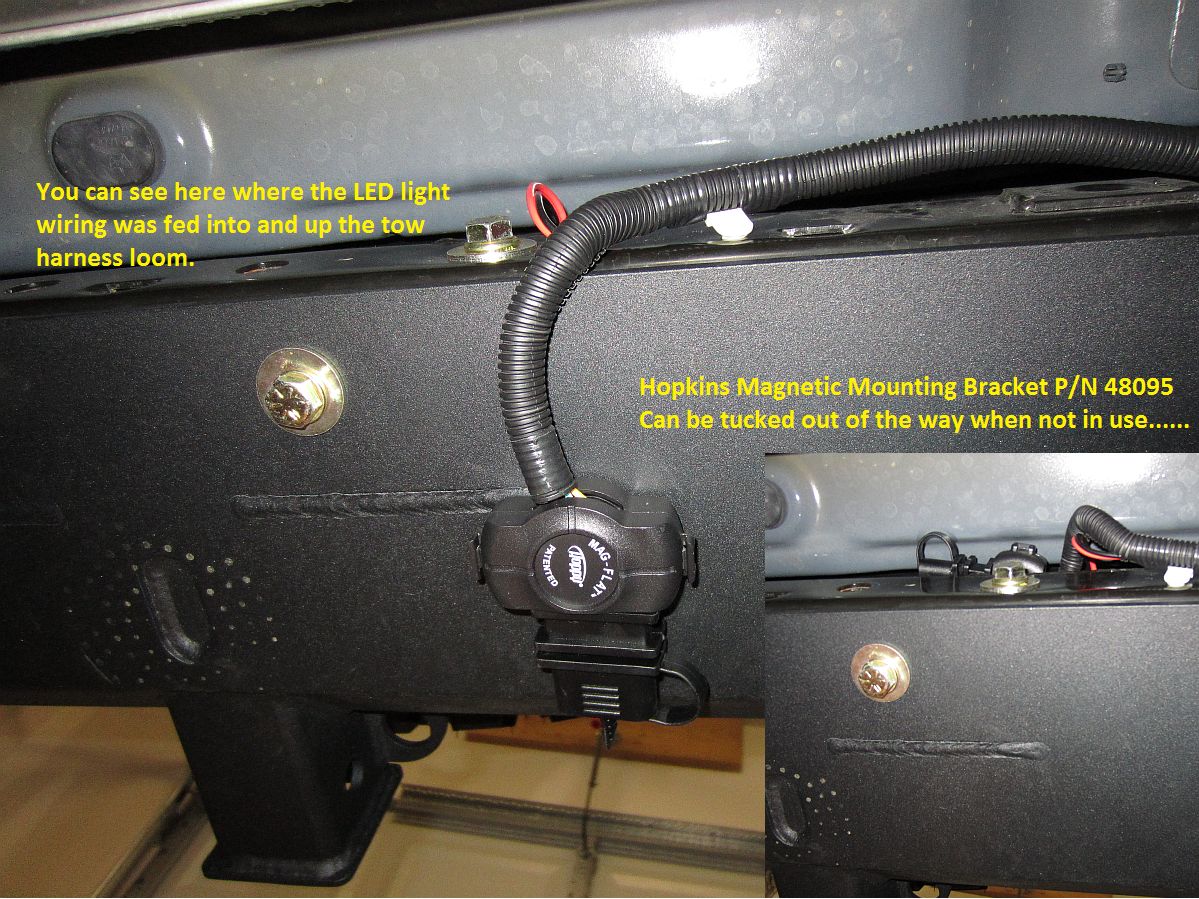
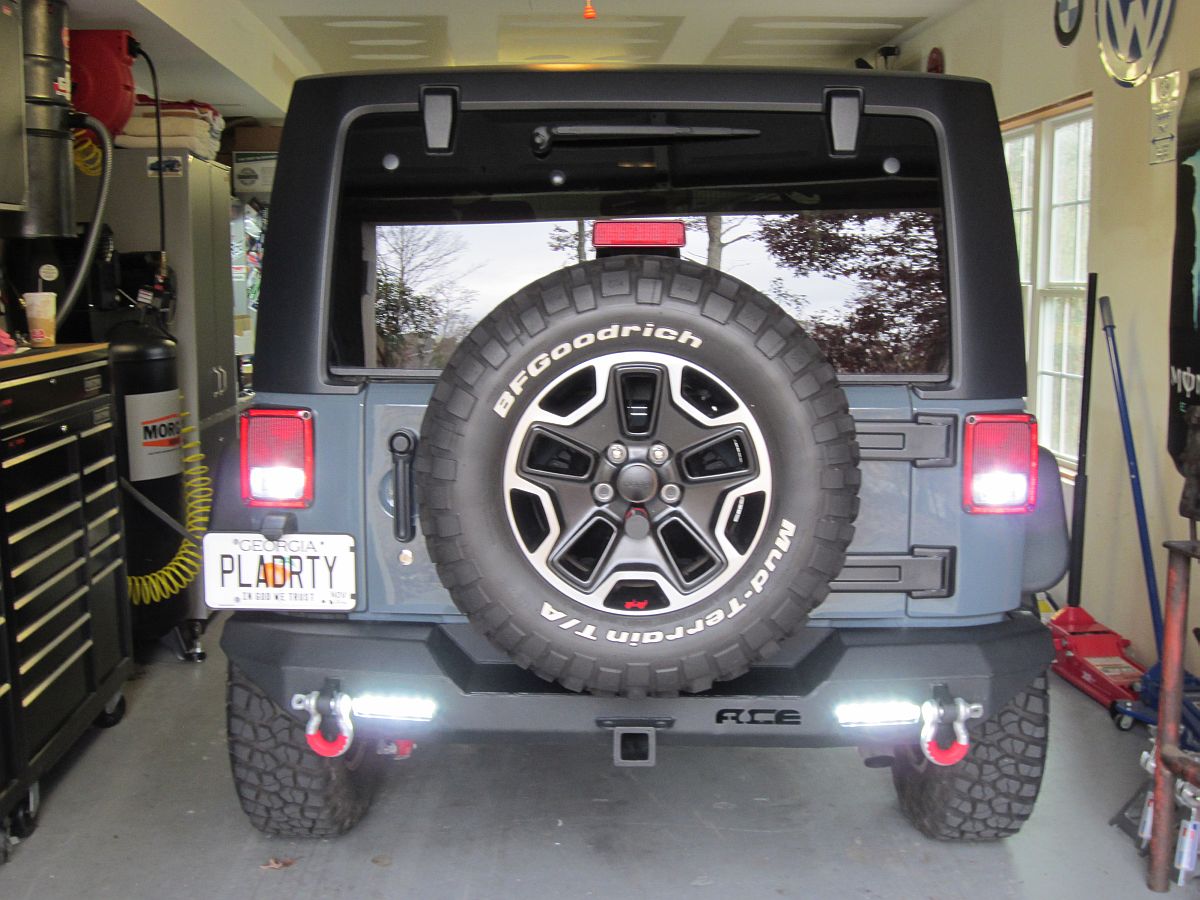
To fill in the bumper cutouts I purchased Rigid SR6 Light Bars (P/N 90631, Spot/Flood Combo- data sheet HERE, installation instructions HERE, more information HERE) from ATV Galaxy on eBay, best offer price a bit lower than list price and cheaper than any of the forum(s) vendors. These lights are BRIGHTand consume less than 2 amps each so I wired them directly to the rear tail light reverse lights by splicing into the tow harness.
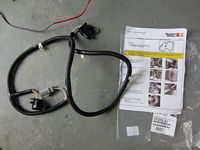
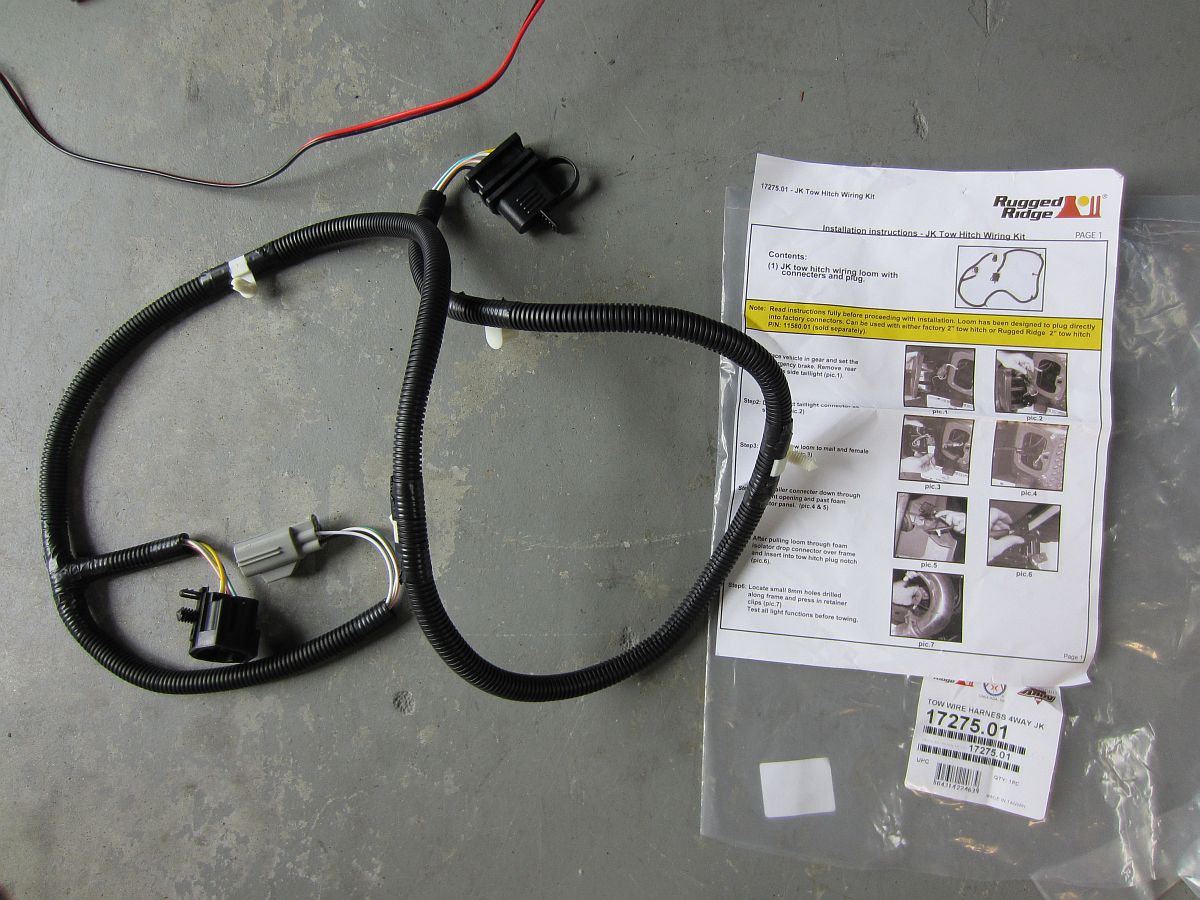
Since this bumper has an integrated receiver hitch, I just needed the tow wiring harness. The Rugged Ridge JK Tow Hitch Wiring Kit (P/N 17275.01) from Amazon (Wiring Harness Installation instructions are HERE) also proved to work well as a method to splice into the reverse lights without hacking up or tapping into the OE tail light harness and I was able to used the harness wire loom to run my LED light wiring. Basic harness routing can be seen in the pics I took when I installed this in my wife's Jeep HERE, and I have some more pics below to show the wires tapped for the reverse lights. Hopkins Magnetic Mounting Bracket (P/N 48095) from eTrailer allows the harness connector to be tucked above and inside the rear bumper when not needed and can be conveniently located any place on the bumper when it is needed.
Also purchased Strattec Hitch Pin Lock 5/8" (P/N 7018440) which seems to be interchangeable with or superseded by Bolt Hitch Pin Lock 5/8" (P/N 7018448).


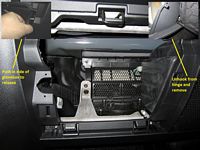
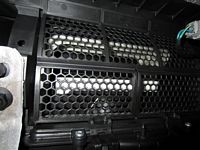
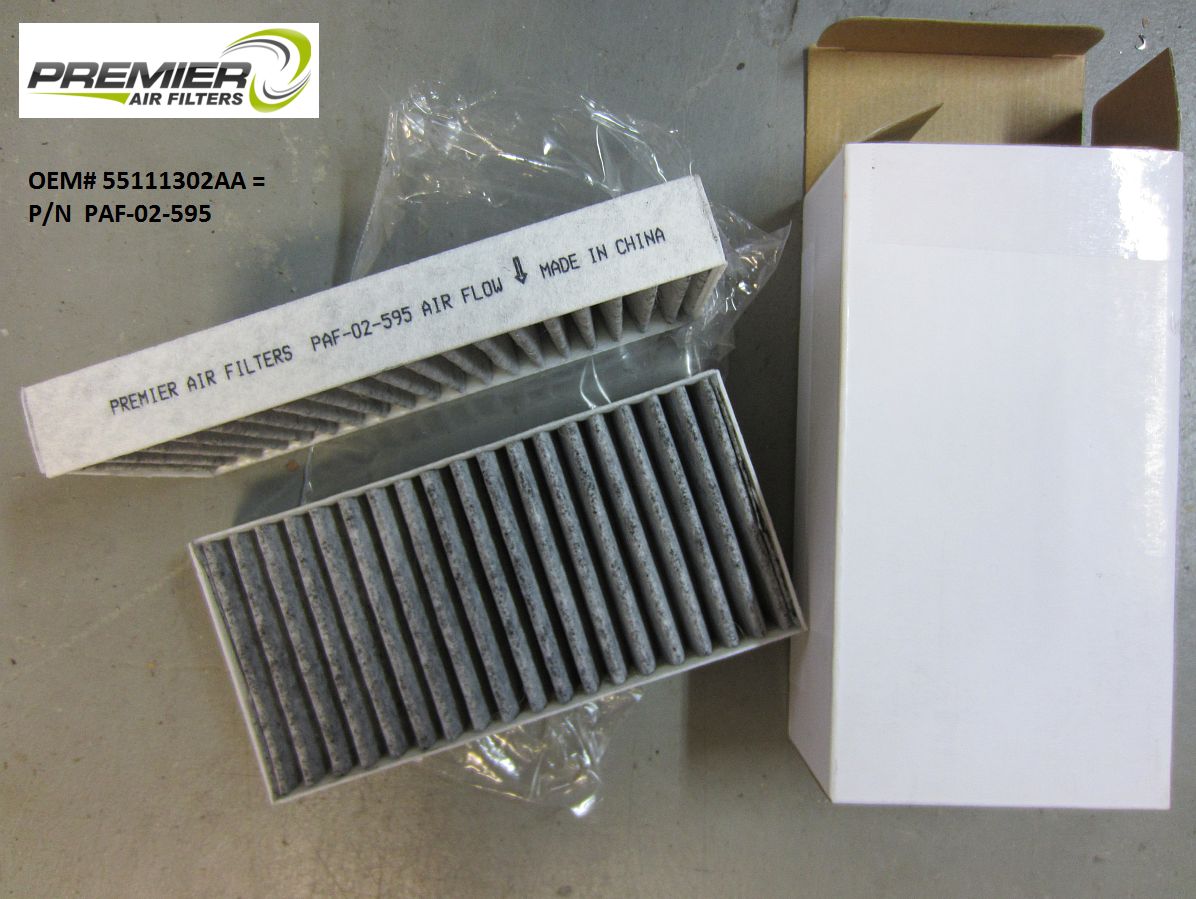
As it turns out, you only get cabin filters in your JK if you have automatic climate control. With the hard top not coming off my Jeep and the heavy duty variety of pollen we see here in the southeast as well as dust from some of the trails, I decided to install some. Carbon Premium cabin air filters purchased from Premium Air Filters eBay store.
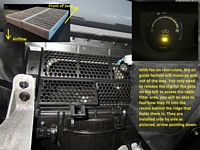
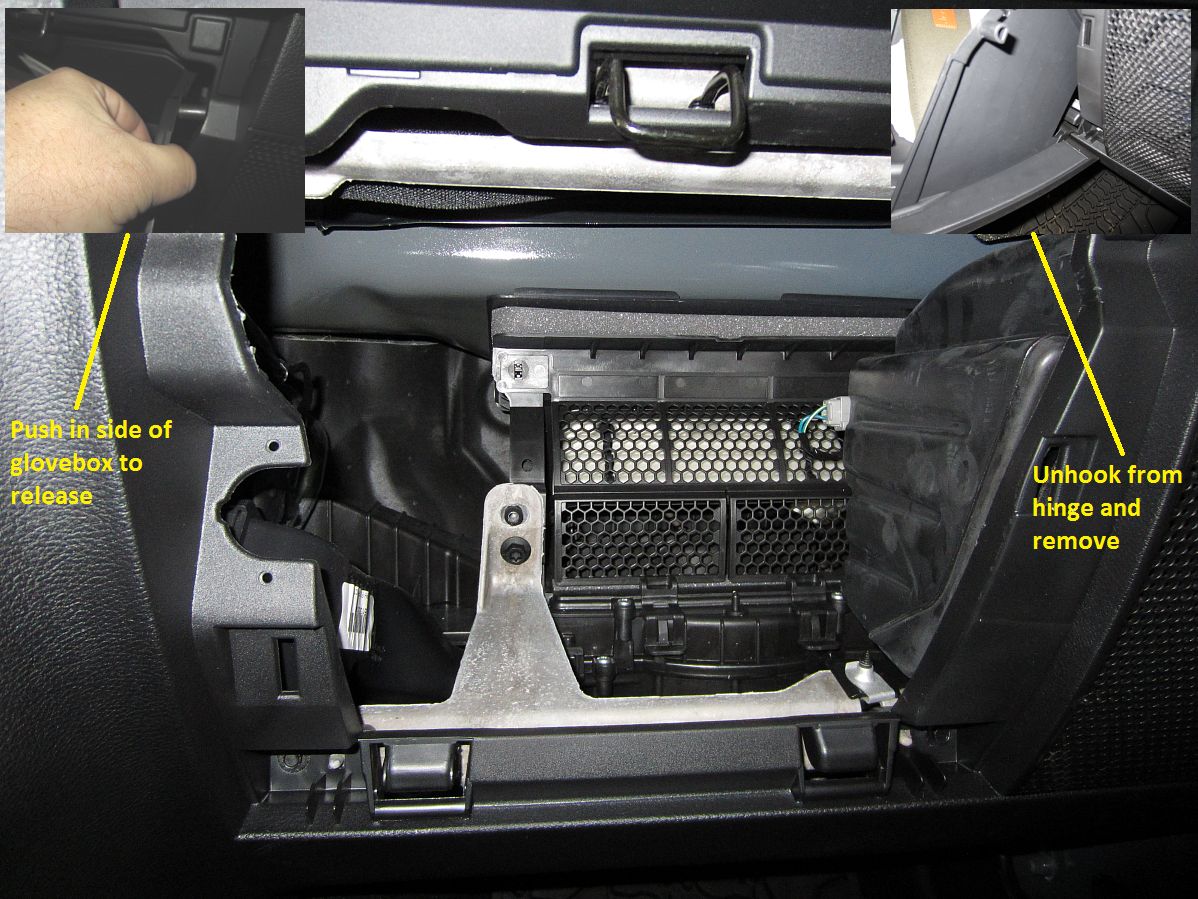
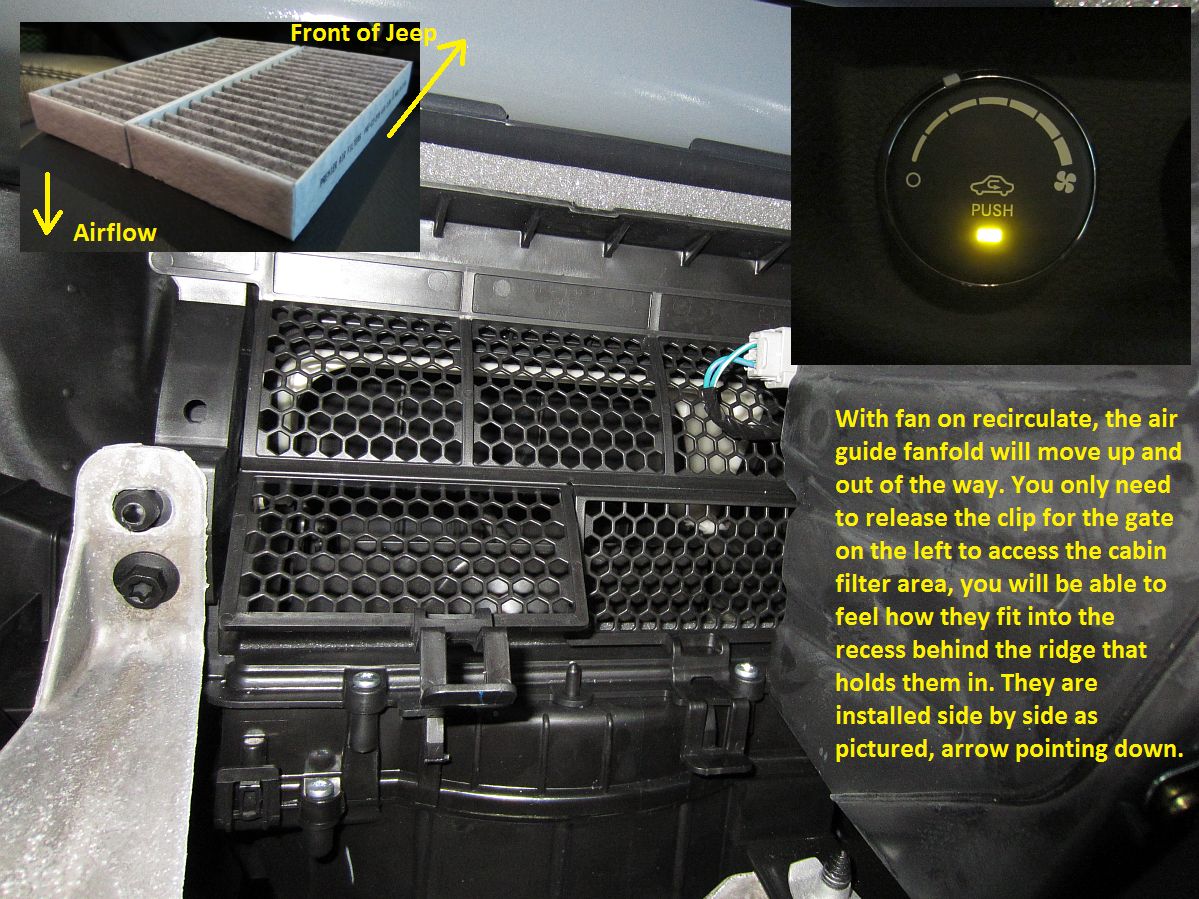
Easy enough to do: remove glovebox by pushing tabs in on either side, unhook from dash hinge, unclip cage access to cabin air filters, with ignition on- set air button to recirculate to increase access, install cabin filters with arrow pointing down, button everything back up- DONE.
There is a YouTube video HERE that shows the process as well.

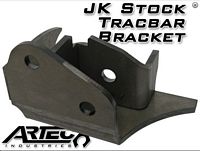
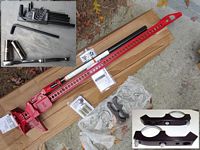
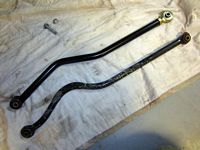
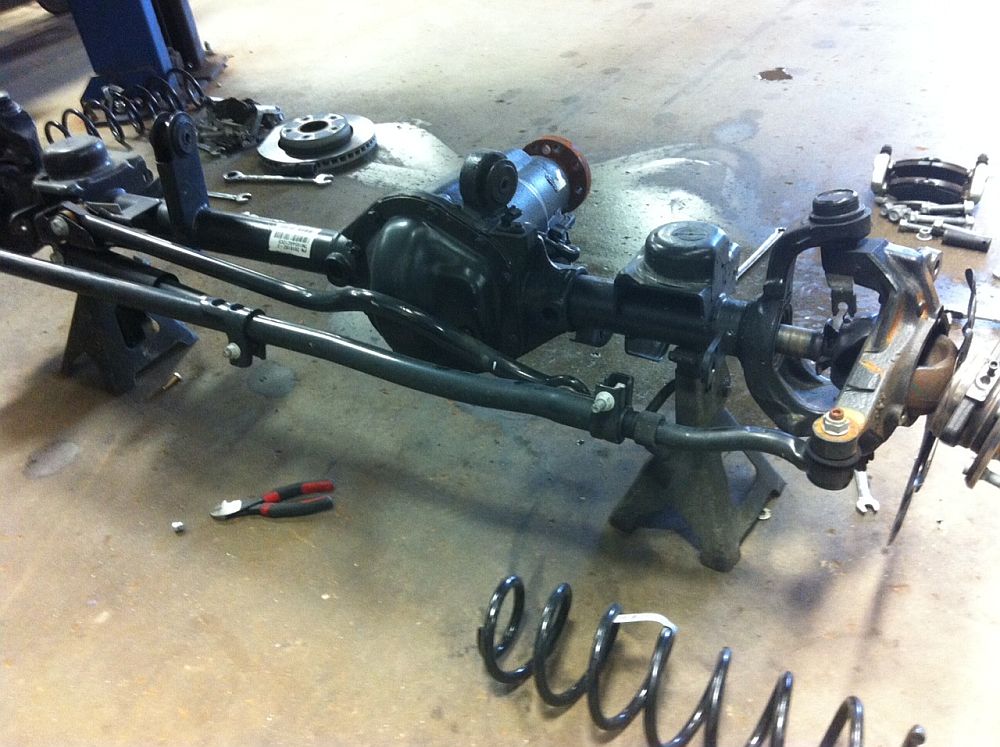
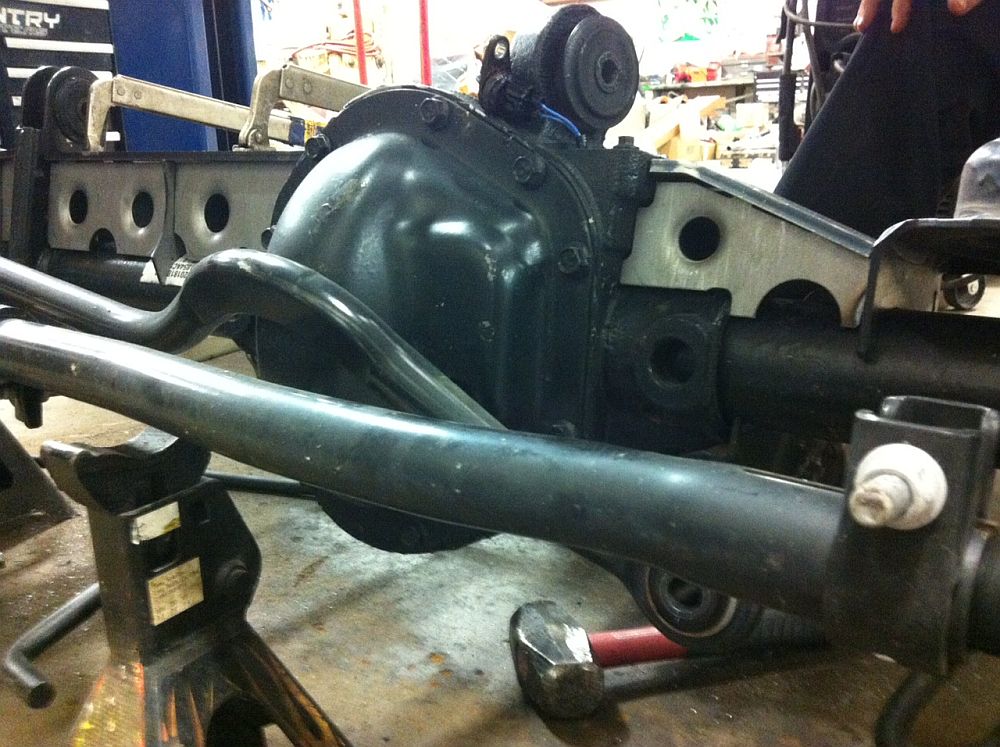
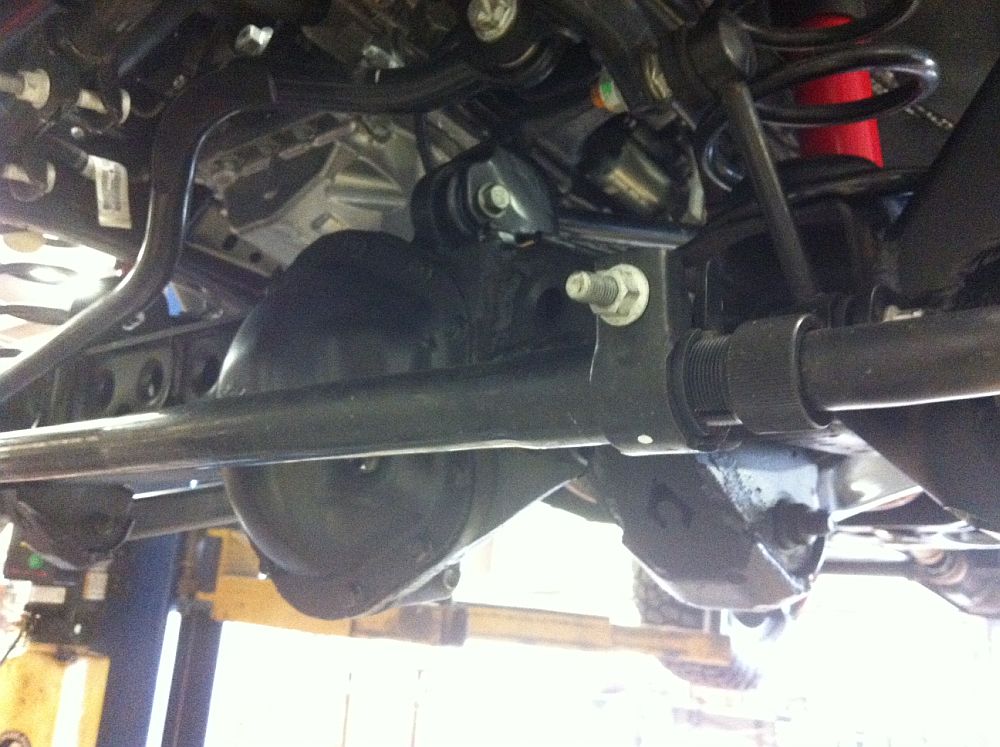
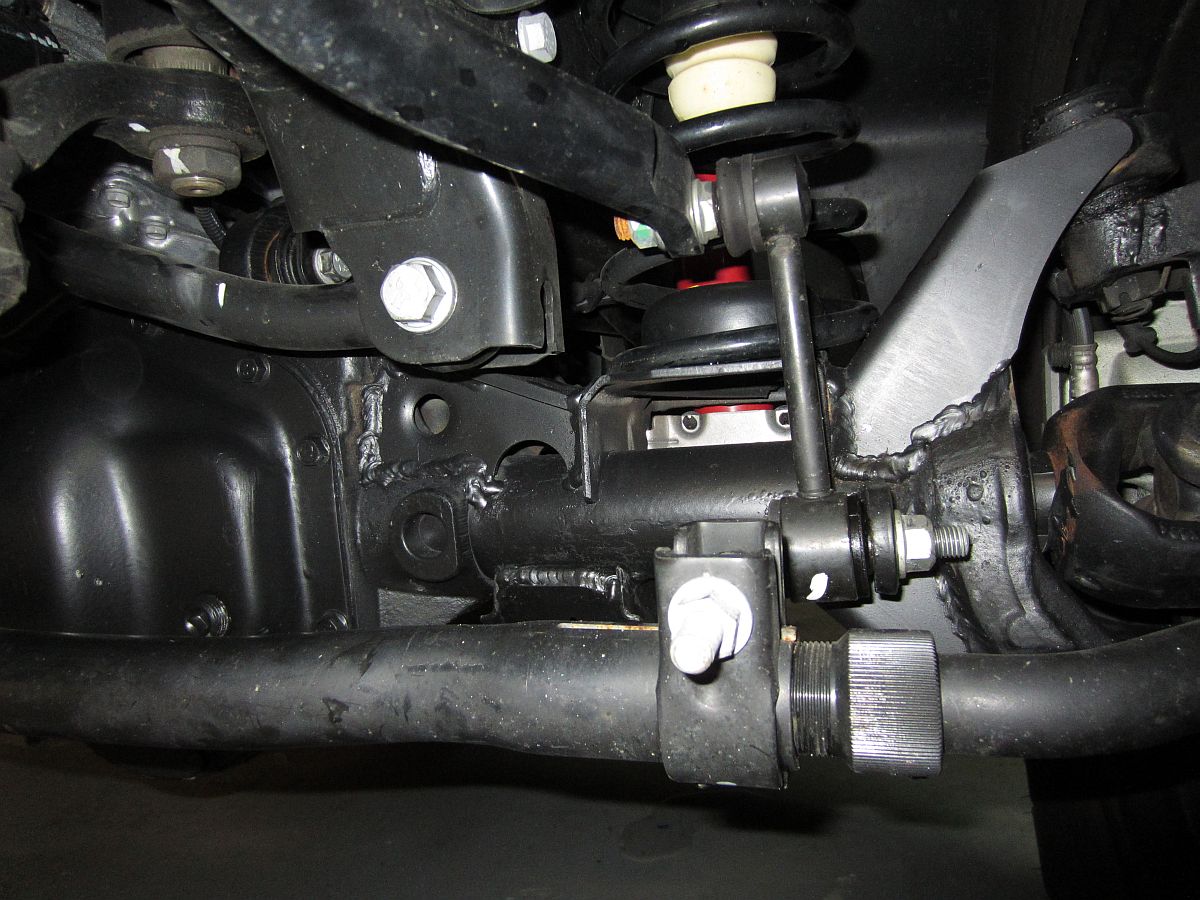
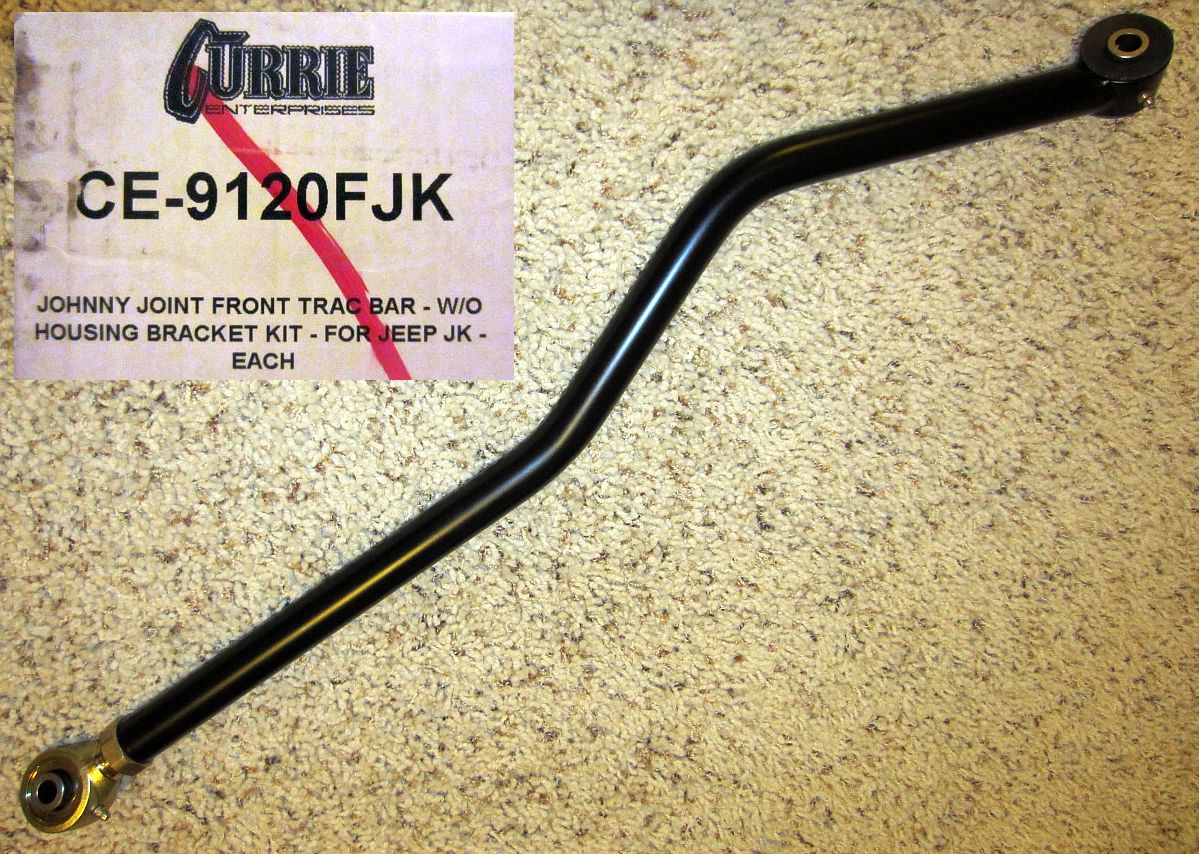
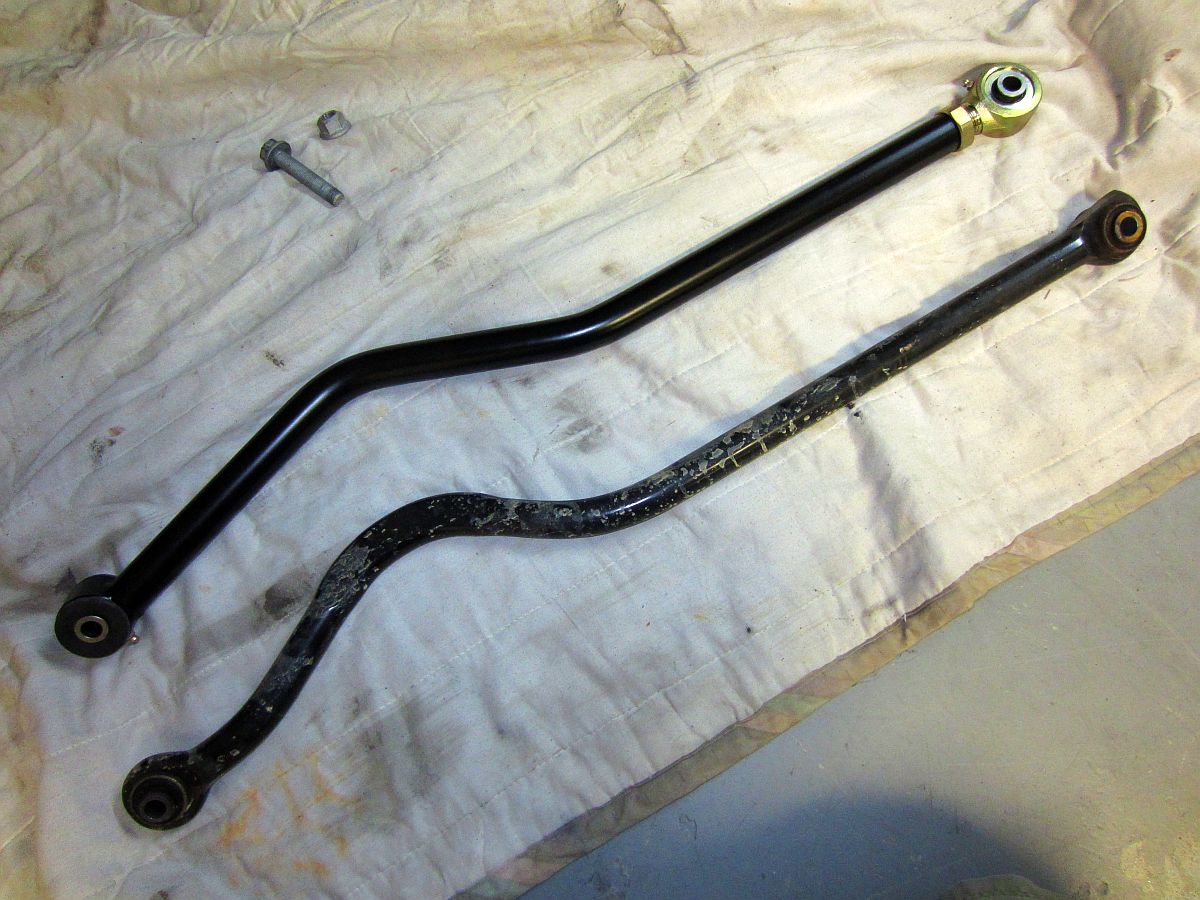
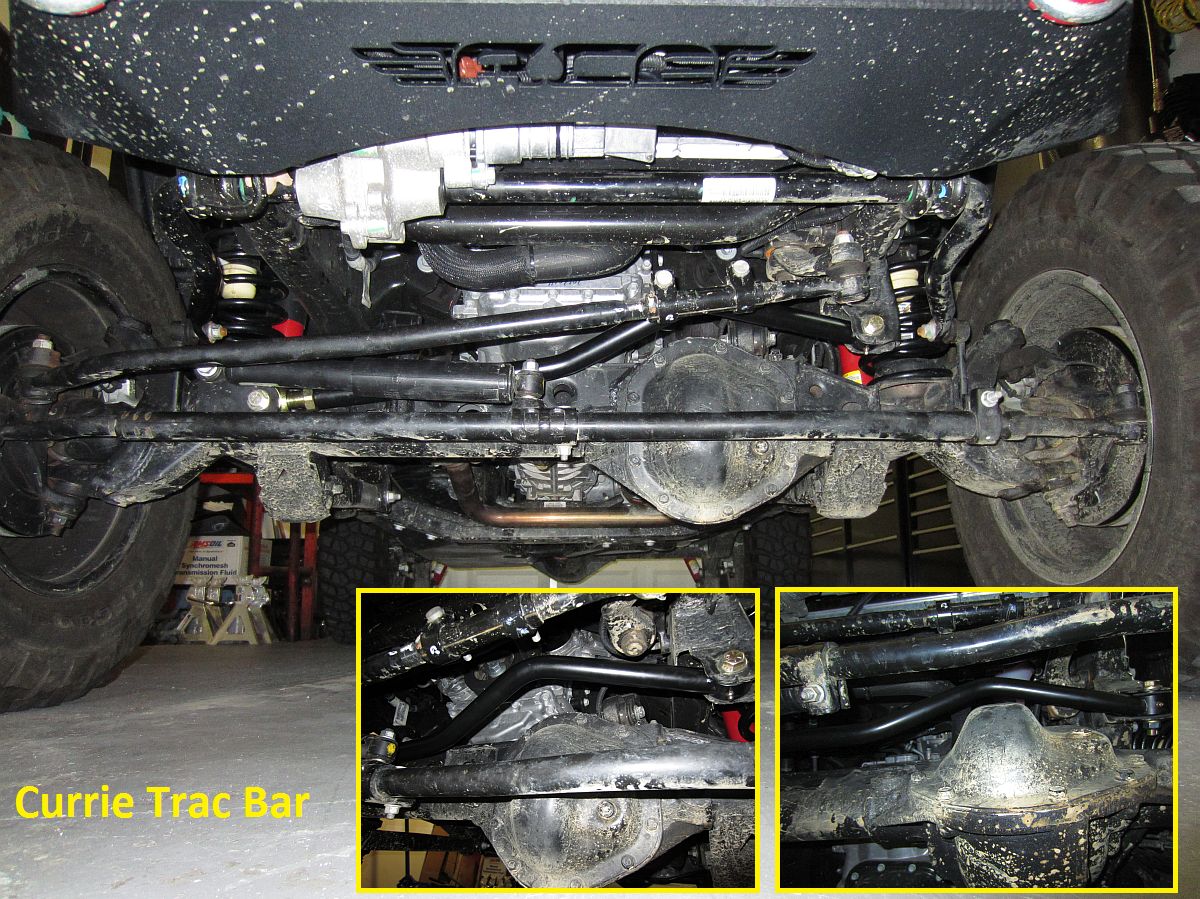
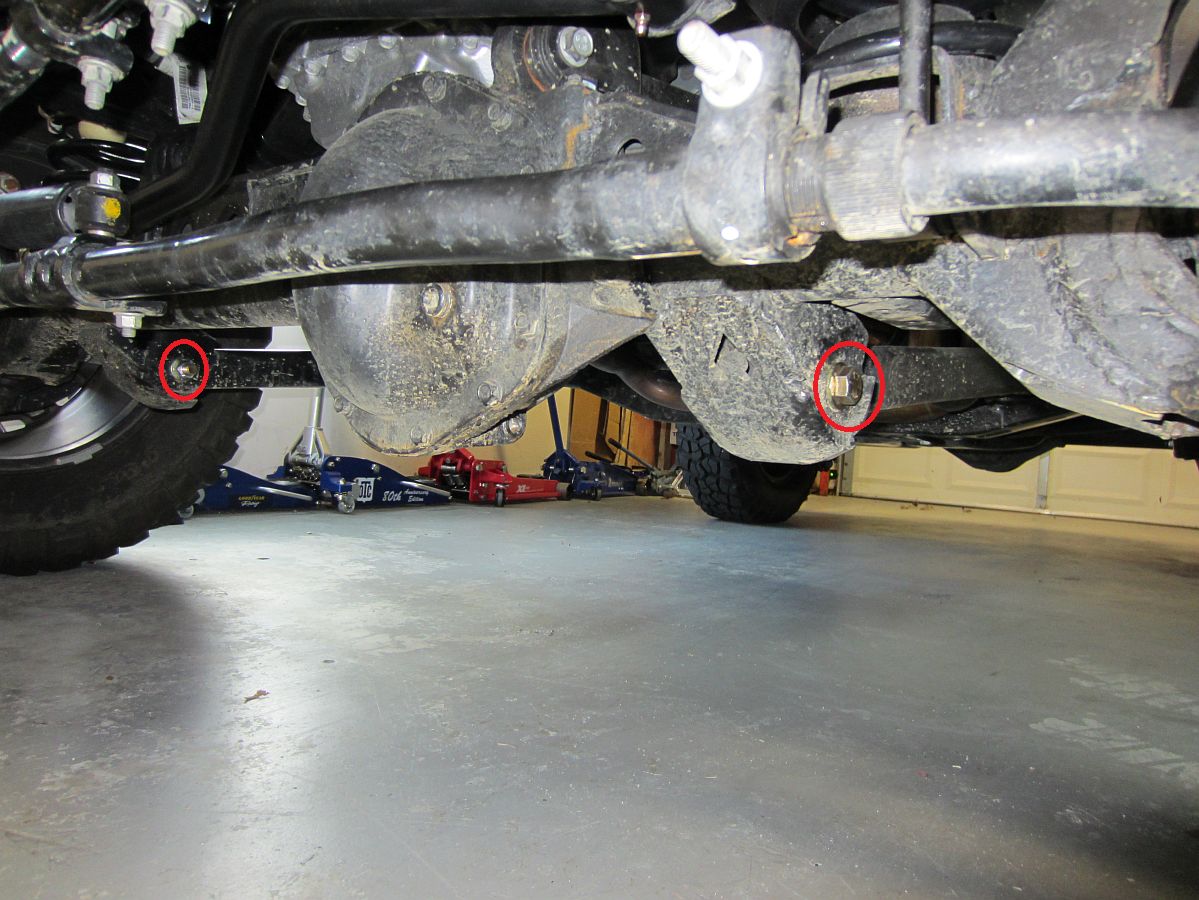
With the recent OE lift my front axle shifted a bit to the driver side so being the AR guy I am, it was time to buy an adjustable front trac bar. A Currie Trac Bar (P/N CE-9120FJK) was selected as the best since it has Johnny Joints on both ends, better than a rubber bushing and serviceable. Johnny Joints got their name from John Currie.
ShopEddies on Amazon is where I purchased mine from but they also have a web store HERE.
I used a metal straight edge up the center of the wheel/tire and another metal straight edge ruler to measure to a common point on both sides (the top of the spring mount) to find the delta- That number divided by two is how much longer I made the trac bar and it worked perfect.
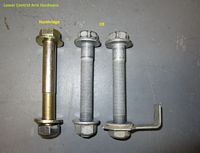
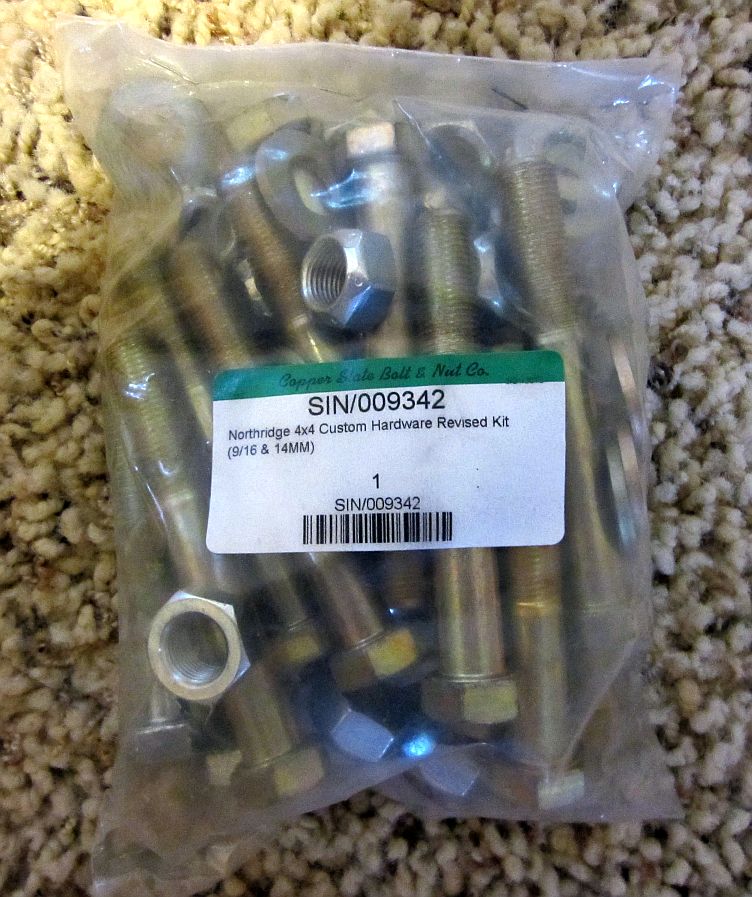
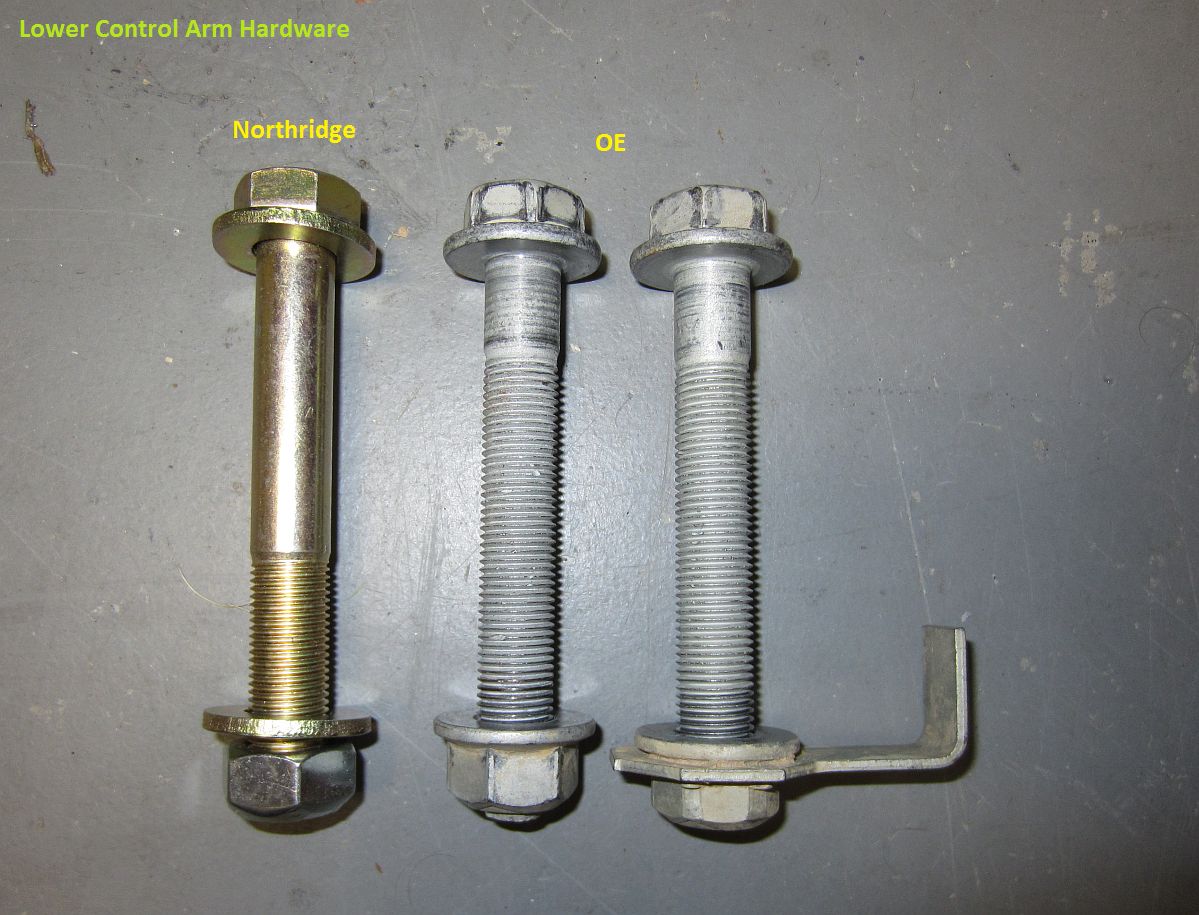
This also was the perfect time to install the new trac bar shoulder bolts/washer/nuts that came with my Northridge Bolt Kit, the 14mm were supplied for 2012 up models but I was able to use the 9/16, maybe because I have the Artec mount at the axle- the 9/16 is preferred and a better fit.


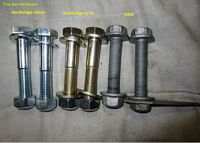
Northridge 4x4 Jeep JK Grade 8 Bolt Kit purchased back when we bought our 2012 Jeep and I found this death wobble issue (video HERE, and another forum thread HERE) doing pre-purchase research, finally installed in the 2012 and bought another kit for the 2013.
Synergy Manufacturing offers a similar Grade 9 kit and also includes hardware for the upper control arms- although overkill for this application IMO, they do have great installation instructions.
Easy enough replacing one bolt at a time. The front trac bar may require a helper to turn the steering wheel to help line up the bolt for R&R, the lower control arms might require rolling the tire forward/backward to line up the bolt for R&R, but most were just R&R. I did not have to use the Northridge supplied 14mm front trac bar bolts/nuts since I still upgraded to the Currie trac bar (above), but used the 9/16 hardware for front trac bar which required some drilling to open up the holes in the frame and Artec mounts. I installed all bolts/nuts where I could still spin the washer and then rolled the jeep (trans in neutral) back and forth a few times by hand to settle everything and then torqued all down to 125 ft/lbs.....will periodically check.
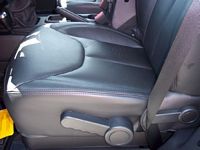
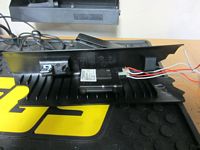
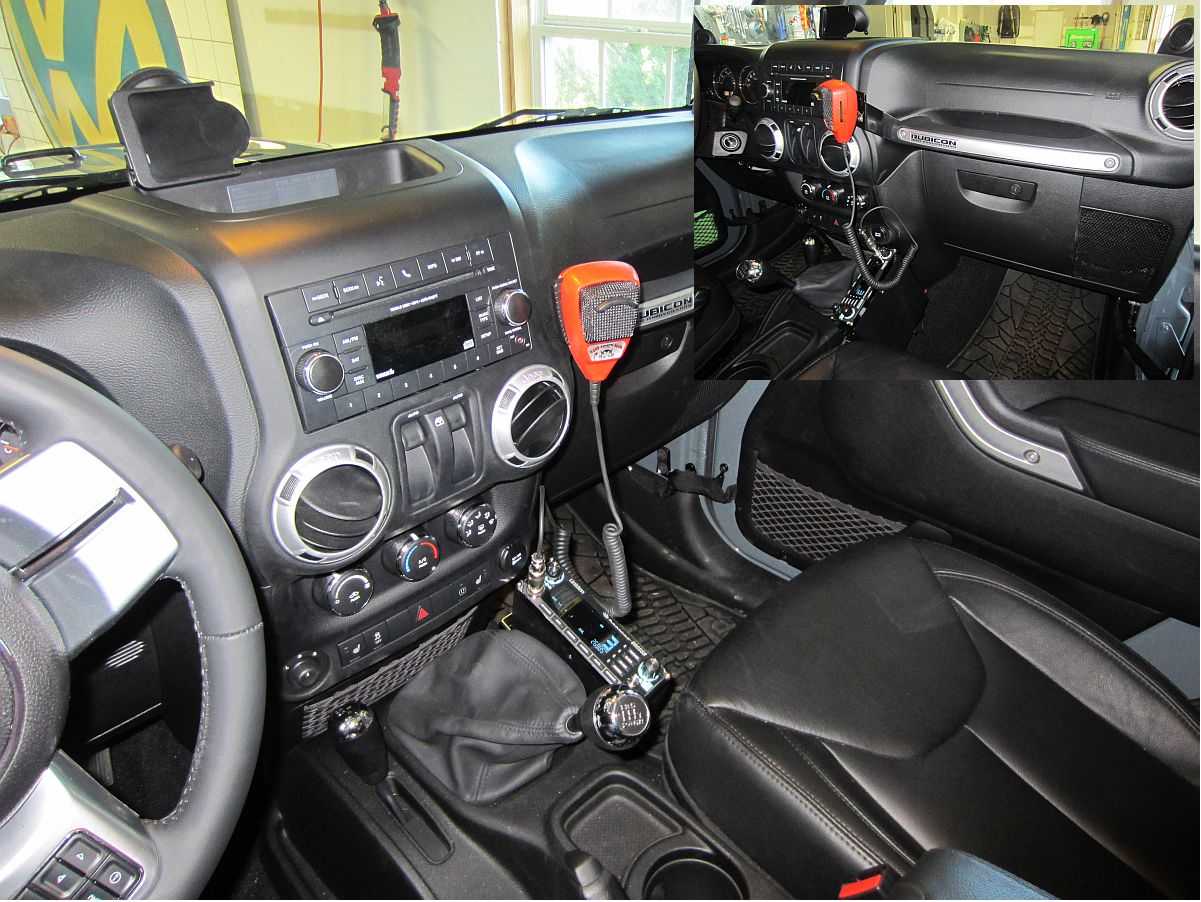
After a few trail rides I decided I needed a CB, both for the trail AND for the highway. I ordered the Uniden 980SSB from Amazon, the ASTATIC RD104E Road Devil microphone (and a Redman CB Radio 4 pin Cobra to 6 pin RCI Microphone Adapter to replace the Uniden supplied corded adapter, this is much cleaner), Quadratec Quick Disconnect CB Mount (Quadratec P/N: 96080.0201, Manufacturer P/N: JK-CBMU), and the VersaMount 2 mic mount / Ultramount antenna mount package from Cool Tech.
Uniden 980SSB Owners Manual HERE, Uniden 980SSB Test Report HERE, Quadratec Mount Installation Guide HERE.....Cool Tech does not have an online version of their manual but my pics below will help as well as this write-up I found. The Quadratec CB mount can be used in a 2-door but limits (prevents) sliding the seat forward and the use of the tilt/tumble feature for rear seat access....not a deal breaker for me.
CB mount was easy as was the mic mount- the antenna mount was not bad but a little more involved. I originally purchased the 4' antenna for range, but will keep it in the Jeep for highway travel and use the 3' antenna most of the time since it plays friendly with my garage. I was able to adjust both antennas to an SWR = 1.00 so they should work well. I will add that I had some issues with FedEx delivery but Cooltech was very supportive and responsive- Thanks Lauren


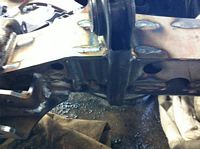
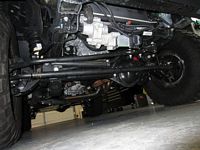
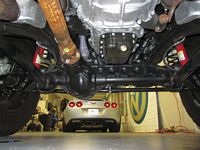
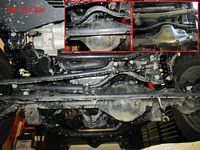
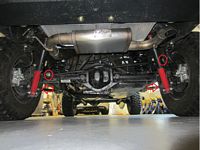
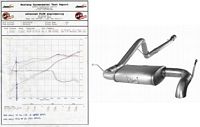
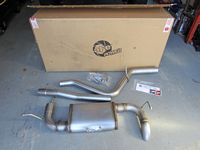
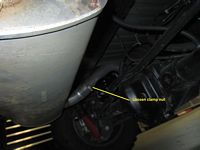
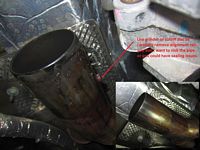
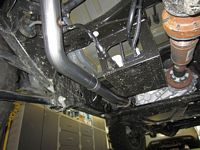
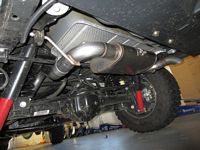
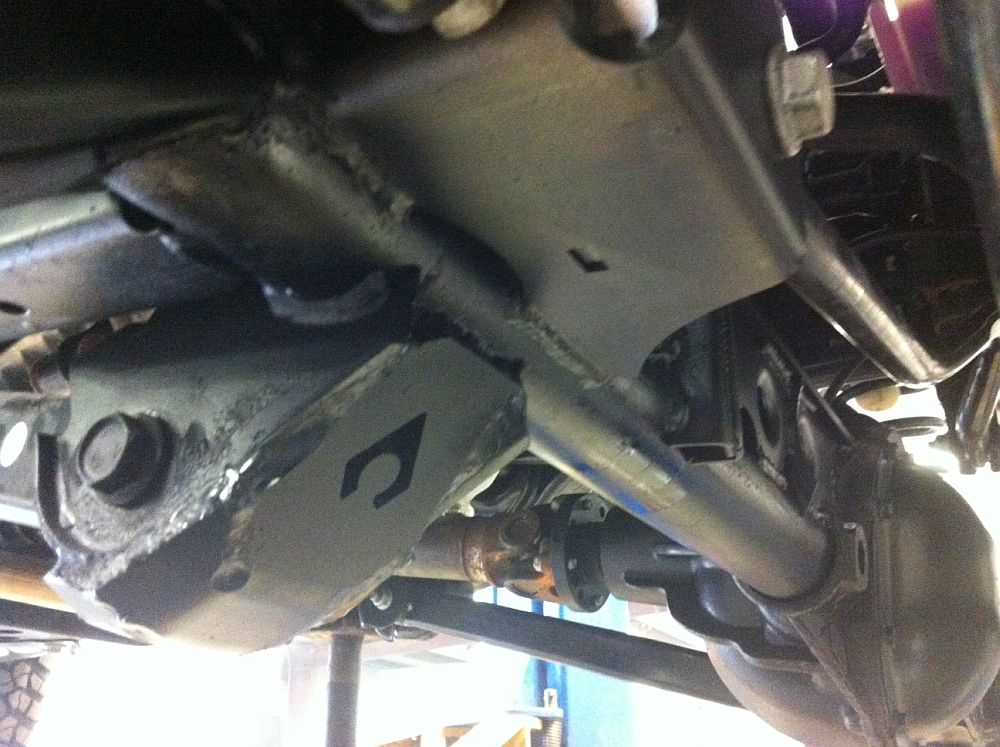
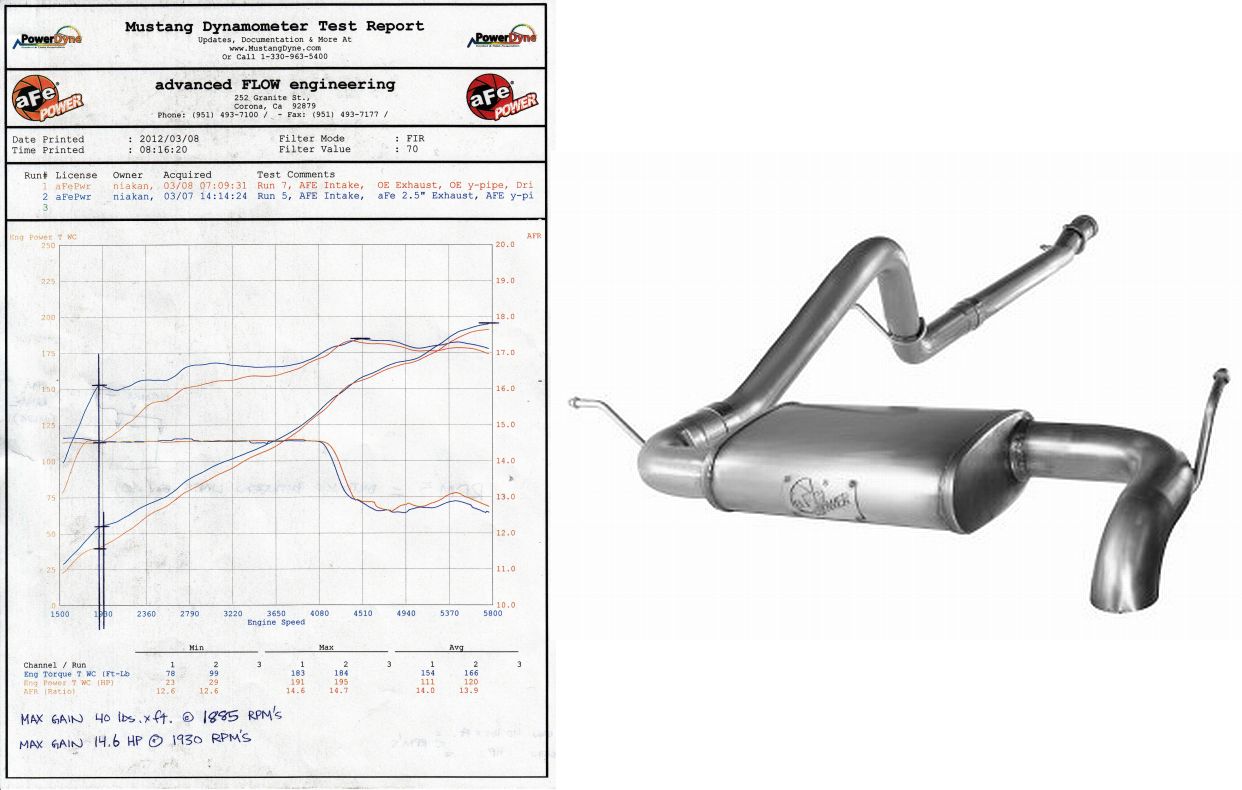
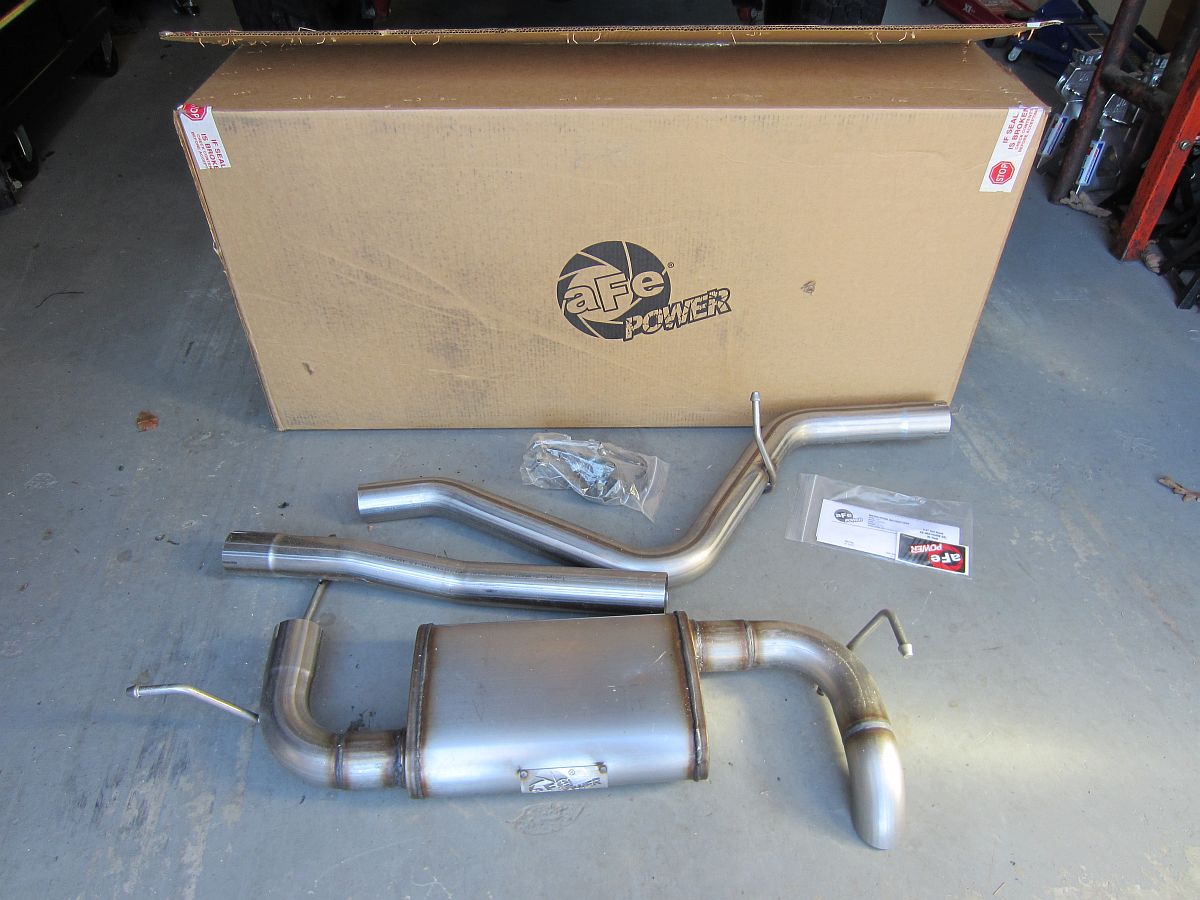
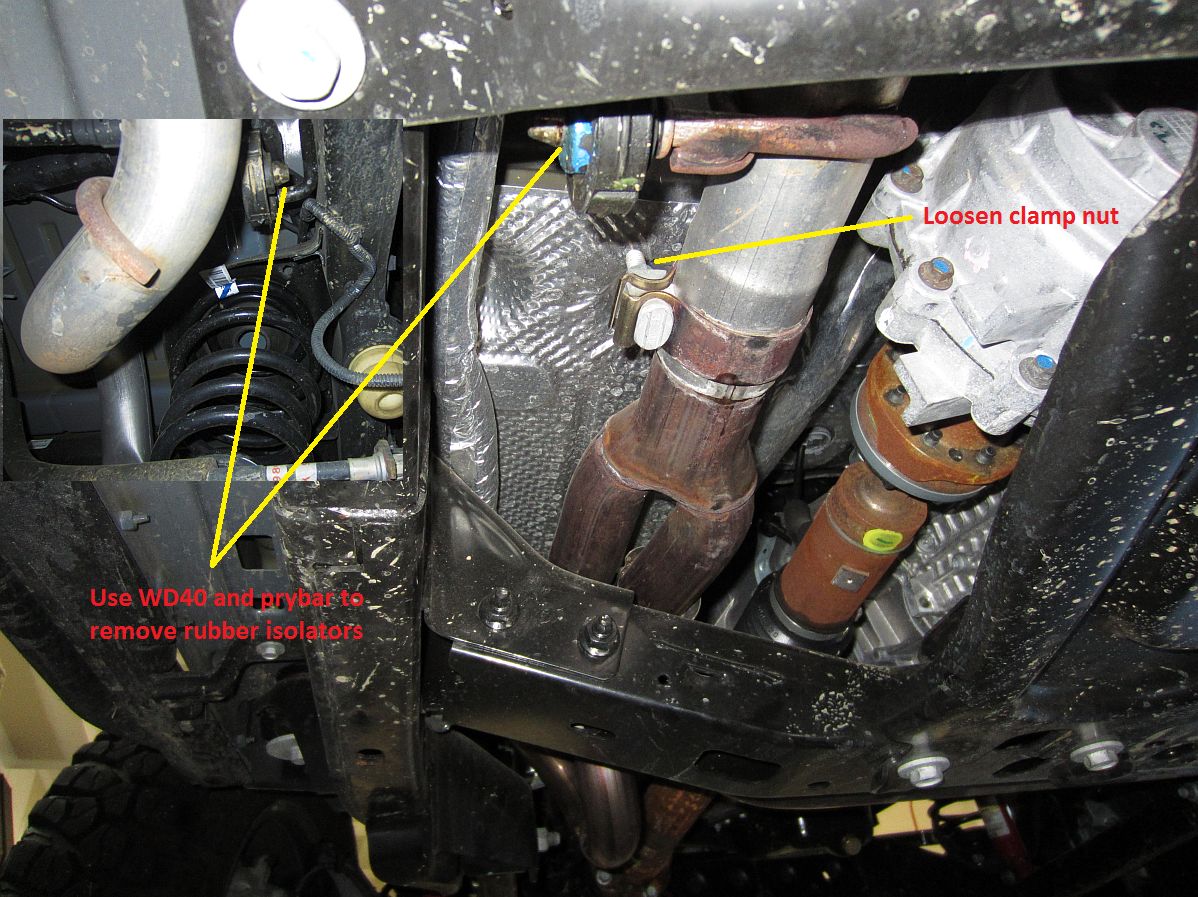
aFe Power MACHForce XP 2.5in Cat-Back SS-409 Exhaust System (P/N 49-46214, installation instructions HERE) purchased from AutoAnything using a 20% off code made this exhaust ~$250 - I couldn't build a stainless exhaust for that.
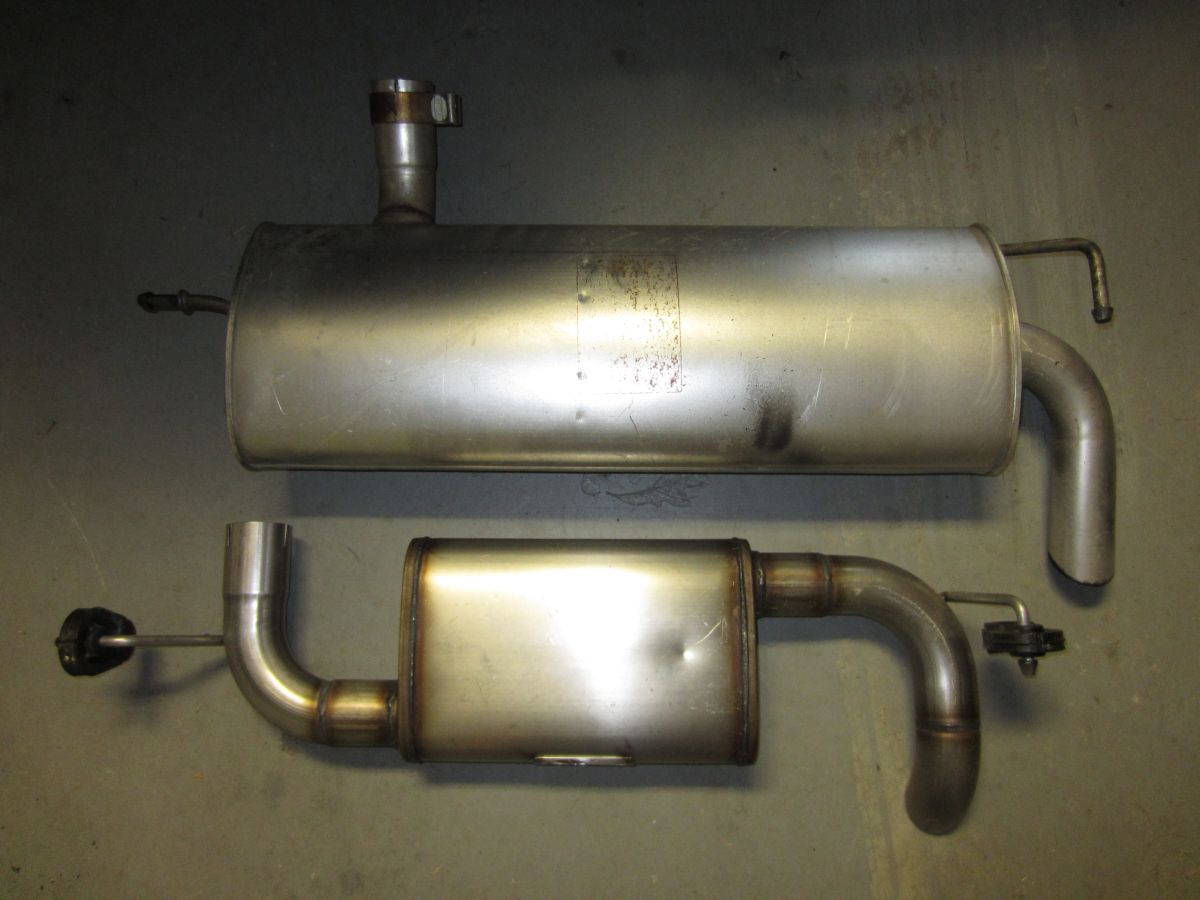
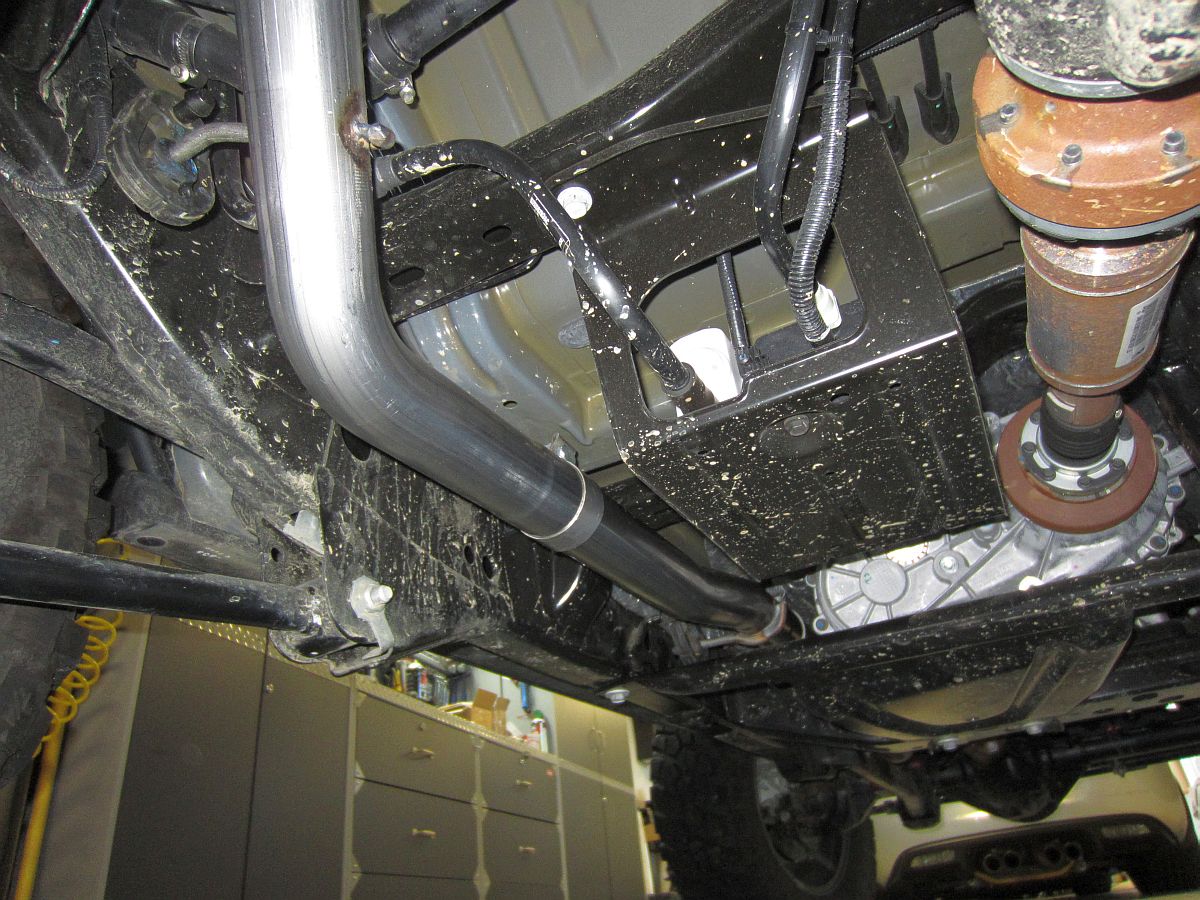
I bought this exhaust to add a little sound, get rid of the HUGE ugly OE exhaust, and get a bit more clearance- check, check, check
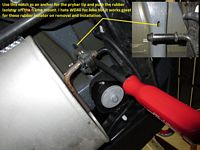
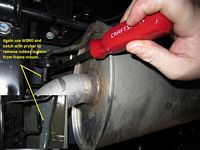
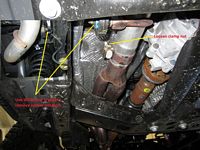
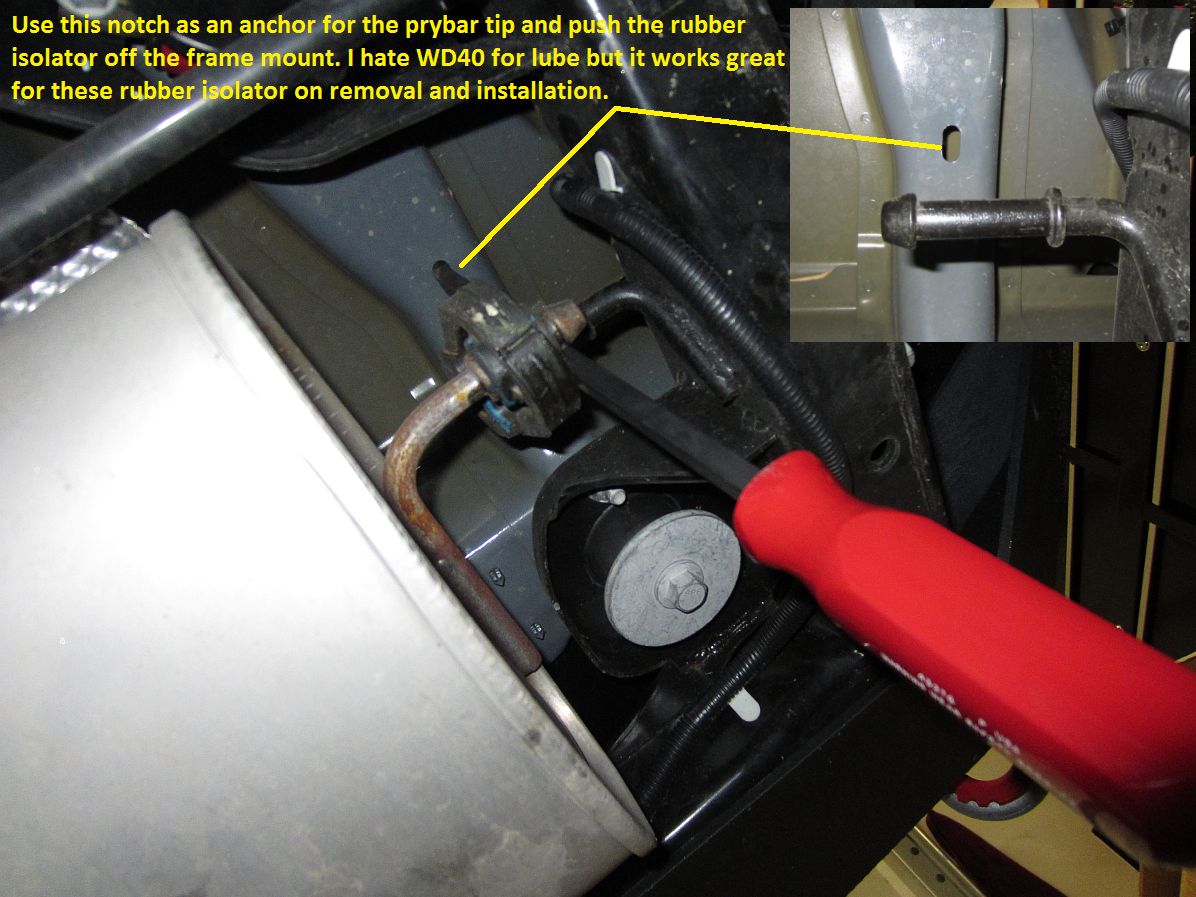
WD40 is your friend for the rubber isolators and the exhaust joints, it will take a bit of pulling/turning/wiggling to get the OE exhaust pieces off. The alignment dowel will have to be ground off so that the aFe exhaust can be installed, I loosely put it all together and hung it on the rubber isolators before tightening all of the clamps starting at the front- clamps angled for easy access but up and out of the way so they won't get hung up on anything.
Of all the custom exhausts I have installed on various cars I have owned over the years (most Magnaflow), this is the best one from a quality and fit standpoint. Everything fit out of the box, I didn't have to adjust or cut anything, the welds look great, and the sound is perfect with no drone (IMO)- it just works.


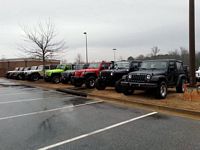
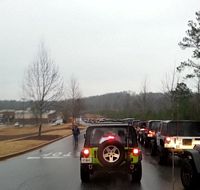
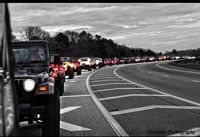
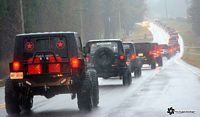
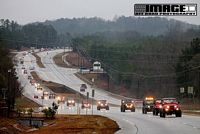
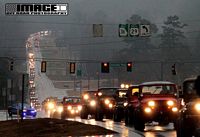
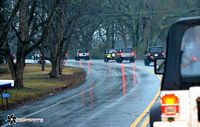
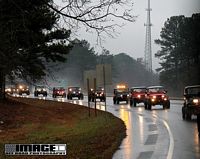
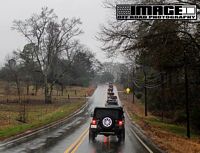
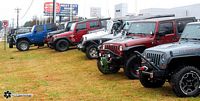
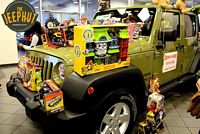
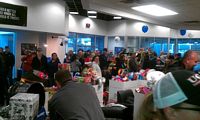
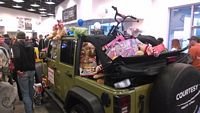
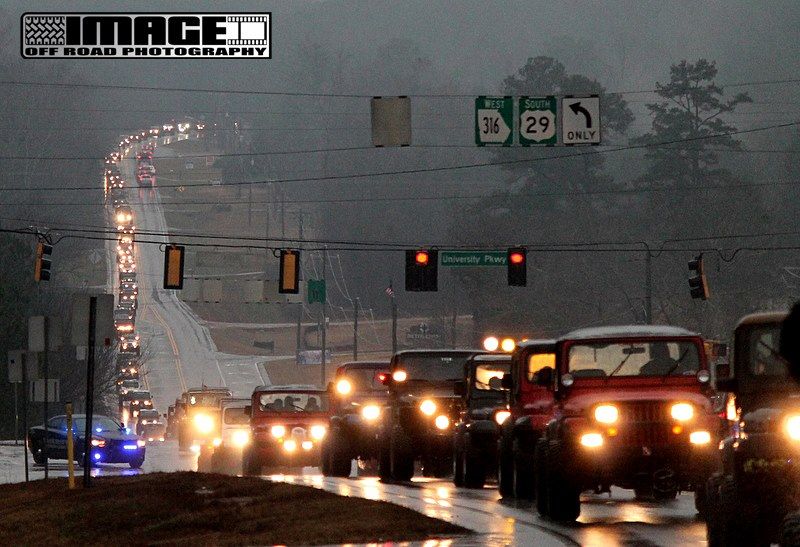
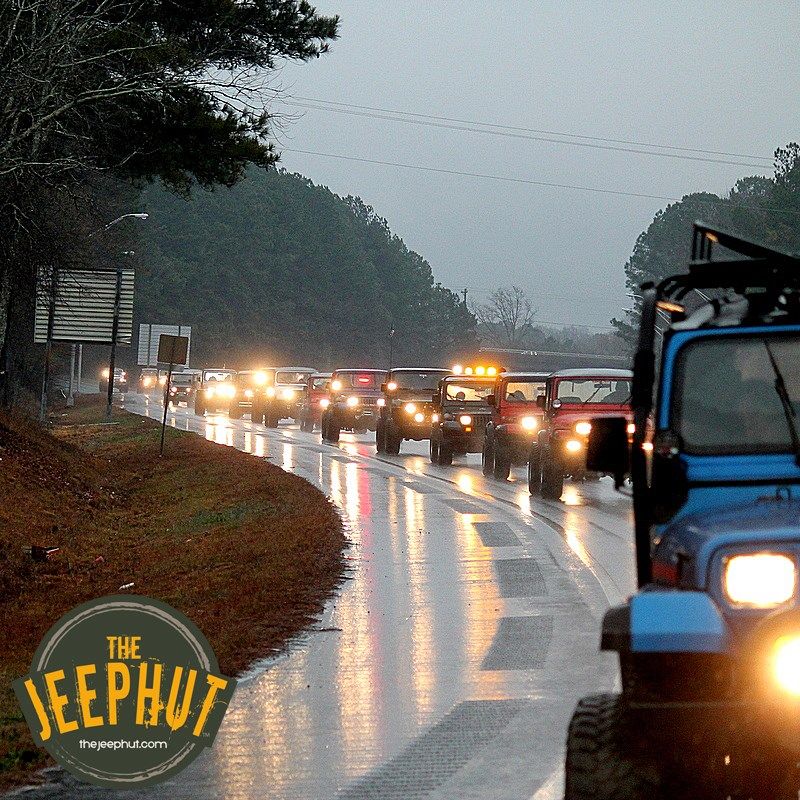
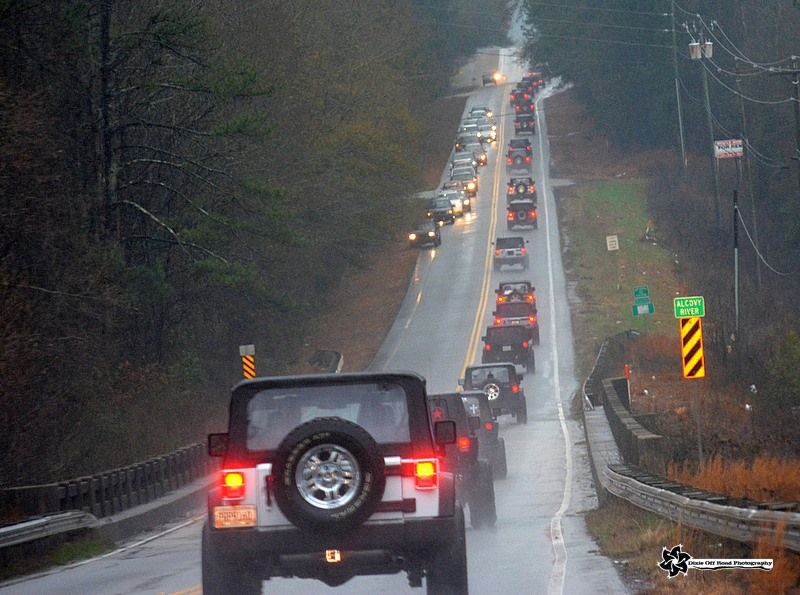
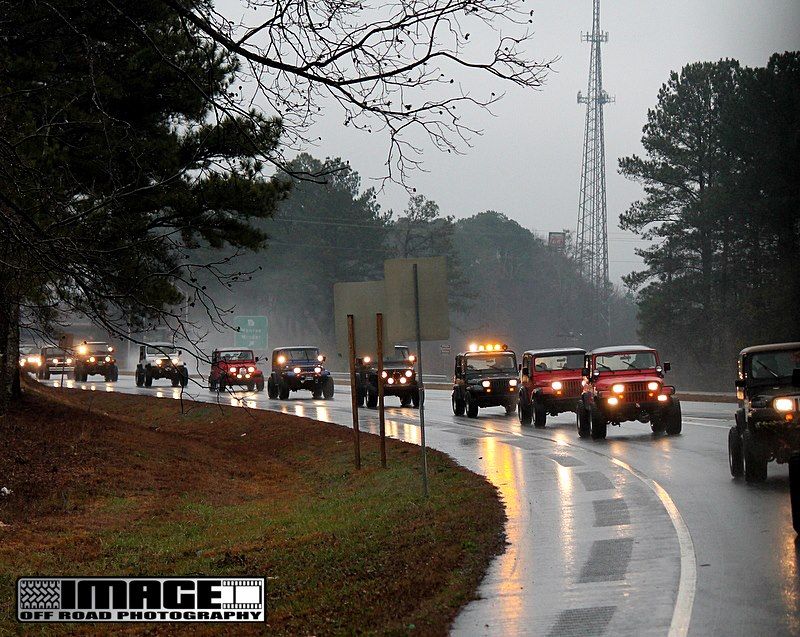
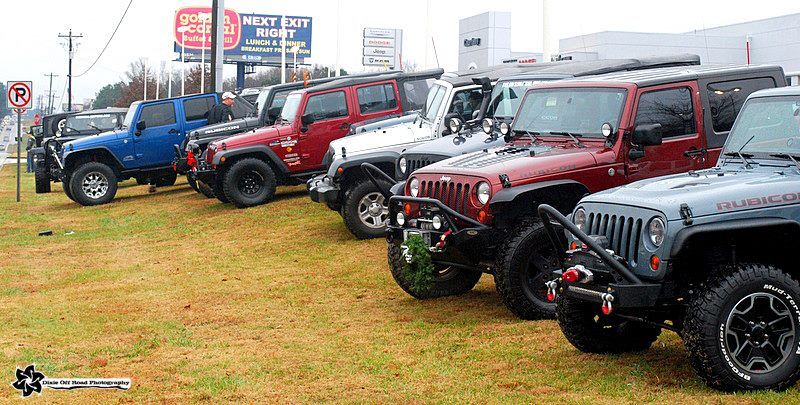
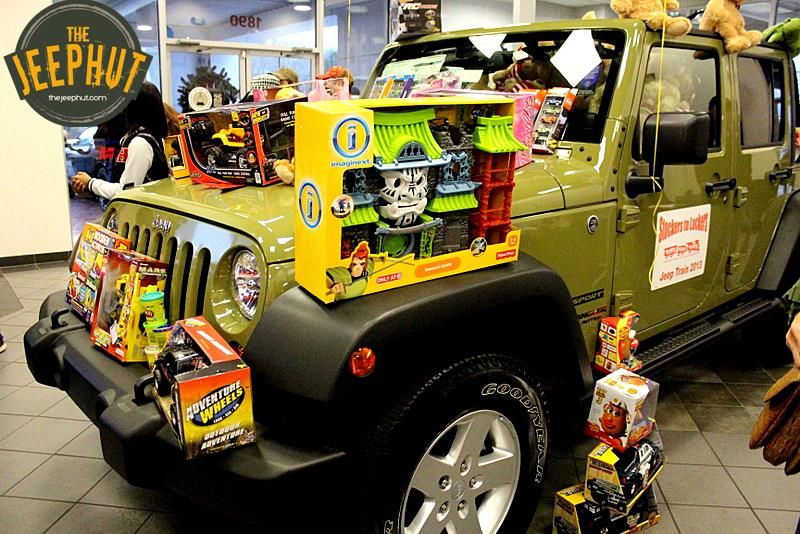
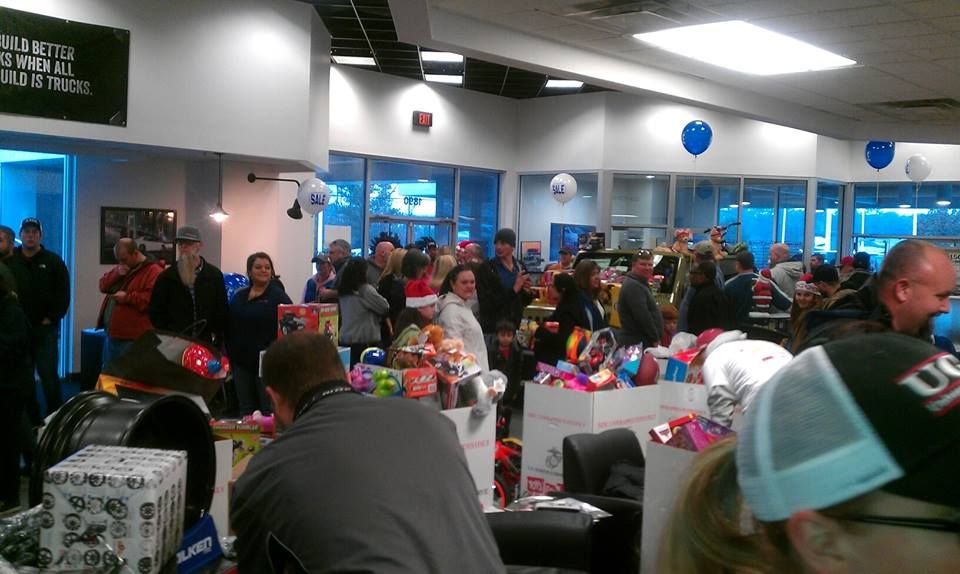
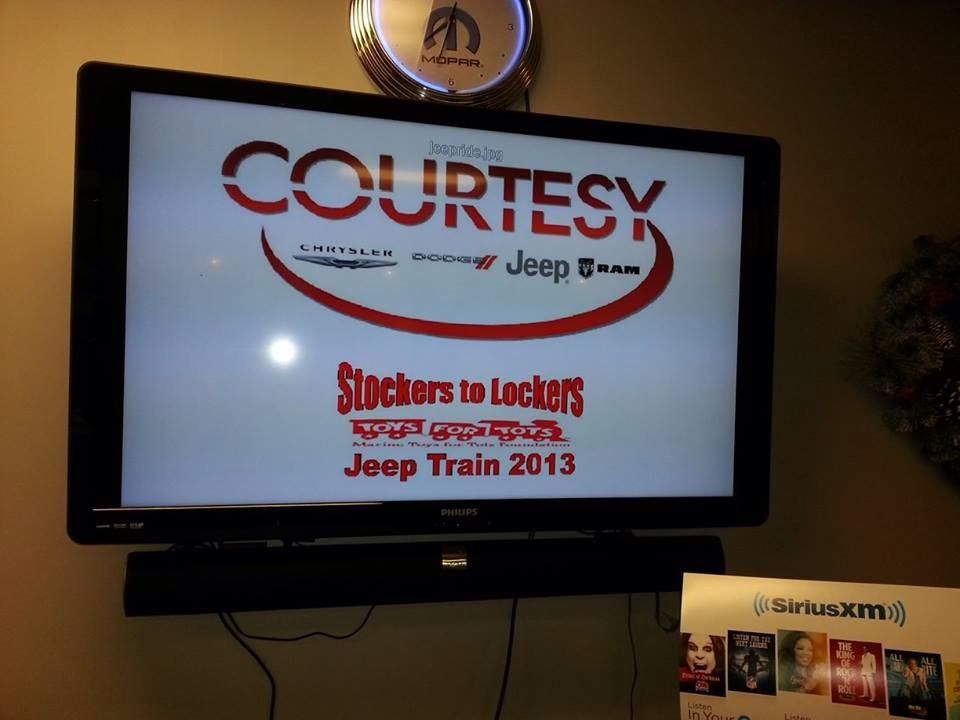
Toys For Tots train with Stockers to Lockers and Courtesy Jeep (Conyers, GA)- great ride for a great cause, over 200 Jeeps this year participated in the train and more showed up at the dealership to donate toys.
This was our first T4T event, Thanks to all of the officers that blocked traffic so we could go through red lights and to Courtesy Jeep in Conyers, GA for hosting the event. Also, THANKS to the various photographers that took these great pictures!


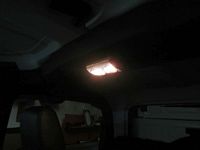
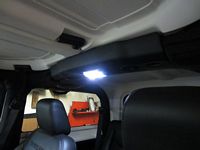
Putco LED Dome Lights (P/N 980294) from AutoAnything installed.
Brighter and whiter than OE and work with CANBUS, mirror map lights go off with timer as expected.

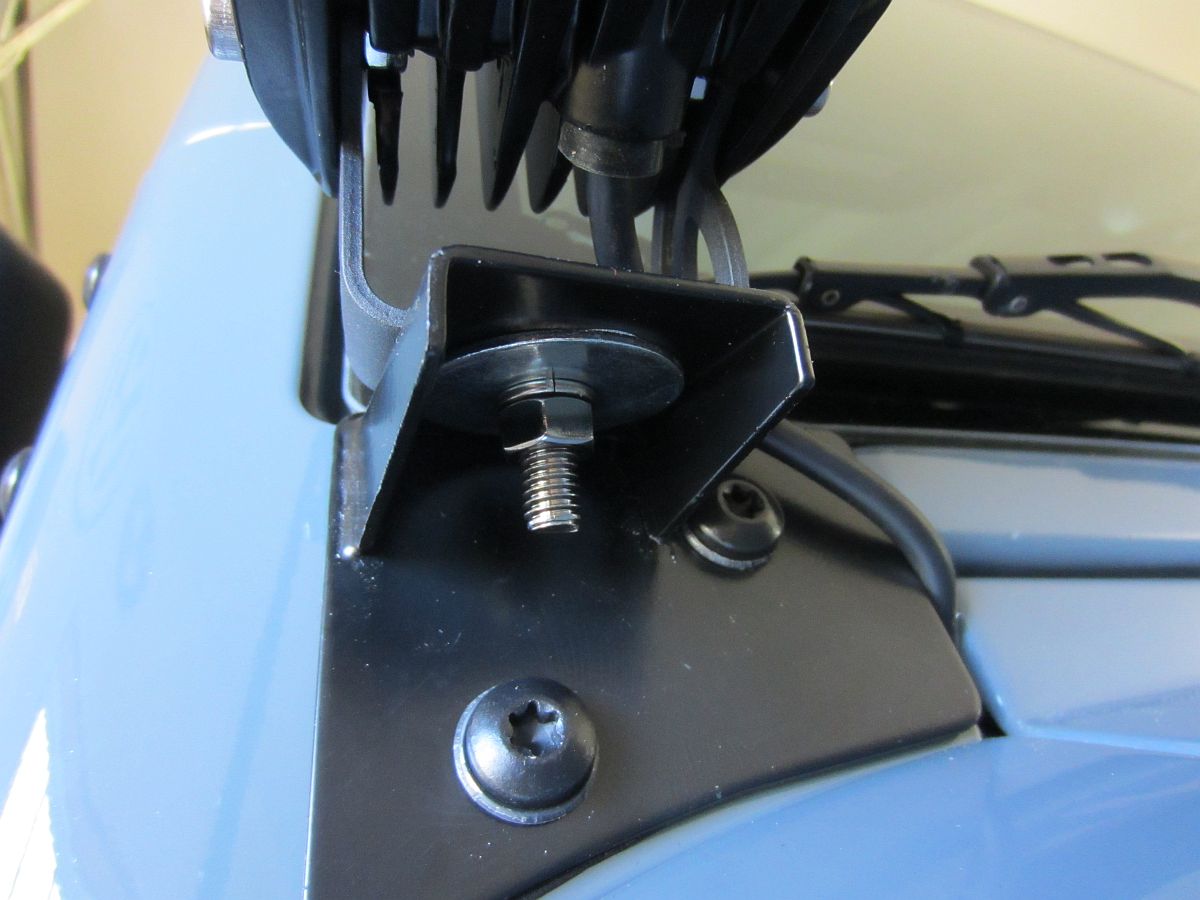
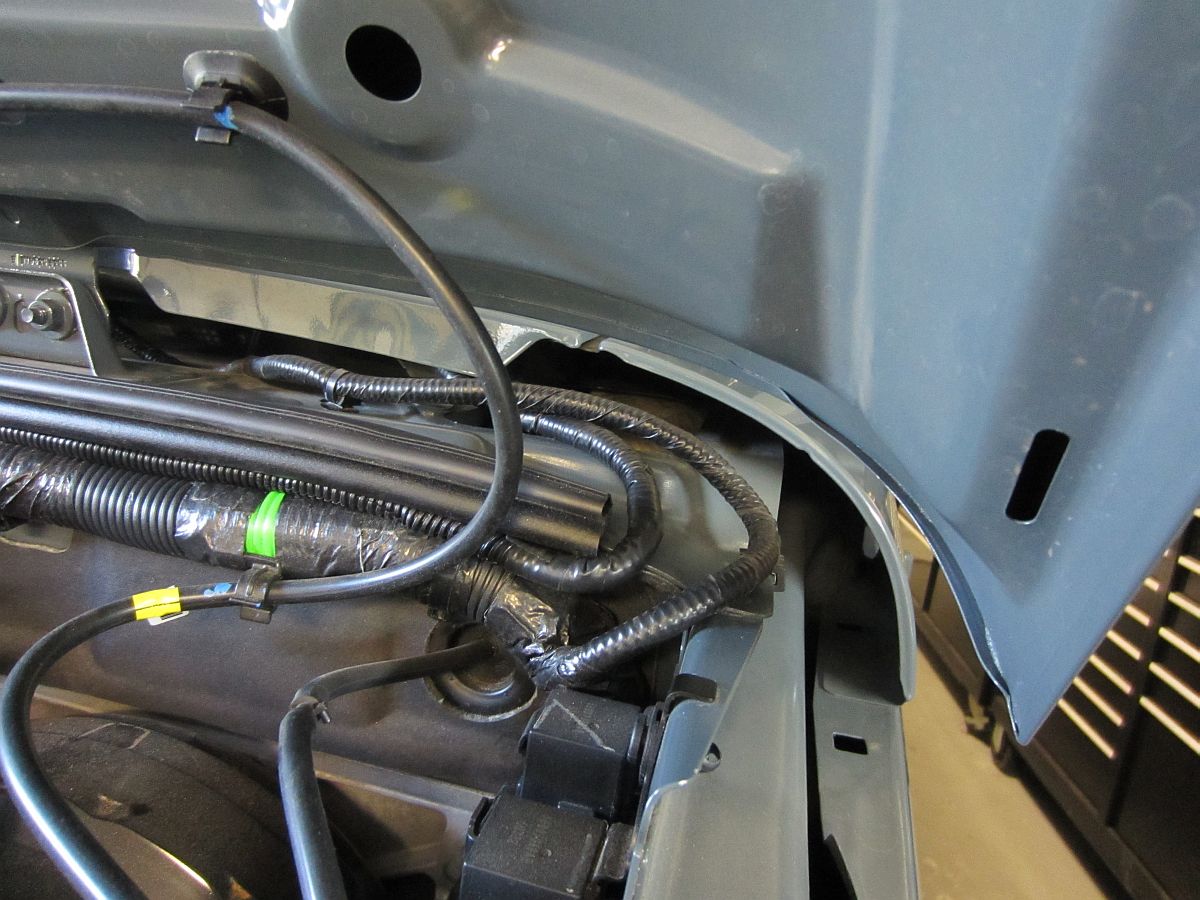
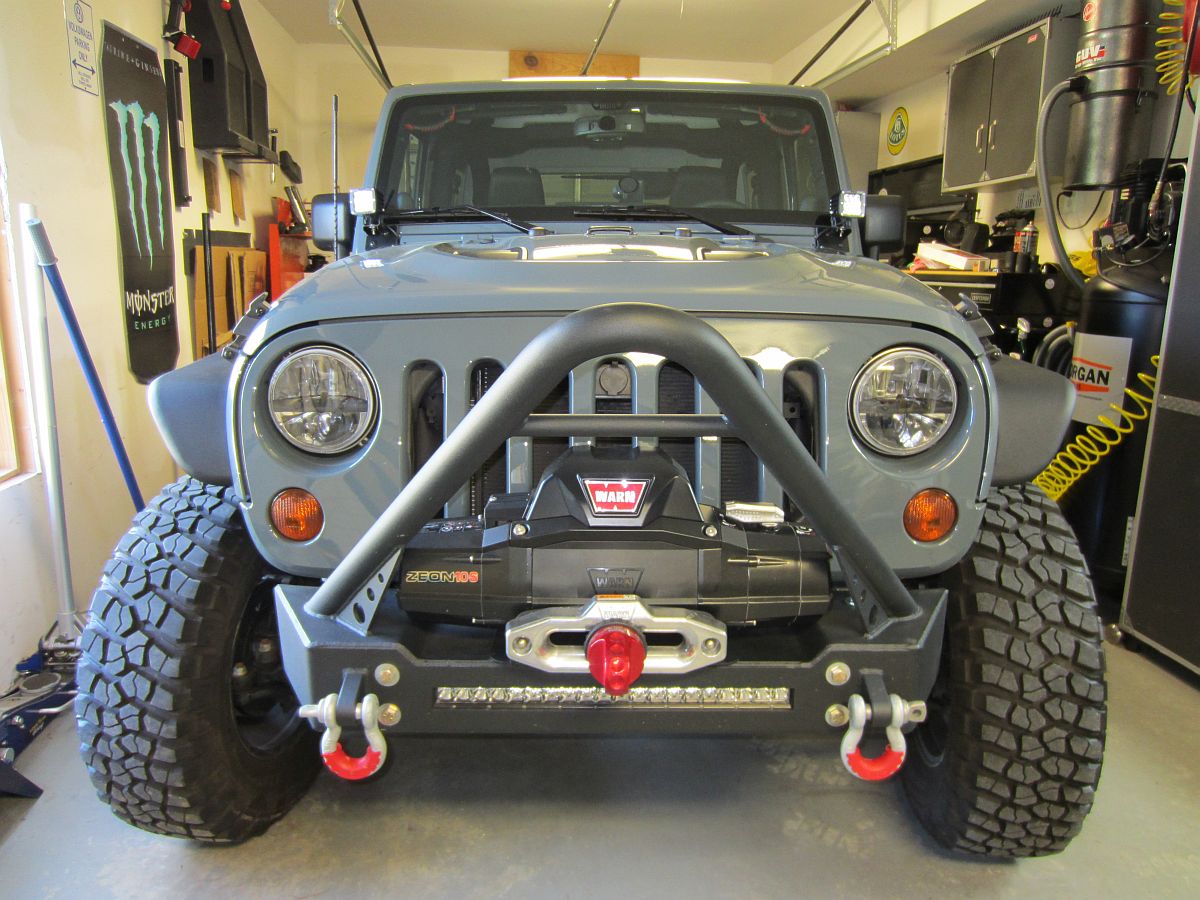
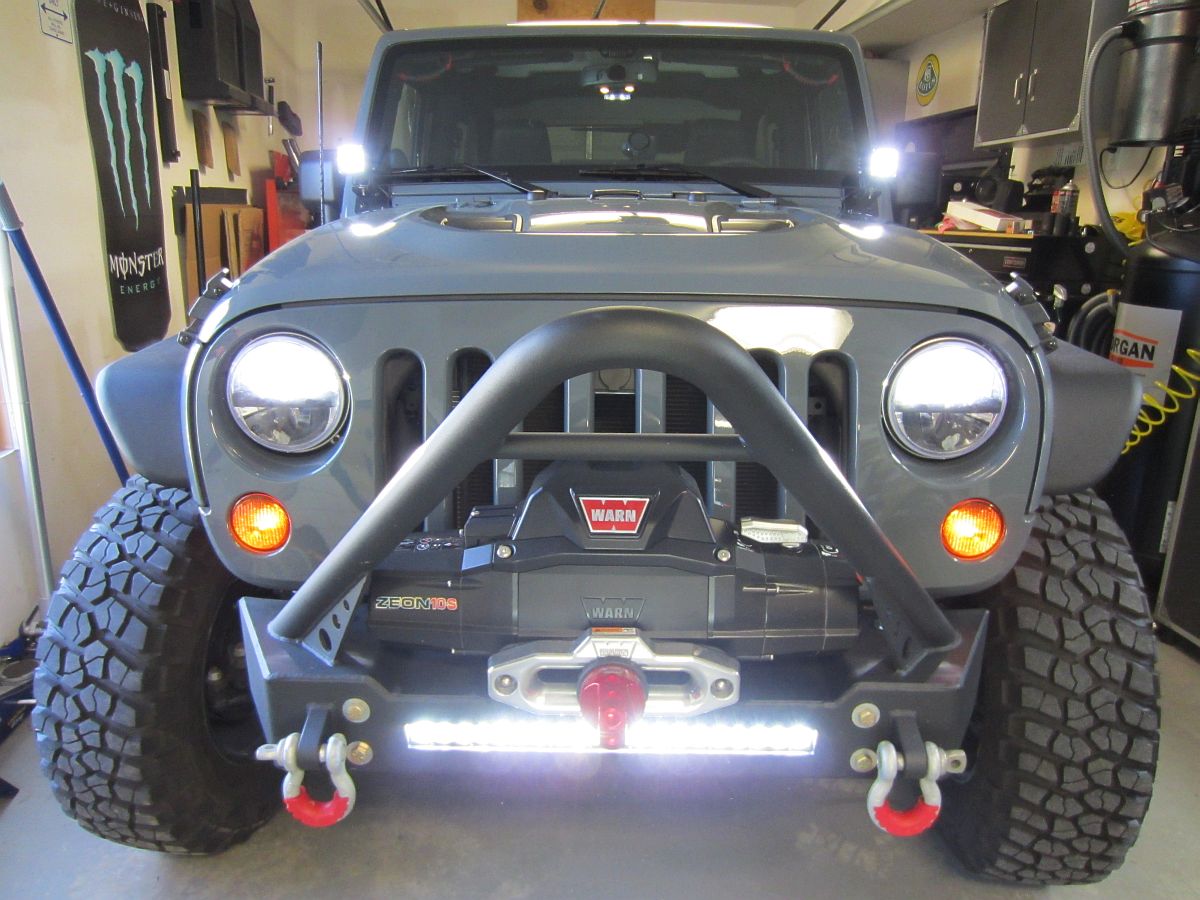
Rigid Industries D2 LED Driving Lights (P/N 50231) purchased from Amazon along with Rugged Ridge Windshield Light Mounts (P/N 11027.03) from Amazon. Rigid D2 installation instructions HERE and Rugged Ridge Light Mount installation instructions HERE.
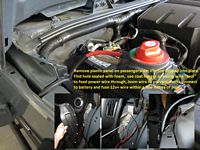
Once the lights were loosely bolted into the mounts the wiring was loomed (1/4" loom found at Napa) and run along the firewall, tucked in with the OE Wiring loom, and down to the same OE fog light wire to act as the turn on (blue wire) and hooked to the battery. The red/black wires and/for the included switch were unused as a result. I found a YouTube video HERE that illustrates what I did for the most part with the exception of the Spod mods.
These lights are pretty bright and complement the SR20 with side fill well.


Pending Projects:
Oil Analysis performed by Blackstone Laboratories
Jeep Rubicon 10A Reviews:
Expedition Portal: 2013 Overland SUV of the Year-Jeep Wrangler Rubicon 10A
FourWheeler: 2013 Jeep Wrangler Rubicon 10A Review
Allpar: 2013 Jeep Wrangler Rubicon 10A Introduction
TruckTrend: 2013 Jeep Wrangler Rubicon 10A First Drive
Car and Driver: 2013 Jeep Wrangler Rubicon 10A Debut
Automobile Magazine: 2013 Jeep Wrangler Rubicon 10A First Drive
Popular Mechanics: 2013 Jeep Wrangler Rubicon 10A First Drive
Jeep Rubicon 10A Video: *High Speed Connection Recommended*
Autobiography of a Jeep (1943)
MotorTrend: 2013 Jeep Wrangler Rubicon 10th Anniversary Edition: At Home on the Rubicon
Autobytel: 2013 Jeep Wrangler Unlimited Rubicon 10th Anniversary Test Drive
SupercarHall: 2013 Jeep Wrangler Rubicon 10th Anniversary on the Rubicon Trail
Jeep Wrangler Documents/Files:
2013 Jeep Wrangler Rubicon 10A Sales Brochure
2013 Jeep Wrangler Owner's Manual
Check for FCA Recalls/Campaigns by VIN
Jeep Wrangler JK Body Repair Manual.pdf
Autoweek: Chrysler/Jeep Pentastar Issue
Allpar: Pentastar Head Issue in Depth
Allpar: An Update on Rare Pentastar Problem
Charger Forums: 3.6L Pentastar V6 Cylinder 2 Failures
Jeep Wrangler DIY Guides/Installation Instructions:

BillsWebSpace: Jeep Wrangler JK Pentastar 3.6L Oil Change
BillsWebSpace: Jeep Wrangler JK Radar Detector Mounting and Wiring
BillsWebSpace: Jeep Wrangler JK Homelink Installation
BillsWebSpace: Jeep Wrangler JK Ace Bumper and Warn Zeon Winch Installation with Remote Cutoff
BillsWebSpace: Jeep Wrangler JK Armor and Transmission/Transfer Case/Differential Fluid Change
BillsWebSpace: Jeep Wrangler JK Rugged Ridge Tow Hitch and Wiring Harness Installation
BillsWebSpace: Jeep Wrangler JK aFe Exhaust Installation
BillsWebSpace: Jeep Wrangler JK Differential Breather Extensions
Jeep Wrangler JK Water Leak Diagnosis and Repair
Jeep Wrangler JK Water Leak TSB
How to fold The Windshield of a Jeep Wrangler JK
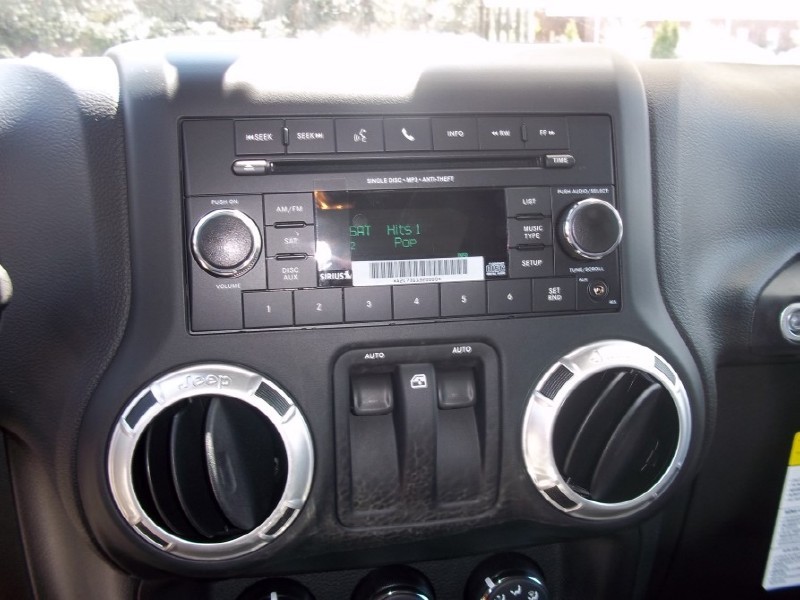
2011 / 2012 Jeep Wrangler Dash & Radio Removal
Stu Olsen: Jeep JK Ball Joint Replacement
Charles Bloyer: Cutting JK Fenders/Liners Front and Rear
Forums and Clubs:


- Parts Diagrams and Wholesale Parts
- Discounted JEEP Parts
- Parts Diagrams


