

Click on thumbnails below for larger pics....
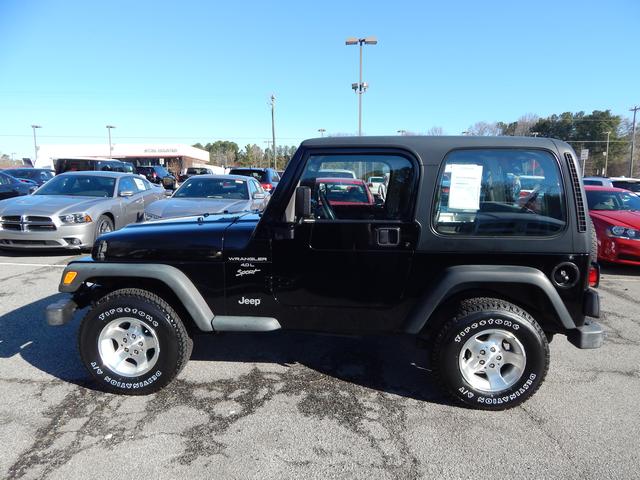
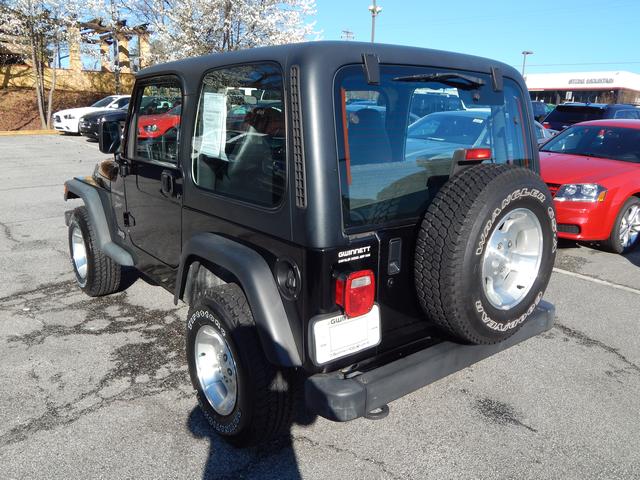
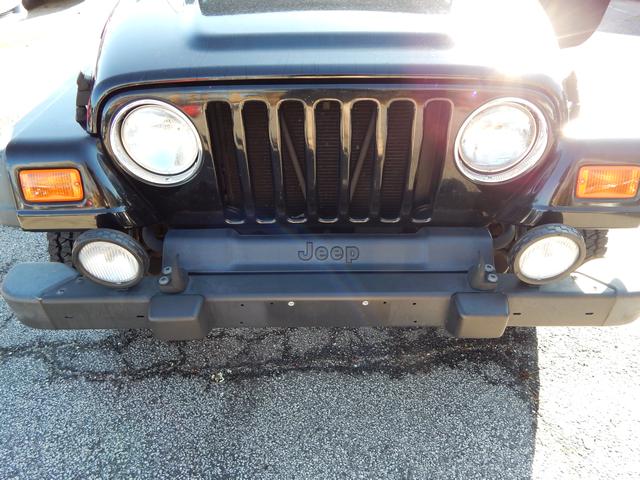
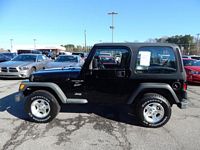
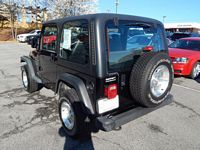
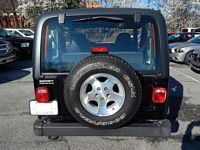
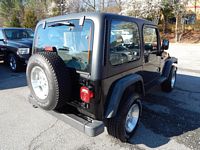
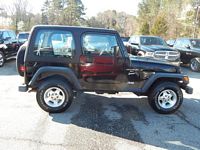
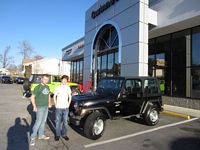
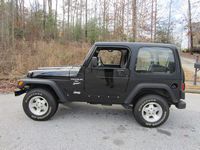
This 2002 Jeep Wrangler Sport was purchased from Floyd Yancy at Gwinnett Jeep. We had been looking for a YJ or TJ for our son to drive and found this TJ, a Wrangler Sport with the 4.0 inline 6 cylinder engine and a Dana 44 3.73 rear axle. One of the reasons we decided on a Jeep for our son was because it was the cheapest to insure according to Forbes.
Dealer Ad is HERE, Build Sheet is HERE, CarFax is HERE.
A day or two after driving the Jeep I did find some oil dripping at the transmission/engine that had not been there when we checked at the dealer- what initially appeared to be an RMS leak was somewhat corrected by torquing all of the oil pan bolts to spec (84 in/lbs), all were a bit loose and one bolt was MIA (sourced at parts store, 1/4"-20x3/4")- the oil pan gasket/RMS will probably require replacement at some point, not what I would expect from a dealership but.....


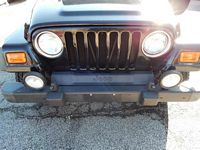

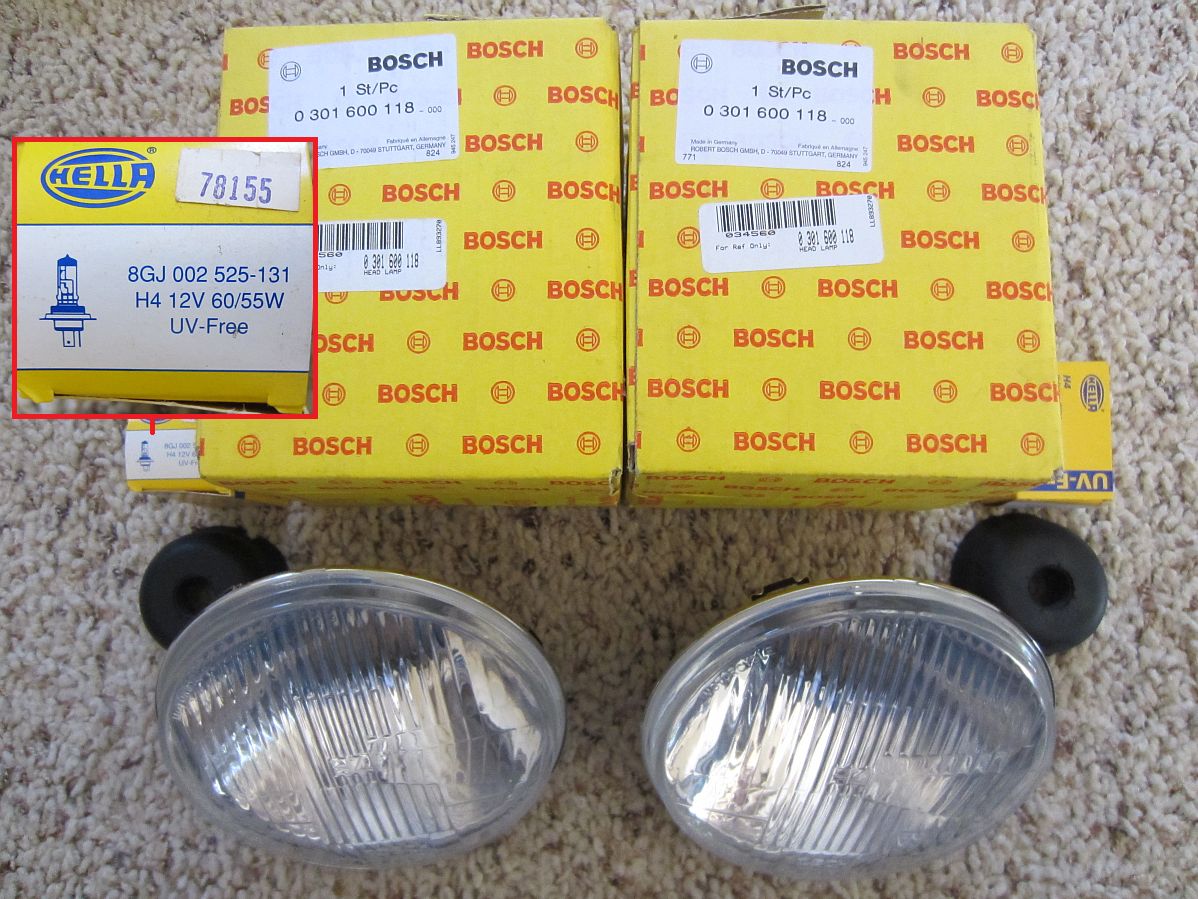
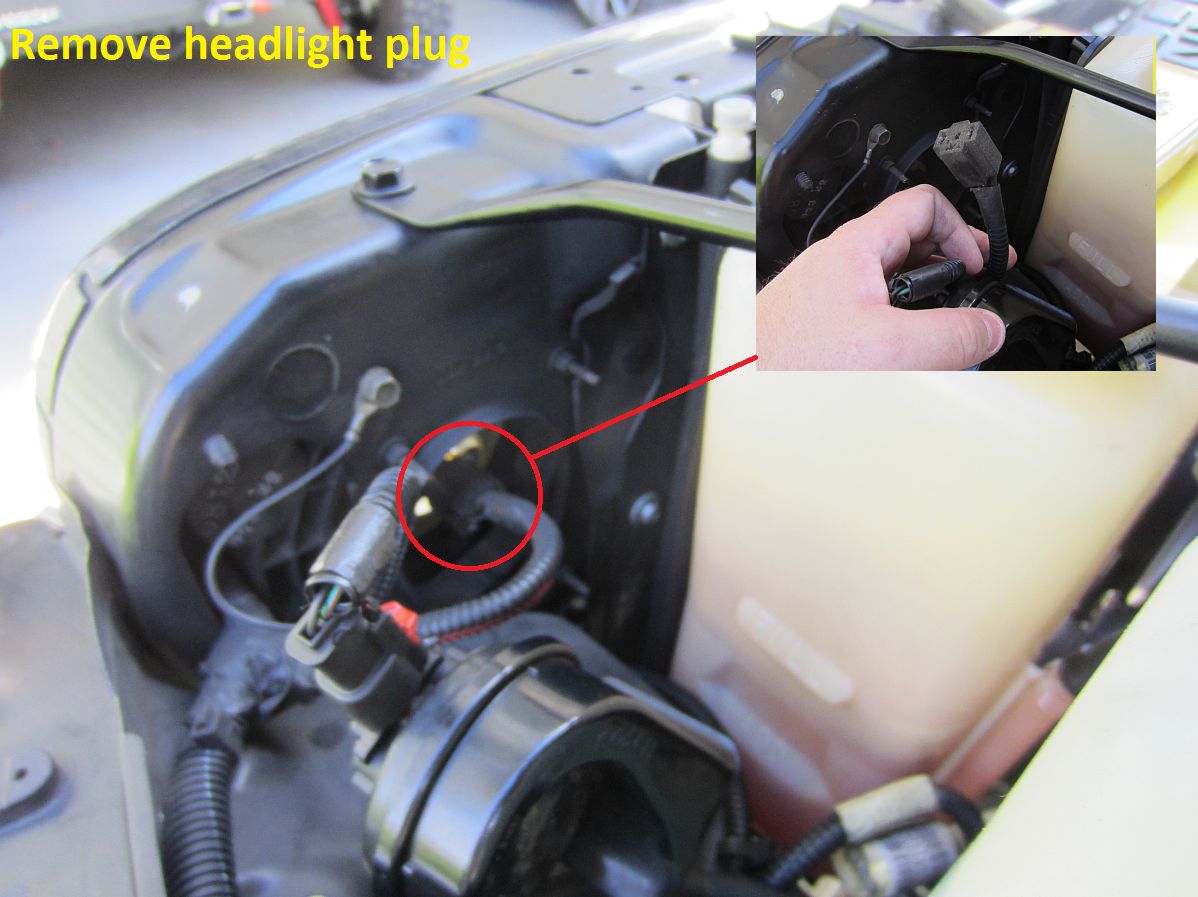
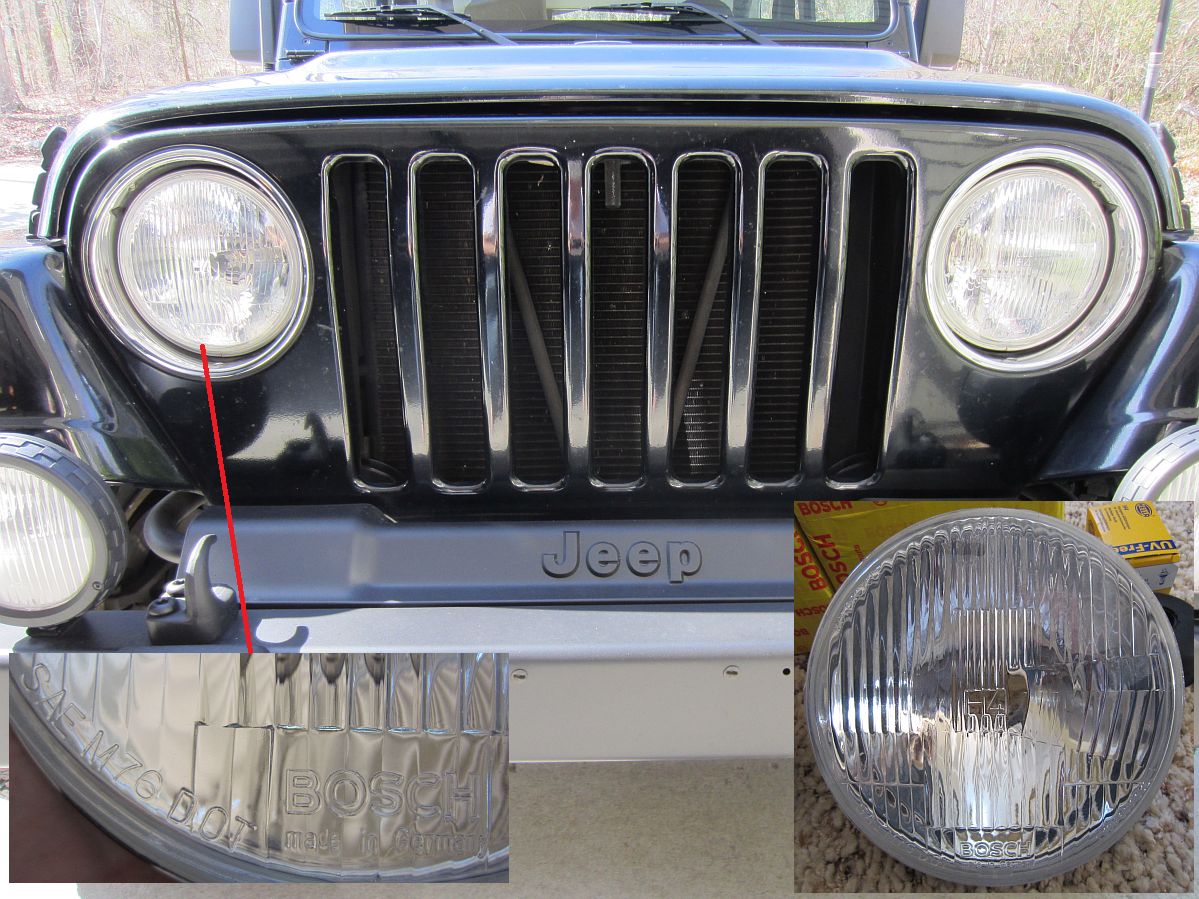
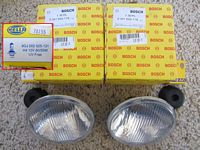
Bosch (Hella) H4 Headlights (P/N 0301600118) with 55/60W Hella bulbs replaced the mismatched Wagner/Sylvania sealed beams. These are DOT approved as shown on the headlight lens and have a much better light pattern/cutoff than the horrible sealed beams while being brighter- more light where you need it to see.
Before installing the lights I applied Lamin-X protective film, thick 40 mil, to protect the headlight lenses since they are glass. Using the instructions HERE, this is a very easy install. For these round headlights I just buy the cheaper bulk film and use a razor to trim away the excess using the glass lens as a guide.
I had bought these headlights YEARS ago for a long departed(sold) 280Z so cleaning out the basement worked to my son's advantage, brand new headlights.
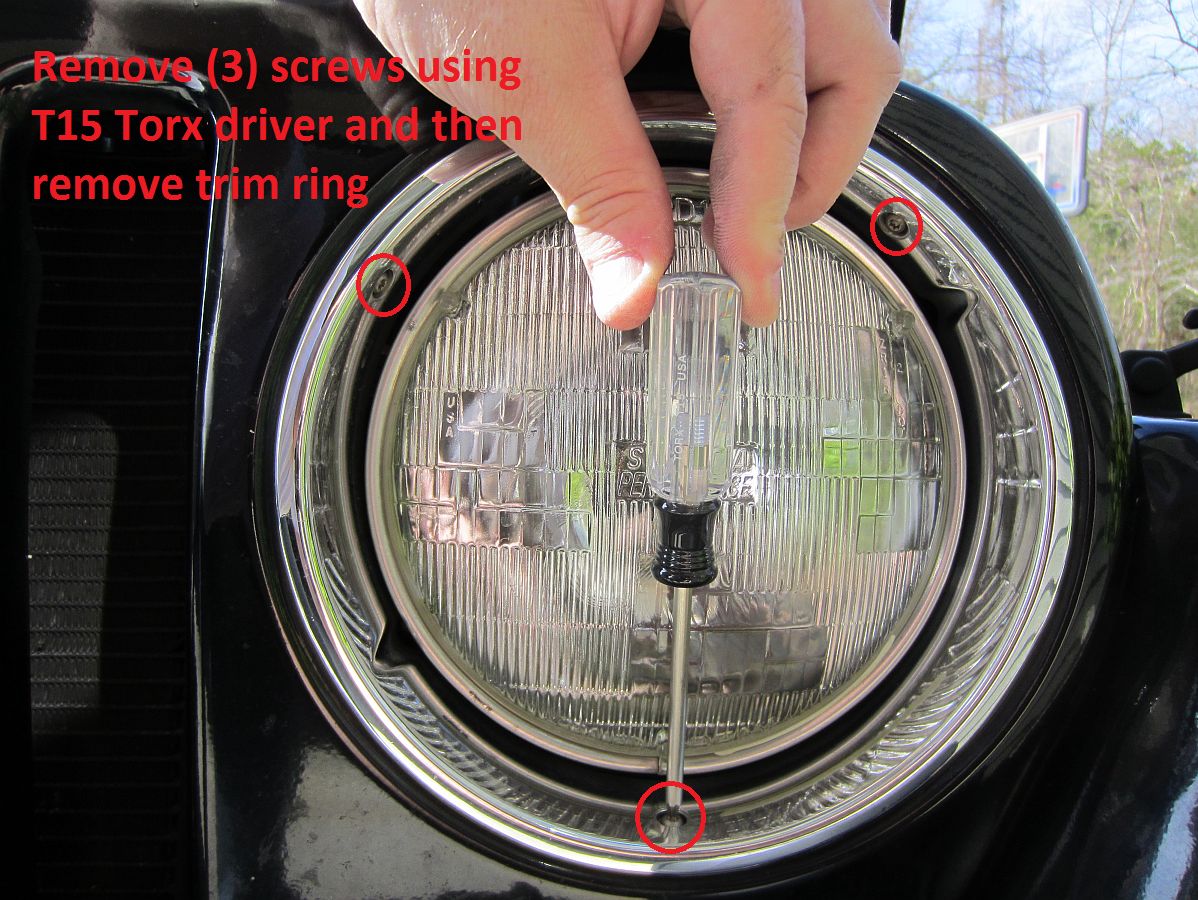
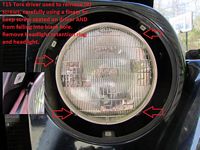
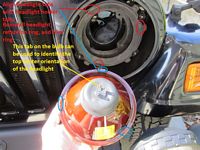
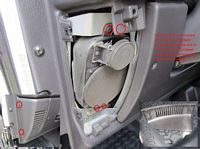
To replace the TJ headlights you will need a T15 Torx driver: 3 screws to remove the trim ring and 4 screws to remove the headlight retention ring. I held a finger under each screw as it was removed/installed so that it would not drop into the black hole. Pics below:


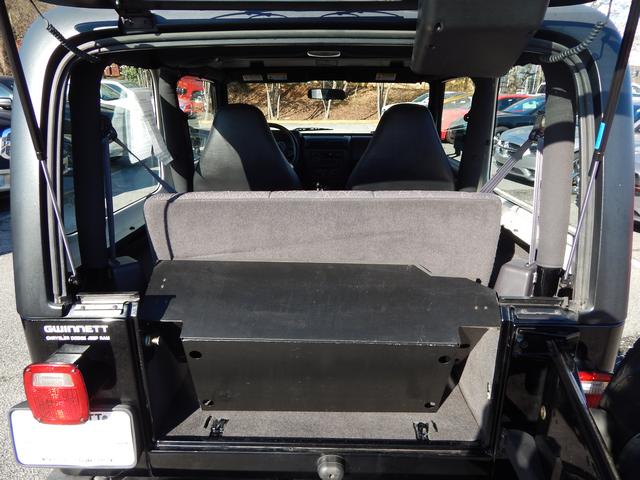
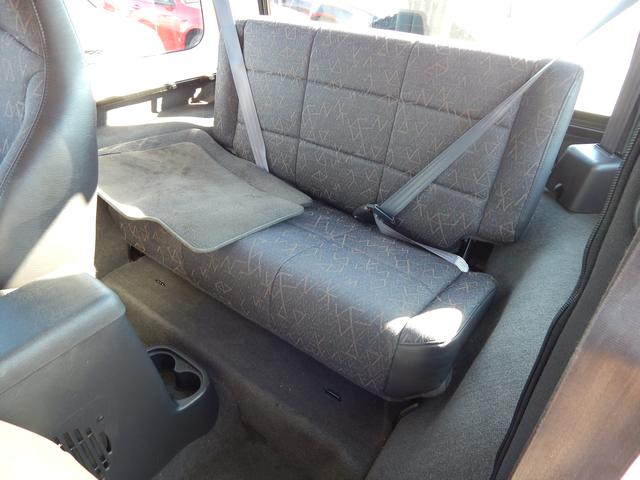
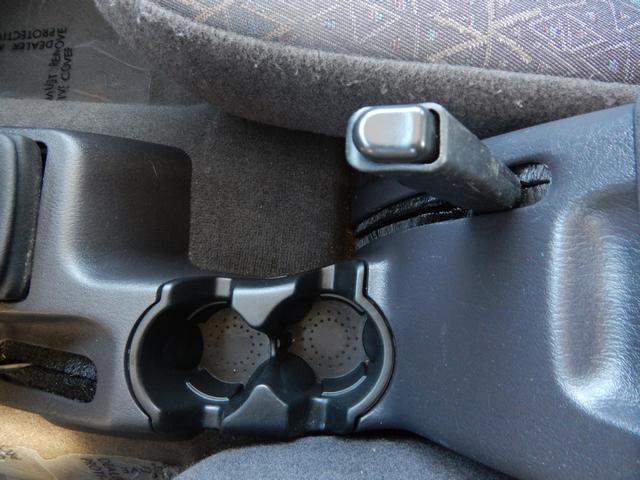
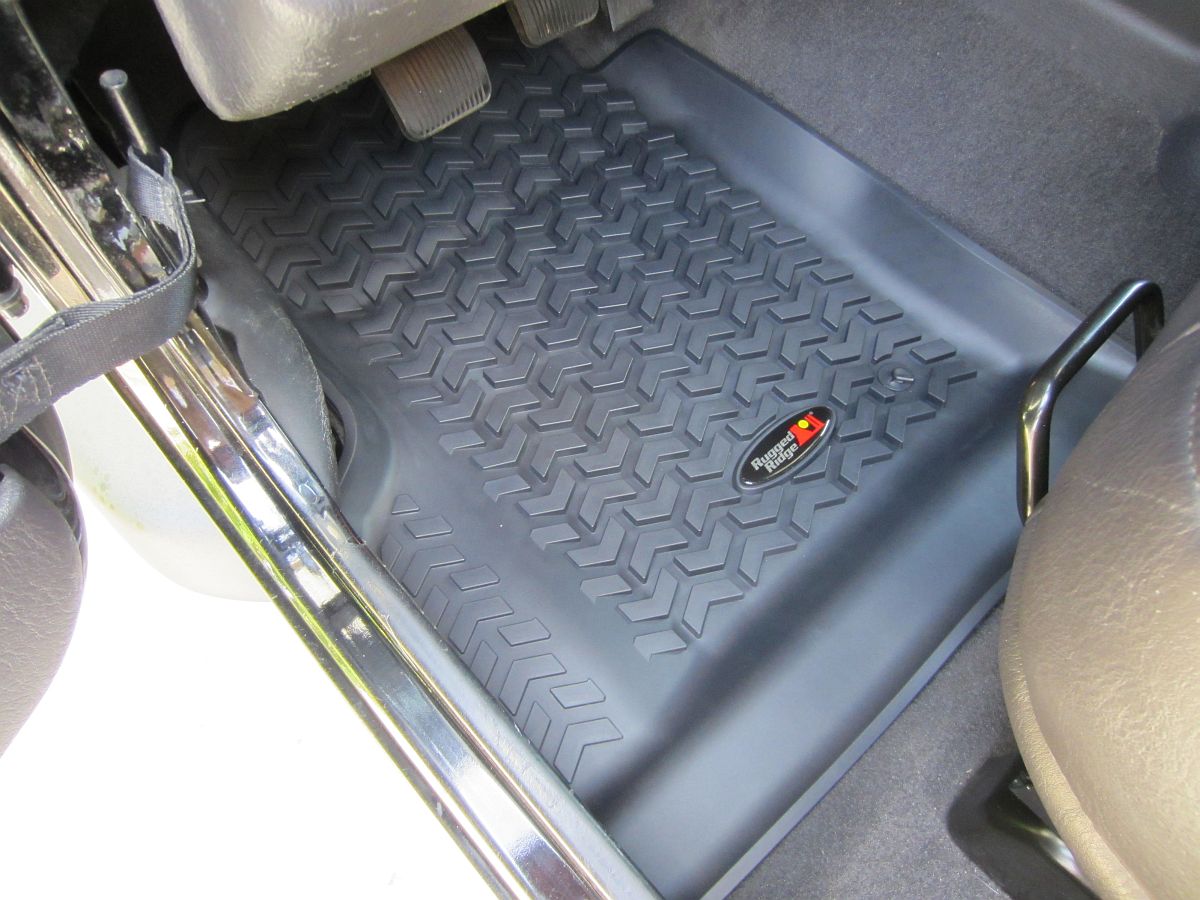
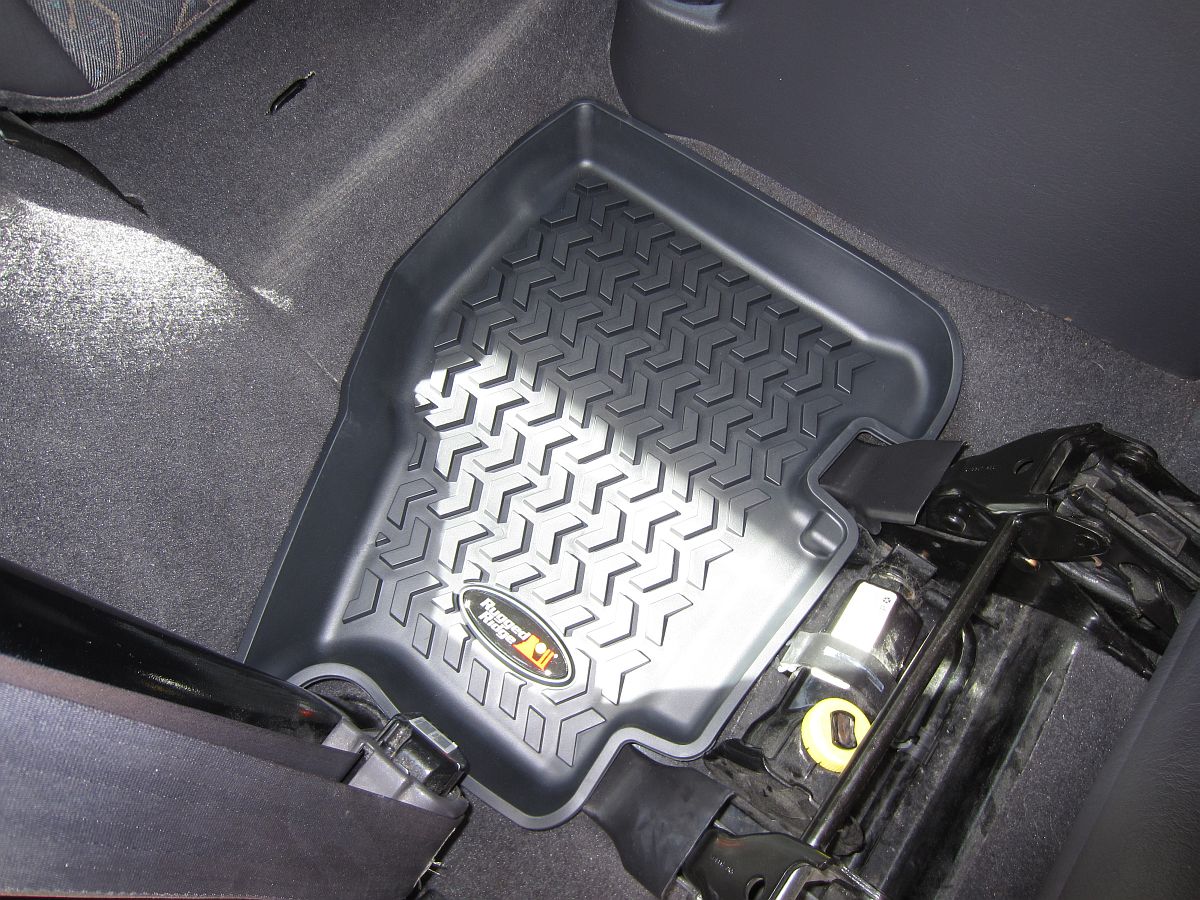
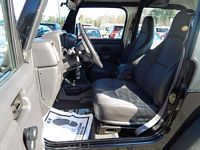
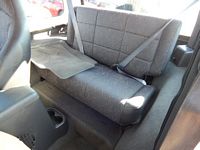
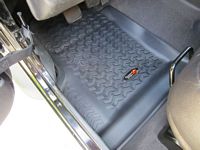
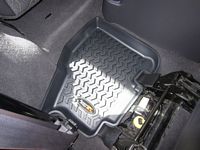
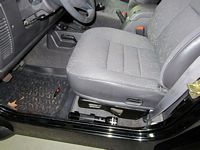
Rugged Ridge Black Front and Rear Floor Liner Kit (P/N 12987.10) from Amazon installed. They fit great and should protect the carpet well.
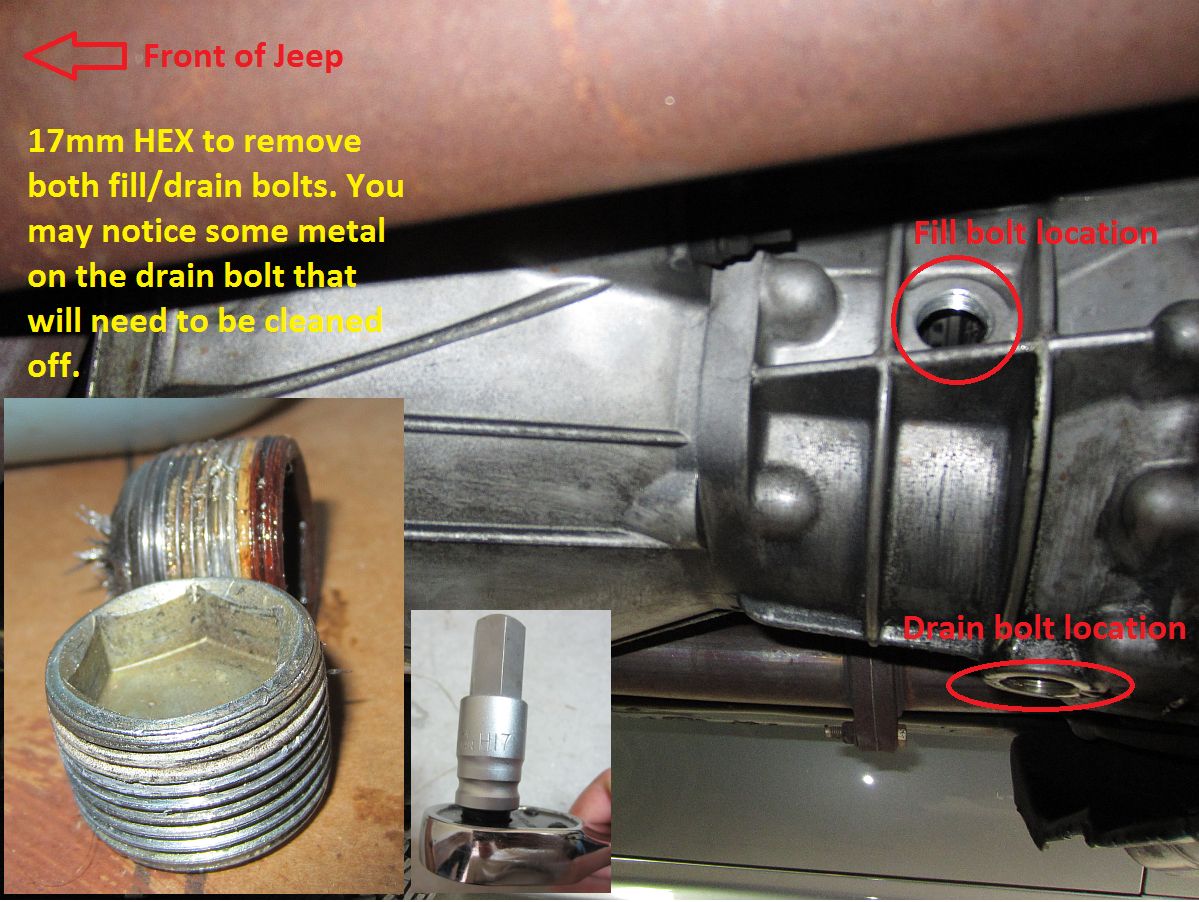
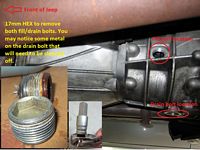
As a start to fluid changes, the manual transmission was first. The NV3550 in the TJ takes 4.9 pints (~2.5 quarts) of fluid and I chose to use Amsoil Manual Synchromesh Transmission Fluid (meets MS9224 spec).
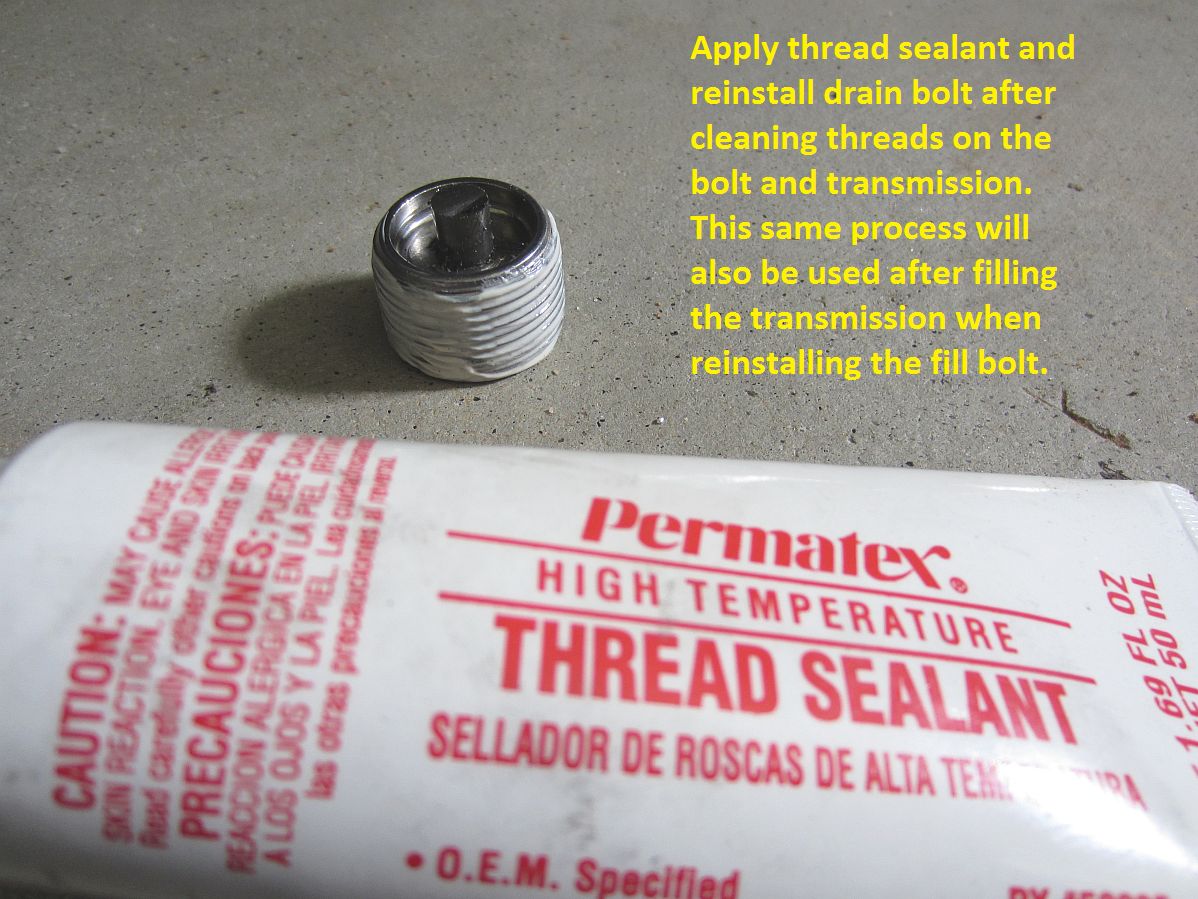
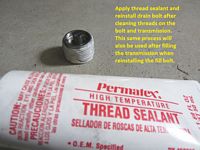
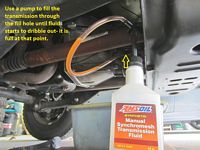
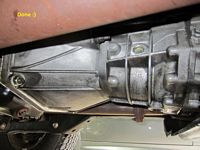
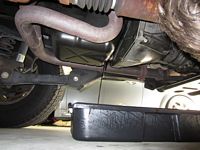
After taking the Jeep for a quick fluid warm-up drive, park on a level surface and start by placing a drain pan under the transmission and loosening/removing fill bolt (17mm HEX)- you may get a little fluid out on this step. Next remove the drain bolt (17mm HEX) and drain all fluid. After draining all fluid clean the threads on the drain bolt and transmission, apply thread sealant, reinstall drain bolt. Fill transmission through fill hole until fluid starts to dribble out, apply thread sealant to fill bolt and reinstall. DoneThe torque spec I found online was 14-20 ft-lbs so I settled on 15 ft-lbs when I reinstalled both.
I found the write-up HERE (archived HERE) helpful when looking into this.
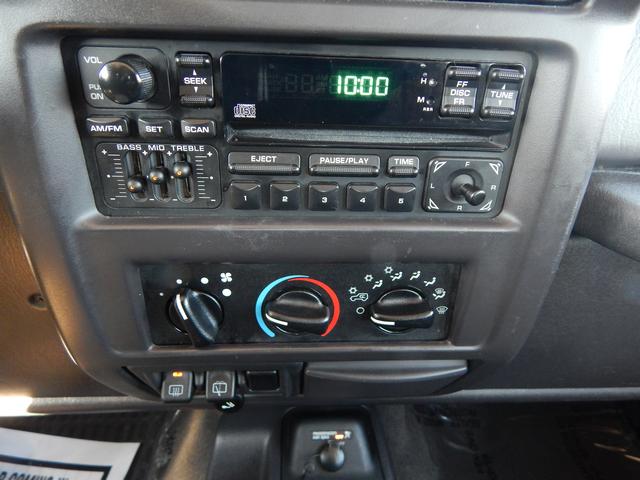
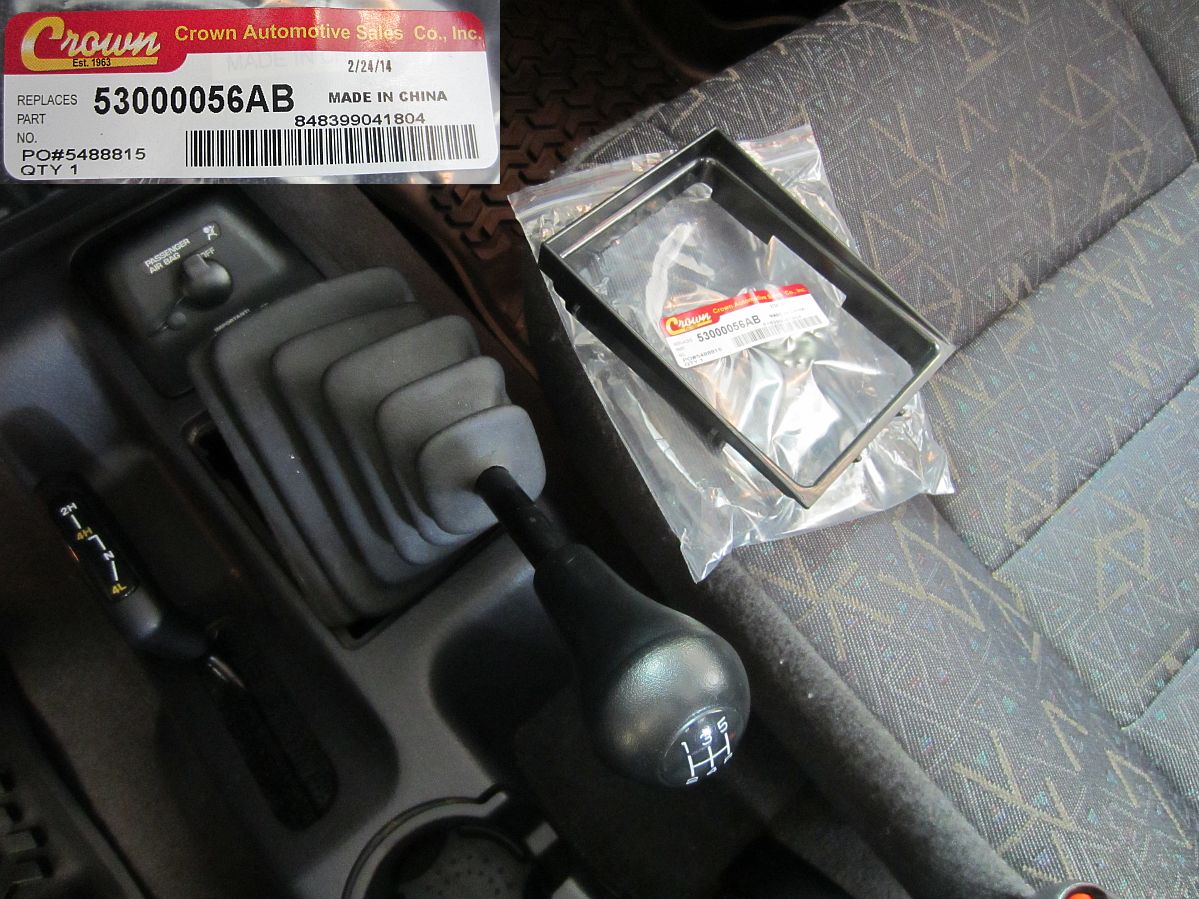
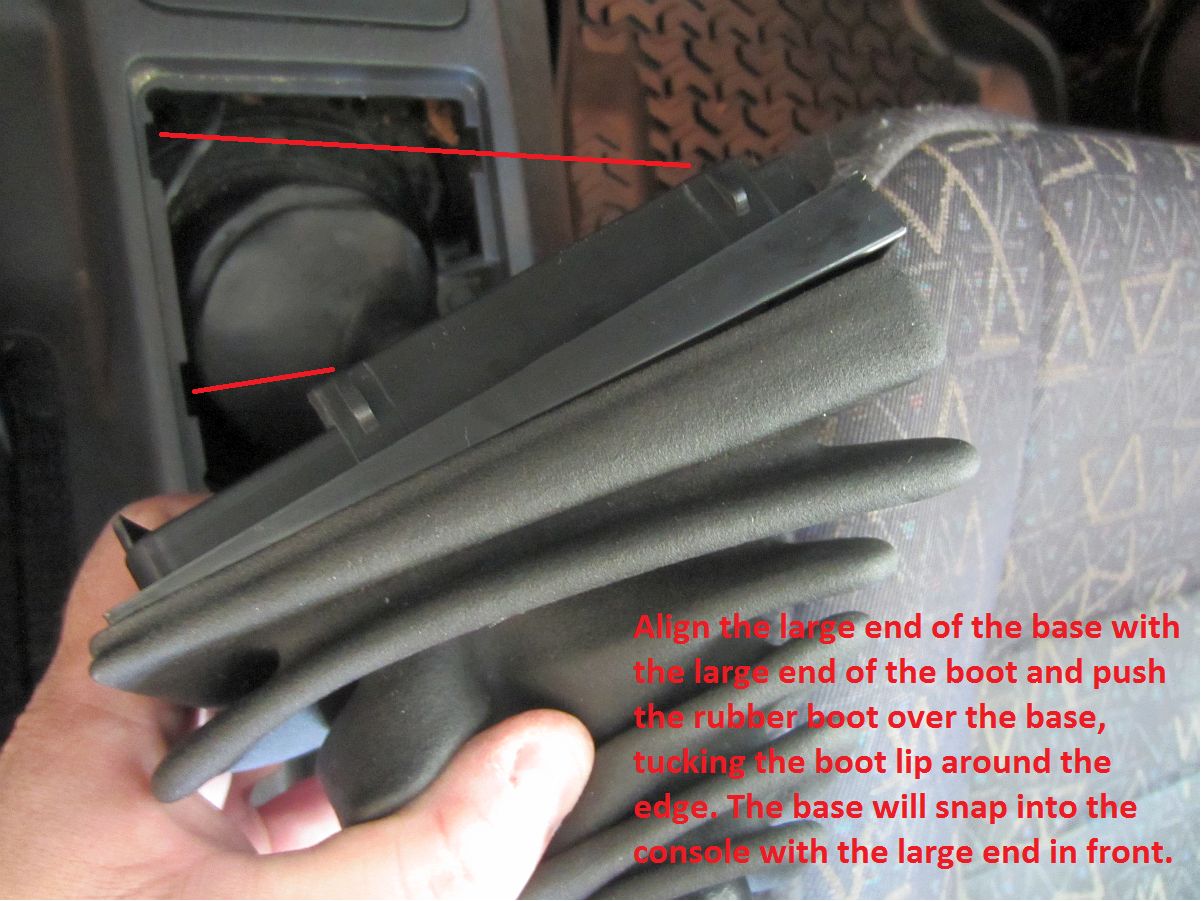
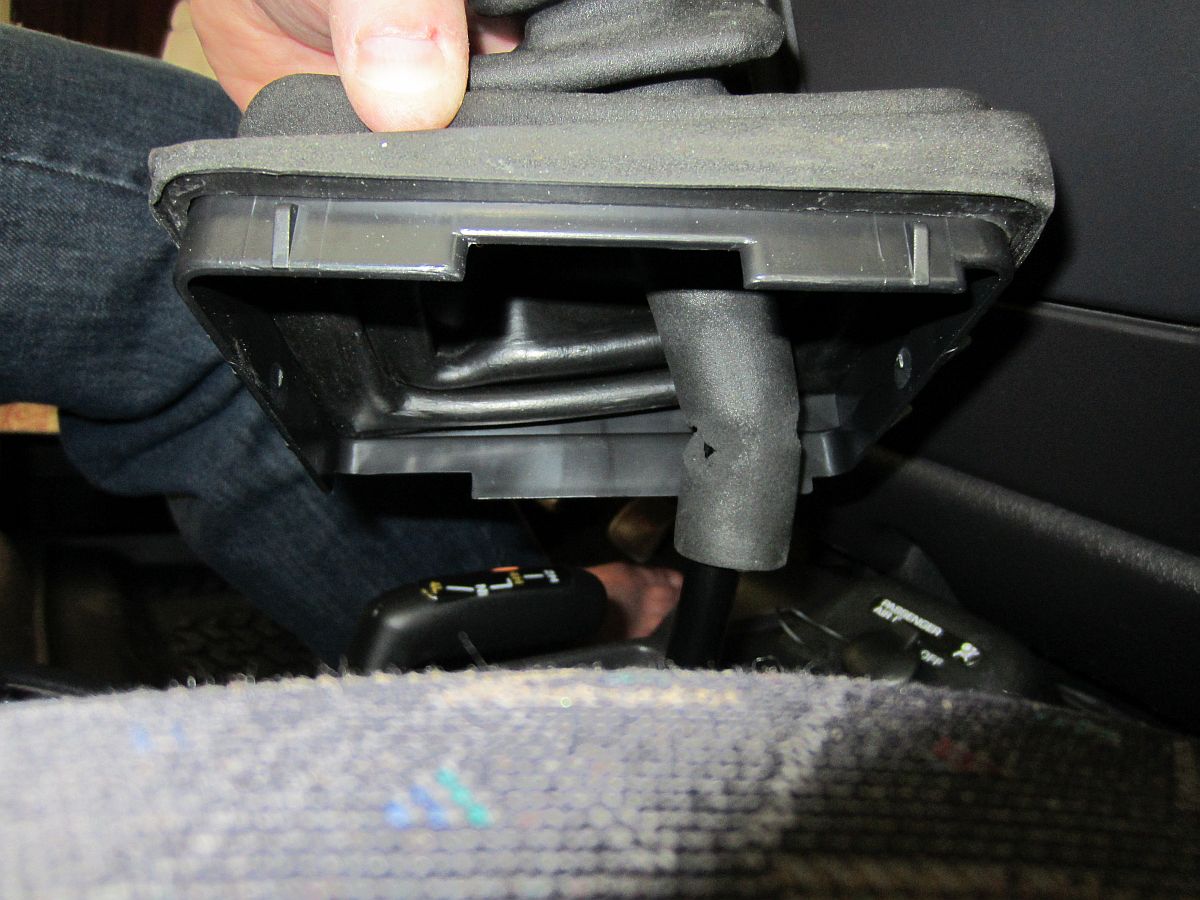
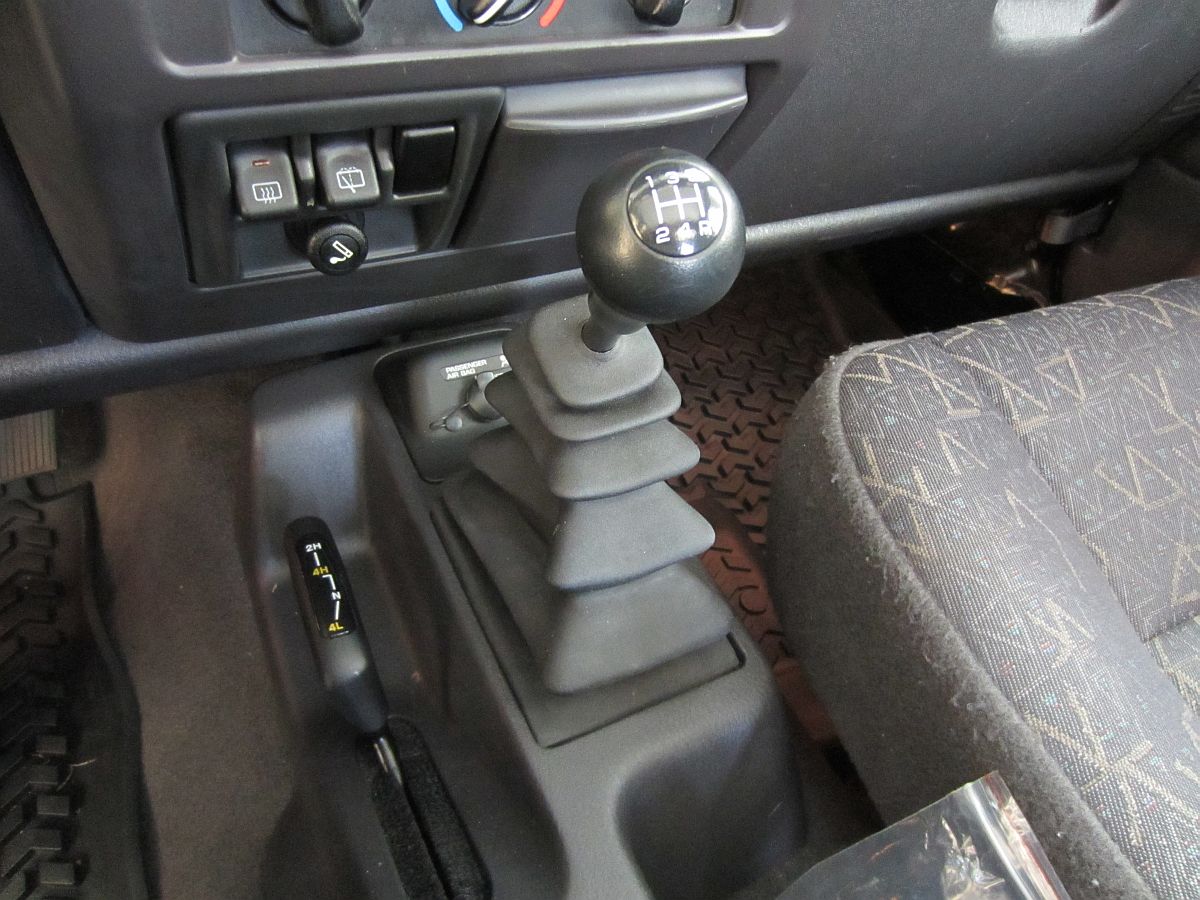
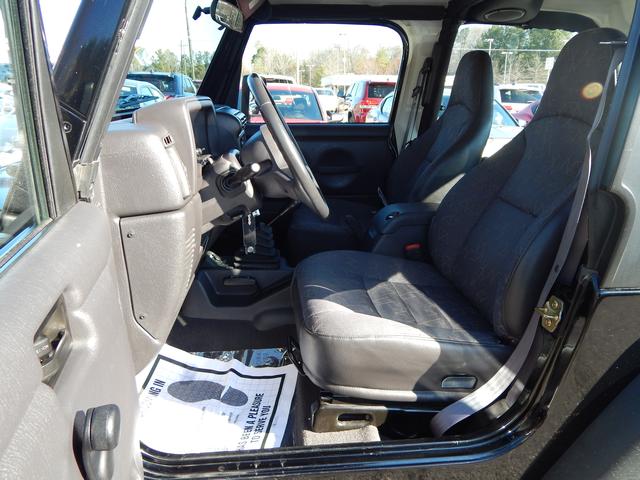
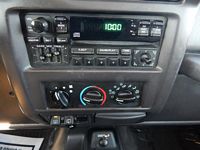
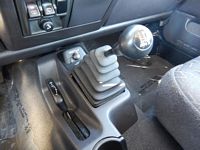
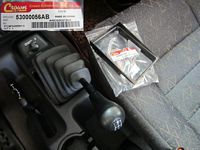
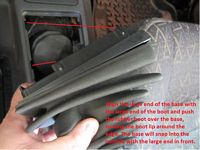
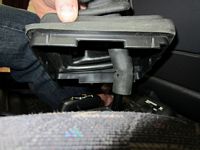
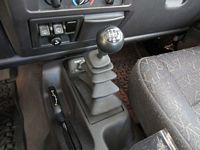
The shift boot was floating around when we bought the Jeep so a new shifter boot base/bezel was ordered from Amazon, Crown Automotive Gear Shift Lever Boot Bezel (P/N 53000056AB).
The boot wraps around the bezel and the bezel is snapped into the console.
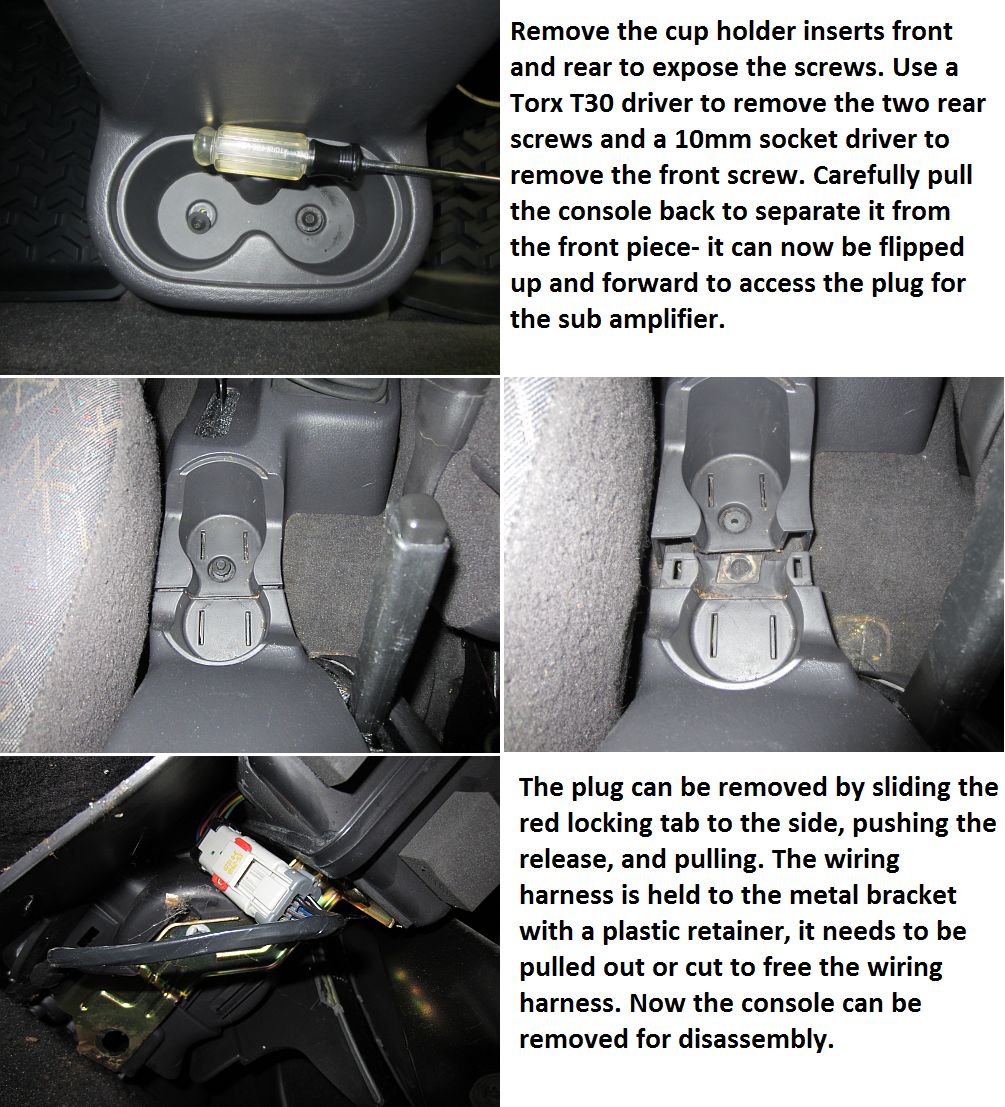
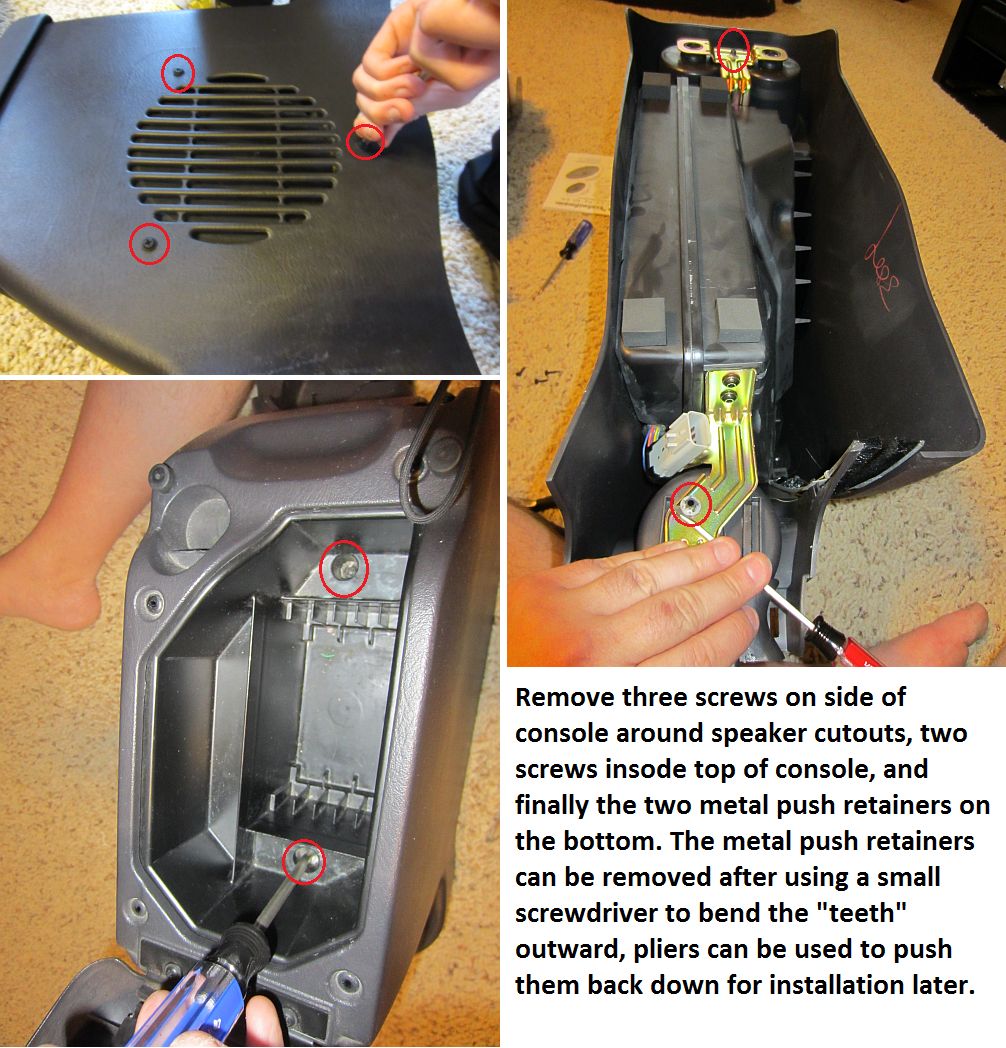
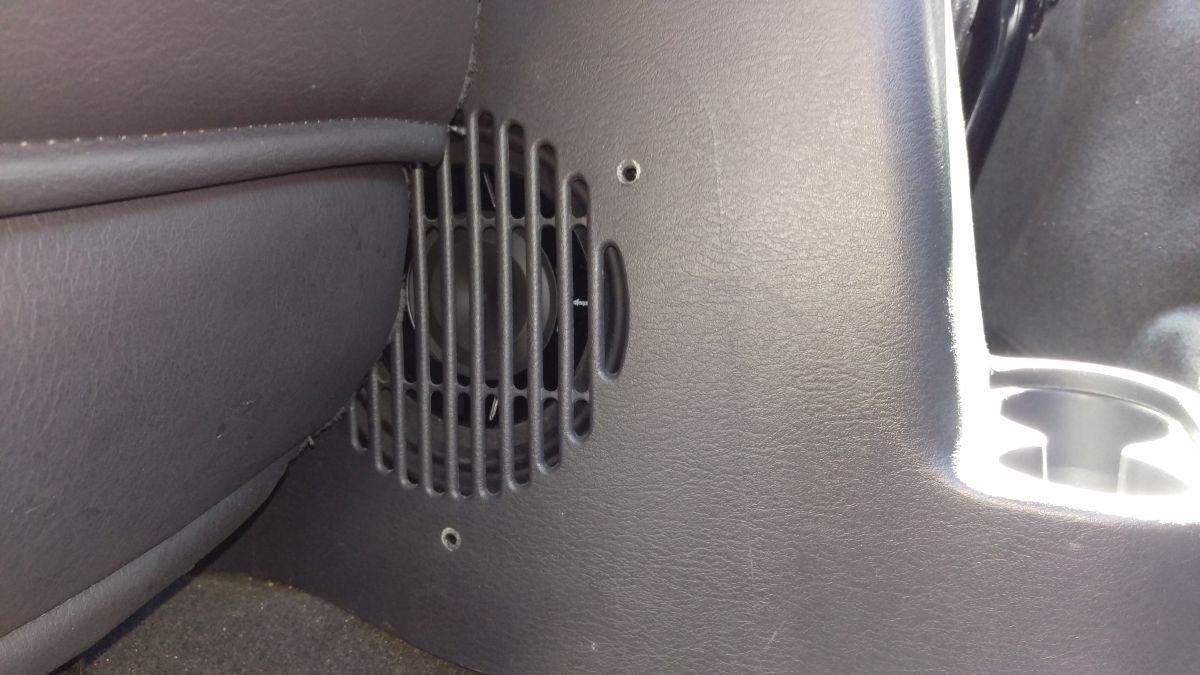
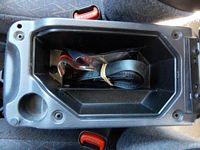
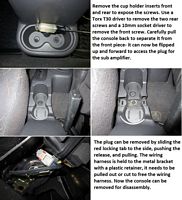
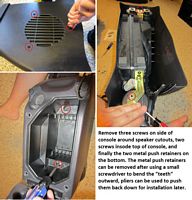
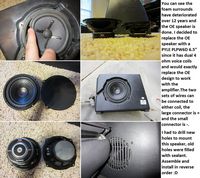
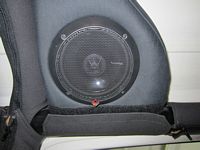
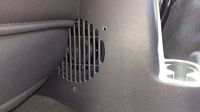
New Pyle Dual 4-ohm Voice Coil Subwoofer (PLPW6D) from Amazon to replace old OE subwoofer in console. Installation and Specifications HERE.
CFE also makes a replacement speaker (available from Quadratec, their DIY replacement guide is HERE, SSV Works makes a replacement center console for a 10" sub and their installation guide is HERE. For those wanting to build their own sub enclosure (measurements HERE) and/or run an external amplifier, the TJ Sub Wiring Diagram is HERE.
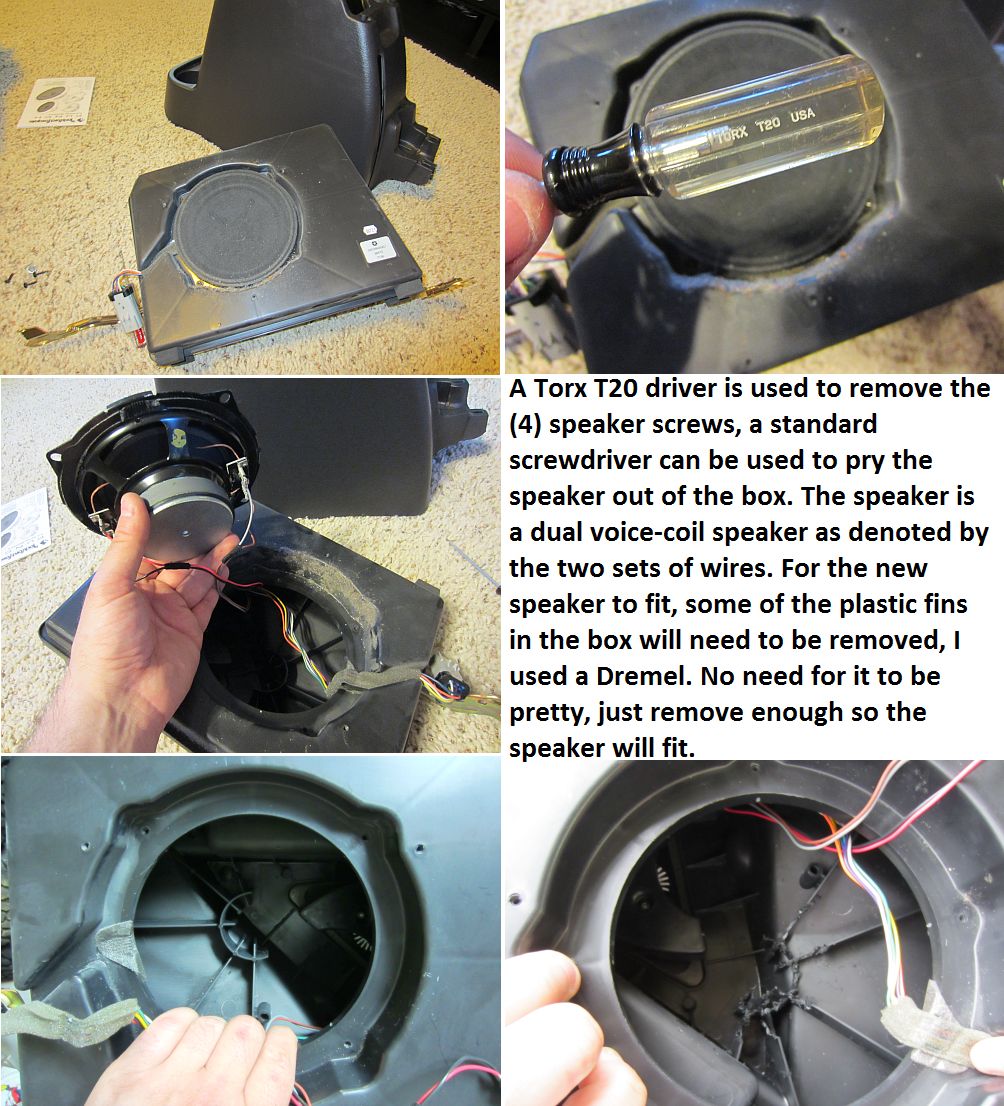
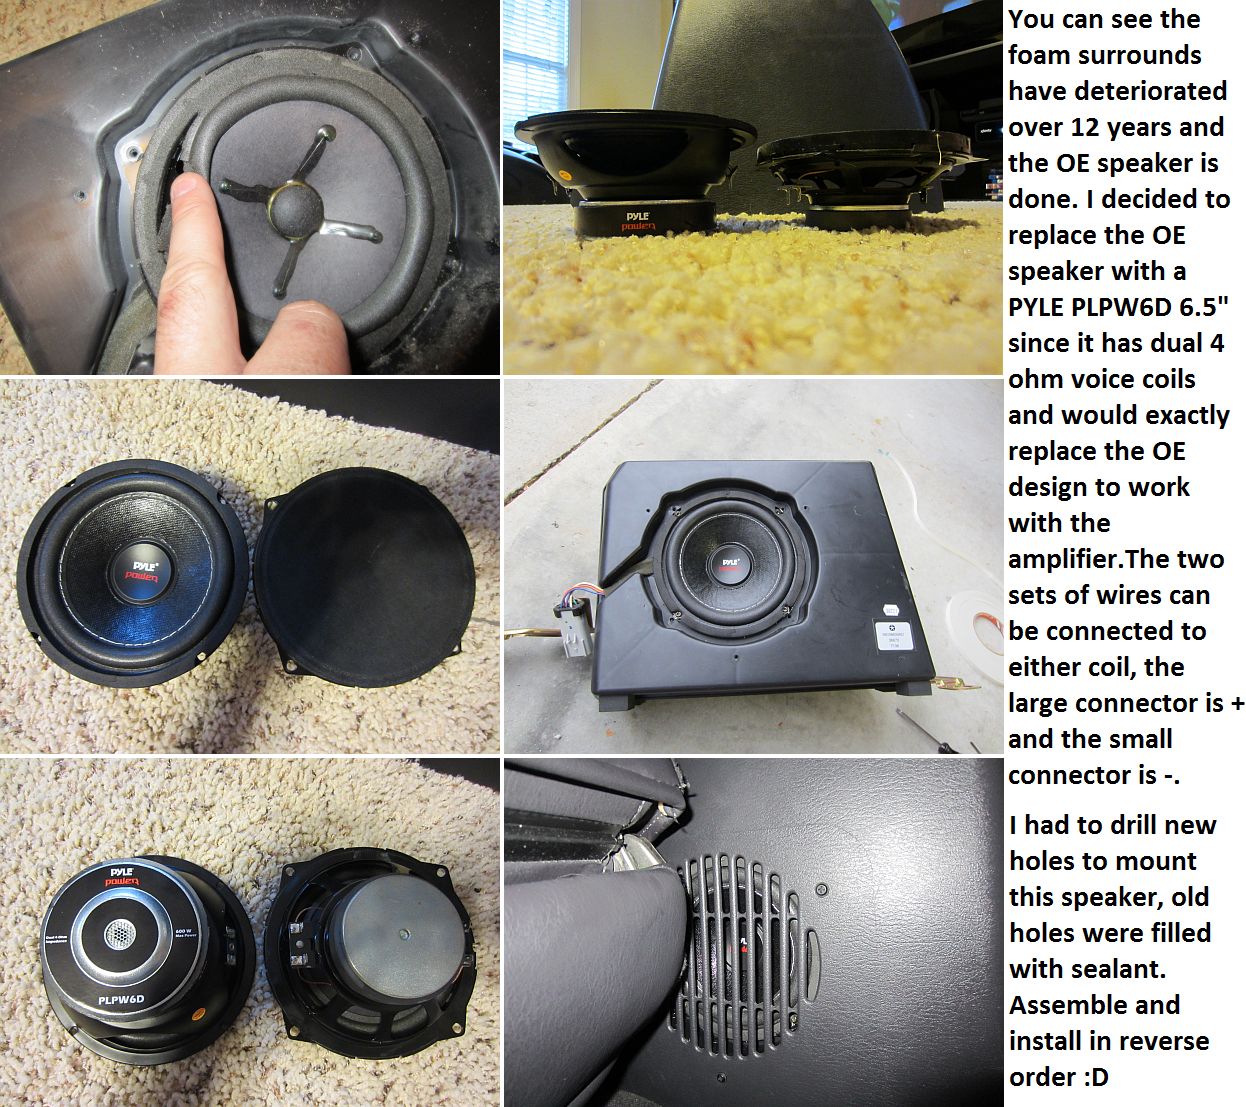
I chose the Pyle since it replaces the factory dual voice coil configuration at a cost of ~$20, although some have had success running single voice coil speakers using only one set of wires as in this forum thread HERE. The OE speaker is dual 2-ohm voice coils so with the Pyle speaker the amp power is half.....we'll see how it works before I spend $120 on a Kicker 40CWRT672. Pics below show the details (not pictured, I did add polyfil to the enclosure before installing the speaker):

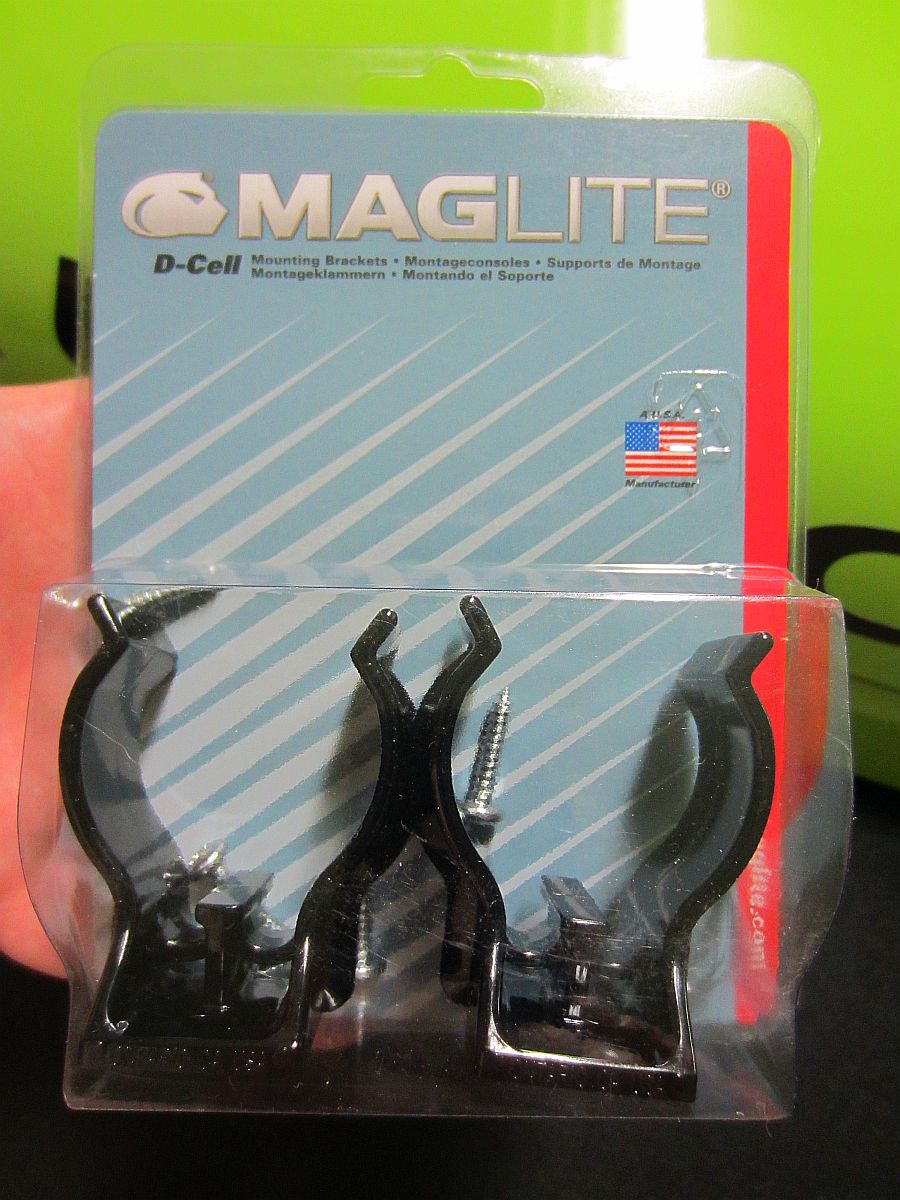
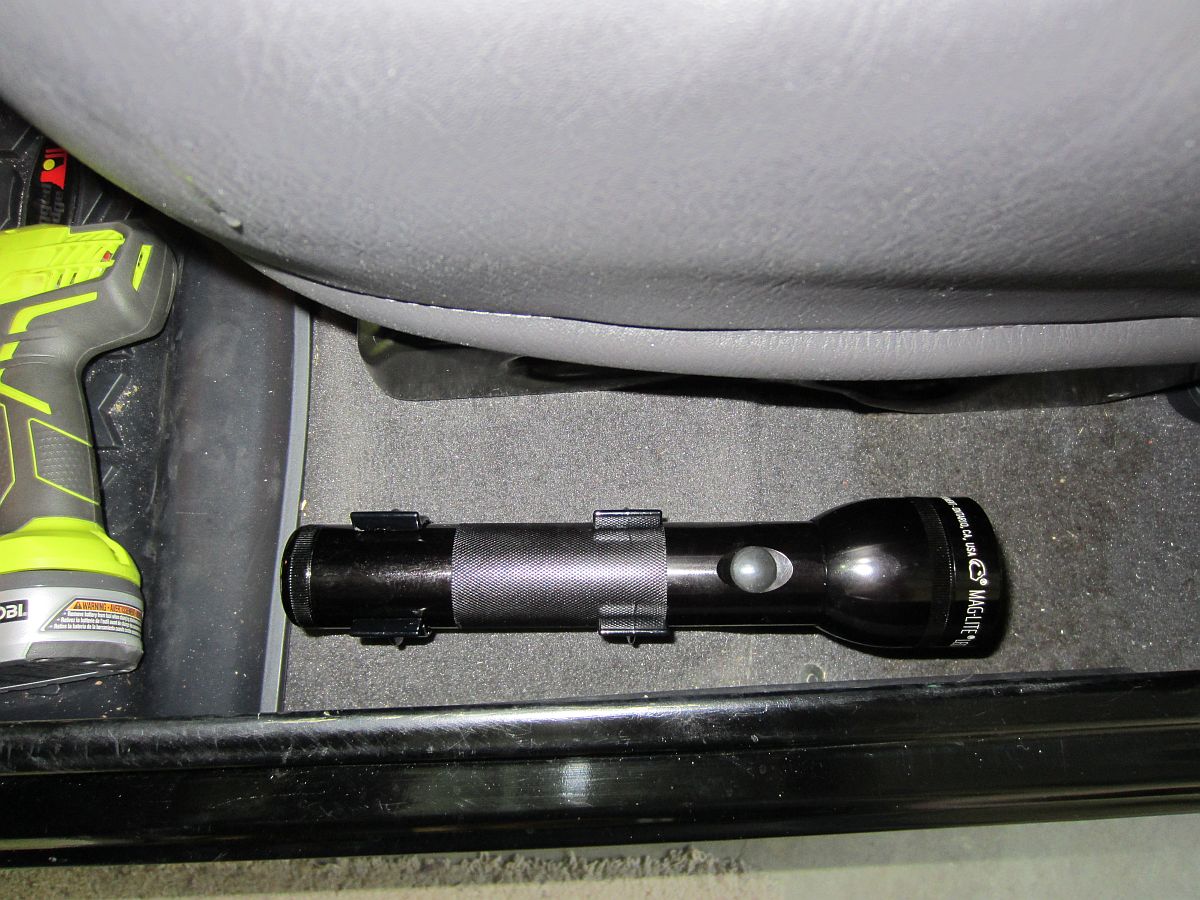
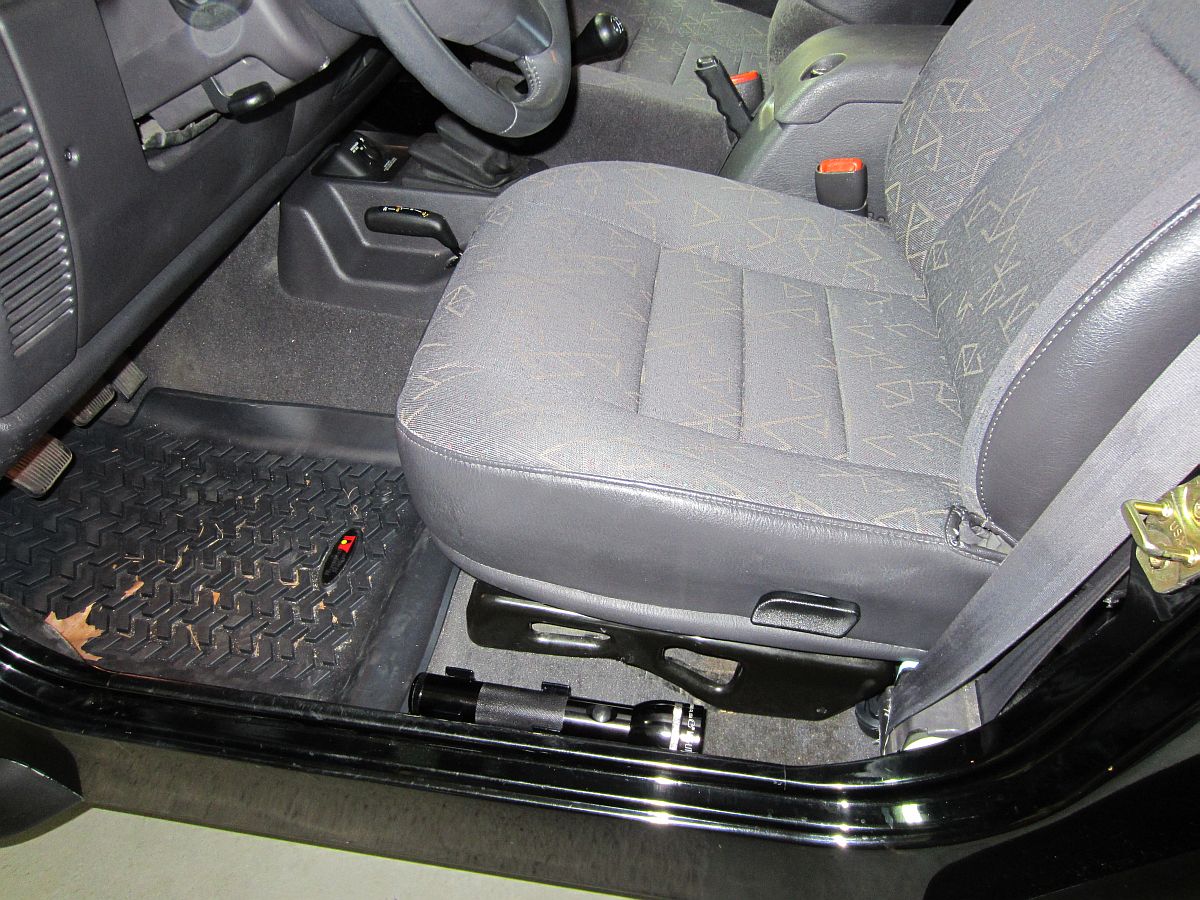
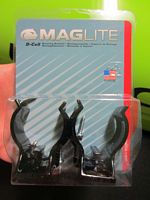
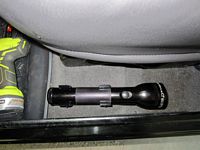
MagLite D-Cell Mounting Brackets (Model# ASXD026, P/N 108-000-426) installed to hold a 2 D-cell LED MagLite.
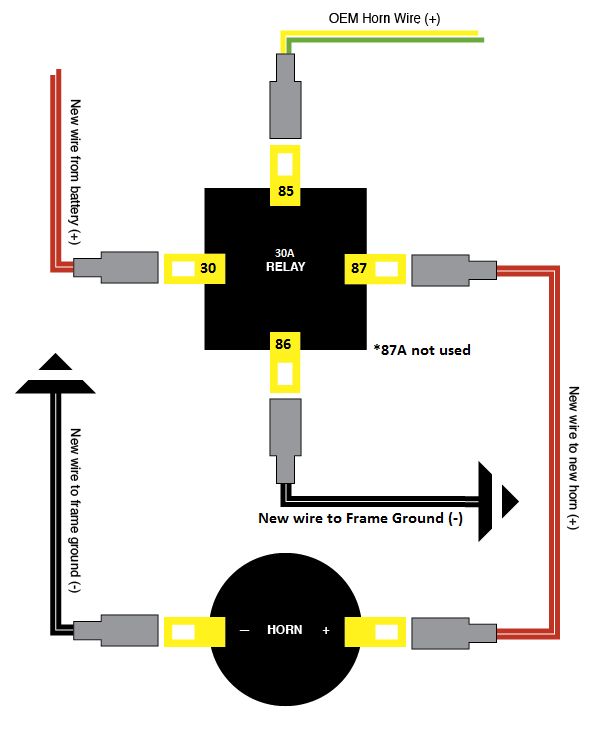
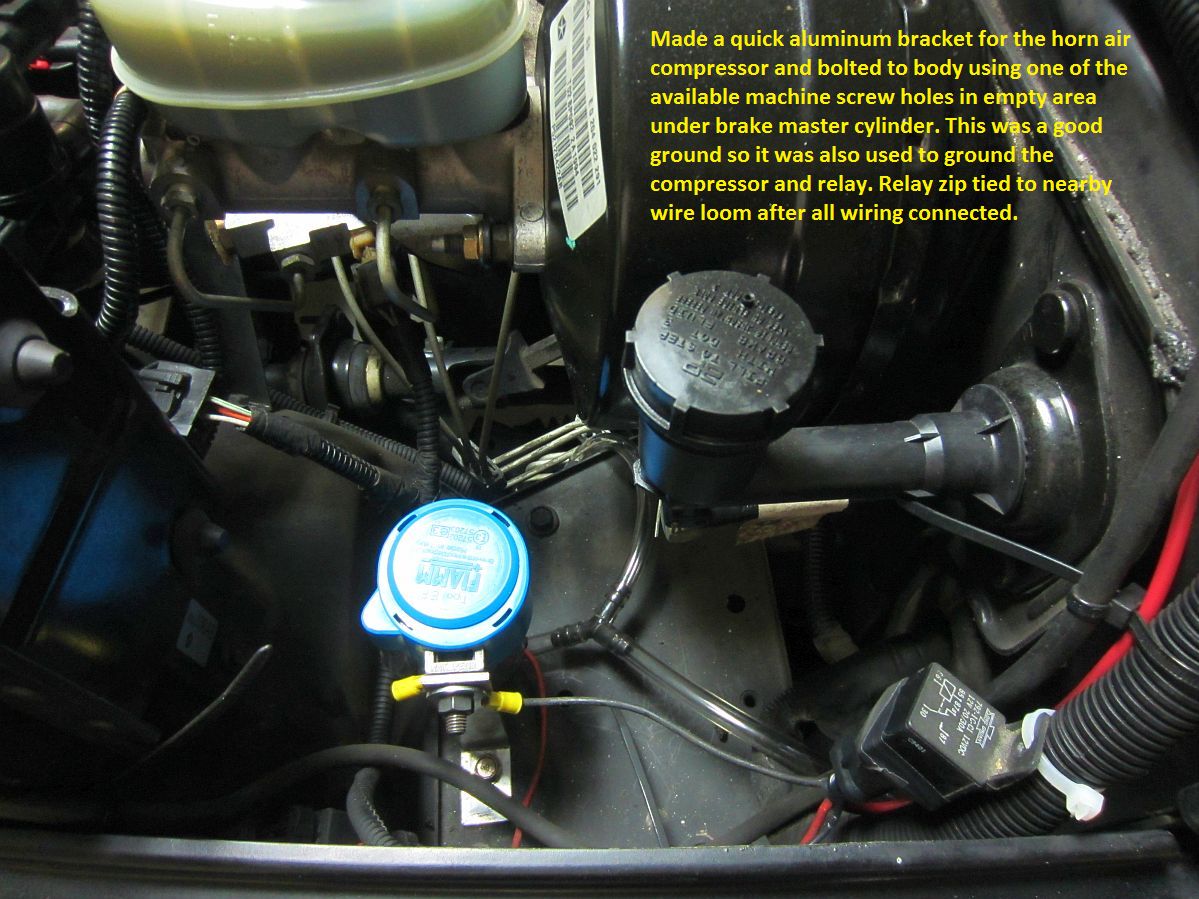
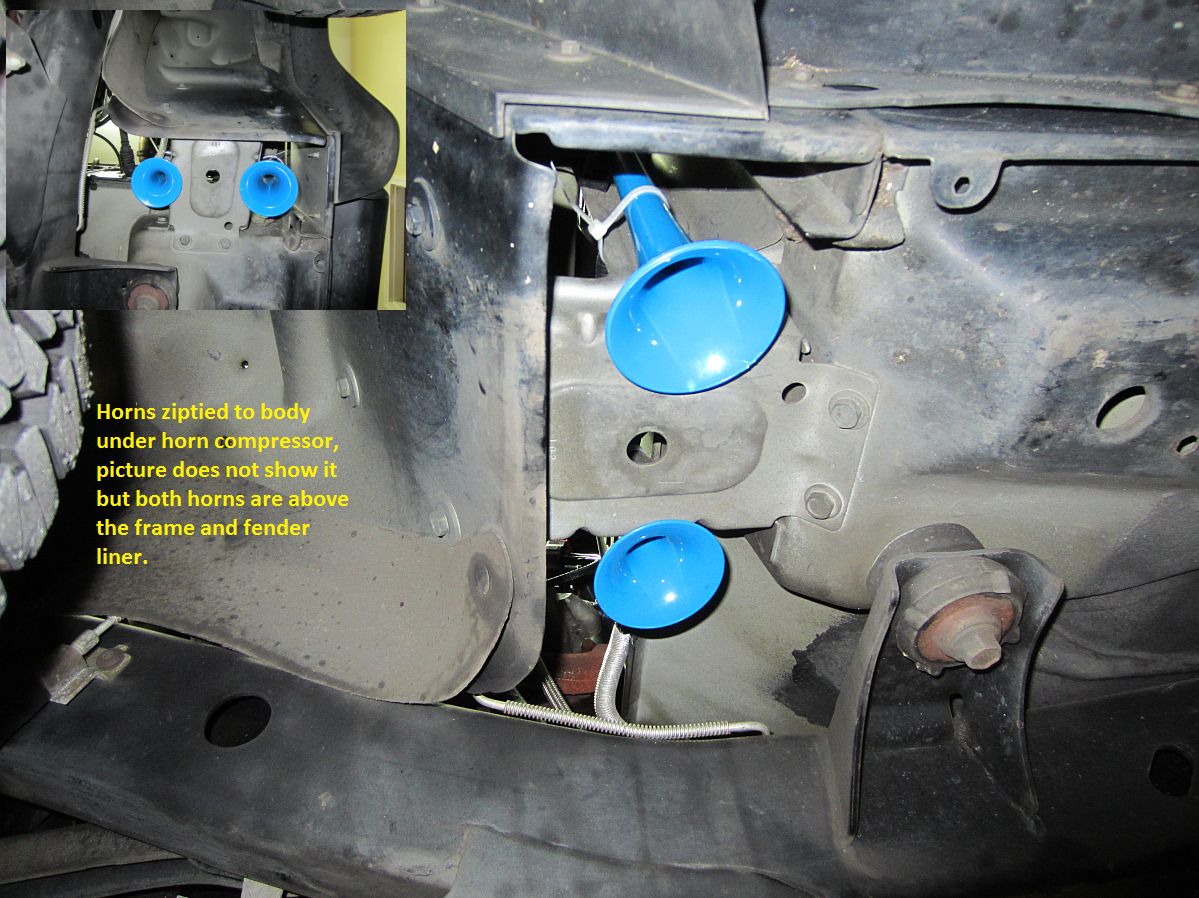
Some old Fiamm air horns I had from a past car were installed - new drivers need to be heard.

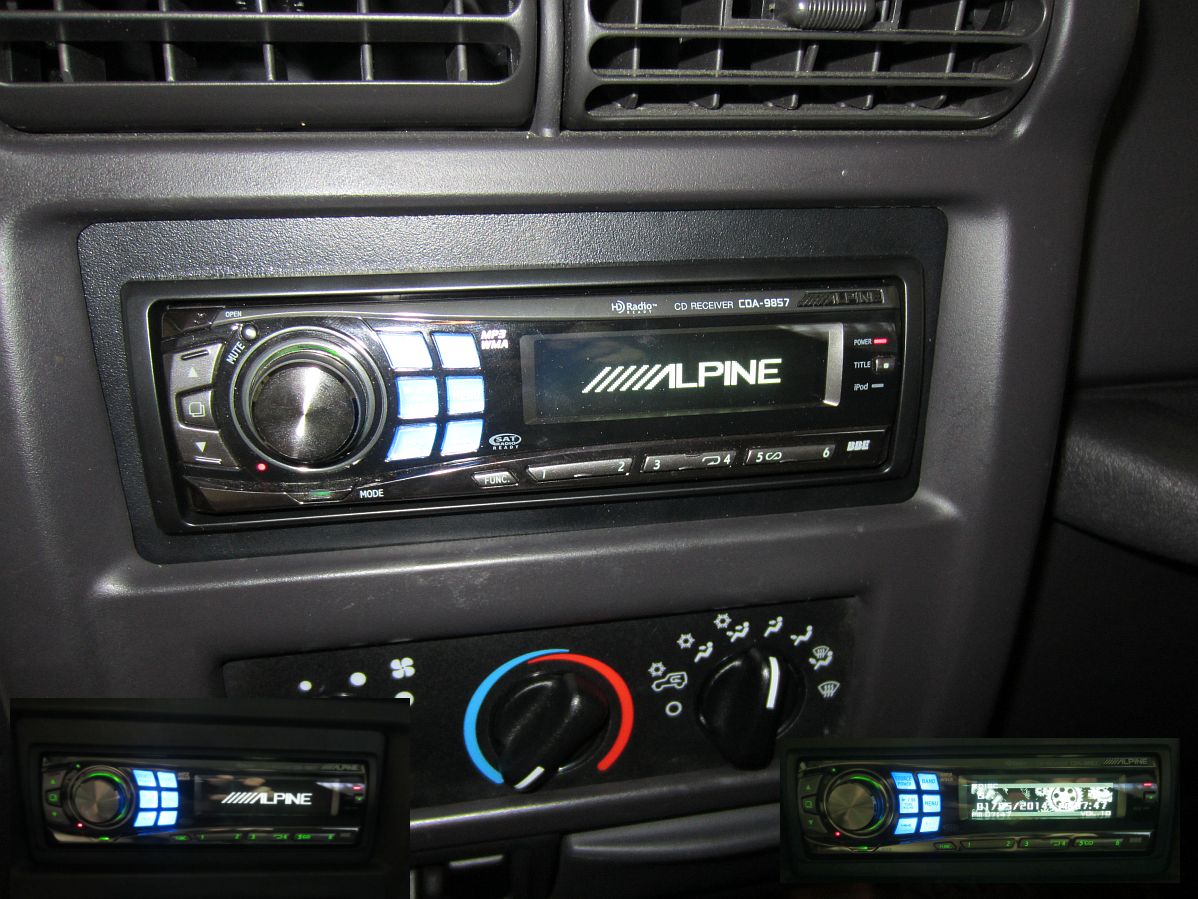
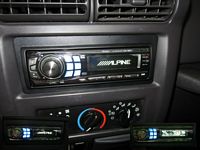
Some old and new stereo items installed:
* Alpine CDA-9857, Manual HERE
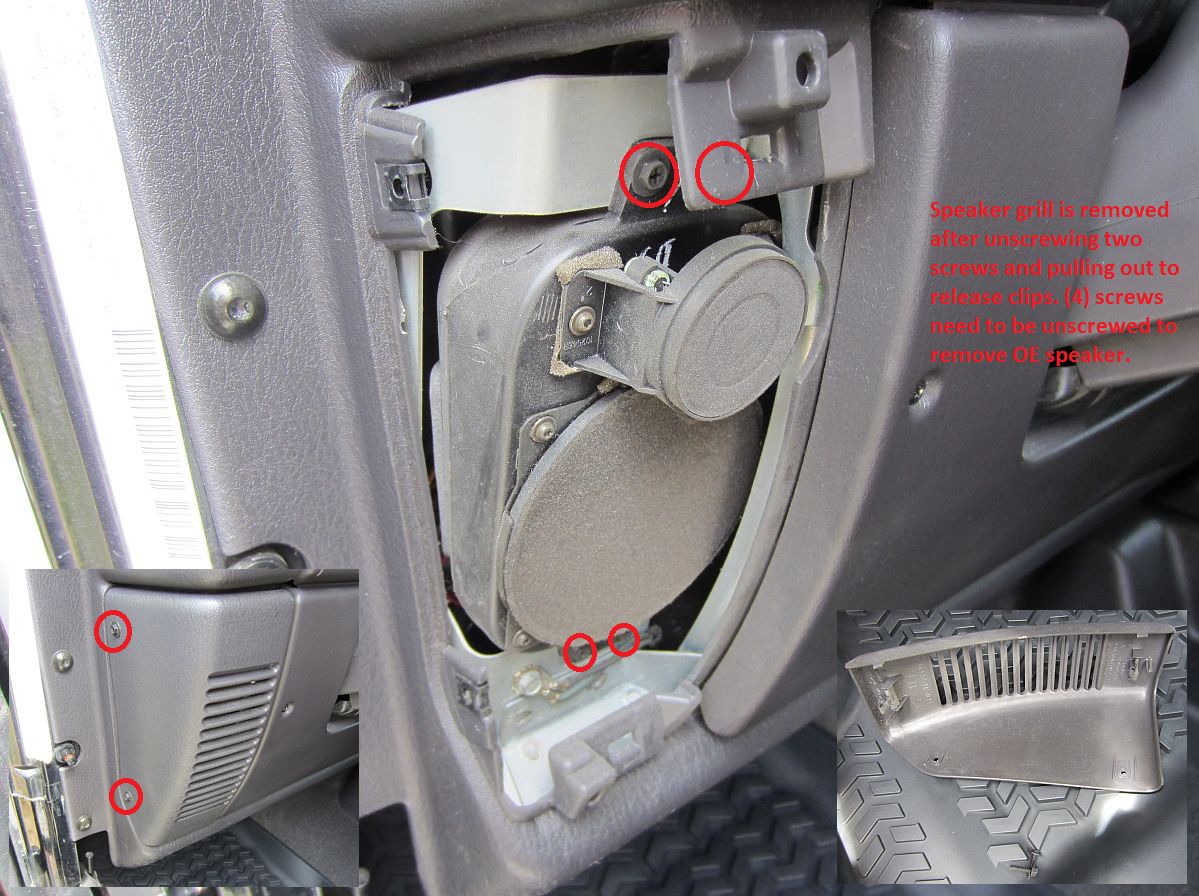
* Rockford Fosgate Punch P152 5.25" speakers from Amazon installed in sound bar, Manual HERE, cutout templates HERE
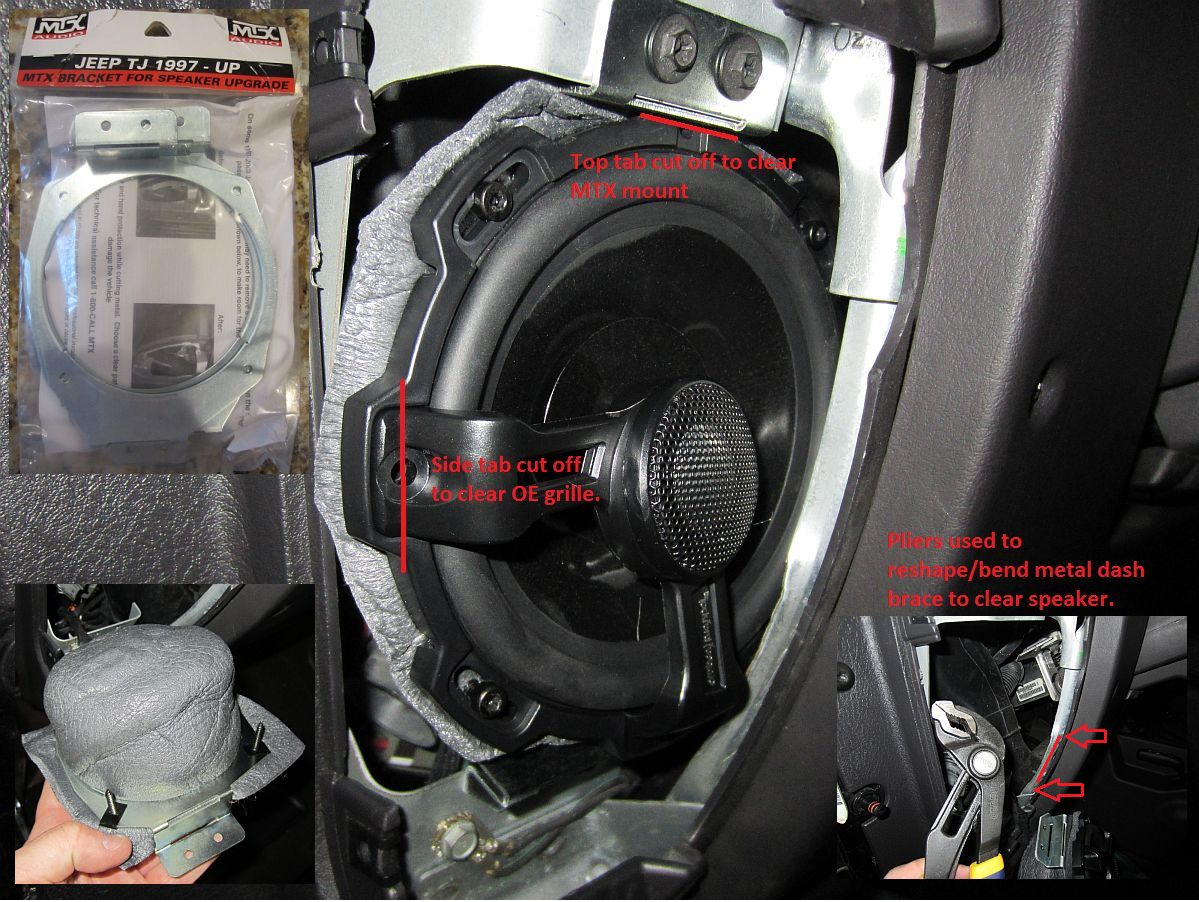
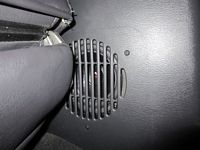
* Rockford Fosgate Power T152 5.25" speakers from Amazon installed in dash, Manual HERE, cutout templates HERE
* MTX JTJ514B TJ Dash Adapters from Amazon used to install the 5.25" dash speakers.
The radio was a plug and play replacement thanks to the Crutchfield Wire Harness and Mounting Kit (Mastersheet for TJ detailing radio and speaker replacement, Radio Wiring for TJ). The sound bar speakers were an easy swap as well, but the dash speakers were a bit more work- both require cutting the factory plug off and crimping new standard female spade type connectors on. The MTX adapter bracket was chosen since it angles the speaker up but that angle and the speakers I was using caused some fit interference with the dash metal brace and speaker grill. The dash metal was easily "adjusted" for clearance but the RF speakers have some added mounting tabs that had to be removed to work with the MTX bracket and to clear the grill- easily, but slowly done to avoid heat extremes, with a die grinder and cutoff wheel. The tweeter bridge of the RF Power speakers forced orientation of the speaker that turned out to be perfect angling the tweeter up and towards the center. I used foam baffles to isolate the front and rear sound waves. Sounds GREAT, next up will be subwoofer and amplifier installation.
[UPDATE] Decided to get a newer head unit with Bluetooth for hands free phone calls and some newer tech/options- Alpine CDE-HD149BT (manual HERE).

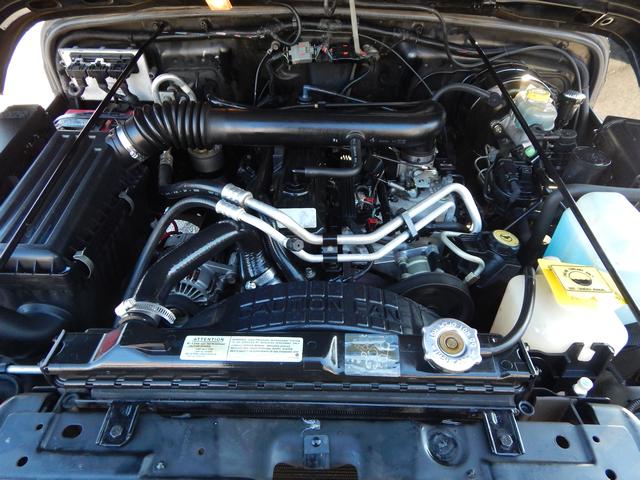
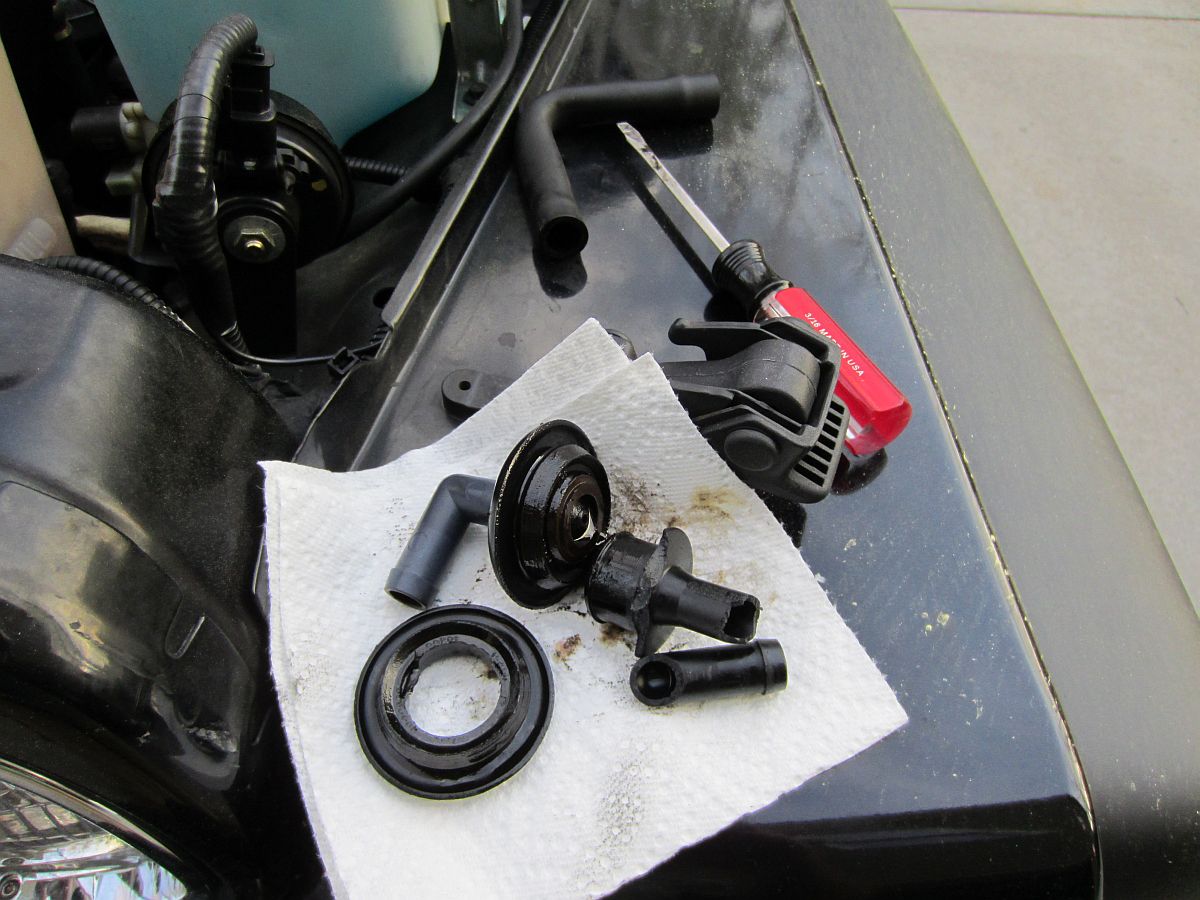
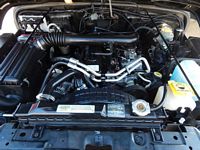
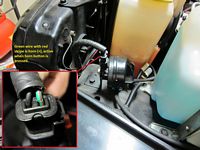
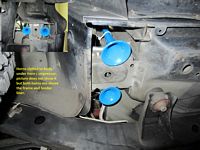
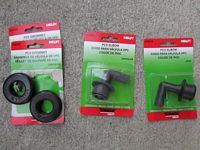
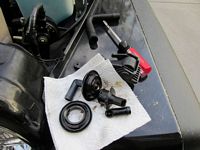
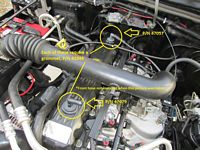
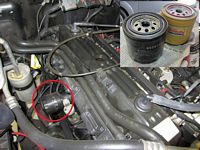
Still trying to resolve an oil leak so thought we would start at the top and replace the two large grommets, CCV valve (erroneously referred to as a PCV valve), and elbow. If your hoses are shot too, you might be better off getting the kit from Jeep/Mopar which includes all of it. I spent ~$15 at the local McParts stores on the Dorman HELP parts. The rubber grommets were like hard plastic and I could see where they were letting oil out so maybe this will slow or eliminate the leak. Both the valve and the elbow were pried out with a screwdriver carefully, the plastic was brittle so these were due to be replaced. I also replaced the front hose with some generic hose and the rear line had the manifold hose replaced- we'll see if I end up buying the OE factory part.
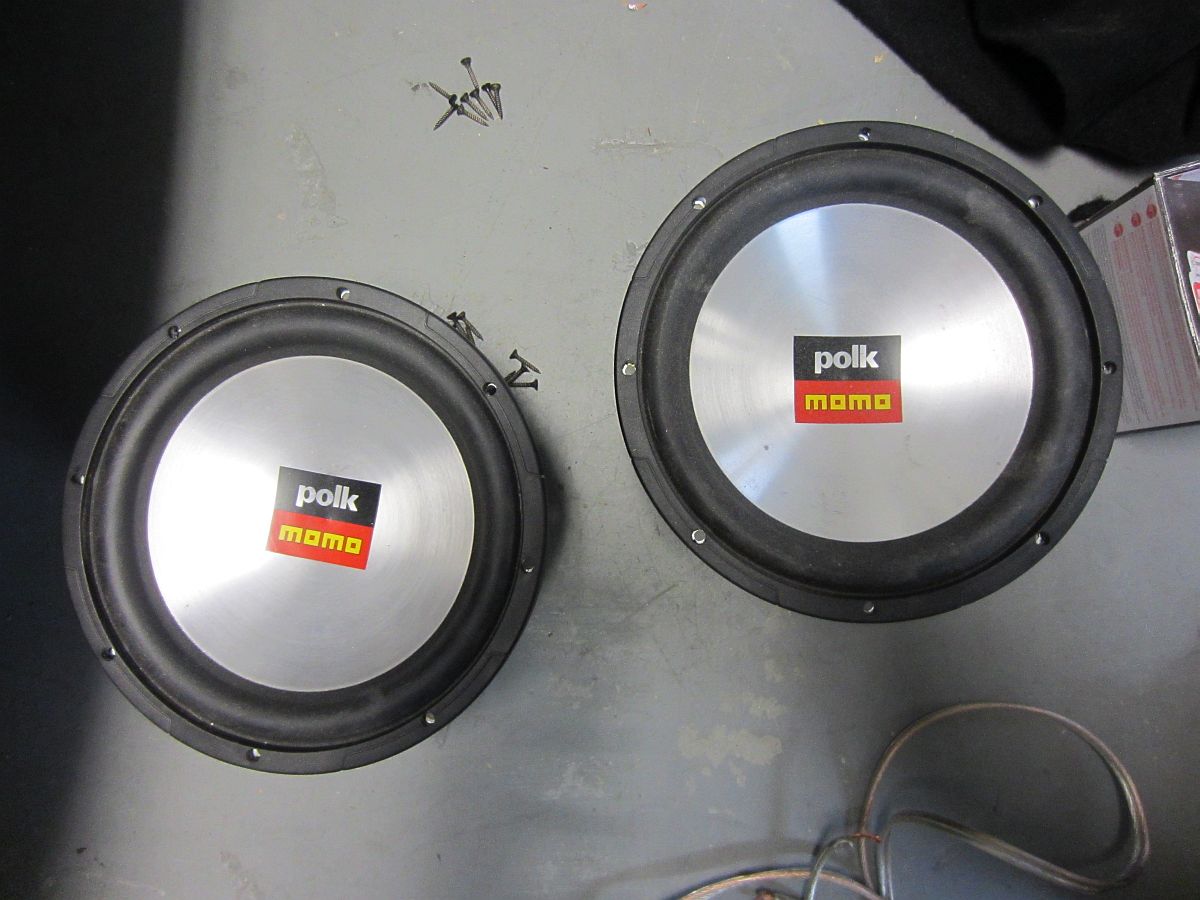
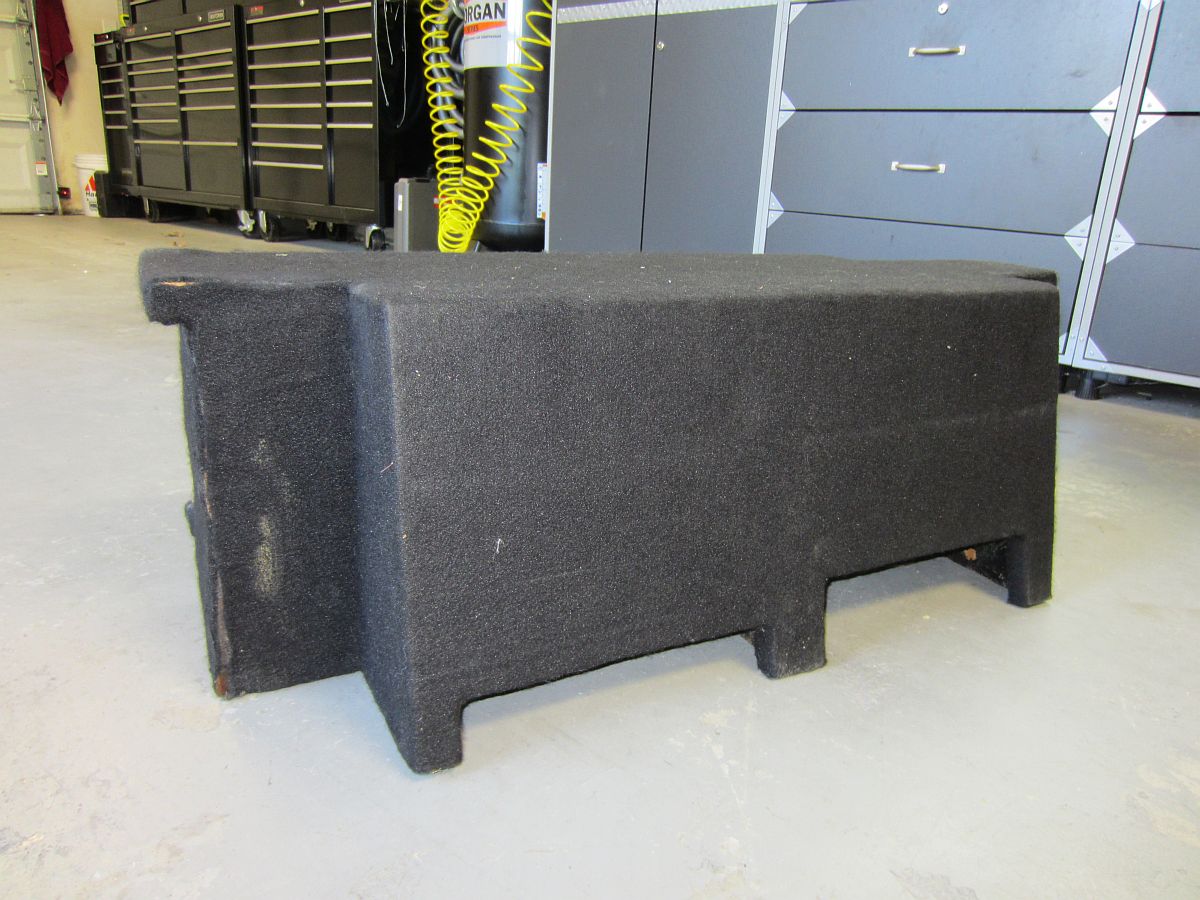
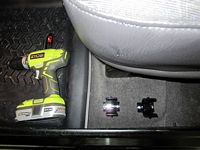
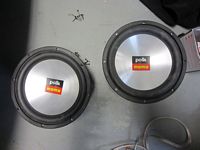
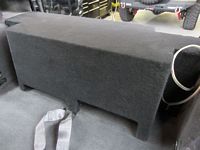
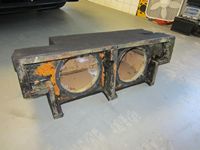
A friend gave my son some old Polk Momo 10" DVC (MM2104DVC) speakers (manual HERE) so we ended up building a sealed box/enclosure for them over the weekend with both speakers firing down. Speaker voice coils, 4-ohm each, were wired in parallel so that the each channel of the amplifier would see a 2-ohm load for each speaker. Amplifier installed was an old Blaupunkt PA4100, a 4 channel digital model using Tripath Technology for VERY low heat and one that could be mounted upside down- an important feature for under-steering-wheel-column mounting. By wiring the front and rear/soundbar speakers in parallel I was able to get all 4 channels down to 2-ohms for 125 watts RMS each (Channels 1/2 for mids/highs high pass xover set to 90 Hz, Channels 3/4 for subs with low pass xover set to 120 Hz). The center console subwoofer was disconnected since the installed amplifier was too much for the factory line converter to handle and it was really no longer needed.
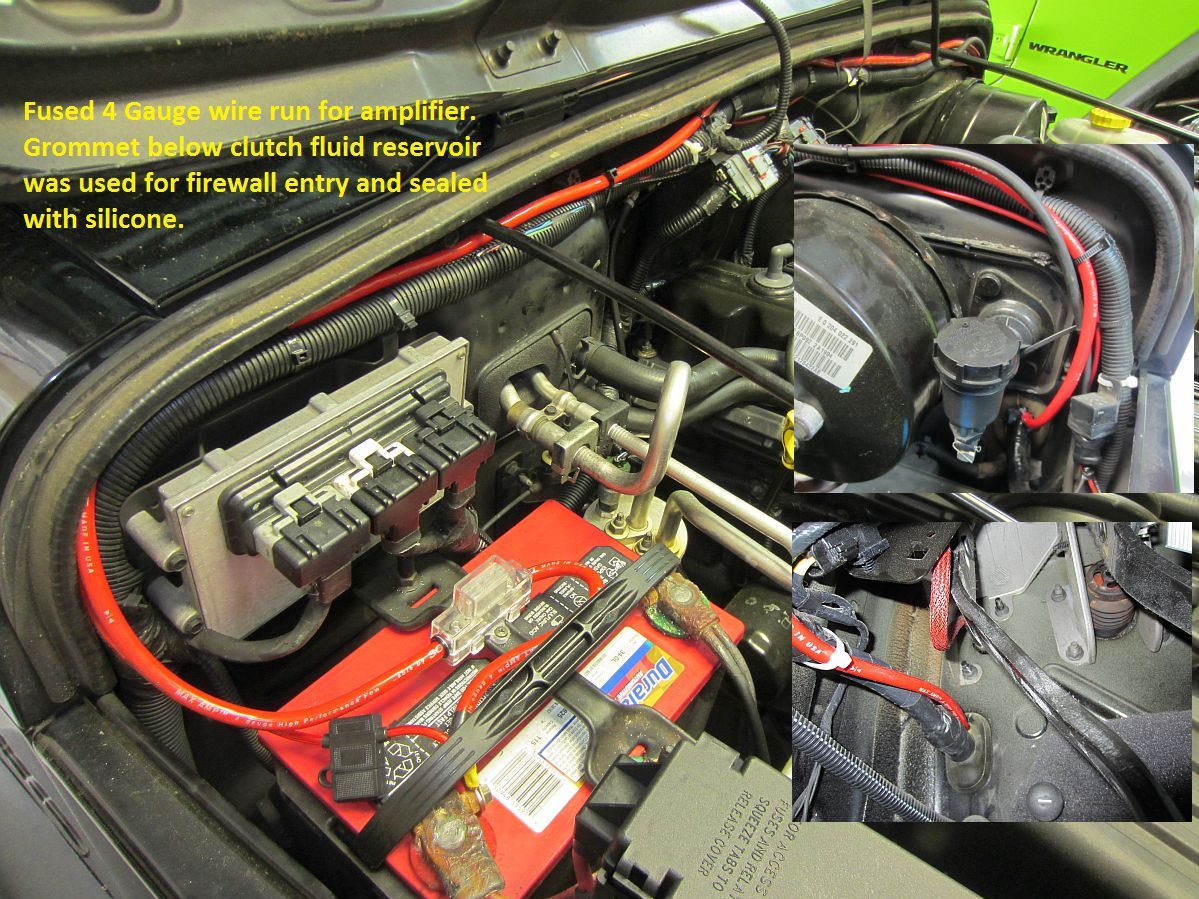
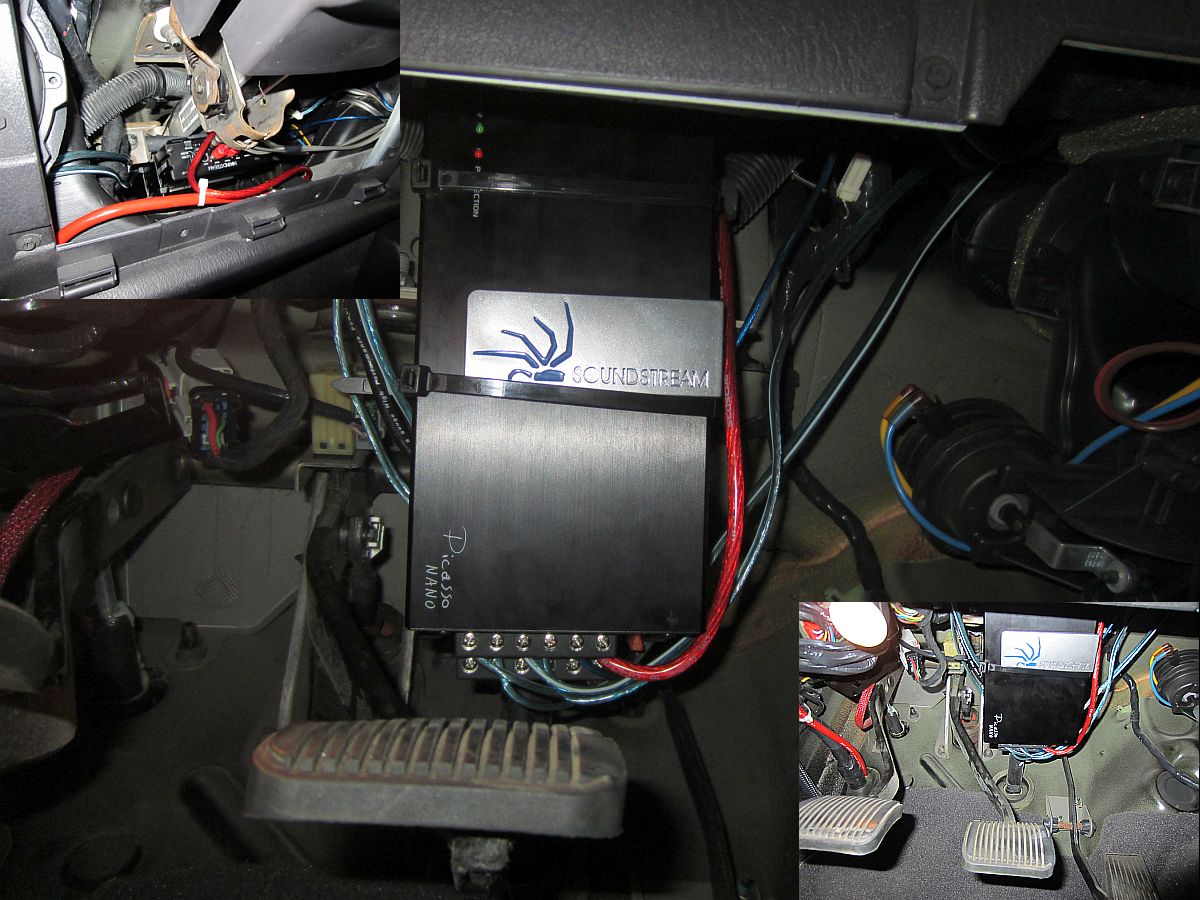
[AMPLIFIER UPDATE] Well, the Blaupunkt amplifier was old when we installed it and one channel finally went to amplifier heaven. This amp was replaced with a new SoundStream PN4.520D digital amplifier (manual HERE) from Sonic Electronix, same arrangement as before with front/rear wired in parallel for 2 ohm load and each sub at 2 ohm for 4 channels @ 130w each. To be honest, for a ~$100 digital amplifier that was this small, I had doubts about it being able to keep up with the old Blaupunkt but tech has come a way in the 10 years between amps and this amplifier ROCKS.....and does not get warm- we were pleasantly surprised and impressed. Cannot see in pics but wiring is all bundled and out of the way of all pedals/moving surfaces.
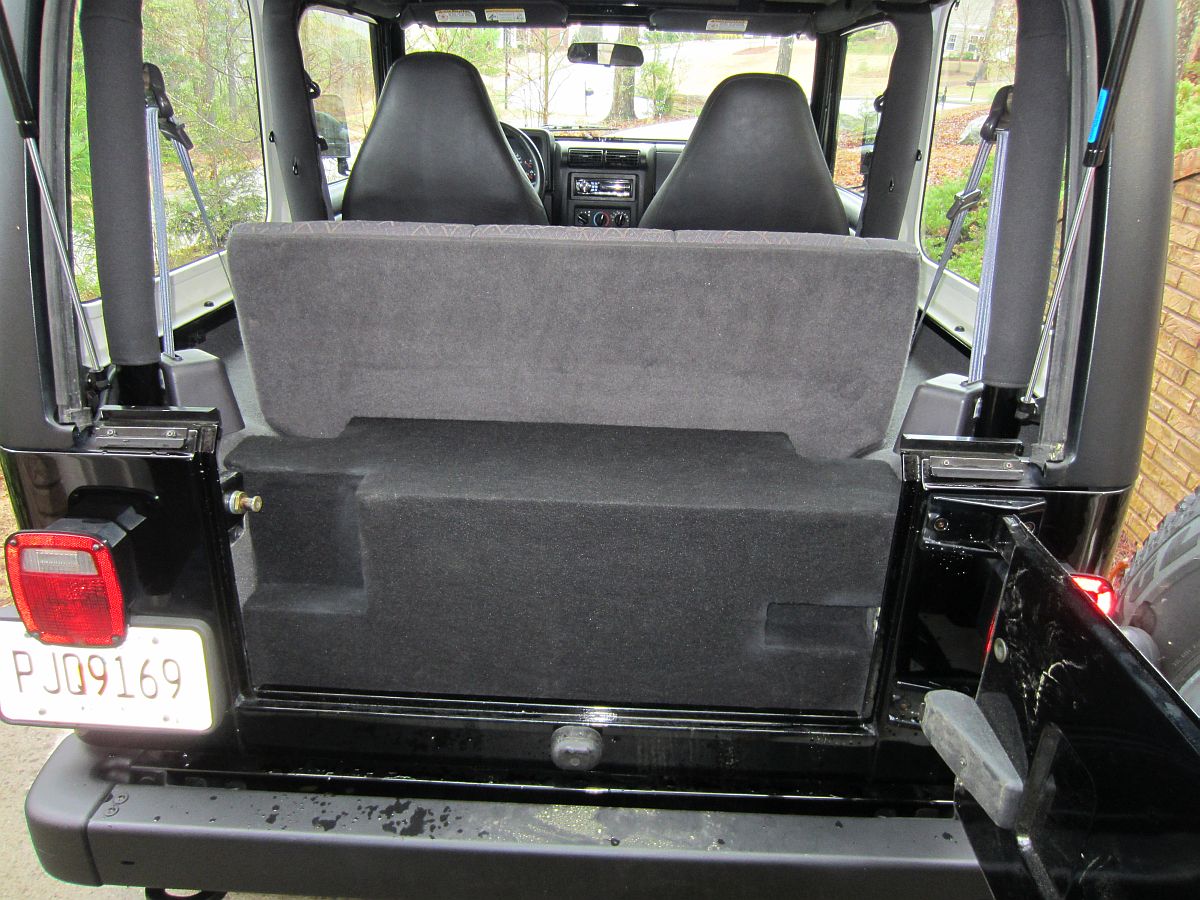
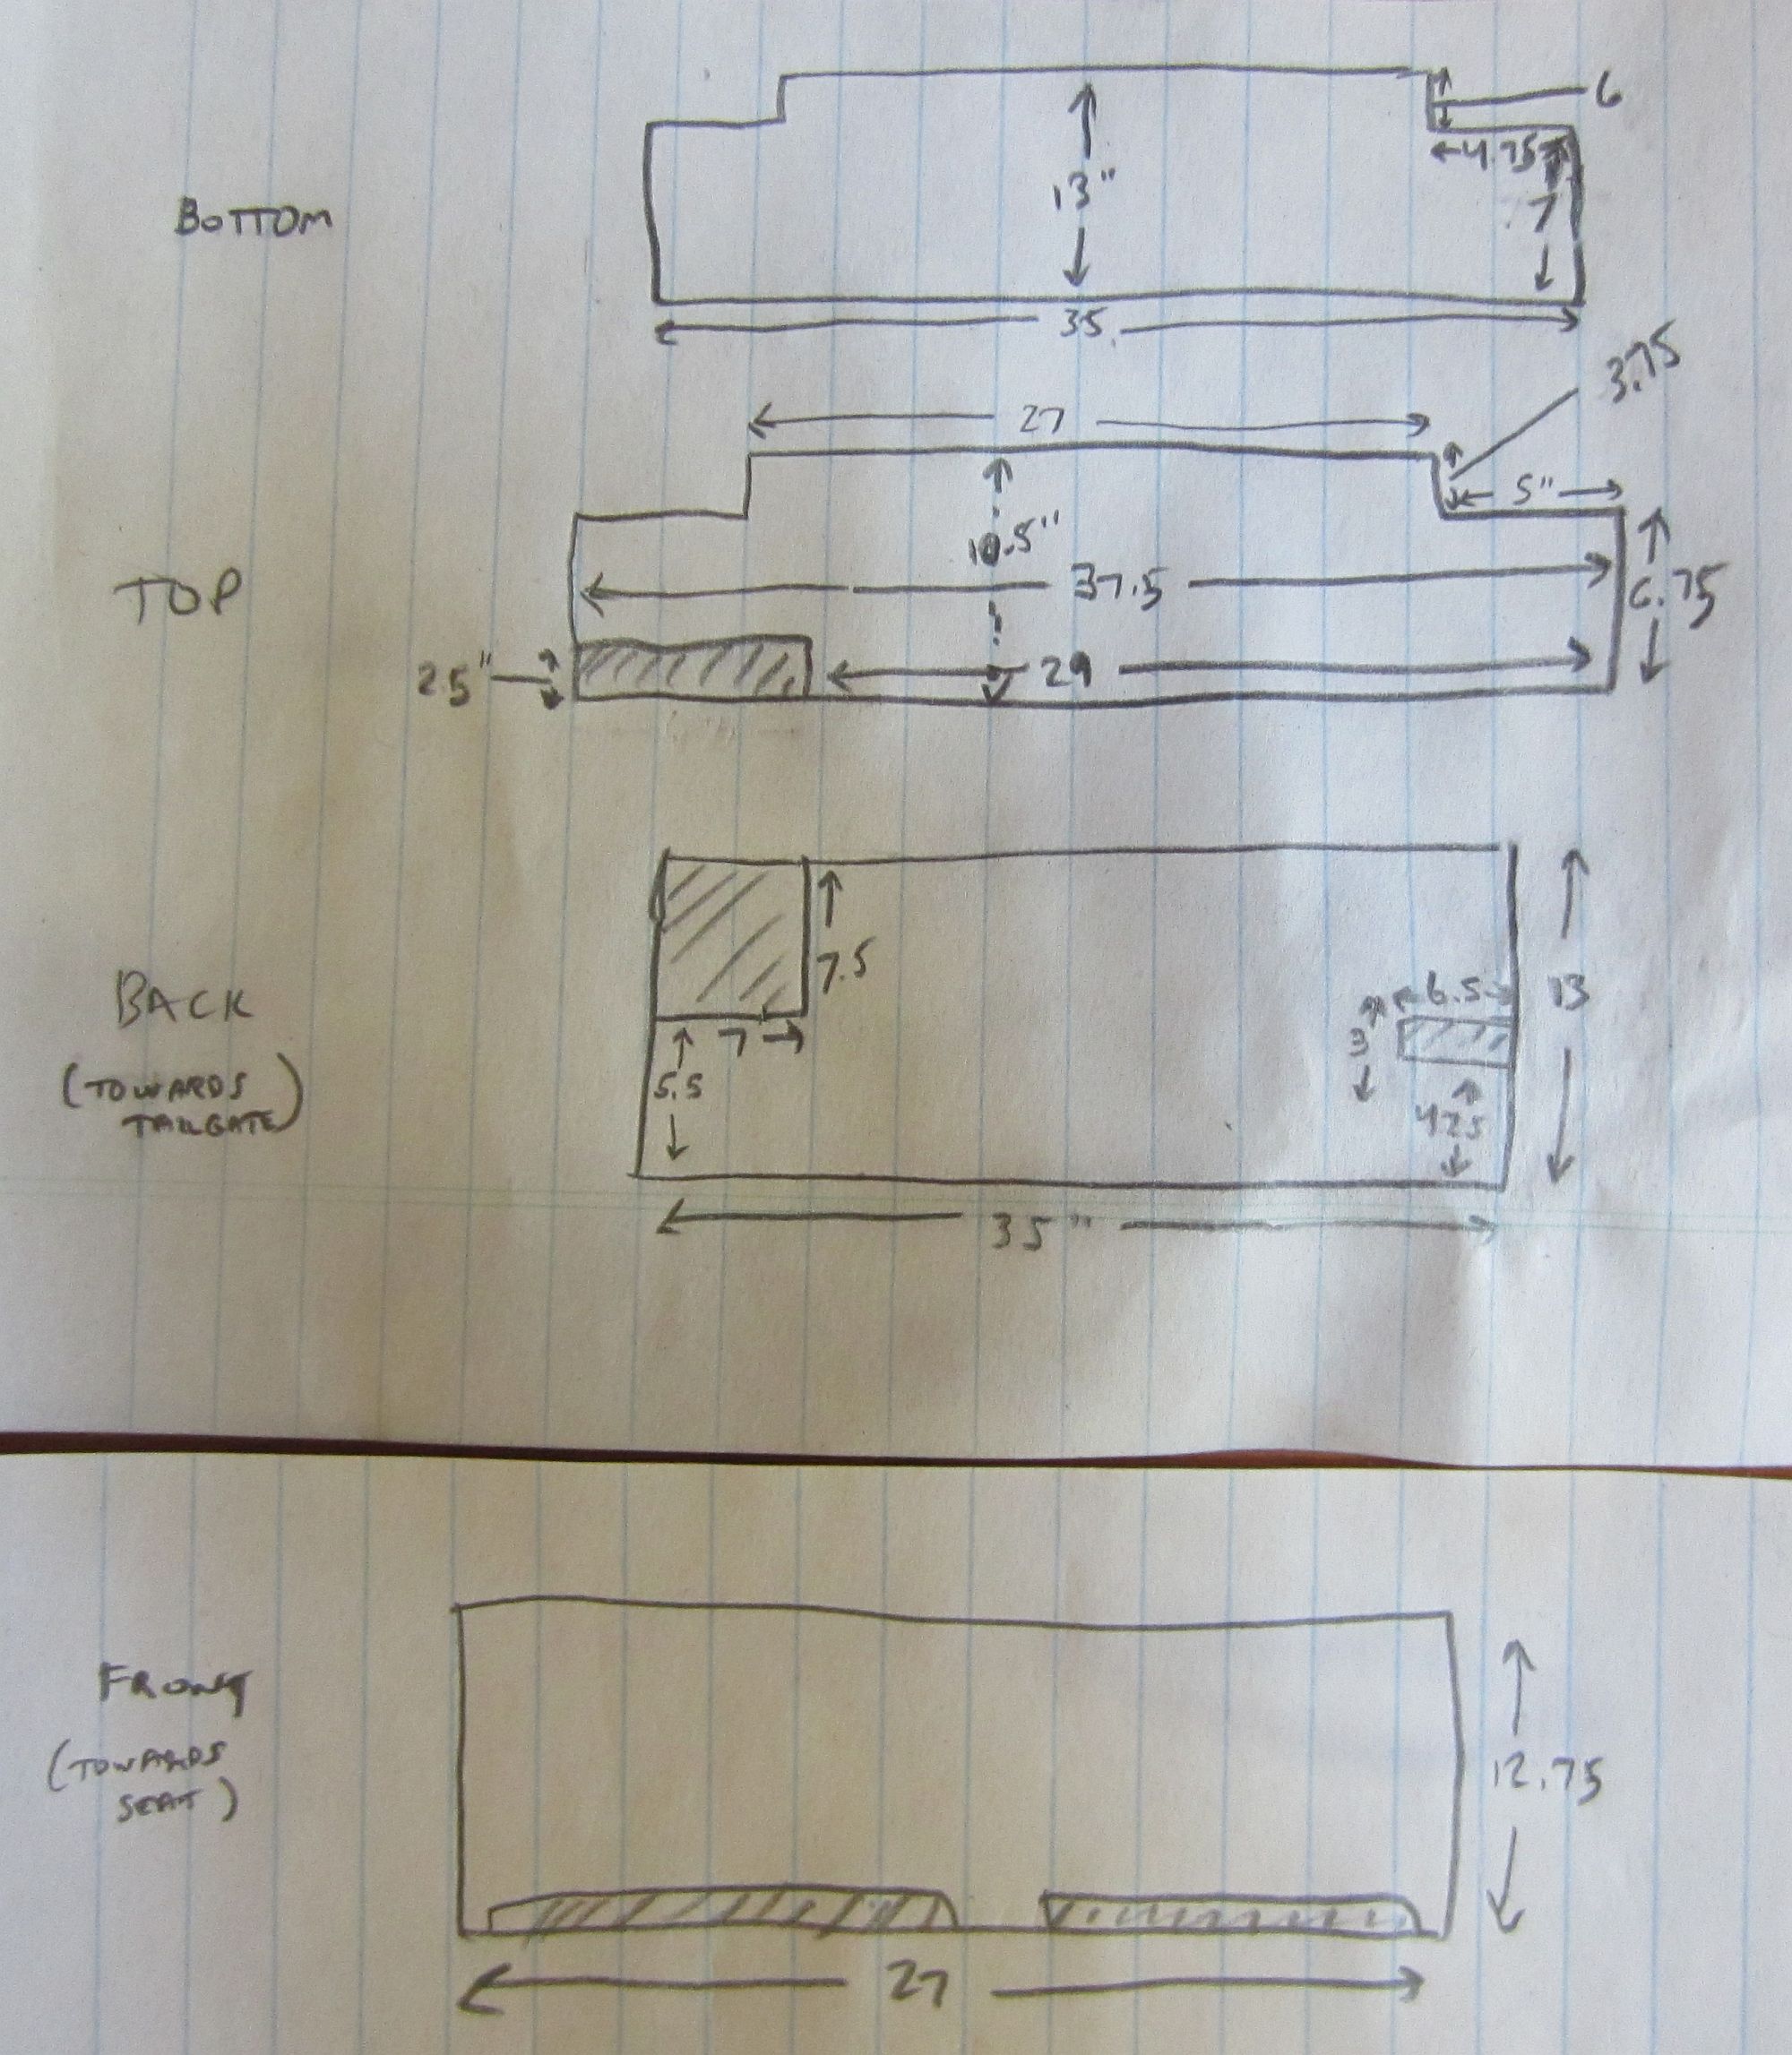
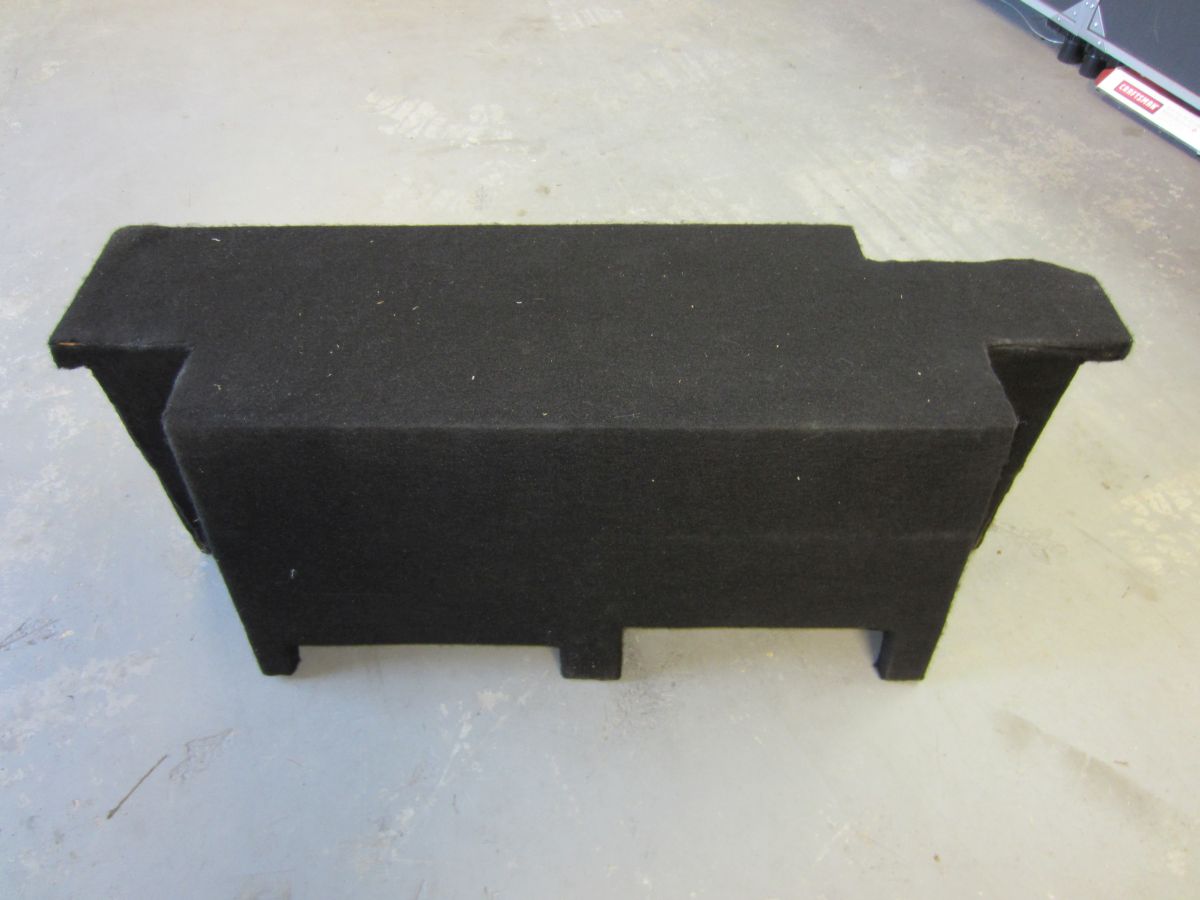
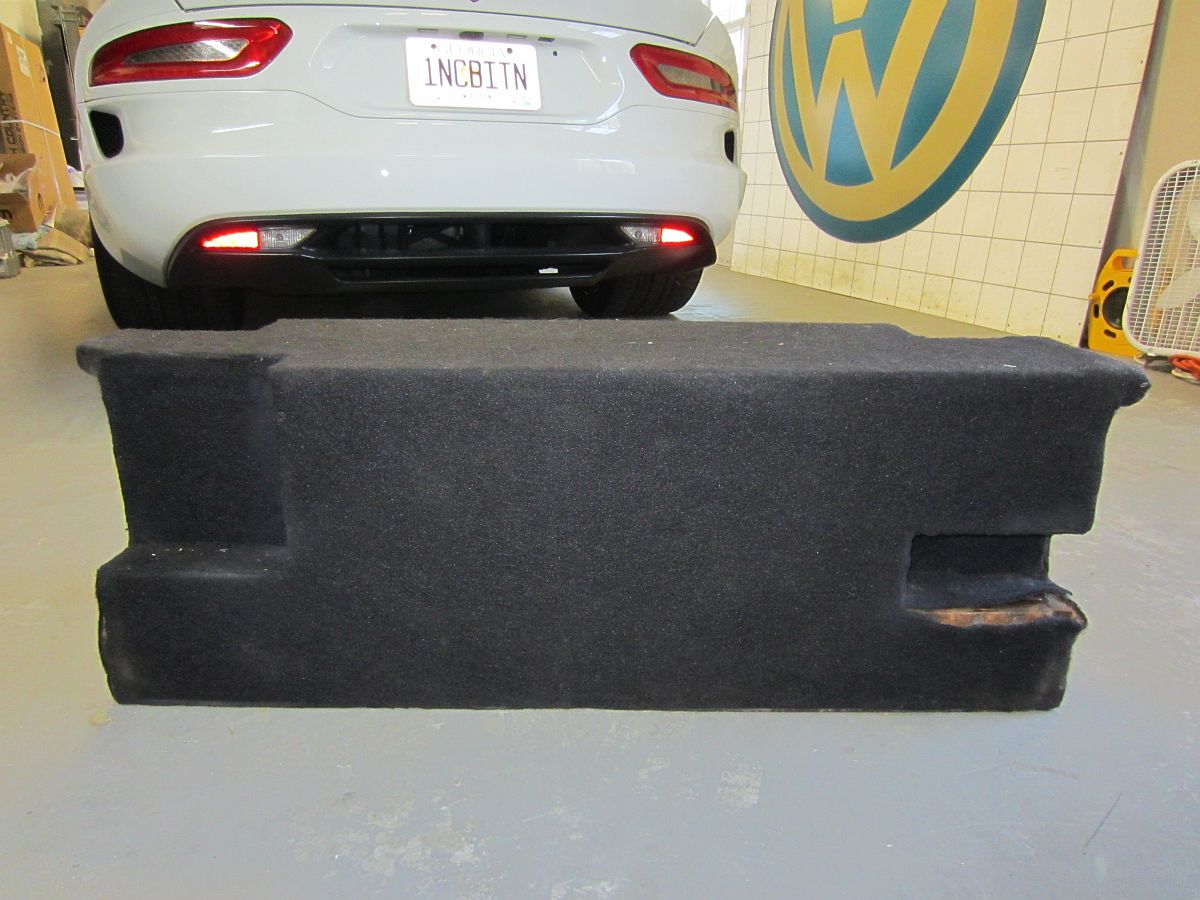
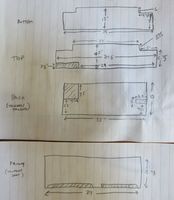
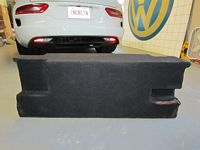
[SUB UPDATE] A recent storm came through and winds were enough to force water in the rear seals and let water in....the MDF became a sponge so box is no longer viable. Was able to take some more pics and obtain measurements, not sure we will go with a rear box next or a different sub solution....but will use Baltic Birch with bed liner sprayed inside and out next time if we do. MDF sounds great but not optimal for Jeep environment.


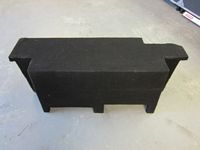
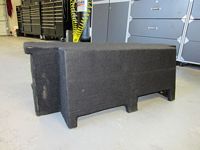
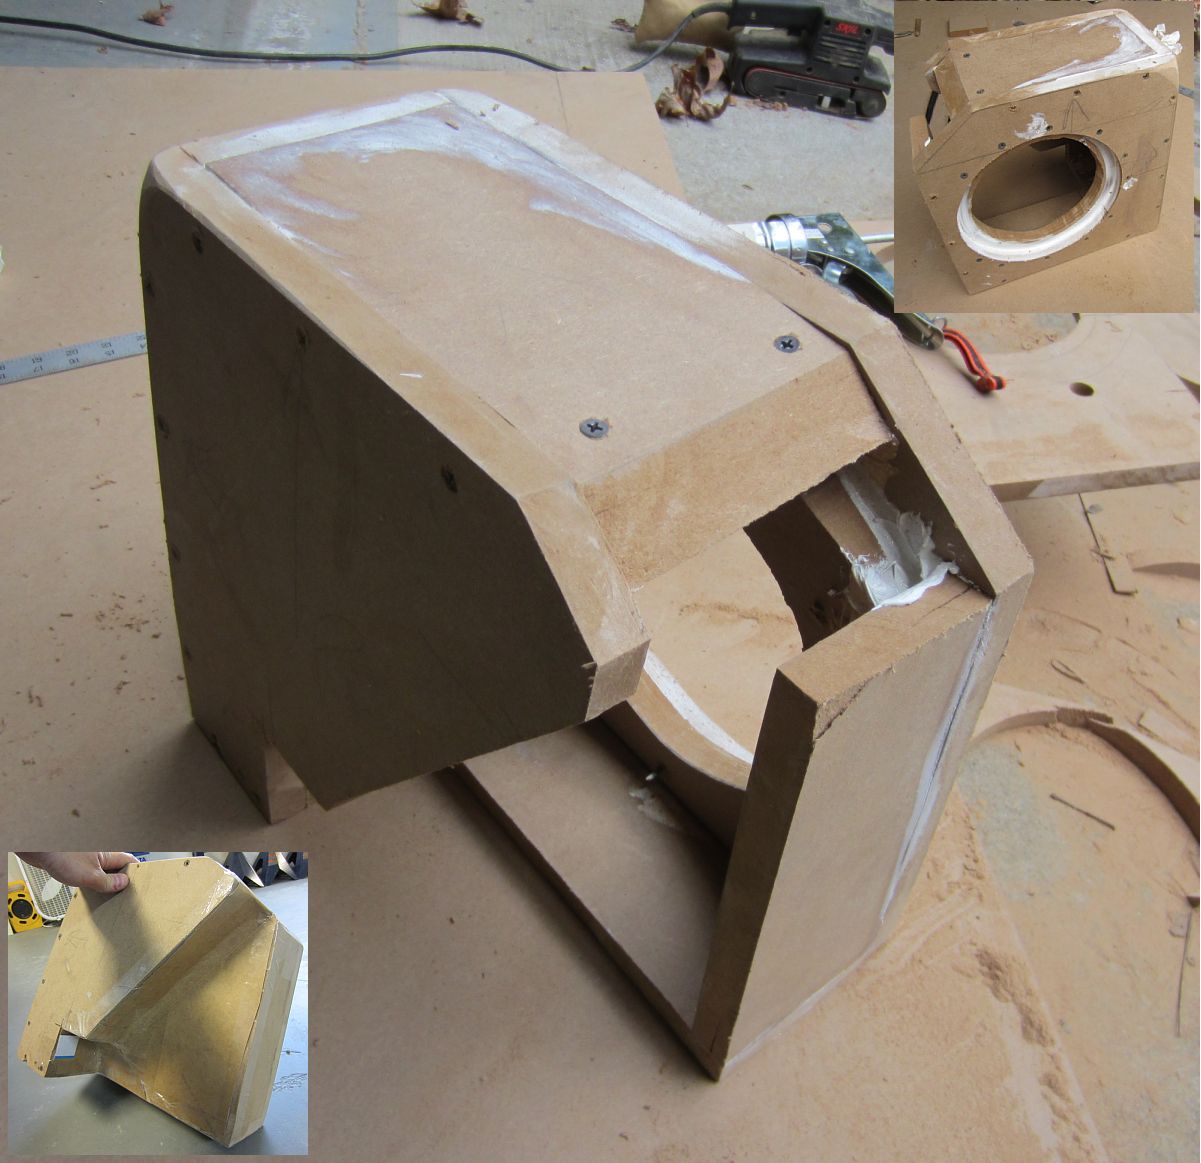
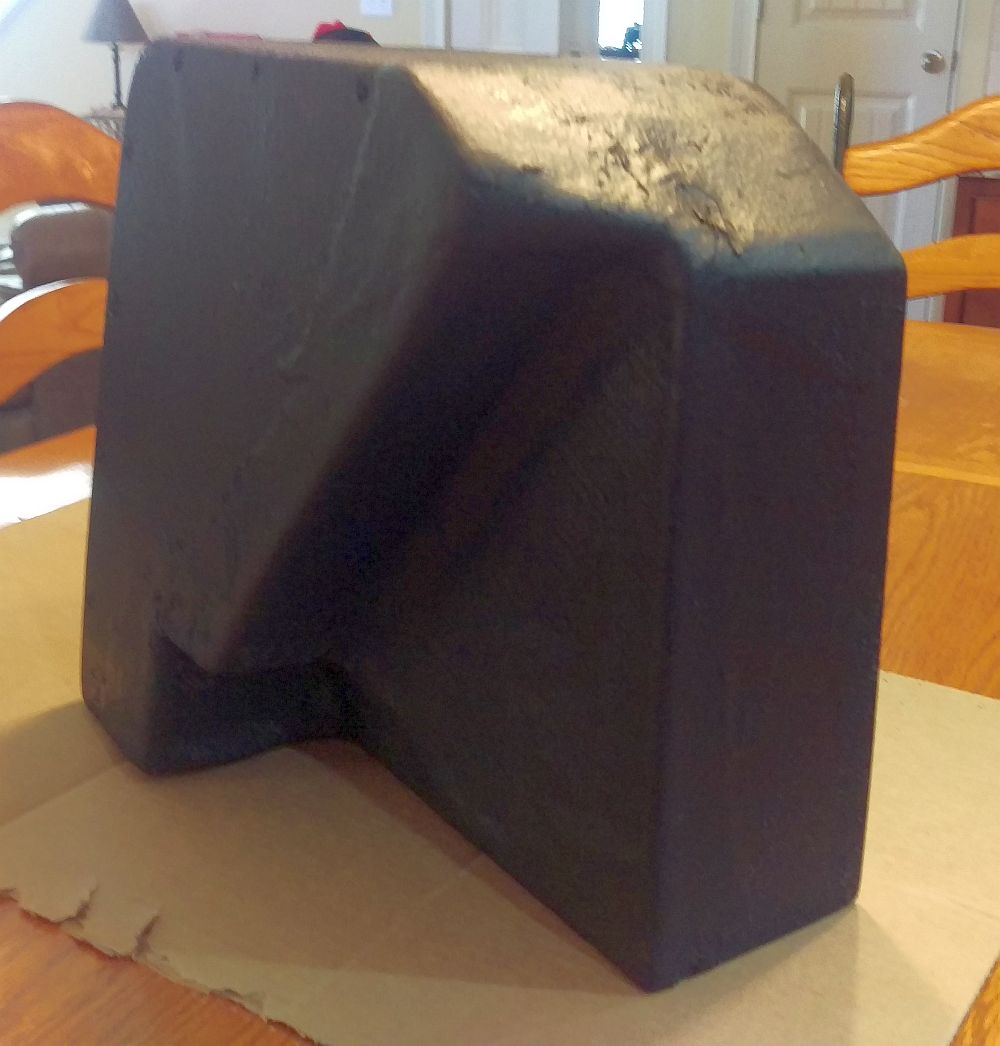
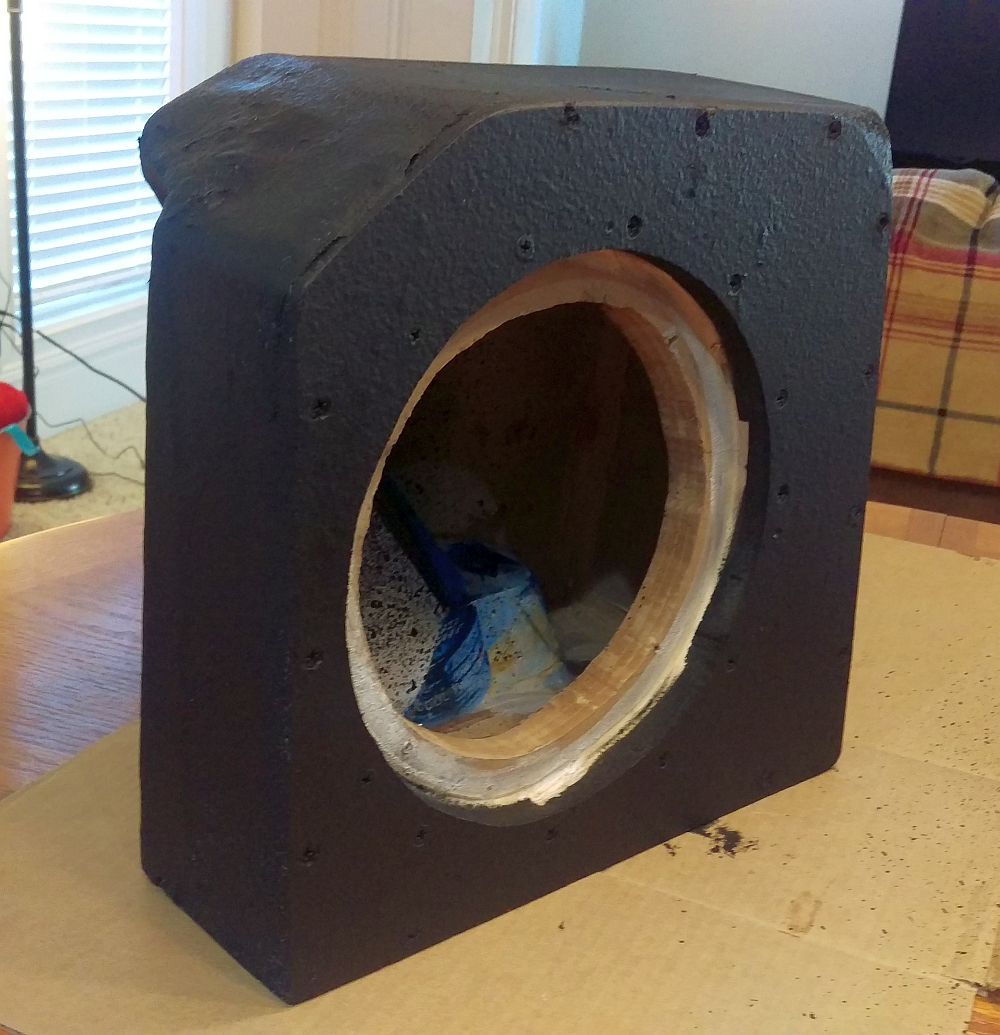
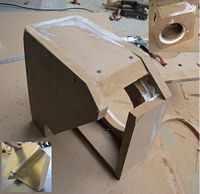
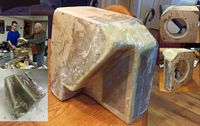
[UPDATE] So, with the sub box above damaged with water, we decided to try the console sub this time around and free up the cargo space.....so a new box and subwoofer were needed. The box was built based on this thread- THANKS OP!
- (archived HERE, box measurements HERE) and the subwoofer used was a Rockford Fosgate P3SD2-8 shallow mount sub (manual HERE) from Amazon. Fortunately, my son's grandfather was building a plane, and had the good fiberglass and experience and was willing to donate some time to finish the box for us.
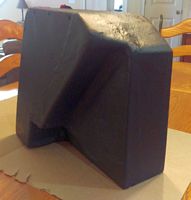
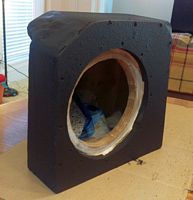
A 10 might work but an 8 was chosen due to the enclosure volume and depth, the 8 specs seemed to be a better match for the enclosure. Coated with bedliner prior to installation to hopefully make it more moisture resistant- Not pretty, but once inside the console with a carpet liner under the lid, you can't even see it. Be careful and cognizant of mounting depth and speaker extension, we had to do some reworking when we found that 3/4" was not enough and the speaker hit the console at extension- had to make a 1/2" spacer and then the console over the box was a REALLY TIGHT fit.
To be honest, it sounds better than expected- pretty GOOD actually
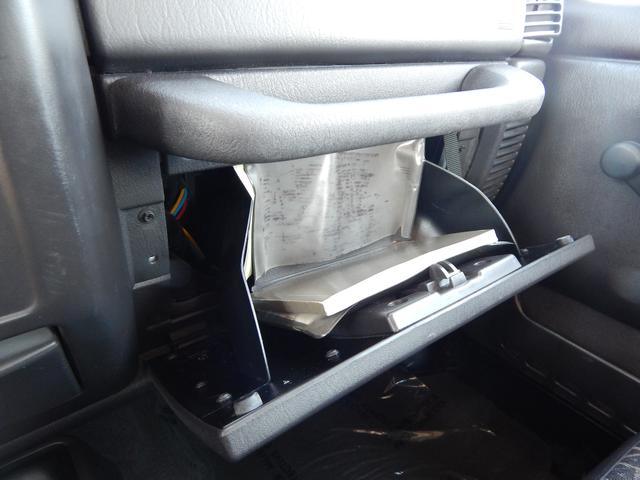
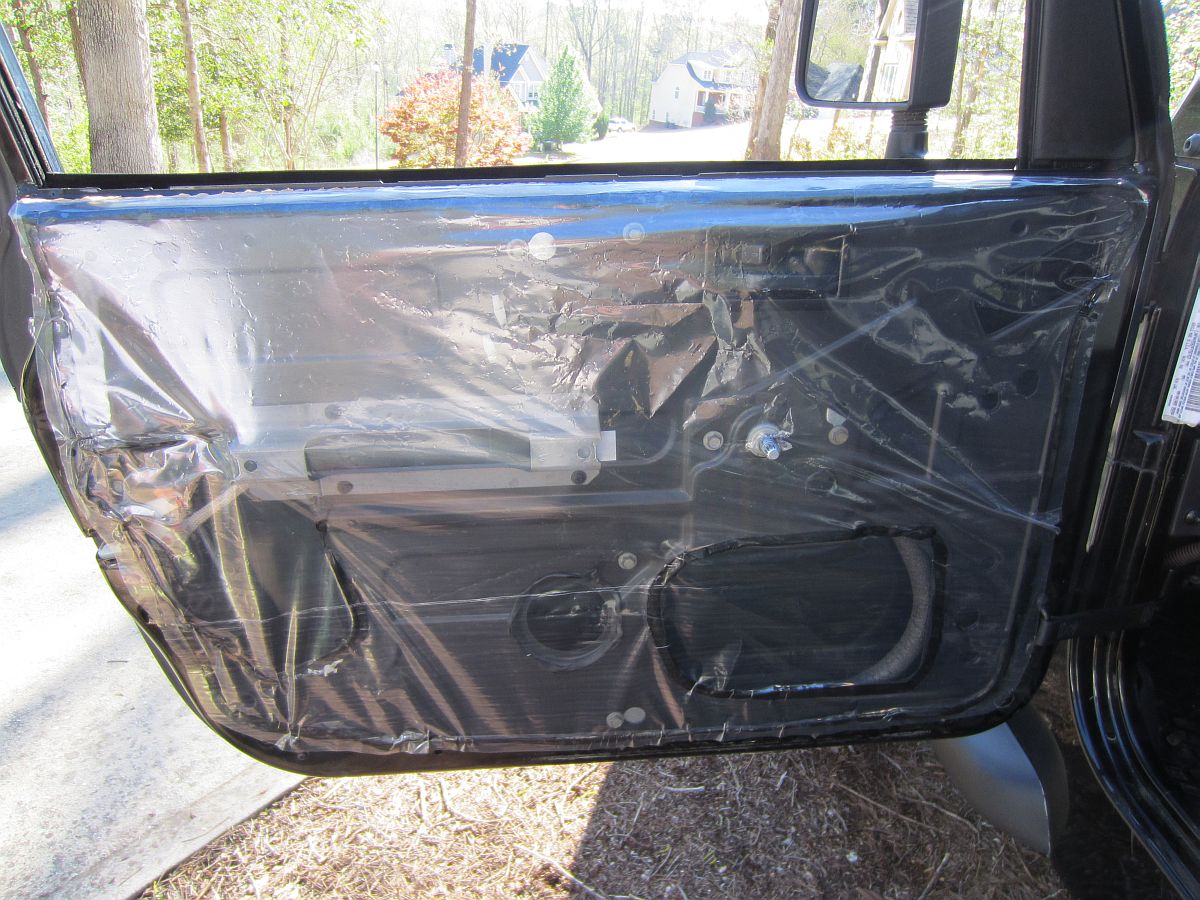
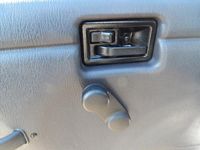
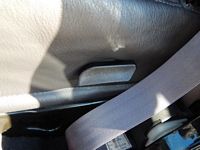
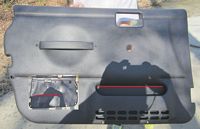
Found the cause of the water leak on the driver side. The water was coming in at the window and running down the inside of the door until it found the opening behind the door pocket and was running into the door pocket and then dripping on the carpet. Installed a vapor barrier to prevent this (pic was before we cut out the door handle hole and trimmed around the edges). It was evident someone had taken the door panel off, it was missing the clip-nuts for the door handle screws so they had rigged these placing all of the load on the plastic door panel instead of the metal door- this was fixed too. It seems the vapor barrier should have been there from the factory as shown HERE.

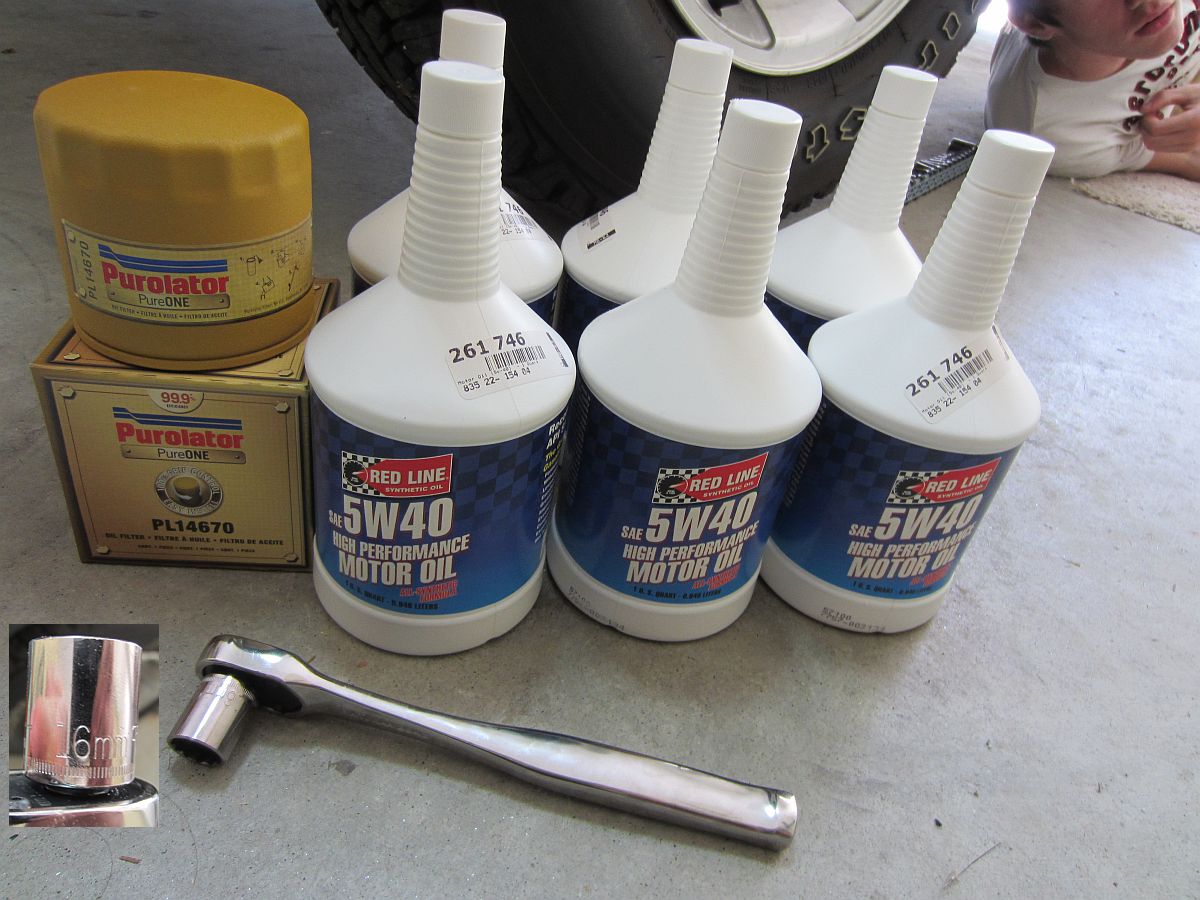
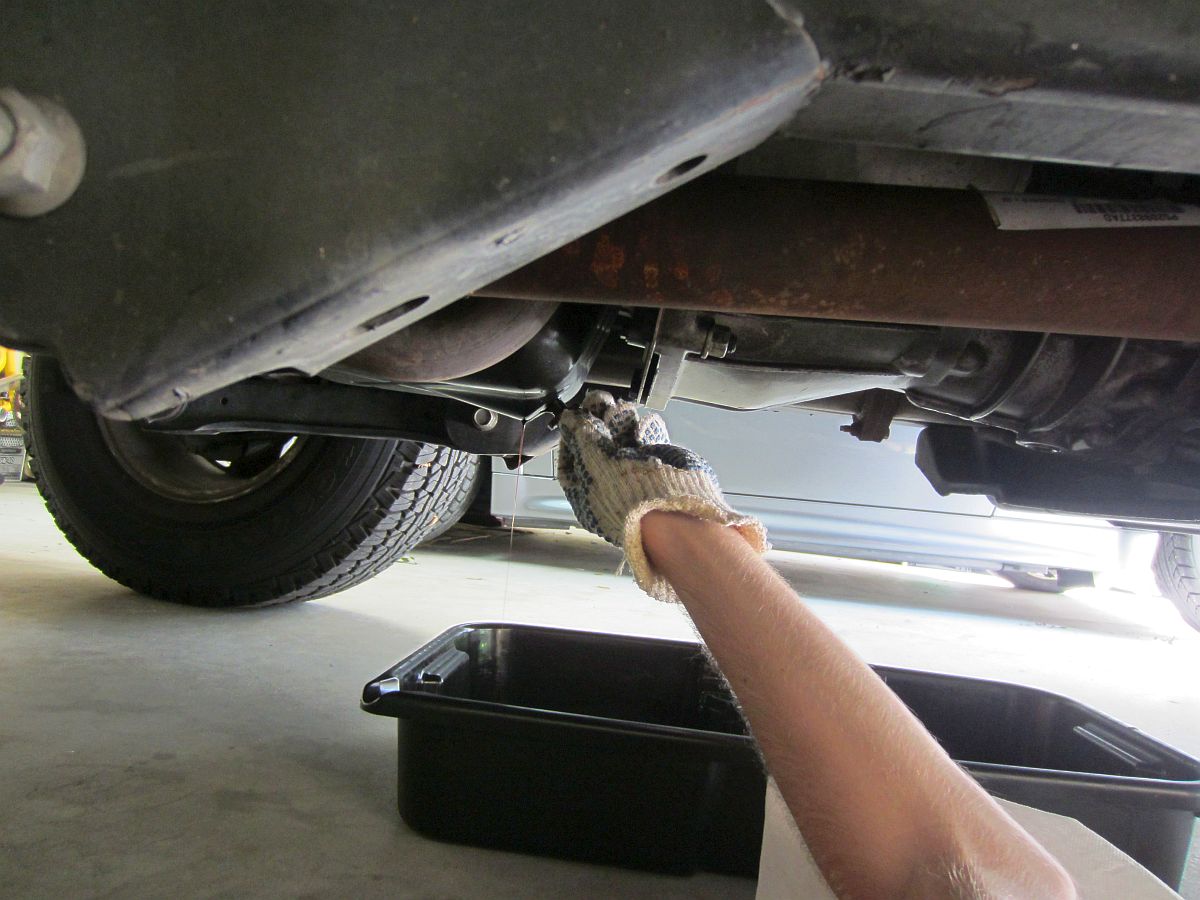
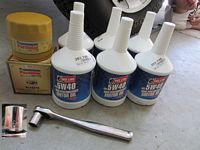
First oil change for us on this TJ, just 1-2k miles after we bought it. A friend was getting rid of some oil and as it turns out a lot of the 4.0 guys are using 5w40 instead of the 10w30- free Redline 5w40 synthetic oil will work for us. Purolator PureONE oil filter (PL14670) replaced the Mopar filter. Oil pan drain plug torqued to 25 ft/lbs after draining oil. And best of all, my son now knows how to change his own oil and most other fluids on the TJ.

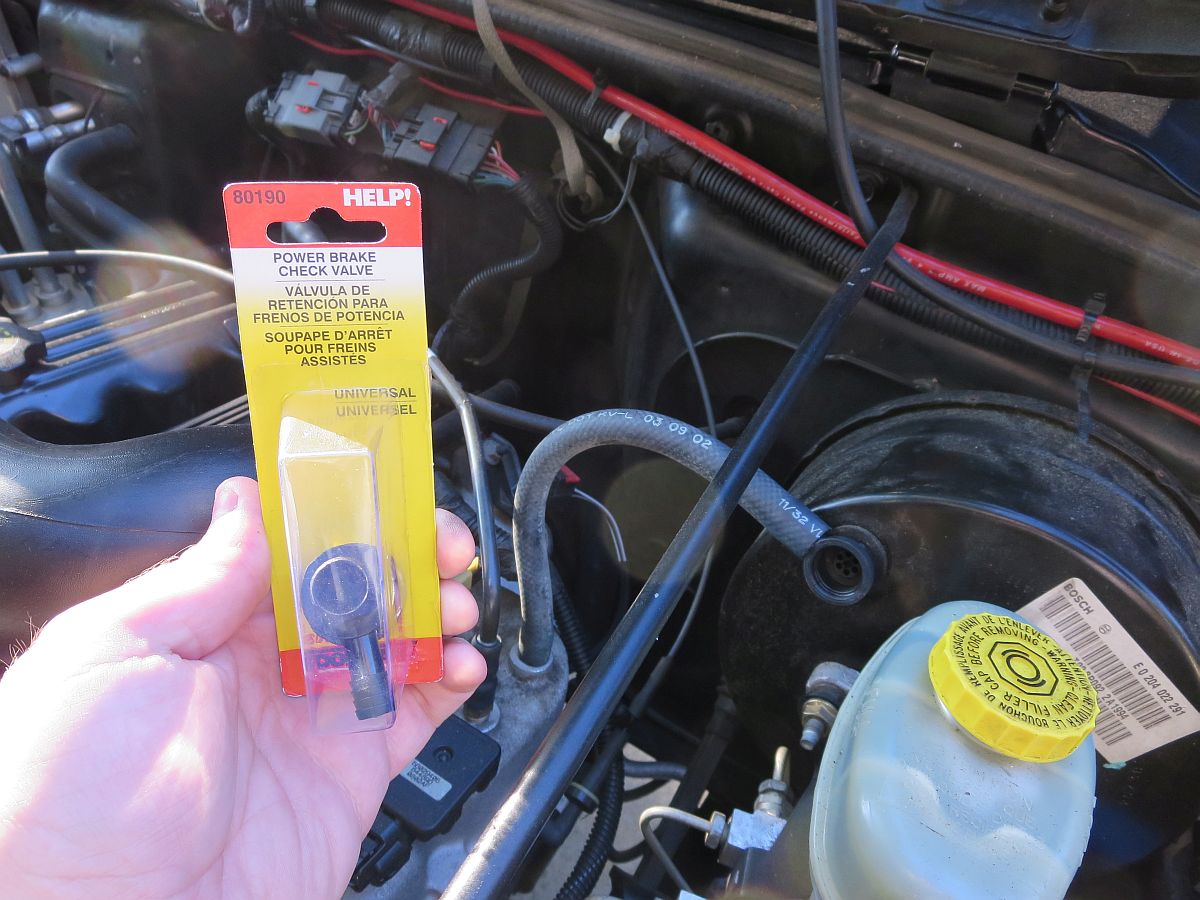
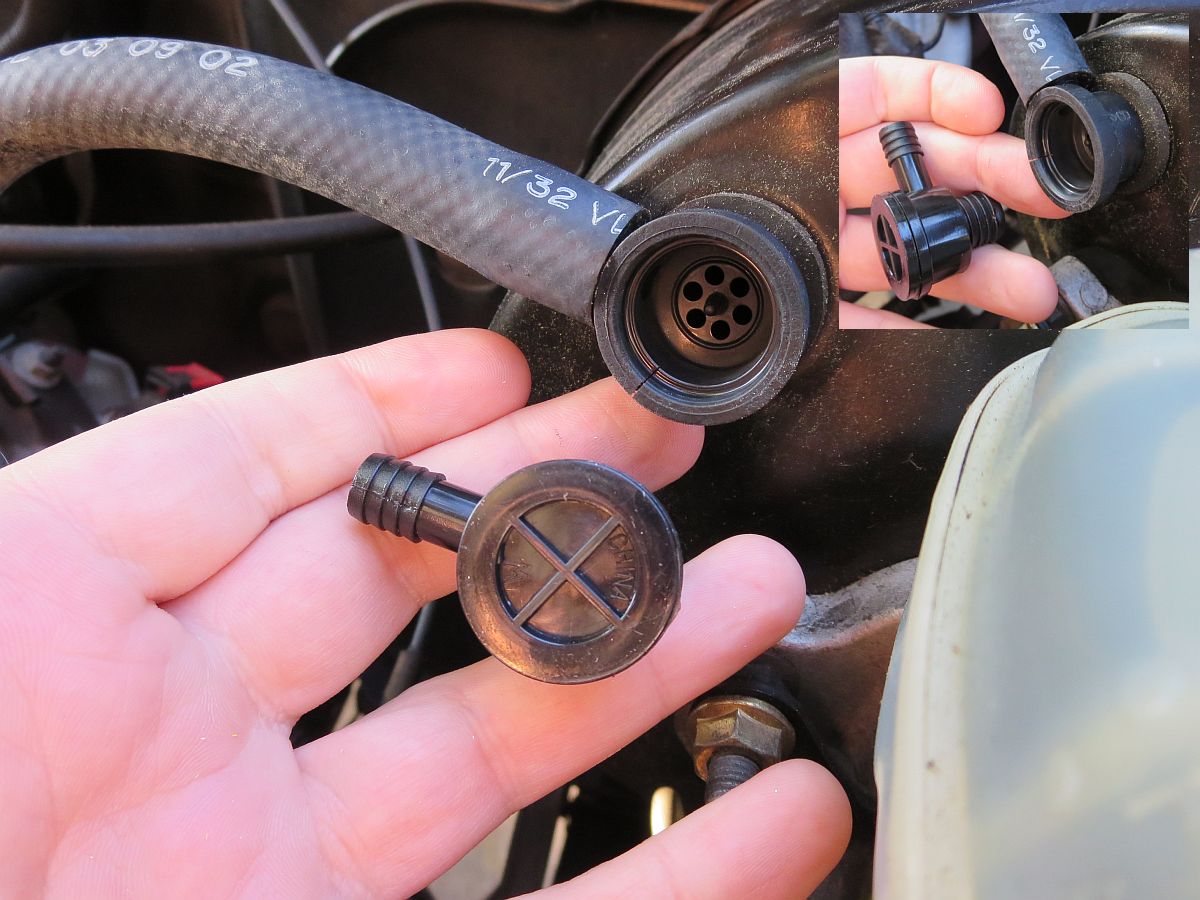
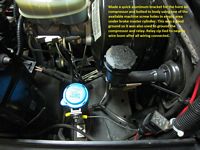
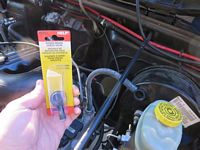
"Dad, the Jeep doesn't have any brakes, come pick me up" was the end to my night. It actually DID have brakes, just no power brakes and HARD to push the pedal so I drove it home. As it turns out the brake booster vacuum check valve had committed hari-kari and blown its guts all over the engine bay and road, leaving a non-working brake booster and a LARGE vacuum leak. You can see a small crack which probably contributed to this blowout. $5 later all fixed (the generic McParts part is a bit looser so if you have time, pick up the OEM part # 04584098).

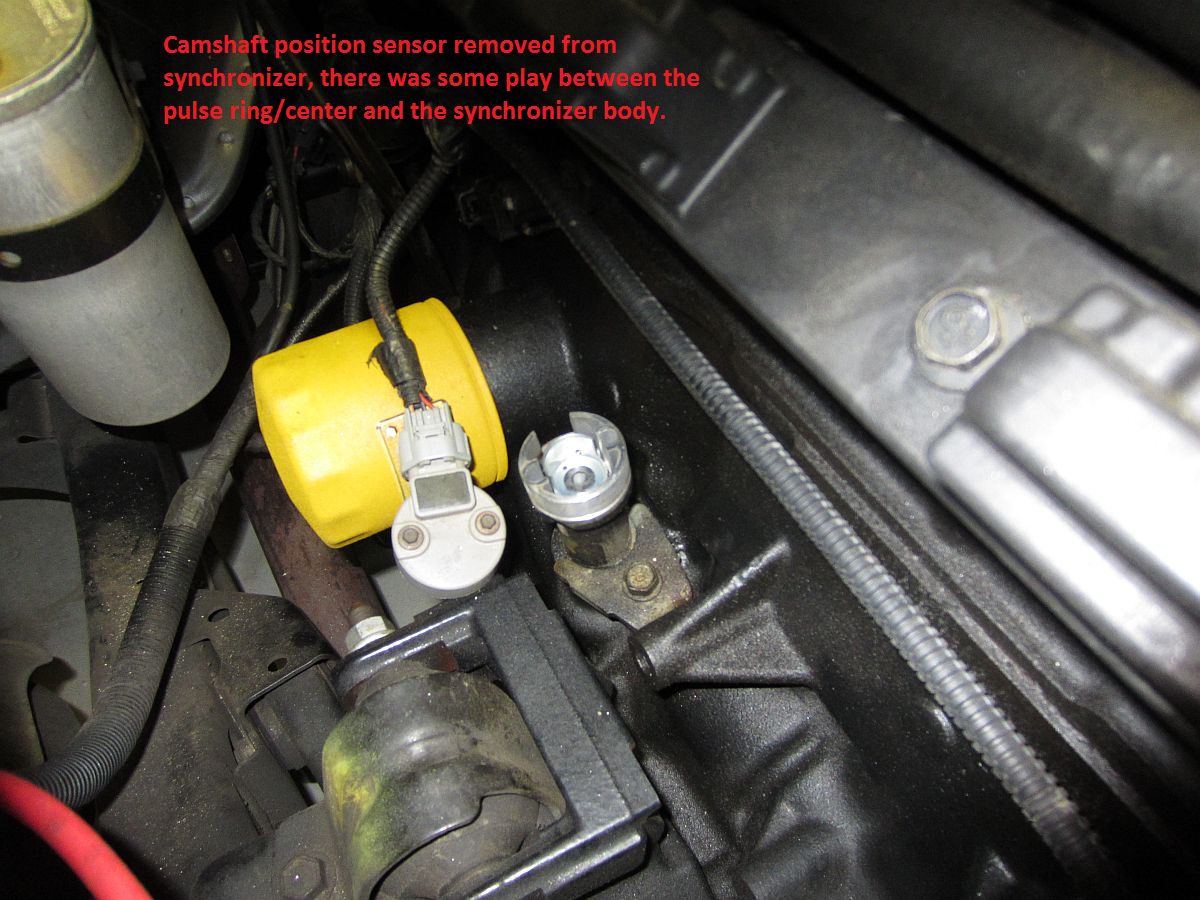
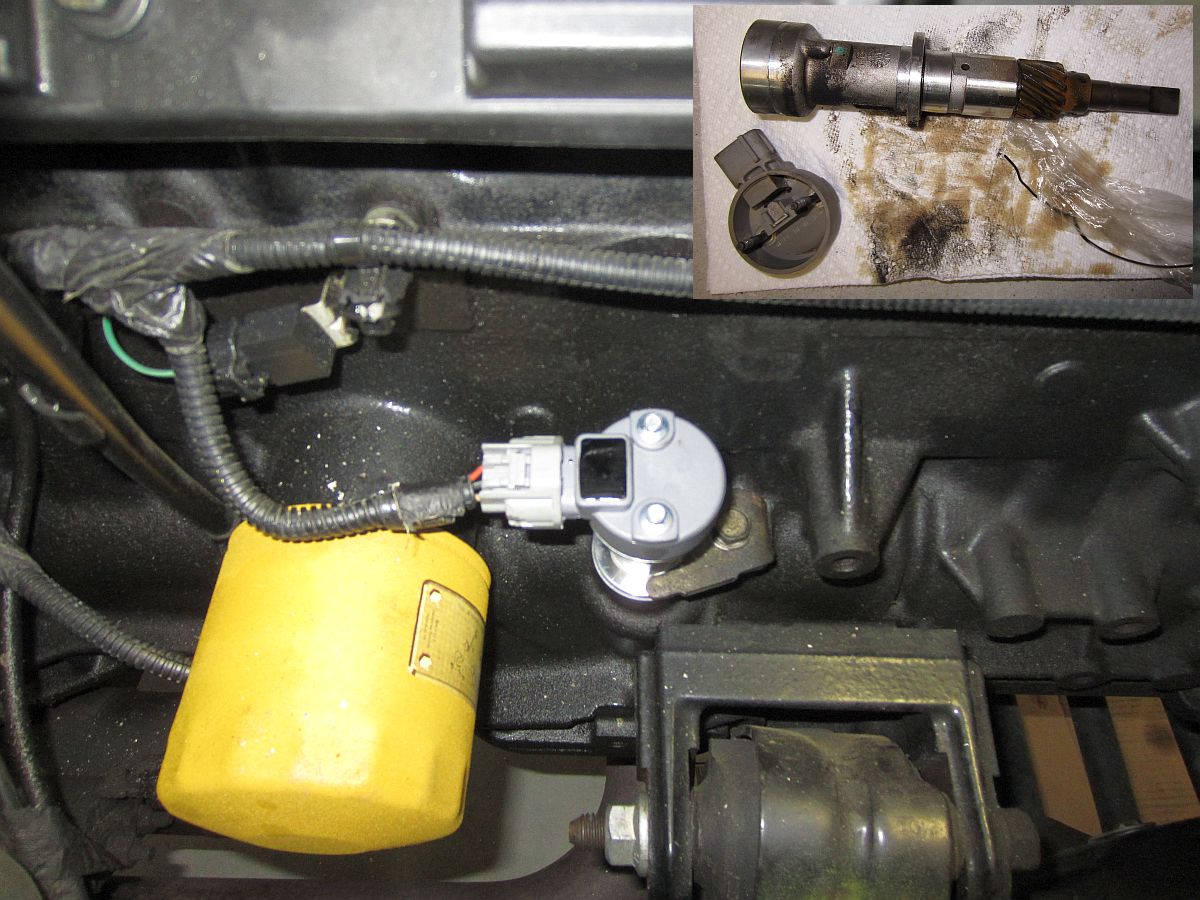
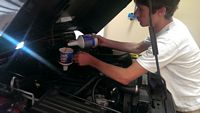
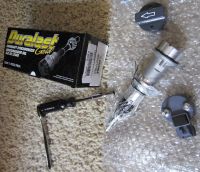
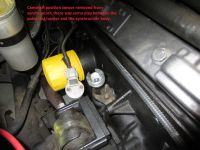
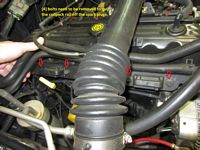
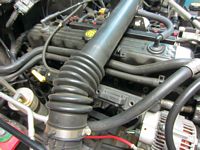
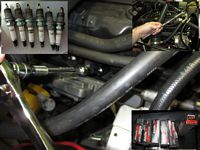
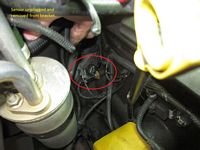
The Jeep's 4.0 had been tapping for a few weeks, I attributed it to a sticking lifter with the cold weather since the noise went away after the engine warmed up....but as it turned out this is also a symptom of a bad camshaft synchronizer. The Jeep threw a P0340 CEL code one morning when I was out of town, "Camshaft Position Sensor 'A' Circuit Malfunction". I was going to just order the camshaft position sensor but after reading a few forum threads decided for the little amount $$ more to just replace the entire camshaft synchronizer. I found one at AutoZone (Duralast P/N CDLG-FD39) with a lifetime warranty for ~$66 (archived page HERE). Perfect fit and sure enough, after this was installed no more tapping and no more code- AWESOME
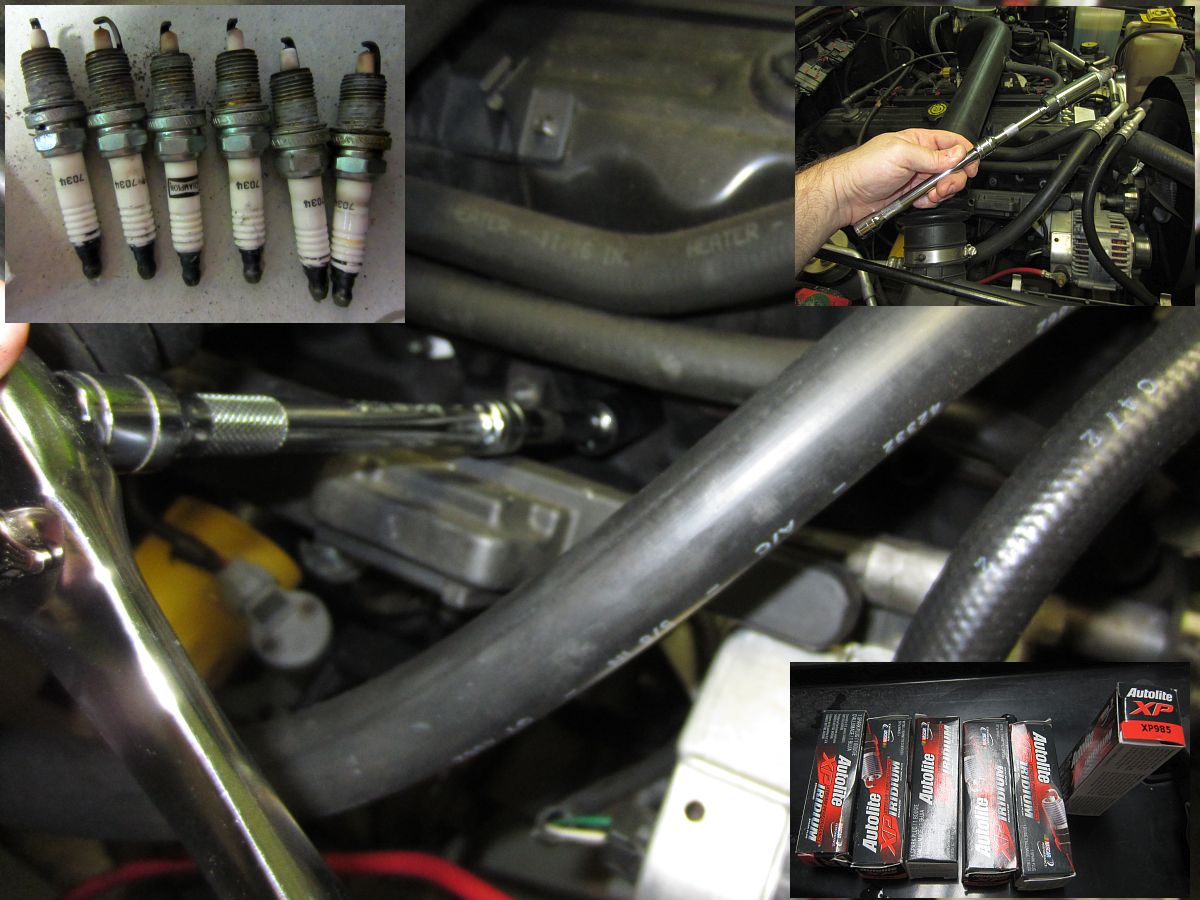
Several DIY YouTube videos out there, one I found was HERE. It was necessary, and also a good time, to change the spark plugs which were removed to allow easier manual rotation of the motor to get to top dead center. Spark plugs we used were AutoLite XP985 from Amazon and gapped to .035, spark plug replacement DIY guide we used was HERE. The electrode on the old spark plugs was almost gone for some- check those spark plugs. [UPDATE] Autozone Camshaft Synchronizer lasted about 1.5 years before locking up and leaving my son stranded. Fortunately there did not appear to be any damage to the oil pump gear and the Jeep was running again after replacement. You may want to step up and buy OE for this part when replacing.

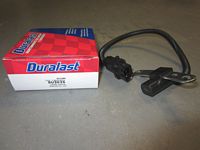
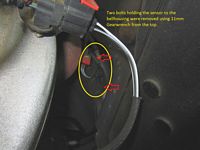
Went to drive to work, Jeep would crank but not start. All suggestions on the forums pointed to the crank position sensor as the most likely culprit (not to be confused with the camshaft synchronizer OR camshaft position sensor).
Picked up the lifetime warranty item from AutoZone and R&Red. Easiest with work platform next to jeep and accessing from the top/removing and installing bolts with a Gearwrench (11mm). Great DIY guide HERE.
The way to test this sensor is that pins B and C (or 2 and 3) should be infinite resistance, ours tested bad so it may/may not have been a contributing factor as it did not fix the no start issue........

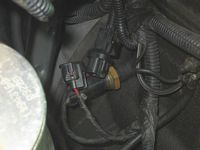
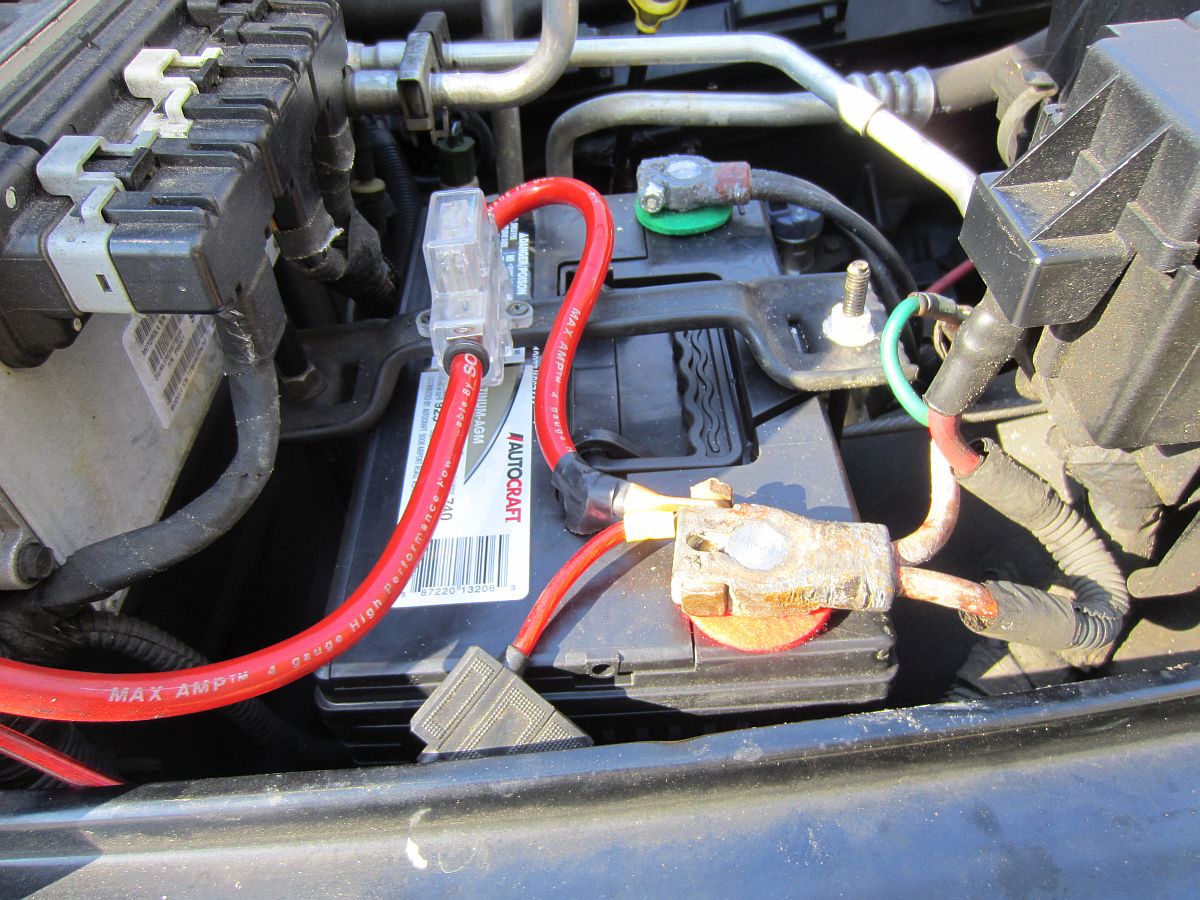
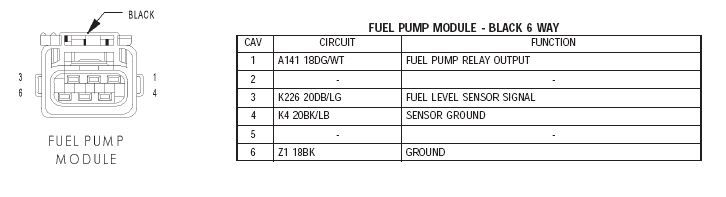
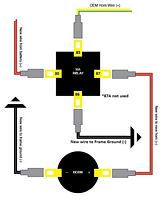
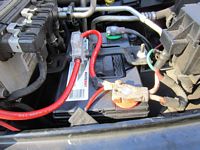
Continues from above- Rather than throwing parts at the problem, I decided to test everything: swapped the known good horn relay with the fuel pump relay, and then with the ASD relay. Since I had ZERO pressure on the fuel rail and the relays tested OK, I decided to spray carb cleaner down the throttle body while my son cranked- Jeep ran fine so spark was not an issue. Tested the fuel pump to make sure I had 12v: at pin 1 (dark green/white stripe wire) when key is turned to run you will see 12v for a few seconds, and constantly when the engine is being cranked or running. I had ground (pin 6, black wire) and 12v so that ruled out any possible power/ground issues that might be caused upstream by the PCM/Relays = BAD FUEL PUMP.
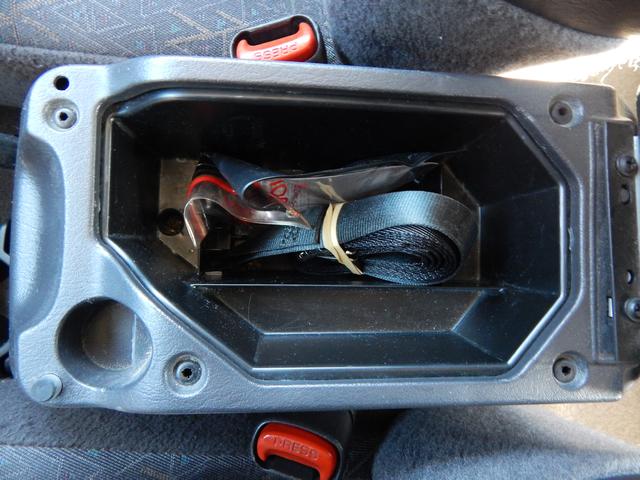
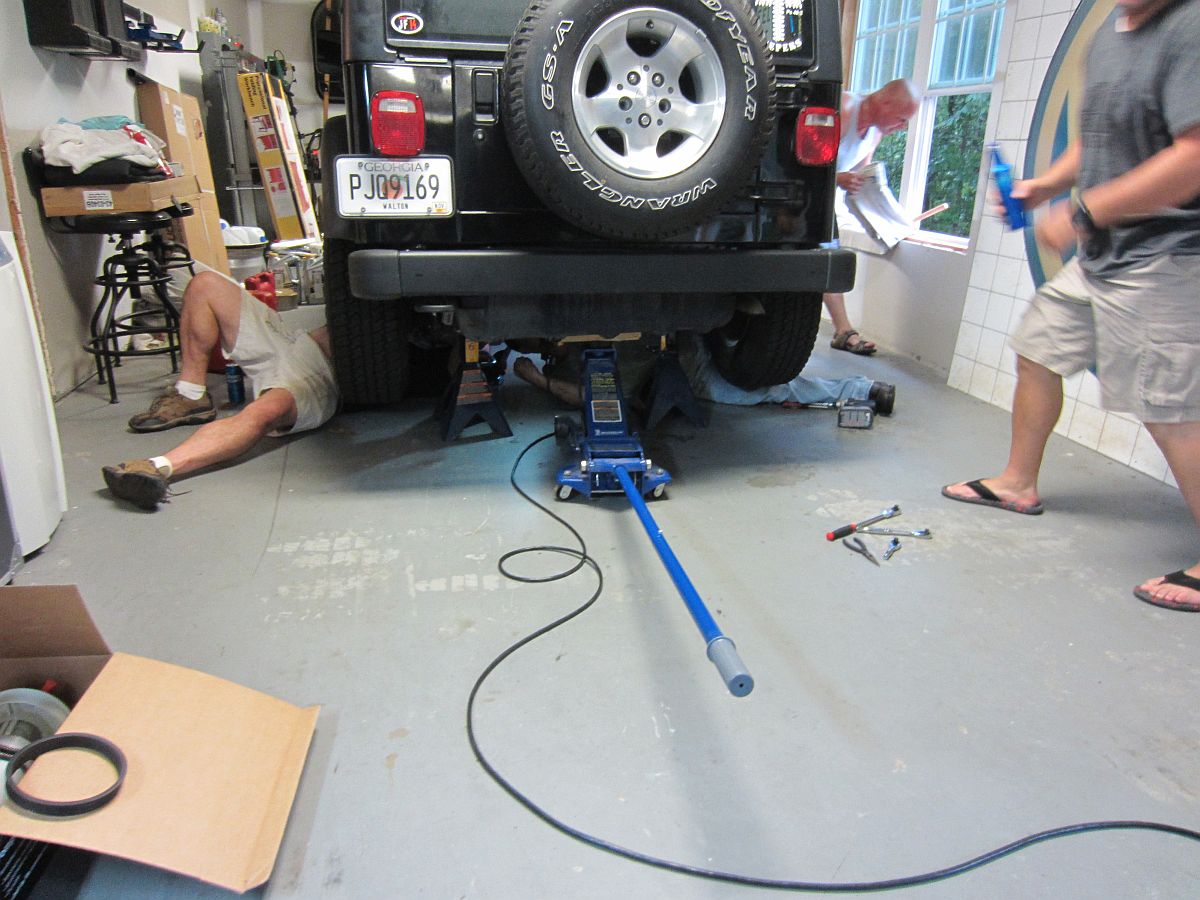
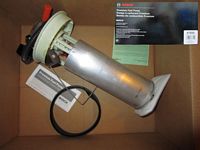
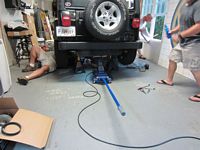
Bosch (OE Manufacturer) fuel pump (P/N 67655) was sourced from Amazon for a good bit cheaper than the offical dealer part. Followed this DIY Guide by WF's Isu60driver almost to the letter, but did use a standard screwdriver and rubber mallet to loosen and then tighten the retaining ring for the fuel pump. Note that this fuel pump has an arrow on the edge that should be pointing towards the front of the Jeep when installed so that it is oriented as in the pics in the DIY guide. Also, soak the nuts down with PB Blaster a few days before- we had to air chisel one bolt/nut off that twisted in the sheet metal in one of the hard-to-get-to front locations. Jacking up the rear of the Jeep and placing jack stands under the axle make access a little easier. We turned it into a party and had a BBQ for friends that helped out, makes the job MUCH easier.

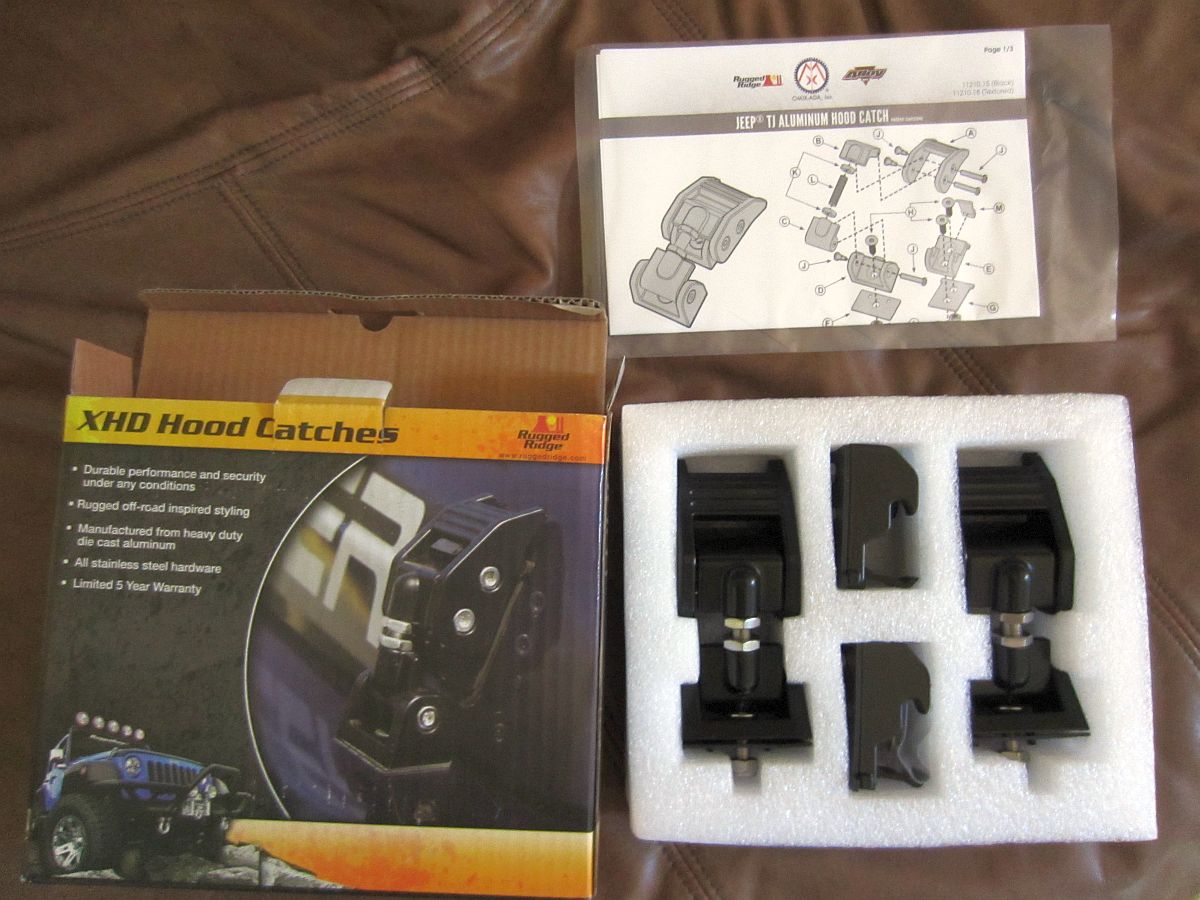
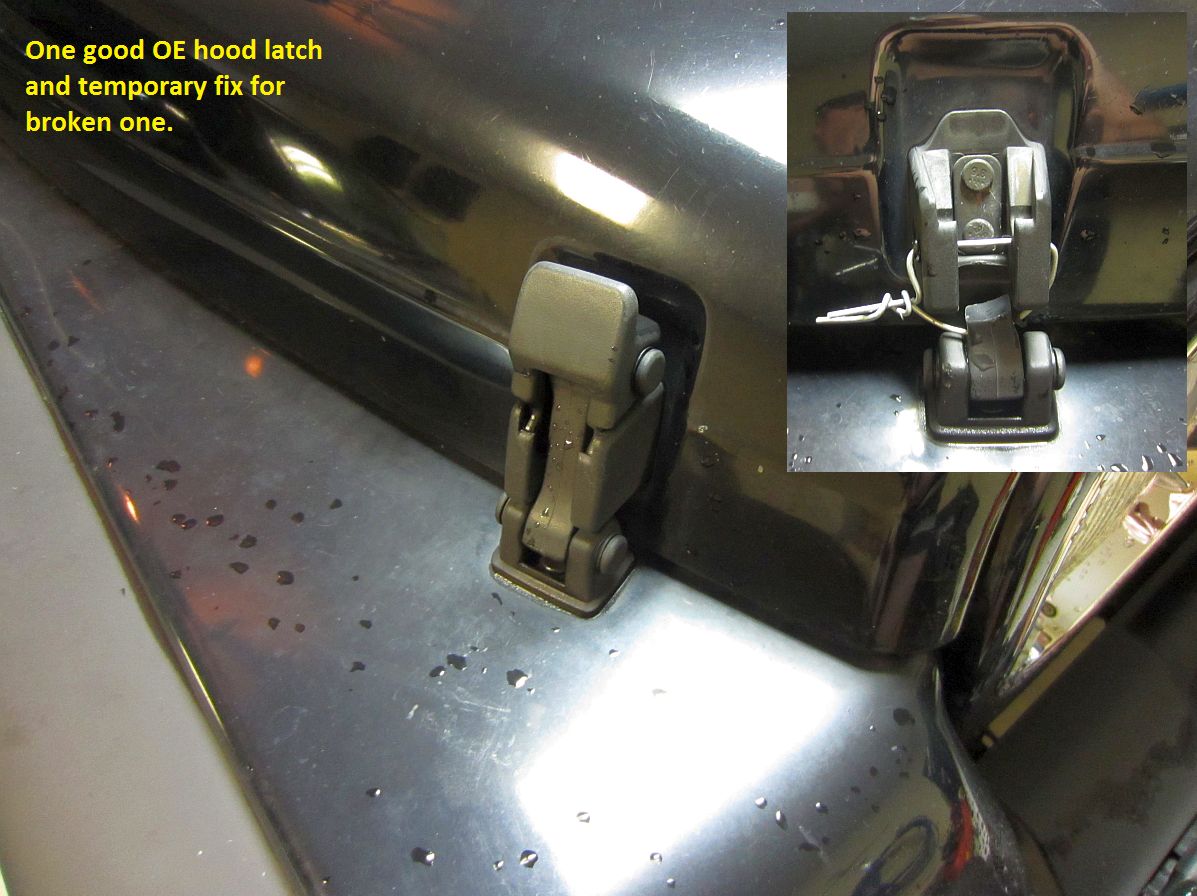
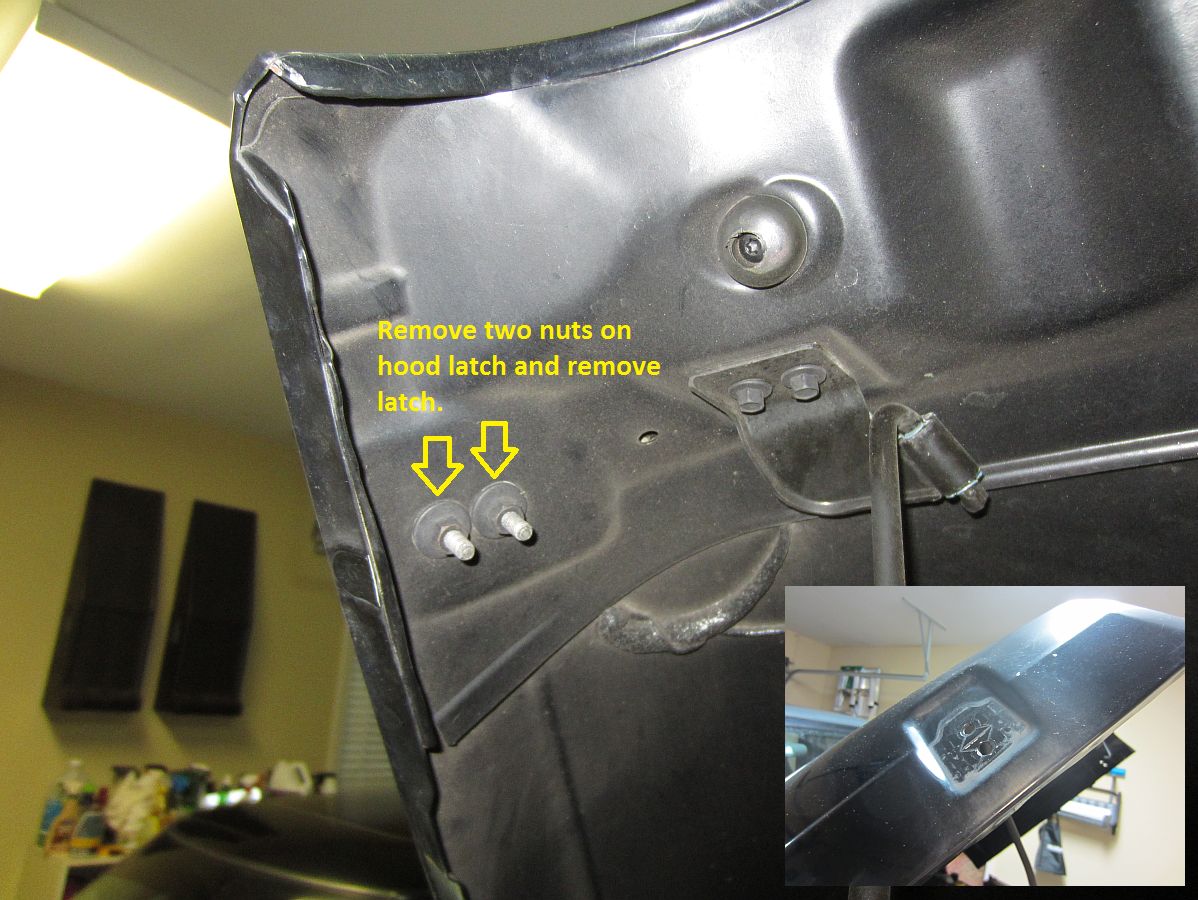
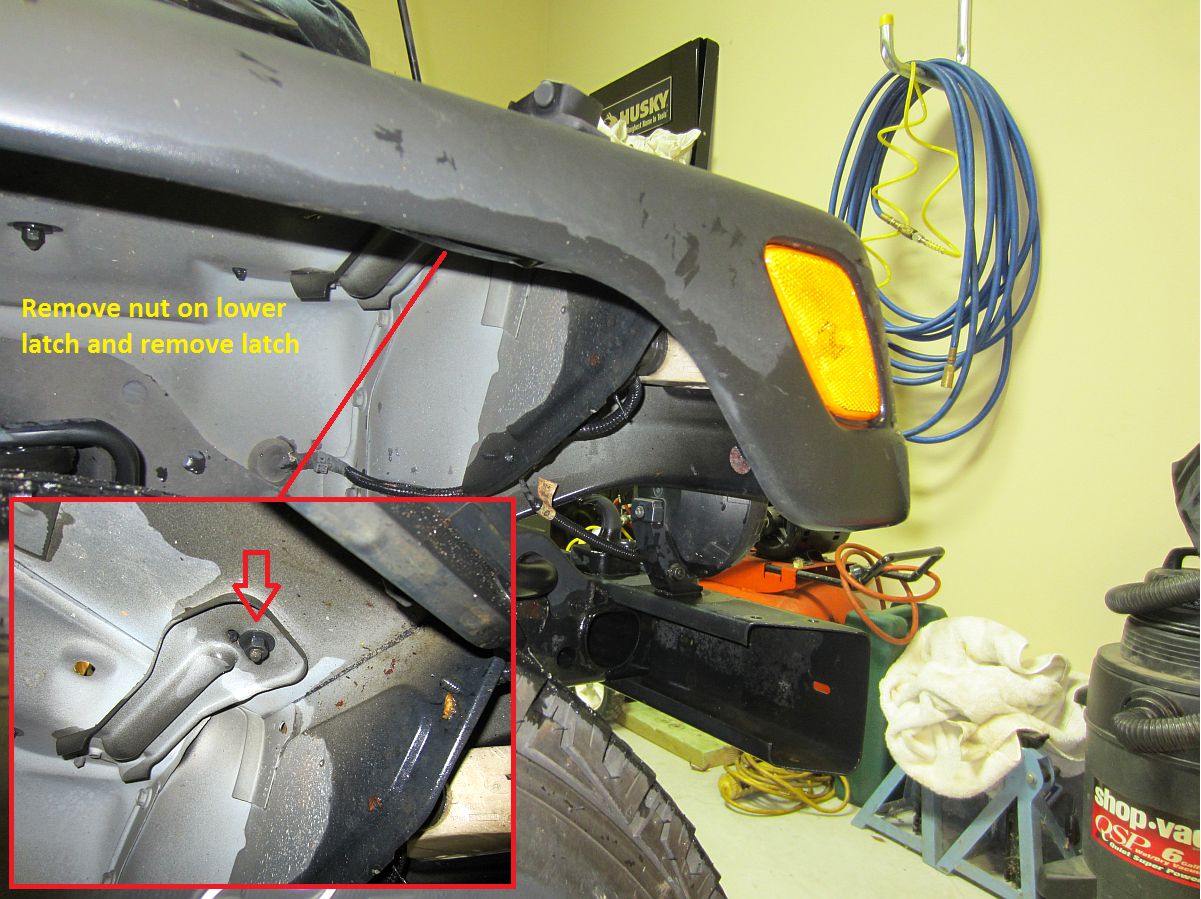
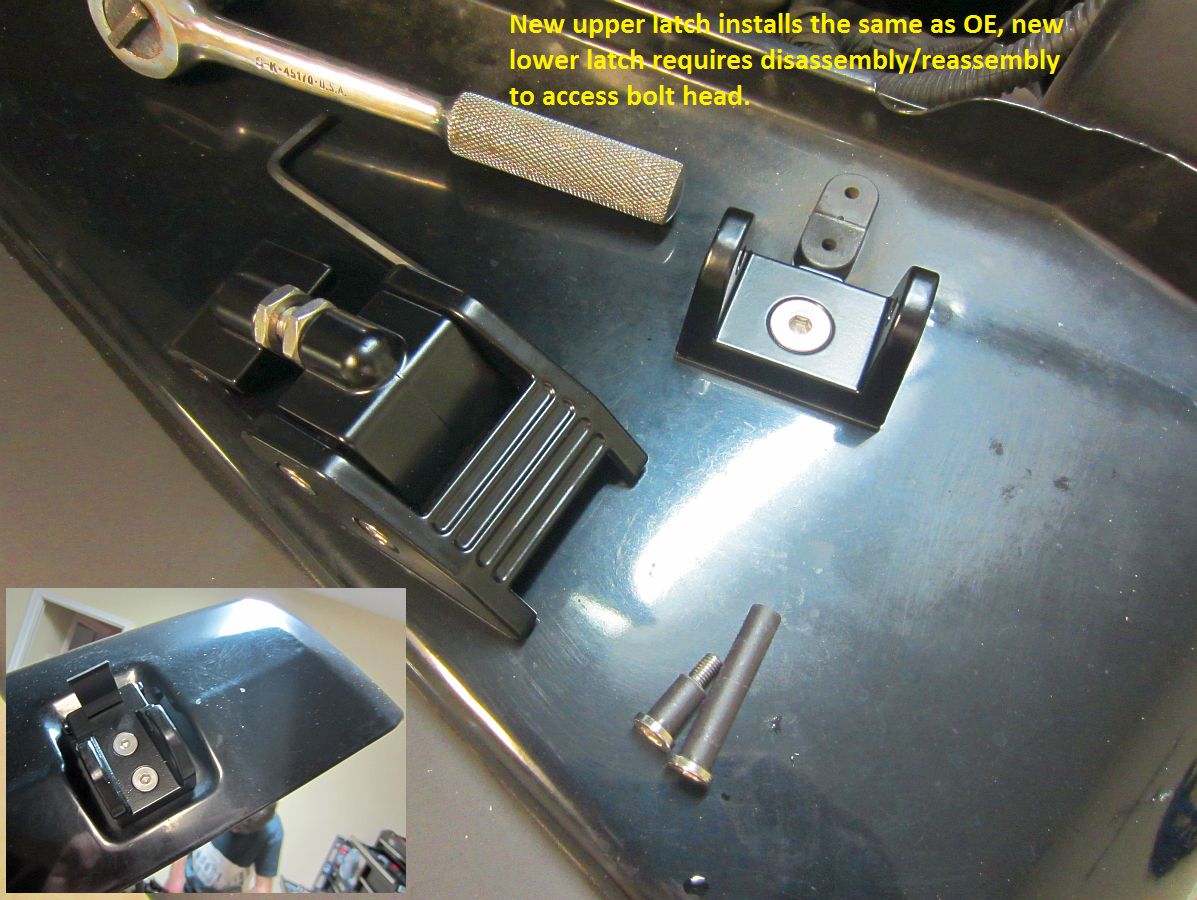
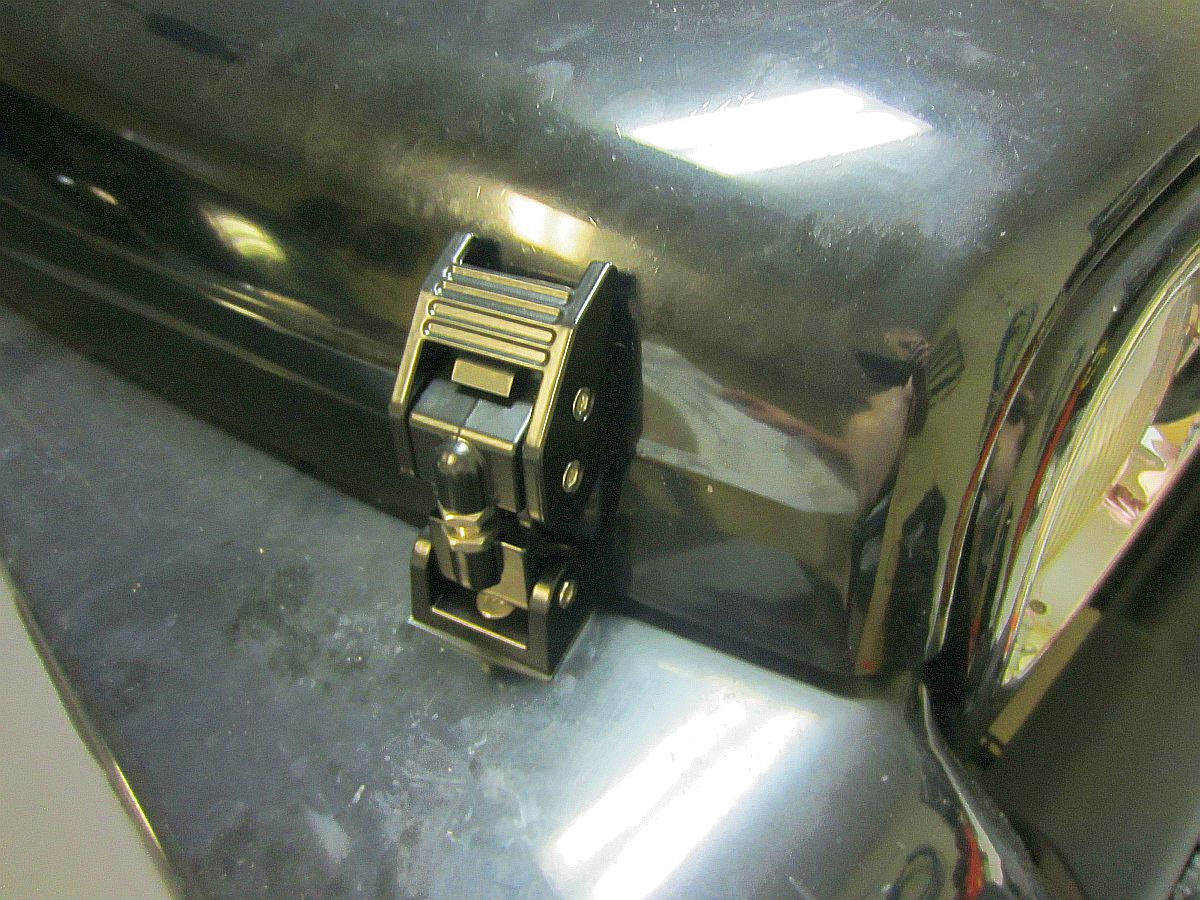
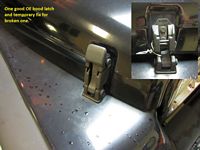
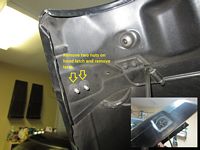
Son had an uh-oh so good time to upgrade damaged parts. Rugged Ridge Aluminum Hood Latches (P/N 11210.15) from Amazon installed- Installation Instructions: HERE.
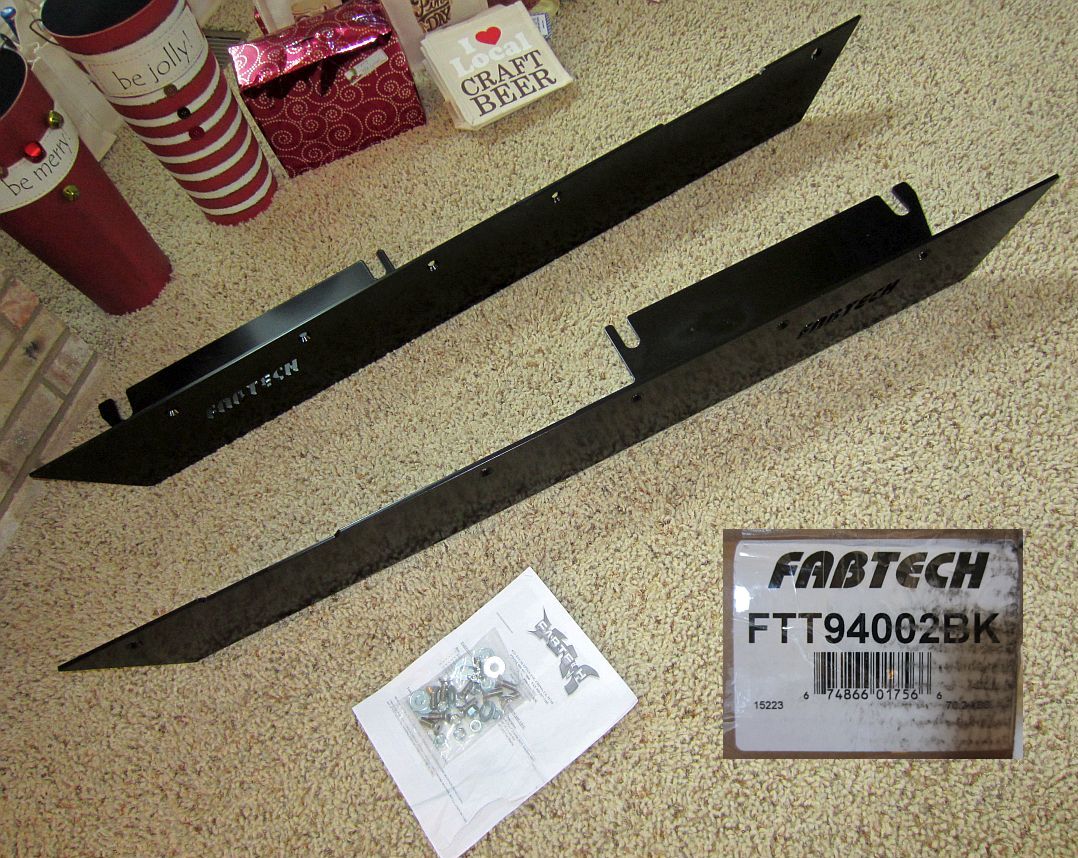
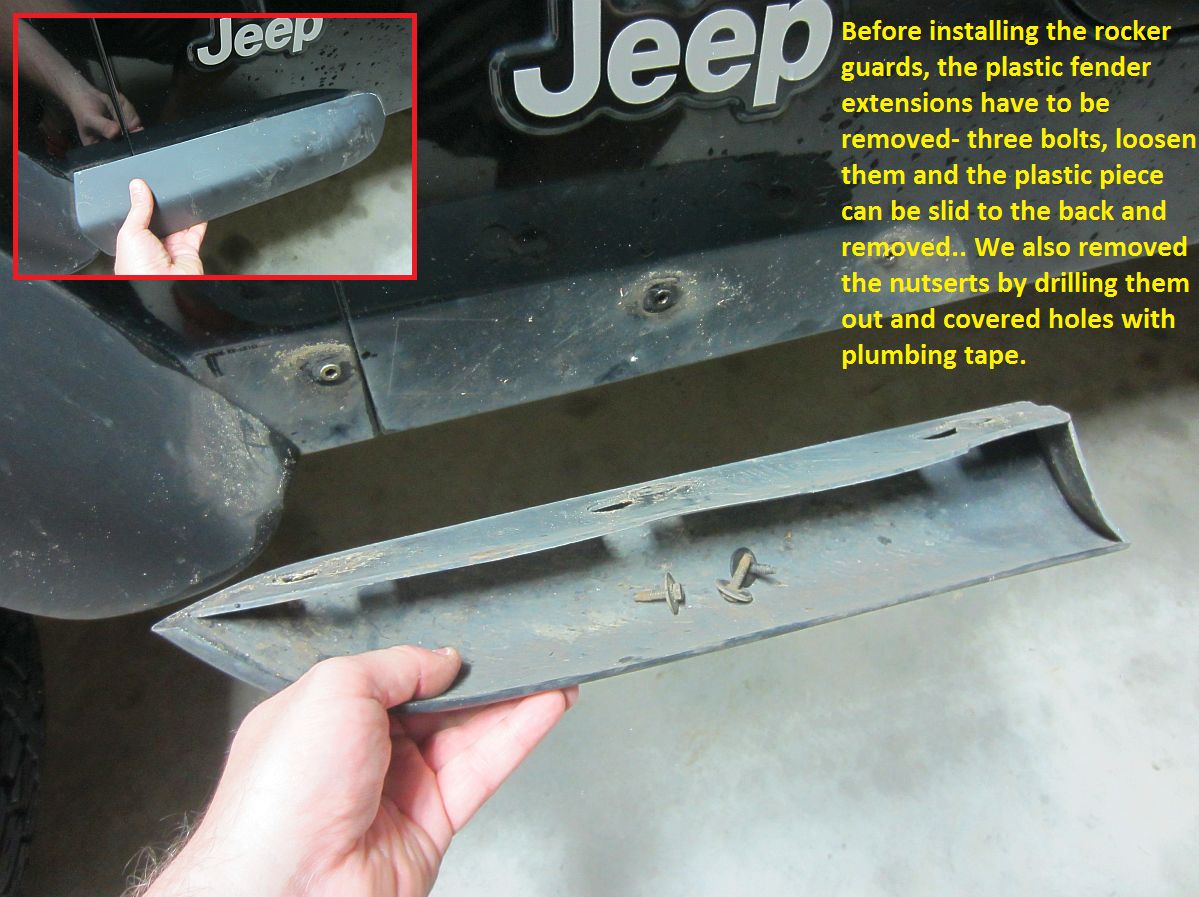
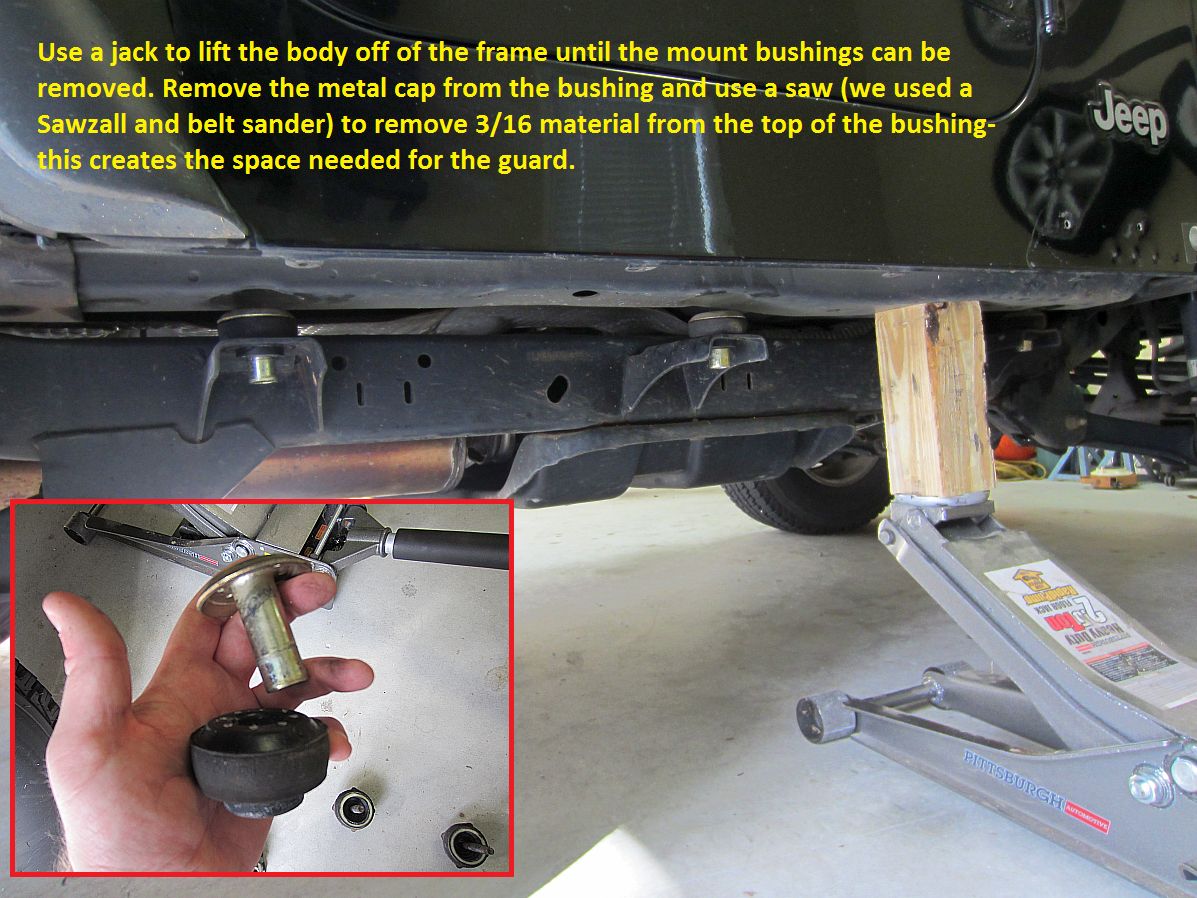
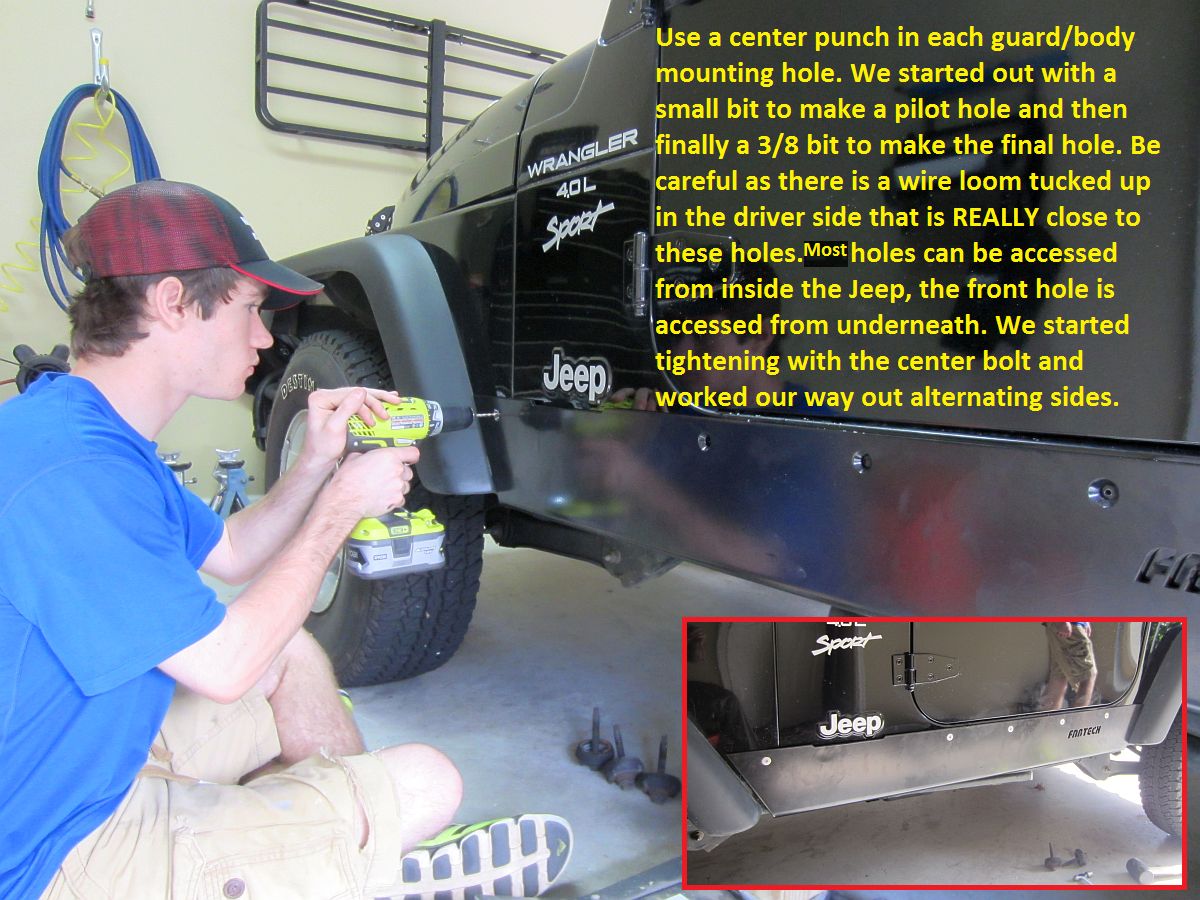
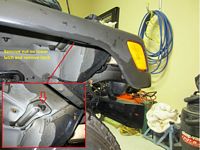
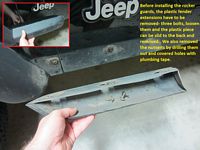
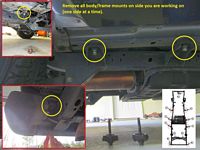
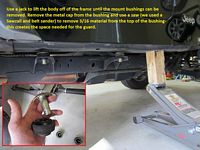
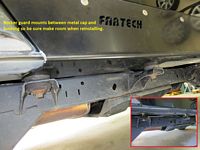
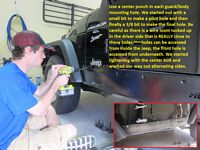
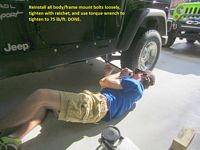
To cover some small dents in the rocker Fabtech Rocker Guards were installed- Installation Instructions HERE. These were chosen due to their coverage (wrap around body) and beefy 1/4" steel. If you ever buy from 4WheelParts (I rarely do but sometimes they have the best price), don't opt for the $10 rush 3-5 delivery- it won't make it if it wouldn't have made it and you'll have to jump through hoops to get a refund....I'm not sure why this wouldn't happen automatically, they have the tracking info and know if they have met the delivery commitment or not.


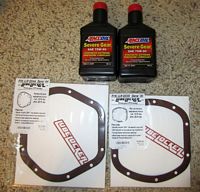
We have been planning to do this since buying the Jeep but finally got around to it- Differential Fluid Change, front and rear.
The LubeLocker gaskets were purchased to make replacing the diff fluid a little easier in the future.
(LubeLocker instructions: Dana44 HERE, Dana30 HERE).
Amsoil Severe Gear 75w90 (GL5) is the fluid of choice for both differentials; may go with Amsoil Severe Gear 75w110 (GL5) next time now that my supply of 75w90 is all gone.
Loosen bolts for diff cover and break seal to let fluid drain into pan, remove bolts/diff cover, clean off sealant (diff and cover), spray off gears with brake cleaner, reinstall diff cover with LubeLocker gasket, fill fluid to fill hole- DONE
NOTE: Be careful when installing the differential covers, LubeLocker states 35 ft/lbs in their instructions as the final torque value but the OE torque value is 30 ft/lbs (reference for torque value, PDF version HERE). I settled on 30 ft/lbs final value and we'll see how it works.
Jeep was a GREAT first vehicle for my son but after 2 years we decided to get him something newer with a warranty and better gas mileage- Jeep traded in for a Scion FRS which my son had been wanting for a while, and now he has a car payment
Oil Analysis performed by Blackstone Laboratories
Jeep Wrangler TJ Reviews/Articles:
Jeep Wrangler Documents/Files:
2006 Jeep Wrangler Sales Brochure
2004 Jeep Wrangler Owner's Manual
Jeep Wrangler DIY Guides/Installation Instructions:
Daily Driven TJ: Rear Main Seal Replacement (archived HERE)
4x4XPLOR.com: Rear Drum Brake Replacement and Adjustment (archived HERE)
BillsWebSpace: Jeep Wrangler TJ NV3550 Manual Transmission Fluid Change DIY
BillsWebSpace: Jeep Wrangler TJ Console Subwoofer Replacement DIY
WranglerForum: Isu60driver's Fuel Pump Replacement DIY Guide (pdf version HERE)
Forums and Clubs:


- Parts Diagrams and Wholesale Parts
- Parts Diagrams