|
[Repair] Rear Main Seal
Replacement.
Introduction
When the time came for me to replace the leaky
rear main seal on my TJ, I searched online for a decent write up. Some
of them were ok, but none of them were good enough to really show the
potential DIY to see what is really going down with the repair. Besides
many were lacking crucial details, explanations and/or without
pictures. I decided to bring something that is more than a write up
with 5 pictures. You won't be disappointed with the amount of detail
shown in this write up.
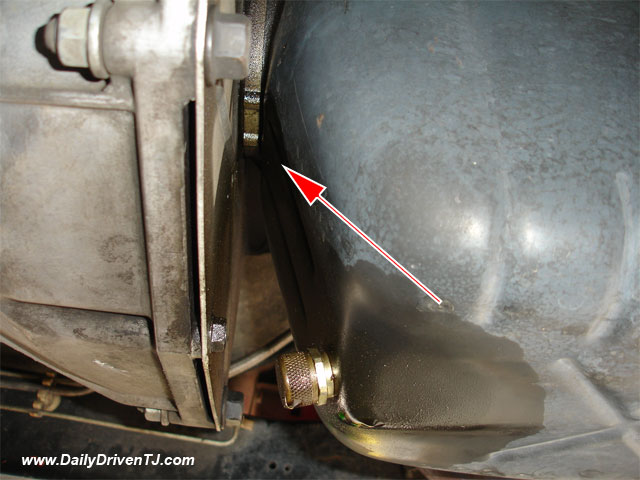
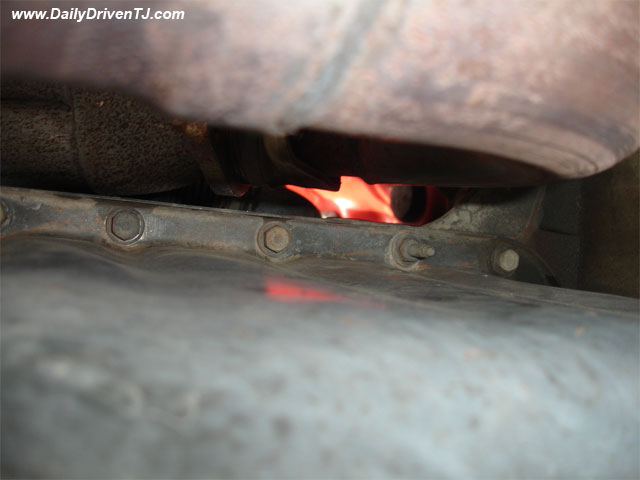
Anyhow, chances are, if you own 4.0L I6, you will
have a rear main seal leaking on you. As shown in the picture above,
the symptom is a engine oil leak between the
engine and the transmission. This repair costs anywhere from $300 to
$600 depending on where you get the repair done. Surprisingly, all the
parts only cost around $50. Not saying it is easy to do, but this
repair is not all that hard to do it yourself. With the this guide
available in DDTJ, you will know exactly what you are getting yourself
into as usual.
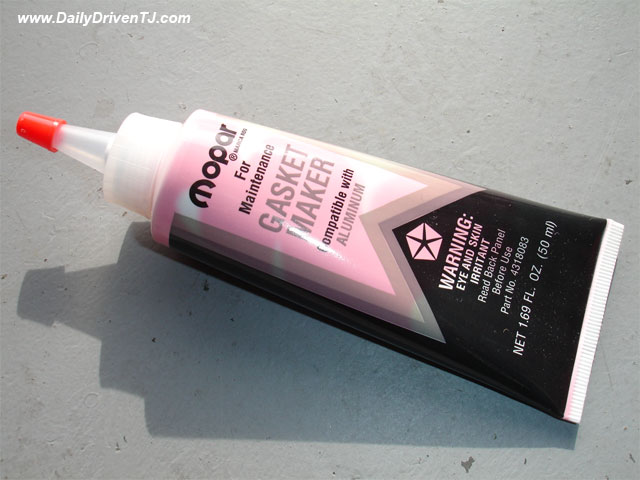
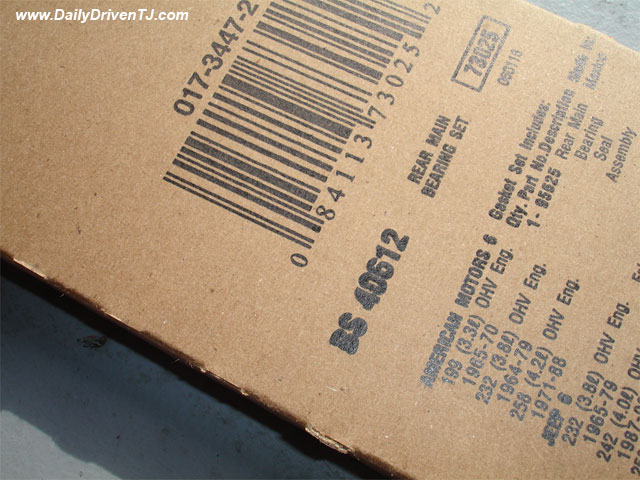
Tools and Parts Needed
High Temperature RTV
Oil Pan Gasket (~$20)
Rear Main Seal (~$14)
LockTite 518 or Chrysler Part Number: 4318083 (Anaerobic! Not
your average RTVs! It is not cheap but required, ~$16 from dealer. No
parts stores carry this item.)
Paint Prepping Solvent
Sockets and Ratchets with extensions
Torque Wrench
6qts. of Engine Oil
Oil Filter
Here are the pictures of the parts you will need
to hunt down.
Anaerobic Gasket Maker (it cures when there is no
oxygen.)
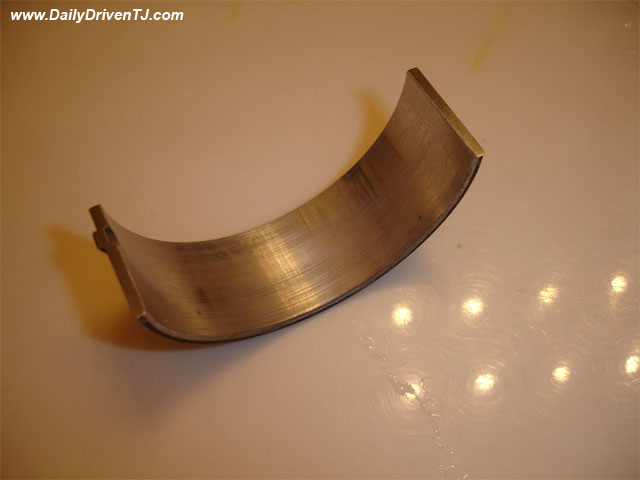
Rear Main Seal (2 pieces)
Oil Pan Gasket (Click on the image to see the part
number.)
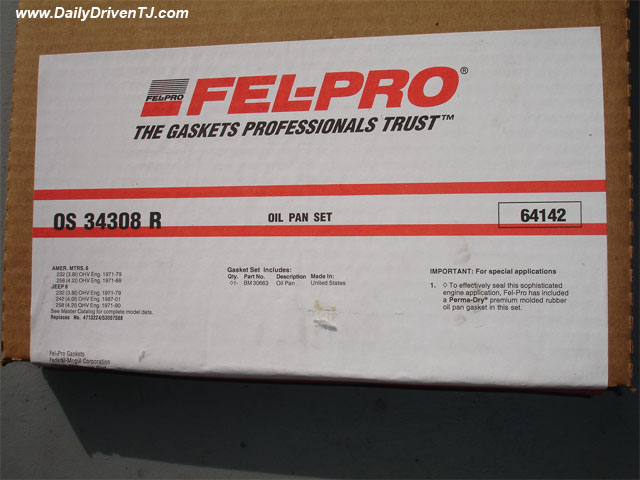
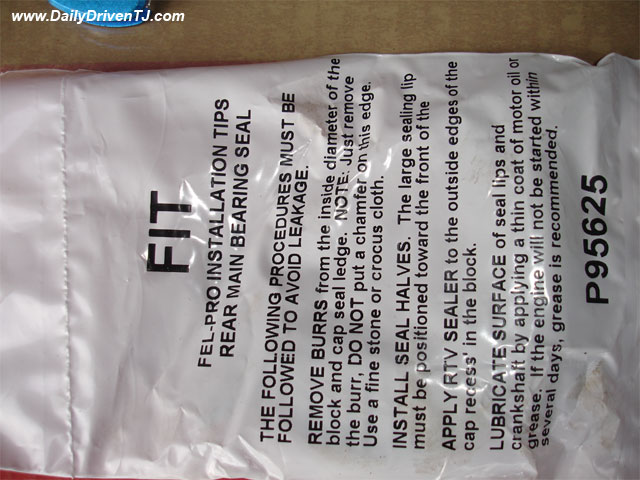
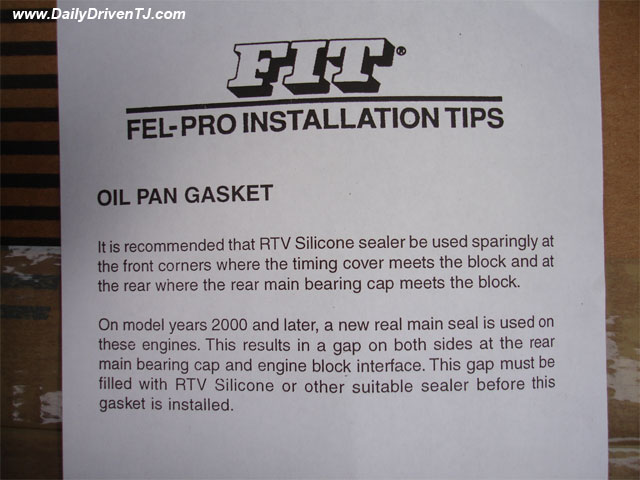
Some instruction that were included in the oil pan
seal and the rear main seal.
Job Hours
Takes about 2-6 hours.
Procedure
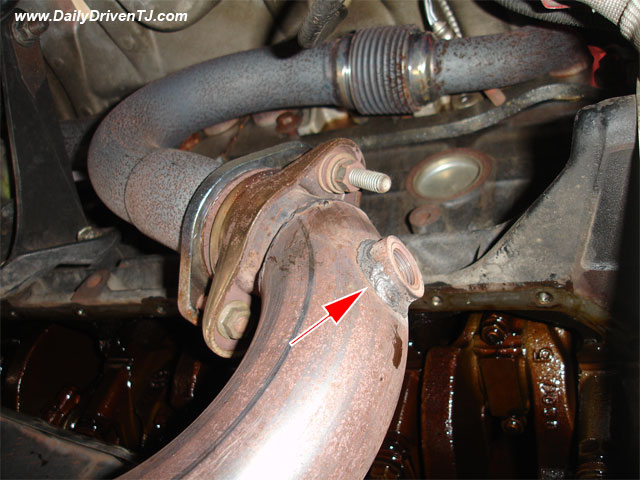
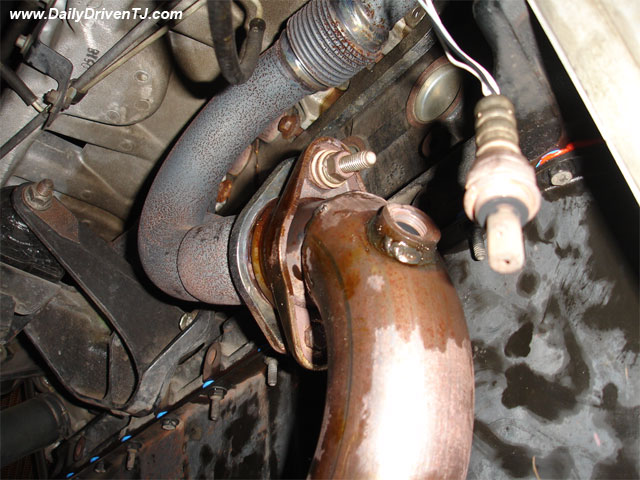
1. Remove the oxygen sensor from the down pipe.
Remove the bolts and nuts holding the down pipe to the header. You will
have to move the pipe around so that you can lower the oil pan later.
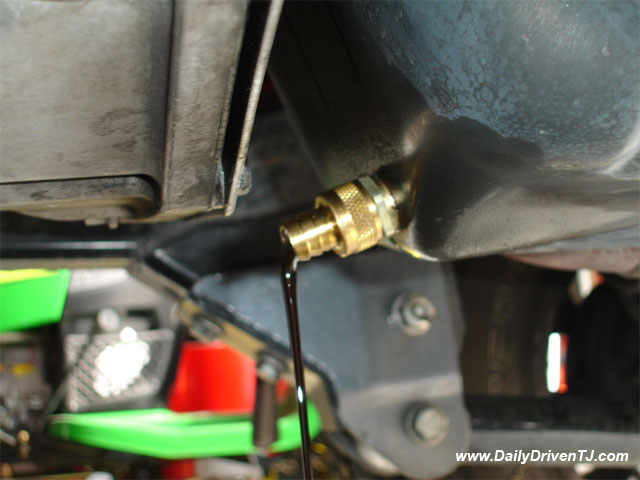
2. Drain the engine oil. I have SureDrain by Fram
installed on the oil pan.
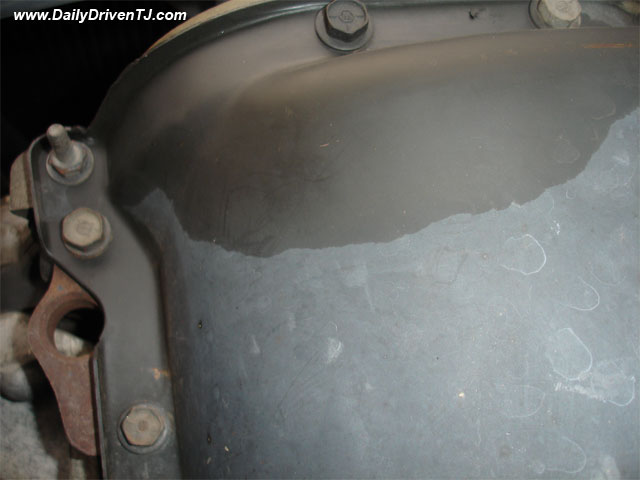
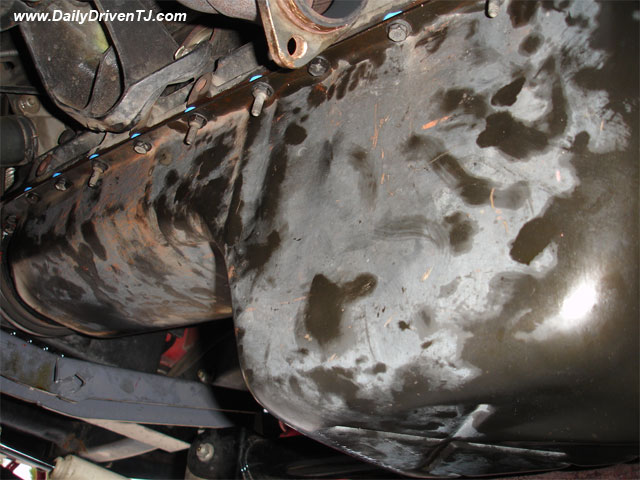
3. Chrysler used different sized bolts to hold the
oil pan to the engine block. I think they used 1/2 inch and another
size. I took several pictures of the bolts and where they are located
so I don't I have to remember them where they go back. Here they are,
for your reference. Start removing them and put them in a safe place.
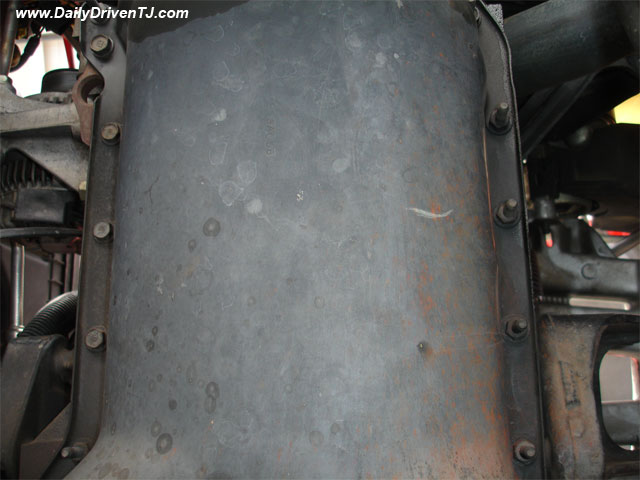
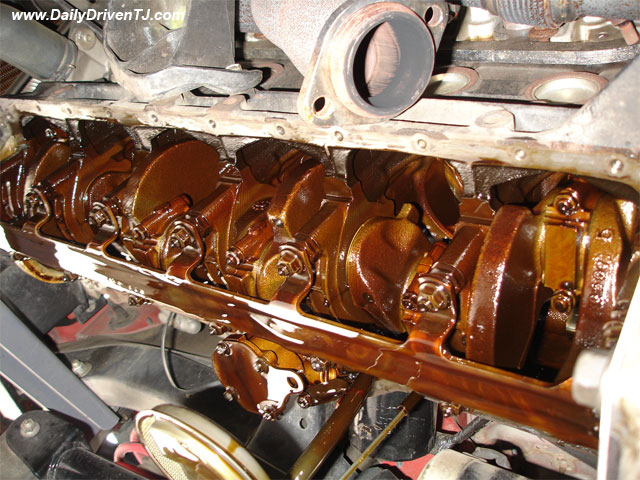
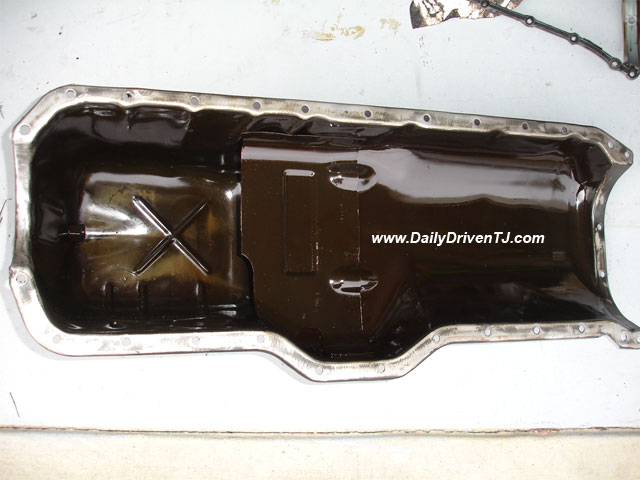
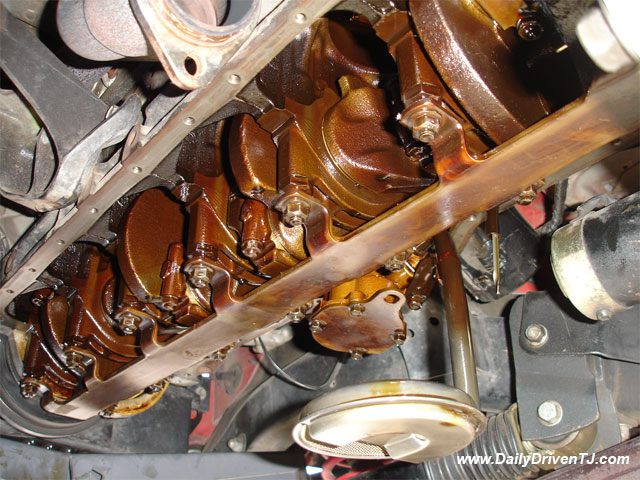
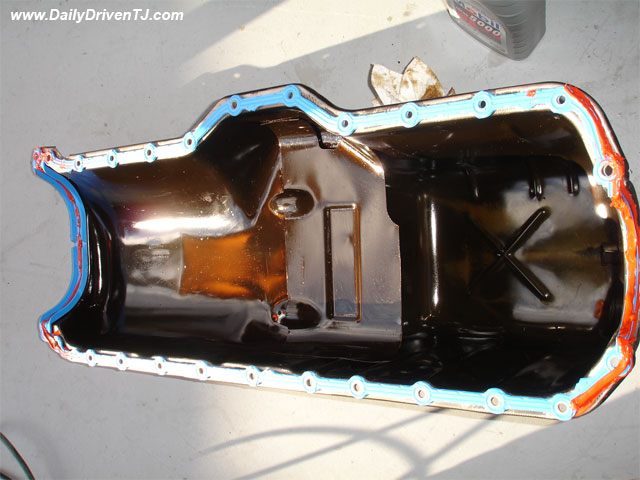
4. Once the oil pan is out of the Jeep, this is
what it looks like. Your engine may look different with less brown. My
Jeep is 10 years old, JFYI.
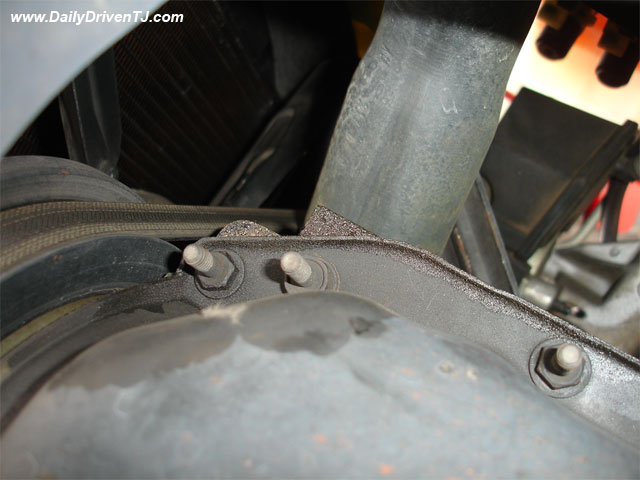
5. Remove the main bearing cap brace by removing
12 bolts. This is the long stick shown in the following picture.

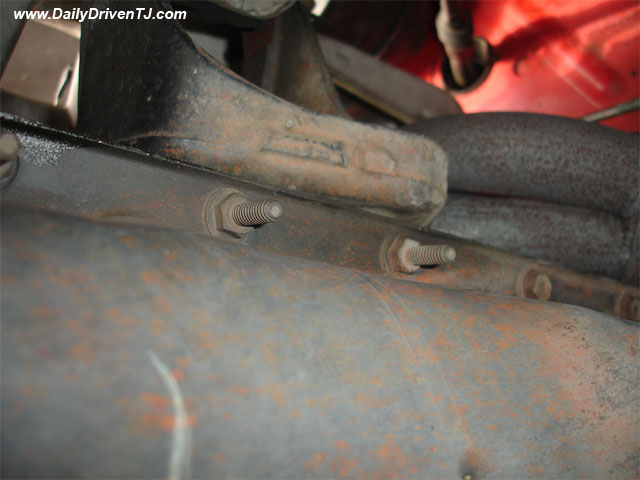
6. With the main bearing cap brace removed, remove
the rear main bearing cap.
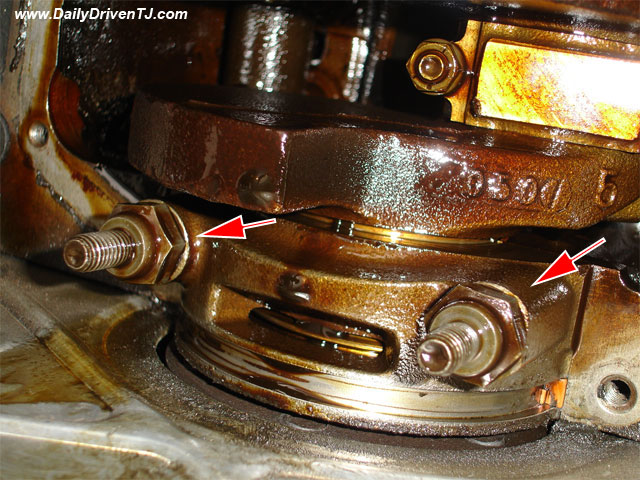
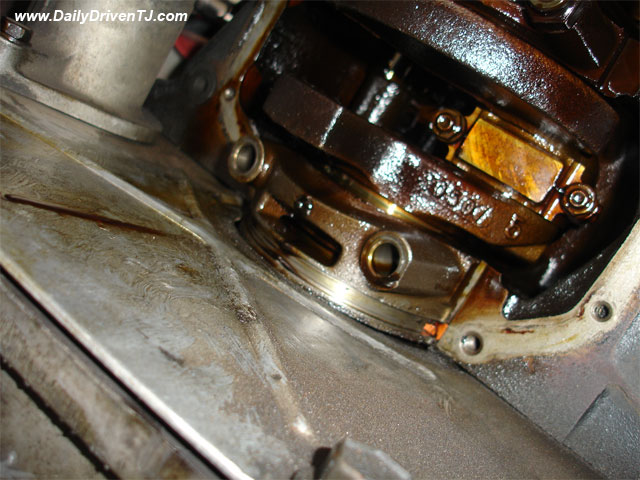
You will have to wiggle the cap loose front to
back, not side to side.
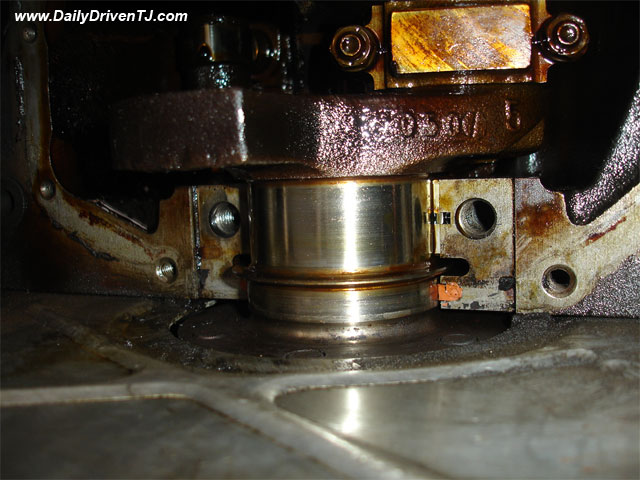
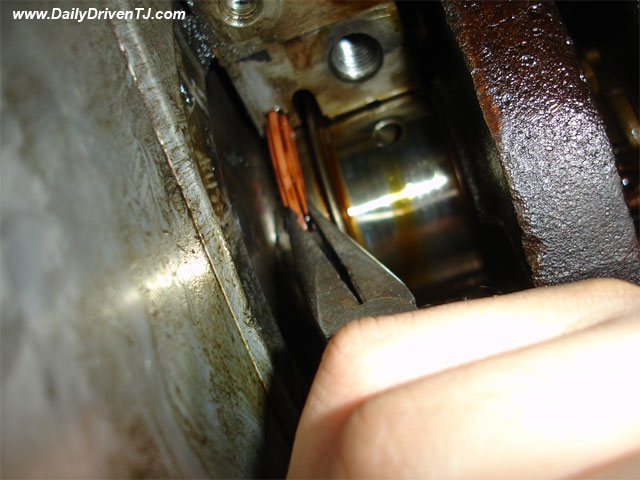
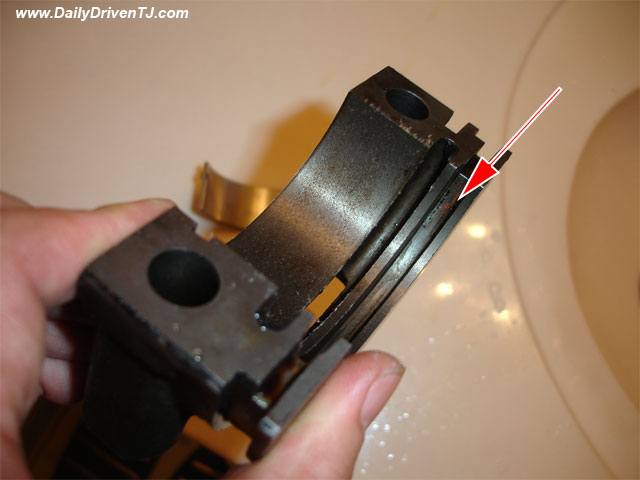
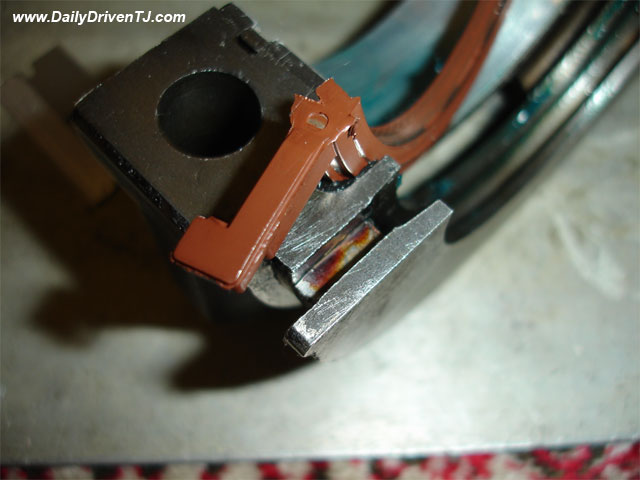
7. Remove the top half of the seal by driving it
out of the block. Use extreme caution not to
score/dent/scratch anywhere. One small nick or scratch can cause leak
and is no longer repairable. As you remove the seal, note the
orientation of the seal. The seal is opening towards the front of the
vehicle.
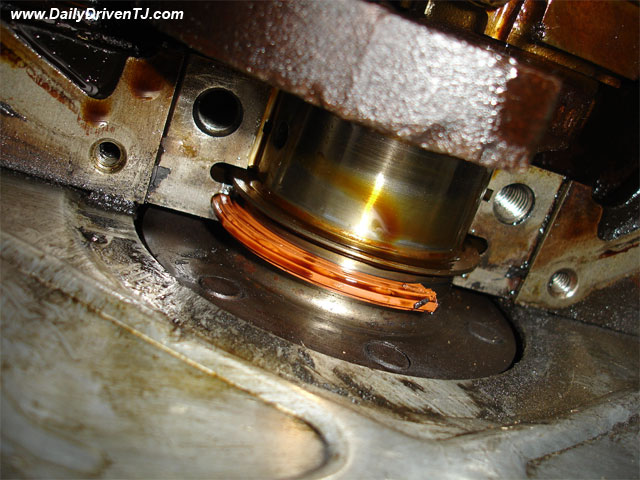
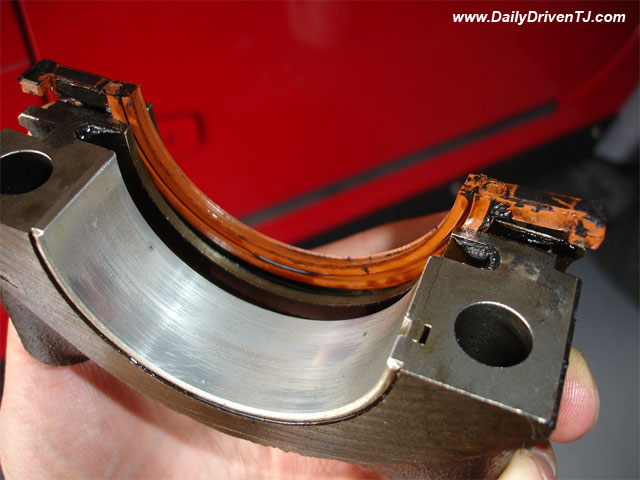
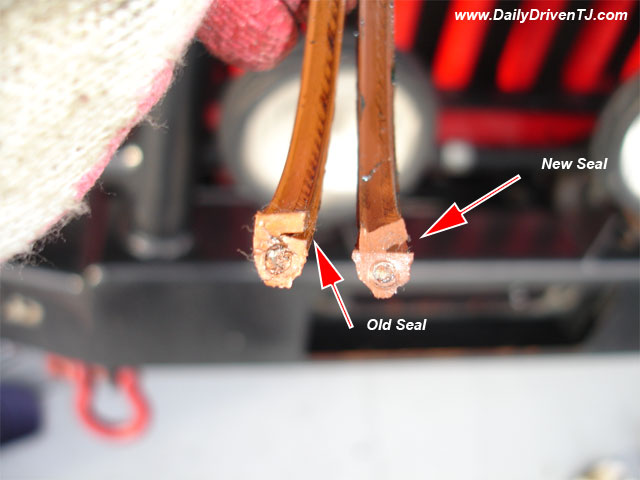
Here is what they look like removed from the
engine. The top half and the bottom half is shown here.
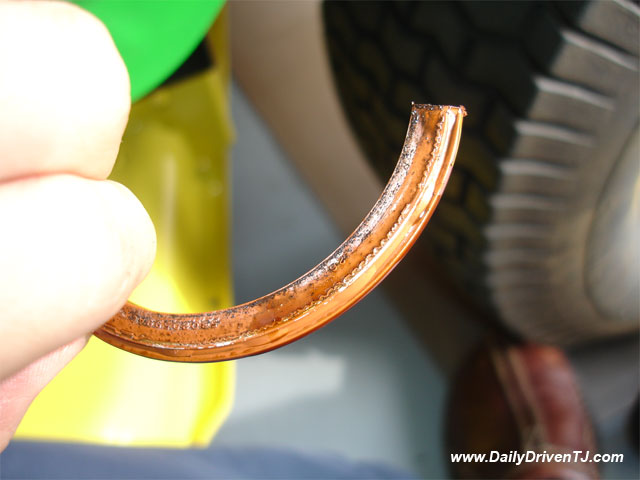
Notice how the old seal has lost its shape. *Blue
residue shown on the new seal is wheel bearing grease.
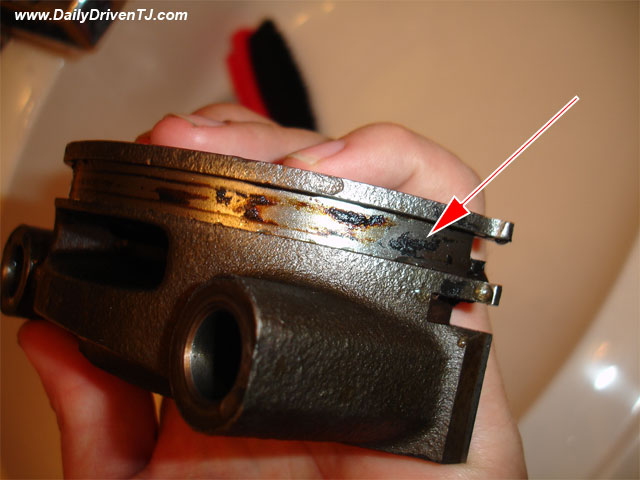
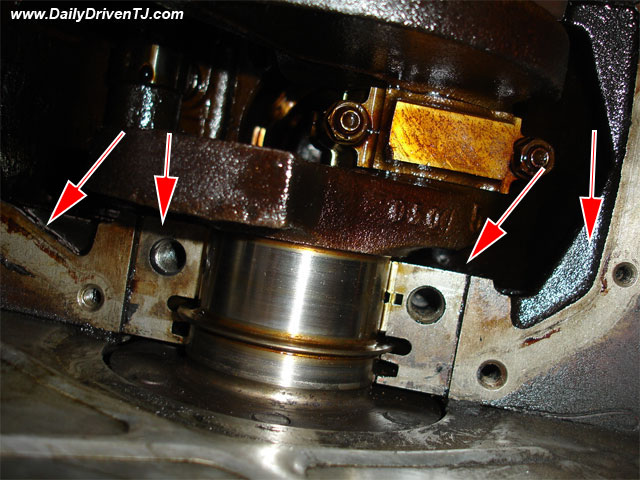
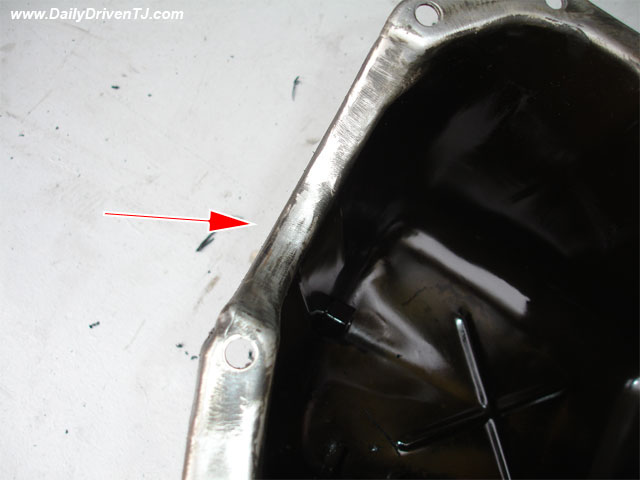
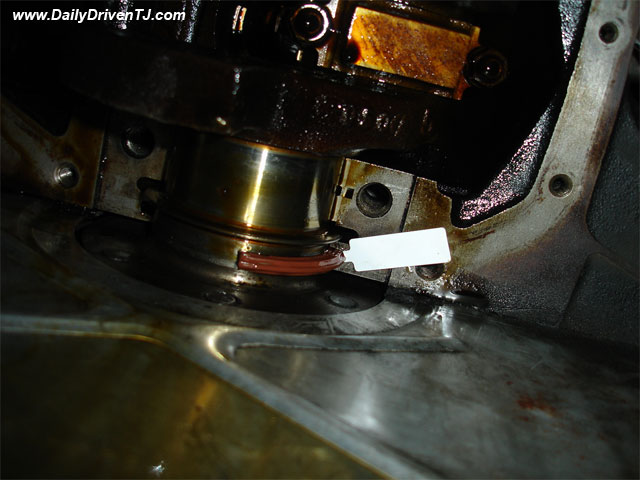
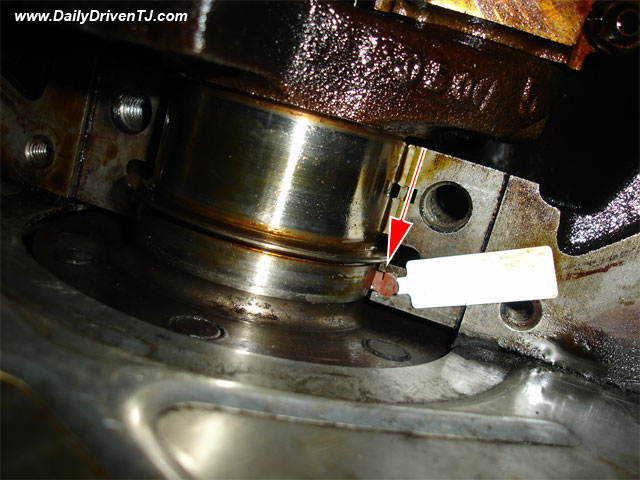
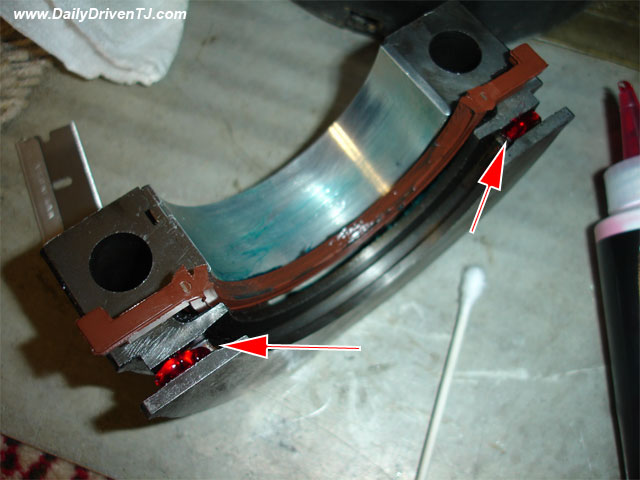
8. Start cleaning the mating surfaces. Make sure
things are cleaned down to the metal without removing any metal. I used
old tooth brush with a lot of elbow grease. Make sure there is no oily
residue left. This is ABSOLUTELY CRUCIAL for the
success of this repair. One little residue of old sealant will cause
leak. Oiled surface does not allow the adhesive to adhere properly. I
used a paint prepping agent to clean the surface. Pay particular
attention to the areas indicated by the arrow.
<Before>
<After>

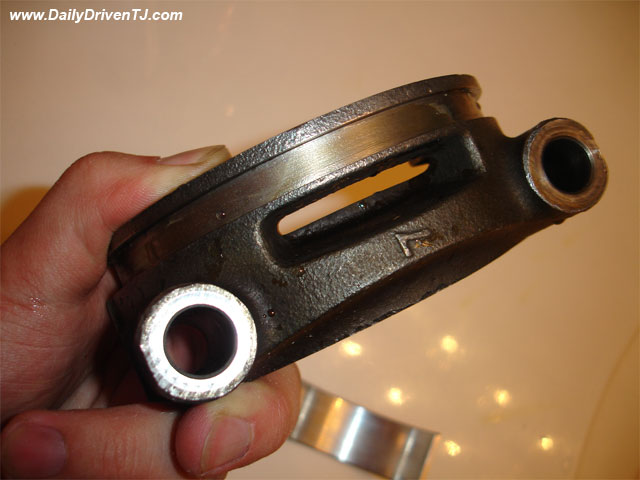
While you are cleaning the bearing cap, if the
bearing falls out of the cap, put it back on the cap with a bit of
grease to go between the two pieces. It only goes in one direction.
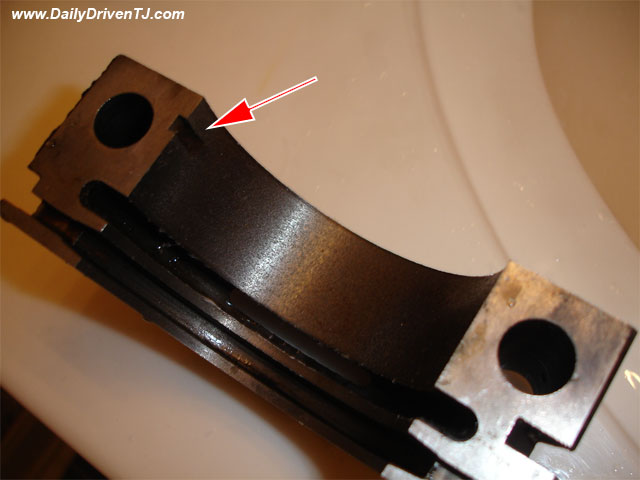

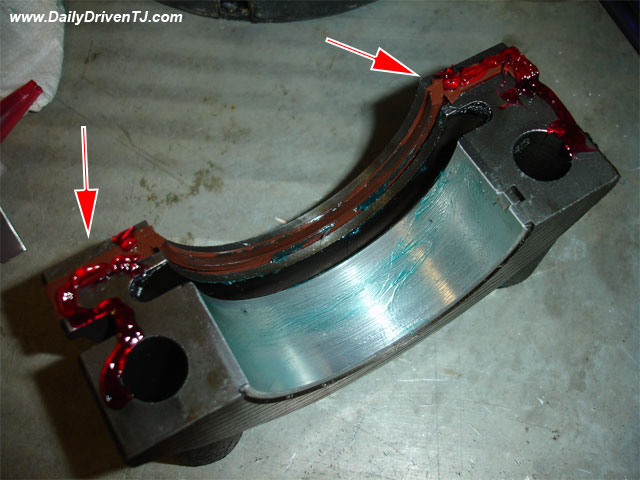
Clean the engine block where the bearing cap mates
against free of any residue whatsoever! This cannot be stressed enough! Clean
ANY mating surface ABSOLUTELY free of any old sealant and any type of
residue!! Remember you have to do this WITHOUT damaging/scoring
the metal!
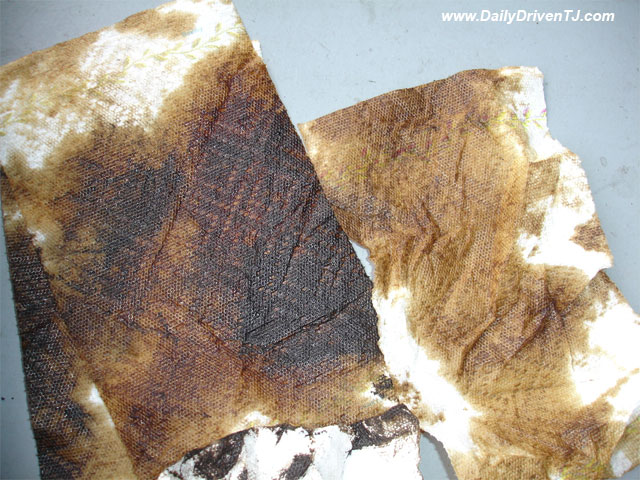
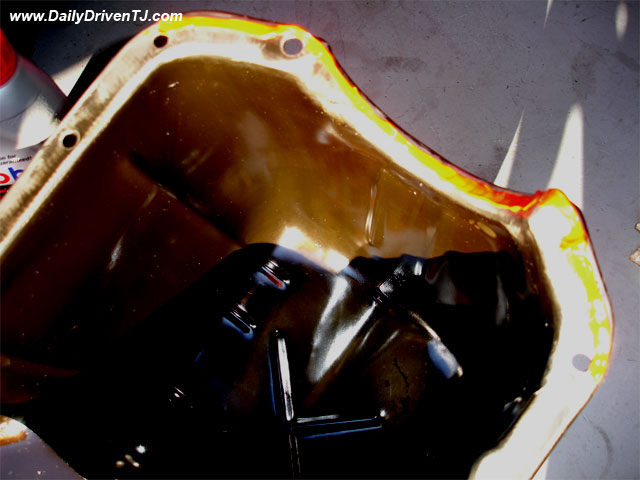
This is a picture of two pieces of paper towels.
Left one is used to absorb the oil from the bottom of the oil pan. The
one on the right is virgin oil. There was considerable amount of solid
stuck on the bottom of the oil pan.
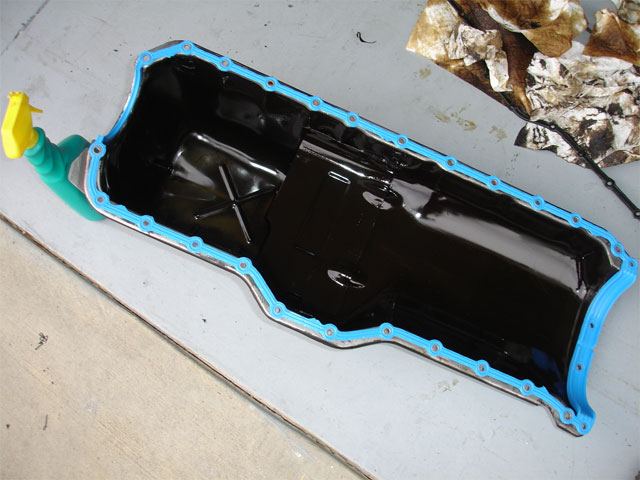
9. Start cleaning the oil pan. Remove the old
gasket and clean the mating surface with mild wire wheel. I cleaned the
surface with paint prepping agent once again. this gets rid of any oil
residues left behind.
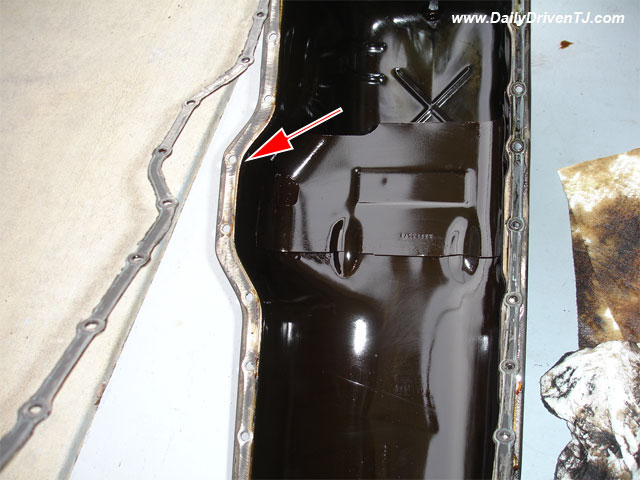
Here is how they should look after you are done
cleaning.
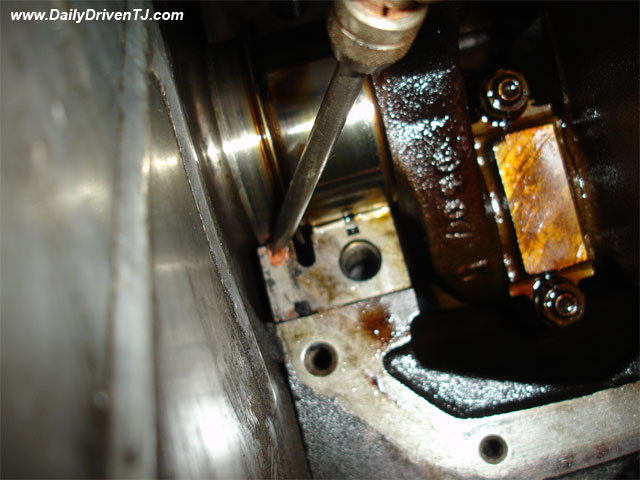
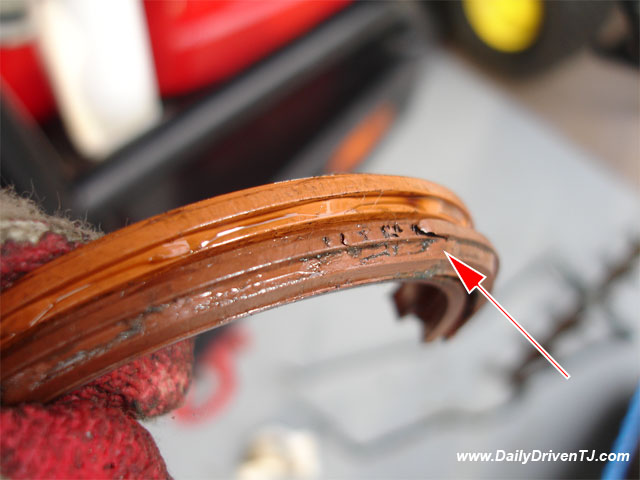
10. Install the upper half of the seal after
lubing with some engine oil. DO NOT PUT ANY SEALANT ON THIS SEAL! With the
seal's lip opening towards the front of the vehicle.
*Here is one crucial detail that every online
write up fails to emphasize. As you push in the upper half of the seal,
if you do not follow (as you push the seal) the circle channel
carefully, you will cut the seal and this will guarantee the rear main
seal to leak again.
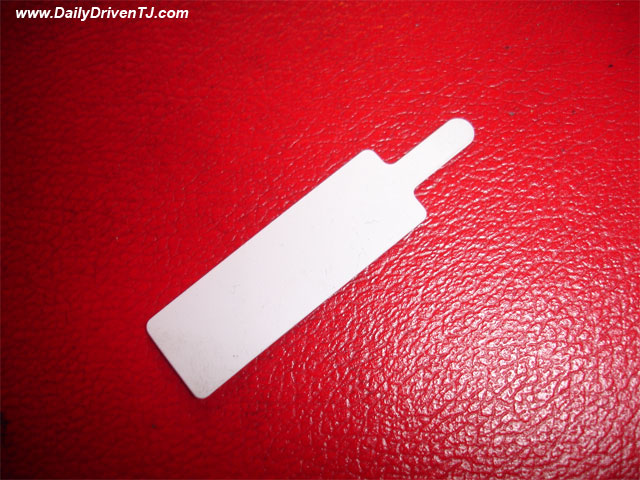
So how do you install the upper seal without
cutting it up? Fel-Pro included this nifty
thin plastic that you wedge between the channel and the seal to keep it
from getting cut. *I saw the same seal kit that included this plastic
piece, and some did not. Your mileage may vary.
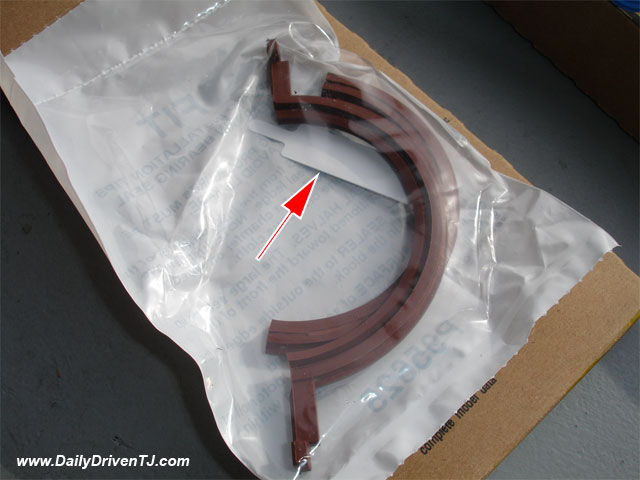
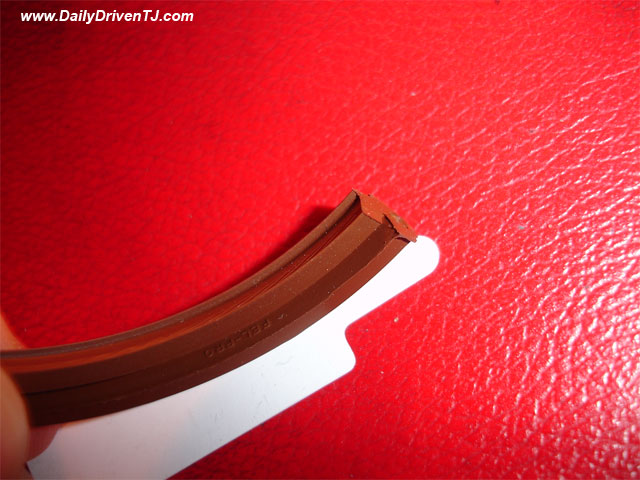
Notice the orientation of the seal where the mouth
of the seal opens toward the front of the vehicle. Once seal is in
place, simply pull the plastic out.
11. Start applying Chrysler Anaerobic Sealant or
Loctite 518 on the rear main bearing cap mating surfaces as
shown in the following picture. You DO NOT NEED MUCH. It is CRUCIALthat
you DO NOT get any of this sealant on the lip of the seal! Make
sure you compensate for the spread of the sealant once it is jammed
between the surfaces. Put some engine oil on the bearing!!
*Anaerobic Sealant starts curing after when it is
isolated from the atmosphere unlike most RTVs. Some may say they got
away with using RTV. They got away. I am not sure if you will. I also
noticed the anaerobic sealer had different viscosity compare to the red
RTV that I used on the oil pan gasket. BTW it is the factory service
manual that is calling for this Loctite 518 or equivalent. There is no
Loctite 518 available in the local part store which is the anaerobic
sealant. You will have to get this sealant from the dealer.
12. Install the main bearing cap and torque the
bolts to 80ft.lbs.
13. Install the bearing brace and torque the bolts
to 35ft.lbs.
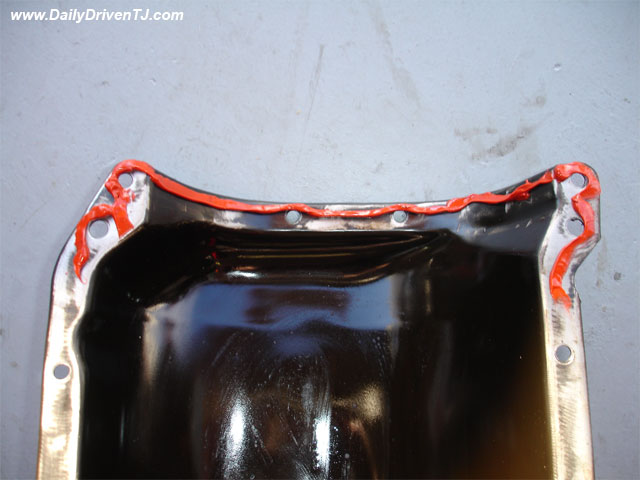
14. Place the oil pan gasket on the pan. I used
RTV on the crucial area at the front of the block and where the rear
bearing cap. I can use RTV here, because this is to seal something that
is not moving against anything. Notice that I used RTV on both the top
and the bottom of the oil pan gasket. *MAKE SURE YOU CLEAN THE MATING
SURFACE OF THE ENGINE BLOCK FREE OF ANY SEALANT AND OILY RESIDUE! I
used paint prepping solvent to clean the surface.

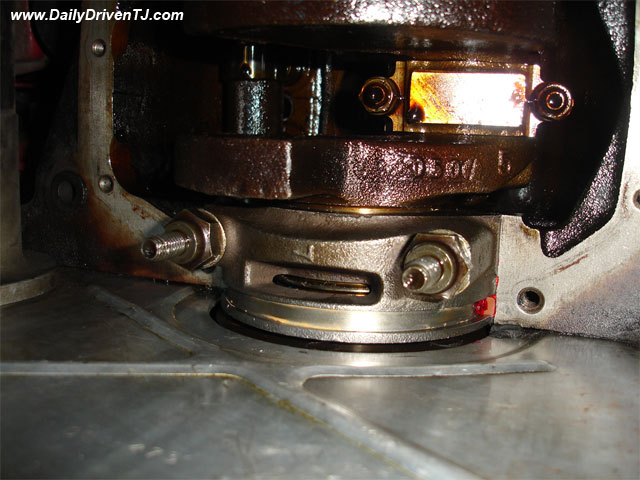
15. Install the oil pan but while doing so make
sure the rear main bearing cap's groove lines up with the oil pan
gasket. Also pay particular attention to gasket on the front of the
engine. It has built in grooves that has to sit just right. Tighten all
the bolts and nuts to 12ft.lbs.
16. Install the down pipe back on the header and
install the oxygen sensor back on the down pipe and JUST hand tight it
down. It just needs to be on there tight
enough so it won't fall back out on its own.
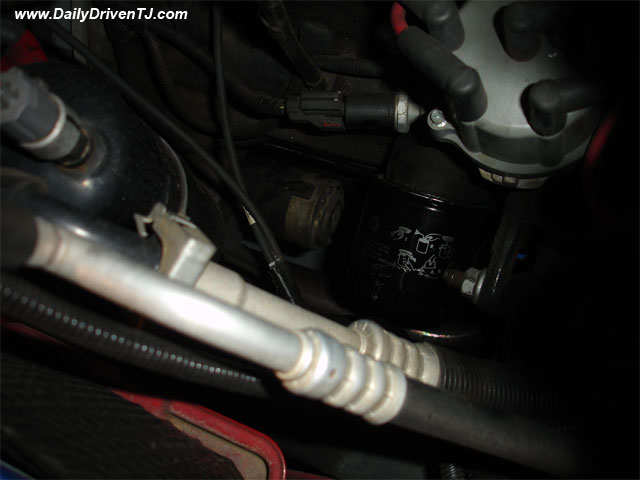
17. Replace the oil filter and put in 5qt of oil
and watch the dip stick to top off. *I learned my jeep even though it
was almost bone dry (which I left it to drain for two days while I was
working on the rear end.) it did not take the full 6qts. More like 5
and 1/2 qts total to have it read
"Full" on the dip stick.
18. Enjoy leak free engine! No more oil spots on
the driveway! Pat yourself on the back, you saved a few hundred
dollars!
Disclaimer
I tried my best to document as much as possible
along with pictures. I hope you find them useful. However, do use the
information provided here "as-is". DailyDrivenTJ.com or the
author does not warrant or assume any legal liability or responsibility
for the accuracy, completeness, or usefulness of any information, or
process disclosed. Use the information at your own risk.
|