

Click on thumbnails below for larger pics....
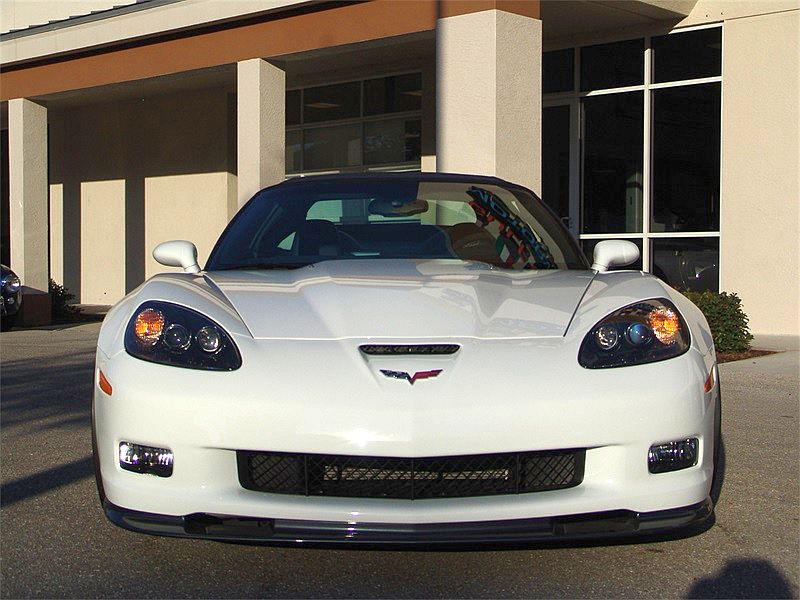
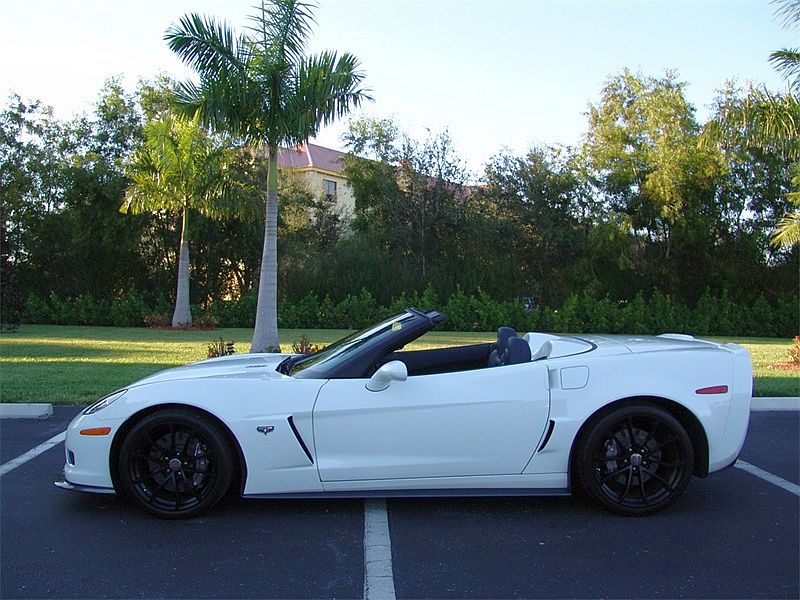
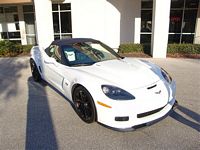
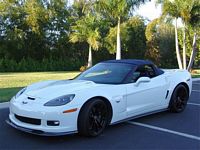
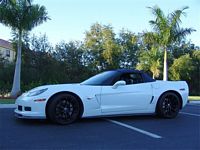
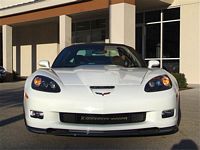
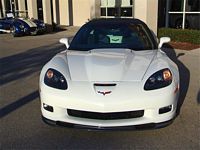
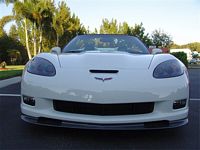
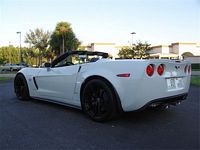
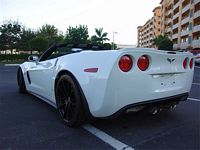
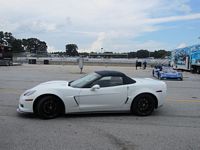
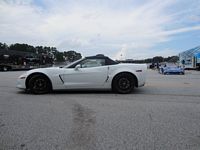
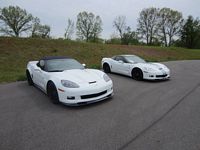
This 2013 Corvette 427 (1SC) was purchased new from Fred Gamble at Jim Ellis Chevrolet. This car was a 60th Anniversary Package car sans stripes with black wheels- exactly what I was looking for. My 2012 Grand Sport was returned to stock and traded in for this car. Fred and the Jim Ellis sales staff were great to work with and I would not hesitate to recommend them to anyone looking for a Corvette. That said, I made the mistake of not double checking all of the boxes in the car when I turned it in and left my iPod and 64GB flash drive in the center console, never to be recovered- draw your own conclusions. Window sticker is HERE.
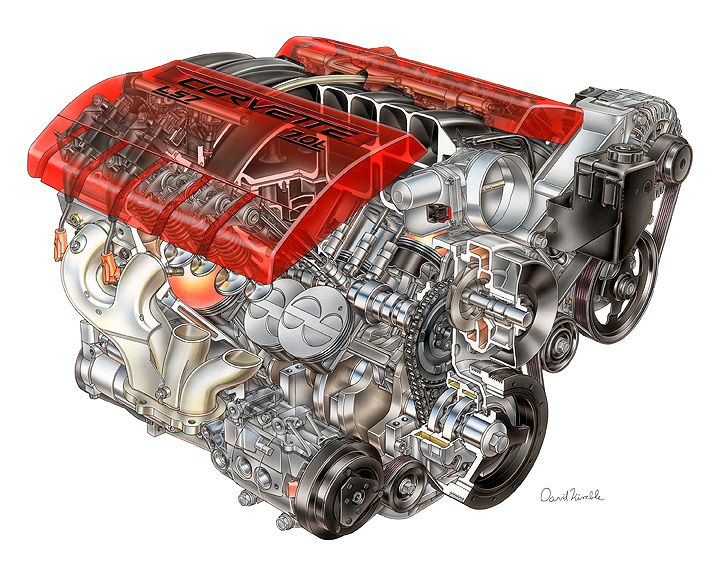
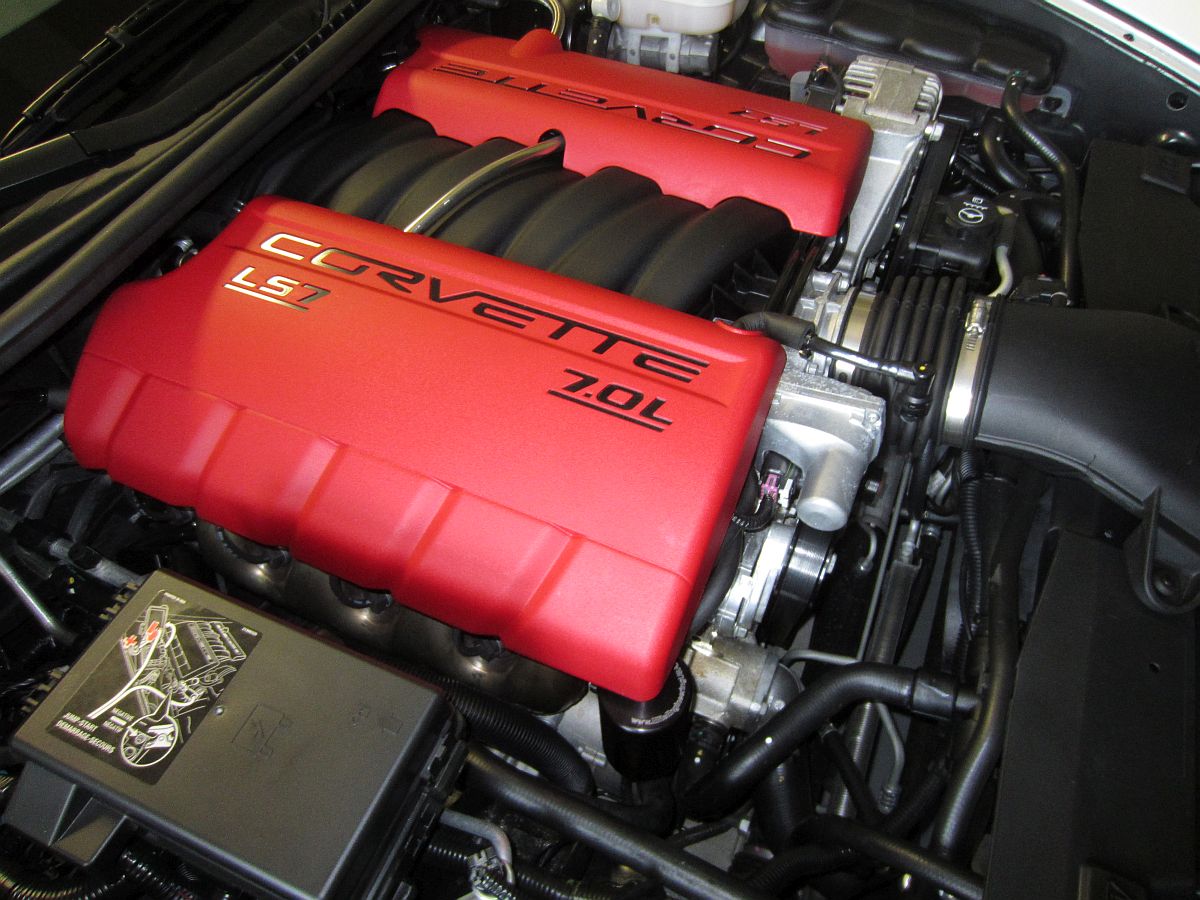
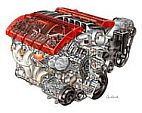
The 427 model was released in the final year of C6 production as a send-off of sorts, only 2552 427 models were made for the 2013 model year, a convertible with the LS7 engine (Hib Halverson's excellent LS7 write-up HERE); up until this model only available in the Z06. Press release is HERE, Hero Card is HERE, website I archived with videos is HERE.
The Lear Car2U remote has replaced Homelink and it can be painful to program- I had to buy another receiver from Liftmaster for my Genie opener to work. Programming instructions are HERE.
So how does the 427 compare to the Grand Sport? I thought on paper it didn't appear to be a huge difference but the torque, the sound, the feeling is something numbers on paper cannot explain- if you're happy with your LS3 don't test drive an LS7It seems like a much angrier, race oriented motor- PERFECT for me.
Some worry about the LS7 valve guide issues, motor failures still seem to be occurring after "the fix"....no worries for me, 100k mile warranty should cover anything that fails. Outside of that I will just bite the bullet and get the heads addressed before the warranty expires. GM's response to this LS7 Valve Guide Issue (archived HERE) and a thread with links to a map of shops that perform the wiggle test to determine if valve guides are within spec HERE (interactive map HERE) as well as registry links to those that have had the test. Hib Halverson's DIY wiggle test guide is HERE. EXCELLENT LS7 article on the Camaro forum HERE and on the LS7 heads HERE.


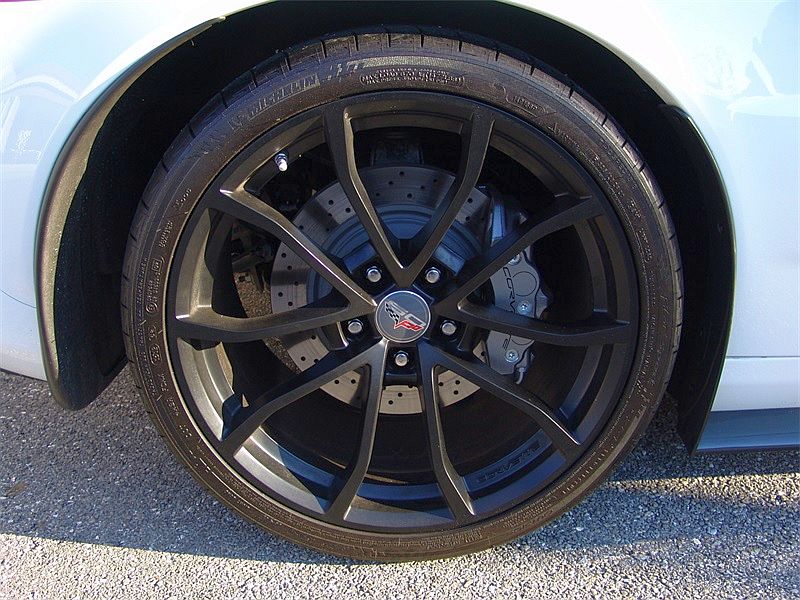
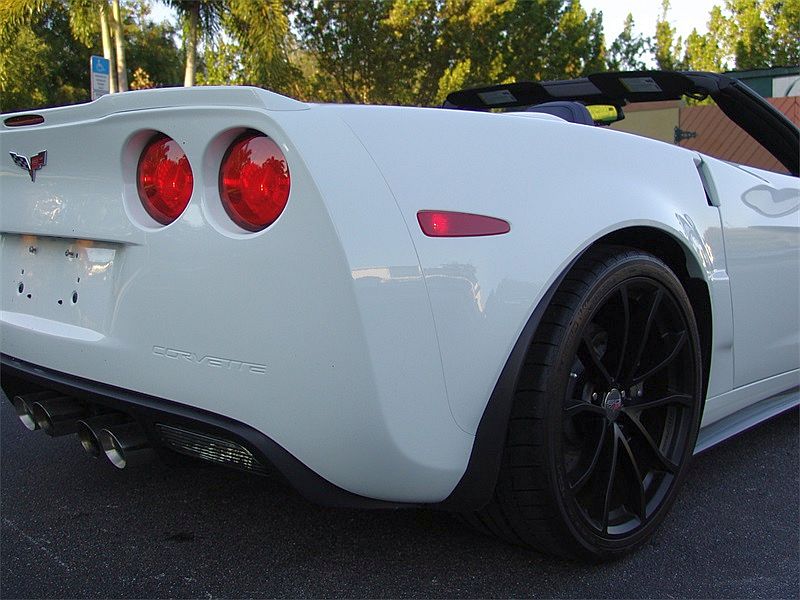
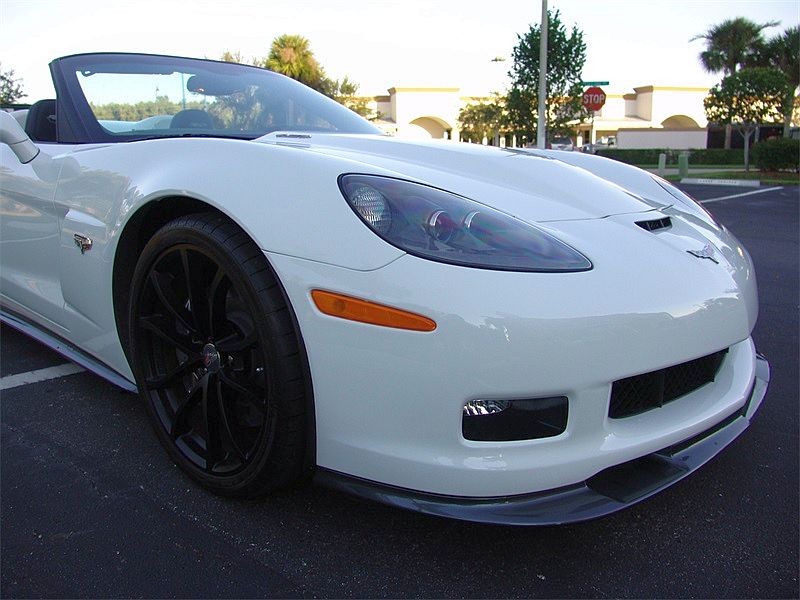
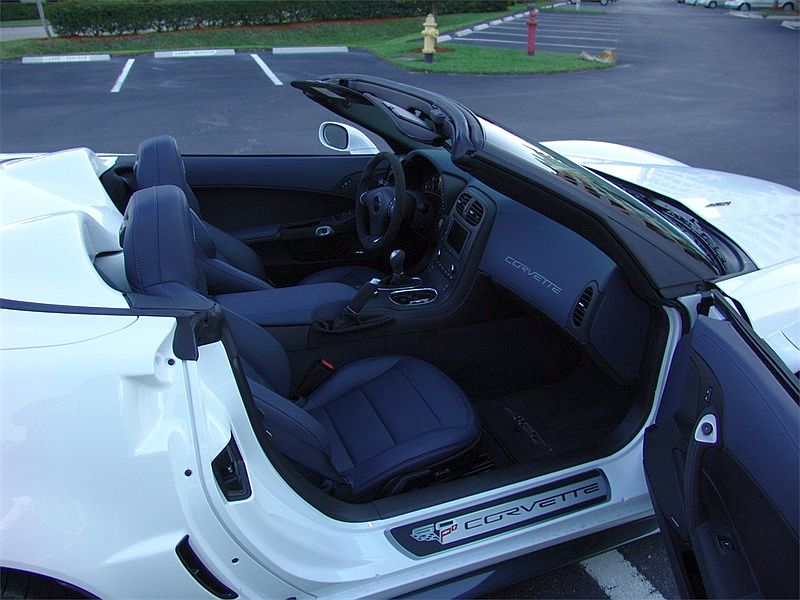
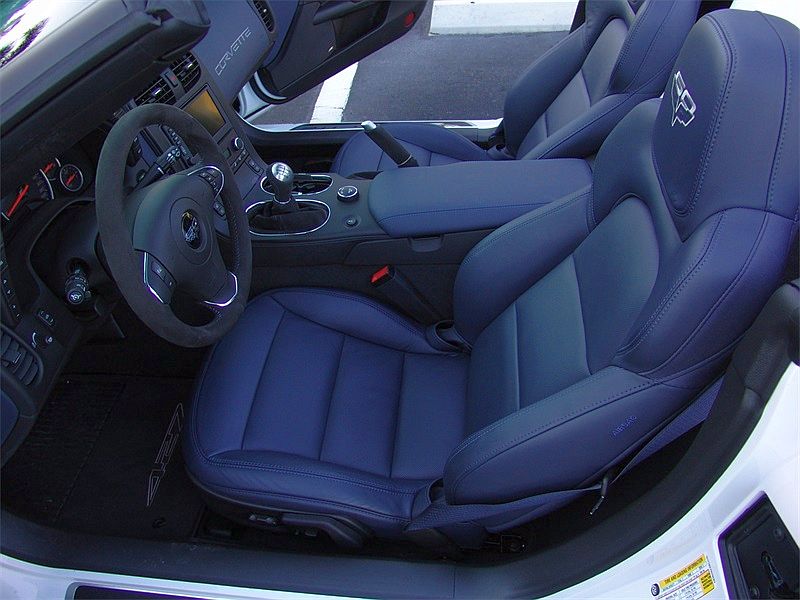
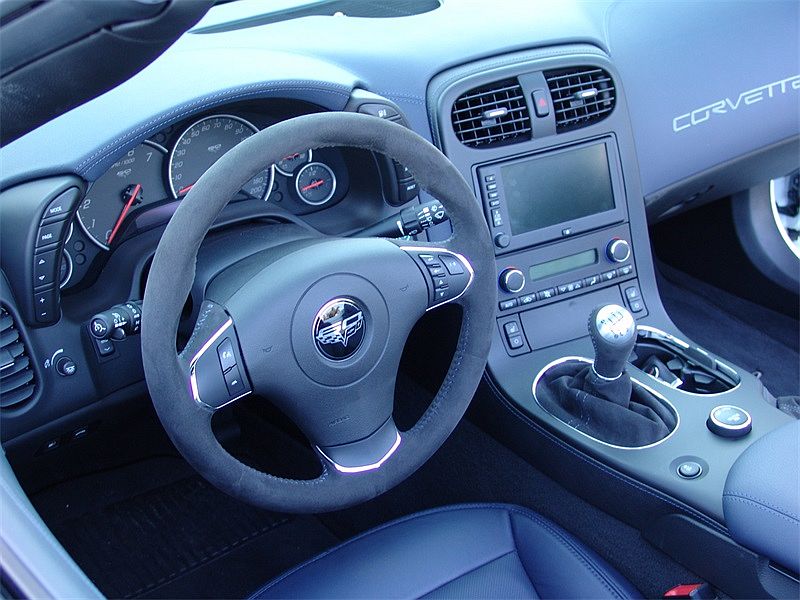
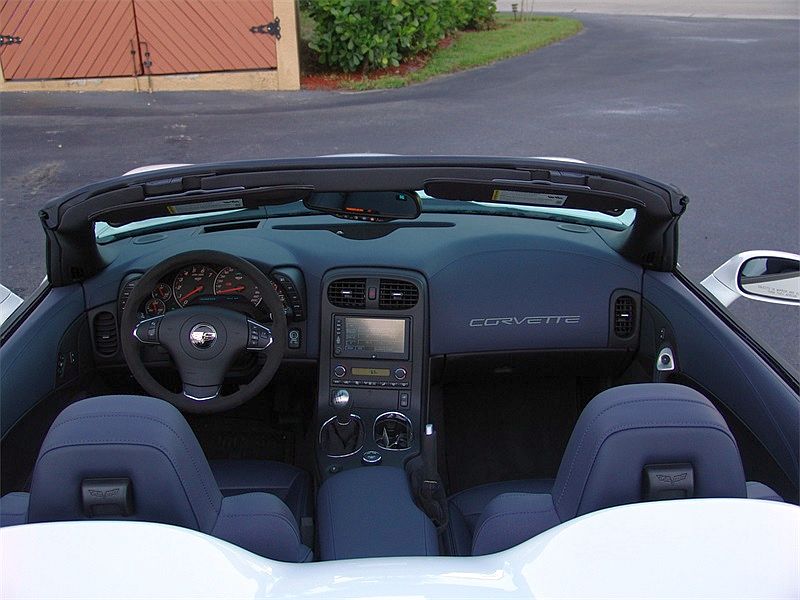
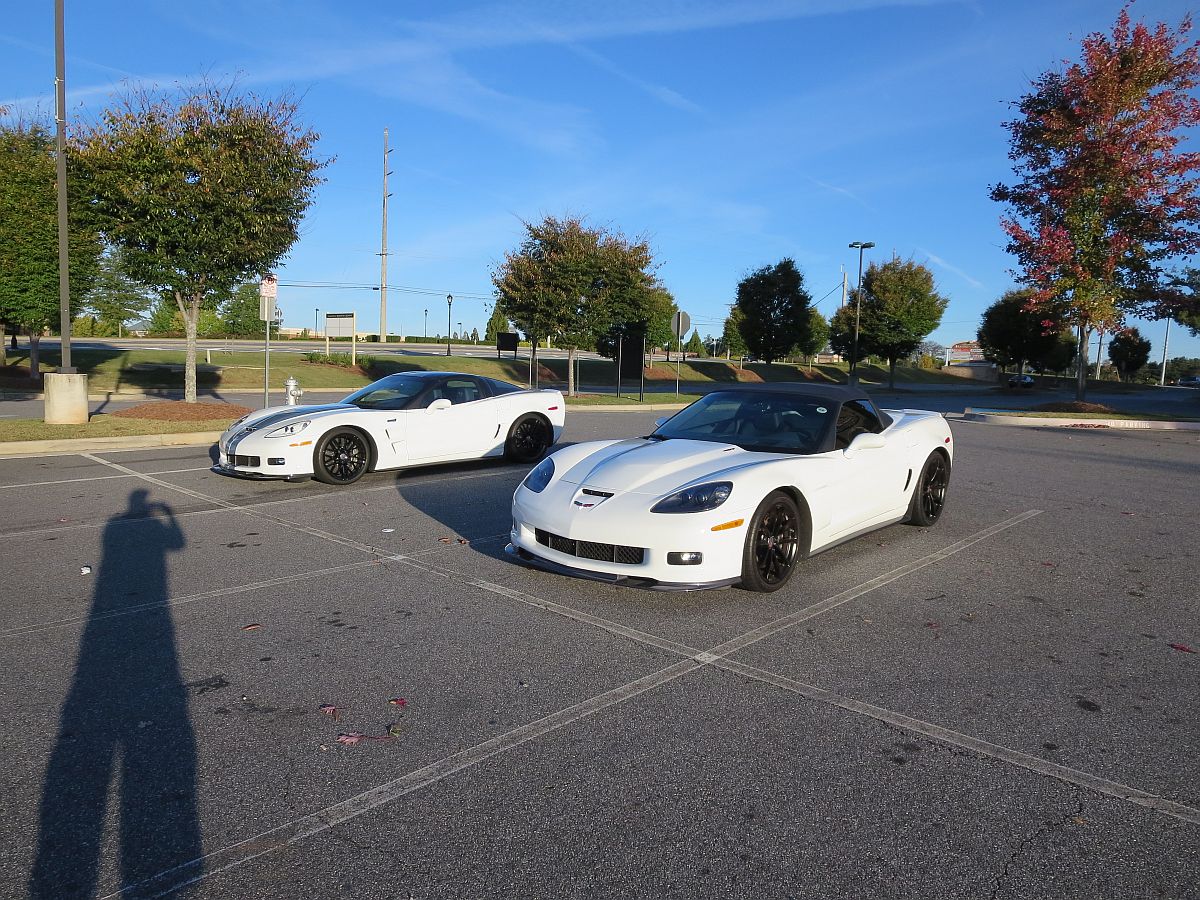
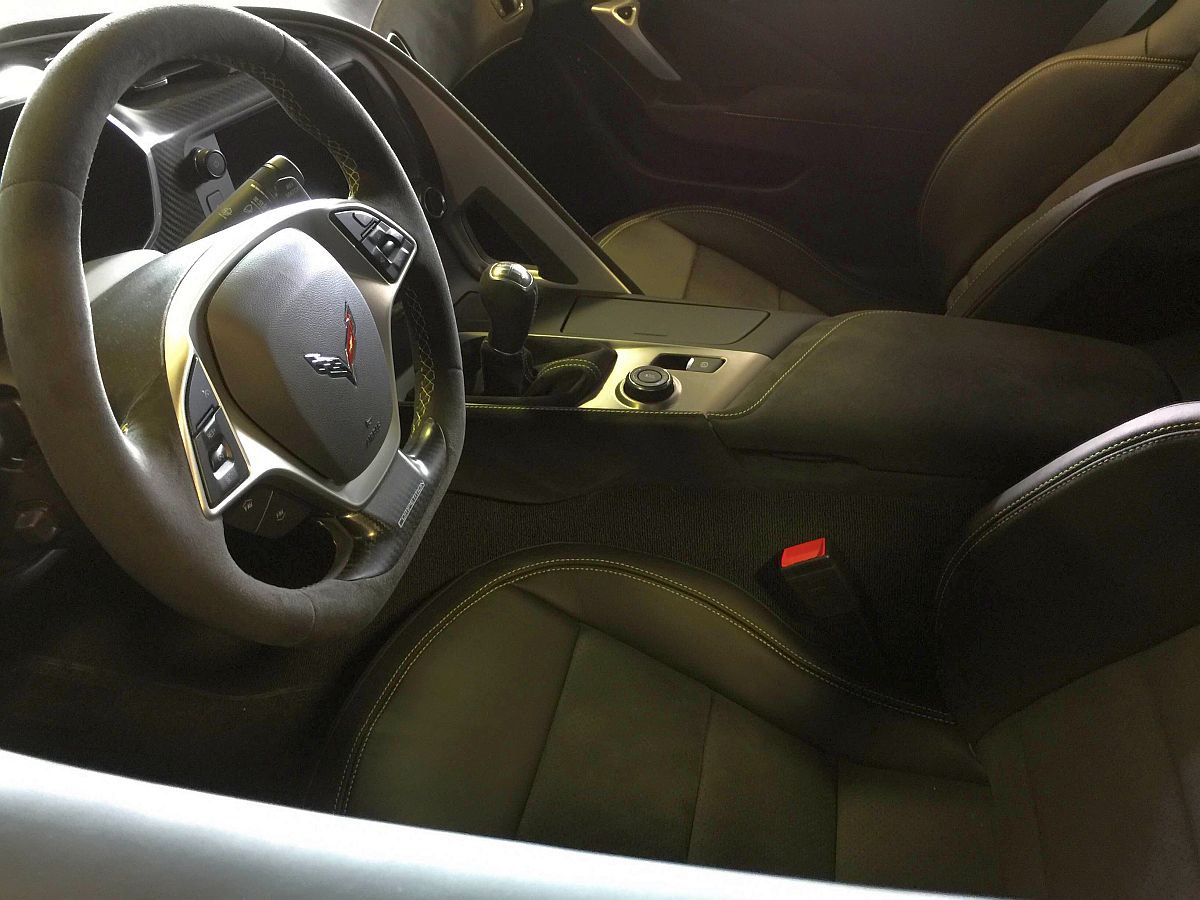
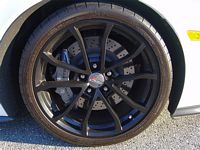
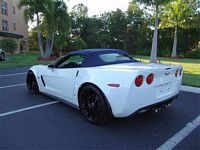
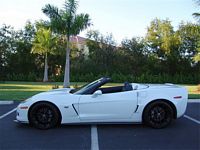
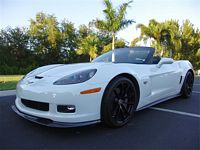
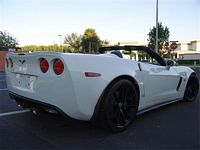
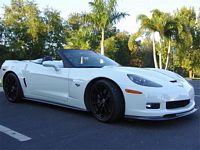
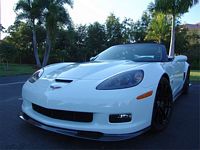
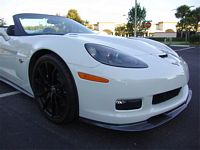
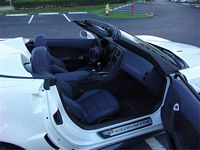
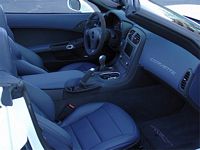
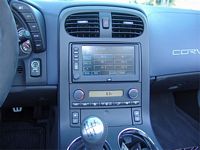
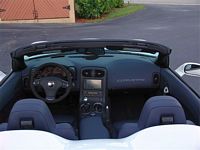
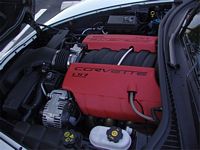
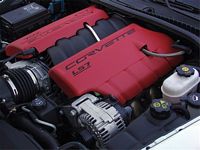
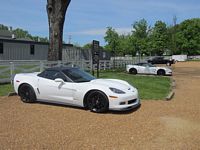
I did not have time between business trips to clean it and take pictures as delivered but found my car's twin at Gulf Coast Motorworks, so these pics are exactly what my car looked like the day it was delivered:


Some things swapped out the day I brought it home (from the Grand Sport) were the:
Odyssey PC1200MJT and the Eagle Eye LED Tail Lights
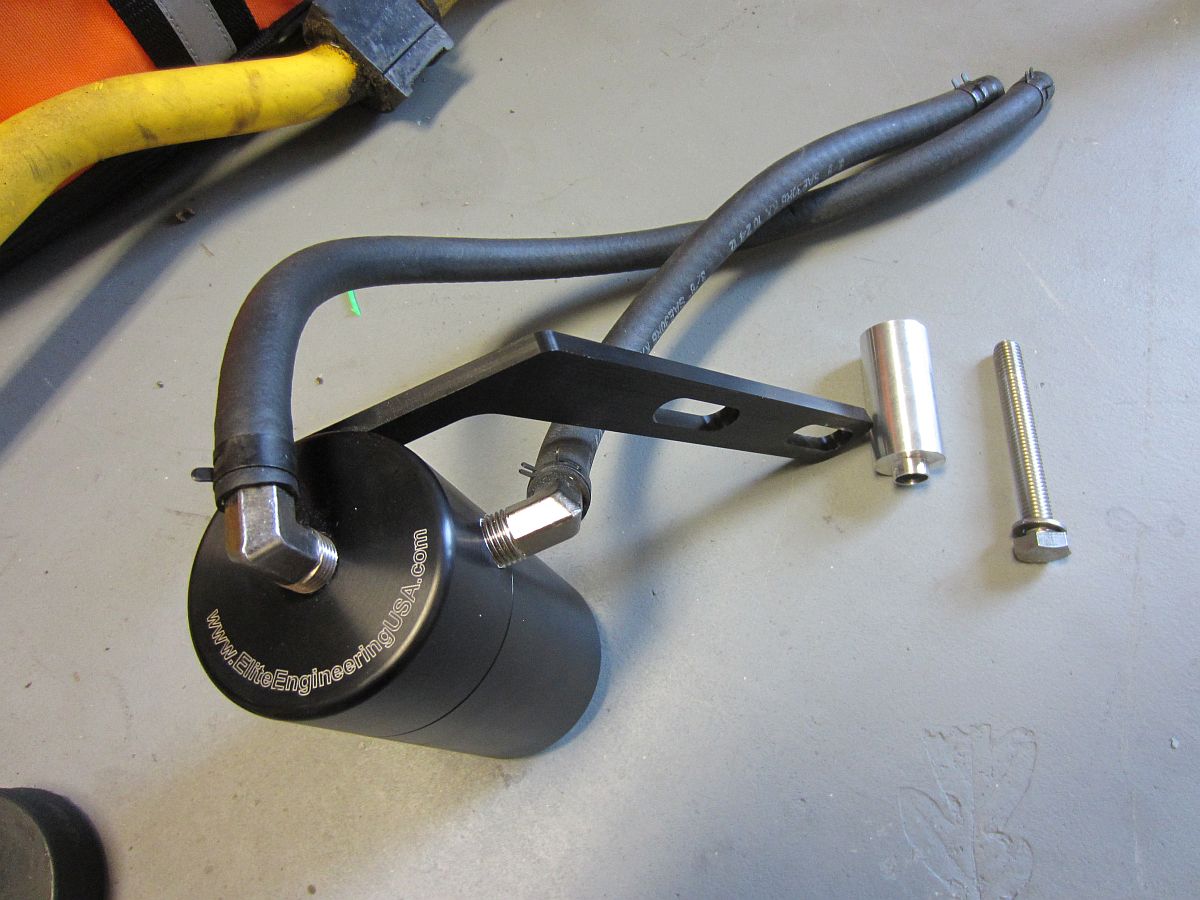
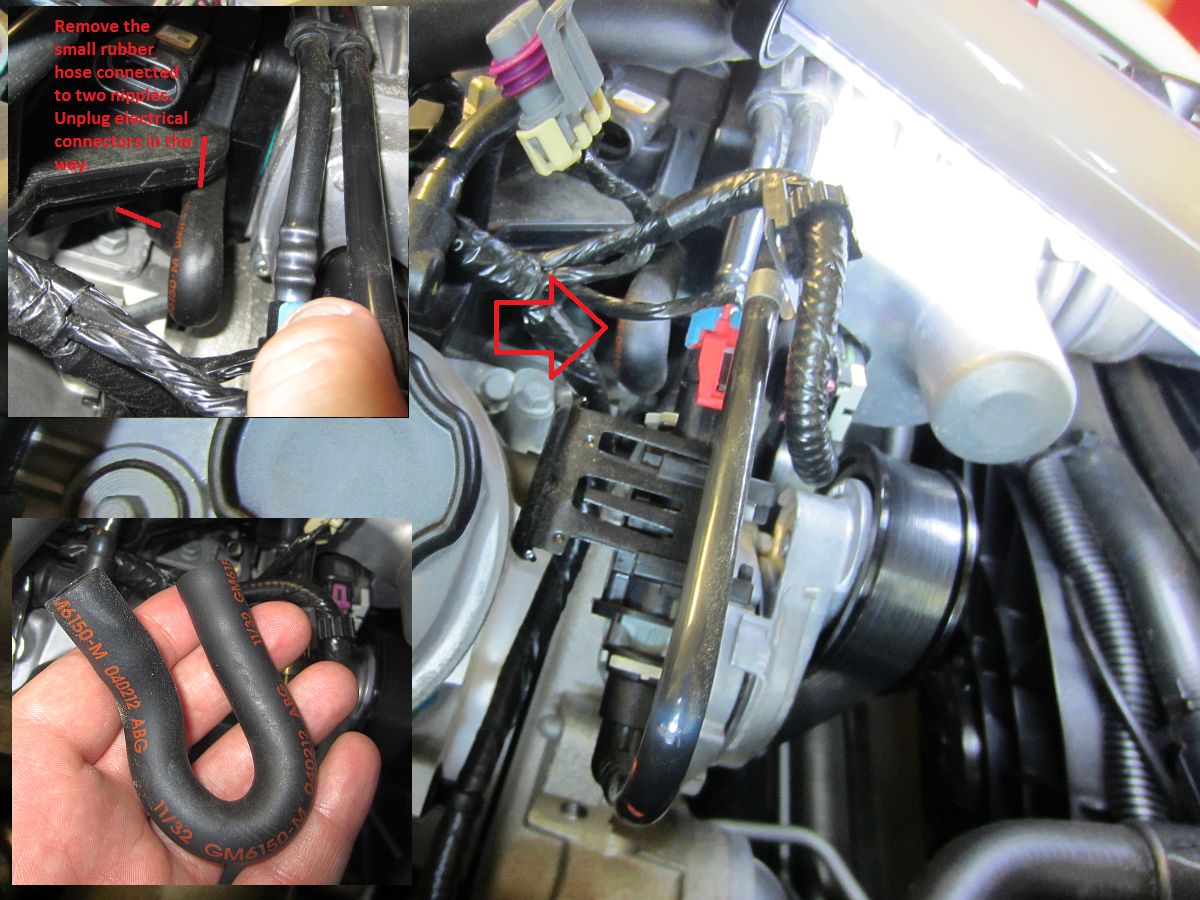
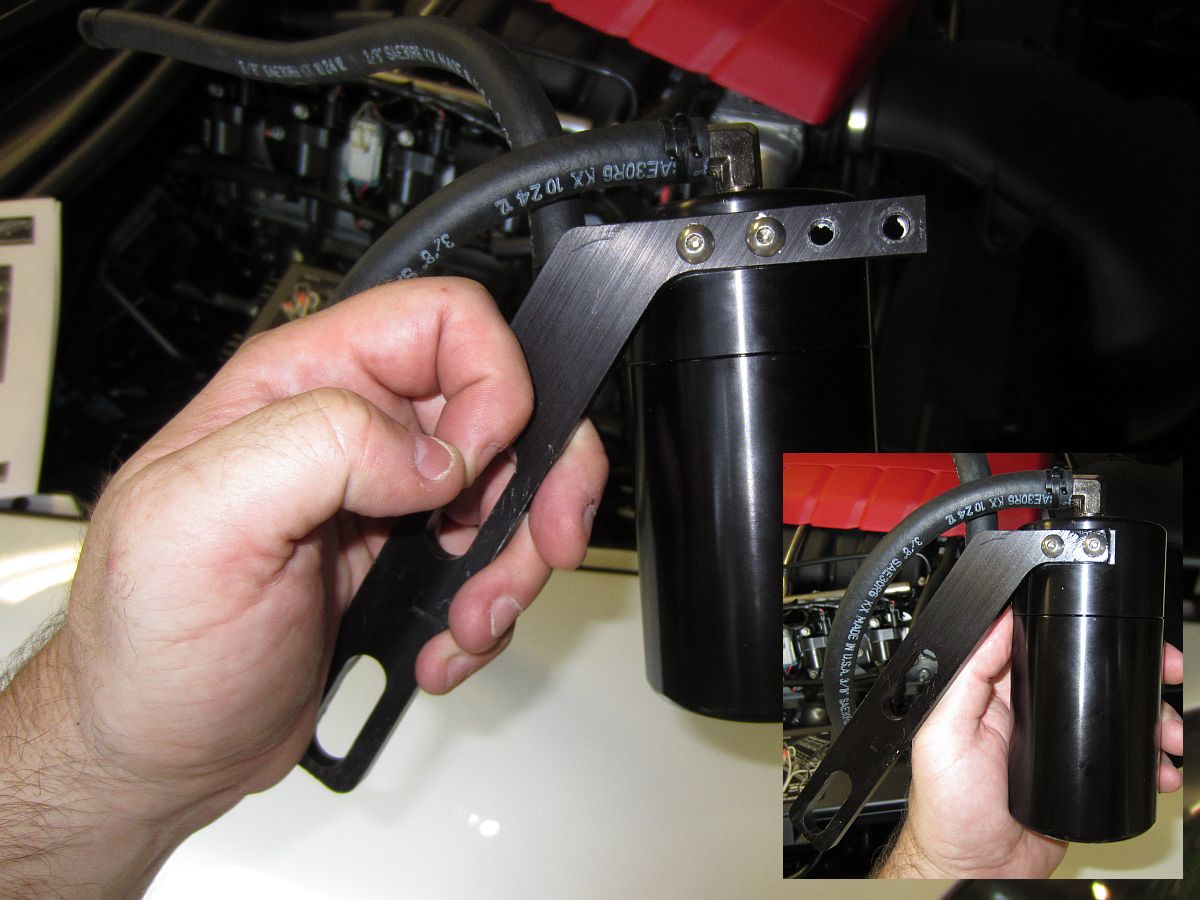
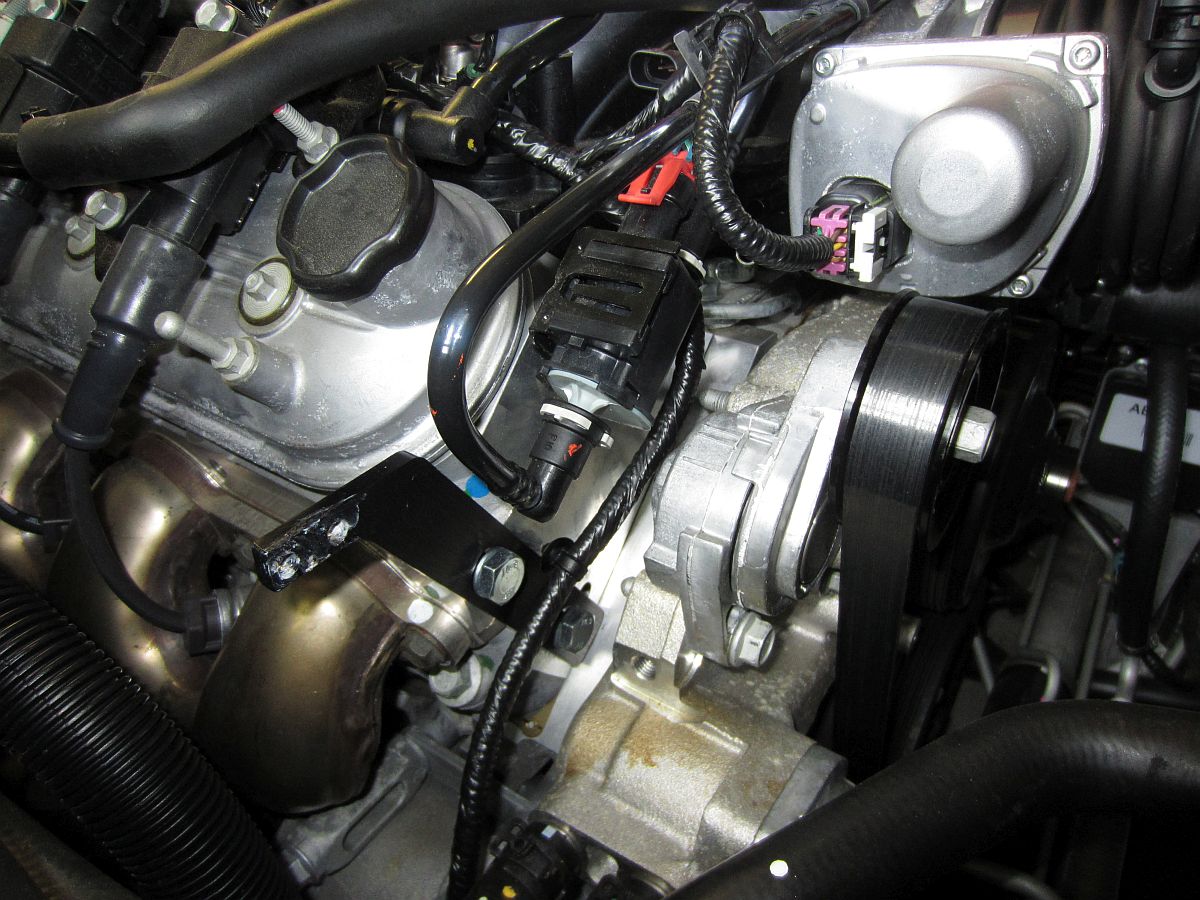
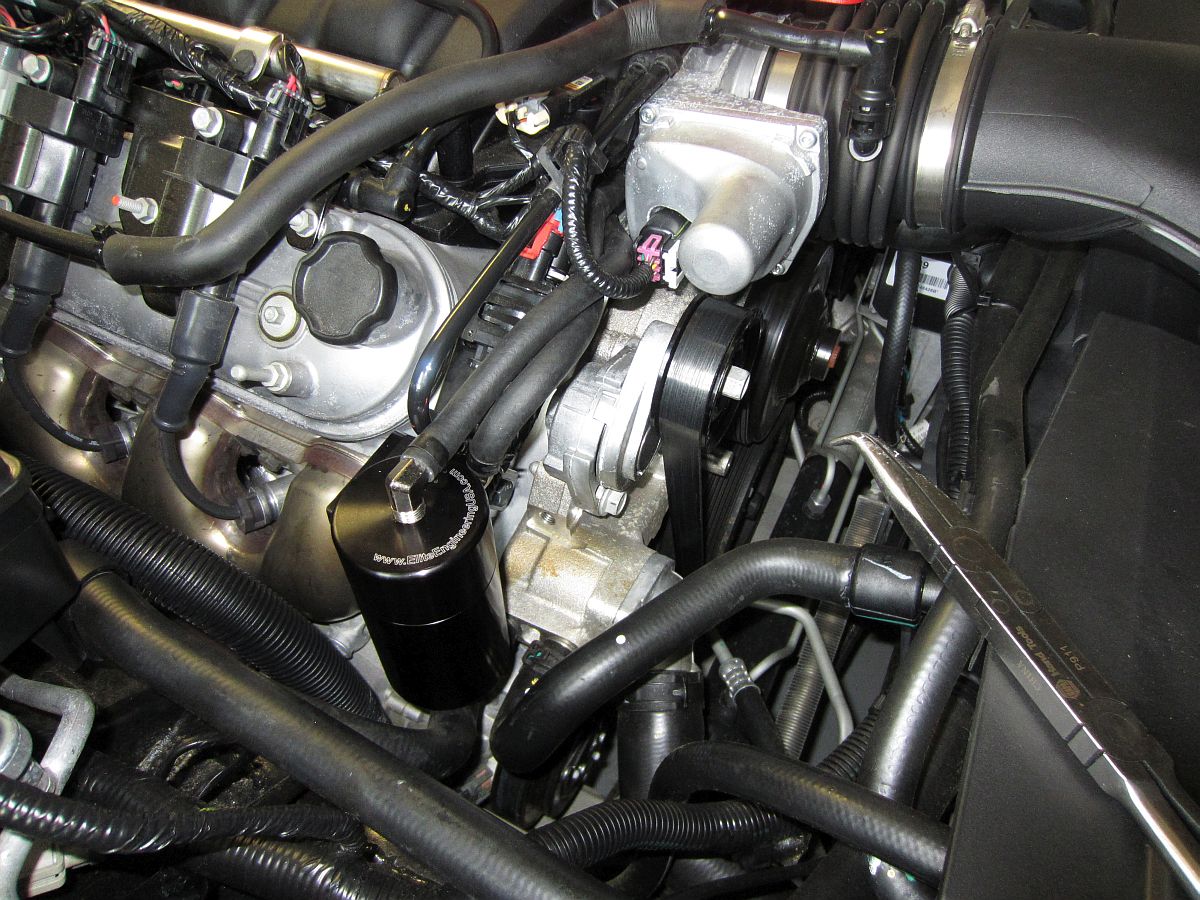
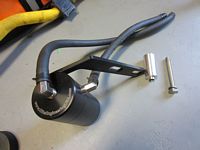
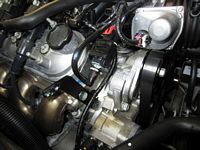
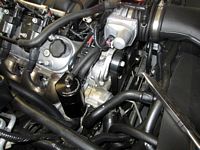
One of the first swapover mods from the GS to the 427 was the Elite Engineering PCV Oil Catch Can -
Installation Instructions HERE, Super Chevy write-up is HERE.
Since the GS had an LS3 and the 427 has an LS7, I had to modify the bracket to work on the new motor, the top needed to be shortened and I had to redrill the mounting holes and paint, but it turned out great. I also needed to source some new bolts to mount the bracket to the block and went with some standard HEX head bolts with washers, easy to access with a gear wrench. Once installed and everything was back in place it is hard to spot and looks OE.


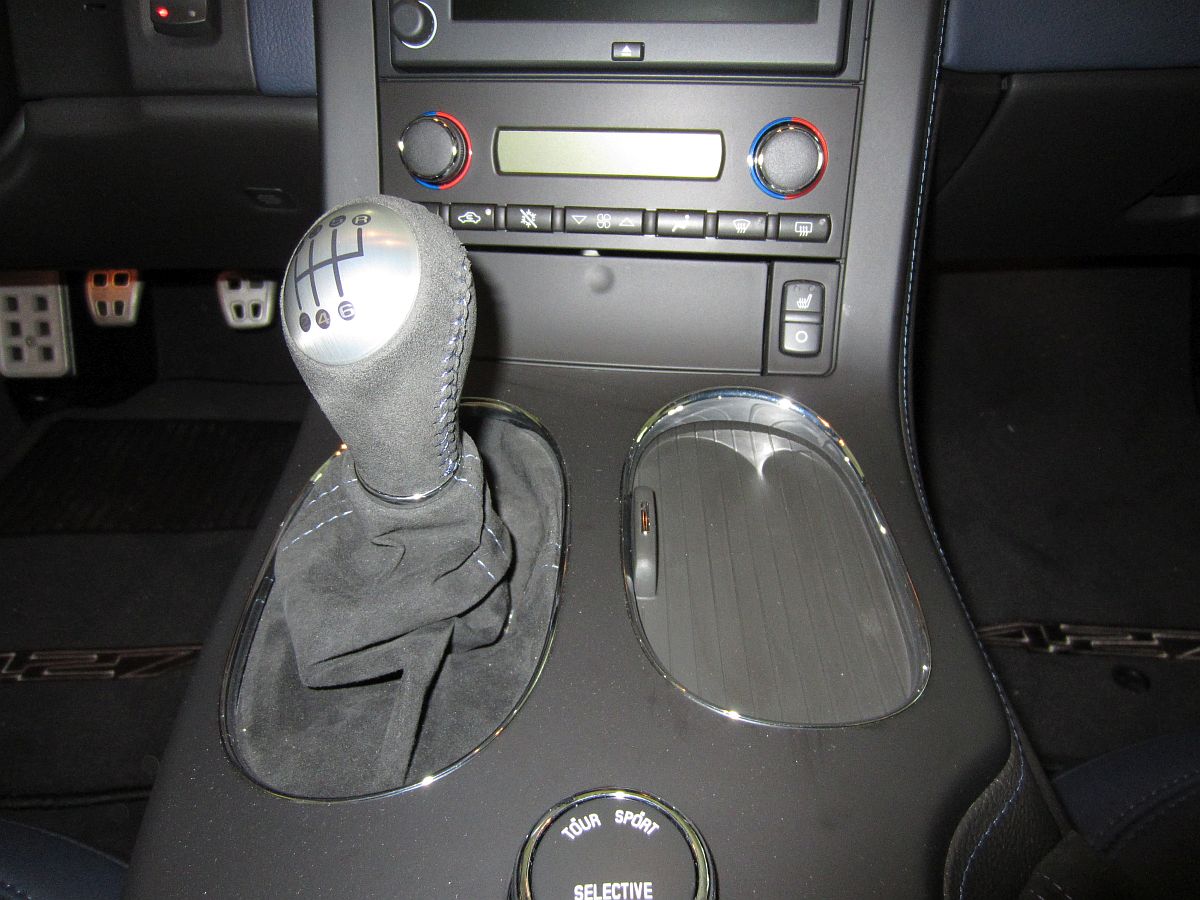
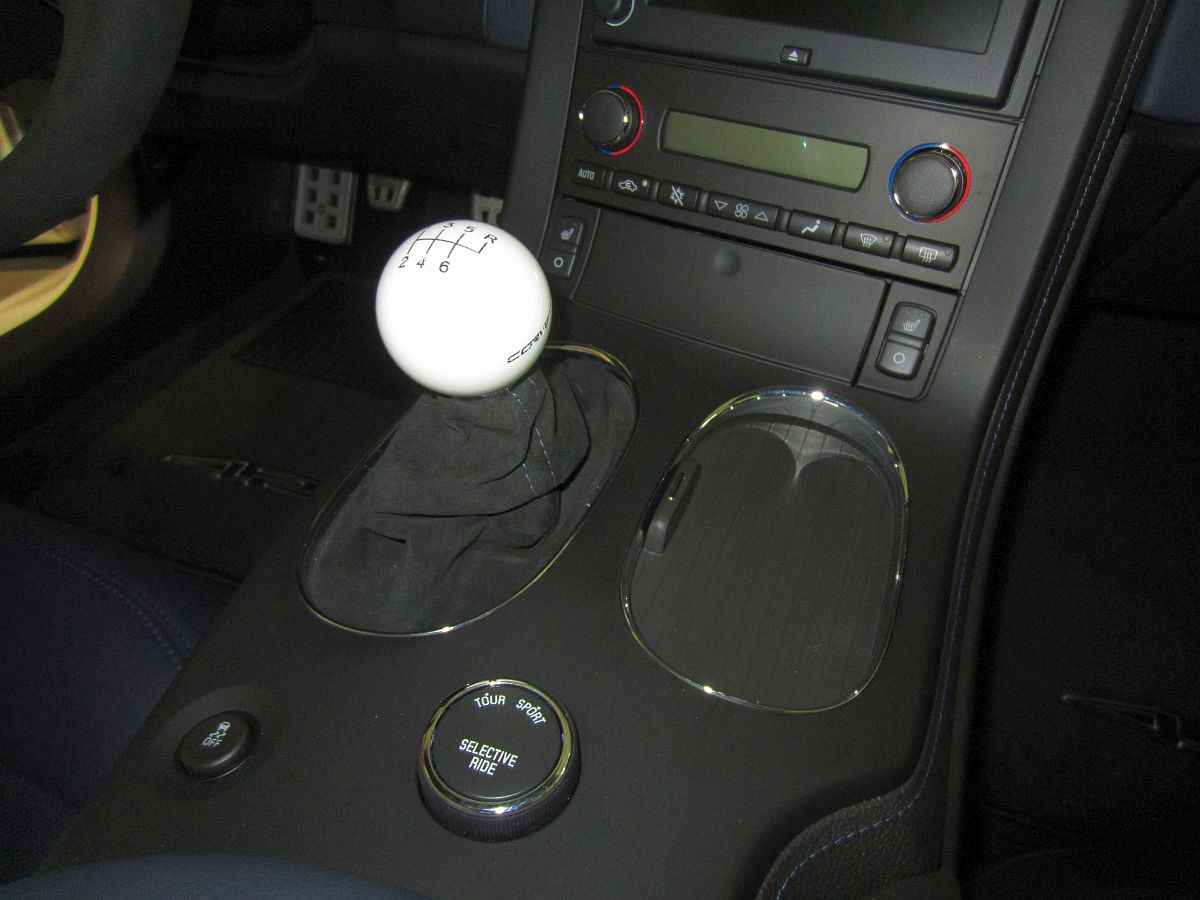
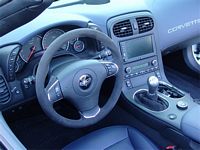
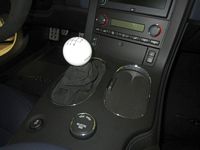
Next up, got rid of the horrible (IMO) shift knob and replace it with something more functional- a round white ball knob from Southern Car Parts. Not only is this more functional for me and my flat palm style of shifting, I was able to store the OE knob.
I have a write-up on my GS page shift knob installation HERE.

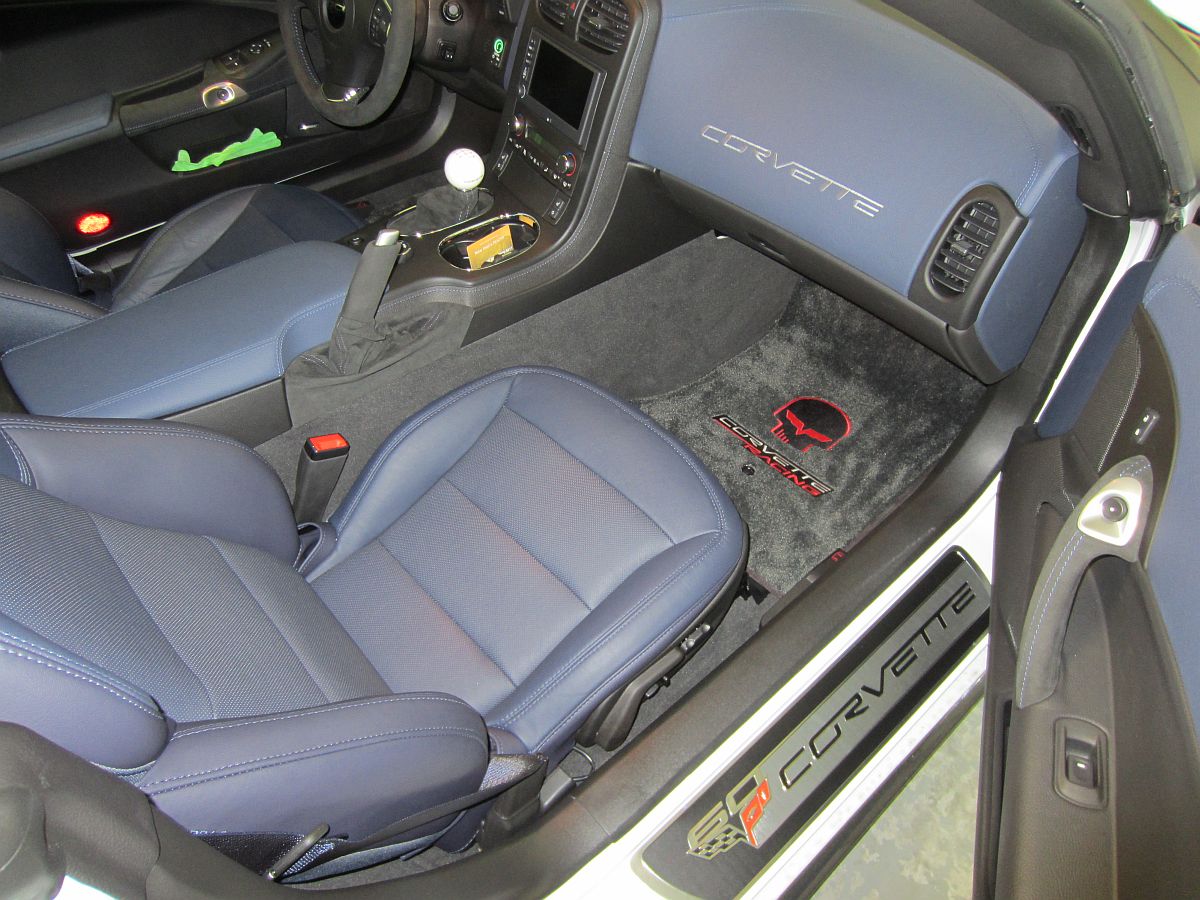
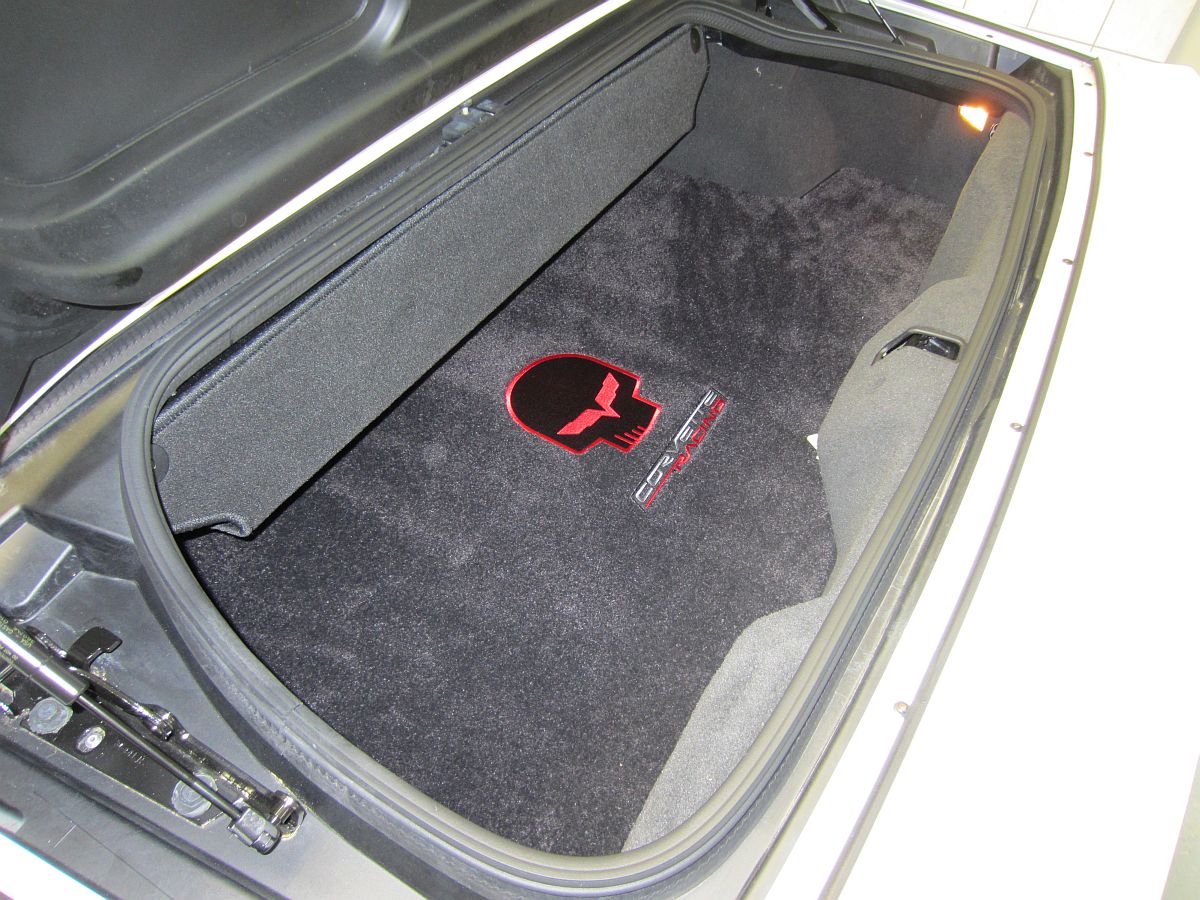
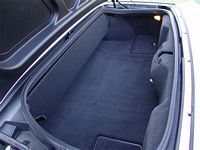
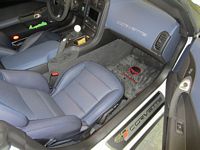
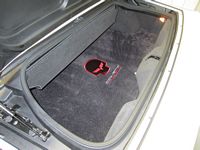
I sold the cargo mat from the GS and bought one like it for the 427, Lloyd Ultimats "Jake" Corvette Racing cargo mat from RPI Designs. I used the matching floor mats from the GS that were purchased from East Coast Corvettes.
The story of Jake can be found HERE.
At first I was leery of using the Red/Silver Jake mats but the red 427 matches so.....
The mat retention hooks in my 427 were no where close to where they should have been on either side causing the OE mats to bunch up on one side and even worse with the Lloyds mats. I ended up finding this thread on CF and moved mine in a similar fashion, now they are perfect.
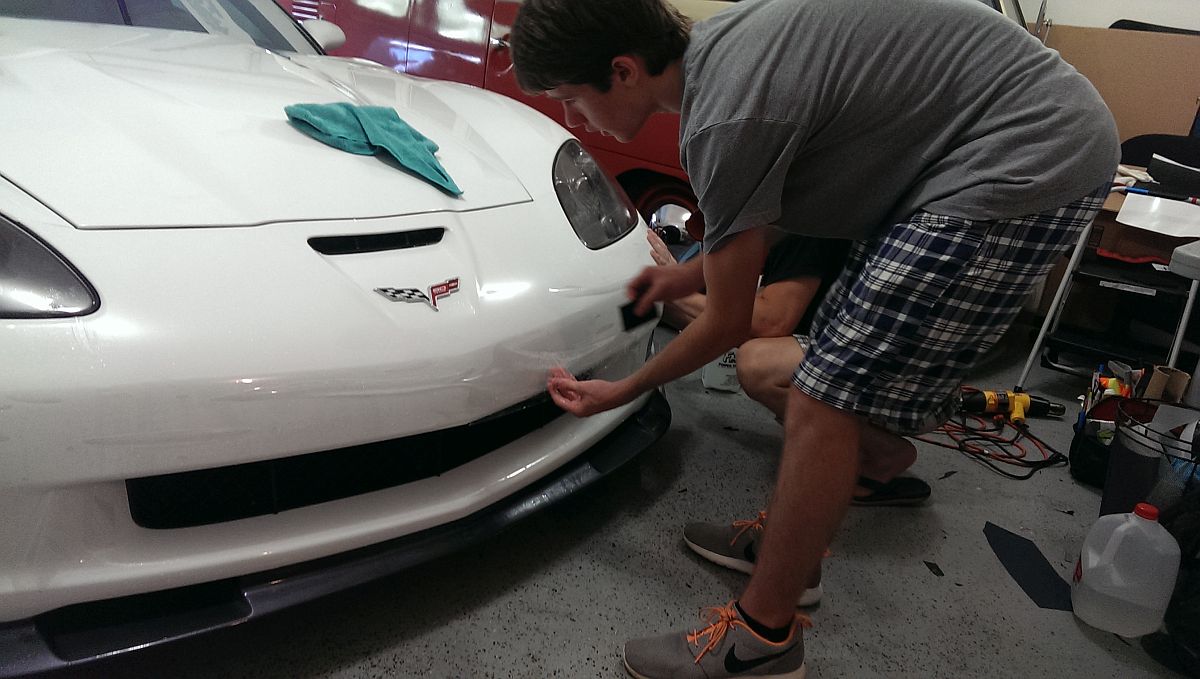
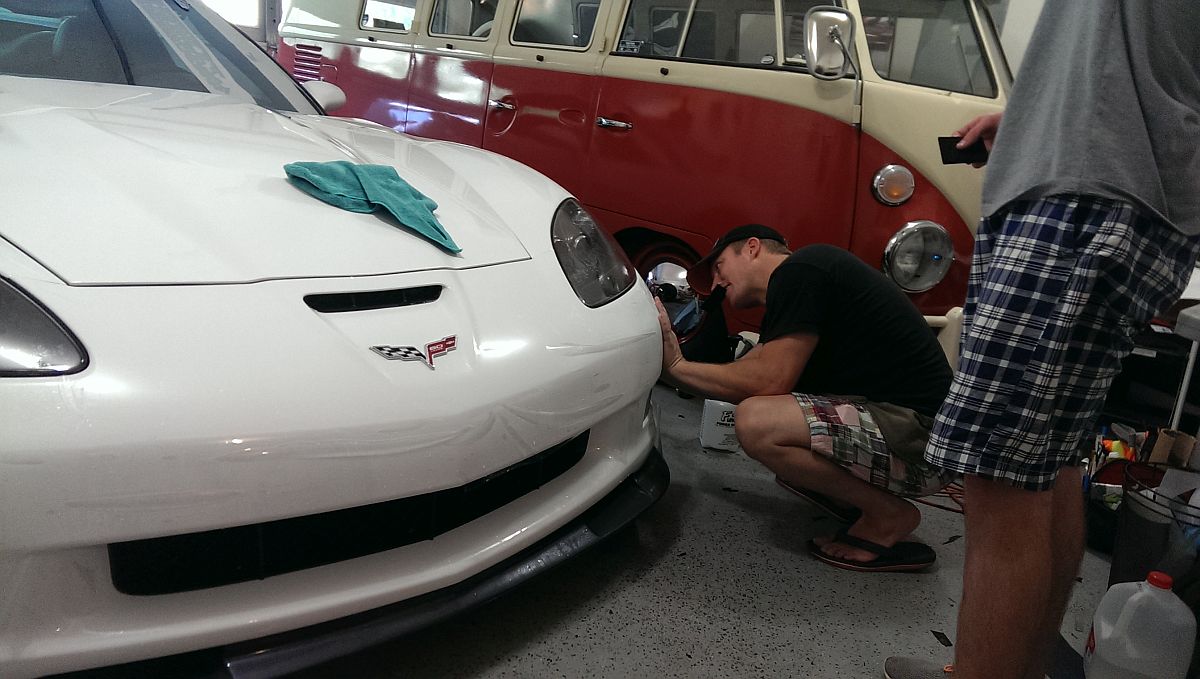
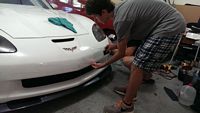
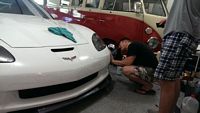
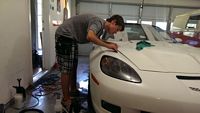
Clear bra installed by Keith Chulick at Chuforia Graffix, he uses Suntek film and it is invisible compared to the 3M film I had on the other car. My son had done a few jobs with Keith and assisted with the installation. Prep took almost as long as the clear bra installation, the car was washed and dirt was steamed out of hiding places to prevent issues with the film, a clay bar was used to get rid of some of the black specs of rail dust (or whatever it was) before installation started. Attention to details like this is something I can appreciate, I wouldn't hesitate to recommend Chuforia Graffix to anyone

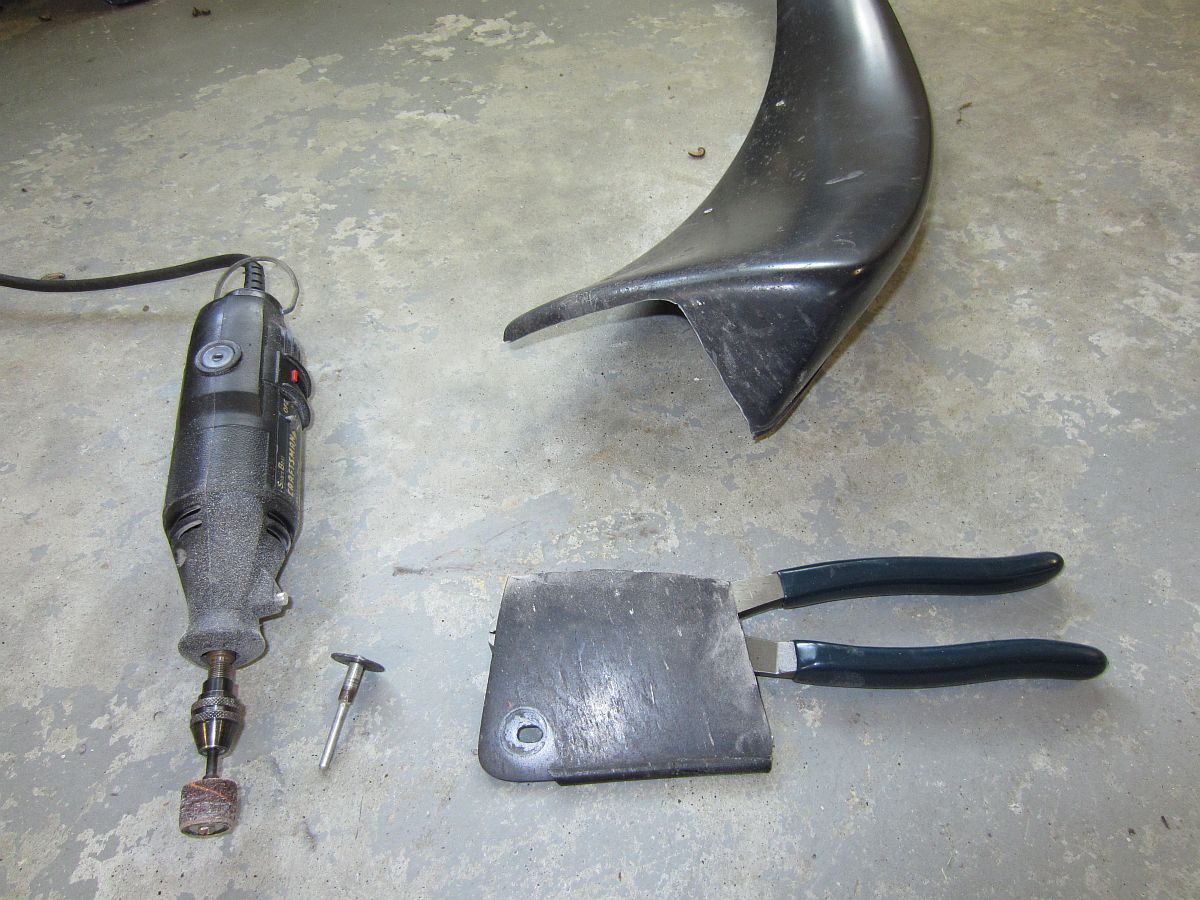
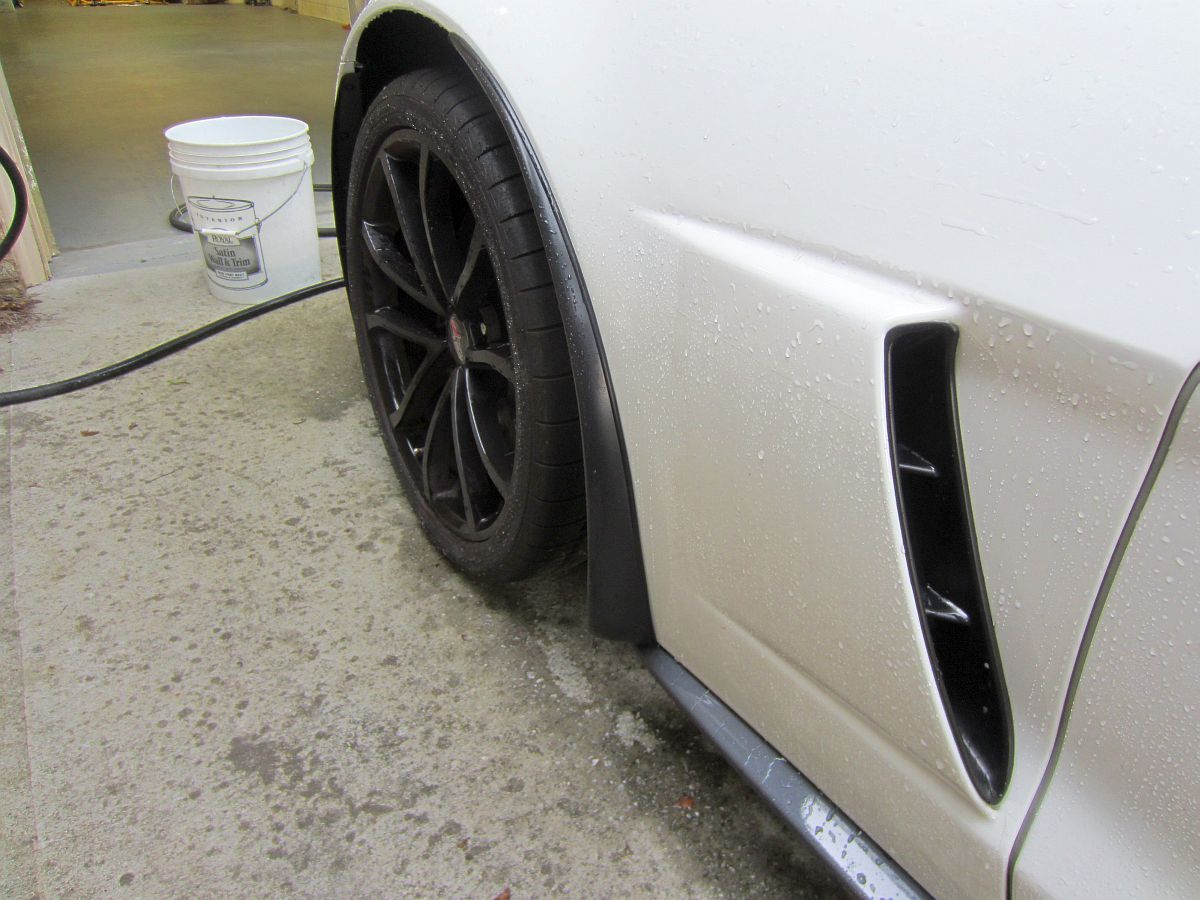
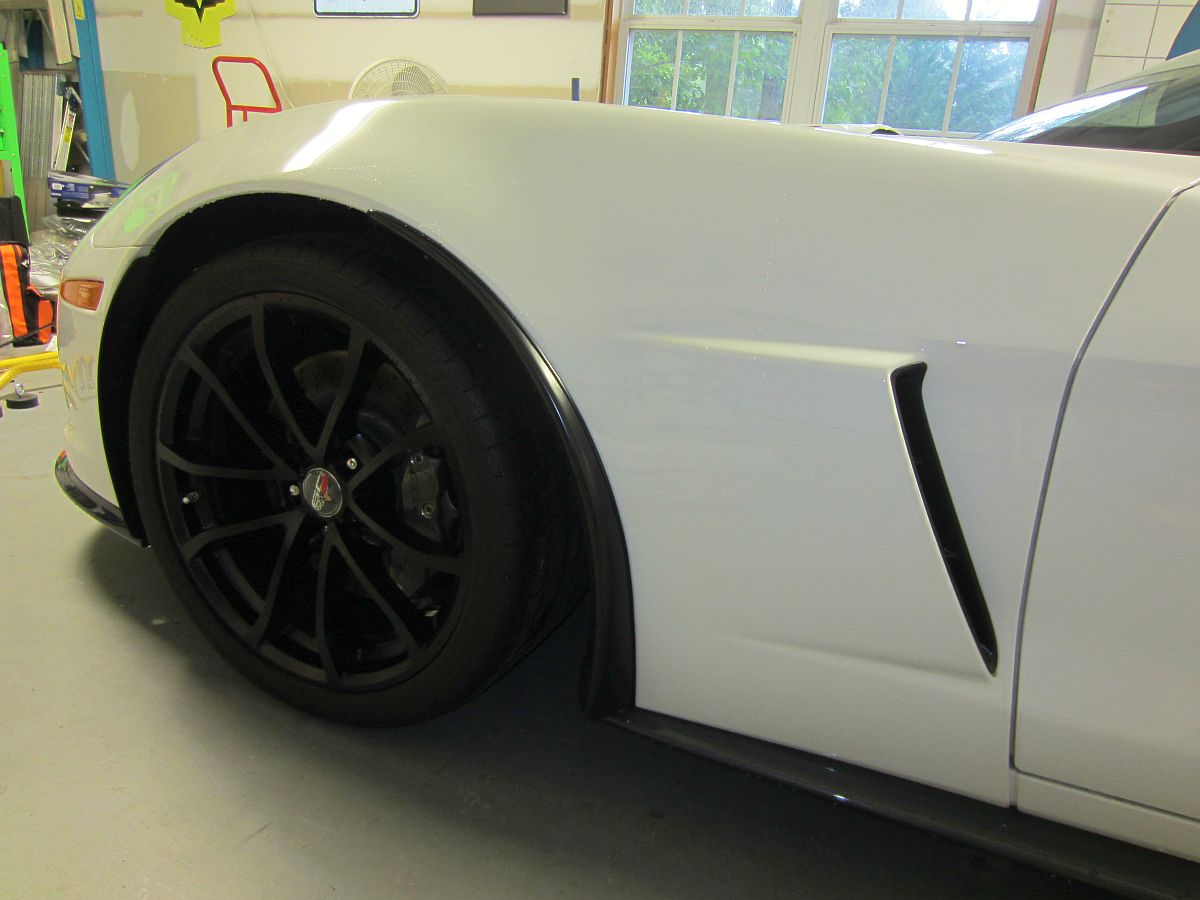
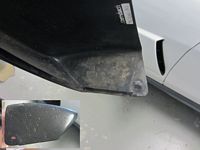
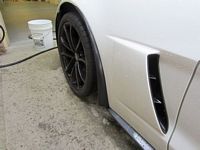
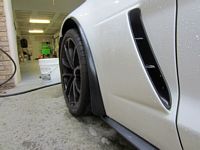
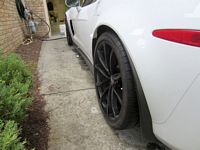
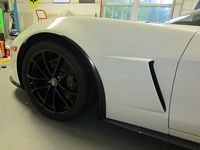
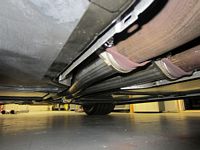
So, the question I had asked myself since buying the 427 with the carbon fiber skirts is this: should I try modifying the Apsis splash guards I already had to work with the skirts or sell them and buy new ones at additional cost to me. I decided modification was something I would attempt to save some money and because I was curious if it could be done without removing the side skirts. I had seen some posts of people that were able to use the normal Apsis splash guards during skirt installation but removing these skirts is painful, a lot of rivets have to be drilled out with no guarantees the skirts won't be damaged in the process. The key to all modifications is cut less than you think and fit accordingly by taking small amounts of material off by sanding....and I still took a bit too much off but not noticeable unless you're under the car, and I guess this will provide a place for water, etc. to drain out. I used a Dremel with cutoff disk to make the cuts I thought were required and then a sanding drum to further remove material as these were fitted and to chamfer the cuts so no edges would cause paint issues. They actually fit better on this car this way than they did on the GS, go figure.
My GS installation is HERE along with some other links and installation instructions.
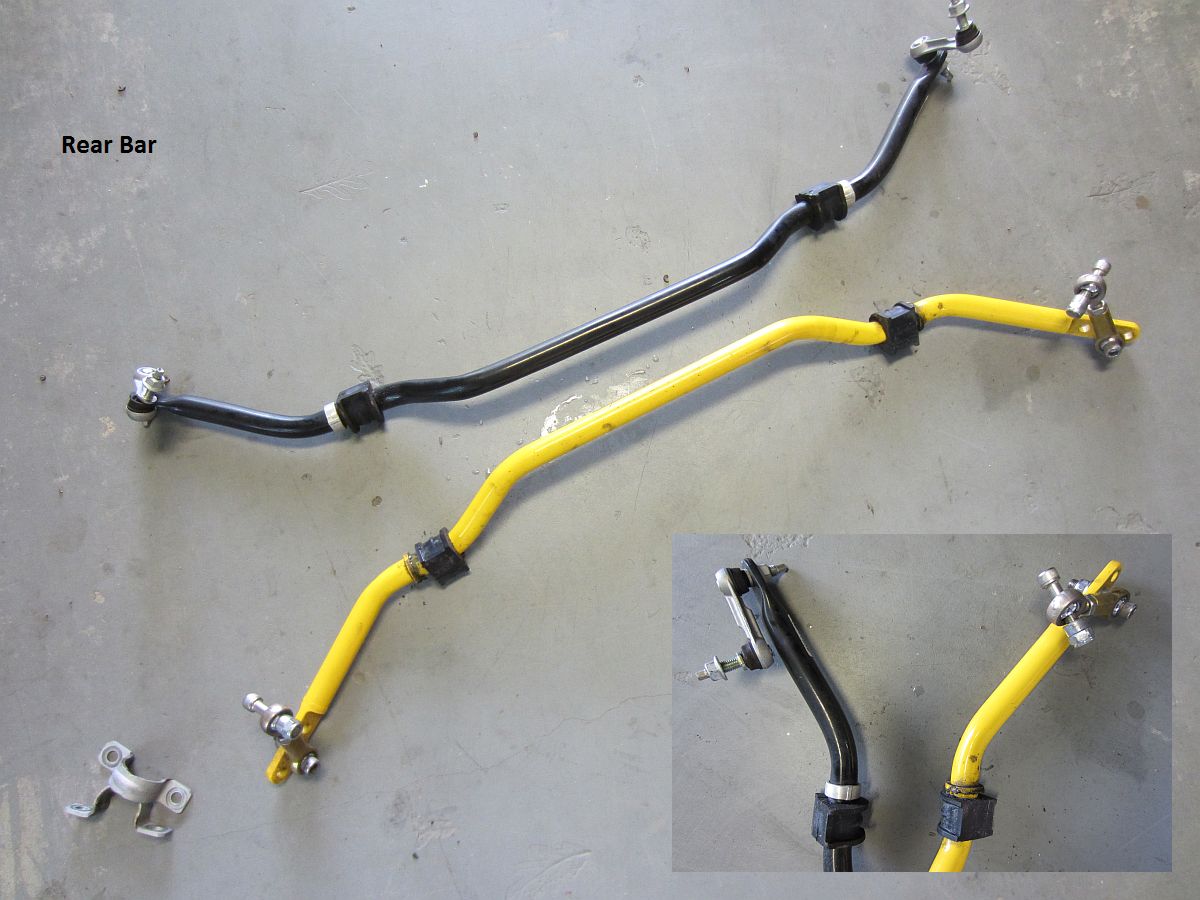
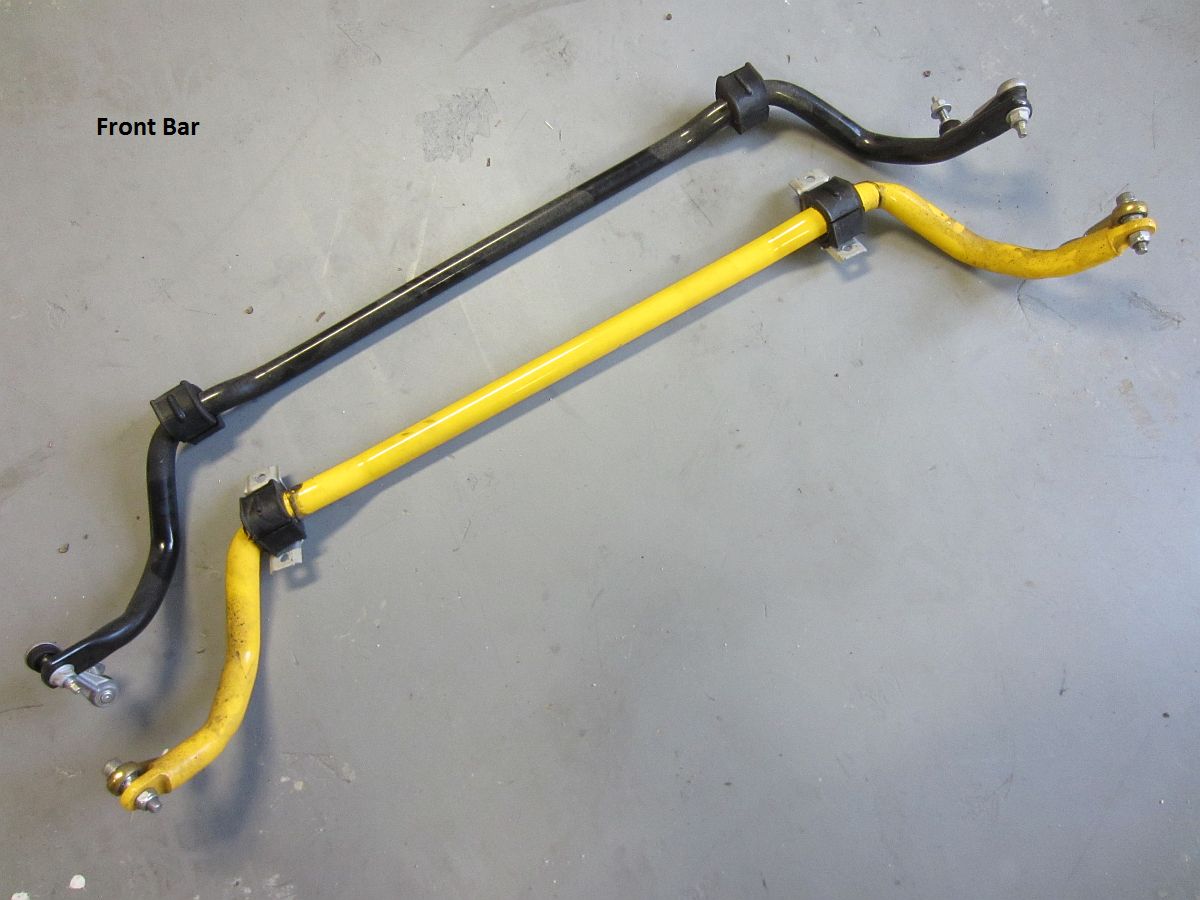
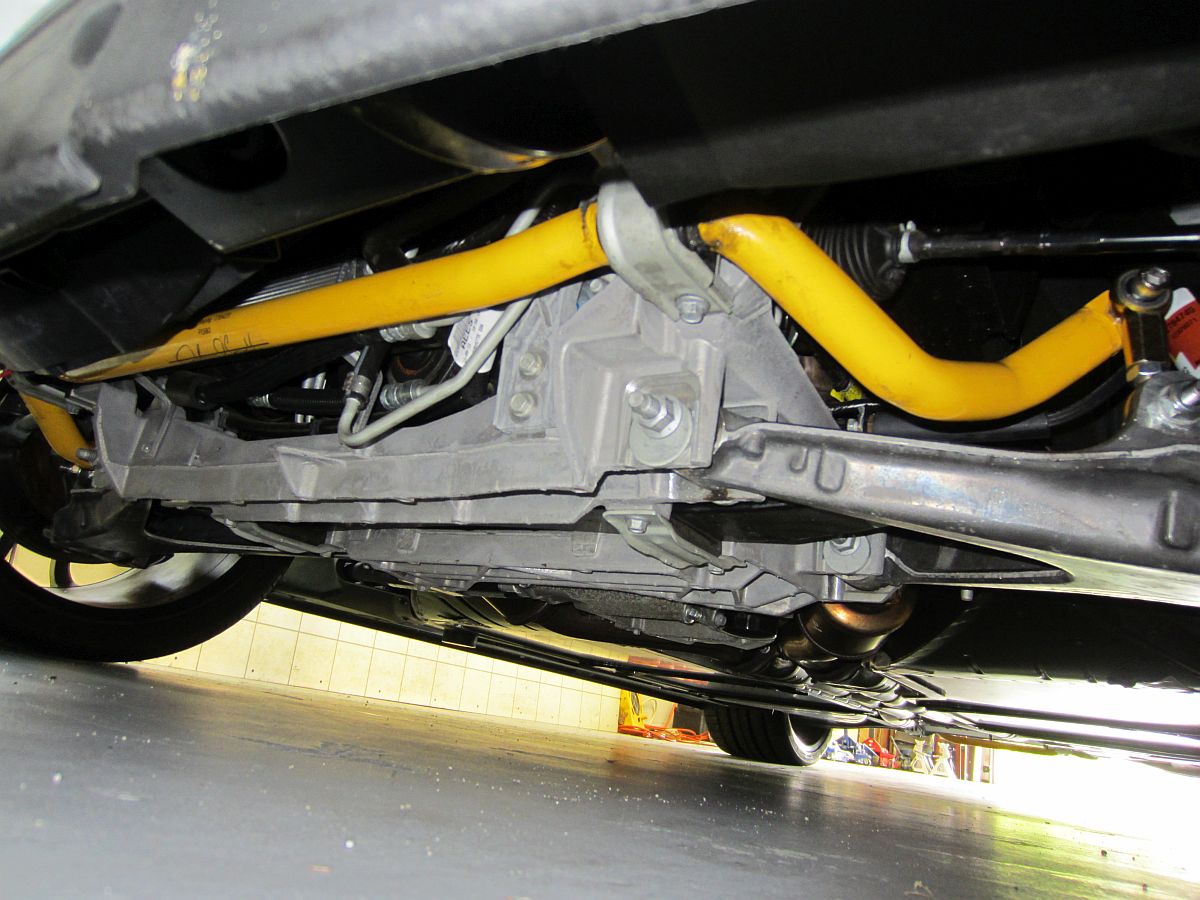
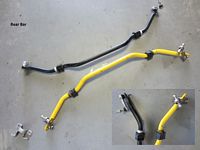
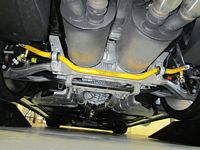
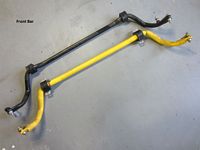
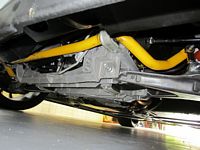
Another GS parts transfer, I had kept the Pfadt JOC Stage 1 sway bars (Diameters are specified at 1.375 [34.925mm] Front and 1 [25.4mm] Rear) from my GS and decided to install them on the 427 (original installation process and details are HERE).
As seen in the graph below, while more aggressive than the OE bars they are not as aggressive as the GM Performance T1 bars.........but are close to the same balance as the T1s which are dialed towards neutral handling as opposed to oversteer. I set the rear bar at the inside hole, full stiff- With the larger front bar, I would rather err on the side of oversteering vs understeeering.......but so far it feels really well balanced, more planted and confidence inspiring than before and they seem to work well with the OE magnetic dampers.

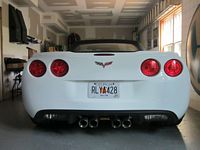
New Tag: RLYA428
Background story is this article quote:
The number in the Corvette 427 convertible's name pretty well sums up the car. It's a Corvette convertible with a 427-cubic-inchor 7.0-liter, in modern parlanceengine under the hood. Actually, the engine's massive 7008-cubic-centimeter displacement converts to 427.7 cubic inches. While that rounds up to 428 cubes, Chevrolet calls it a 427 for nostalgic purposes to pay homage to the 427 big block that powered Vettes back in the day. Today's "427," called the LS7, has until now only been available in the Corvette Z06 coupe. It loses no power for its installation in the 427 convertible, meaning it'll offer 505 hp and 470 lb-ft of torque. A six-speed manual transmission is the only available gearbox, and the driveline and rear axle are borrowed from the Z06, too. We hope the company has beefed up the rest of the convertible to handle the extra power, but the truth is that the regular 426- and 436-hp Vette convertibles have to be pretty sturdy already. Car & Driver Magazine , January 2012
7008 (cubic centimeters) = 427.654399 cubic inches rounded up is 428....I figured it would be a conversation starter anyway.
As I had done prior with the Grand Sport (write-up HERE), Dexron LS Gear Oil (P/N 88862624) from Cheapest GM Parts (along with differential line clip, P/N 24205103) purchased for differential oil change (and is full synthetic according to manufacturer HERE) and Amsoil Torque-Drive Synthetic Transmission Fluid (P/N ATD1G) purchased for transmission fluid change. I like to change initial fill fluid early to get rid of any break in metals
......around 1k miles.
I used CF Dreamin's Transmission Fluid Change DIY Guide HERE (archived HERE) and Differential Fluid Change DIY Guide HERE (archived HERE). I did run the car while on jack stands this time (10 MPH for 1 minute in second gear, be sure traction control is OFF), rechecked fluid levels, and then did my figure 8s in the culdesac. I always change fluids when they are hot and found this time, and last time with the GS, that there was no additional fluid needed- YMMV. My wife helped since I was covered in oil, tranmission fluid, and diff fluid- driving the car at 10 mph on cross beam adapters on jack stands HERE.
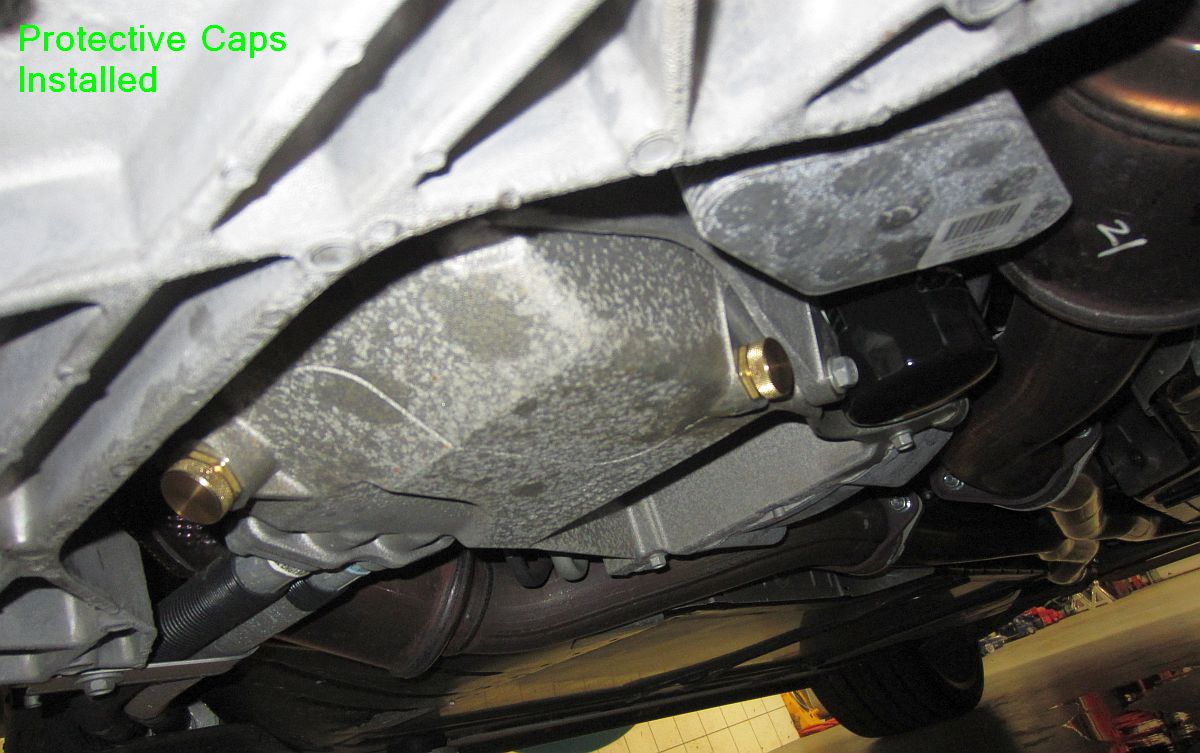
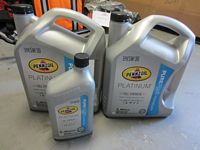
As detailed in my GS write-up HERE, the factory fill Mobil1 5w30 was also changed at the same time to Pennzoil Platinum 5w30 (tech data sheet HERE), another dexos1 certified synthetic oil- we'll see how the UOA comes back for this. Fumoto drain valves (P/N F107S) purchased but NOT installed, the one on the side would not go on without an extension to clear the oil pan ribs and the front one was just a bit low IMO. What I did end up purchasing for next time is No-Spill Systems Compact Drain Valves like I had/have on our Jeeps; I already had the drain hose but that would need to be purchased as well if you don't have one. Video of how it works HERE.
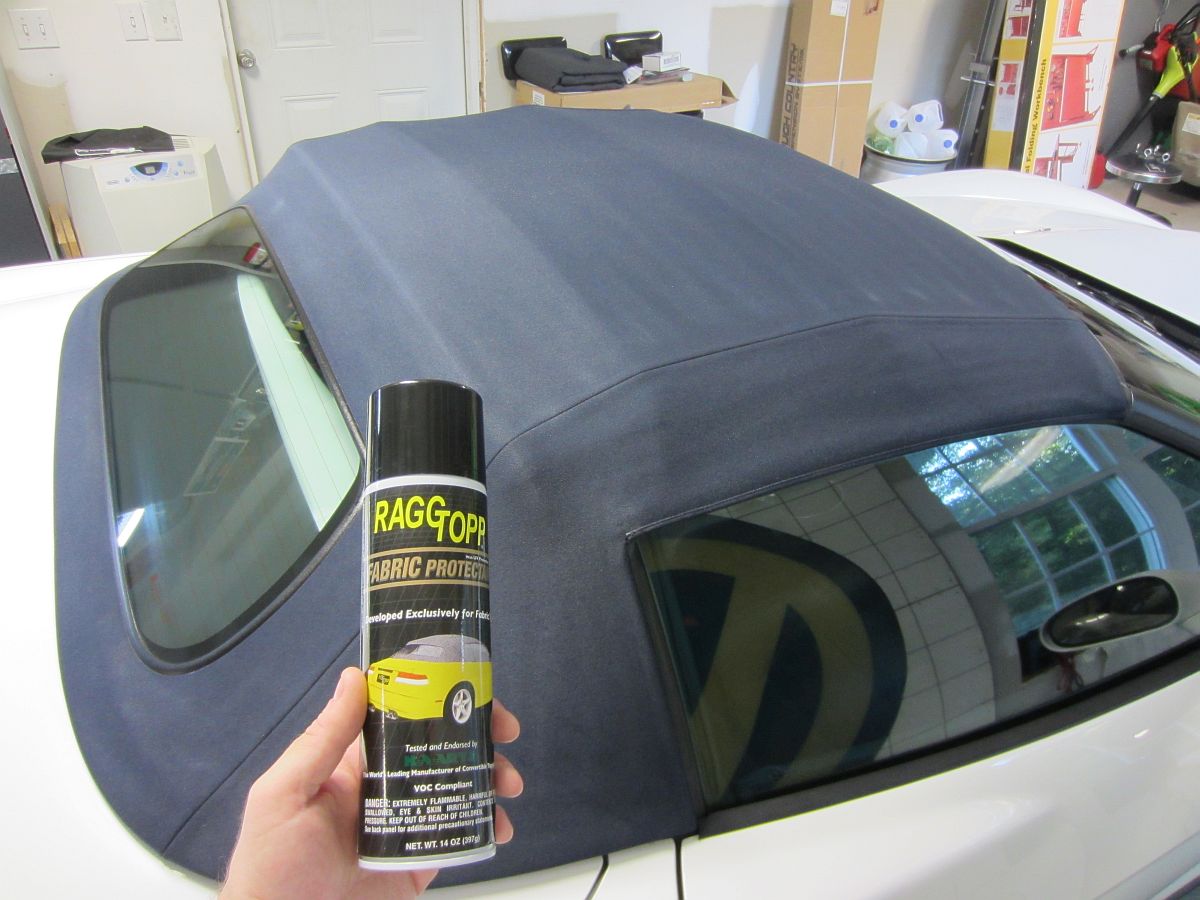
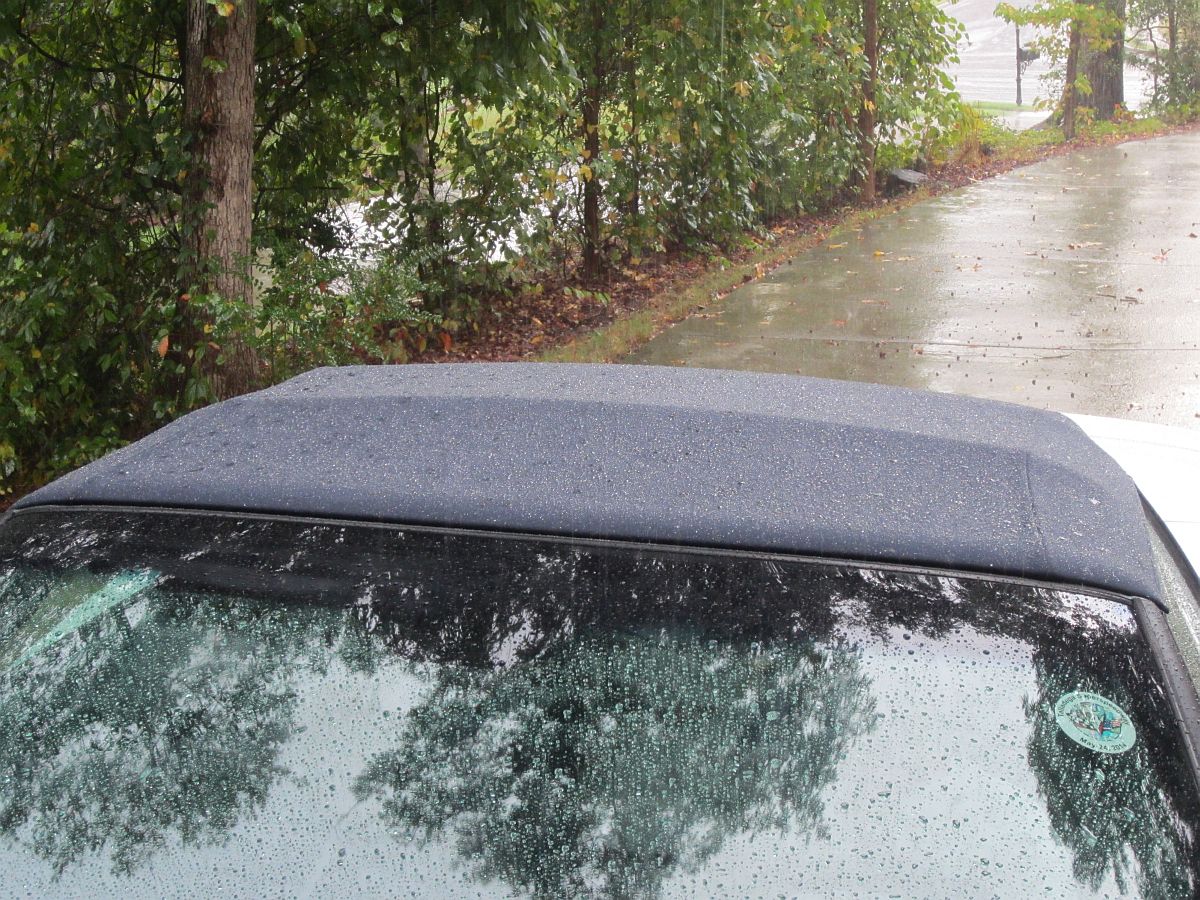
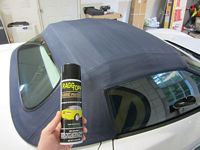
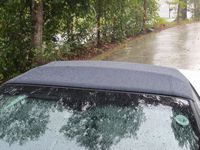
Also had a chance to get the initial 3 coats of Raggtopp Fabric Protectant on the top, it will be nice to have a top that beads water like the rest of the car (and is UV protected)....video that shows prep and application HERE.

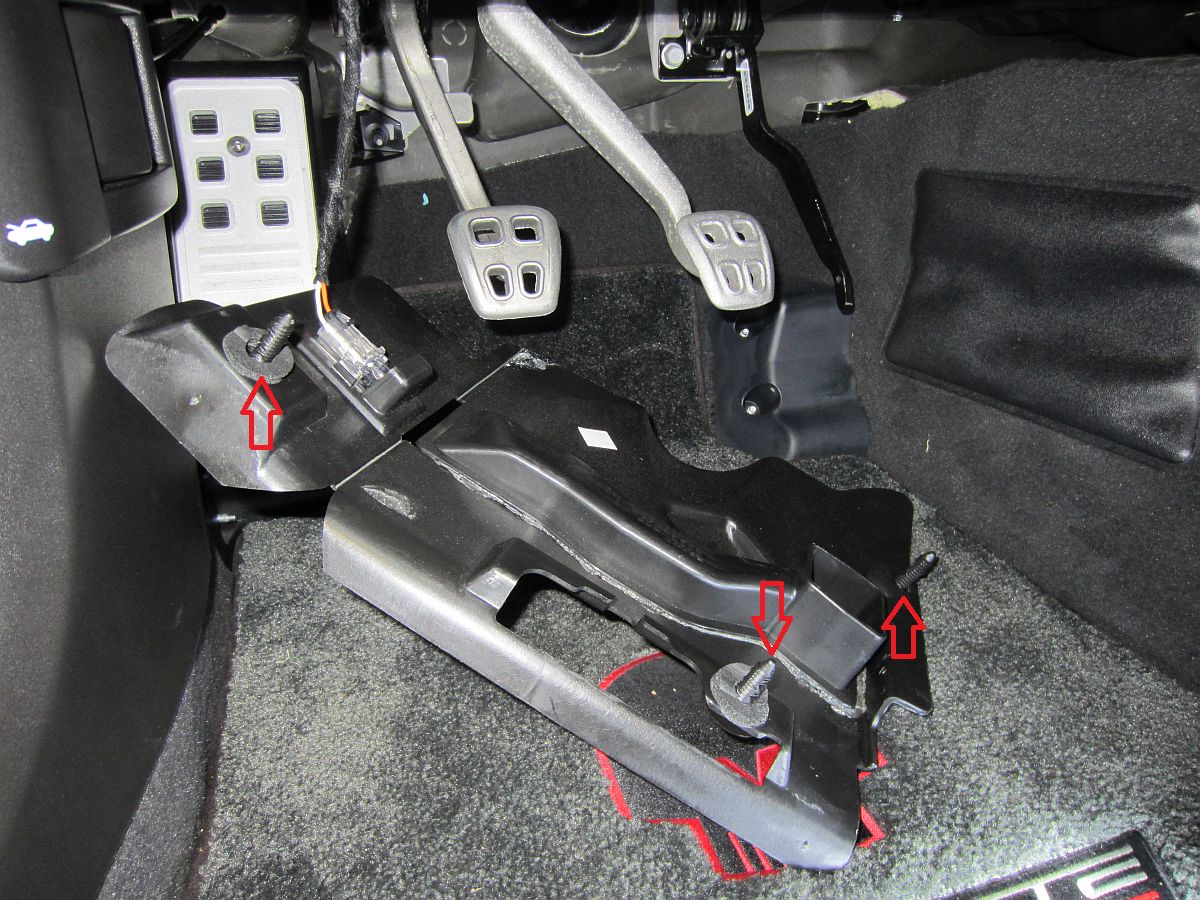
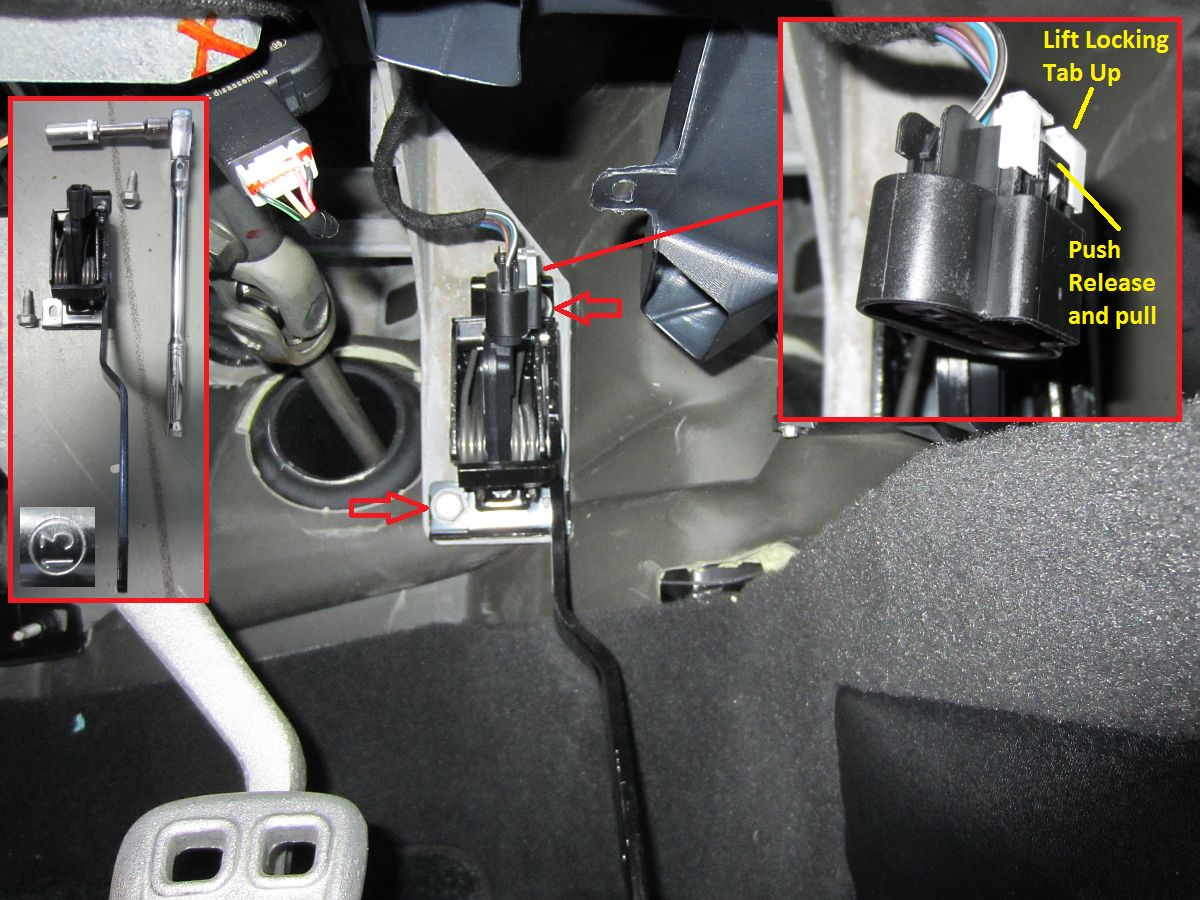
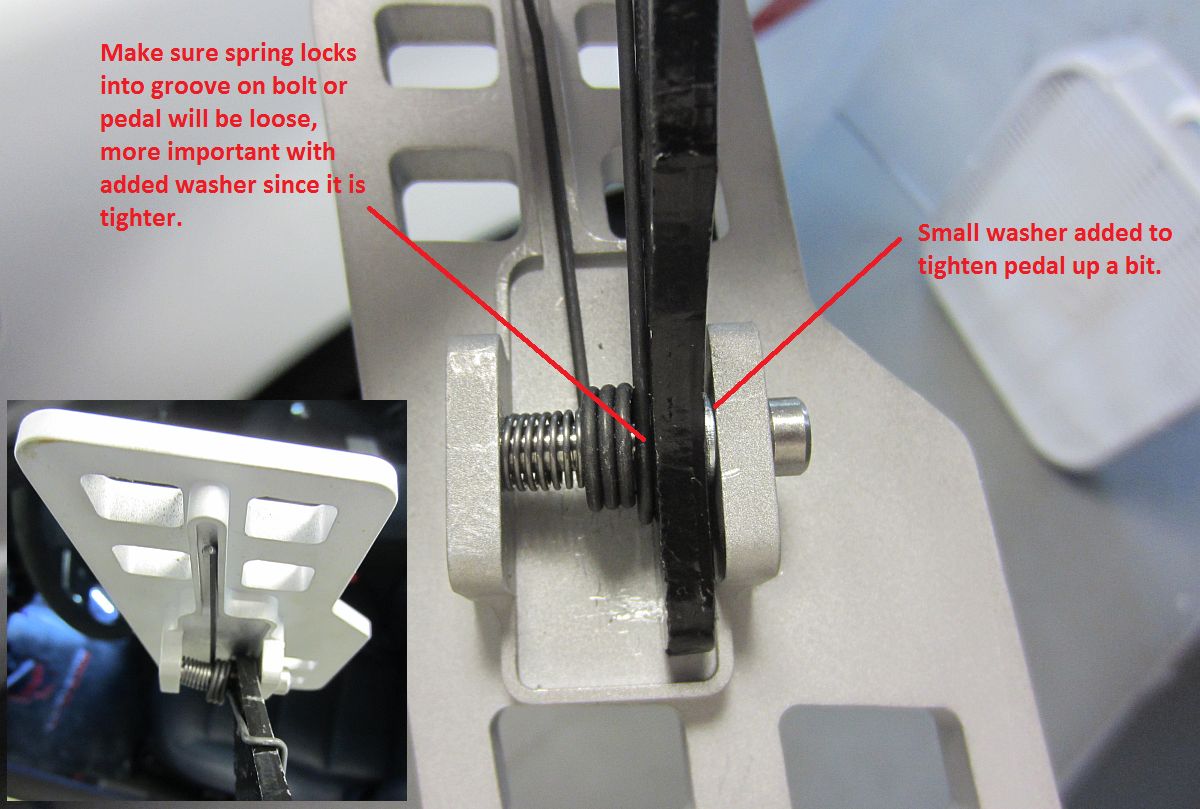
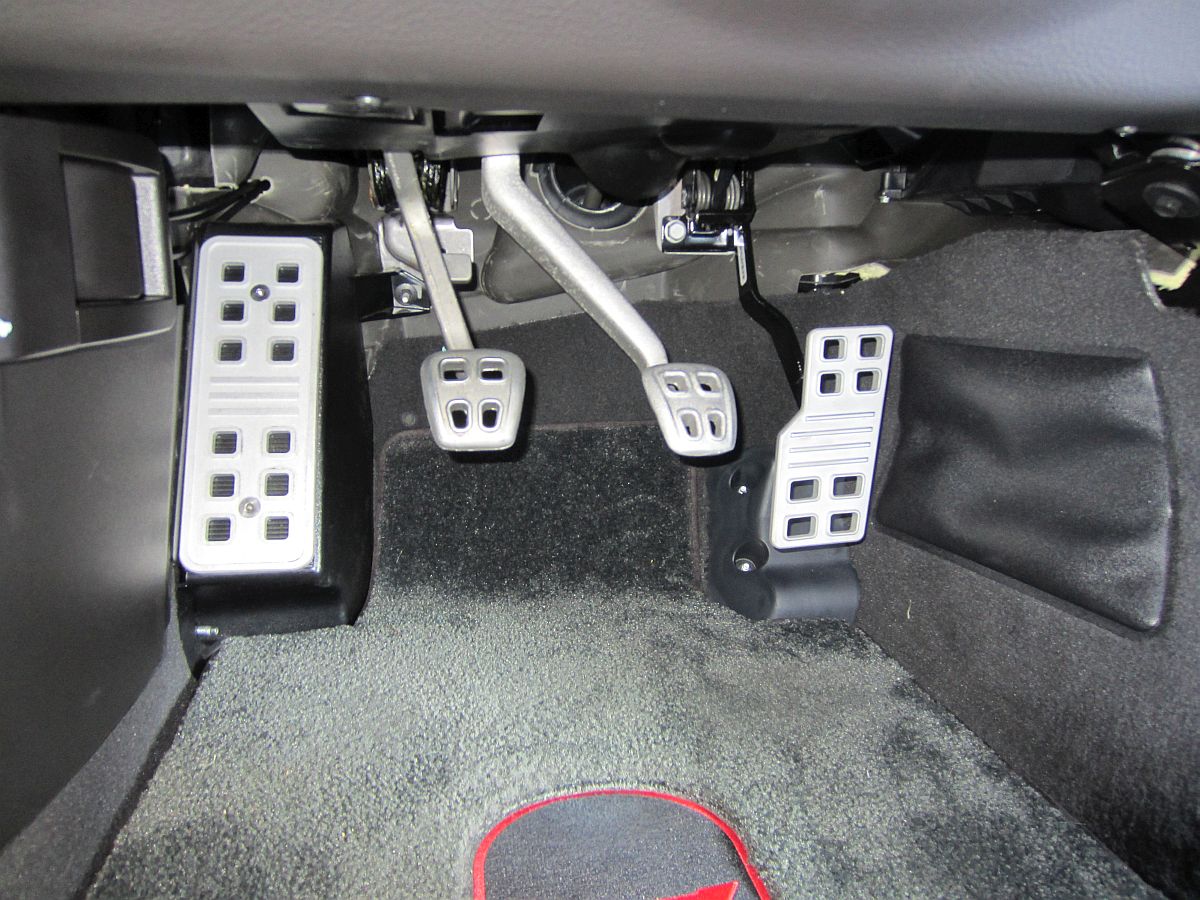
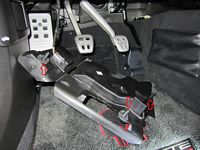
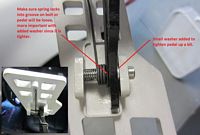
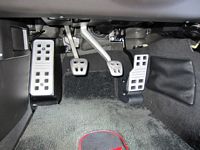
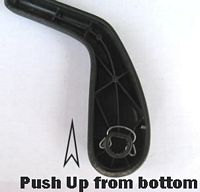
Another mod transplant from the Grand Sport, Elite Engineering Gas and Dead Pedal Set (write-up HERE). However, I had noticed some slop in the pedal when installed on that car so I decided to tighten it up a bit with this installation- most on the forums had achieved this by adding a poly washer to the assembled pedal to make the tension spring fit tightly against the pedal when locked into the groove on the bolt. This did work but the steel washer I added also served to frustrate the installation in the car as it gets caught in the groove and makes assembly while in the footwell yoga position VERY difficult.......MUCH easier to pull down the plastic under dash piece (held in place by three platic push retainers) and remove the plug and two bolts to extract the gas pedal assembly and to assemble this outside the car. Pics below show all the important information, plug has a white/gray locking clip that has to be pushed up and then the black plastic tab is pushed to release the plug. Having done this twice now, not counting the uninstallation when the GS was traded in, I would say this is much easier and faster with the pedal assembly removed, YMMV.
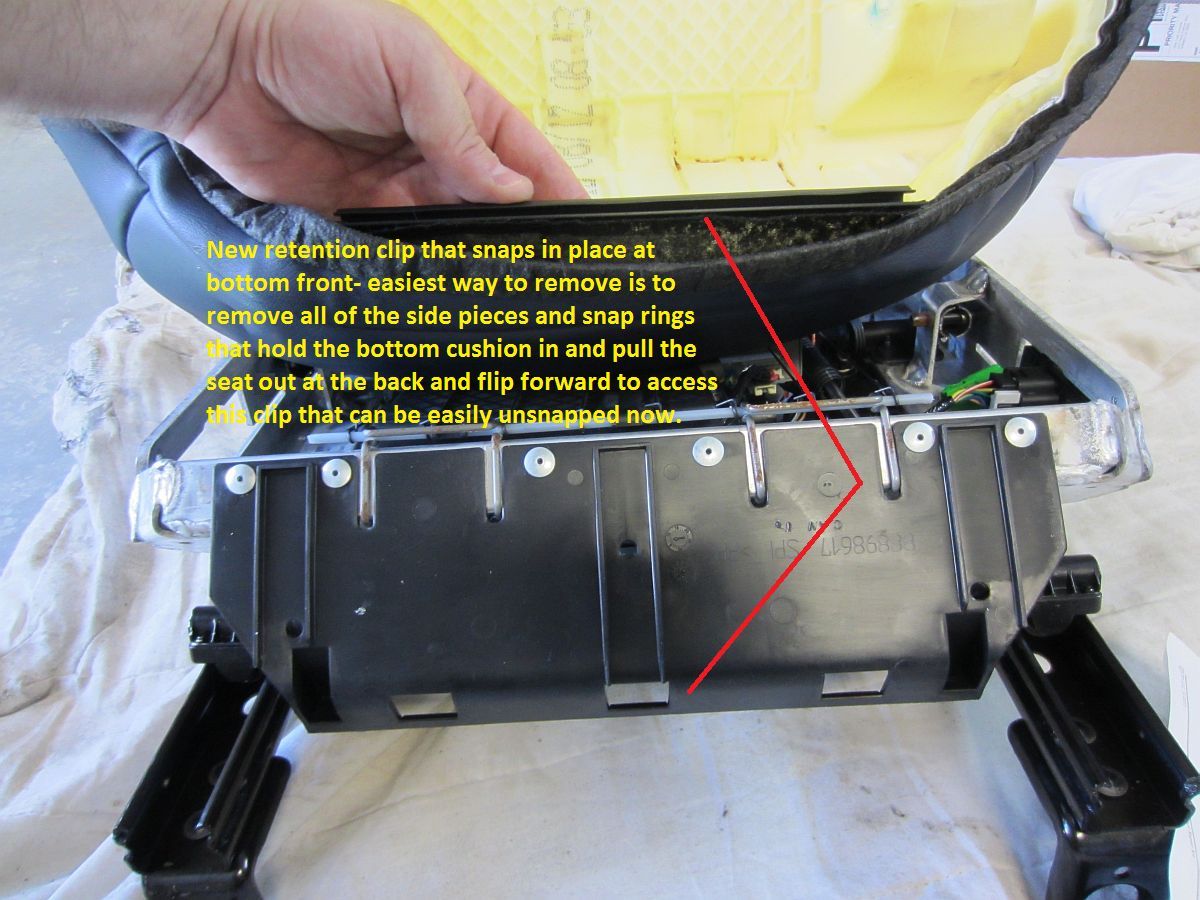
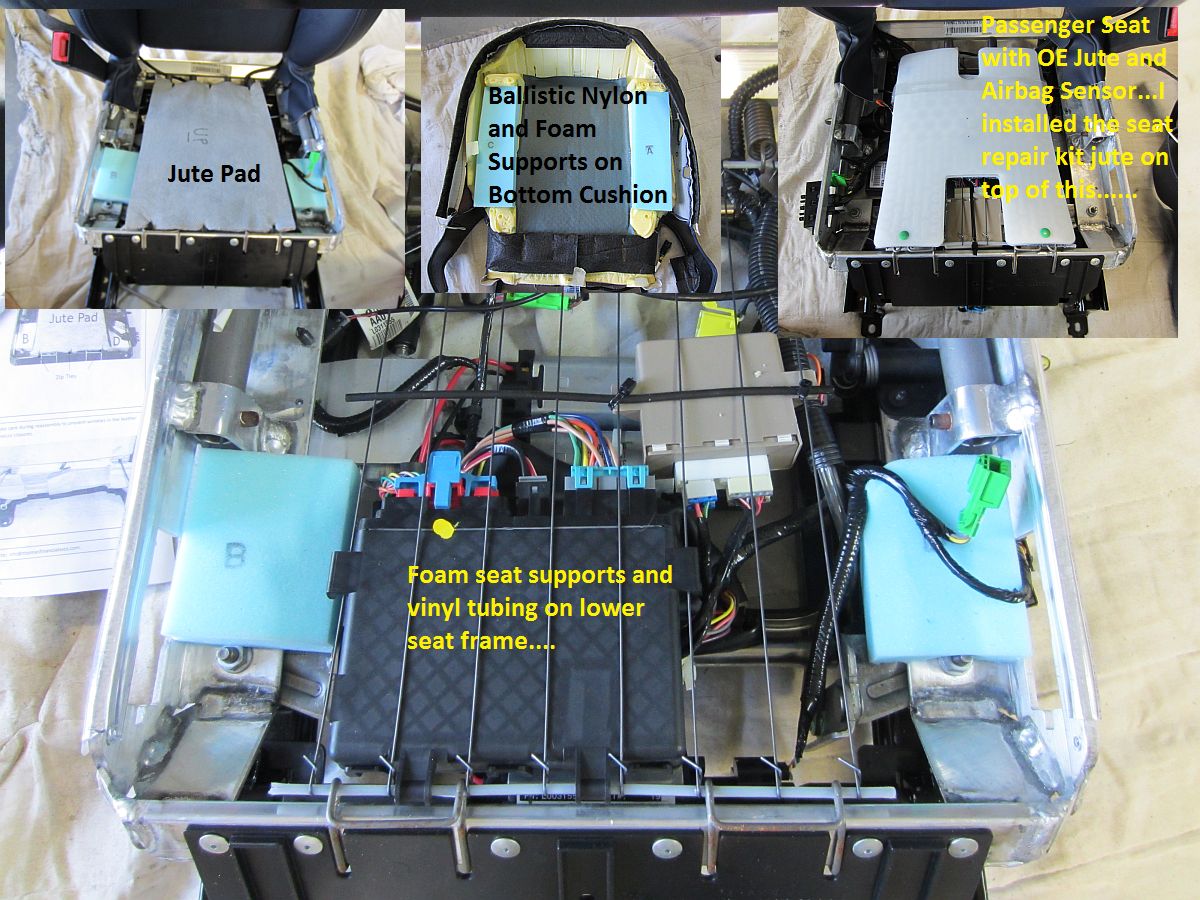
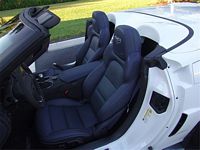
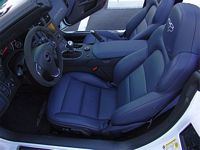
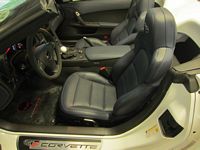
Thomas Mezger's Seat Repair Kit purchased from West Coast Corvette- Thomas's write-up on this kit is HERE and I took some pictures to document my GS driver seat installation HERE.
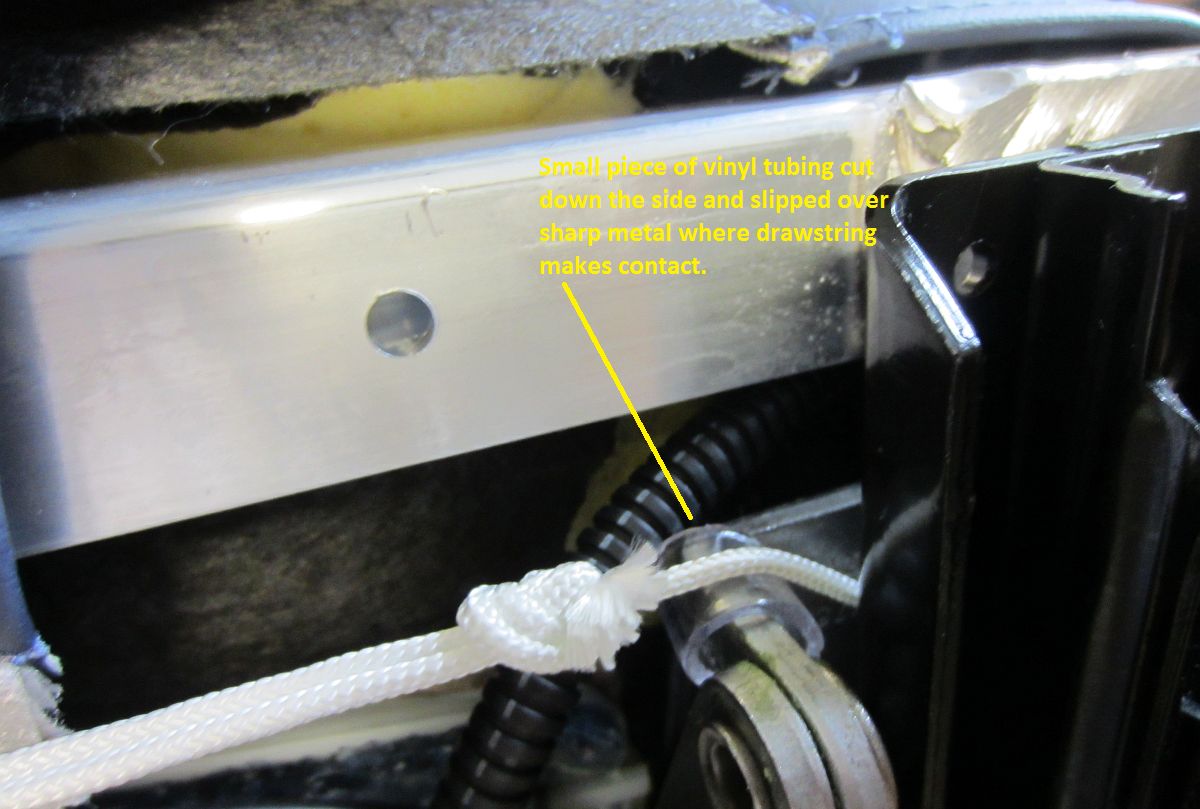
I took some additional pics below during my installation to supplement the provided black and white printout and above DIY guides. I also changed a few things in addition to doing both driver and passenger seats: the two metal risers that cut into the OE foam seat were covered with a small piece of vinyl tubing (smaller than the prior GS installation) cut down one side so that they would slip over, and rather than remove the seat switch I just unplugged it after removing the plastic cover and metal plate. Seats feel WAY better now, more supportive and firm....Actually makes the seats tolerable.
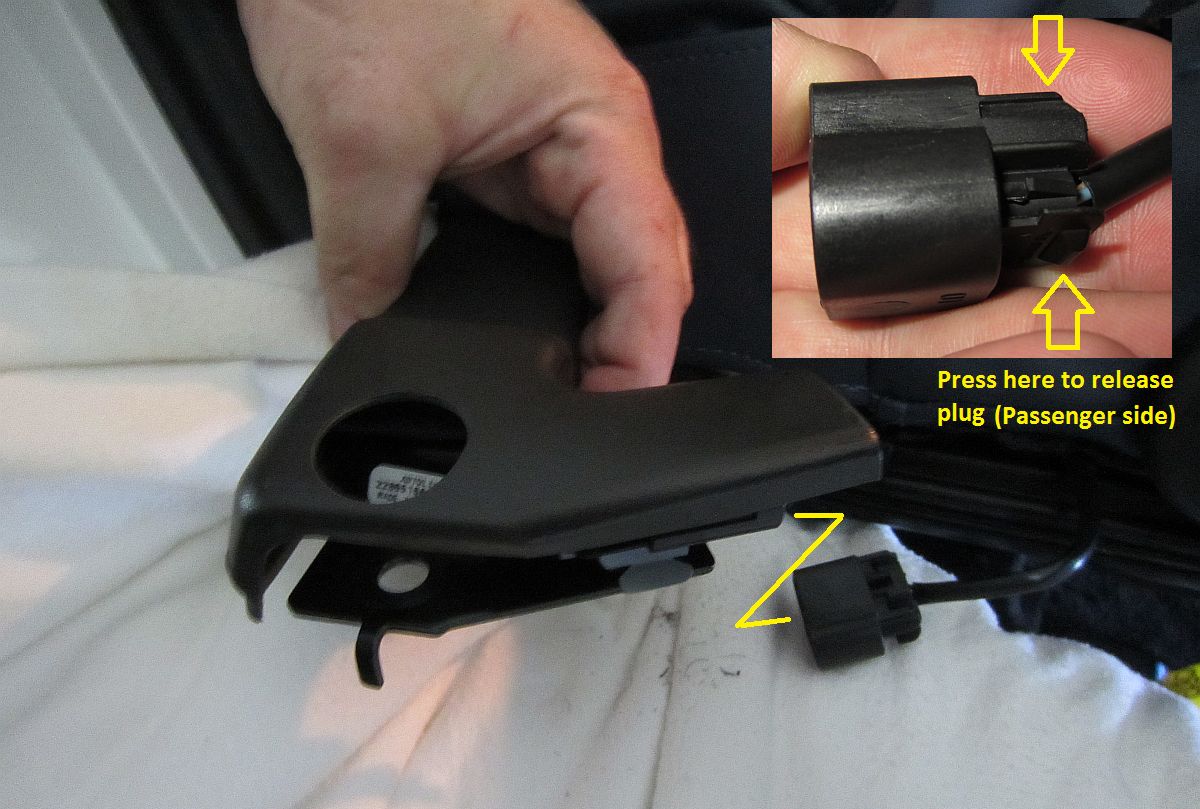
I did notice the 2013 seats are different in one aspect to the 2012, the front of the seat cover actually has a plastic strip that hooks to the front plastic piece and does not rely exclusively on the draw string. Also, the passenger seat is a bit different in that it has the airbag sensor already sitting on a piece of jute, and the seatbelt also has a plug that needs to be undone prior to seat removal- all detailed in below pics.
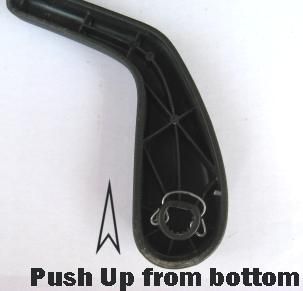
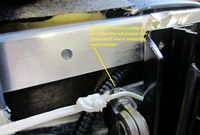
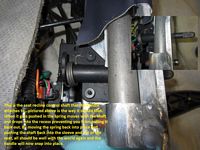
This was also an opportunity to replace the plastic seat adjustment handles with billet handles from RPI Designs, these guys always have a coupon code that makes them cheaper than anyone else for a lot of items. The billet handles look a good bit nicer than the cheap plastic pieces we get from the factory and feel a bit sturdier as well. One thing I did discover is that the shaft they attach to is plastic and if pushed hard enough to snap in place the shaft actually pushes in and it will now be impossible to mount the handle. I used a small file to make the splines in the new handle work a little better until they slid on with no force. To correct the shaft pushed into the seat, I had to take the seat back out, take the bottom off, and while holding the spring out of the way push the shaft back into the recess and out of the seat......also in pics below. These billet handles did require a bit of work, both to polish the imperfections that I could correct and to remove paint for the OE clips to snap in place and to file the splines for a better fit, just not worth the hassle to return for another set-YMMV.


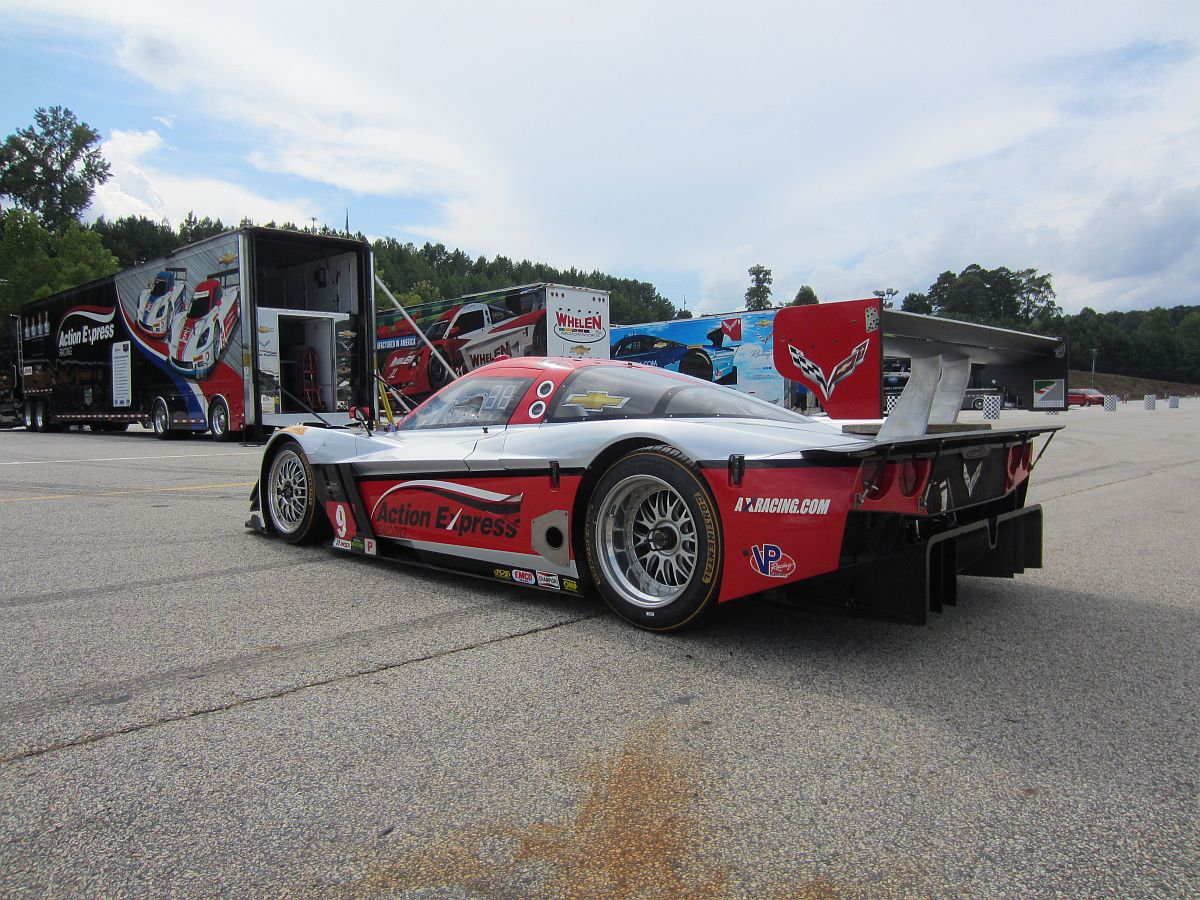
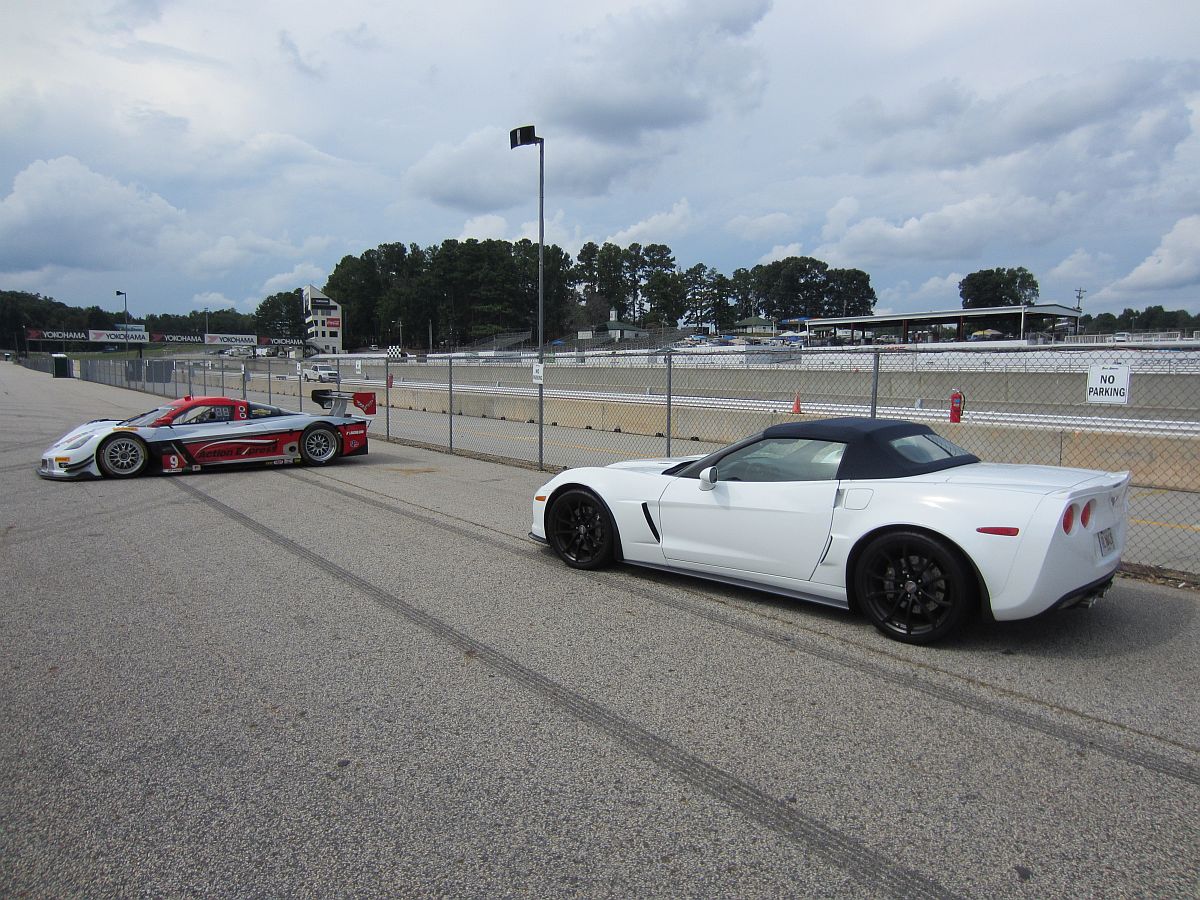
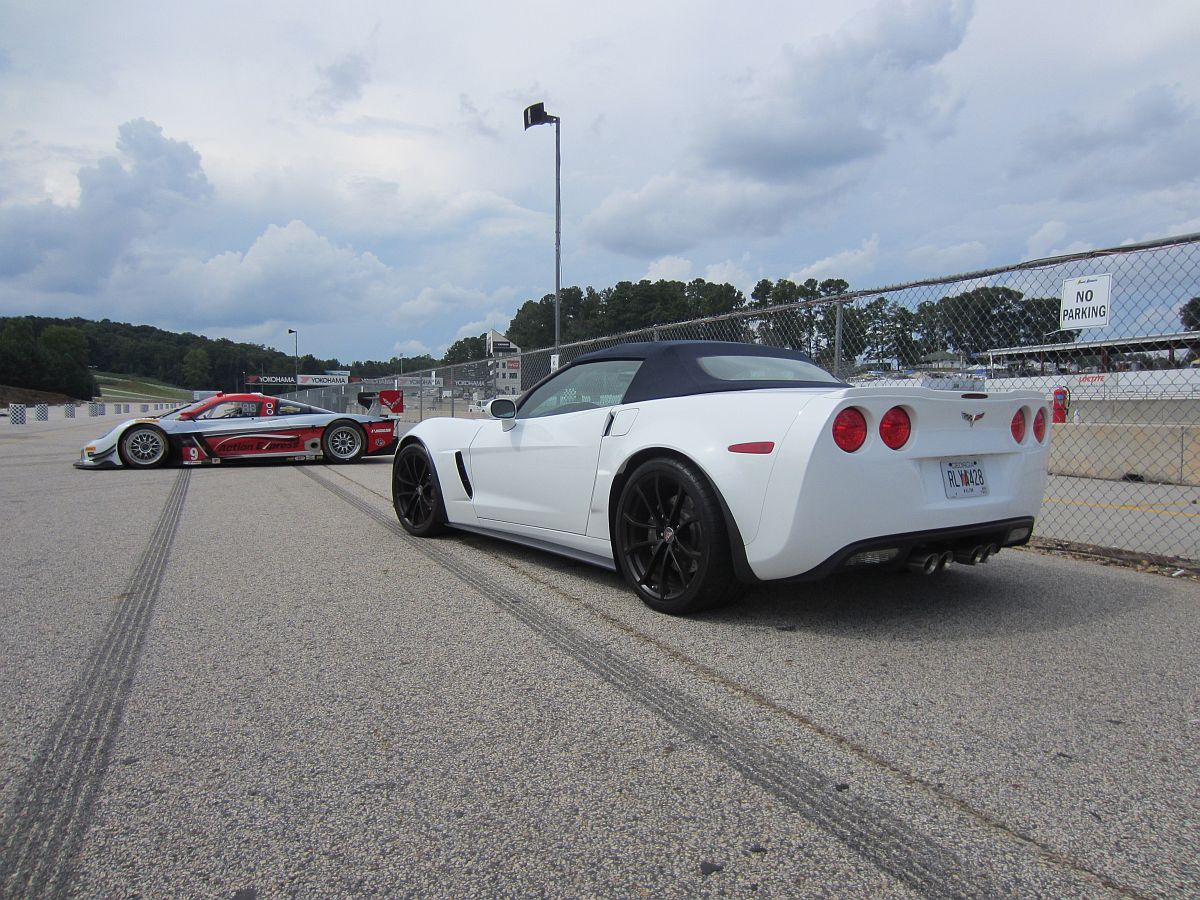
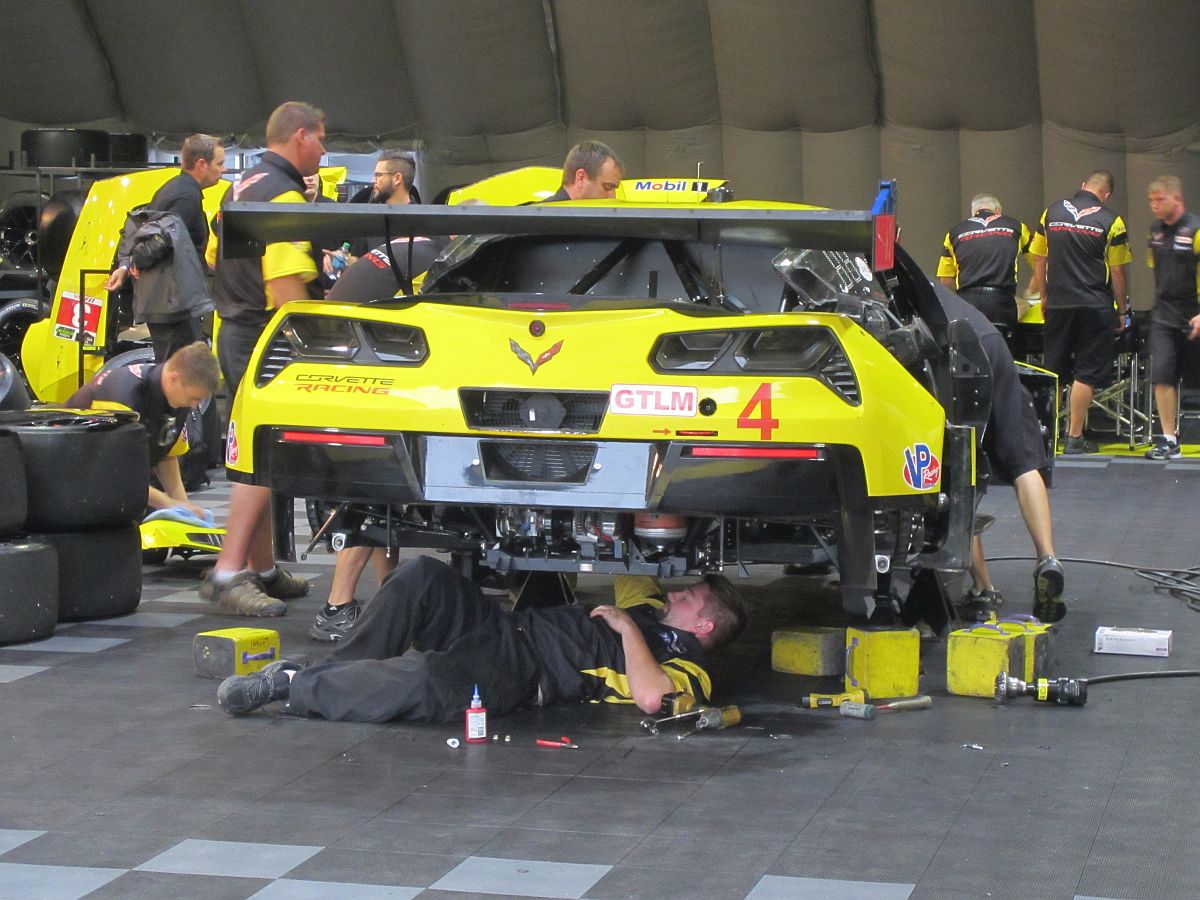
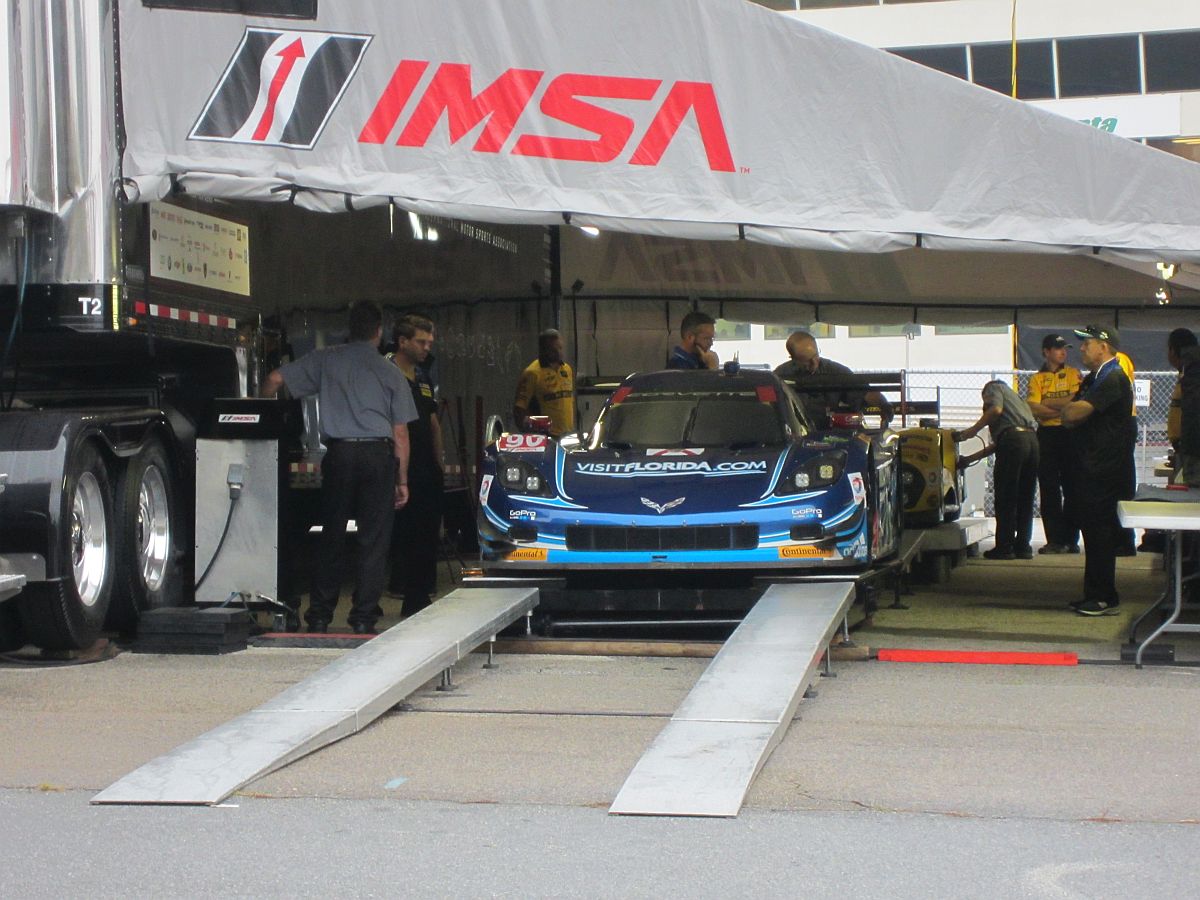
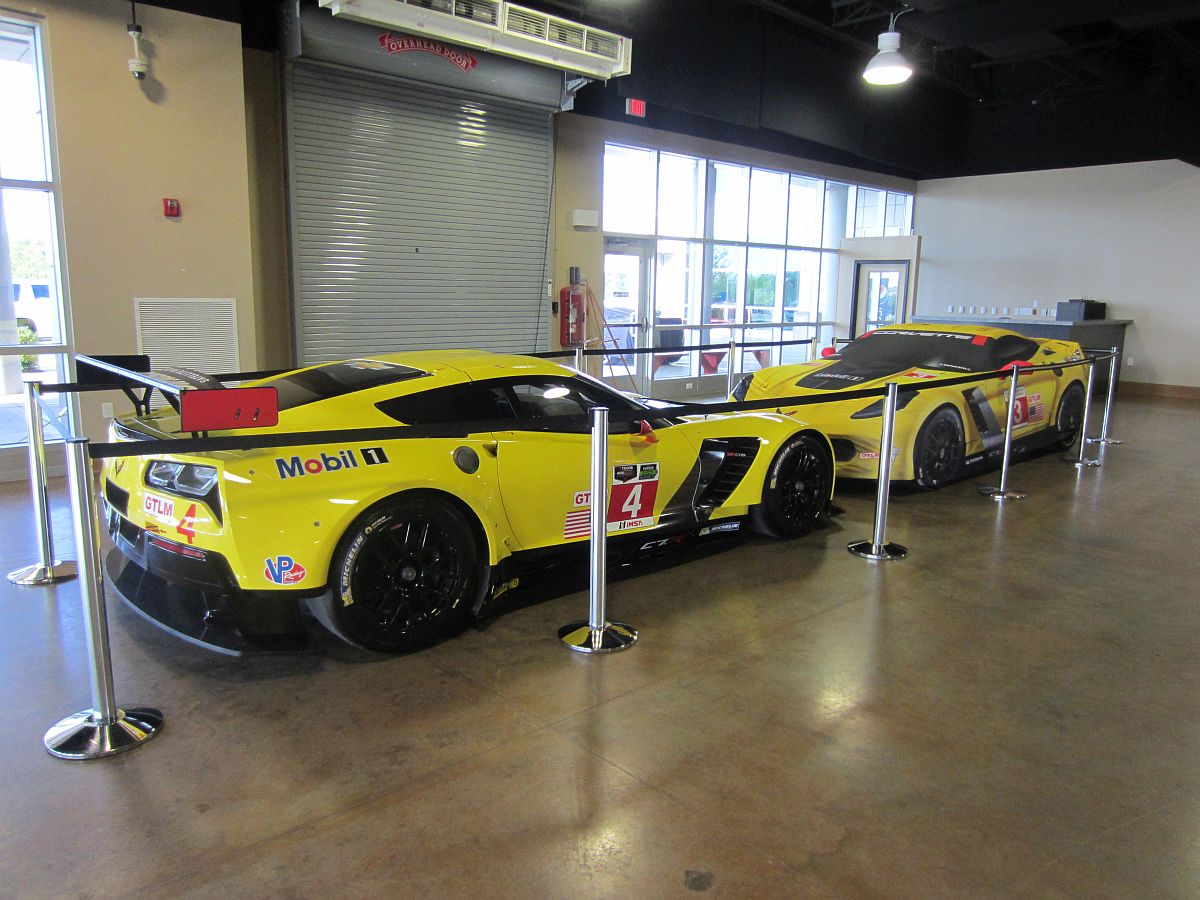
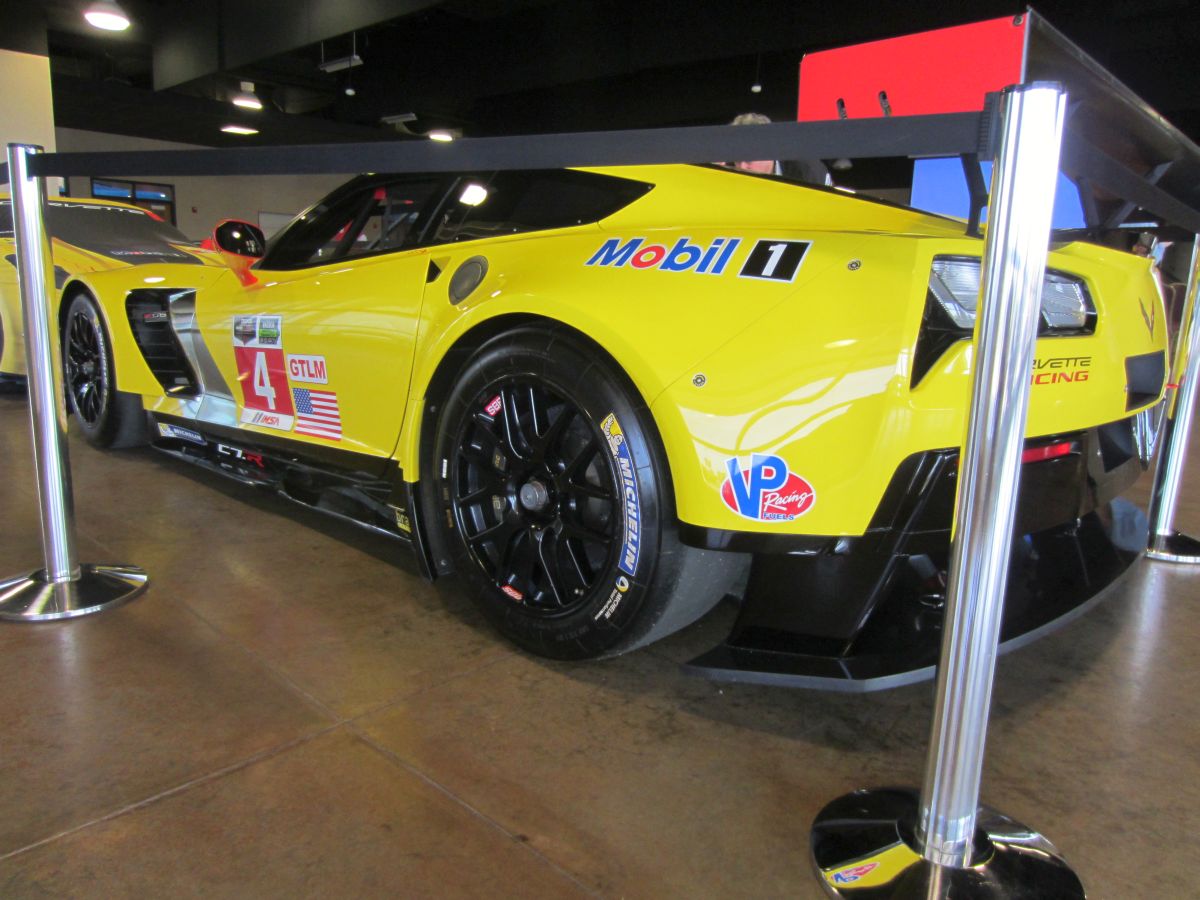
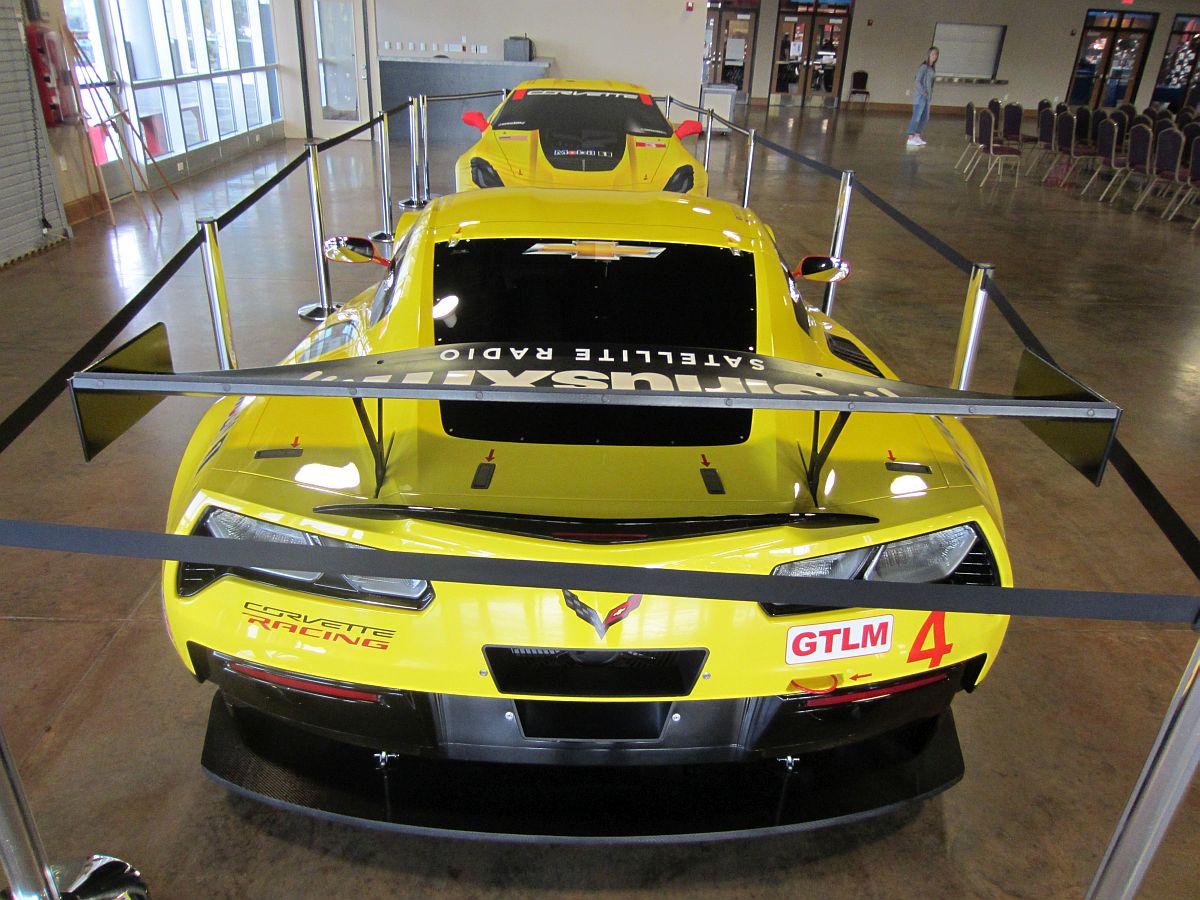
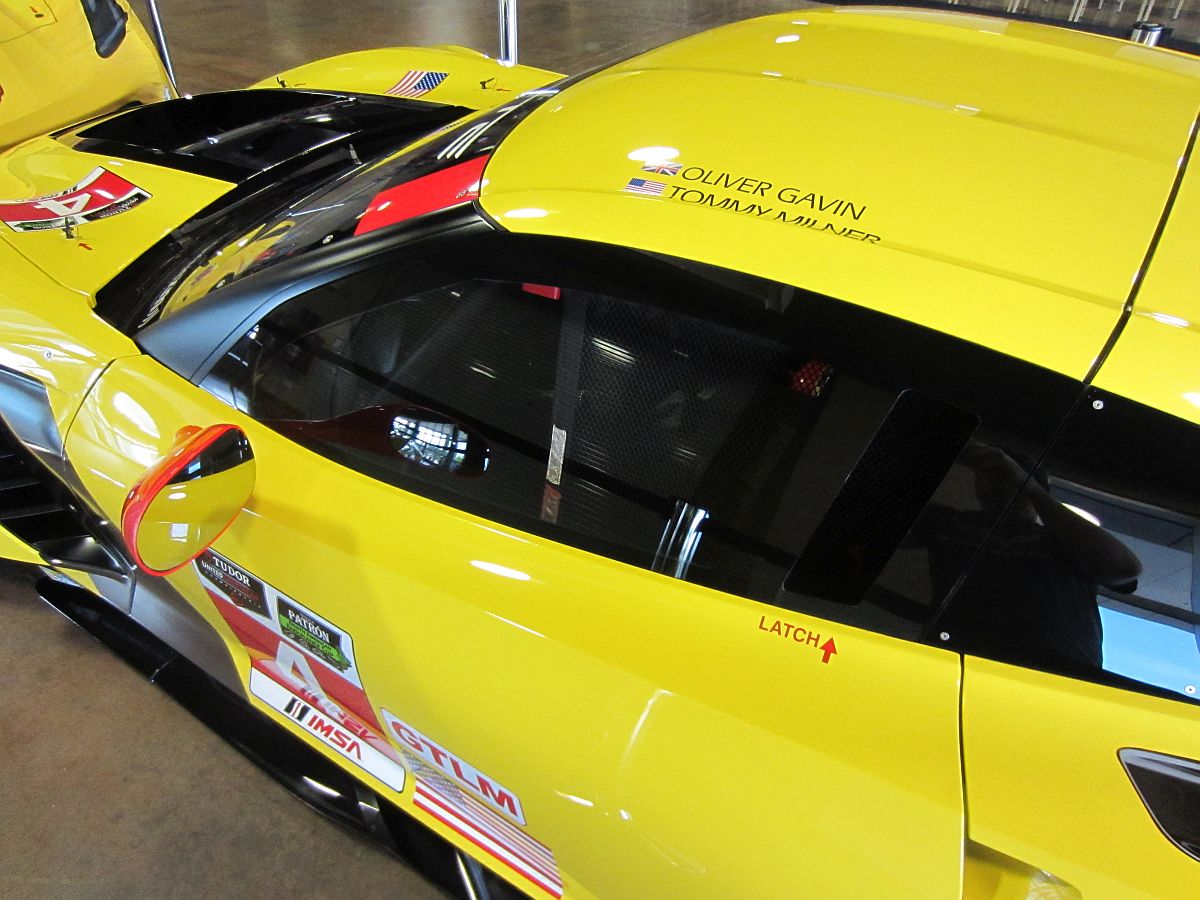
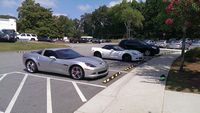
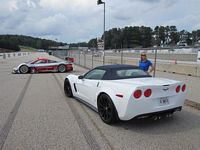
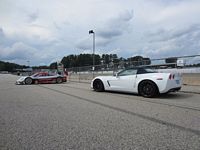
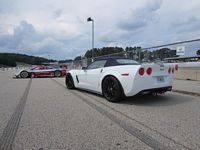
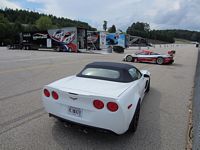
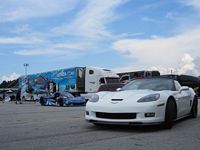
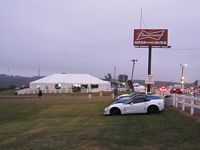
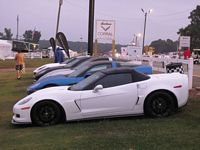
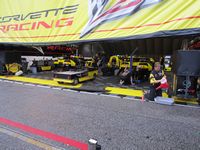
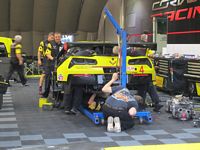
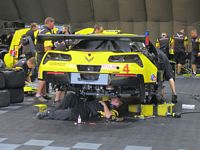
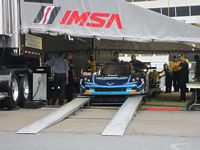
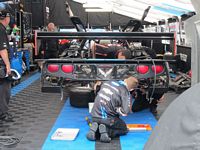
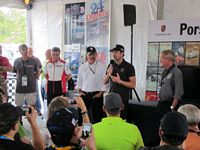
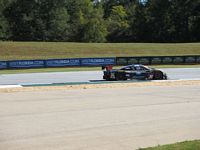
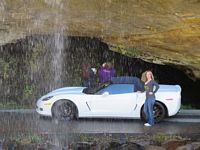
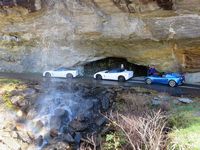
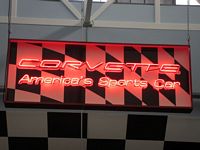
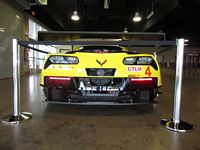
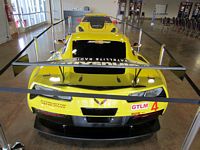
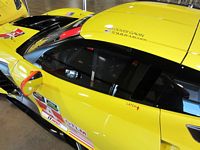
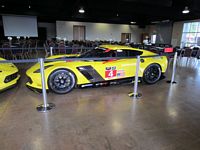
While watching a friend at an HPDE at Road Atlanta, we noticed some Corvette teams had arrived a few weeks early for Petit Lemans to setup...... so we decided it could be a photo op


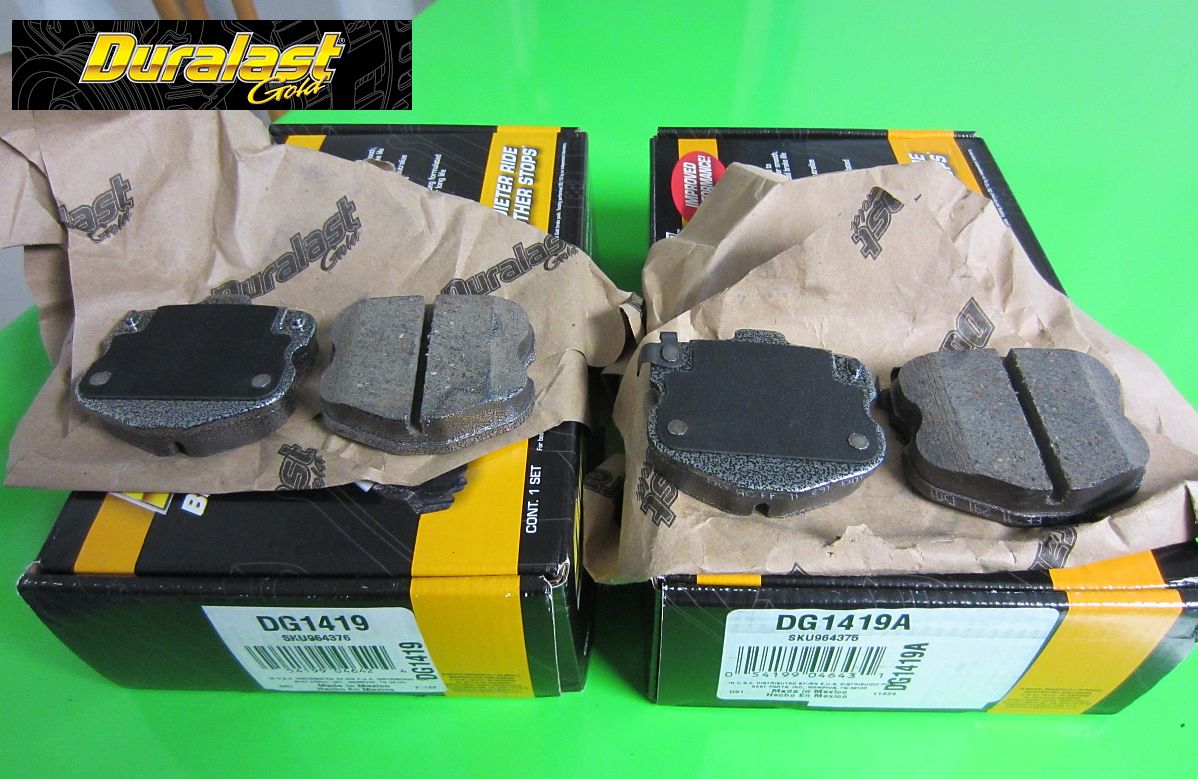
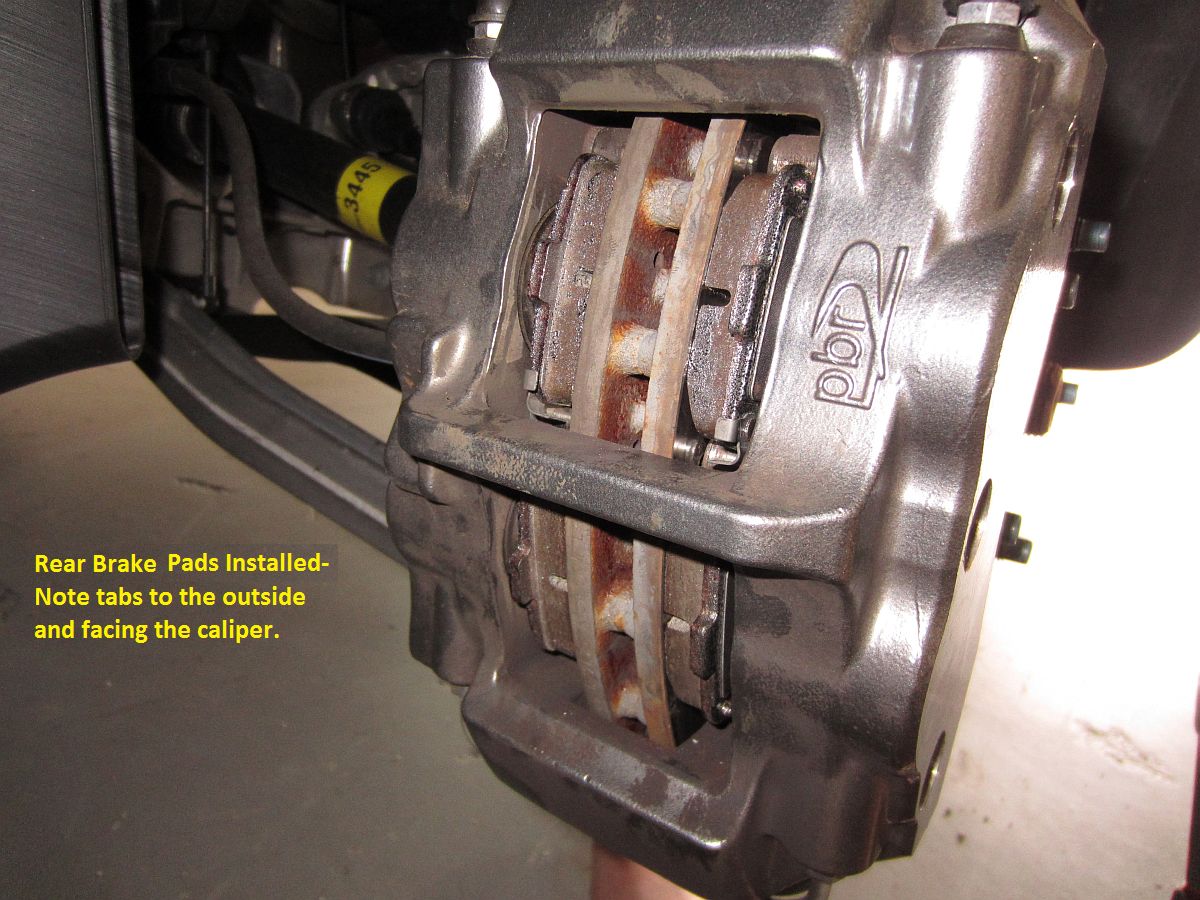
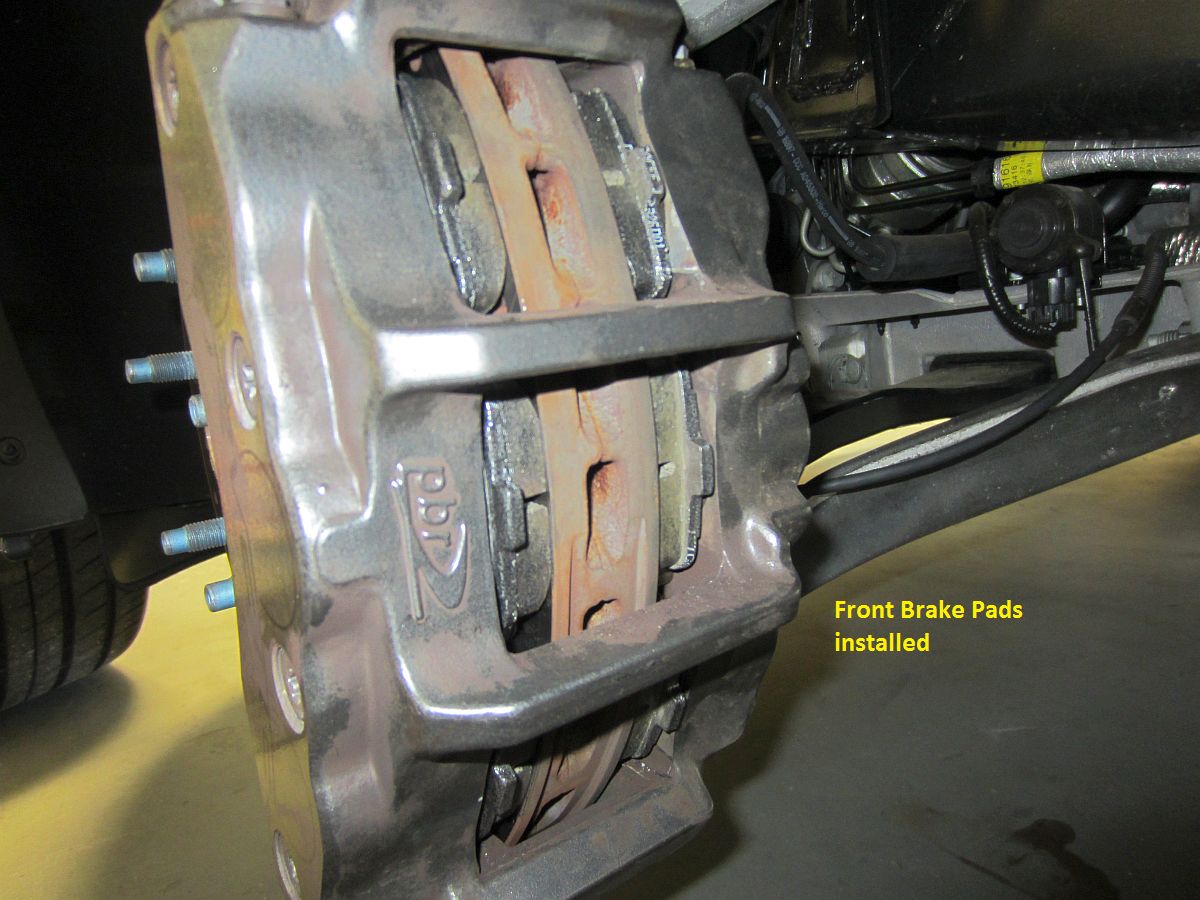
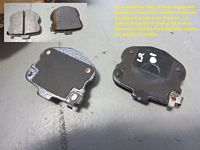
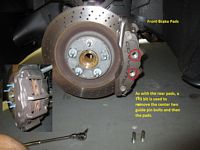
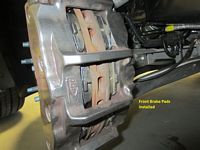
Autozone Duralast Gold Brake Pads (P/N DG1419 front, DG1419A rear) purchased to cut down some of the brake dust produced by the OE pads. These ceramic pads are lifetime warranty/replacement so it should be the last set of street pads I will need. Bedding in the pads I used the StopTech procedure outlined HERE.
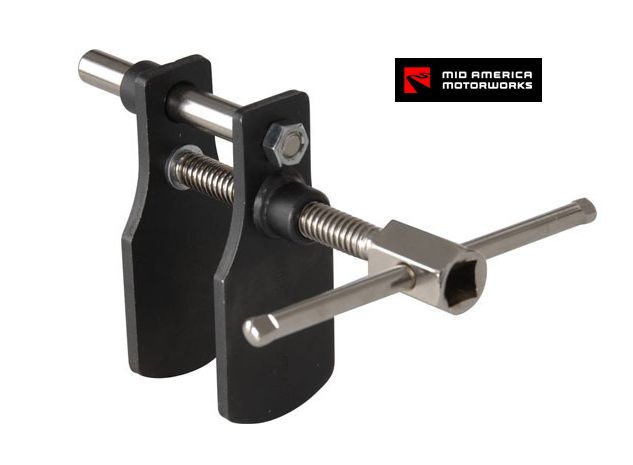
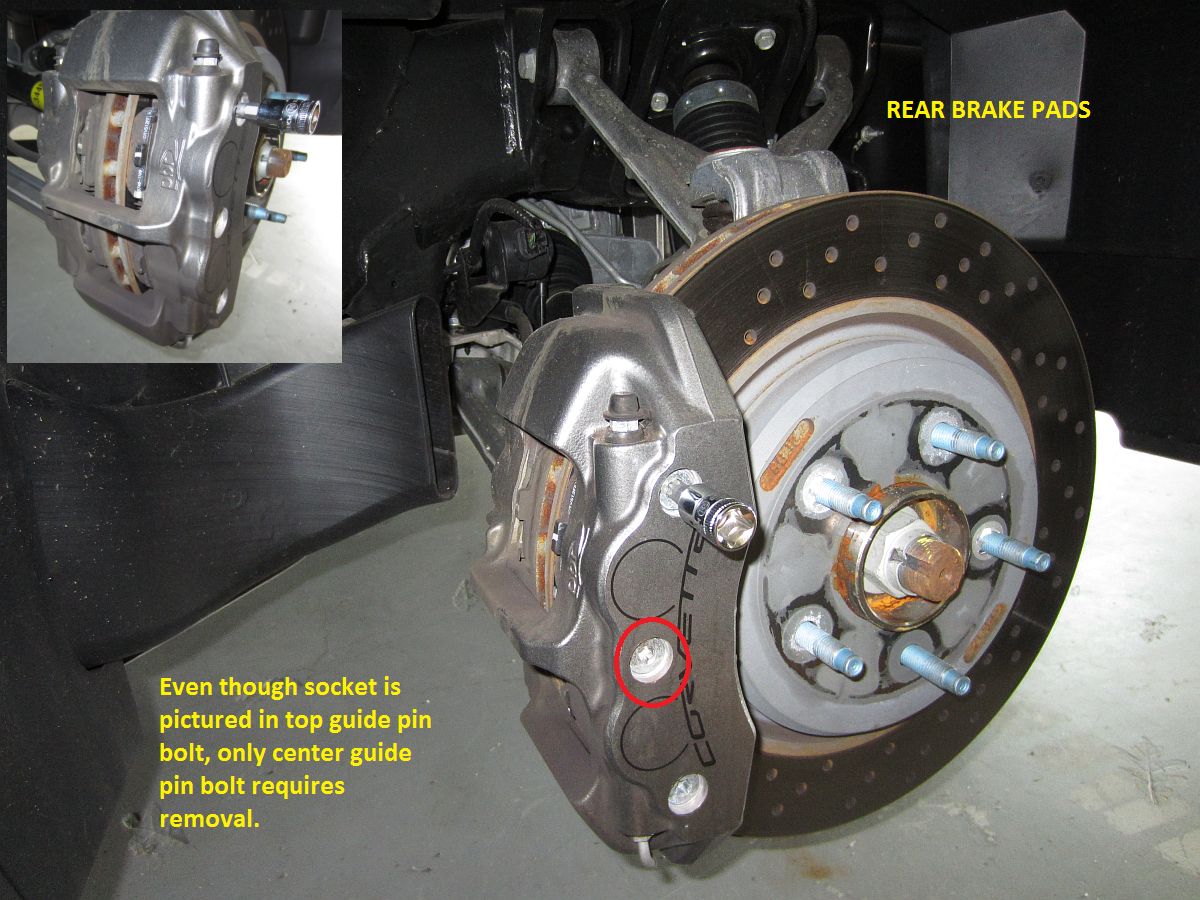
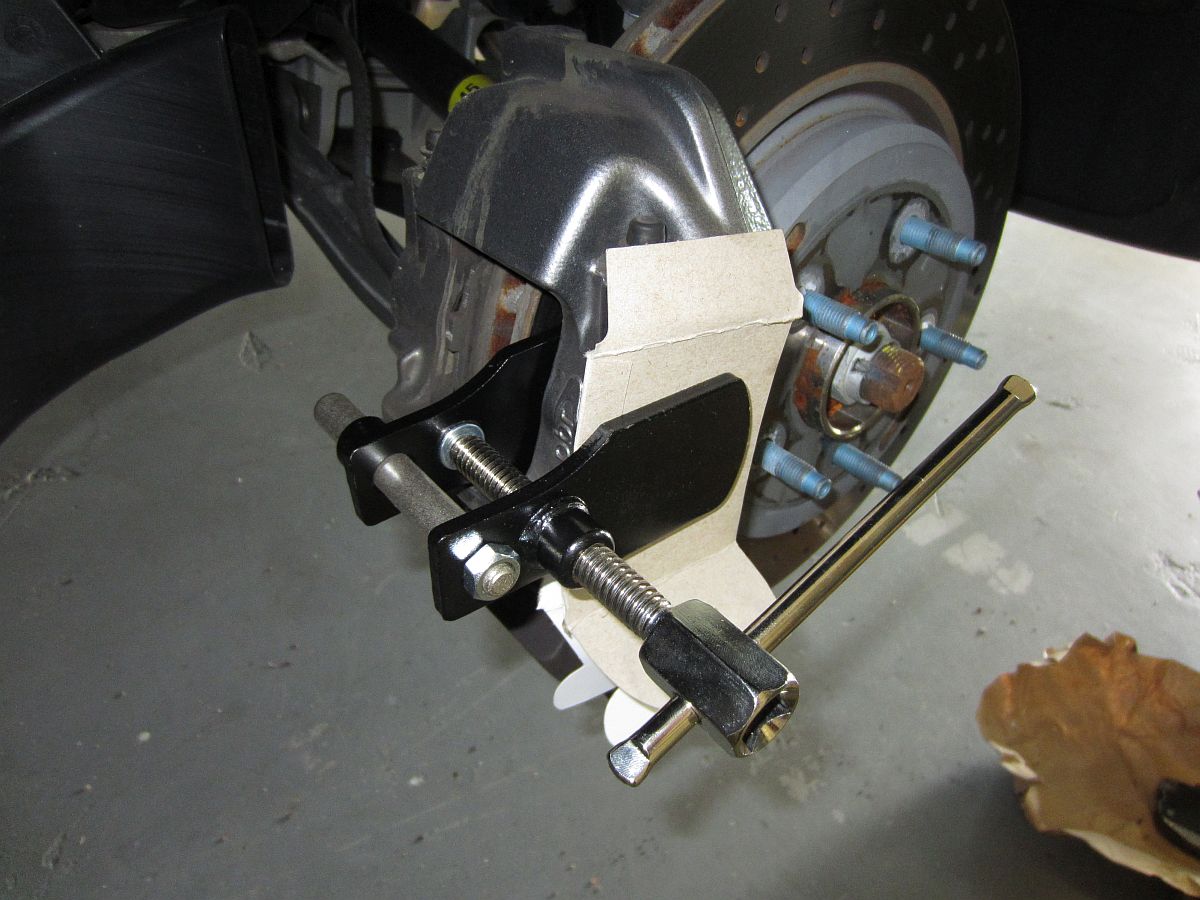
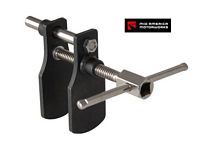
To R&R the pads I decided to get the caliper piston compression tool from Mid America Motorworks, this was easy to use with no worries about marring the caliper powder coat- used an old oil filter box to pad the caliper.
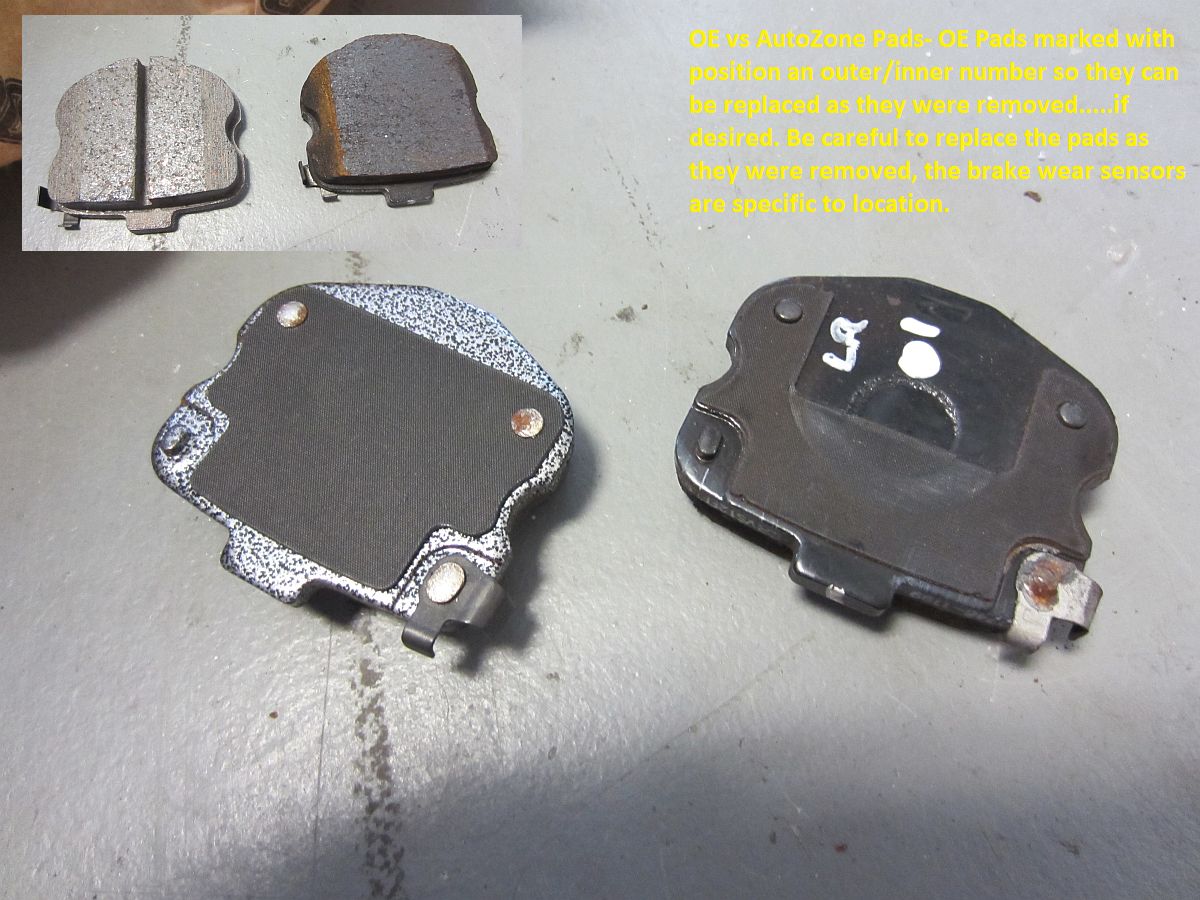
For the front pad replacement, only the center two guide pins need to be removed using a T45 bit, the rear pads only require one center guide pin to be removed- The pads can be pivoted off the remaining guide pins easily after using something (for me a standard screwdriver) to push the pad against the piston so that it is free to remove... Be careful not to damage the caliper paint. The caliper piston tool was used to reset the piston after the OE pads were removedif there was not enough space to insert the new pad. This change was at ~1400 miles so no worries about fluid, that will be replaced when the lines are replaced in the next few months over holiday/vacation. After each set of pads was replaced, the brake pedal was pumped to push the pistons back into place and to avoid having to siphon fluid out of the reservoir. Be careful to note pad position as they are removed, on my car the brake sensor pads (metal tab that squeals when pads are worn down) were on top in the rear and on bottom in the front- YMMV.
After bedding them in and going to the mountains today for some aggressive driving, I think these pads will work well for me. Dust reduced about 90% and the pads seem to work pretty well- time will tell. At the track I might swap the OE pads back in at a minimum or go with some track speciofic aftermarket pads.


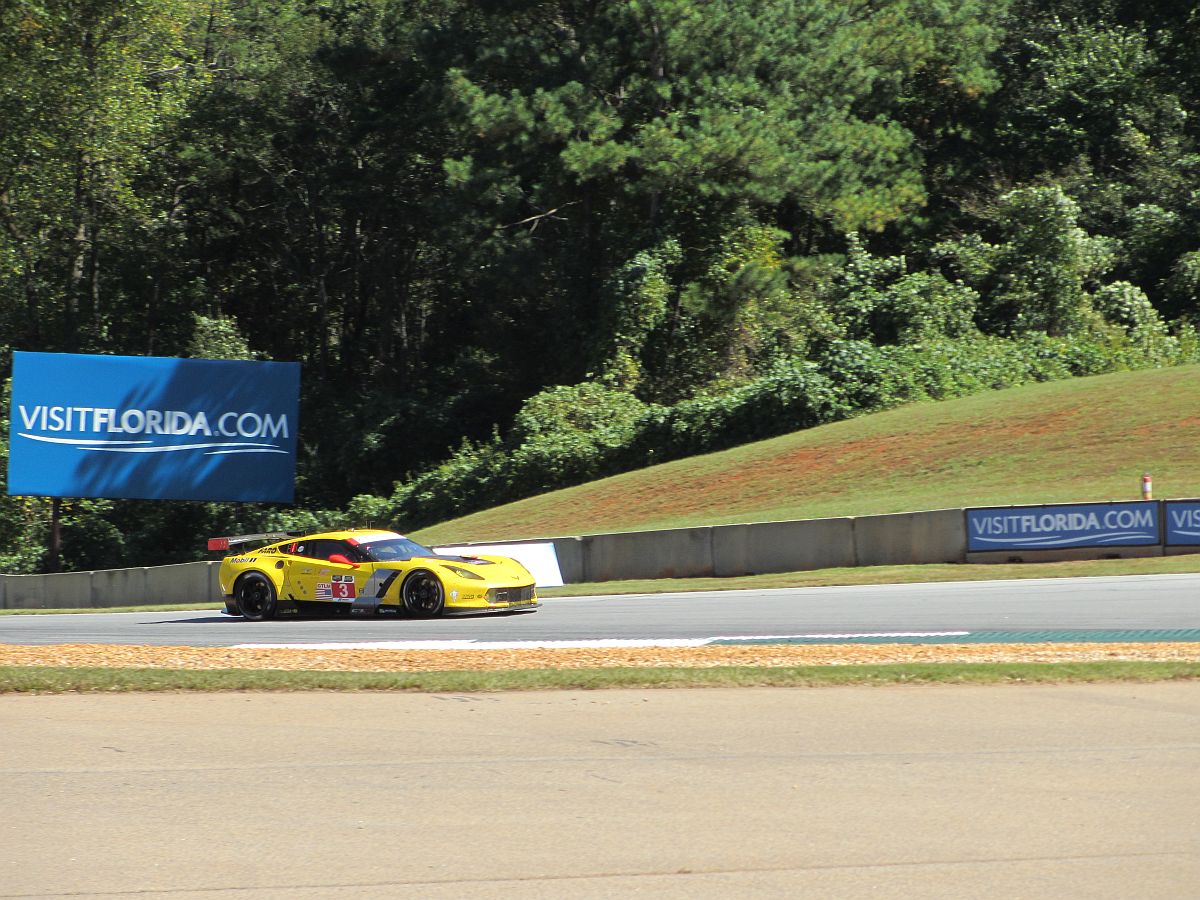
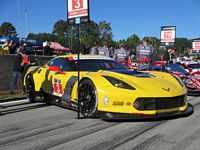
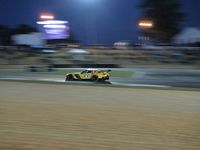
Petit Le Mans 2014: Schedule HERE, Provisional Standings HERE.
Corvette did well in the (DP) Daytona Prototype class but just missed a podium finish in the (GTLM) GT Le Mans class.
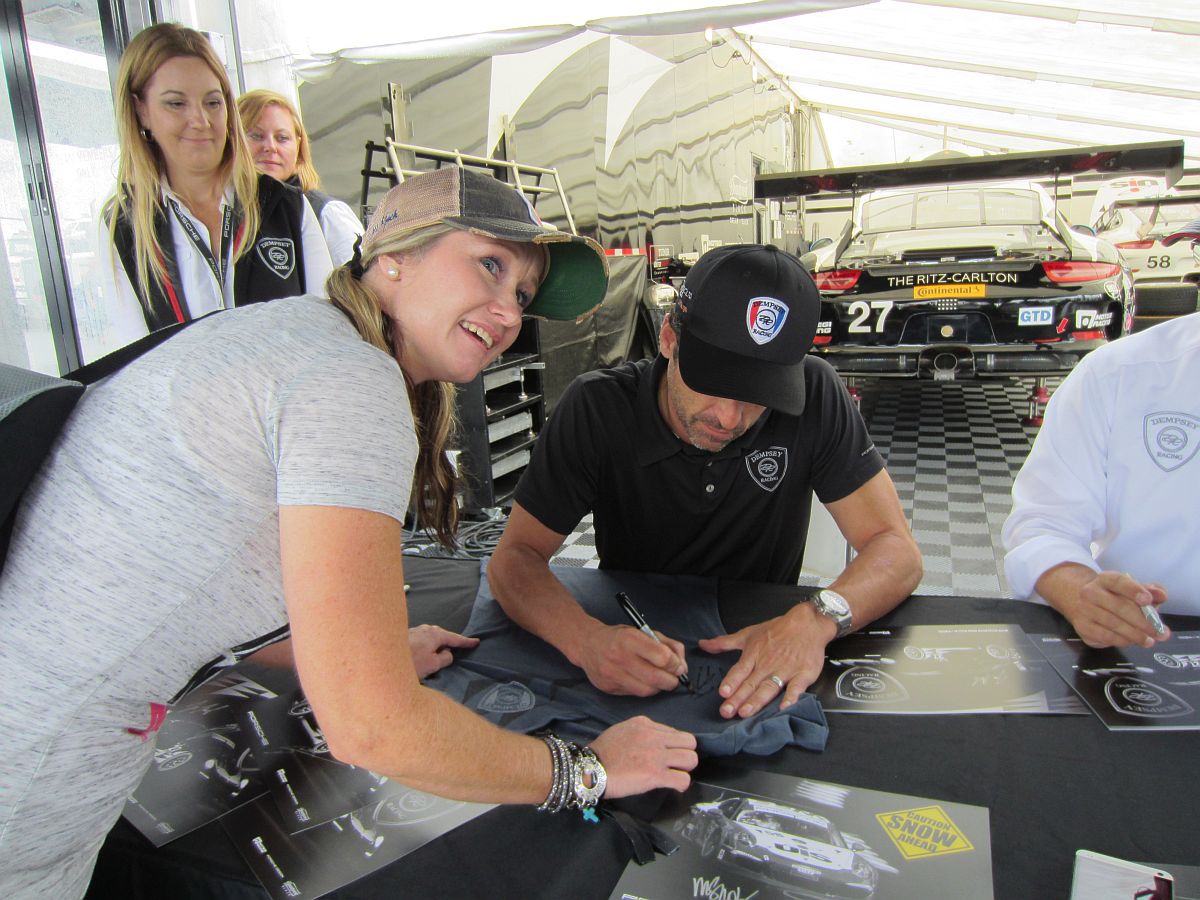
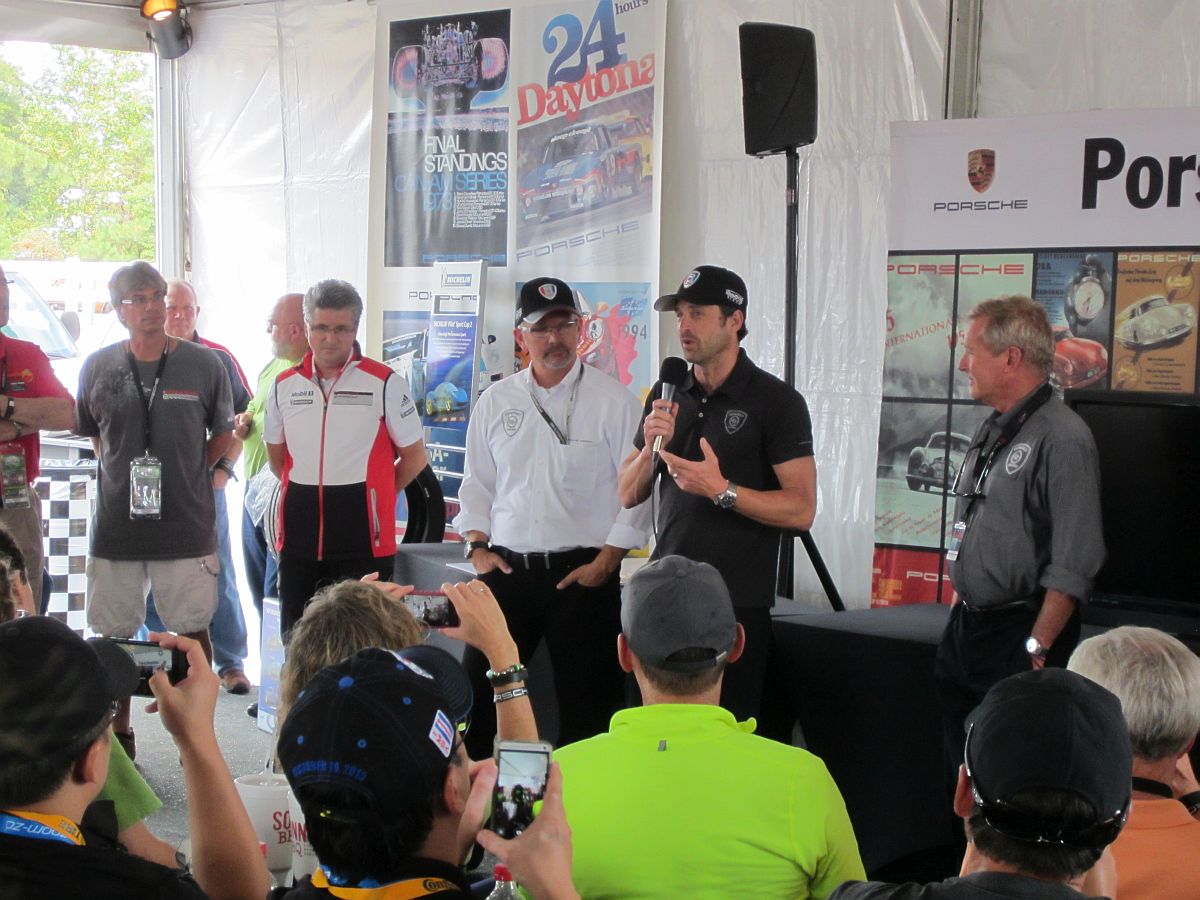
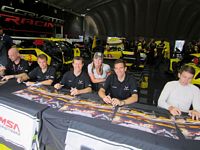
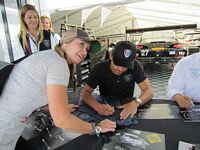
A first for the 427 and our first time in the Corvette Corral- great on both counts. My wife did get her picture with the Corvette Racing Team and the Action Express DP team, very nice guys and fan oriented in the midst of competition. We had been at the Porscheplatz in previous years as well as this one and the Corvette Corral had them beat in our opinion....despite Patrick Dempsey's team being there to talk.
A factory Z06 made an appearance so that owners not being able to make the trip to one of the Corvette Museum events to see the car could see what was coming.
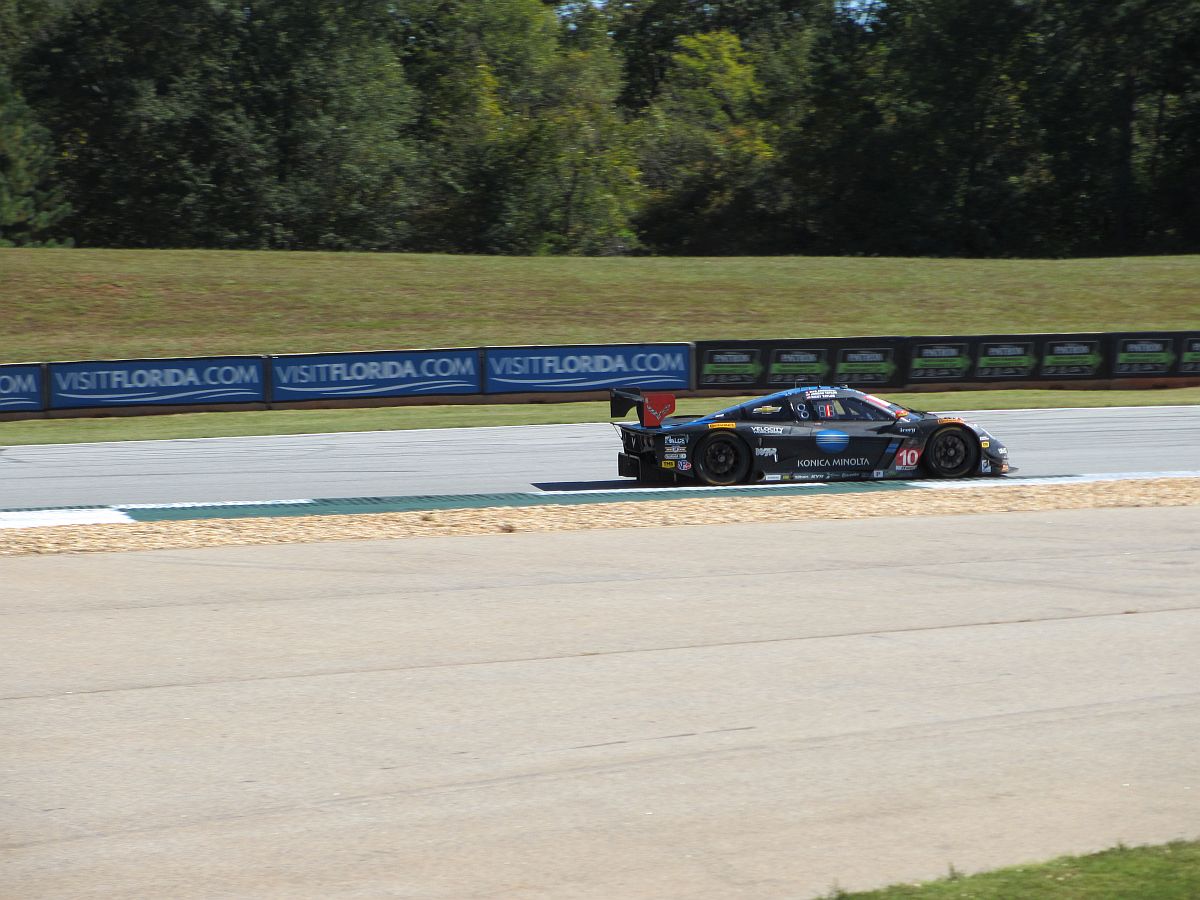
Corvette won the 2014 Tudor DP races (press release HERE) and Wayne Taylor Racing teammates and brothers in the Konica/Minolta Corvette DP car became the first Americans to win overall.
Great but long day, maybe next year we will show Porsche and Viper who the boss really is in GTLM


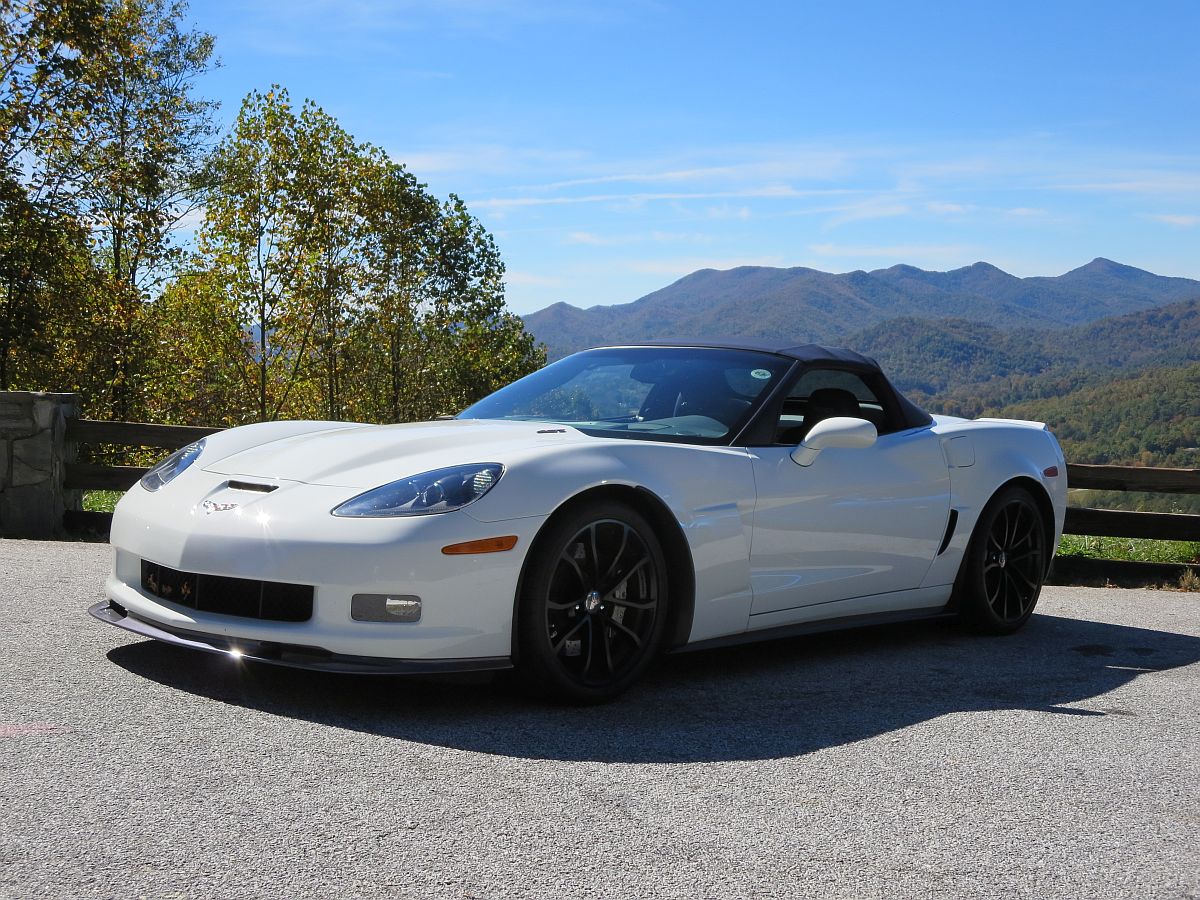
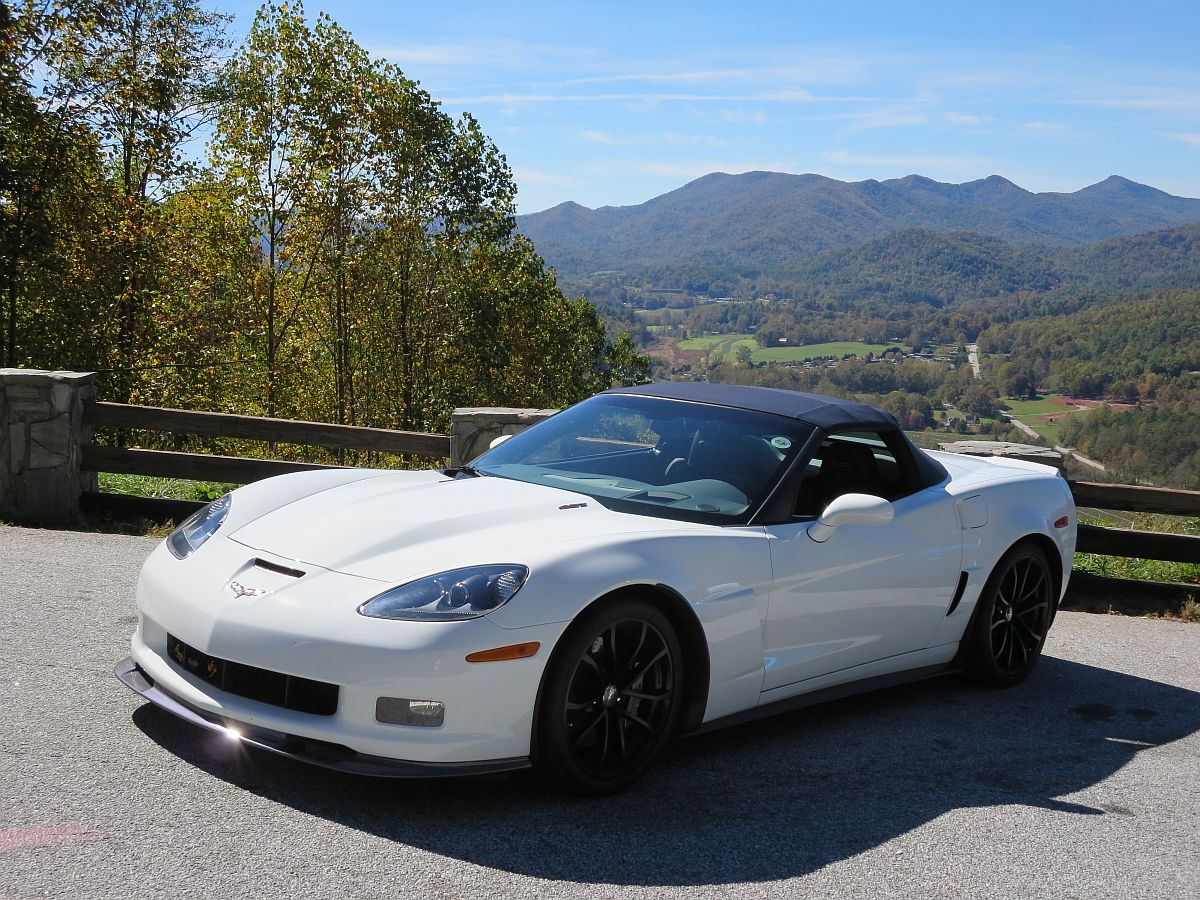
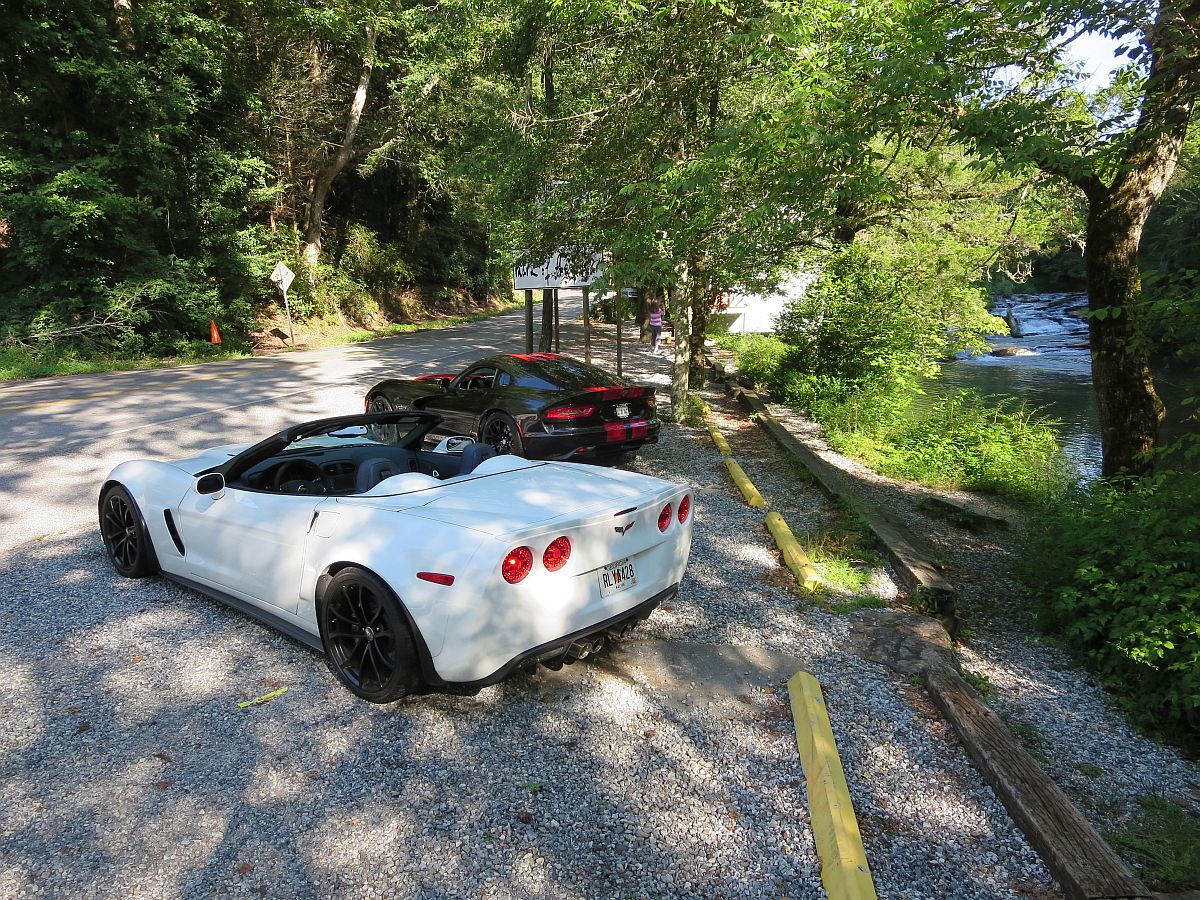
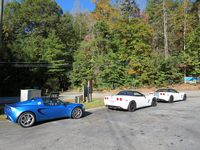
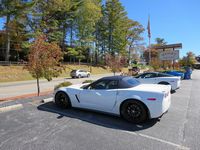
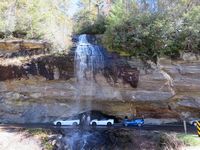
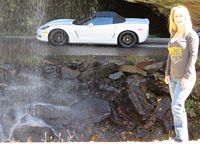
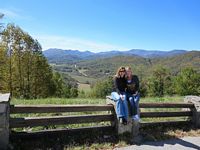
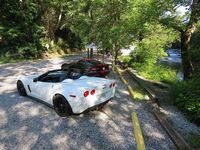
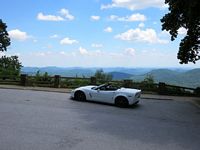
Fall 2014, off to some fun roads with friends in the North GA to Highlands, NC area.....


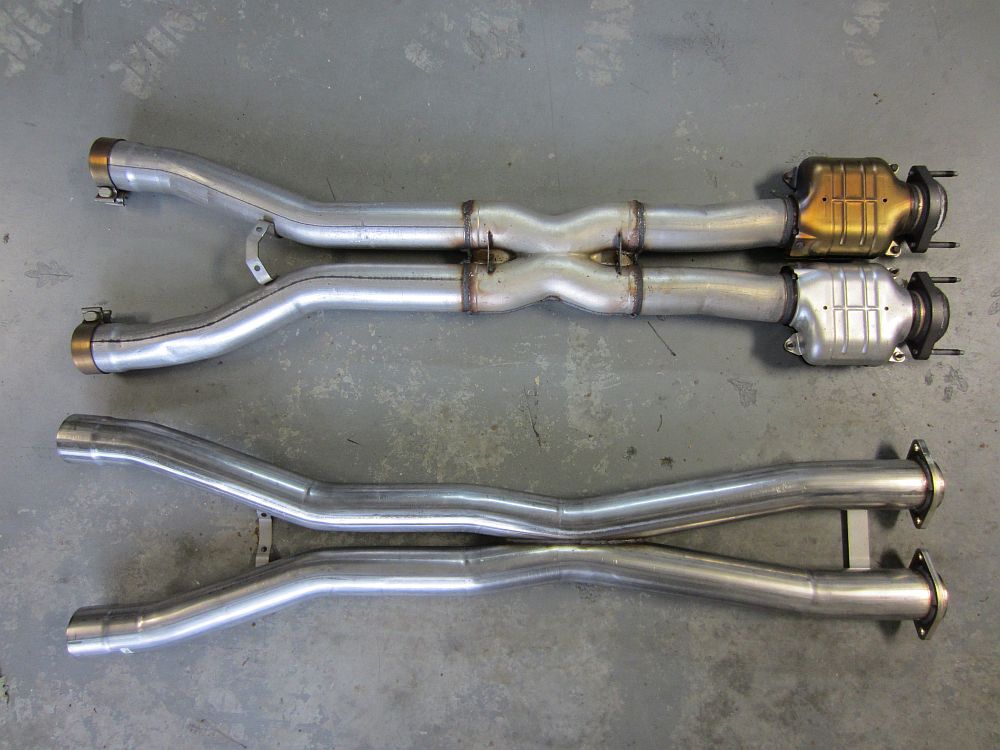
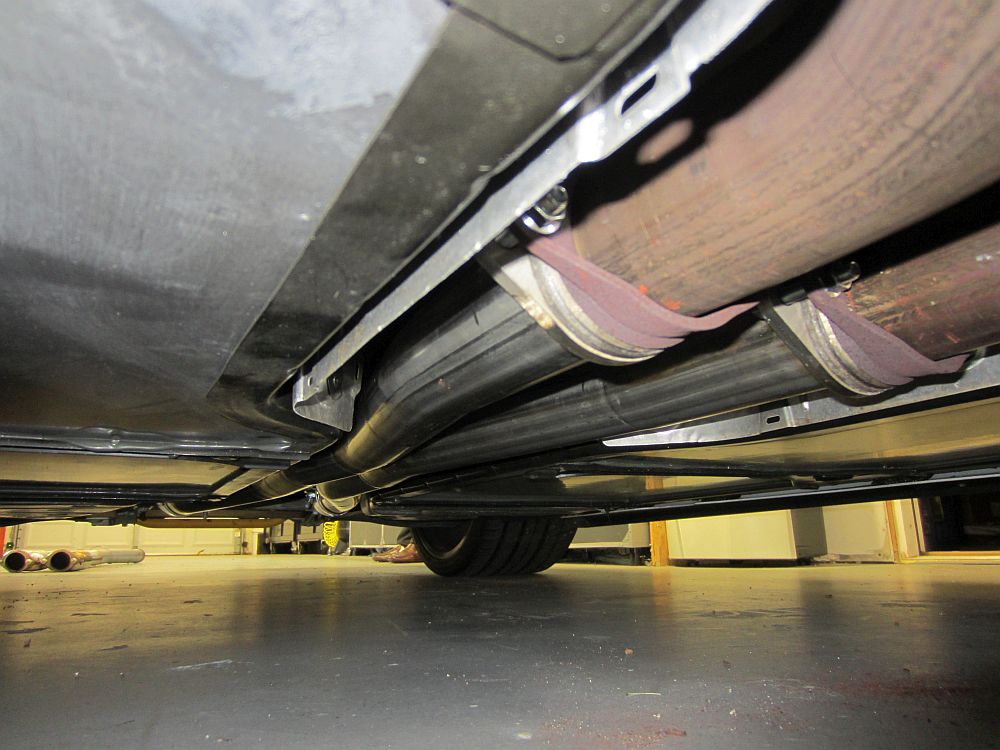
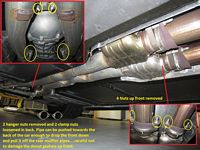
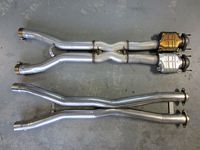
Corsa X-Pipe (P/N 14331) for 2012/13 Z06 and ZR1 (and 427) applications purchased from THMotorsports- installation instructions HERE, you will have to extract the parts specific to the x-pipe.
CF thread that got me thinking about this can be found HERE.
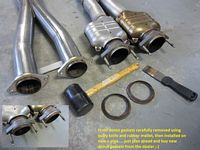
Prior to purchase I searched the forums and even emailed Corsa and could not find a conclusion that this was a direct swap for the OE x-pipe when retaining the factory mufflers- but it is. Corsa even replied that cutting WAS involved, it was not. Direct swap, pipe comes with all required hardware.....but I would recommend purchasing new donut gaskets from Chevrolet (2- P/N 10354707).
Heat seems to be reduced in the center tunnel area, and exhaust sound is a bit higher pitched with slightly reduced frequency and volume of the pops and burbles that sold me on the LS7. Center tunnel heat is WAYYYYY down, where I could have cooked meals in the center console before, now the cupholder and center console are just barely warmer than ambient temp now- HUGE improvement.....YMMV

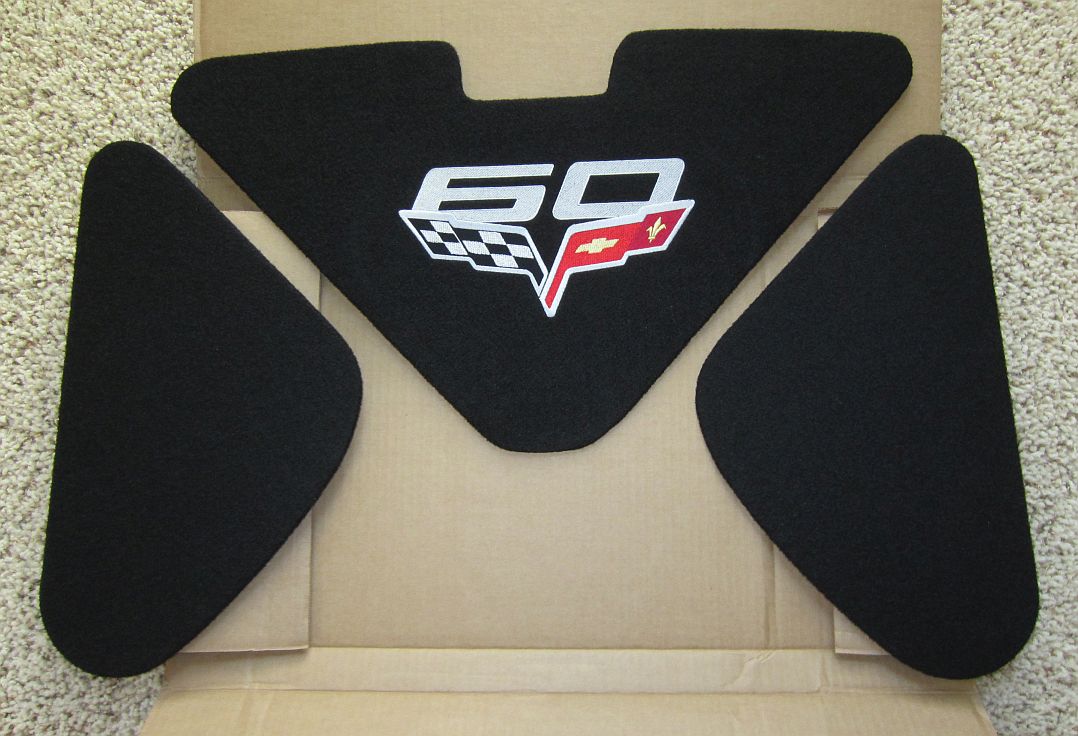
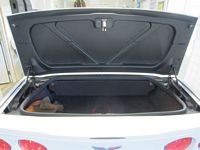
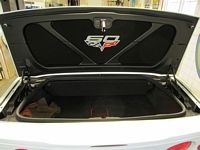
Embroidered "60th" trunk liner purchased on eBay from snakeskinner1- best deal on the net. I always thought the trunk looked like it was missing something, I think this is it. Attached with industrial Velcro, secure and removable.
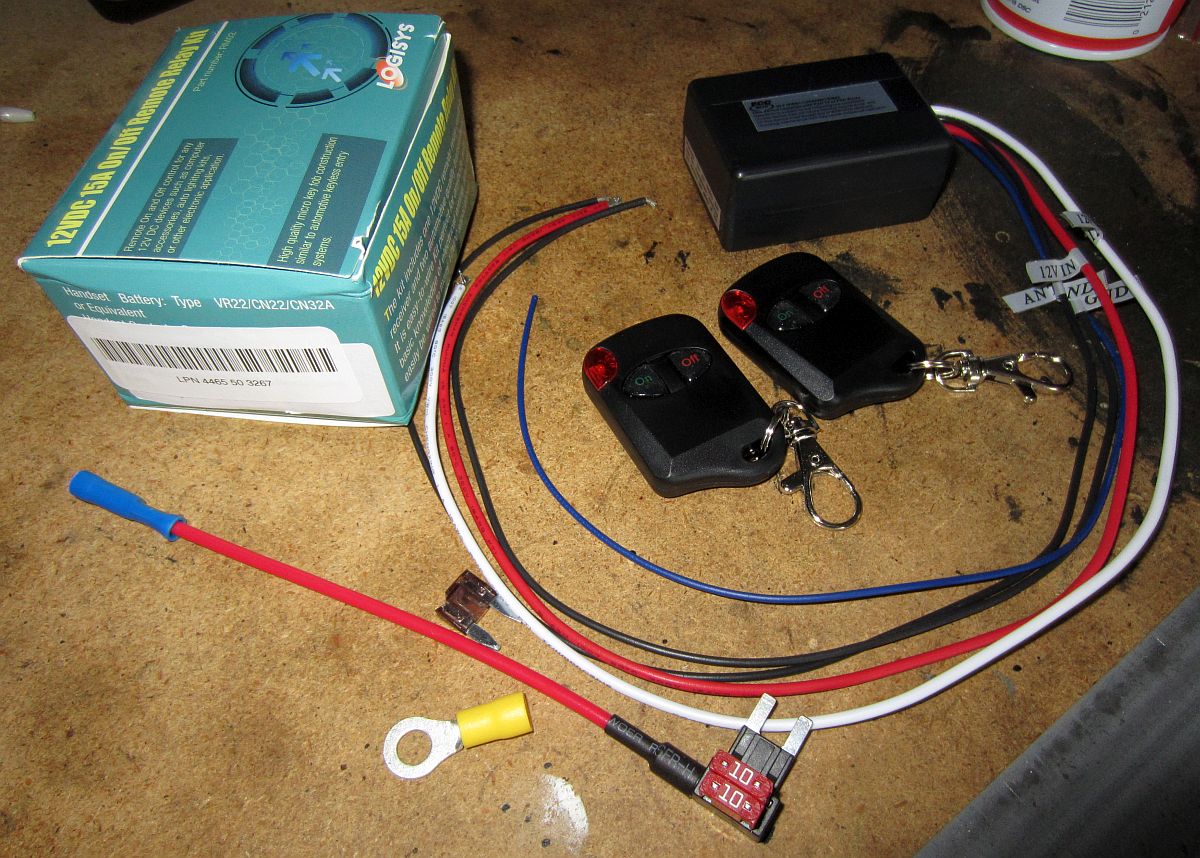
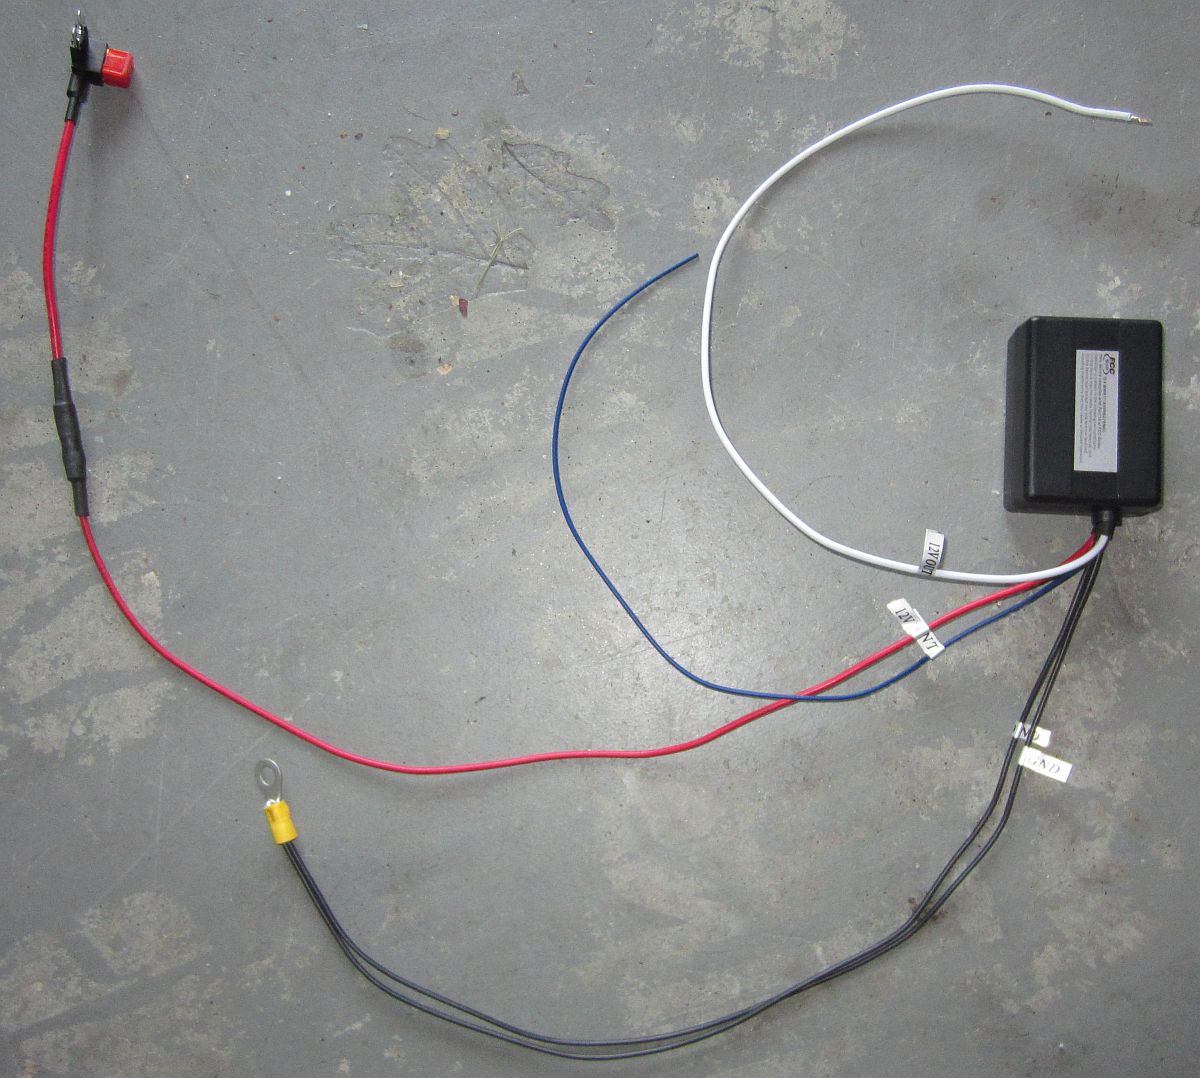
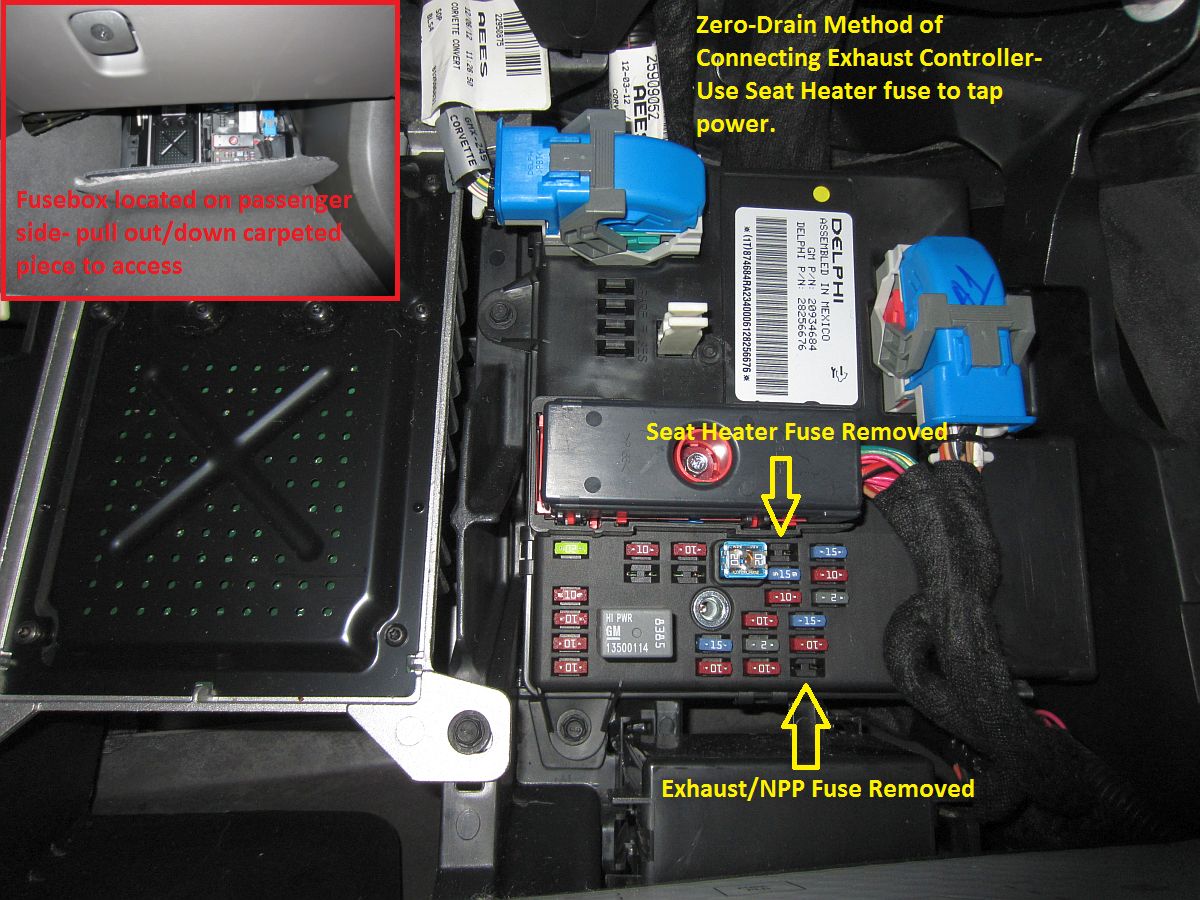
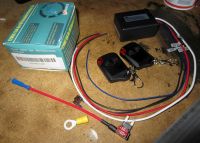
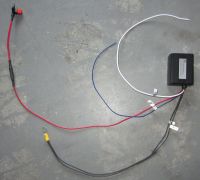
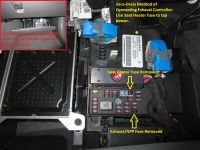
I wanted and was looking for a way to manually control the NPP exhaust and found Exterminator's DIY on Corvette Valley (PDF version archived HERE) that showed how to build and install a NPP exhaust remote control. The way he has wired his, it will remember the on/off position but has a little battery drain- even when turned off before turning the car off to minimize this. I wired mine a little differently using the zero battery drain method and an add-a-fuse tap, one caveat is that it does not remember the on/off position last set but always defaults to off/loud when the car is started- perfect for me. Instead of taking power from the NPP fuse this method required using the seat heater fuse to tap into 12v+.
This DIY build seems to resemble a popular aftermarket option: Forum thread HERE, archived in PDF format HERE.
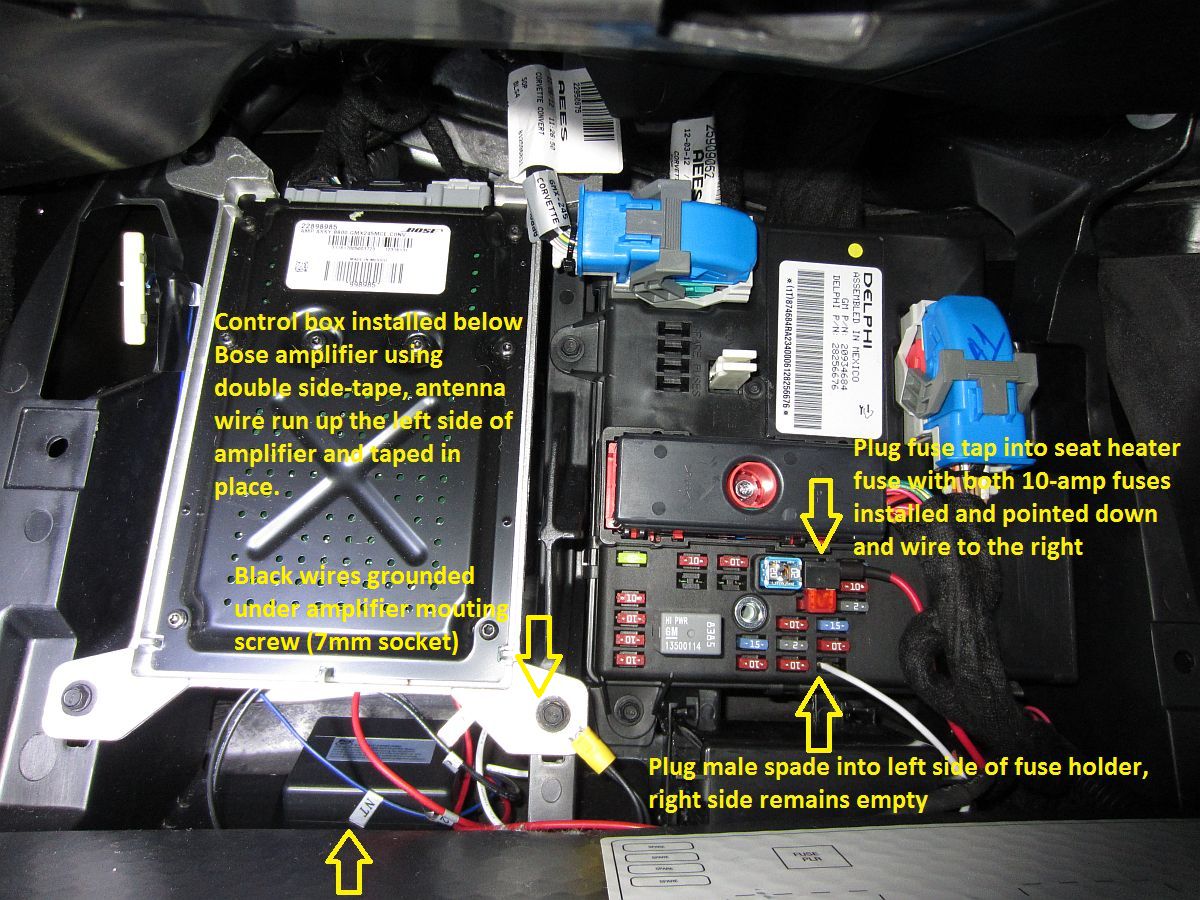
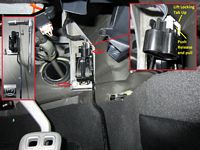
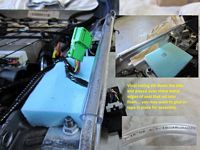
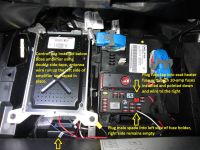
DIY version works great and only costs ~$25 in parts from Amazon: (1) Add-a-fuse power tap and (1) Logisys RM02 12V 15AMP Relay Kit with Two Remote Controls. Access the fusebox by gently pulling down the carpeted panel under the floor mat on the passenger side of the car, remove both 10-amp fuses from the seat heater and NPP exhaust valve fuse locations in the fusebox, plug both 10-amp fuses into the add-a-fuse sockets, connect the add-a-fuse red power wire to the remote control box red wire using the crimp connector (I also used heat shrink tubing over mine once crimped), the black ground wires from the remote control box are twisted together and grounded using the screw for the amplifier mount, white wire is attached to a male spade and plugged into the left side of the fuse holder (right side remains unused), box is tucked below amplifier (or double side taped), and blue antenna wire is run up the left side of the amplifier. Pics of my installation below:
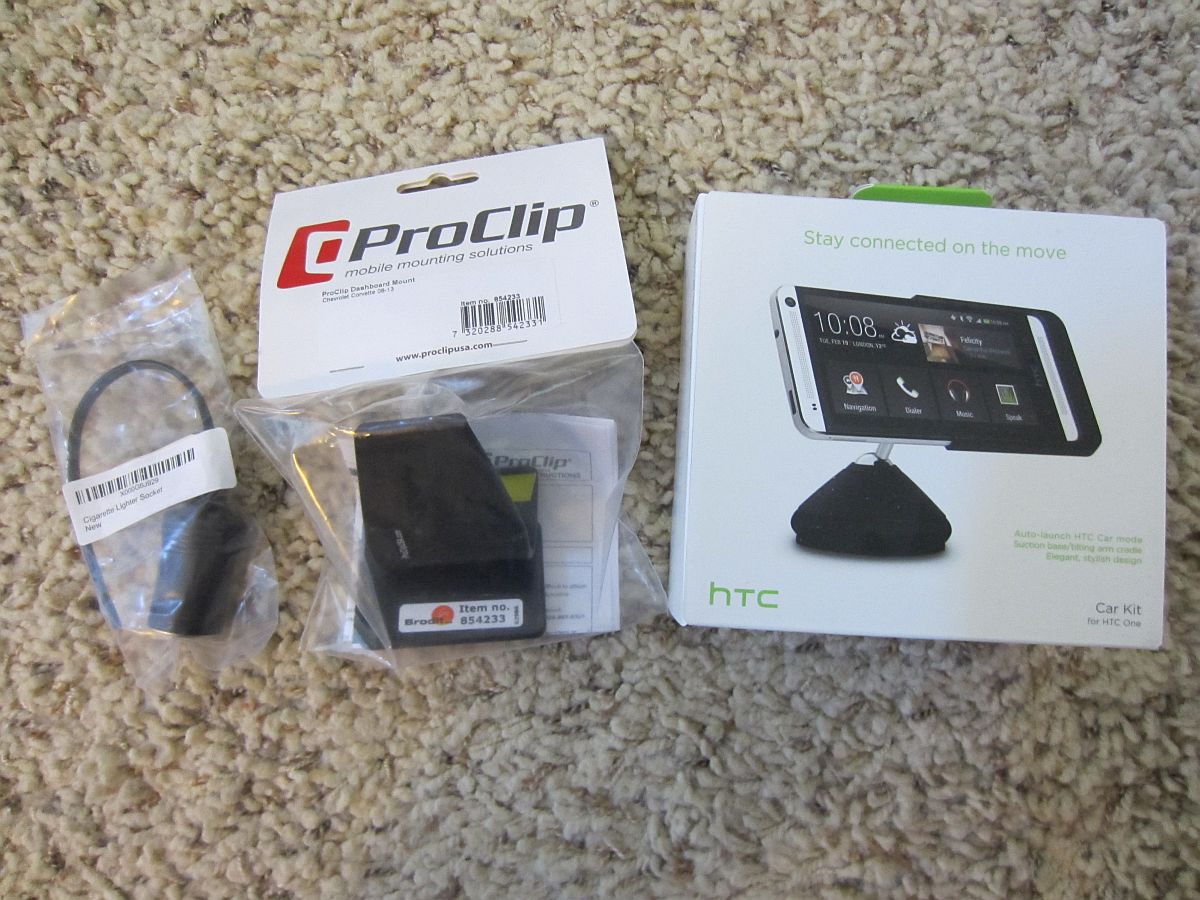
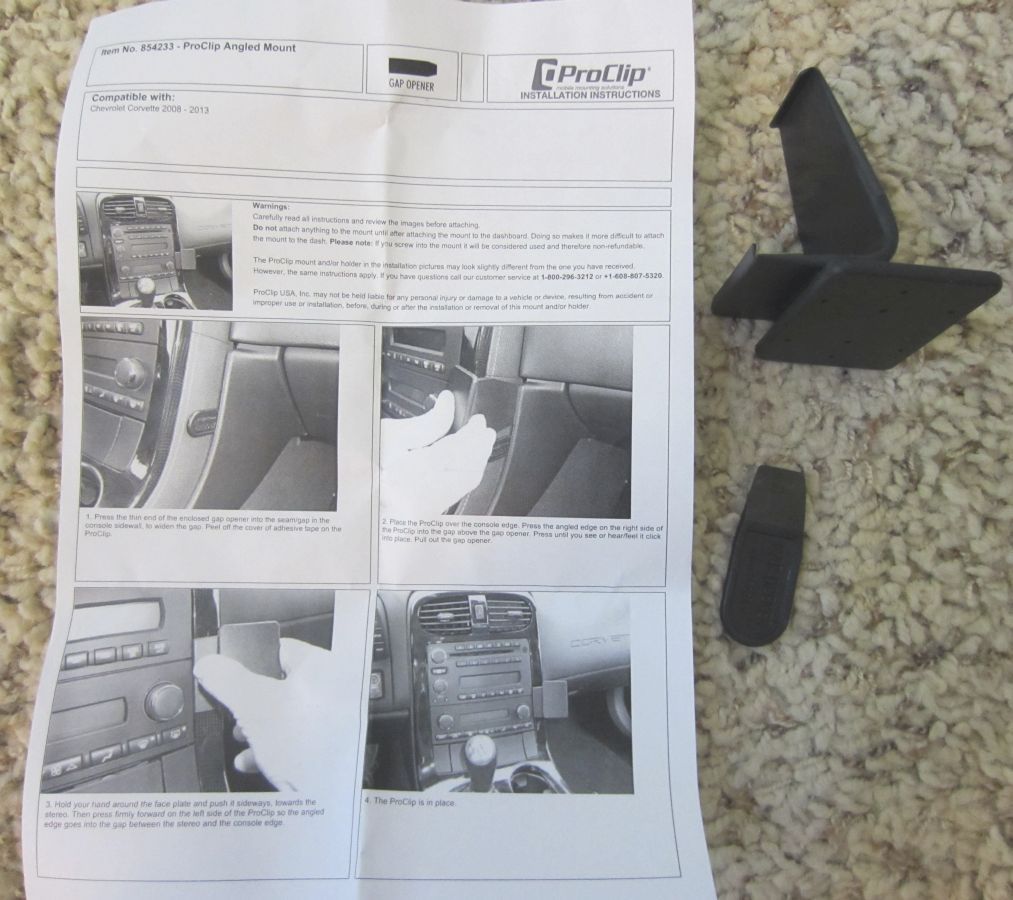
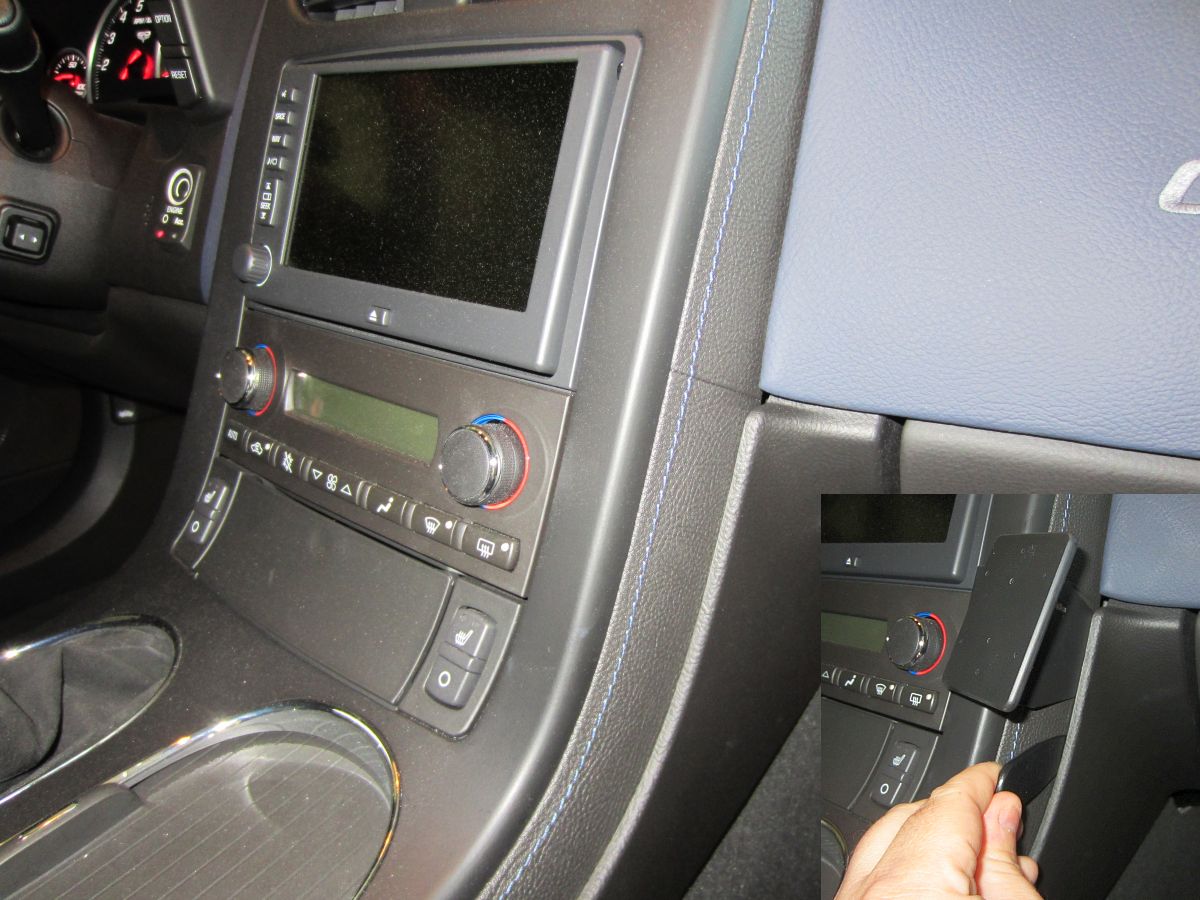
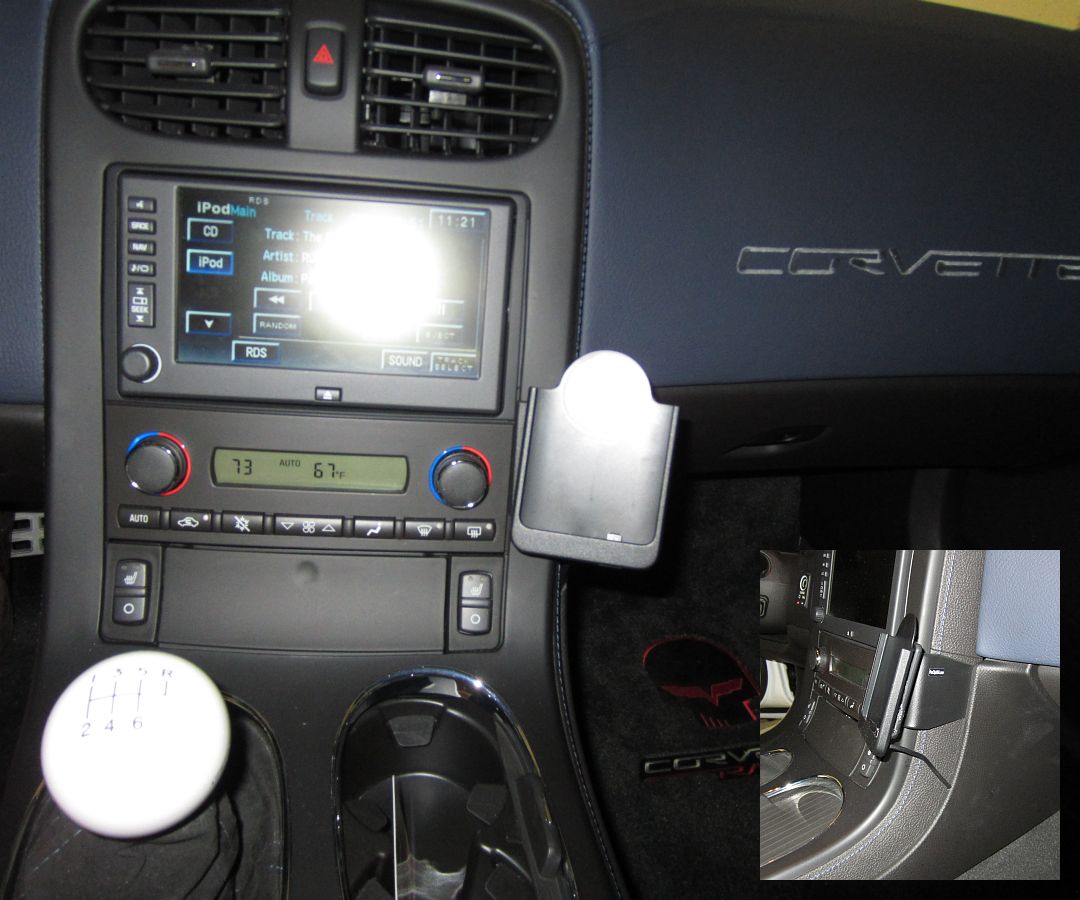
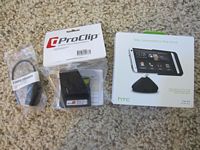
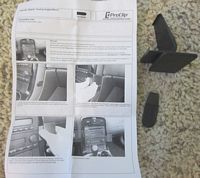
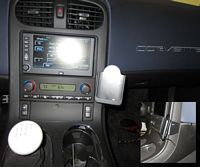
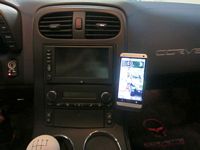
ProClip mount installed to be used in tandem with an HTC One phone dock (PDF installation instructions archived HERE). Ground and ignition 12v+ sourced at same locations as above remote exhaust control. I find that sometimes the dock needs to be modifed a bit to sit flat on the mounting surface, a little sanding and overnight curing for the E6000 adhesive and the dock is solidly mounted (but can be removed from the mount when the need to update the dock for a new phone arises- I LOVE E6000).
Nice to just slip the phone in the dock to charge it and use Google Maps.

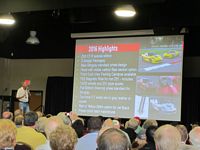
First time driving the 427 to the NCM Corvette Bash. The 2013 and 2014 NCM Corvette Bash events we had attended were big due to the C7 Stingray preview followed by the C7 Z06 preview. This year, the 2015 NCM Bash was a little less busy than the past events- the only news this year was some minor updates and new models.
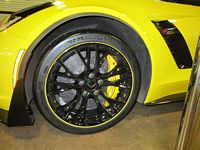
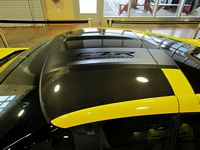
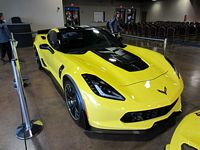
The most interesting of all new models was the C7.R Edition (unveiling video HERE) which is mainly unique aesthetic queues for the Z07 package cars, limited to 500 cars with unique VIN numbers......and to unveil this they also had one of the GT cars there with Tommy Milner. Museum repairs to fill "the hole" were still in process. We also stopped by the NCM track, amaziong to think we were at the ground breaking last year and the track is being used this year.
As always, nice to visit the museum with friends and see all of the Corvettes, as well as tour the Jack Daniels Distillery on the way up and tour the Makers Mark Distillery before heading home....and stop at some scenic points on the way.


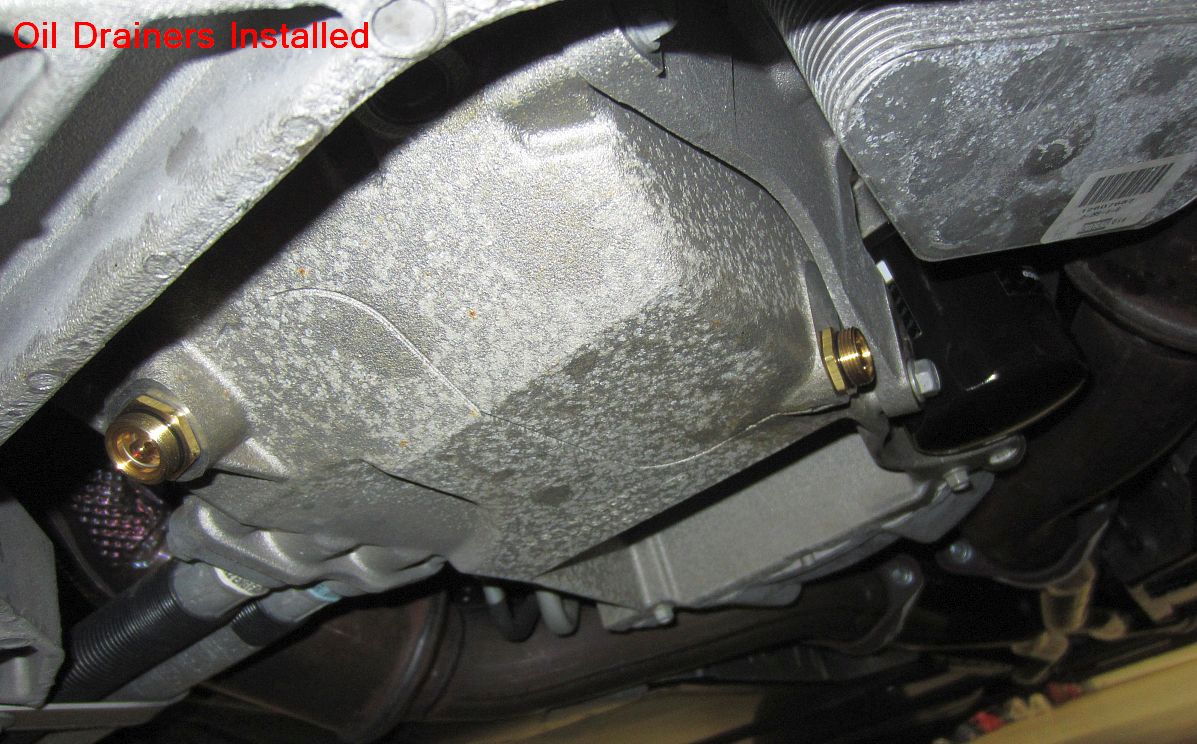
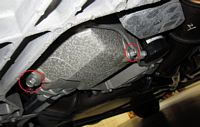
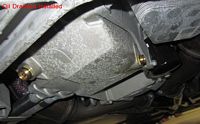
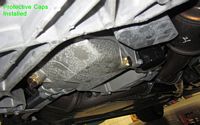
No Spill Systems Compact Oil Drainers installed, replace oil drain bolts. I had originally looked at the Fumoto valve I had used on other cars but it would not clear without some adapters/extensions and I didn't want them hanging down under the car, the low profile of the NSS oil drainer offers the same pros without the cons. Video of how it works HERE. I keep the oil drainer in a ziplock bag in the trunk just in case......

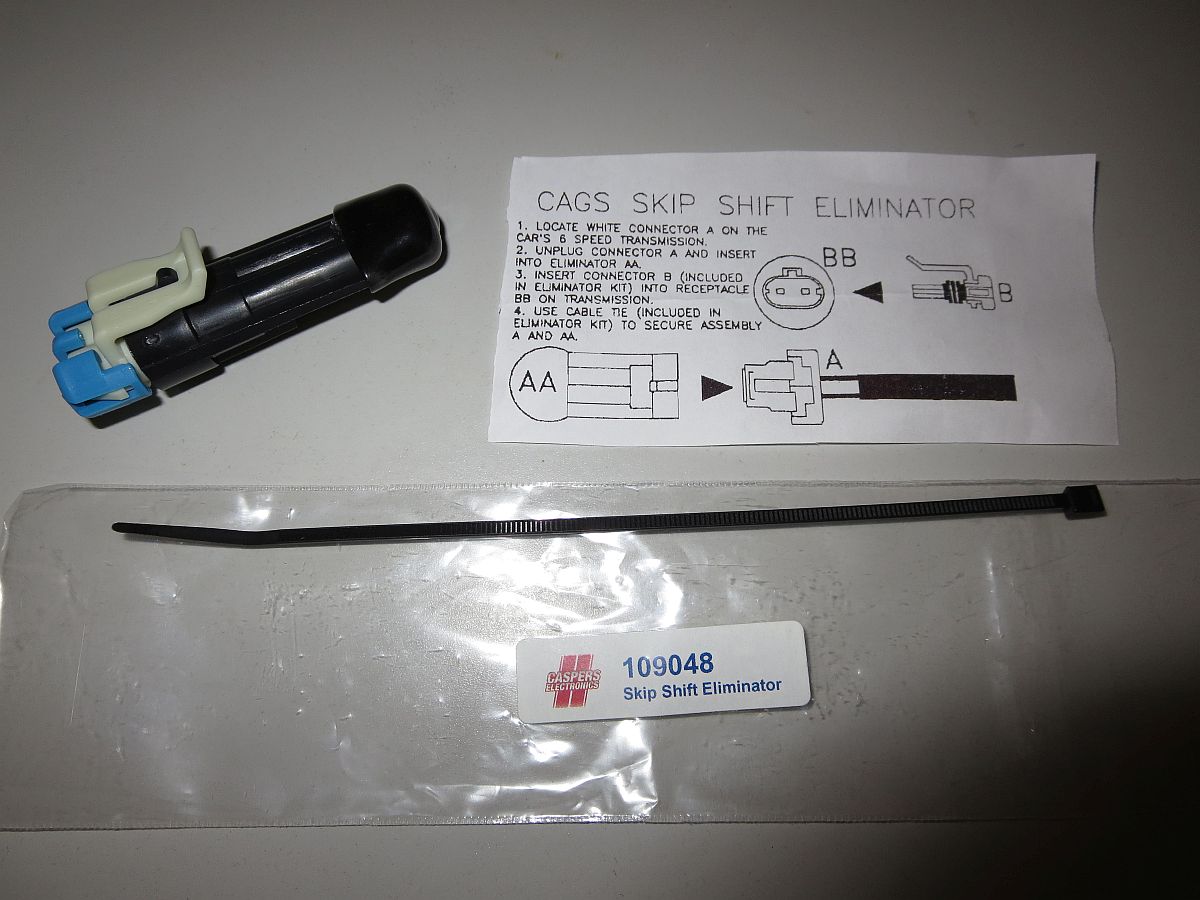
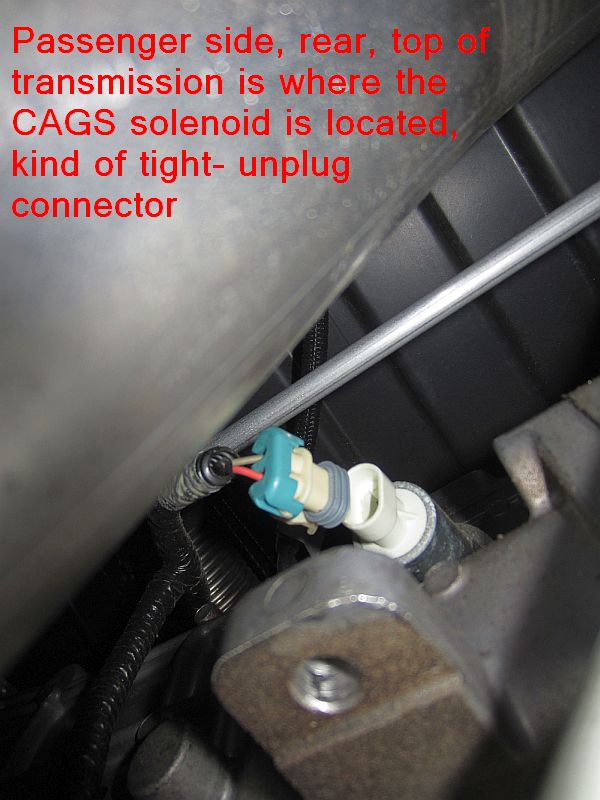
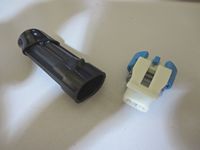
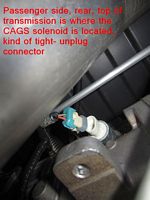
Casper Electronics CAGS Skip Shift Eliminator from Southern Car Parts installed (PDF installation instructions archived HERE). The CAGS did not bother me until I started commuting in ATL traffic, drives much better now without having to fight the lock out solenoid.


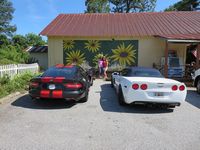
427 had a play date with friends' new Viper GT (my next car will be a Viper) to get break in miles started:


.....And then it was Viper time......I wish I had the $$$$$ to support all of the cars I love, but can only afford one at a time. The 427 was traded in on the Viper, I think the 427 will be missed more than any other car I have parted with- maybe I'll have another LS7 powered Corvette in the future.
Corvette 427 Reviews:
Corvette Magazine: Three Days in the D in a 2013 Corvette 427
GM Authority: Saluting The Corvette C6 In The 2013 427 Convertible
MotorTrend: First Test- 2013 Chevrolet Corvette 427
MotorTrend: Quick Drive- 2013 Chevrolet Corvette 427
Car&Driver: 2013 Chevrolet Corvette 427
Road&Track: 2013 Chevrolet Corvette 427
Automobile: Driven: 2013 Chevrolet Corvette 427
Edmunds: 2013 Chevrolet Corvette 427 Track Test
Autoweek: 2013 Chevrolet Corvette 427 Review Notes
Super Chevy- 2013 Chevrolet Corvette 427 Convertible- Sky is the Limit
The Truth About Cars Capsule Review: 2013 Chevrolet Corvette 427
The Car Connection: Overview, 2013 Chevrolet Corvette 427
AutoSavant: 2013 Chevrolet Corvette 427
MotorAuthority: 2013 Chevrolet Corvette 427
Fox News- 2013 Chevrolet Corvette 427
Examiner: 2013 Chevrolet Corvette 427 60th Anniversary Ready to Rumble
Automobiles Review: 2013 Chevrolet Corvette 427
KBB: 2013 Chevrolet Corvette 427
Autos CA: 2013 Chevrolet Corvette 427
LA Car: 2013 Chevrolet Corvette 427
Rides Mag: Driven- 2013 Chevrolet Corvette 427
WorldCarFans: Corvette 427 Collector Edition Announced
Corvette Magazine: Drop Top Duel 2013 Corvette 427 vs 2014 Corvette Stingray Convertible
Corvette and 427 Video: *High Speed Connection Recommended*
C6 Corvette Owner Instructional DVD
2013 Chevrolet Corvette 427 Convertible - Autoweek walk around with Tadge Juechter
2013 Chevrolet Corvette 427: All American Hero Motor Trend Ignition Episode 34
Track Tested: 2013 Chevy Corvette 427 Convertible -- Edmunds.com
National Geographic Ultimate Factories: Corvette
Discovery Channel: Rebuilding an Icon, The Corvette (5 Parts): 1, 2, 3, 4, 5
Motor Trend Head to Head: 2013 Viper GTS vs 2012 Corvette ZR1 (with Randy Pobst)
Corvette Grand Sport em Nurburgring
Corvette Racing (C6.R) We're Ready
Corvette Racing's Tommy Milner, Petit Le Mans 2013 (last year C6.R and ALMS)- /DRIVER'S EYE
2010 Track to Street: Corvette Racing Series: Episodes 1, 2
2011 Track to Street: Corvette Racing Series: Episodes 1, 2, 3, 4, 5, 6, 7, 8, 9, 10, 11, 12
Commercial: Corvette Heaven
Corvette/427/LS7 Articles/Documents/Files:
2013 Corvette 427 Press Release
Chevy Culture, A Legend Returns: 2013 Corvette 427 Convertible
2013 Corvette Navigation/Infotainment Manual
2012 Corvette Slide Presentation from 2011 Bash
Pfadt Corvette Alignment Guide and Corvette Camber Alignment Settings
Super Chevy: How to Maintain Valvetrain Stability- LS7 Exhaust Valves (PDF Version HERE)
Ruthless Pursuit of Power: Lucky Seven Edition The Mystique of the Z/28's 7-Liter, 7000-RPM, LS7 by Hib Halverson (Z28 version HERE)
Vette Magazine- Chevrolet Corvette: 60 Years of an American Icon, Part 1 (1953-1982: C1, C2, and C3)
Vette Magazine- Chevrolet Corvette: 60 Years of an American Icon, Part 2 (1984-2013: C4, C5, and C6)
David Farmer's C6 Torque Specs (2005)- Facebook Page HERE
Final Overall C6 Corvette Production Numbers Summary HERE
2013 C6 Production Numbers Detailed HERE
2013 Corvette 427 Production Numbers HERE
LS7 EFI Crate Engine Specifications
Corvette DIY Guides/Installation Instructions:
BillsWebSpace: C6 Corvette Dry-Sump Engine Oil Change
BillsWebSpace: Manual Transmission and Differential Fluid Change
BillsWebSpace: Ranger Method Clutch Fluid Replacement
Ranger Method Clutch Fluid Replacement and Information
BillsWebSpace: Elite Engineering Heel/Toe Gas Pedal and Dead Pedal Installation
BillsWebSpace: Later (2008+) C6 Key Fob Battery Replacement
BillsWebSpace: Installing TFS Seat Repair Kit
BillsWebSpace: NPP Exhaust Controller DIY- Build and Install
CF Dreamin's Manual Transmission Fluid Change
CF Dreamin's Differential Fluid Change
LMBToms's Brake Pad and Rotor Change
Junkman2008's Power Steering Fluid Change
DSvettes Driver Door Handle Installation- Great detail around driver door panel removal
DSvettes Passenger Door Handle Installation- Great detail around passenger door panel removal
CF cclive's C6 Key Fob Programming Instructions
Ray's (kawal.net) Corvette C6 Dash Replacement
Ray's (kawal.net) Corvette C6 Ignition Controlled Power Outlet
CF VIPNiSS's Outside Door Switch Fix
Lieblweb's Rocking Seat Fix (pdf HERE)
racerxr's C6 Low Beam Headlight Fix (.pdf)
David Farmer's Torque Specs and DIY Page
C6 Corvette Gas Tank/Fuel Pump Removal and Replacement Guide (PDF Version)
Hib Halverson's LS7 Wiggle Test DIY Guide
CF Kokopelli's Guide to Disable F55 (PDF version HERE)
CF JKbride's DIY Fix for "Loose Gas Cap" indicator aka code P0449 w/Pics (PDF version HERE)
Forums and Clubs:


Other Corvette Sites: