
O2 SIM INSTALLATION INSTRUCTIONS
Tools: 8mm Socket Small flat-head screwdriver Electrical Tape
Step 1: Preparation
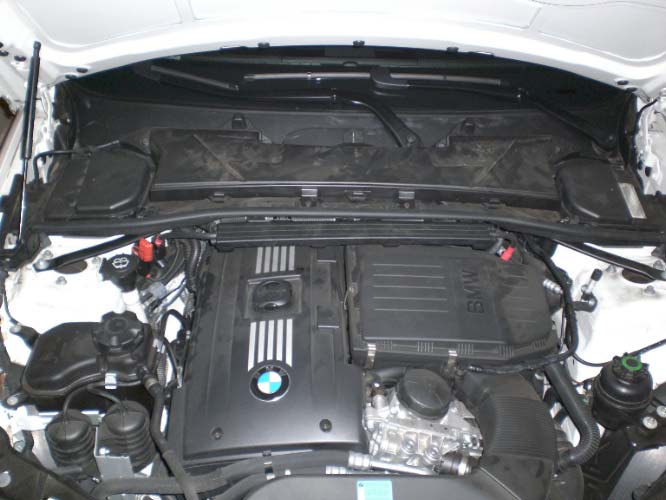
-Disconnect the
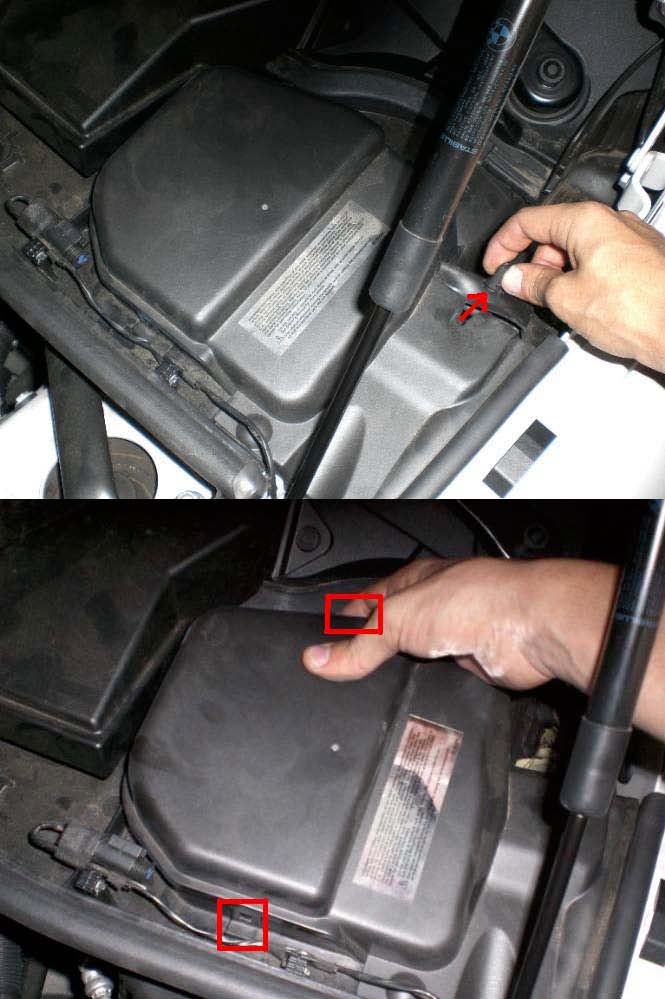
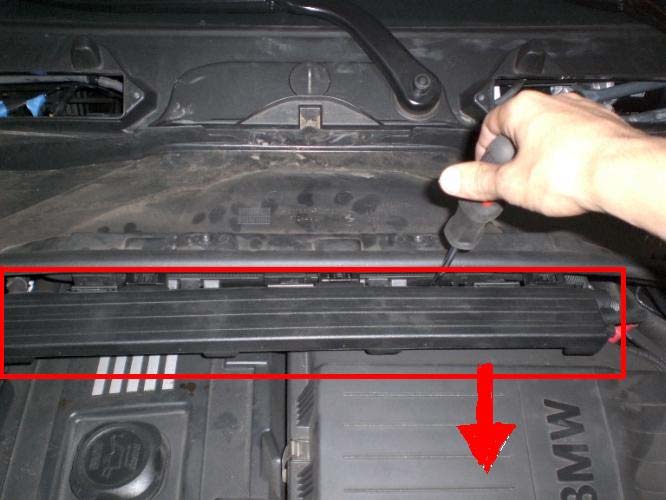
Step 2: Access the ECU box located in the engine bay, passenger side. -Remove side covers by pulling out the rubber tabs and releasing the front and rear clips.
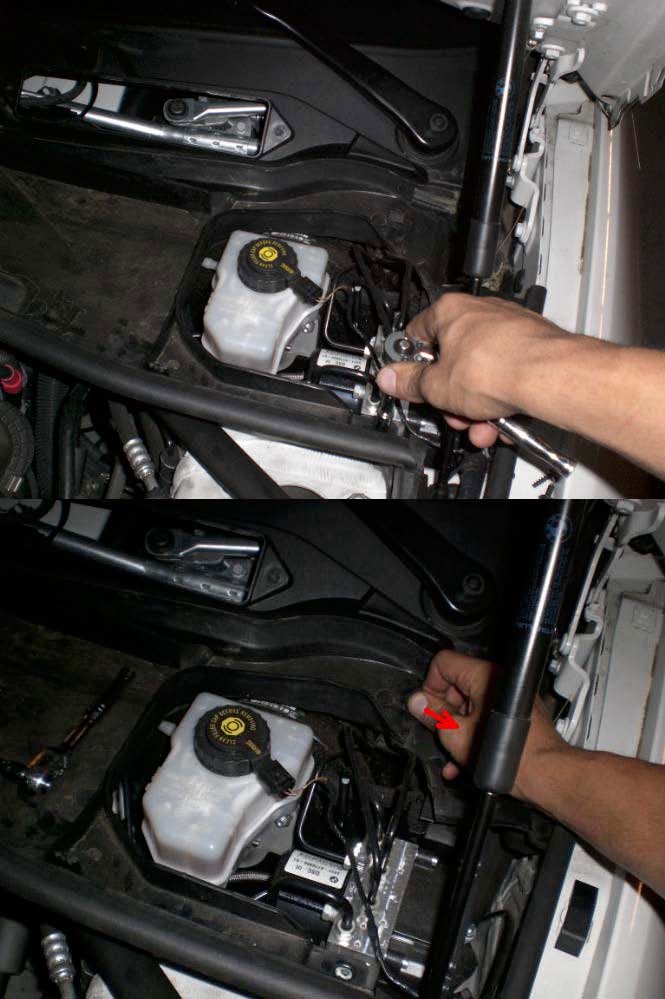
-Remove the HVAC air filter by unbolting six 8mm bolts and set it to the side
-Unclip the left and right temperature sensors and put them out of the way. The sensor on the driver side will just unclip. Turn and pull straight out to remove the sensor on the passenger side.
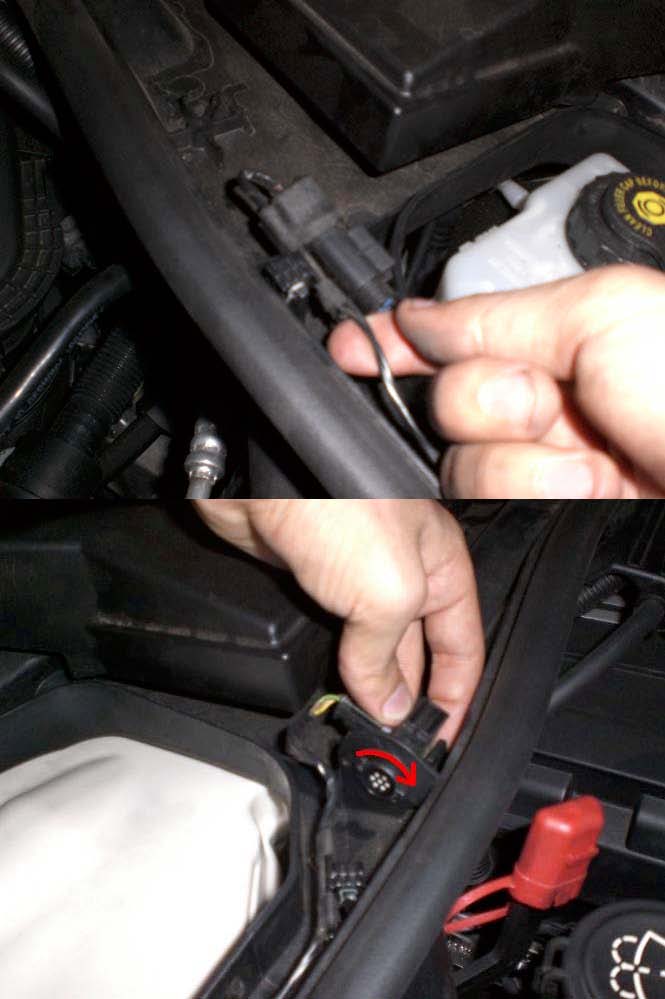
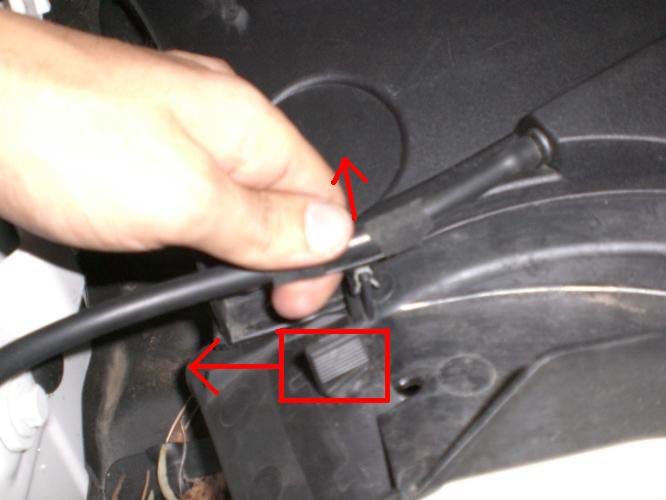
-Unclip the battery cable by sliding it straight out.
-Release the cable bundle using a flat-head screwdriver.

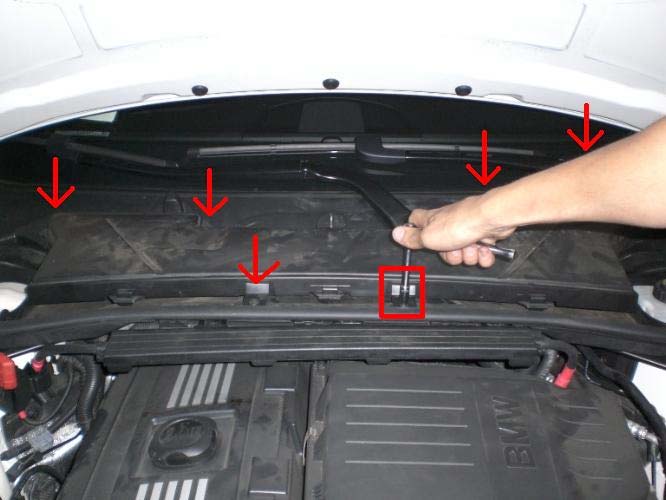
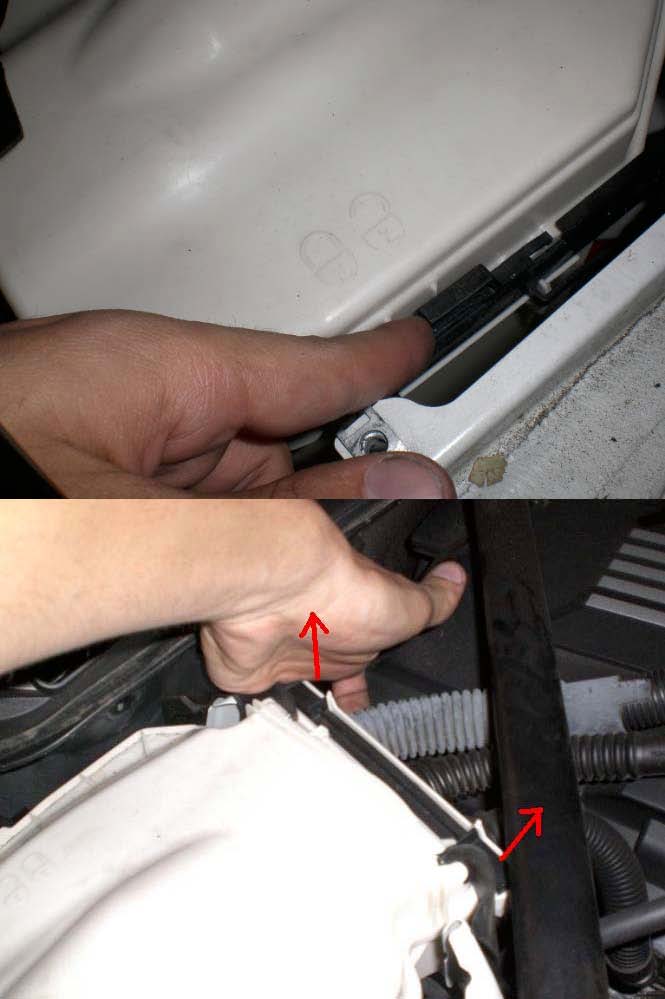
-Remove the two 8mm bolts that hold down the plastic cowl and remove two rubber tabs and a wash fluid line
-Remove the plastic cowl and place to the side.
-Open the ECU box located on the passenger side by sliding the clips into the unlock position (front & back) and pulling the clips off on either side (left & right)
Step 3: Connect the O2 Sim
- Remove the LEFT LARGER connector by sliding the slider to the left and pulling up.
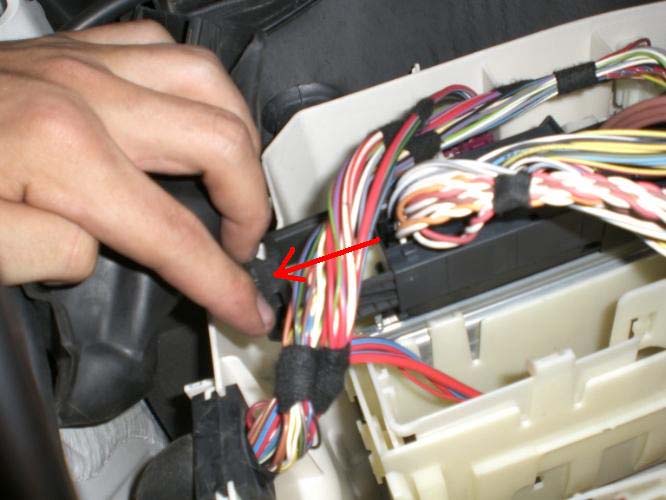
-Remove the slider by pushing in two small pins on the bottom of the connector and pulling all the way out.
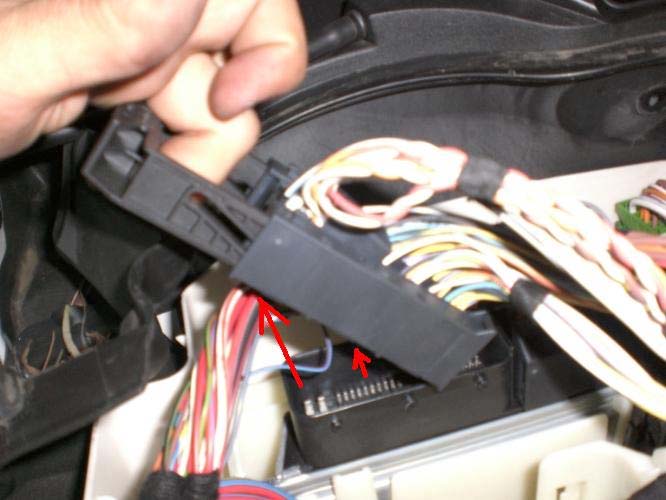
-Remove the black sub connector by releasing it from the clip (Shown in red) and sliding it out.
-Locate pin #32 and remove the BLACK-RED wire by slightly pushing down on the connector and pulling out. Slide in the BLACK connector from the O2 sim. Slide the male connector from the O2 sim into the female connector that was originally removed and cover the connection with electrical tape.
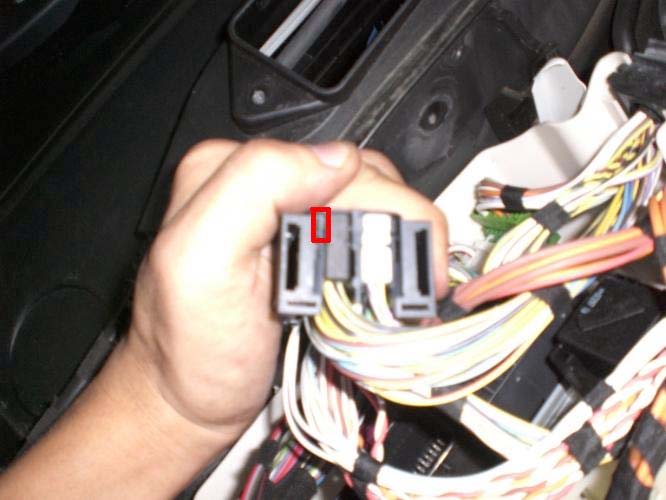
- Replace the LEFT LARGER connector -Use the same process as shown above in step 3 to remove the RIGHT SMALLER connector.
-Locate pin #19 on the black sub-connector and remove the YELLOW wire by slightly pushing down on the connector and pulling out. Slide in the WHITE connector from the O2 sim. Slide the male connector from the O2 sim into the female connector that was originally removed and cover the connection with electrical tape.
-Locate pin #20 on the black sub-connector and remove the YELLOW wire by slightly pushing down on the connector and pulling out. Slide in the RED connector from the O2 sim. Slide the male connector from the O2 sim into the female connector that was originally removed and cover the connection with electrical tape.
-Reconnect both connectors into the ECU and start up the car. It should idle and run normally, otherwise there is a faulty connection.
-Repeat Step 2 in reverse to put back to stock. -Make sure to clear all existing codes and give the ECU about 50 miles to adapt.
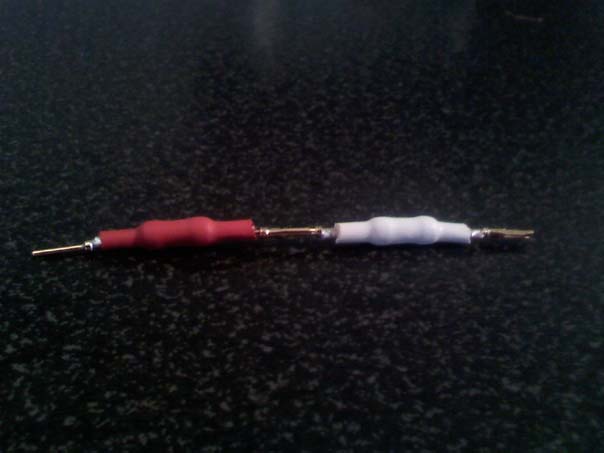
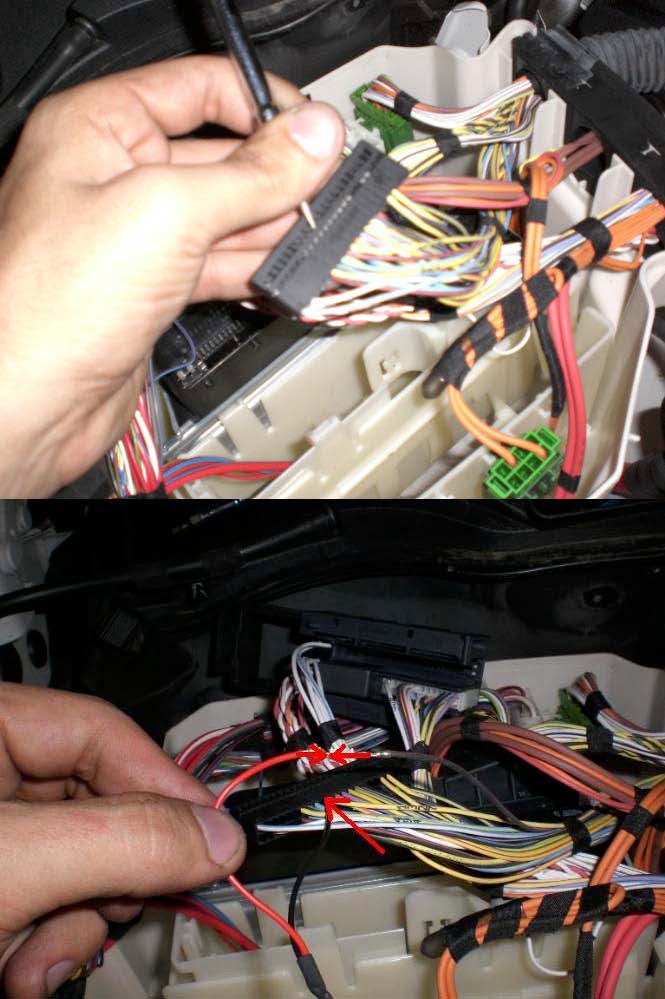
If your vehicle continues to get codes PO420 and PO430,
please attach the included
adjustment harness between the red and white looms on the Riss Racing O2
Simulator.