
PERFORMANCE ENGINE SOFTWARE, LLC
BMW 335, 535 INSTALLATION MANUAL
INTRODUCTION
Thank you for purchasing PES software. Please take the time to read all of the following instructions very carefully before proceeding to the next steps.
The PES computer has been designed to fit your car and work perfectly with no guesswork at all. We have found that most problems arise when the manual isn’t followed, or a careless mistake is made during installation. For this reason PES highly recommends the installation be performed by a PES install center or a qualified professional mechanic with diagnostic equipment.
Remember; we are here to support you and help with any questions you may have. Just call and ask! If you are installing the kit yourself and have a problem it may be impossible for PES to help diagnose the problem unless you have the proper diagnostic equipment.
Your OBDII system remains fully functional with this system.
PLEASE NOTE:
The manual is written step by step from the average installer’s point of view. Most steps have a corresponding image number(s) in high resolution. Some of the simplest steps do not have an associated image.
The photos used in this manual were taken during the installation on a 2007 335 coupe.
INSTALLATION STEPS
1) Remove ignition key.
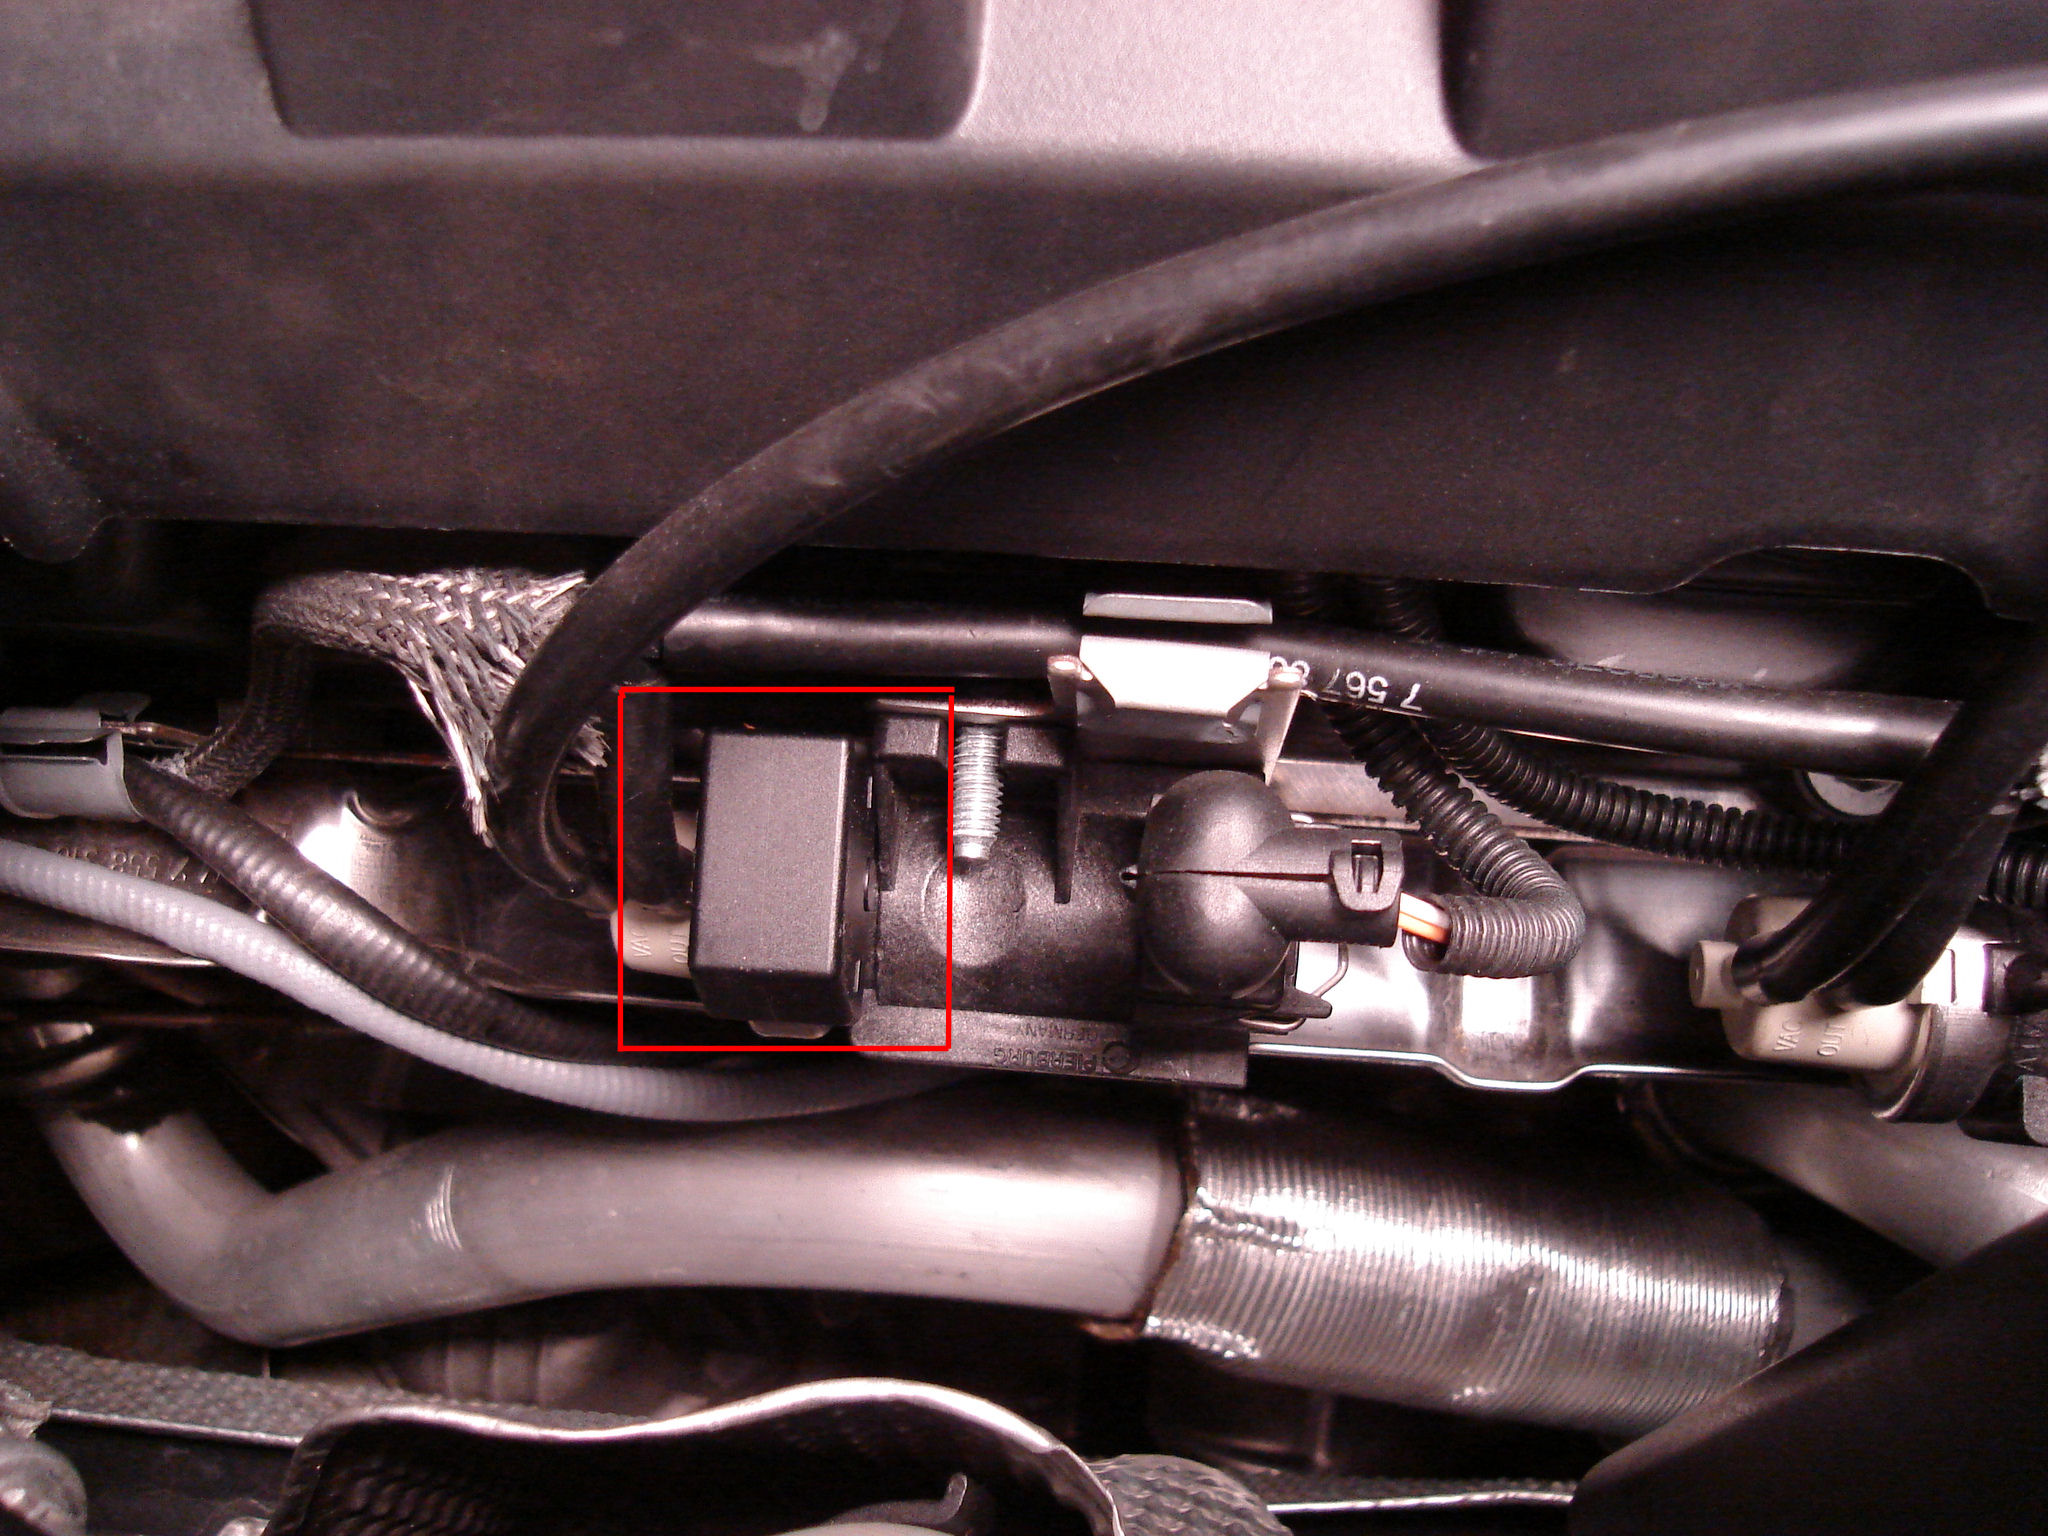
2) Open the hood. On the passenger side of the engine locate
2 solenoid turbo control valves. There is one to the front of the engine and
one to the rear.

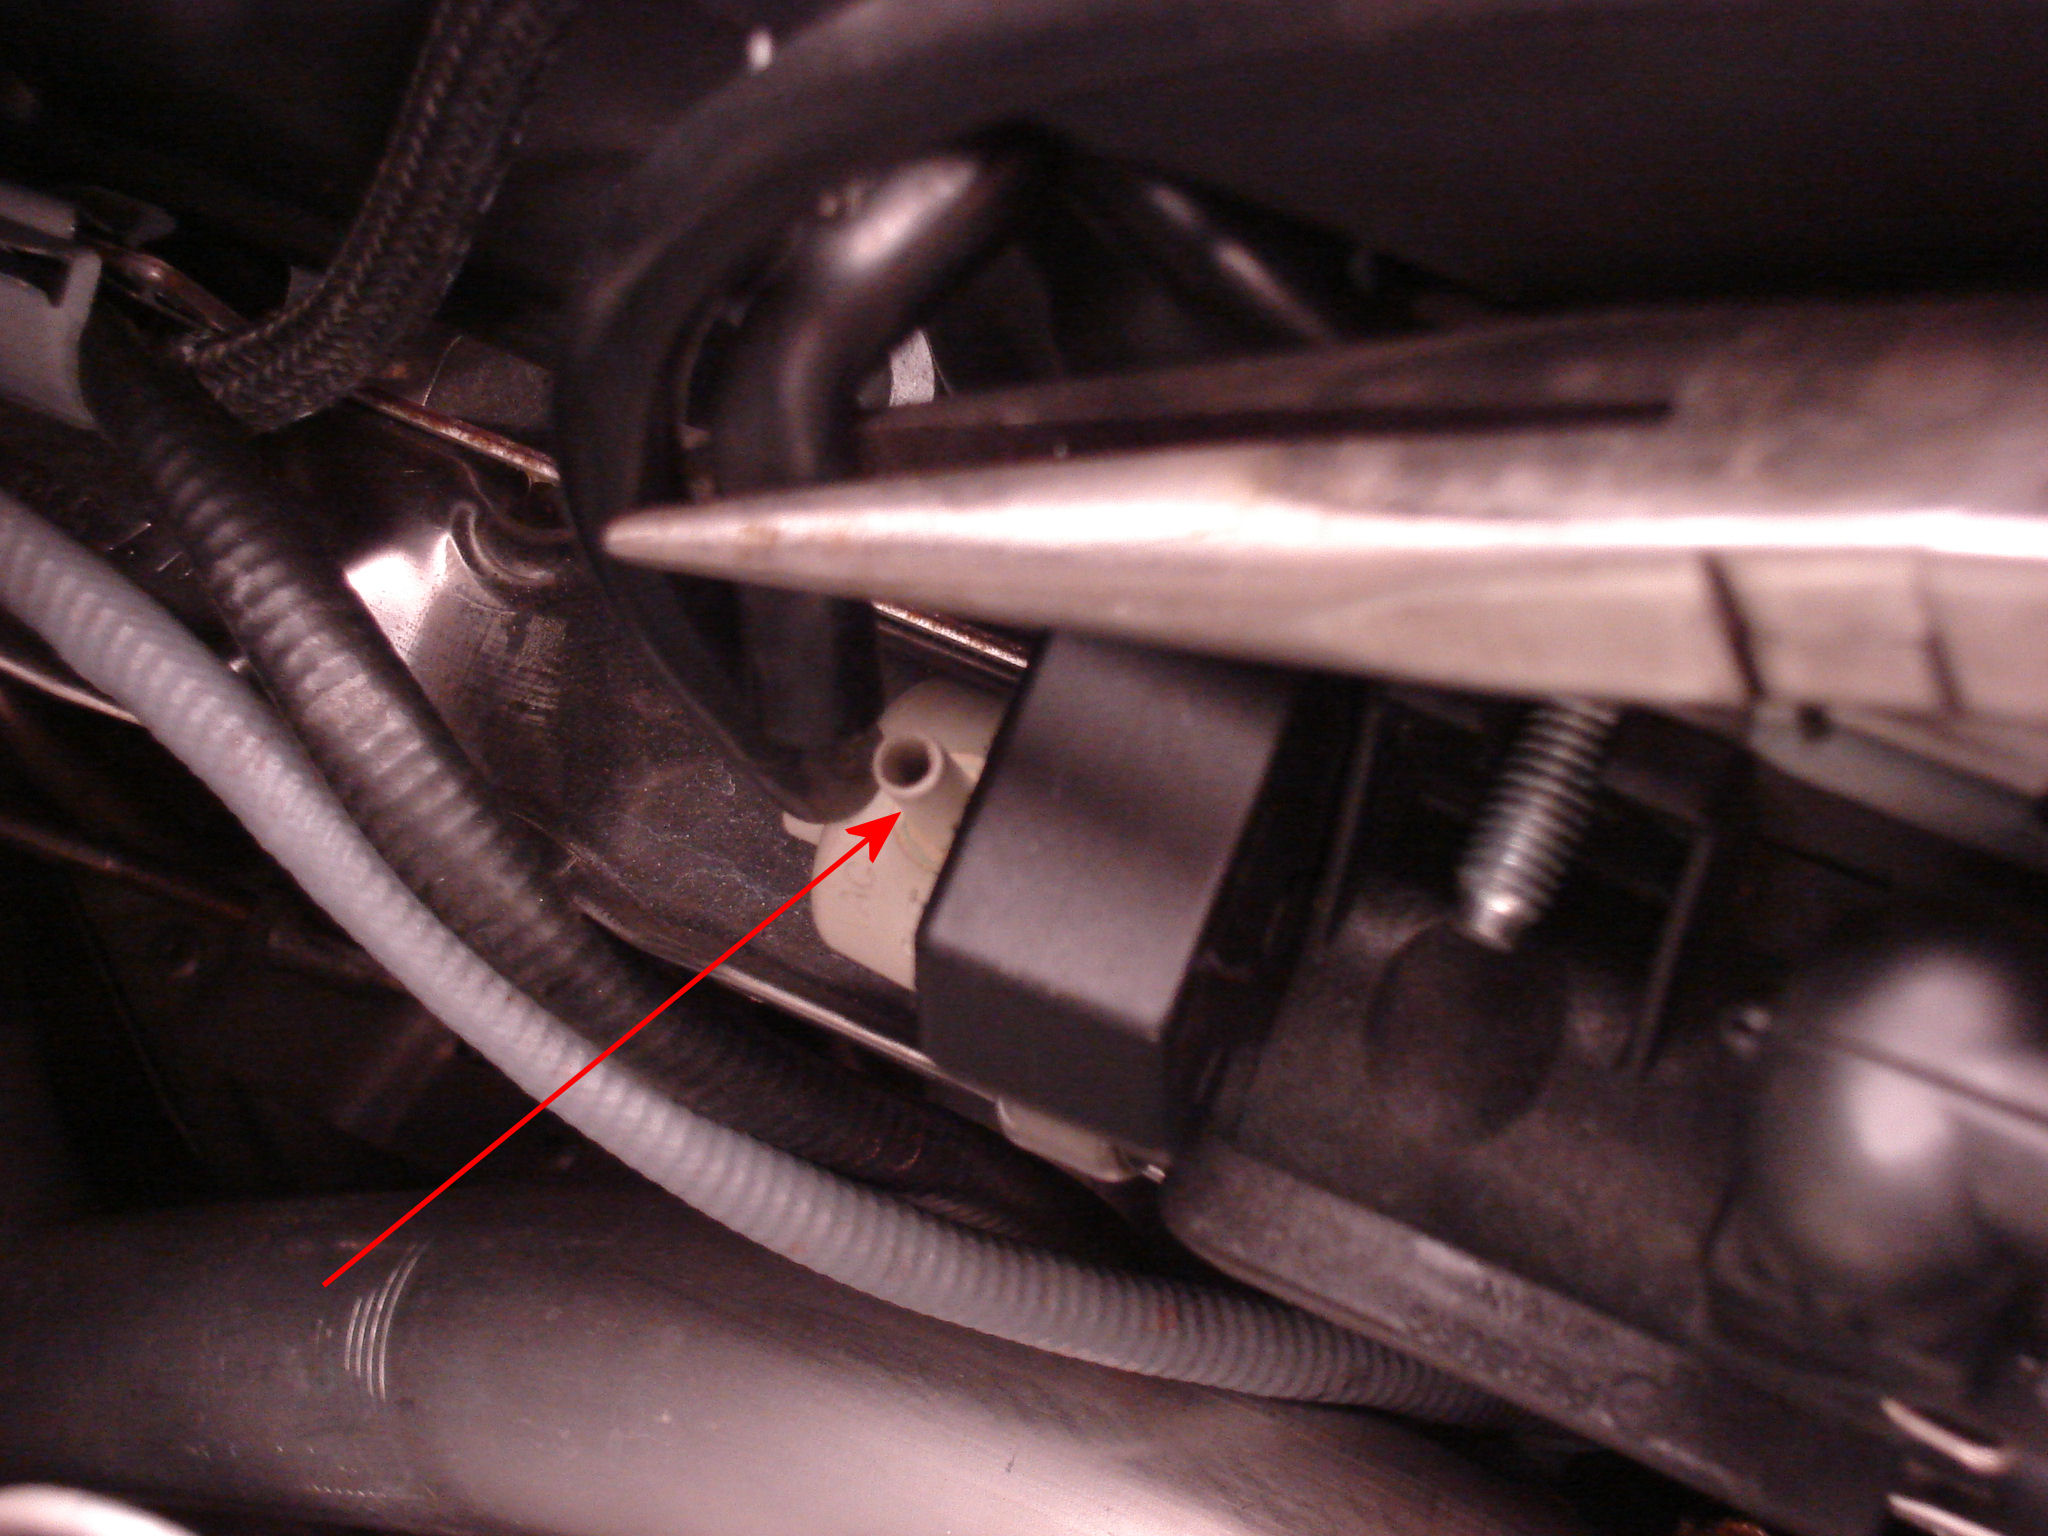
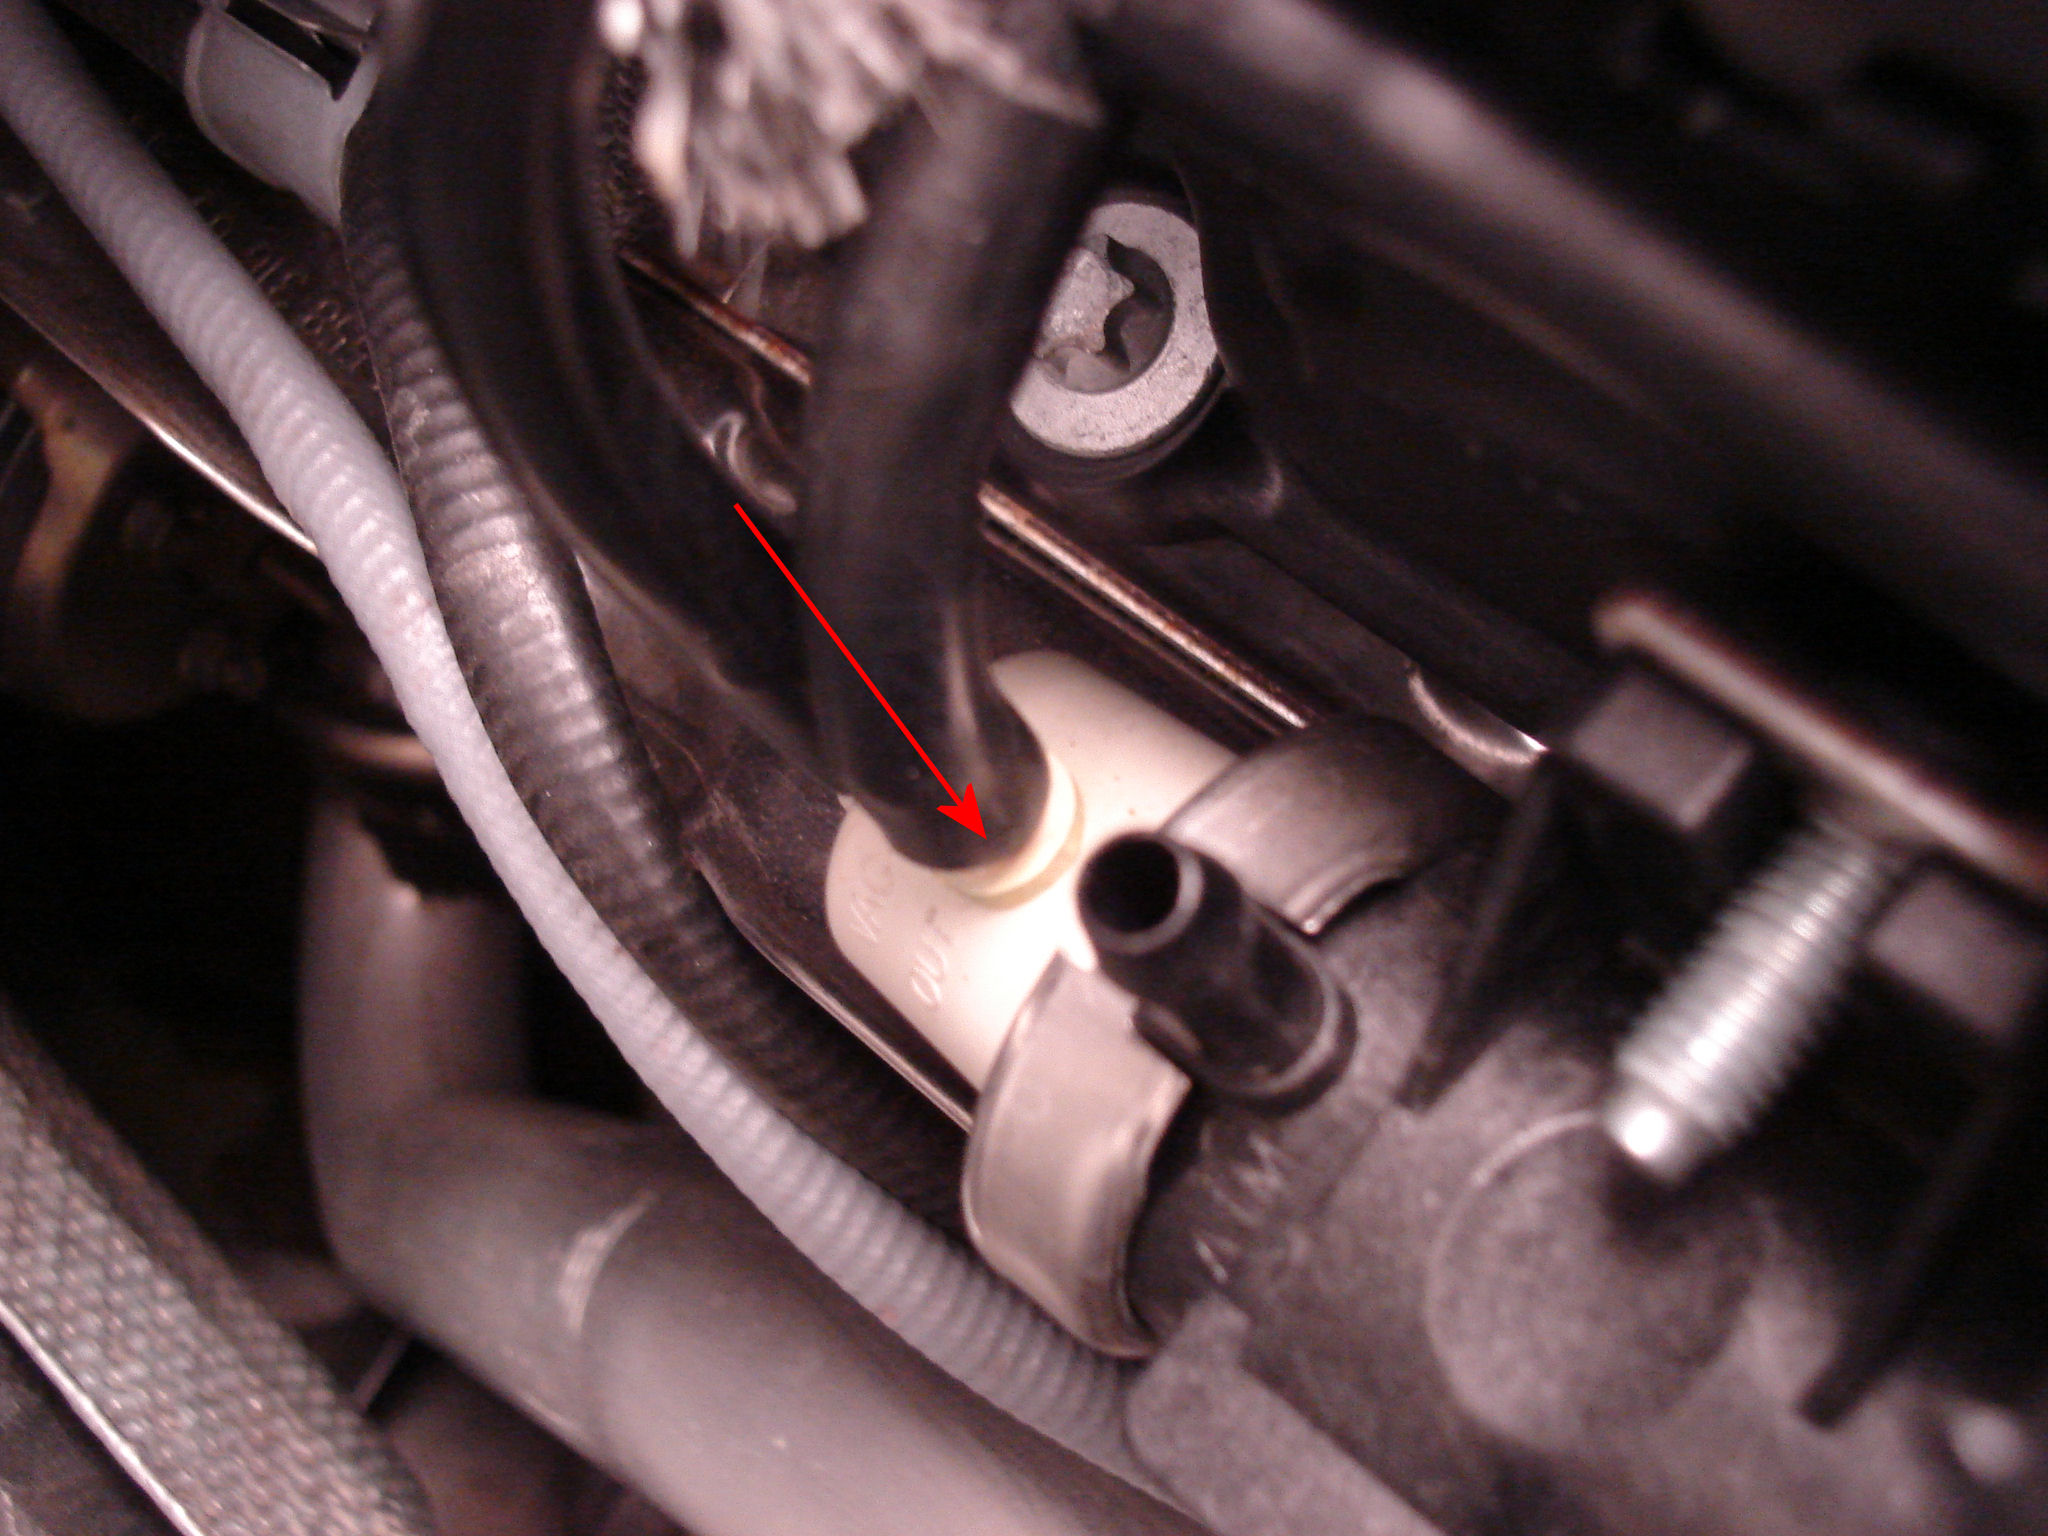
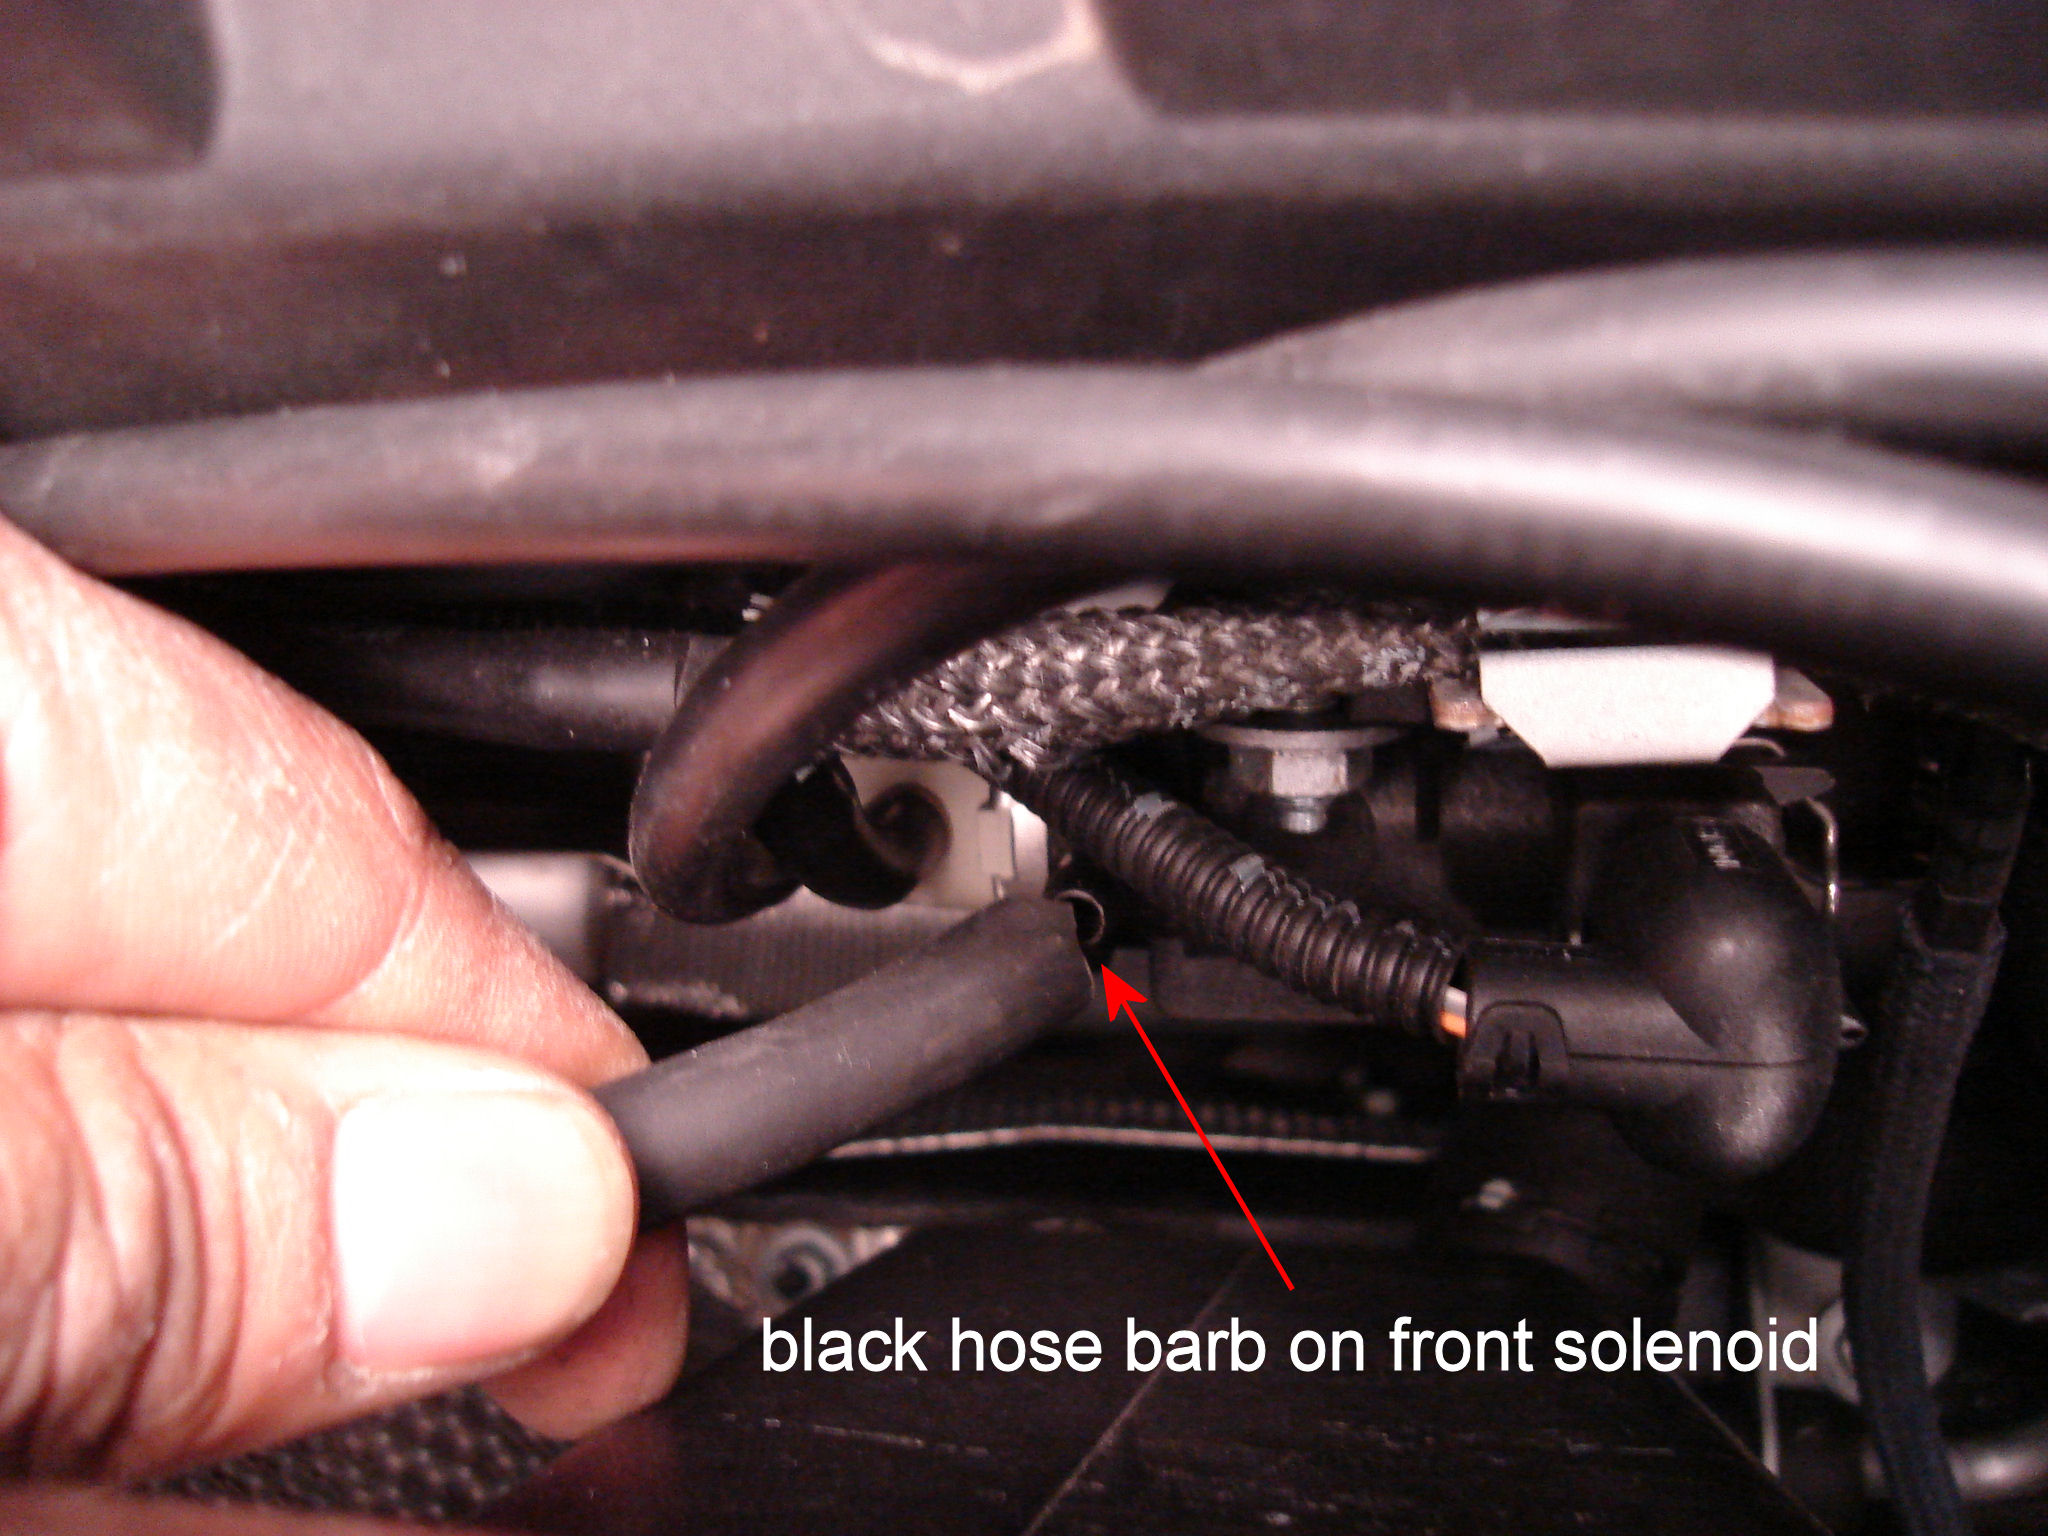
3) There is a rectangular “hood” covering a hose barb on
each one. These must be removed. First disconnect the small vacuum hose just to
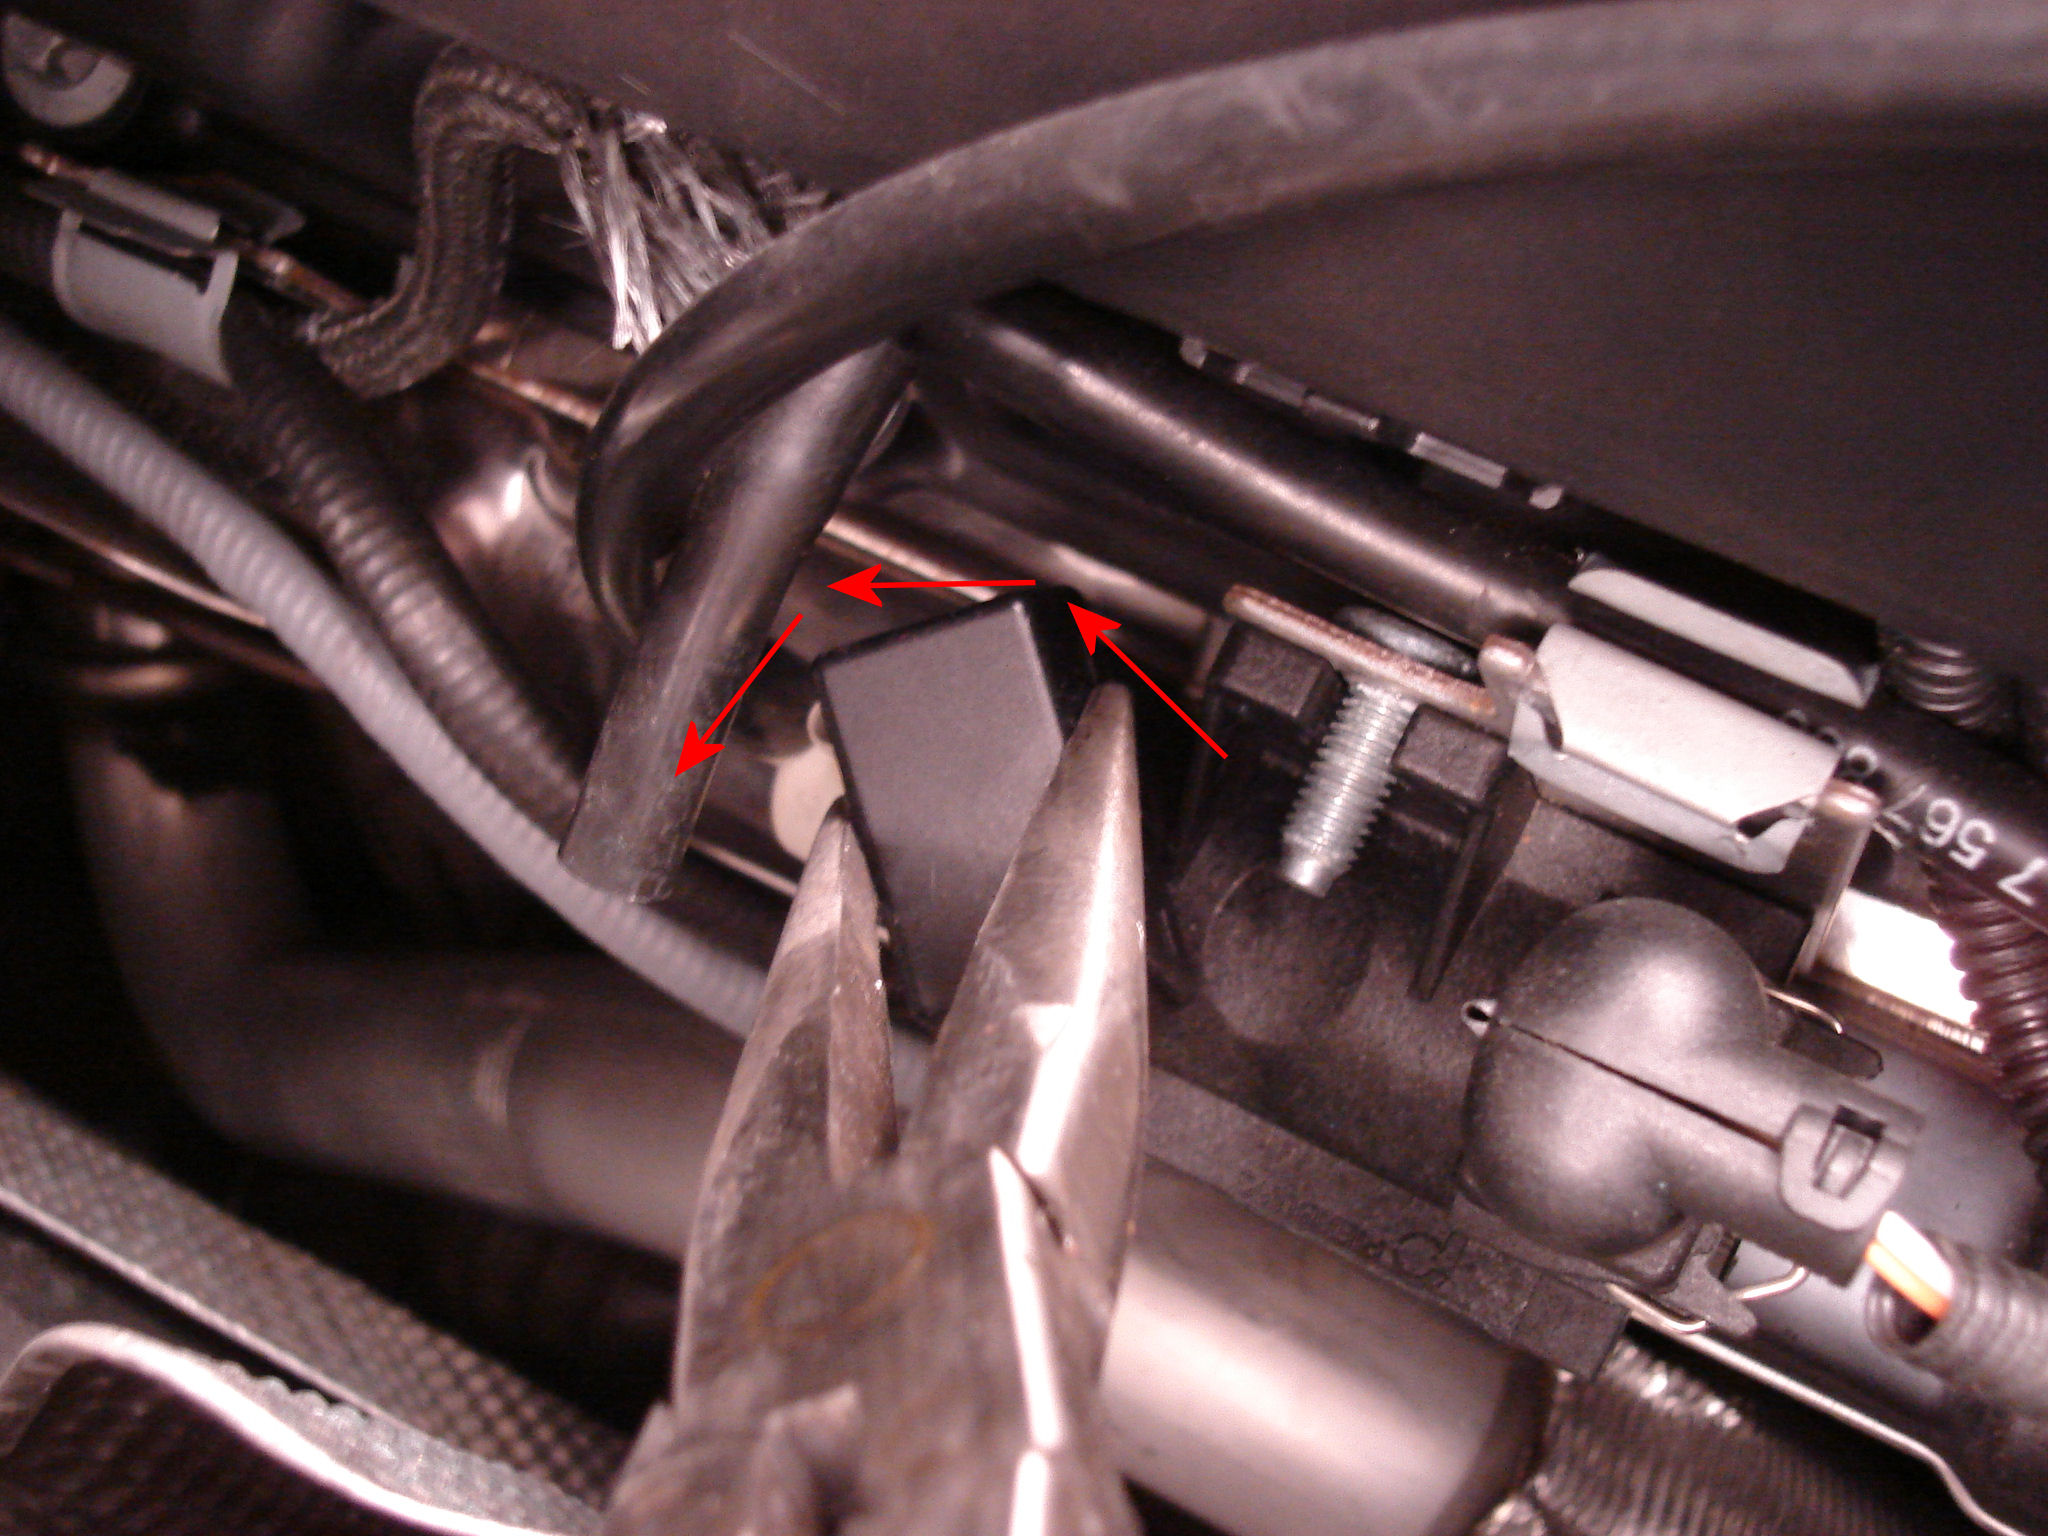
the left of the hood on white portion of the valve. The best way to remove them
is to grasp the cover with pliers and rotate/pull in a counter clockwise
motion. This part has some internal plastic retainers which you may hear click
during removal. This will expose a large black hose barb.
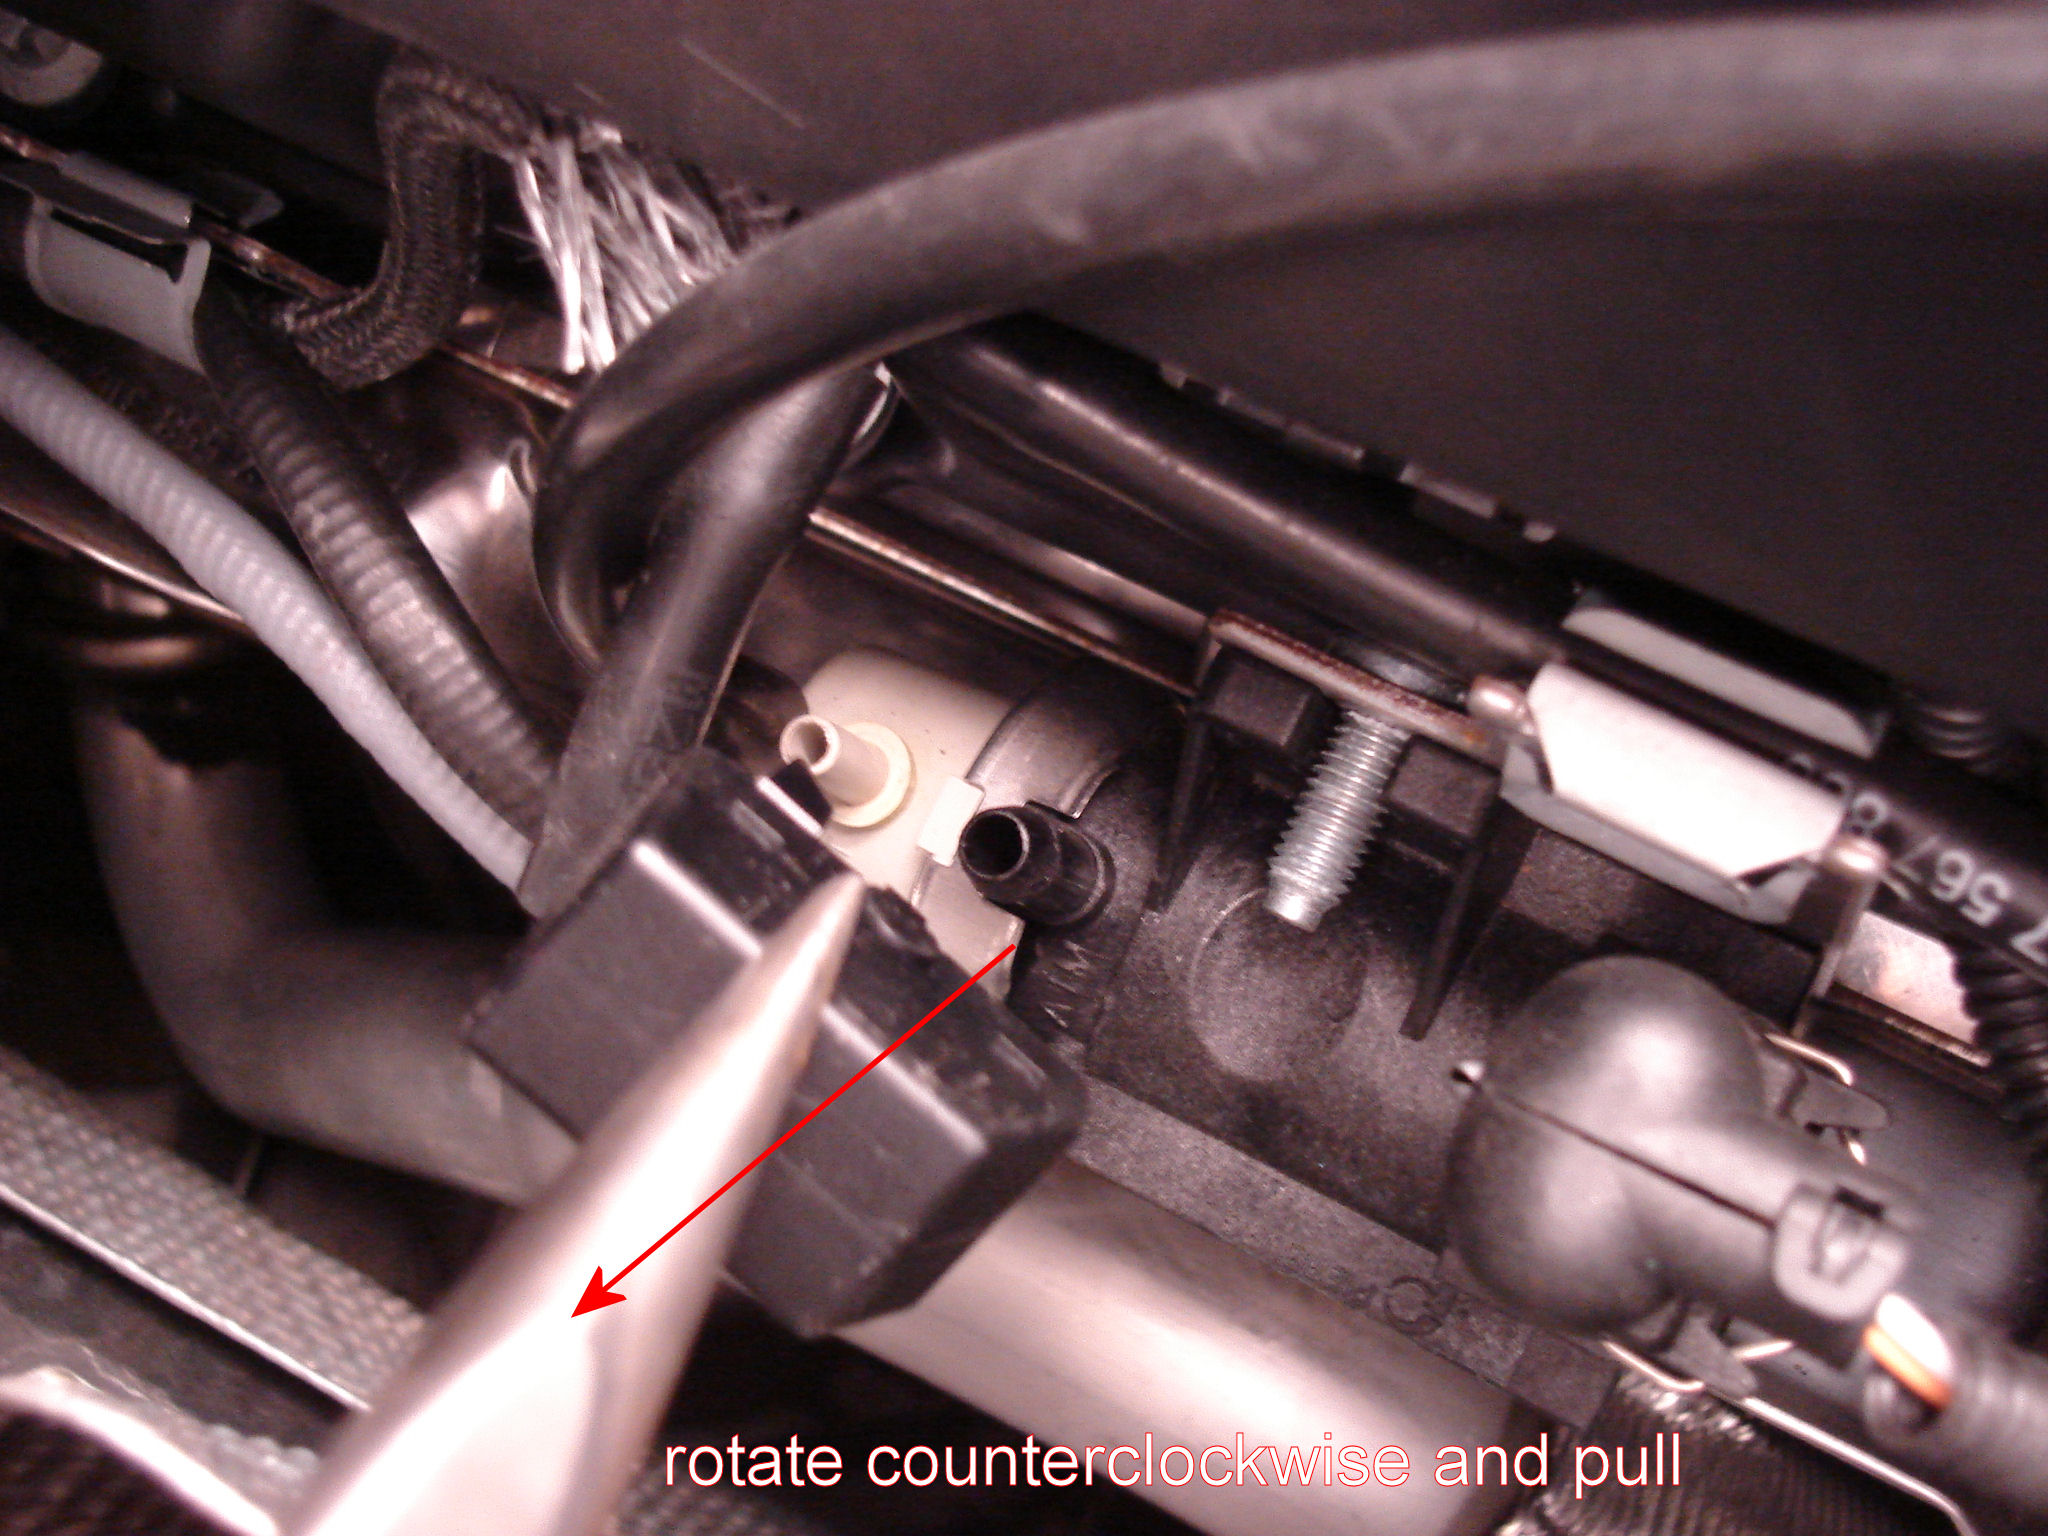
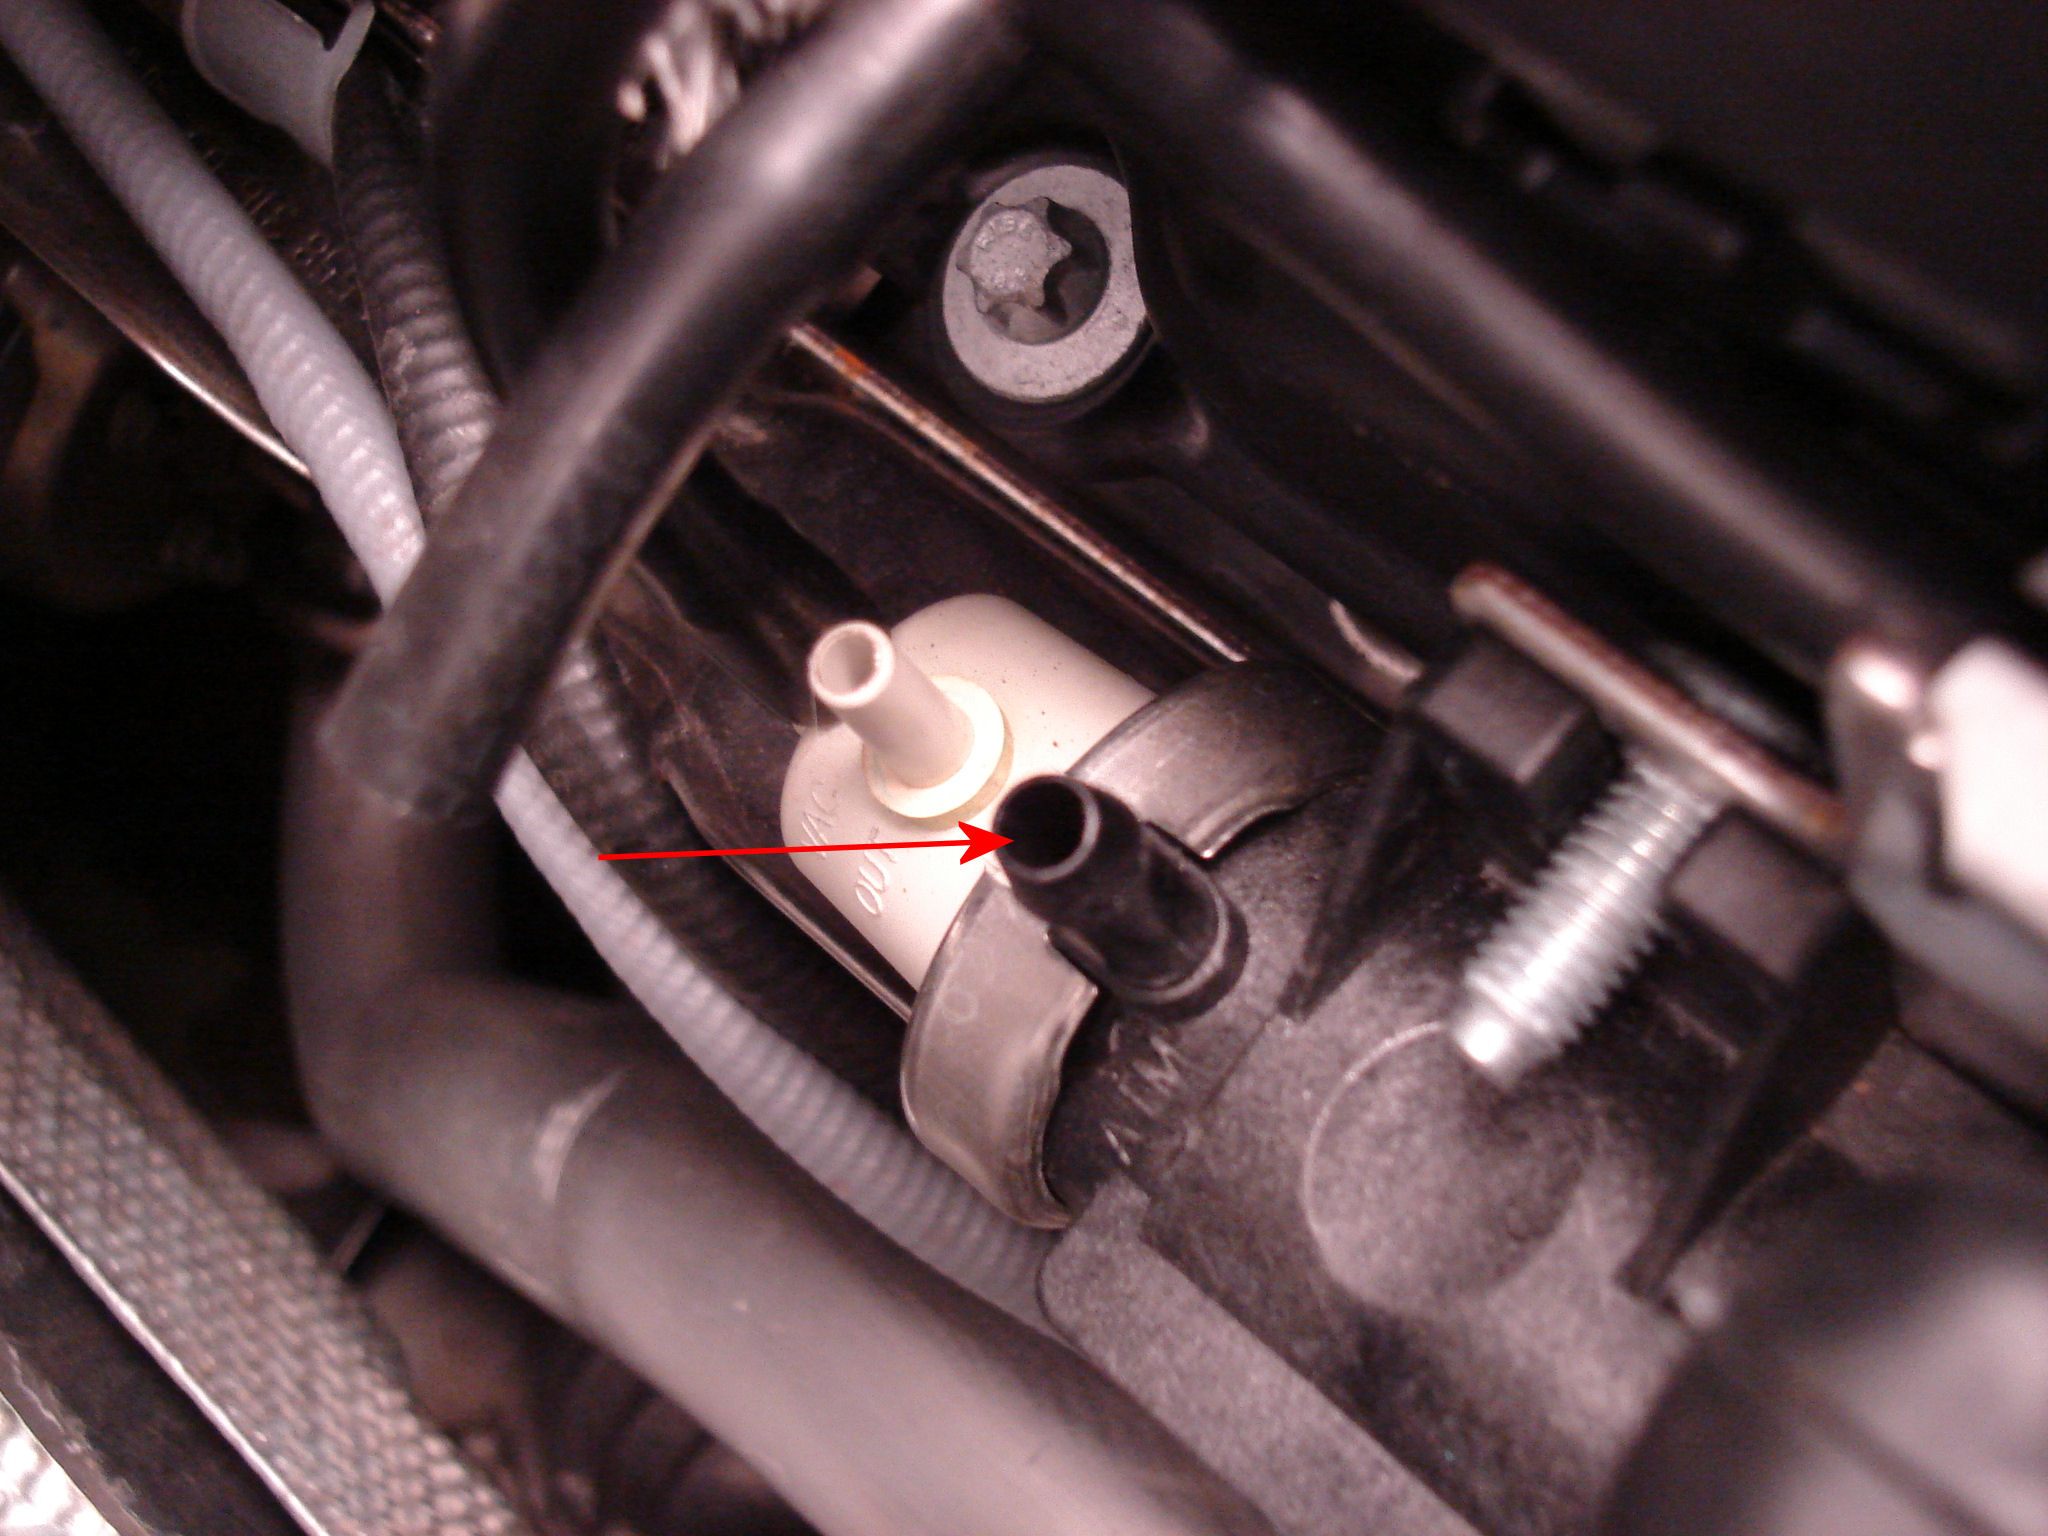
4) Replace the vacuum line you removed from the white hose
barb.
5) Repeat step 3 & 4 on the other valve.
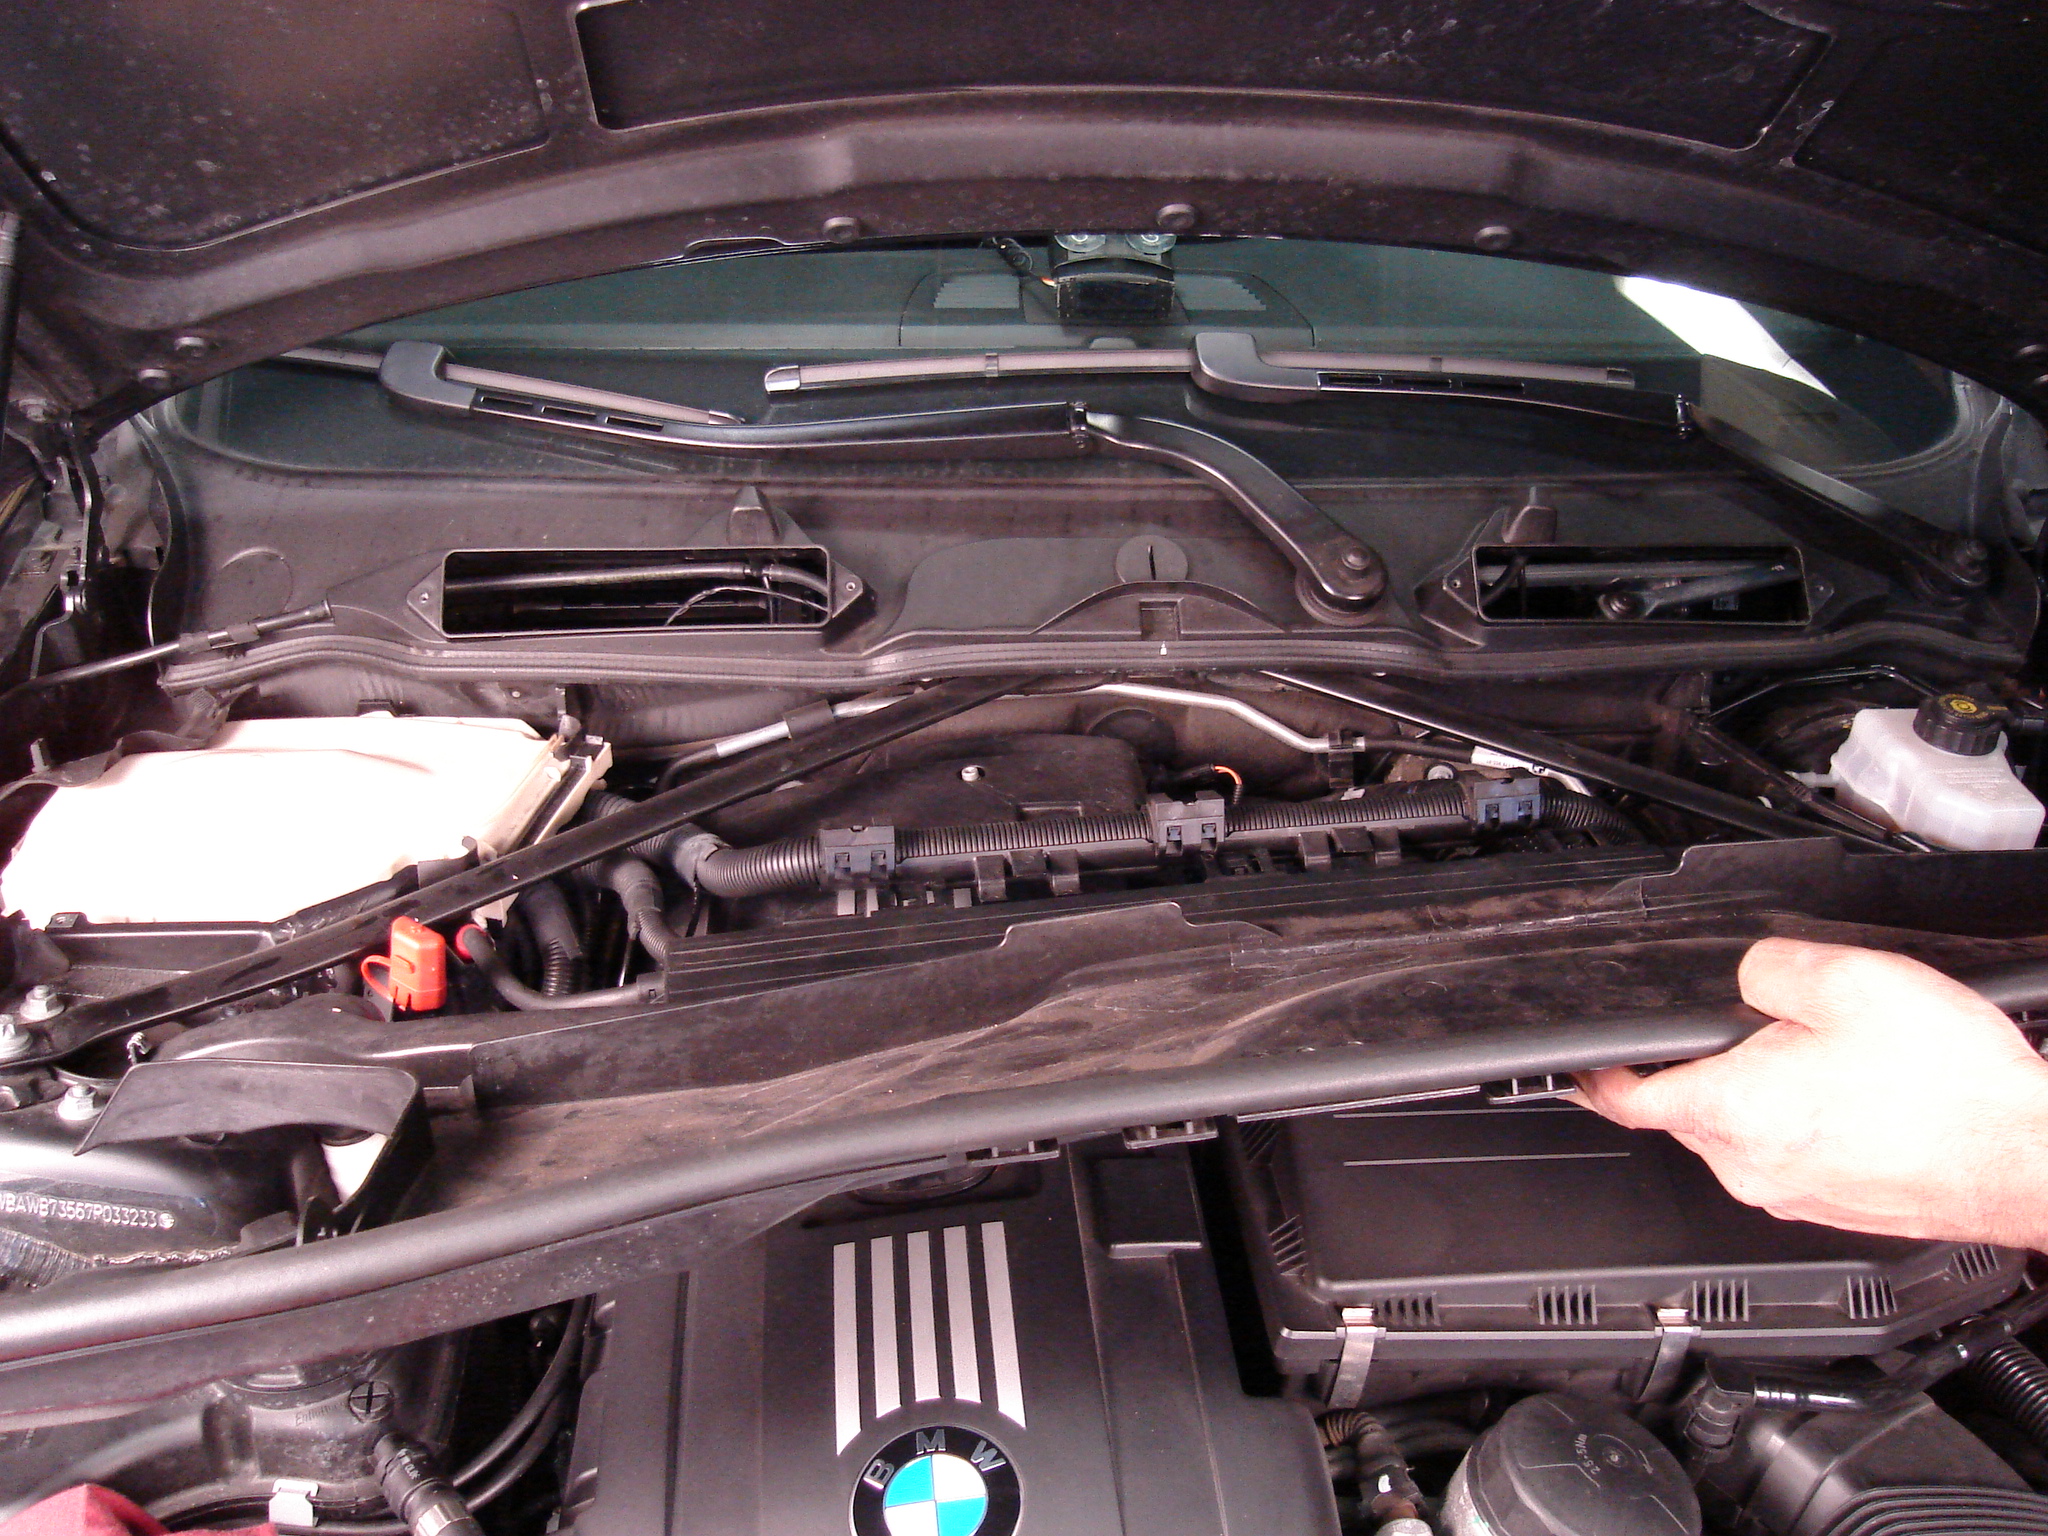
6) Remove 6 8mm bolts from cabin filter housing and remove.
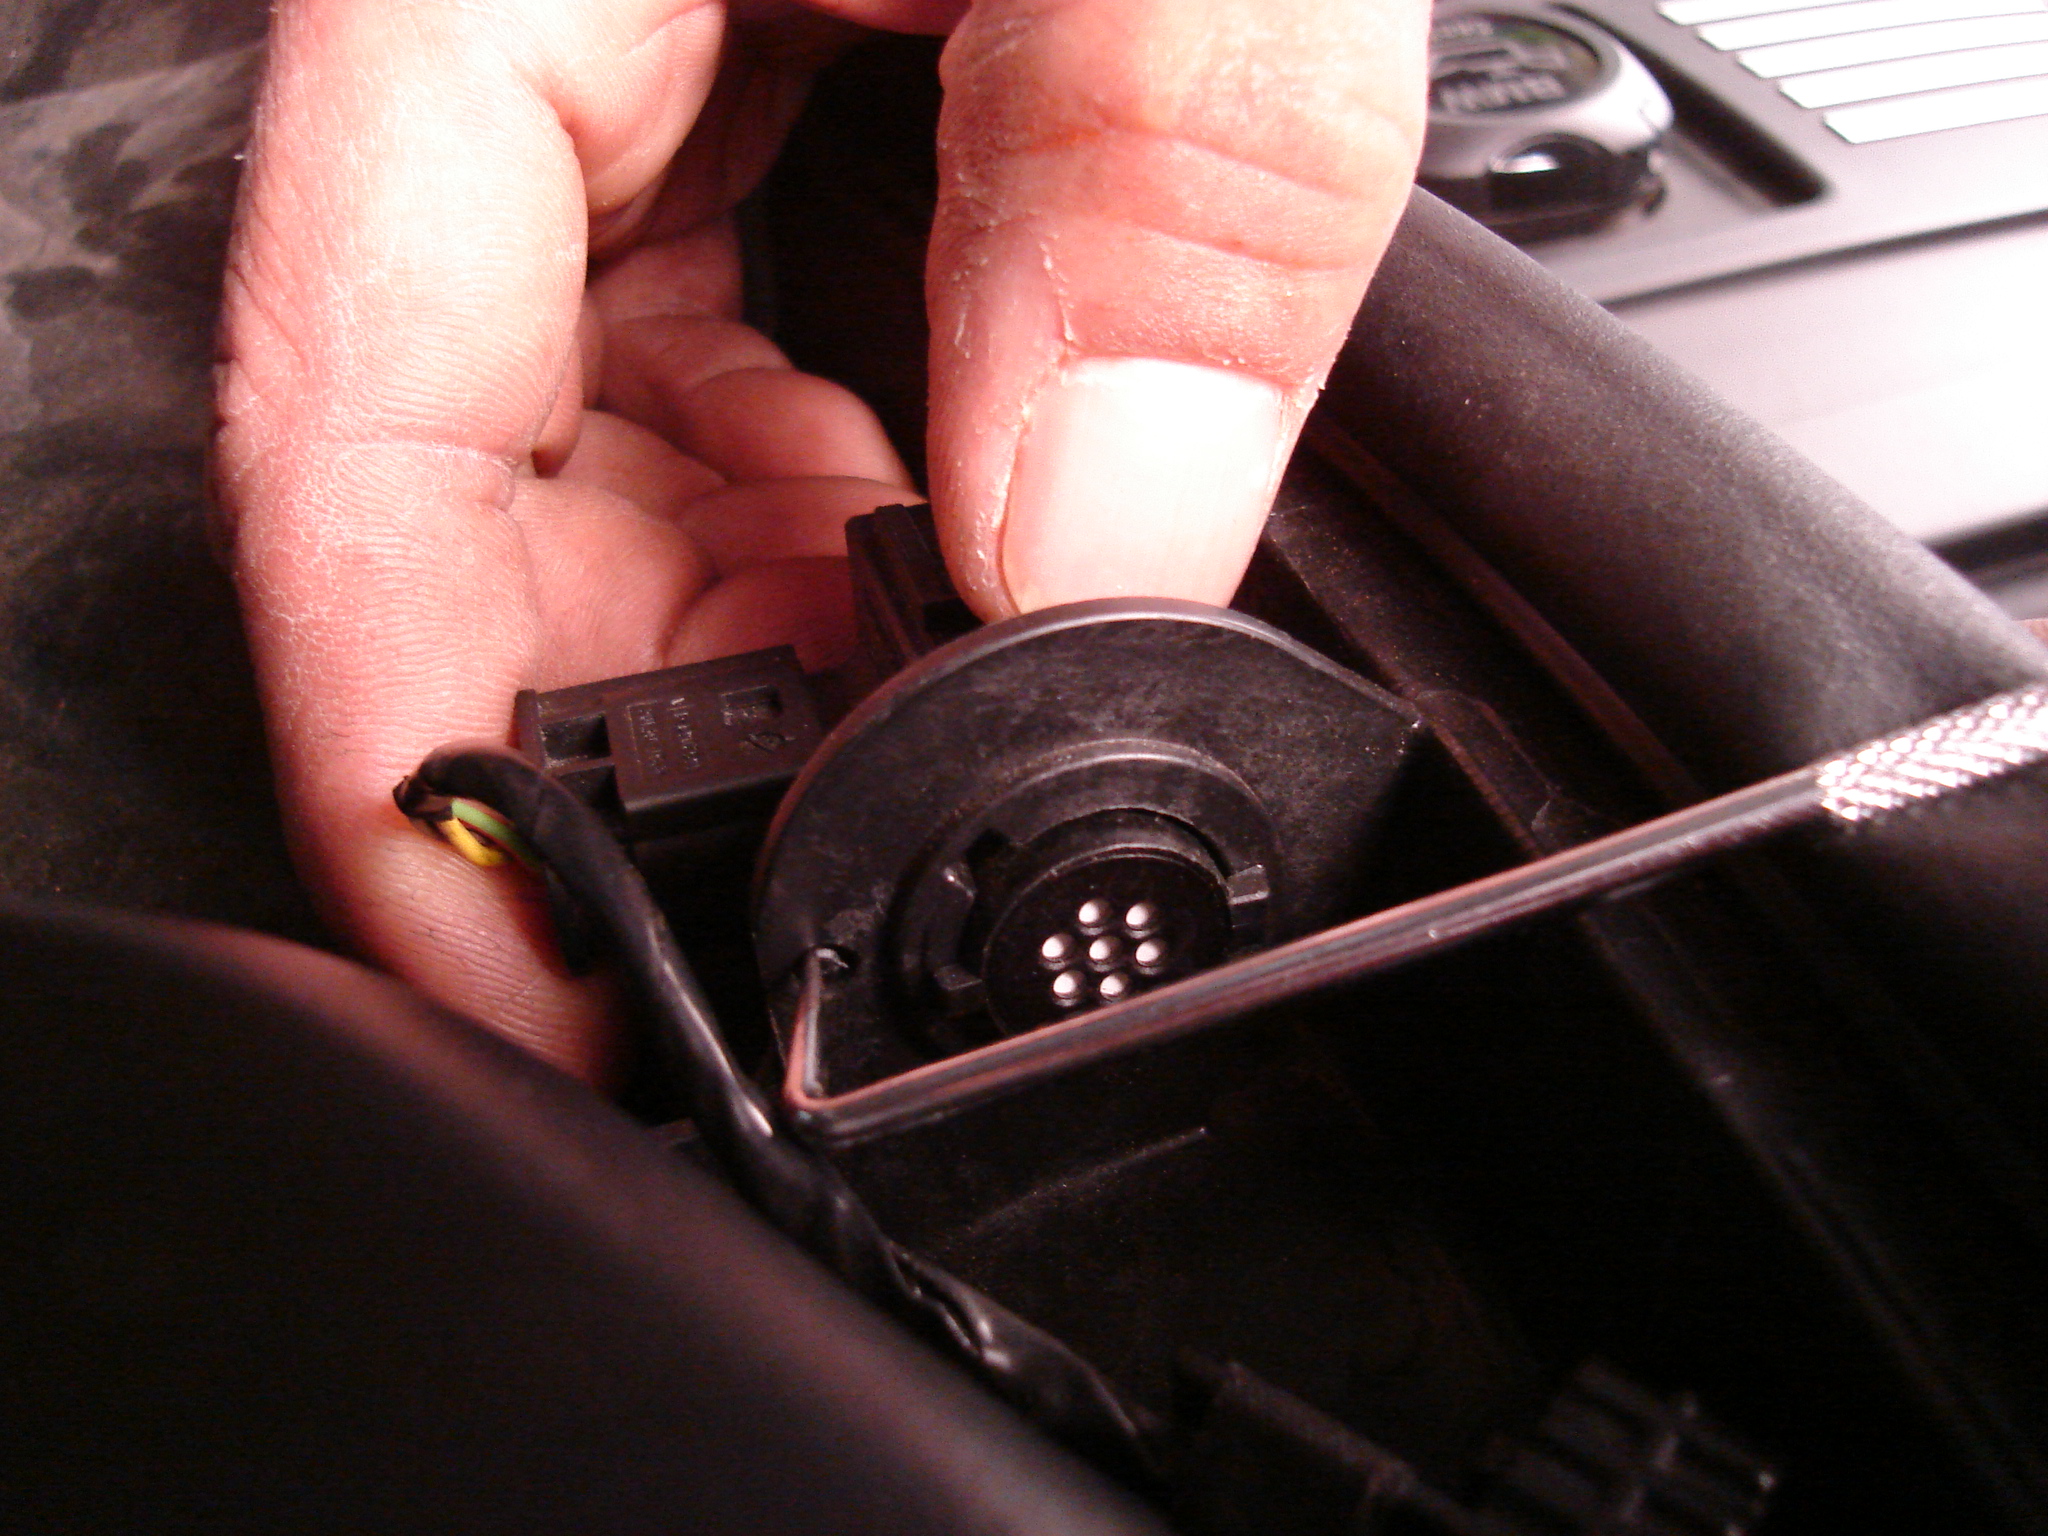
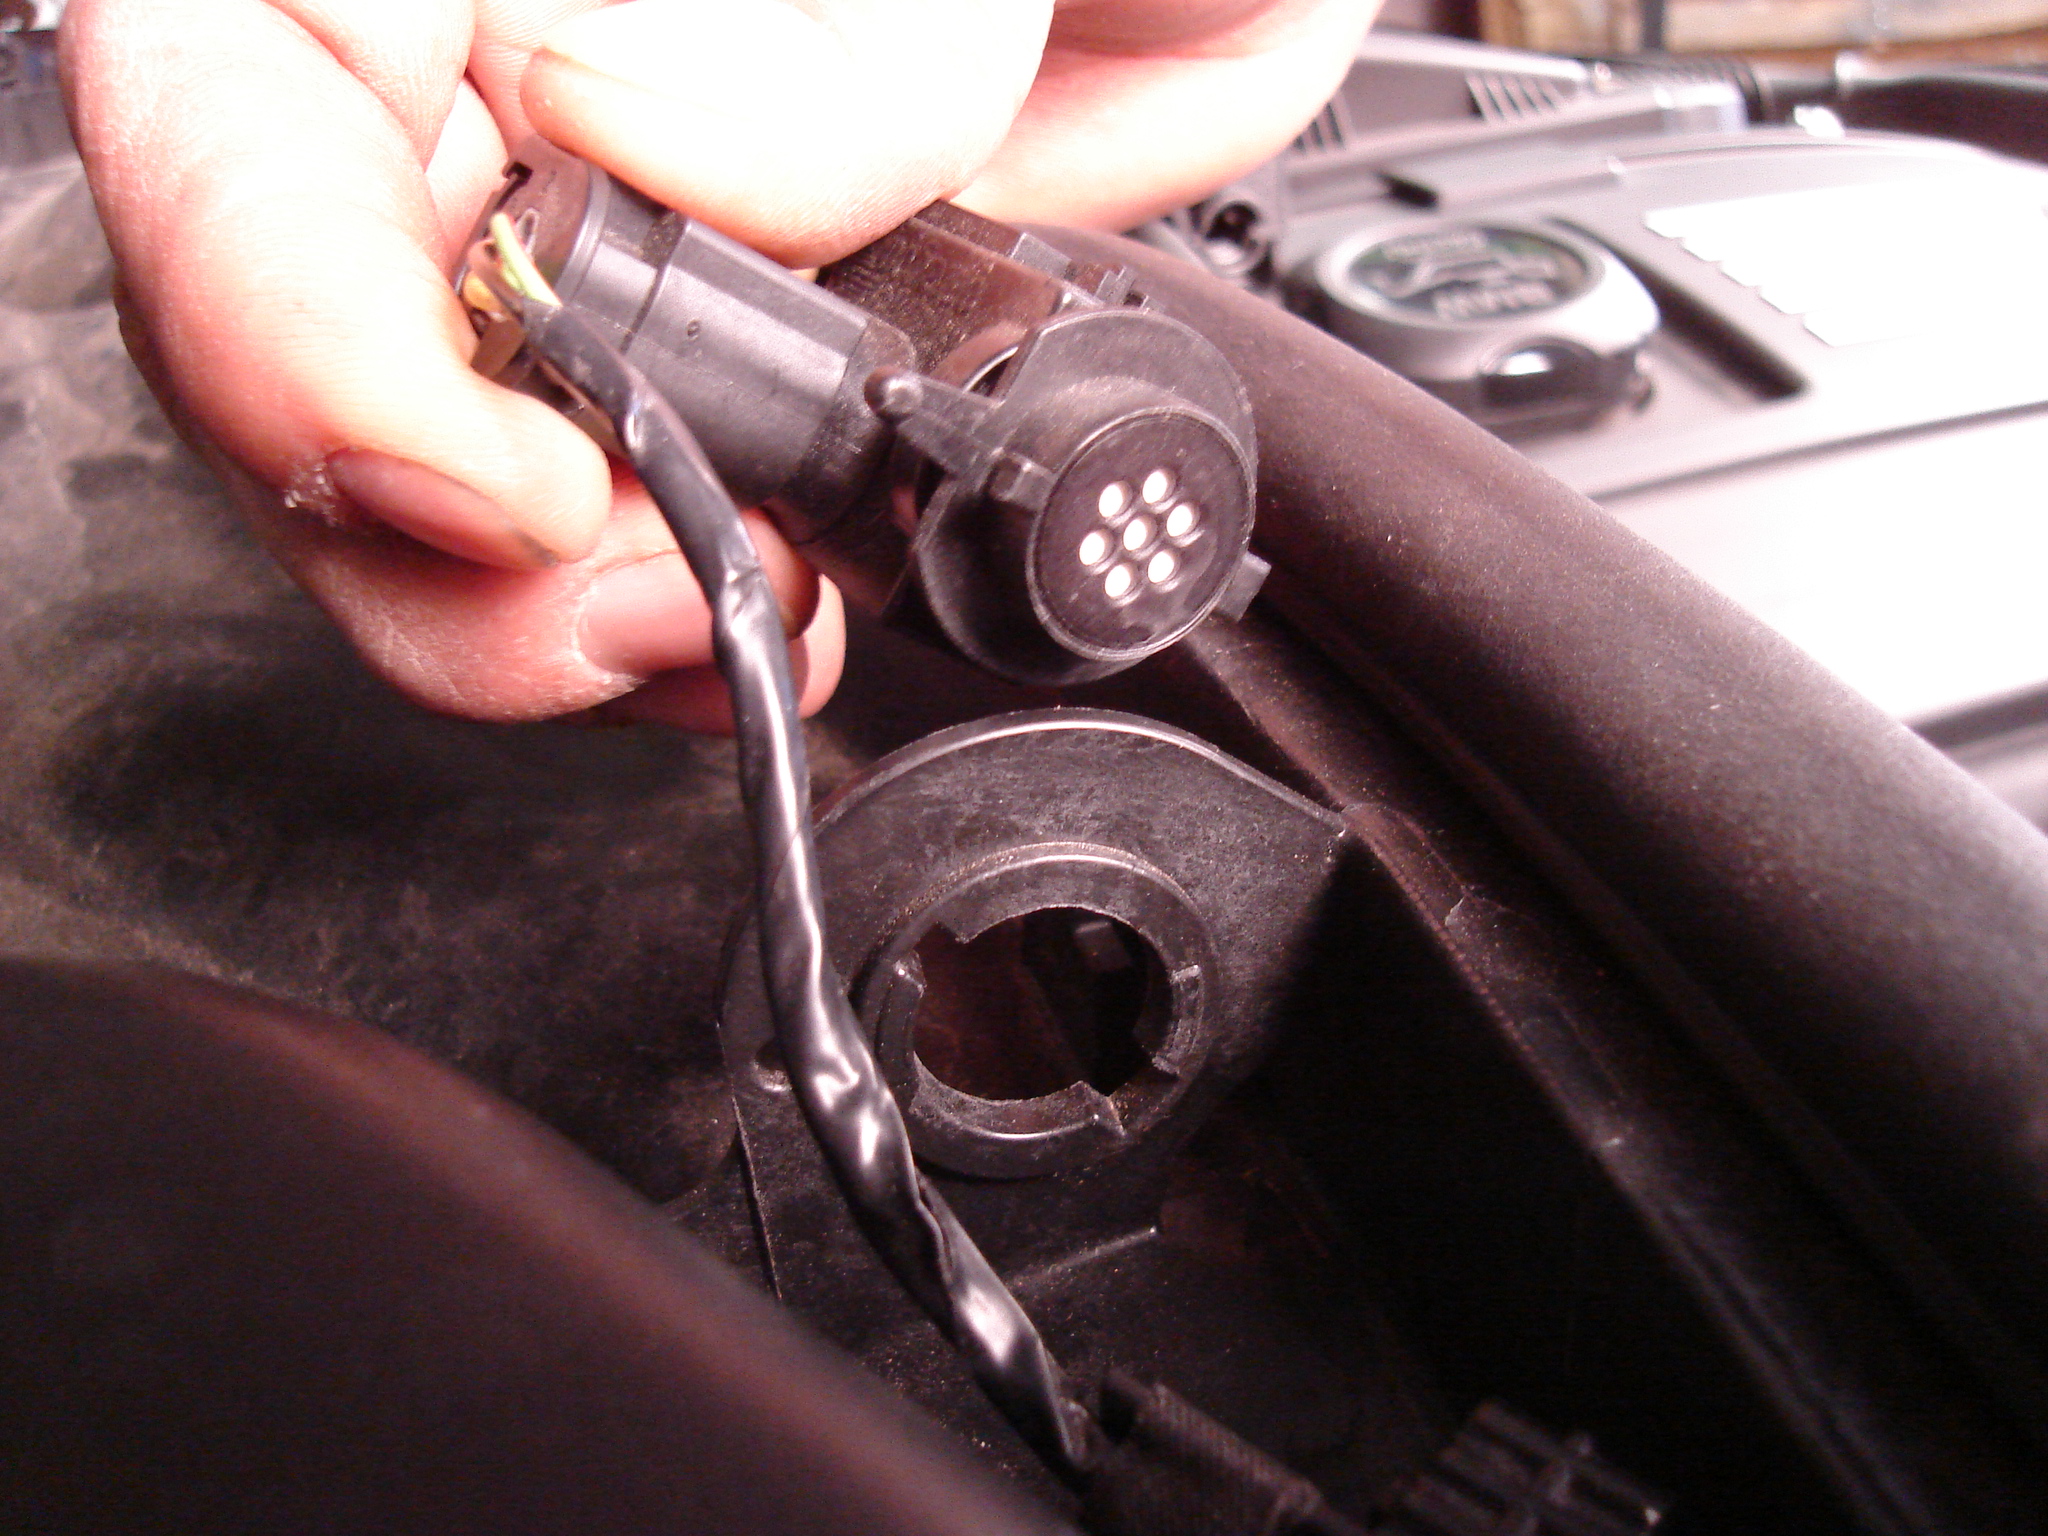
7) Remove sensor on passenger side as shown. First push in
button with small pick tool, then rotate upward. Remove from plastic housing,
and unclip wire retainers. A similar sensor on the driver’s side will just need
to be unclipped from the wire retainers.

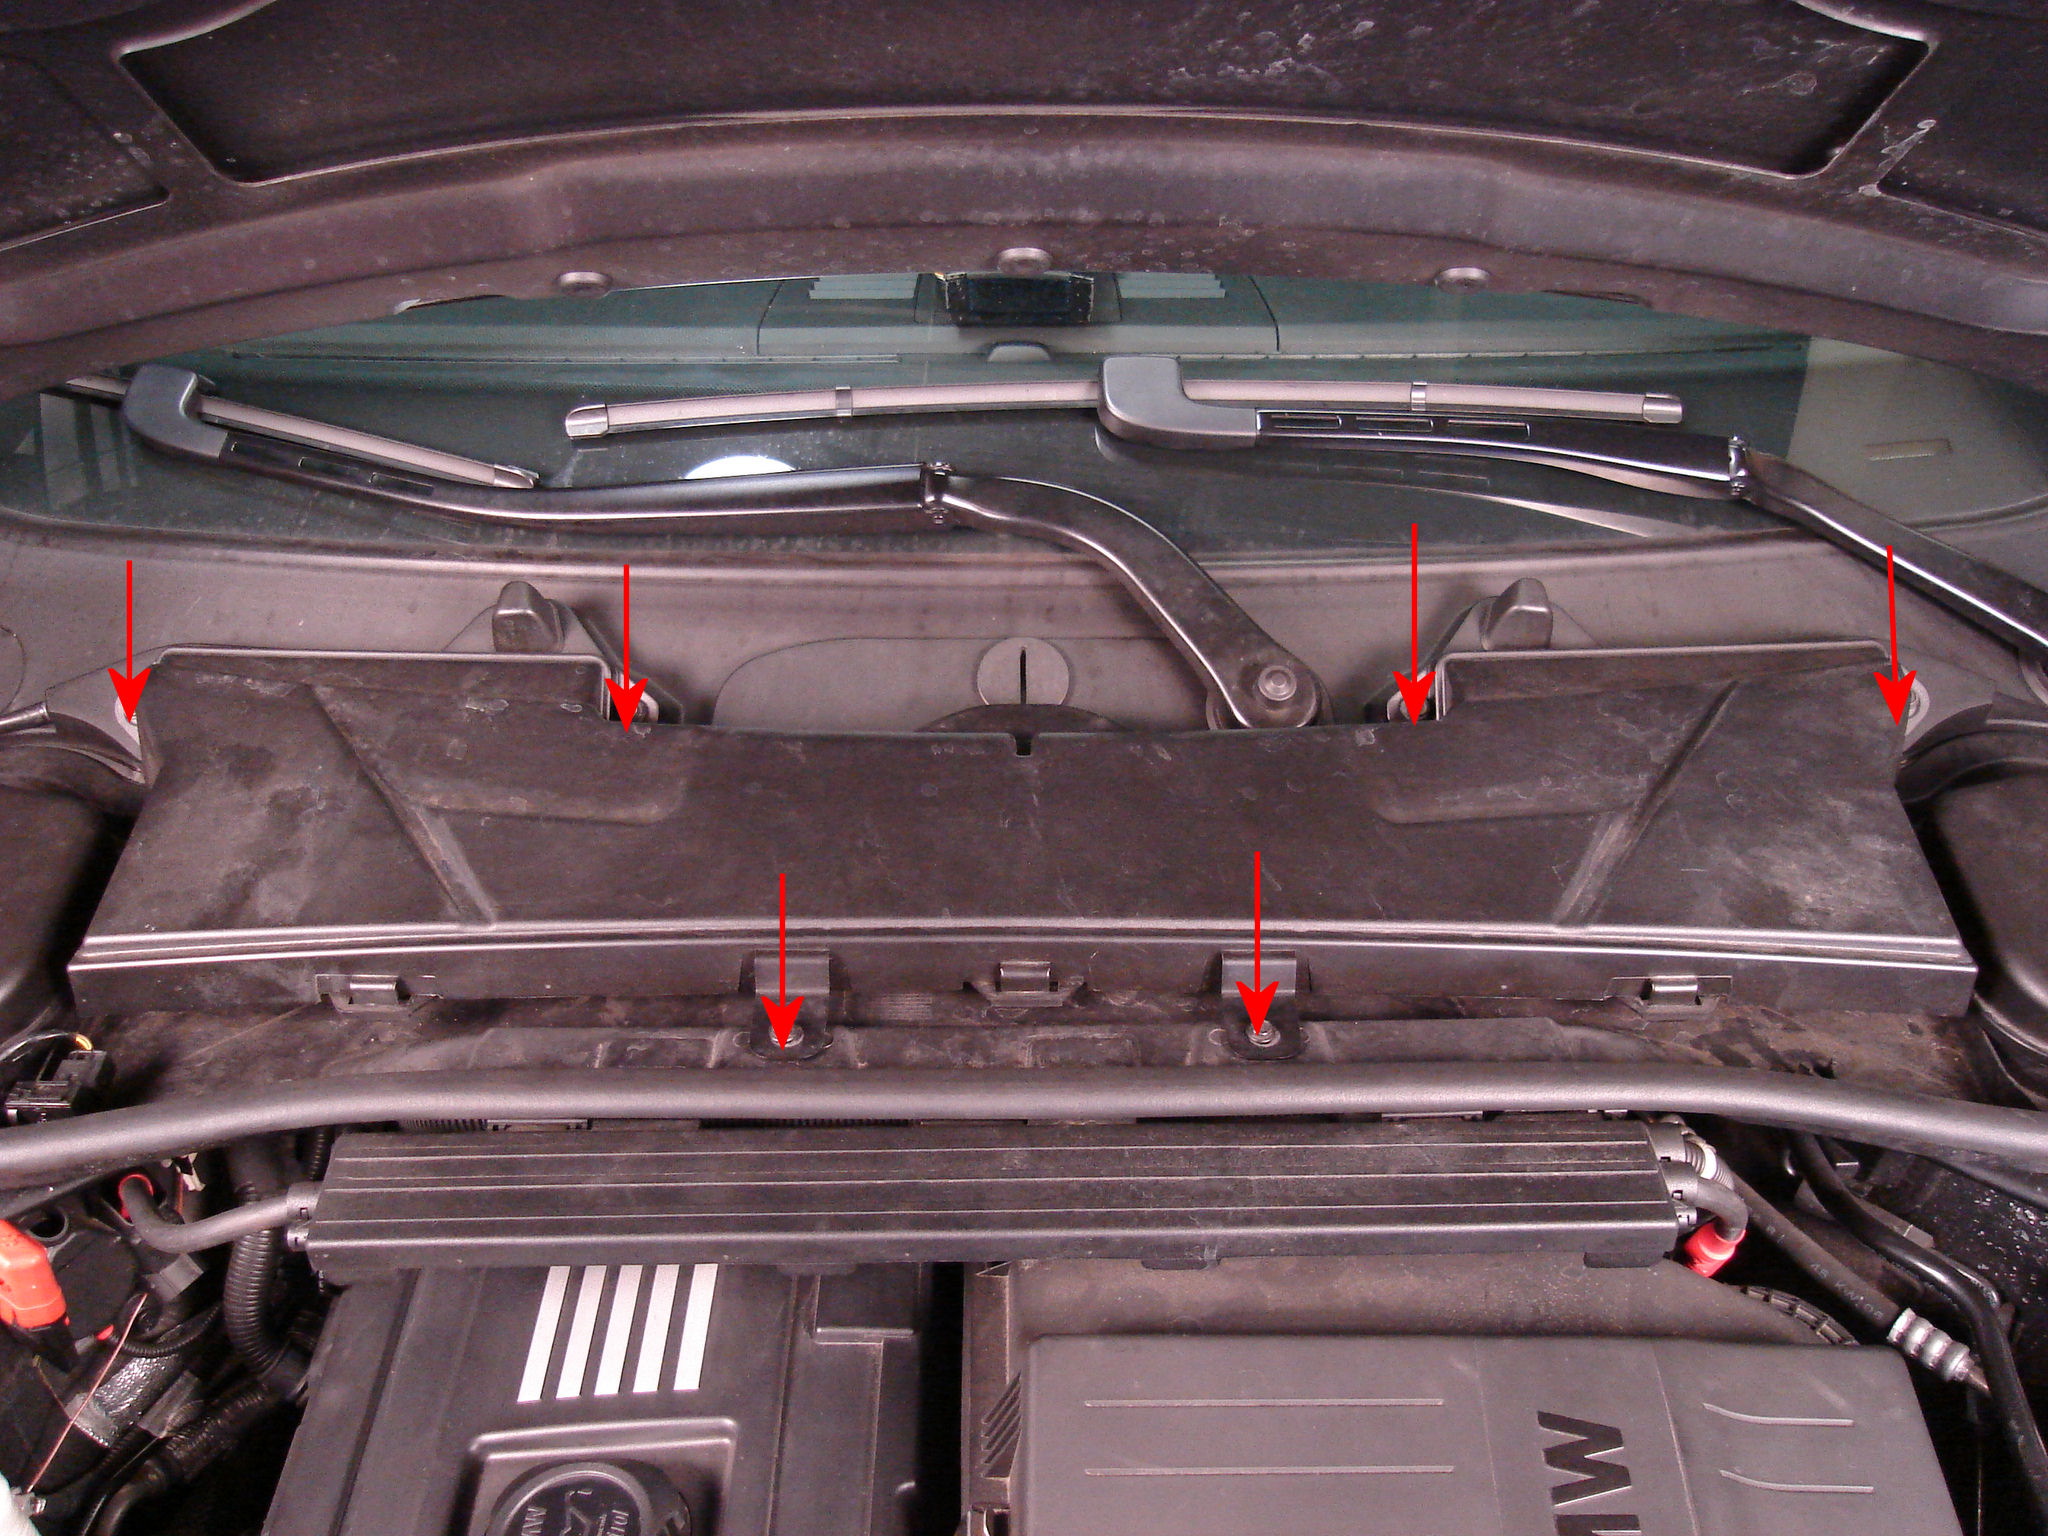
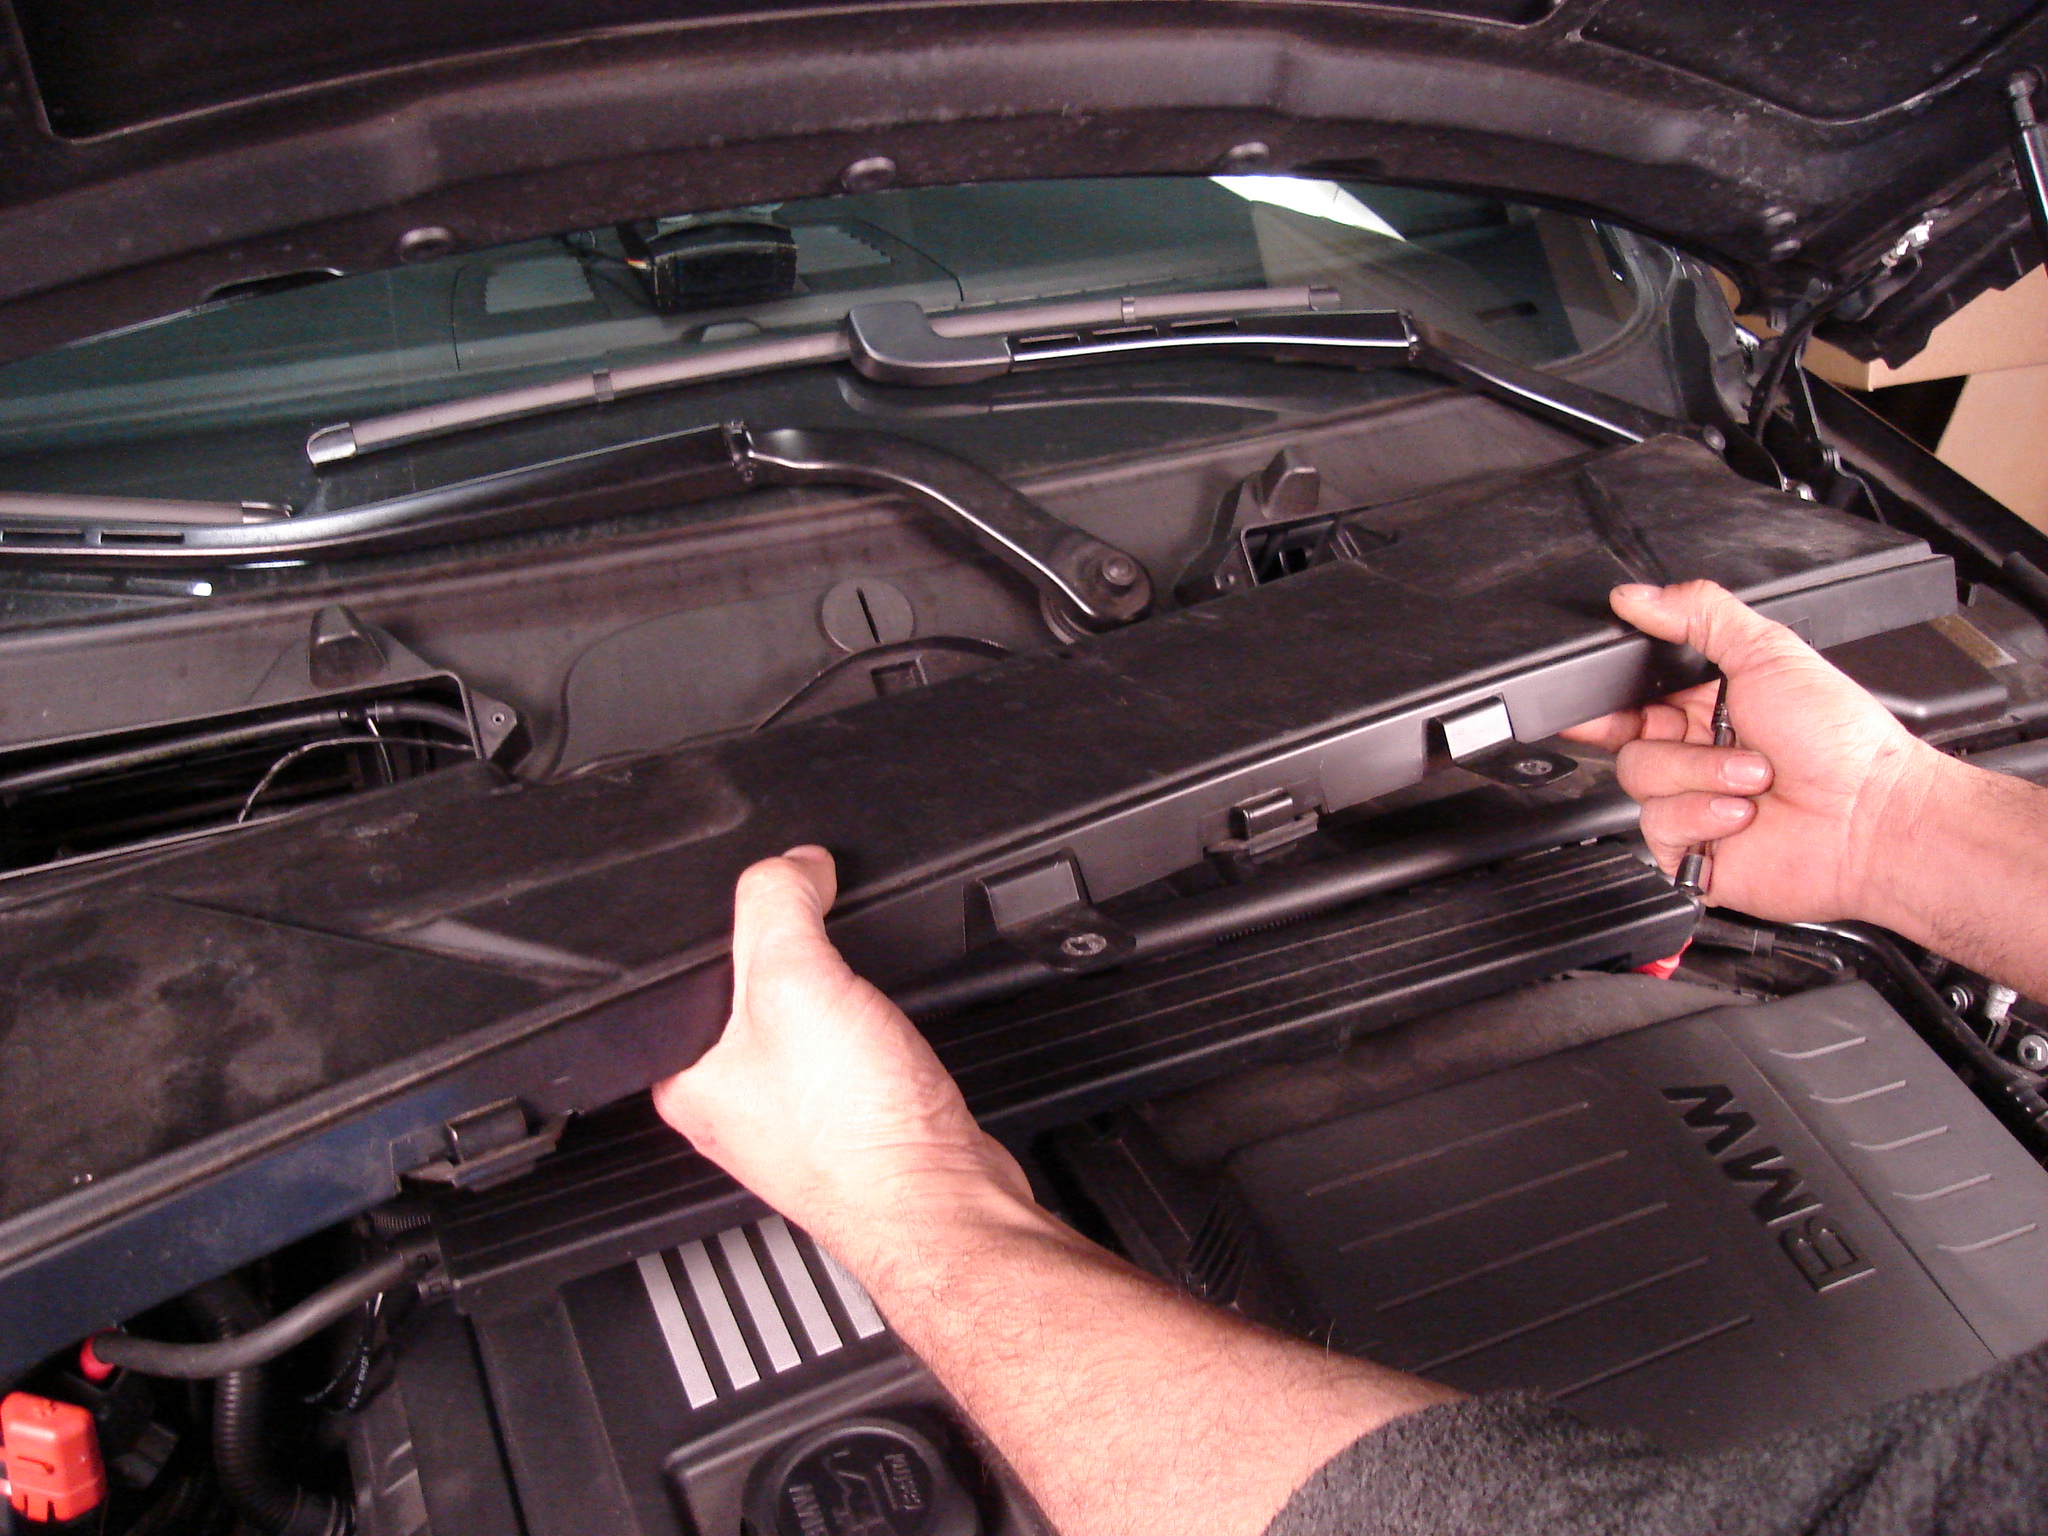
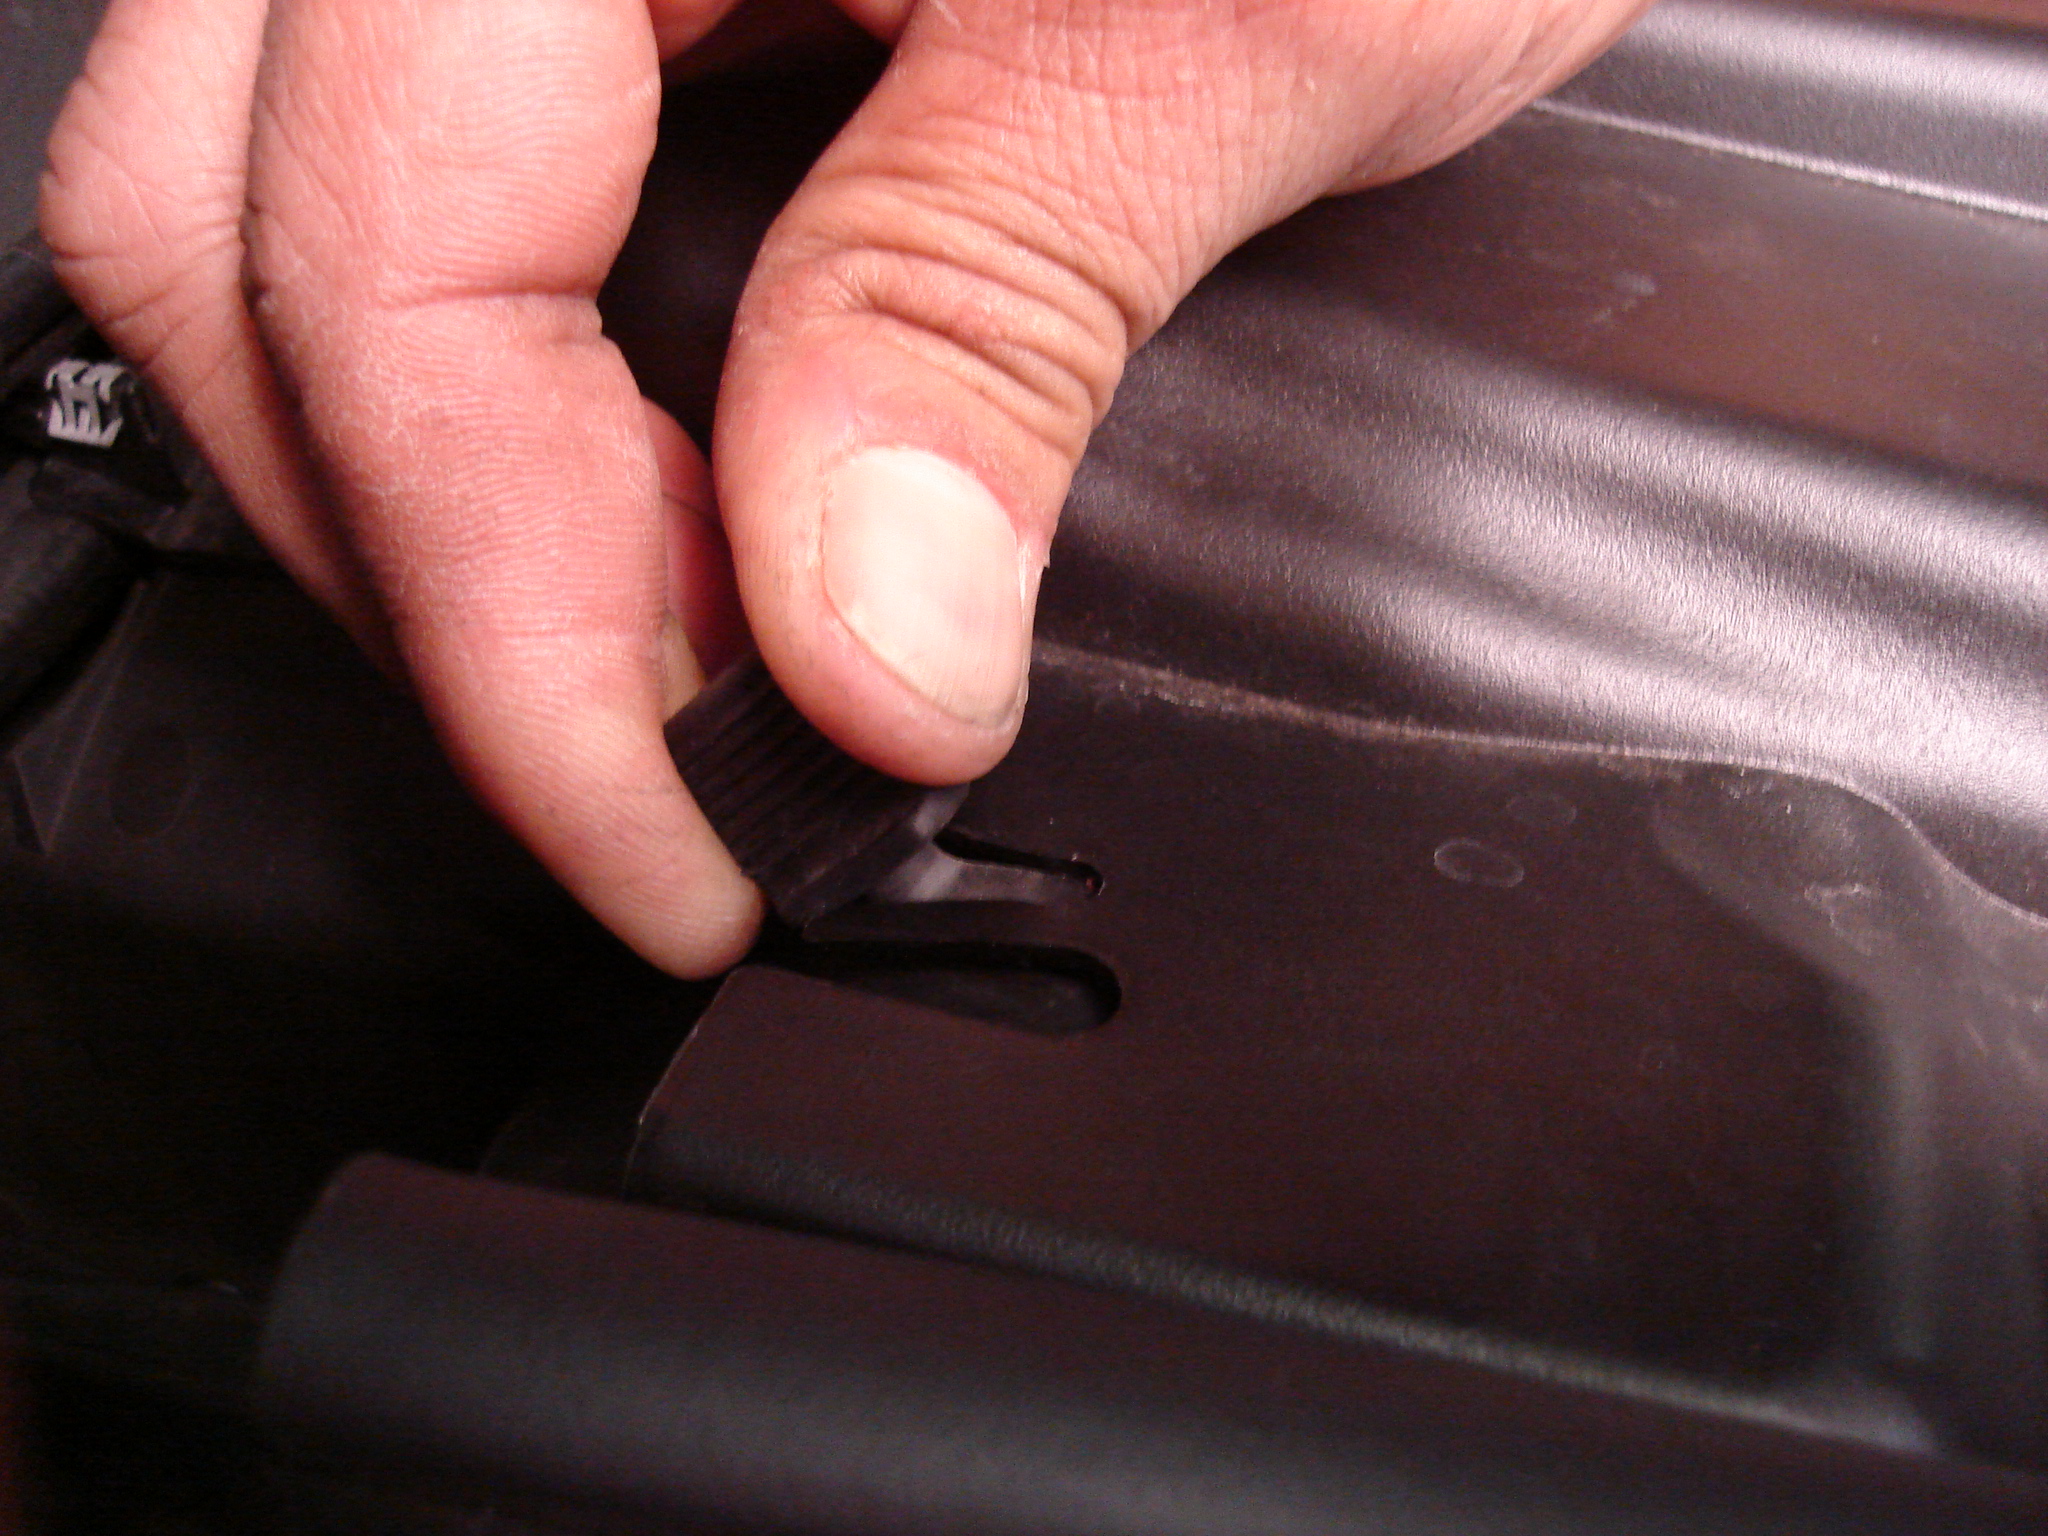
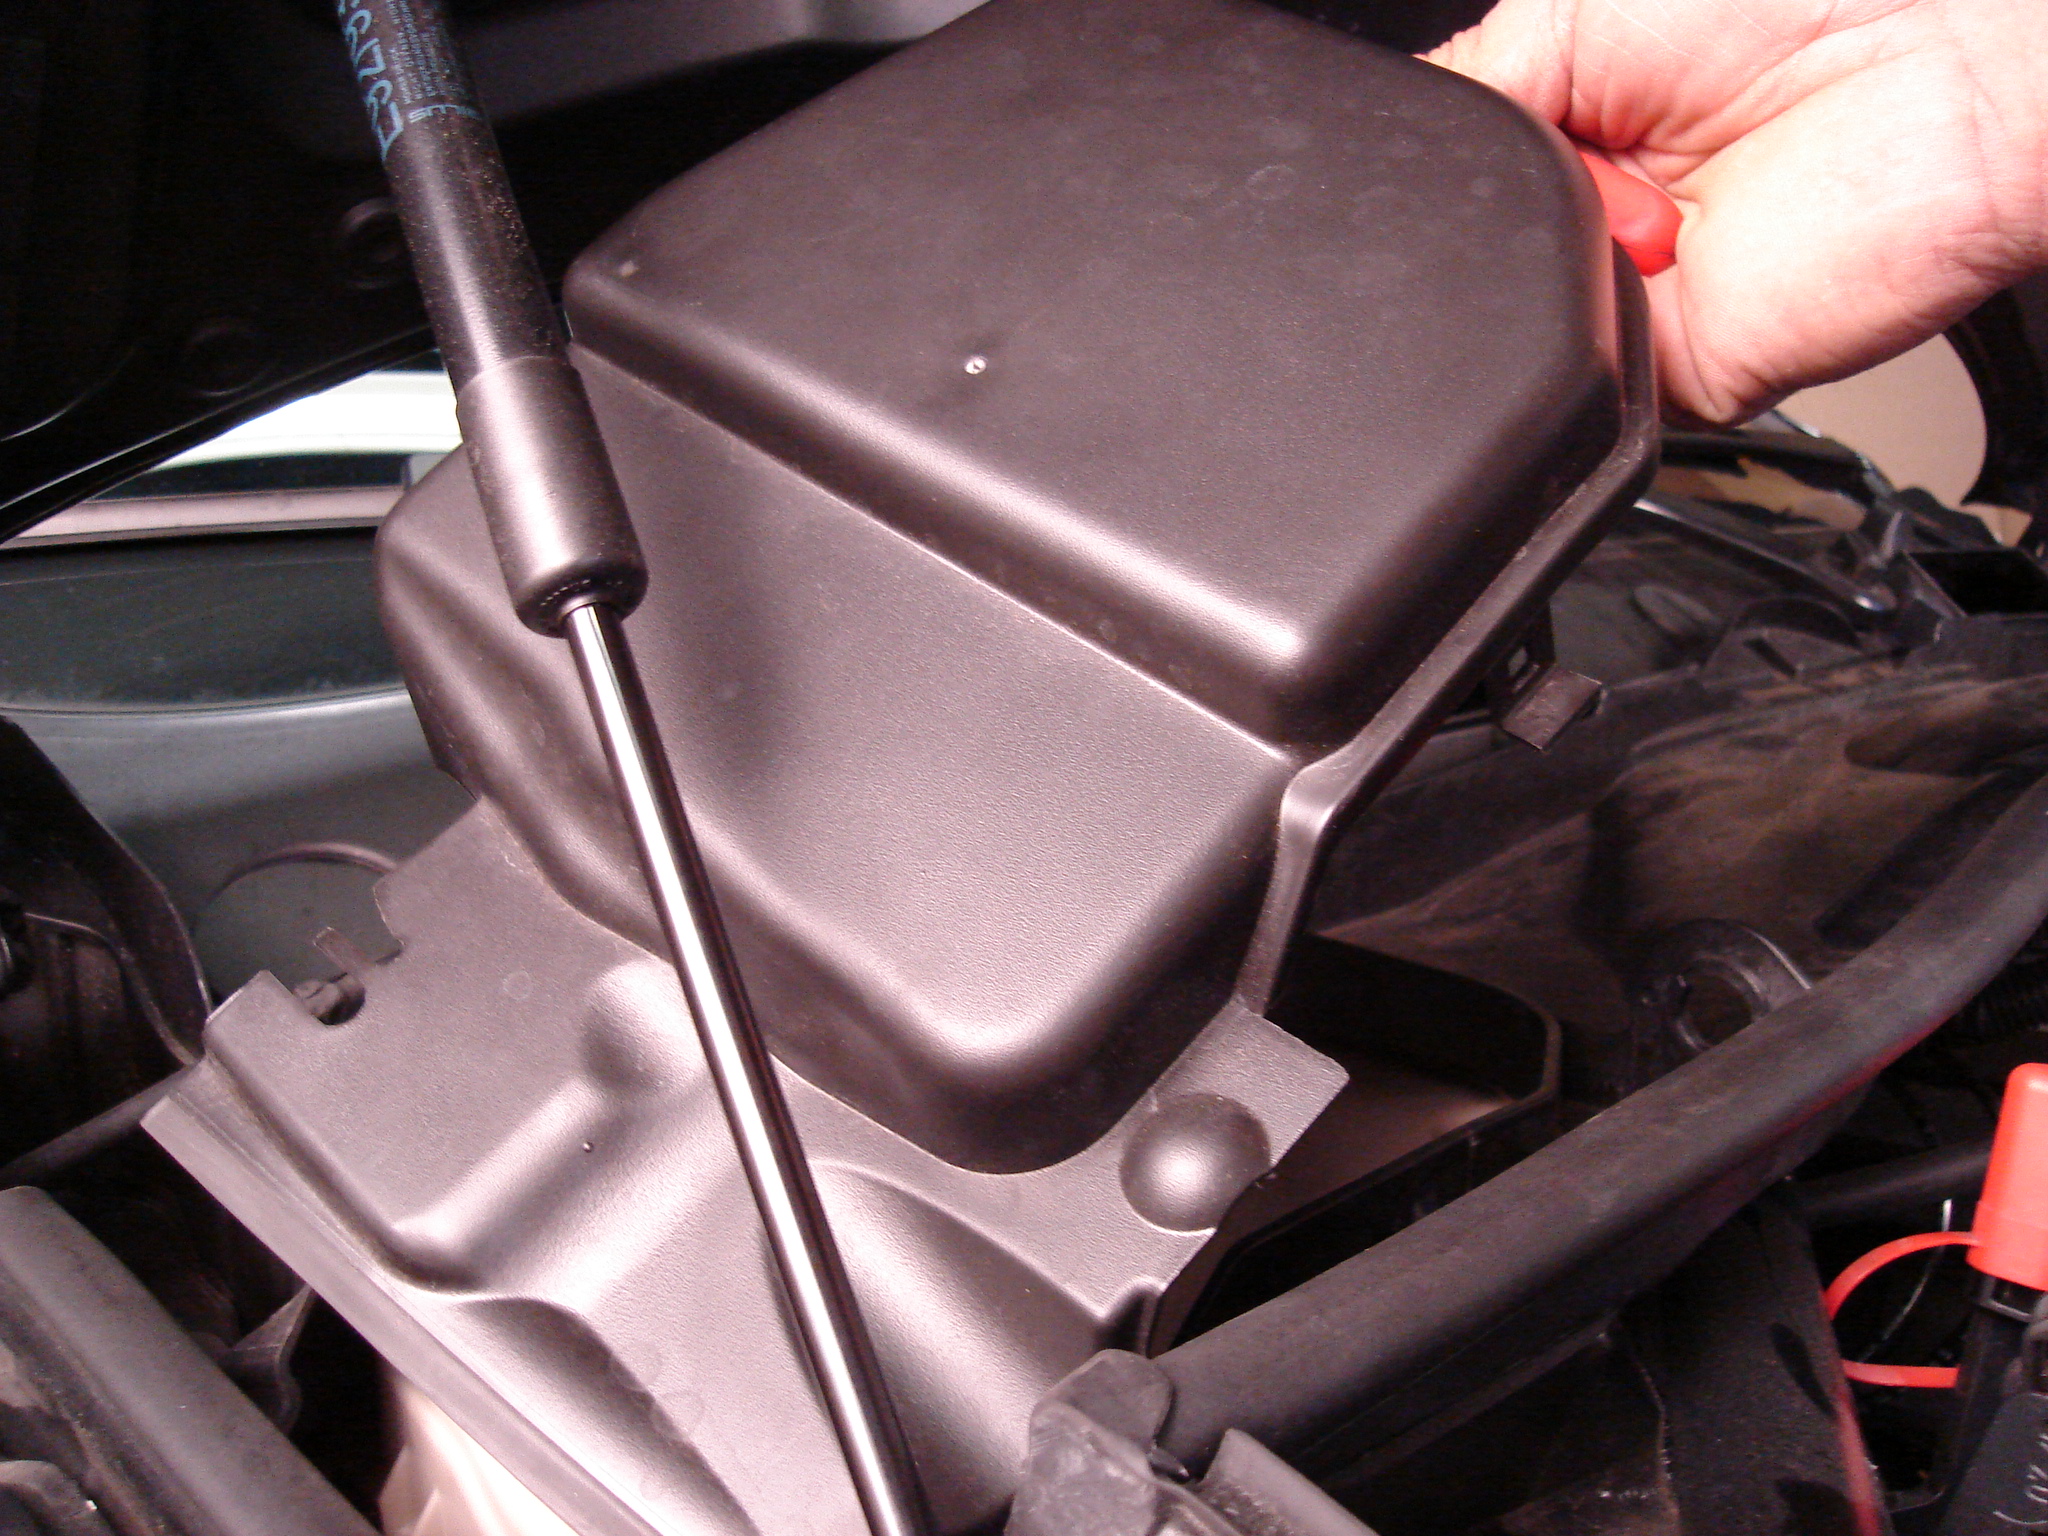
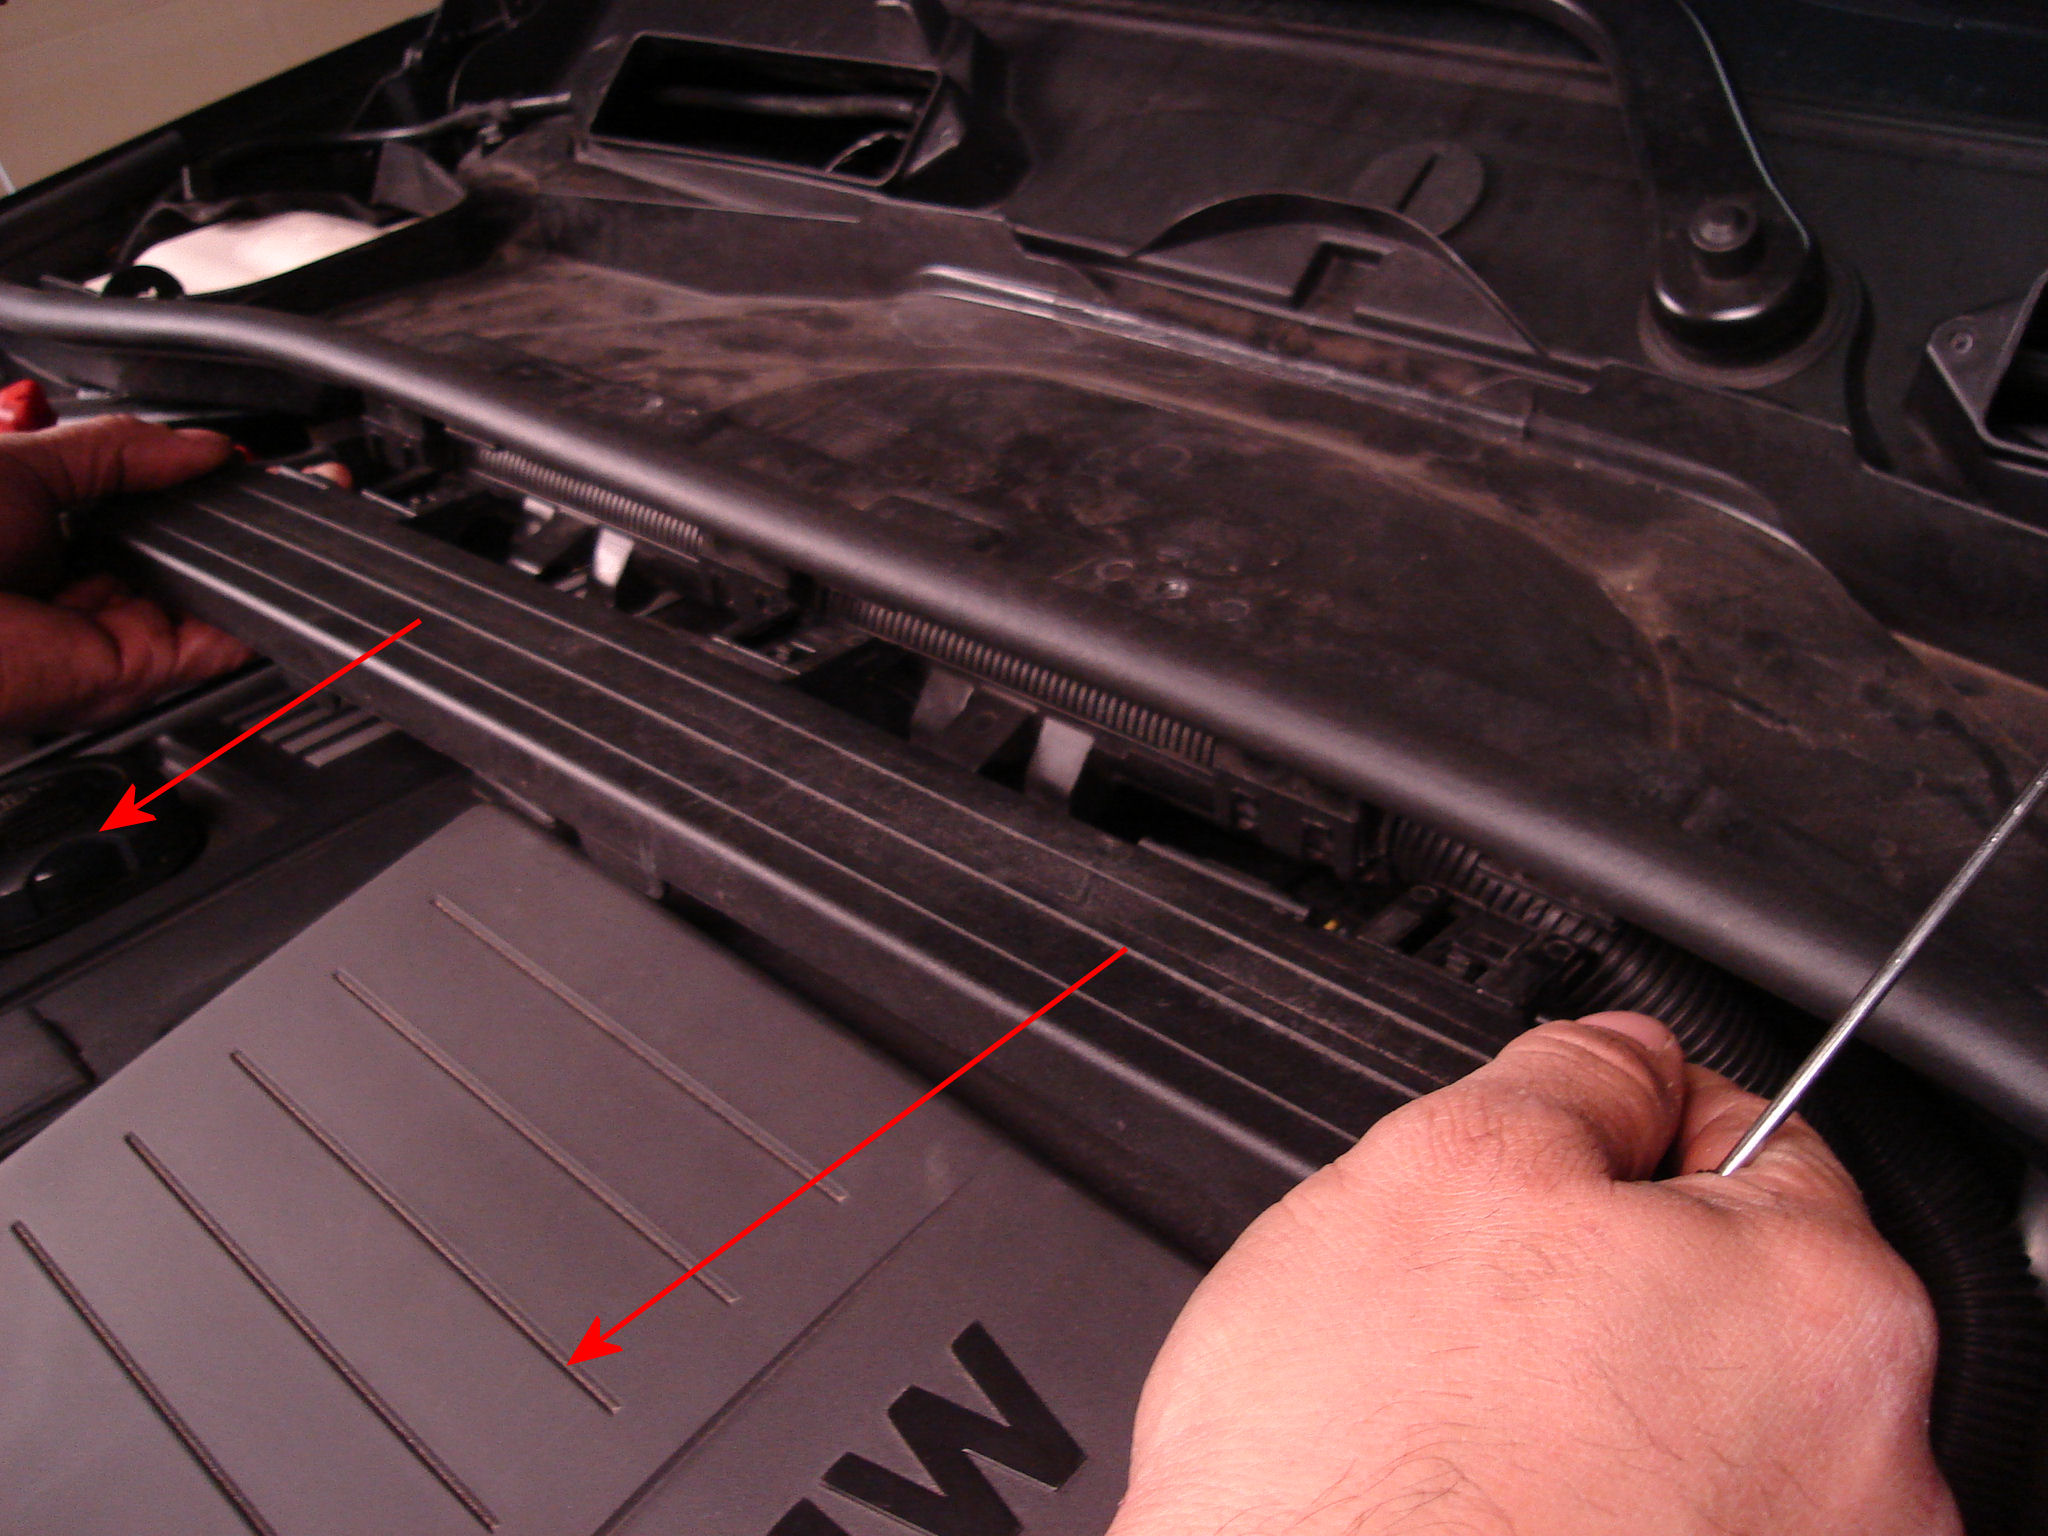
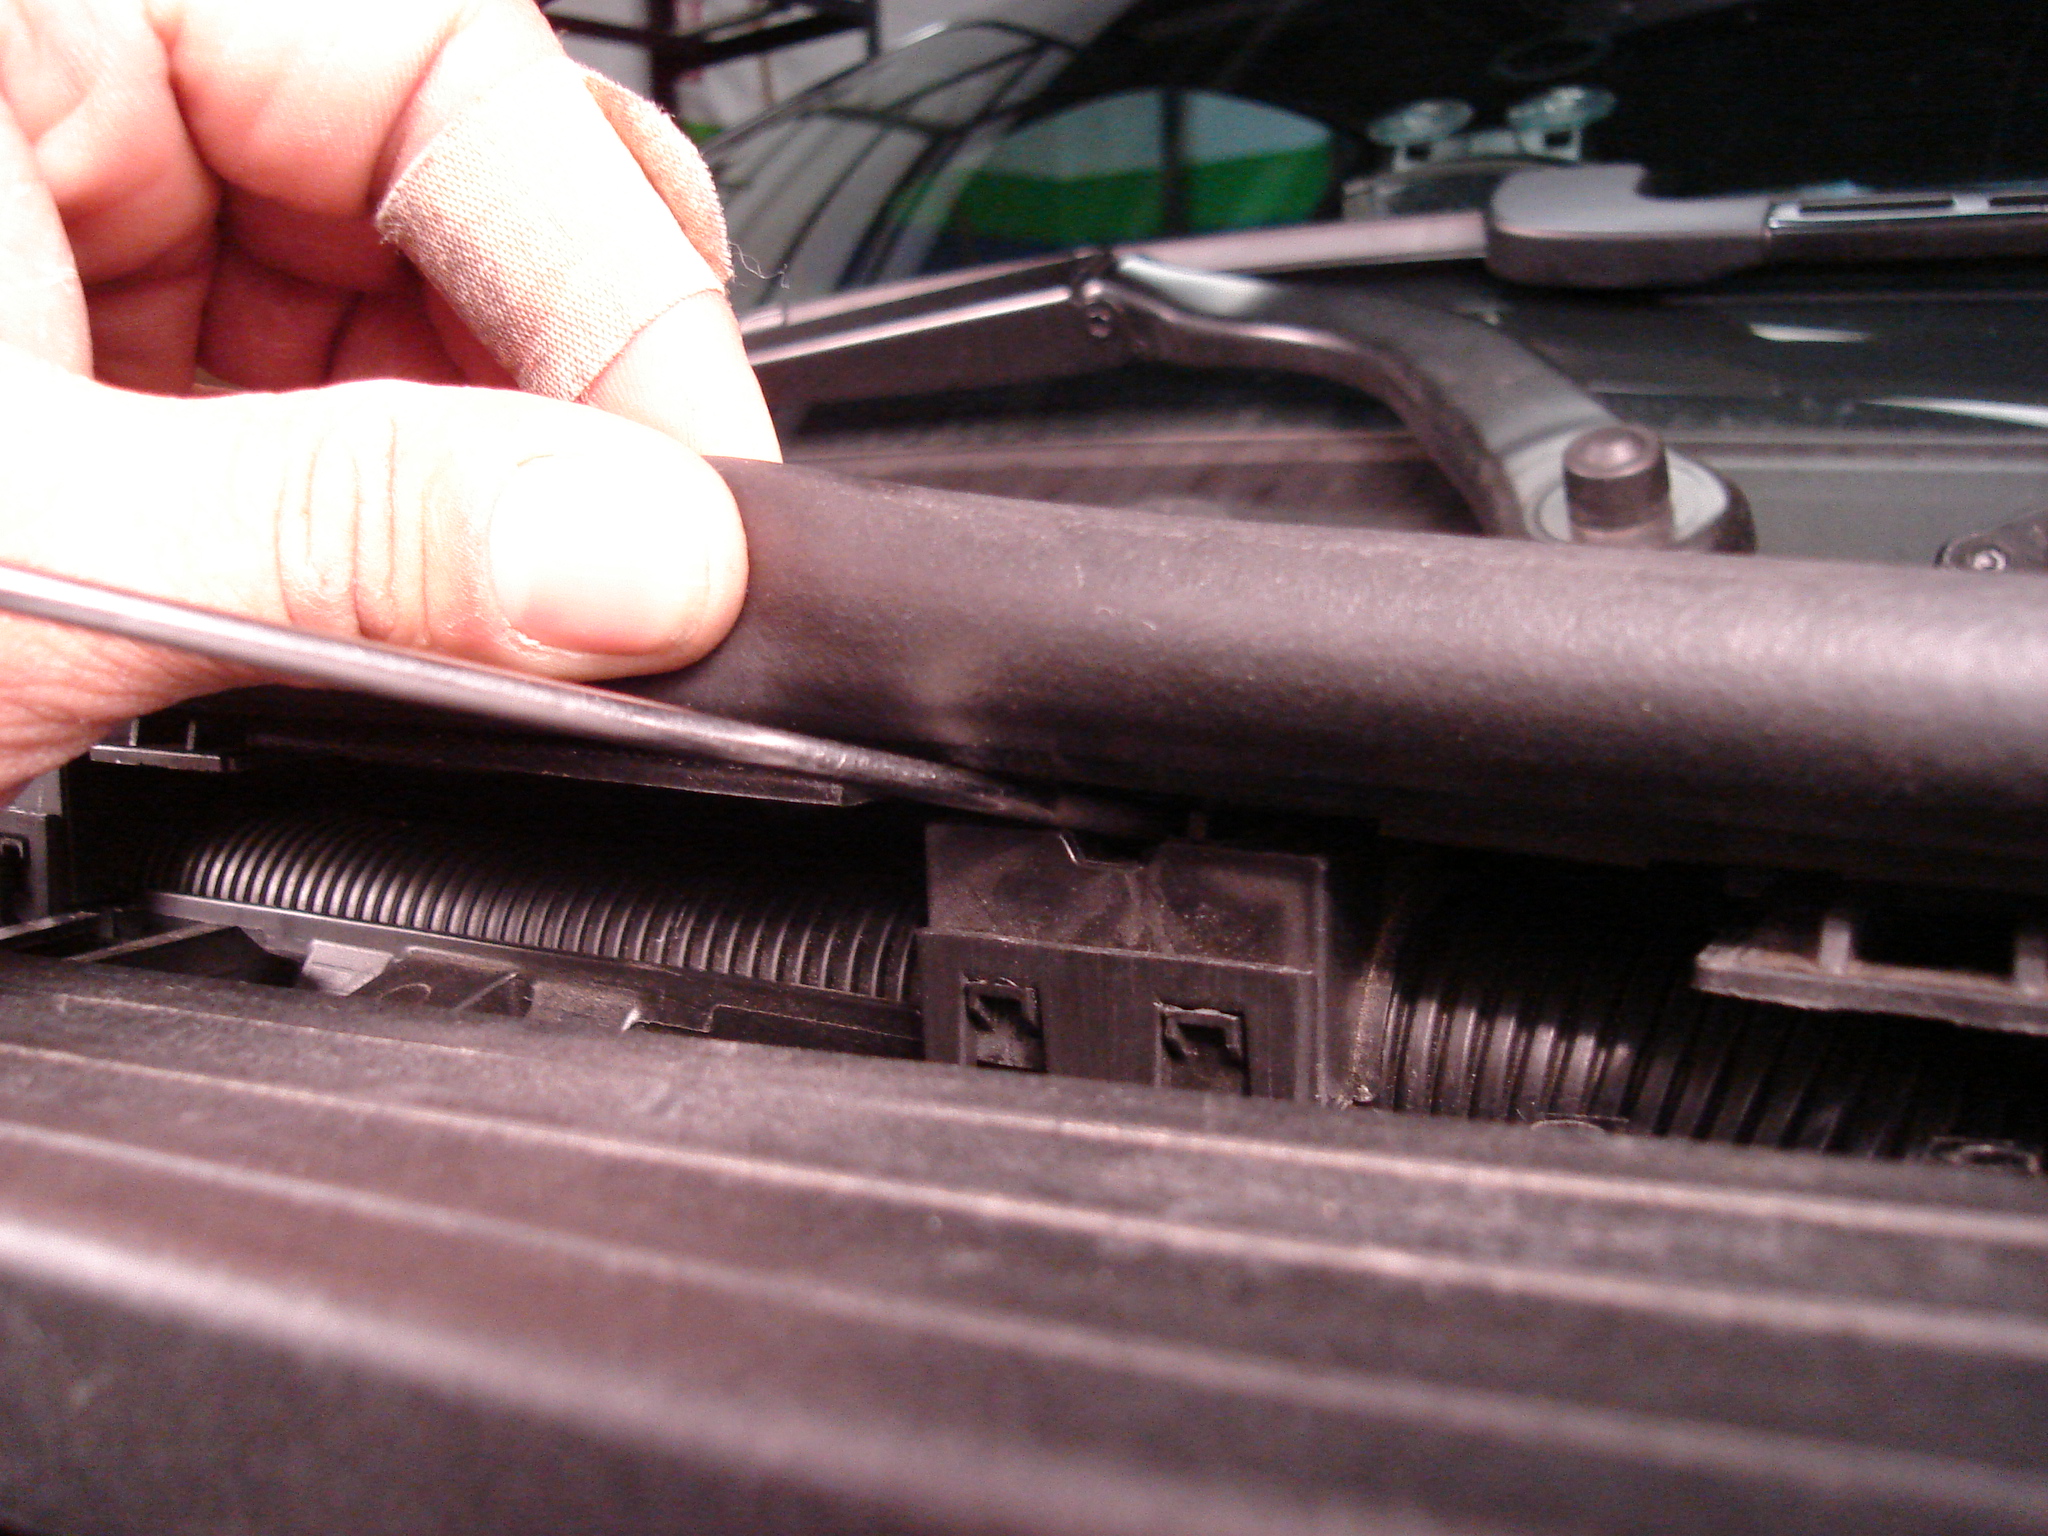
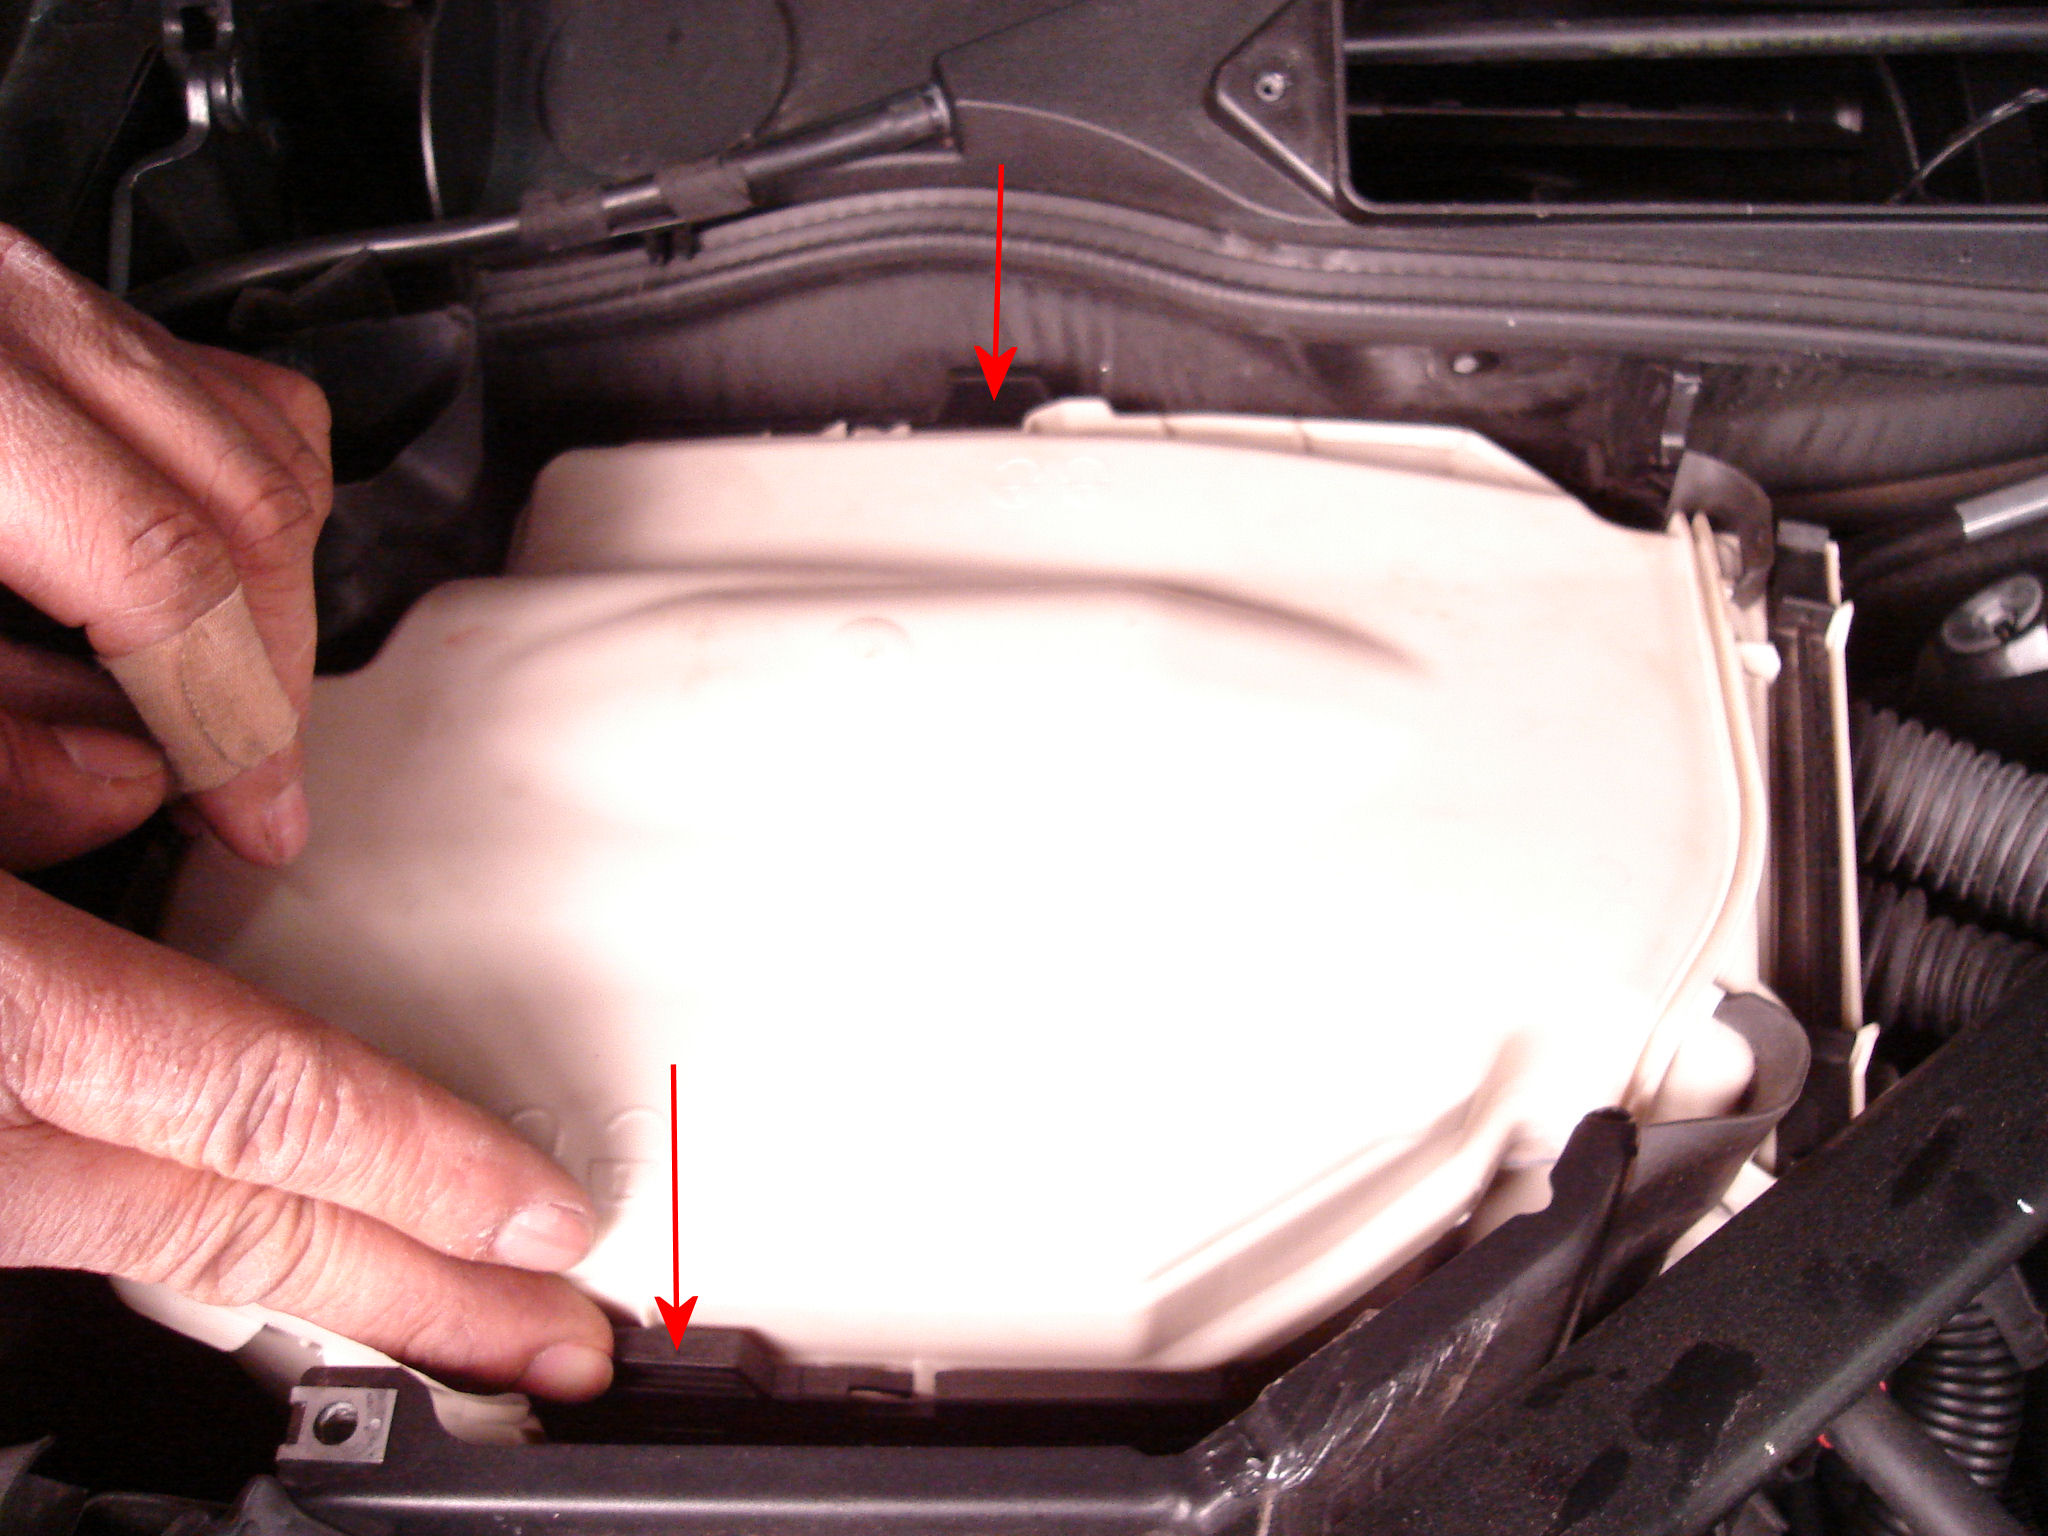
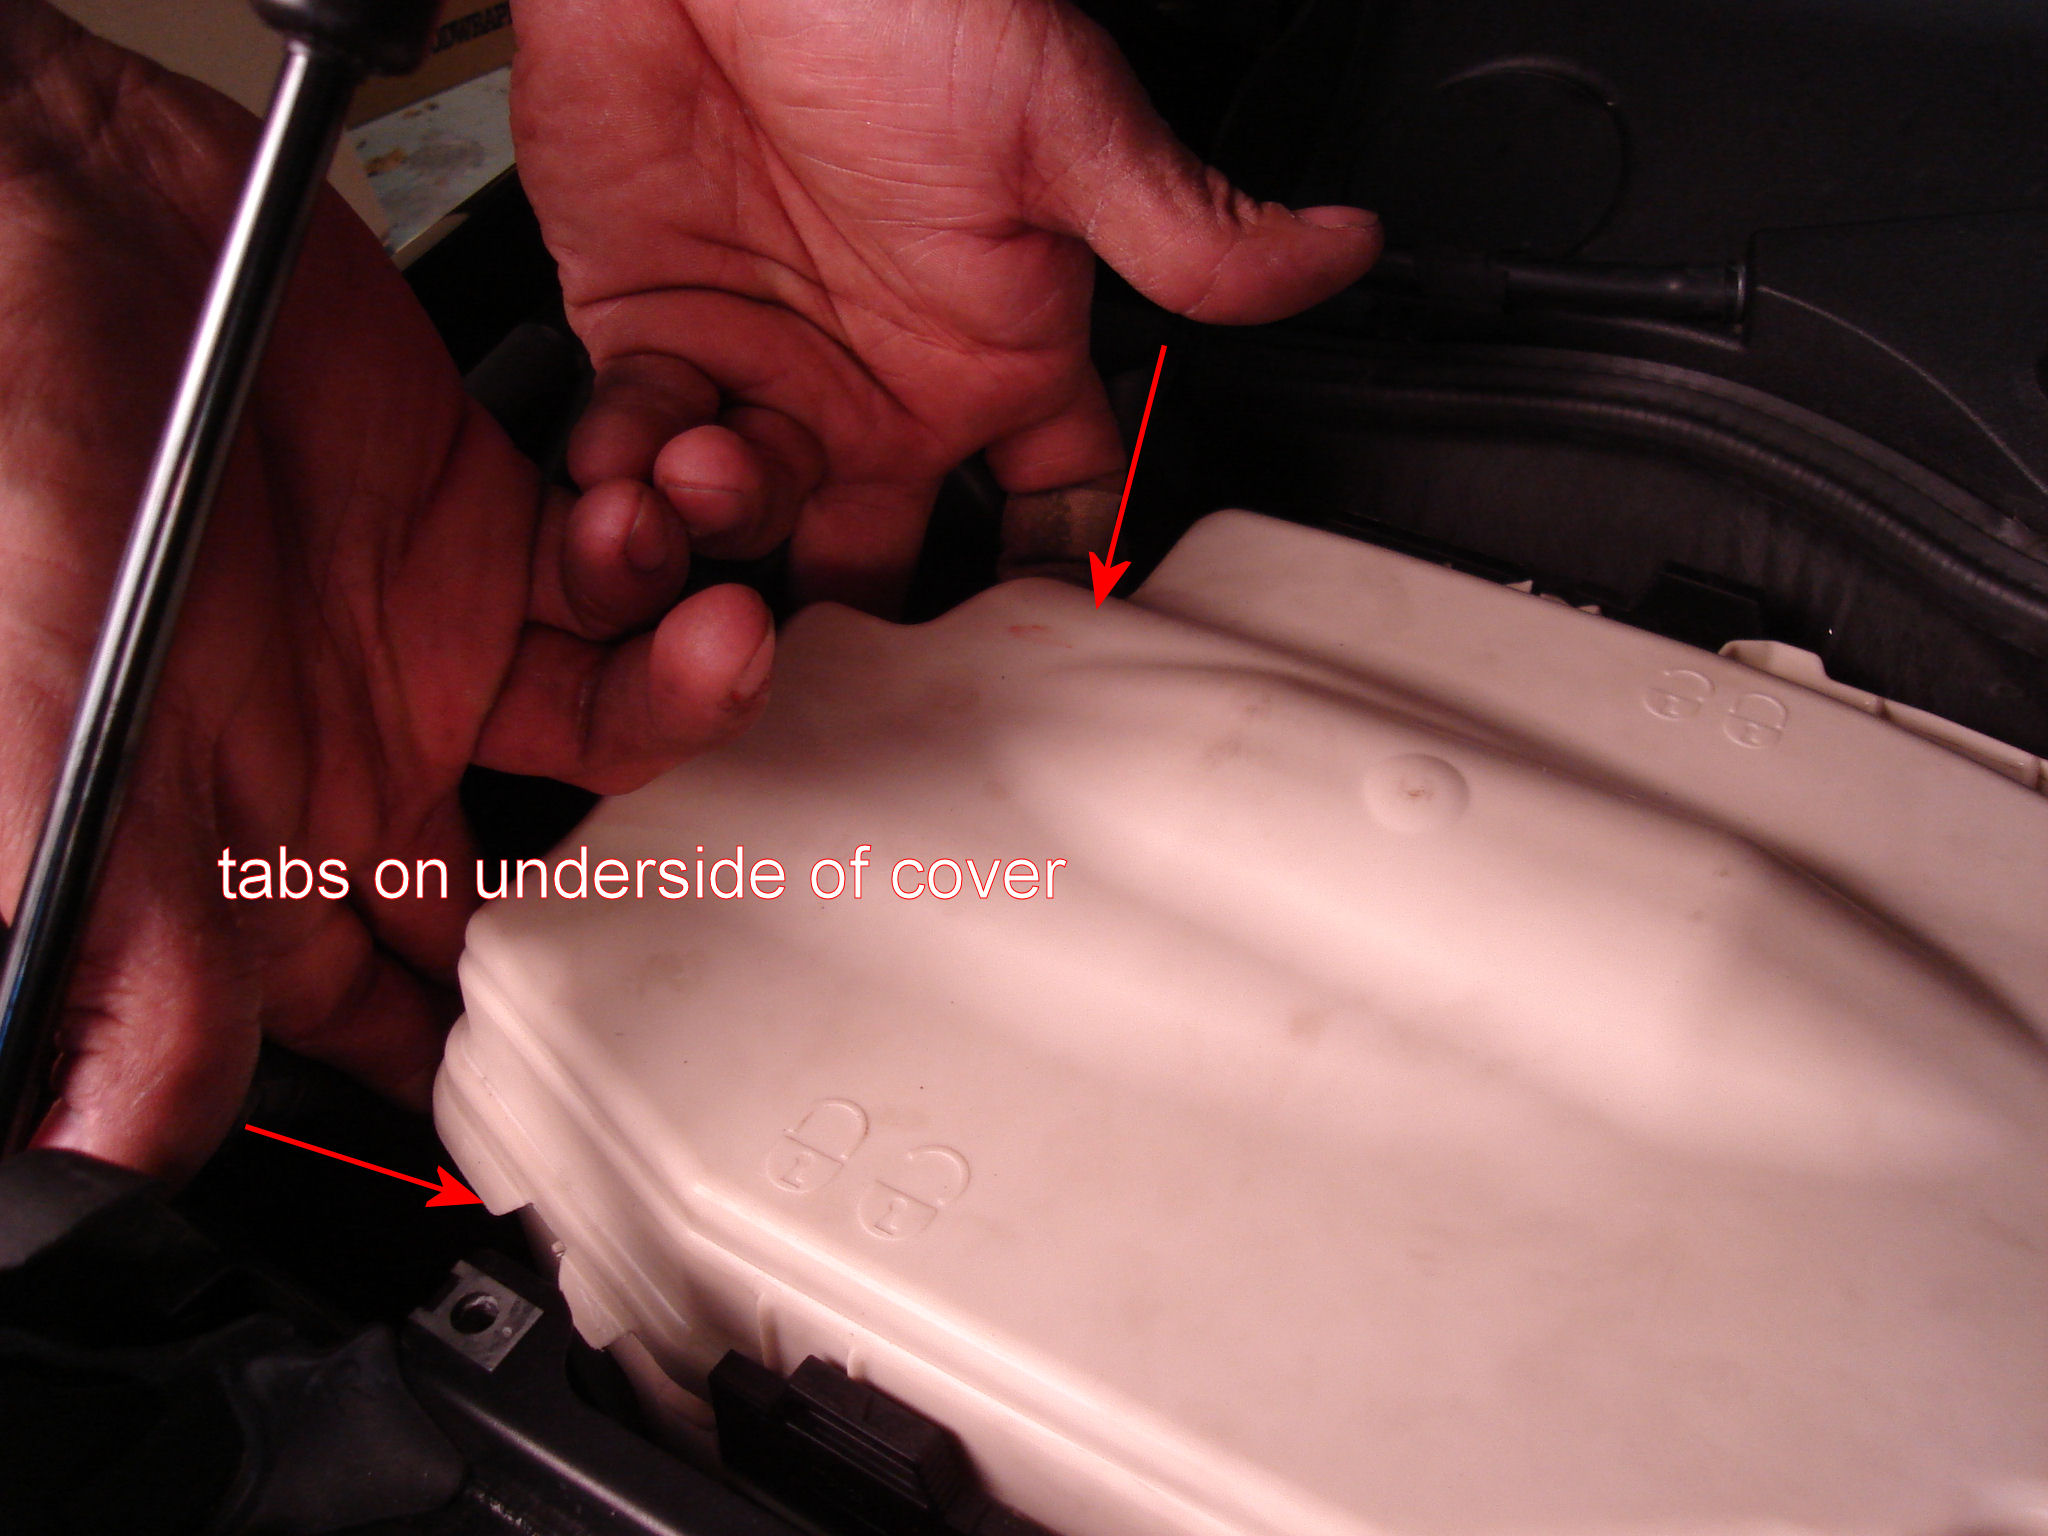
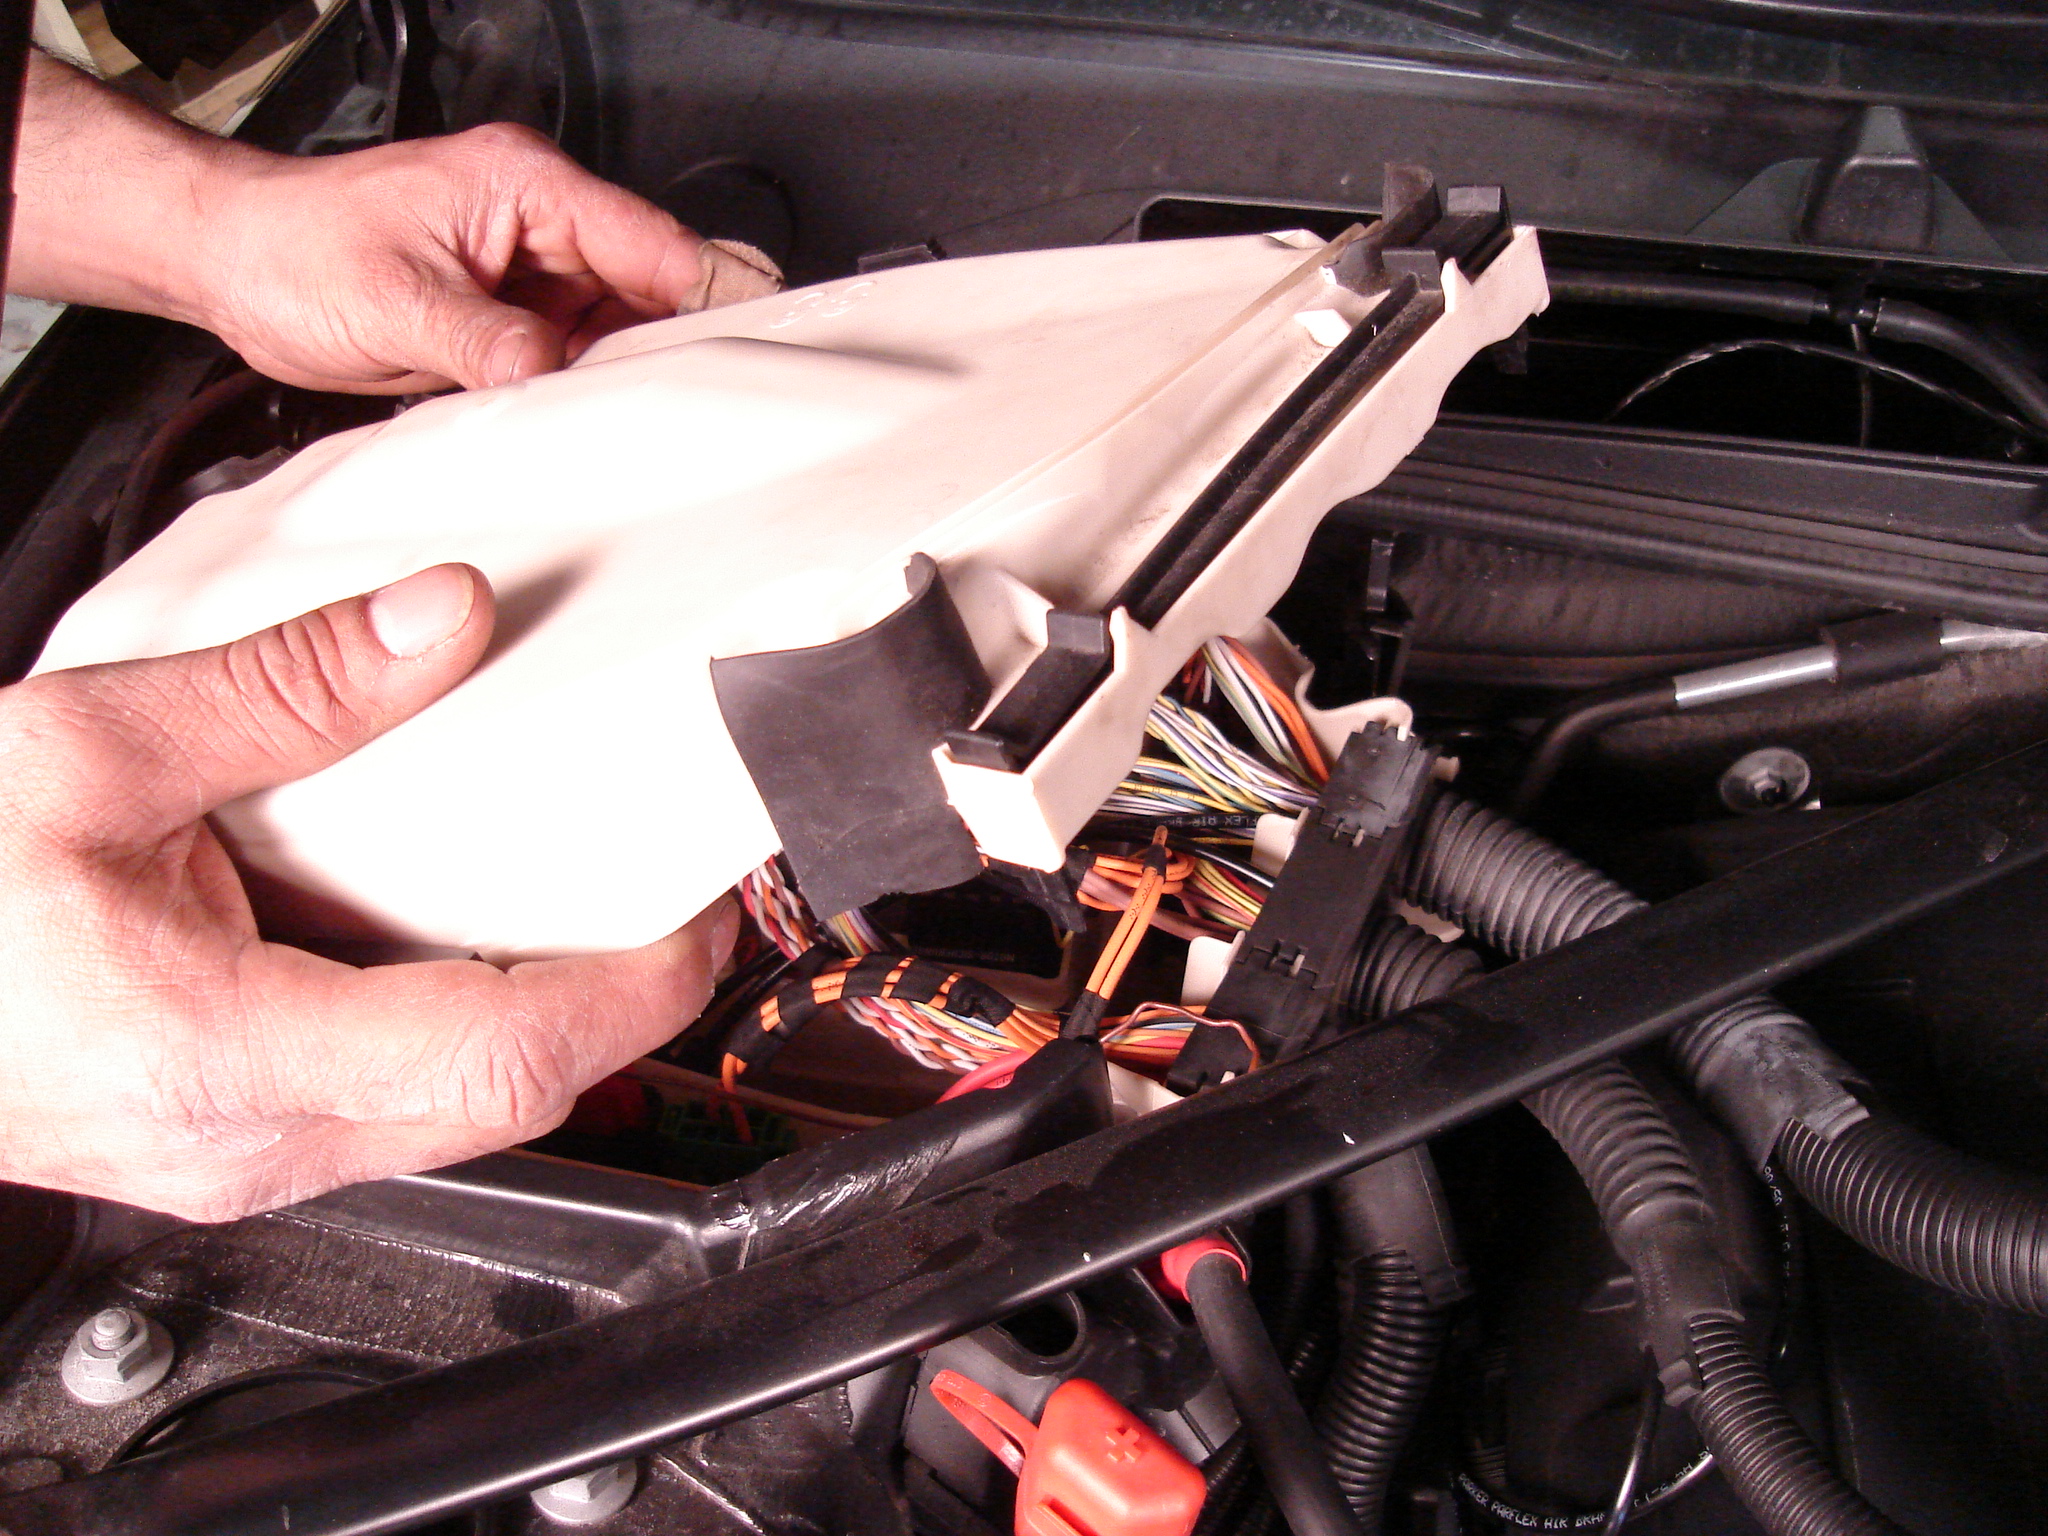
8) There is a black cover on both the driver and passenger
sides that must be removed. First peel back the rubber grommets. Next, unclip
the box from the front and rear tabs and remove it. Repeat on the other side.


9) Unclip the harness cover by pulling towards the front of
the car
10) Unclip the underlying harness by releasing the tabs with
a small screwdriver and pulling towards the front of the car.

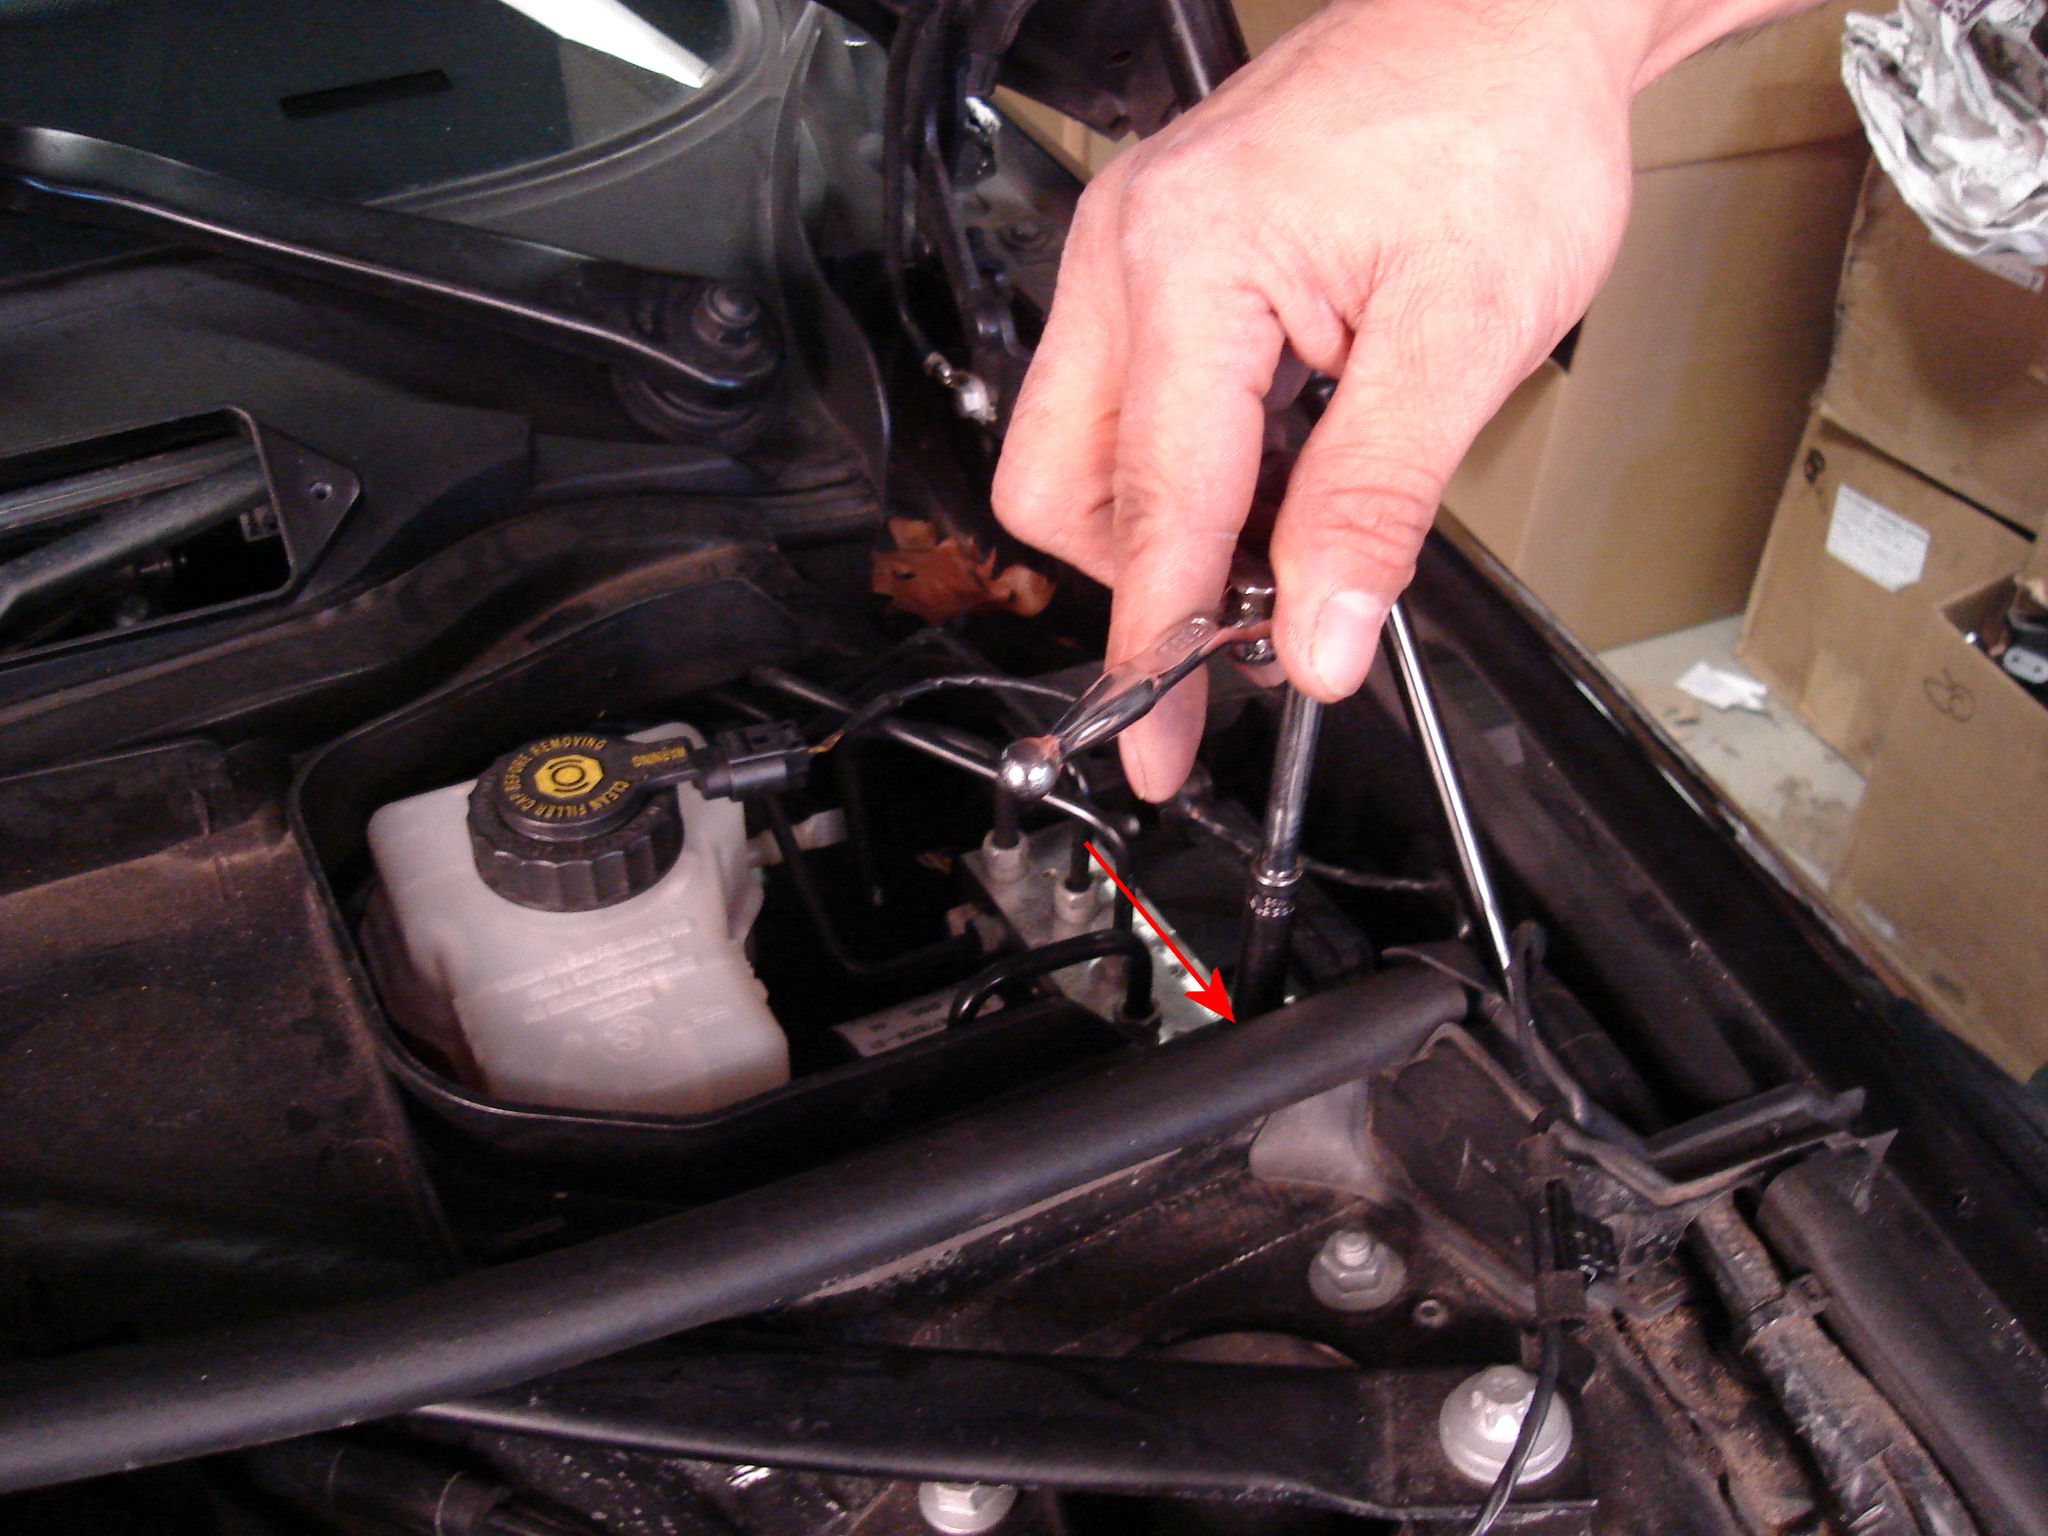
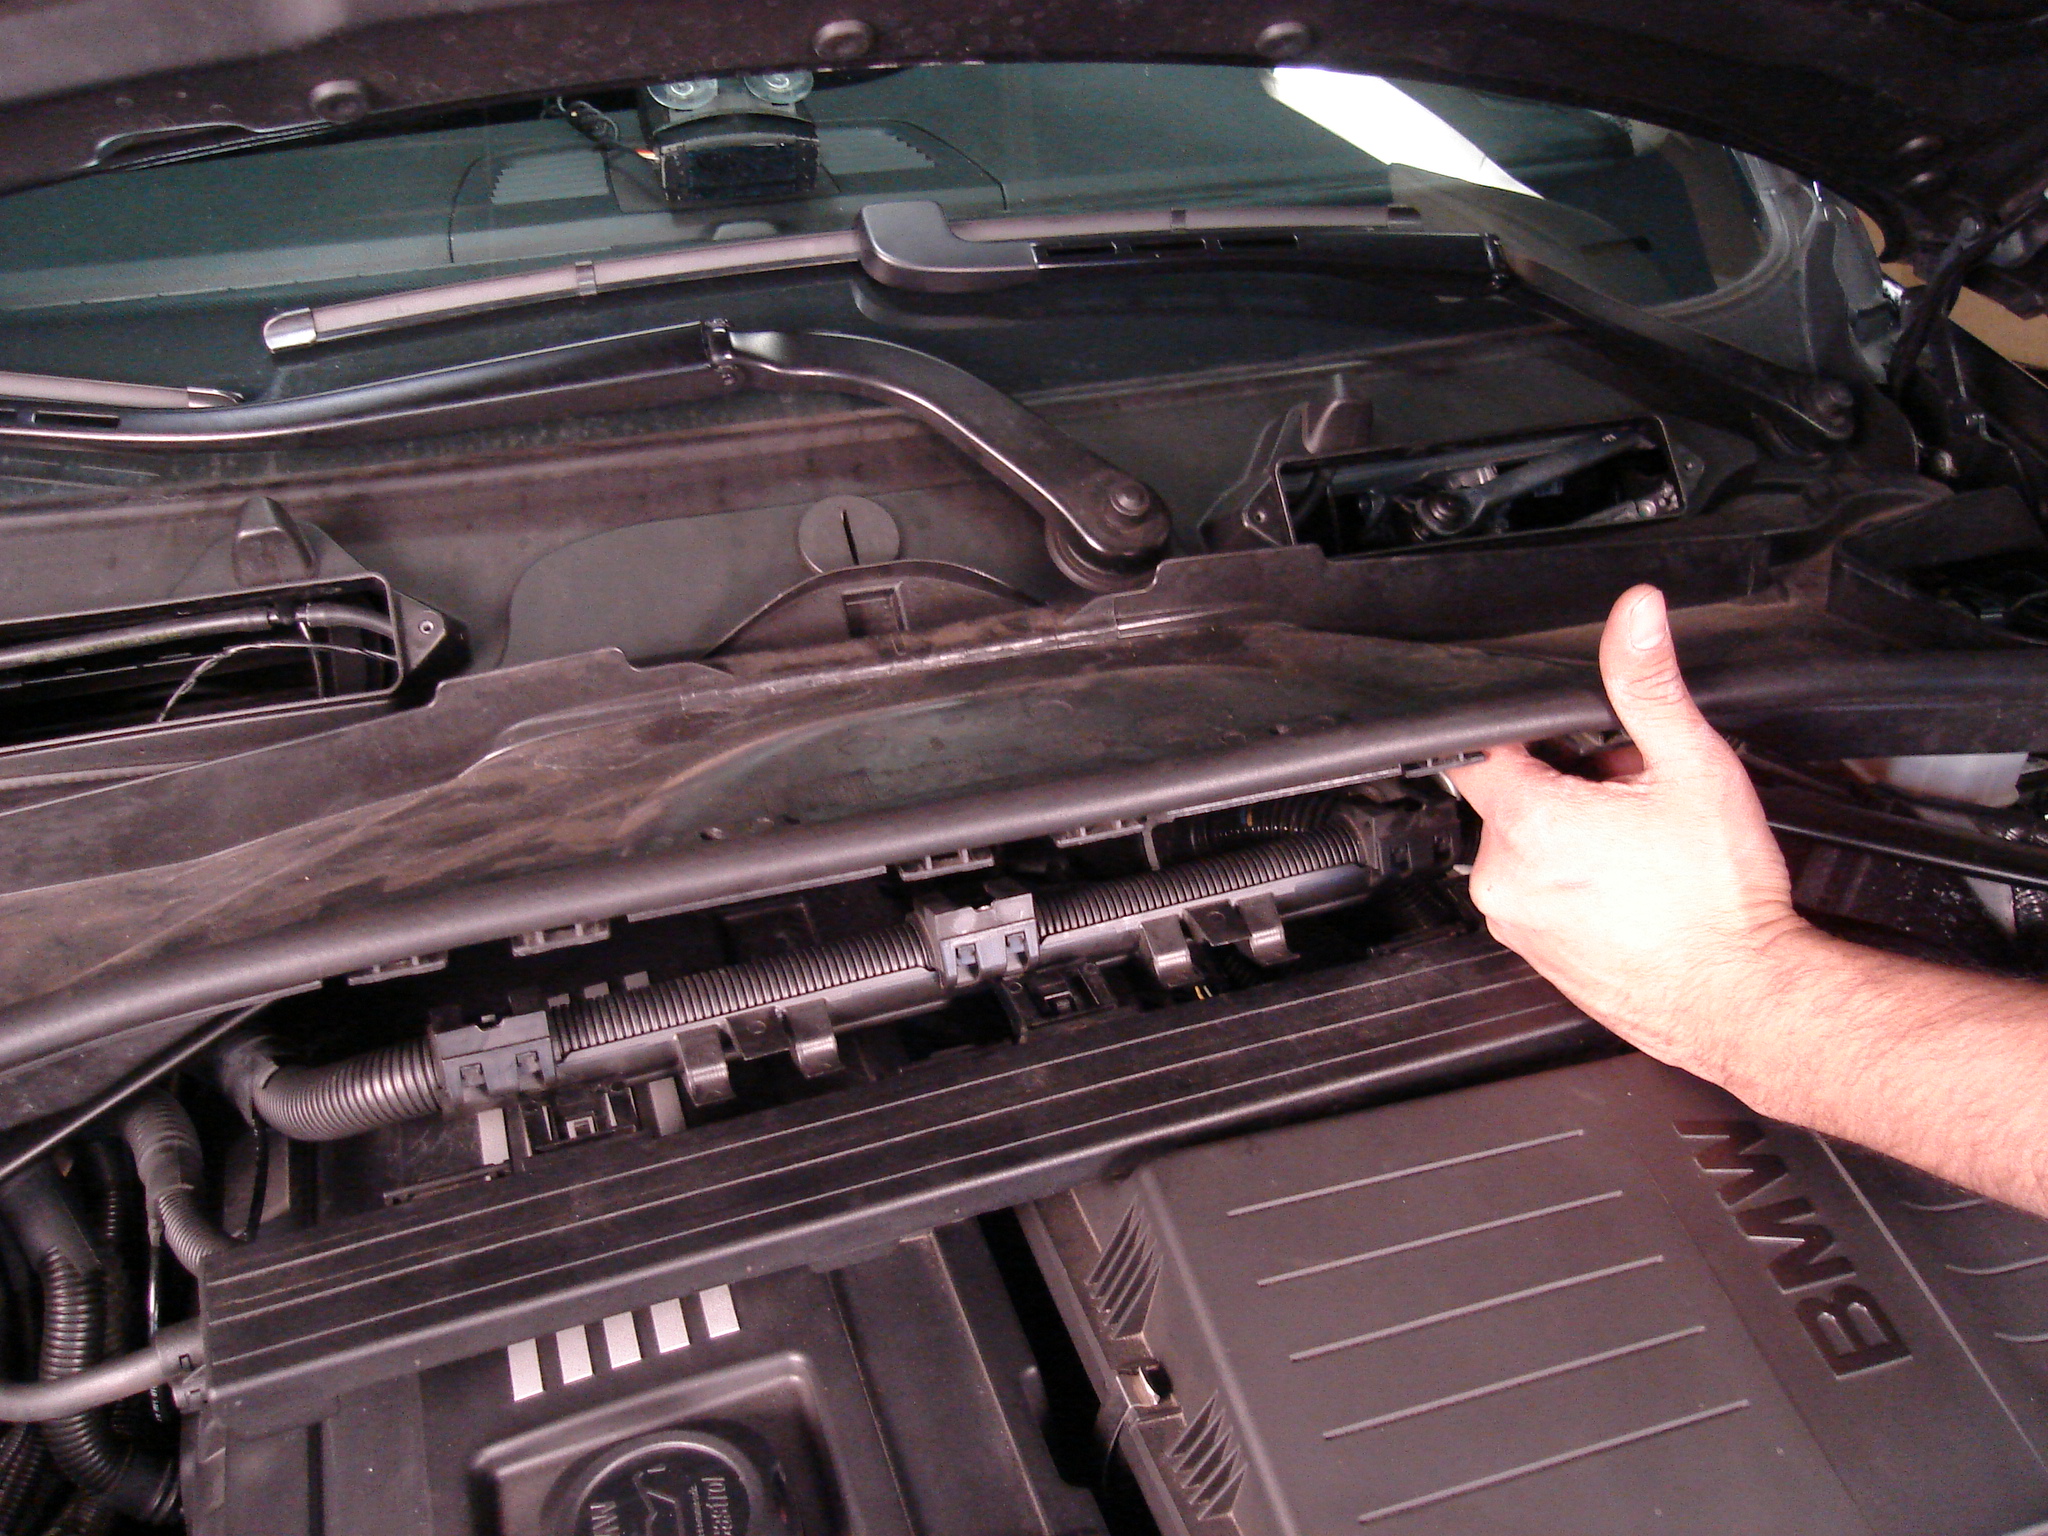
11) Remove the cover under the cabin filter housing by
removing 2 8mm bolts. One on the passenger and one on the drivers side.

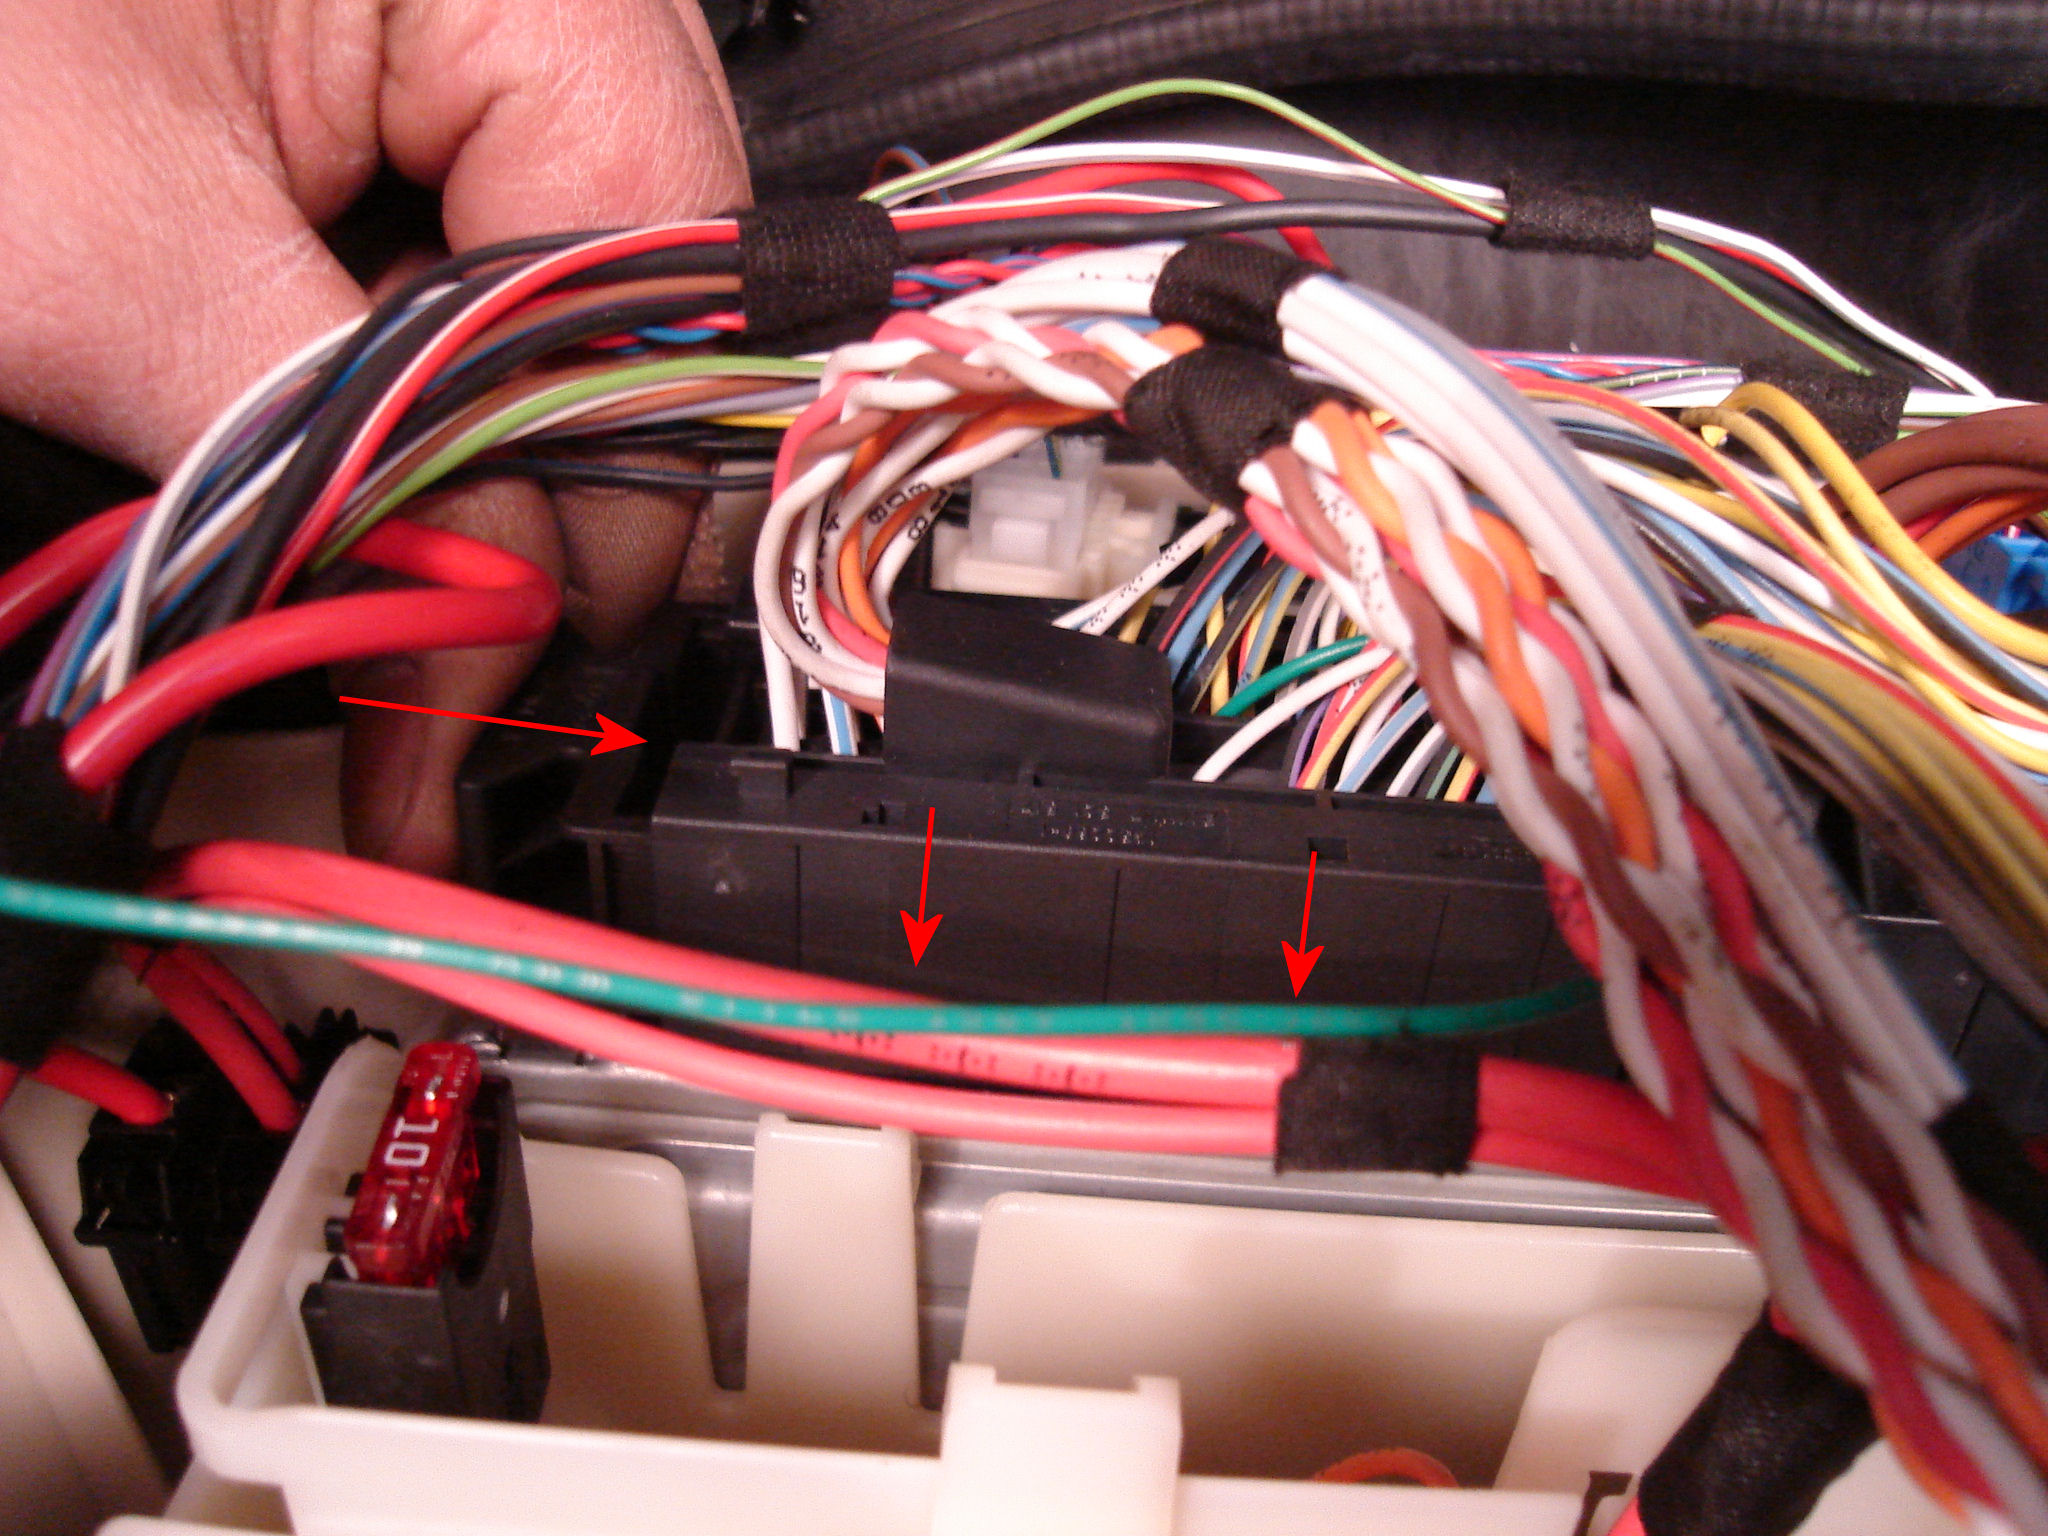
12) Next open the weather proof housing where the ECU is
located. Note that there are 2 tabs with lock indicators. Slide the tabs to
release. On the opposite sides there are clips which are released by prying
outward on the underside.
13) Locate the large plug on the ECU
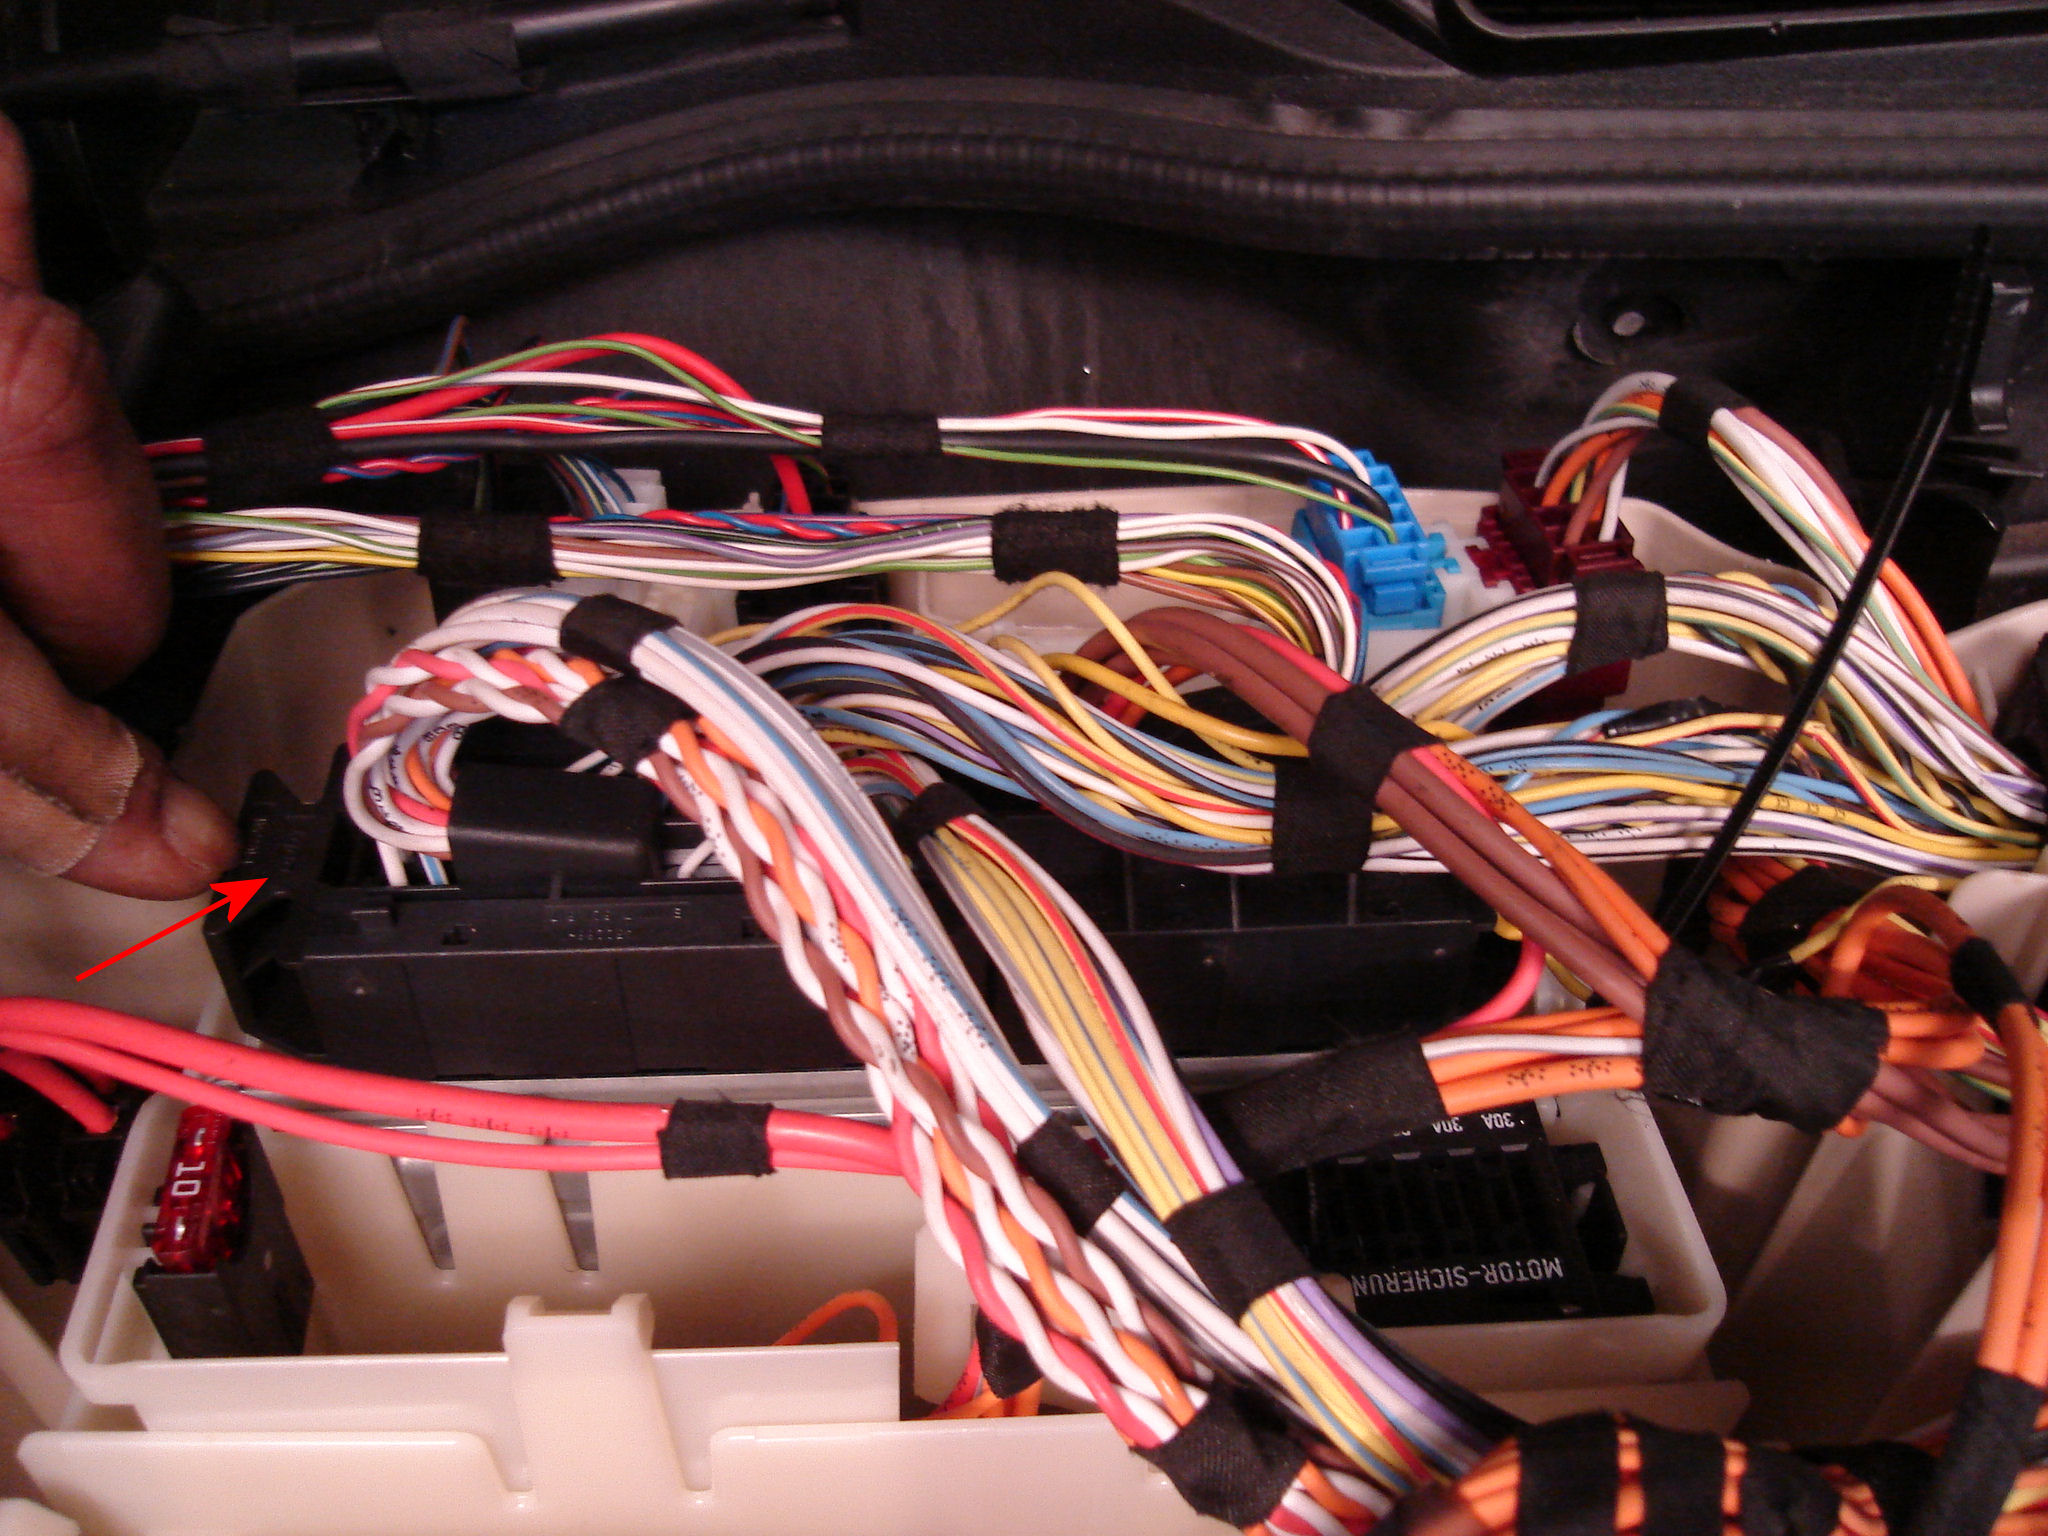
14) Pull the tab outward to release the plug from the ECU

15) Release the black section of the plug harness by
releasing the tab.
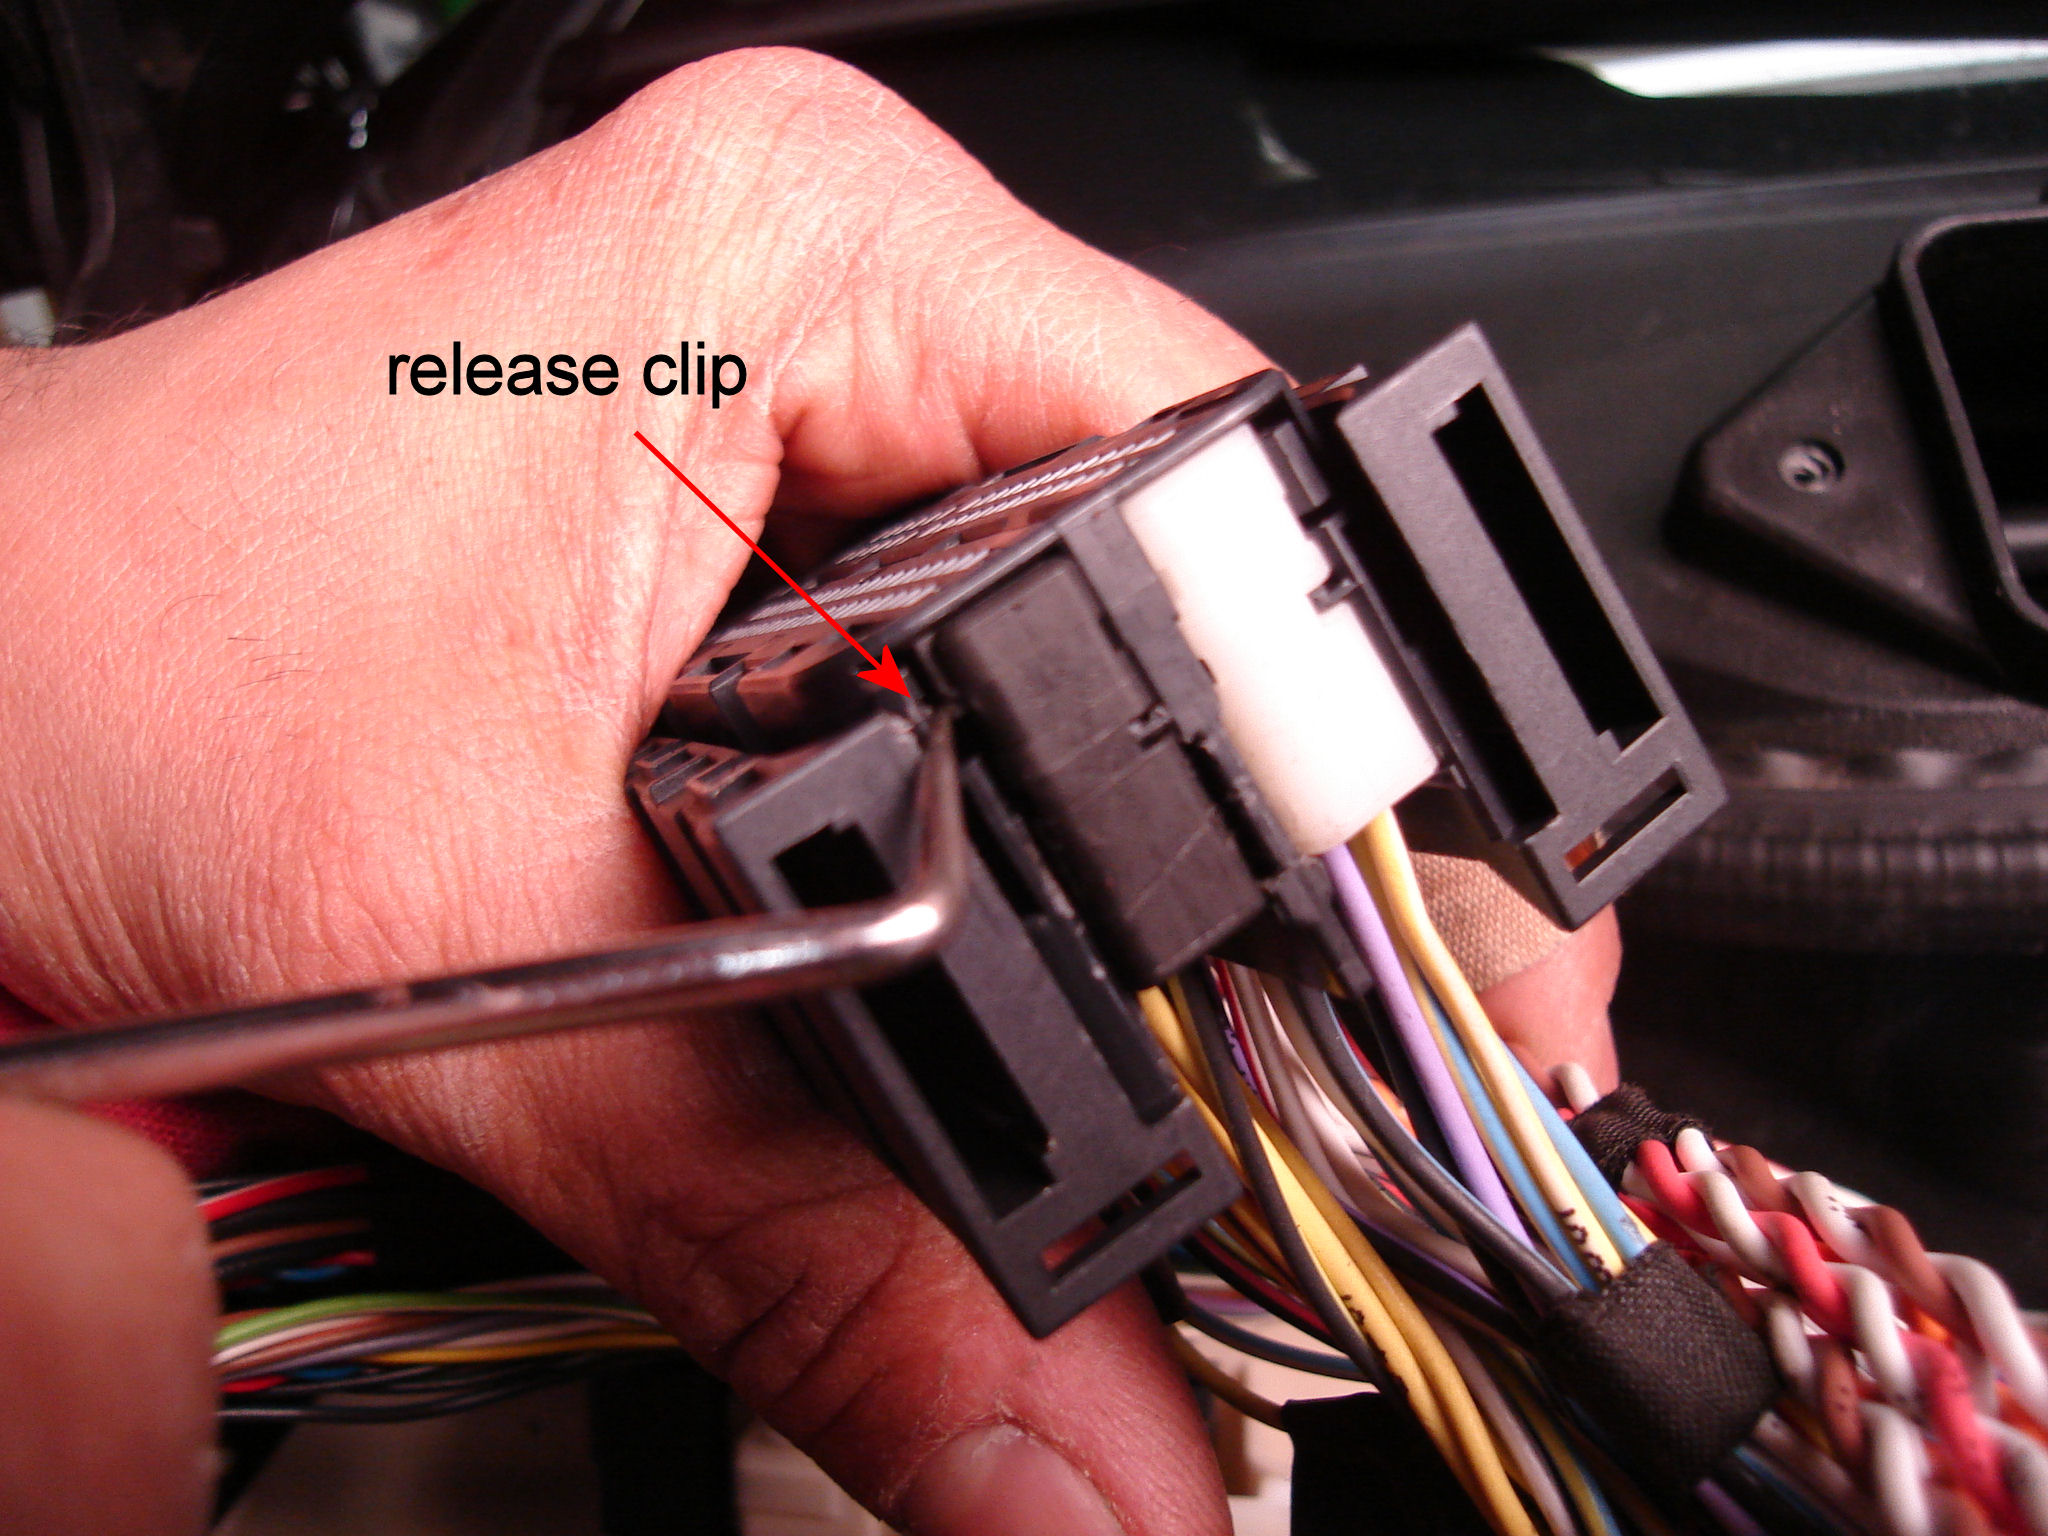
16) Slide the black connector out of the plug.
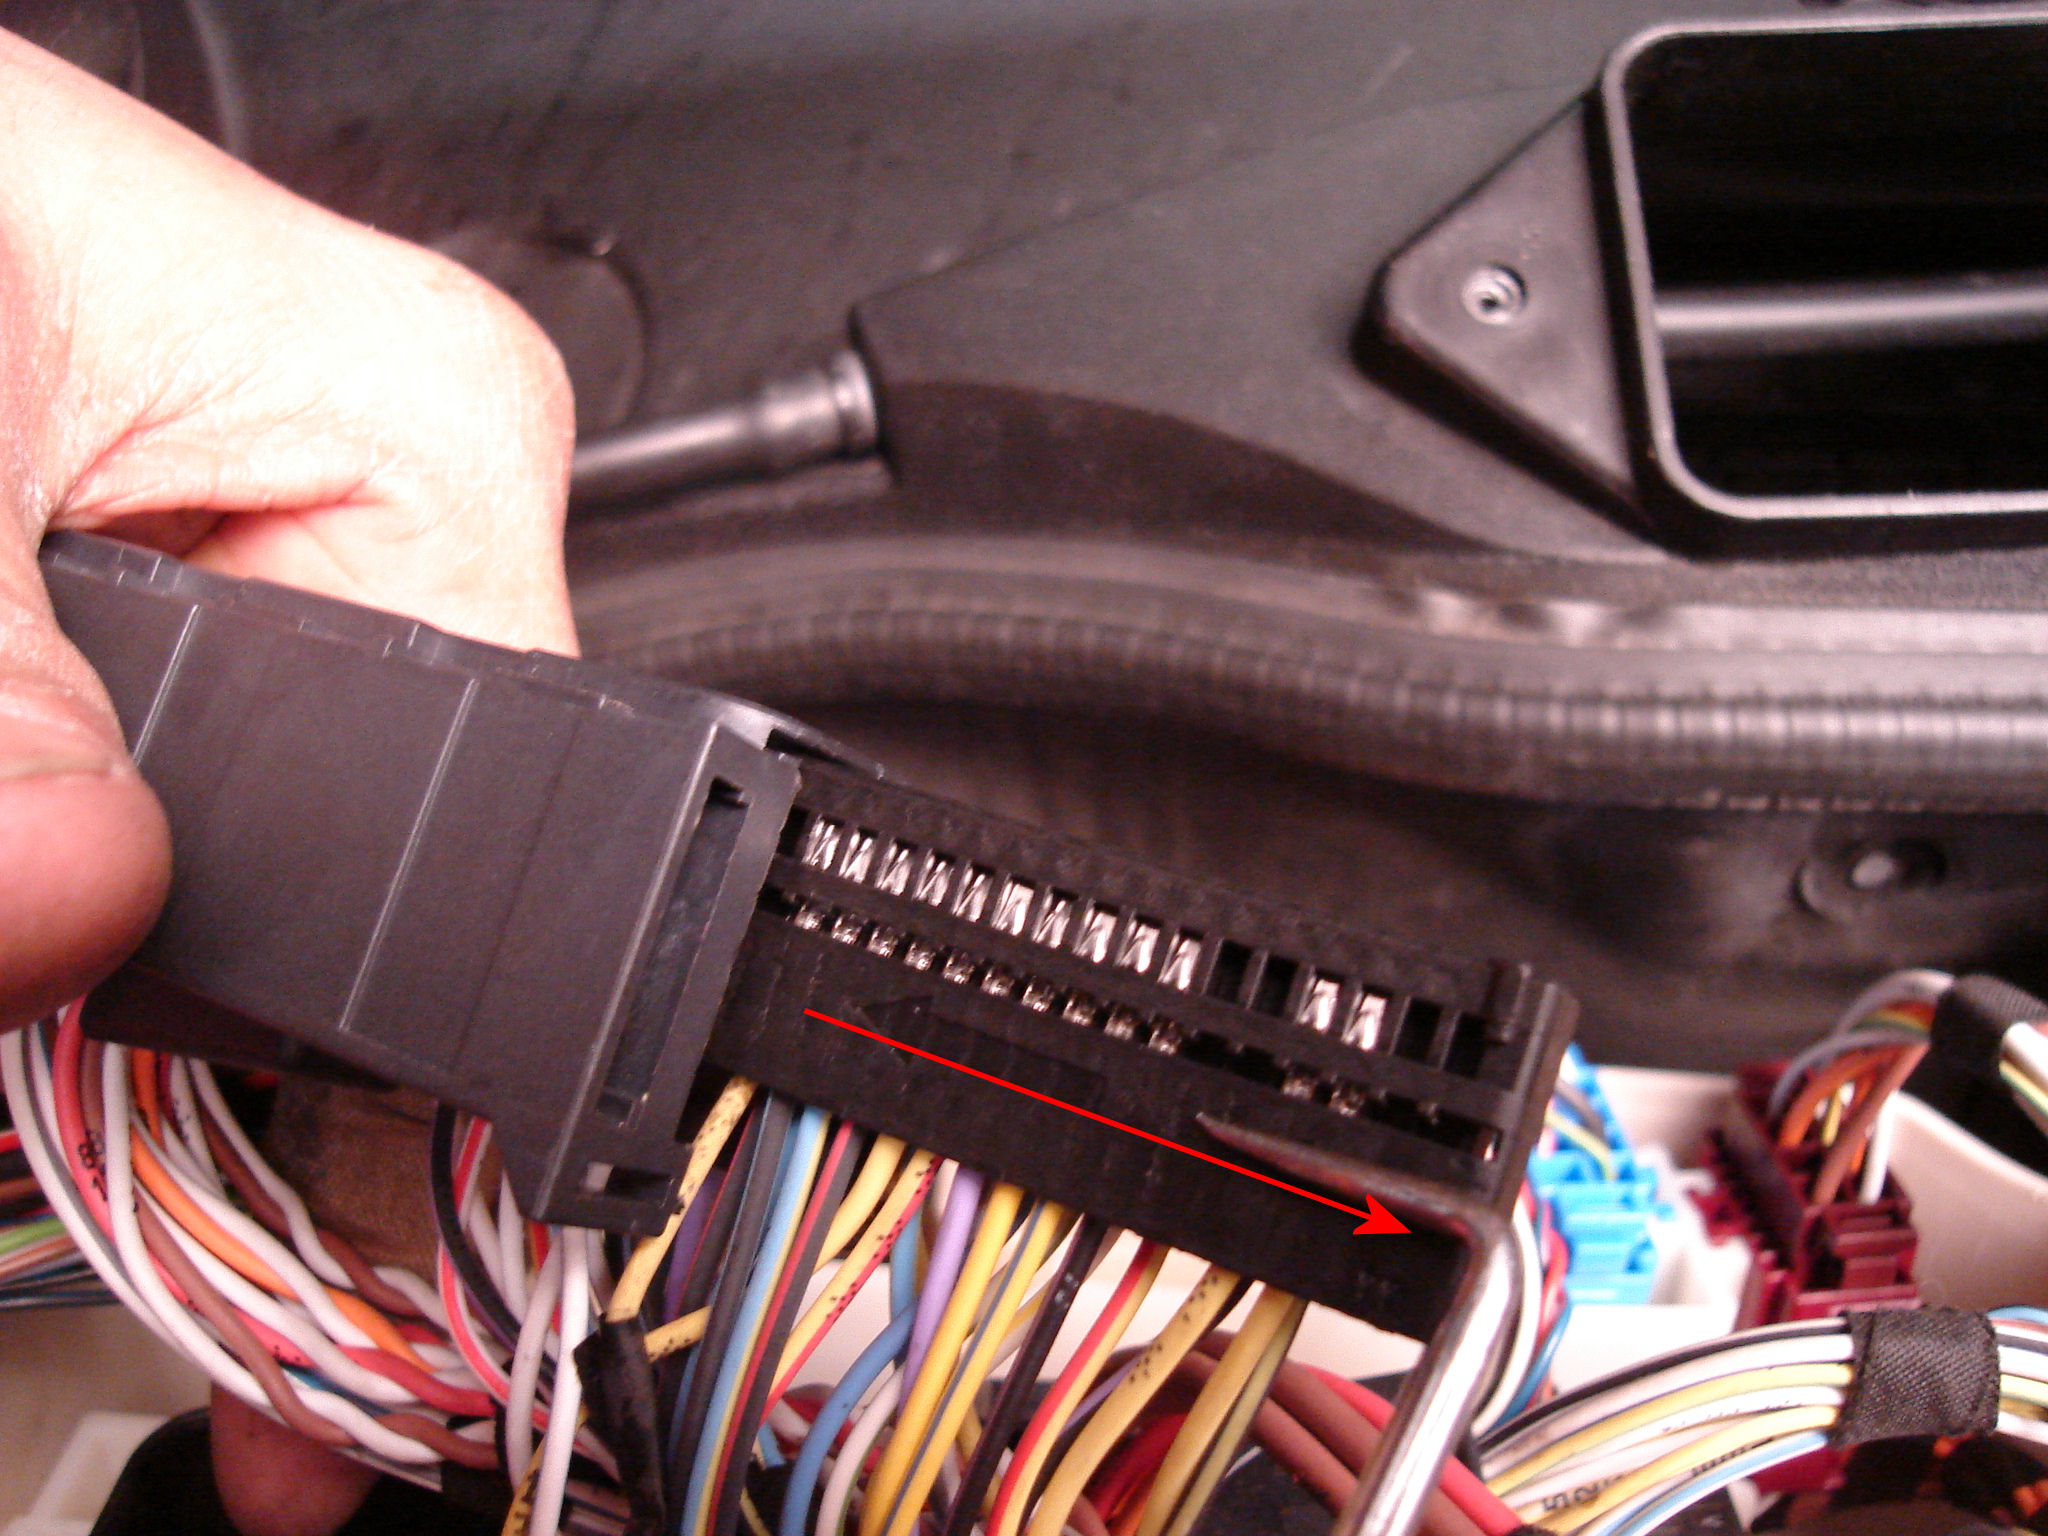
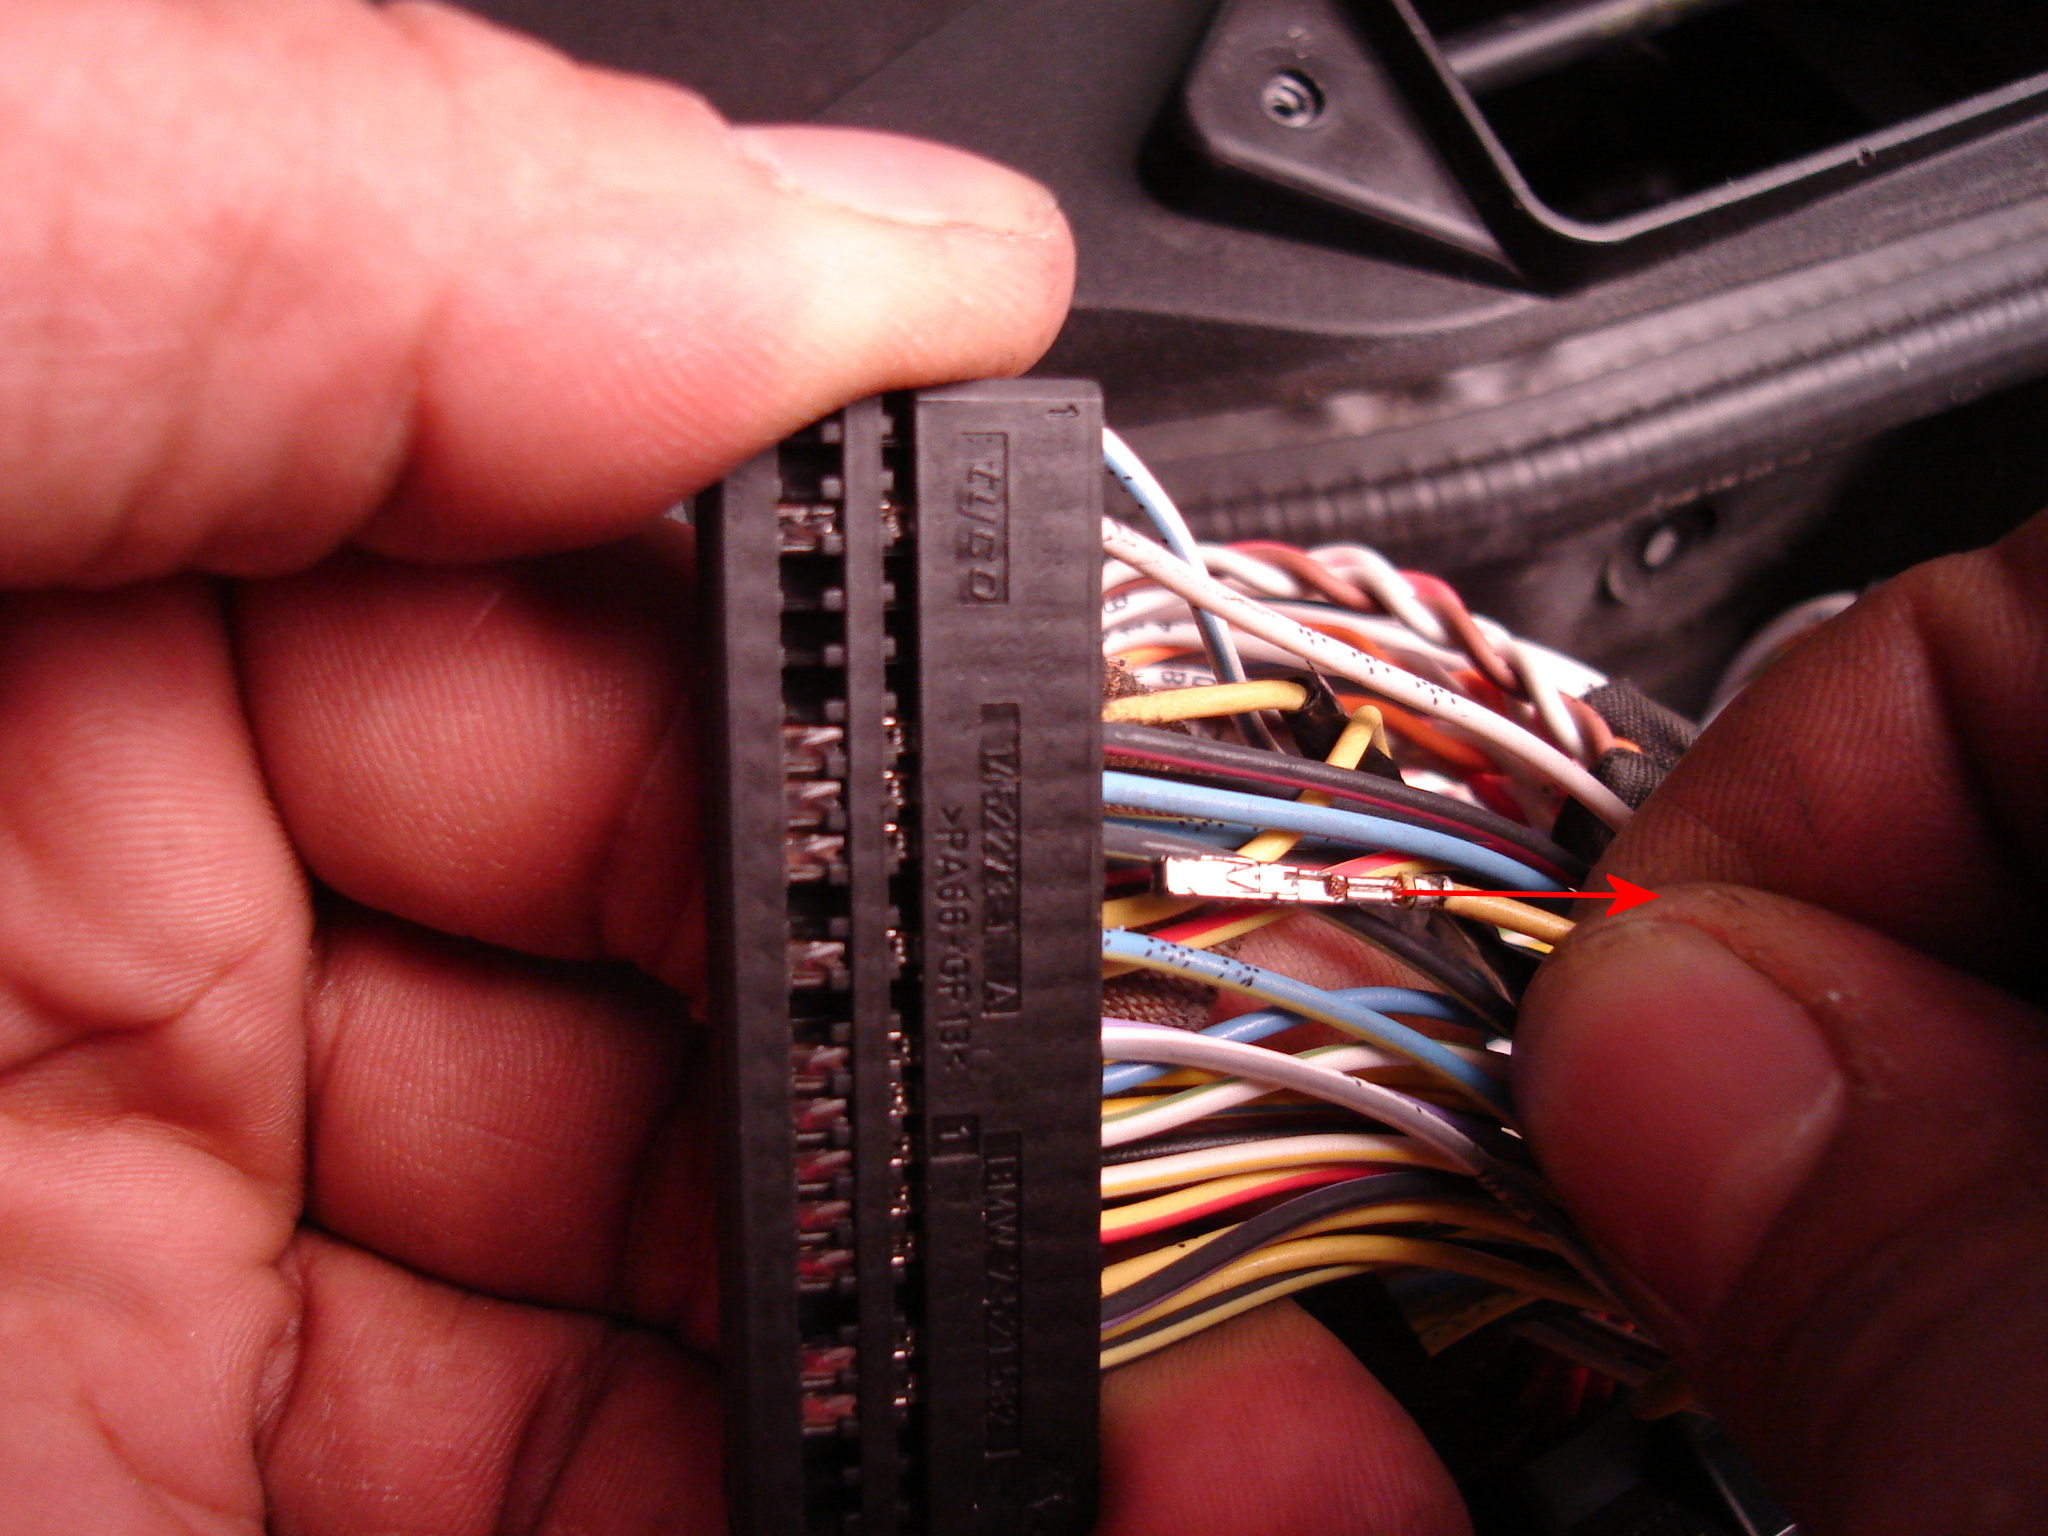
17) Locate the numbers on the plug. On one end there is a
(1) and on the other end there is number (22)
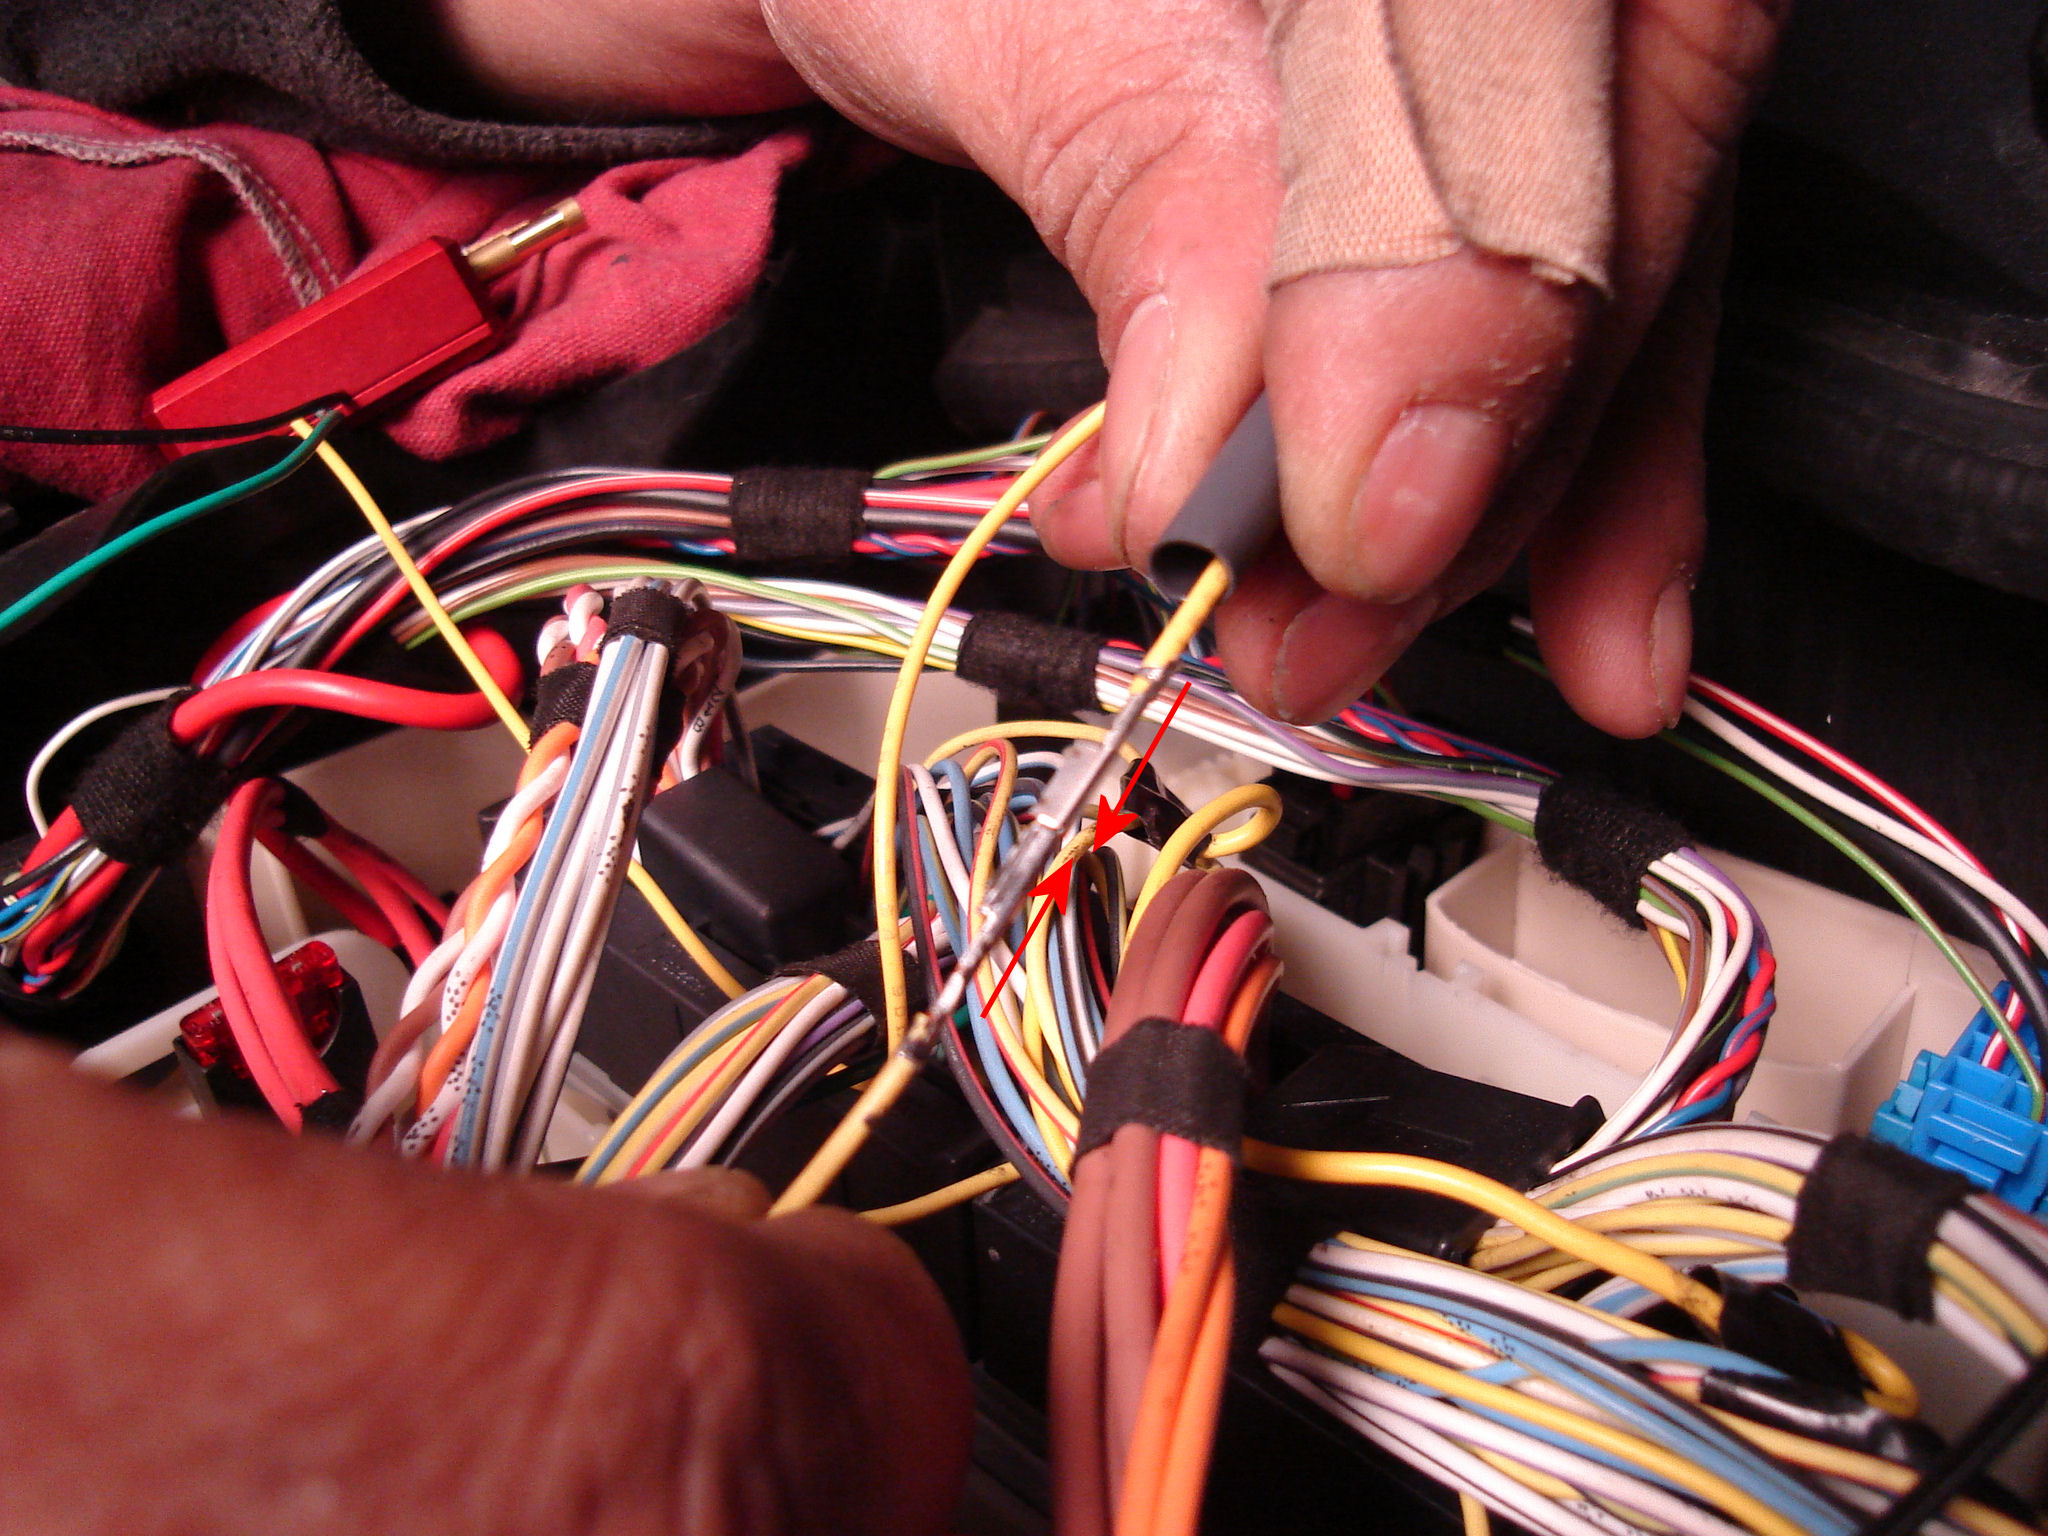
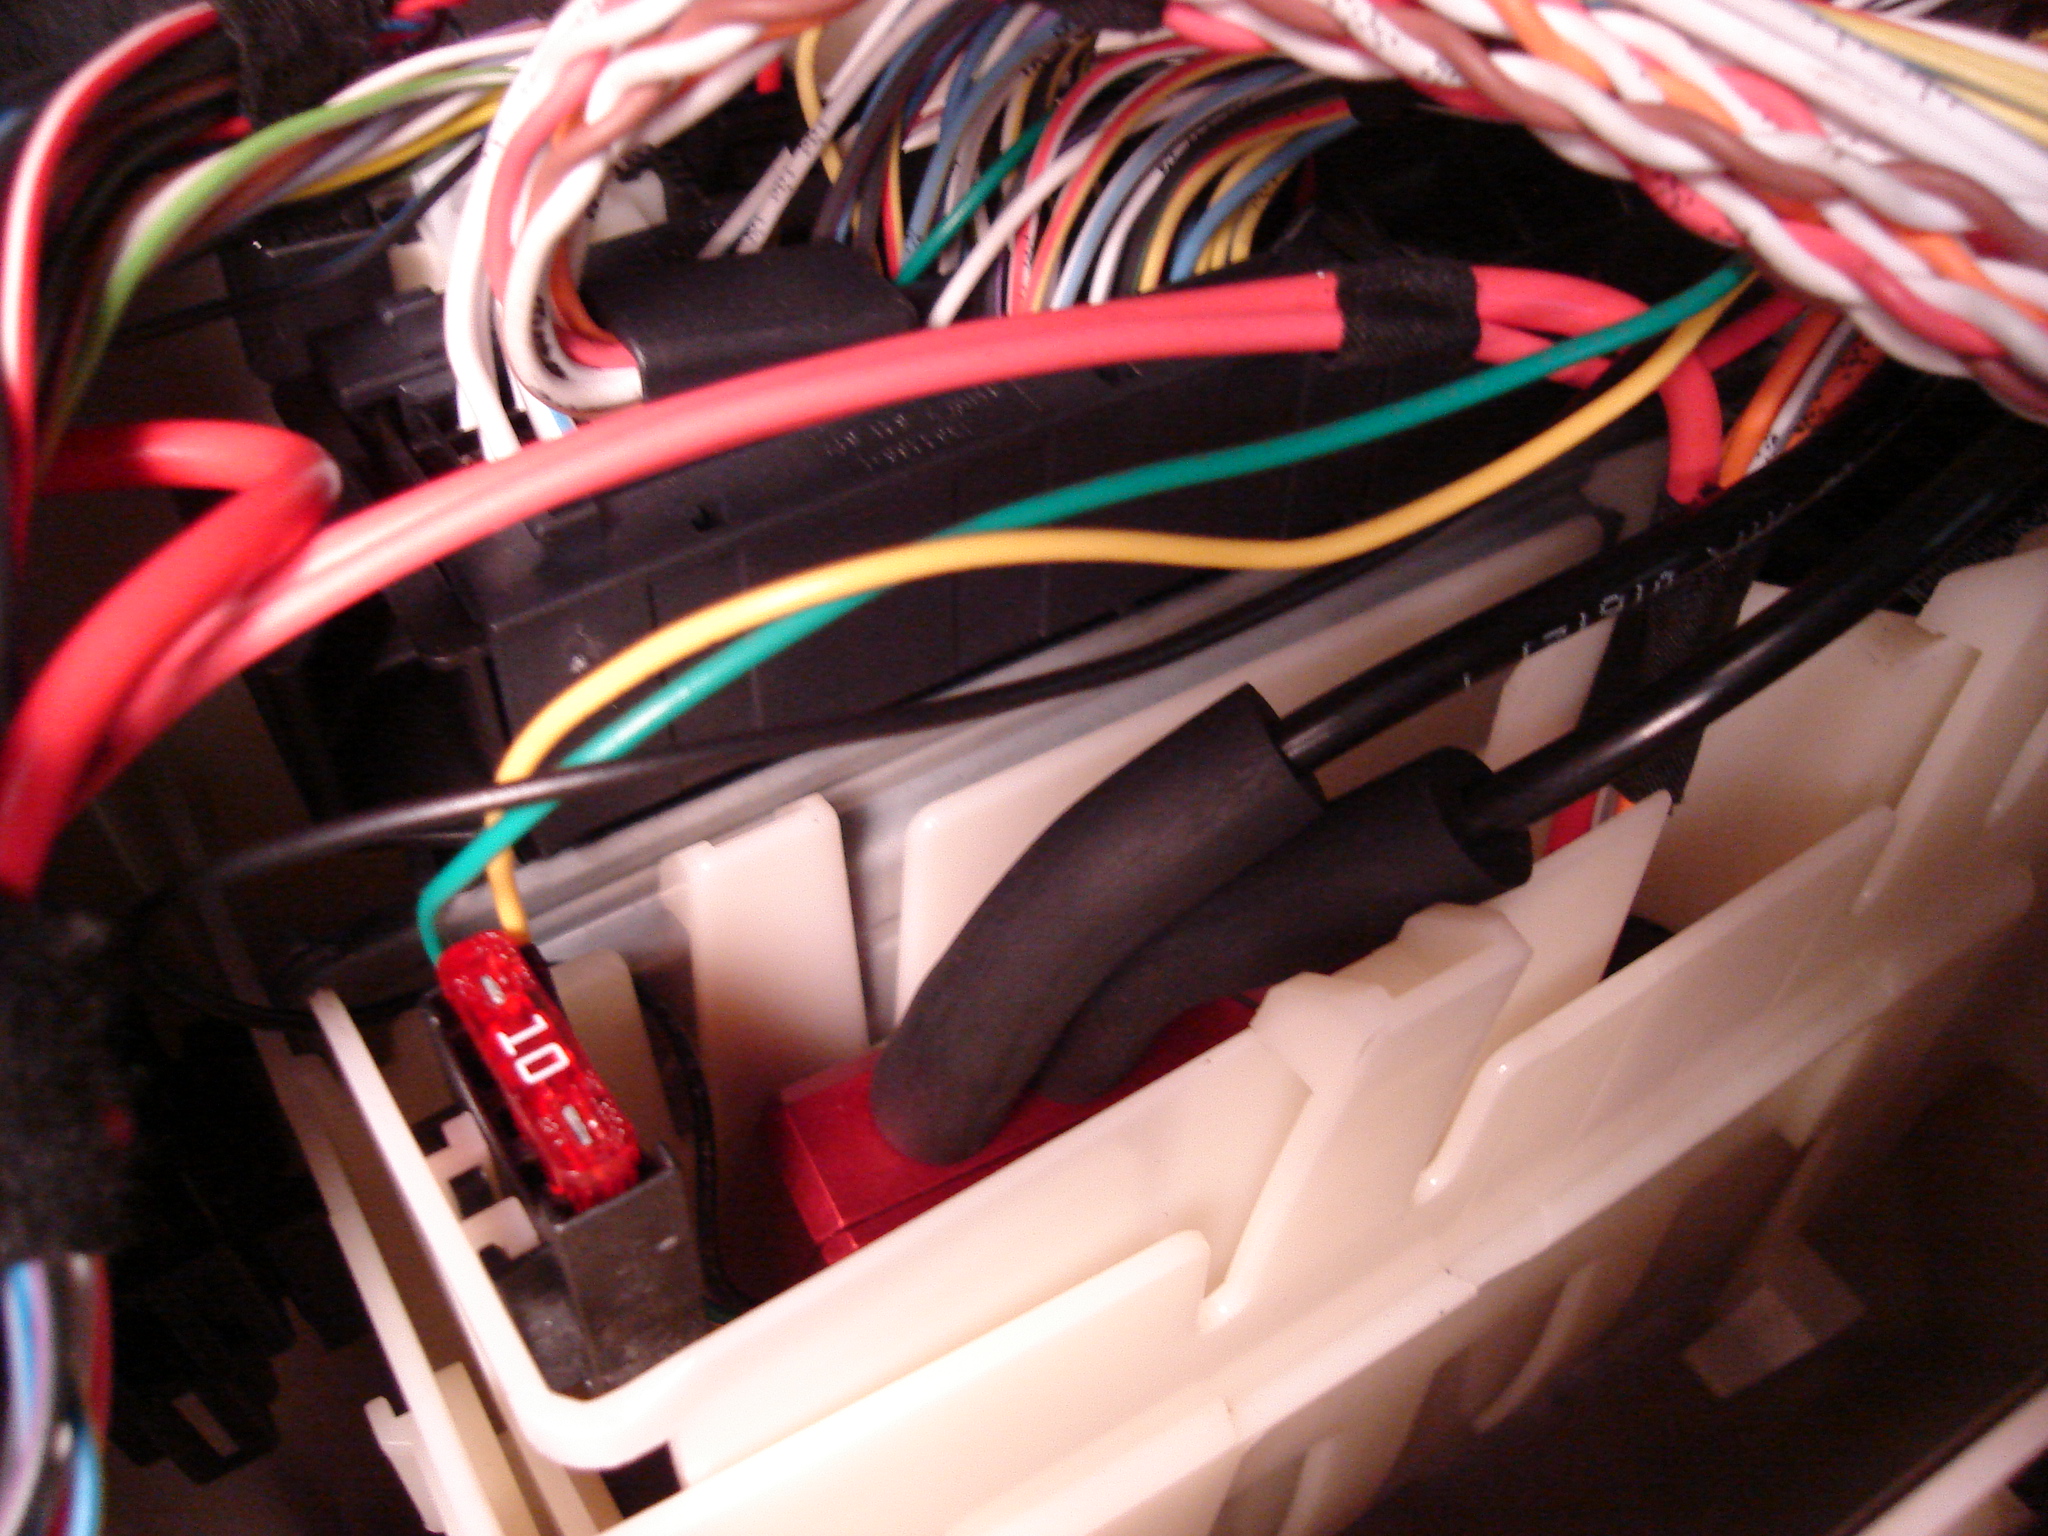
18) From the side marked (1) count inward to the #10 pin. It
will be a solid yellow wire.

19) Using a pick tool press on the release tab of the pin
and slide the wire out of the plug. The wire should easily be removed.
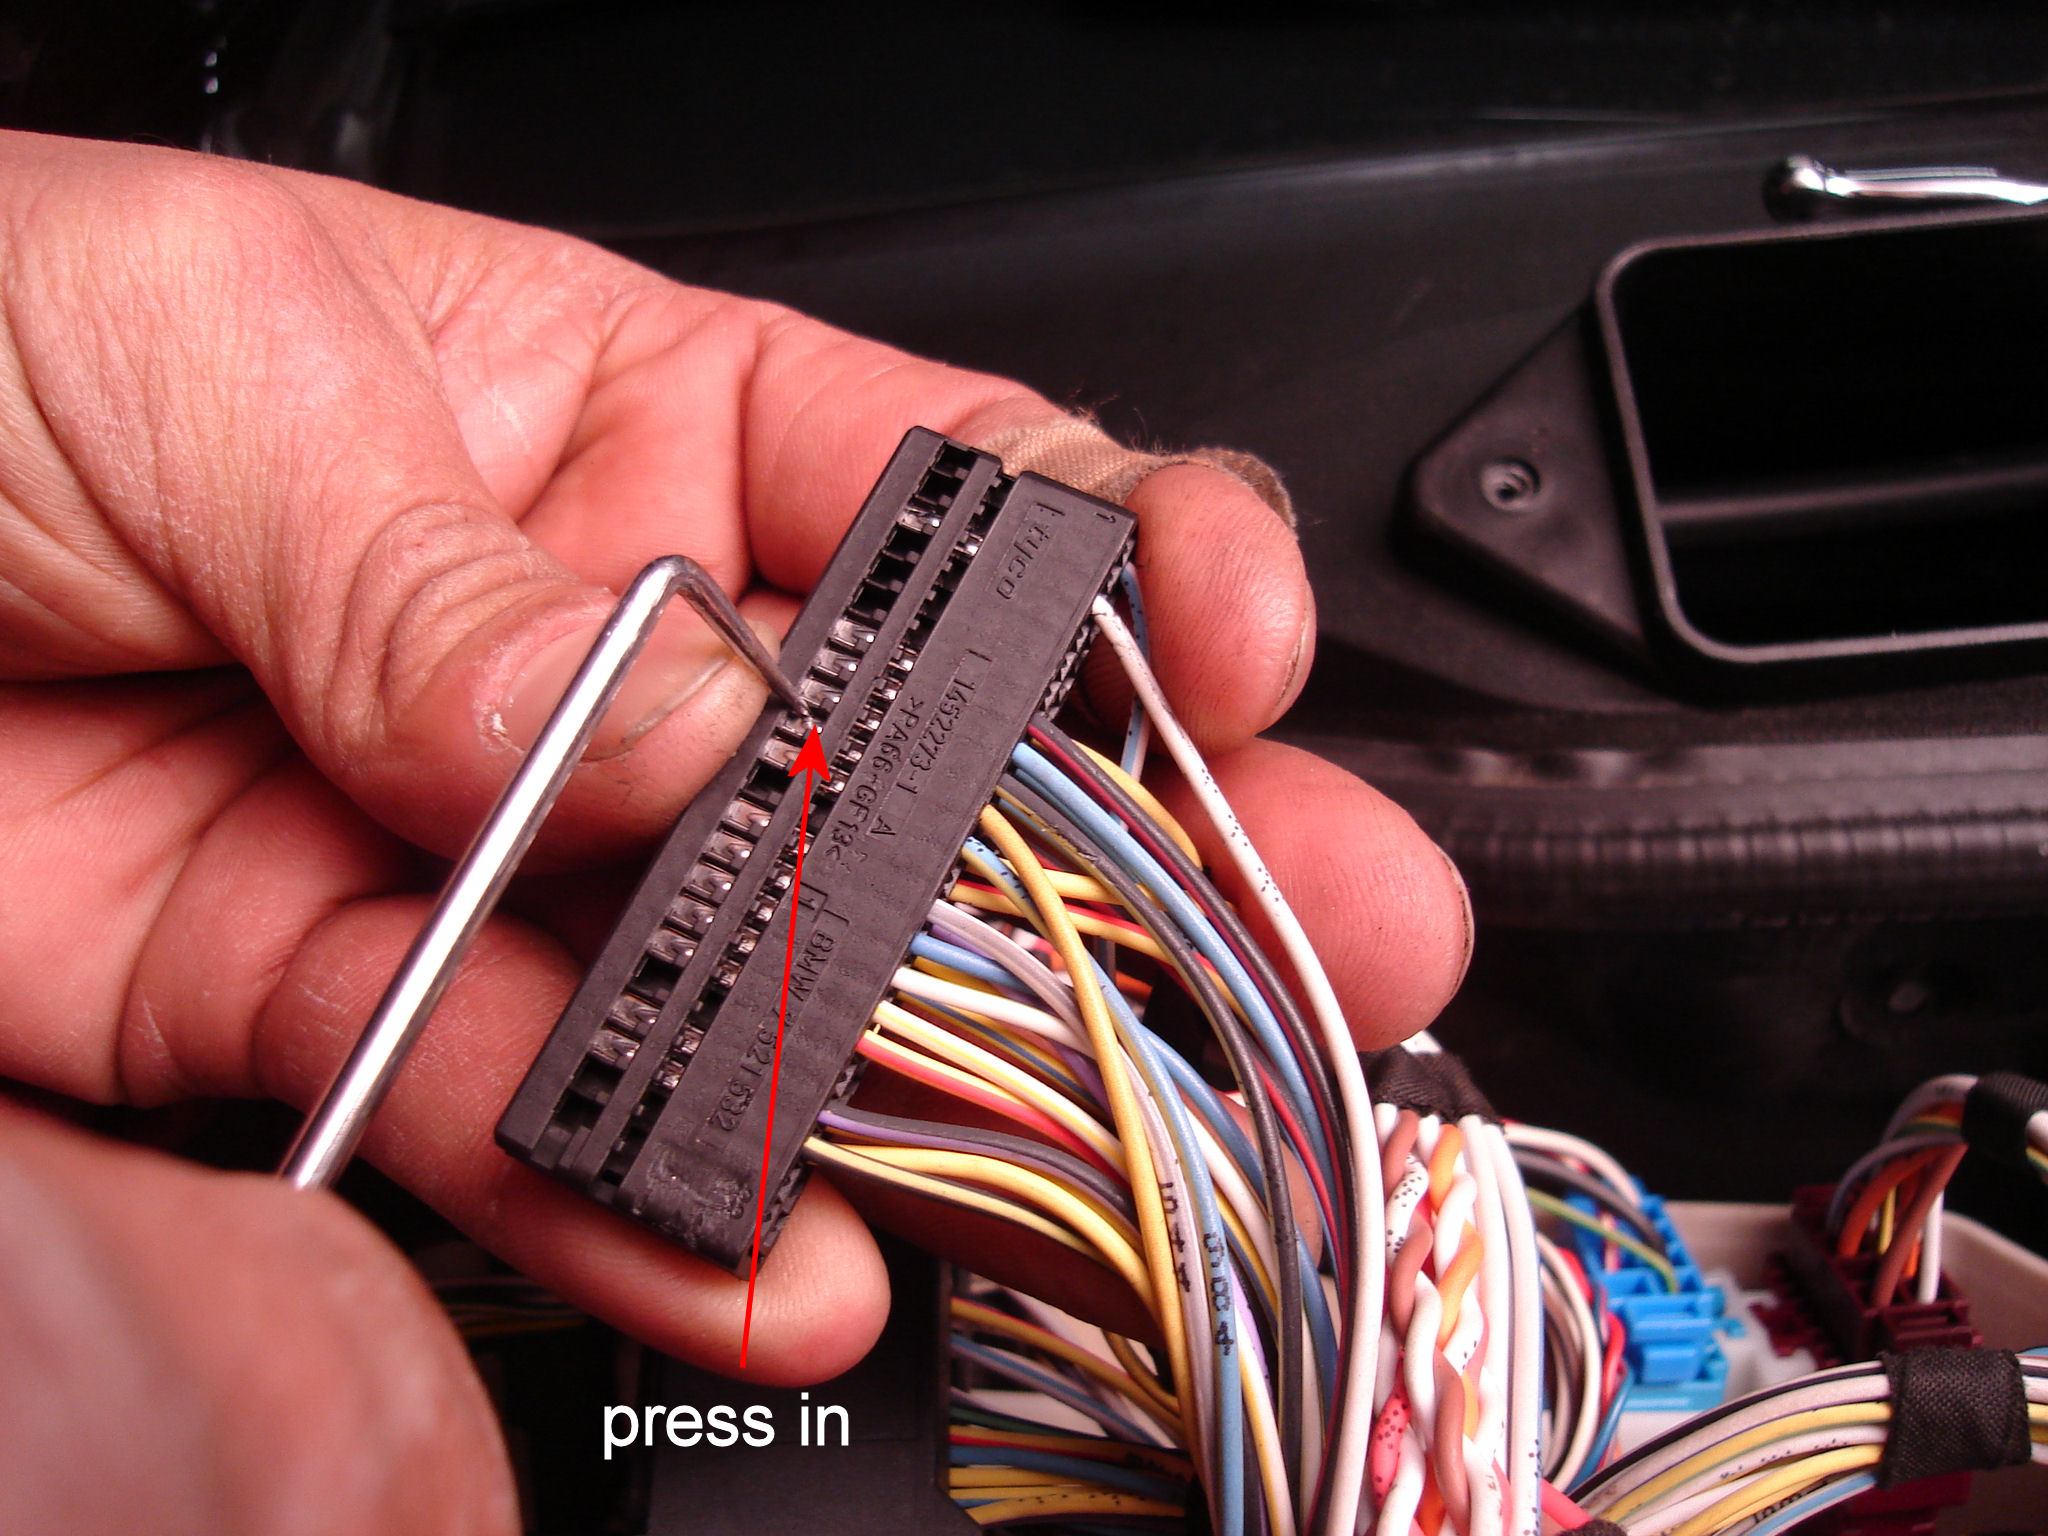
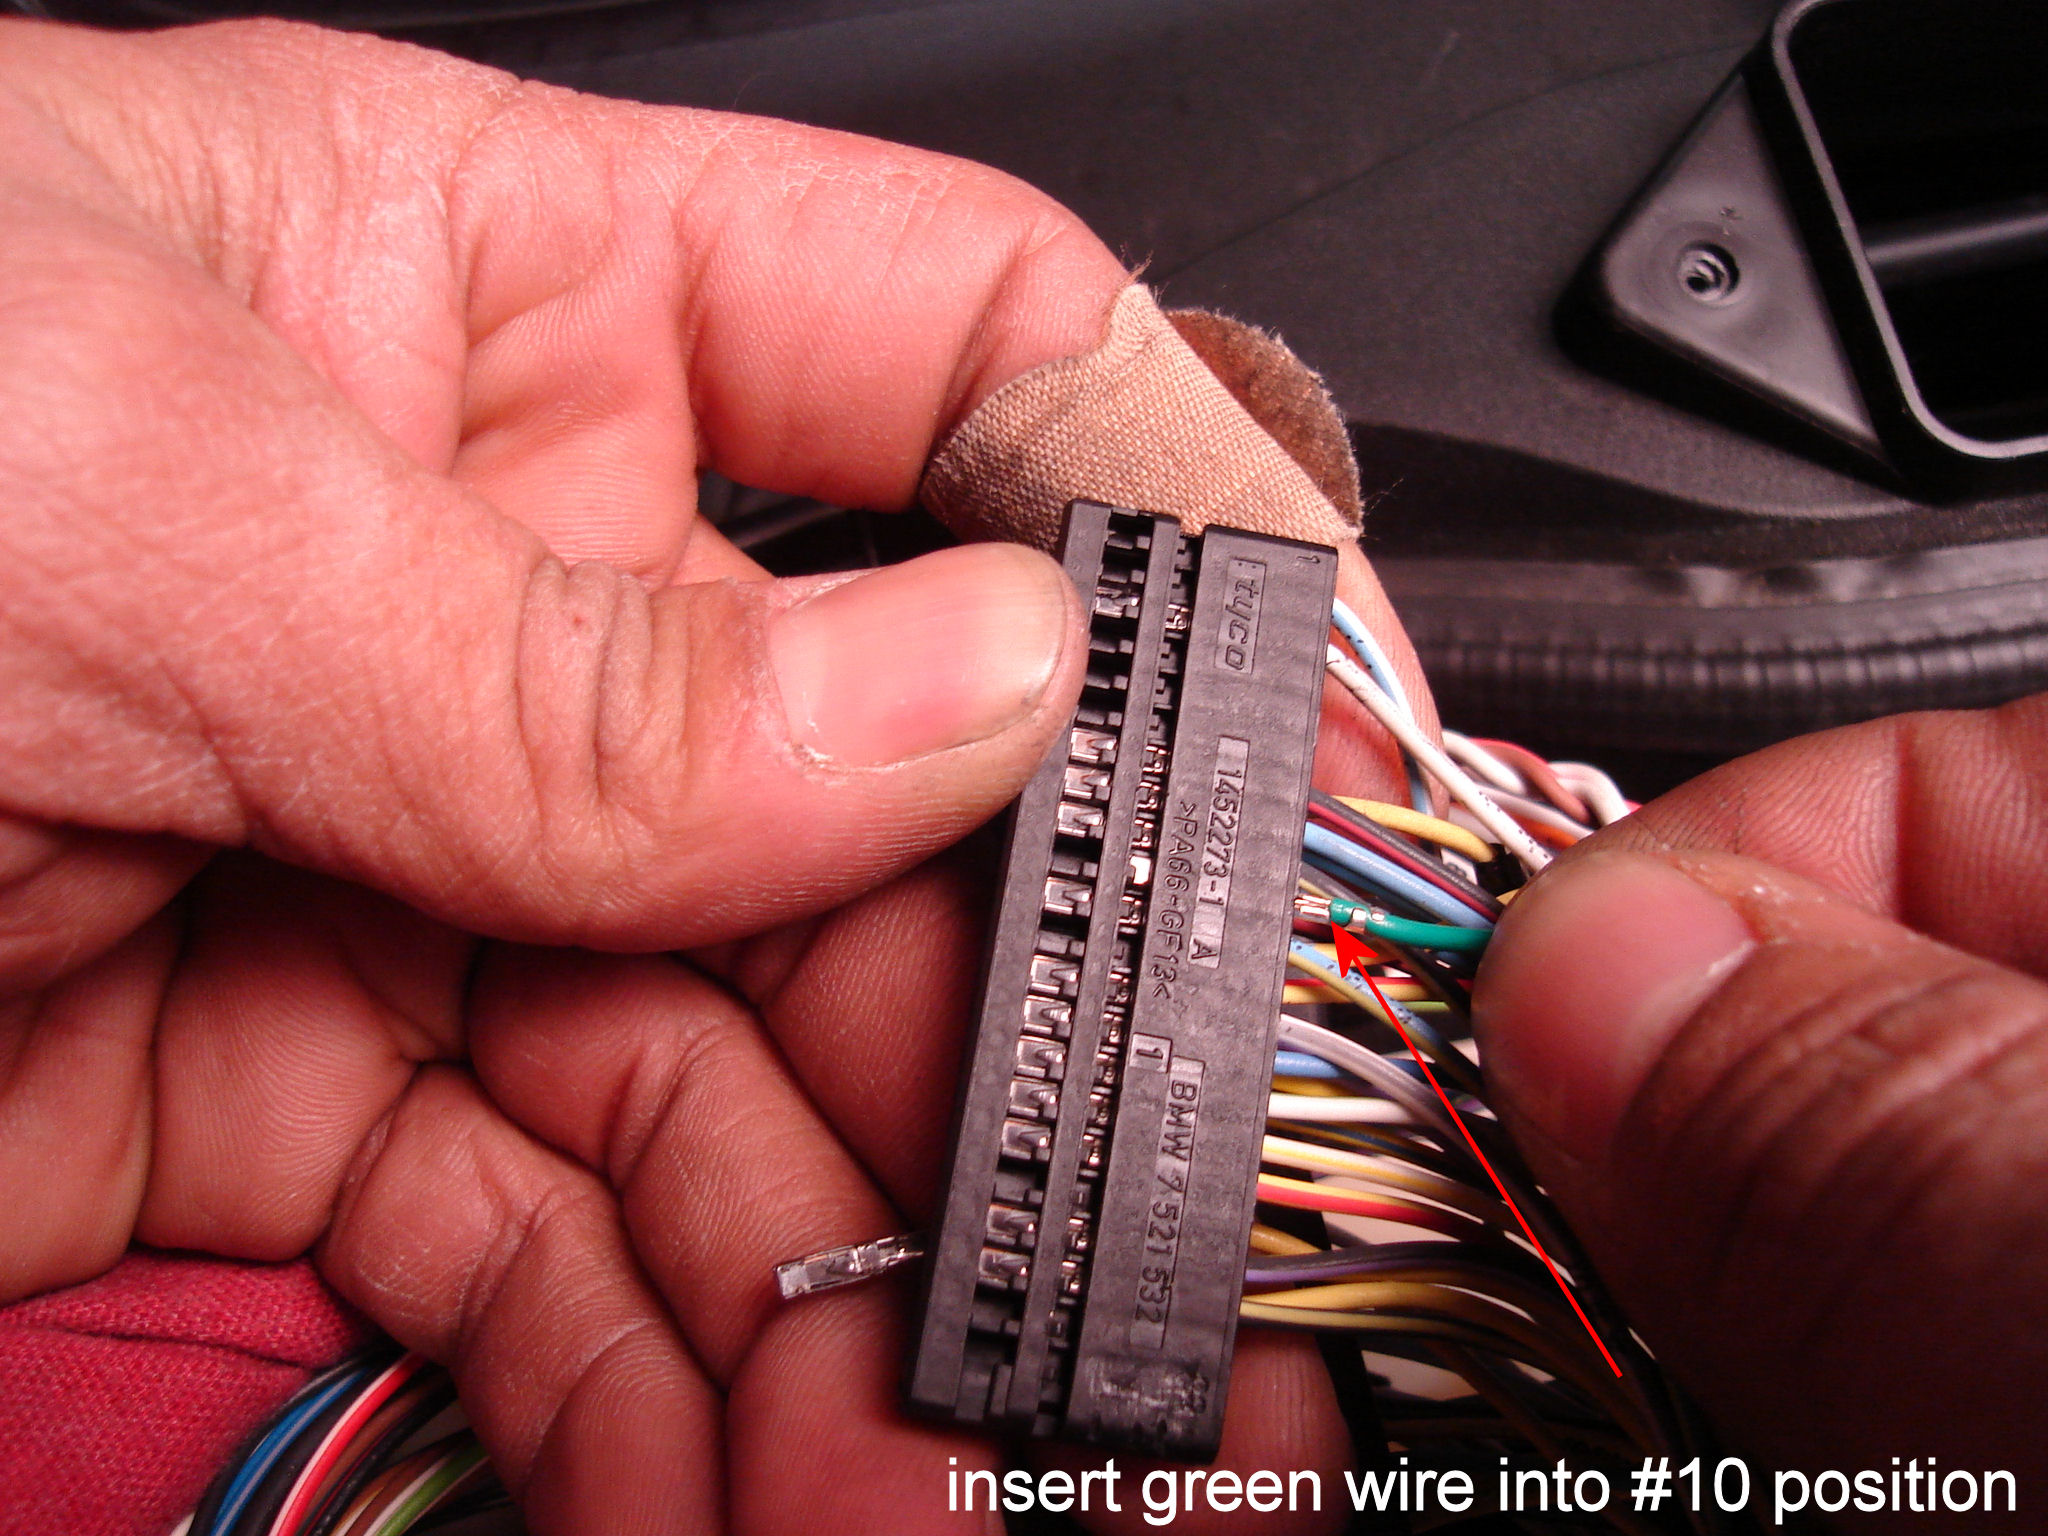
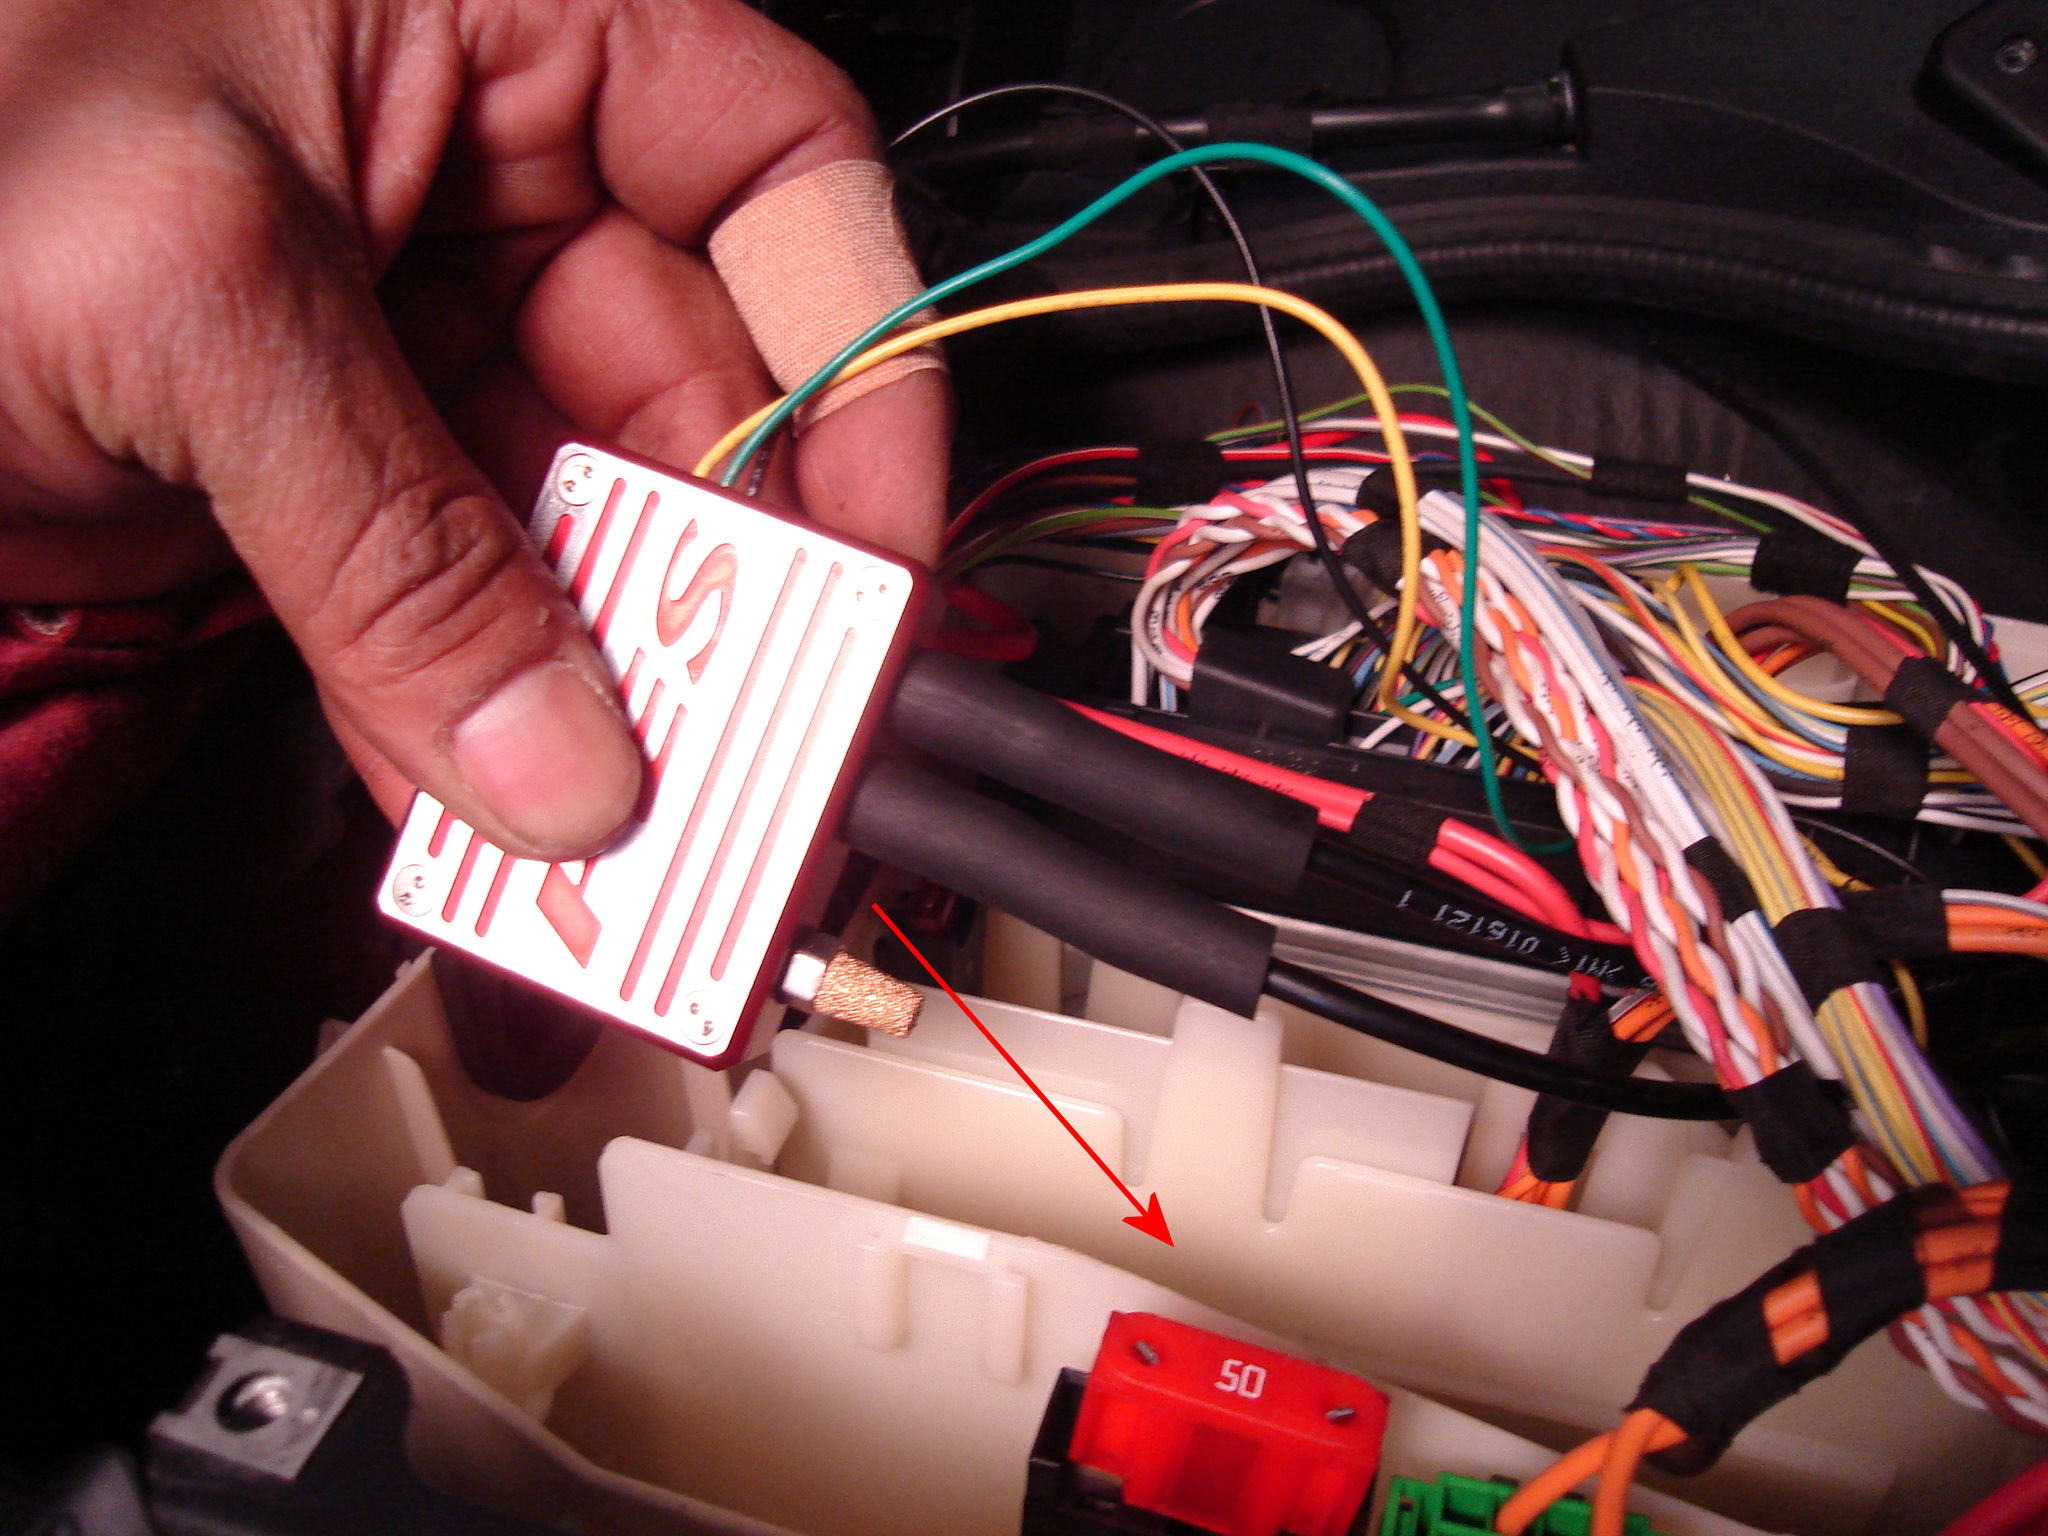
20) Insert the green wire from the PES box into the #10 slot
where you just removed the yellow wire from.
21) Slide the black connector back into the plug. NOTE that
there is an arrow on the black plug that should be pointing inward.
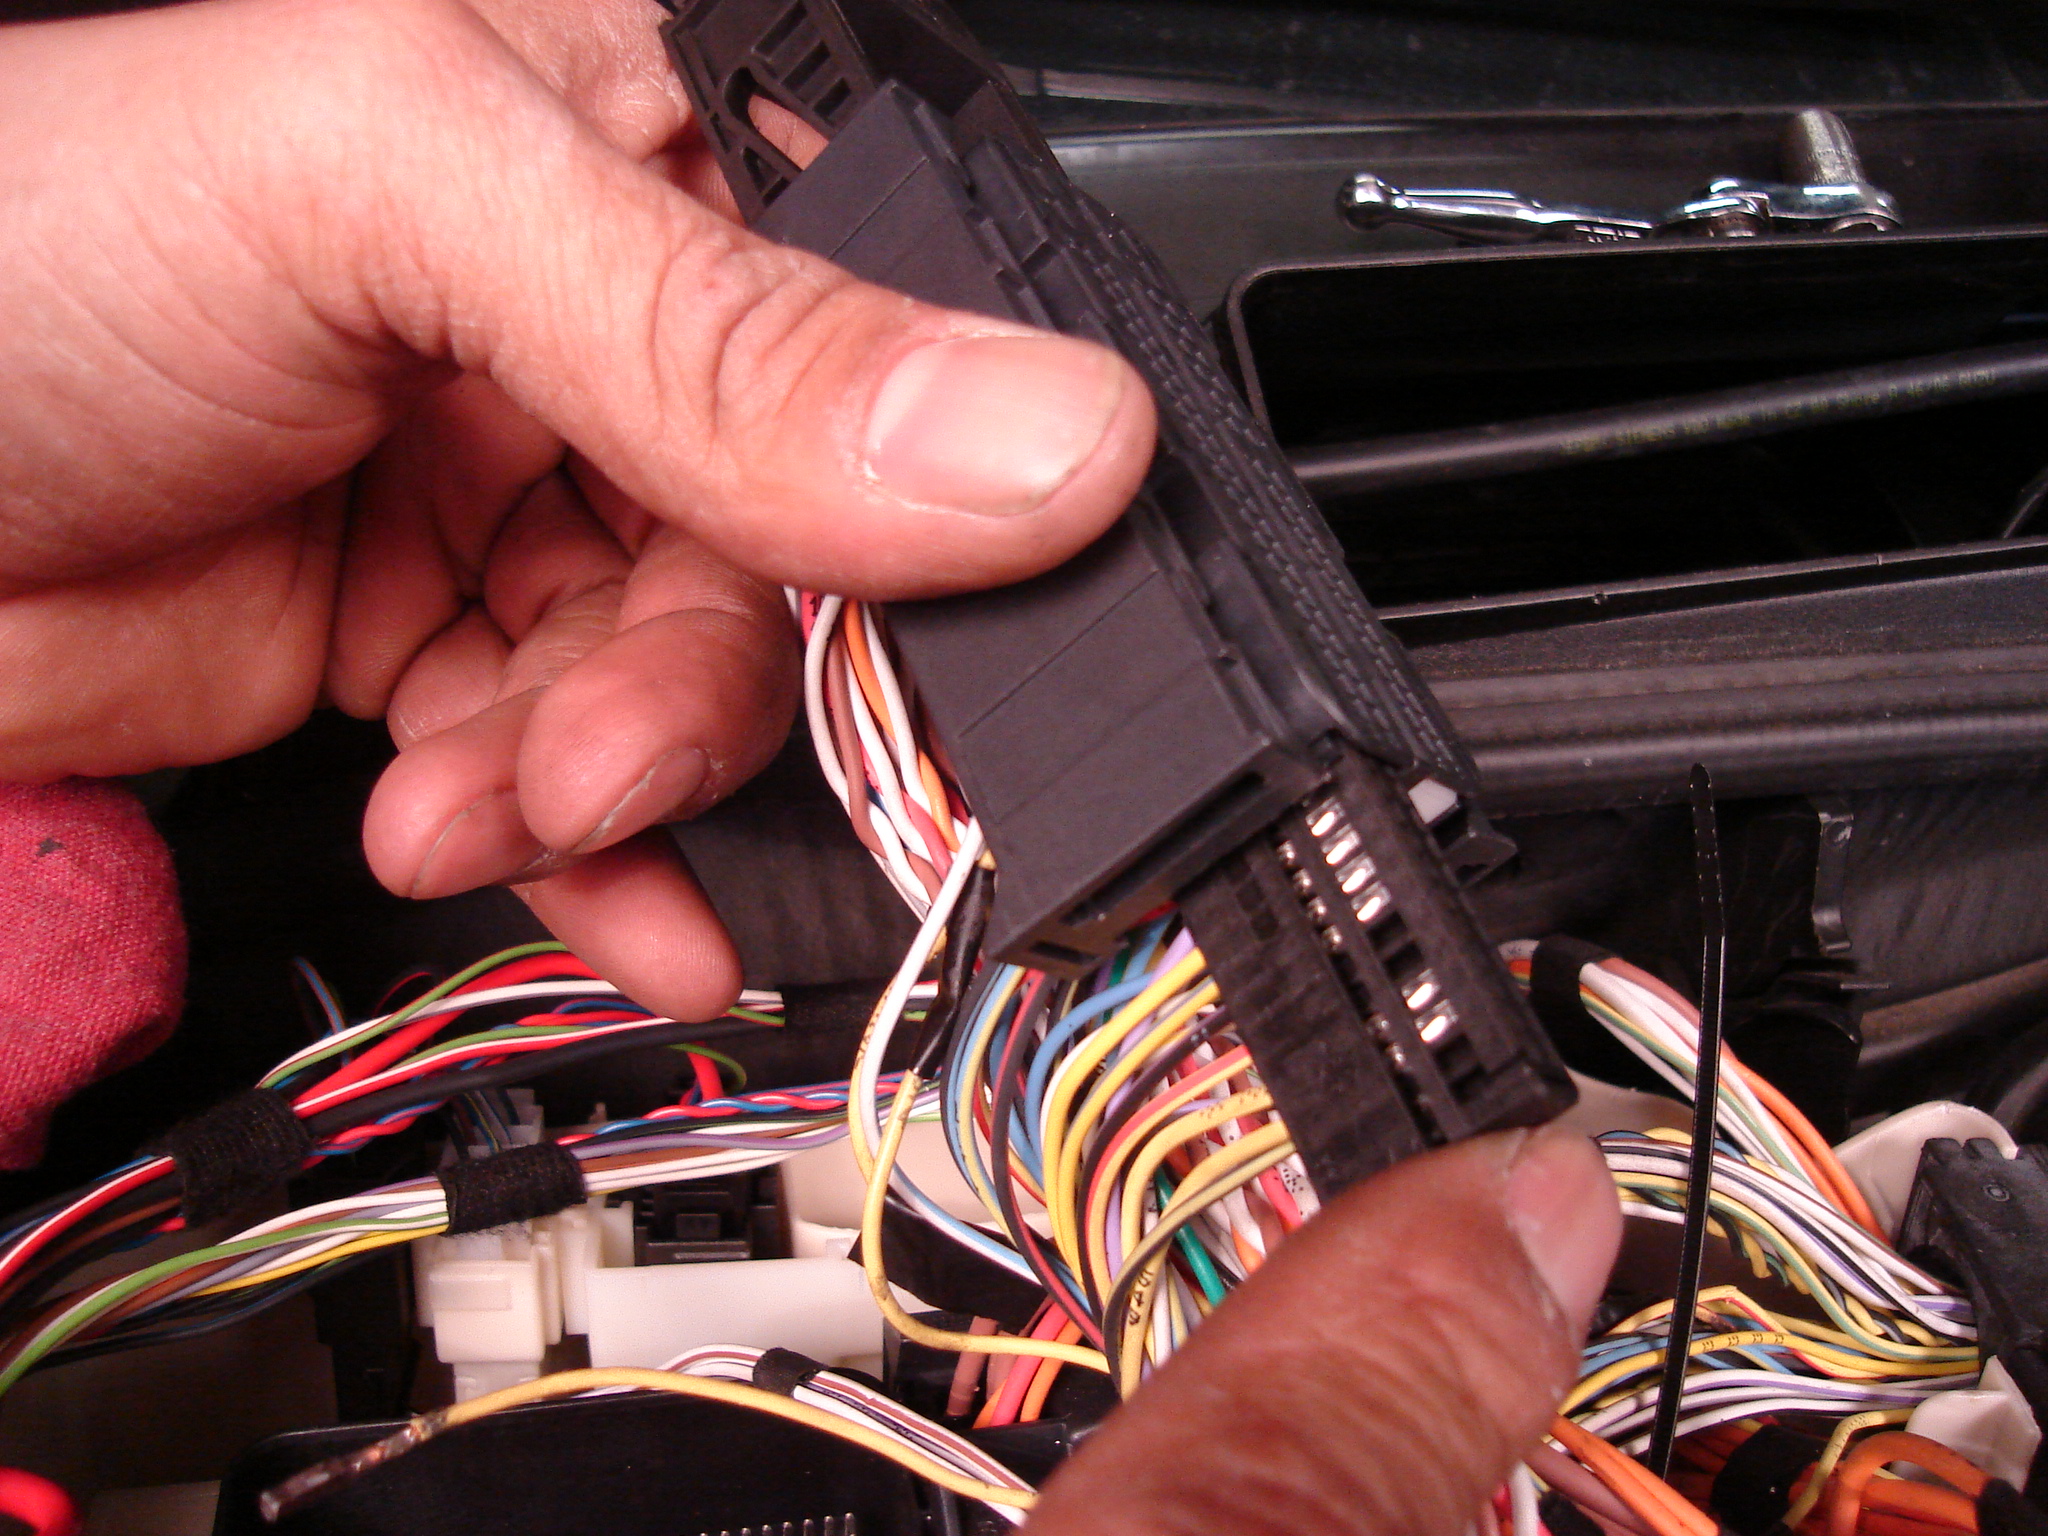
22) Re-connect the plug to the ECU by pushing in the tab
which will draw the plug onto the ECU.
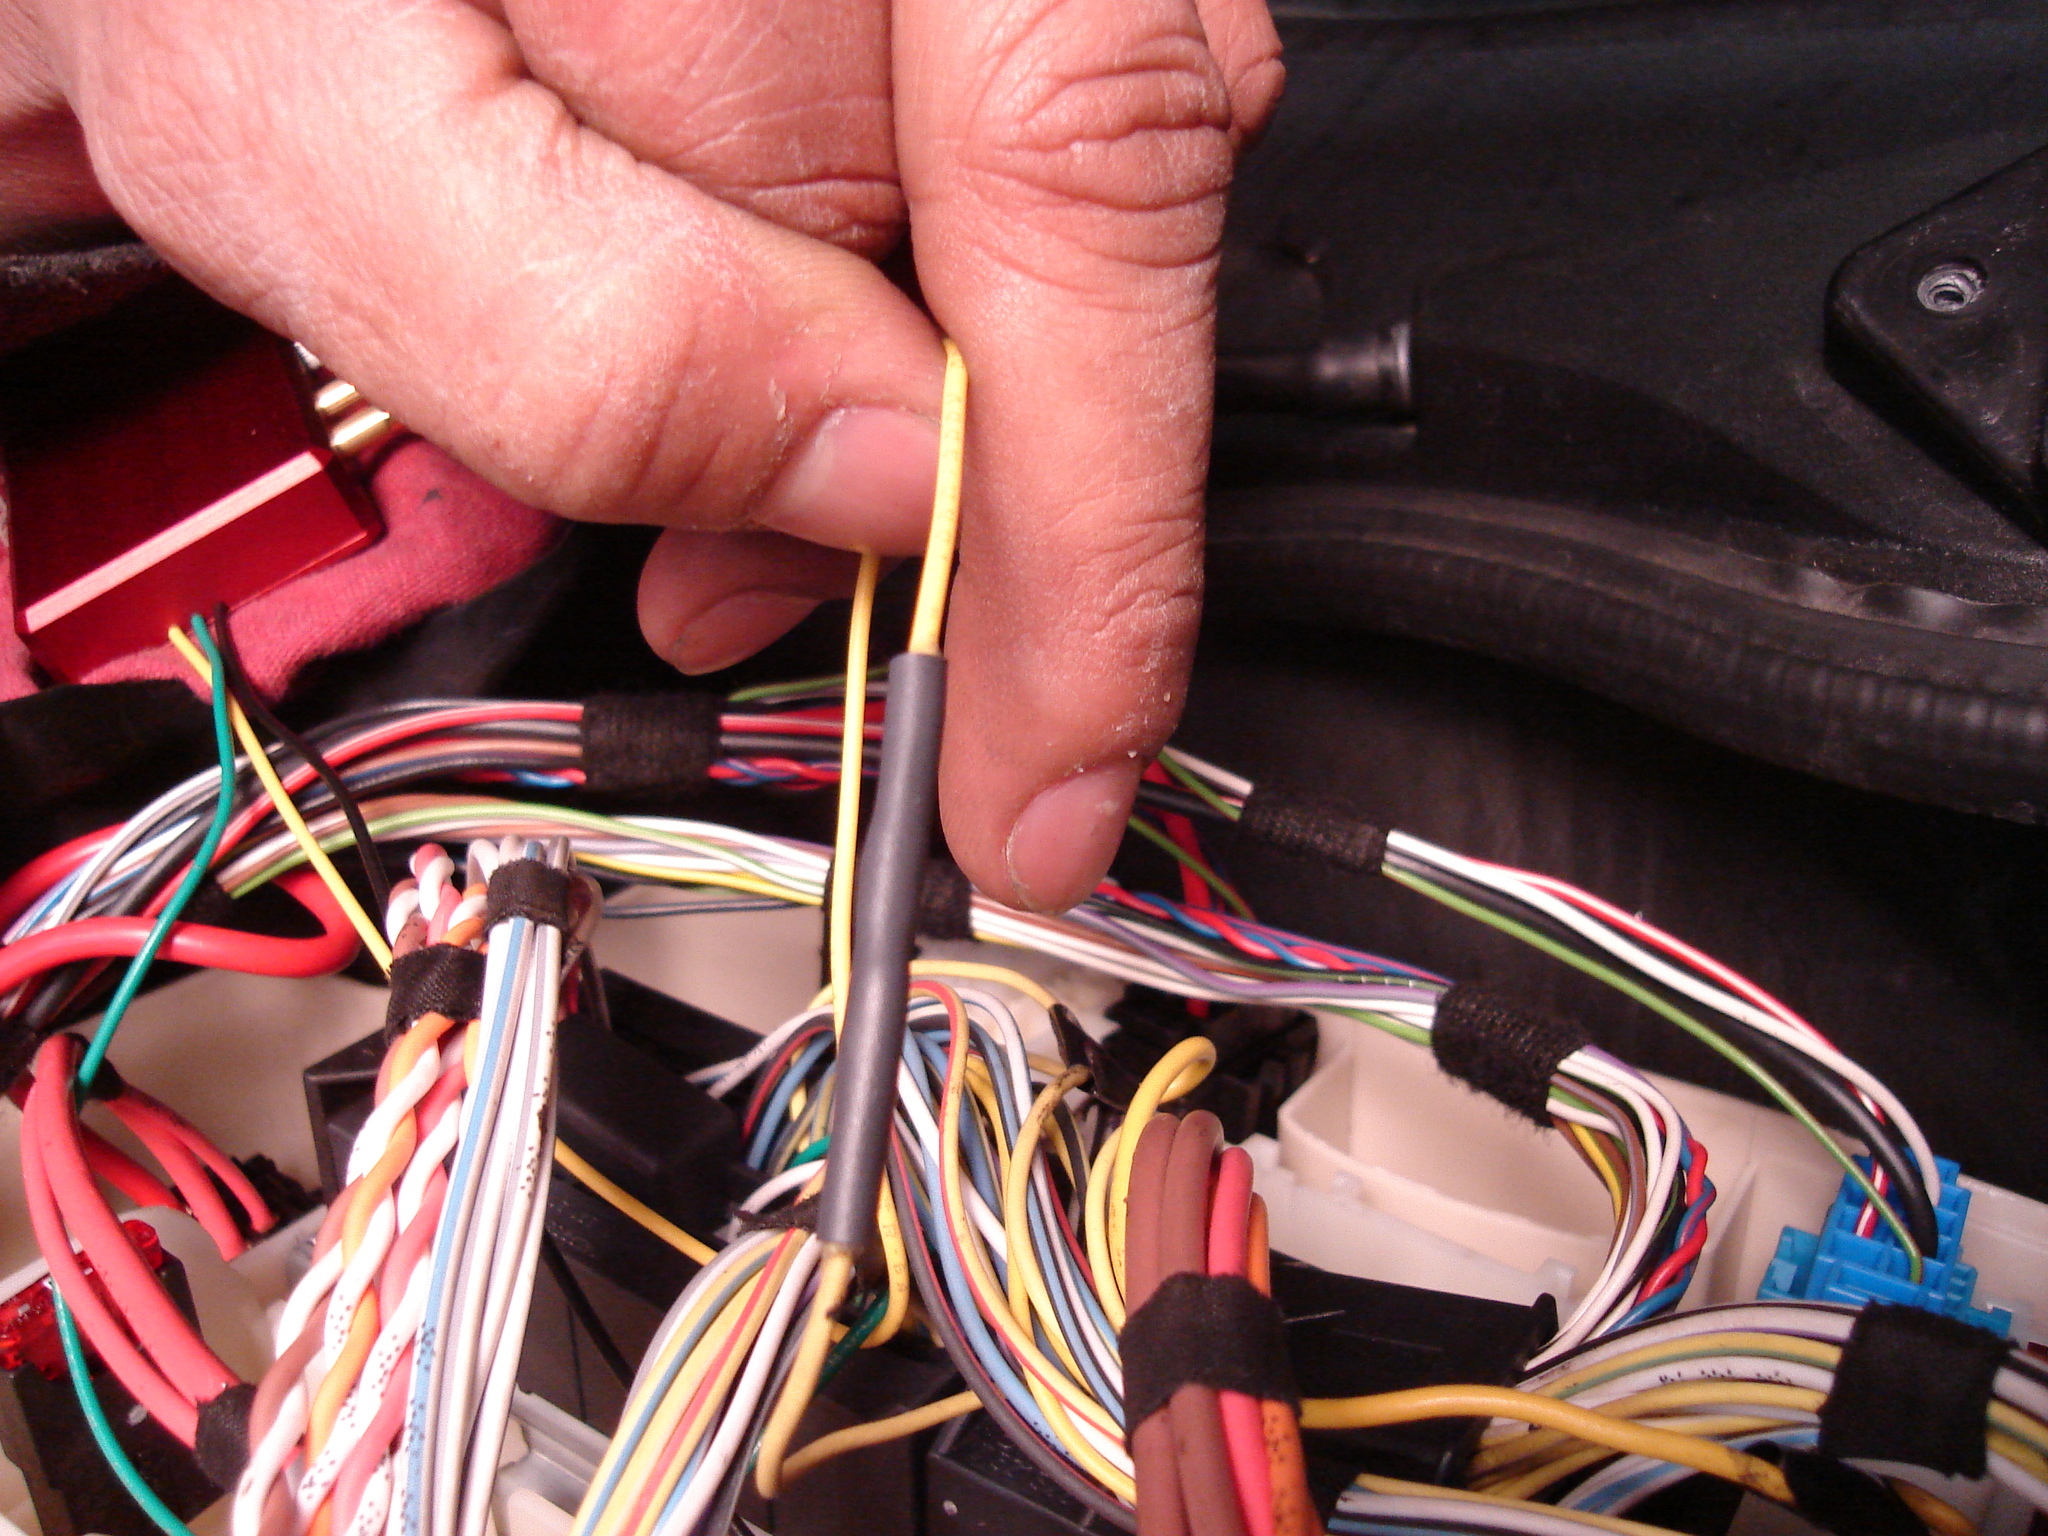
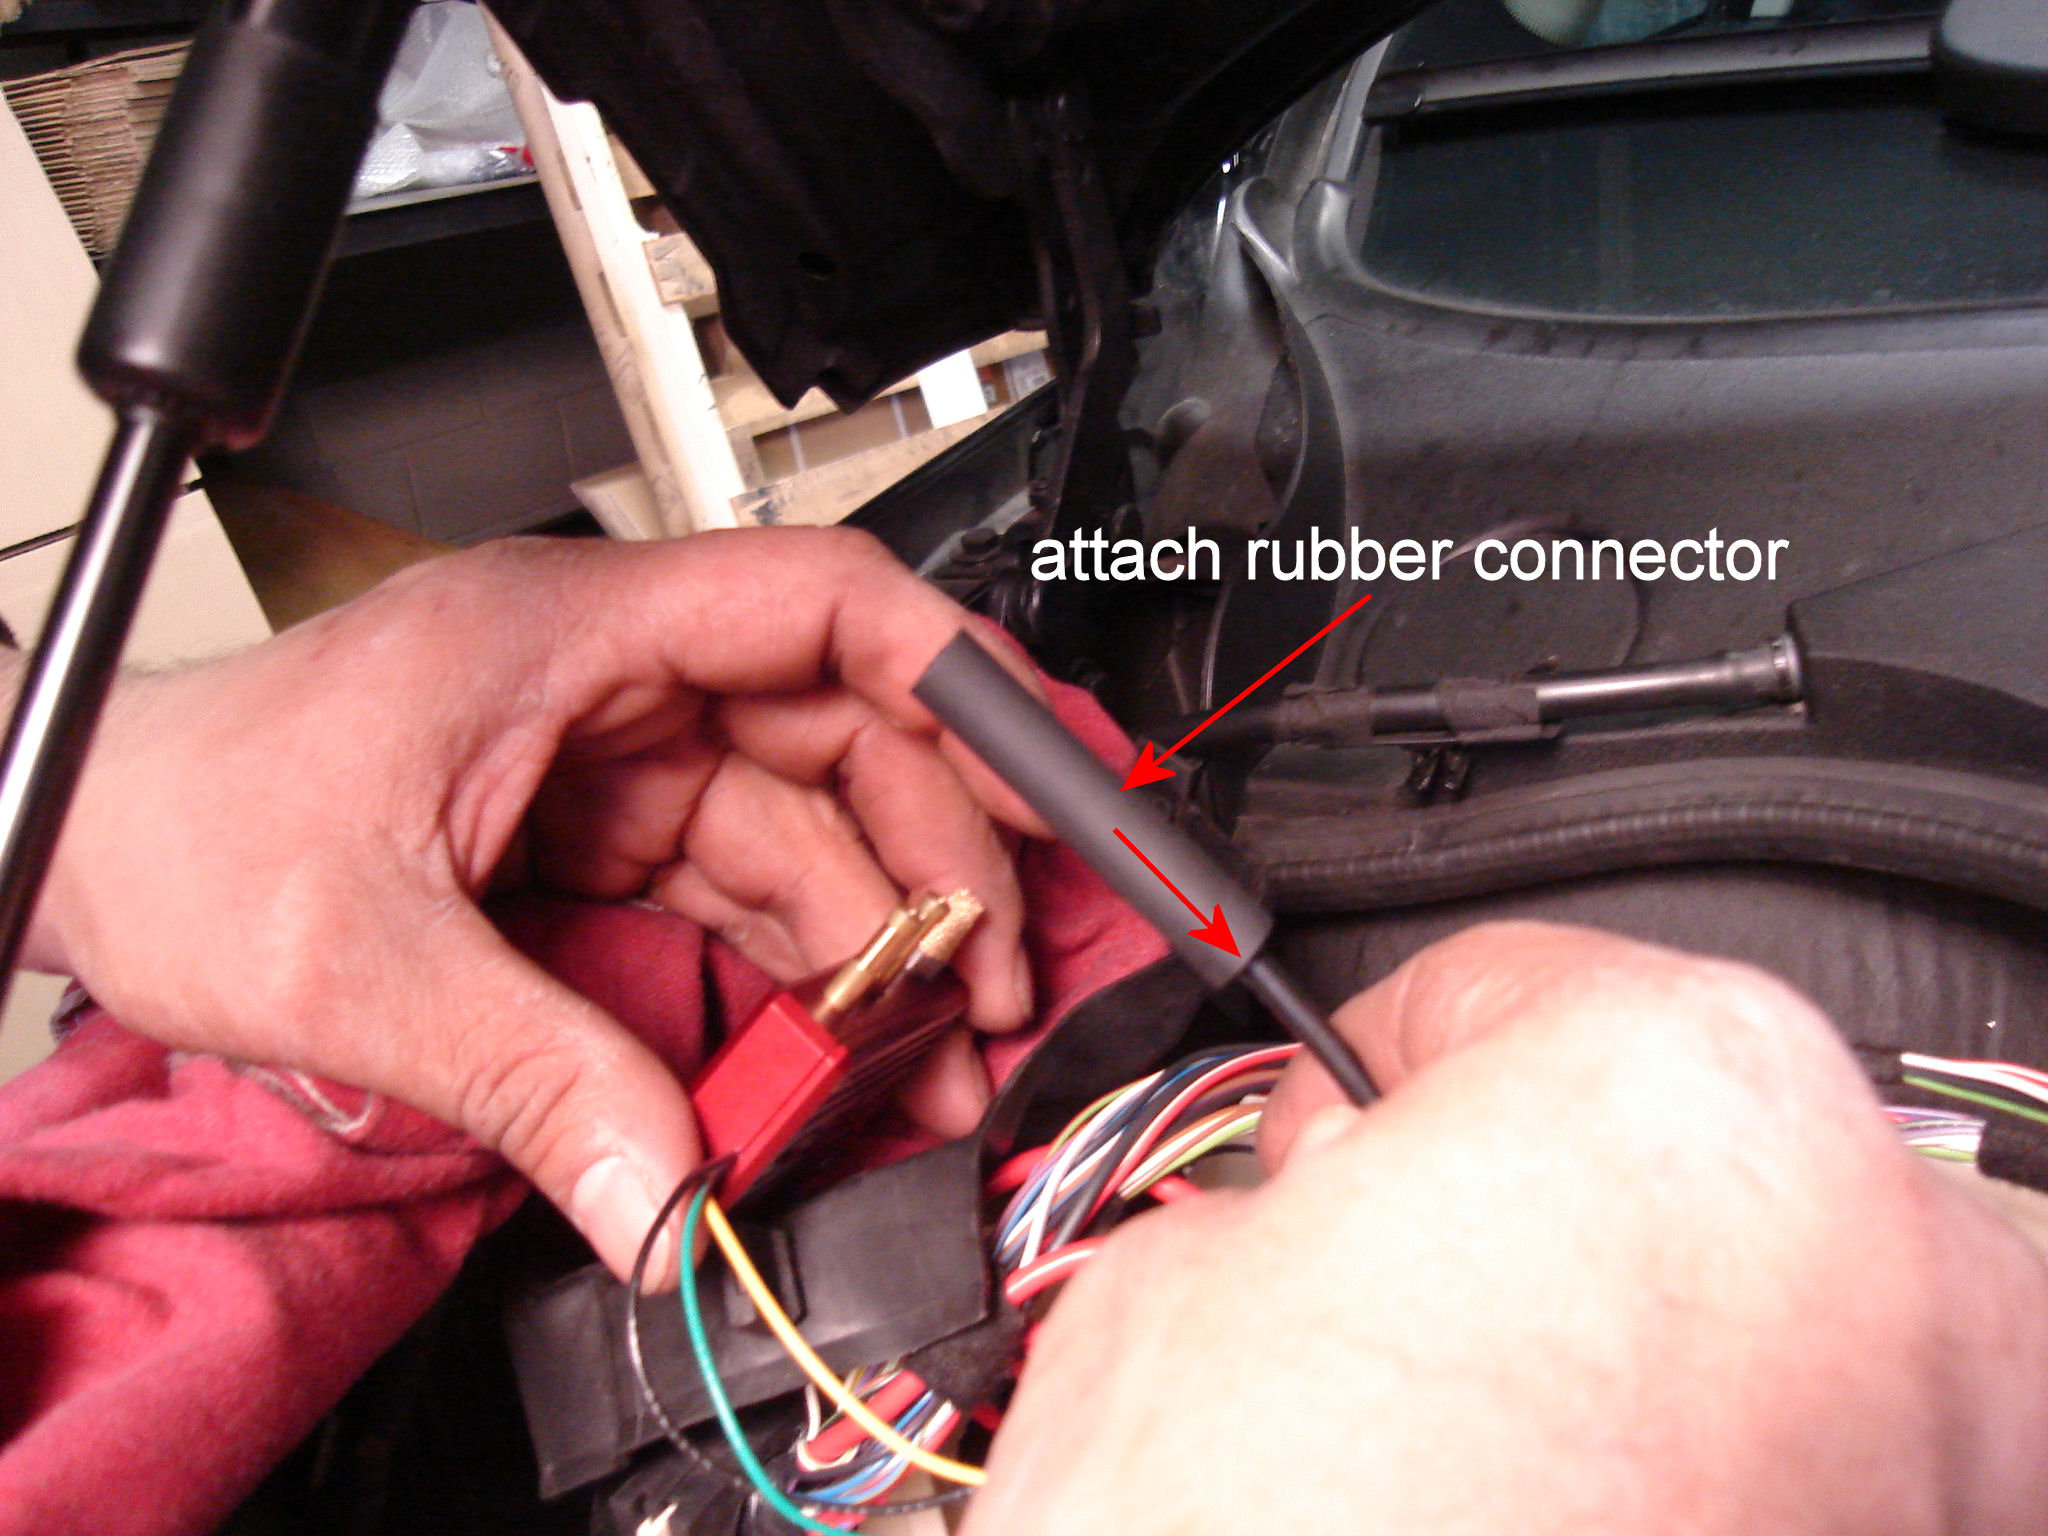
23) Slide the supplied heat shrink tubing onto the yellow
wire.

24) Plug the male yellow wire from the PES box into the
female yellow wire that was removed from slot #10. Heat the tubing with a hair
dryer to shrink.
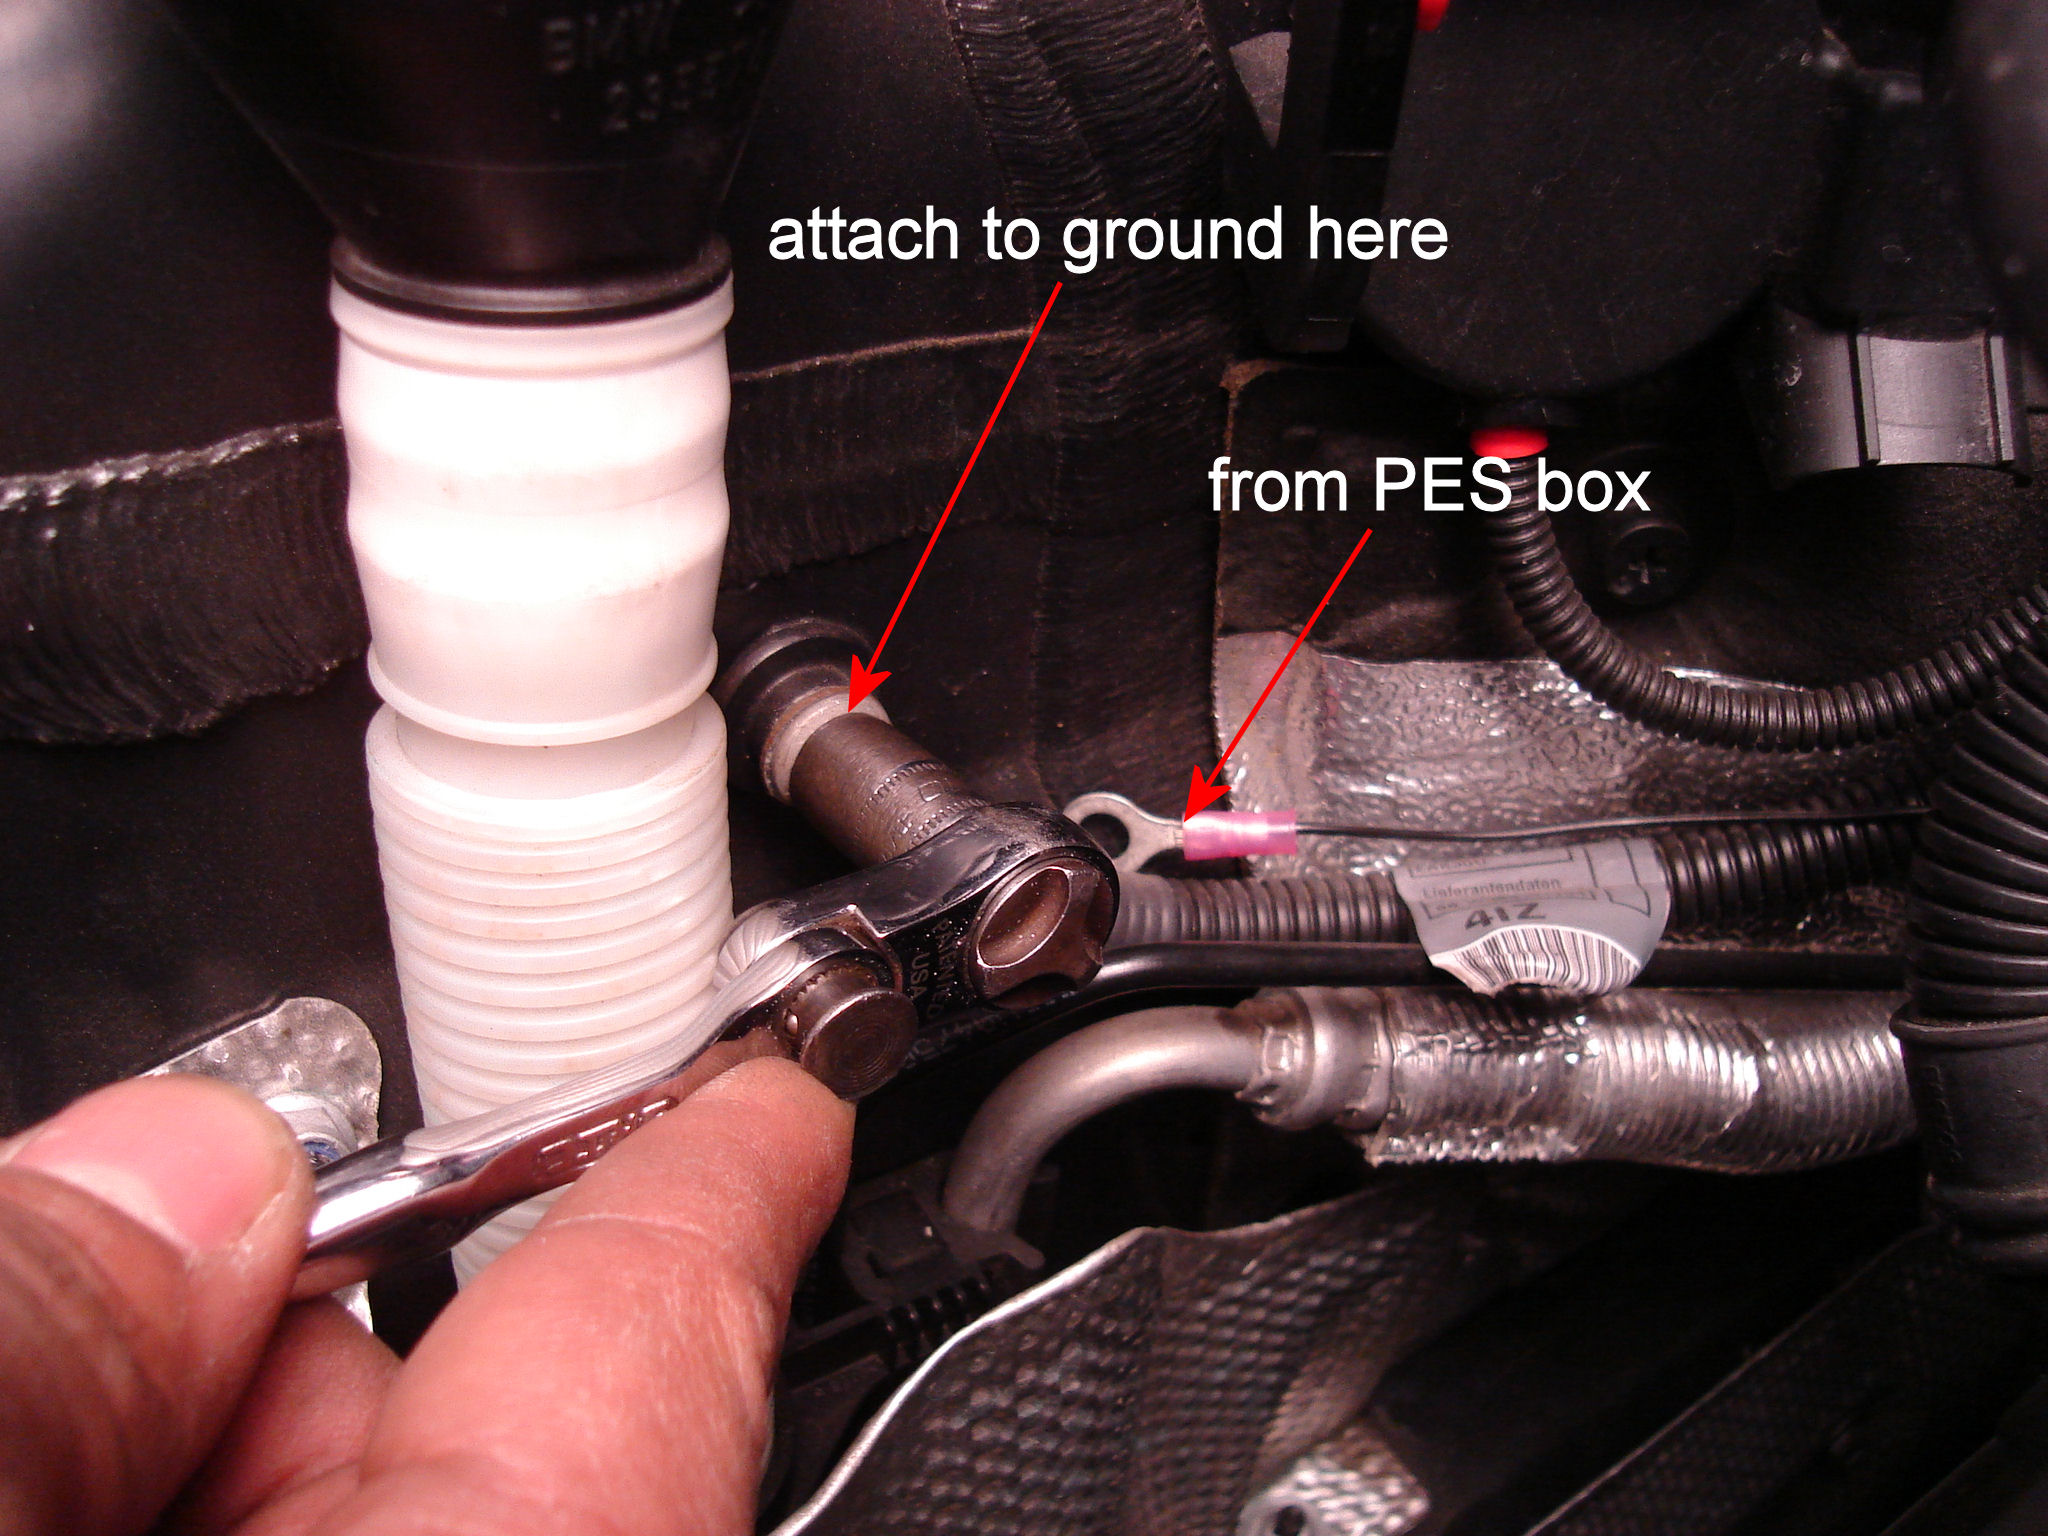
25) Run the black wire from the PES box around the main
rubber wire harness and connect it to the ground on the inner wheel well inside
the engine compartment.
26) Fish the longer hard vacuum line marked “F” through the
front rubber harness into the ECU box.

27) Connect the side that has the rubber connector to the
front solenoids black hose barb you exposed in step#3.
28) Attach one of the supplied hose connectors to the hard
line and connect it to the PES box on the center hose barb marked “F”

29) Run the shorter hard line marked “R” from the rear
solenoid hose barb through the harness and connect it to the PES box hose barb
marked “R” in the same way you connected the front line. (NOTE: IT IS CRUCIAL THAT THE FRONT AND REAR
VACUUM LINES ARE NOT MIXED UP. DO ONE AT A TIME TO PREVENT A MISMATCH)
30) Rest the box in an open area making sure that the vacuum
lines are not kinked.
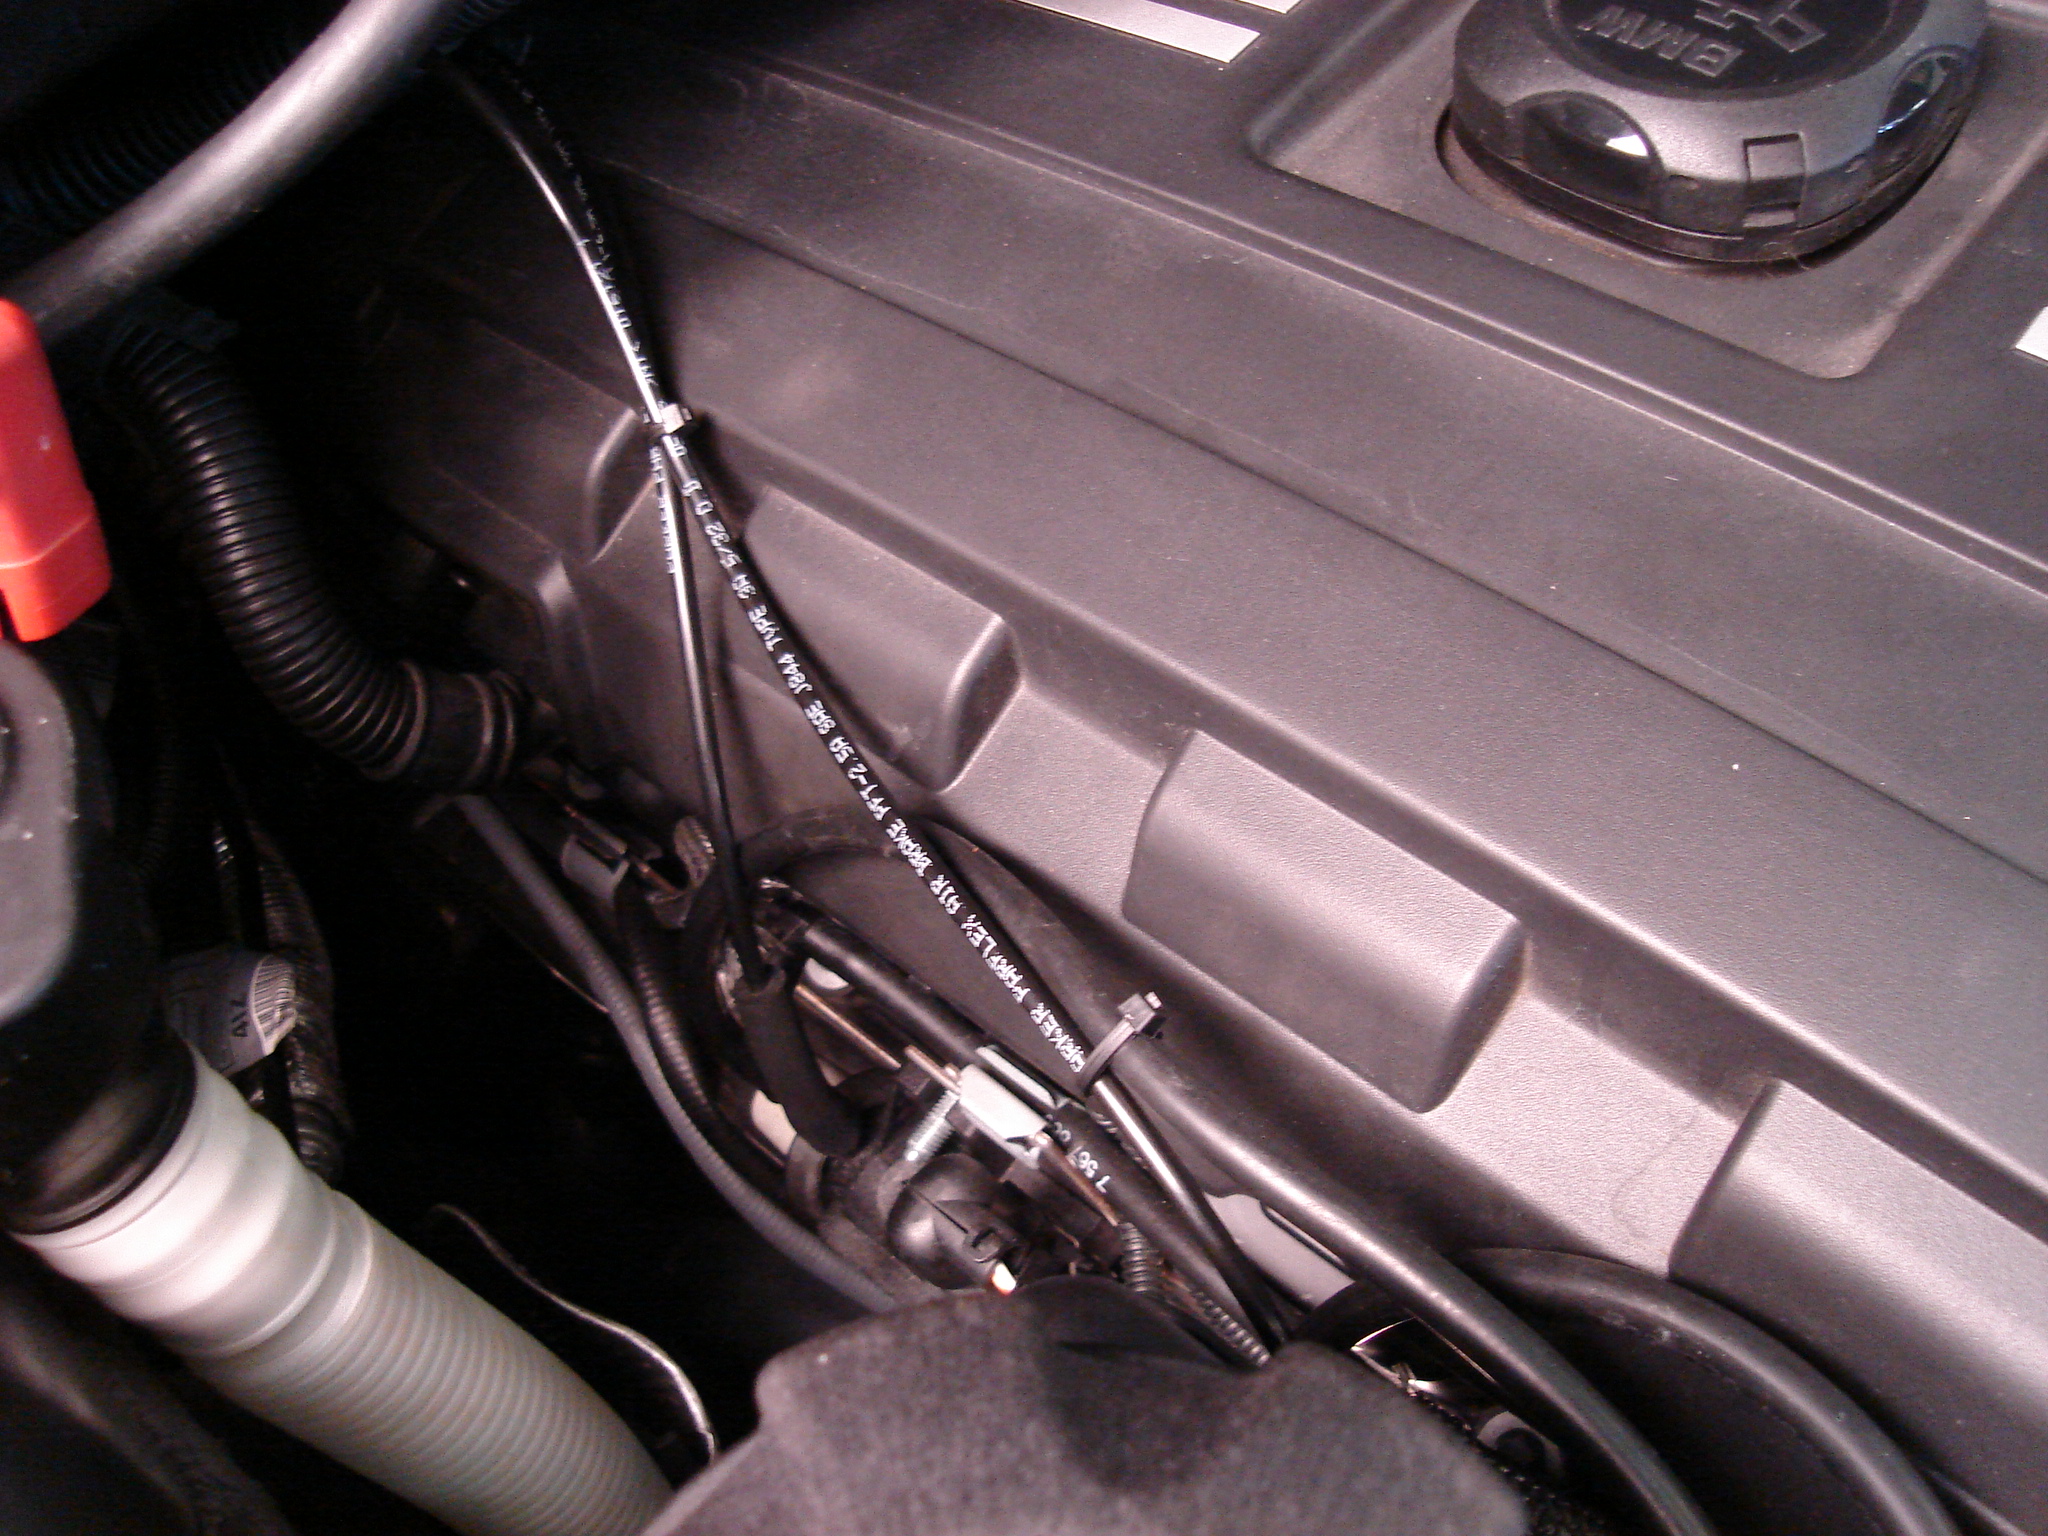
31) Neatly zip-tie the hard vacuum lines close to the valve
cover. Do not make the zip ties tight where they could pinch the vacuum lines.
32) Now you can reinstall the ECU and engine covers in the
reverse order they were removed.
33) Start the car and let idle for approx. 5 minutes, then,
drive the car at normal load until the engine oil temp. reaches full operating
temp. The factory BMW ECU will not allow full boost until the oil achieves
operating temp. The PES computer retains that feature. The car can now be
driven as you wish, enjoy!
MAINTAINENCE
USE ONLY SUPER UNLEADED FUEL (Minimum octane 91)
Race fuel (100+octane) should be used on track days.
CONCLUSION
We hope that you enjoy your new PES software. We greatly appreciate your business!
PES LIMITED WARRANTY
THE WARRANTY
The original purchaser of PES software is warranted against defective materials
and workmanship for one year from date of purchase with unlimited mileage. The
warranty ONLY covers the components of the software system.
WHAT VOIDS THE WARRANTY
Incorrect installation and/or
maintenance: The PES software system must be installed and maintained as per
the prescribed routine maintenance procedure as outlined in the installation
guide.
No proof of purchase: At the time
of a warranty claim, buyer must provide proof of purchase (original receipt or
invoice).
Incorrect use: Any damaged, or
modified software units will not be warranted.
EXTENT OF WARRANTY
Any defective part properly returned to PES will be replaced by PES. PES will
not be responsible for any other expenses incurred by the customer under the
terms of this warranty, nor shall it be responsible for any damages either
consequential, special, contingent, or otherwise; or expenses or injury from
the installation or use of the software system. Any parts returned to PES shall
be sent at the customer's expense along with a proof of purchase. PES reserves
the right to determine whether the terms of the warranty, set out above, have
been properly complied with. In the event that the terms are not complied with,
PES shall be under no obligation to honor this warranty.