Here is the oil change how-to that a lot of people have been asking about.
Tools required:
13mm socket or wrench
36mm socket or wrench
Jack and stands
Oil drain pan
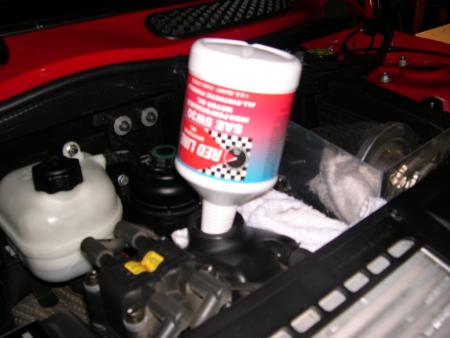
4.7 (5 is OK) quarts of 5W30 full synthetic (I prefer Redline - Amsoil and Motul are great too)
New filter replacement from MINI
Here's the filter kit from MINI and my favorite oil.
 Time required:
About 30-45 minutes
1. Start by making sure the car is warm - this will help to make sure you get as much of the old oil out as possible.
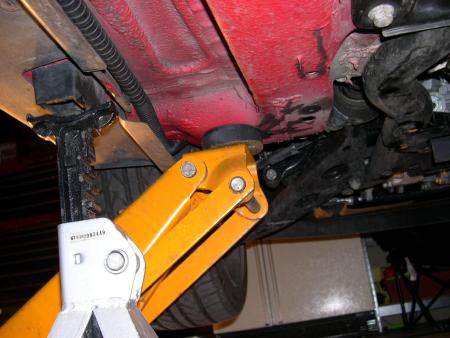
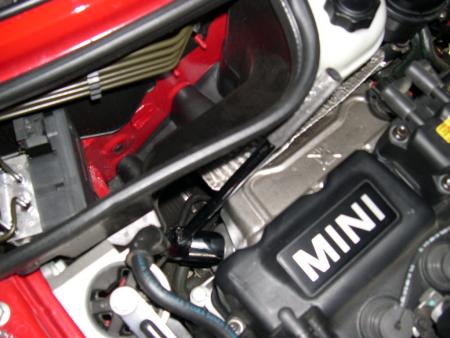
2. Jack up the car, and use jack stands (for you 2minis). Here is the best jack point we've been able to find. It will lift the entire side, so you can put the jack stands under the factory jack points. This picture is looking forward on the driver side.
3. Drain the oil from the case before you remove the filter. This is a 13mm, and be careful, as the oil is warm.
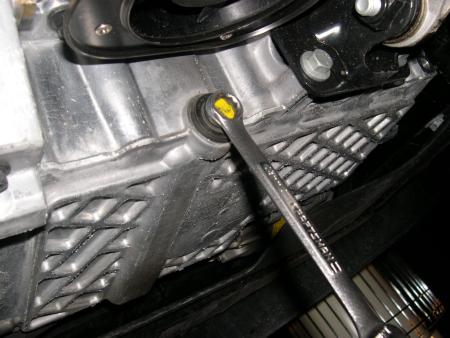
Technique is to remove the plug until it is barely threaded, then, using two fingers above where the draining oil path will be, pull the plug up and away.
When you do it right, you won't get any oil on you or the floor :D .
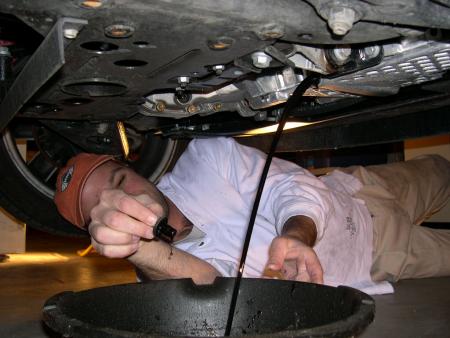
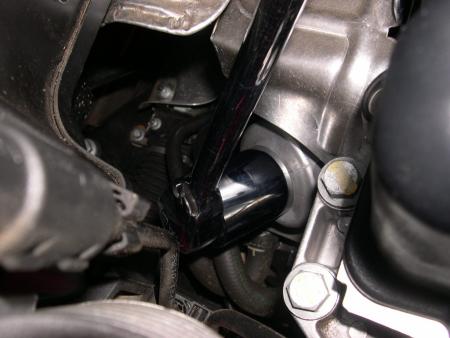
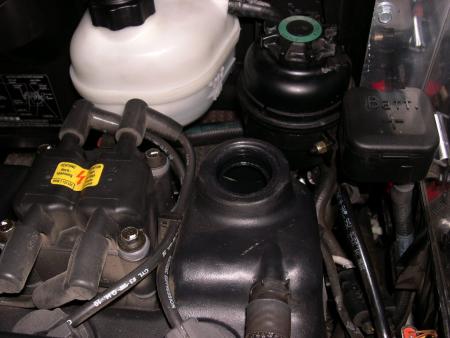
4. Let the oil drain, and move to the top of the car. The filter is a canister type on the backside of the block to the passenger side of the center. It is removed using either a 36mm wrench (some of the larger adjustables will get this big as well) or a 36mm socket and ratchet.
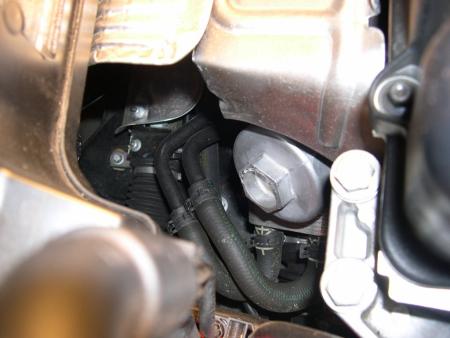
This is looking at the filter from the passenger side.
Here's the 36mm socket with a ratchet. You can find these just about anywhere - this one is just from Home Depot - but they are also at Sears and most auto parts stores.
Let's have a closer look at the socket on the filter.
When you pull the filter off, it's tough to keep oil from getting everywhere, but moving the drain pan about six inches more toward the passenger side from where it was for the case drain plug will minimize the mess.
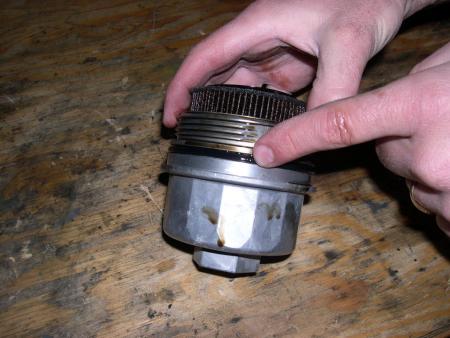
Note the orientation of the filter in the housing.
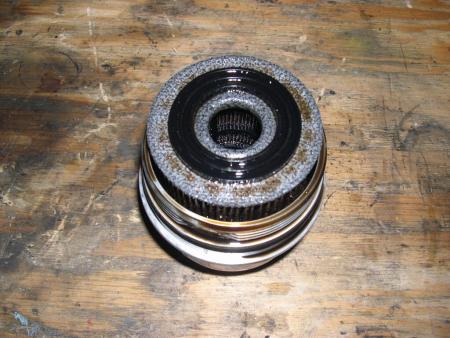
Here is the top of the filter coming out of the housing.
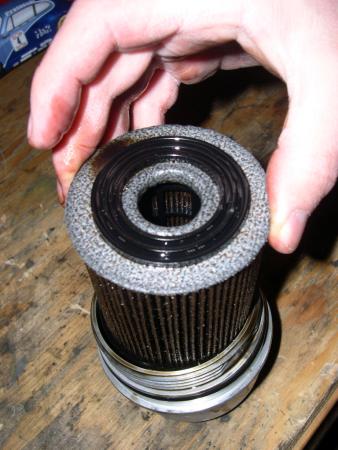
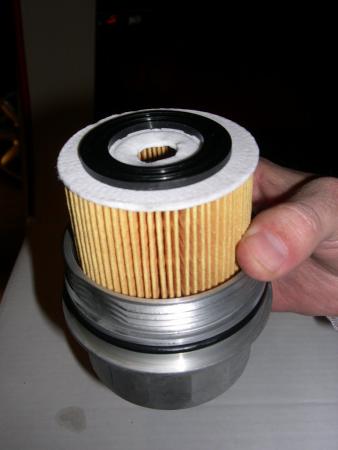
This is the part of the filter that goes into the housing.

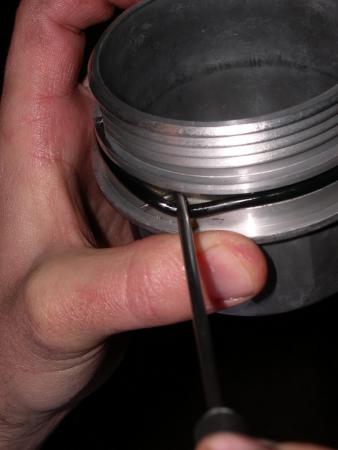
You will notice there is an O-ring around the housing. This is included in the new filter kit, and should be changed.
5. Here is the removal of the O-ring. You don't need this tool - anything, even a pen, will work. Be careful not to score the O-ring seat.
6. Once you have the O-ring off of the car, clean out the housing. Some brake clean works in lieu of a parts washer.
7. It's a good idea to dip the new O-ring in some clean oil, or spray it down with WD-40. This will keep it from wanting to roll off the housing while you are screwing it on to the block again. It installs by just slipping it over the housing into it's groove.
8. Here is the new filter in the housing. After installing it in the housing, oil the rubber seal with new oil. This will make you happy the next time you take the filter off.
9. Reinstall the filter on the block. You will need to push the filter onto the guide - it sorta feels like it pops on. Screw the housing back on, and torque it to 25Nm, which isn't that much more than hand tight.
10. Reinstall the drain plug under the car, and tighten it to 31Nm.
11. Remove the oil cap on the cam cover.
12. Install the 5 quarts of oil.
13. After the oil is installed, replace the cam cover cap. Make sure the filter is on, the drain plug is replaced, and the cam cover cap are on, then start the car. Make sure the low oil pressure light is out. Check for any leaks under the car or from the filter area.
14. Lower the car and enjoy!
Thanks again to DiD for the photography!
If you have any questions, let me know.
It should be noted that the early Coopers have a plastic retaining post and spring. The spring goes into the housing, then the filter goes on. All filters are the same now.
Hope that helps!
Randy
720-841-1002
randy@webbmotorsports.com