

Click on thumbnails below for larger pics....
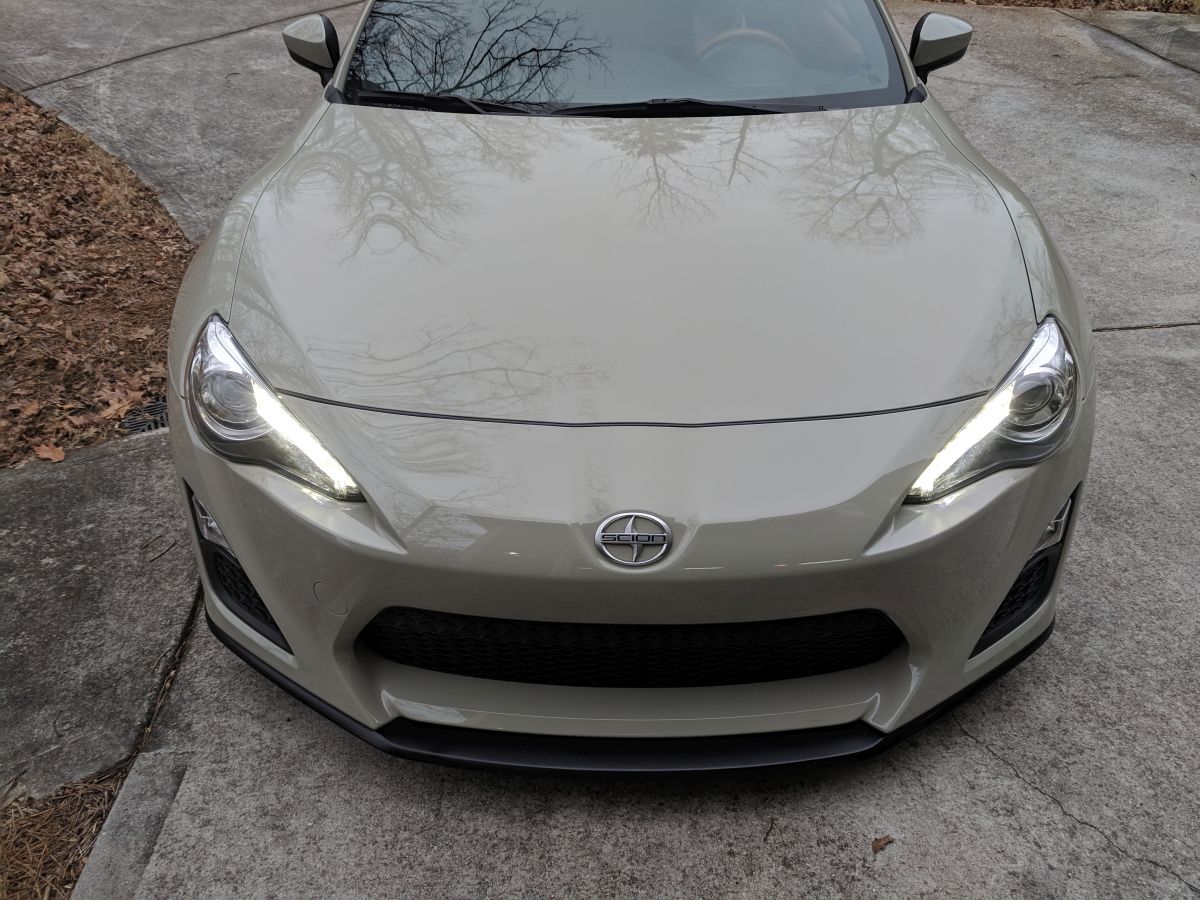
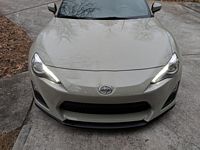
This 2016 Scion FRS Release Series 2.0 was purchased from Tim Jump at Heyward Allen Toyota- pretty low stress dealership and the staff was great. After our experience with our son's 2014 Scion FRS, we decided this last year Scion FRS would make a great replacement for our aging Mini Cooper S. This FRS may be the only car where I have found an existing, quality DIY guide for just about all mods......
The FRS is the Toyota/Scion side of the FT86 twins, the Subaru BRZ is the other side- there are some suspension tuning differences between the two.
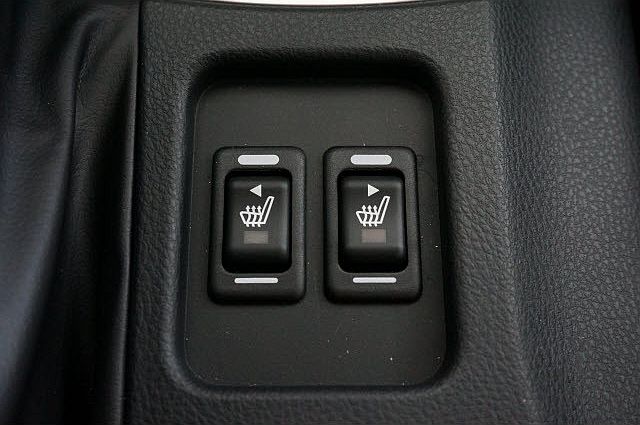
Since it has push-button start it also has the alarm which by default is turned off: following the steps in this forum post will enable/activate it.
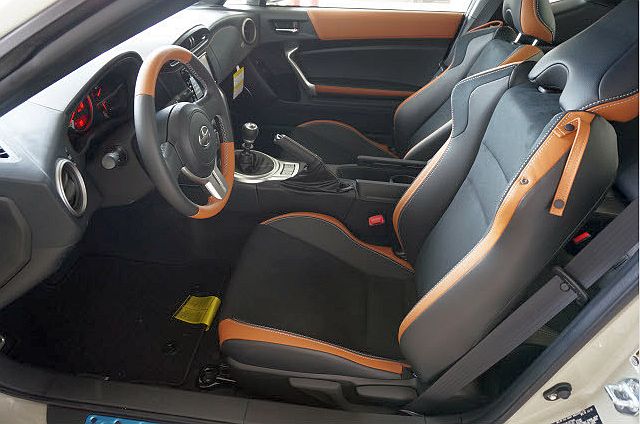
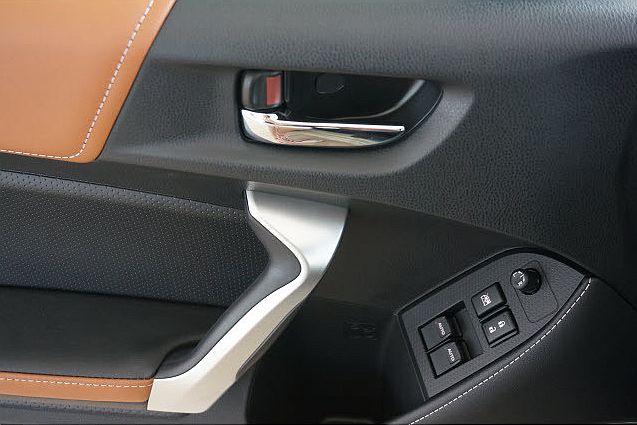
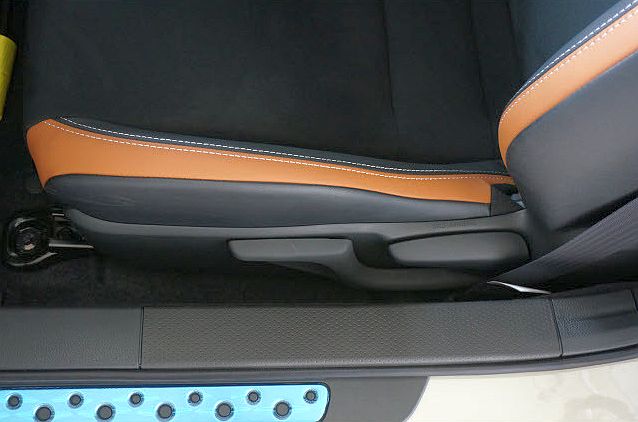
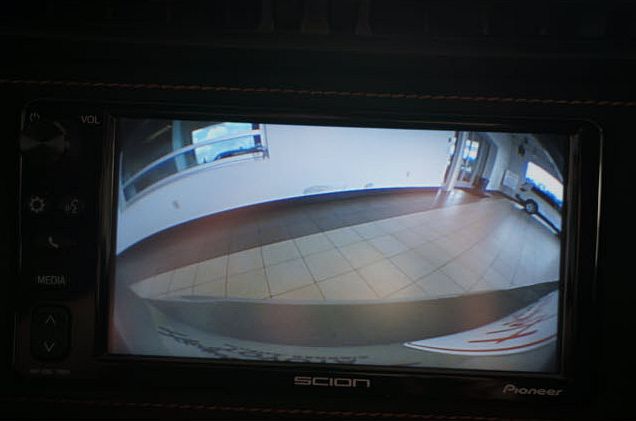
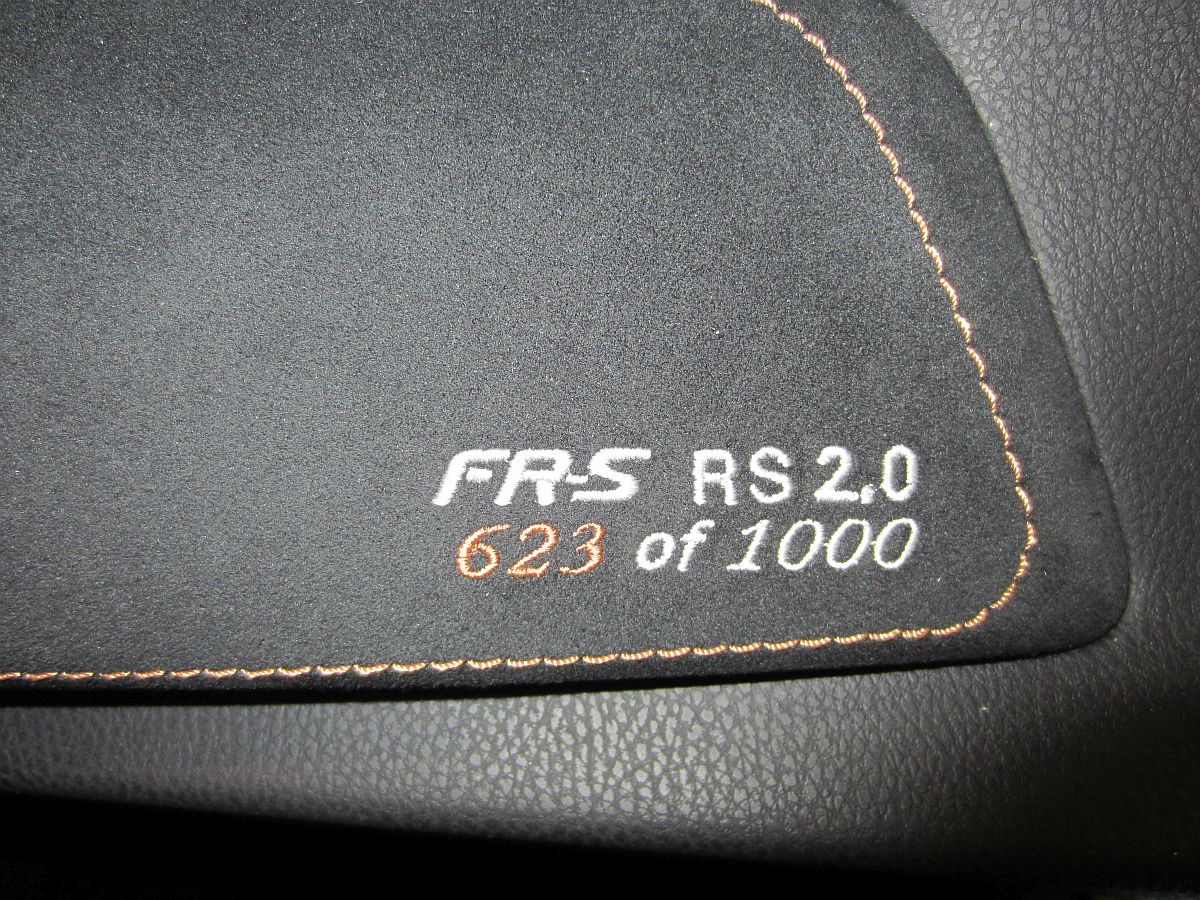
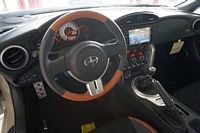
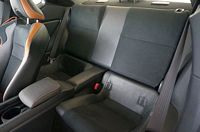
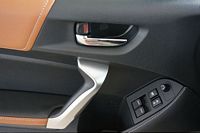
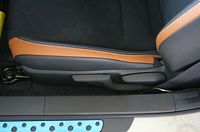
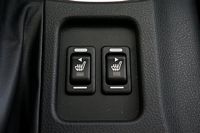
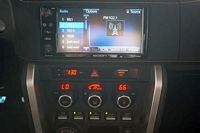
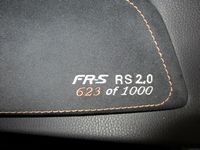
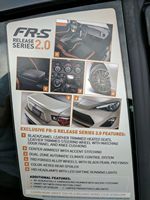
This car was #623/1000 of the Release Series 2.0 which has the nicer BRZ interior and electronics-
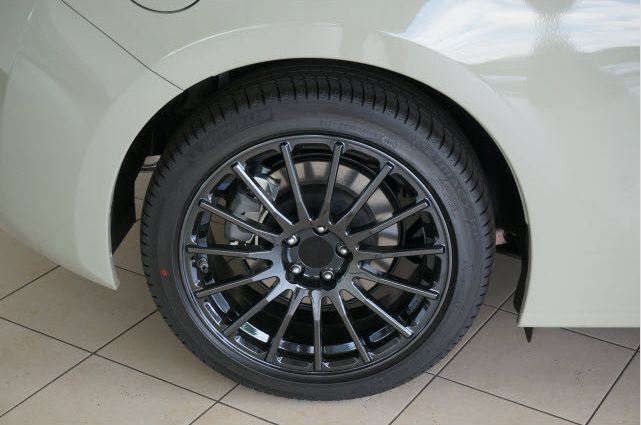
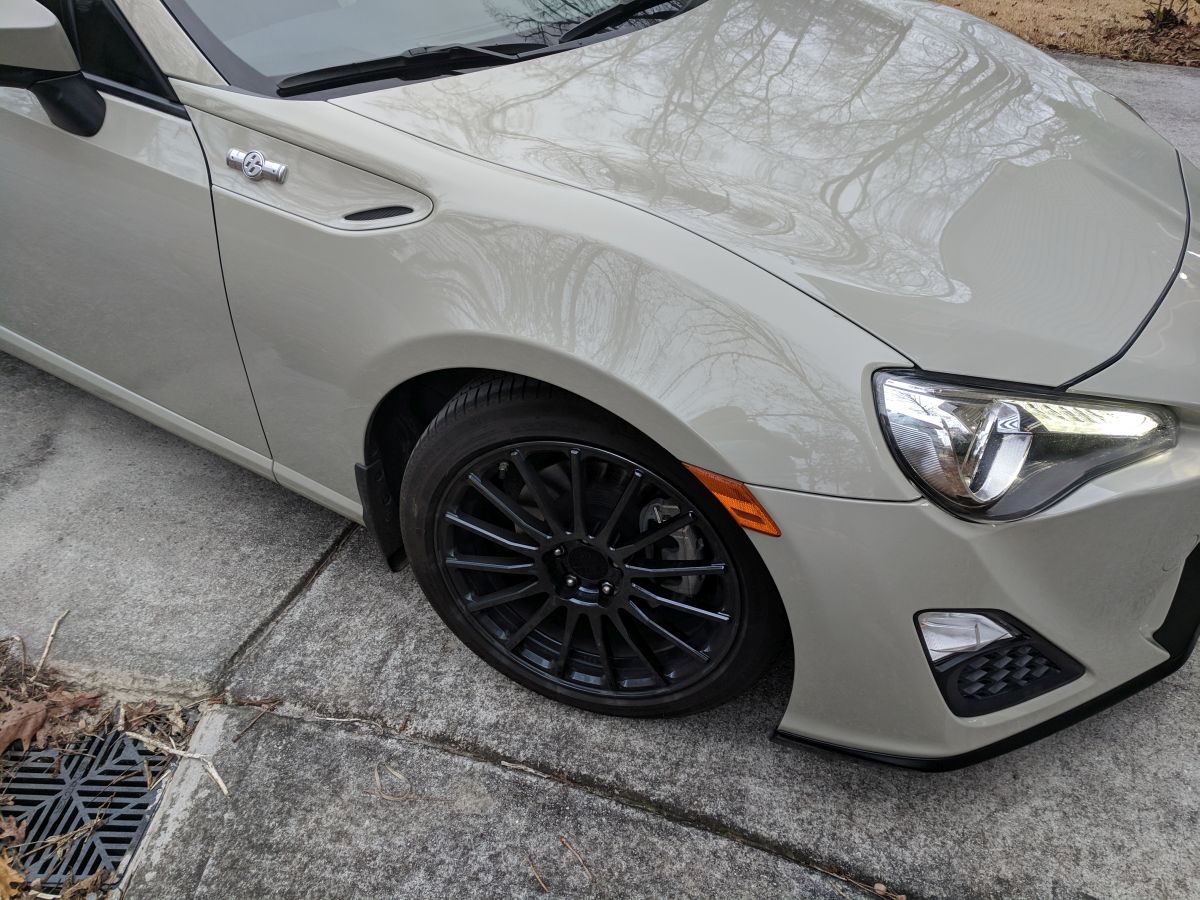
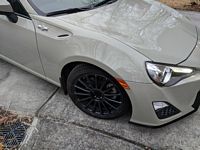
FT86 FRS Release Series 2.0 Registry HERE. RS 2.0 specific front spoiler is P/N PZ321-18004, wheels are P/N PTR20-18160-BK.
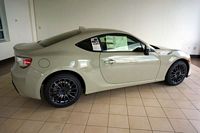
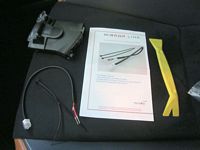
Vehicle Specifications are HERE. Dealer Ad is HERE, dealer ad pictures below:


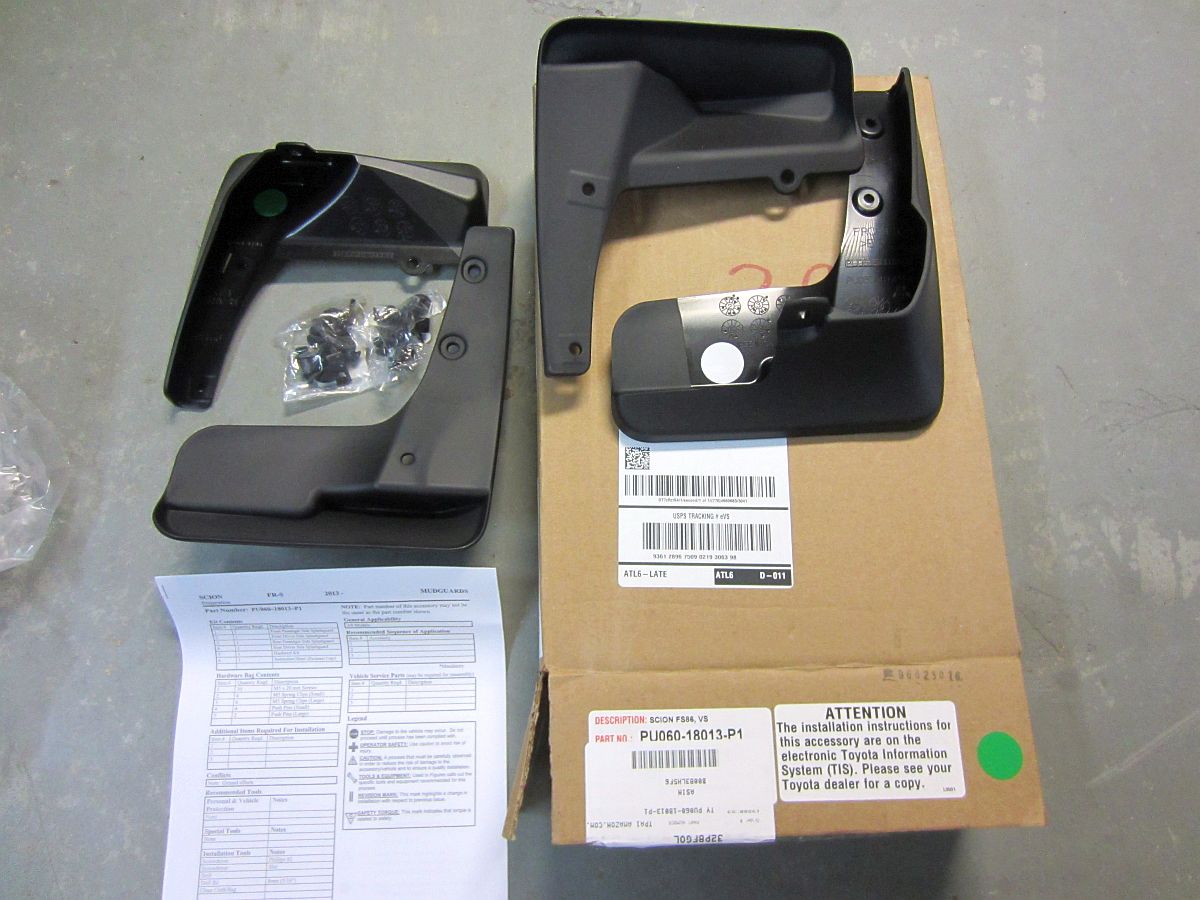
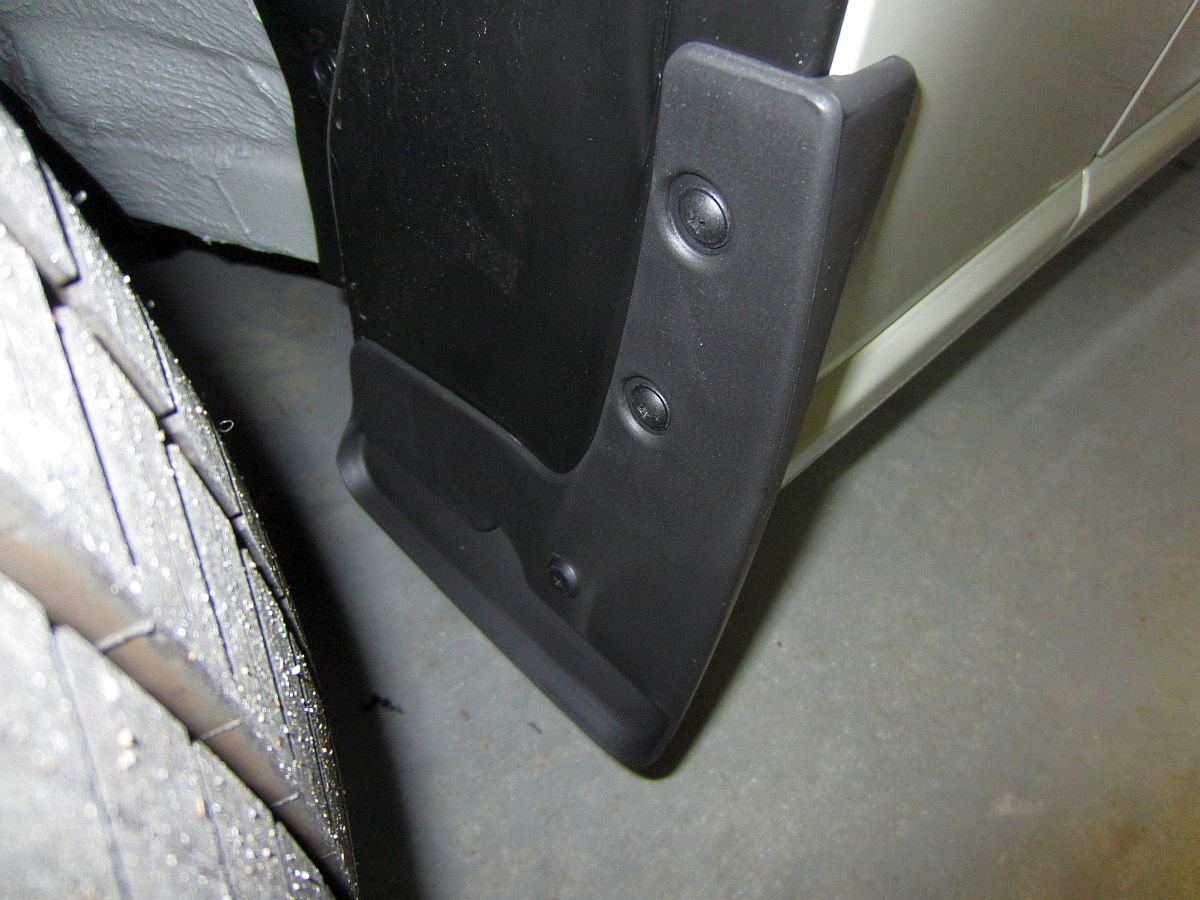
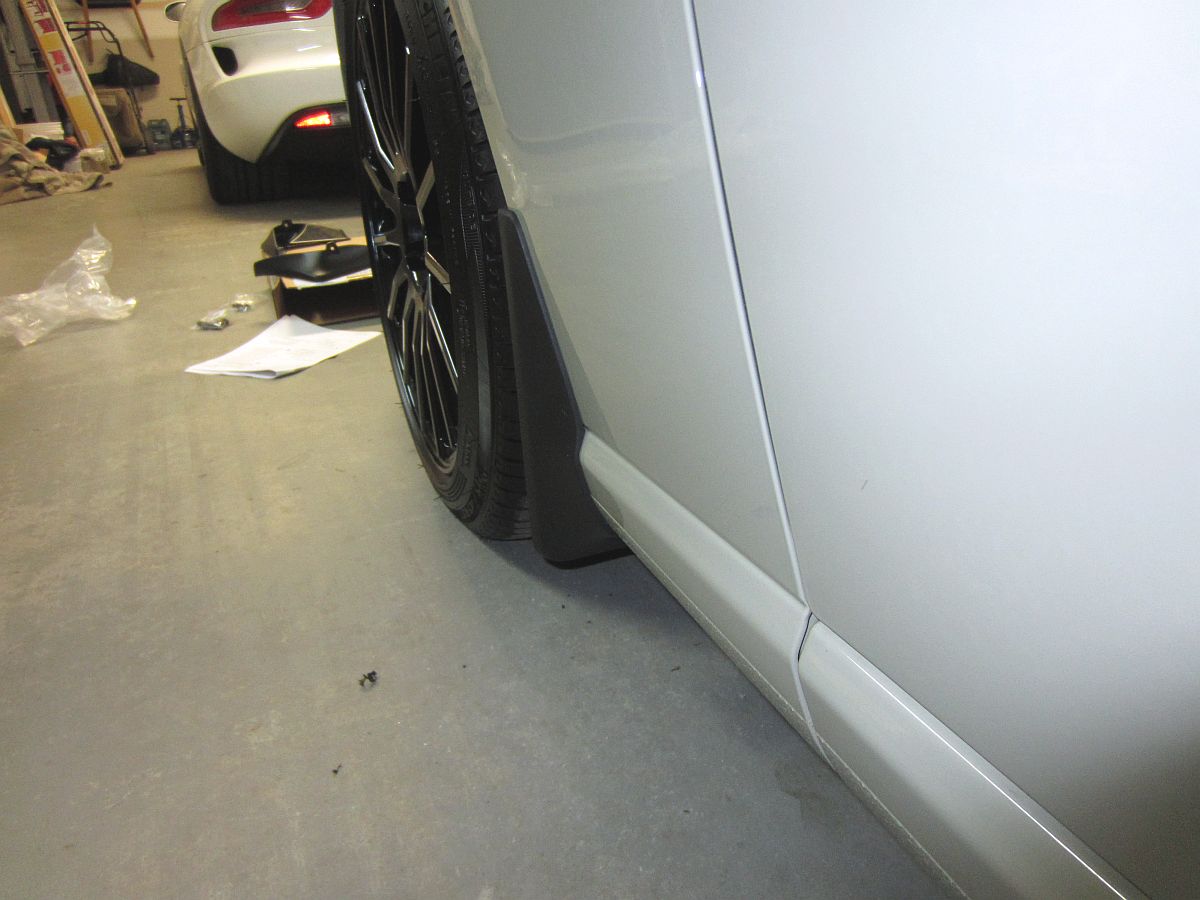
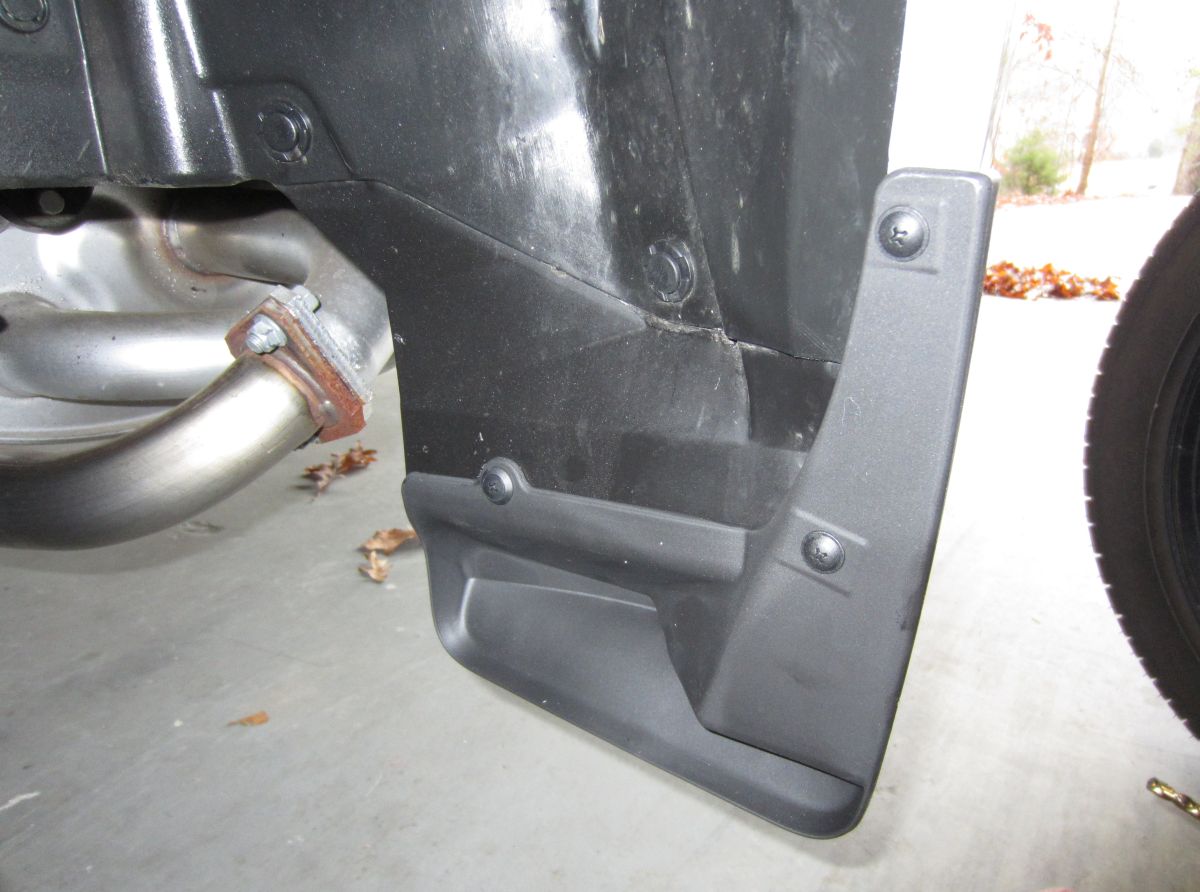
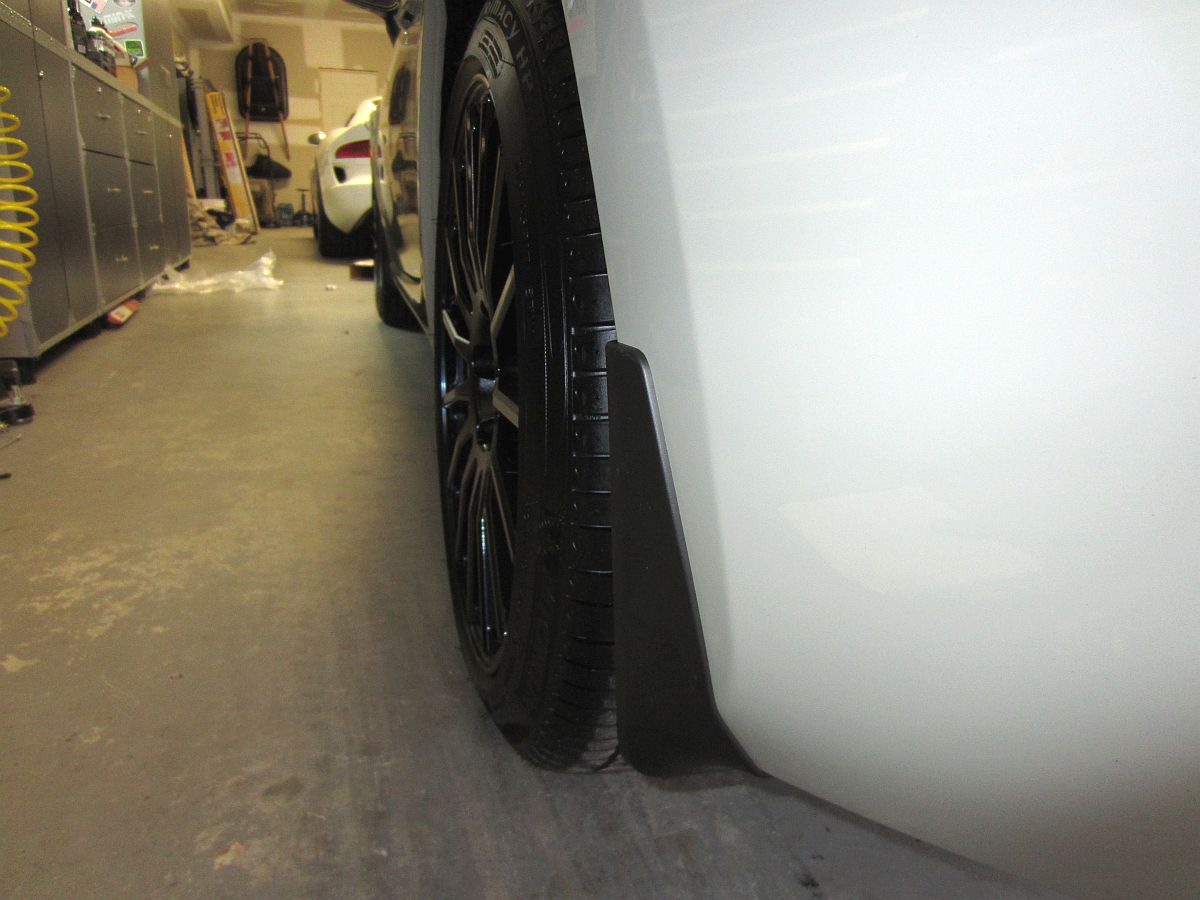
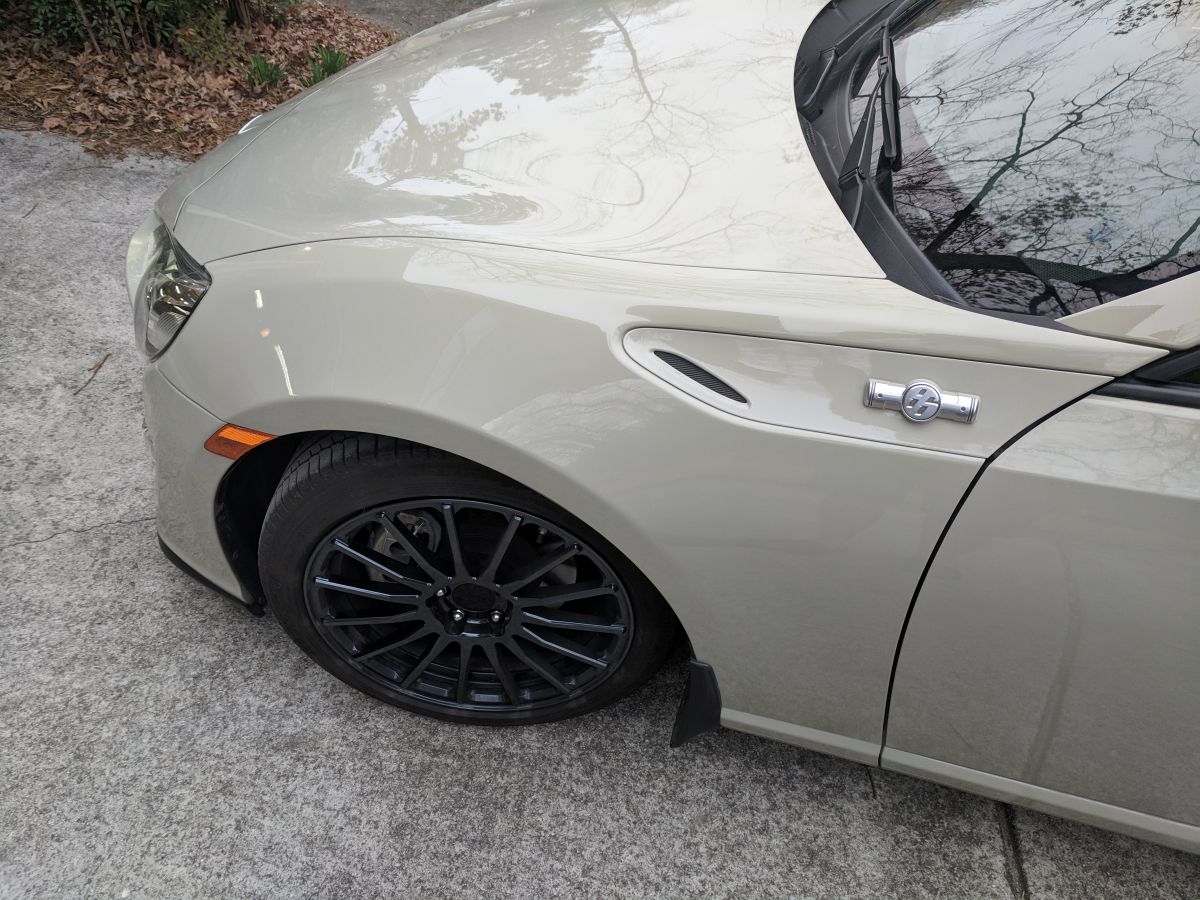
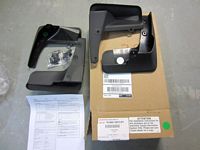
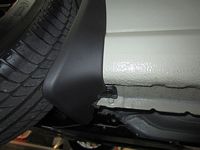
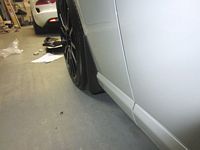
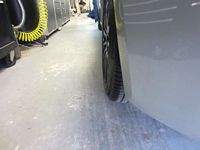
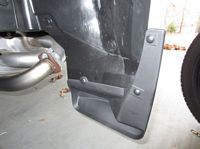
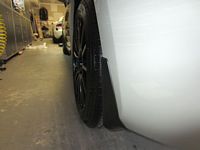
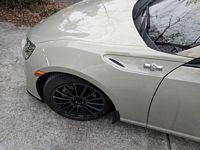
Scion Mud Guards (P/N PU060-18013-P1) sourced from Amazon
installed - Installation instructions HERE and a good DIY write-up on FT86 Club HERE.
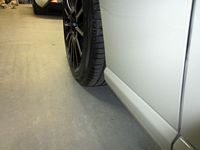
Rather than remove the front wheels, I turned the steering wheel to one side to allow access and then the other direction for the other side- this allowed plenty of room to install the front guards, drill and all. No way around removing the rear wheels, this is required for easy installation of the rear guards. Before and after pics show what is covered/protected, this is a GREAT first mod.


Some Subaru/BRZ updates from Quirk Parts and Amazon
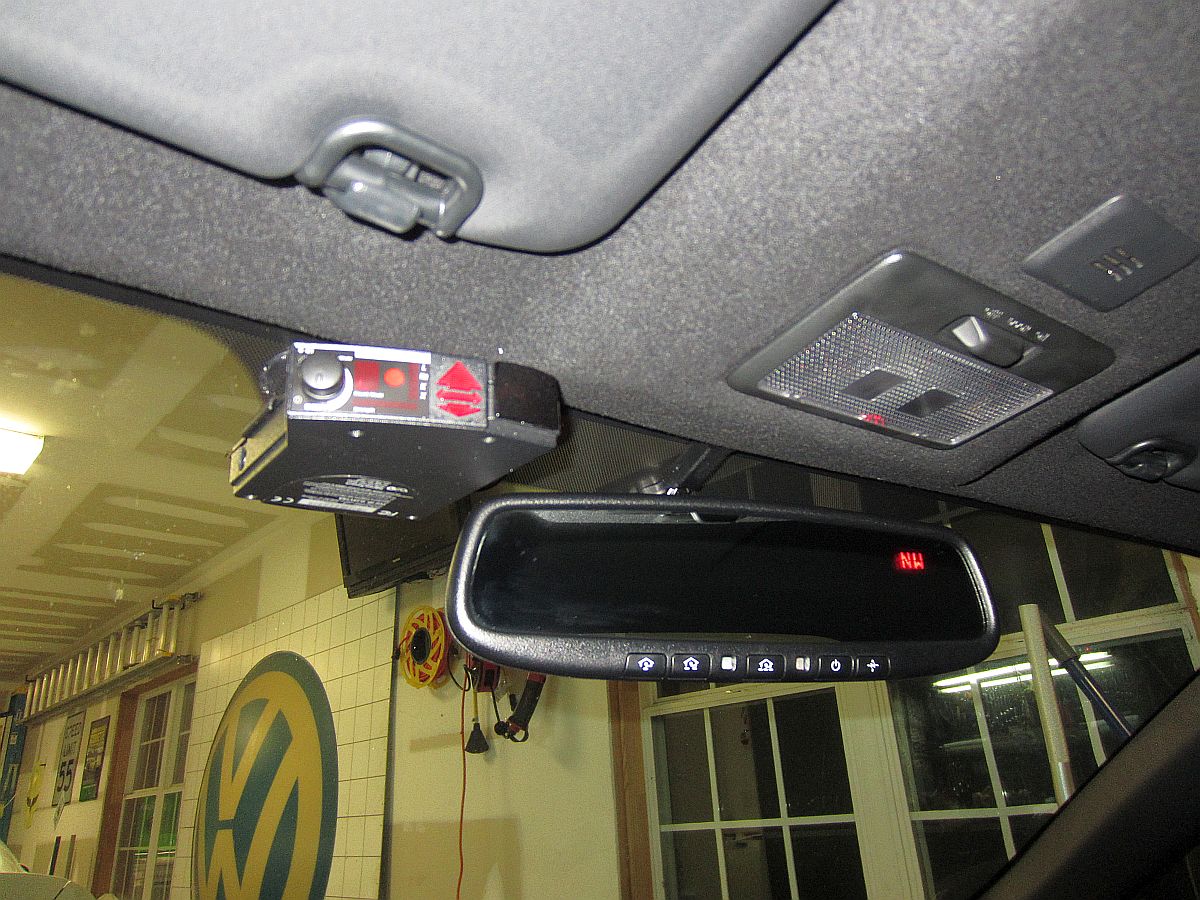
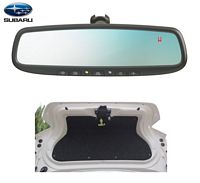
- Subaru BRZ Auto-Dimming Mirror/Compass/HomeLink & Adapter Kit (P/N H501SCA100) -
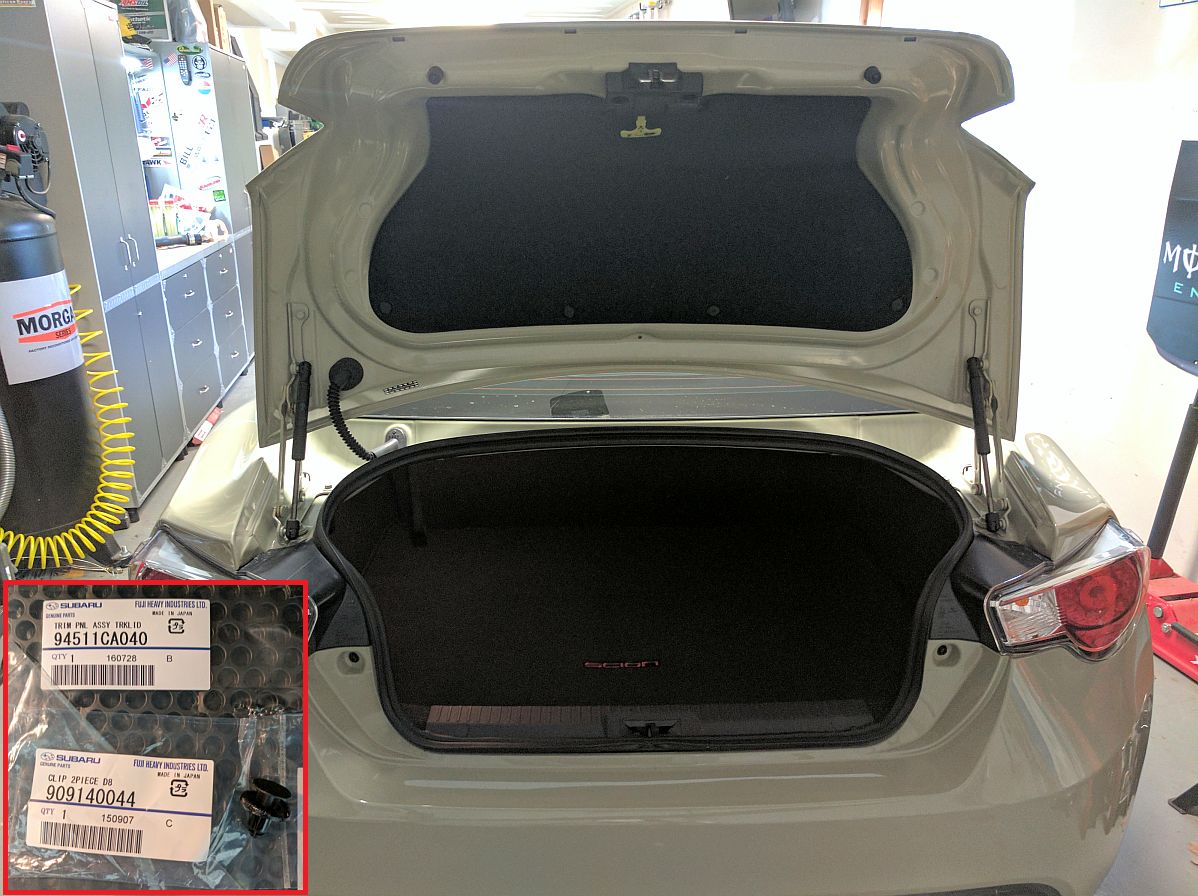
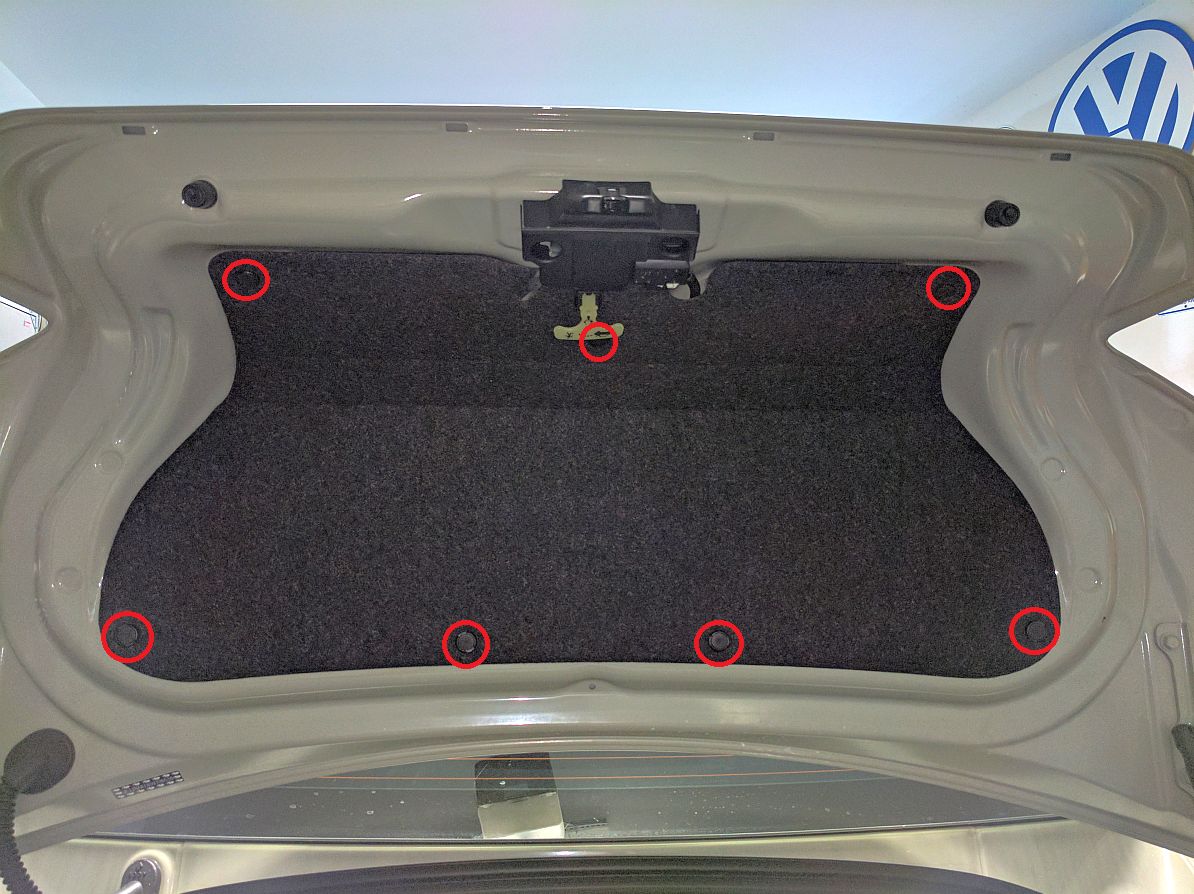
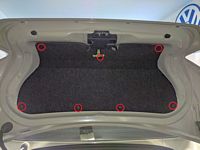
86 Speed Frameless Mirror Installation Video HERE may help...forum threads HERE and HERE.- Subaru BRZ Trim Panel-Trunk Lid (P/N 94511CA040)
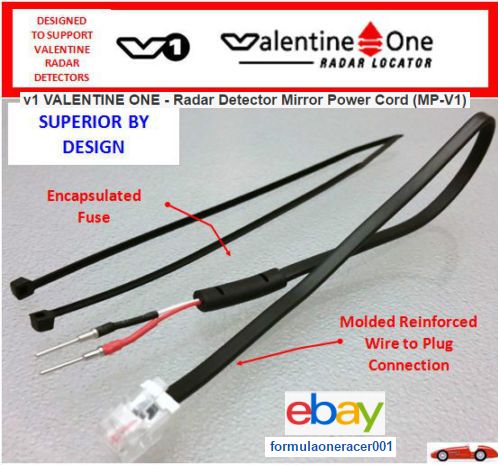
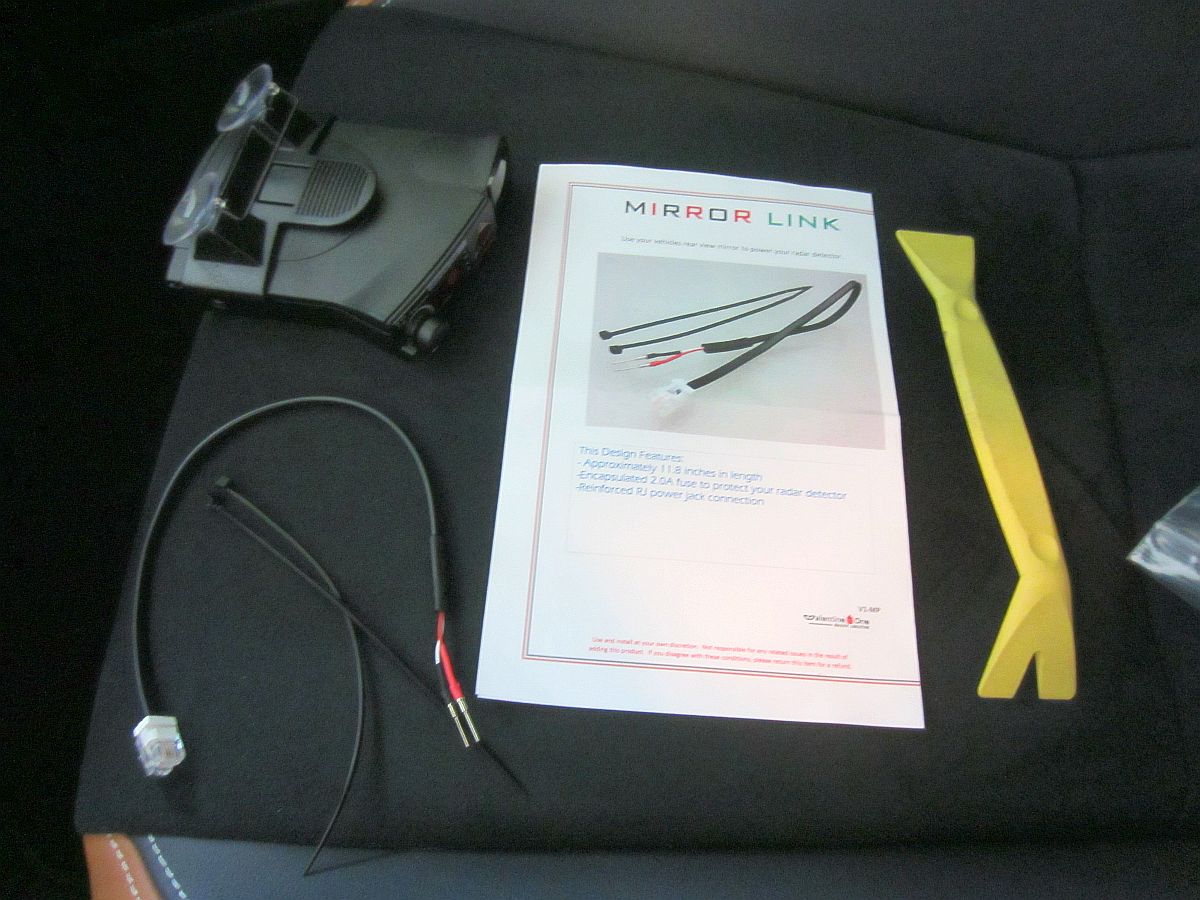
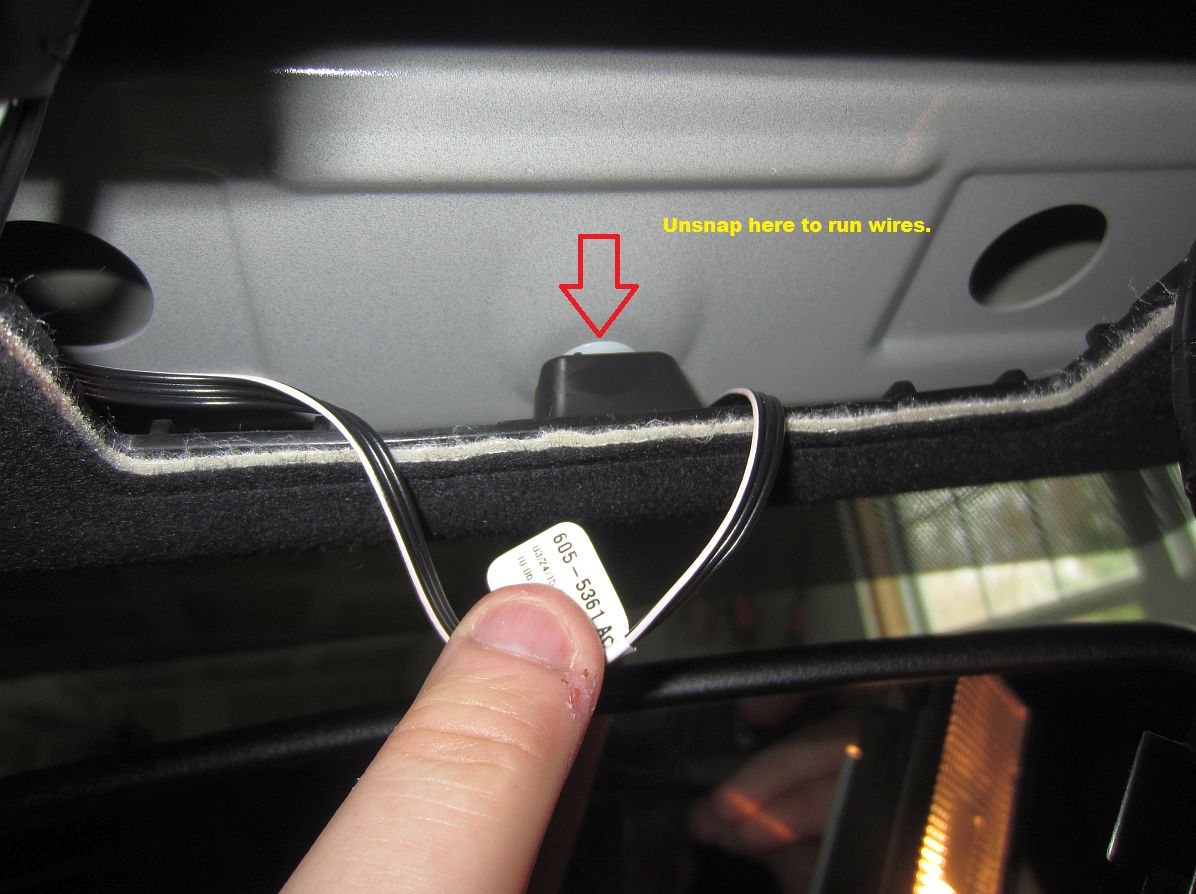
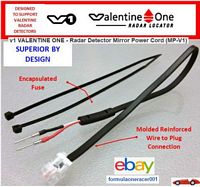
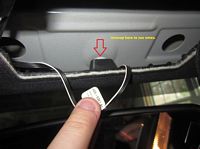
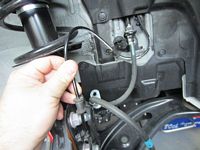
While installing the new mirror I also decided to hardwire the radar detector using a power cord made up of pins that push into the back of the plug for the mirror, good forum DIY guides HERE and HERE. I did not remove all of the trim that the DIY shows, I merely unsnapped the center of the headliner and carefully fed wires through. This forum thread outlines a solution for the mirror adapter stability issue- buy some 8-32 X 1/2 (non self-tapping) flat head screws and replace the 2 self tapping mounting screws.
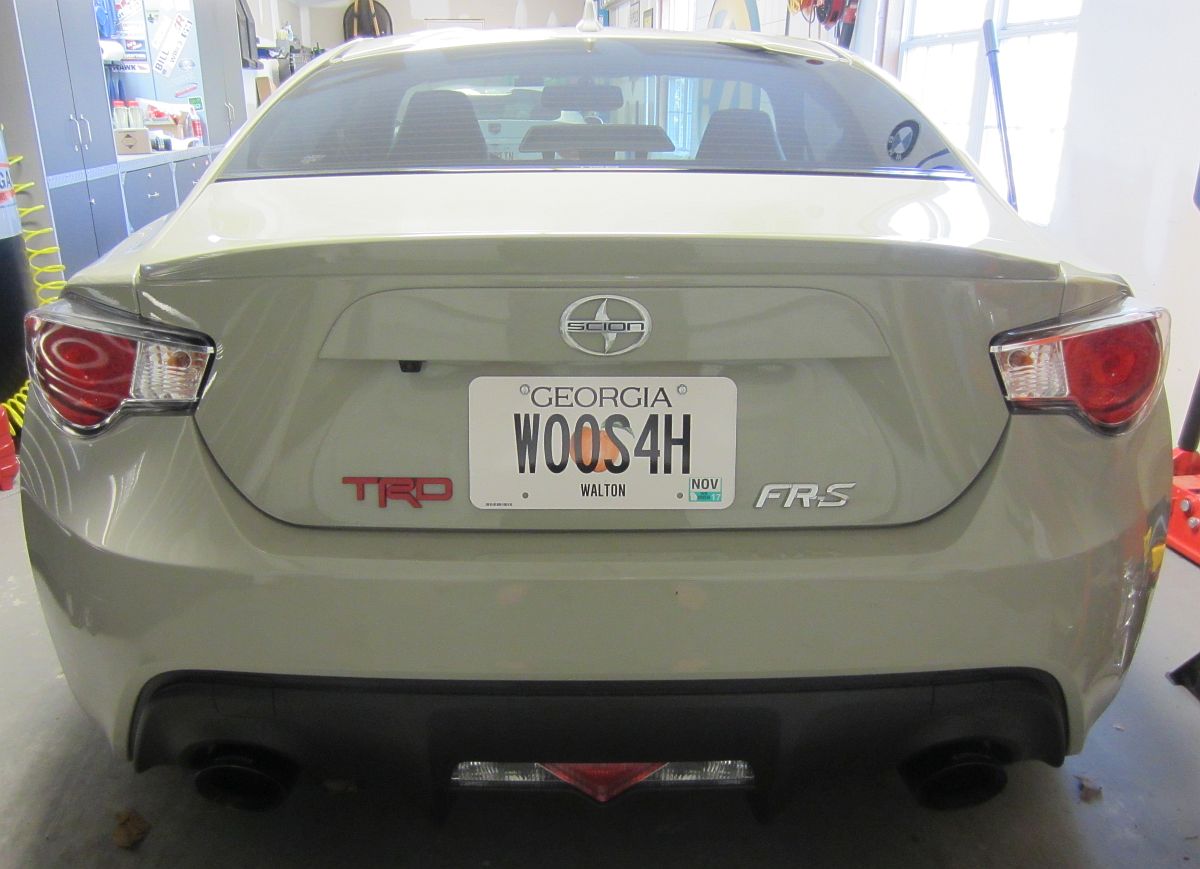
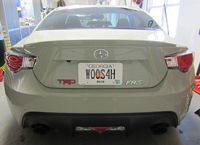
New tag- W00S4H (WOOSAH..... Relax, it's a 4 cylinder)


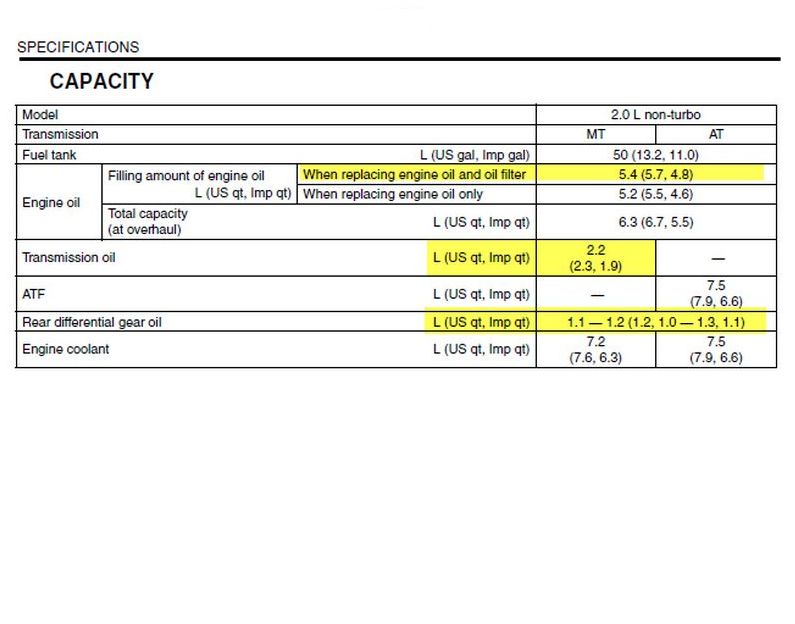
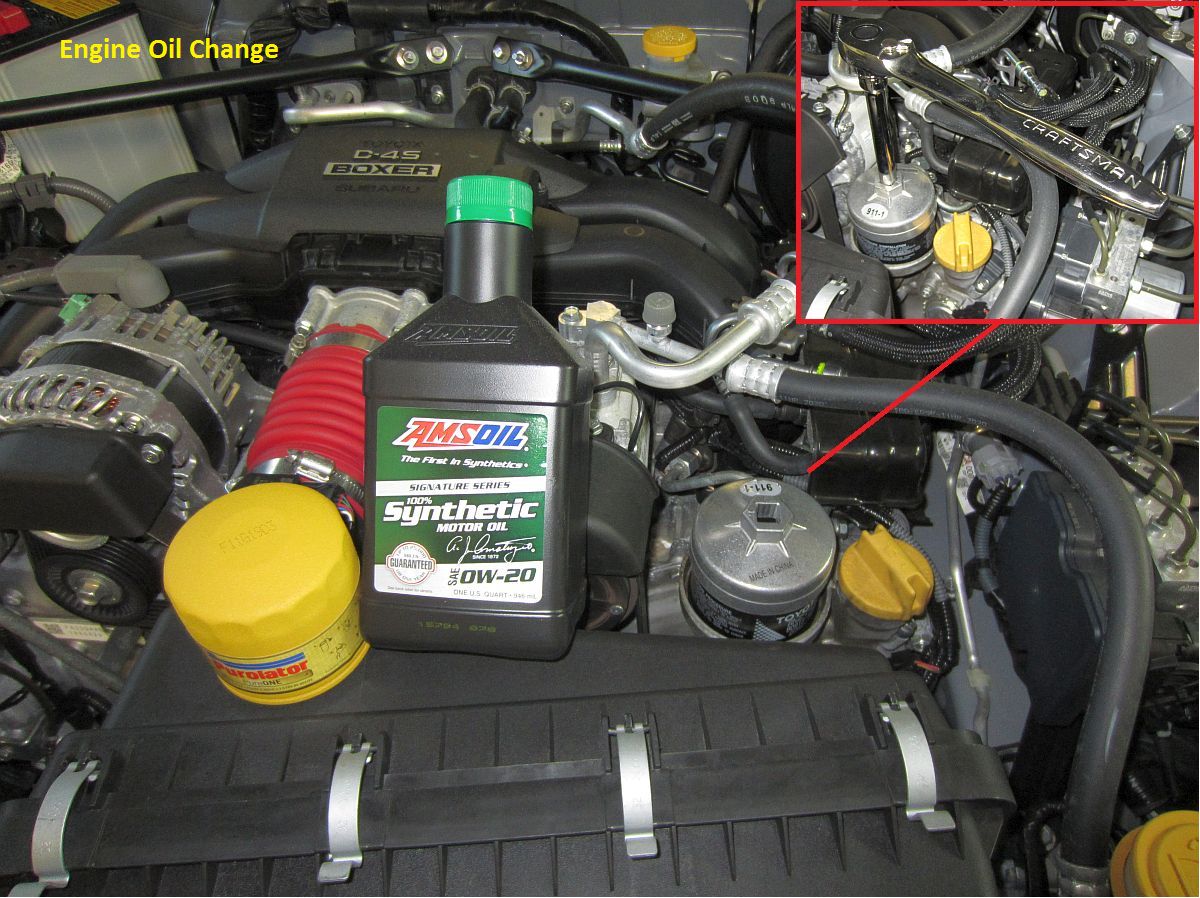
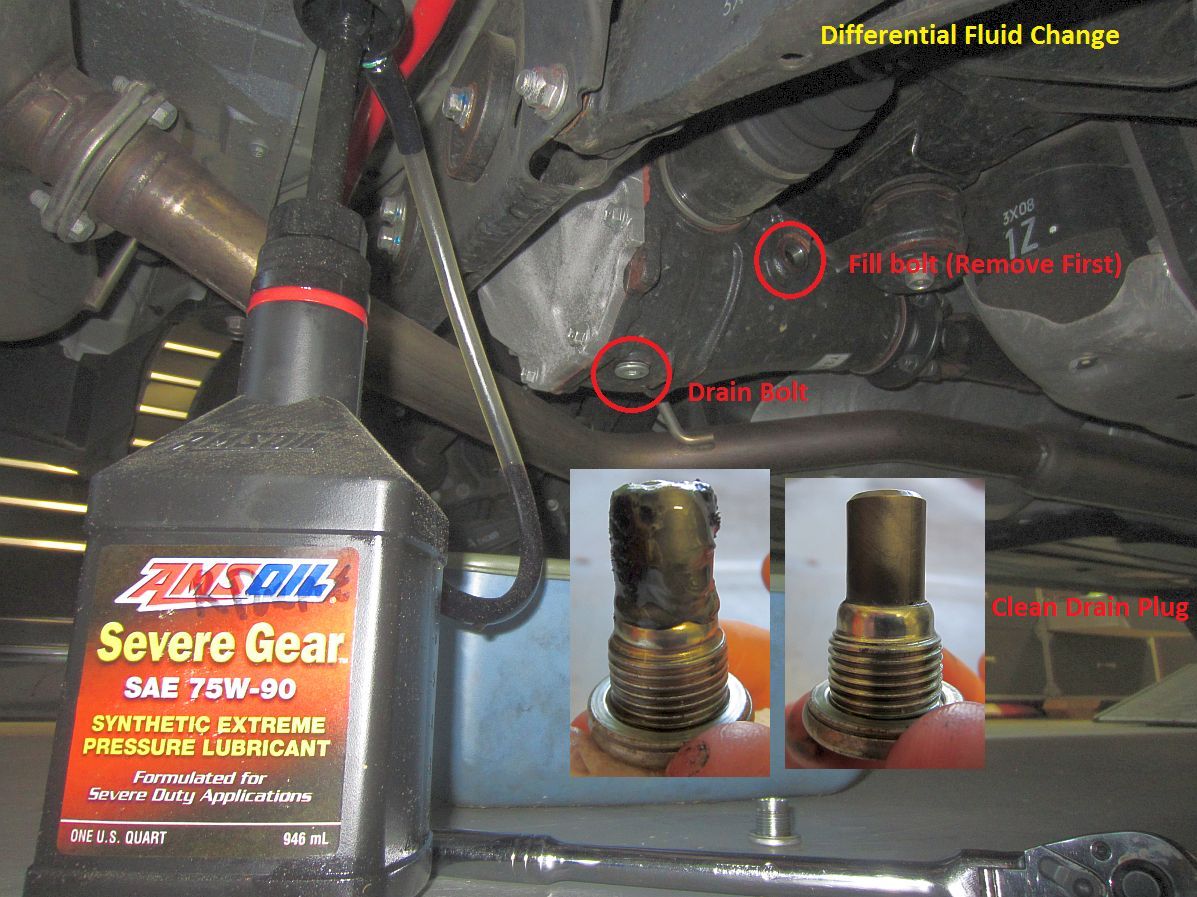
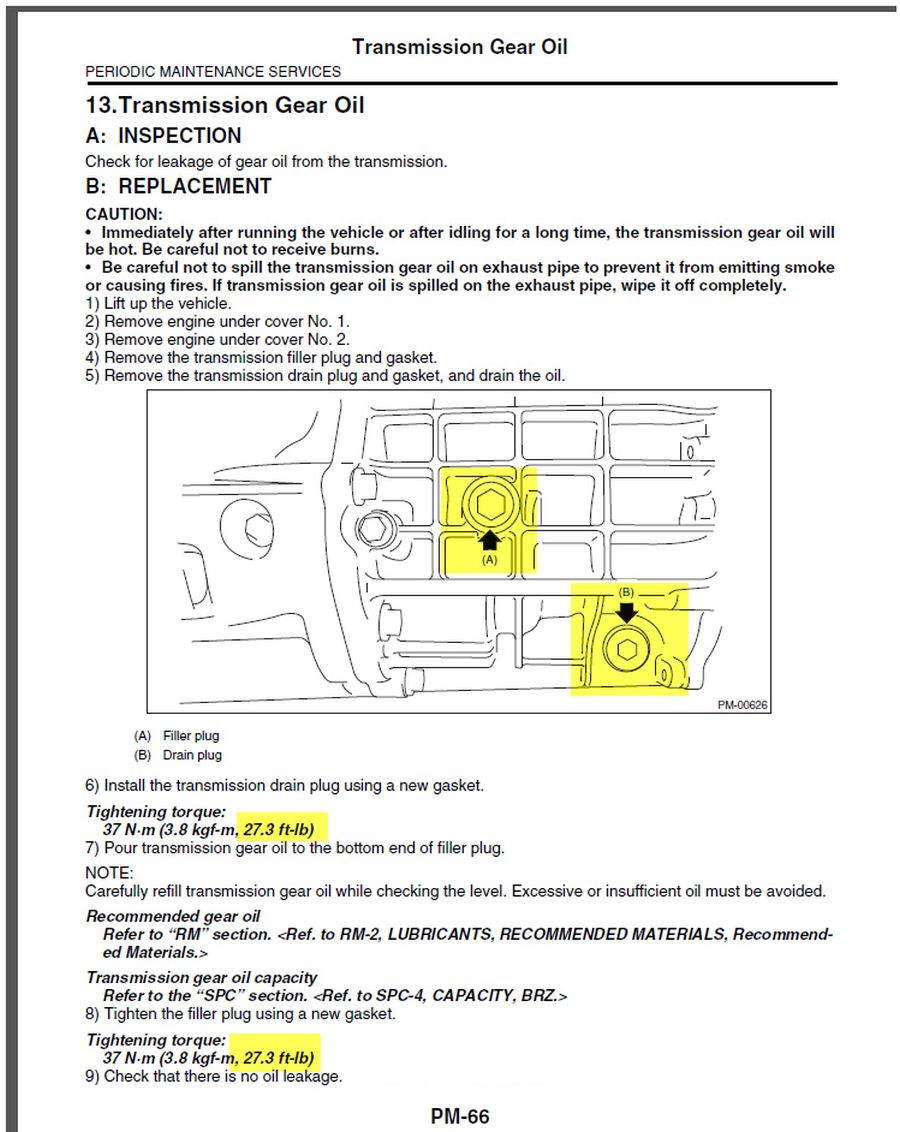
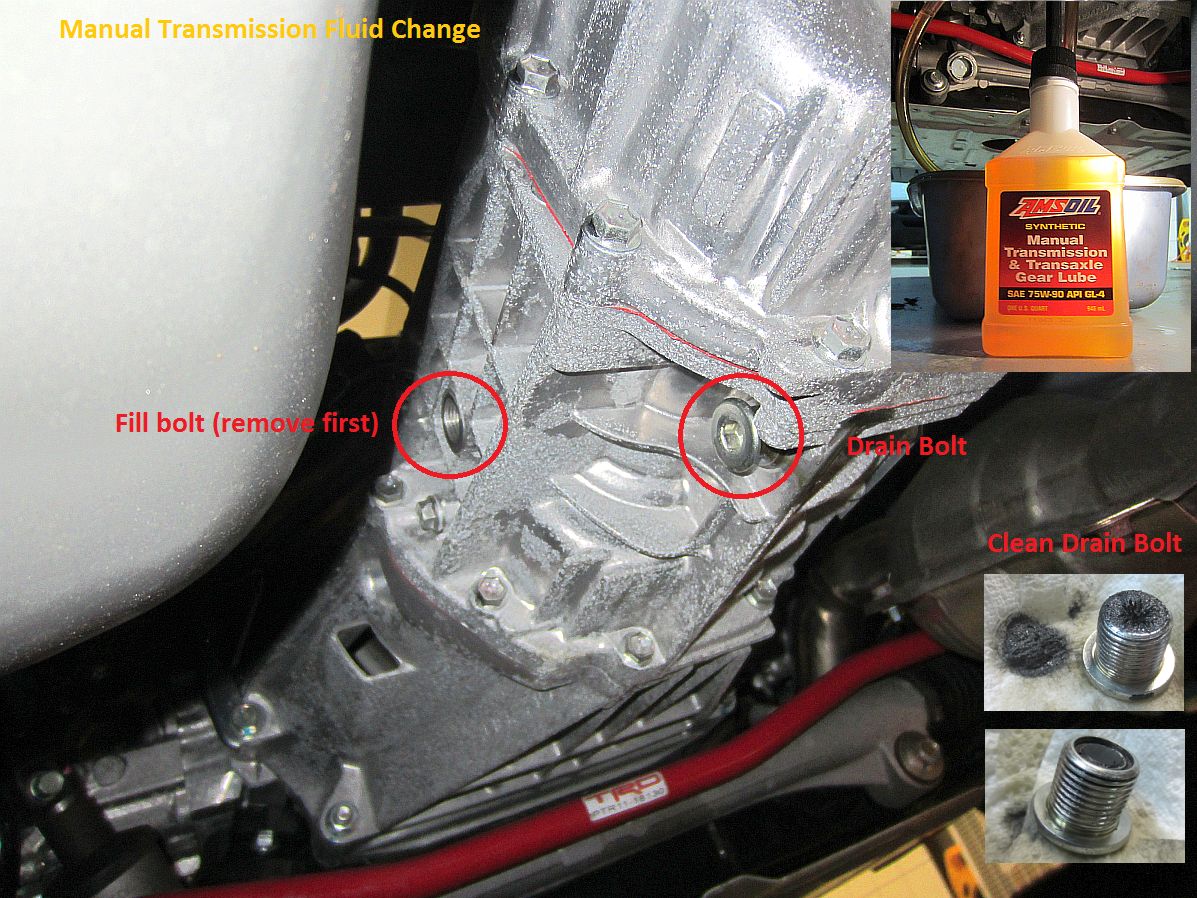
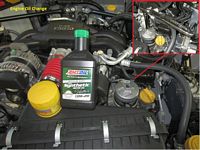
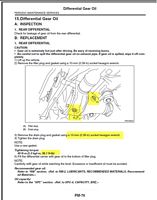
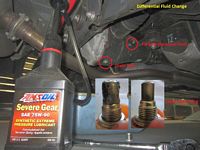
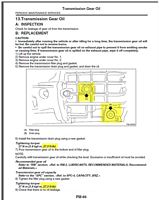
Owning BMW M cars got me in the habit of dumping factory fill at around 1k miles to remove break-in metals/debris.....so, time to change the engine oil/filter, transmission fluid, and differential fluid.....and also install a Fumoto Oil Drain Valve, P/N F108S- follow the installation directions and don't over torque.
For the Engine: Amsoil Signature Series 0w20 Synthetic Motor Oil ....good oil thread if you track your car HERE
For the Transmission: Amsoil Manual Transmission Fluid 75w90 (GL4) or Ford XT-M5- QS Full Synthetic MTF
For the Differential: Amsoil Severe Gear 75w110 (GL5)
Even though you may be tempted to pick up a filter at the McParts store, you should really opt for the Japanese made Subaru oil filter, P/N 15208AA130 (same filter you get in the Toyota box with P/N SU003-00311)- Subaru specs the filter bypass pressure higher than most of the McParts store filters....some good oil filter discussion HERE and HERE.
I love Amsoil products and am a dealer but after running the MTF in my son's car decided to try the Ford Motorcraft fluid in our car.....it shifts so much better and is GL4, maybe a bit thinner? No more painful waiting to go into 2nd when colder, and after it is warm shifts like butter.


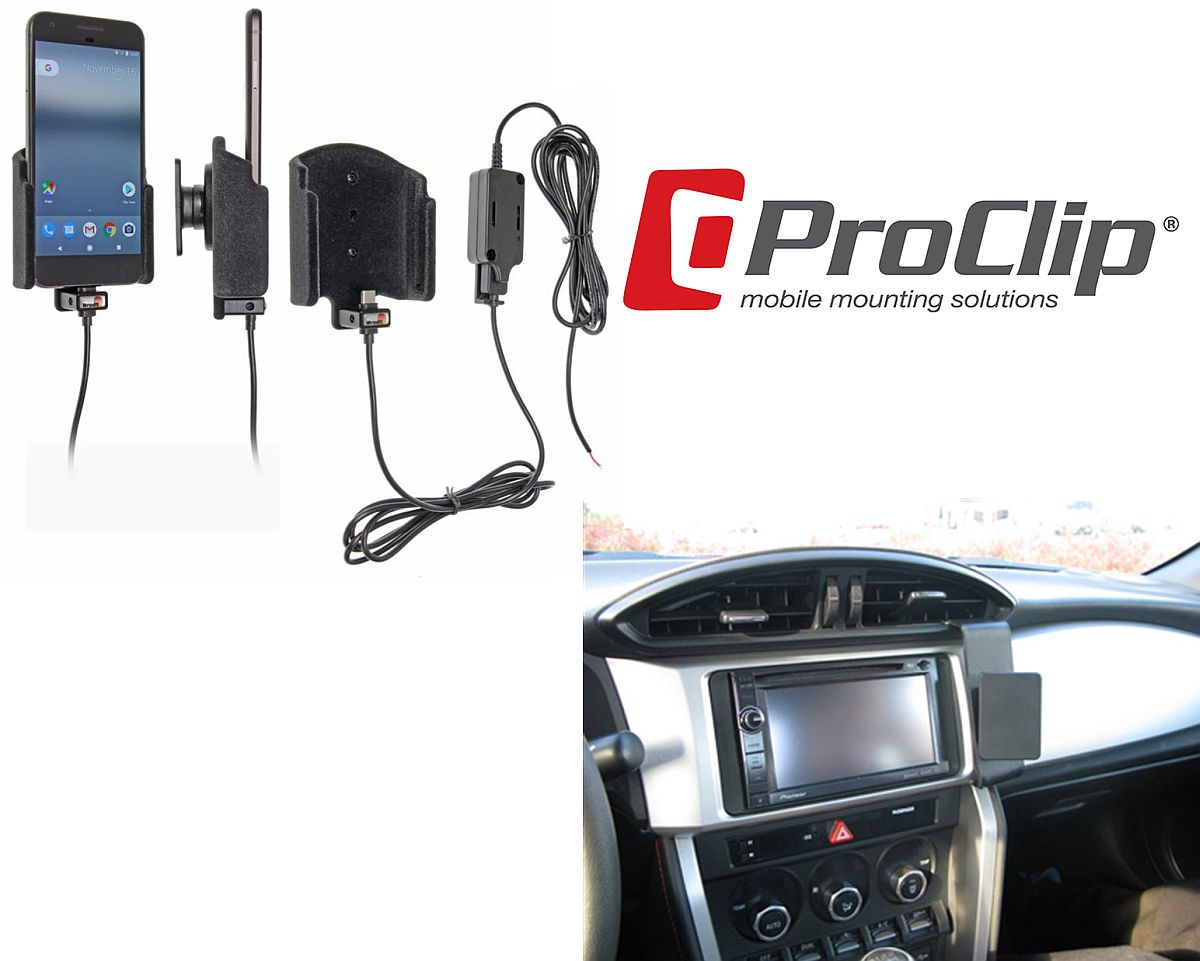
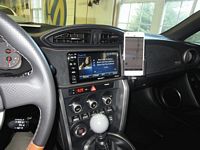
ProClip phone mount installed, consisting of:
- Google Pixel Padded Charging Holder for Hard Wired Installation (P/N 527923)- Installation Instructions HERE
- Scion FR-S 2012-2016 ProClip Angled Mount (P/N 854812)- Installation Instructions HERE
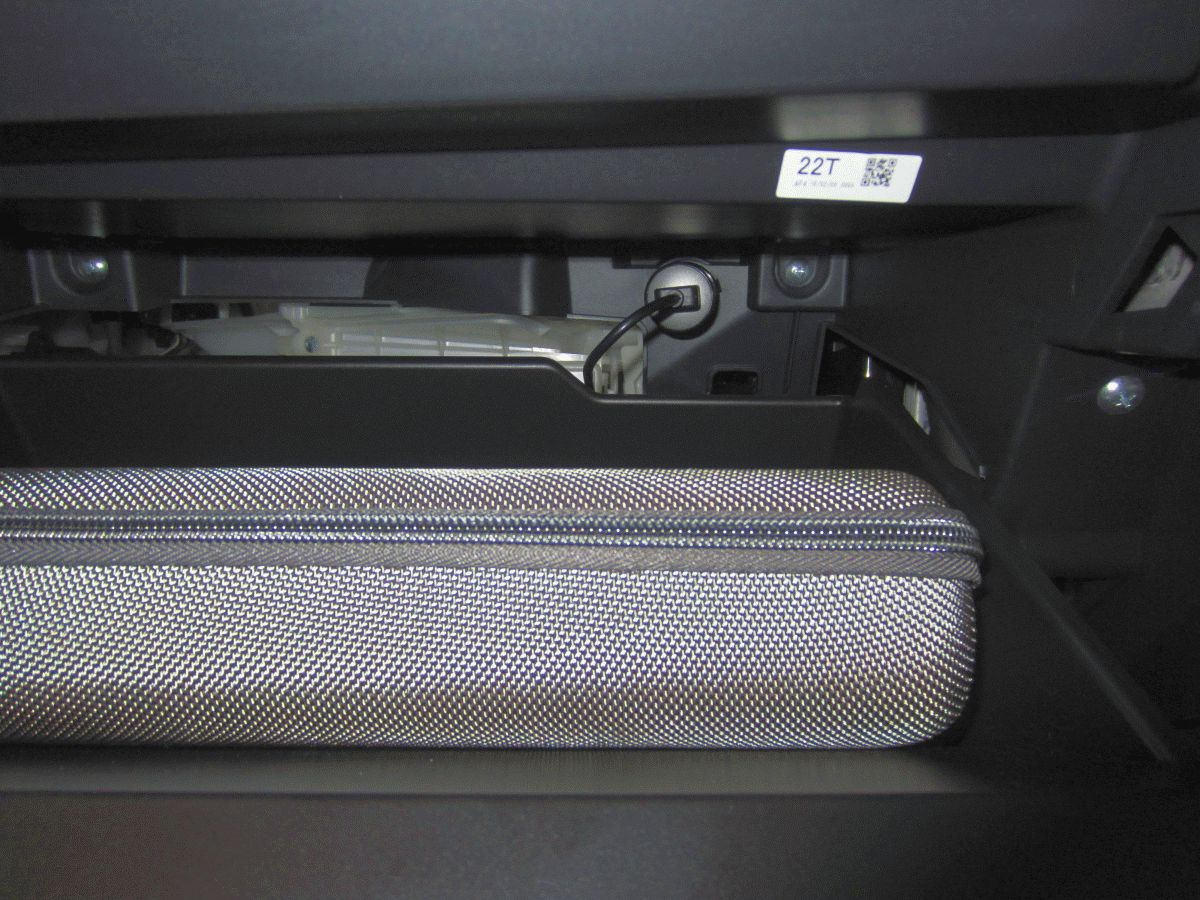
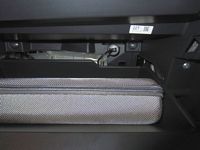
For now, I decided it was easier to use the existing 12v socket in the glovebox than to hardwire the phone adapter.
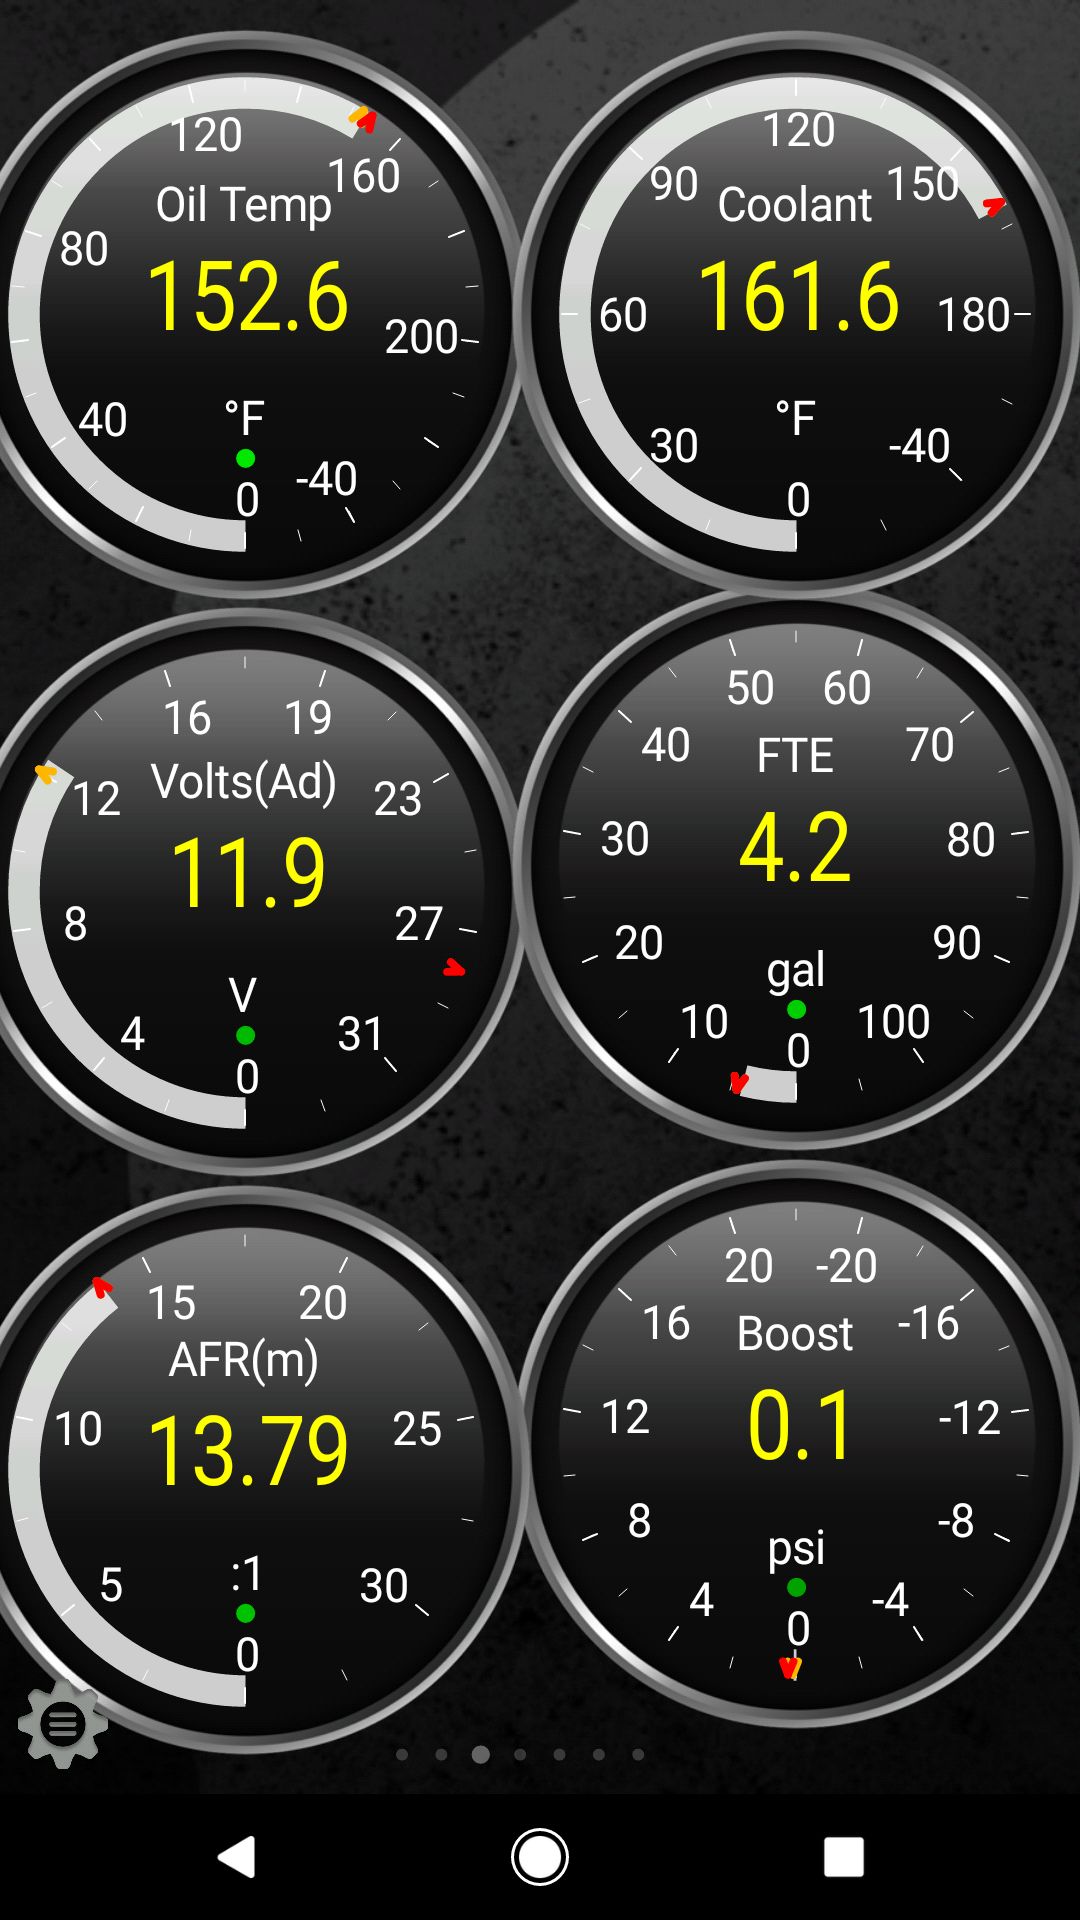
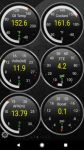
Also a value add for this mount, using the Torque app with an OBDII Bluetooth Adapter


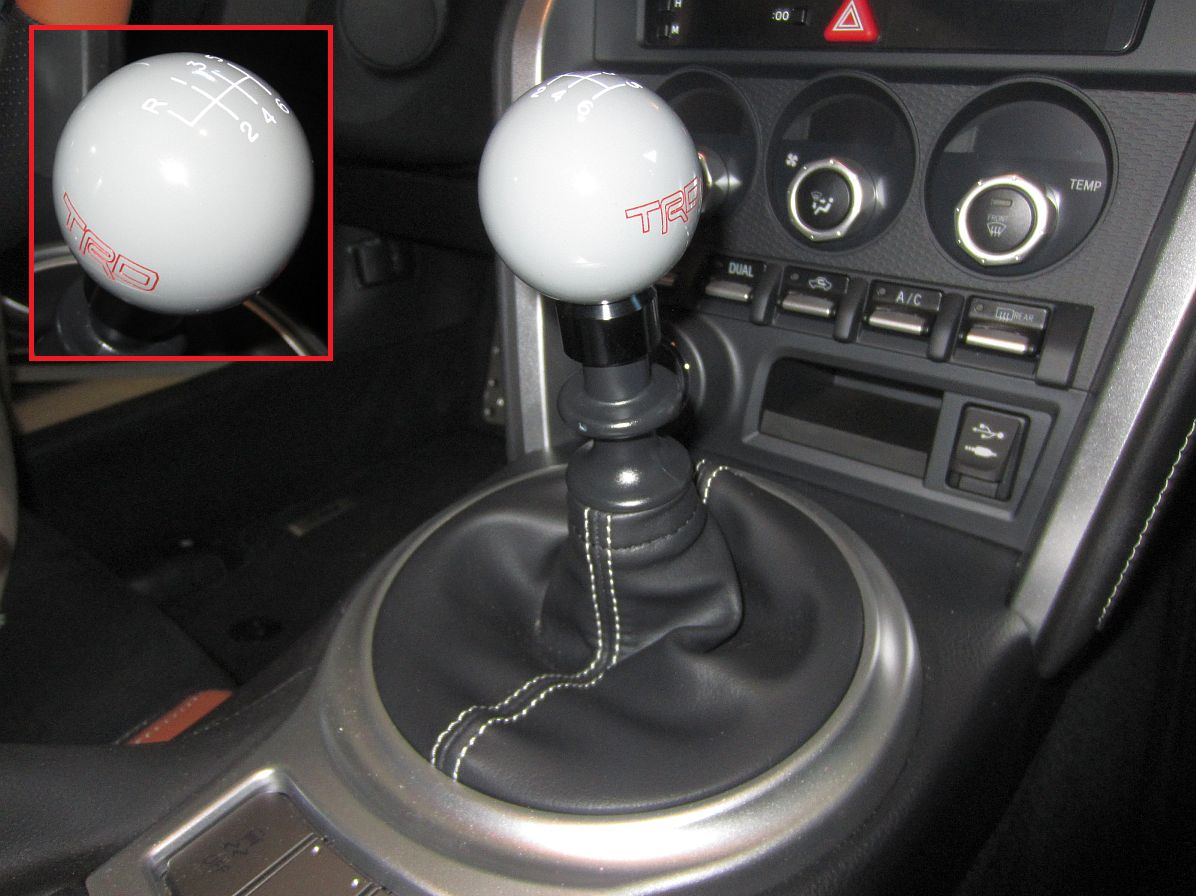
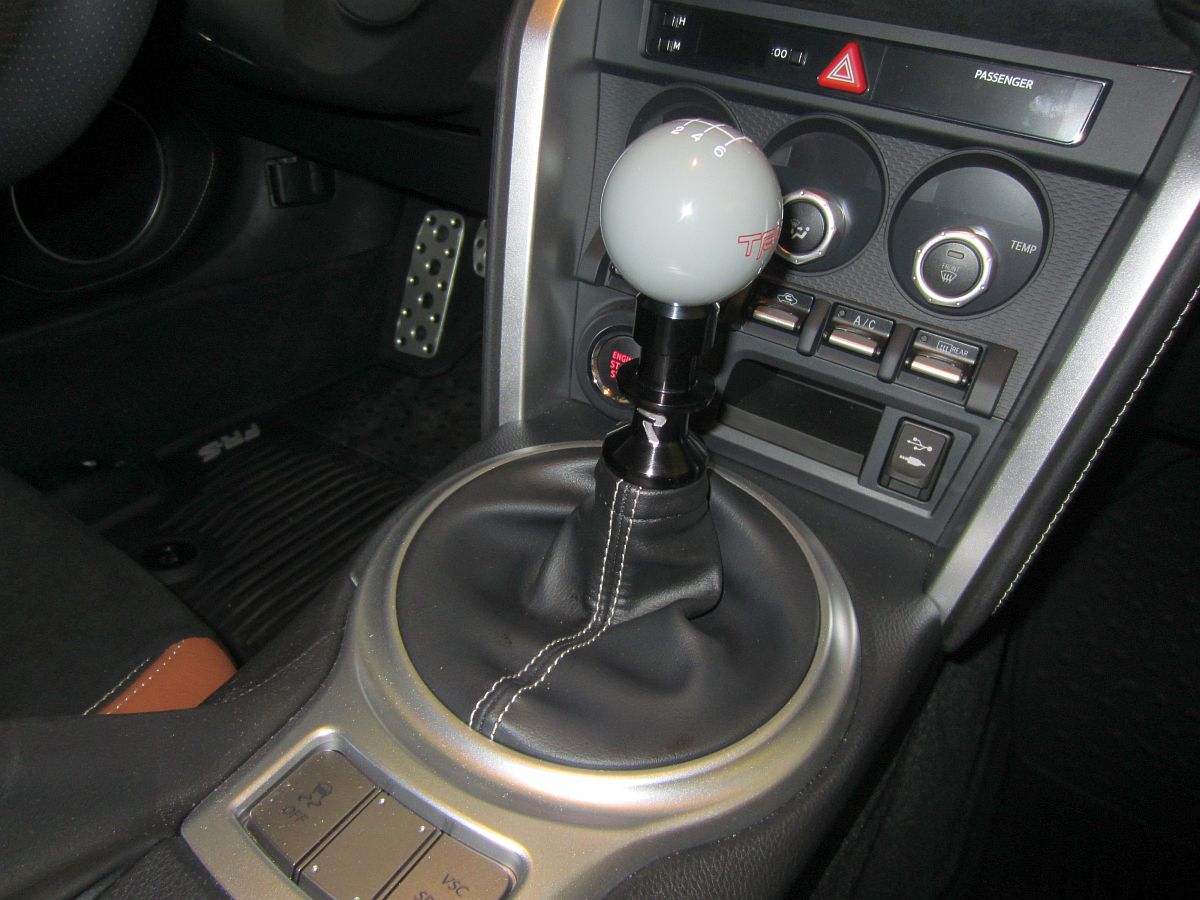
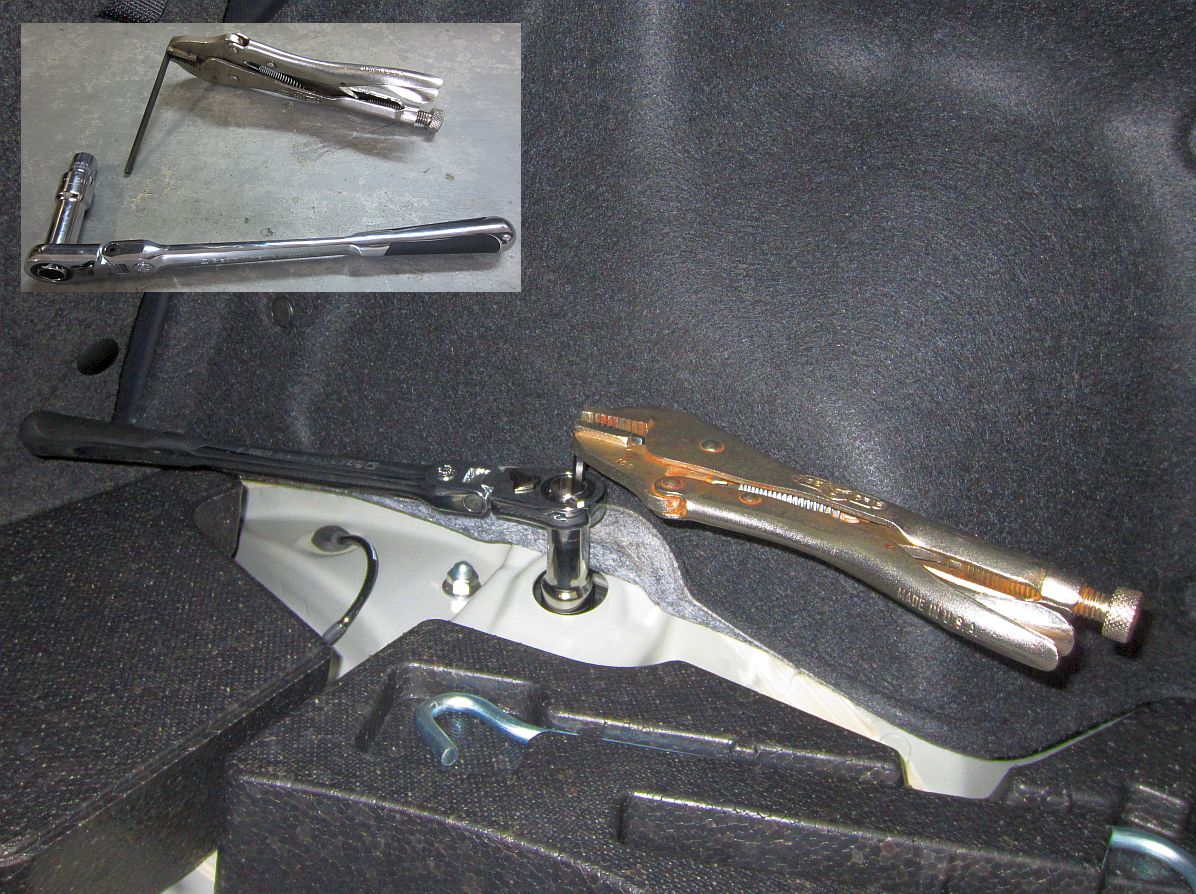
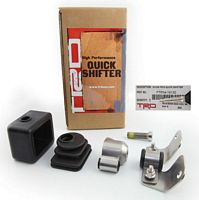
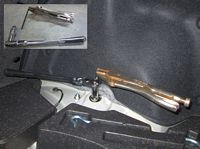
My son installed a KartBoy short shifter in his car and I opted to install his hand-me-down TRD Quick Shifter
Installation instructions HERE. The biggest complaint and the reason my son replaced his is due to the hex bolt loosening and causing the shifter to malfunction, cleaning the bolt/threads and using red Loctite should resolve this. Some forum discussion on the TRD Quick Shifter HERE and HERE.
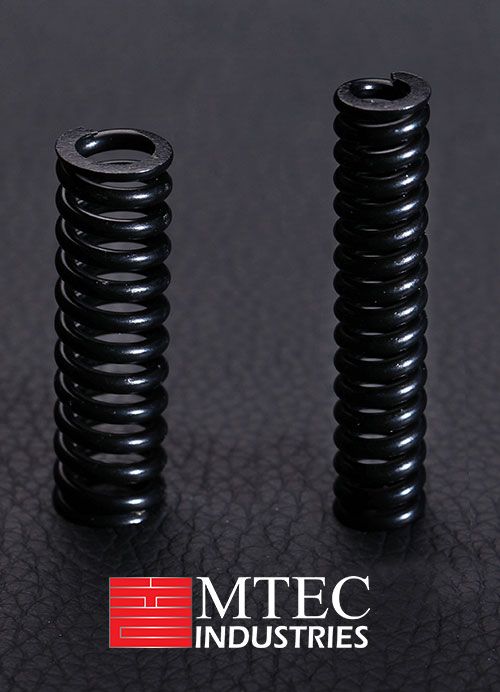
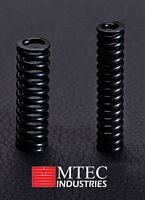
I also thought it was a good time to install the MTEC Industries shifter springs, installation video HERE. The MTEC springs are worth the effort, shifts almost telepathic now....I may at some point in the future install their clutch spring as well (installation instructions HERE).
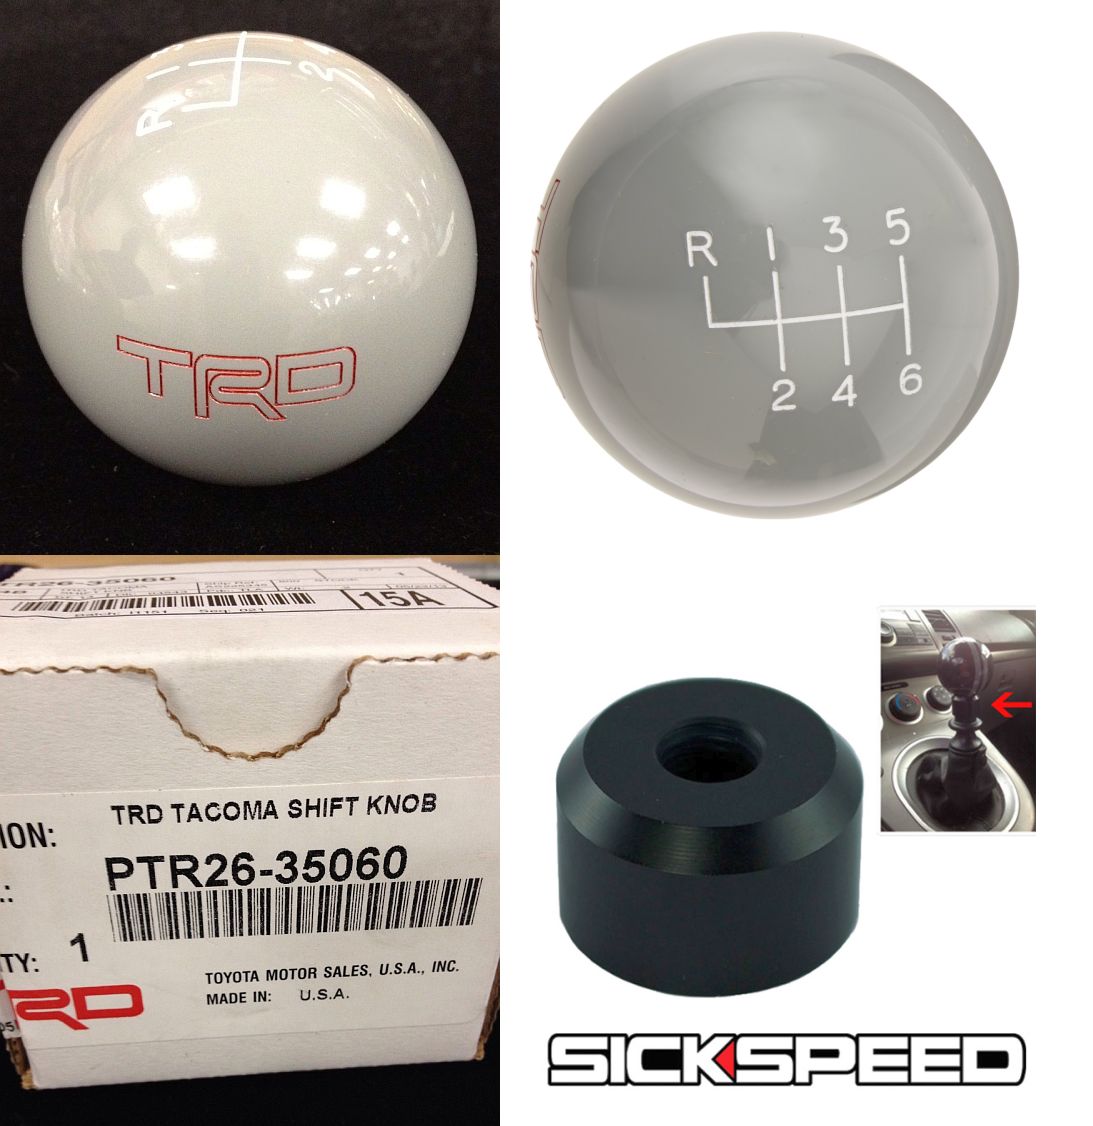
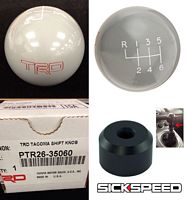
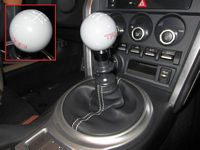
Of course with a TRD quick shifter you also need a TRD shift knob, this one is a Tacoma shift knob
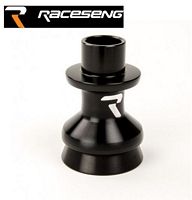
I later decided to add the Raceseng Reverse Lockout from FRSport, installation instructions HERE and installation video HERE. I ended up using one size smaller than the recommended 3/32 punch to remove the OE rollpin, 3/32 punch I had was just a bit tight....**DON'T FORGET TO PUT IT IN REVERSE BEFORE REMOVING THE PUNCH AND OE LOCKOUT**. I had some leftover swaybar bushing grease I applied to the plastic piece prior to installing the new lockout.
And, short shifters accentuate the already bad cold performance of the transmission, the reason the FRS/BRZ has this issue is HERE.
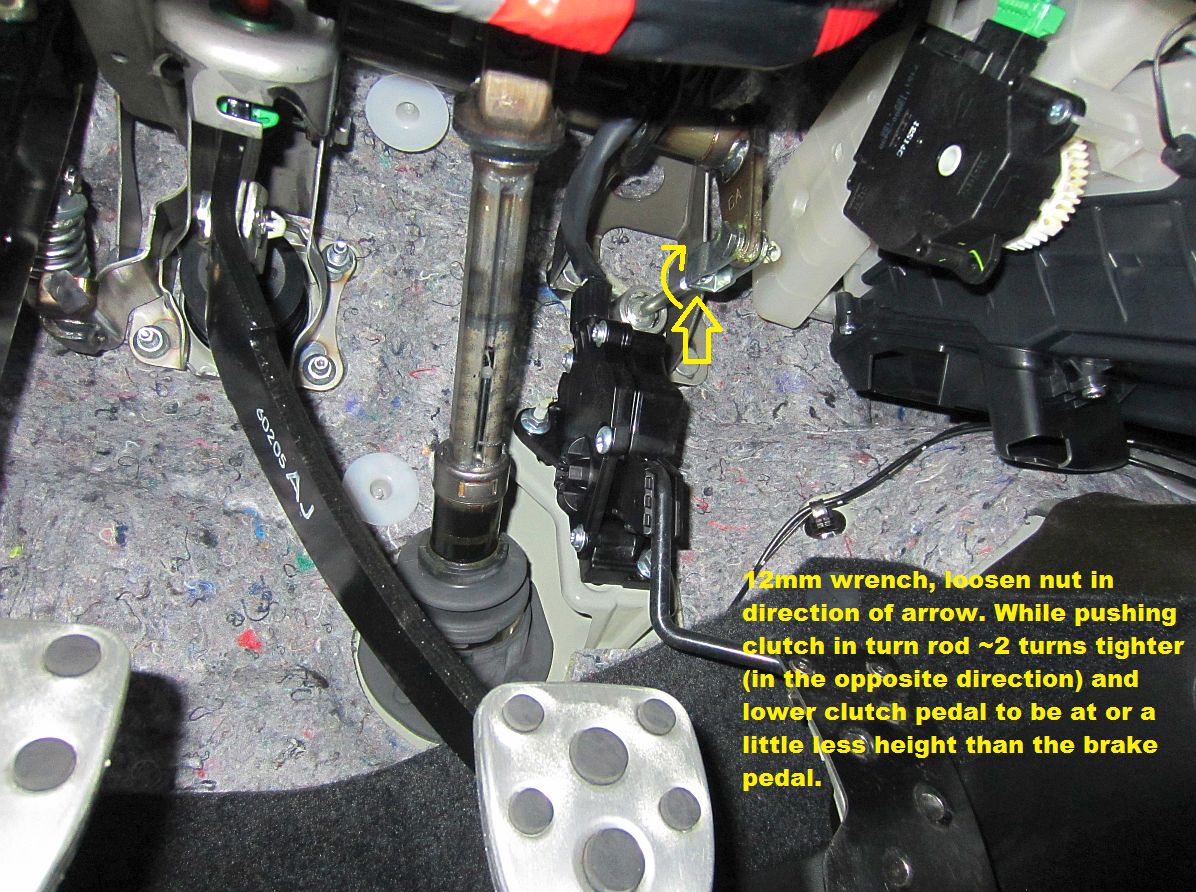
One option for clutch feel and throwout bearing longevity is to adjust the clutch pedal, forum thread HERE. Some also opt to remove the helper spring for the clutch pedal, the spring makes the clutch pedal light but also hard to feel the engagement/release points, forum thread HERE.

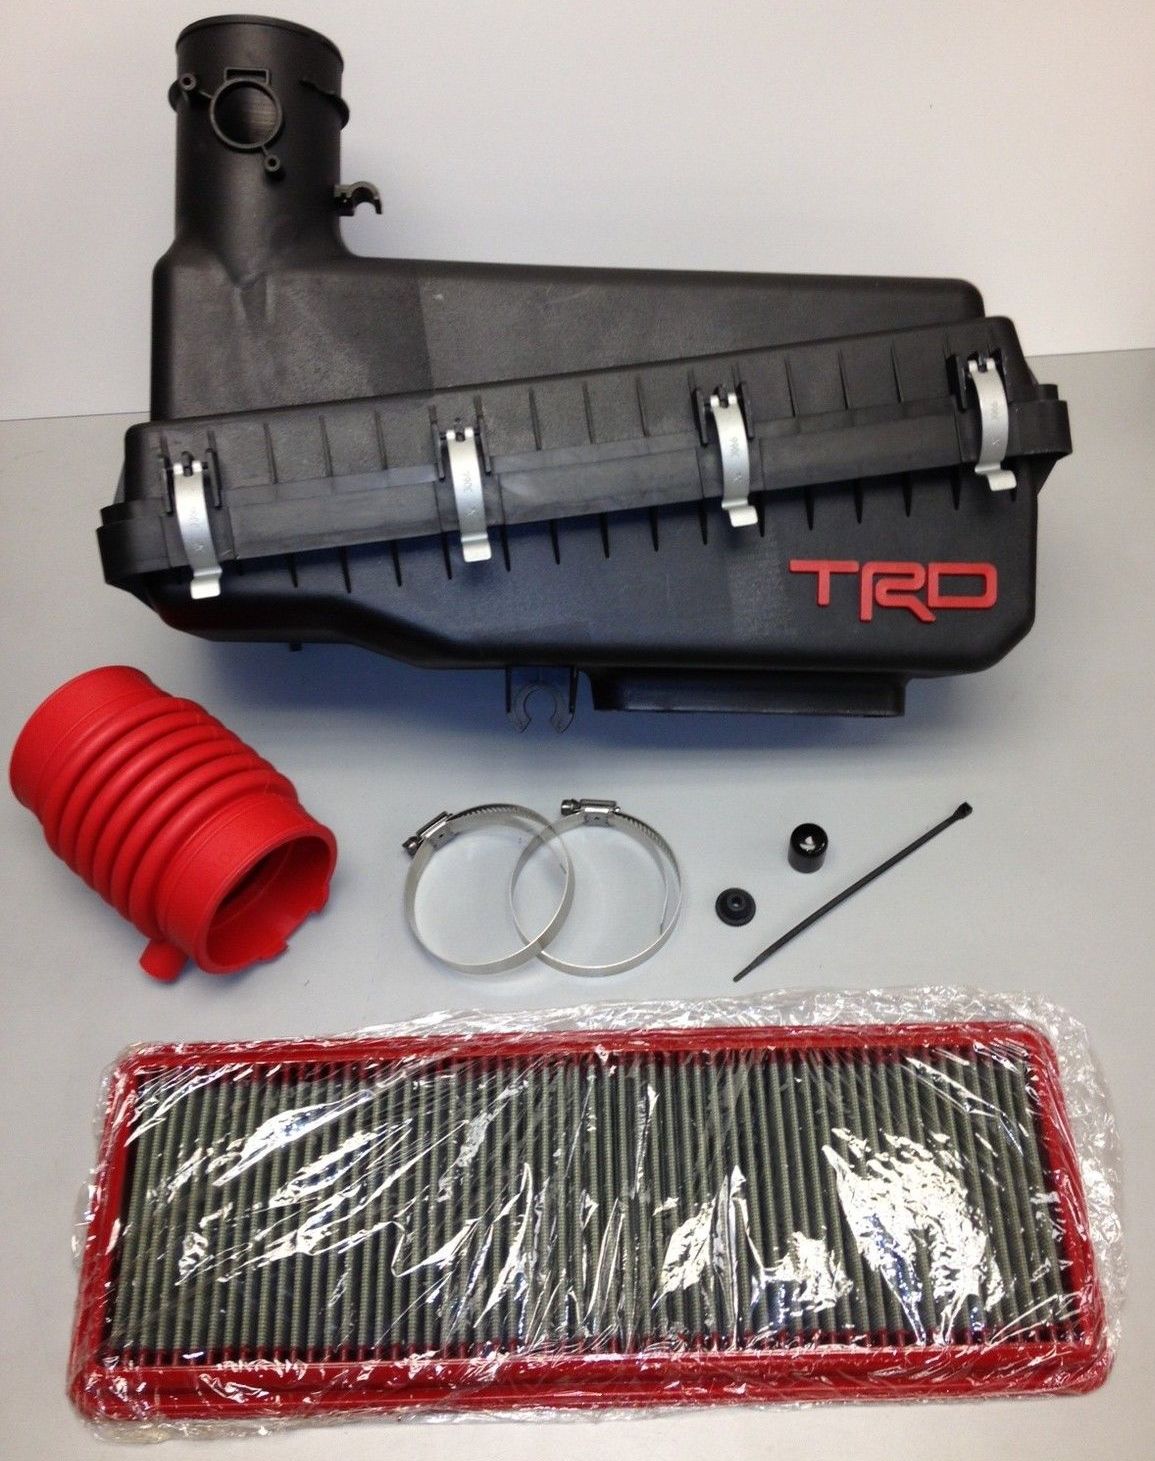
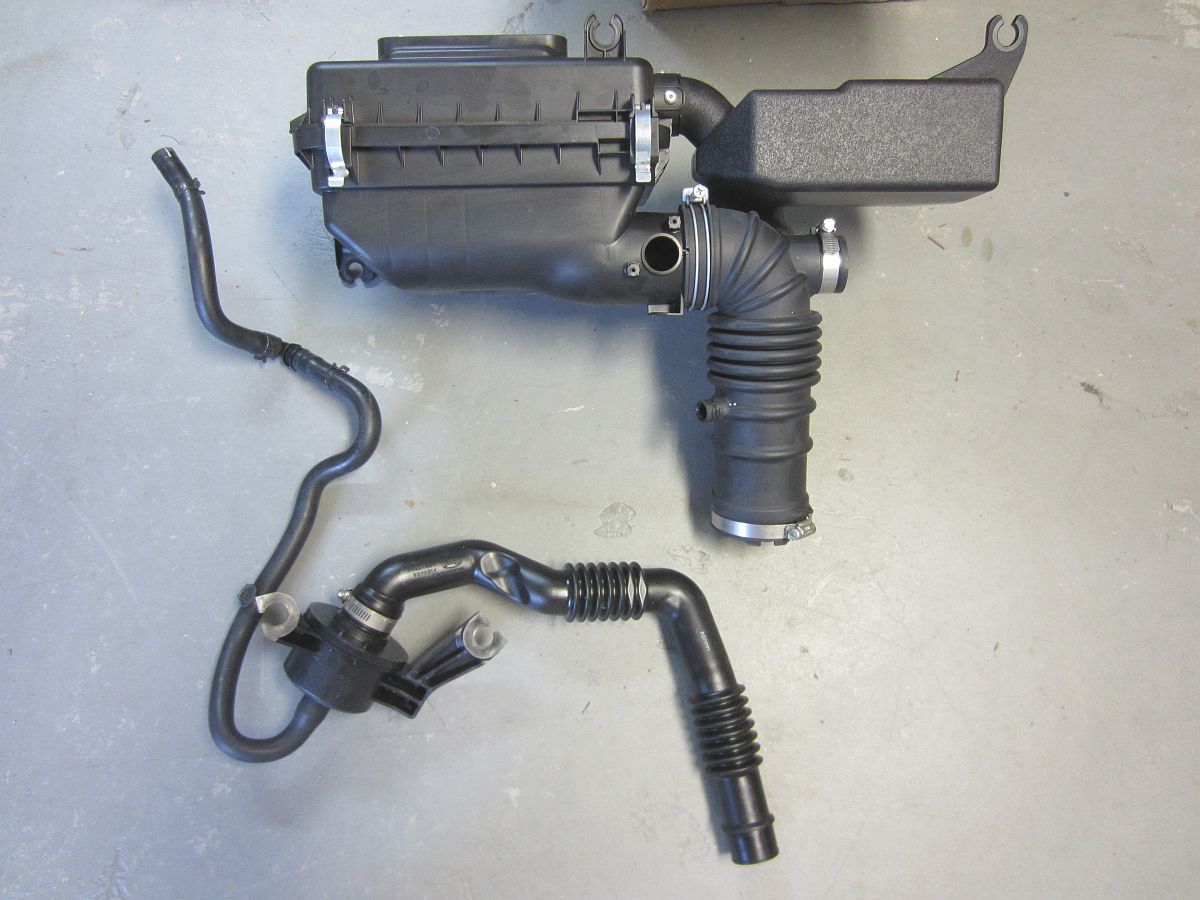
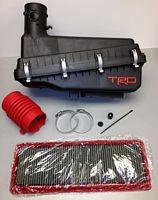
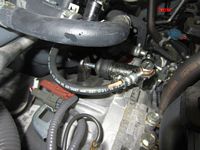
TRD Performance Air Intake (P/N PTR03-18130) from Amazon
DSport tested the TRD Intake HERE and HERE, video HERE. F1point4 posted a quick look review HERE.
I originally purchased this from Peruzzi Toyota (dba Toyota Parts House), they canceled my order without any explanation and raised the price- STAY FAR AWAY FROM THESE GUYS!!
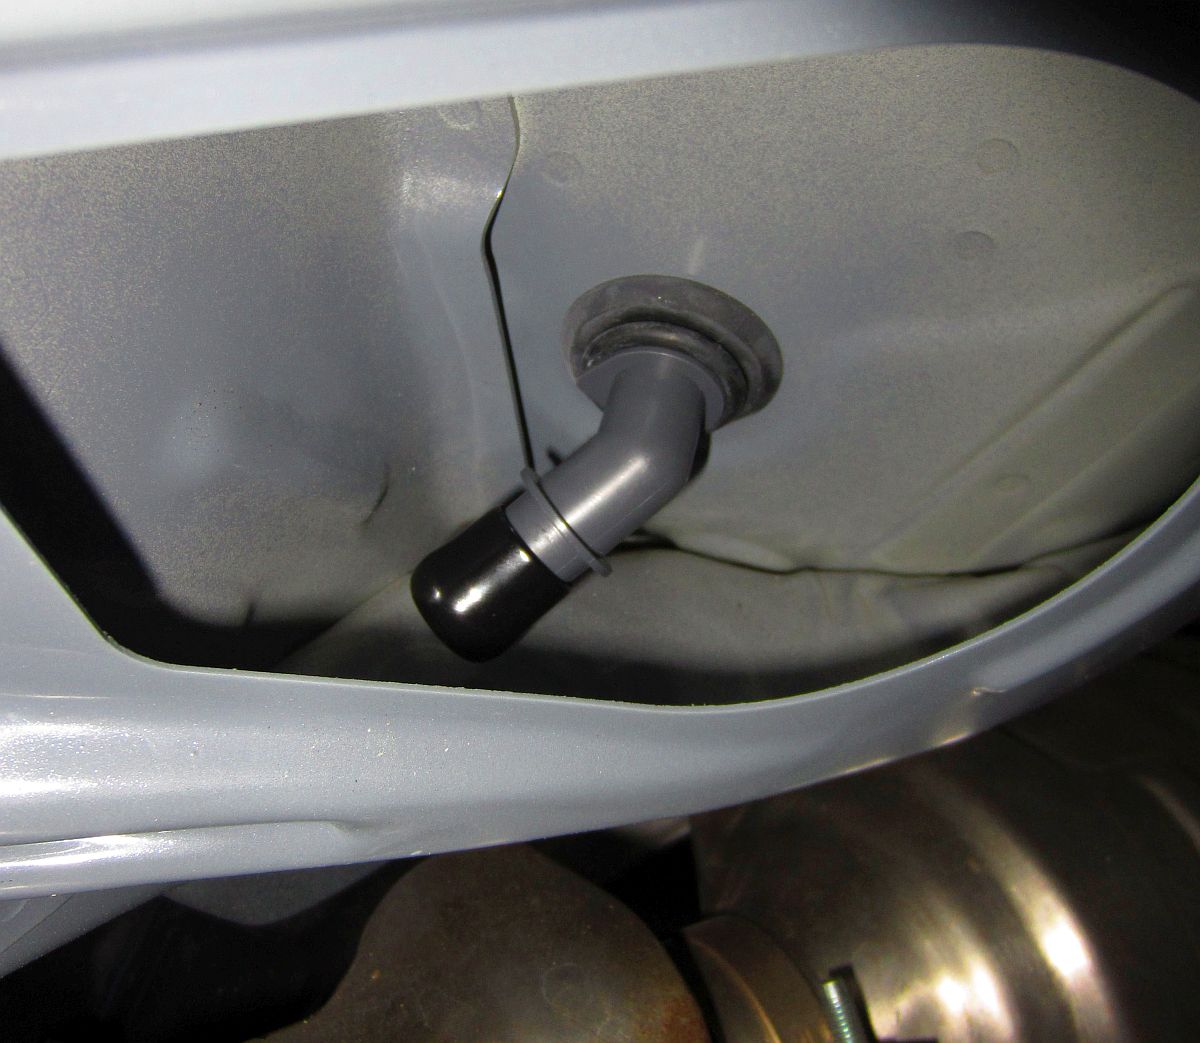
EASY way to remove/install the grommets from factory airbox is to push out the metal insert, remove grommet, install grommet, push metal insert back in. It was also a bit tough to remove the sound generator tube hose at the point suggested in the instructions so I removed it from the firewall and capped it there....why keep it?
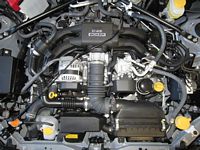
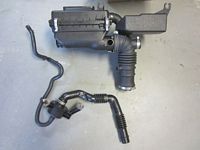

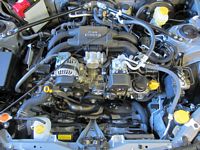
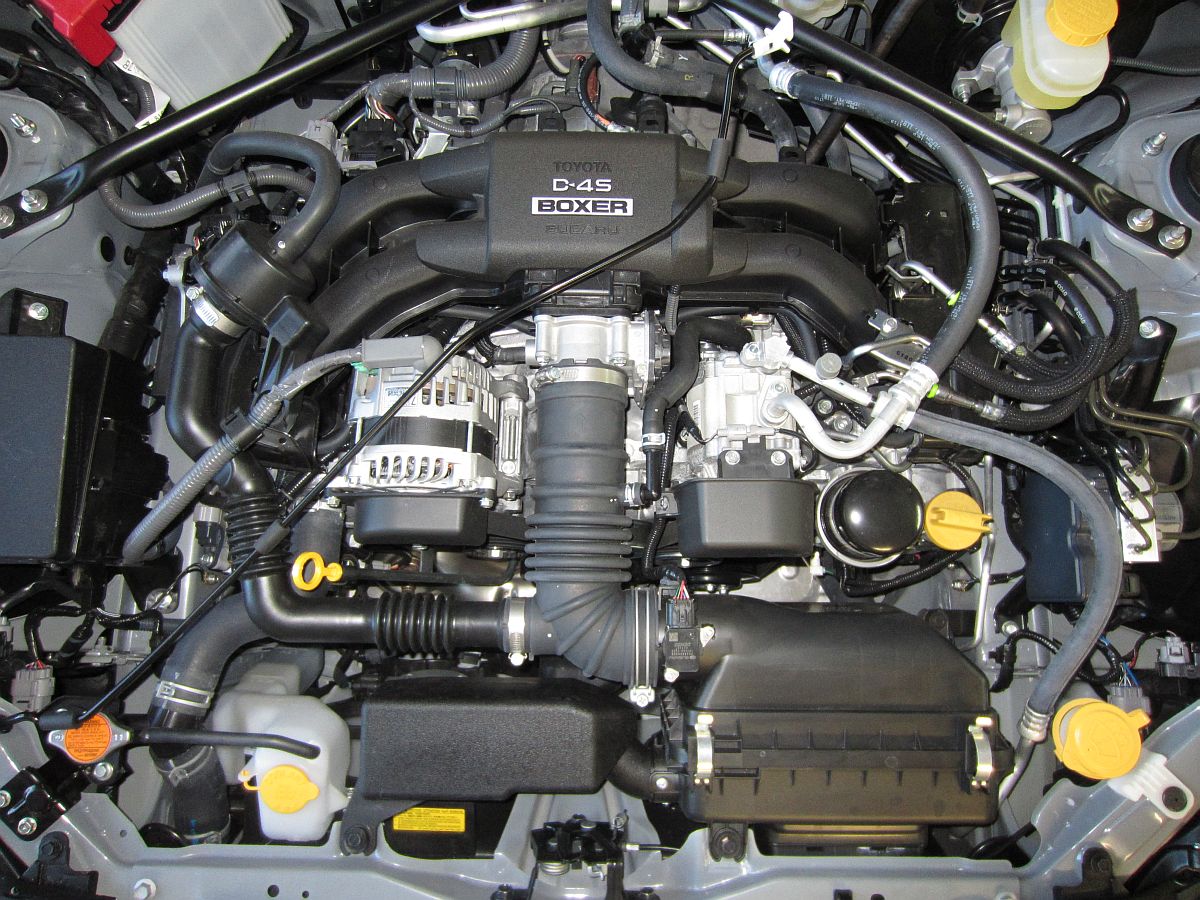
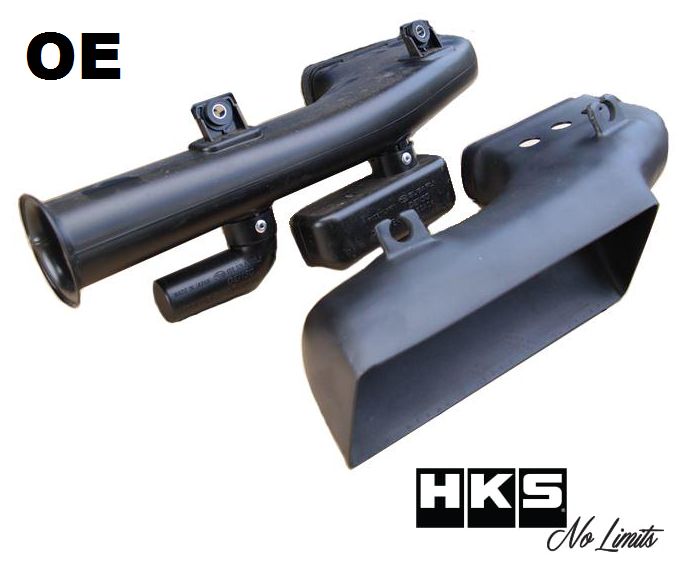
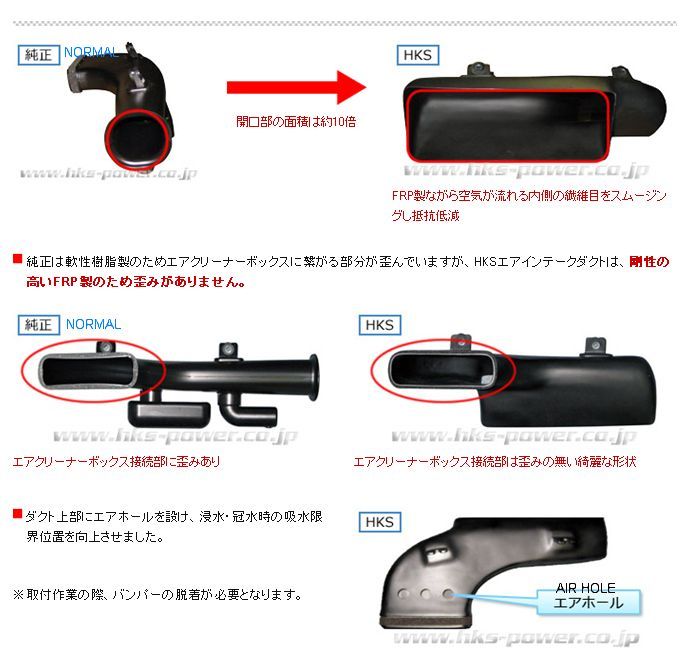
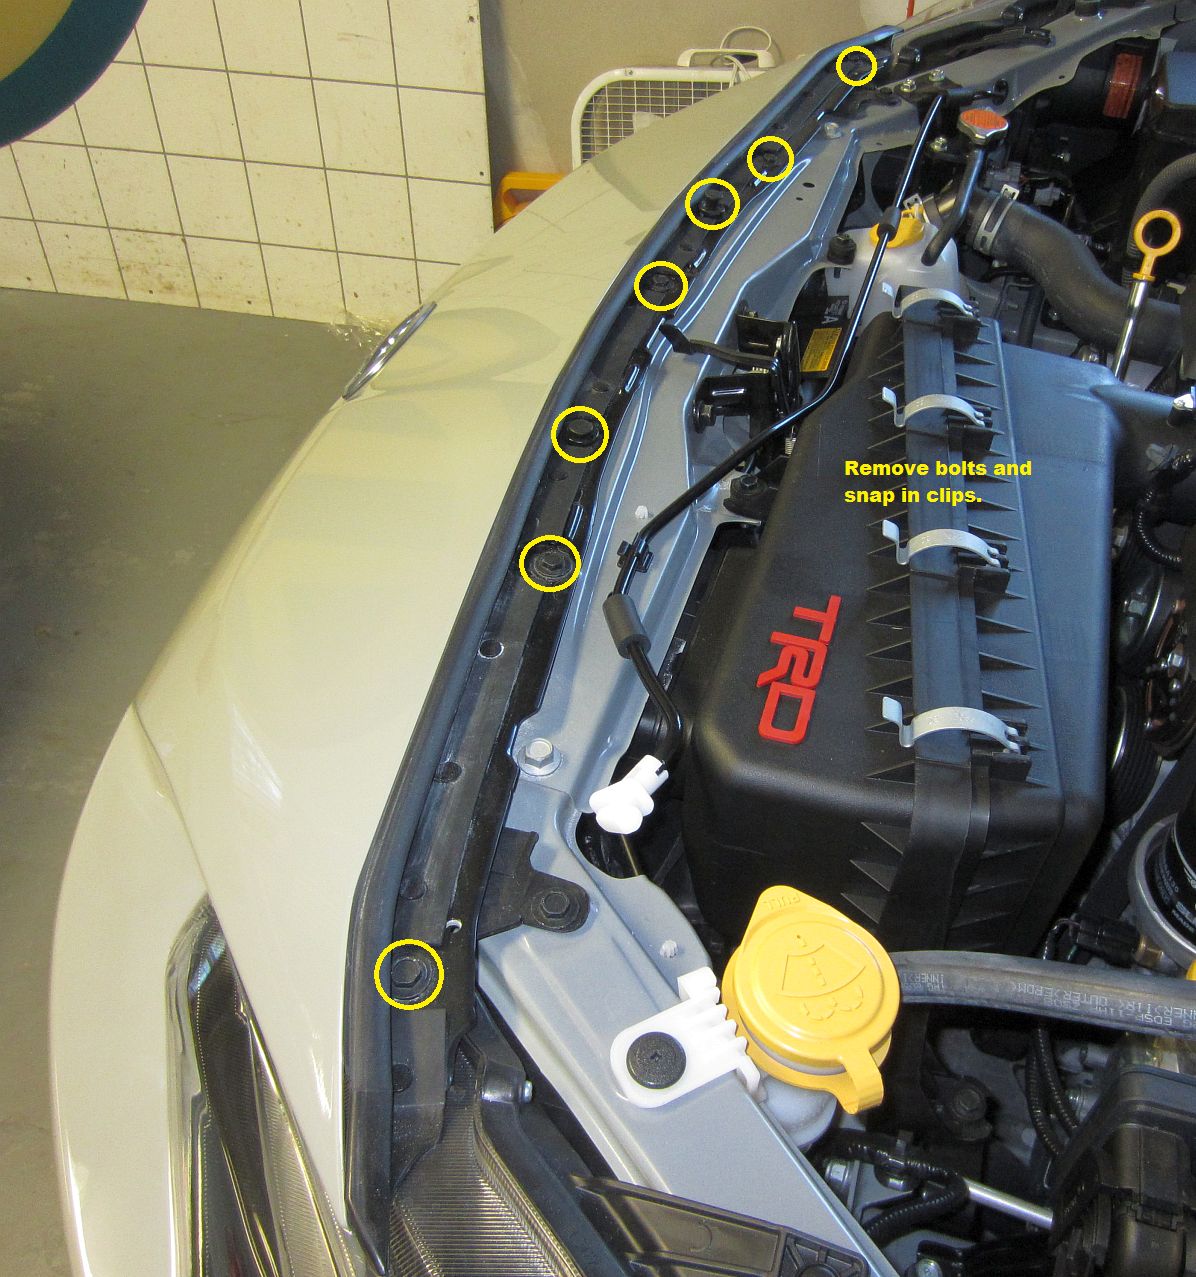
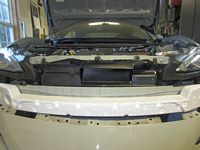
HKS Air Intake Duct (P/N 70999-AT001) from Enjuku Racing installed- release information HERE, installation video HERE.
Some forum discussion on the HKS Air Intake Duct is HERE and on modifying the OE air intake HERE.
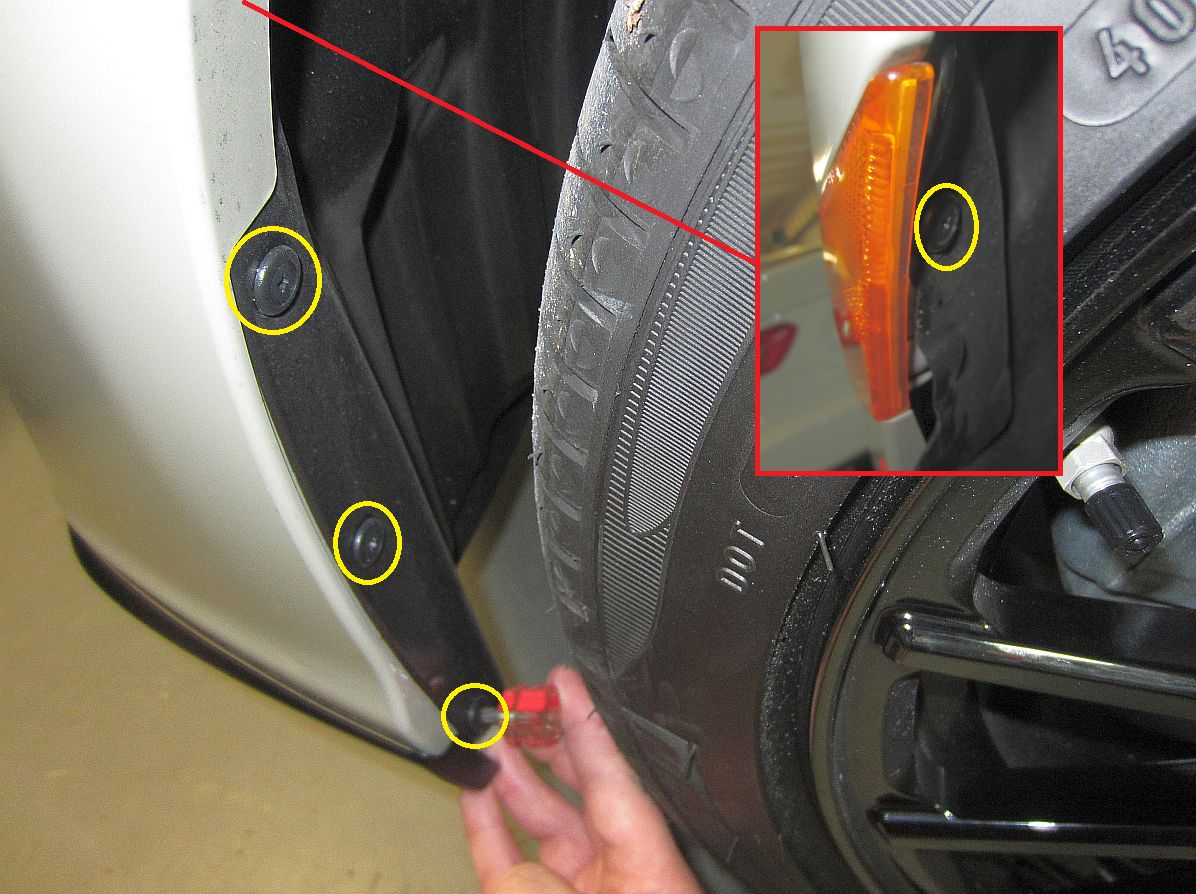
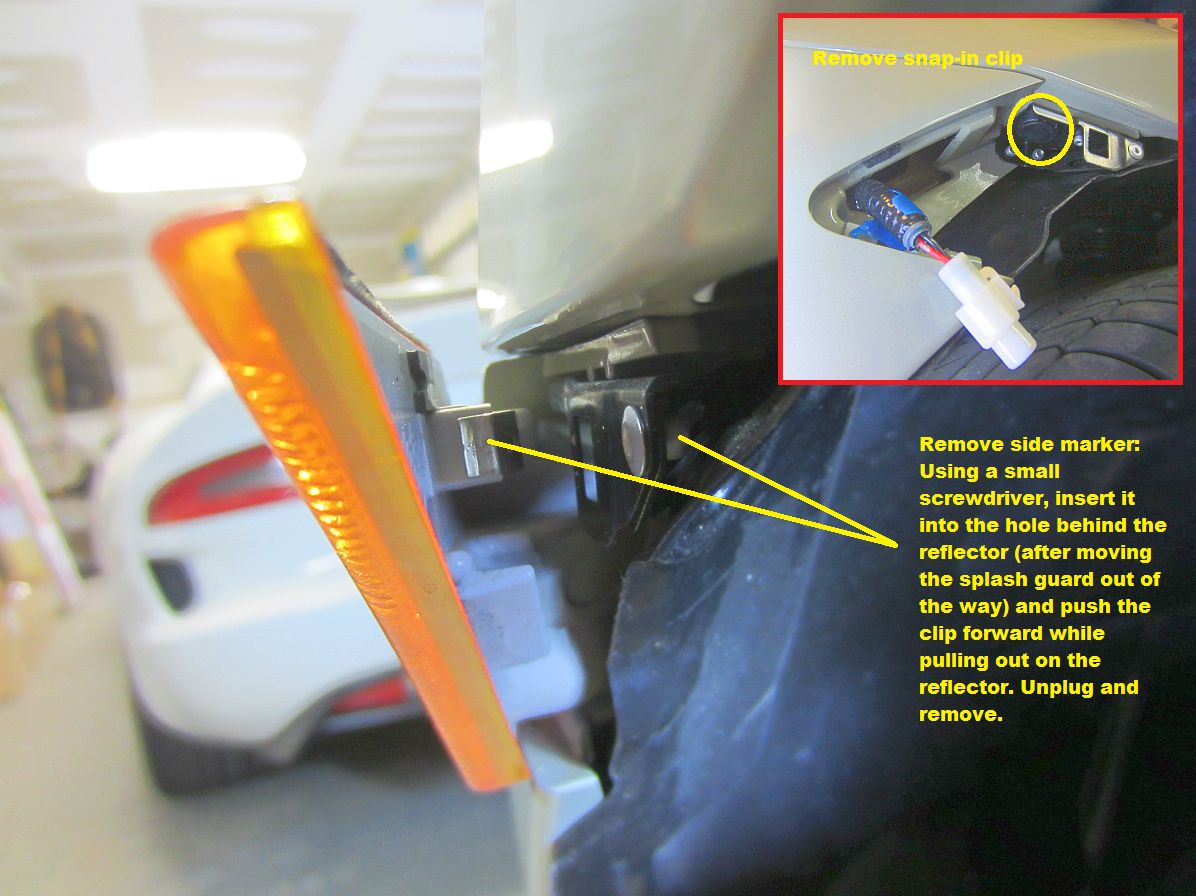
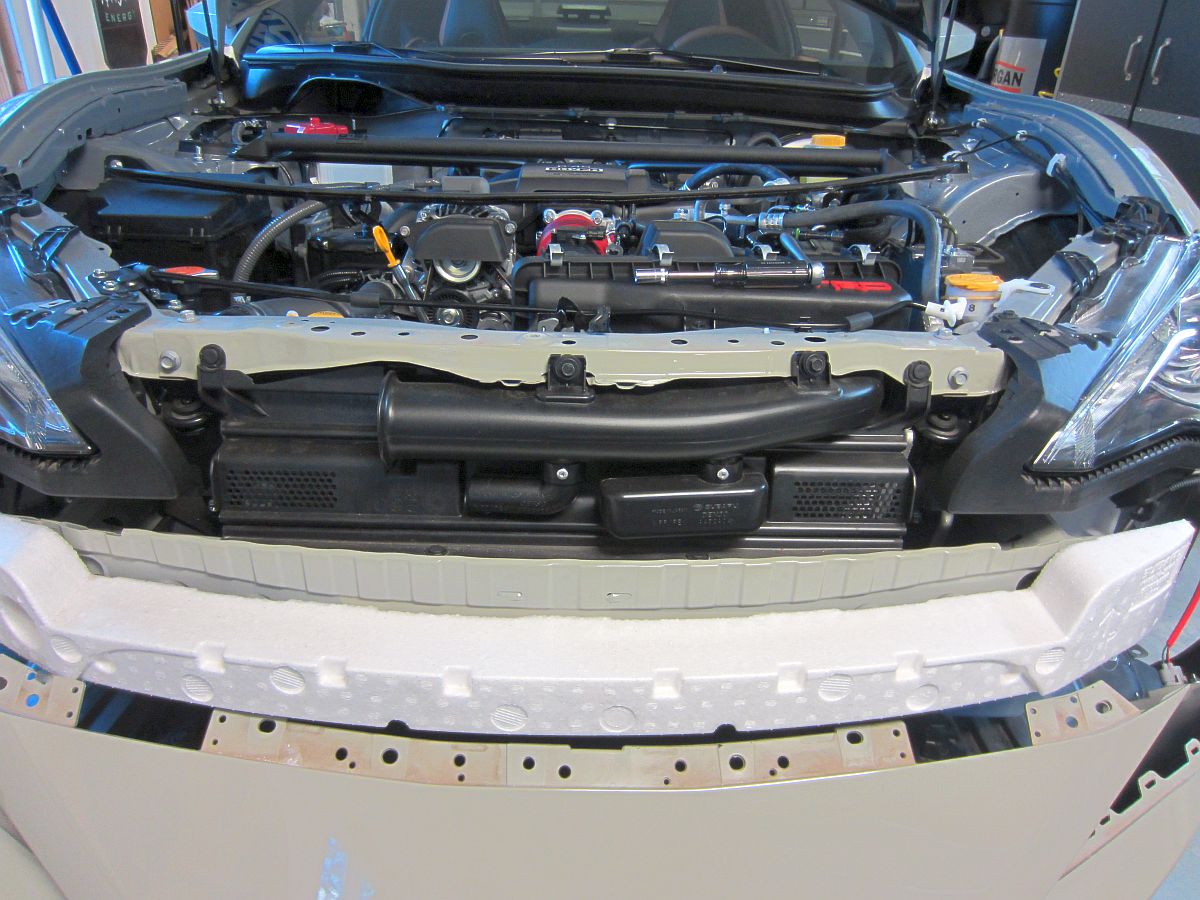
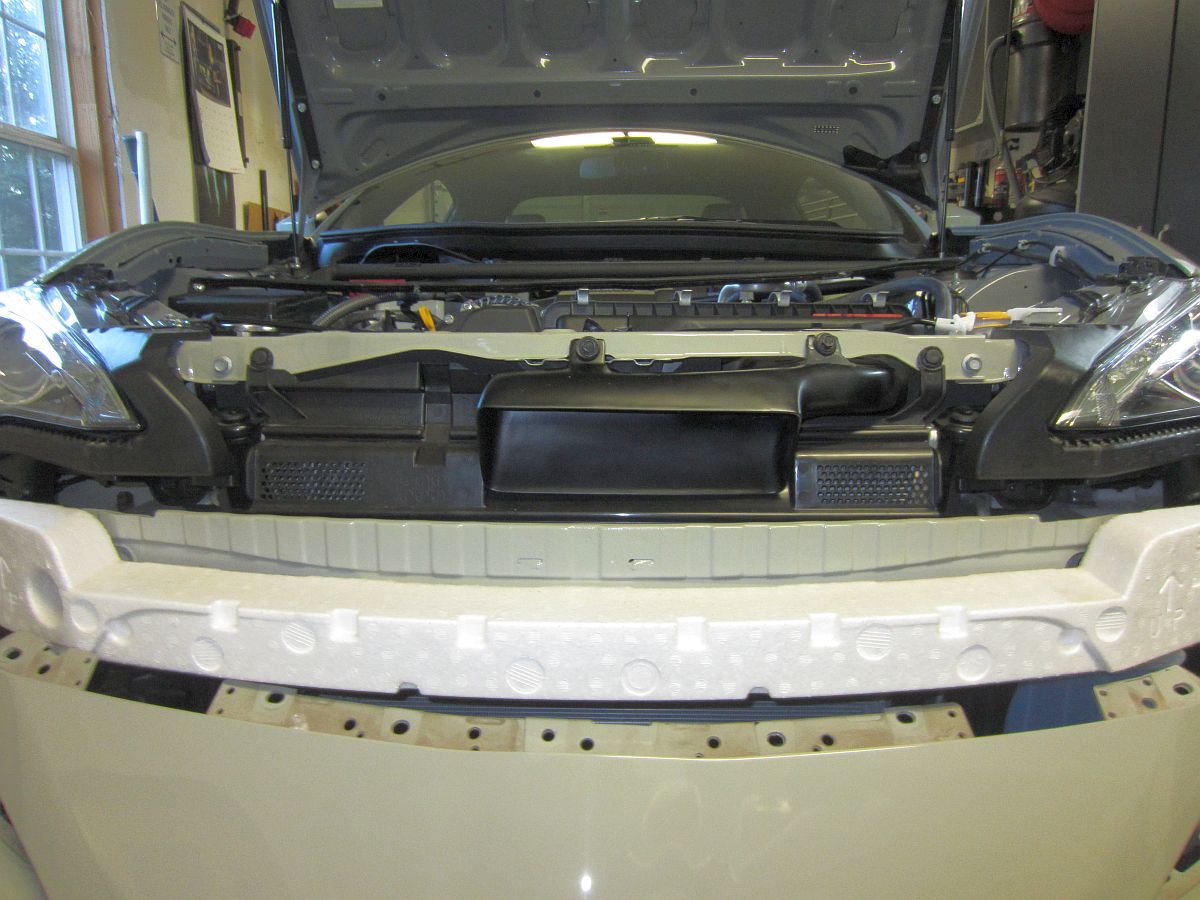
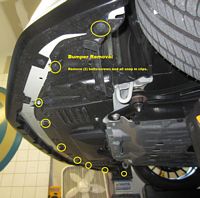
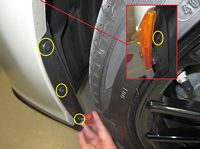
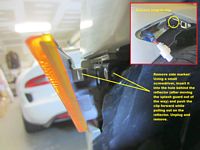
Remove the front bumper (remove ALL bolts/clips and pull on either side of bumper to release/remove), 10mm socket to remove (2) bolts for OE air intake and pull out, remove both grommets, reinstall grommets on HKS intake, insert HKS intake into air filter housing, and bolt in place.


Before:After:
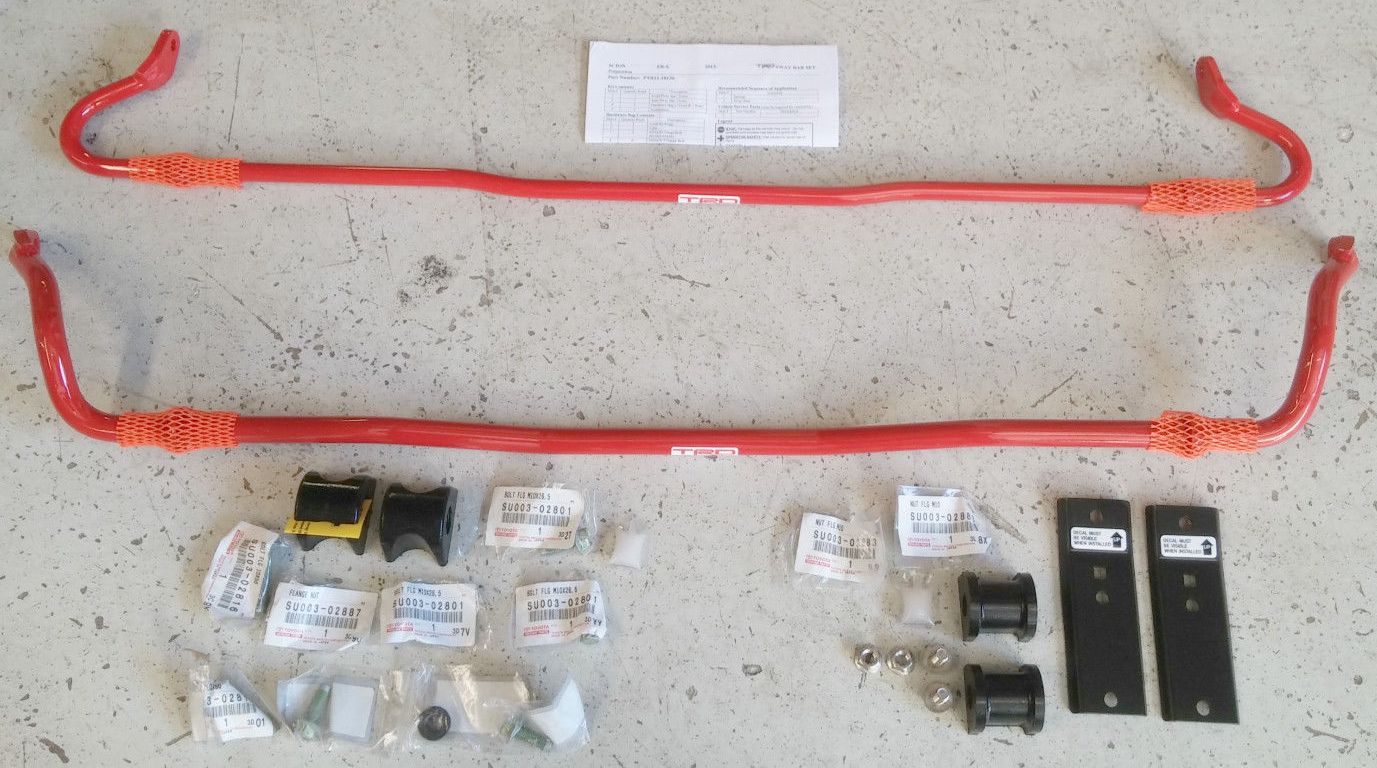
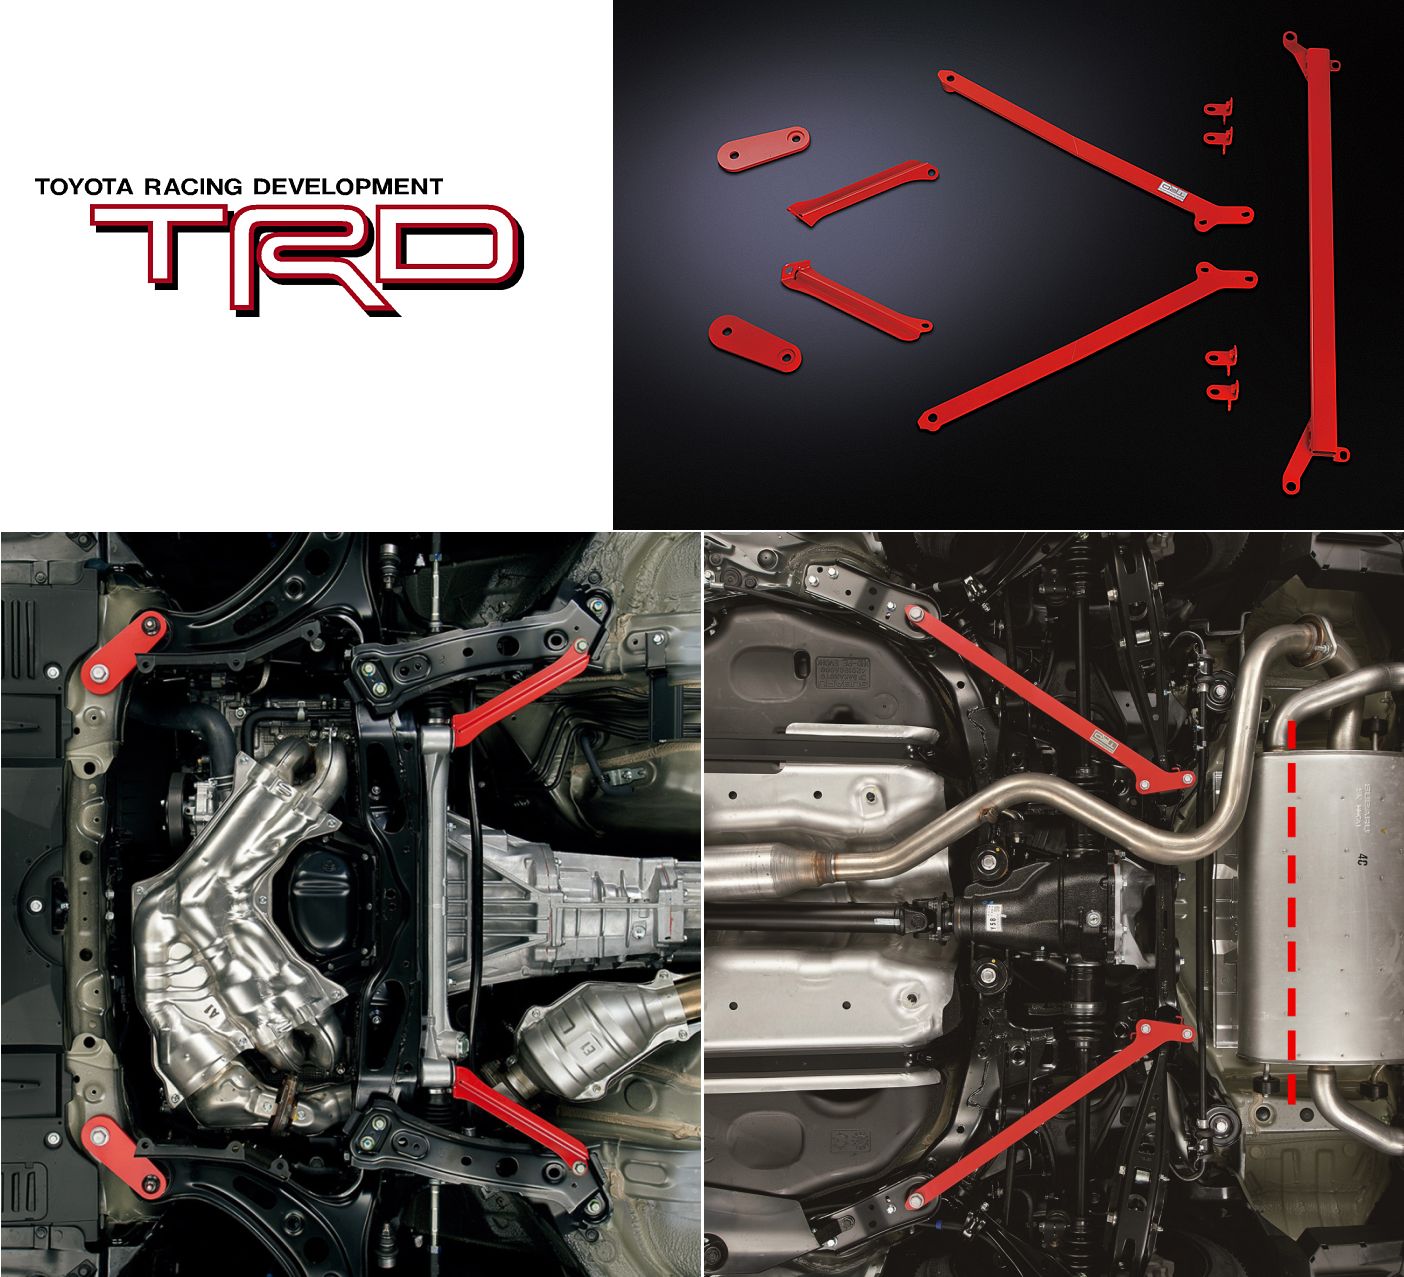
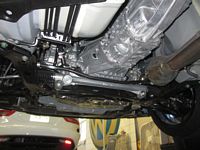
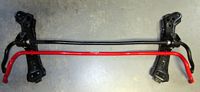
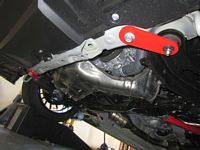
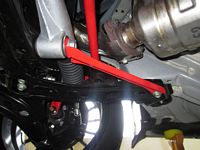
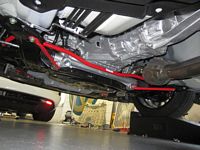
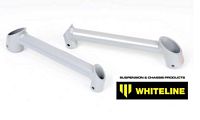
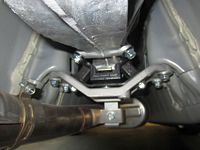
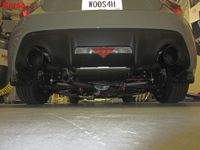
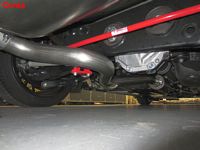
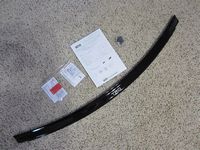
TRD Sway Bar Set (P/N PTR11-18130) from Sullivan Brothers Toyota Parts installed, Installation instructions HERE.
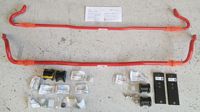
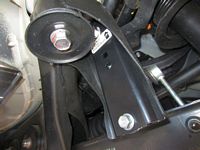
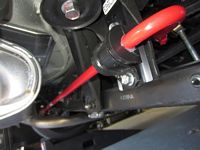
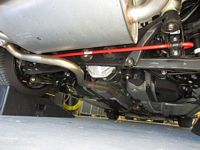
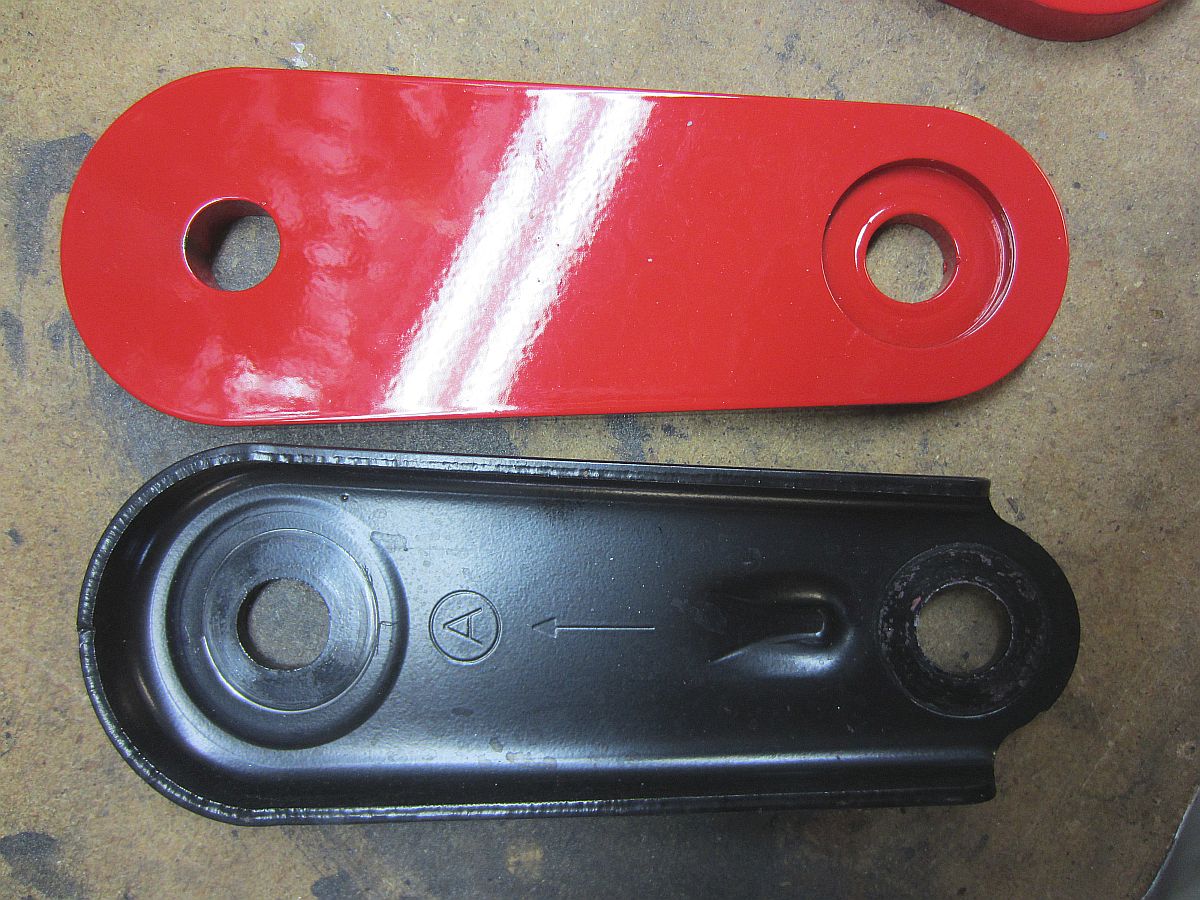
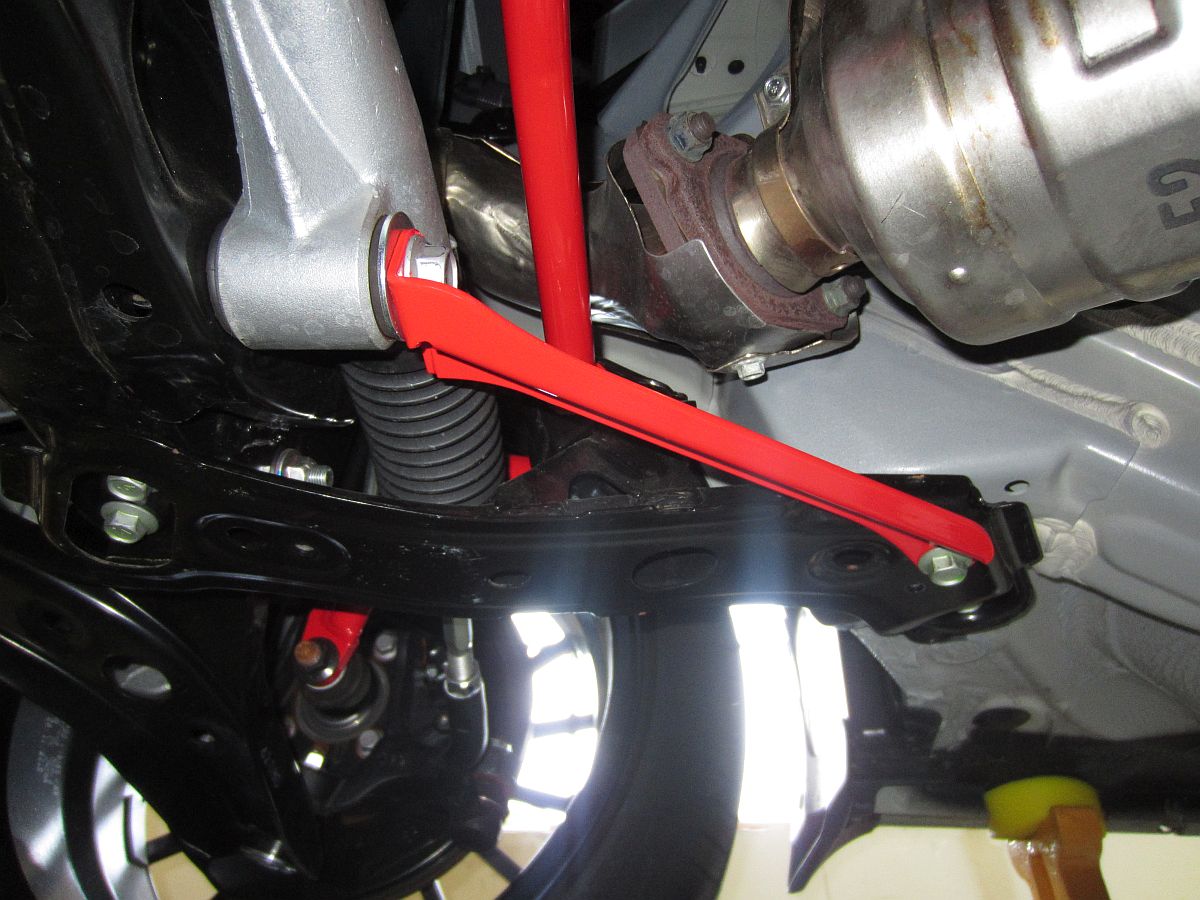
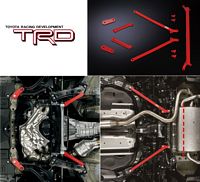
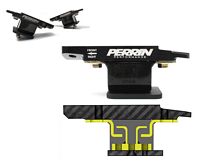
TRD Member Brace Set
The rear/bumper brace will most likely collect dust in the garage, US spec cars are built with a heavier/stronger rear bumper reinforcement compared to JDM cars.....and it would require some modifications to work for not a lot of ROI.

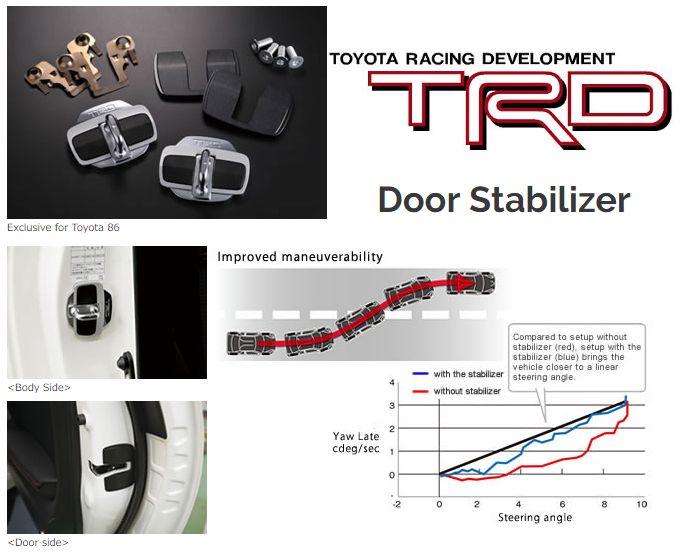
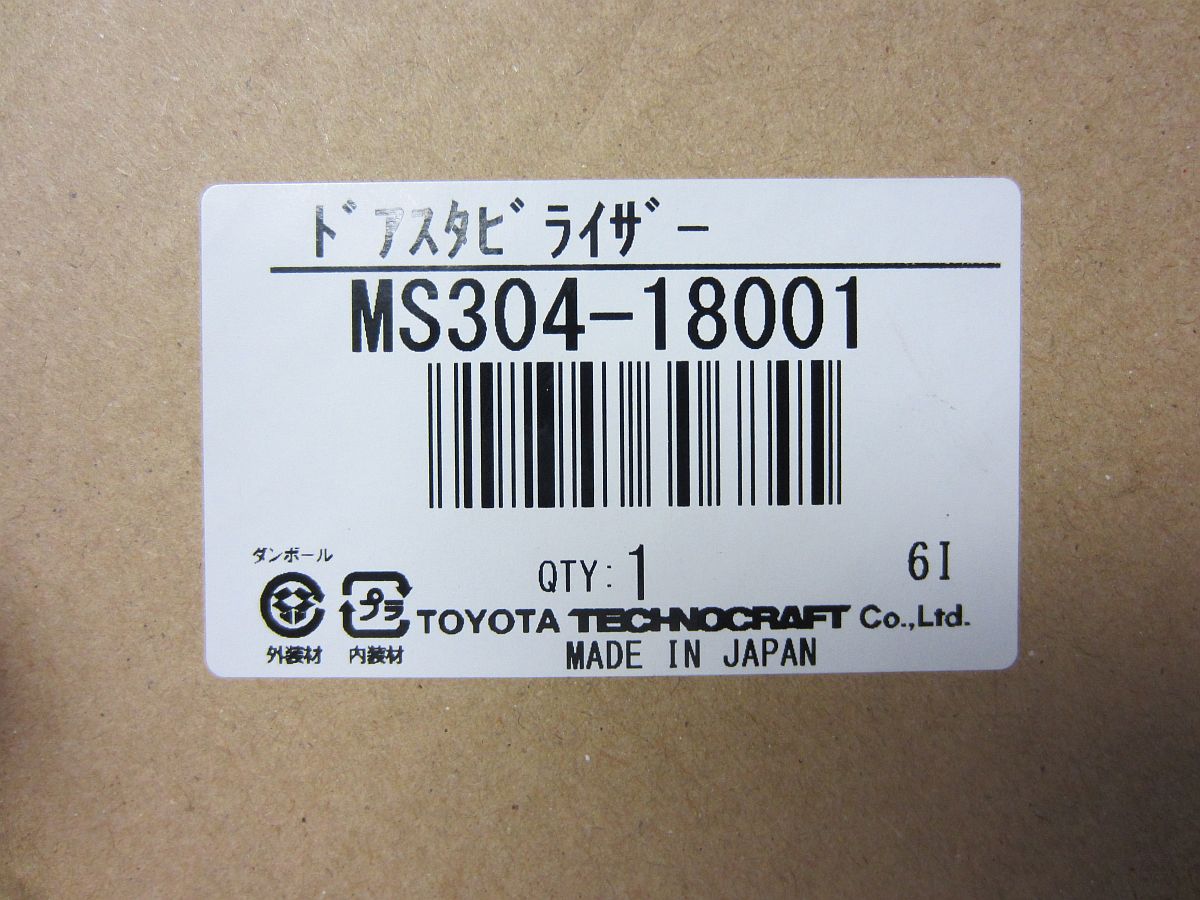
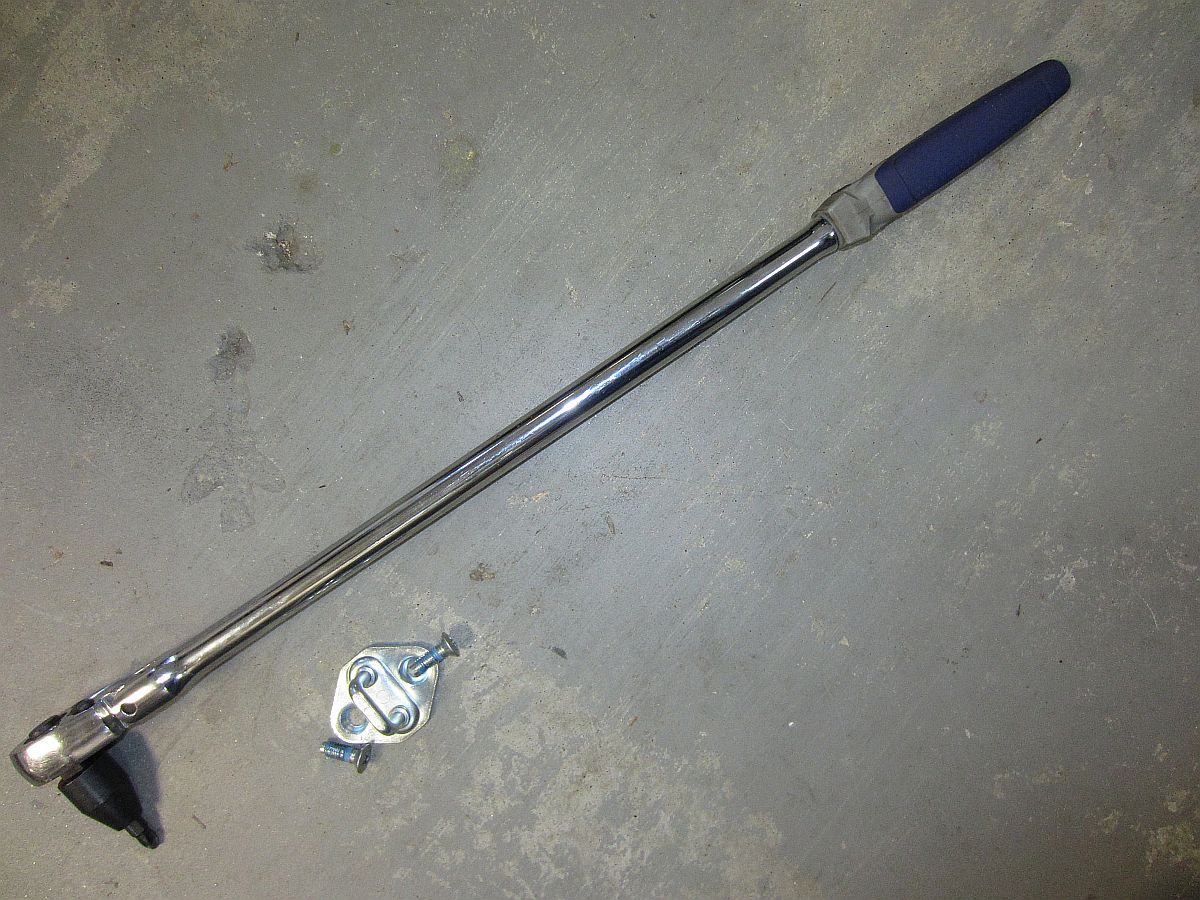
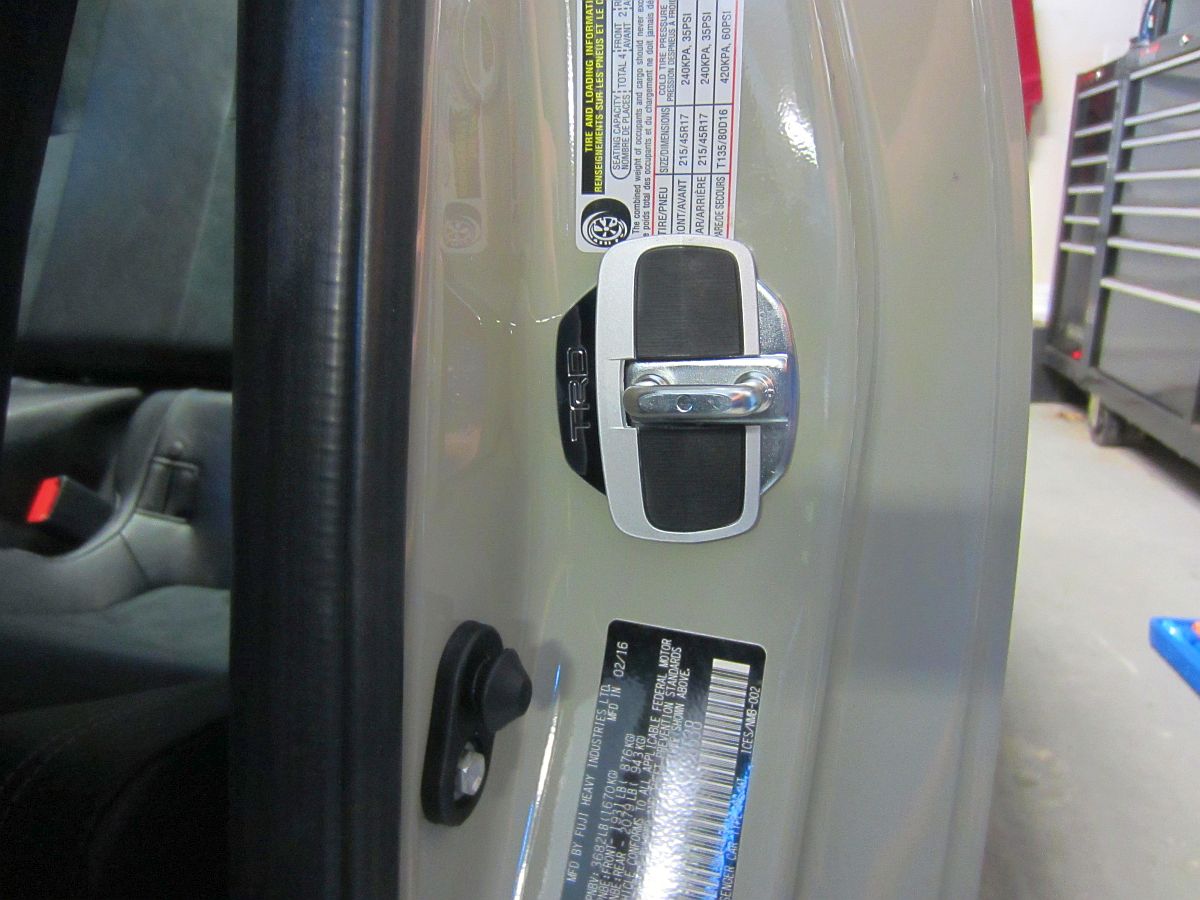
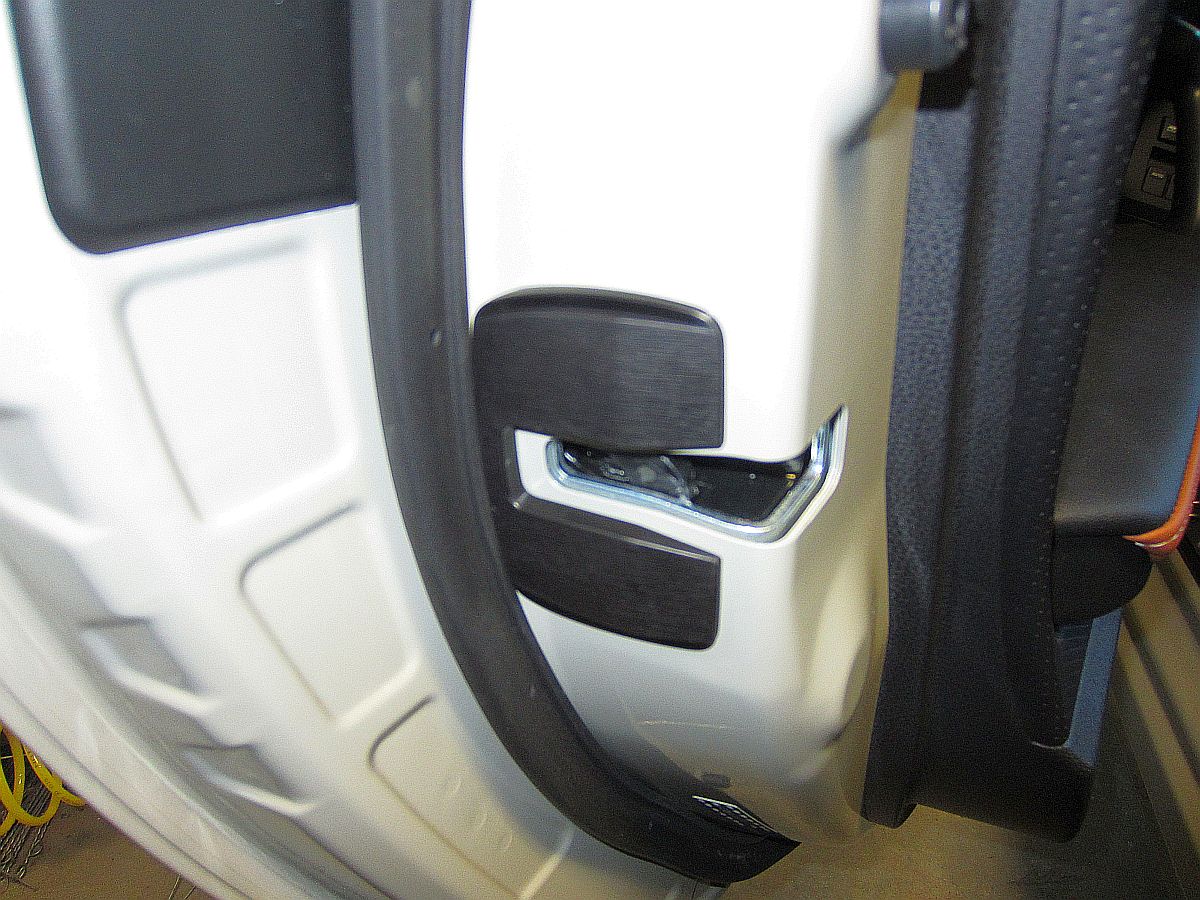
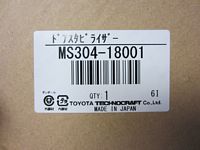
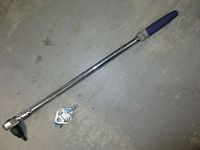
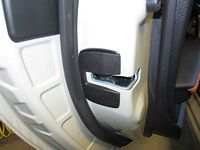
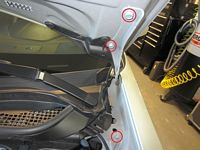
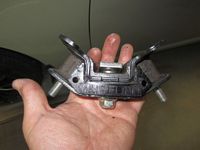
TRD Door Stabilizer (P/N MS304-18001) from Japan Performance
Aisin received awards in 2012 for the design of this part.
Forum discussion can be found HERE and a Forum DIY guide is HERE.


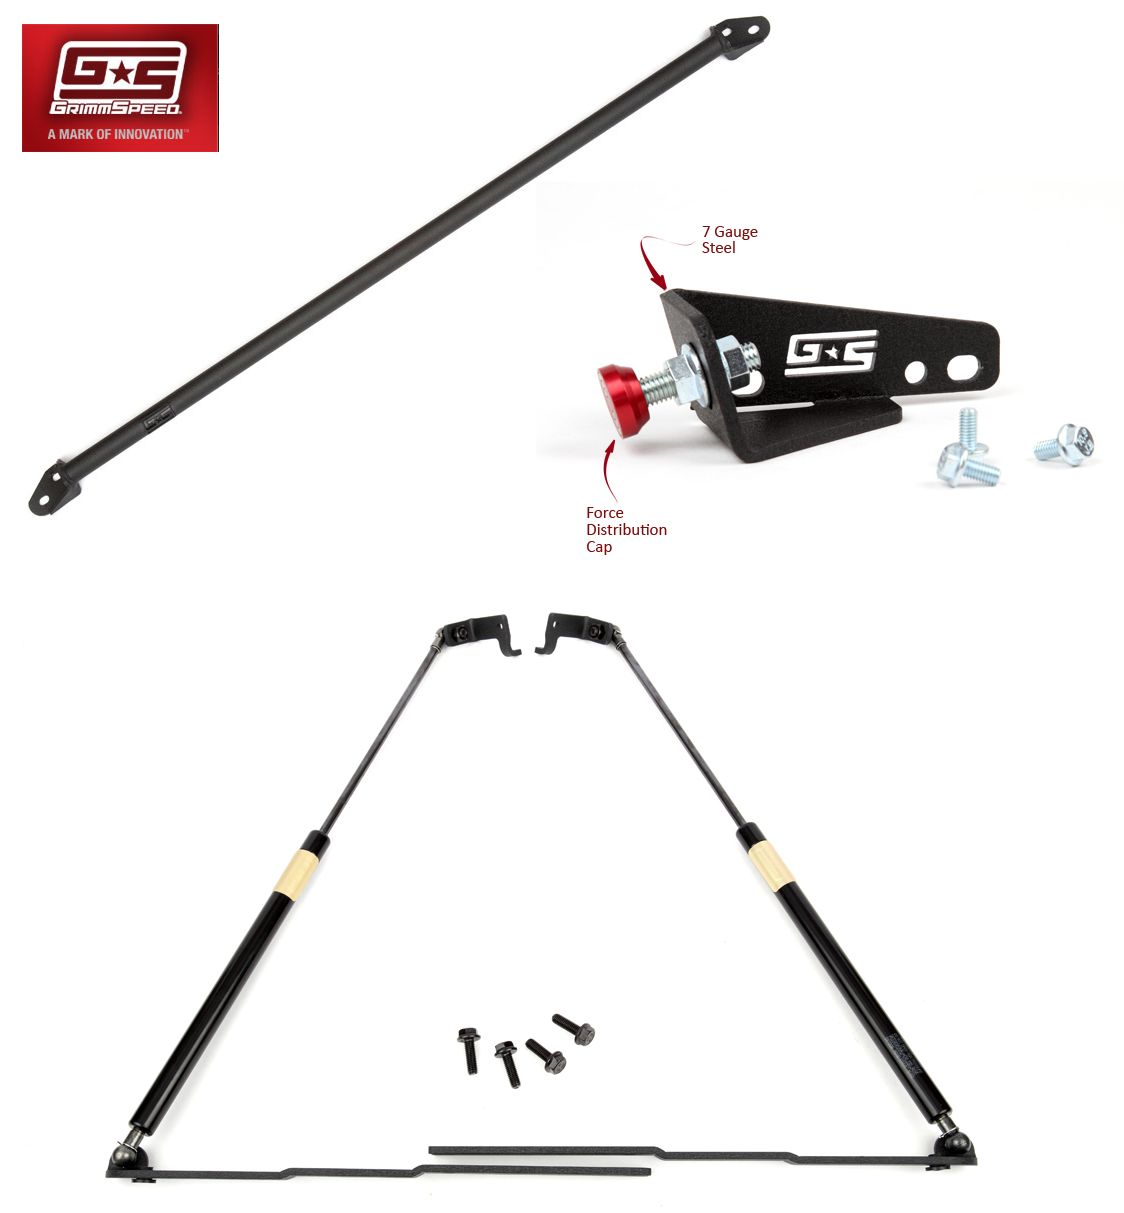
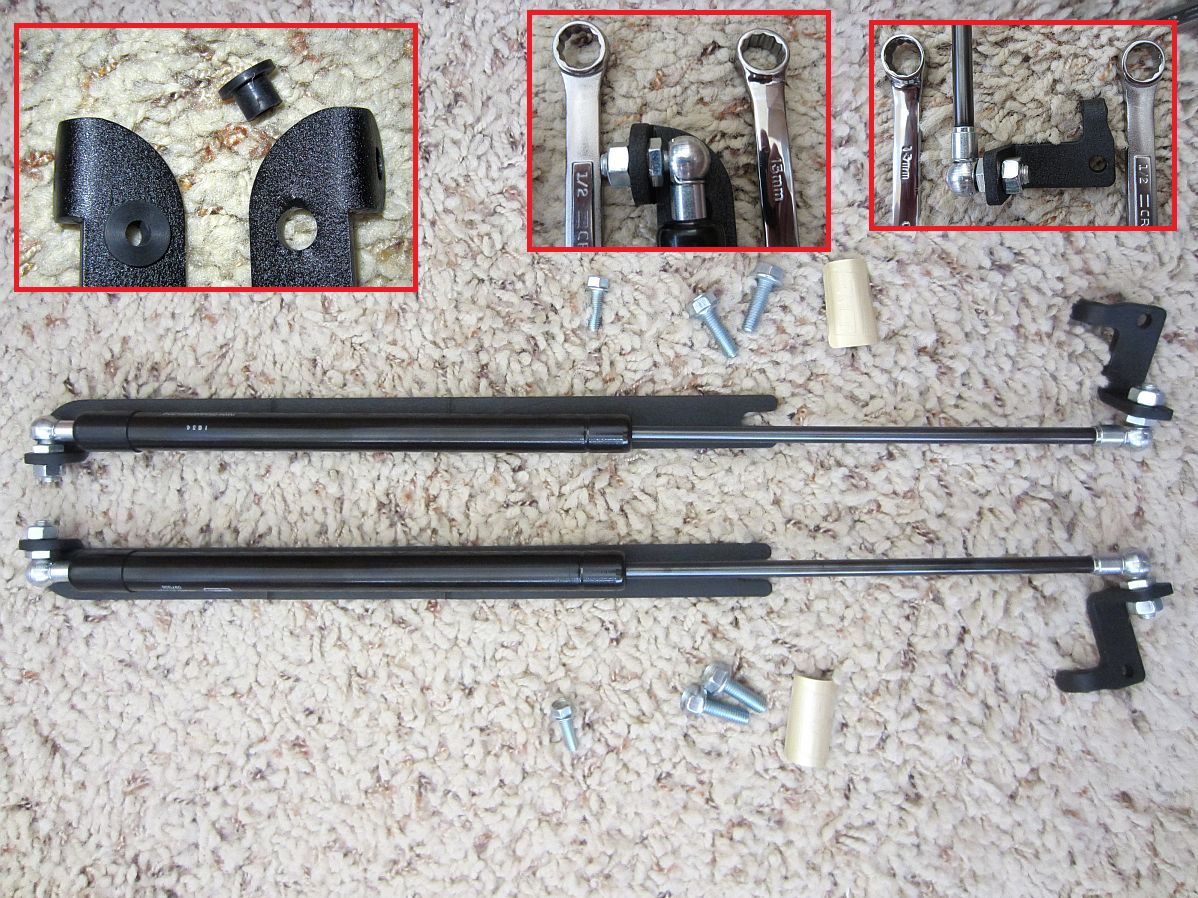
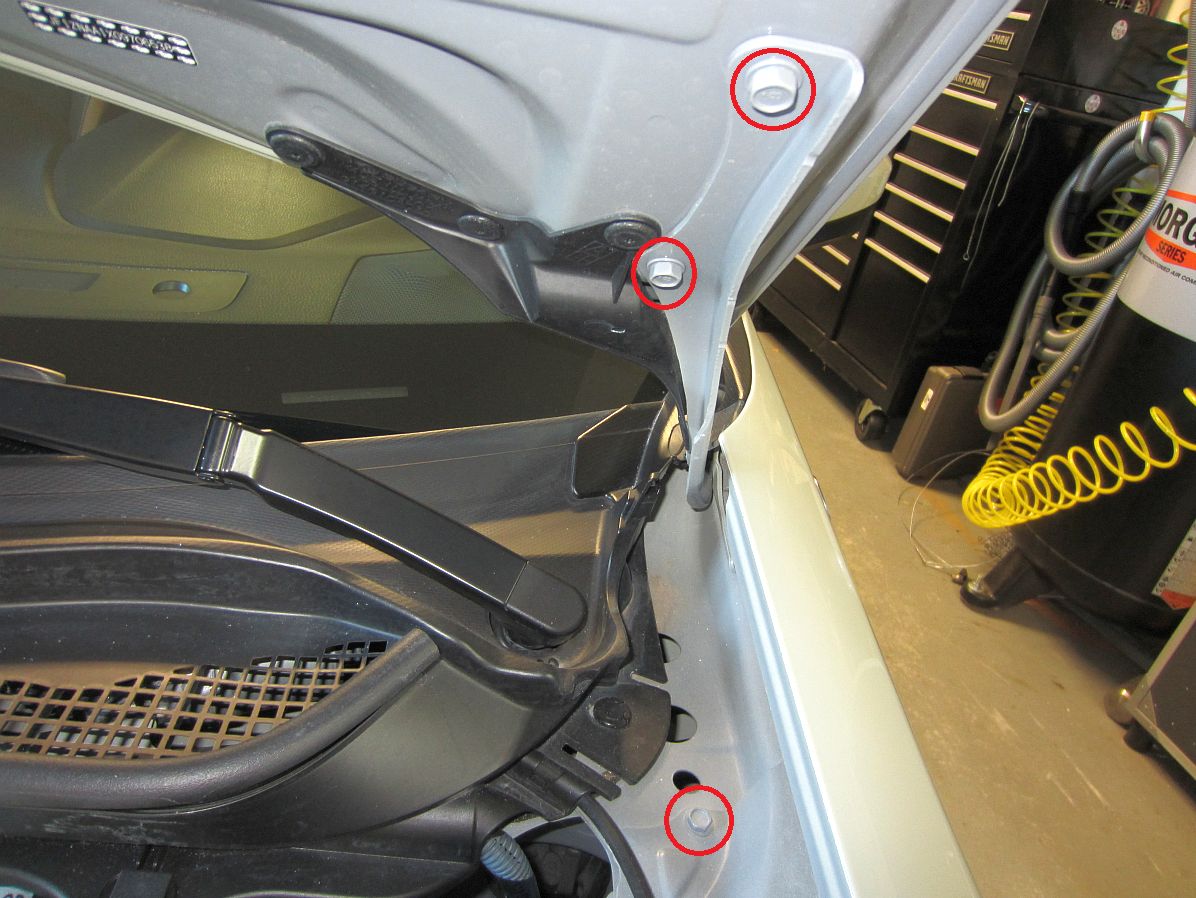
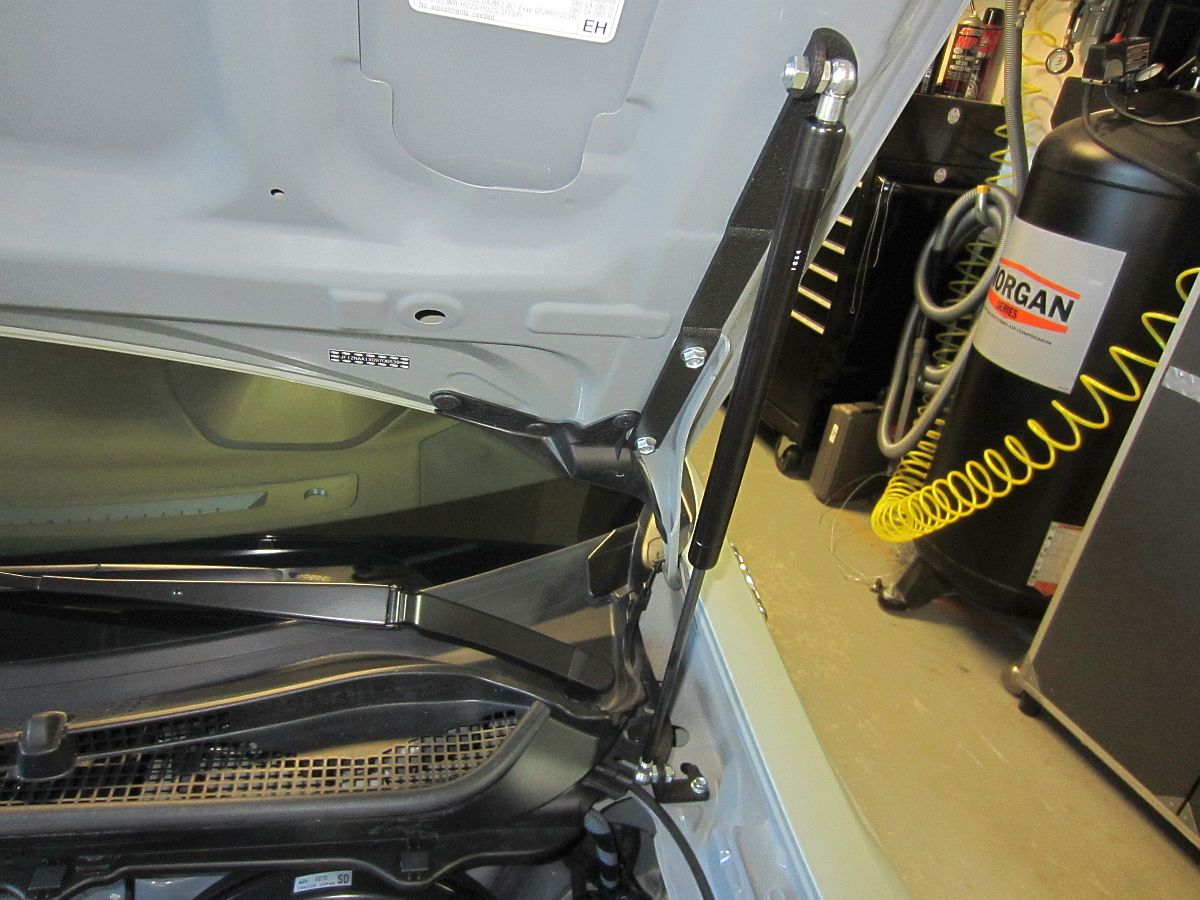
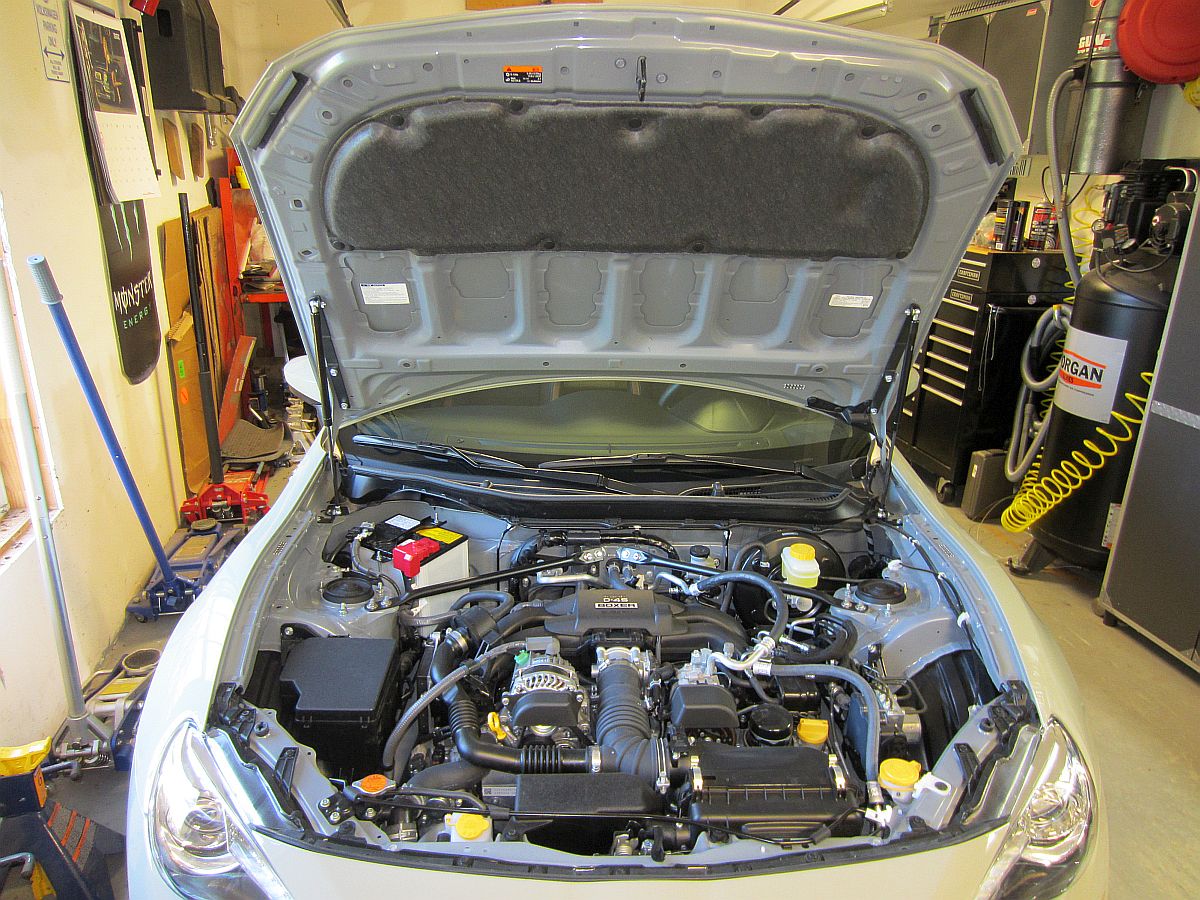
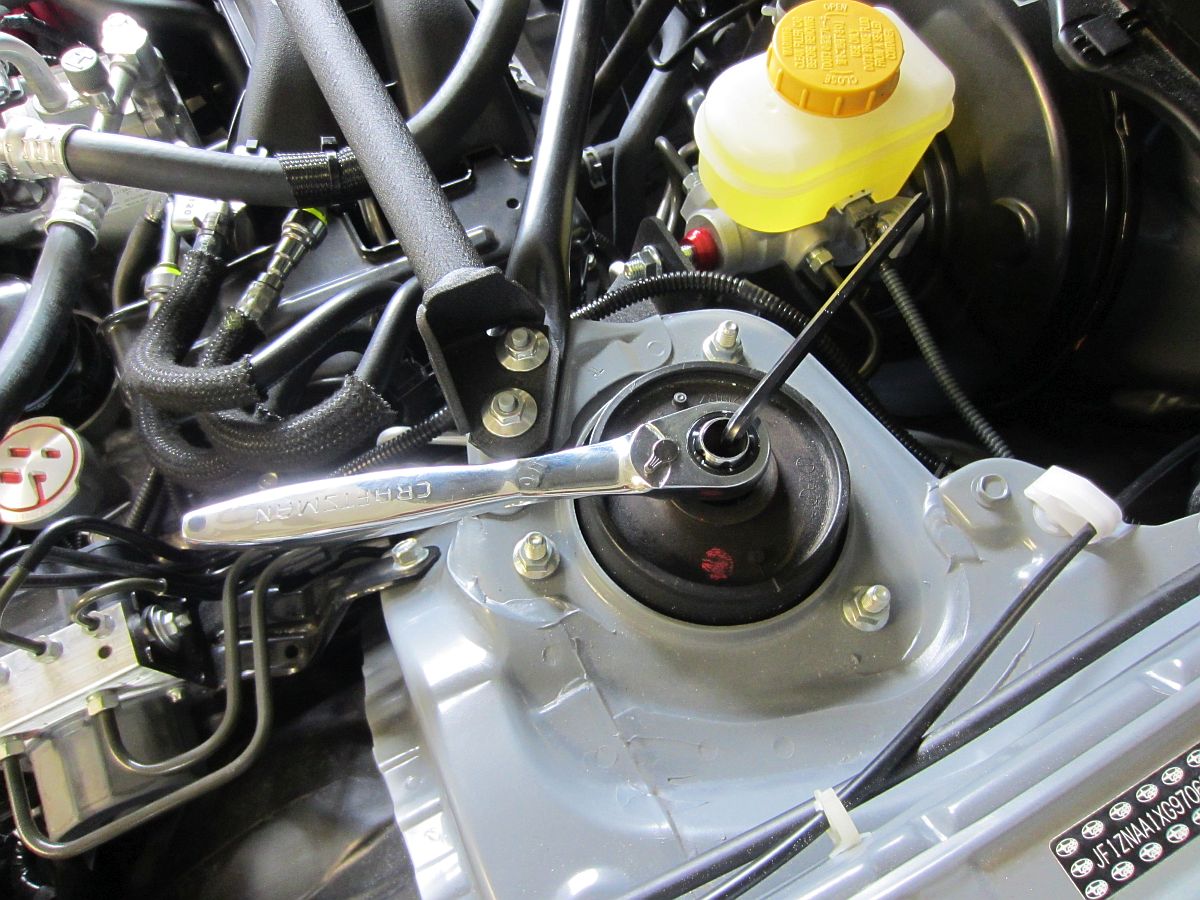
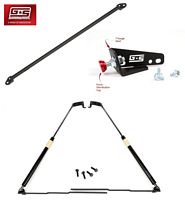
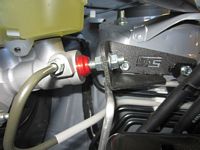
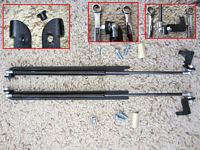
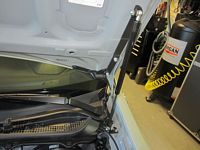
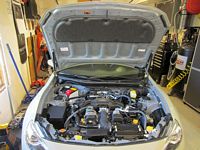
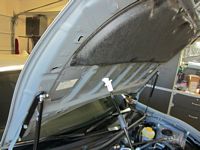
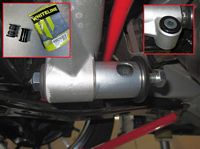
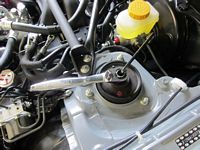
GrimmSpeed Strut Tower Brace, Master Cylinder Brace, and Hood Struts installed.....installation instructions here:
Some forum discussion on the:
- GrimmSpeed Strut Tower Brace, video HERE
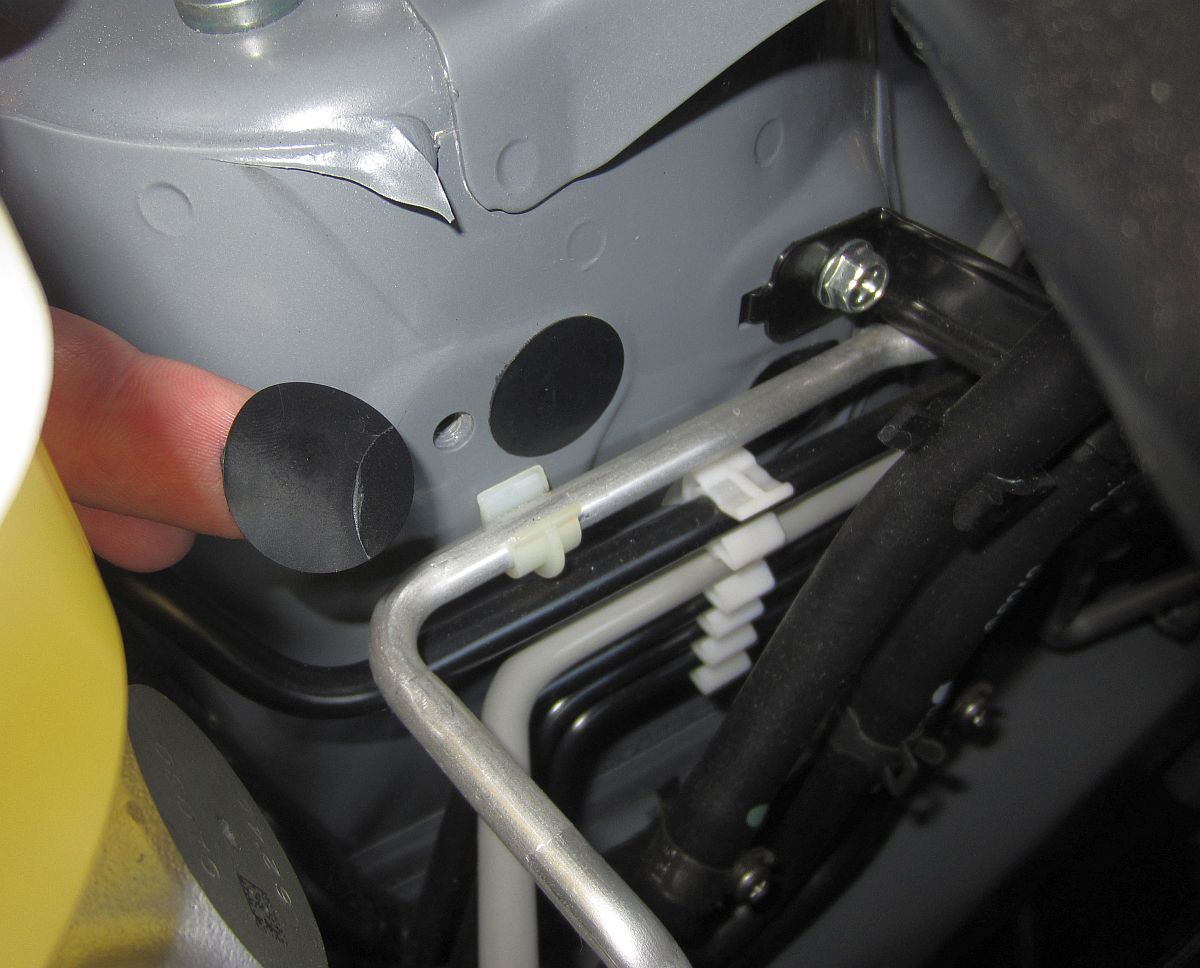
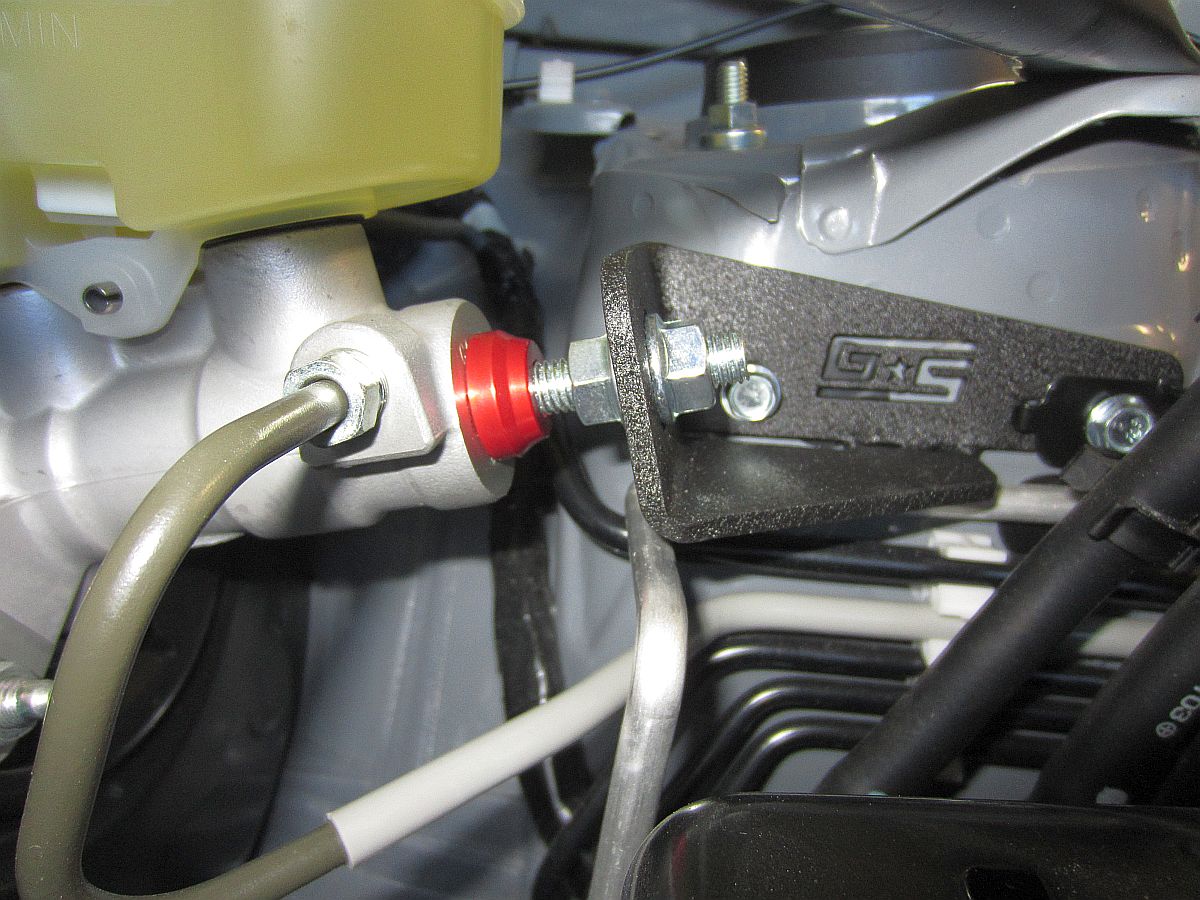
- GrimmSpeed Master Cylinder Brace, video HERE, forum DIY by F1point4 HERE
- GrimmSpeed Hood Struts, installation video HERE
- GrimmSpeed Strut Tower Brace is HERE and HERE.
- GrimmSpeed Master Cylinder Brace is HERE, video that shows comparison before/after HERE.
- GrimmSpeed Hood Struts is HERE, testing video HERE.
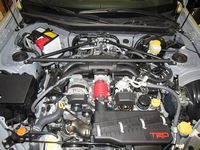

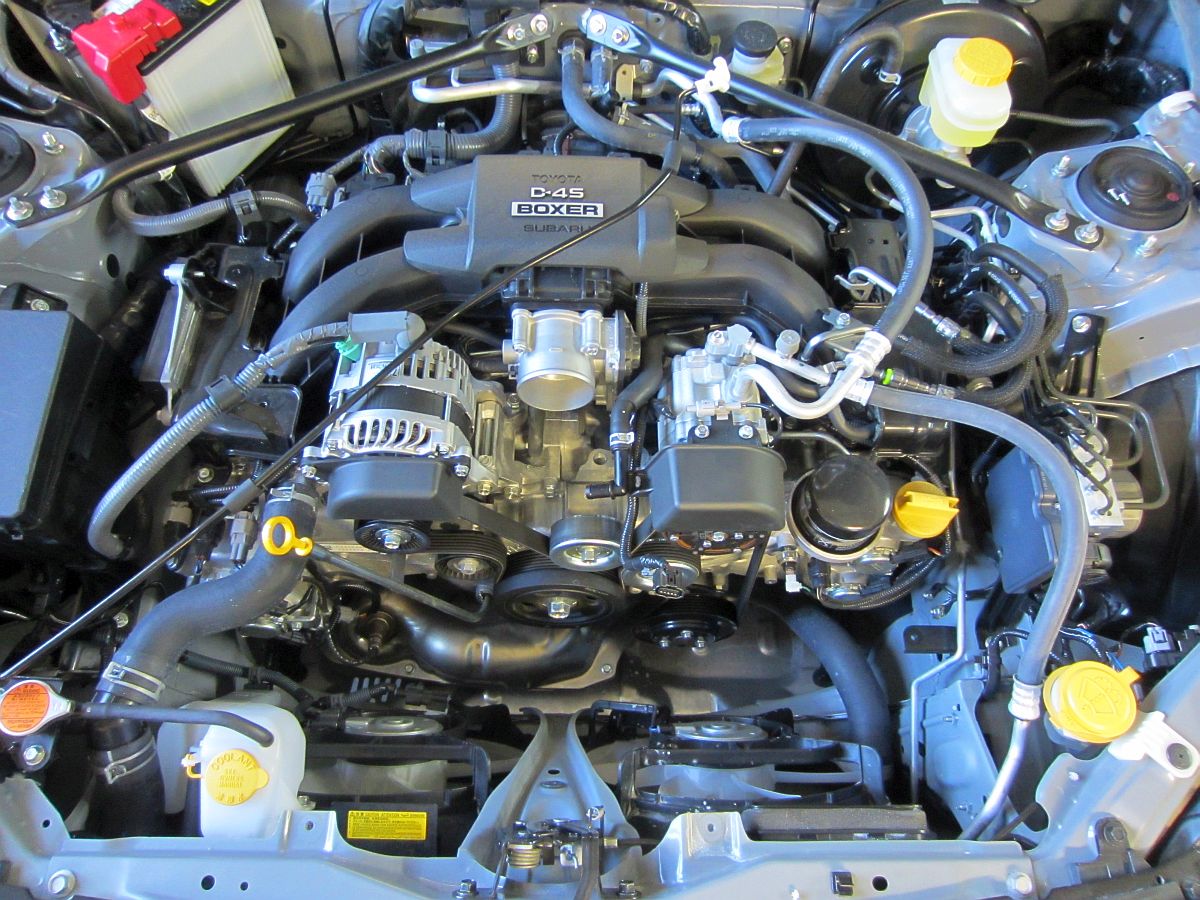
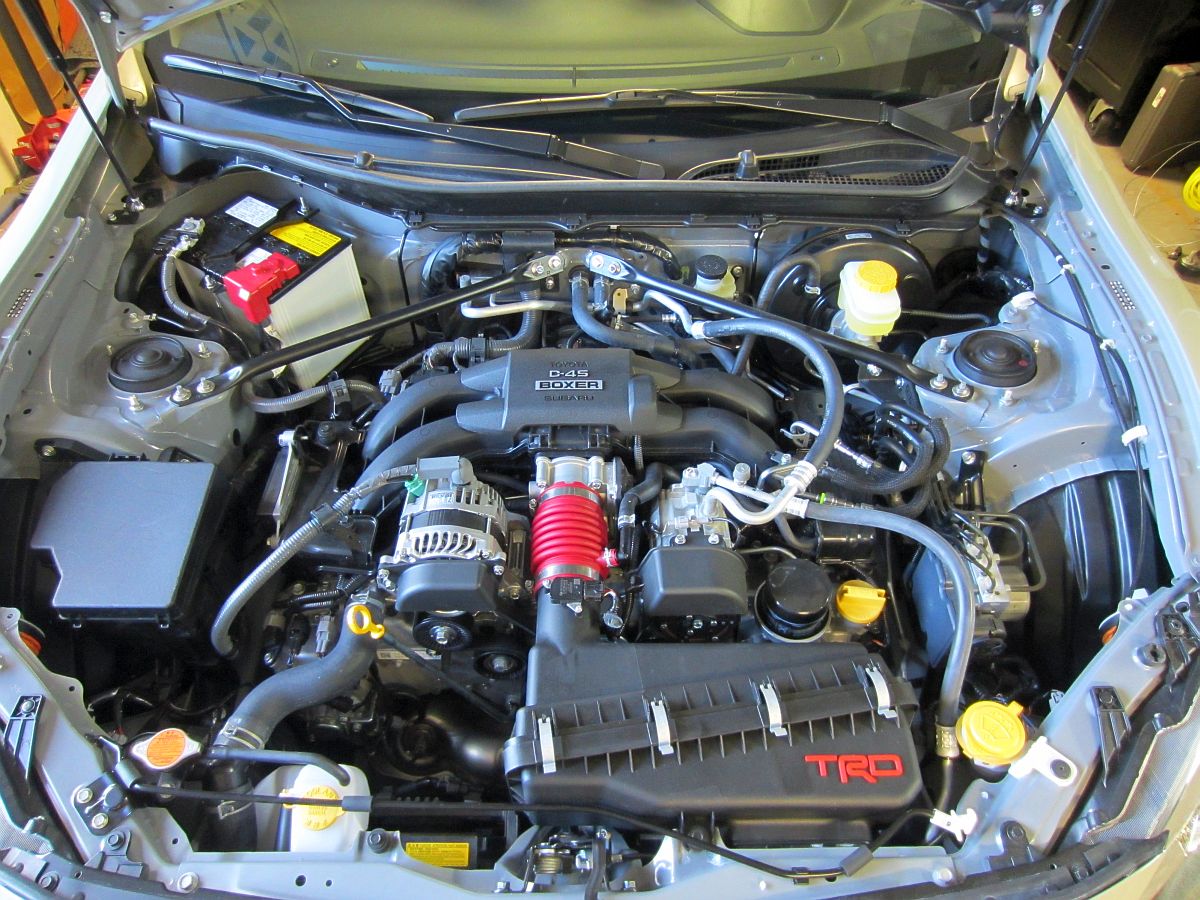
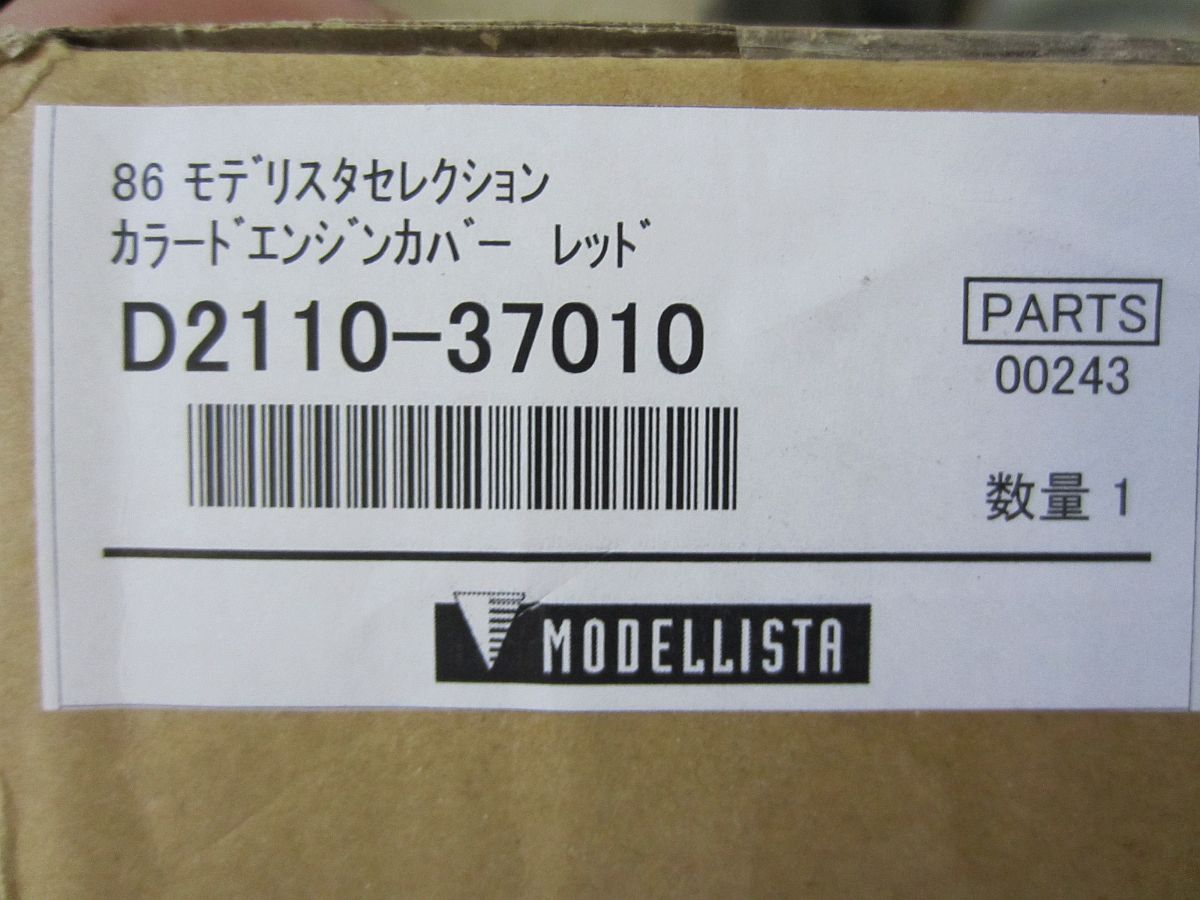
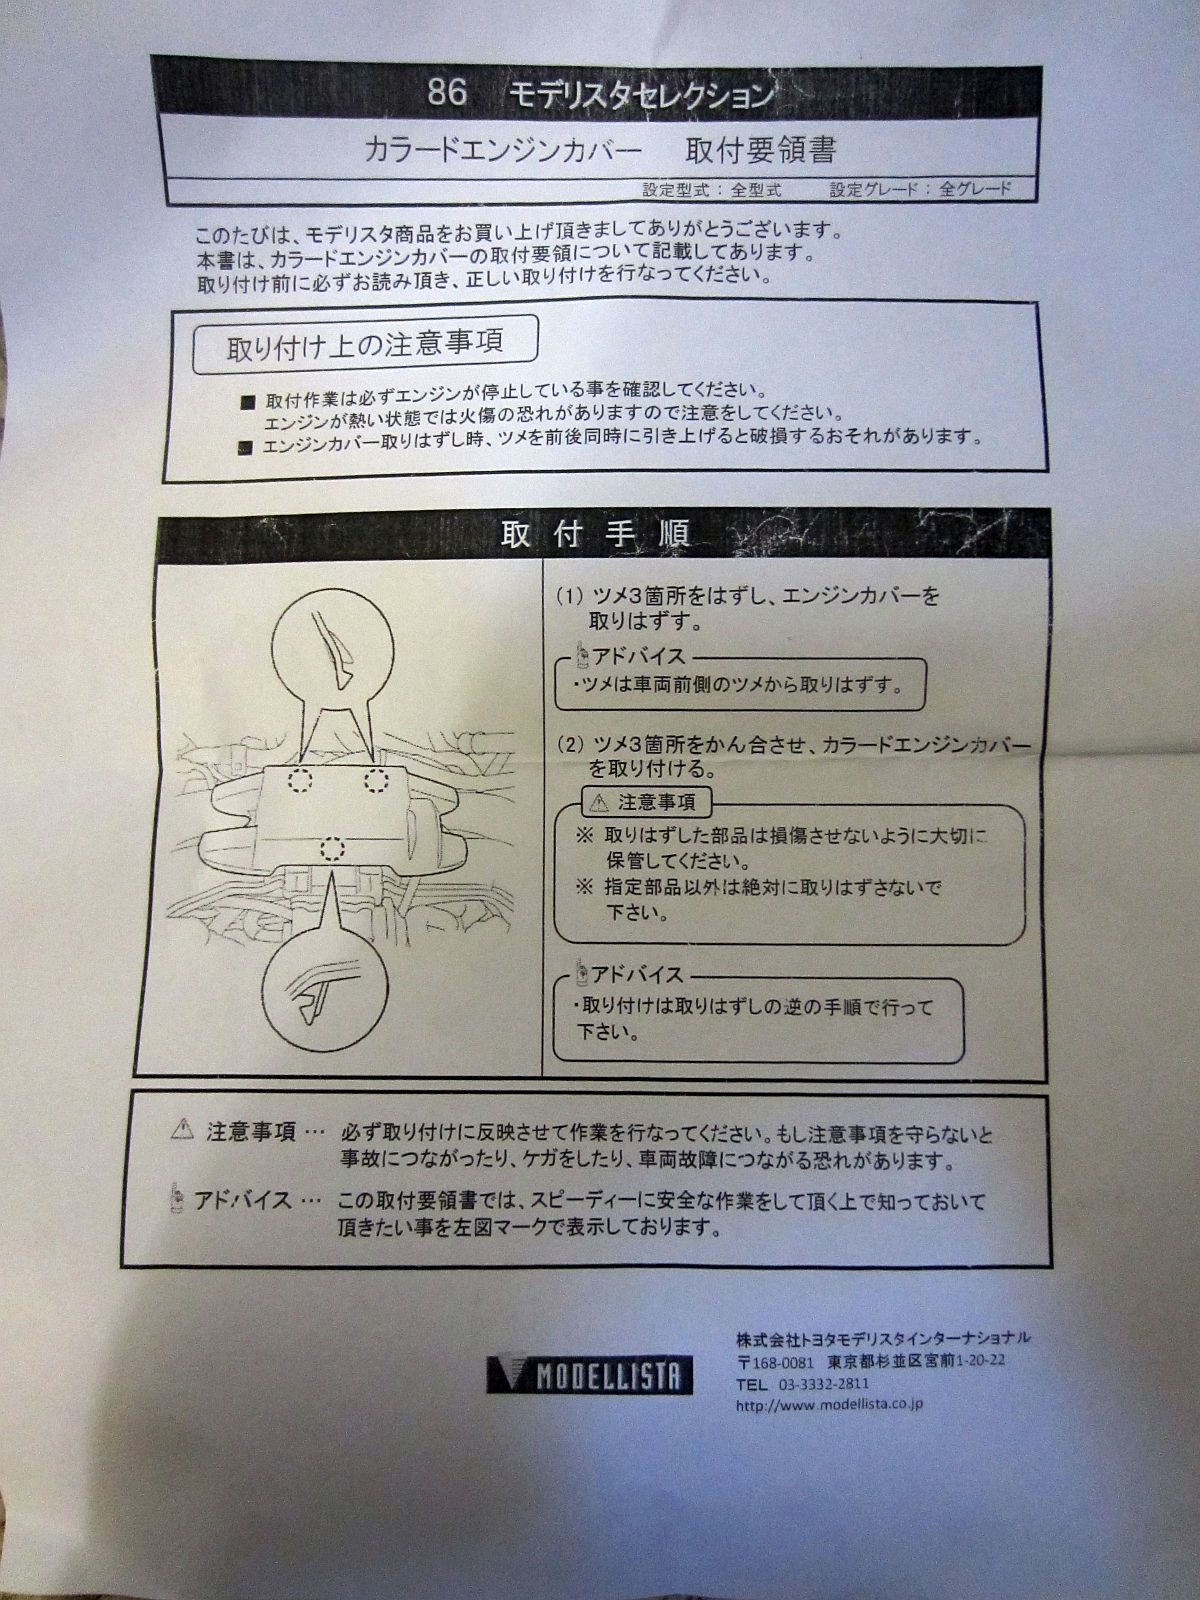
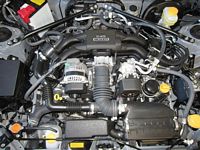
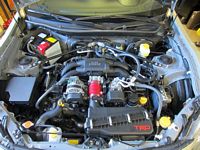
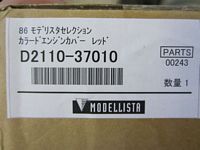
OEM JDM Modellista Red Engine Cover (P/N D2110-37010) from eBay installed.

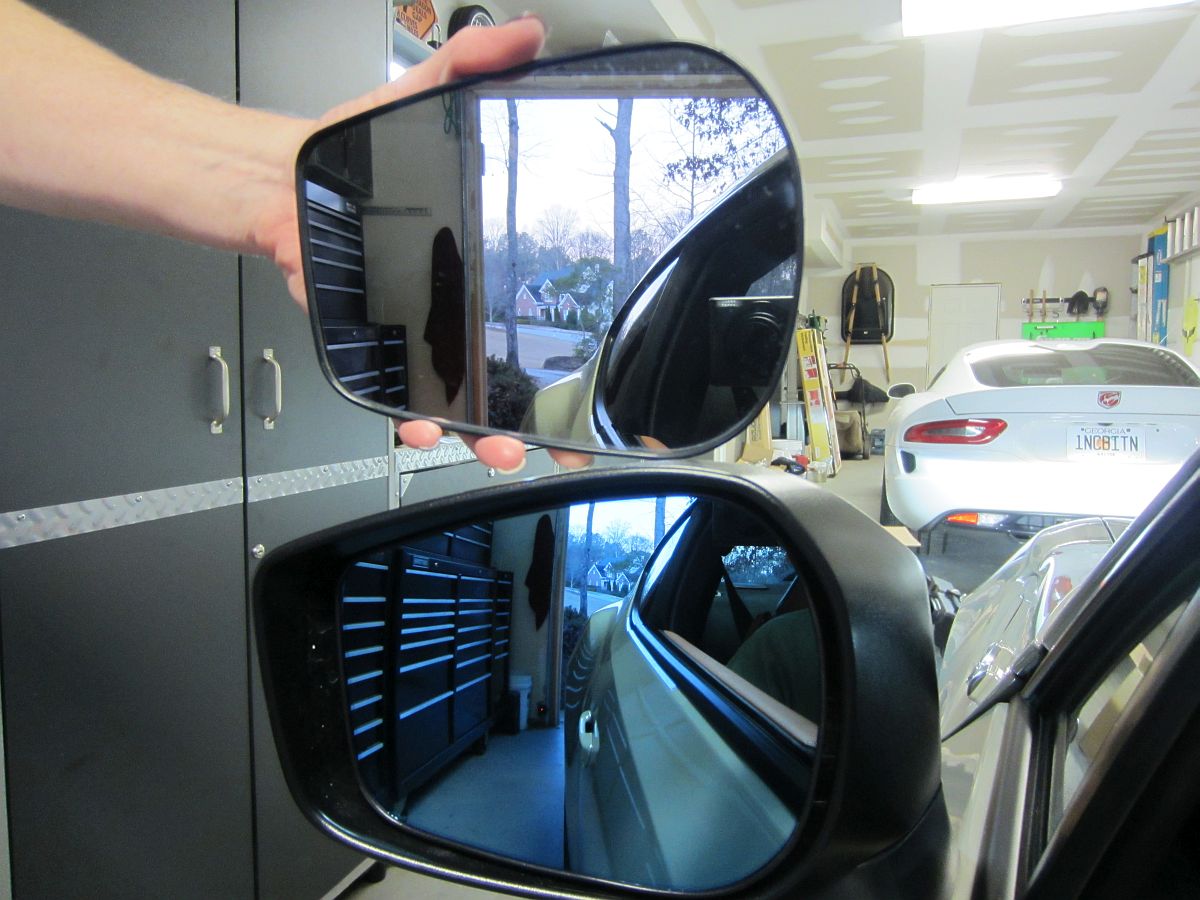
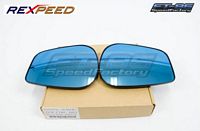
Rexpeed Wide Angle Heated Mirrors from FT86 Speed Factory installed.....using this video.

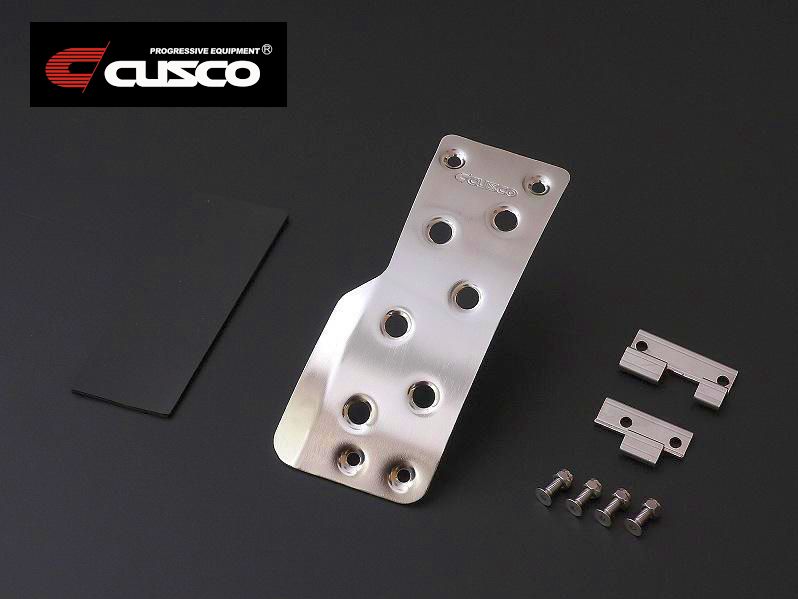
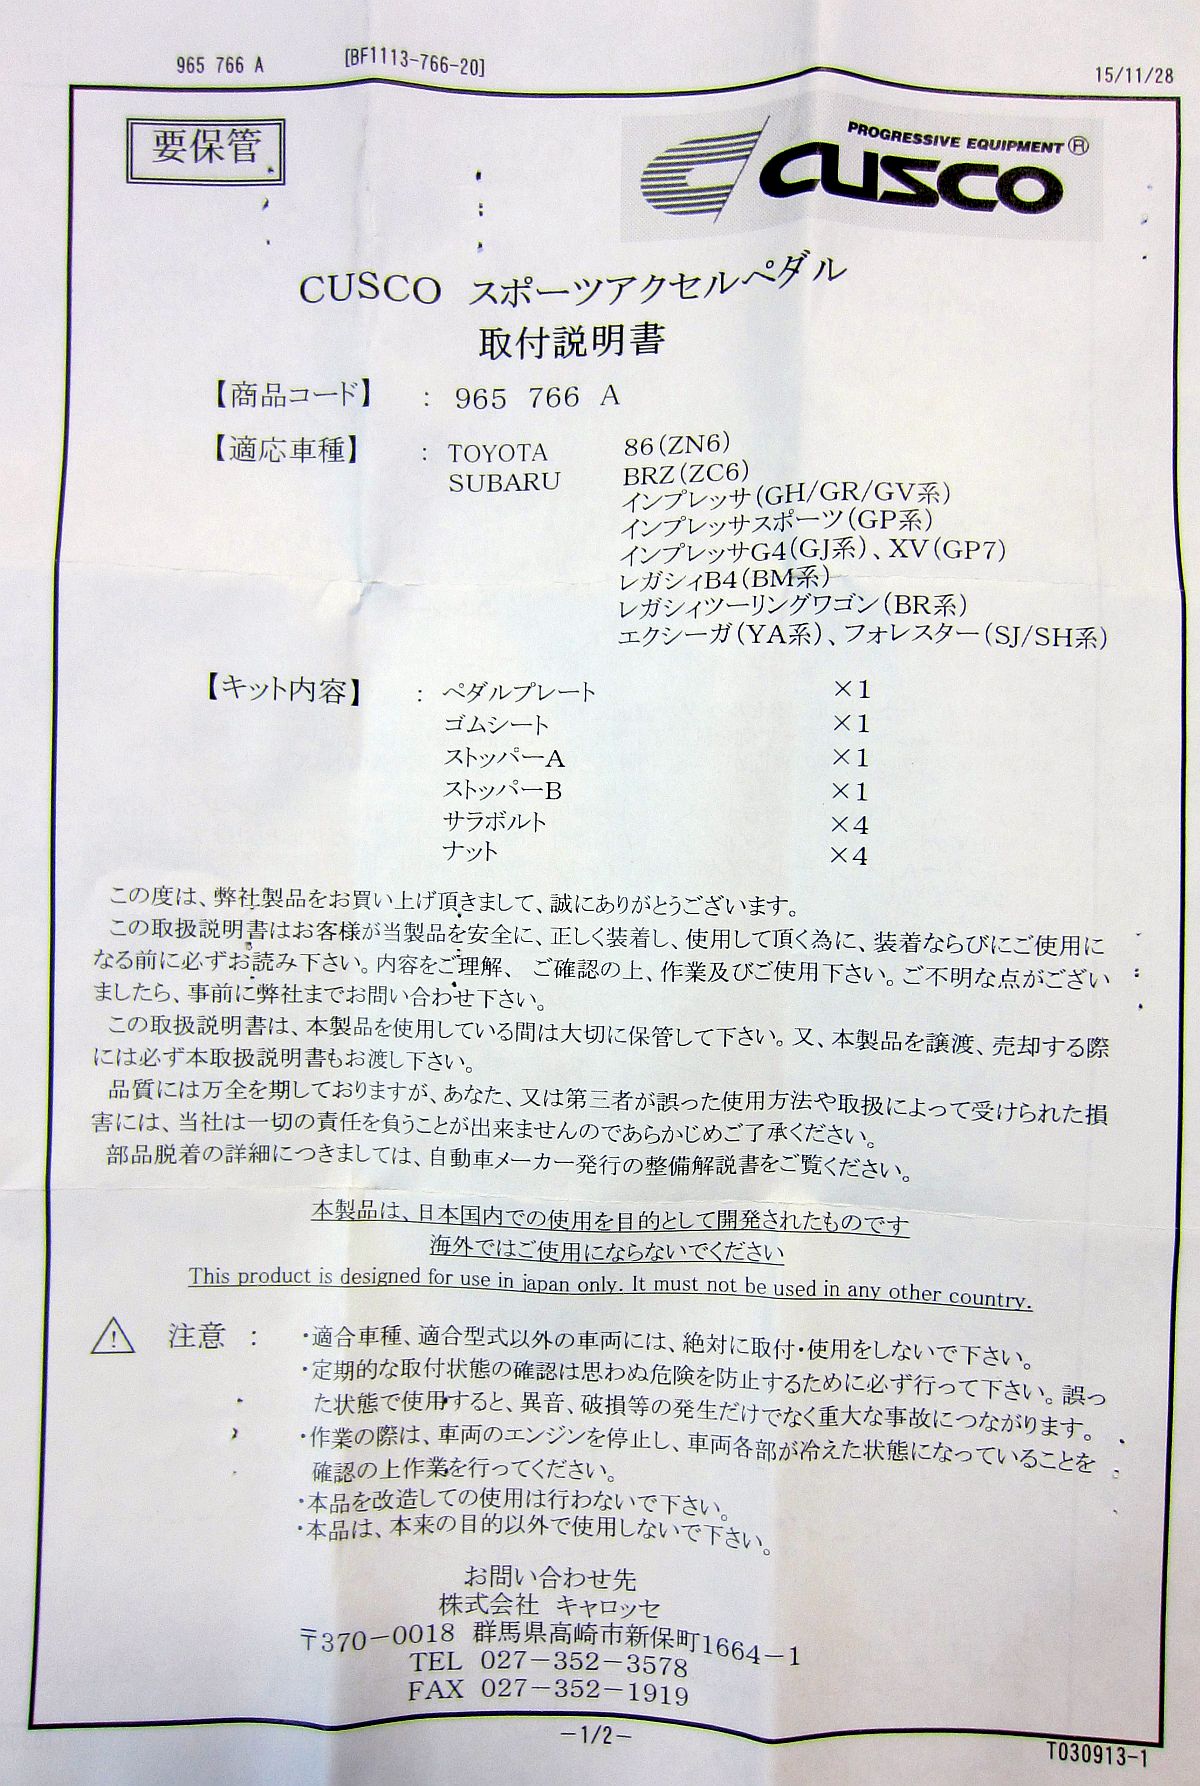
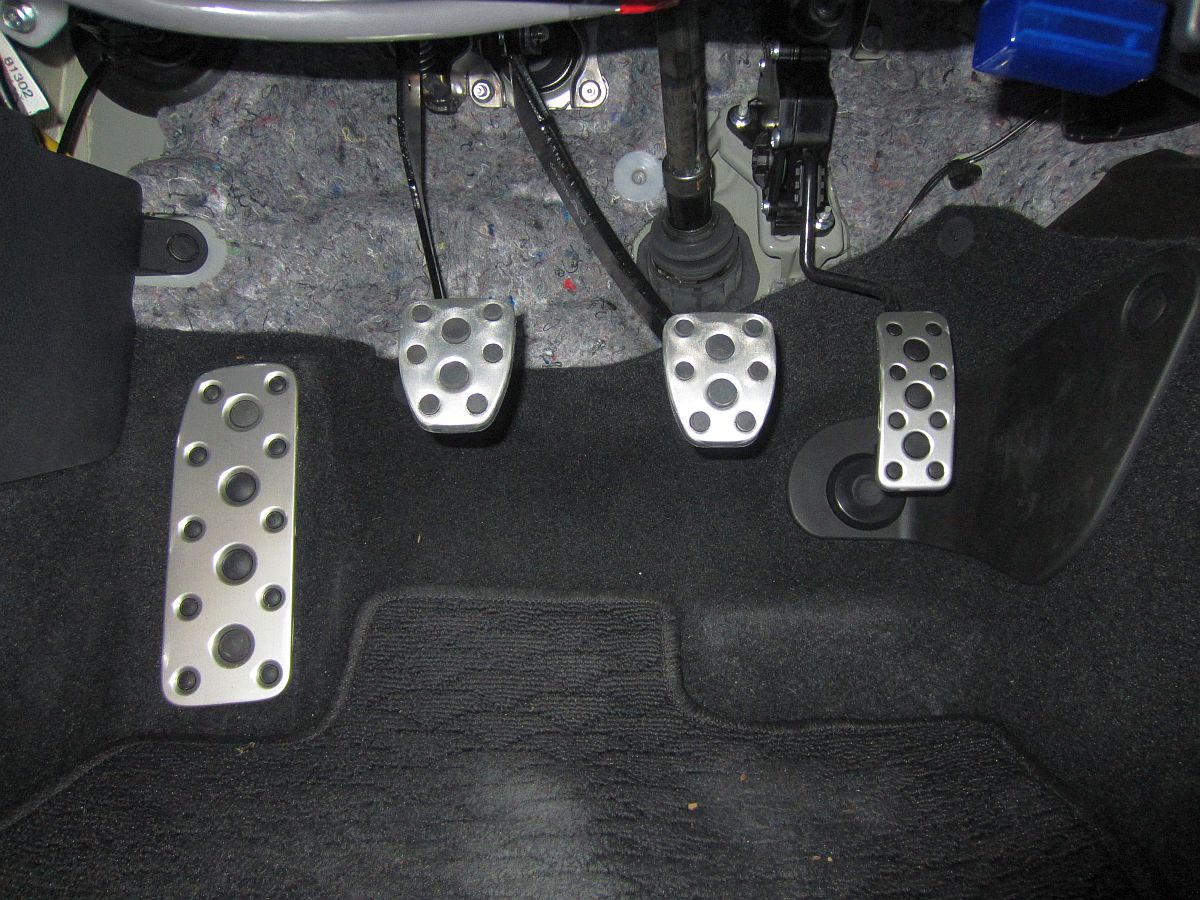
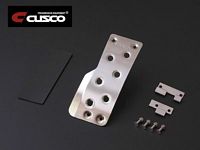
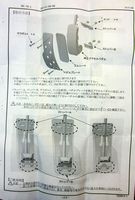
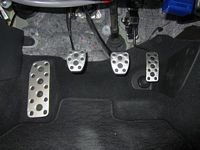
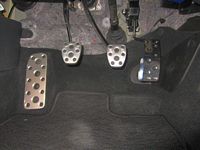
Cusco acceleration pedal attachment from Amazon
Forum discussion HERE.
Not the best thought out product for installation- they could have designed the rear mount plates in such a way that the nylok nuts would be held in place so you don't have to find new yoga positions to hold a 7mm ignition wrench on the nut while tightening the hex screws with a 2.5mm HEX key.....oh well, it seems to be an improvement once installed.
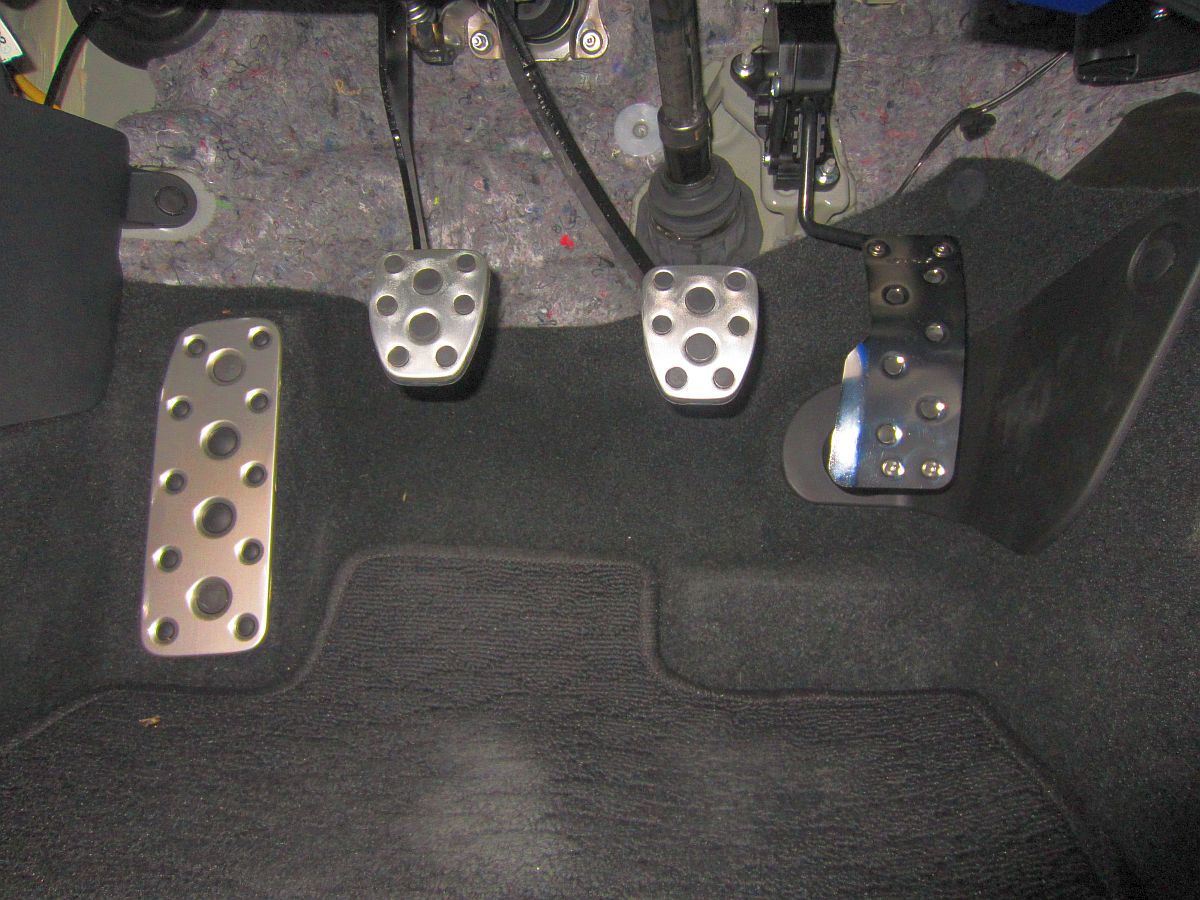
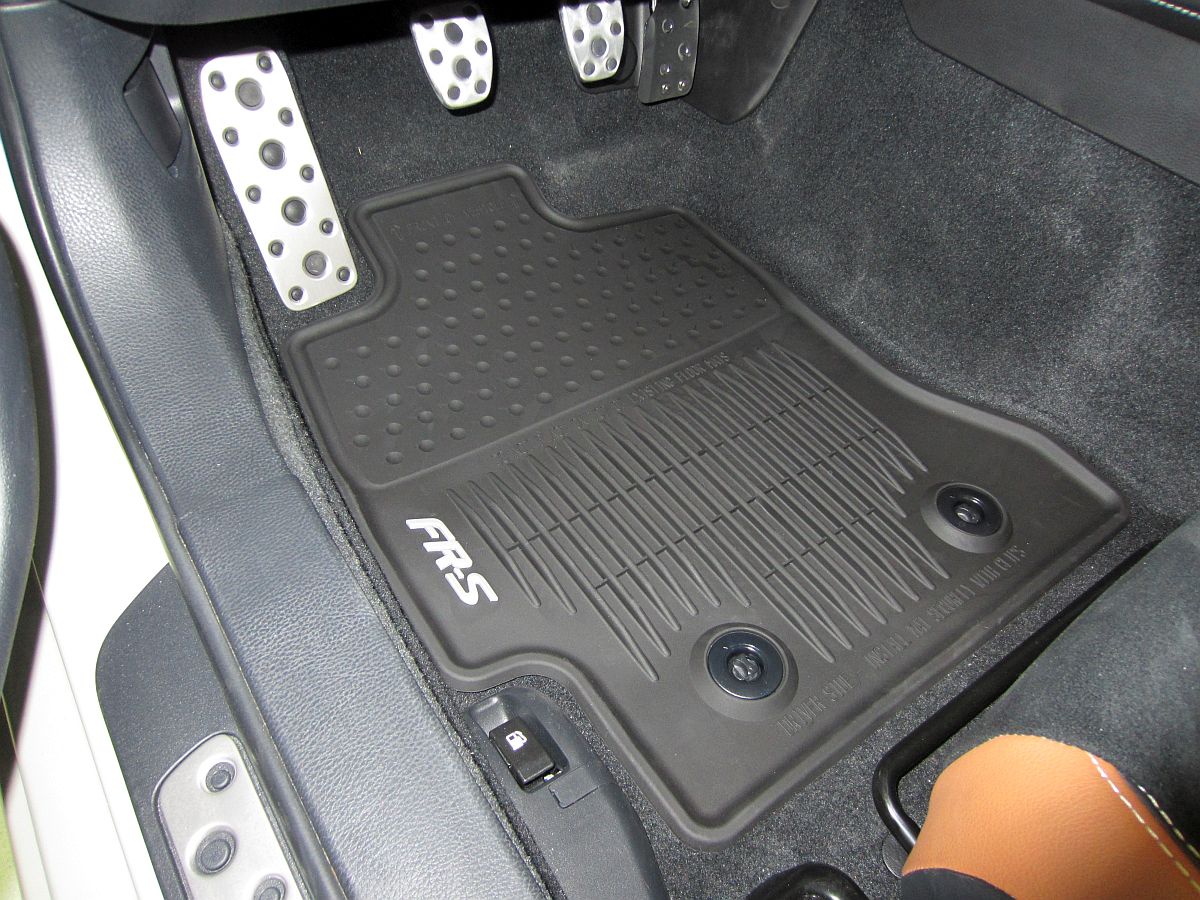
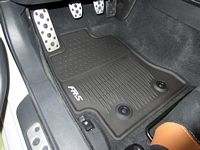
Scion All-Weather (Rubber) Floor Mat set (P/N PT908-18130-20) from Amazon

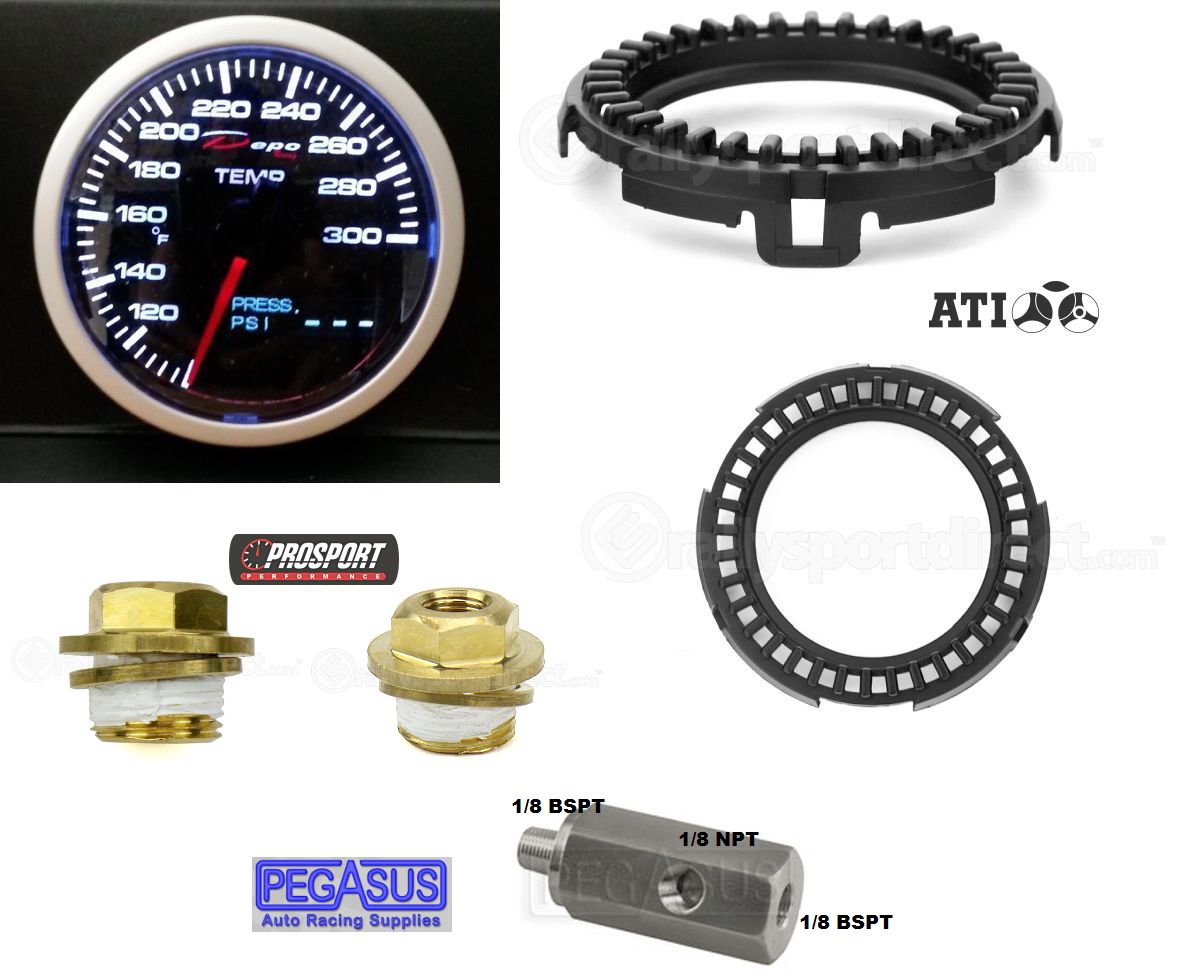
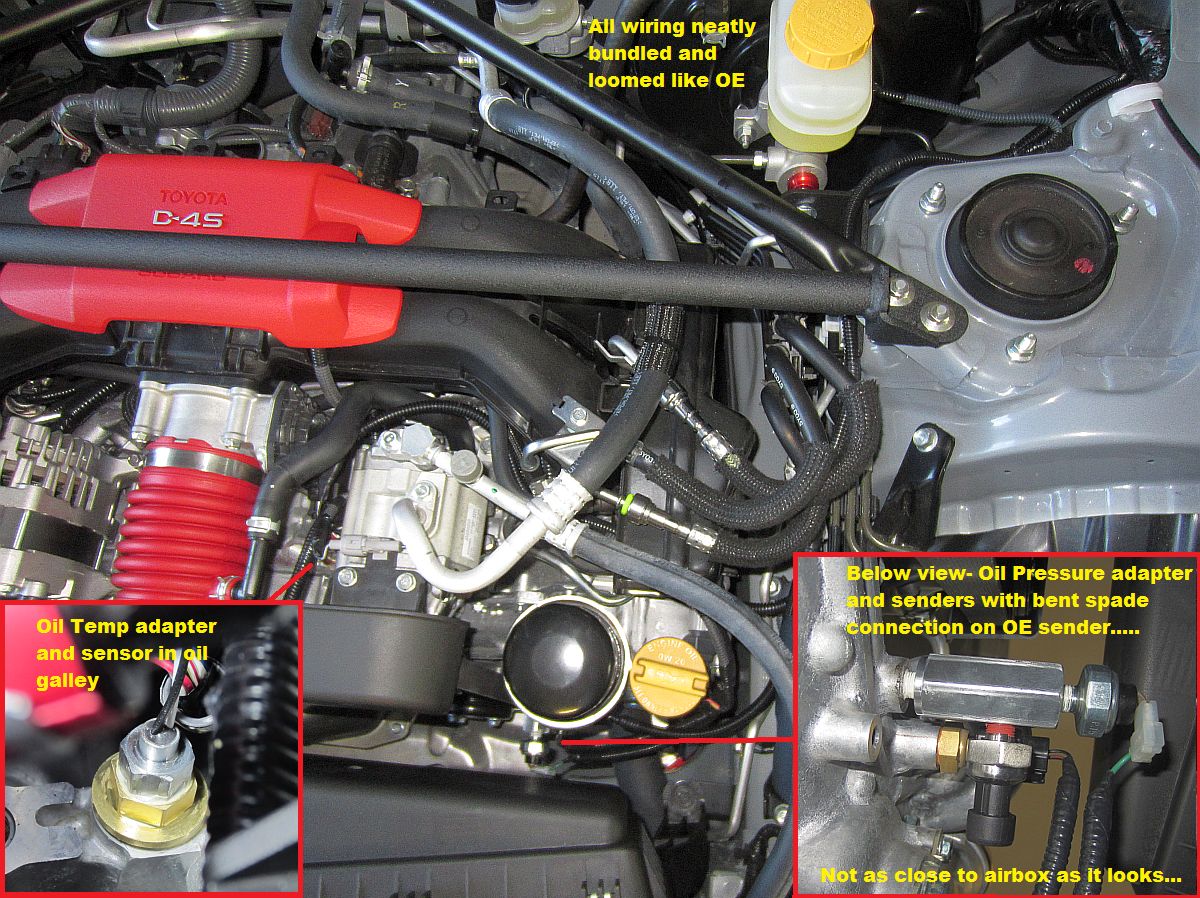
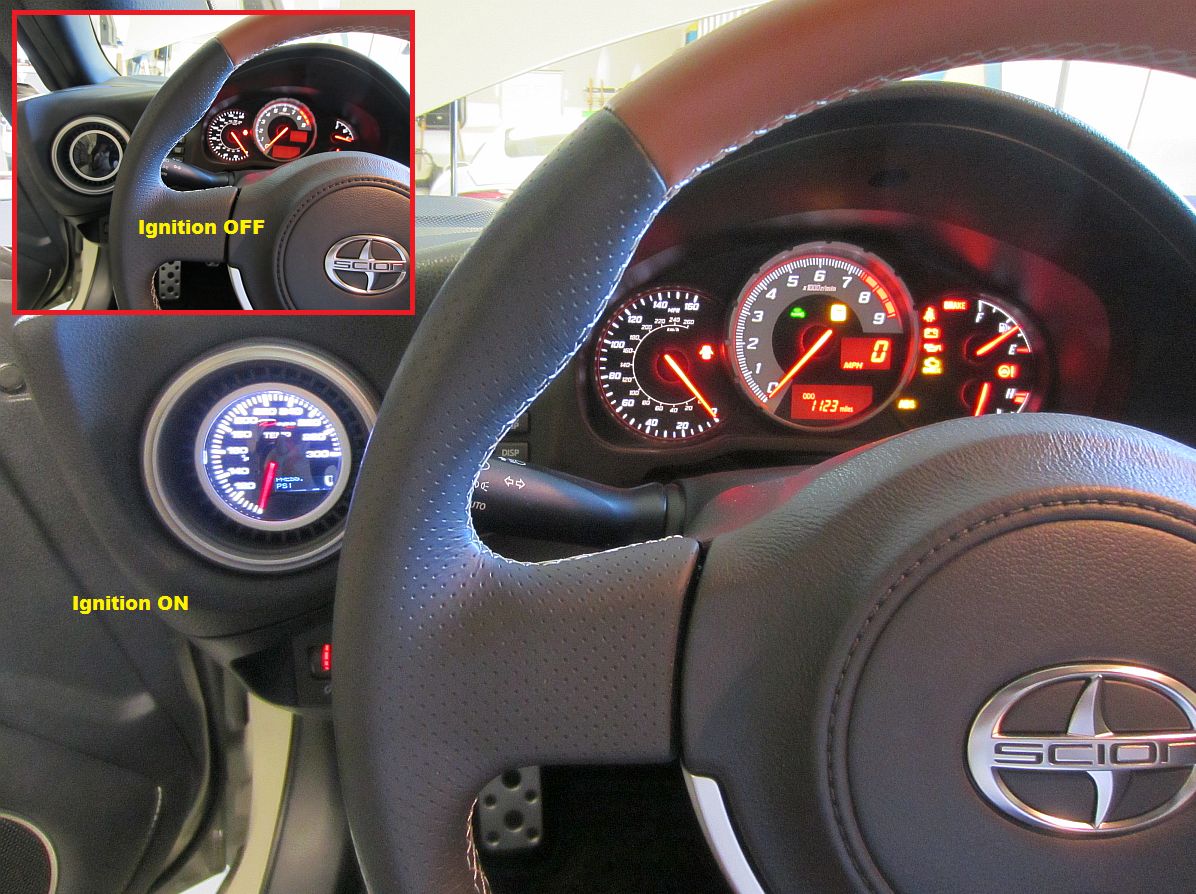
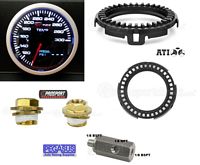
Depo Racing 60mm Oil Pressure/Temp Gauge (P/N WA603426B, installation instructions HERE) from Tuner Parts Direct installed using:
ProSport Oil Galley Plug 1/8 NPT (P/N PRS PSNUT) for the oil temp sender
NOTE: The Subaru OEM Oil Galley Plug is threaded for 1/8 BSPT senders and DOES NOT WORK for 1/8 NPT senders.Pegasus Pressure Gauge Adapter, 1/8 BSP Male & Female, 1/8 NPT Female Tee for the new oil pressure sender and retention of the existing OE sender, ATI Vent Pod 60mm (P/N ATI VPOD-72)
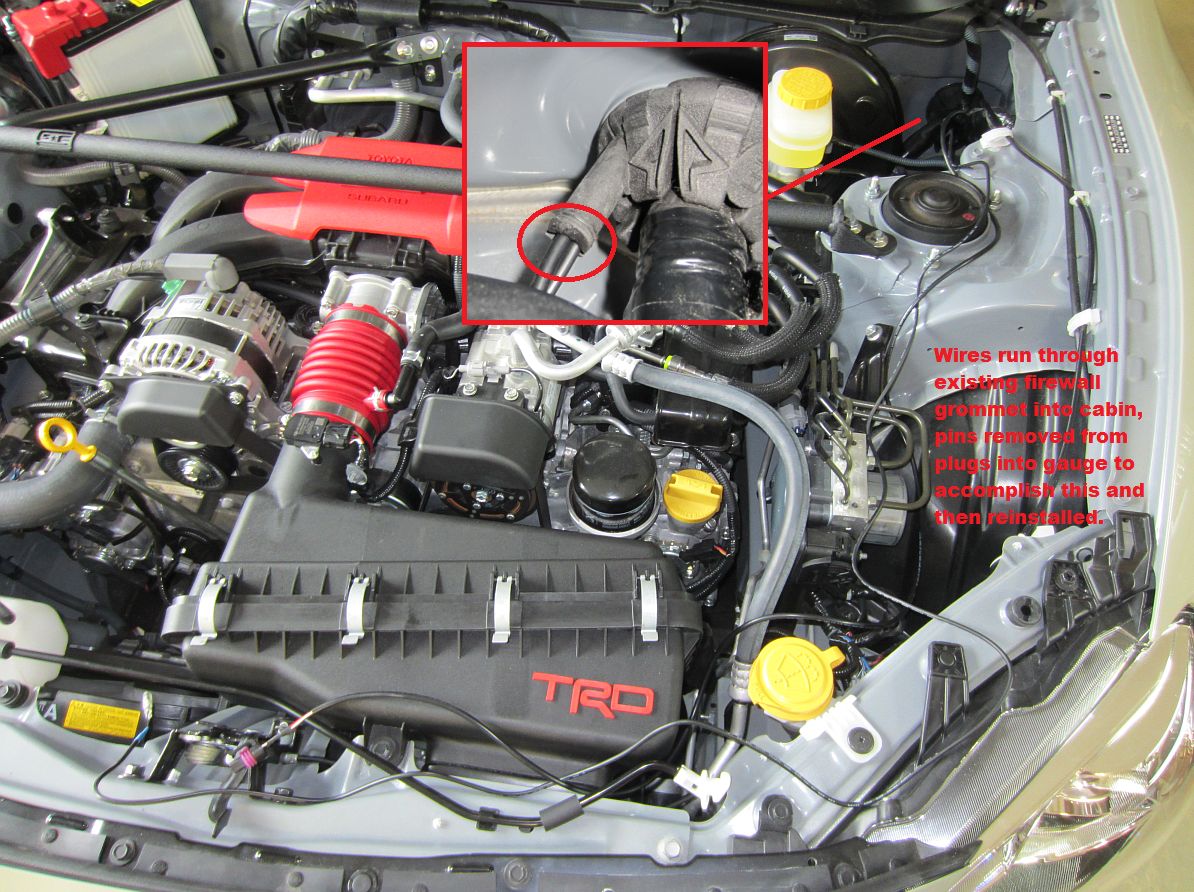
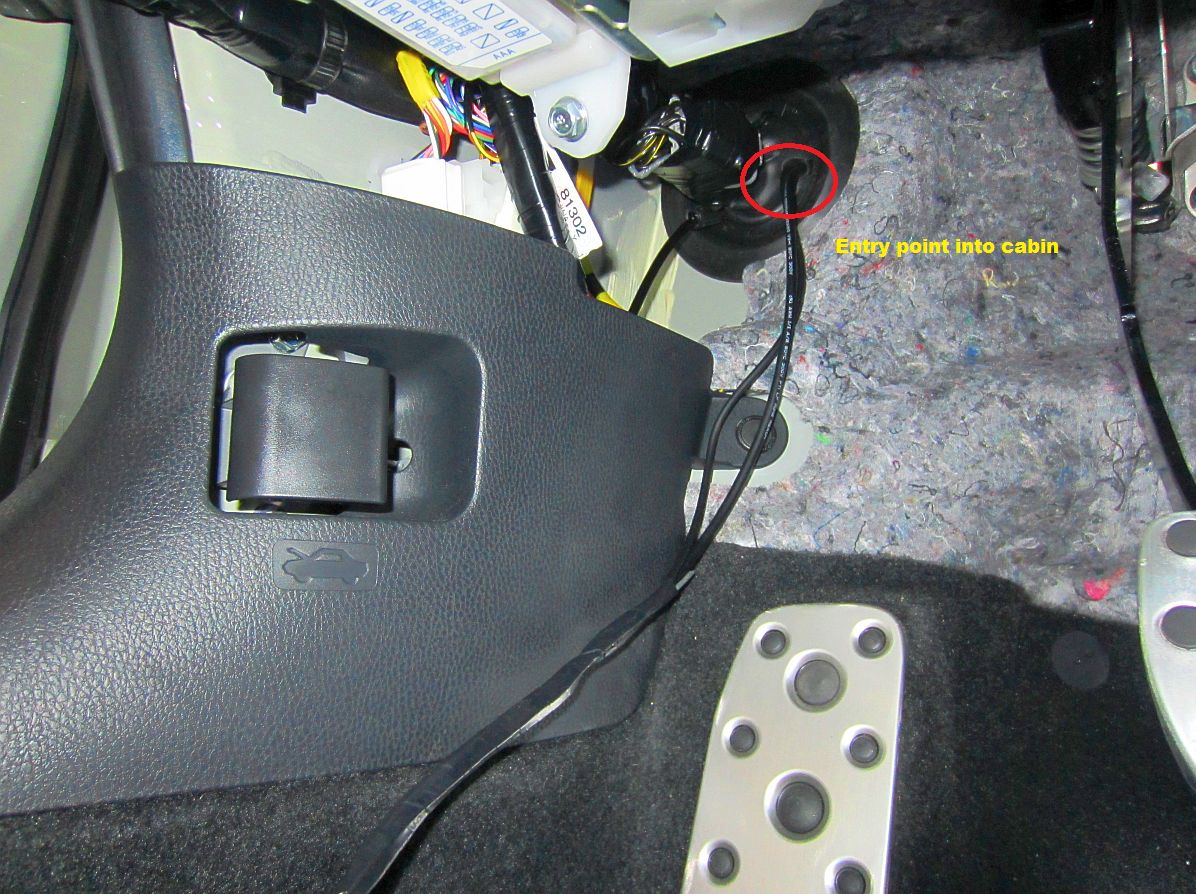
I used a GREAT forum DIY guide HERE and AutoMeter guide in part HERE during installation of vent pod/gauge and wiring. To make the ATI Pod fit the AC vent tightly, I wrapped it with electrical tape....and then did the same thing with the Depo gauge to make sure it was tightly pressed into the pod, we don't need any new rattles
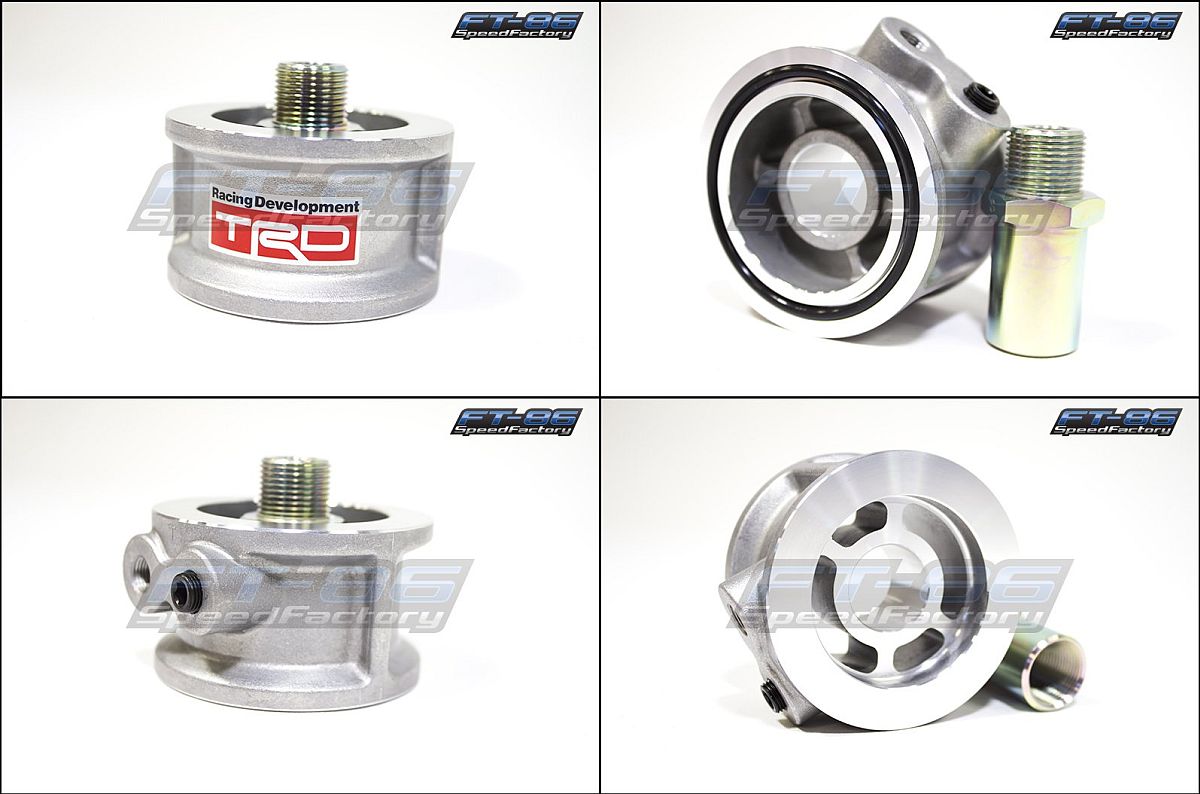
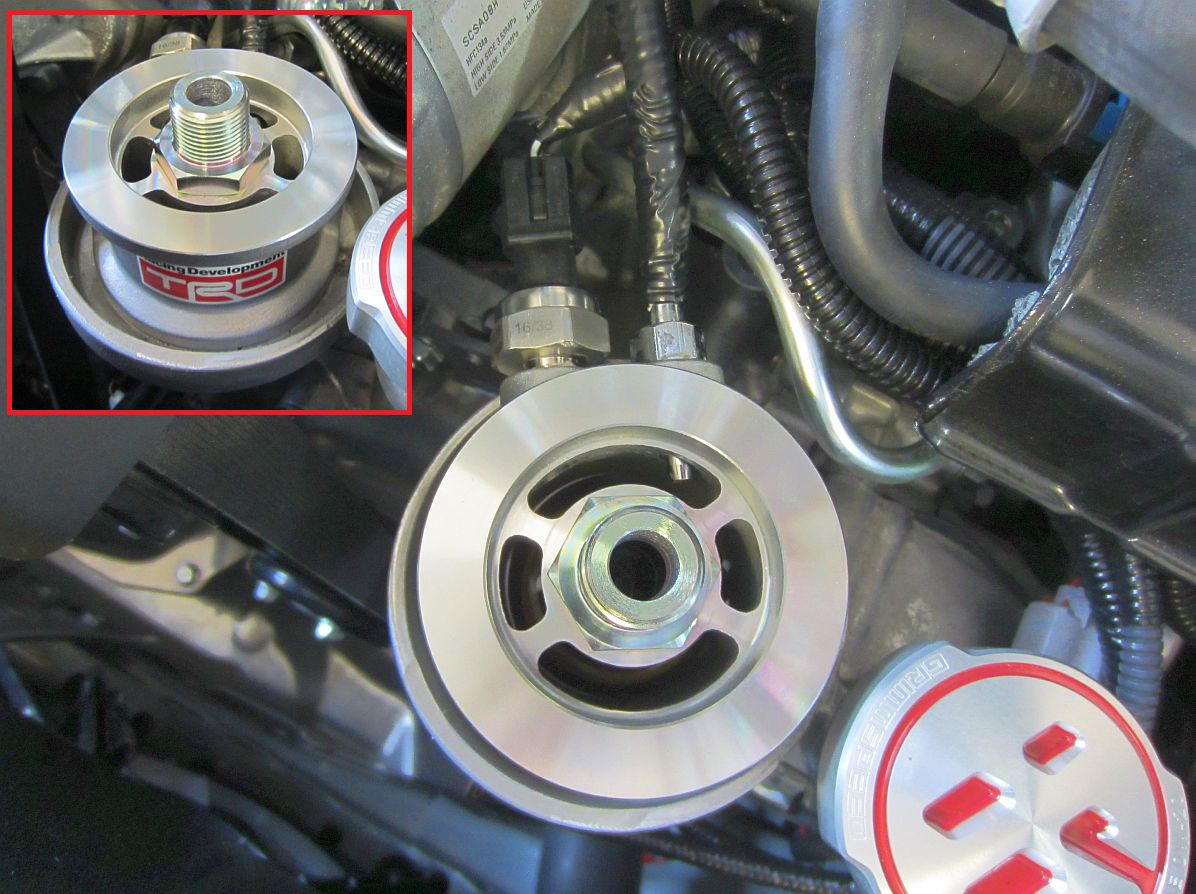
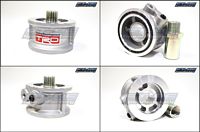
Permatex® High Temperature Thread Sealant (P/N 59235) (tech data sheet HERE) used on all adapters and senders, I let it cure the 24 hour cure time before starting engine up to check for leaks.[UPDATE] No leaks but the short oil temp probe did not really protrude from the galley adaptor and may have contributed to the delta between its readings and the OBDII/Torque gauge (others had the same issue, detailed in this thread). So, I decided to plug the galley hole/remove the adapter for the oil pressure sender returning all to stock and move both senders to a TRD Oil Sandwich Plate (P/N MS415-00001) for a clean/best scenario sender placement....we'll see if that corrects the oil temp delta. Installation instructions here in Japanese and English Translation. I did end up retapping the holes for 1/8"-27 NPT and using thread sealant, they come tapped as BSP- proceed at your own risk.


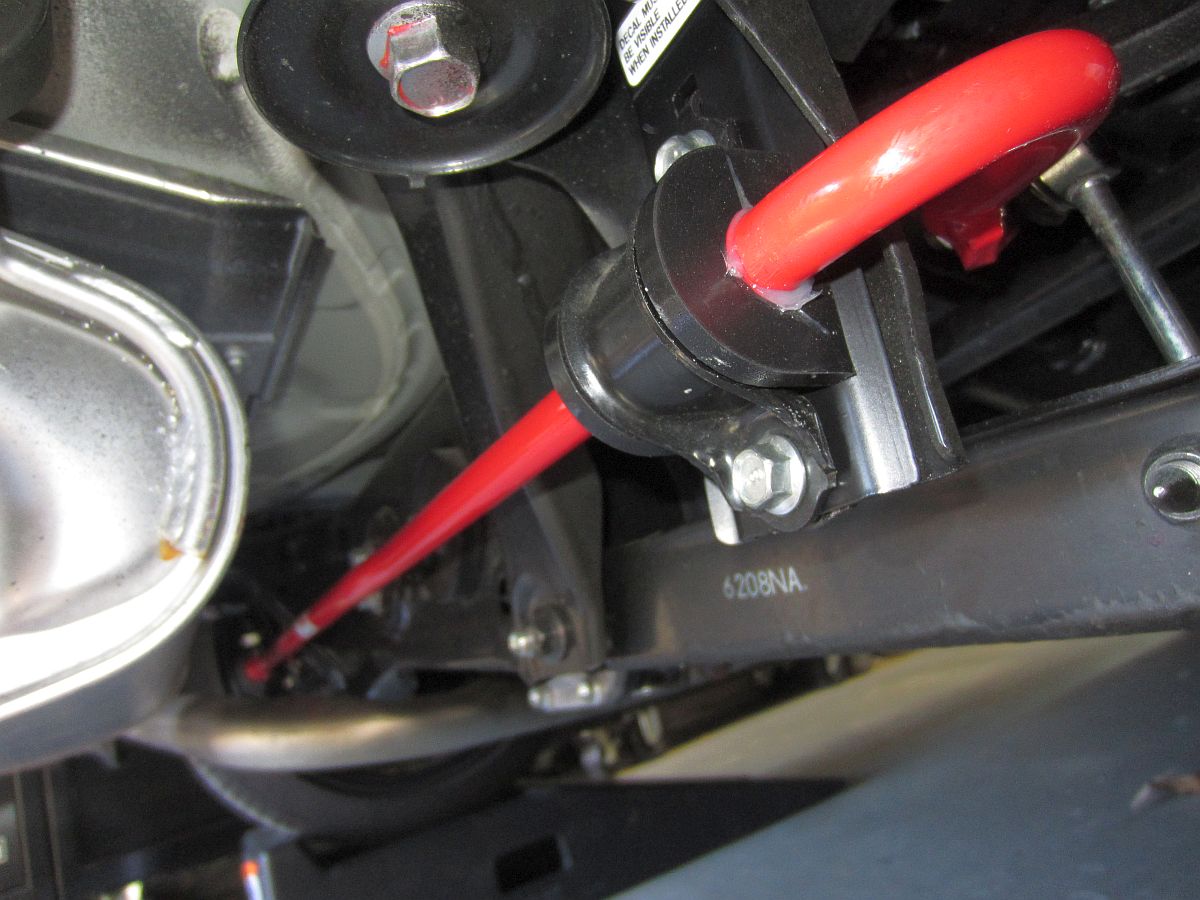
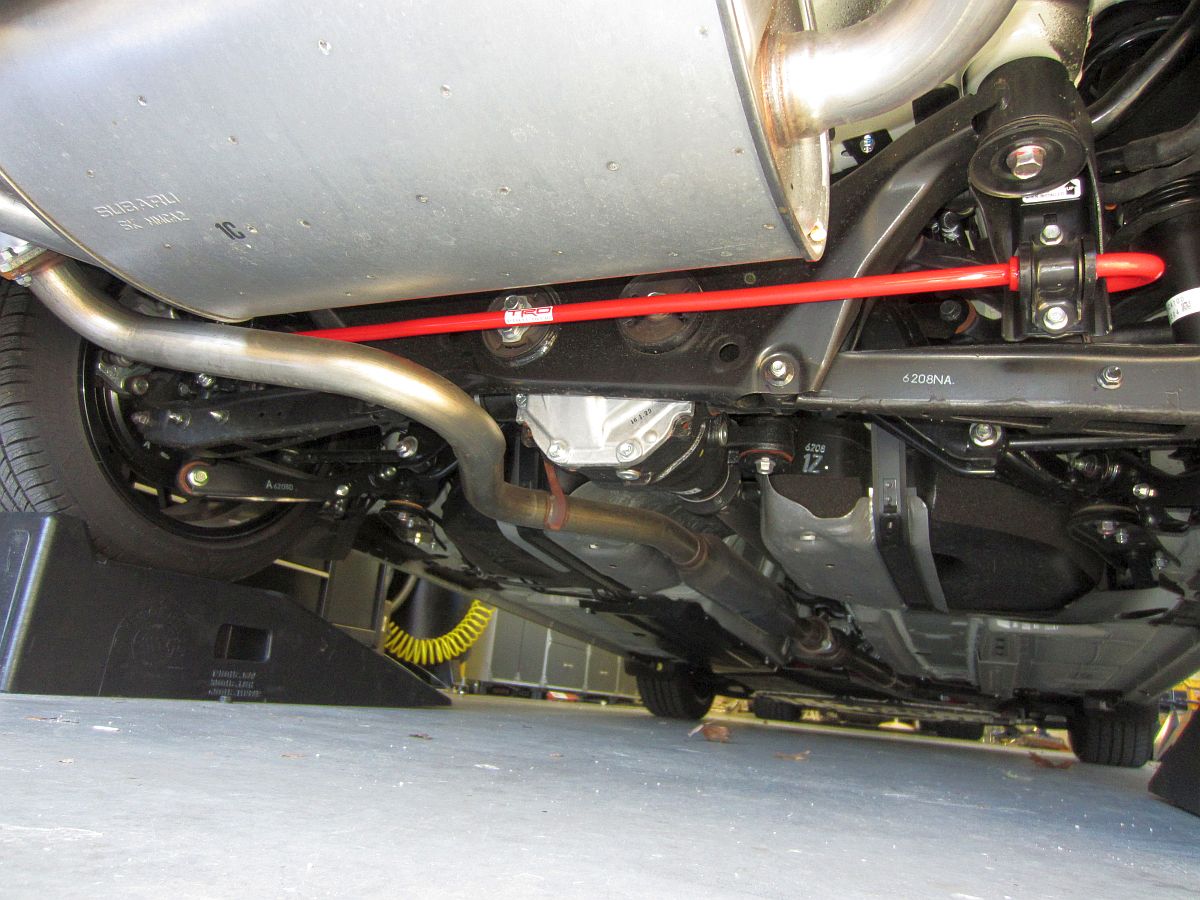
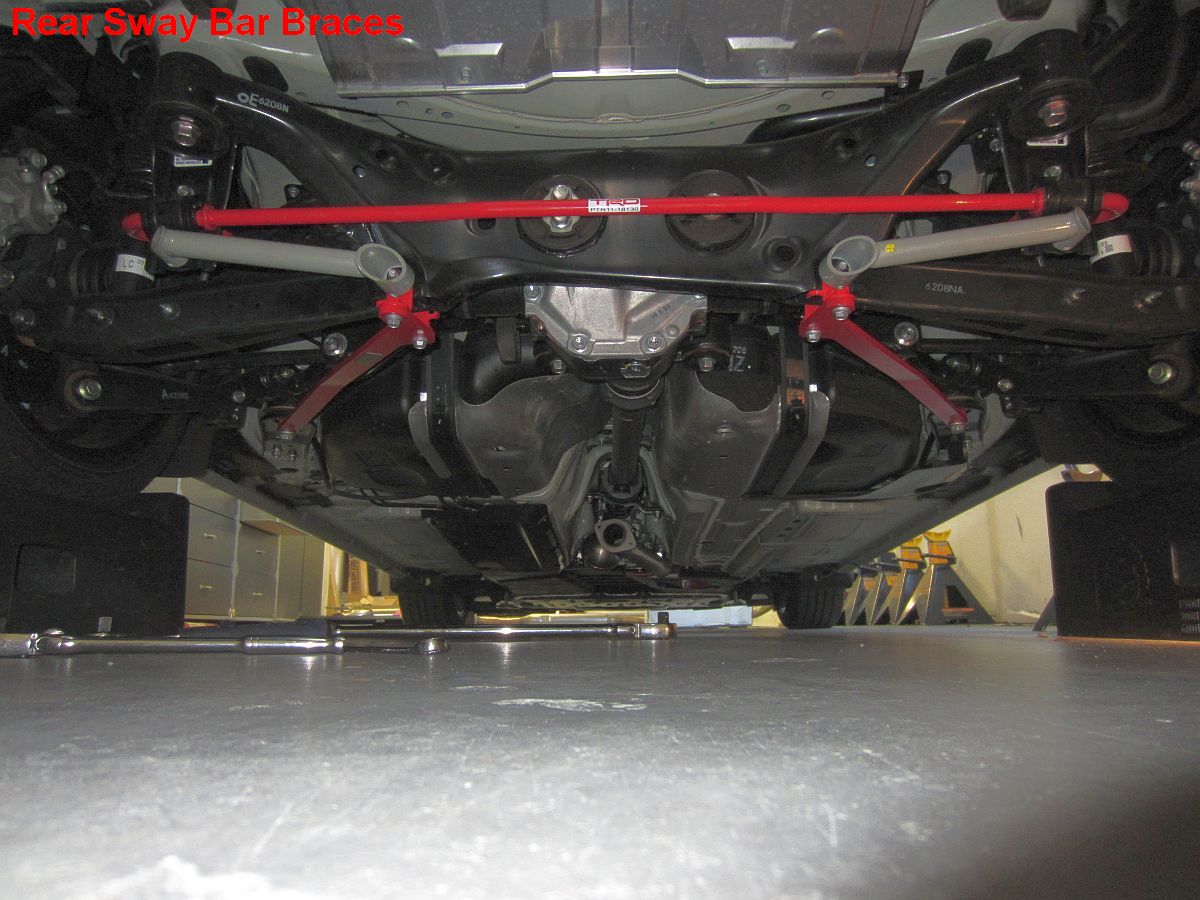
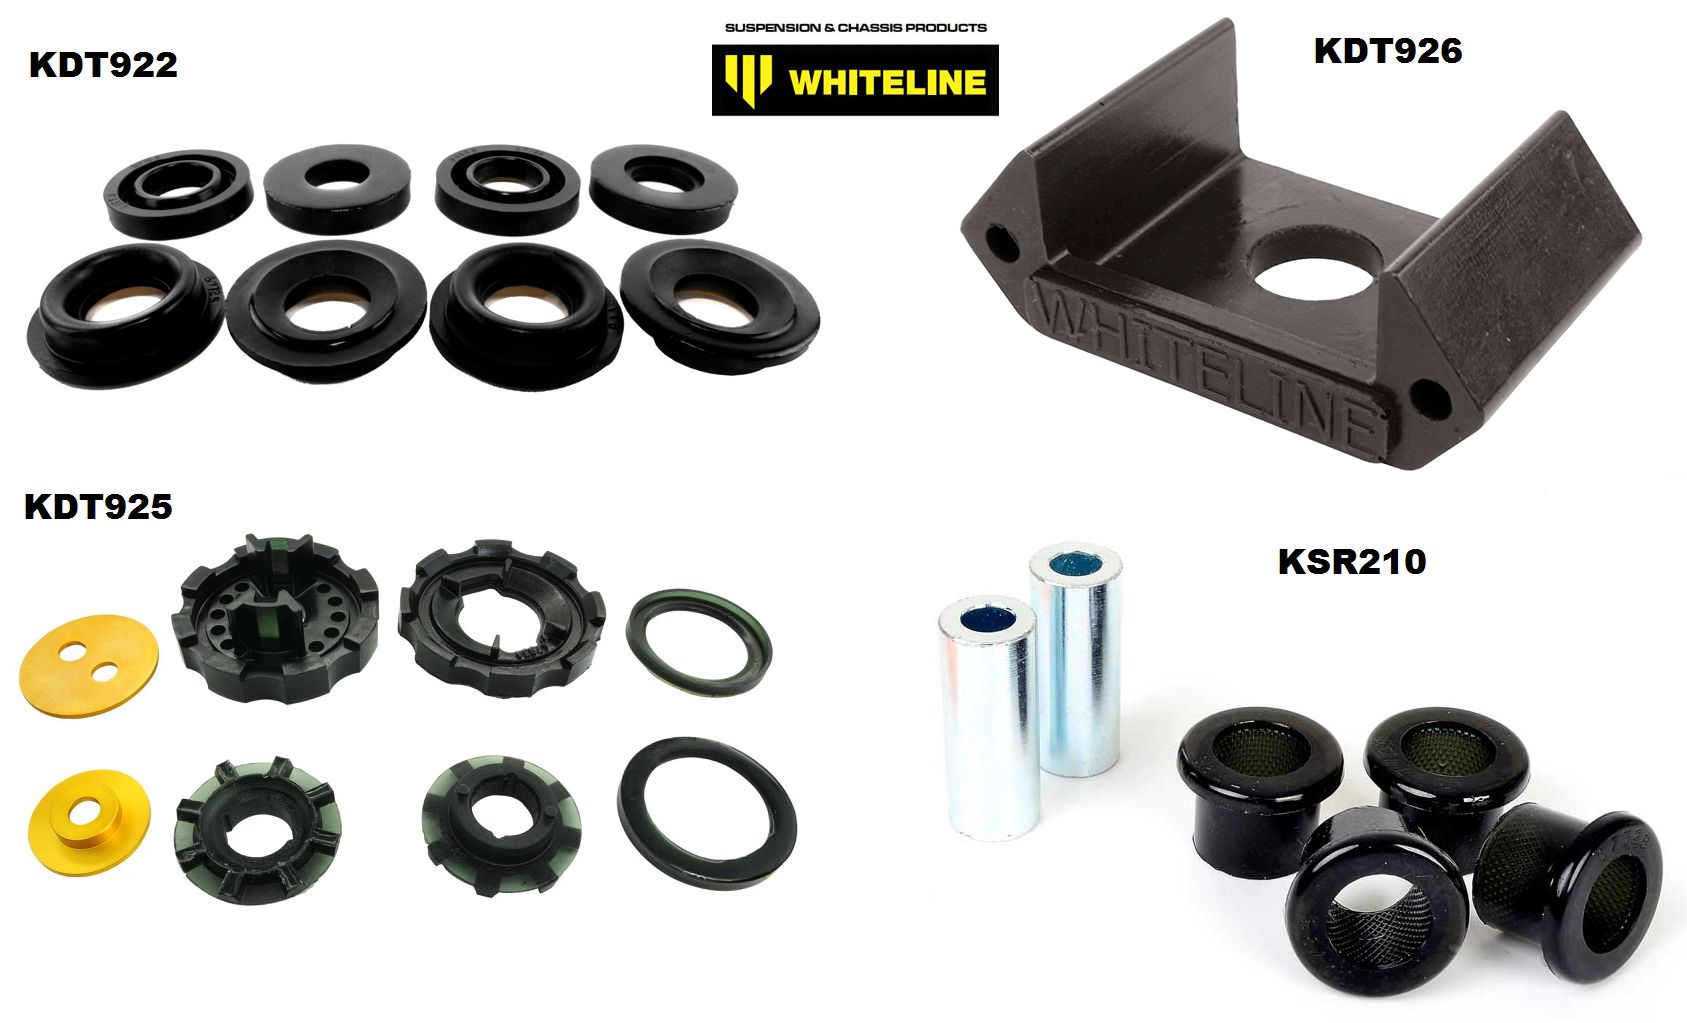
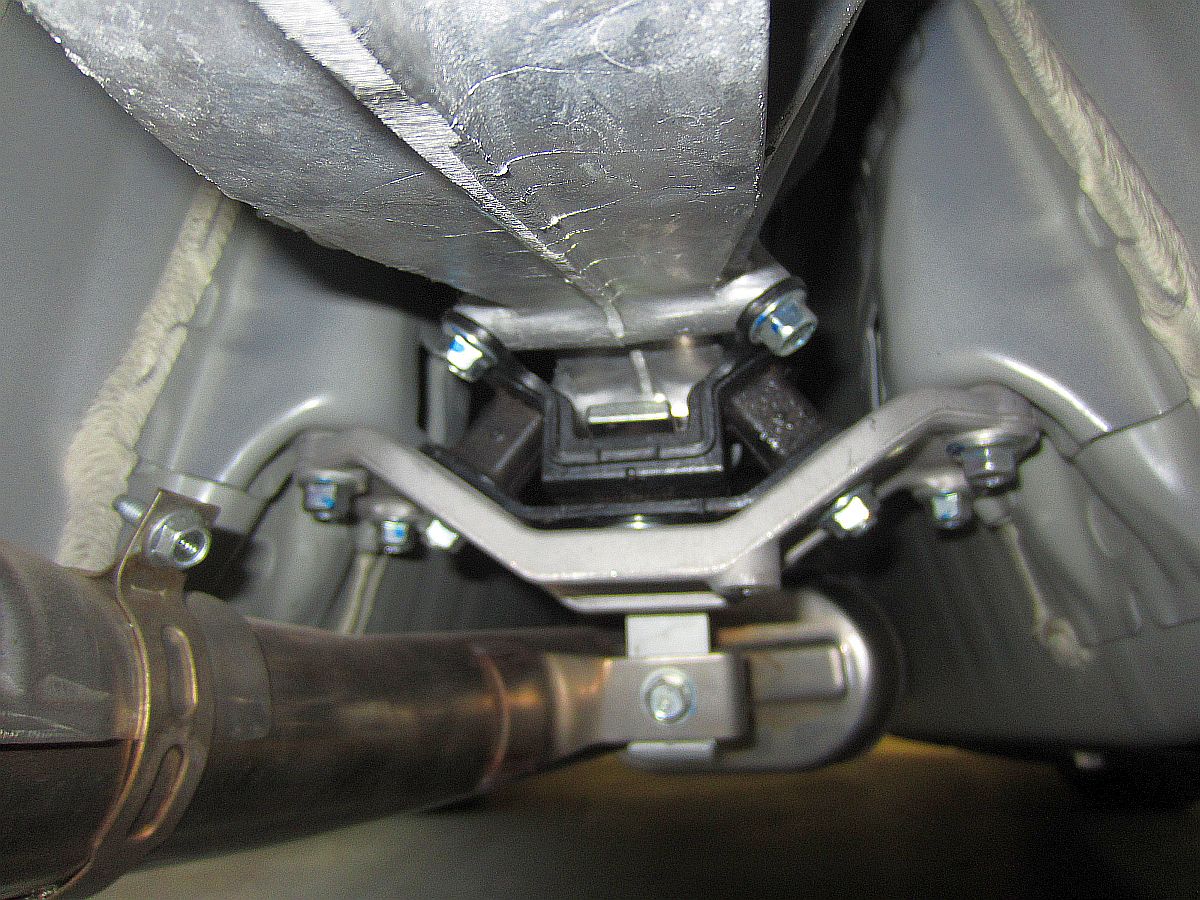
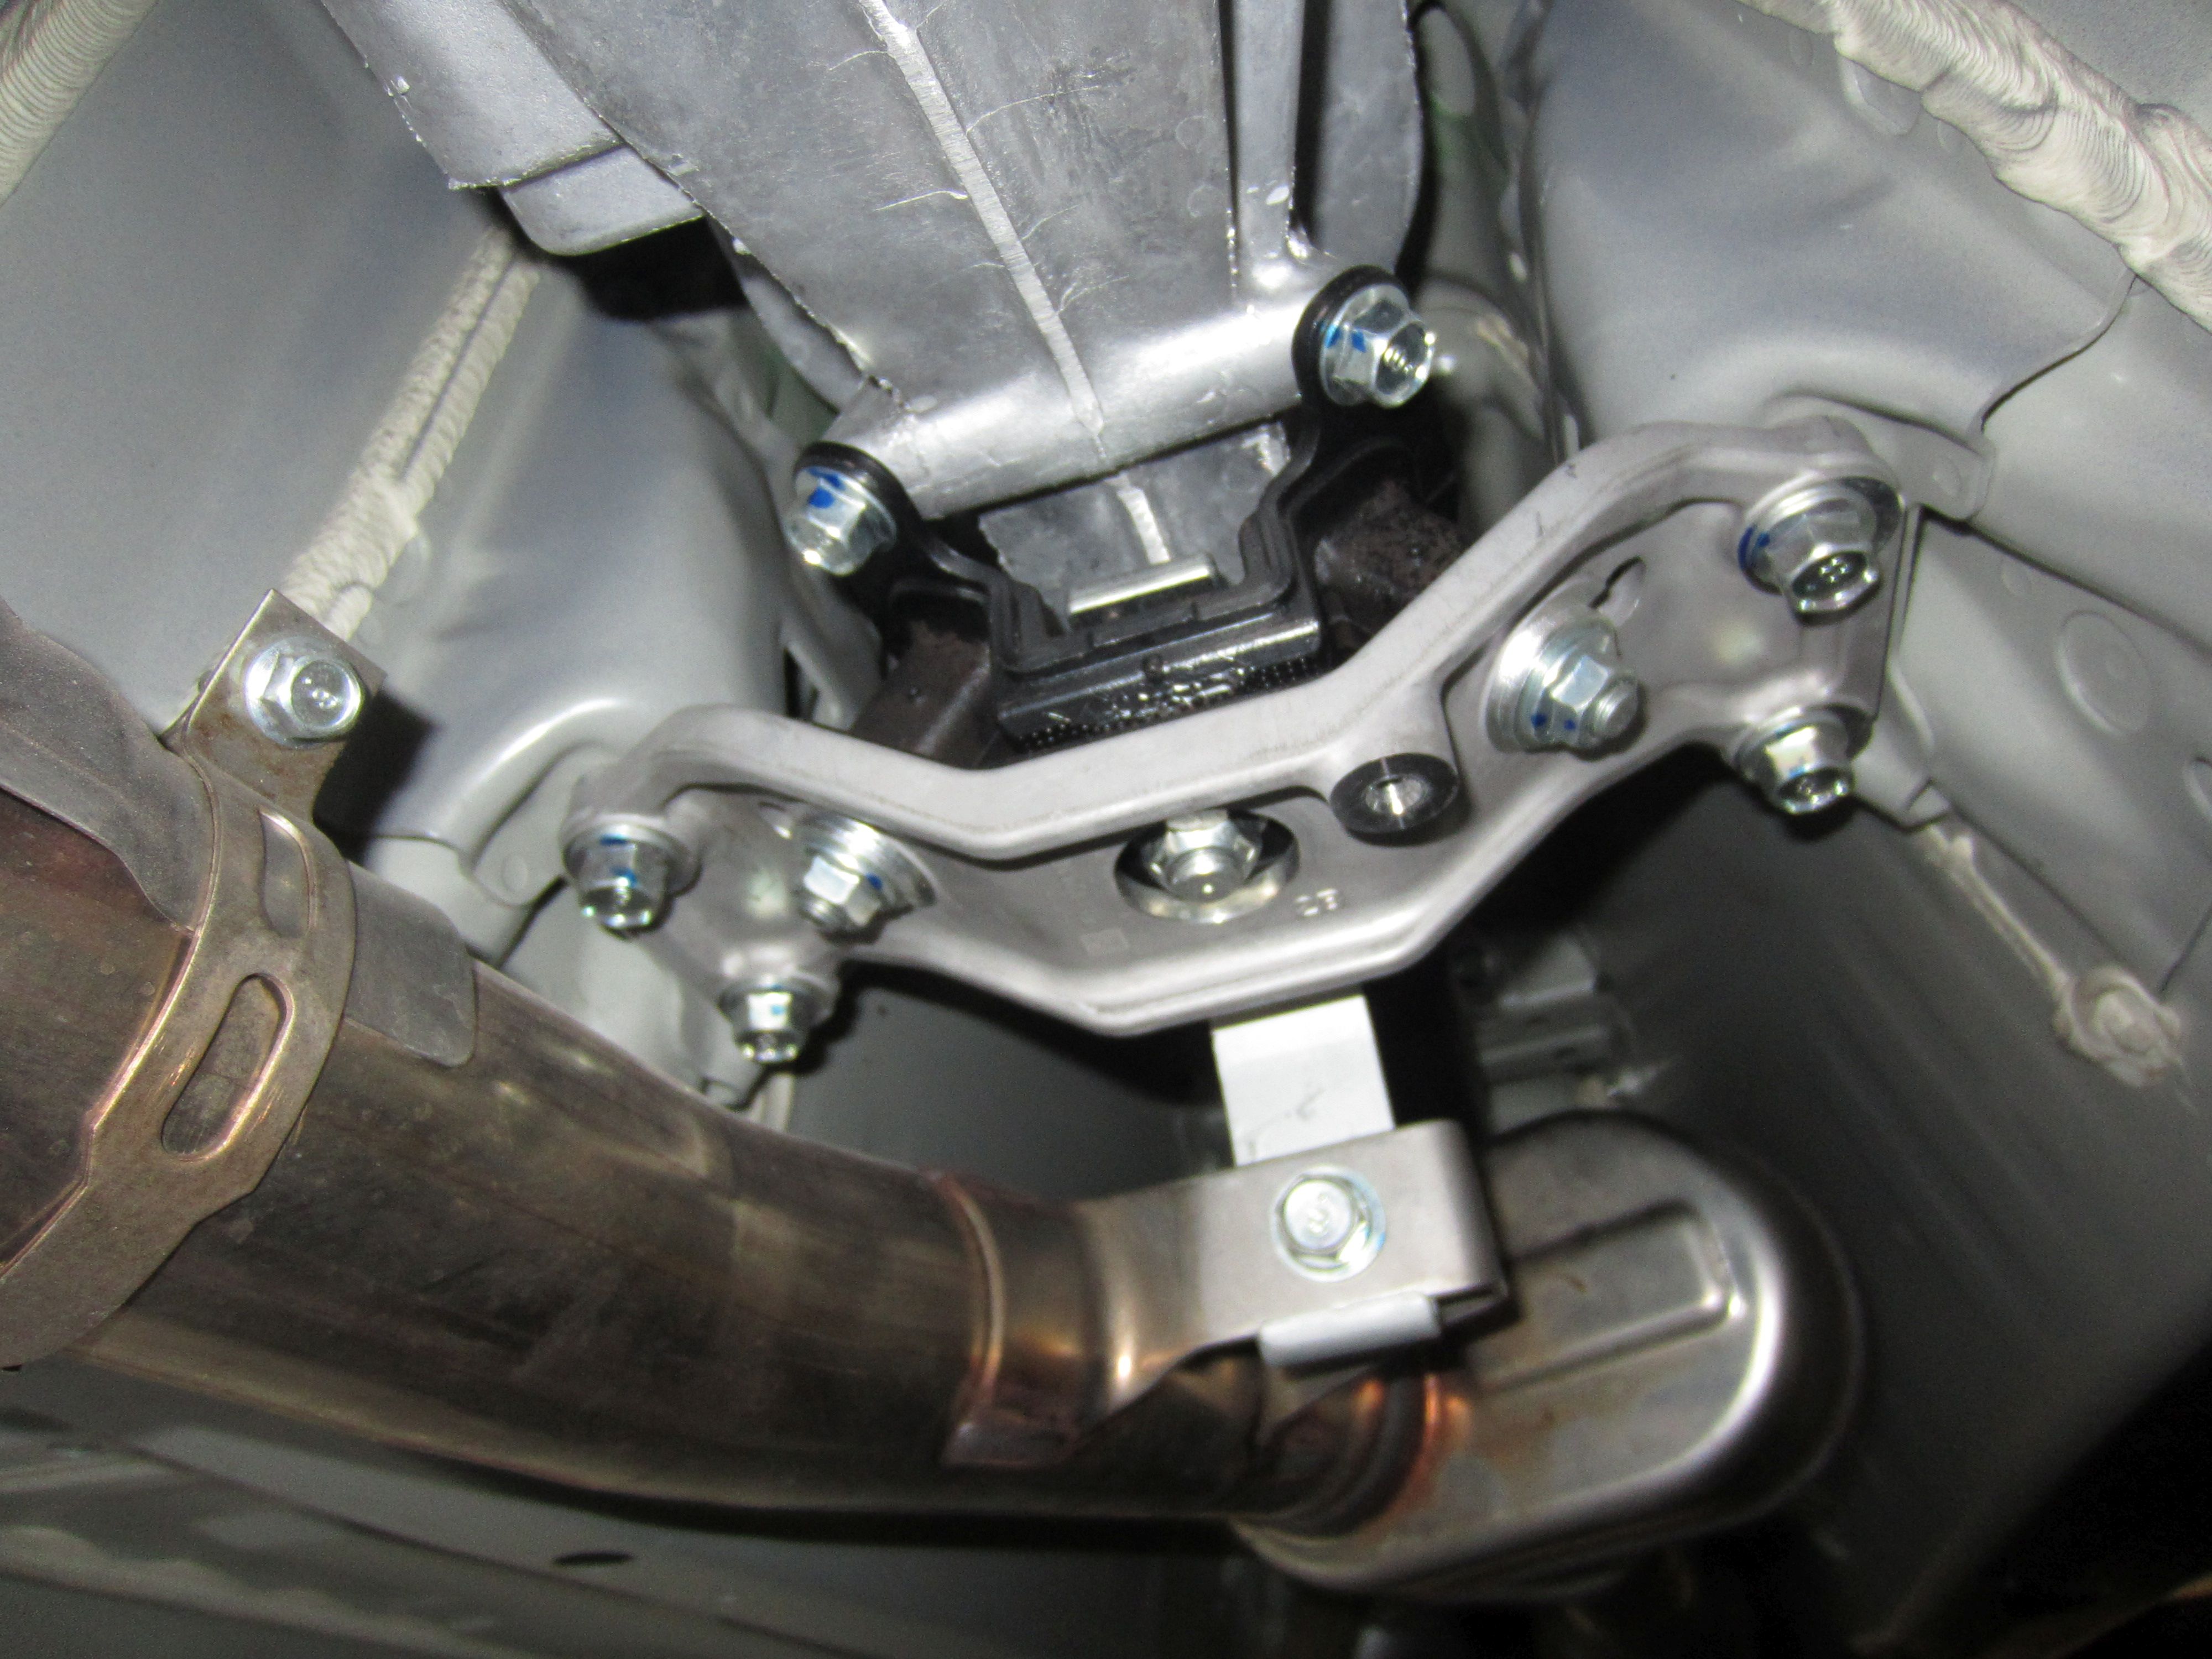
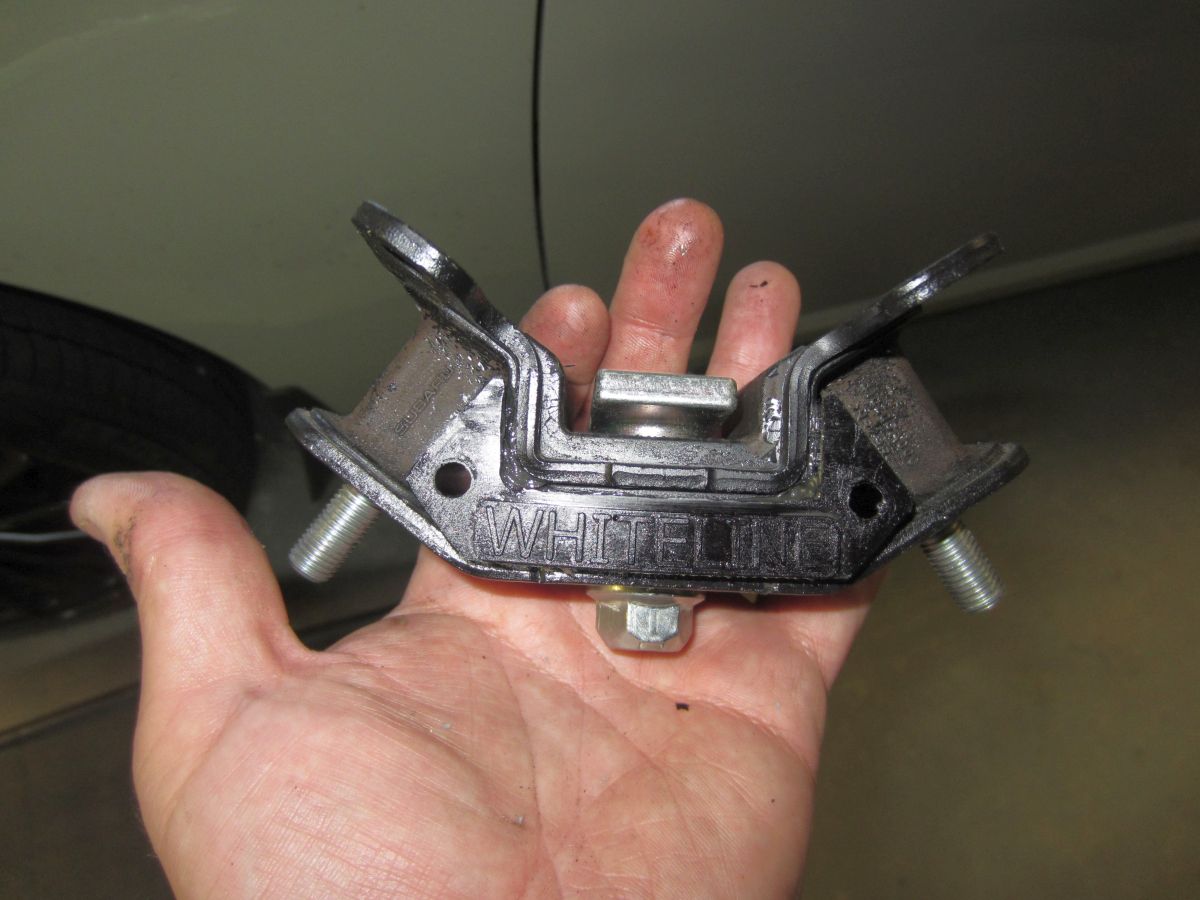
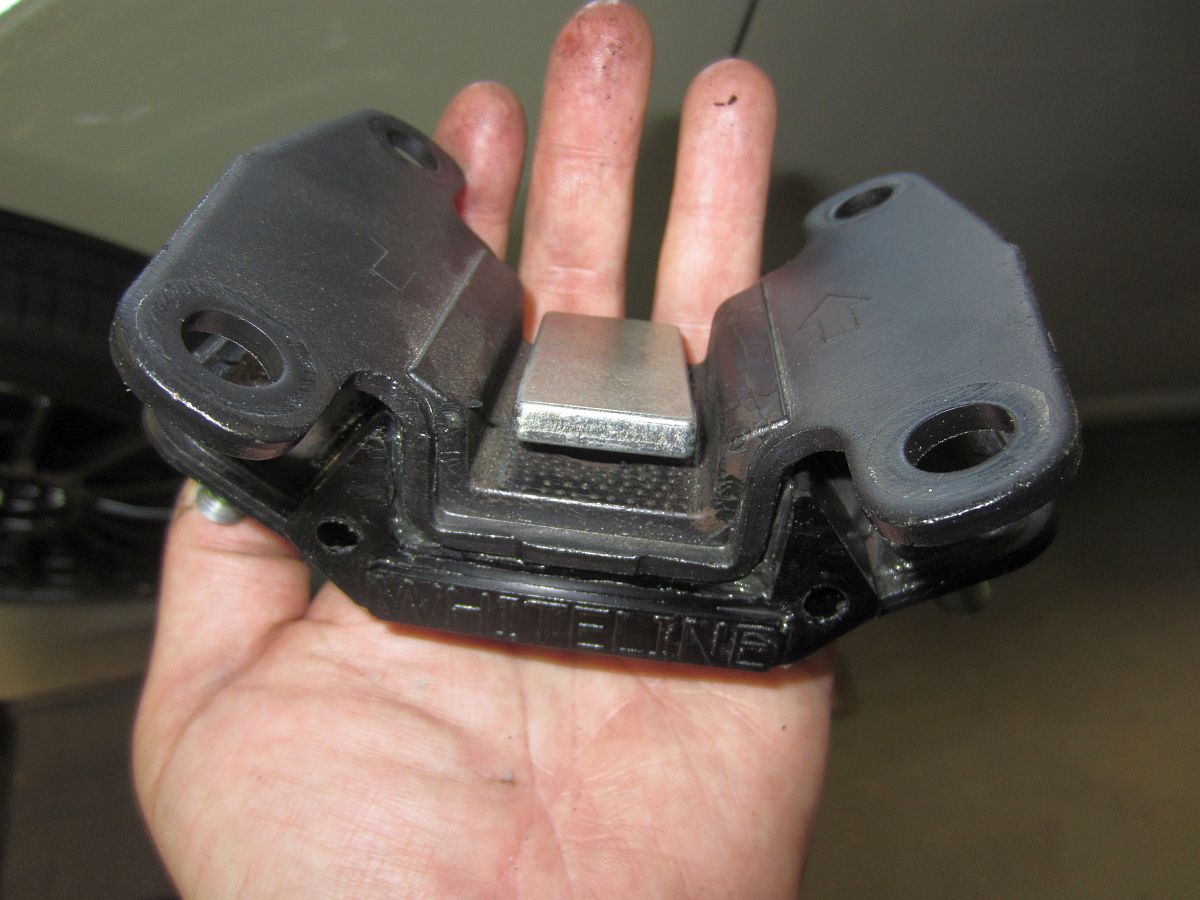
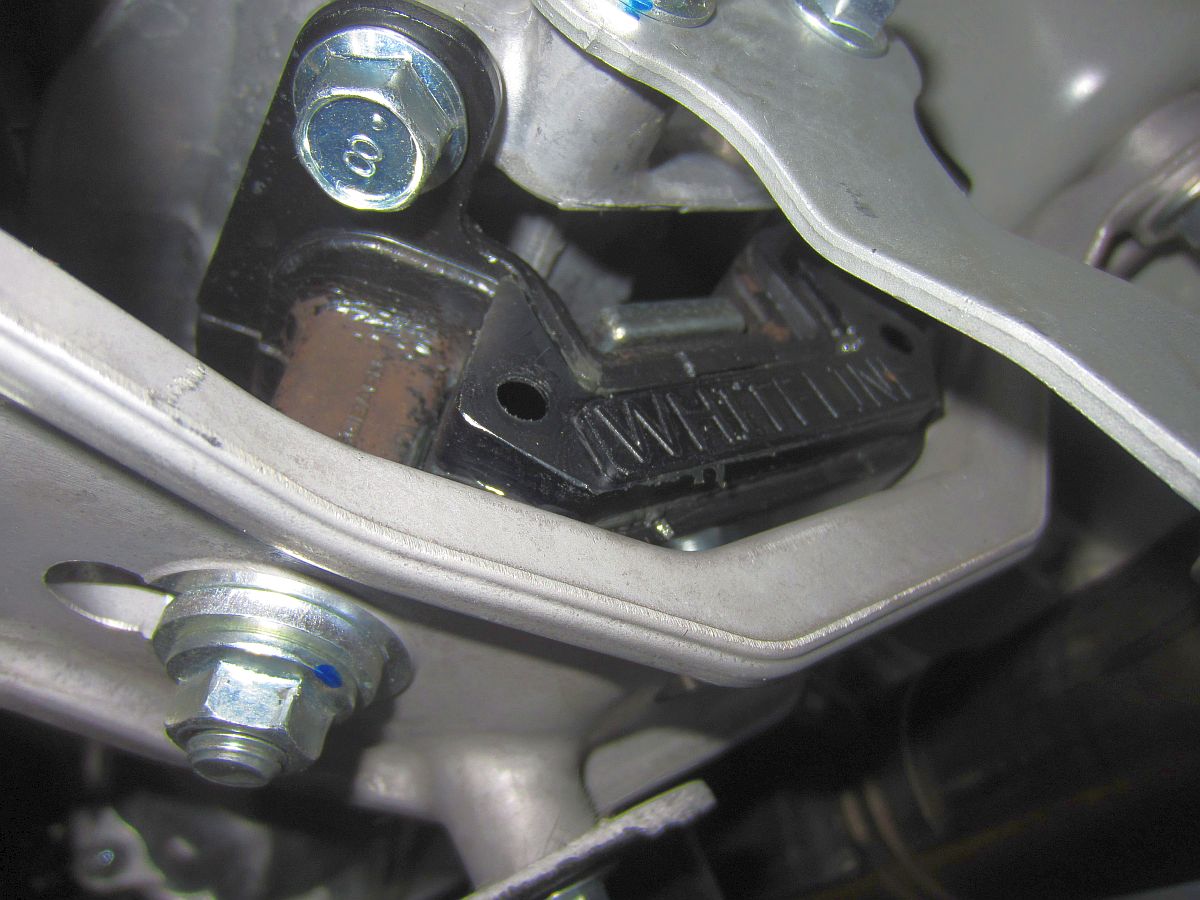
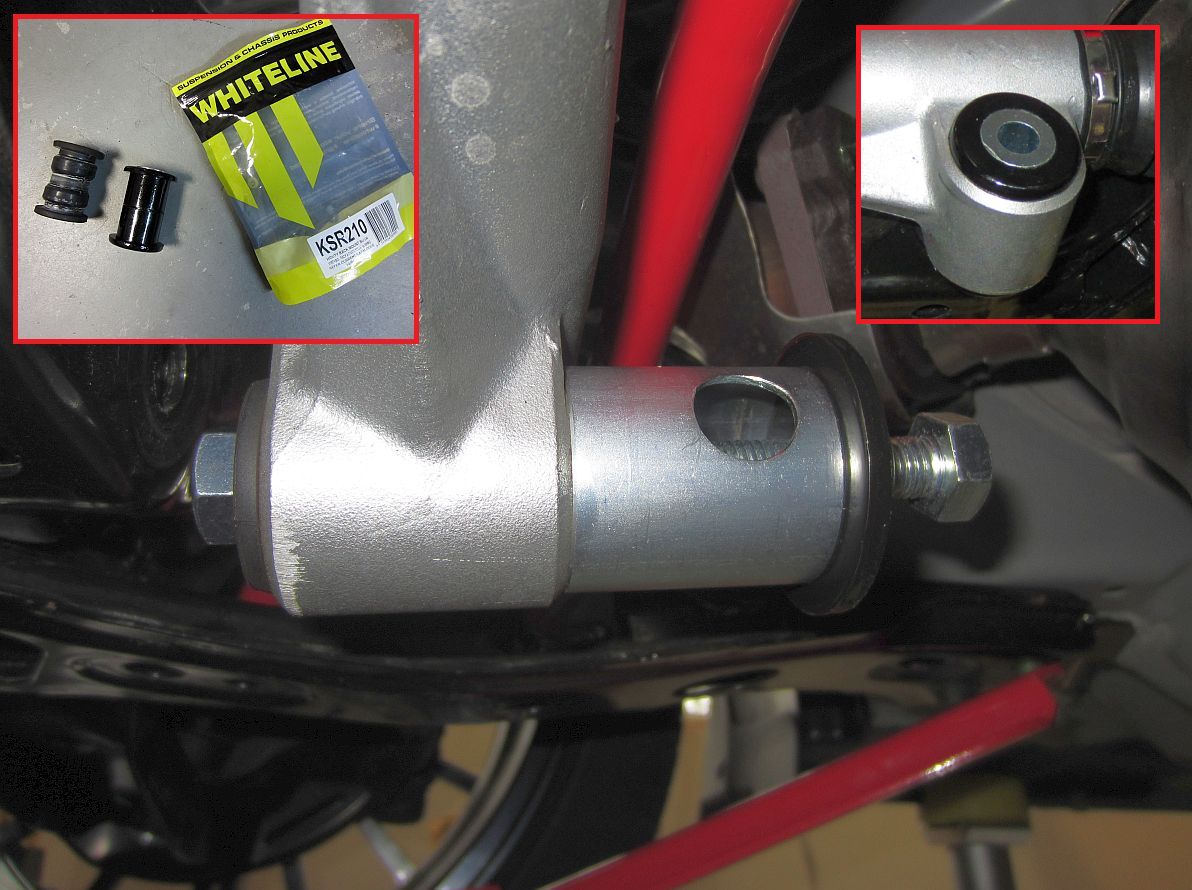
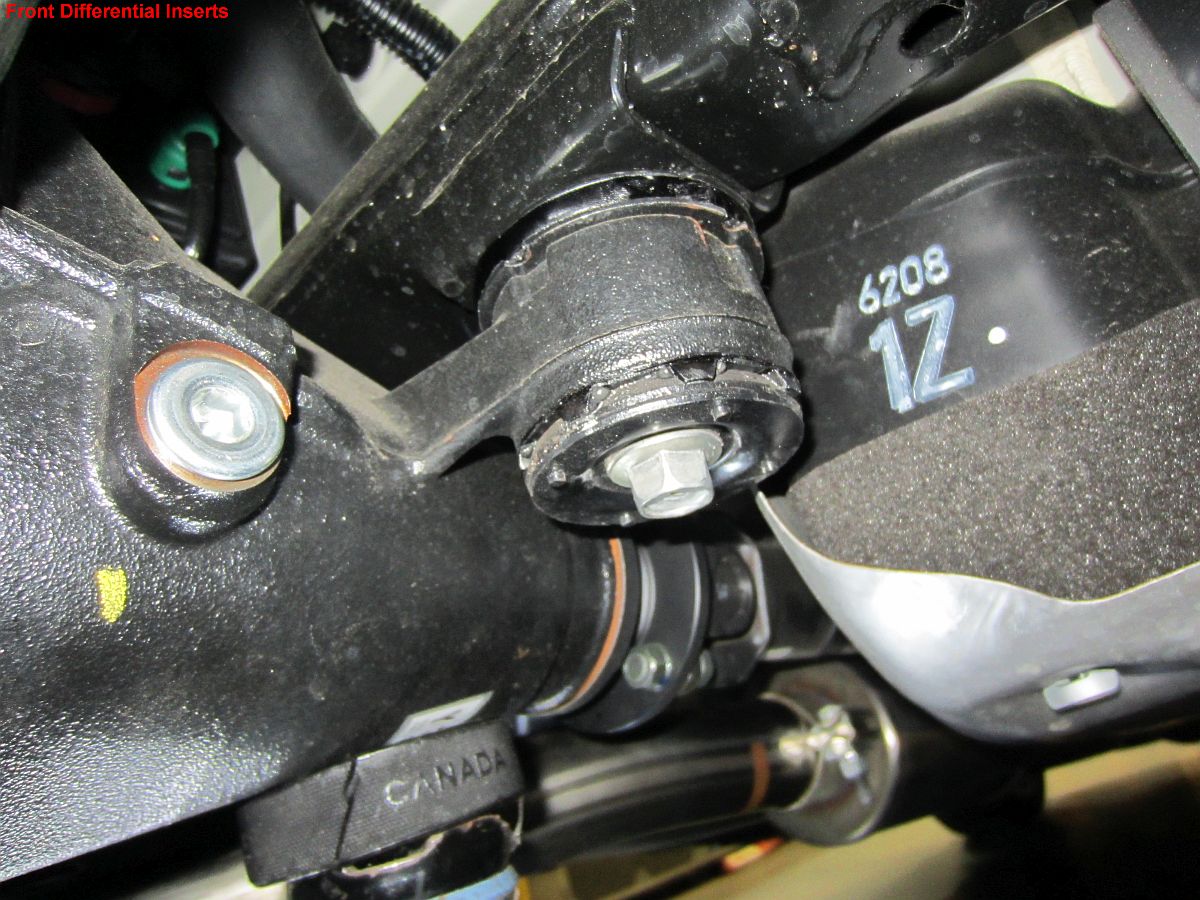
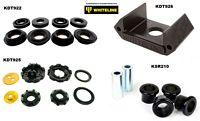
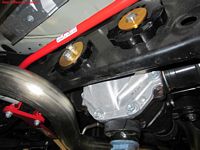
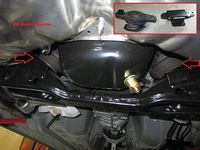
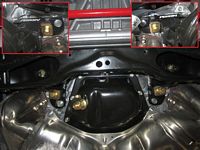
Whiteline bushings and rear sway bar mount braces installed:
- (KDT926) Front Gearbox Positive Shift Kit Bushing
- (KDT925) Differential Mount Cradle Inserts
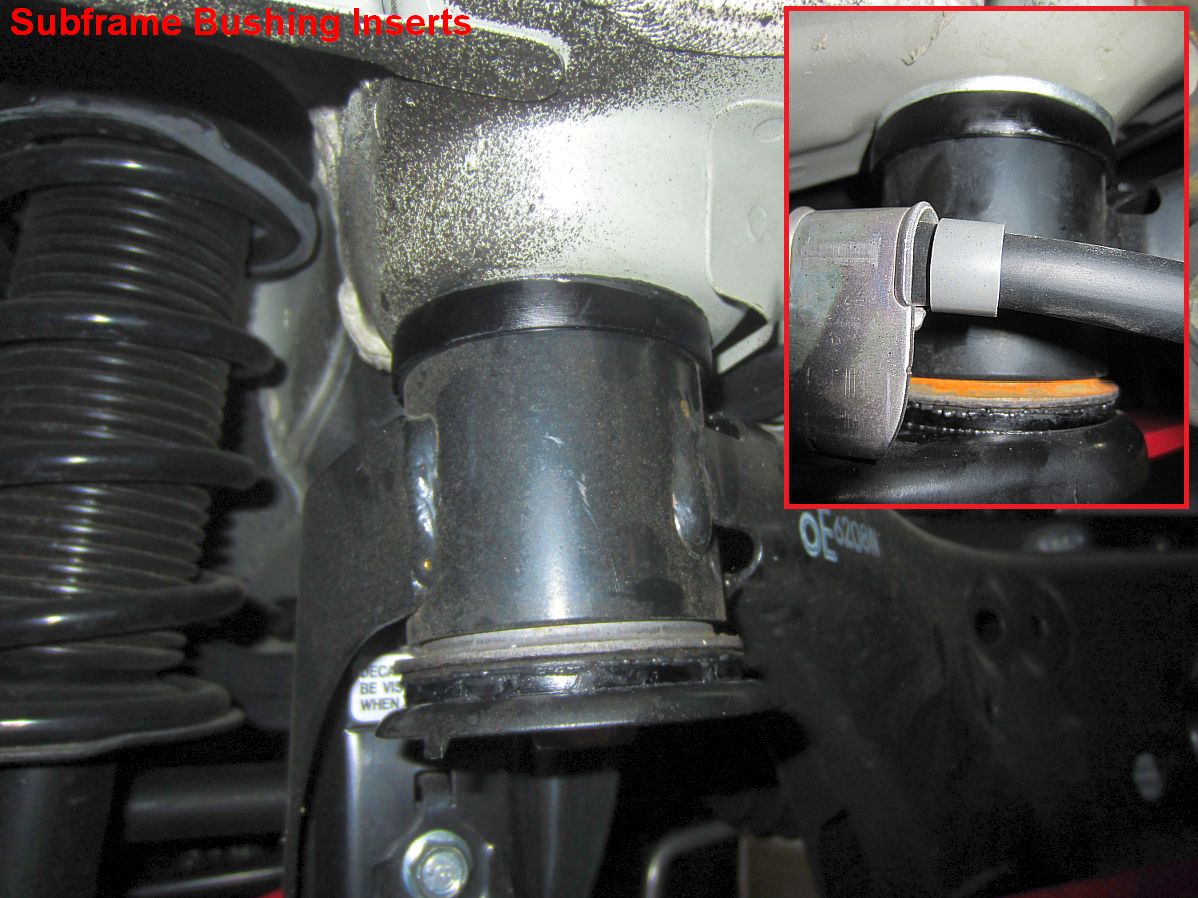
- (KDT922) Rear Crossmember/Subframe Mount Insert Bushings
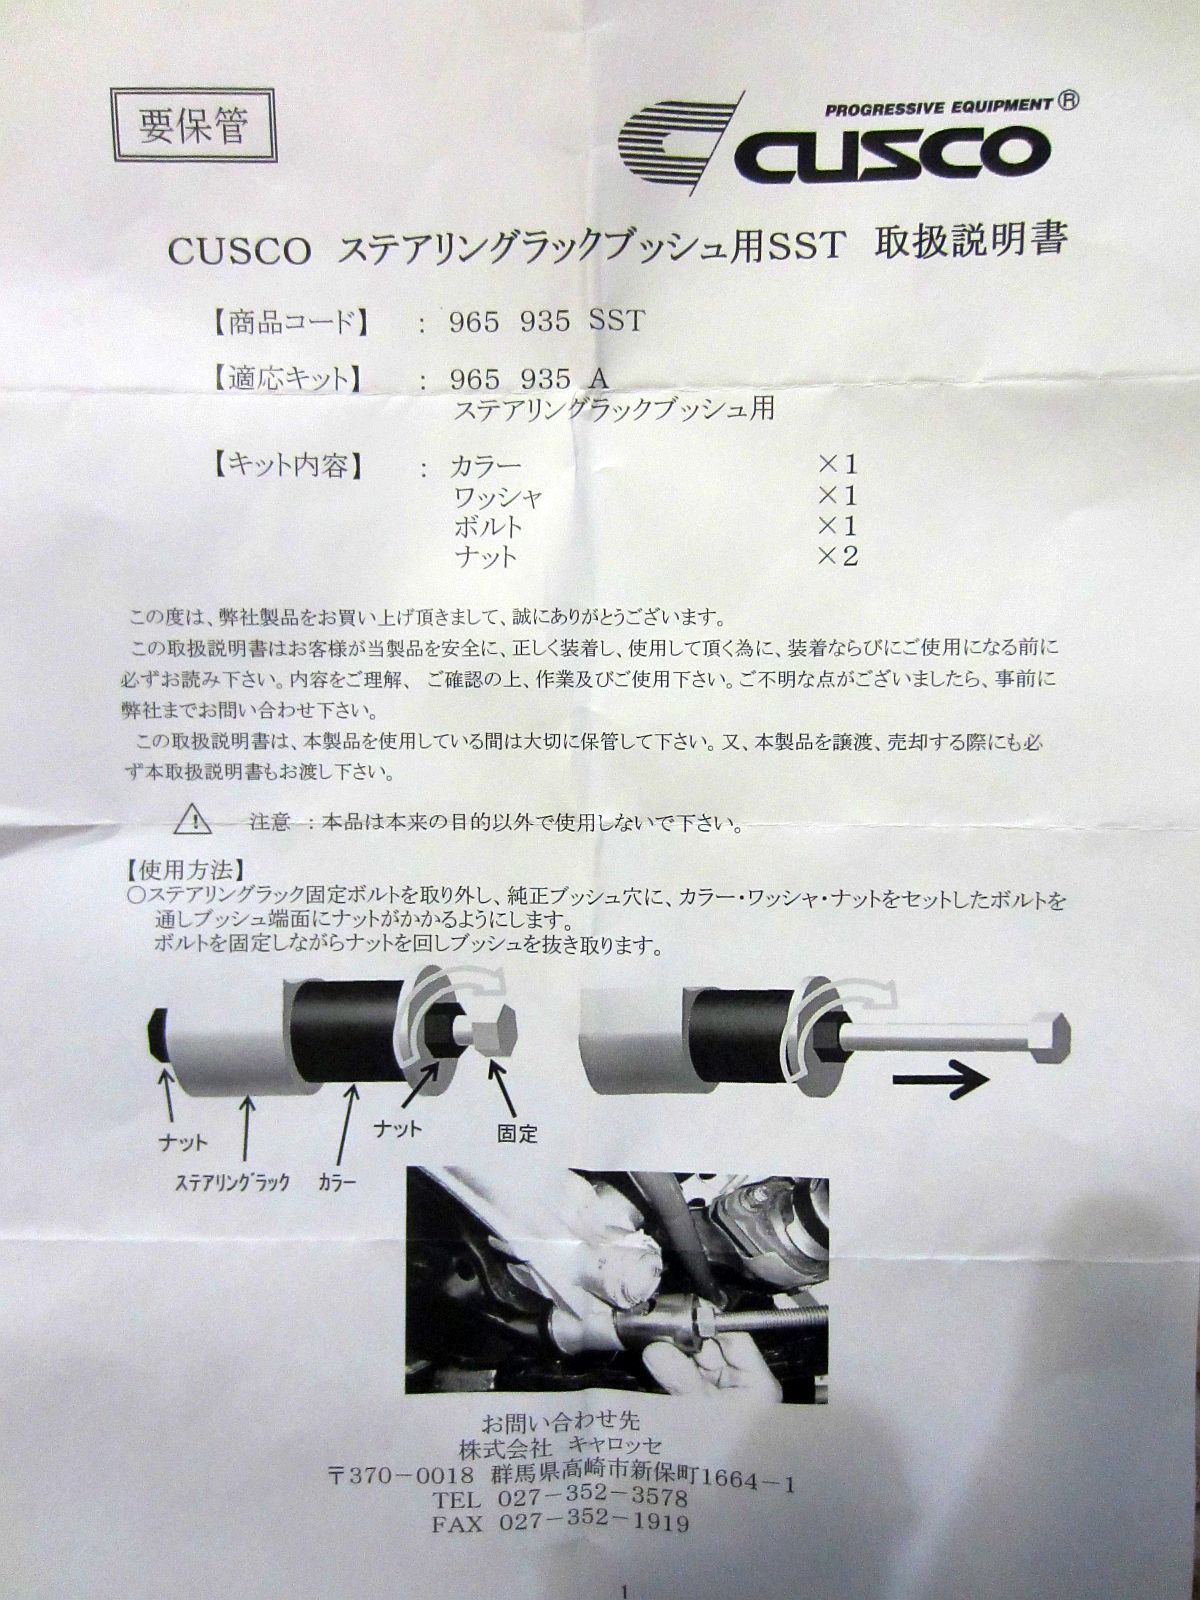
- (KSR210) Steering Rack and Pinion Mount Bushing
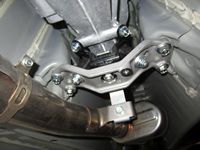
- (KBR38) Rear Brace-Sway Bar Mount
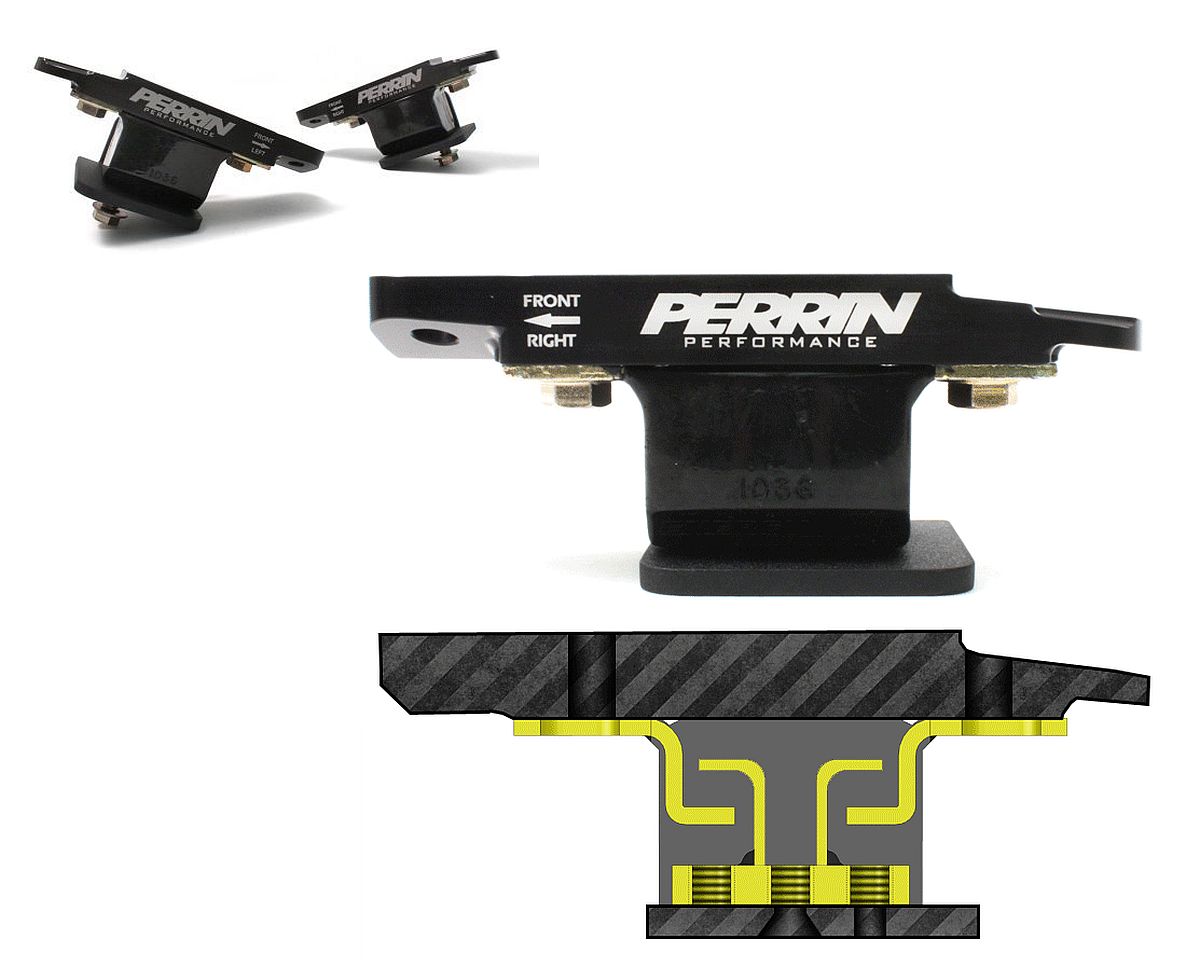
All of these Whiteline Bushings coupled with the Perrin Engine Mounts makes for a super tight feeling car.

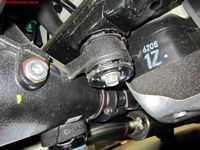
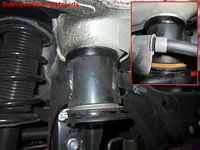
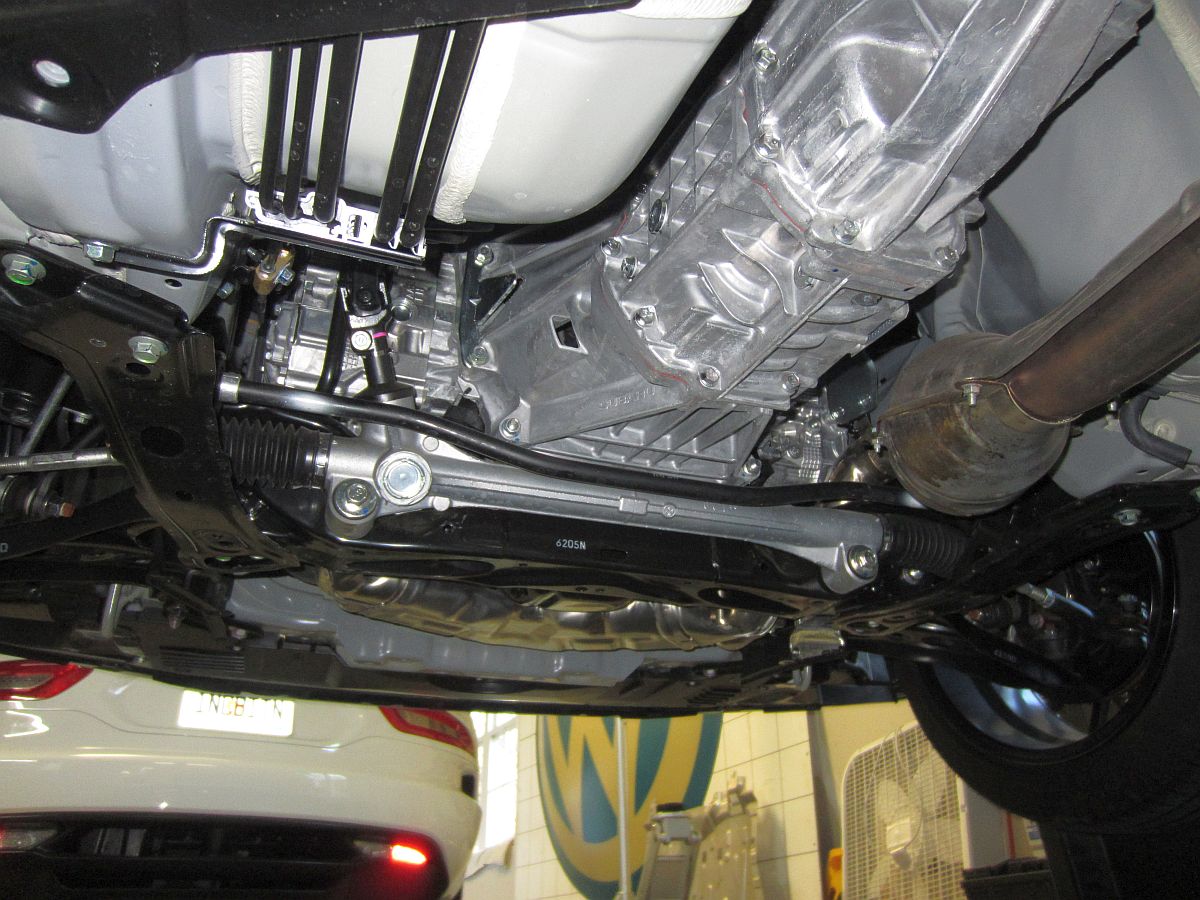
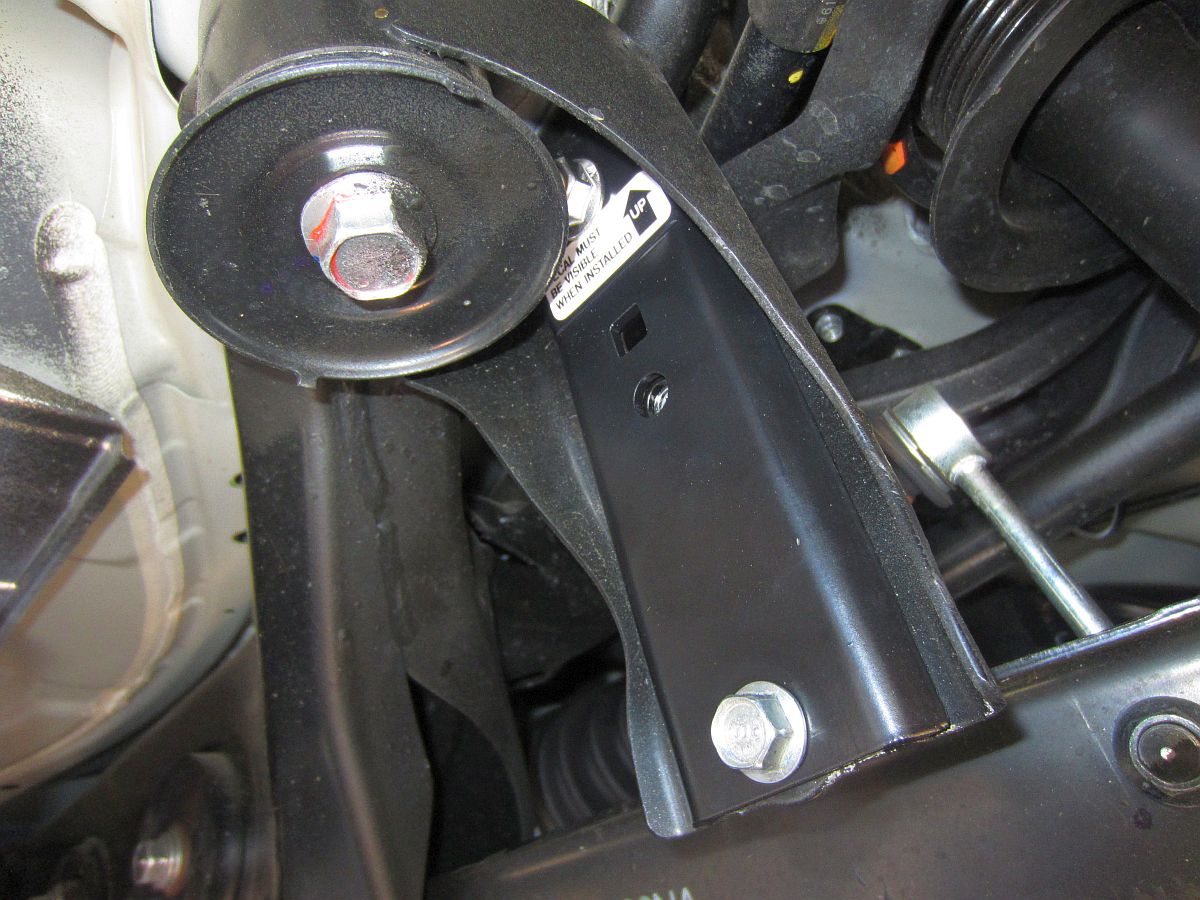
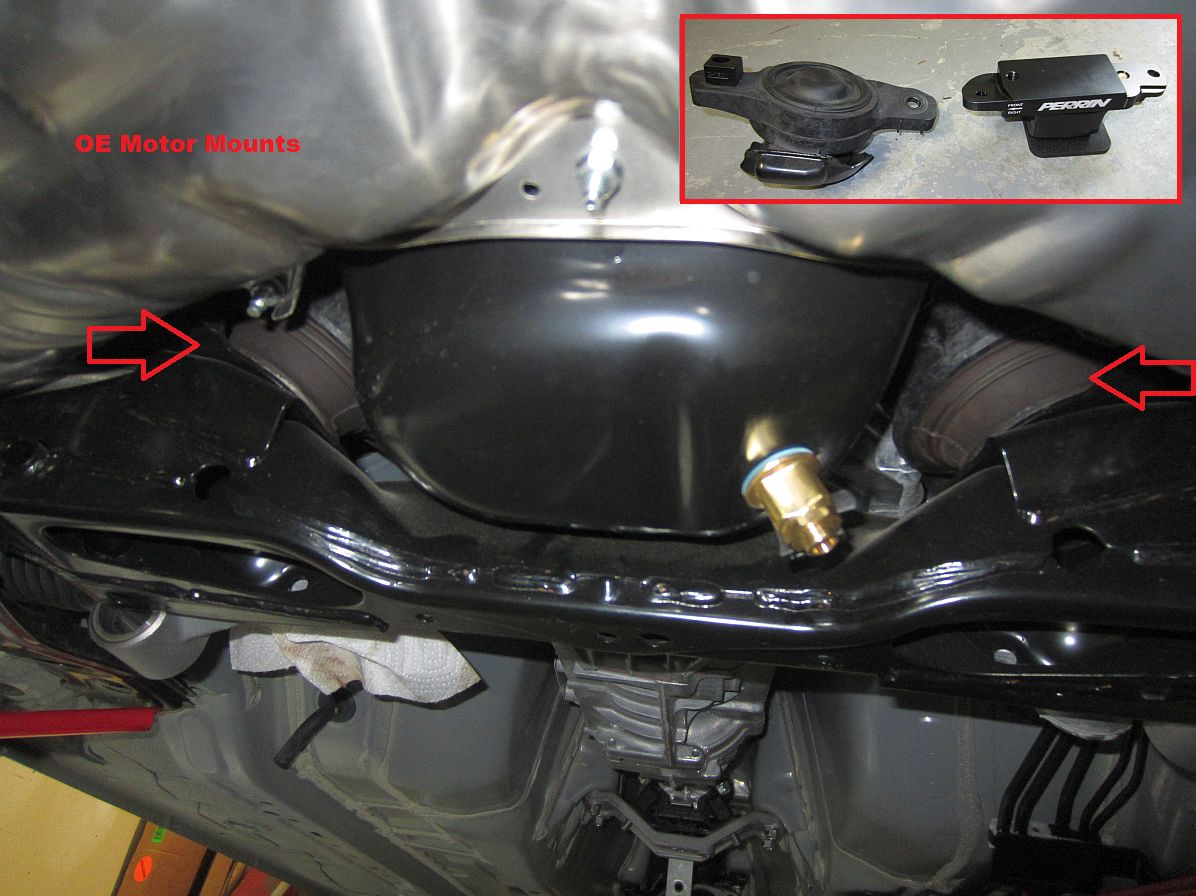
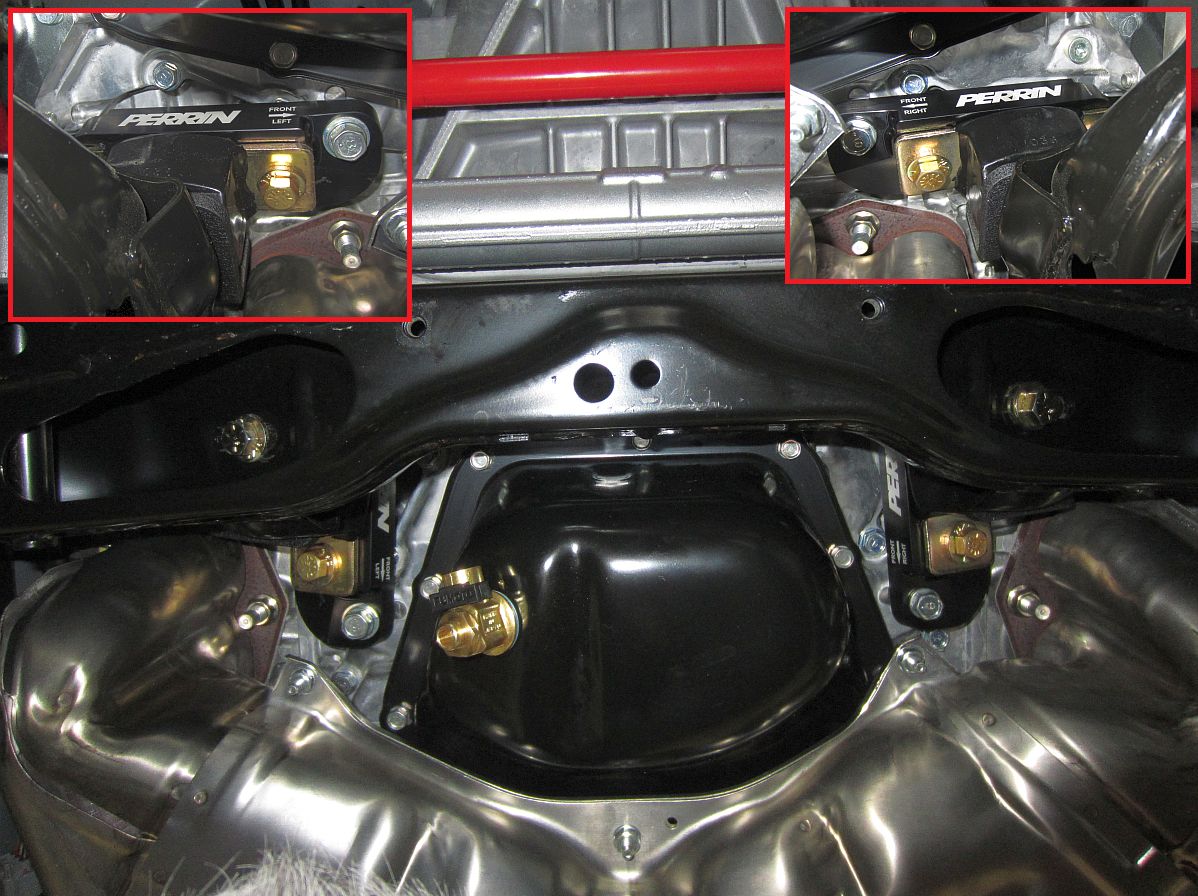
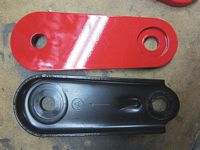
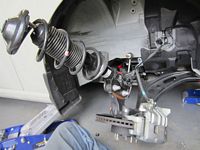
Perrin Engine Mounts from Amazon
Since I was already having to loosen engine mounts and jack the motor for the Nameless downpipe installation I figured I would go ahead and install these at the same time.
Installation: I used the noted forum guides, no issues removing either OE mount but I did have the over pipe out and the steering rack dropped at that point for other projects. The driver side mount was a little more challenging but out in 5 minutes, I would recommend removing the steering rack bolts so the rack is movable, this is the only way I got the driver side mount out so quick. Lining up the Perrin mount bolt hole was the most challenging part of the installation, a pry bar is your friend.
Initial drive after installation: Yeah, a little vibration at warm idle but hardly noticeable any other time (but I have had poly mounts in most of my cars so YMMV), paired with the Whiteline transmission bushing insert you do hear more gear noise. Worthwhile even for my NA car, I like to feel connected and this enhances that aspect.
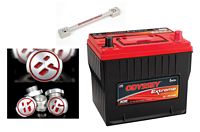
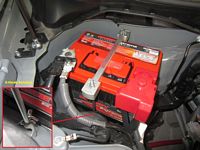
Odyssey PC1400T Battery from Amazon
For those that require insight into changing out the battery in this car, this is a pretty good DIY guide with pics of the hooks and locations: Change The Battery on a Scion FR-S & Subaru BRZ.
Warning, the GrimmSpeed battery tie down may/may not work with the OE battery, it definitely doesn't work with the Odyssey- the front J-Hook is a bit too short. Your mileage may vary but I was able to use a small S-Hook from Home Depot that lengthened the J-Hook enough to work.....time will tell if this is a viable long-term solution.
Odyssey Battery documents: Owner's Manual HERE, Technical Manual HERE, Ultimizer Charger Information HERE/ Manual HERE, Warranty Information HERE.
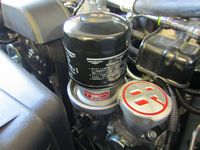
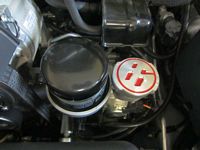
And since I'm on a GrimmSpeed roll, I also got their 86 oil cap from FRSport.
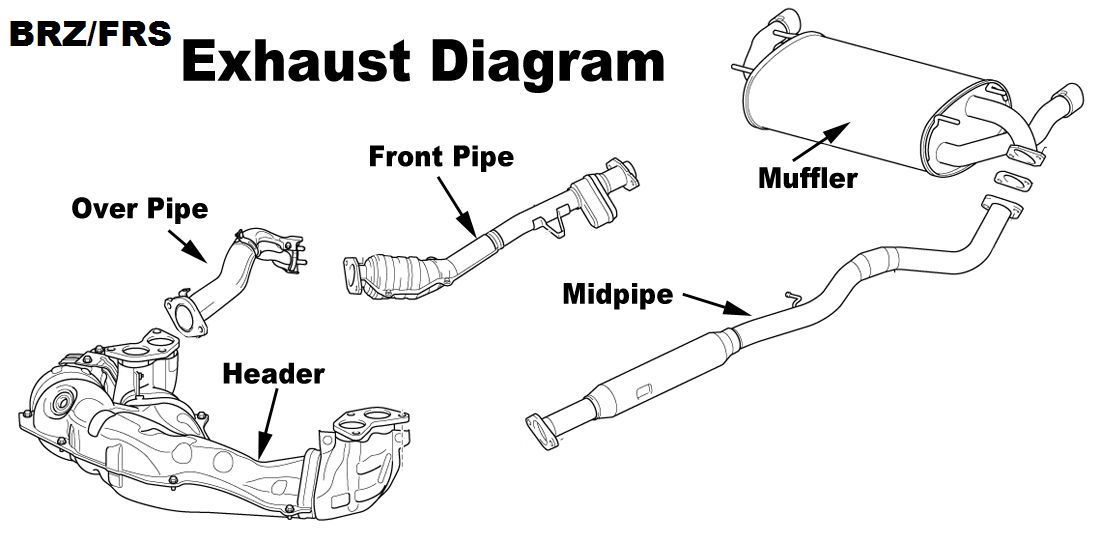
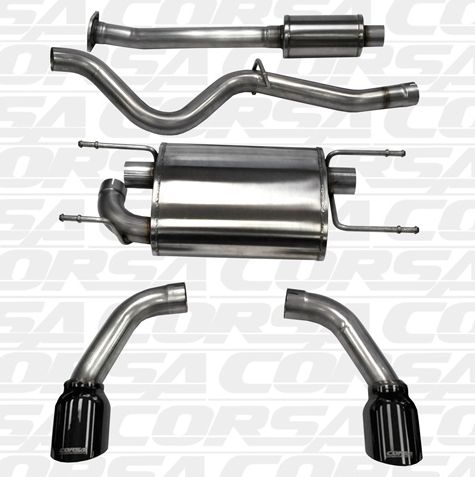
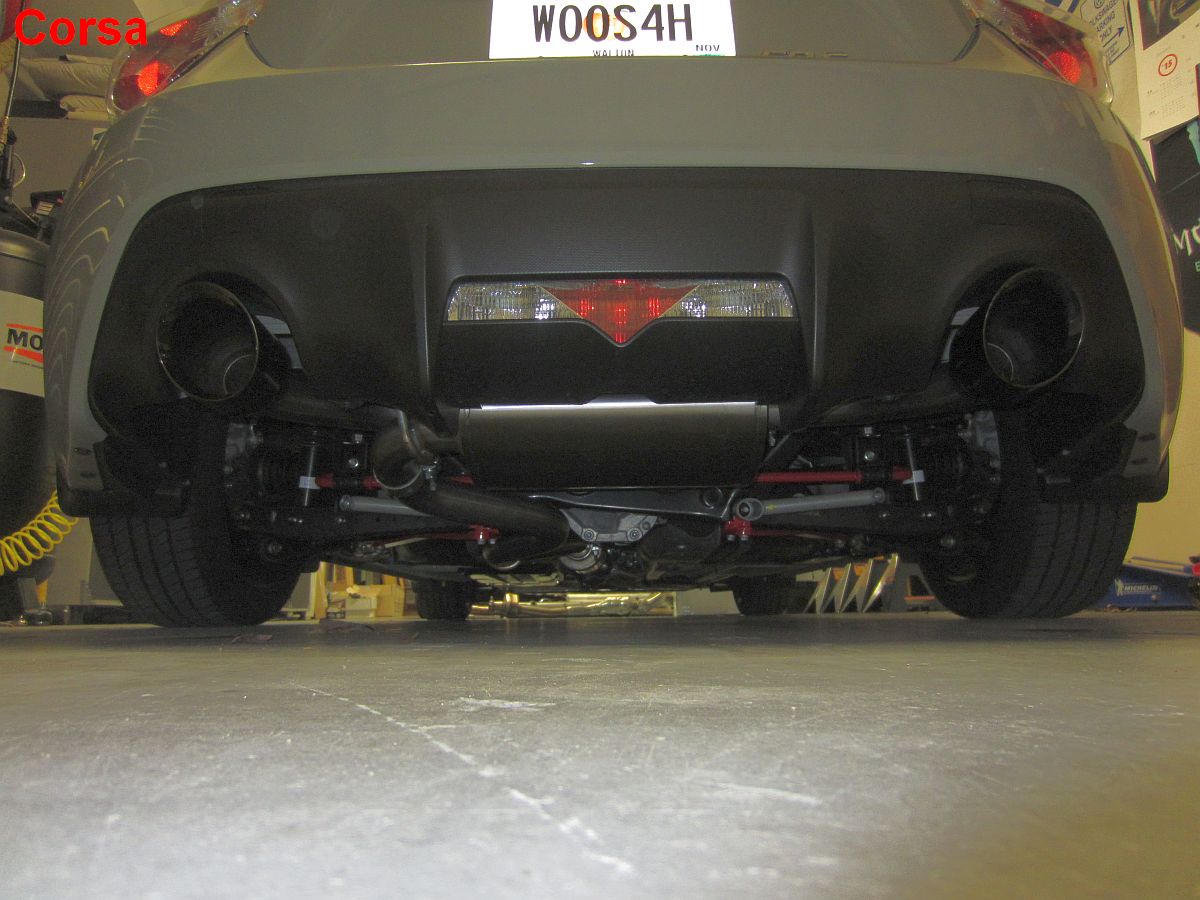
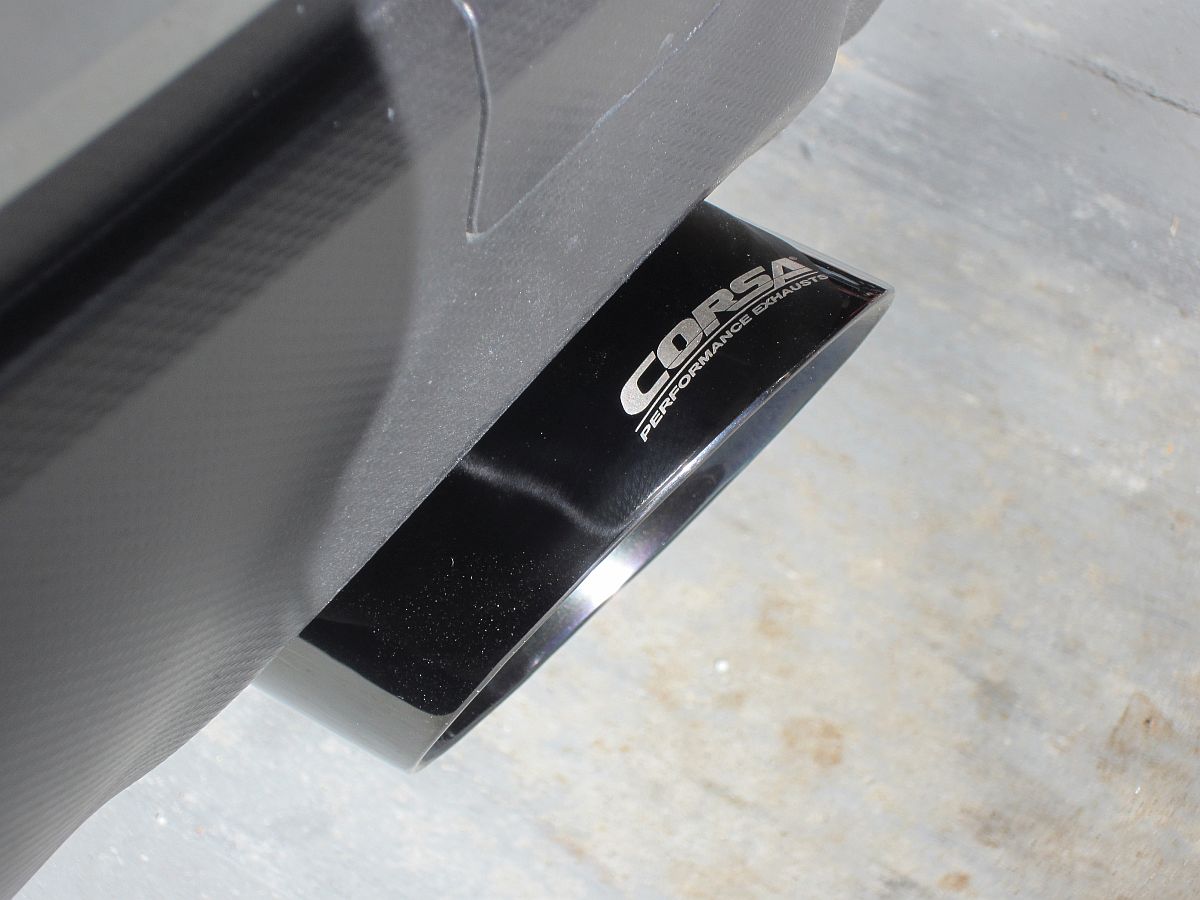
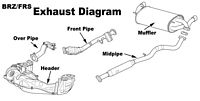
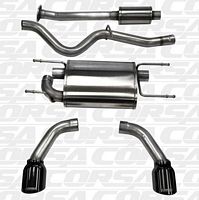
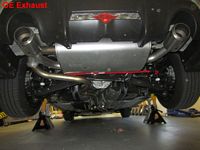
Corsa Catback exhaust with Black Diamond Tips (P/N 14864BLK) from Amazon installed, Installation Instructions HERE and Warranty Information HERE.
Some forum discussion on development HERE.
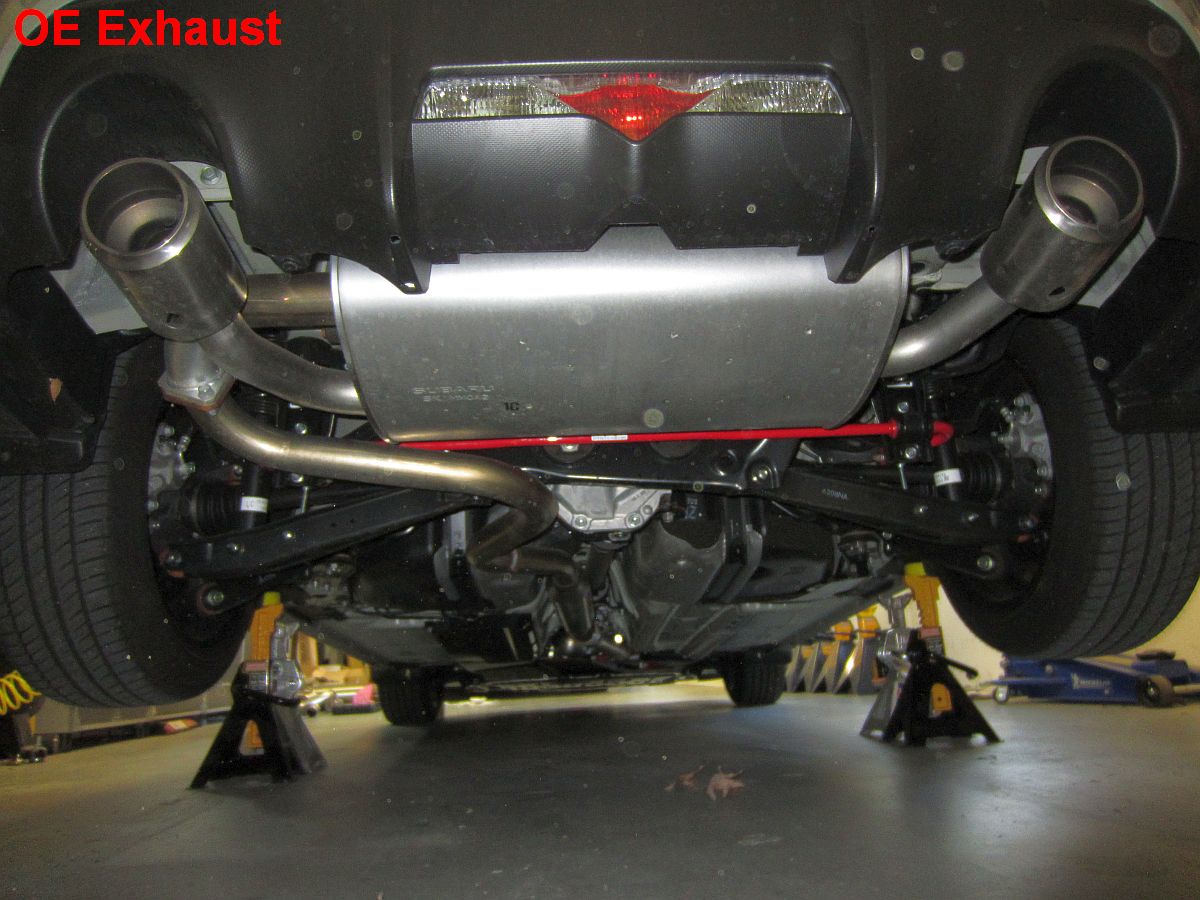
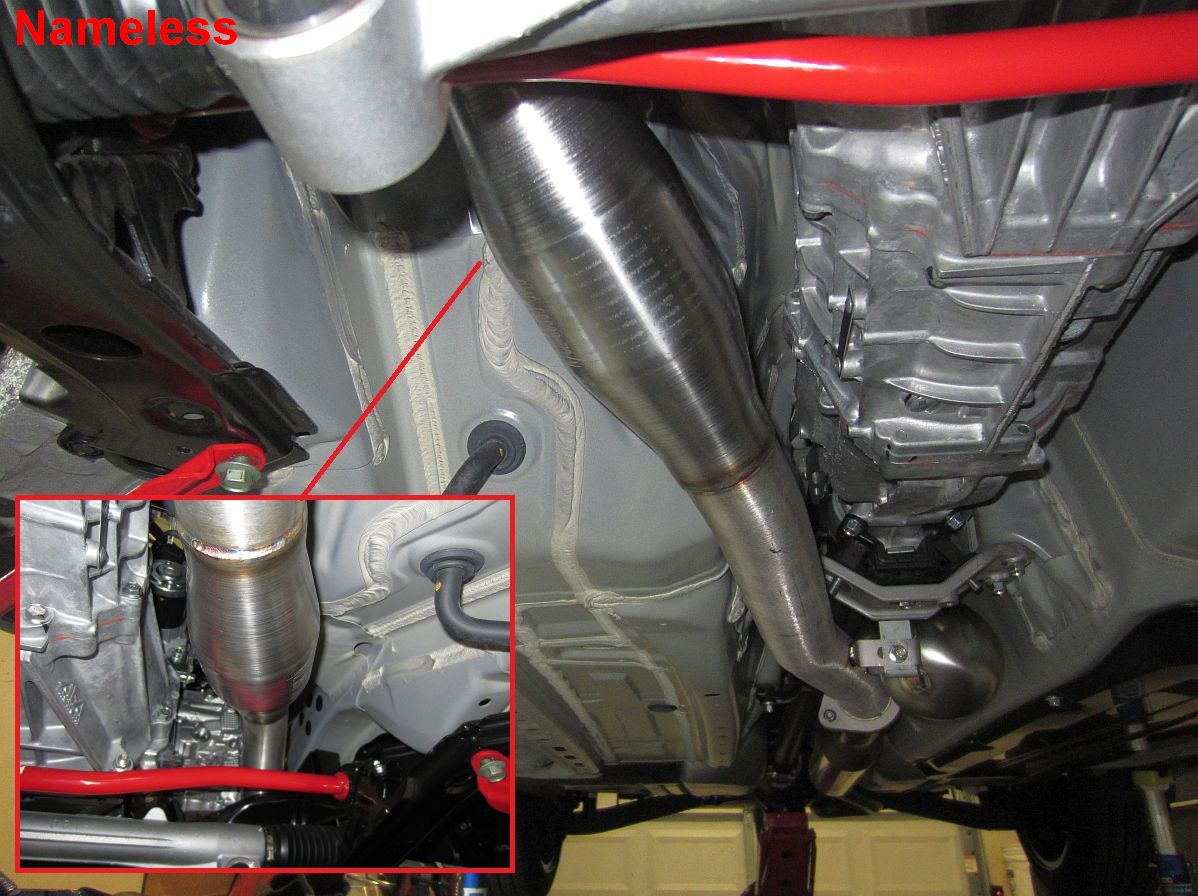
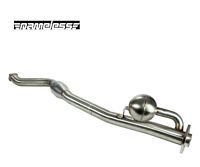
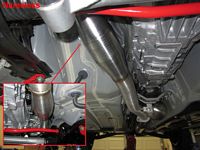
Corsa replaces the midpipe and muffler, next on the list is the Nameless 2.5" Downpipe (Replaces Overpipe) with Helmholtz Resonator that replaces the front pipe and over pipe in one piece. Forum discussion is HERE, some forum write-ups outlining DIY tips HERE and HERE.
Nameless downpipe installed first in progression along with some other projects that had overlapping labor tasks, the fit was PERFECT, no adjustments required as there was no contact anywhere.....made OE exhaust a tiny bit louder. Corsa exhaust requires a bit of time to adjust and fit so tips are aligned, maybe moreso with my Nameless front pipe? Corsa eliminates the donut flex joint at the front pipe and replaces it with a flat gasket/hard connection which is less forgiving to any tolerance differences between OE and aftermarket....I actually had to cut the muffler pipe shorter on the passenger side to allow the tip to slide closer to the muffler and to clamp/line up.
But, the Corsa exhaust sounds great. Higher pitched and more exotic sounding than my son's TRD exhaust and with no drone, exactly what I was looking for in this car.


RaceComp Engineering (RCE) Yellow Springs (installation instructions HERE) ordered from Modern Automotive Performance and then CANCELLED.....using OEM struts/shocks for now. MAP was great providing updates and following up but after waiting inside week 5, I gave up and canceled my order: RCE and their distributor dropped the ball in a major way even after this was brought to their attention- customer service is not their focus and regardless of product quality, service will get my $$$$ vote every time. I understand their forum participation is valued, but maybe they should spend more time managing their supply chain?
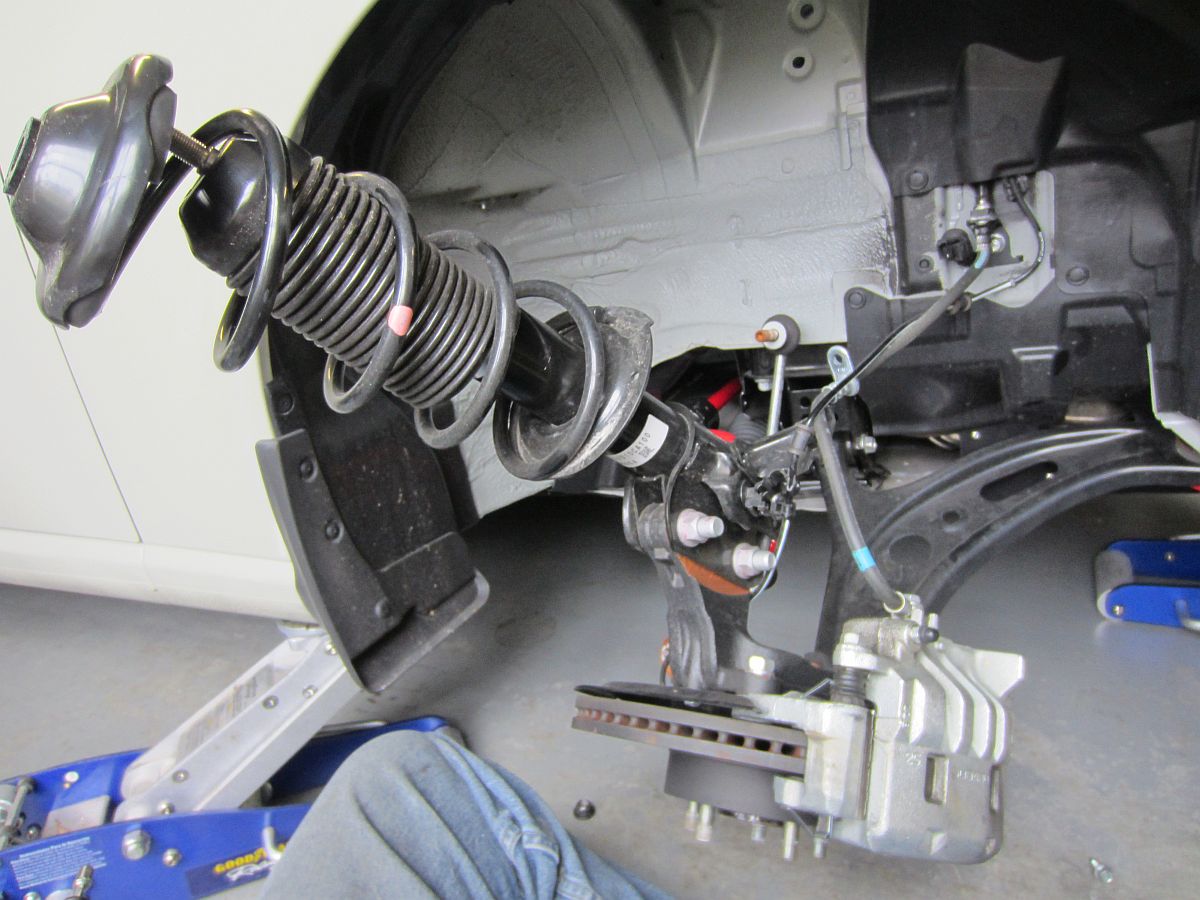
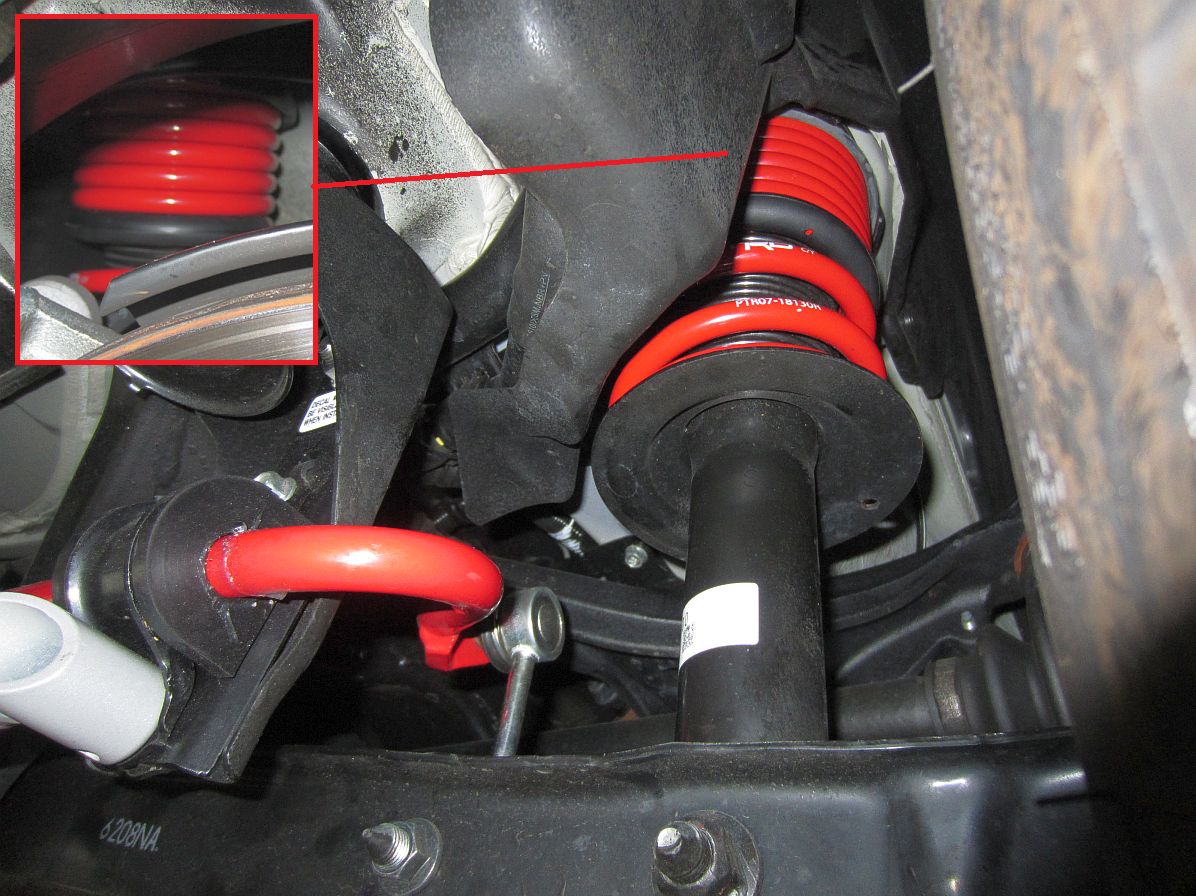
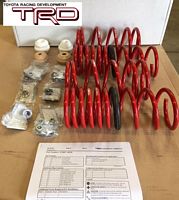
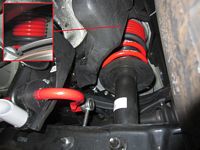
I ended up going with TRD Springs (P/N PTR07-18130) from FRSport that were quickly delivered a week later and had the advantage of no warranty concerns, installation instructions HERE. As with all my other TRD purchases, new hardware was included (bump stops, etc.). Forum discussion on TRD springs can be found HERE.
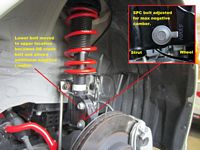
Some installation write-ups I used from the FT86 Club forum are HERE and HERE. I elected to go the "no spring compressor" route where all bolts up top are removed, lug bolts loosened, and one end (front or rear) jacked up at central jack point, suspension drops (more so up front than rear), sway bar bolts removed, [front] speed sensor wires and brake lines removed from retainers, [rear] knuckle bolt removed, damper compressed and moved to the outside, spring and bumper replaced, reinstalled (upper damper nuts and rear knuckle/lca bolt torqued under load)- EZPZ, under 2 hours for all including front camber bolt/crash bolt installation.
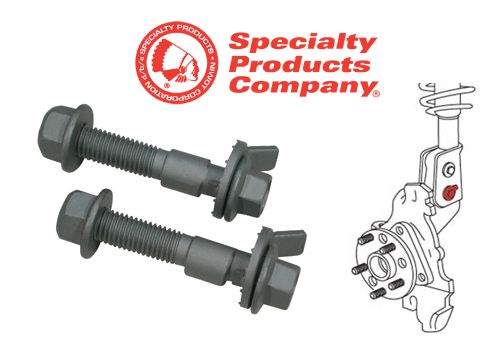
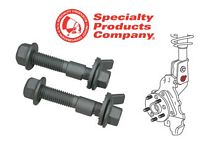
To add a little negative camber, SPC EZ Cam Camber Bolts from Amazon
Some good info on spring rates and motion ratios HERE and a good comparison thread, although not updated, is HERE. These TRD springs should pair nicely with the TRD Sway Bars already installed.
After alignment with these springs camber in the rear was a little over negative 2 degrees, with the SPC/crash bolt combo up front camber was ~ negative 2.5 degrees. PERFECT
Twinz posted some comparison pics of his stock/TRD spring cars in this forum thread.

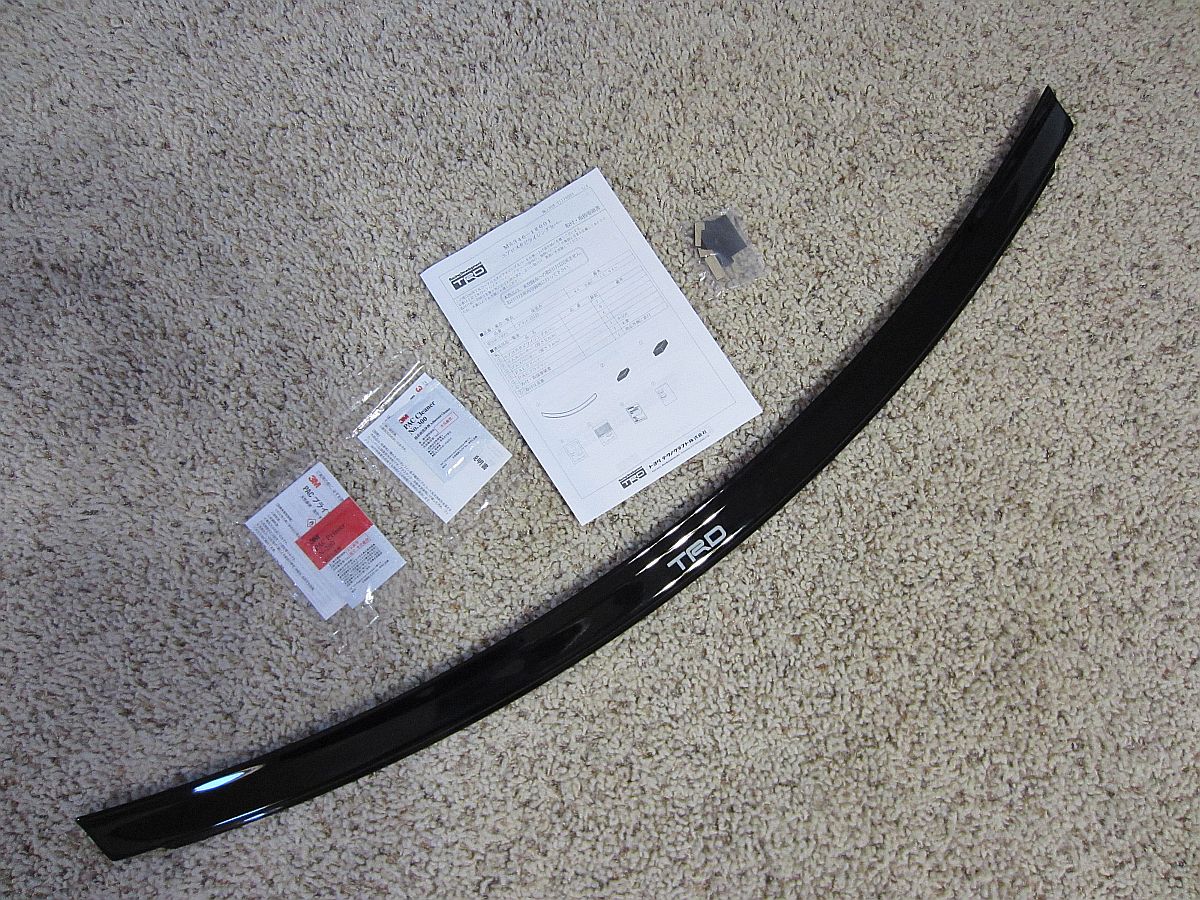
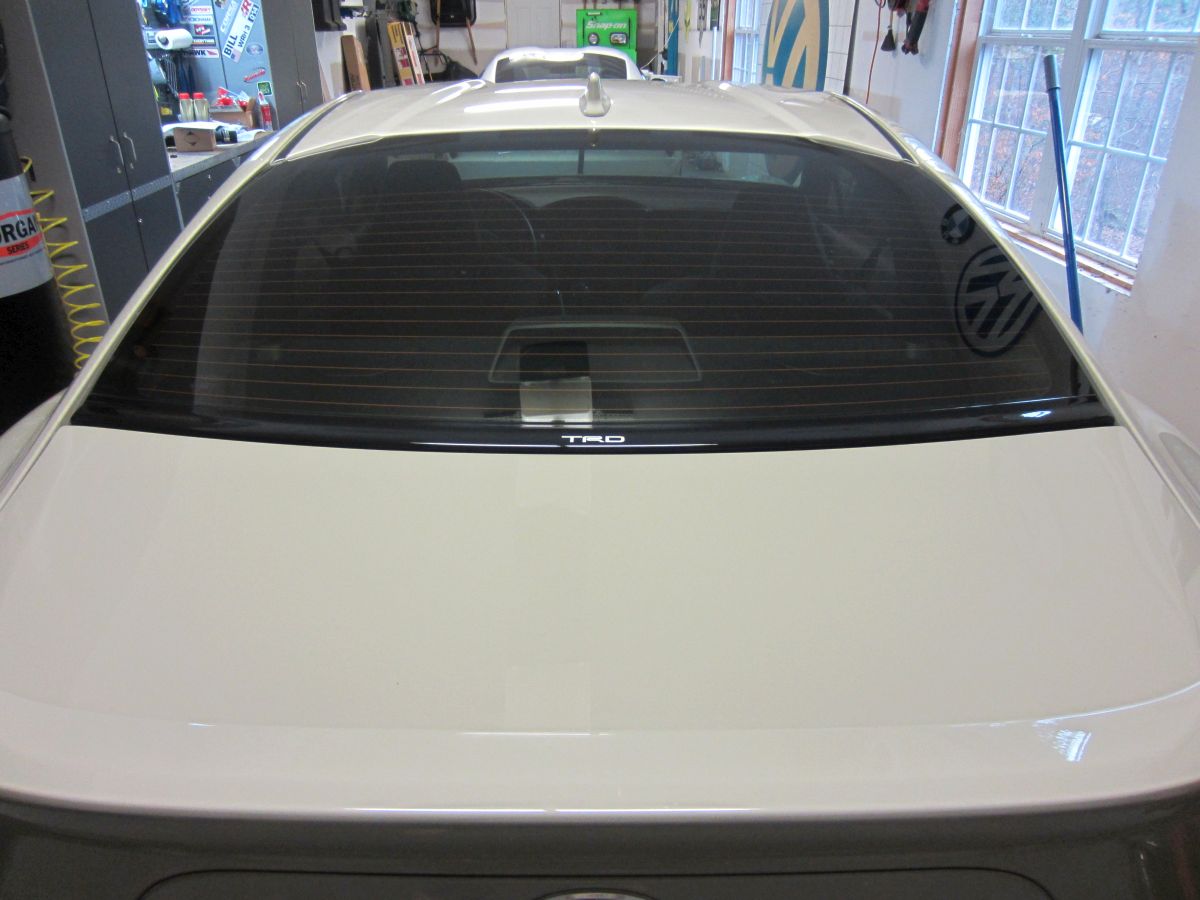
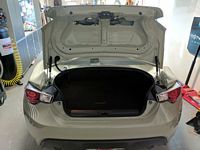
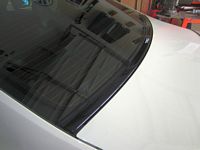
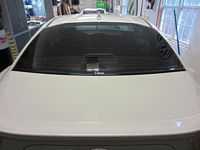
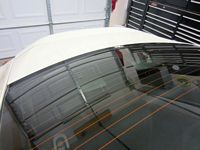
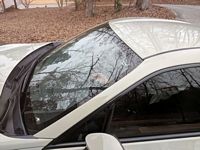
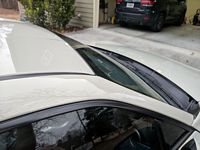
TRD Aero Stabilizing Cover (P/N MS346-18001) from Japex Trading installed- Installation instructions here in Japanese and English Translation (Use the spacer table on the Japanese version, it did not translate accurately). Forum discussion (some installation advice in addition to discussion) HERE, HERE and HERE.
The cover attaches to the glass, the body and trunk are masked off to prevent primer contact, glass is cleaned with supplied PAC cleaner, and then PAC primer is applied to glass and allowed to dry for 10 minutes (don't get this on any painted surfaces). Measure distance from glass to trunk edge per instructions and use spacers per chart....adhesive is to build spacers of correct thickness, NOT to stick to cover. Once the spoiler is put in place with correct spacers, double side tape backing (should already have leading edge taped to cover) is removed per instructions- top first and then bottom. Once ALL double side tape backing is removed the spacers can also be removed....and I typically like to apply pressure at points around the object being double-side taped to promote adhesive bonding.

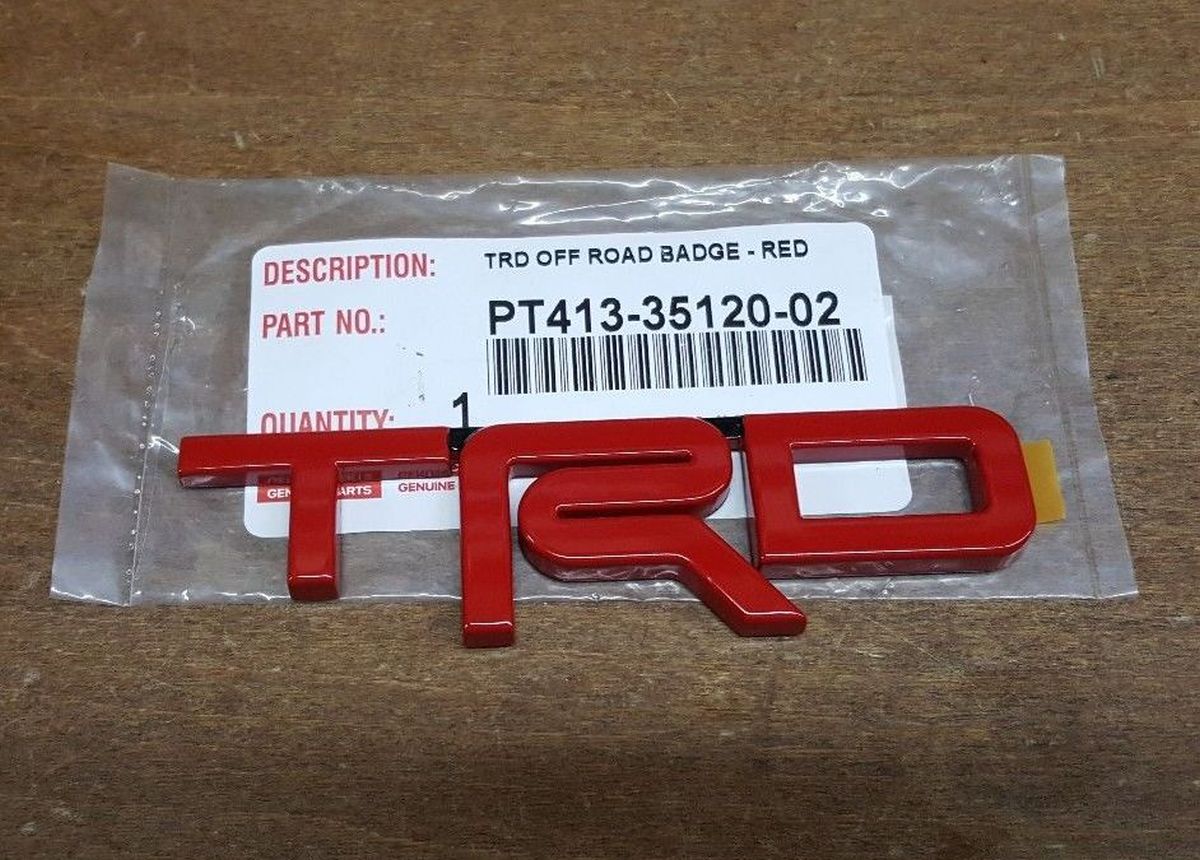
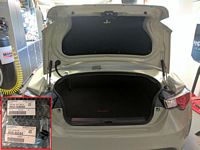
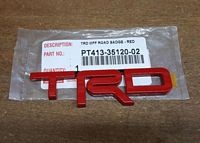
With all of the TRD enhancements, I decided I needed a TRD emblem on the trunk. RED TRD emblem (P/N PT413-35120-02, for Toyota TRD Pro trucks and SUVs) from Amazon
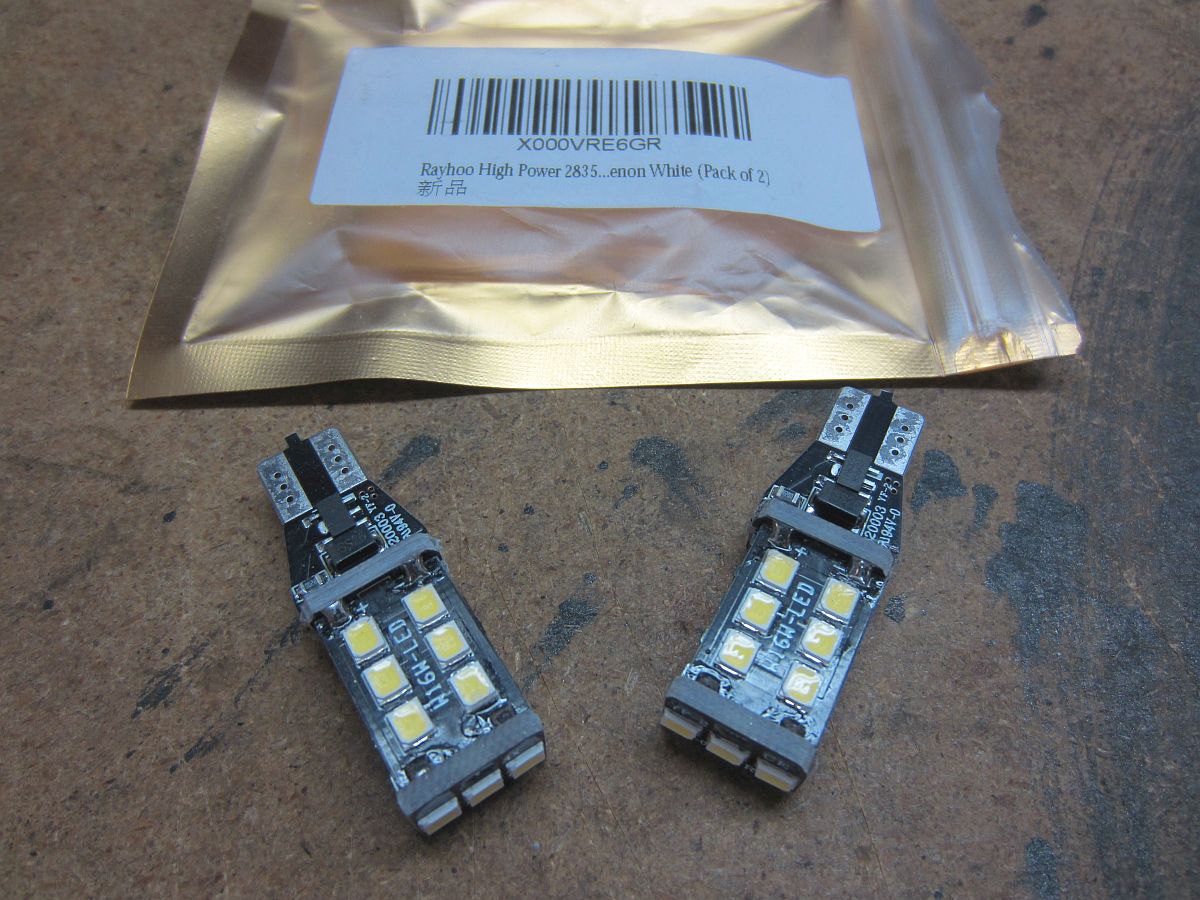
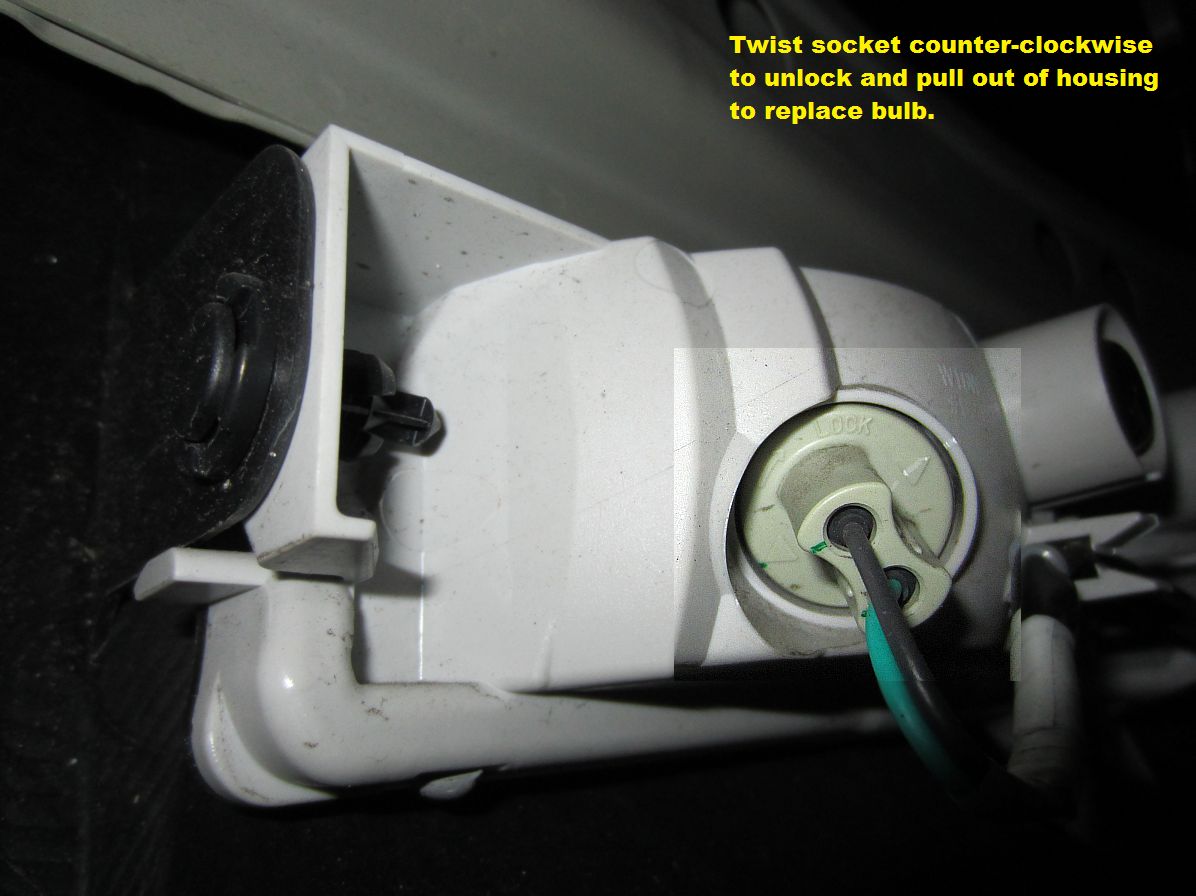
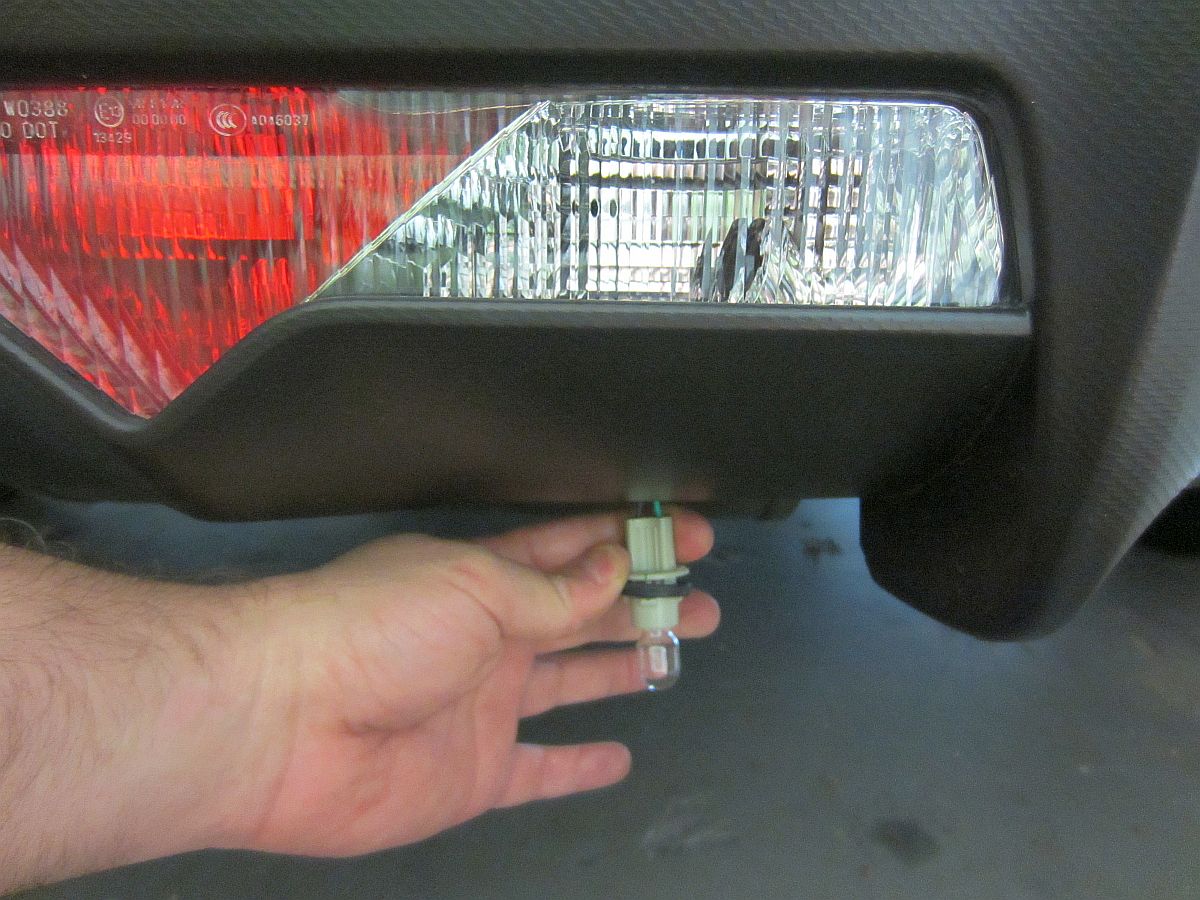
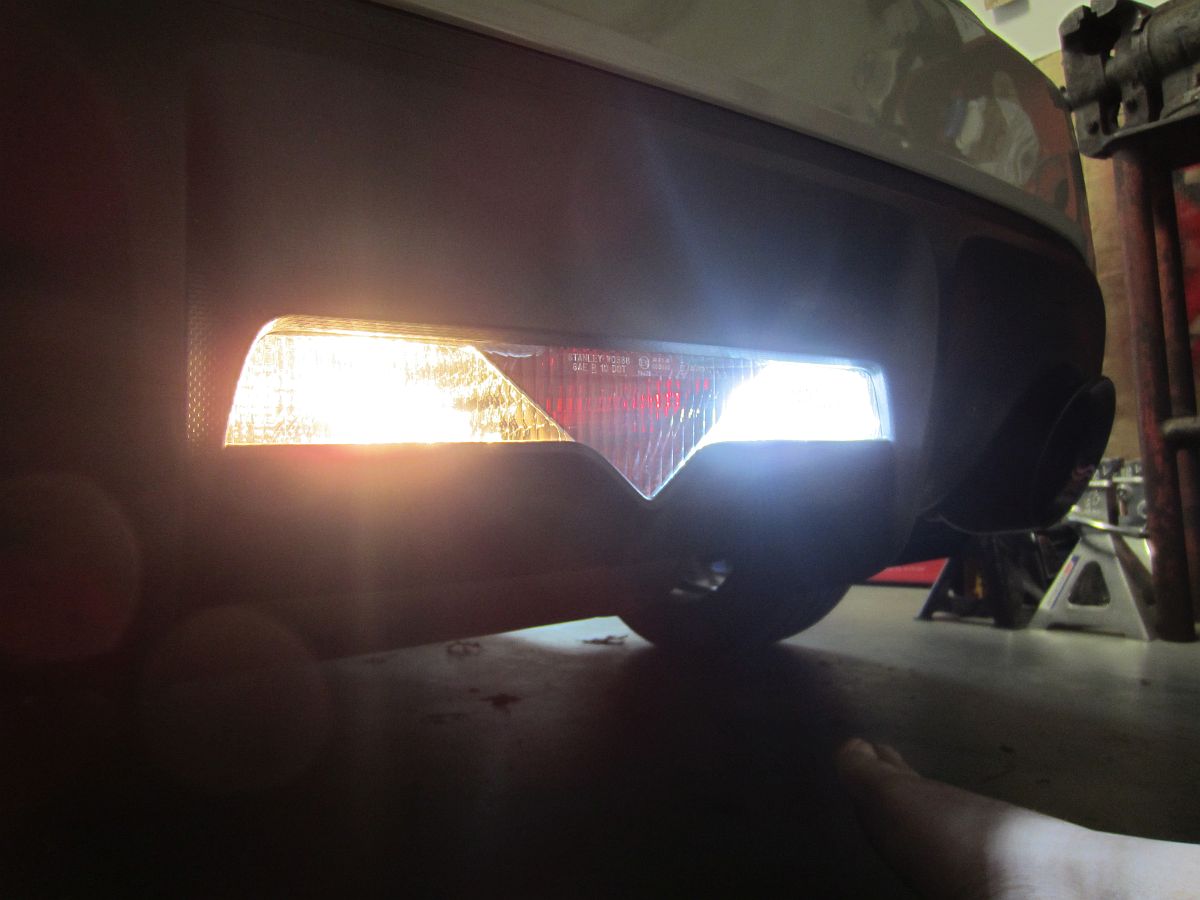
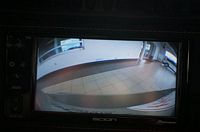
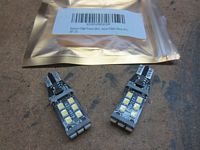
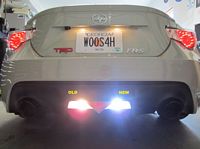
Rayhoo High Power 2835 W16W LED Bulbs For Backup/Reverse Lights from Amazon
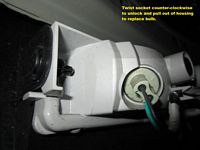
Feel behind lens for socket on either side, twist socket counter clockwise to unlock and pull out, pull bulb out and insert new bulb. Since LEDs only work one way, it is a good idea to engage reverse to turn lights on so you can verify they are installed the correct way and working before reassembly. If they are not working, remove bulb and insert the opposite way.


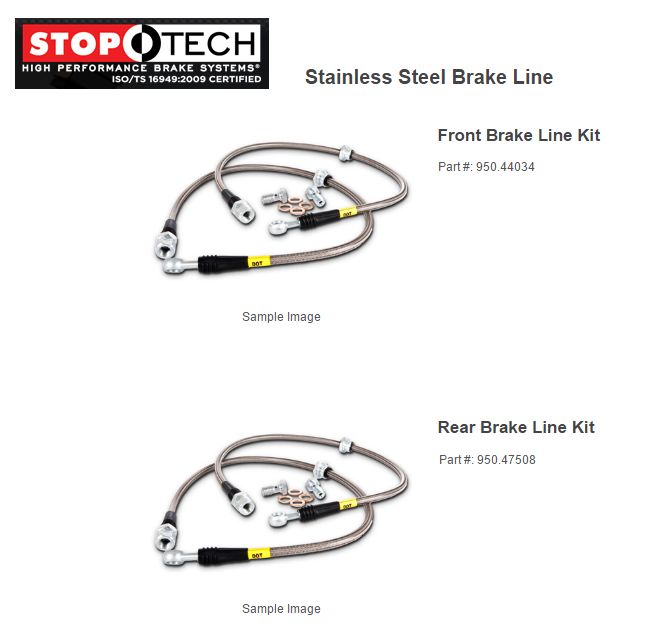
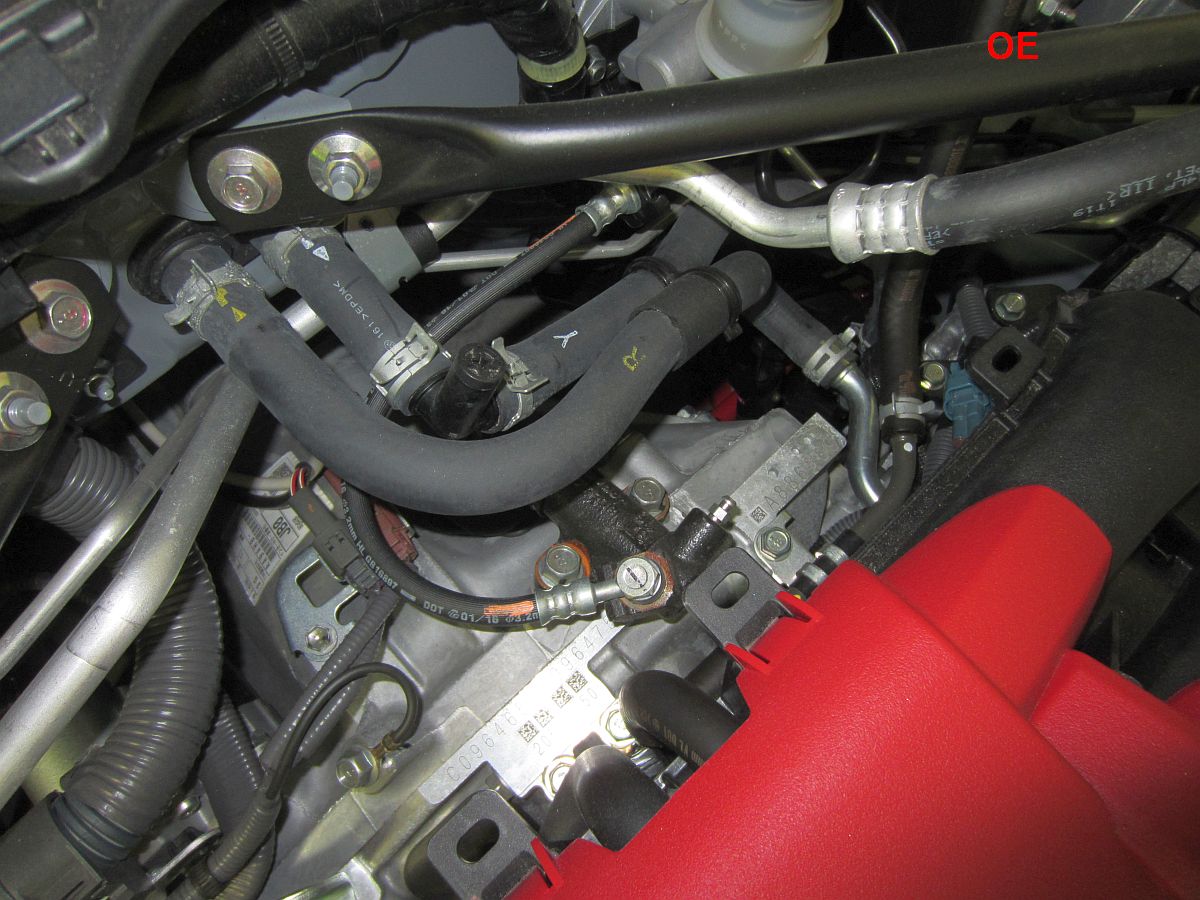
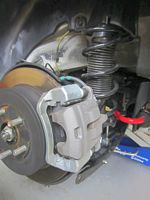
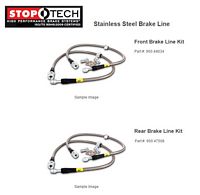
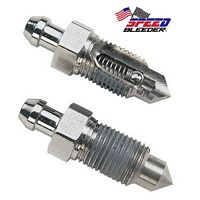
StopTech stainless steel brake lines from AutoAnything installed along with stainless steel Speed Bleeders (P/N SB1010-SS) from Quadratec.
Forum DIY Guide HERE for SS brake line installation.
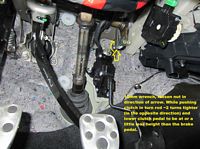
In pursuit of a better feeling FRS clutch I decided to adjust the clutch pedal first, FT86 forum DIY HERE....WOW, so much better.
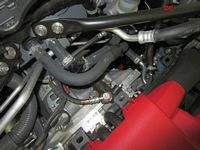
Next up is the clutch slave swap detailed in this FT86 forum DIY HERE, sourced from the local 24/7 AutoZone (P/N 900061), copper washers sourced from Amazon......I might not ever use all of them but I will use them, and these were free with my Amazon Rewards CC points.
Watch the fluid level in the reservoir, it's not big and only takes a few pumps to drain it
Definitely worth the low investment in both time/$$$ (30 minutes and $30) for the ROI, clutch now feels lke it should have- take note Toyota/Subaru.

[UPDATE] My son sold his FRS to buy ours. Better to keep all of the mod $$$$ and effort in the family.
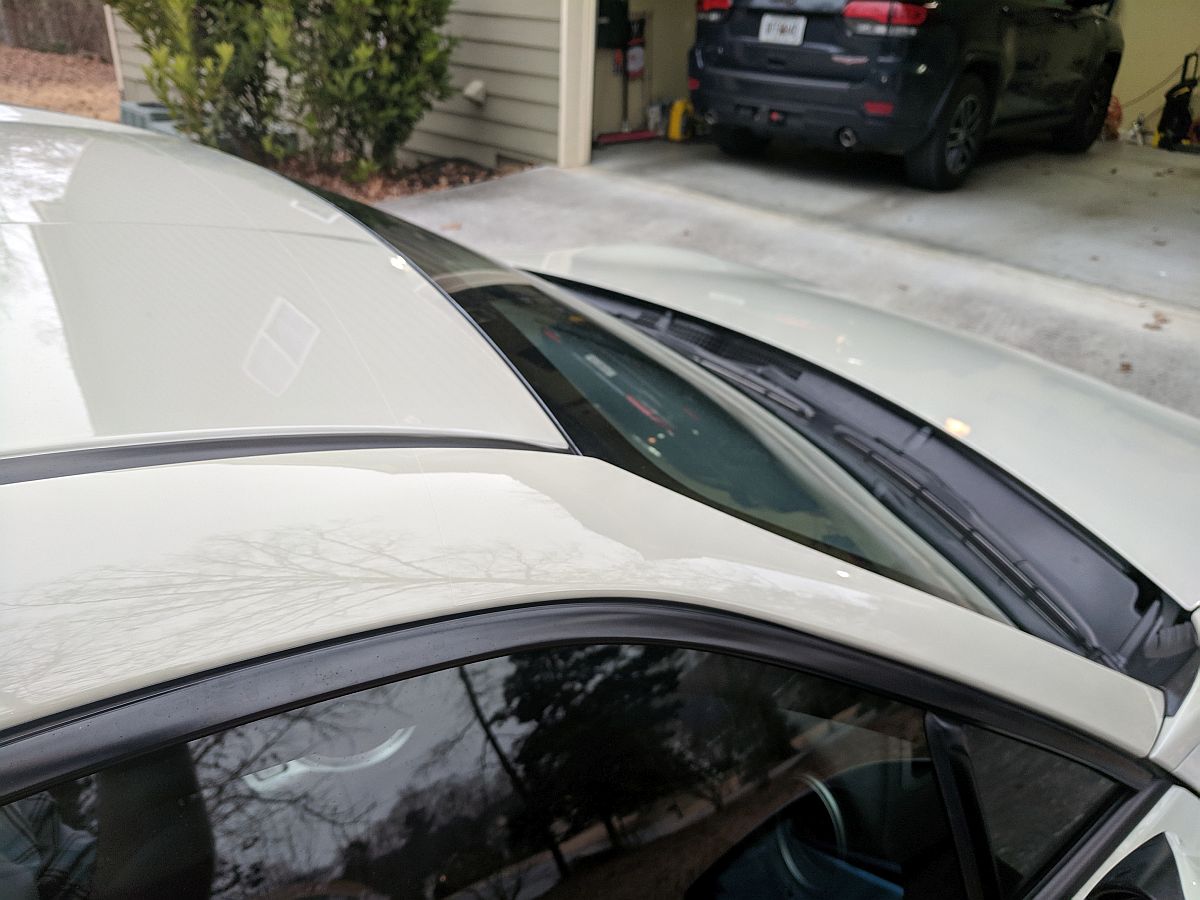
Xpel Ultimate Plus Paint Protection Film (VIDEO) on the front bumper/hood/fenders/front roof section/a-pillars/mirrors/door handles installed at Sun&Shield Automotive Films.

Oil Analysis performed by Blackstone Laboratories
Scion FRS Documents/Files:
2014 Scion FRS Owner's Manual (Special Edition, applicable to release models)
2016 Scion FRS Quick Reference
2016 Subaru BRZ Quick Reference (applicable to release series)
2016 Scion Premium Audio Owner's Manual
2016 Scion FRS Warranty and Maintenance
ALL YEARS Scion FRS Service Manuals and Wiring Diagrams
2013 Scion FRS Wiring Diagrams
Scion TSB: S-SB-0007-16 - Abnormal Chirp or Squeak Noise From High Pressure Fuel Pump
Scion TSB: S-SB-0012-17 - Abnormal Noise When Clutch Is Depressed
Scion FRS Reviews/Articles:
The FR-S Development Story (Full Brochure)
Toyota Press Release: Scion FR-S Release Series 2.0
Car and Driver: Scion Announces Un-Lame FR-S Release Series 2.0, Just 1000 Will Be Built
Automobile Magazine- One Week With: 2016 Scion FR-S Release Series 2.0
Autoblog: Scion FR-S Release Series 2.0 offers subtle sophistication
MotorTrend: 2016 Scion FR-S Release Series 2.0 is Tamer than 1.0
Autoweek- The 7 best Scions ever: A definitive list
Edmunds: 2013 Scion FRS Suspension Walk-Around
Motor Trend: 2013 Scion FRS TRD Parts Galore
Toyota Racing Development: Scion FRS TRD Parts
Car and Driver- 2013 Subaru BRZ and 2013 Scion FR-S: A Study in Comparison and Contrast
Grassroots Motorsports: 2016 Scion FR-S New Car Reviews
SpeedHunters: Taking it Back to the Eighties, TRD 86
EVO: Trio of liveried Toyota GT86s celebrate Le Mans 24h (Pic 1,2,3,4 | Video HERE)
Scion FRS Video: *High Speed Connection Recommended*
Scion FR-S Release Series 2.0 Walkaround
Scion FR-S Release Series 2.0 Commercial- Exotic Pet
Scion FR-S Release Series 2.0 Commercial- Foot Model
Scion FR-S Release Series 2.0 Commercial- Tiny Gold Bouncers
Scion FR-S Release Series 1.0 Walkaround
Toyota 86 - Area 86 with Keiichi Tsuchiya (drift king )
2015 Scion FR-S Your Ride Has Arrived
2014 Scion FR-S - "Makes Everything Epic"
2014 Scion FR-S - "In The Dust"
2013 Scion FR-S Teaser (Extended) [HD]
2013 Scion FR-S "Driving Is Back" Commercial
2013 Scion FR-S "Bringing Sport Back" Launch Commercial
TOYOTA GT86 (UK): The Real Deal Advert - Full Version
Toyota Global: Built by passion in the factory
Parody: This Is How Your Wife Reacts When You Buy a Toyota GT86-Subaru BRZ-Scion FRS
Subaru Global: BRZ Development Part 1 and Part 2
2013 Scion FR-S | Torsen® Limited Slip Differential Explained
2013 Scion FR-S | Aerodynamics Explained
2013 Scion FR-S | D-4S Technology Explained
2013 Scion FR-S - Exterior Walkaround
2013 Scion FR-S - Interior Walkaround
Scion FR-S Concept - Behind the Scenes with Ken Gushi
Scion FR-S Concept - Behind the Scenes with Scion VP Jack Hollis
The Toyota FT-86, GT-86, Scion FRS - /CHRIS HARRIS ON CARS
Scion FRS vs. Subaru BRZ Review: All Differences Detailed and Explained!
Winding Road: Modifying the WR TV Subaru BRZ - Corsa Intake & Exhaust
Motor Trend Head2Head: 2016 Mazda MX-5 Miata Club vs. 2015 Subaru BRZ
Everyday Driver: The Driver's Choice? - MX5 vs FRS (Gt86, BRZ)
Everyday Driver: 2013 Scion FR-S - Long Term Review #1
Everyday Driver: Tracking & Drifting - Long Term Scion FR-S
Everyday Driver: RWD in a Snowstorm - Are we Crazy? - FR-S Long Term #3
Everyday Driver: Searching for Torque - Header & Exhaust - FR-S Long Term #4
Everyday Driver: Supercharged vs Tuned - Long Term FRS (GT86) #5
Everyday Driver Europe: 2017 Toyota GT86 (86, BRZ) Review - Autobahn and Hatch Comparisons
Everyday Driver: 2017 86 vs 2013 BRZ - What you need to know
savagegeese: Motor Oil | Fine Print and Misconceptions
savagegeese: FRS - BRZ Oil Pressure and Temperature Tech FA20
savagegeese: Review | 2017 Toyota 86 | Past and Future
savagegeese: Best New Fun Cars for Under $30,000 | 2018
PowerNationTV: Engine Power - Supercharged Sports Car For Less
PowerNationTV: Engine Power - Silver Scion FRS (Suspension, Brakes,Clutch)
evo: Toyota GT86 vs Mazda MX5 | evo DEADLY RIVALS
MotorTrend: 2017 Mazda MX-5 Miata RF vs. 2017 Toyota 86 - Head 2 Head Ep. 89
Scion FRS DIY Guides/Installation Instructions:
Safely Jacking and Supporting Your BRZ/FR-S by FT86CF's GrimmSpeed (Jacking Points HERE)
DIY Clutch Replacement by FT86CF's Supermassive
FTspeed Video - How to Install a Clutch in your FRS BRZ 86
DIY - Transmission / Diff Fluid Change Reference Guide by FT86CF's F1point4
DIY - Stainless Steel Lines-Speed Bleeders-Fluid Bleed/Flush by FT86CF's F1point4
DIY - Kartboy Short Shifter Installation by FT86CF's F1point4
DIY - Whiteline Positive Shift Kit by FT86CF's F1point4
DIY - Transmission / Diff Fluid Change by ModBargains
DIY - Swap Clutch Slave Cylinder and Hydraulic Line for Improved Feel and Control by FT86CF's Ultramaroon (clutch line replacement detailed HERE)
DIY - Changing Spark Plugs by FT86CF's Scenic Driver
Direct Injector Seal Installation | Video and Issues by FT86CF's Dezoris
OE Mud Guard Install DIY (BRZ & FR-S) by FT86CF's JonnyRocket
Radar Detector EASY Hardwire Installation (BRZ & FR-S) by FT86CF's speedracer38
Homelink/Compass/Auto Dimming Mirror Installation (BRZ & FR-S) by FT86CF's DEC1
DIY-Replacing Rear View Mirror/Hardwire Radar Detector by FT86CF's Lil Abner
Proclip FRS Mount/Dock Installation
Redline Goods Leather Boots Installation
Whiteline Gearbox Thrust Insert (aka Positive Shift Bushing, KDT926) Installation
Whiteline Differential Mount Cradle Inserts (KDT925) Installation
Whiteline Rear Crossmember/Subframe Mount Insert Bushings (KDT922) Installation, Forum DIY Guide by F1point4 HERE
Whiteline Gearbox Thrust Insert (aka Positive Shift Bushing, KDT926) Installation
Whiteline Steering Rack Bushings (KSR210) Installation Instructions not provided, but HERE courtesy of Energy Suspension
Whiteline Rear Brace-Sway Bar Mount (KBR38) Installation
Scion FRS Hotchkis Sway Bar Installation
Remove The Air Bag on a Scion FR-S & Subaru BRZ (GT-86)
Remove The Steering Wheel on a Scion FR-S & Subaru BRZ (GT-86)
Headliner Removal Guide by FT86CF's FRSPacNW
Dropping Headliner to Access Antenna by FT86CF's post_break
How to Fix FRS/BRZ Parcel Shelf Rattle (easy way to remove shelf HERE)
How-To: Remove Rear Deck & Third Brake Light by FT86CF's Moshpit37
DIY Rubber Dash Lifting Fix by FT86CF's 1Cor10:23
DIY - Differential R&R and Ring & Pinion Swap by FT86CF's Dustin
DIY - Replacing Struts and Installing Coil Springs by FT86CF's DarrenDriven
DIY - A simpler spring/strut install DIY (no compressor needed) by FT86CF's jeebus
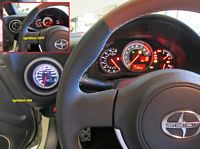
How to set the Shift Light & Gear Indicator Display Settings by FT86CF's EsoBOFH
BRZ FRS: How To Set Shift Light and More HD
DIY - Easy clutch grab adjustment (video HERE)
How To: Free Clutch Spring Removal in 15 Minutes - A must do for manual trans!
DIY: ATI 60mm Vent Pod Install With Defi Gauge
DIY - Changing Your Brake Pads
DIY: Front Brake Pad and Brake Rotor Replacement
"Pedal Dance": Turn Off Brake Force Distribution and Panic Brake Function at Track
DIY VIDEO TUTORIAL: BRZ Headlights on an FR-S (Video HERE)
DIY - Fog Light Powered with Factory Stalk and BCM
Scion FRS Mud Guard Installation
Scion FRS TRD Quick Shifter Installation
Scion FRS TRD Exhaust Installation
Scion FRS TRD Performance Air Intake Installation
Scion FRS TRD Lowering Springs Installation
Scion FRS TRD Sway Bar Installation
Scion FRS TRD Lower Brace Set Installation: Japanese and English Translation
Scion FRS TRD Door Stabilizer: Japanese and English Translation
Scion FRS TRD Oil Sandwich Plate: Japanese and English Translation
Scion FRS TRD Trunk Spoiler, 2 different guides: Toyota GT86 Instructions and English Translation from Japanese version with Templates courtesy of My Hachi Roku GREAT DIY Guide
FT86 Forum- Kanzai Front Bumper Reinforcement/Repair Kit Thread - Installation Instructions HERE
Scion FRS Resources:
FR-S / BRZ Wheel Directory, Gallery, and Fitment Guide Chart
Forums and Clubs: