This is a very easy do-it-yourself project... it took me less than an hour. The “quick-disconnect” design GM came up with for the differential cooler line works great.
 DIY - Transmission Fluid Change is HERE
*** Standard disclaimers apply. I assume no responsibility for any damage. Please be careful - the consequences of a mistake or improper install could be disastrous ***
Pics below are from a 2007 Z06, and a 2007 Service Manual was used.
Tools
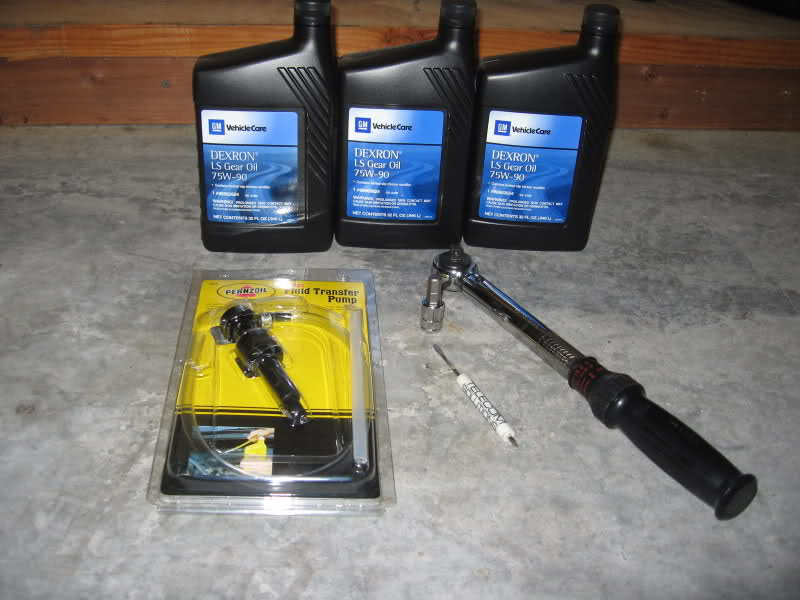
* 3/8” Wrench
* 10mm Hex Socket (3/8” Hex will work also)
* Small Flat Blade Screwdriver
* Oil Drain
* Suitable Pump / Transfer Tube
* 3 Quarts Diff Fluid (p/n 88862624 for the GM fluid – NO additive required for this fluid)
* 1 Diff Cooler Line - Retaining Clip (p/n 24205103). Note: The Service Manual says to use a new Retaining Clip. Most people reuse theirs.
However there was a clip failure HERE. So either replace the clip or make sure it is not deformed and fully seated.
 Step 1) Raise Car
Car must be level once raised to get an accurate fluid level reading.
Step 2) Locate Diff Fill and Drain Plugs
Under the car:
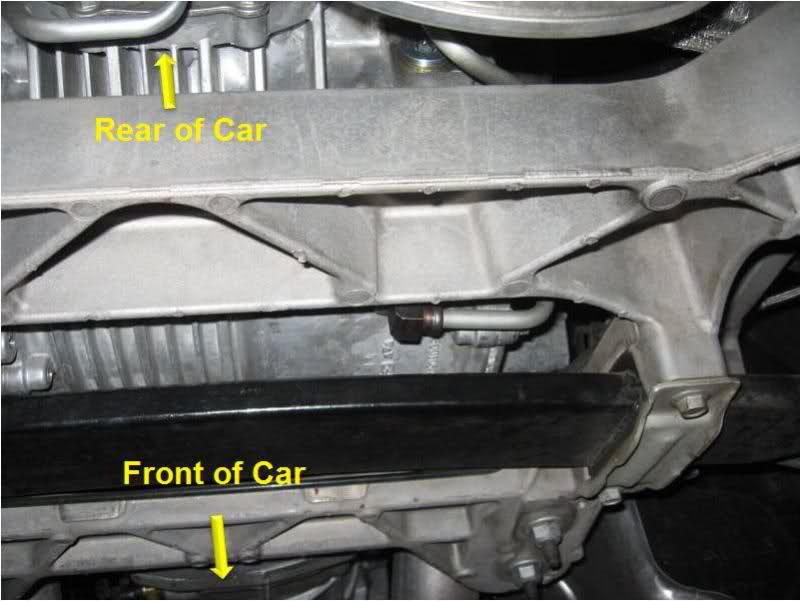
Zoomed in:
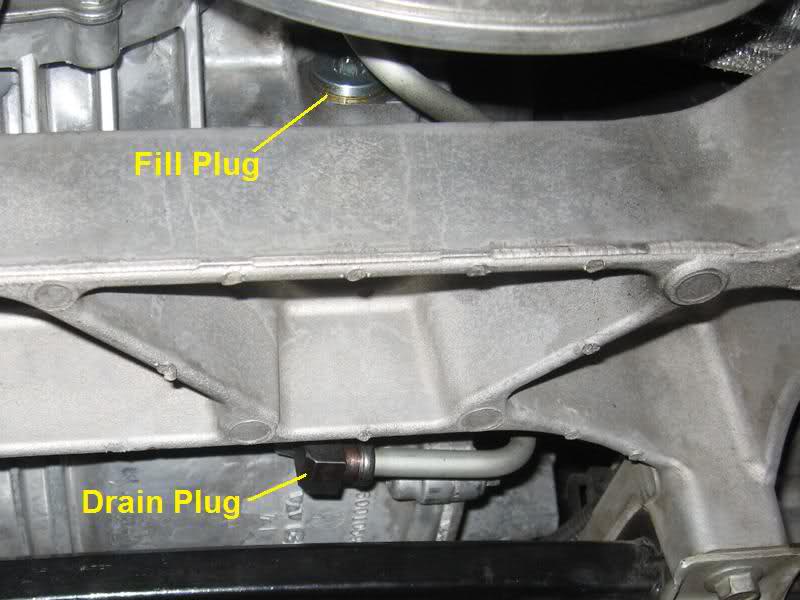 Step 3) Open Fill Plug
I’m a big believer in opening the fill plug, before dumping the fluid out

Place Oil Drain under Fill Plug
Insert 10mm (or 3/8”) Hex Socket and open:
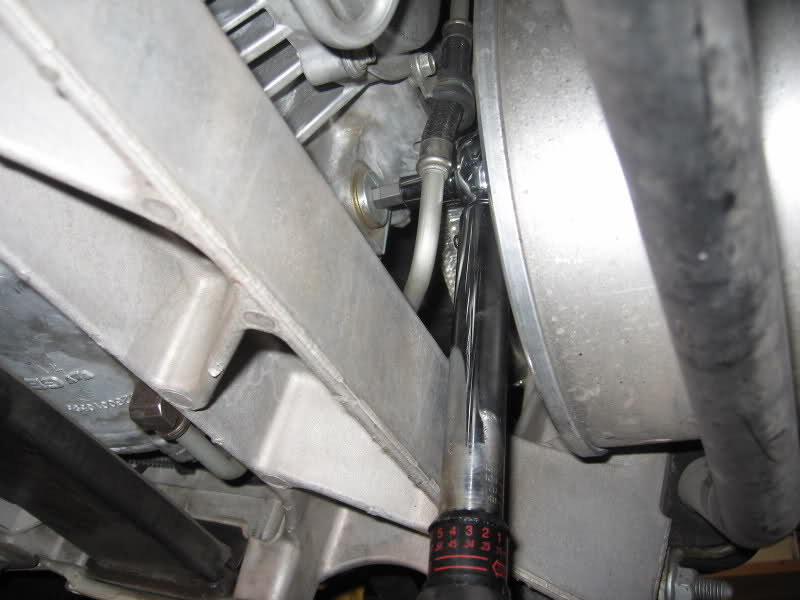
A little fluid may dribble out:
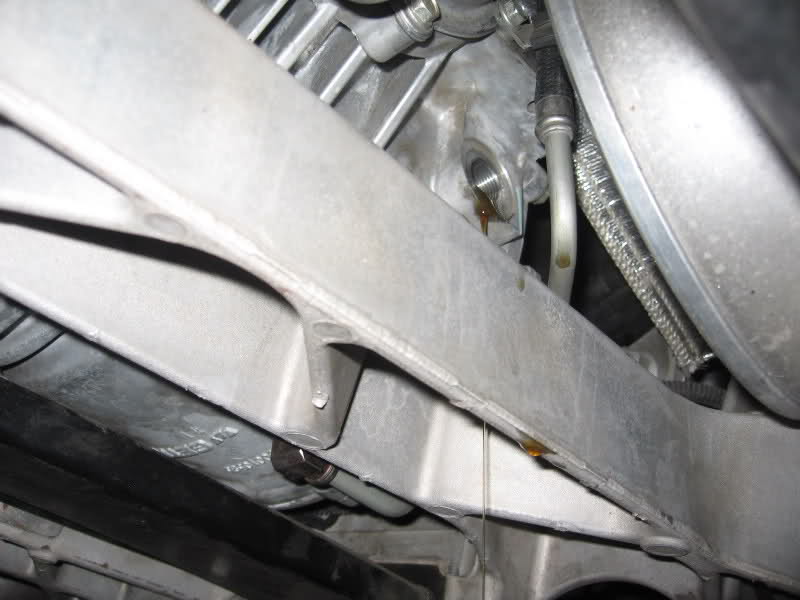 Step 4) Remove Retaining Clip from Drain Plug / Cooler Line
There is a retaining click which secures the Drain Plug; it must be removed.
Retaining Clip and Fill Plug:
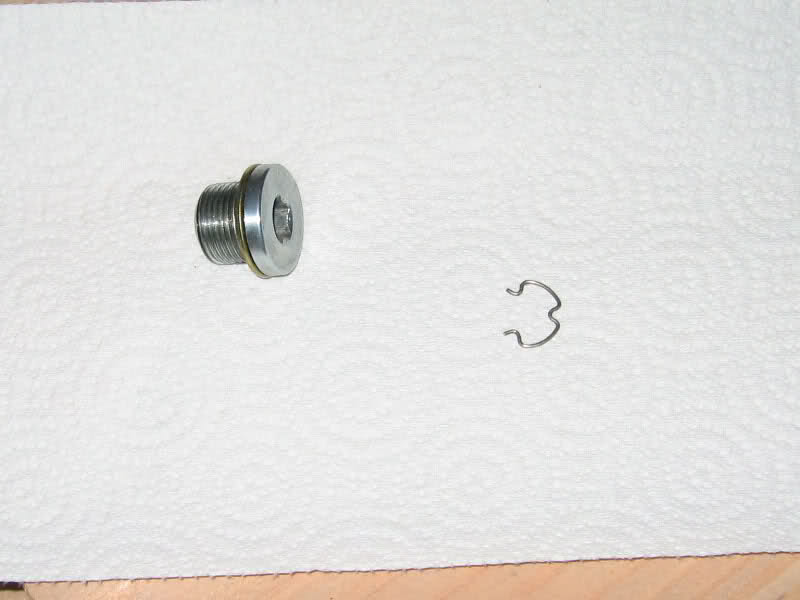
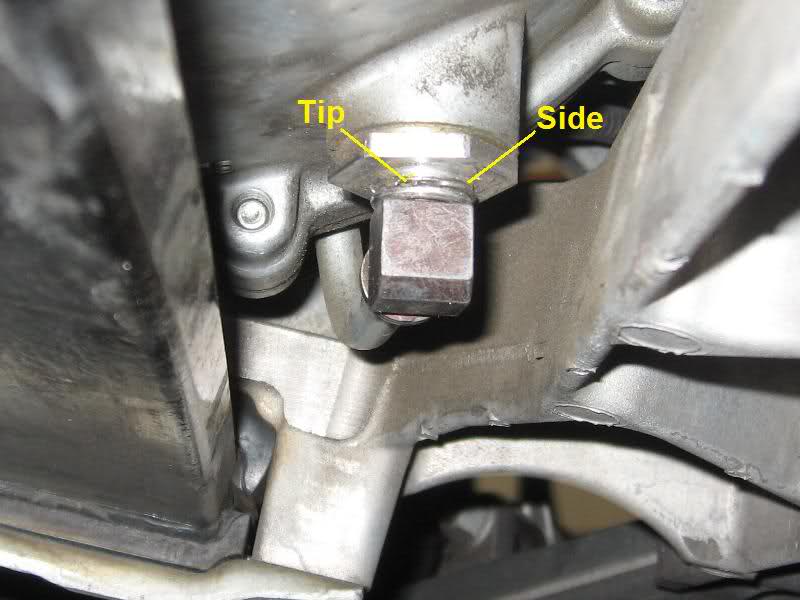
Insert Small flat blade screwdriver at the ‘tip’ of the clip and pry/move it toward the rear of the car. It’s not a high tension clip; it doesn’t take a lot of force to remove. Working from the left (drivers) side of the car was easier for me.
Clip Position:
Screwdriver in place:
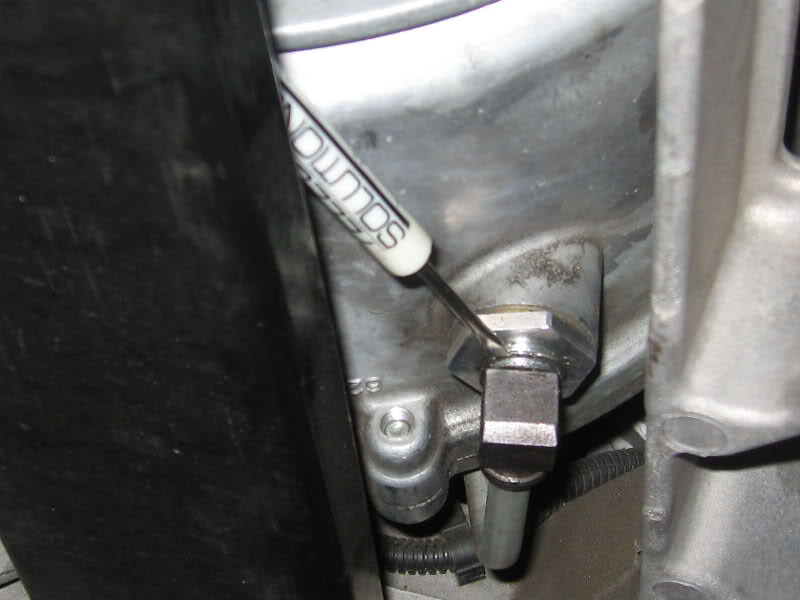
Clip partially out:
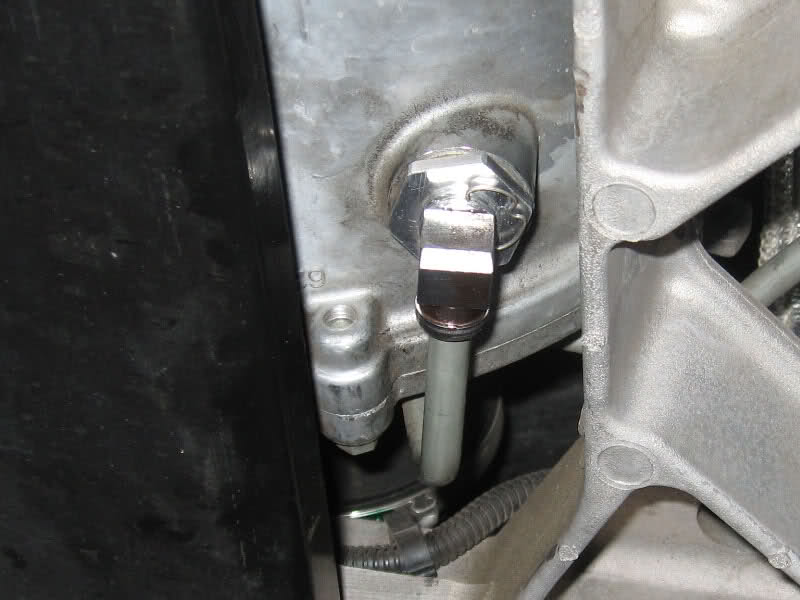 Step 5) Open Drain Plug / Cooler Line
Place Oil Drain under Drain Plug
Pull the Drain Plug straight down… wiggle slightly side-to-side as needed. You can use your fingers. It takes a little of force, but not too much. And move Drain Plug to the side.
Drain Plug partially out:
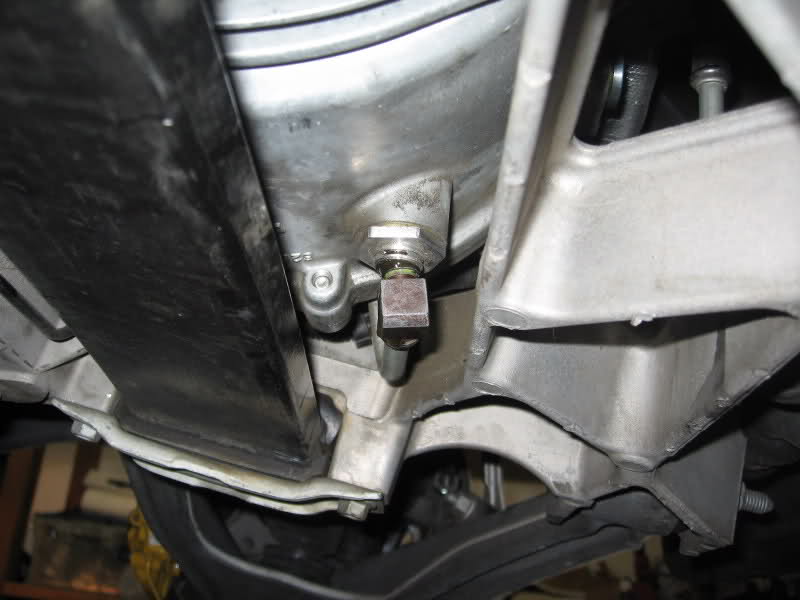
…and the money shot:
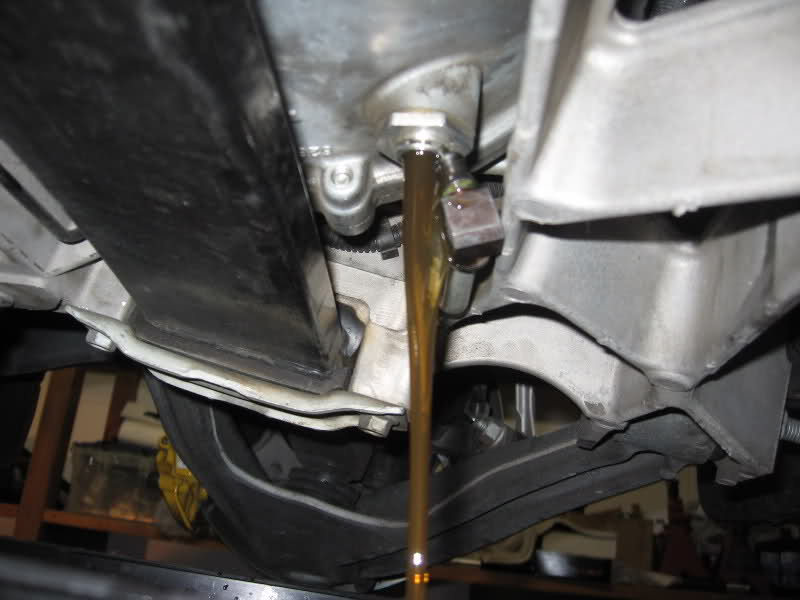 Step 6) Close Drain Plug / Cooler Line
Once fluid is drained, push Drain Plug straight up into place. You should hear or feel a SNAP.
Step 7) Replace Retaining Clip
* Service Manual says to use a new Retaining Clip.* Most people reuse theirs.
However there was a clip failure HERE. So either replace the clip or make sure it is not deformed and fully seated.
Push the Clip back into place (push toward front of car). The sides and center of the Clip should click back into place.
With clip in place, pull down on Drain Plug… it should not pull out.
Step 8) Fill Diff with Fluid
Insert Pump / Transfer Tube into fill port and add fluid until it starts to dribble out, and then stops dribbling.
Mine took ~2.5 quarts.
Pump in place:
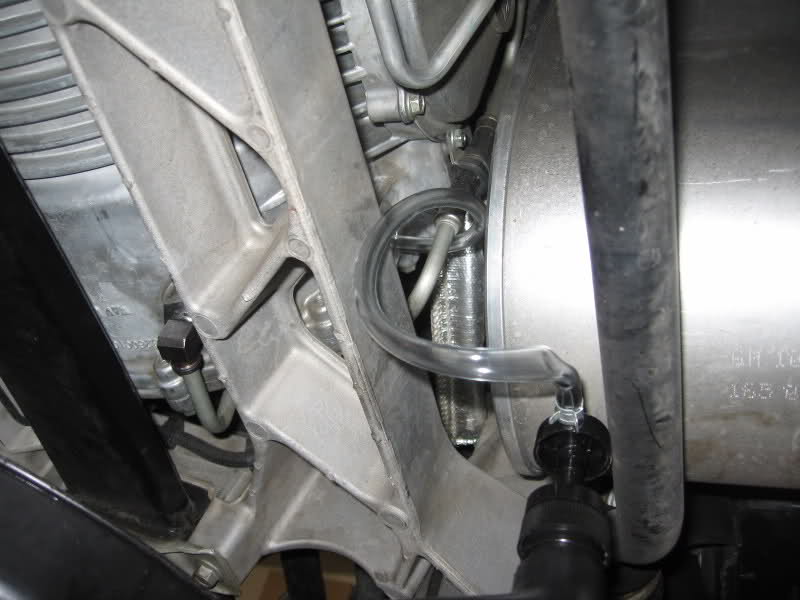
Overflow draining out:
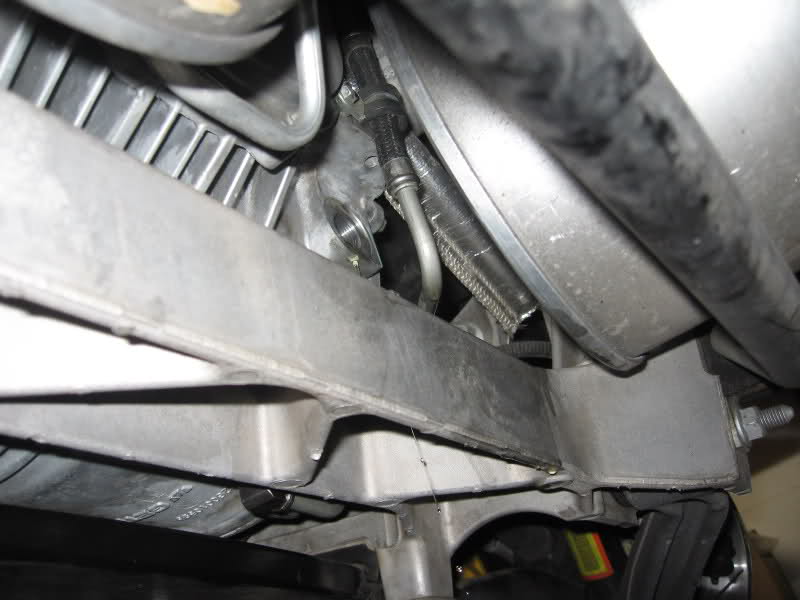 Step 9) Close Fill Plug
Torque to 26 lb-ft (35 N*M)
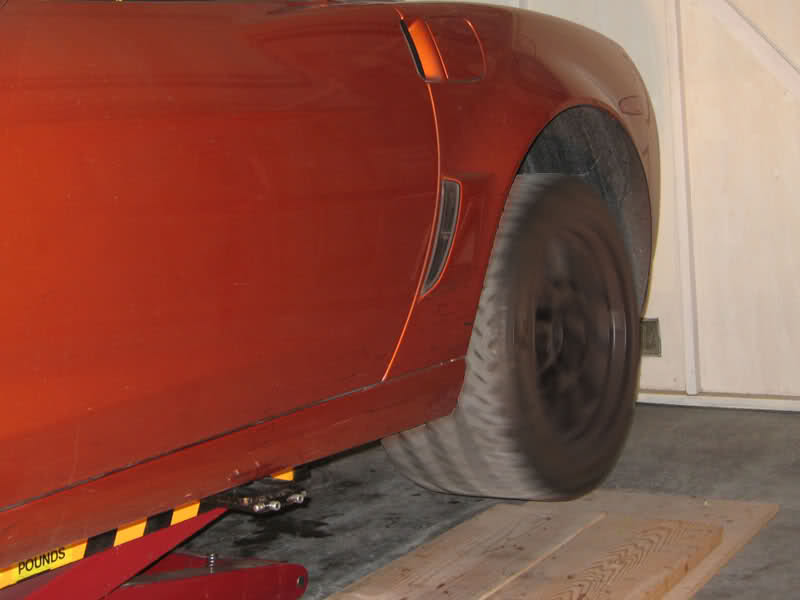
Step 10) “Drive car” while lifted
Now for the scary part of this procedure… the car rocks side-to-side pretty good due to the shake of the motor.

Since I had to add more fluid after this step (step 11); I’m going to say this step is important.
* From Service Manual: Raise the vehicle so the wheels are about a foot off the floor. Make sure the wheels can spin freely without obstruction from the hoist or any nearby items. Start the vehicle and put the transmission in second gear. Slowly accelerate to 10 mph and hold this speed for one minute. *
I suppose an alternative would be to lower the car and go for a short, slow test drive.
Make sure rotors are secure against the hub. My rotors don’t sit perfectly vertical without the wheels on… and they made a horrible grinding noise against the brake pads. You can put the rear wheels back on... but note that CCW 13" will rub the control arms at full droop!
 Step 11) Check Fluid Level
* From Service Manual: Differential fluid level…should be even with the bottom of the fill plug hole to no lower than 6mm (0.25 in) below the opening. *
I couldn’t figure out how to check if the level was within 6mm (0.25 in)… I don’t have very big hands, and I still couldn’t fit my hand to check the level with a finger. So I just started adding more fluid.
Open Fill plug.
Add fluid until it starts to dribble out, and then stops dribbling. Mine took an additional ~4 ounces.
Close Fill plug.
Torque to 26 lb-ft (35 N*M)
Step 12) Lower Car and go for a Test Drive
* From the TSB to cure a noisy diff: Once the differential fluid has been changed, the vehicle must be driven in 8-10 tight figure eight maneuvers to heat the fluid and allow the fluid to be worked into the clutch plates. *
That’s it… enjoy your new Diff fluid!
