![]()
My BMW 335i RIX Effects Boost Gauge
Installation
I originally purchased the
first solution RIX Effects brought to
market in the form of a pod that wedged in the corner of the
dash/windshield/pillar with a VEI gauge but was not satisfied with it and
returned it- I was looking for a more integrated solution. Rick came out with
his idea for a more integrated approach a short while later, it replaced the
driver’s side vent with a gauge that perfectly matched the BMW OE lighting and
looked OE.
To see what the VEI gauge looks/works like, you can see Pikka’s
video with RIX’s original solution here:
http://www.youtube.com/watch?v=b1z397UaABQ
.
The vent gauge works similarly but has a few new things for RIX such as JB3 map
switching.
I offered to evaluate one of
the first units shipped and decided to take some pics of my installation, Please note that these might be used to
supplement the RIX Effects
instructions that came with your gauge but should not replace them. Details in
the instructions were NOT replicated here so please refer to the RIX
instructions.
I did things in a slightly
different order, I started by removing the vent assembly- it is press fit and
can be removed by hand with no tools, just pull it straight out.
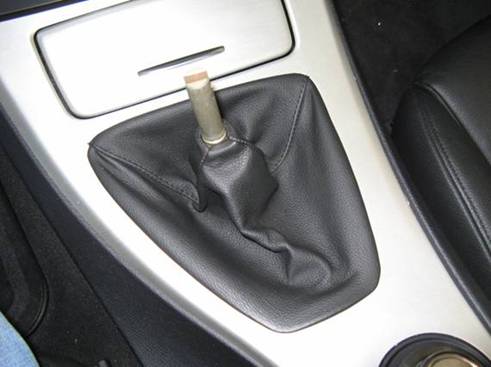
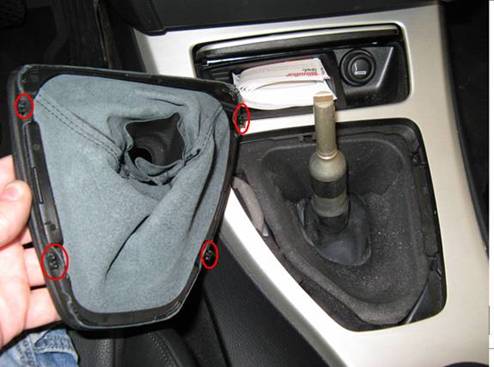
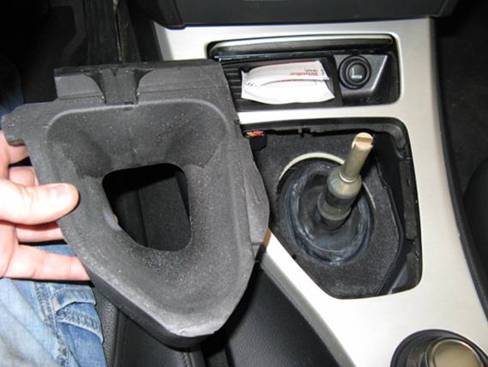
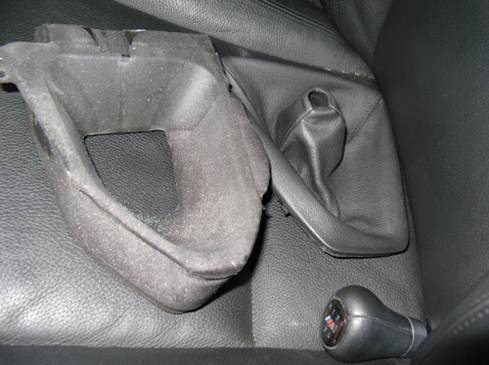
I sat the vent assembly to the
side and removed the shifter pieces to run the wiring. I removed the shift knob
(pull up hard), the shift boot (four clips, removed by tugging upward gently at
clip areas), and the foam insert around the shifter:
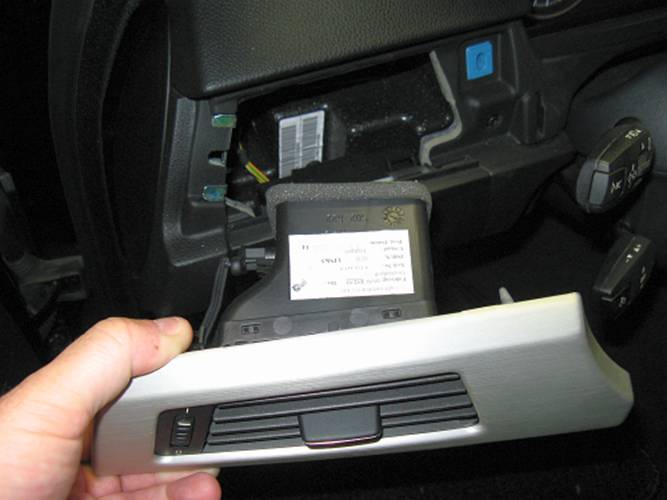
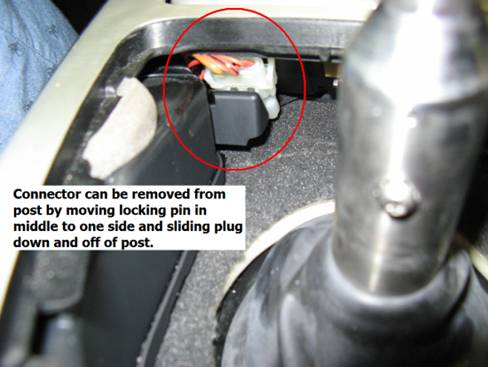
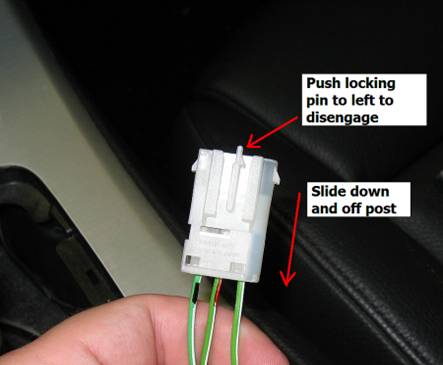
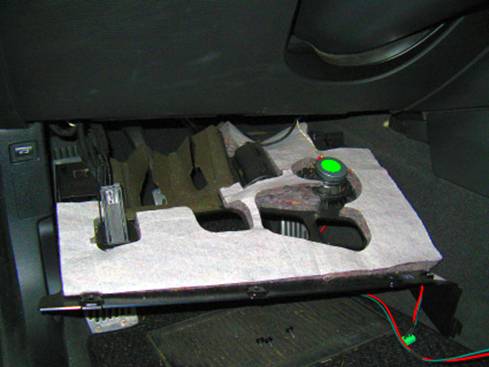
With all of the shifter pieces out
of the way, I had enough room to access the plug for the ashtray. RIX has
provided a plug-and-play solution for the wiring harness. The OE ashtray plug
is held to a post in the console and can be removed by releasing the clip in
the center of the plug. The plug can be removed from the socket by pushing the
release tabs on either side while pulling apart. The wiring harness is then
plugged in. Once the gauge wiring harness is plugged in, the plug can be reattached
to the post by sliding it up until it clicks in place, the wiring can be tucked
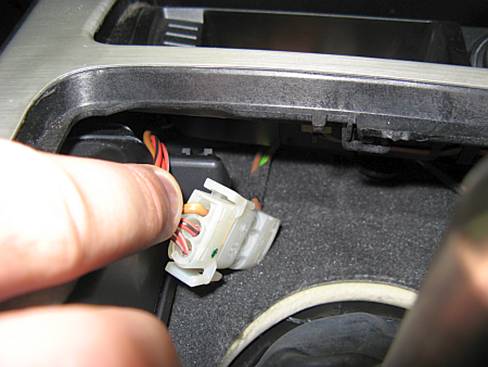
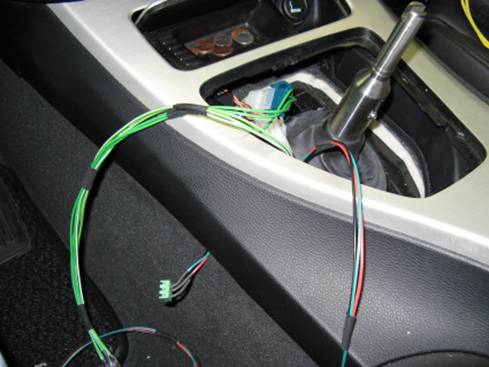
forward and out of the way. I ran the gauge end of the harness between the
carpet and console and fished it out, it can then be
tucked along the console edge up to the lower dash trim piece:
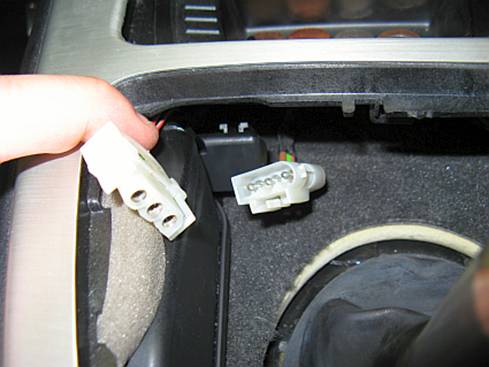
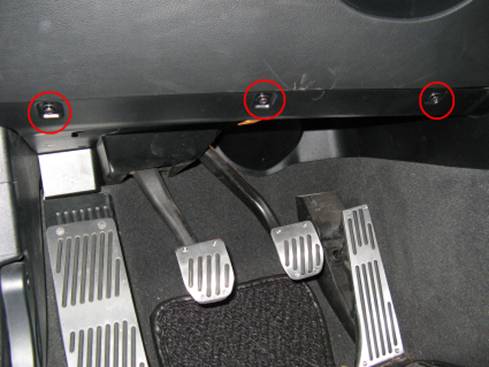
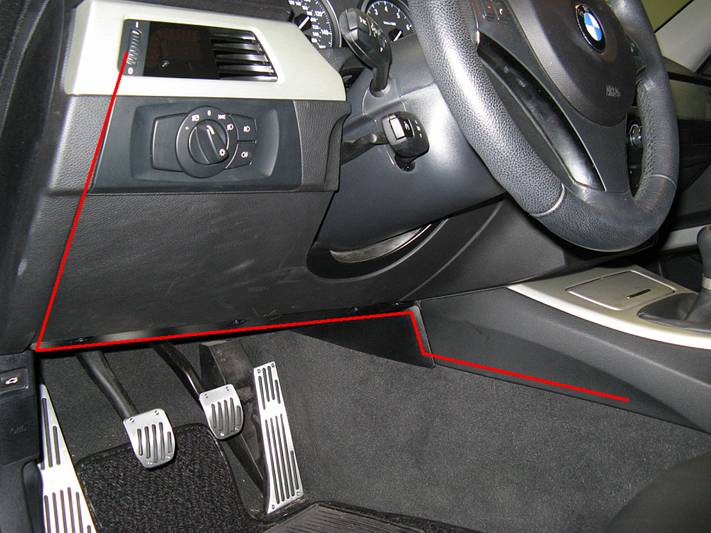
Three Torx screws for under dash
cover are removed, cover can be pulled back and left
to hang for access to run wire harness and vacuum line:
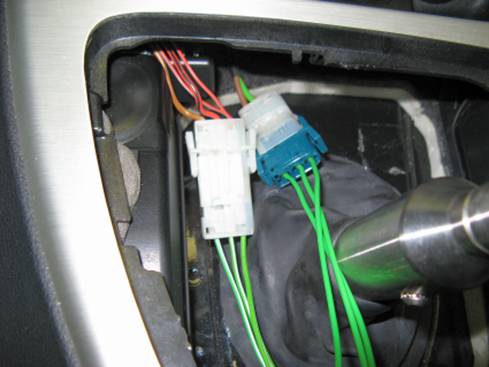
I tucked the wire in under the edge of
the console and ran it across the lower dash and up to the left of the vent
cavity. I was careful not to pinch the harness or make contact with screws when
re-installing the lower dash cover.
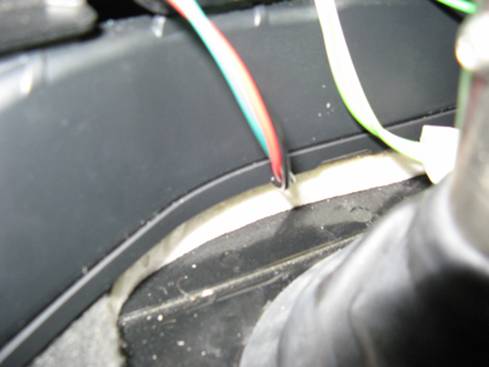
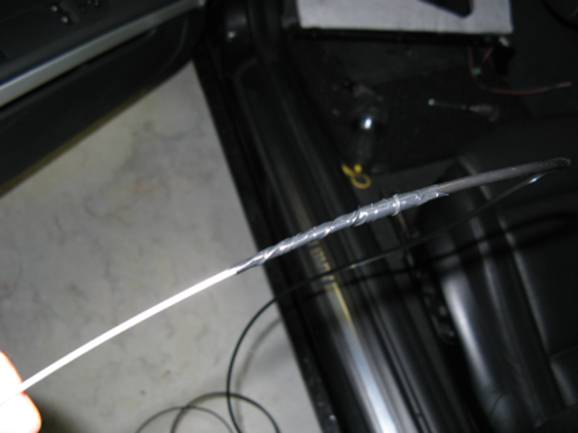
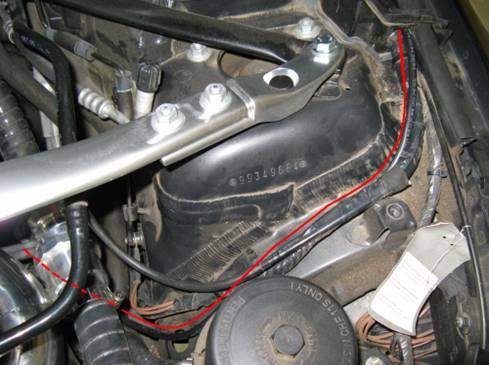
I then ran the vacuum line. I found
some baling wire, slid the vacuum line over the baling wire and then used
electrical tape to make sure it would not separate. I found a fabric covered
hose about ½” in diameter that looked like a good place to run the line, almost
directly behind the clutch pedal, and carefully pushed the wire through the
grommet surrounding it (a deviation from the RIX instructions). I found it on
the other side, by the brake reservoir (cover removed) and pulled it through:
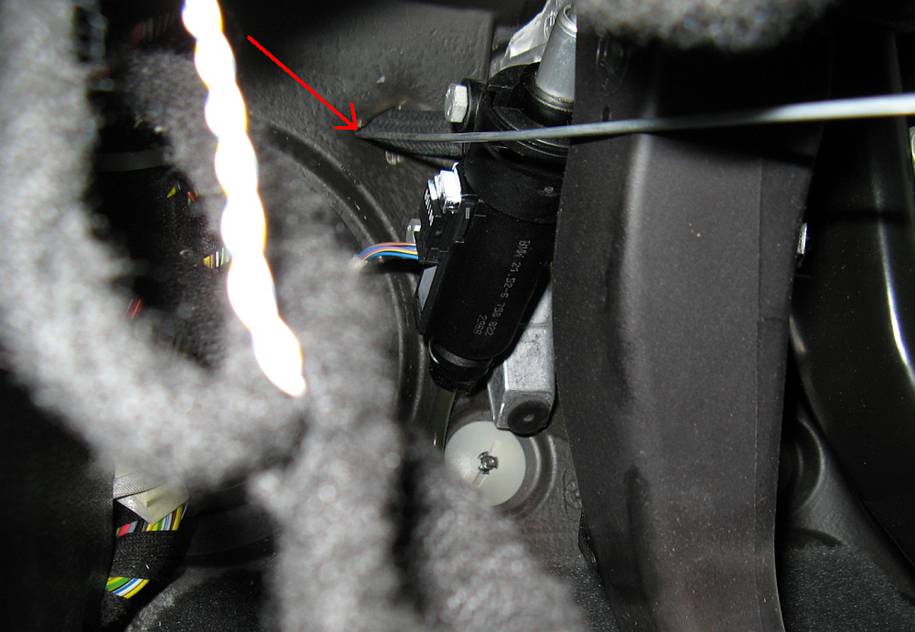
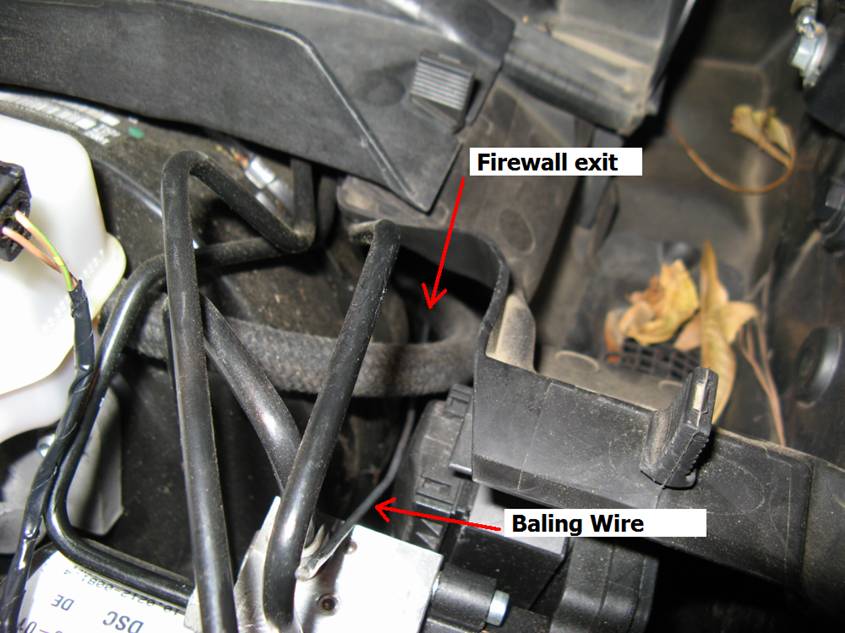
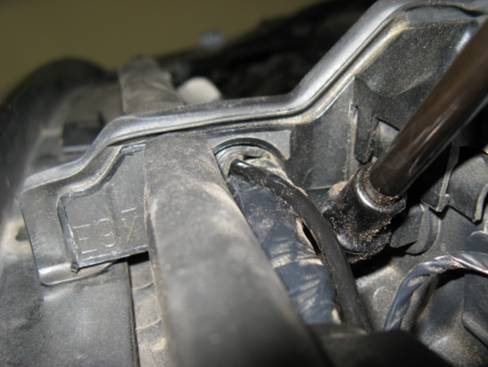
Wire was then run through an
existing grommet and down under the diverter valves and to the diverter valve
vacuum line junction. I put a slightly larger and harder piece of vacuum line
around the main one to guard against abrasion from the grommet down. I also zip
tied the rubber hose at the vacuum line and wrapped it with cloth based
electrical tape. When tucked under the DVs (making
sure not to kink any of the lines), you would never know there was a boost
gauge hooked up:
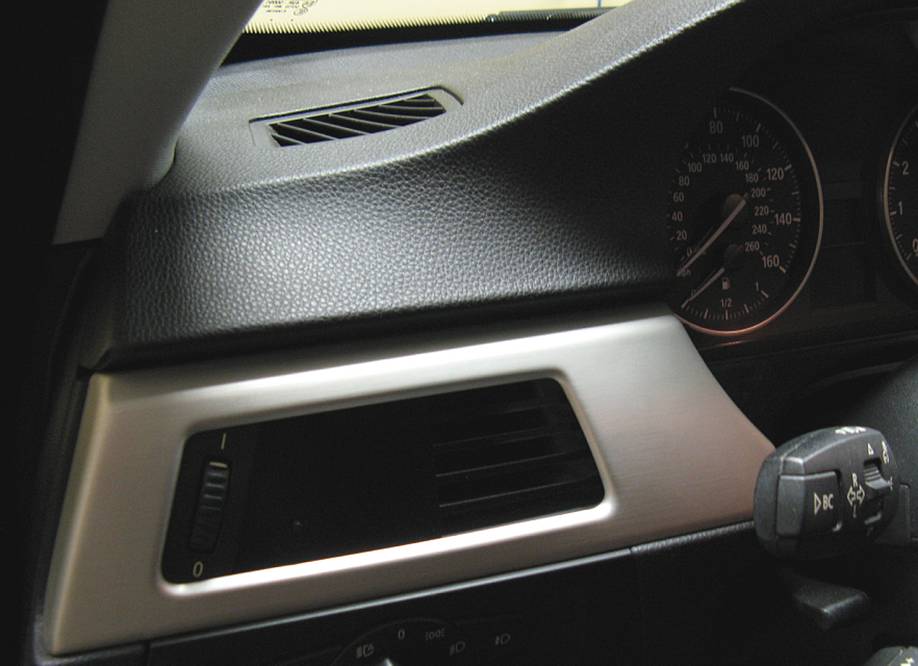
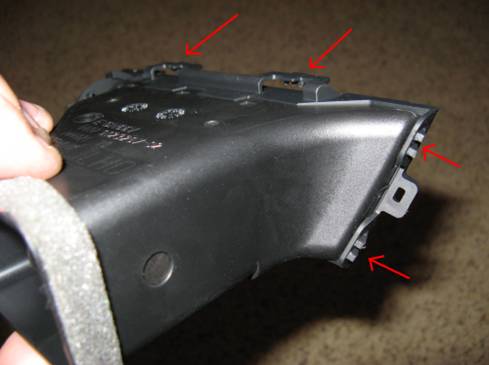
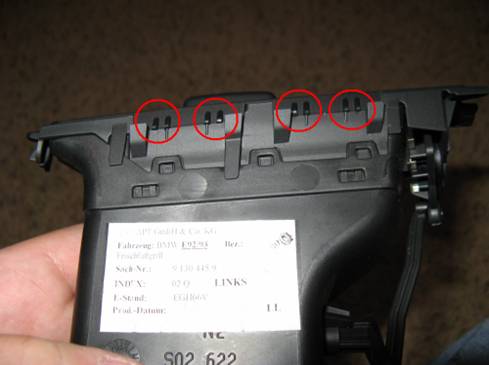
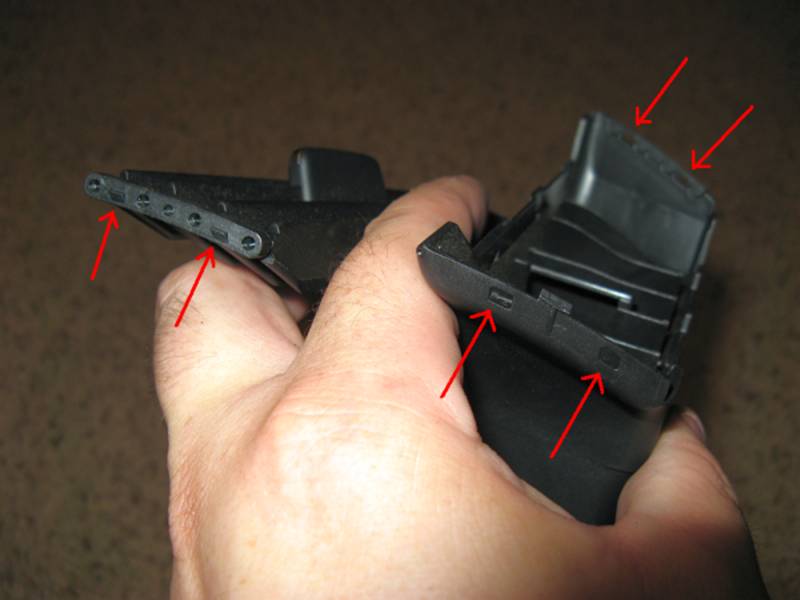
Now, time to disassemble the vent
and get the gauge ready to connect. The vent is removed from the trim piece by
carefully unsnapping at four points shown (I used a small flat blade
screwdriver), applying some pressure to release the clips on bottom, and
sliding to the side to disengage:
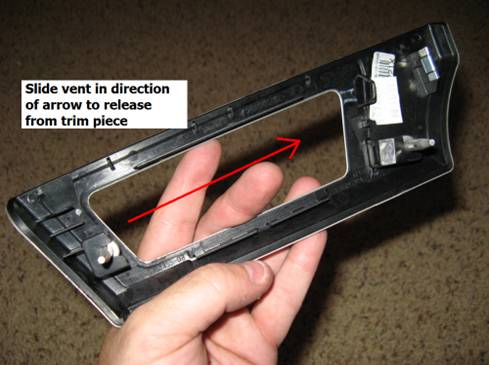
Now that
the vent is removed from the trim piece, the disassembly can begin. I unsnapped
the vent door control arm from the socket carefully. While applying slight
pressure the clips on top and bottom are unsnapped, the piece will then tilt
and allow the clip on the side to be undone:
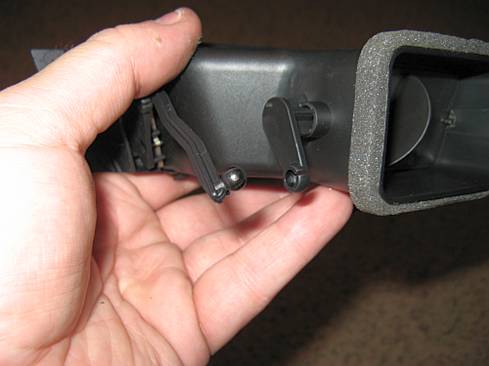
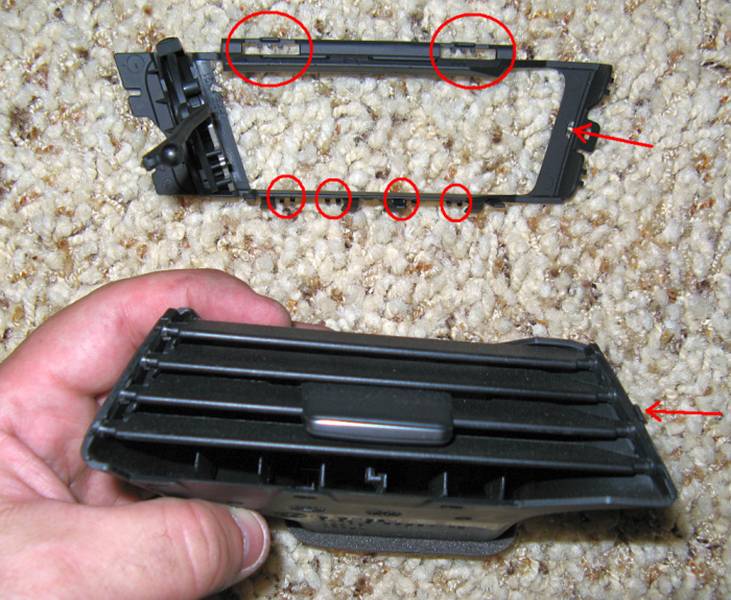
The horizontal louvers are removed from the vent by
unsnapping at two points on either side:
The
vertical louvers are removed by flexing the vent and popping the four snap-in
points out, two on bottom and two on top:

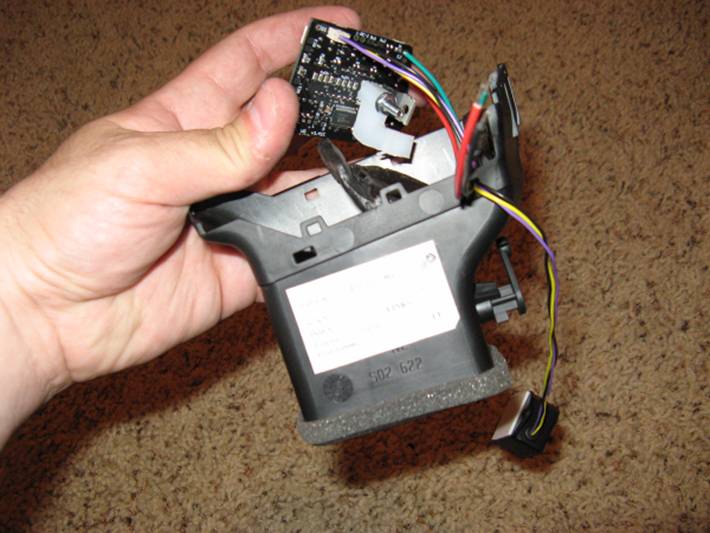
The vacuum
sensor plug is routed through the no-longer-used vent hole and plugged into the
gauge, the gauge wiring is routed through the same
hole:
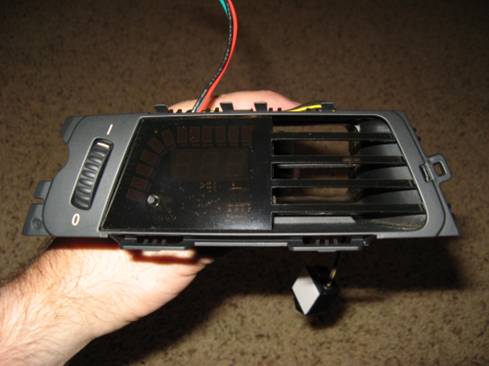
The gauge
is put in place after installing the foam guard in the empty vent assembly and
the mounting screw is started (NOT tightened) ……and the reassembly starts. It
is a little tricky, you have to hook the bottom of the vent cover on the bottom
and carefully maneuver the smoked gauge face into place before snapping it back
together. Once together, the gauge is mounted as per RIX instructions with a
single screw, tightened while applying pressure to the smoked face. I found
that if too tight, the direction of tightening force would twist the gauge and
cause the switch to bind. The vent door control arm can be snapped back into
the socket and the vent assembly can be reinstalled on to dash trim piece:

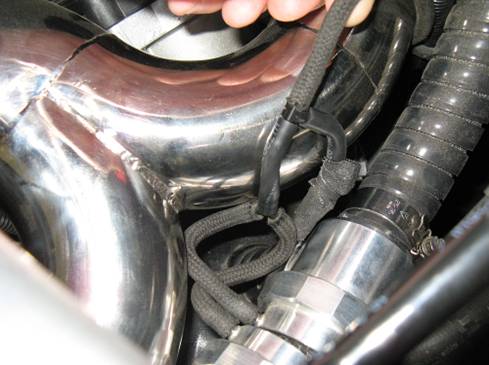
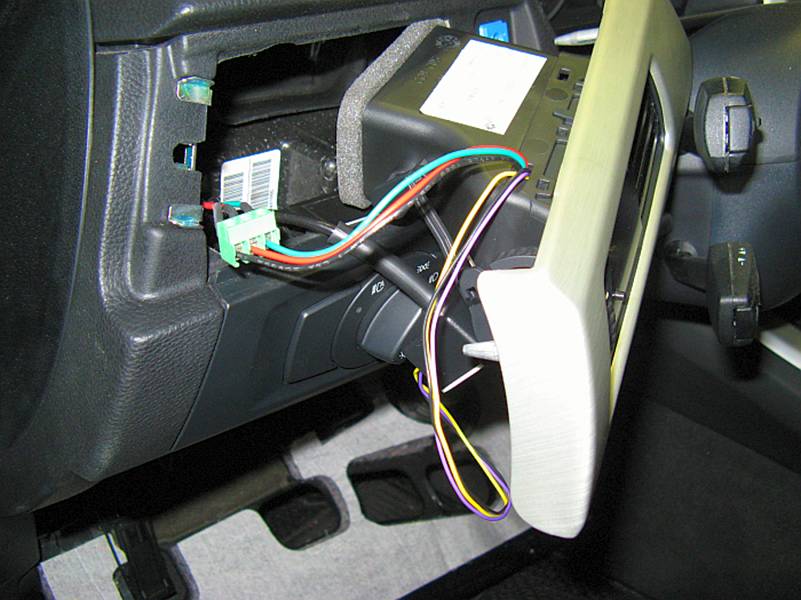
Back to the
car to hook up the vacuum lines and wiring harness. I did not use the double
sided tape for the vacuum sensor but wrapped it with some packing foam and tucked
it down beside the vent area. Be careful when routing the wiring that it is not
in the way of the vent door control arm. Wiring harness is color coded, plug in
like wires and tighten screws to lock in place. Installation is reverse of
removal:
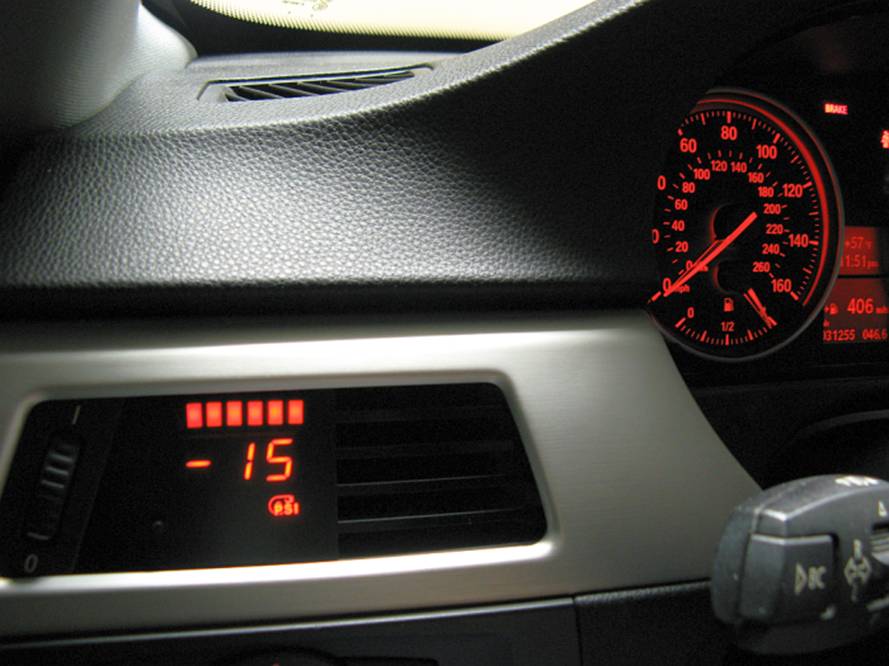
Finished
product looks great, kudos to RIX Effects for bringing such an integrated
solution to market: