![]()
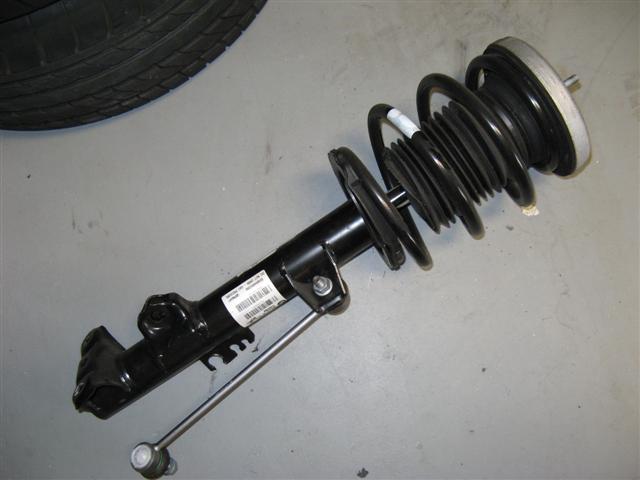
BMW E86 Z4M Coupe KW V3 Coilover
Suspension Installation
I thought
shortly after purchasing my Z4M Coupe that the suspension might be able to be improved
on. Suspension choices were limited and after some consideration for combined
street and track use (mostly street) I decided the KW V3s fit my needs……it also
helped that a fellow M Coupe owner had some with about 1k miles on them he was
looking to sell for 30% less than MSRP. I couldn’t find a lot of information so
I decided to take some pics for informational use, ANY USE OF THIS INFORMATION BY YOU IS AT YOUR OWN RISK.
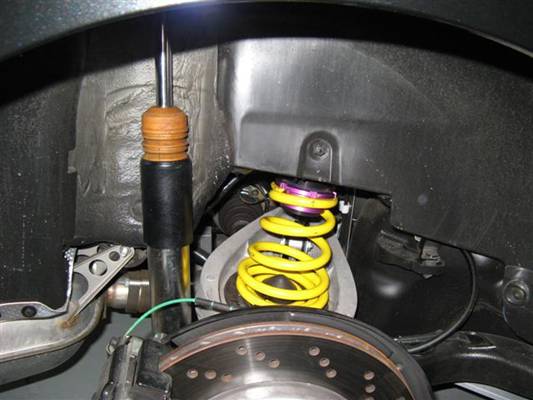
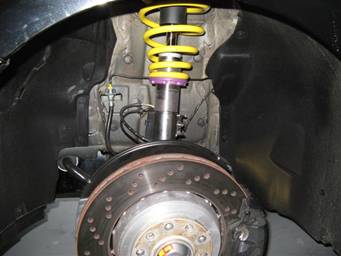
FRONT:
The front suspension
is pretty consistent between the left and right sides, so the instructions here
will apply to both sides with one key difference being the headlight level
switch on the passenger side. The car will have to be jacked up so the wheels
can be removed, easier to do both sides of the same axle at a time but each
corner can be done independently as well.
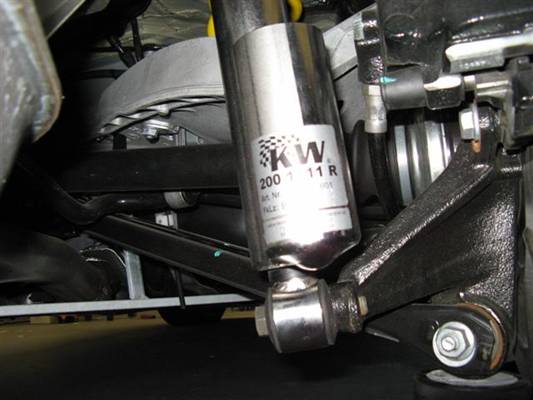
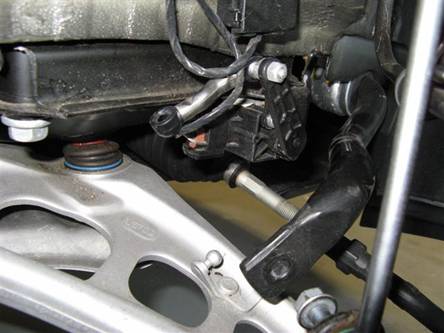
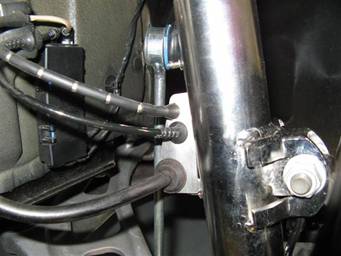
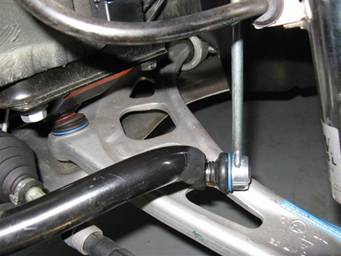
The first
thing I did was to press the brake sensor wire, ABS sensor, and brake line (all
with grommets) out of the carrier on the strut, and then the lower sway bar end
link was unbolted (wrench required on both sides, there are flats in front of
the end link boot for a wrench):
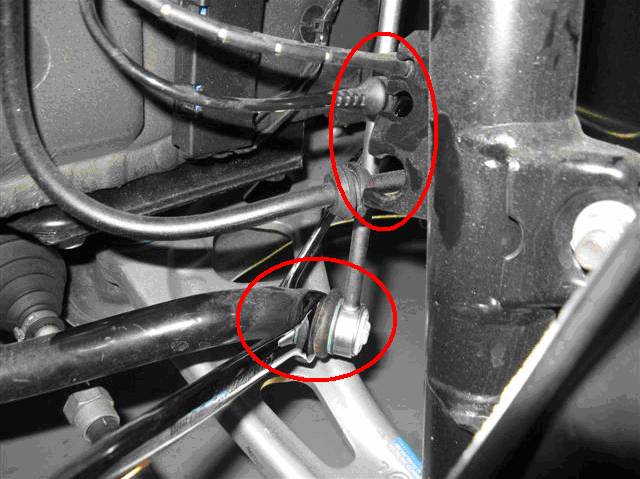
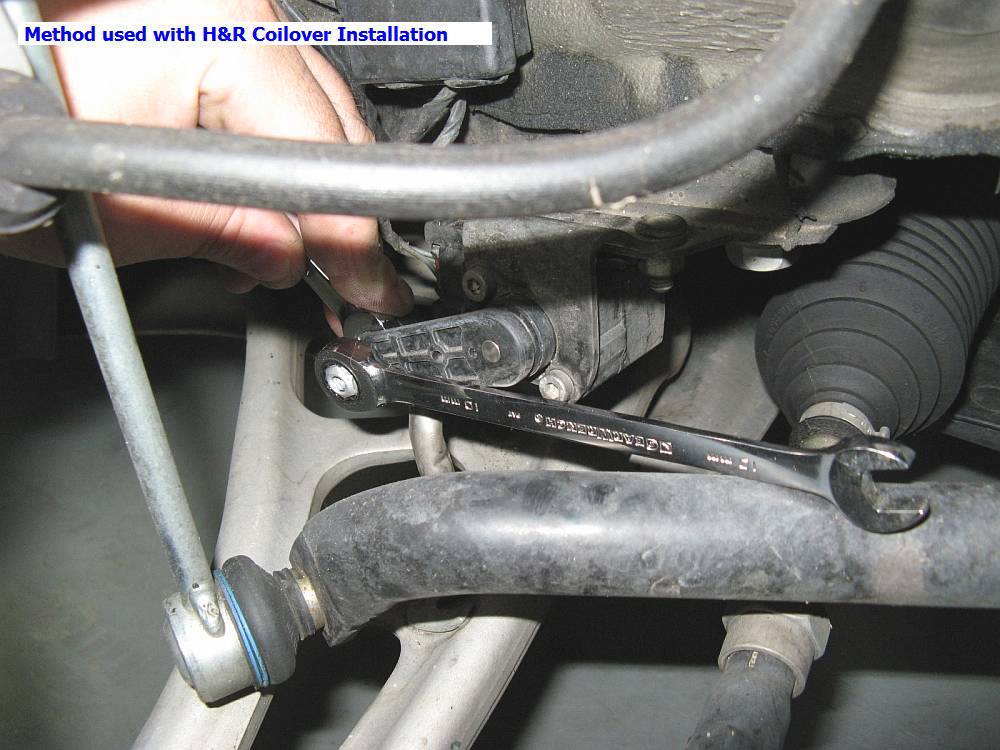
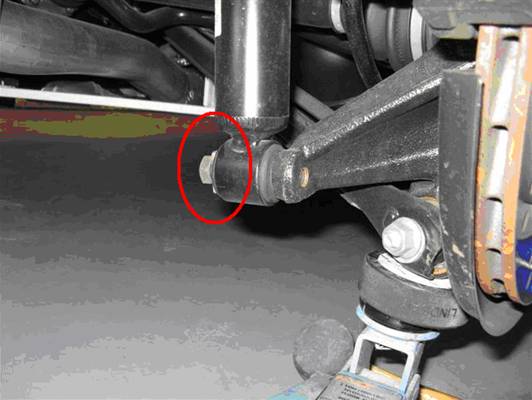
(Passenger
Side ONLY) Remove the headlight level switch link from the control arm ball
joint, I found needle nose pliers work great to pop this off. The link can be
carefully tucked behind the wires so that it remains out of the way until it is
ready to be reattached.
Alternatively
(as suggested by Bimmerfest’s kitw, and the method used for my
subsequent H&R coilover installation) the link
can also be disconnected by removing the 10mm nut to reduce the chance for
breakage of the plastic ball joint:
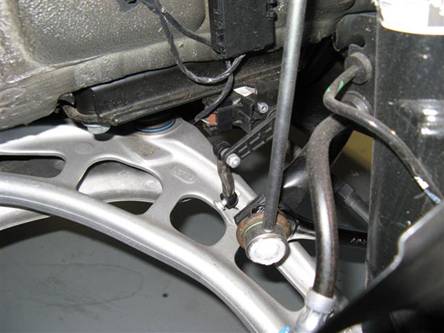

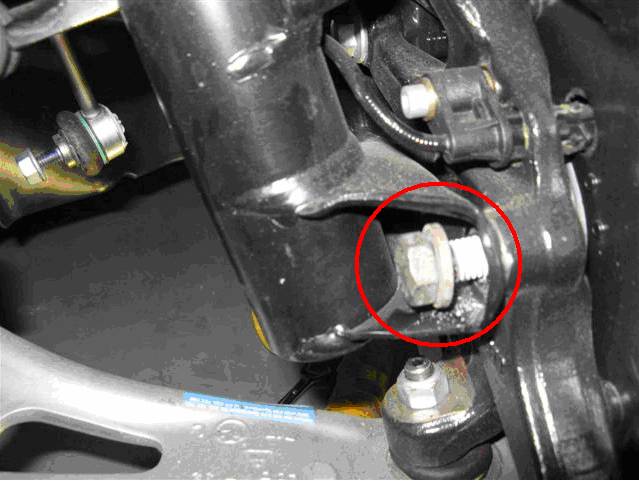
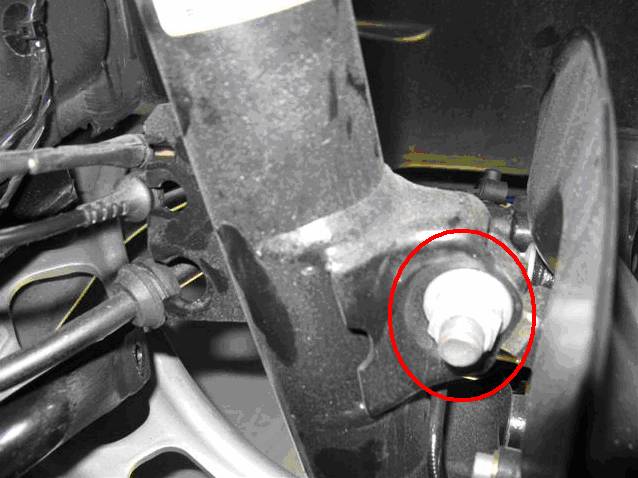
Remove the
2 bolts going from the strut mounting tabs into the steering knuckle/hub, one
on each side:
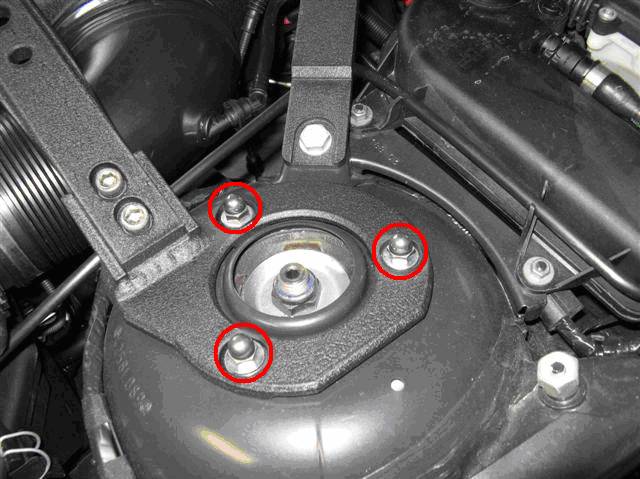
Loosen (but don’t remove) the
top 3 nuts for the upper strut mount:
Make sure the hub is supported on both sides and remove the nut and bolt that
remains holding the strut to the hub. CAUTION: If this
bolt is removed and the hub is not supported it could fall to the side and
damage sensor wires and/or brake lines:
Completely remove the nuts on the upper strut mount while holding the strut
assembly with the other hand so it does not fall:
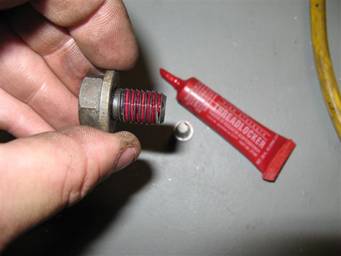
Installation of new components is reverse of above, be sure to use red LocTite
on the two lower strut bolts since they were originally installed that way. I
found a floor jack under the control arm (hockey puck for padding) was helpful
to support the hub assembly and align things so they could be bolted back
together:

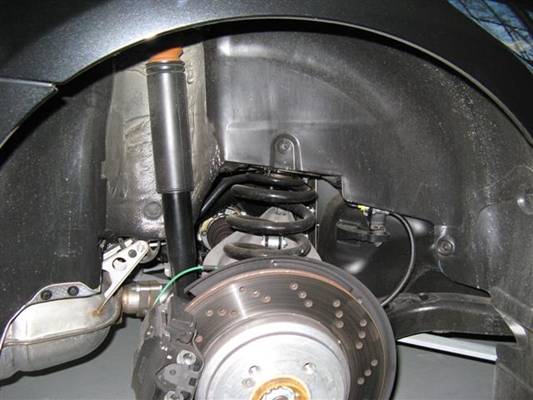
REAR:
For the rear both sides are the same, I started off by placing a jack (padded
with a hockey puck) under the control arm and jacking it so that it just
touched the control arm with some added pressure. The next step was to remove
the lower shock mounting bolt:
Next I lowered the jack so that the control arm was hanging freely. Make sure the
parking brake is OFF (and the front wheels chocked) or you might not get full
range of downward motion with the control arm as the brake cable cannot extend.
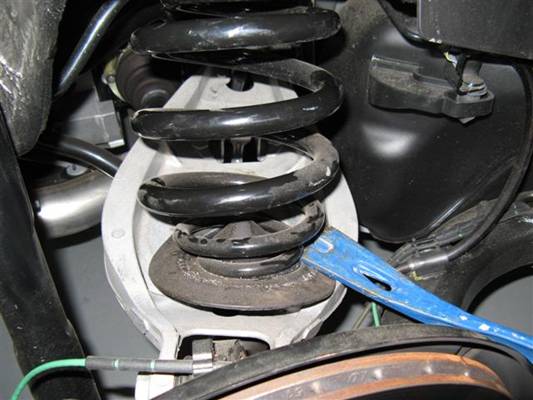
By using one hand to apply downward pressure to the control arm and my free
hand to apply pressure with a crowbar, the spring should come most of the way
out. It can then be removed with a twisting motion to one side.
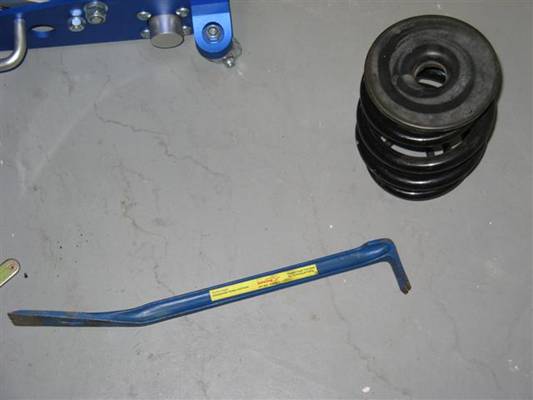
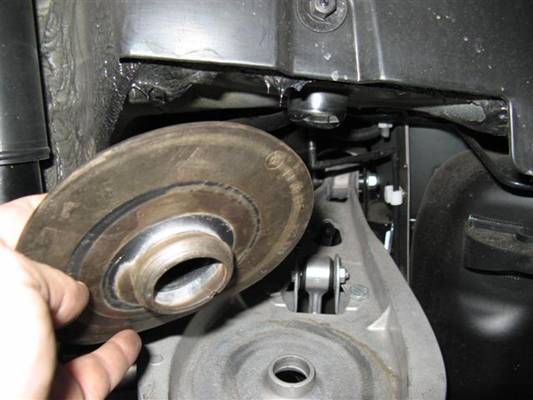
Remove the
upper rubber piece and throw it in the box with the old suspension pieces.
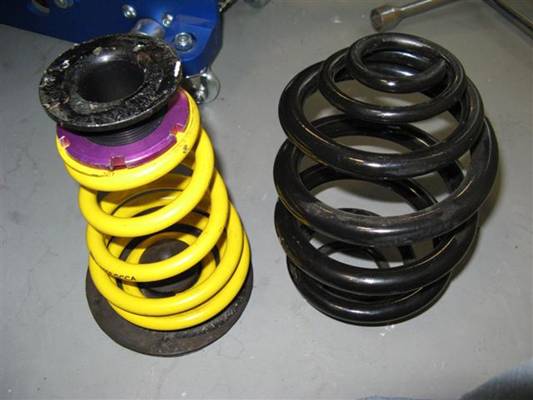
Remove the lower rubber piece and place it on the new spring with the adjuster
on top. Place the bottom of the spring with pad in the control arm first and
then while applying downward pressure to the control arm assembly, wedge the
adjuster on top with spring into place.
To R&R
the shocks, the interior cargo area needs to be disassembled. I used the BMW
instructions HERE to
facilitate that step so I could access the upper shock mounts- be prepared to
take your time and carefully remove fasteners and snap pieces apart so nothing
gets broken, it may take a while.
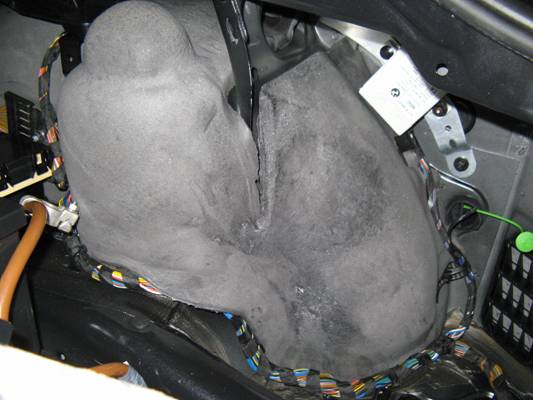
Once the
interior pieces are removed and you can see the foam cover over the upper
mount, carefully pull the top of the piece loose so that you can access the
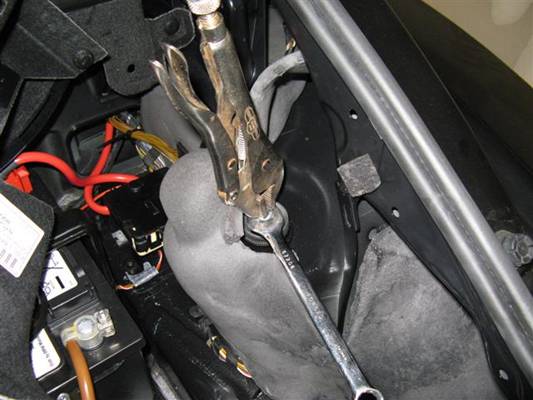
upper mounting bolt (the one on the middle, the other two stay). There is a
flat spot on the shock rod for a wrench, I used vice grips adjusted to hold the
shock rod but not tight, it does not need a lot of force effort to keep it from
turning once the nut is broken loose. Once the nut is loosened to the point it
makes contact with the vice grips, you should be able to hold the shift rod
under the car and remove the nut by hand, this will also prevent it from
dropping to the ground so make sure you have got a grip on it. The new shock
can then be inserted and tightened the same way you removed the old one, make
sure that the pieces are oriented correctly:
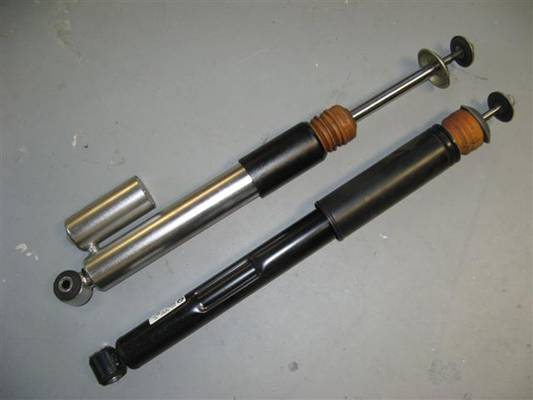
I found a
floor jack under the control arm (hockey puck for padding) was helpful to
support the control arm and align the lower shock mounting bolt. The reservoir
for the shock is offset and should be on the side closer to the brake caliper.
That’s it.