![]()
Installing JCW Steering Wheel in an
R50/R53 Mini Cooper
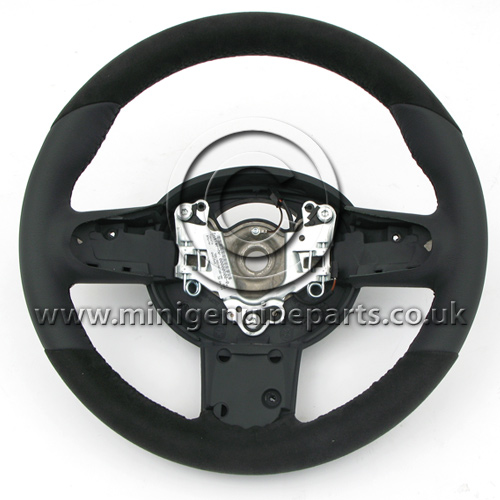
The JCW
Steering wheel offers a little more padding and a different feel from the standard
wheel and even the Sport wheel as my car came with. Since the
http://www.minigenuineparts.co.uk/
Since I
had the side pieces with radio and cruise control switches, I was limited to
replacing the center lower piece.
Standard
Disclaimer: ANY USE OF THIS INFORMATION
BY YOU IS AT YOUR OWN RISK.

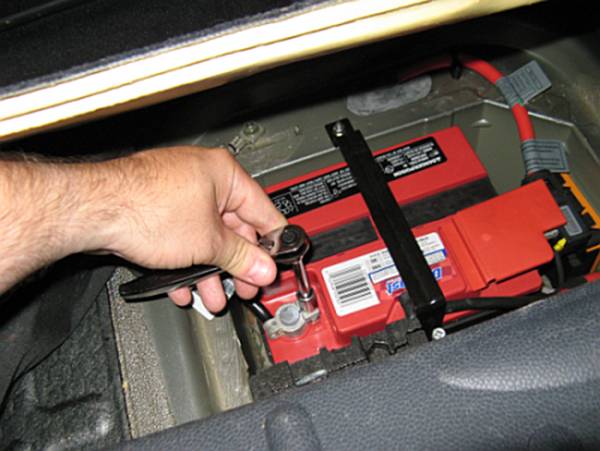
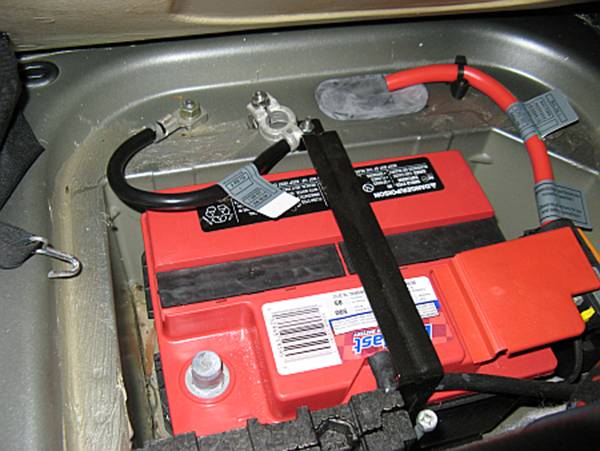
To start,
I disconnected the battery by removing the ground cable using a 10mm socket/ratchet.
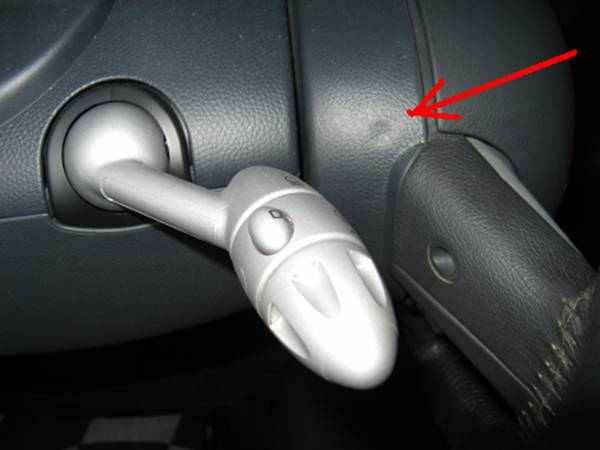
You may want to place a rag over the latch so the hatch will not lock, if it
does you will have to use the manual release under the rear seat:
CAUTION: Working with
airbags can be dangerous so proceed at your own risk, refer to the
BMW
TIS Airbag/Steering Wheel Replacement instructions for more information and
before proceeding.
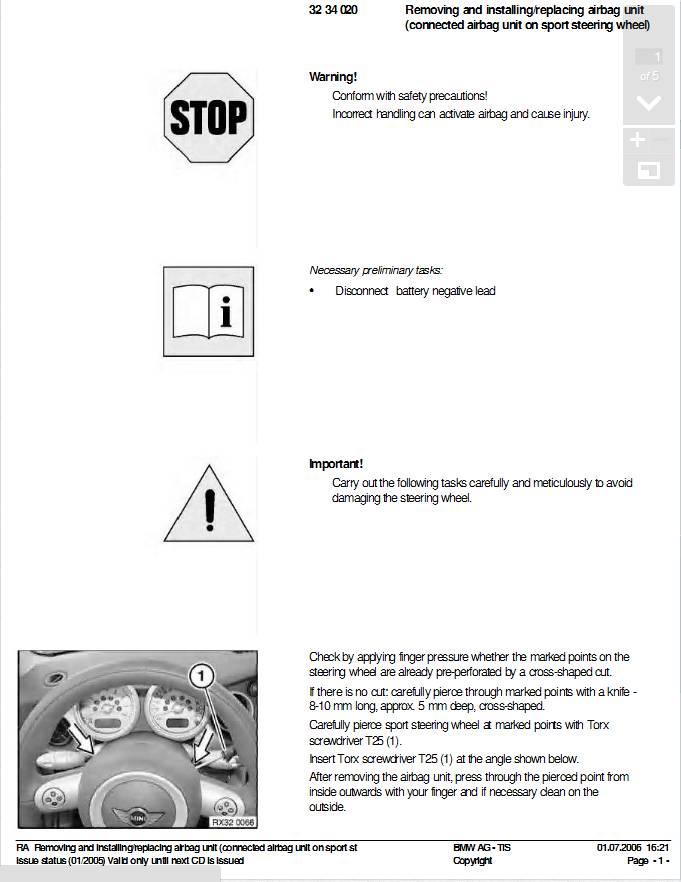
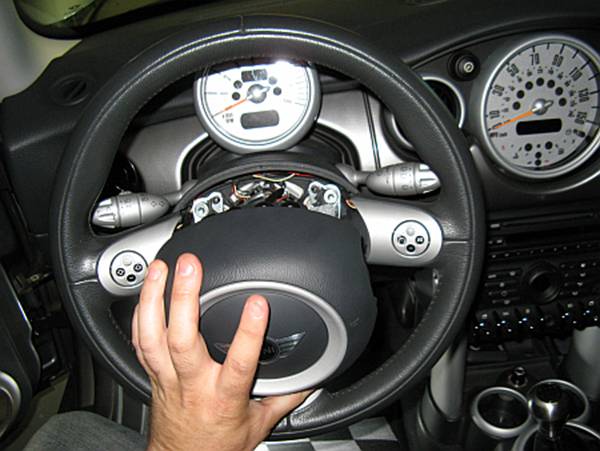
Looking at
the new steering wheel you can see how the airbag retention springs work; you
will notice some small dimples on the side of the steering wheel you are
removing where a small Torx driver can be inserted to release the spring. I
used a T10 driver since it was small and I did not want to make the slits in
the dimple any bigger than they needed to be. You will need to do one side at a
time while pulling out on the airbag until both sides are released and the
airbag is free. Pics of the wheel without airbag demonstrate how the spring is
released, once you feel the spring at the end of the driver push down at the
angle the driver is at and the spring will move to the side and release the
airbag clip; video demonstrating this is HERE if the pics don’t
illustrate this well enough:


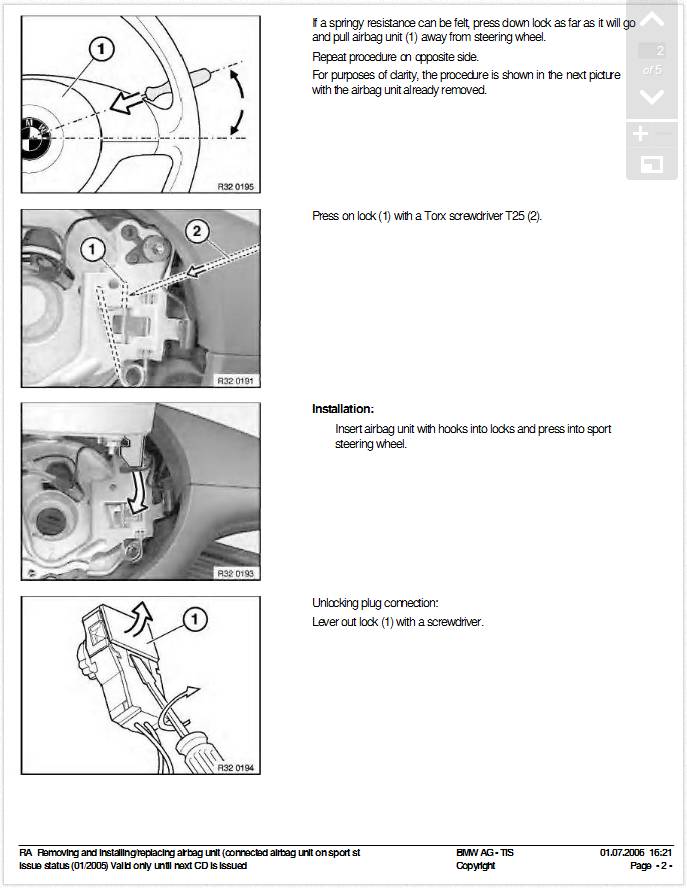
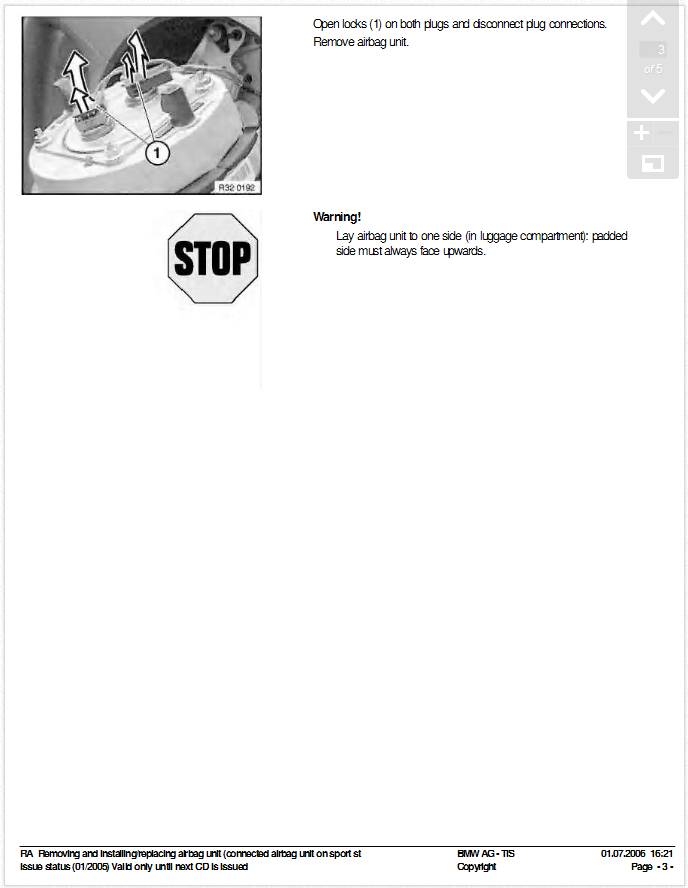
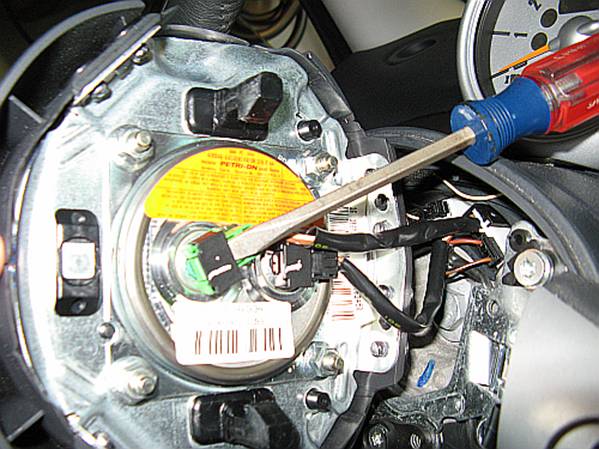
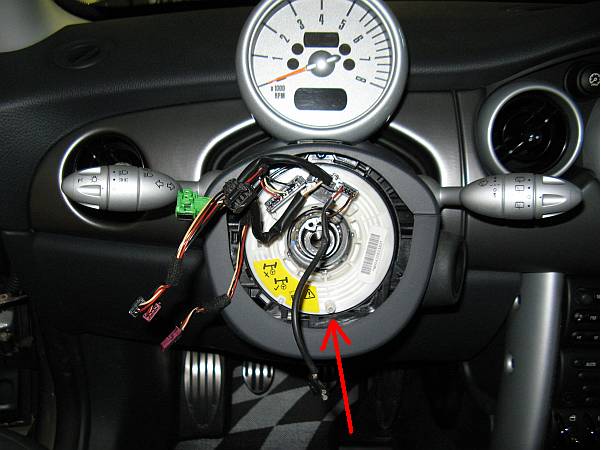
Once the airbag
is released, the wiring connectors will need to be removed. This is done using
a small flat blade screwdriver to pry up on the locking clip as shown for both
connectors, and carefully pulling out to remove the plug:
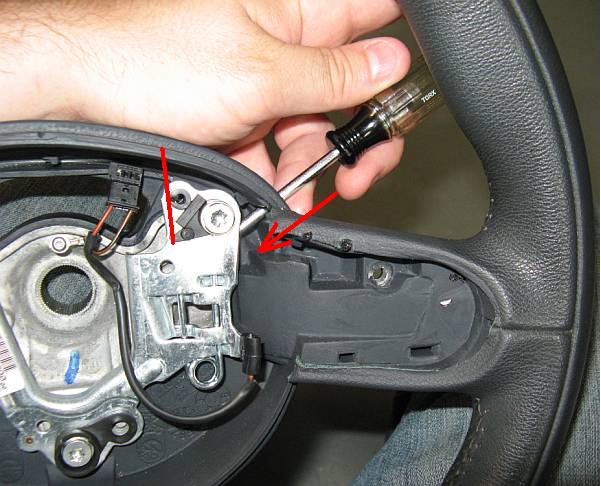
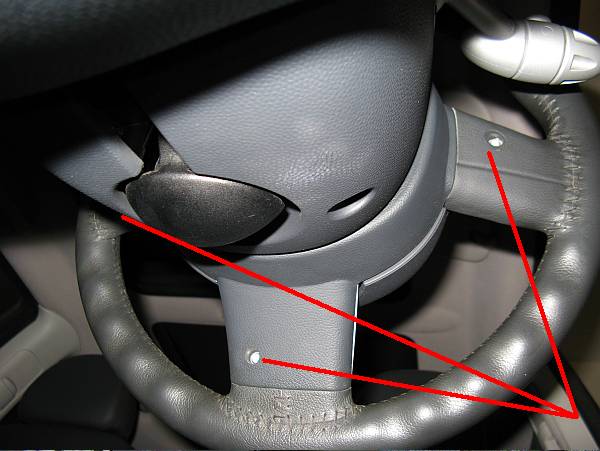
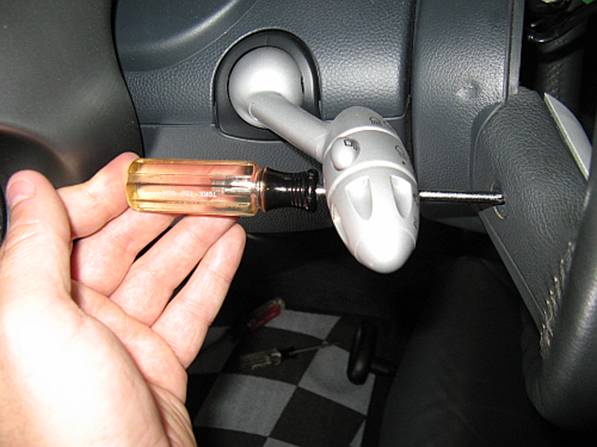
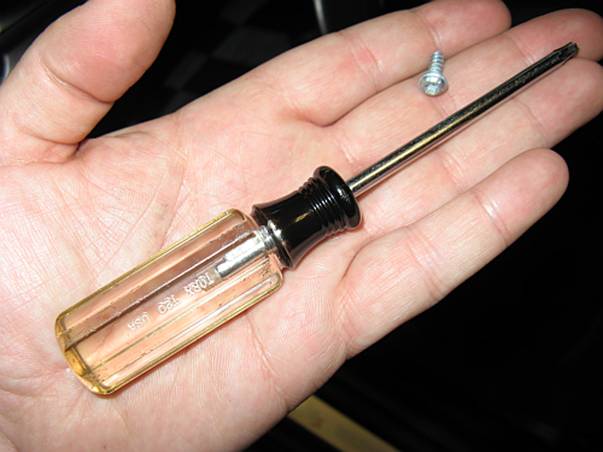
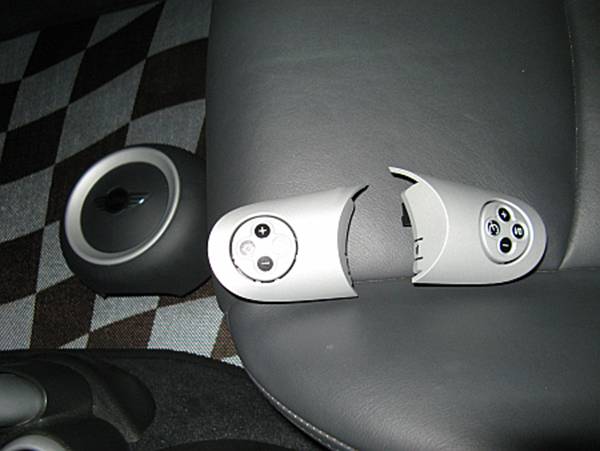
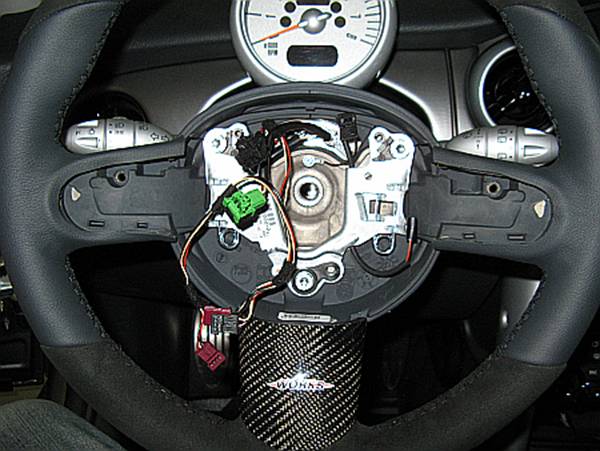
Next to be
removed are the three trim pieces. Each piece is press fit into the steering
wheel with a single screw holding it in, a T20 Torx driver is used to remove
these screws. The Torx driver has to be directly in line with the head of the
screw and this can be misleading due to the angles of the steering wheel
spokes:
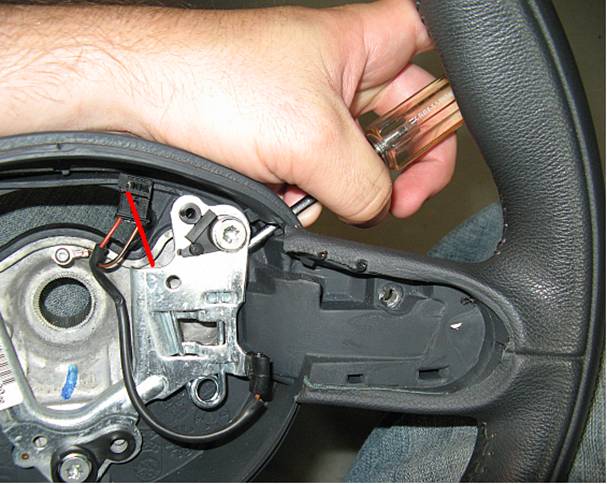
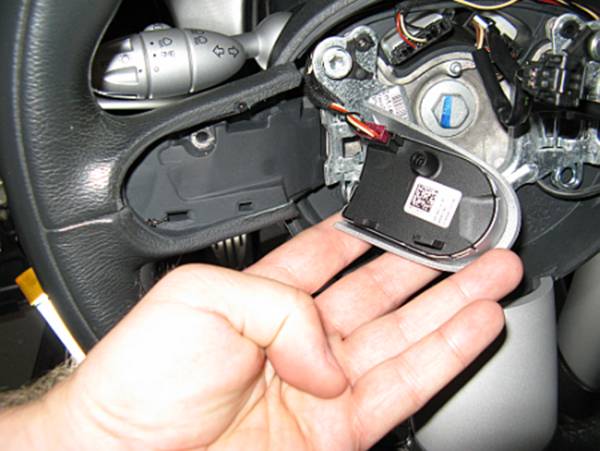
When all
three screws have been removed the pieces can be carefully pulled out of the
steering wheel, it takes a little pulling since they are press fit:
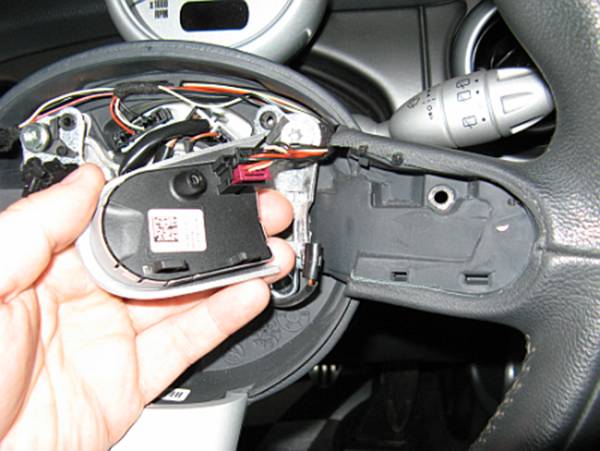
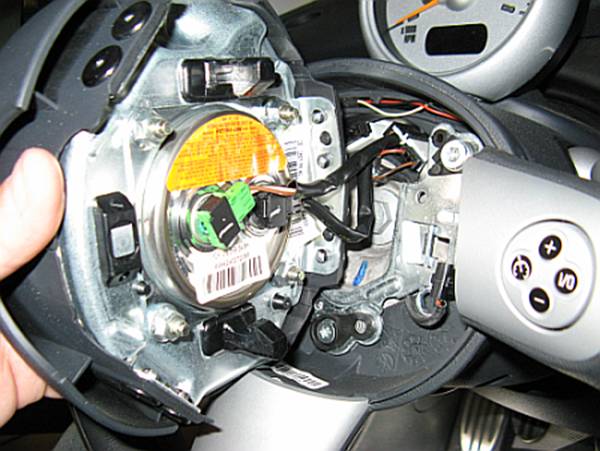
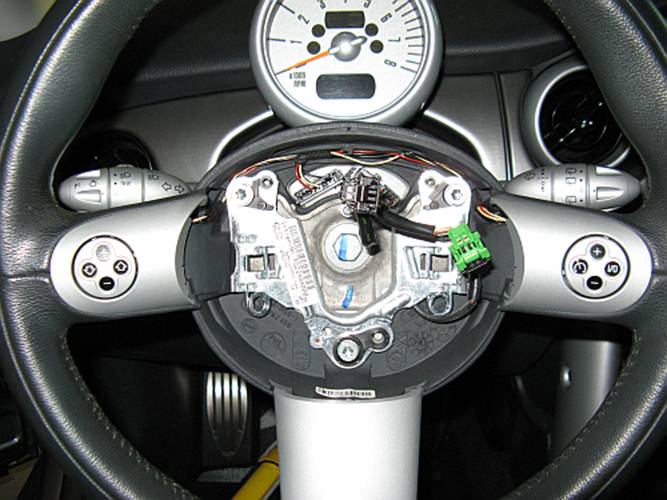
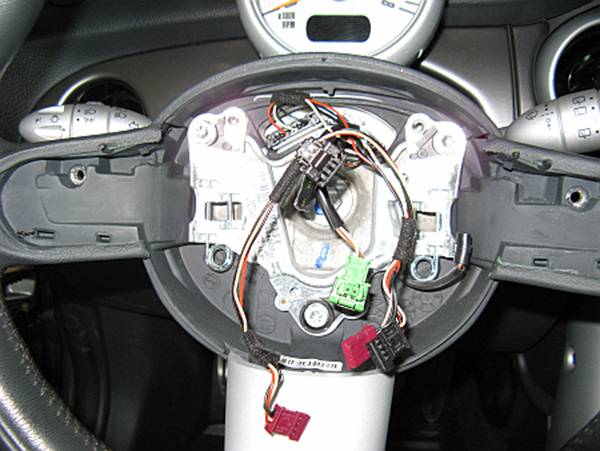
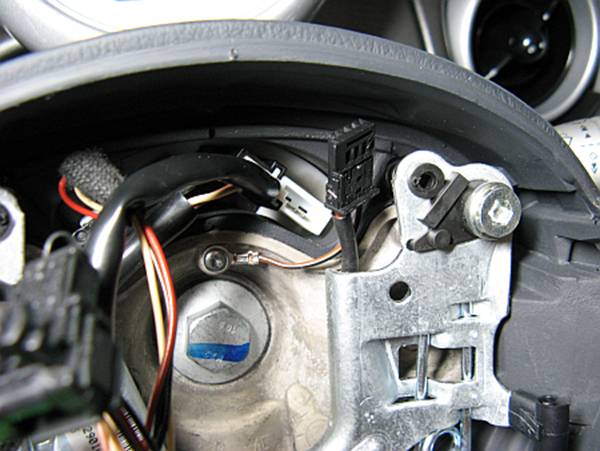
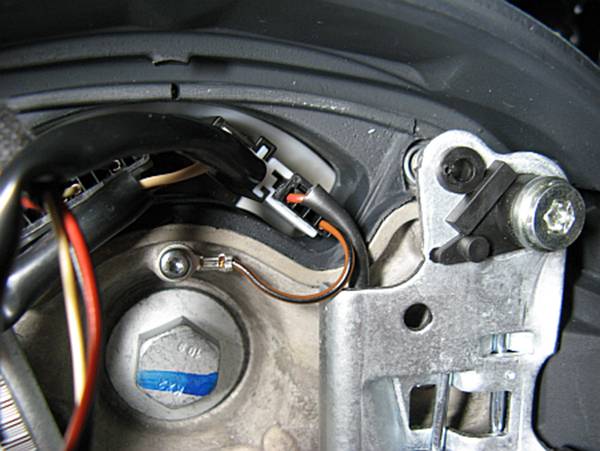
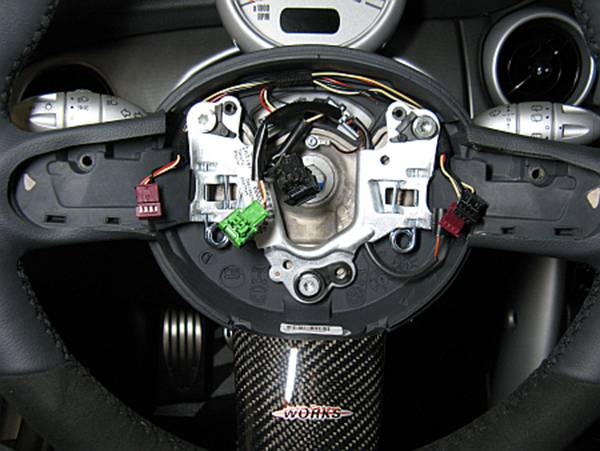
The wiring
harness plugs are removed from the multi-function switches, carefully pulling
outward on the connector (not the wires). Note how the wiring is run around the
top inside of the steering wheel hub in the pics above, this will need to be
replicated with the new wheel installation:
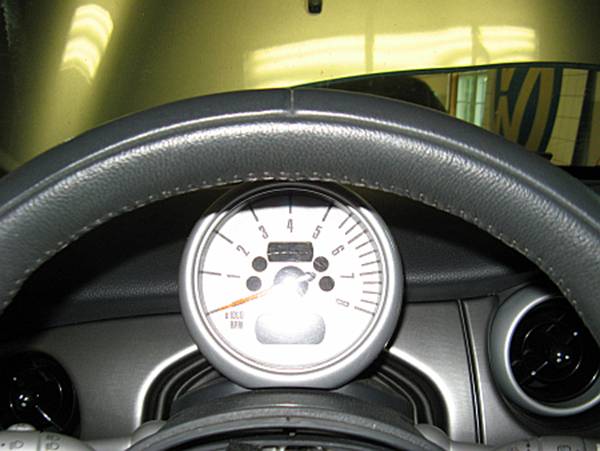
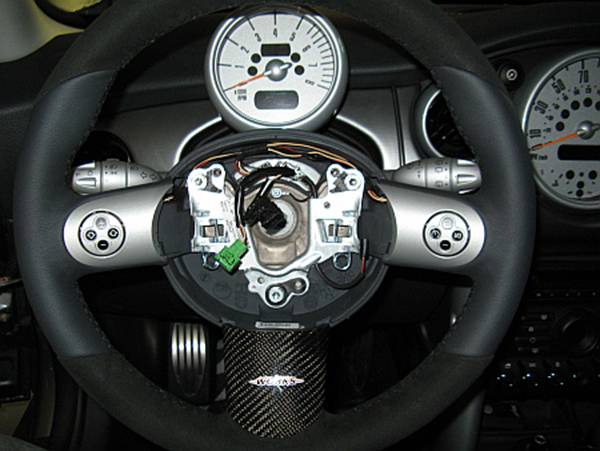
If you
have not already done so, it is a good idea to center and lock the steering
wheel (we have that nice seam on the wheel to line up with the 4 on the tach),
the wheels should also be straight when the steering wheel is centered:
The horn
connector (circled) should be unplugged from the car; the new steering wheel
will come with this wire in place (disregard the driver on the screw in the
picture, I removed this wire from the wheel before noticing that the new wheel
had this installed):
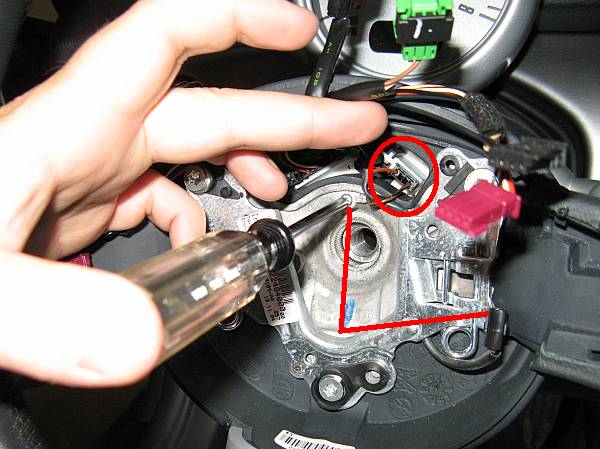
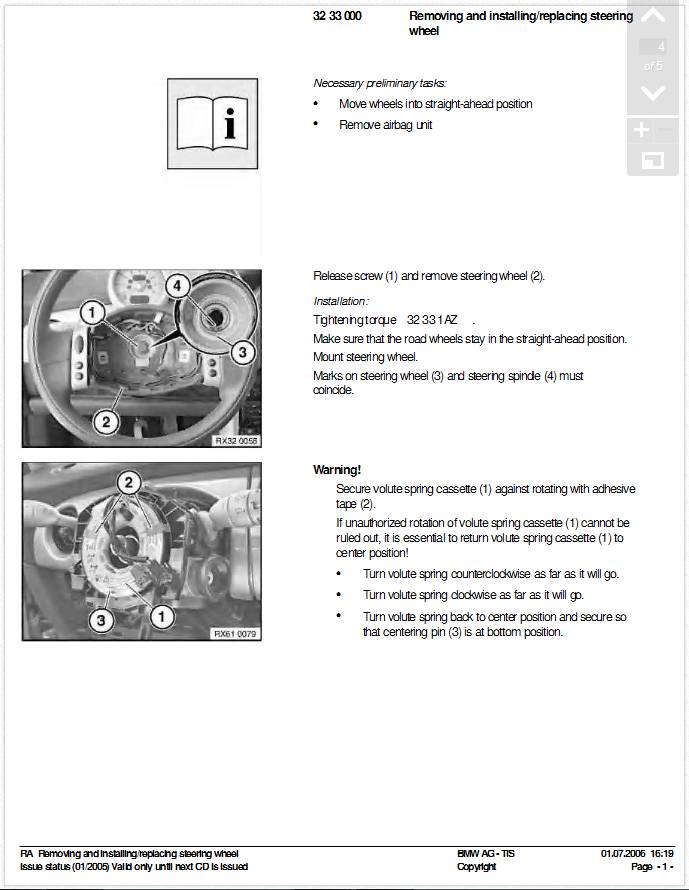
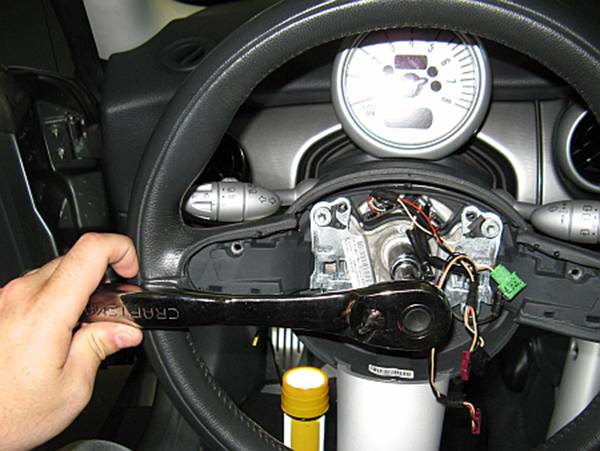
The
steering wheel bolt is removed using a 16mm socket (I used a ½” ratchet for
leverage with a small extension):
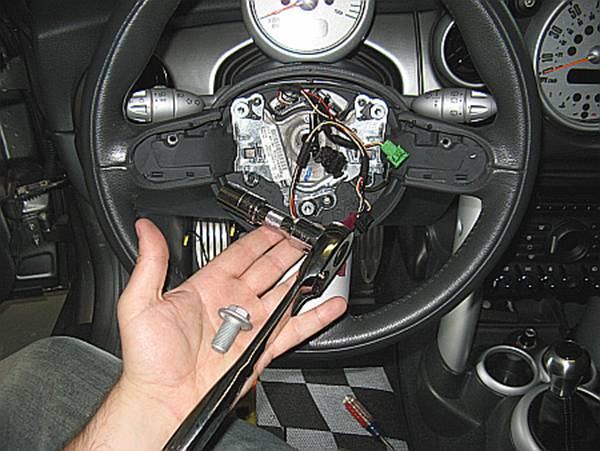
Surprisingly
and unlike every other steering wheel I have removed, this one just comes off- not
press fit at all. Be careful to route the wires and connectors through the top
hole as it is removed. [Disregard the horn wire removed from the wheel in the
pic below, I did remove this before I noticed the new wheel already had it
installed]:
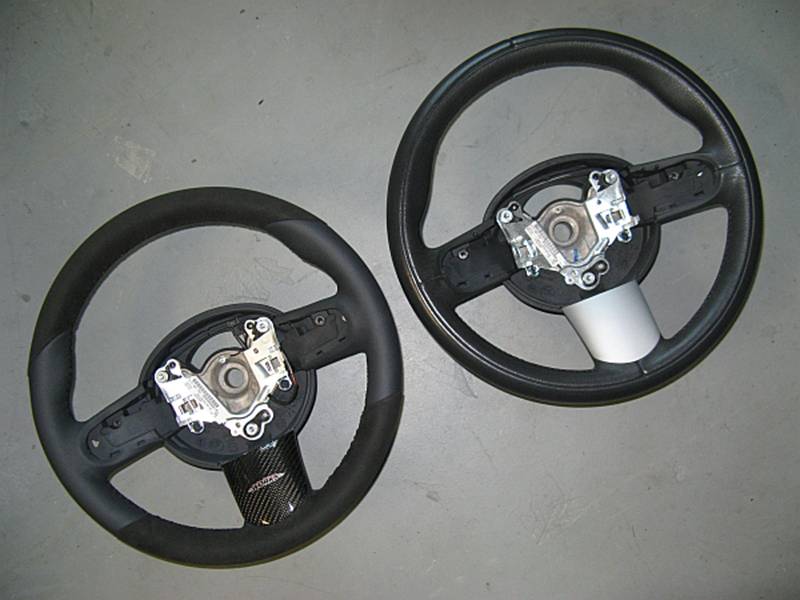
Old Sport
wheel vs new JCW wheel, the JCW covering is a little nicer and it feels a
little thicker:
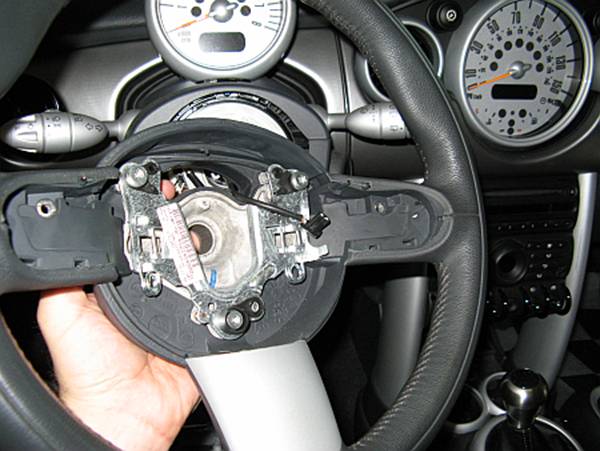
The
plastic wheel behind the steering wheel will free-spin, the pin on this plastic
wheel should be in line with the center bottom part of the steering wheel AND
centered- this plastic piece will turn the same number of times the steering
wheel turns so it is critical to make sure that it is not only centered in
position but also centered in number of turns. I tried not to move mine so this
was easy, BMW TIS suggests tape to prevent it from turning after the steering
wheel is removed. If you are not sure or have any doubts as to how much this
wheel has moved the BMW TIS suggests turning the plastic wheel clockwise to
lock and counting the number of turns as it is turned counter-clockwise to
lock, centered should be half this total number of turns. If you look at the
back of the steering wheel you will see where this pin lines up with a hole in
the bottom center of the wheel:

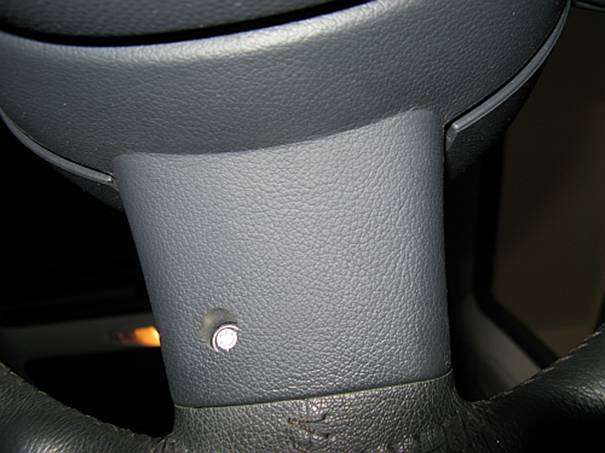
The lower
center trim piece can be installed with the T20 Torx screw removed prior.
Steering wheel wiring/connectors are fed through the hole on top and the
steering wheel is lined up and placed on the splined steering wheel shaft while
also carefully making sure the pin on the plastic wheel is going into the
steering wheel hole it mates with. The steering wheel bolt can be hand threaded
and hand tightened at this point:
The horn
connector is plugged in:
The
multi-function wiring harness is tucked around the top inside of the steering
wheel hub and plugged into each switch piece. The side pieces can then be press
fit into the steering wheel and secured with the T20 Torx screws that were
removed from the original steering wheel:
The BMW
TIS states that the torque spec for the steering wheel bolt is 63 Nm which
equates to 46.46 lb/ft. A torque wrench is used to torque the steering wheel to
steering shaft bolt to spec:
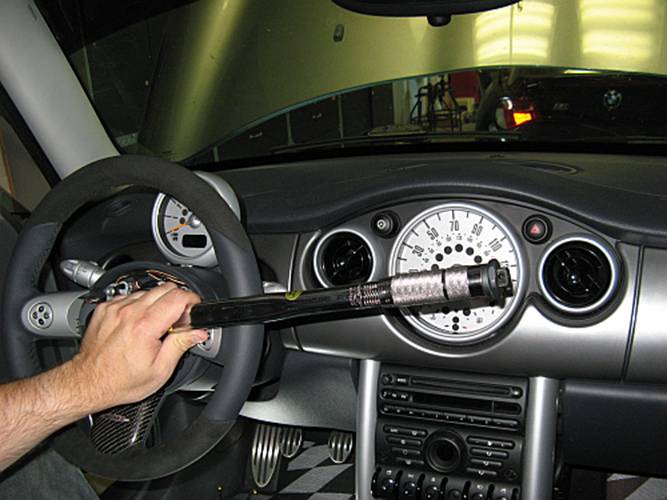
DID YOU
REMEMBER TO TORQUE THE STEERING WHEEL BOLT TO SPEC?
After checking
all wiring, the airbag is ready to be plugged in and snapped in. The two wiring
harness plugs for the airbag are color coded and easily matched with the
correct receiver- be sure to snap the locking clips down after plugging them
in. The airbag is lined up on the wheel and pushed into place, you should feel
and hear the side pieces click into place in the spring retainers. The battery
can be reconnected and the steering wheel functionality can be tested.
That’s it-
You have completed the steering wheel swap- Enjoy driving with your new JCW
wheel:

TIS: