![]()
Raising the motor on the Mini
Cooper S (R53) to install:
· TSW Upper motor mount
· WMW 15% Pulley
·
· Tensioner Damper Poly Bushings
Well, it’s
not necessary to raise the motor to install the last two items but they are
easier to get to and why not go ahead and do it all while you’re in there. I
had owned my MCS for about a week before deciding it was time to do some things
right away- I knew the upper motor mount was leaking/failed
when I bought the car and wanted to do the pulley upgrade. While looking at
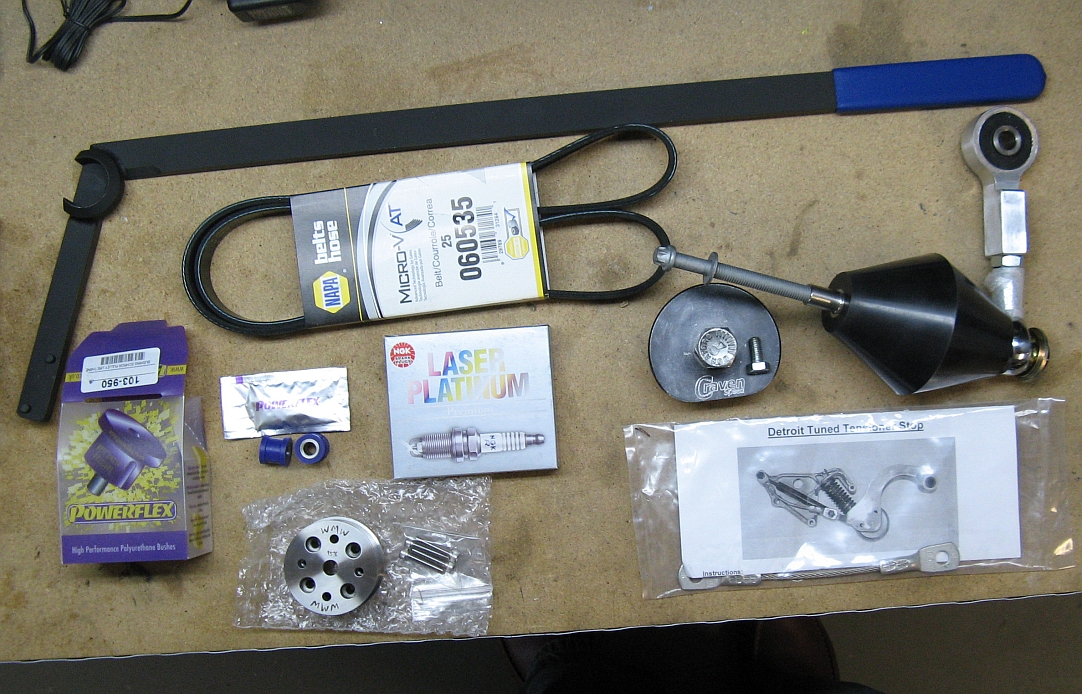
Way’s online store (Way Motor Works),
I found there were some other items I could/should go ahead and get/install
while doing the others- Work Smarter, Not Harder. Way had a great package deal
with the pulley, belt, plugs, and tensioner stop and
provided a loaner pulley puller.
Standard
Disclaimer: ANY USE OF THIS INFORMATION
BY YOU IS AT YOUR OWN RISK.
Raising the motor
The motor has
to be jacked up a bit for access to the supercharger pulley and in order to
replace the upper motor mount. Start by jacking up the passenger side of the
car (or both sides) and supporting the car with jack stands- You may want to
loosen the lugs on the passenger side wheel before jacking since it will be
coming off.
The first
step is removing some nuts/bolts to allow the motor to be jacked up.
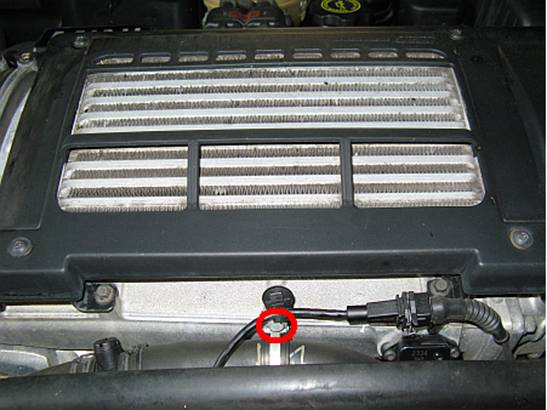
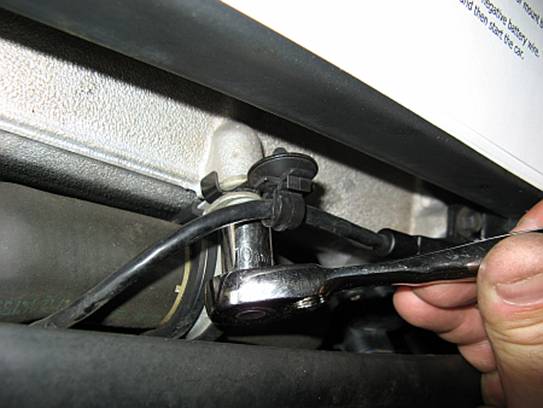
The
hose/wiring holder bolt should be removed using a 10mm socket/ratchet:
Next the upper
motor mount bolts need to be addressed- loosen but don’t remove the driver side
motor mount bolt:

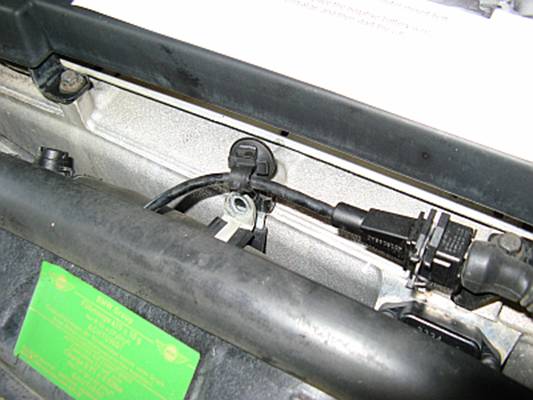
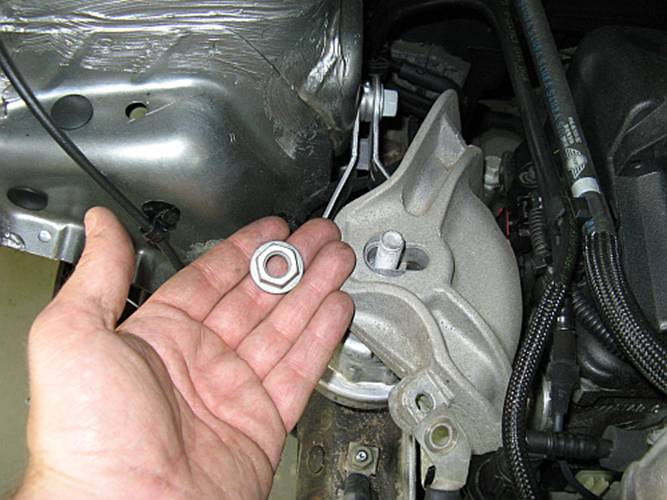
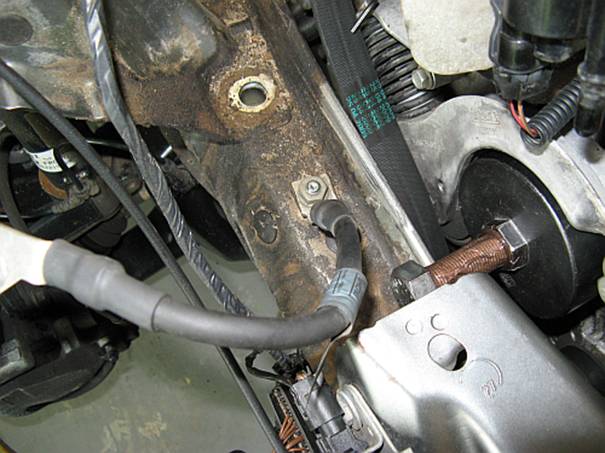
Remove the
passenger side ground strap nut/bolt (13mm wrench or socket) - be careful as
the bolt is captive underneath:
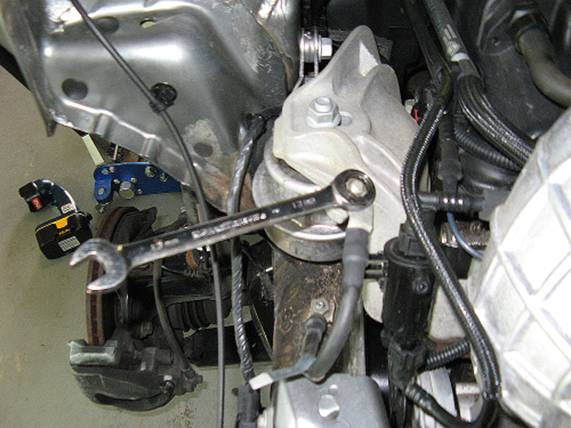

Remove the
passenger side motor mount nut:
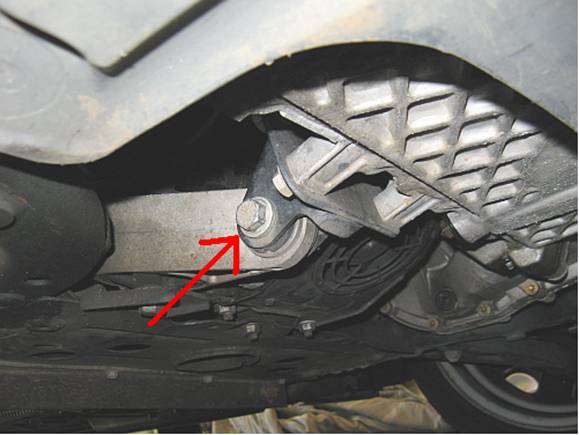
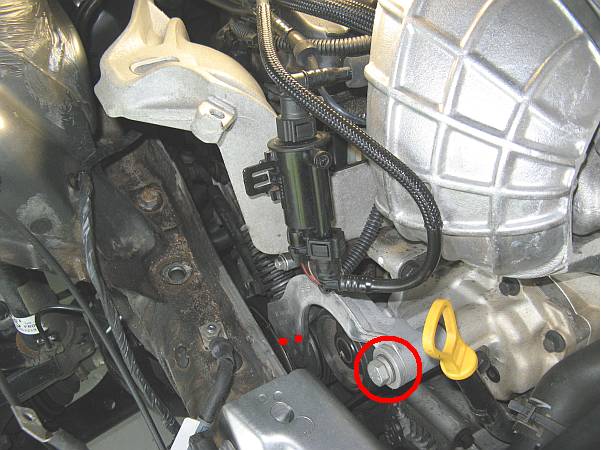
Remove the
lower motor mount bolt closest to the oil pan:
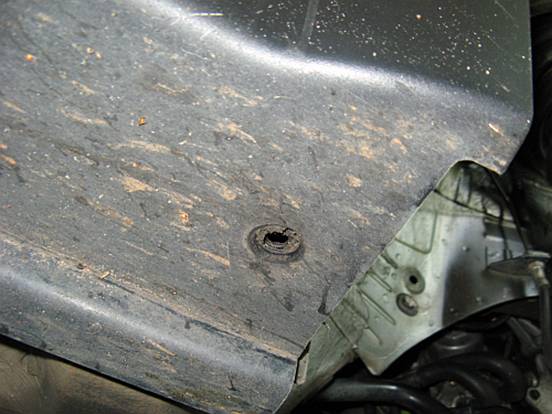
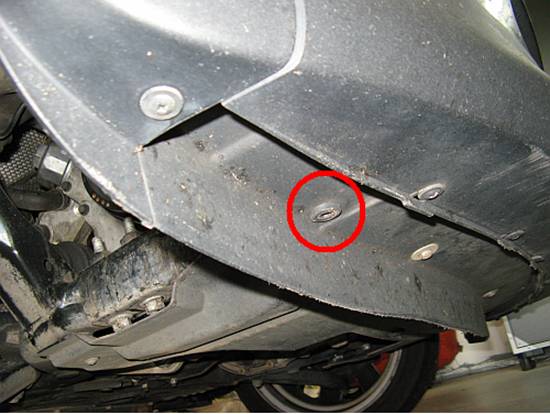
After
removing the wheel, remove the passenger side wheel well cover, there are
several plastic Phillips head screws that can be helped out by inserting a
small flat blade screwdriver under the screw head in the opposing slots on the
base. There are also two screws, one on front and one behind that need to be
removed:

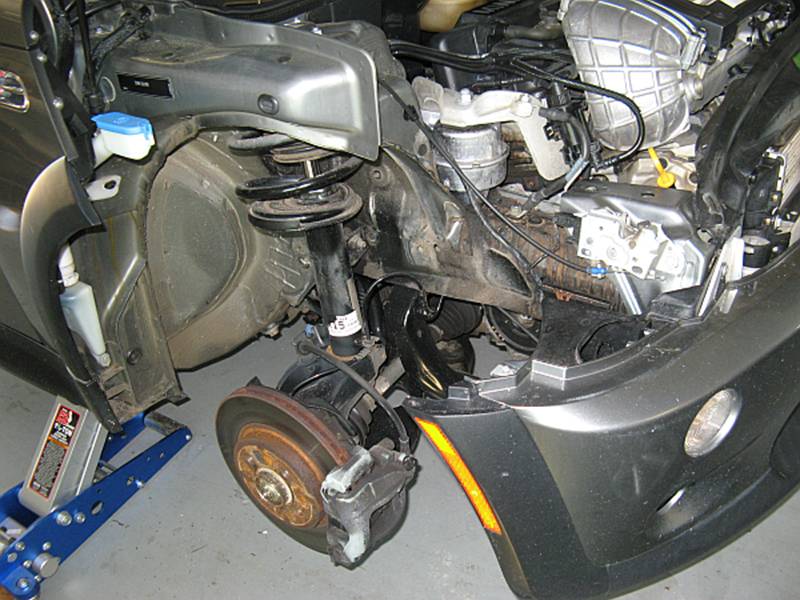
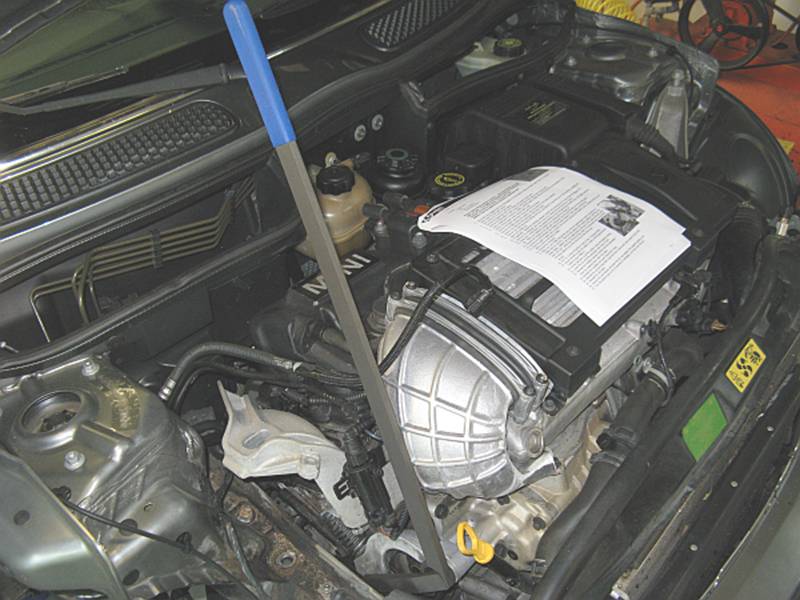
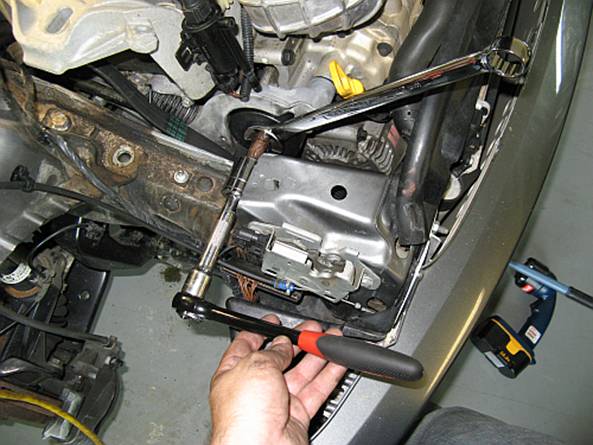
Place a
jack under the motor oil pan, I used a piece of wood to spread the load and
centered the jack where the oil pan drain plug is:

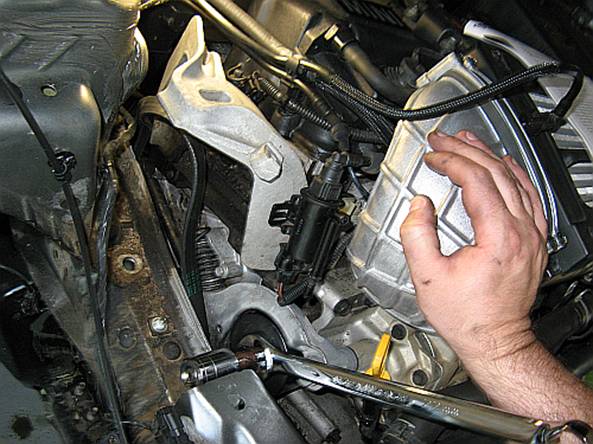
While jacking
the motor up, you want to listen and look for problems: wires or hoses getting
pinched or tight, interference of components, power steering pump/fan, ignition
coil wiring, etc. The motor just needs to
be high enough to remove the
Replacing the upper passenger side
motor mount
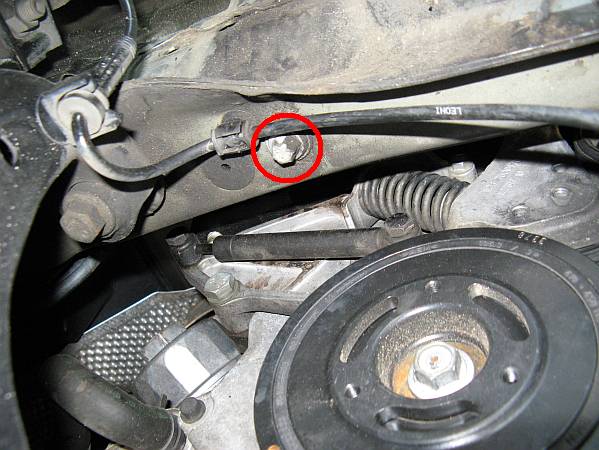
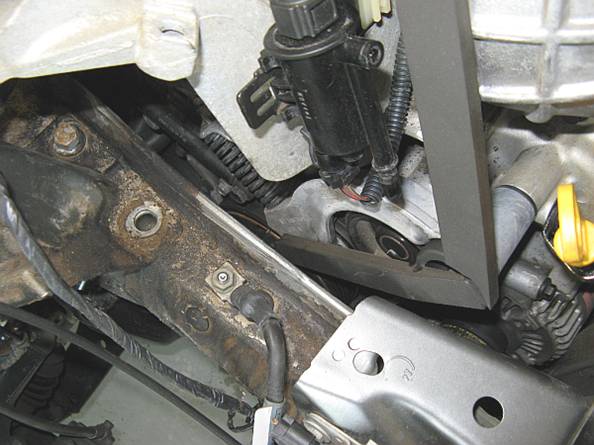
Since the
upper bolt has been removed to lift the motor, there are only a few more things
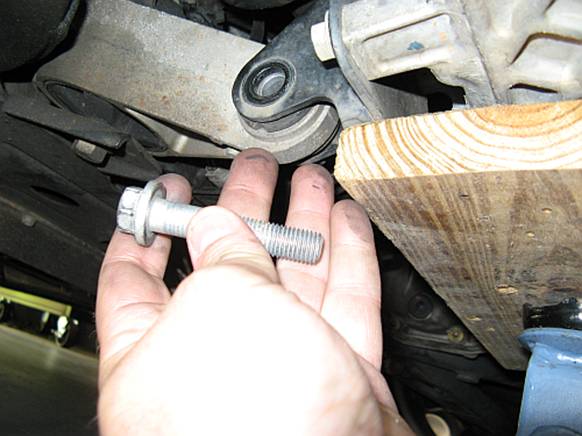
required to remove the old mount. The mount has a support that bolts to the
strut tower, this bolt should be removed.
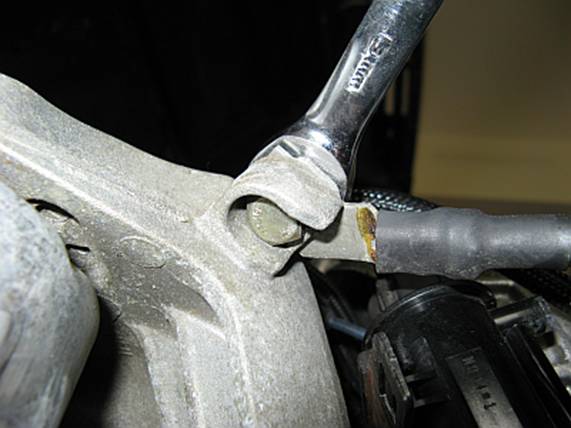
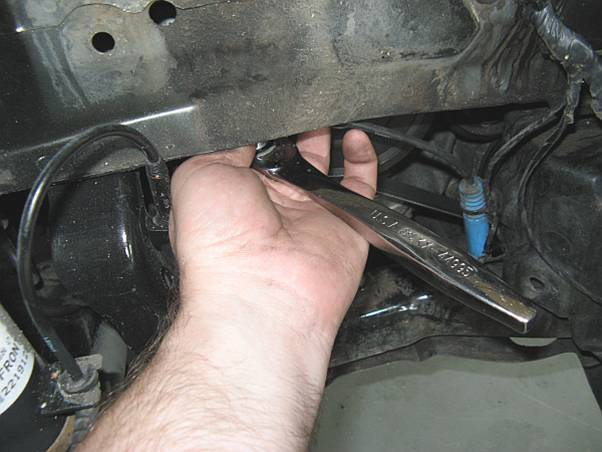
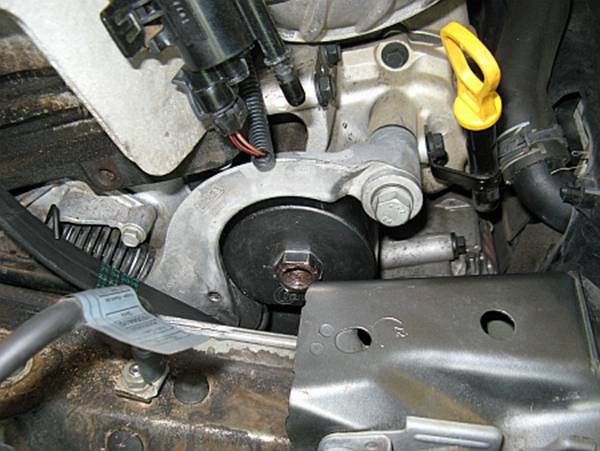
Only one more bolt remaining: the bottom one. It
requires an external Torx, E12 socket to remove:
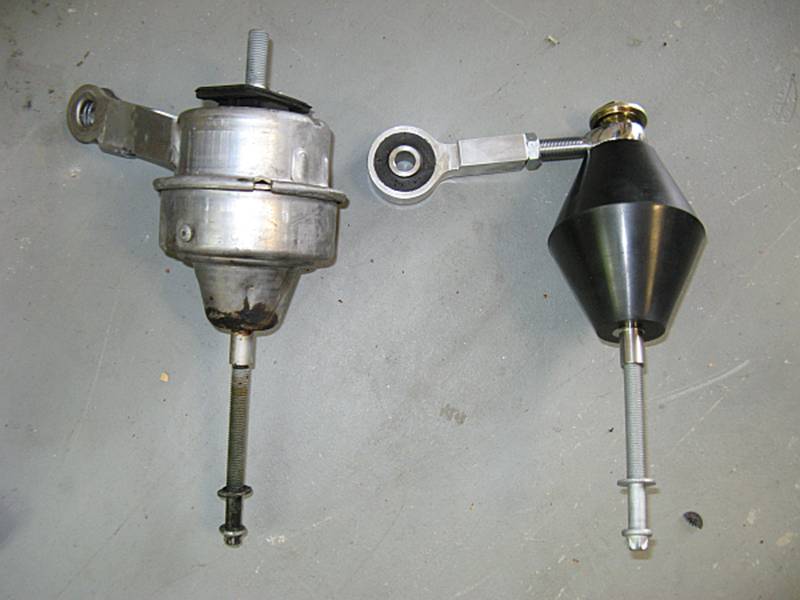
Comparing
the old and new mounts:
For
installation I will defer to the TSW
provided instructions which are located HERE, remember to install all bolts
removed and torque to spec.
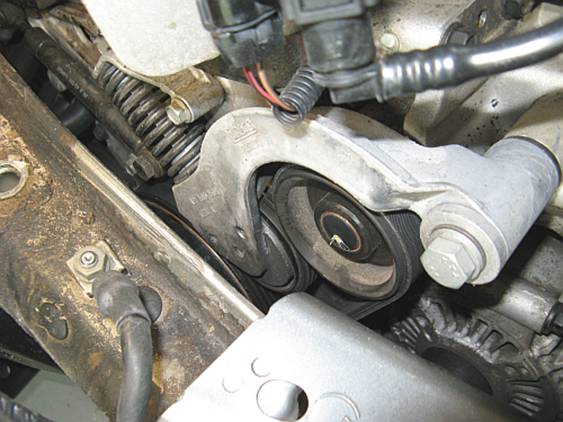
Replacing the pulley:
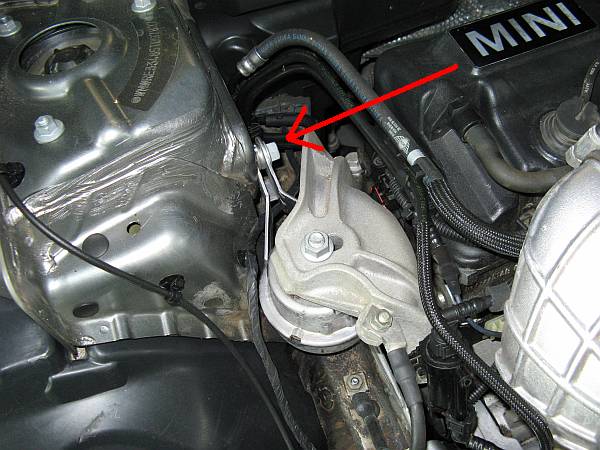
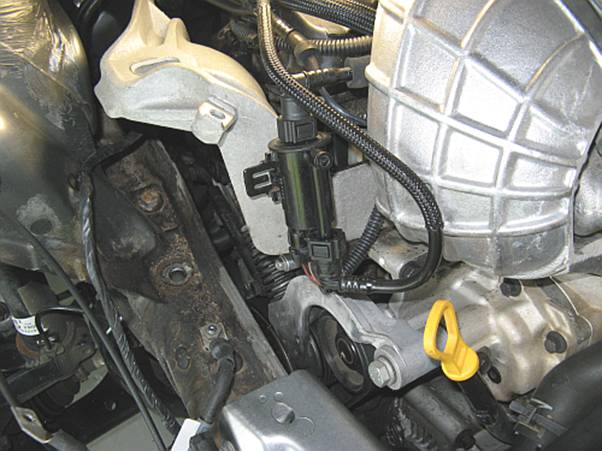
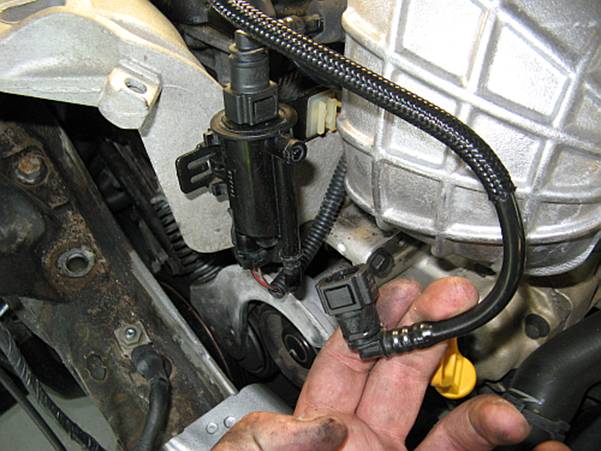
Before
using the tensioner tool, there is a vacuum hose in
the way that needs to be removed- just press on either side and pull to
release:
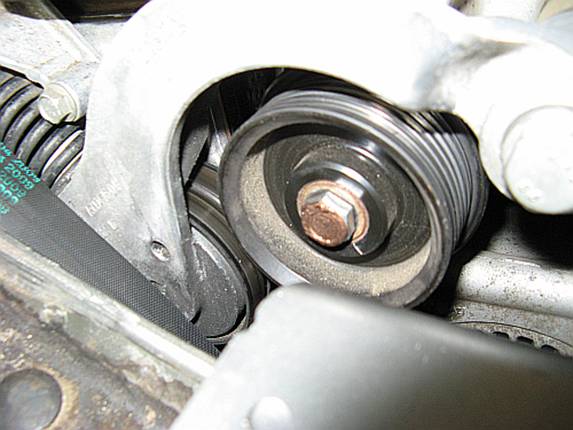
The tensioner tool has two pins that go into the lower part of
the tensioner and the supercharger bolt is used as a
fulcrum point:
While the tensioner tool is used to compress the tensioner
spring, insert a small piece of wire or a hex key into the SECOND slot on the tensioner holder. The serpentine belt can be removed from the
SC pulley:
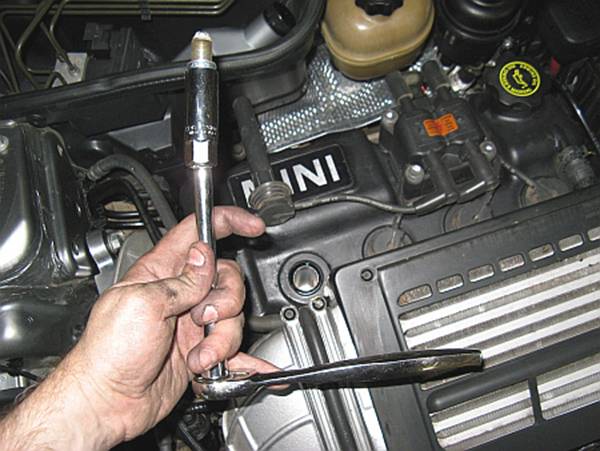
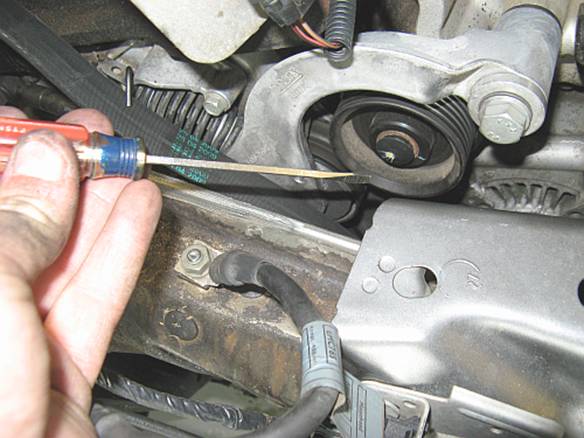
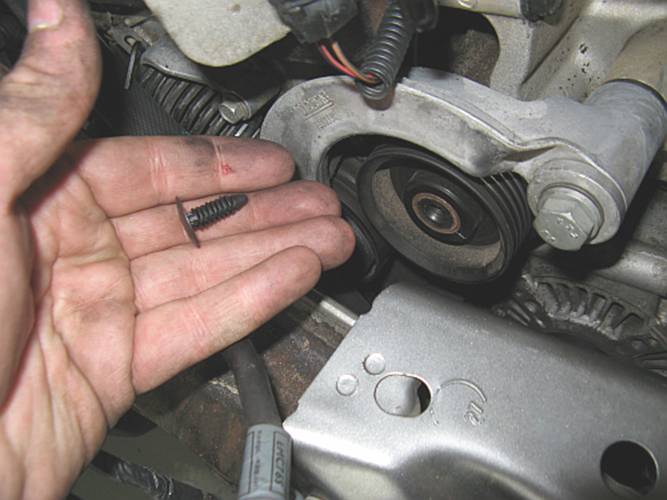
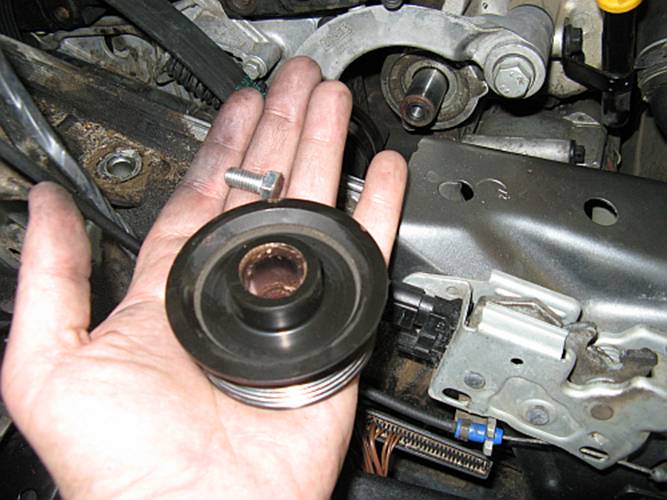
The OE
pulley is press fit on to the supercharger shaft and will have to be removed
using a pulley puller. The OE pulley has a plastic center piece pushed into the
threaded SC snout, it can be removed with a small flat
blade screwdriver:
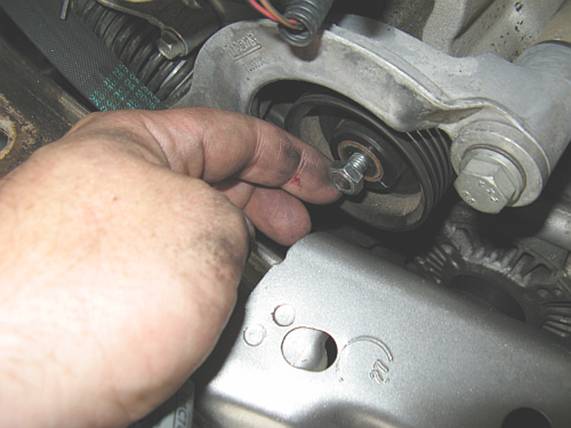
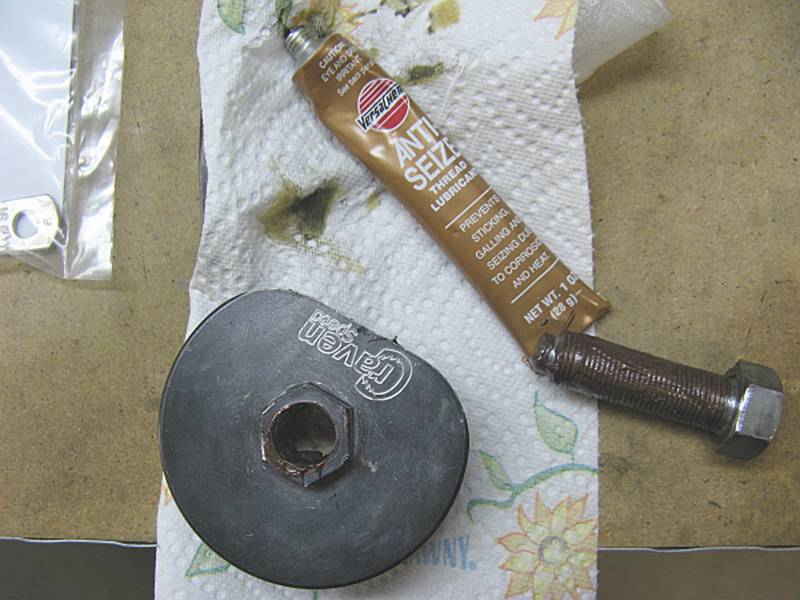
The pulley
puller I am using is the CravenSpeed puller, it will allow the pulley to be removed without
removing the tensioner assembly. Since it uses the SC
snout as a point to push the pulley off, a bolt is used to protect the SC shaft
nose- some use the bolt that held the ground wire to the passenger side mount.
To reduce friction and help with smooth removal, apply some anti-seize to the
bolt head after the bolt is screwed into the snout:
Because of
the amount of force it will take to remove the pressure fit pulley, it was
suggested by both Way and CravenSpeed to LIBERALLY use anti-seize with the
puller:
The puller
body will slip over the pulley and mesh with the belt grooves on top. Once it
is in place the puller bolt can be installed. A wrench is used to hold the
puller body while another wrench is used to turn the bolt- this will pull the
pulley off the SC shaft. It may be easier to access the puller bolt by having a
friend push the motor back and/or hold the puller body wrench as the puller
bolt is tightened:
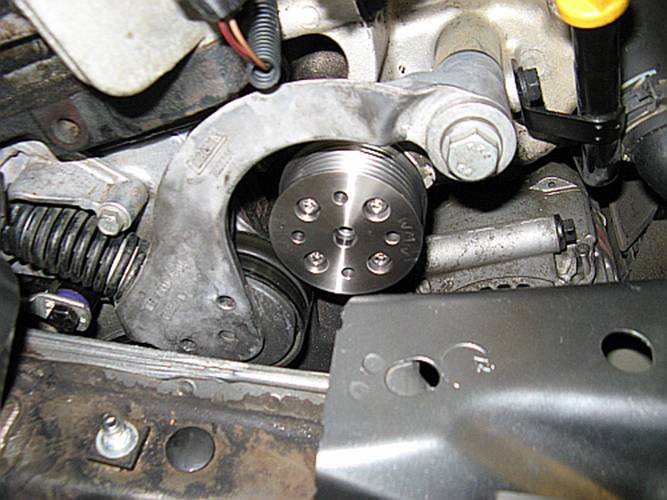
Clean all
of the anti-seize off the SC shaft nose before installing the new pulley.
Way
suggests using the CravenSpeed
pulley installation instructions found HERE to install the new pulley, they
also have a picture of the belt routing for installing the new belt. Remember
to reinstall the vaccum line after installing the
belt and using the tensioner tool to release the tensioner.
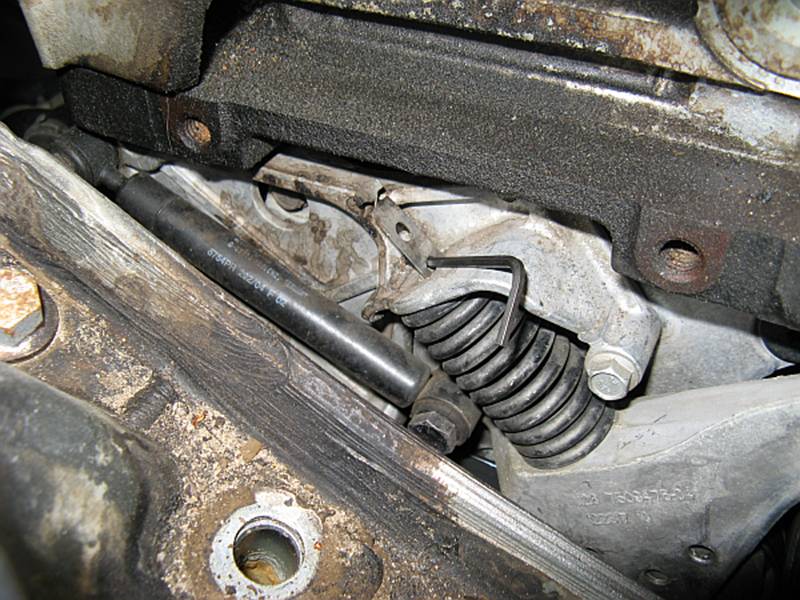
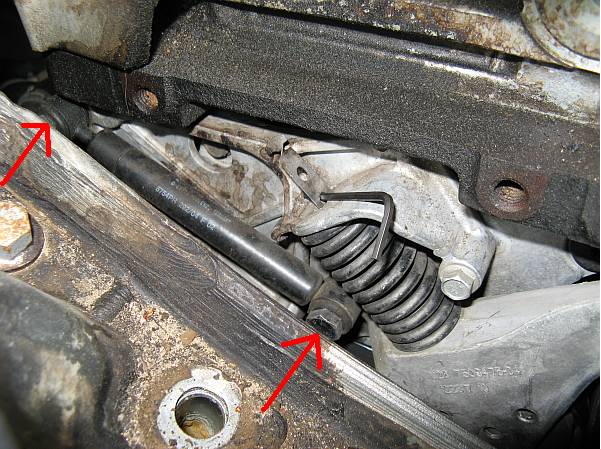
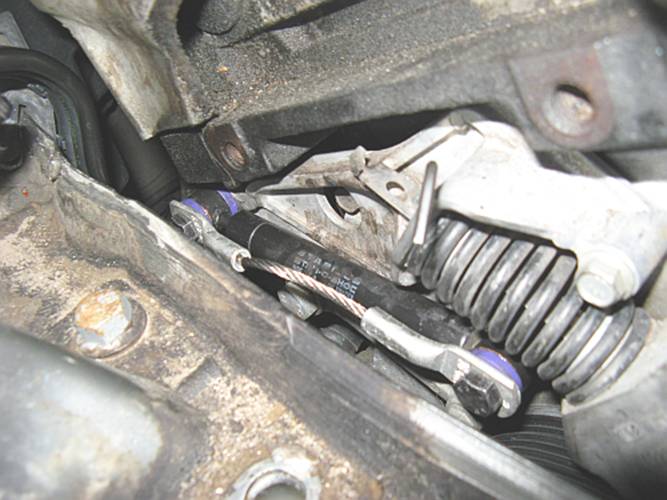
Installing Tensioner
Stop and Damper Bushings:
The tensioner stop prevents the tensioner
from slamming into the crank if/when the belt breaks. Since this was being
installed it was also a good time to upgrade the bushings to poly as another
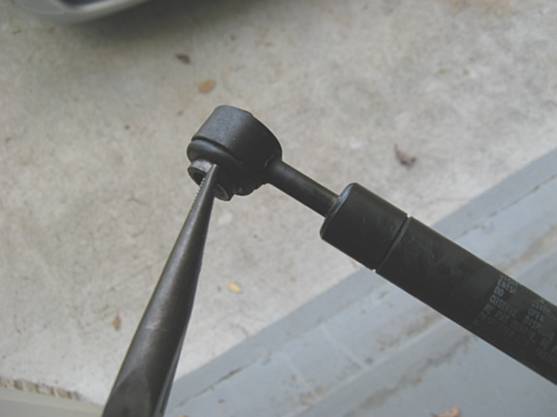
preventative failure item. The tensioner damper is
held in place with two bolts, these will be removed so that the tensioner damper bushings can be installed (removal of
damper not necessary if only the stop is being installed, this can be done one
bolt at a time). If the motor had not been jacked up for other projects,
accessing the damper bolts would have been easily done from below after
removing the wheel well cover:

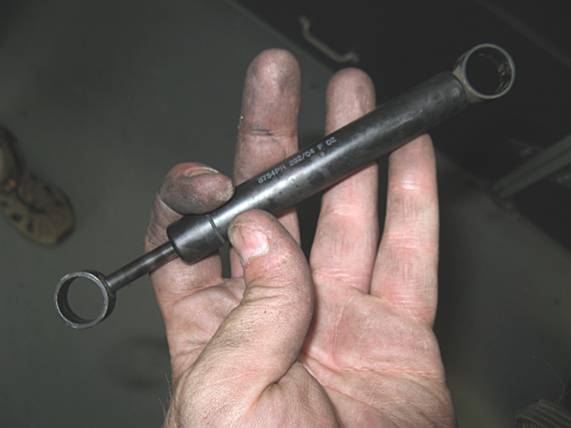
To remove
the old bushings the metal sleeve is pushed/pulled out and then the bushings
press out easily:
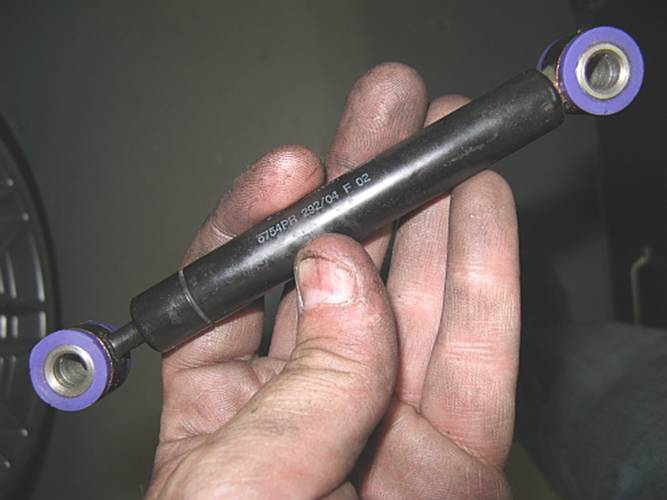
Bushings
are installed the same way they were removed- insert poly bushing and once
seated insert metal sleeve. The bushings come with lube that looks a lot like
the anti-seize I used on the pulley puller, I used it around the bushings
themselves and the metal sleeves inserted into them:
Now that
bushings are in, time to reinstall damper with tensioner
stop. Install one bolt at a time trying to keep stop end parallel with damper
while tightening:
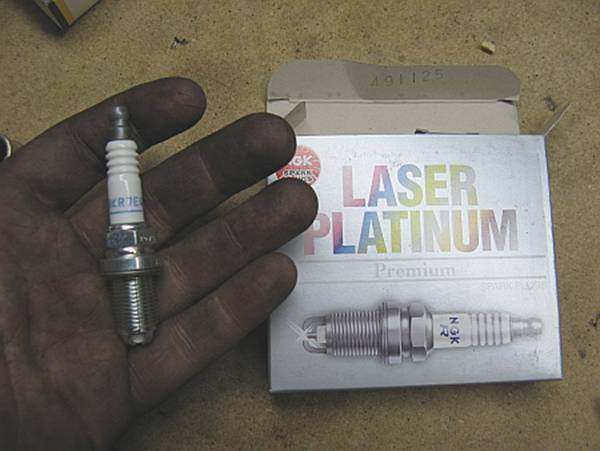
After installing JCW cooler spark
plugs (aka NGK BKR7EQUP), enjoy your new found power
and peace of mind.