![]()

Installing BMW Z4M UUC Transmission
Mounts
The OE
transmission mounts are a little soft and allow the transmission to move slightly
under braking and cornering forces which can cause the shifter to work
inconsistently. Knowing what I know now, these would have been installed when I
installed the short shifter instead of collecting dust in the garage for two
years. Shifts are a lot more solid and consistent.
Standard
Disclaimer: ANY USE OF THIS INFORMATION
BY YOU IS AT YOUR OWN RISK. This guide is meant to be a supplement to the UUC
Installation Instructions and not a replacement.
The
transmission mounts and enforcer cups work together to allow movement but
control it better than the OE bushings. More information can be found on UUC’s website: http://www.uucmotorwerks.com/html_product/tranny_mount/html_tranny/about.htm
Another
helpful write-up is here: http://www.zpost.com/forums/showthread.php?t=411452
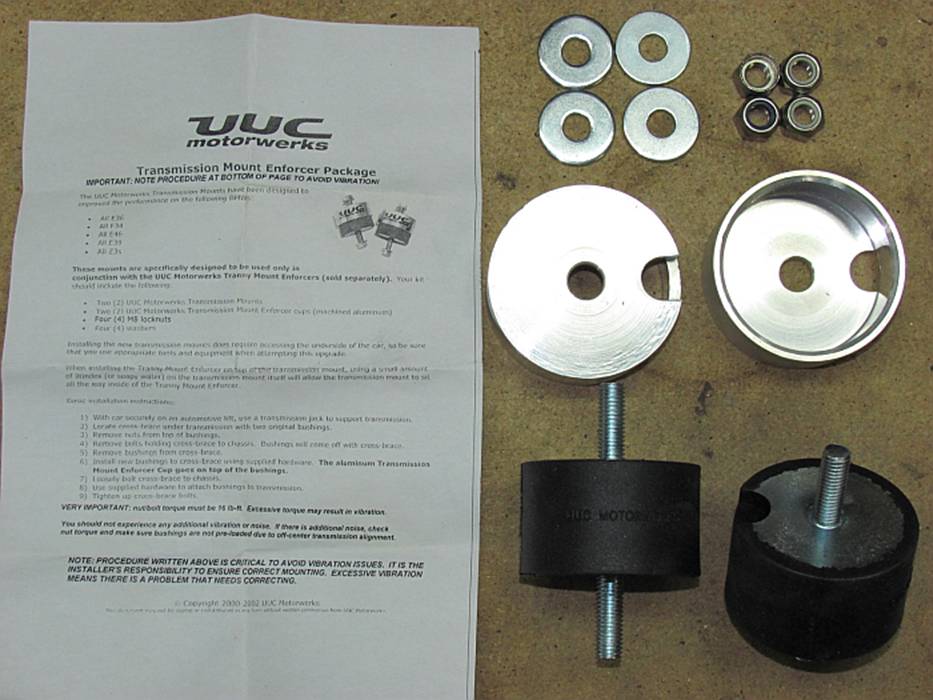
UUC Installation instructions
below:

My Installation:
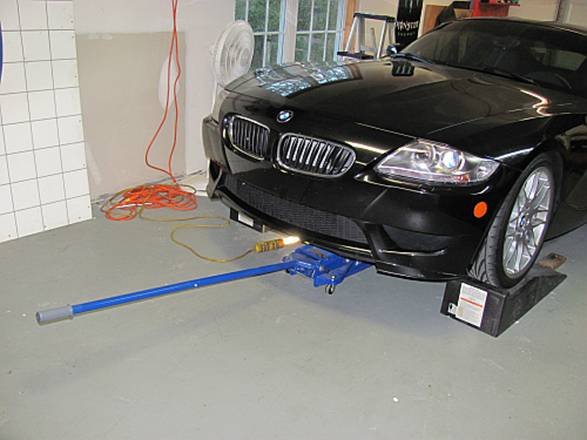
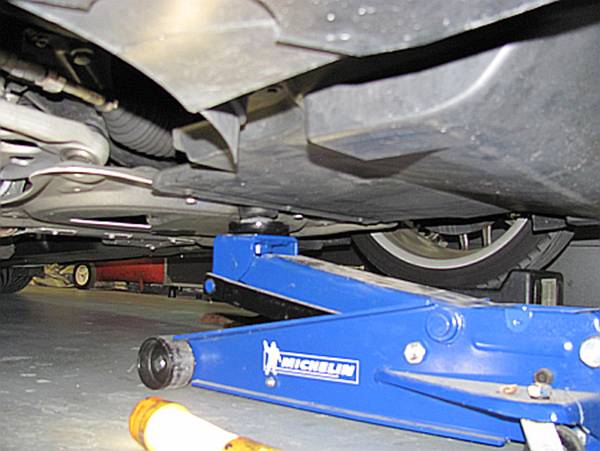
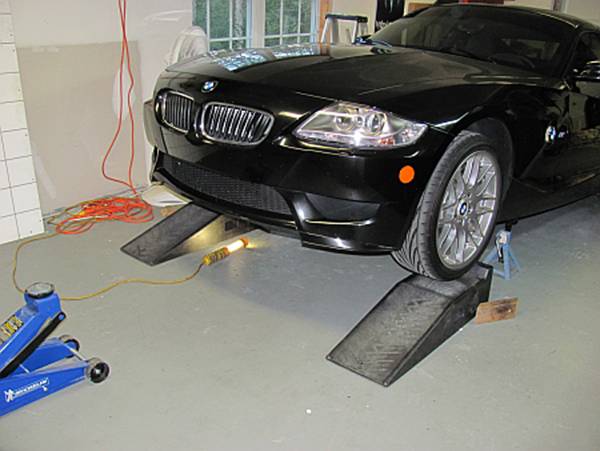
The
transmission mount is located almost in the center of the car, but a little
closer to the front. Since my car is pretty low to the ground I drove it up on
ramps first and then jacked it up high enough using the central jack point to
get jackstands under the front jack points. For
safety, I placed the ramps under the tires in parallel with the jack stands (I
don’t want to get crushed):

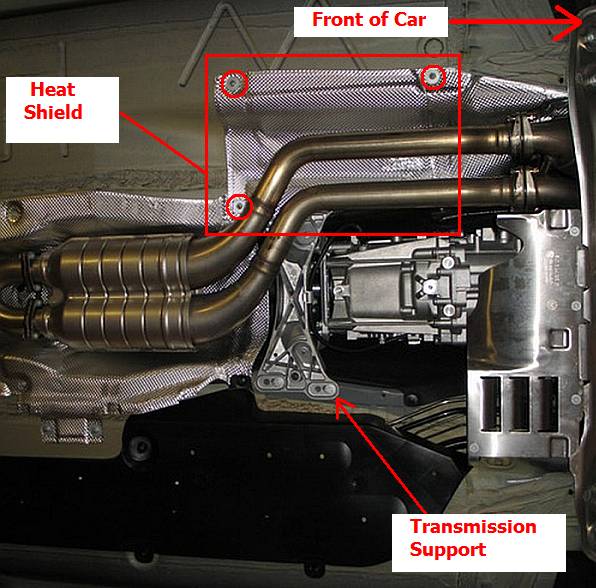
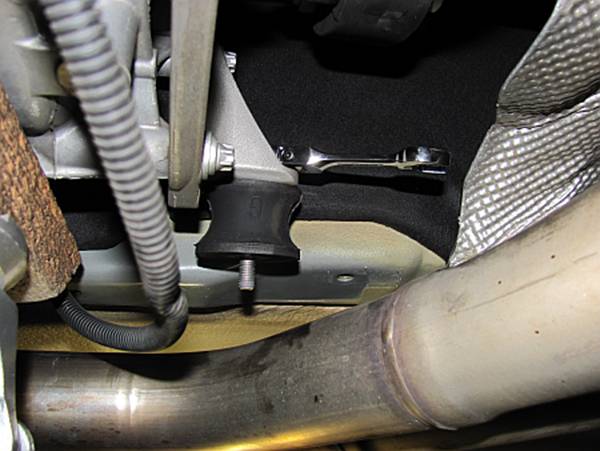
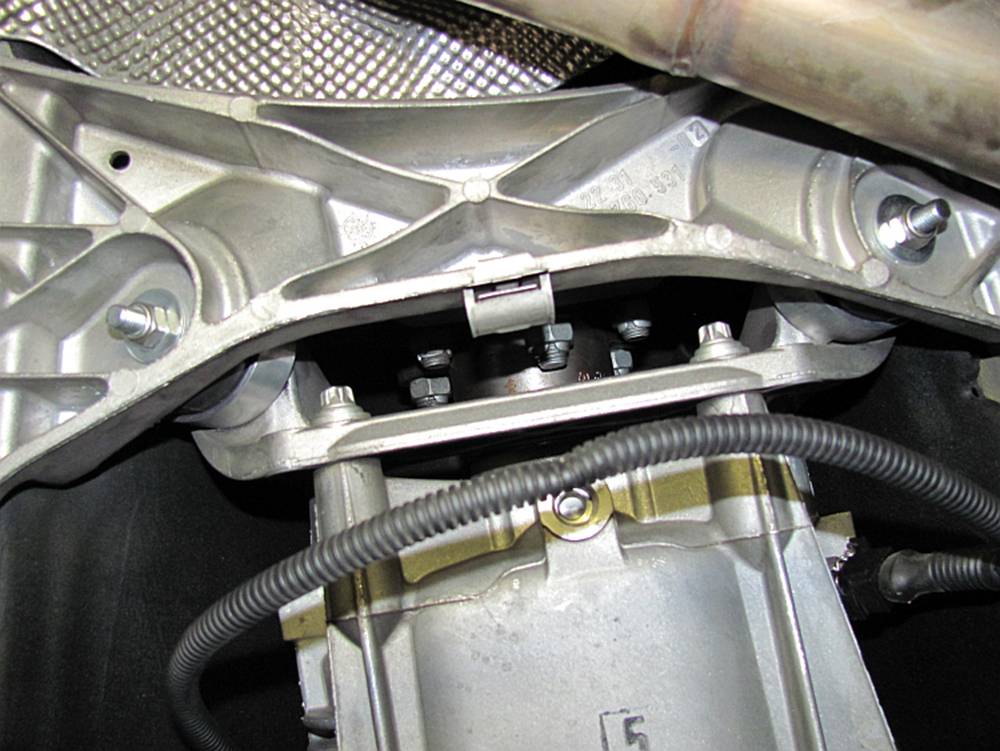
Sliding
under the car and looking towards the front, you can see the transmission
support above the exhaust:

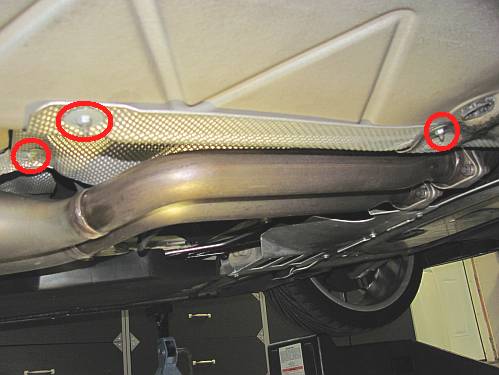
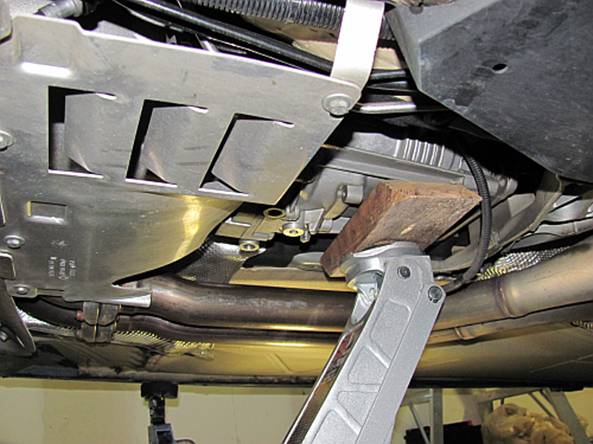
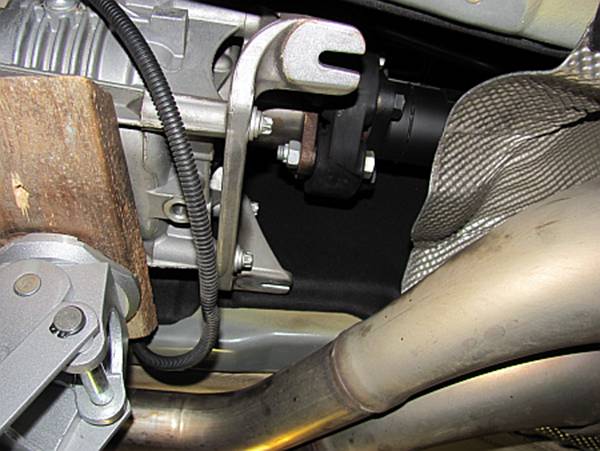
A heat
shield will need to be removed to access the passenger side bolts, three
retainers can be removed using a 10mm socket wrench
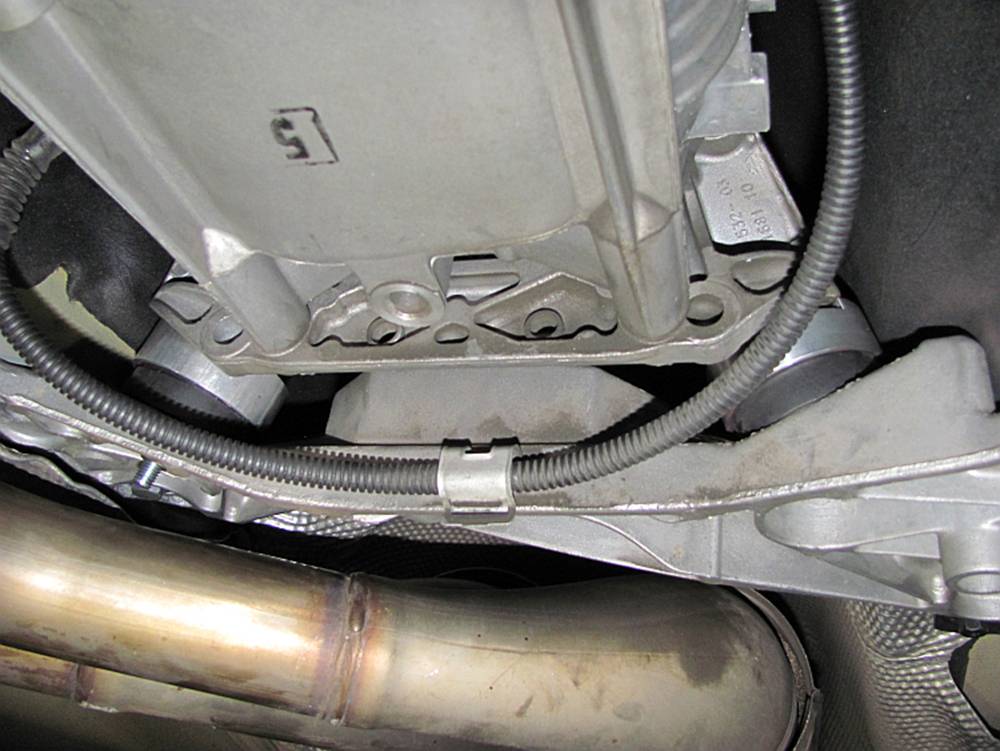
Remove the
wire loom from the clip on the transmission support:
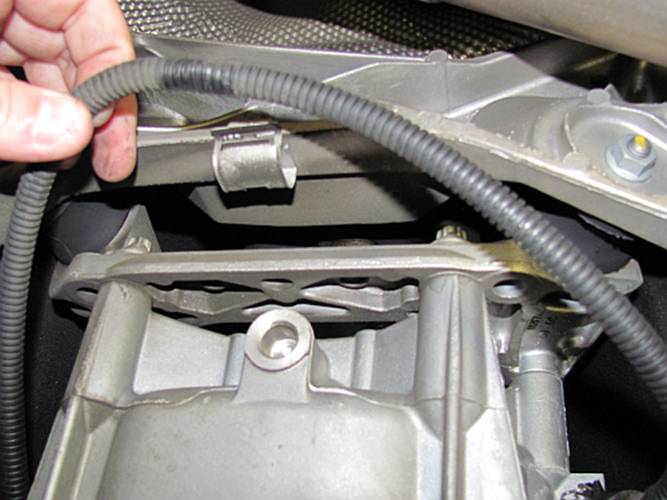
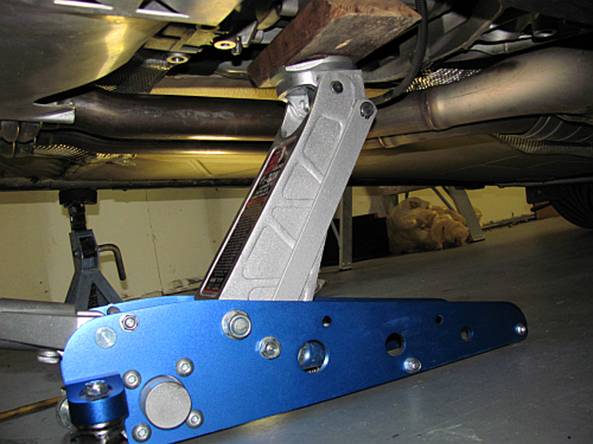
Support
the transmission with a jack, a block of wood can be used to cushion the jack.
The jack was jacked up just enough to hold the transmission in place, I tried to
place it as close to the support as possible without it getting in the way:
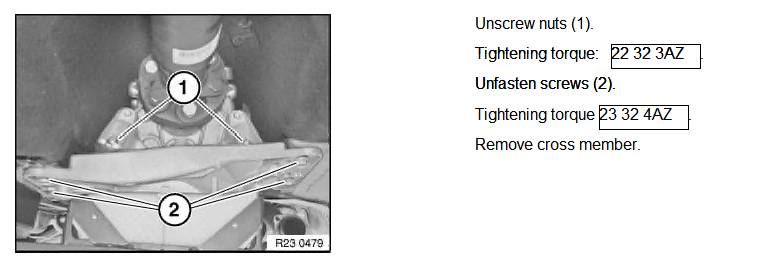
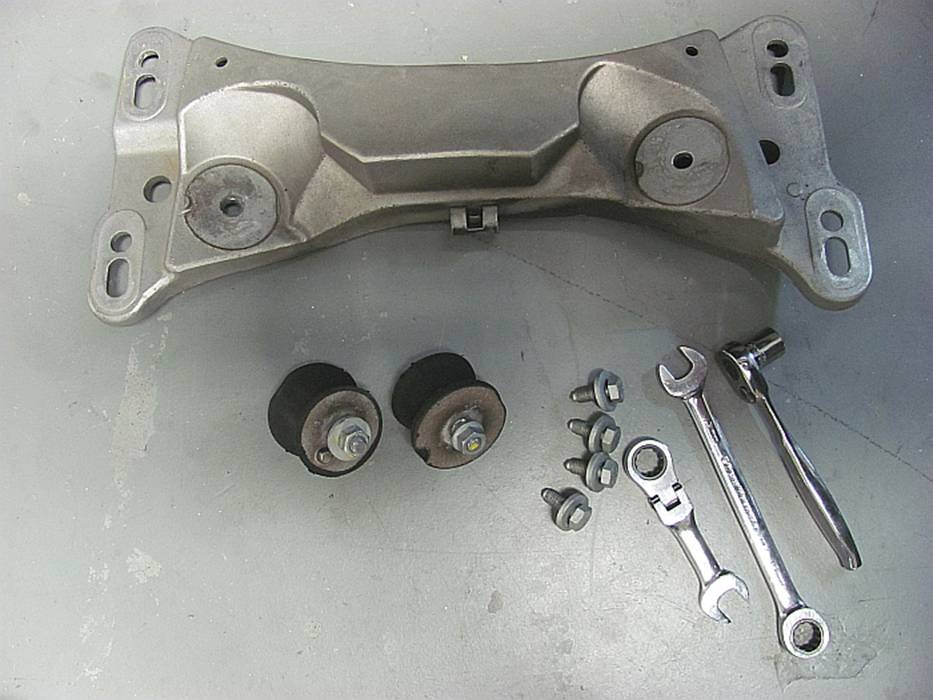
Using a 13mm open end wrench and ¼” 13mm socket wrench, I was able to remove
the two bolts holding the rubber mounts to the support, and then the four bolts
holding the support to the body. There is not a lot of room to work, especially
on the passenger side, so be patient and persistent. After removing the
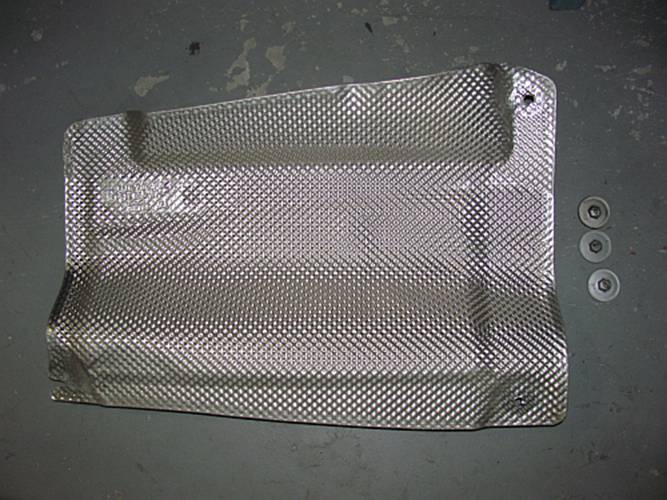
support, the top mount nuts were removed and then the soft OE mounts were free:

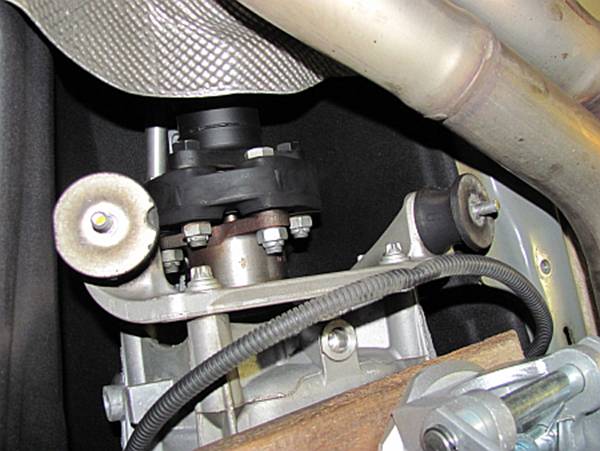
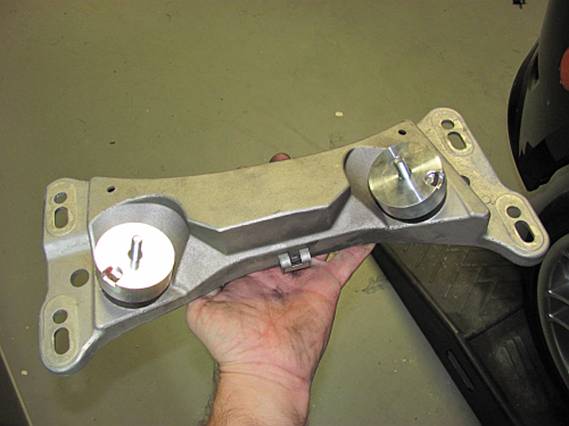
You can see in the picture above where the mounts meet the support the index
keys that allow the bushings to align one way, make sure that the recession in
the new mounts is aligned with this before hand tightening the bolts- the
mounts should be flat on the base. Comparison pics of OE vs new UUC mount
(installed):

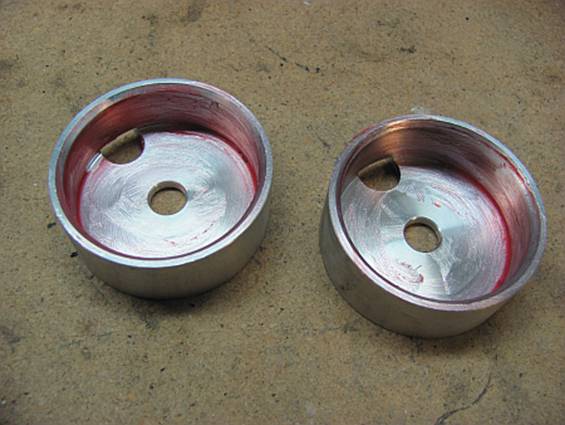
Per the
Pelican write-up on E36 UUC transmission mount installation (http://www.pelicanparts.com/bmw/techarticles/E36-Tranny_Mounts/E36-Tranny_Mounts.htm),
I lightly lubed the enforcer cups with some Mobil1 multi purpose synthetic
grease to eliminate friction and chafing. The enforcer cups I have are also
notched for a key but this was not needed since they are installed on top of
the transmission bushings, new enforcer cups no longer have this relief:
I found it
impossible to maneuver the support assembly into place without jacking the
transmission a little more, it slid in after I tried a
few different angles and approaches. Loosening the mount lower nuts makes it a
bit easier to line up the mounts top bolts with the transmission slots and
position the enforcer cups so that they sit flat on the transmission- I had a
helper lower the jack while I pushed the passenger side enforcer cup forward to
clear. I used the UUC provided washers
and Nyloc nuts on the bottom mount screws but elected
to use the OE nut/washer on top- they start easier and are easier to tighten in
the tight space available, the smaller flex-head Gearwrench
worked GREAT for this:
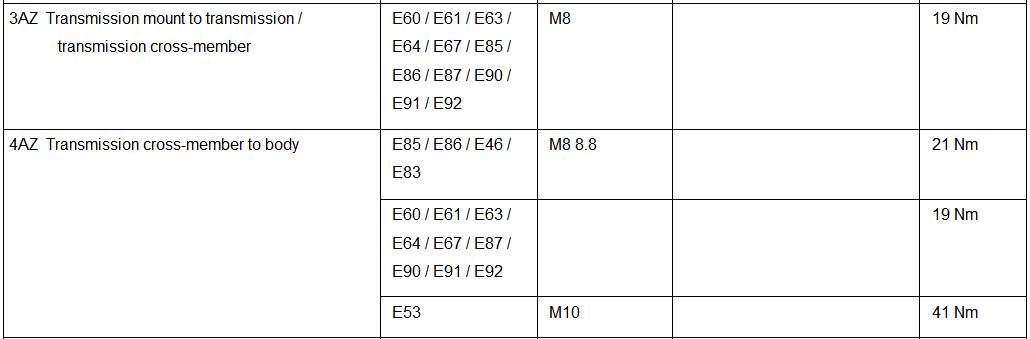
Not that
you will be able to get to all of the bolts with a torque wrench, but here are
the BMW TIS references: